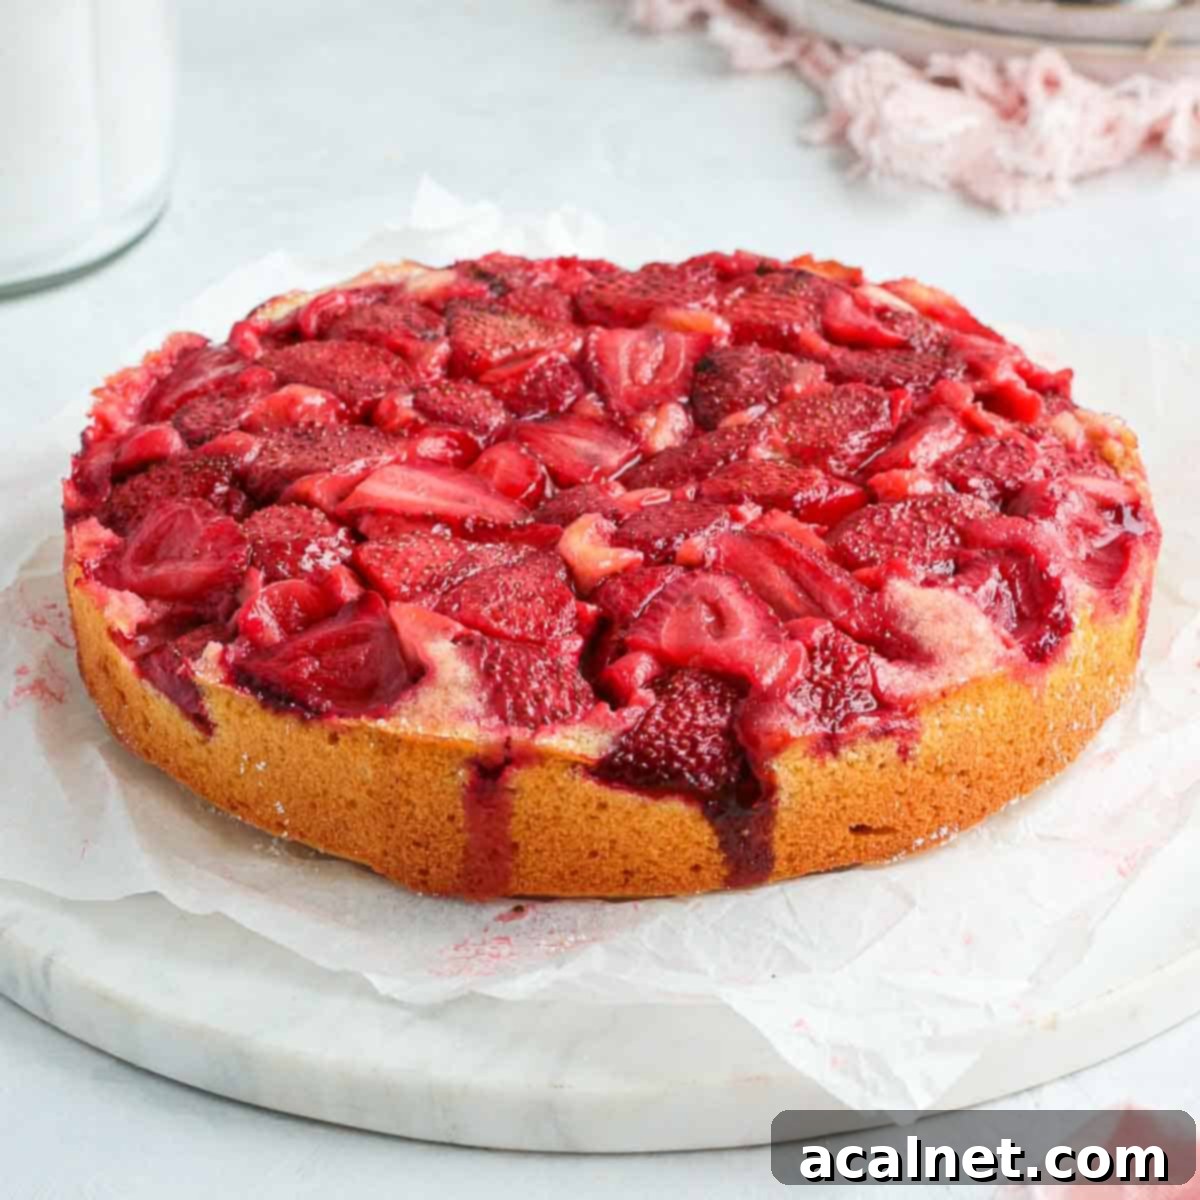
The Ultimate Strawberry Upside Down Cake: Your Perfect Summer Dessert Guide
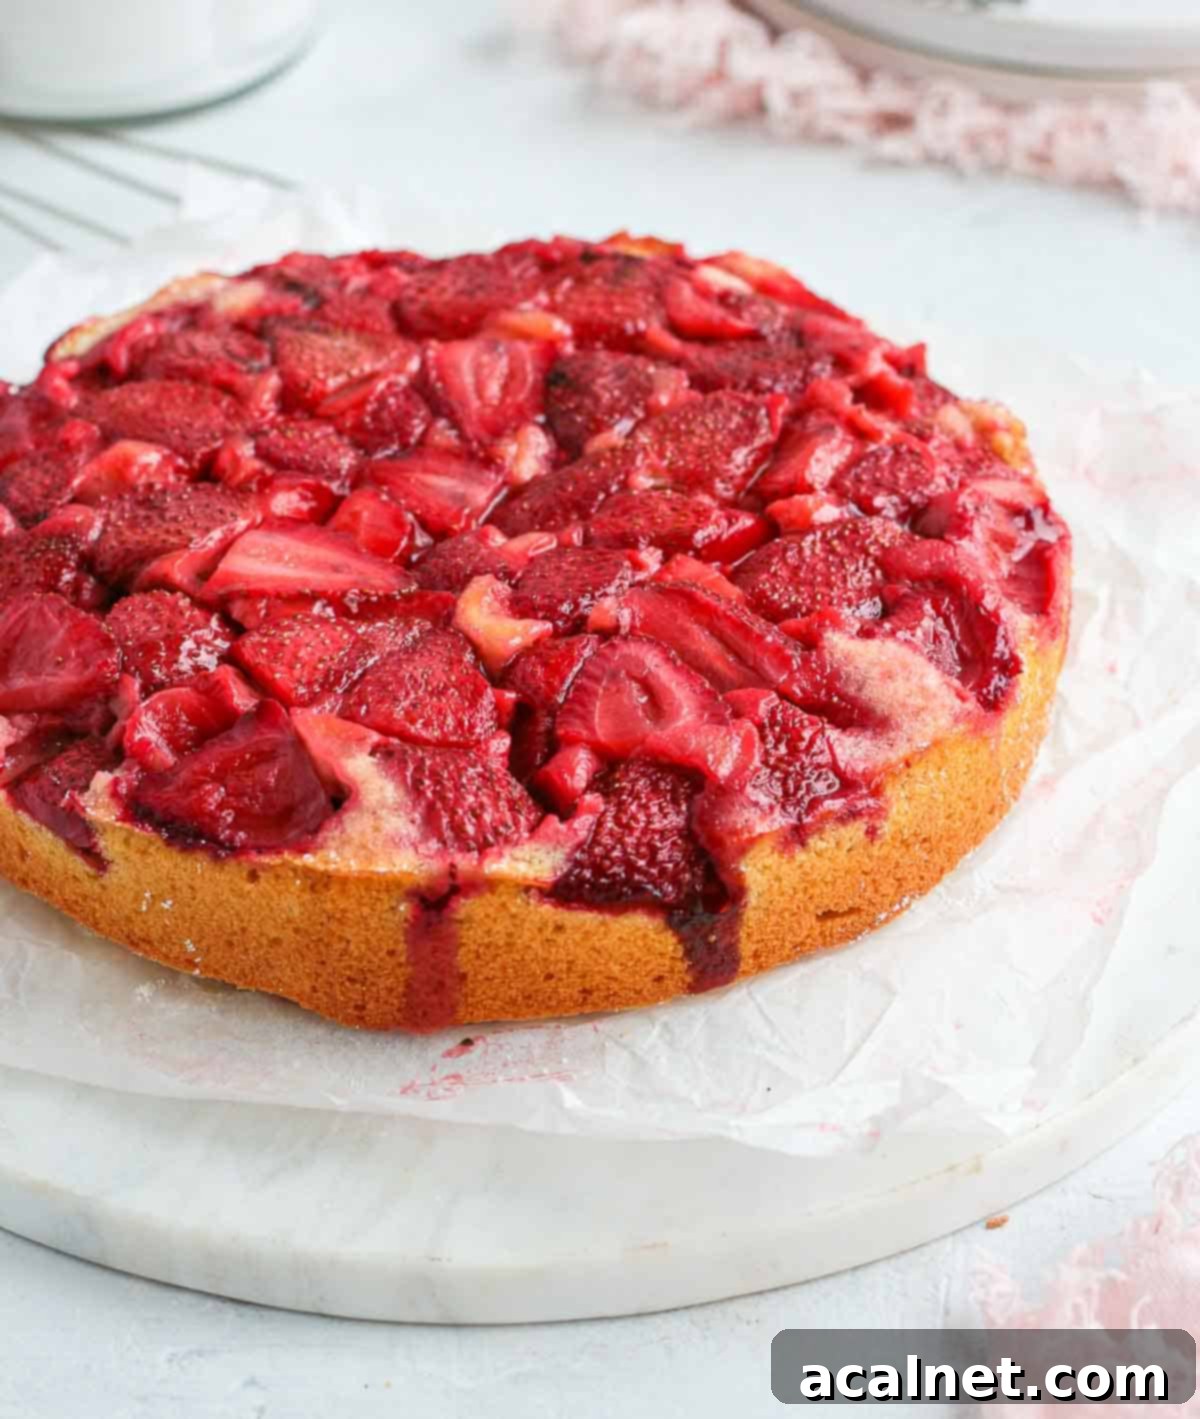
This Strawberry Upside Down Cake is an absolute delight, embodying the essence of summer in every bite. It’s an incredibly easy-to-make dessert that bursts with fresh, vibrant flavors. Imagine succulent strawberries, lightly caramelized to perfection, baked beneath a tender, airy vanilla butter cake. The result is a stunning, simple, yet utterly decadent cake that’s ideal for any occasion, from a casual afternoon tea to an elegant dinner party. Get ready to impress with this beautiful and delicious creation that celebrates the sweet abundance of strawberry season!
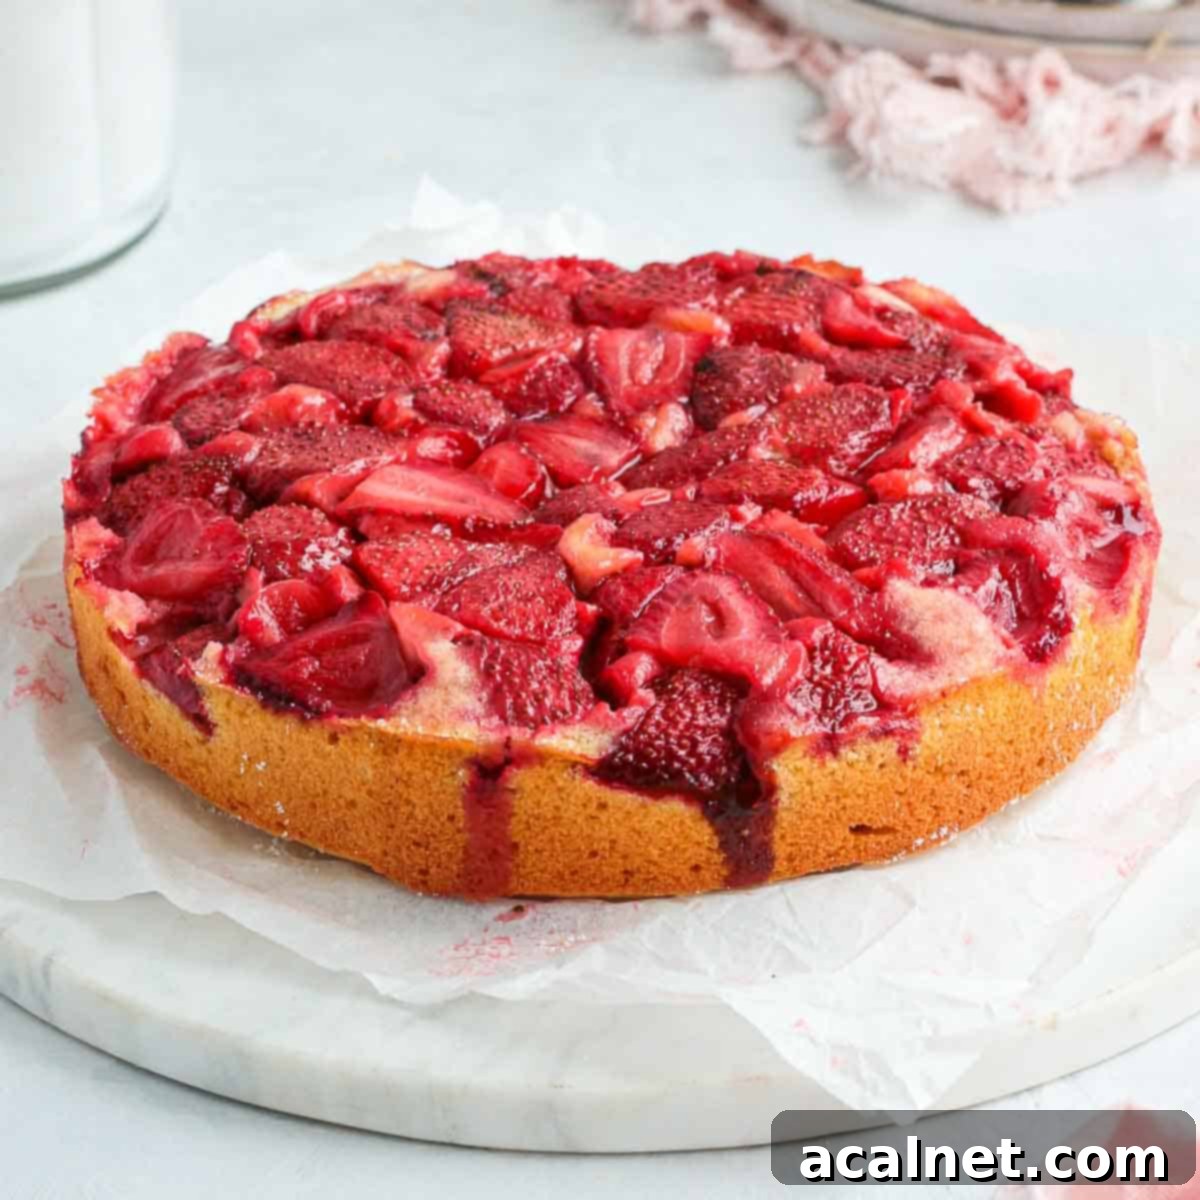
Why You’ll Fall in Love with This Strawberry Upside Down Cake
The moment this strawberry upside-down cake starts baking, your kitchen will be filled with an aroma so divine, it’s truly irresistible! This isn’t just any cake; it’s a celebration of summer, offering a deliciously light dessert that looks incredibly impressive yet is surprisingly quick and simple to prepare. It’s the perfect balance of elegance and ease, making you look like a pastry chef with minimal effort.
What makes this recipe stand out? It’s a more straightforward and faster alternative to my Strawberry Crumble Cake, but the rich flavor and intoxicating smell of the oven-roasted strawberries are equally captivating. The magic truly happens when the sweet, slightly tart berries, glistening with a gentle caramelization, are paired with a light, moist, and tender vanilla butter cake. The cake serves as the perfect canvas, allowing the natural sweetness and vibrant color of the strawberries to truly shine.
Beyond its incredible taste and visual appeal, this strawberry cake is wonderfully versatile. Just like my Blackberry or Plum Upside Down Cakes, it’s an ideal dessert to serve after a hearty meal, a fantastic contribution to a party or barbecue, or simply a delightful treat to enjoy with your afternoon tea or as a sweet snack. Its simplicity and robust flavor profile guarantee it will be a crowd-pleaser every single time. Prepare for compliments!
Essential Ingredients for Your Strawberry Upside Down Cake
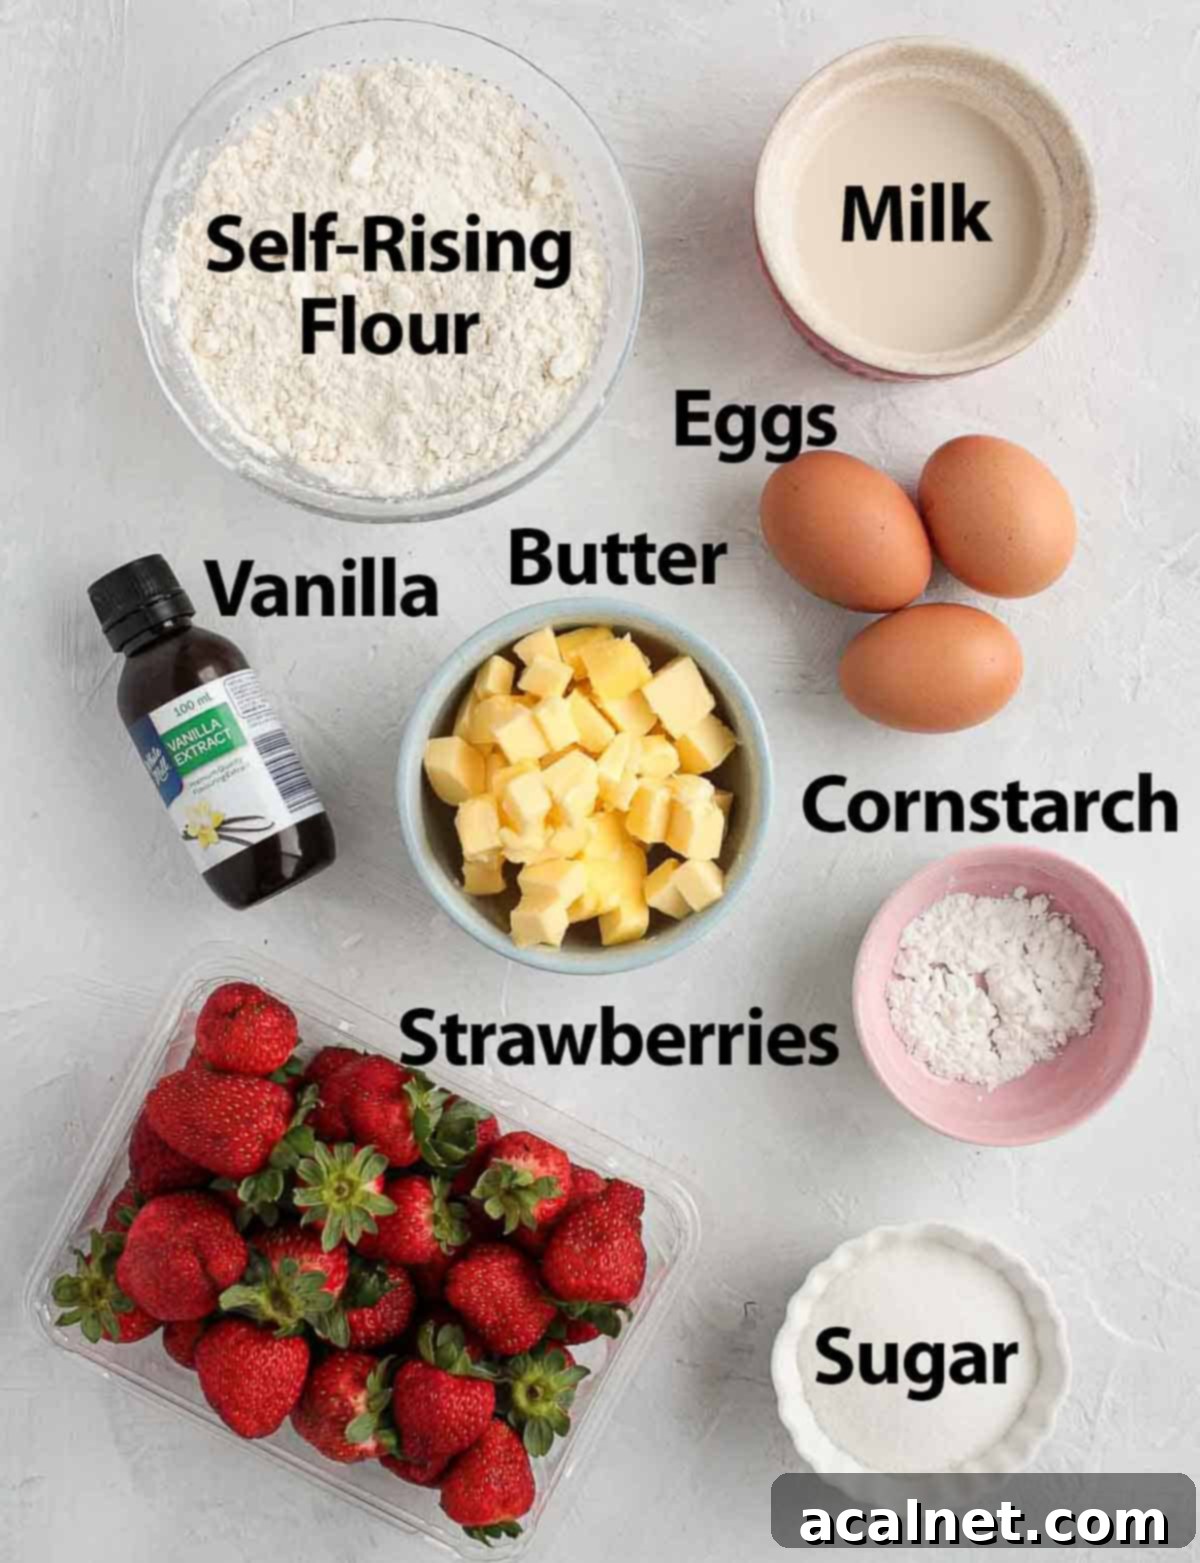
This delightful strawberry cake is crafted from just 8 simple, readily available ingredients. Each one plays a crucial role in creating the perfect balance of flavor and texture.
For the Luscious Strawberry Layer:
- Fresh Strawberries: Opt for ripe, sweet strawberries for the best flavor. I highly recommend cutting them into large chunks (simply slicing them in half usually works best) rather than small pieces. This ensures you get wonderfully soft and lightly caramelized fruit with every bite, and they won’t disintegrate during baking.
- Caster Sugar: This fine-grain sugar easily dissolves and mixes with the strawberries, contributing to the beautiful caramelization that forms during baking. It balances the strawberries’ natural tartness.
- Cornstarch: This is a secret weapon! When mixed with the sugar and strawberries, cornstarch helps to thicken the juices released by the fruit during baking. This prevents your cake from having a watery bottom and instead creates a luscious, slightly jammy, caramel-like layer that clings perfectly to the cake.
For the Light and Fluffy Vanilla Butter Cake:
- Unsalted Butter: Ensure your butter is very soft, at room temperature. This is crucial for proper creaming with the sugar, which incorporates air into the batter, leading to a light and fluffy cake texture. Using unsalted butter allows you to control the salt content in the recipe.
- Caster Sugar (Fine White Granulated Sugar): Similar to the strawberry layer, caster sugar’s fine texture ensures it creams beautifully with the butter, creating a smooth, aerated base for our cake batter.
- Eggs: Use large eggs, and make sure they are at room temperature. Room temperature eggs emulsify better with the butter and sugar, resulting in a smoother, more uniform batter and a finer crumb for your cake.
- Milk: I typically use Full Cream Milk (Whole Milk) for maximum richness and flavor. However, this recipe is quite forgiving; plant-based or dairy-free milk alternatives work wonderfully too. I’ve successfully made this cake with Soy Milk, so feel free to use your preferred milk. Just ensure it’s also at room temperature.
- Vanilla Extract / Essence / Paste: Vanilla is key to enhancing the overall flavor of the cake. Vanilla extract is commonly used, but for a more intense vanilla flavor and those beautiful speckles, consider using vanilla paste or scraping seeds from a vanilla bean.
- Self-Rising Flour: This is truly the easiest flour to use for cakes as it already contains baking powder and a pinch of salt. It guarantees a consistent rise. If you only have Plain / All-Purpose (AP) Flour, don’t worry! You can easily make your own self-rising flour by adding 1 ½ teaspoons of baking powder and a small pinch of salt (about ¼ teaspoon) for every cup of plain flour. For this recipe’s 250g (approx. 2 cups) of self-rising flour, you would use 250g plain flour with 3 teaspoons baking powder and ½ teaspoon salt.
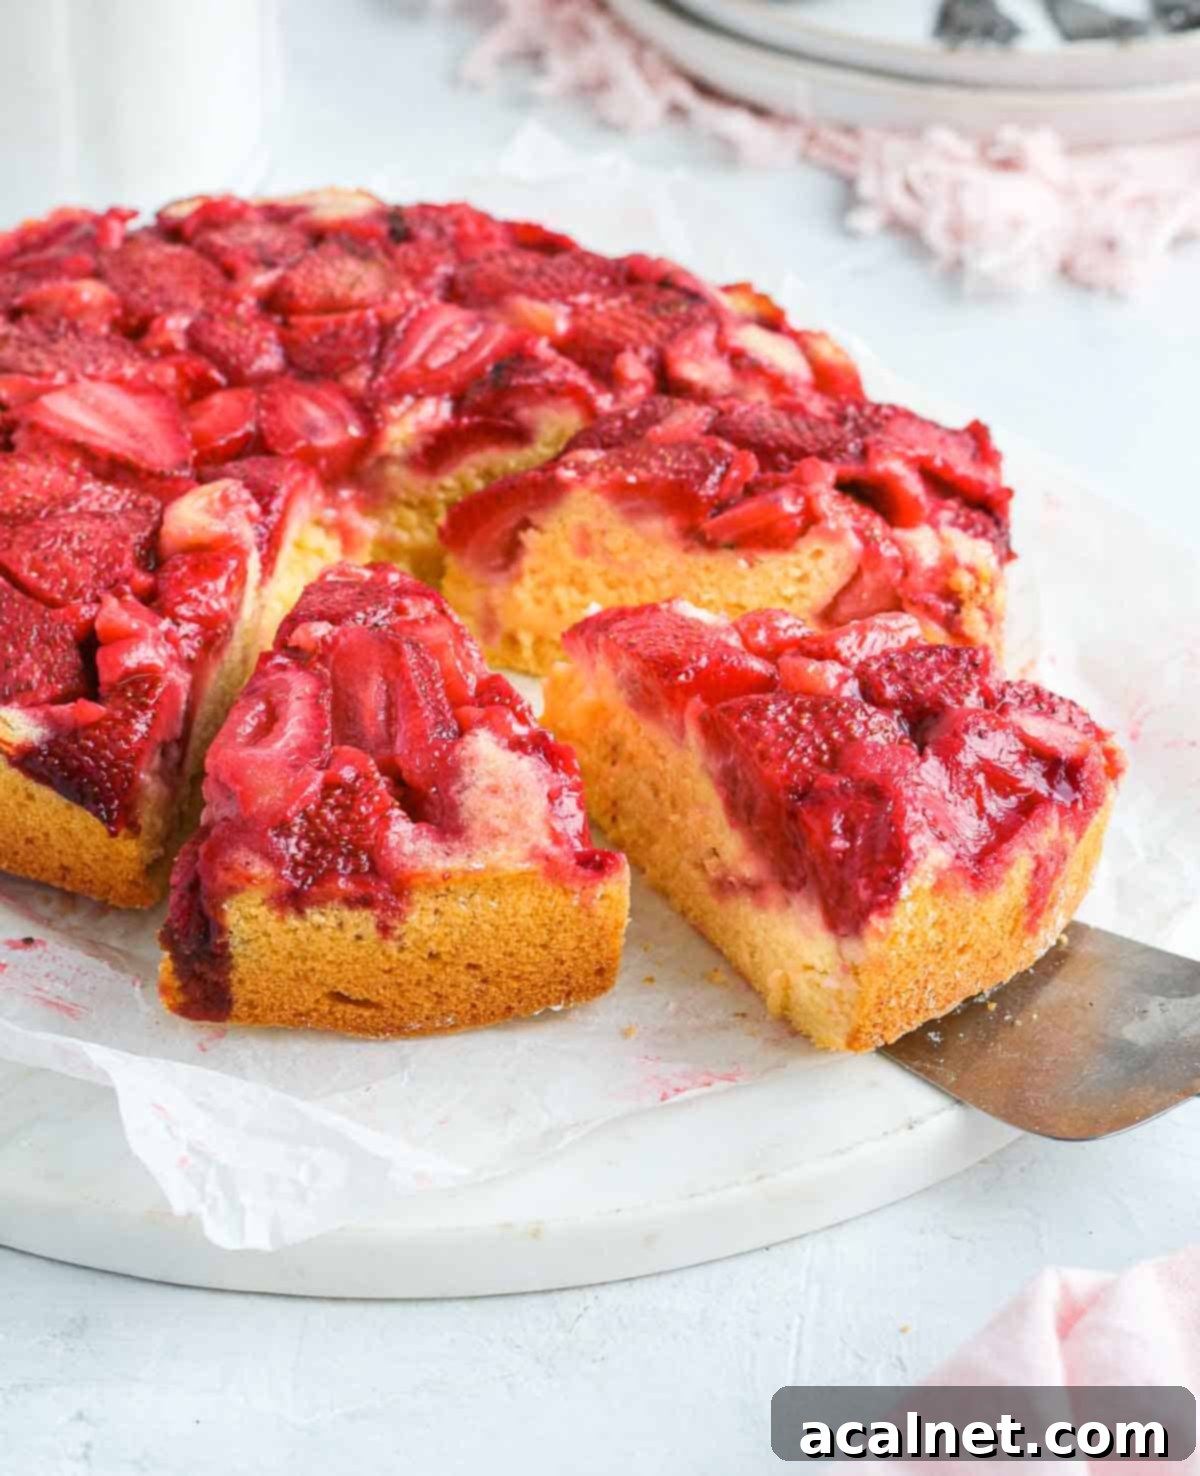
How to Bake the Perfect Strawberry Upside Down Cake
Creating this stunning strawberry cake involves two straightforward primary steps: first, preparing the delicious strawberry layer, and then mixing together the light and fluffy cake batter. Follow these detailed steps for a flawless result:
- Preheat Oven & Prepare Pan: Begin by preheating your oven to 180°C (350°F). Next, prepare your 22cm / 9-inch Springform Pan or a standard round cake pan. Line the bottom of the pan with baking paper. For springform pans, lightly grease the sides. If using a regular round pan, I recommend also lining the sides with a strip of baking paper or greasing and flouring thoroughly to ensure easy release. This is crucial for a beautiful upside-down finish.
- Prepare the Strawberries (Photo 1): Wash your fresh strawberries thoroughly, remove their green tops (hulling them), and then slice them in half or into large chunks. Place the prepared strawberries into a mixing bowl. Add the specified amount of caster sugar and cornstarch. Gently toss the mixture until the sugar and cornstarch evenly coat all the fruit. This coating is essential for the berries to caramelize nicely and for their juices to thicken during baking.
- Arrange Strawberry Layer (Photo 2): Carefully transfer the coated strawberries to the bottom of your prepared cake pan. Arrange them in a single, even layer. You can be artistic here, creating a pattern if desired, as this will be the top of your cake! Set the pan aside while you prepare the batter.
Crafting the Vanilla Butter Cake Batter:
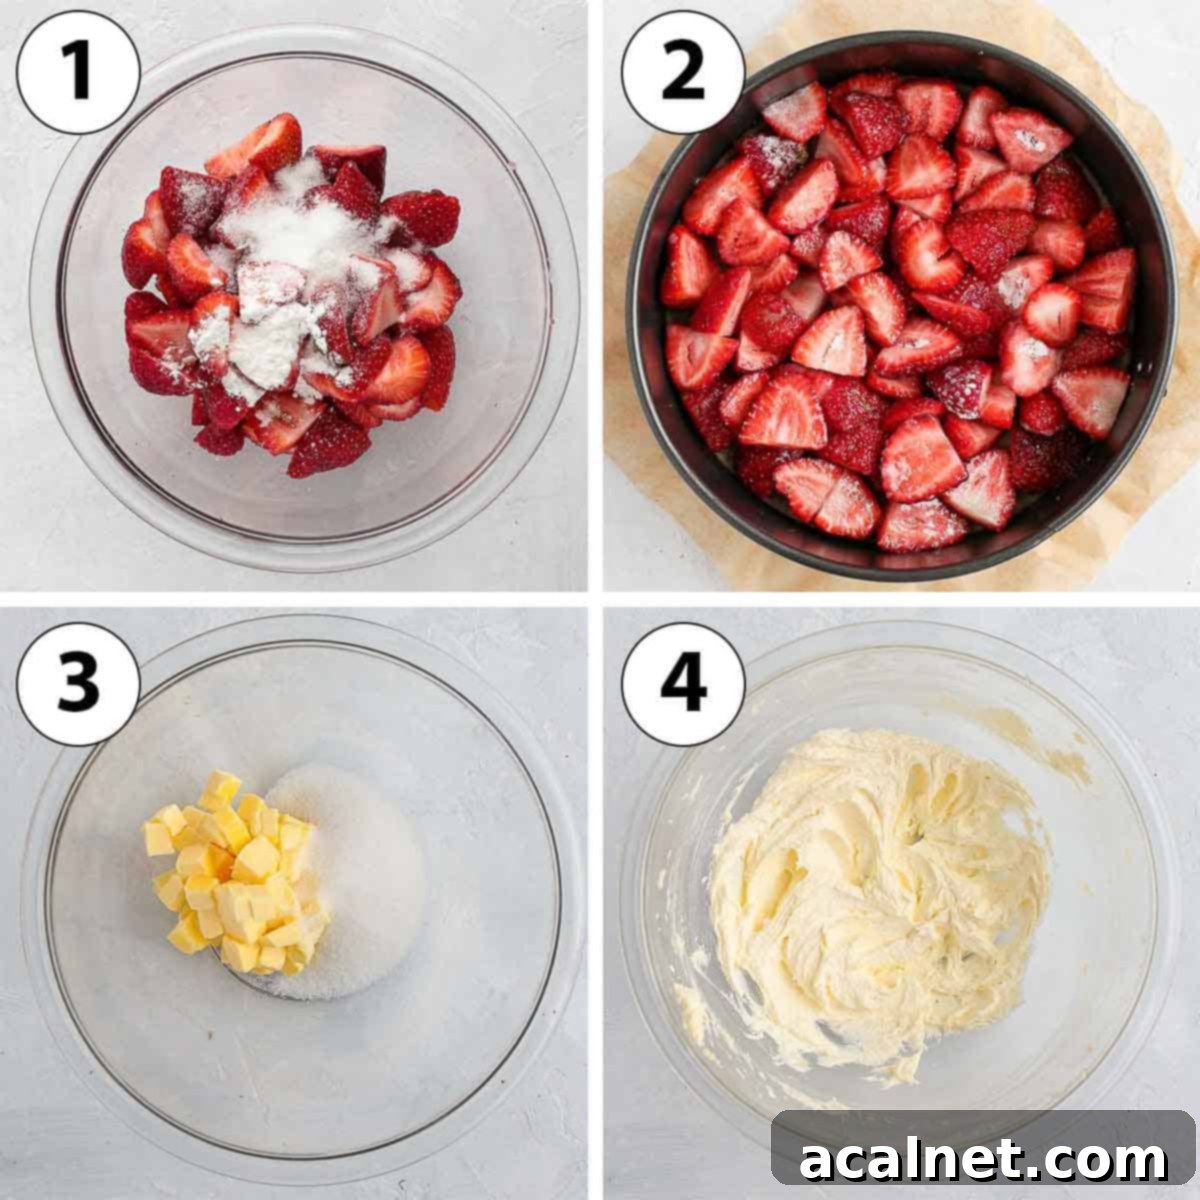
- Cream Butter and Sugar (Photos 3 & 4): In a large mixing bowl, combine the very soft unsalted butter and caster sugar. Using an electric mixer, cream them together on medium to medium-high speed for about 5 minutes. This step is crucial; you’re looking for a mixture that is significantly lighter in color, very fluffy, and has almost doubled in volume. The sugar crystals should be mostly dissolved into the butter, indicating proper aeration.
- Incorporate Eggs (Photo 5 & 6): Add the room temperature eggs one at a time. After adding each egg, mix slowly until it is fully incorporated into the butter mixture before adding the next one. Don’t be alarmed if the batter appears to curdle or split slightly at this stage; this is normal and will resolve itself once the flour is added. Continue mixing until the batter looks cohesive after each egg addition.
- Add Wet Ingredients (Photo 7 & 8): Pour in the milk (also at room temperature) and vanilla extract (or paste). Mix on a low speed until just combined. Be careful not to overmix at this stage.
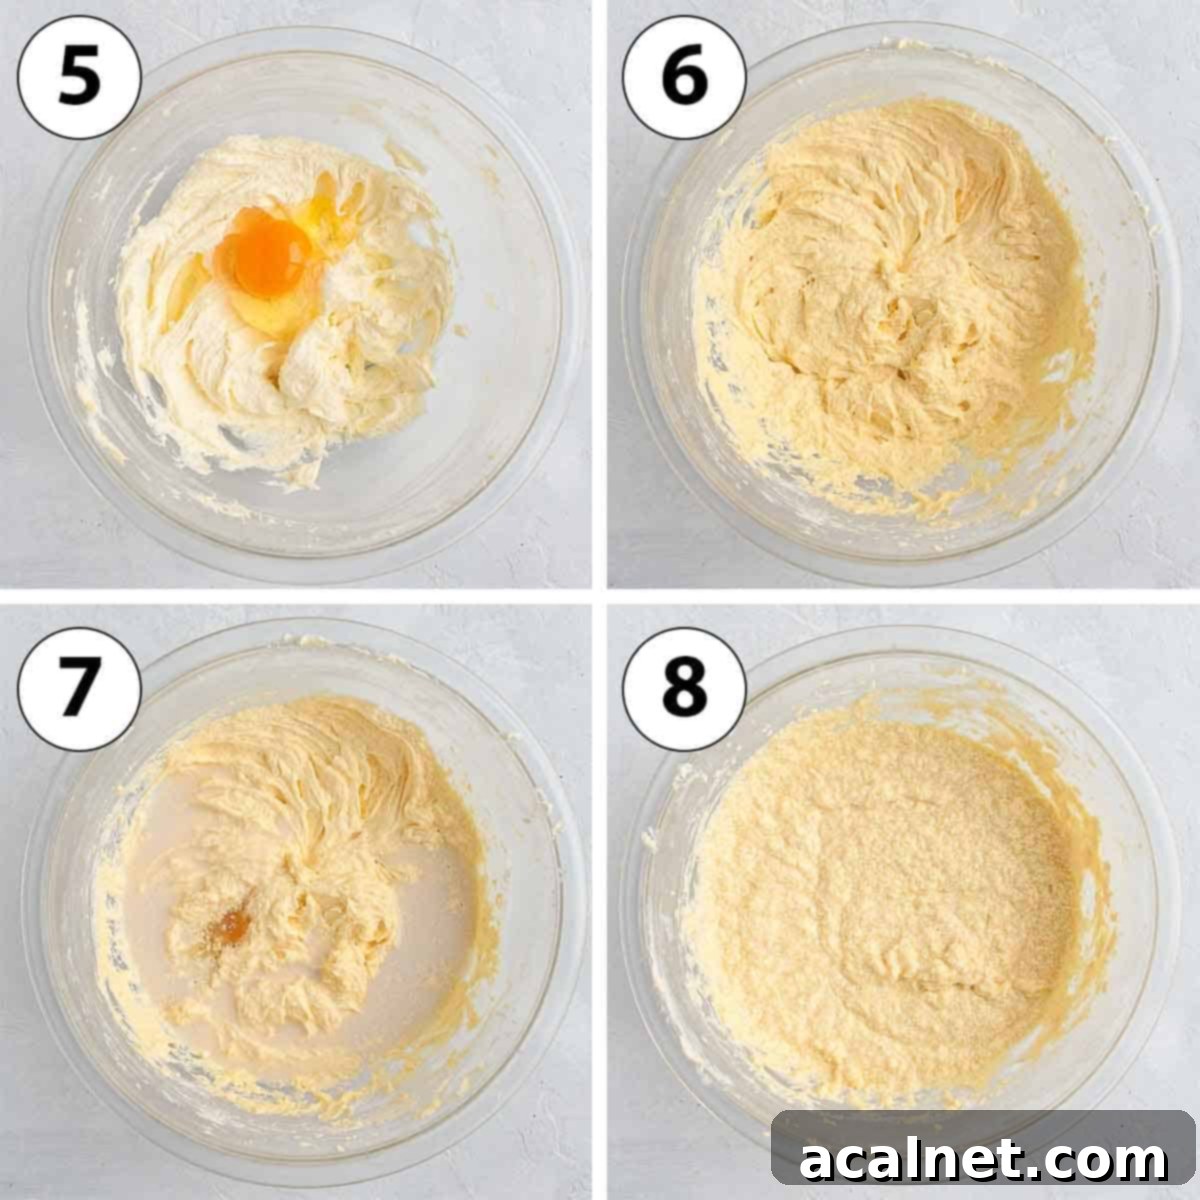
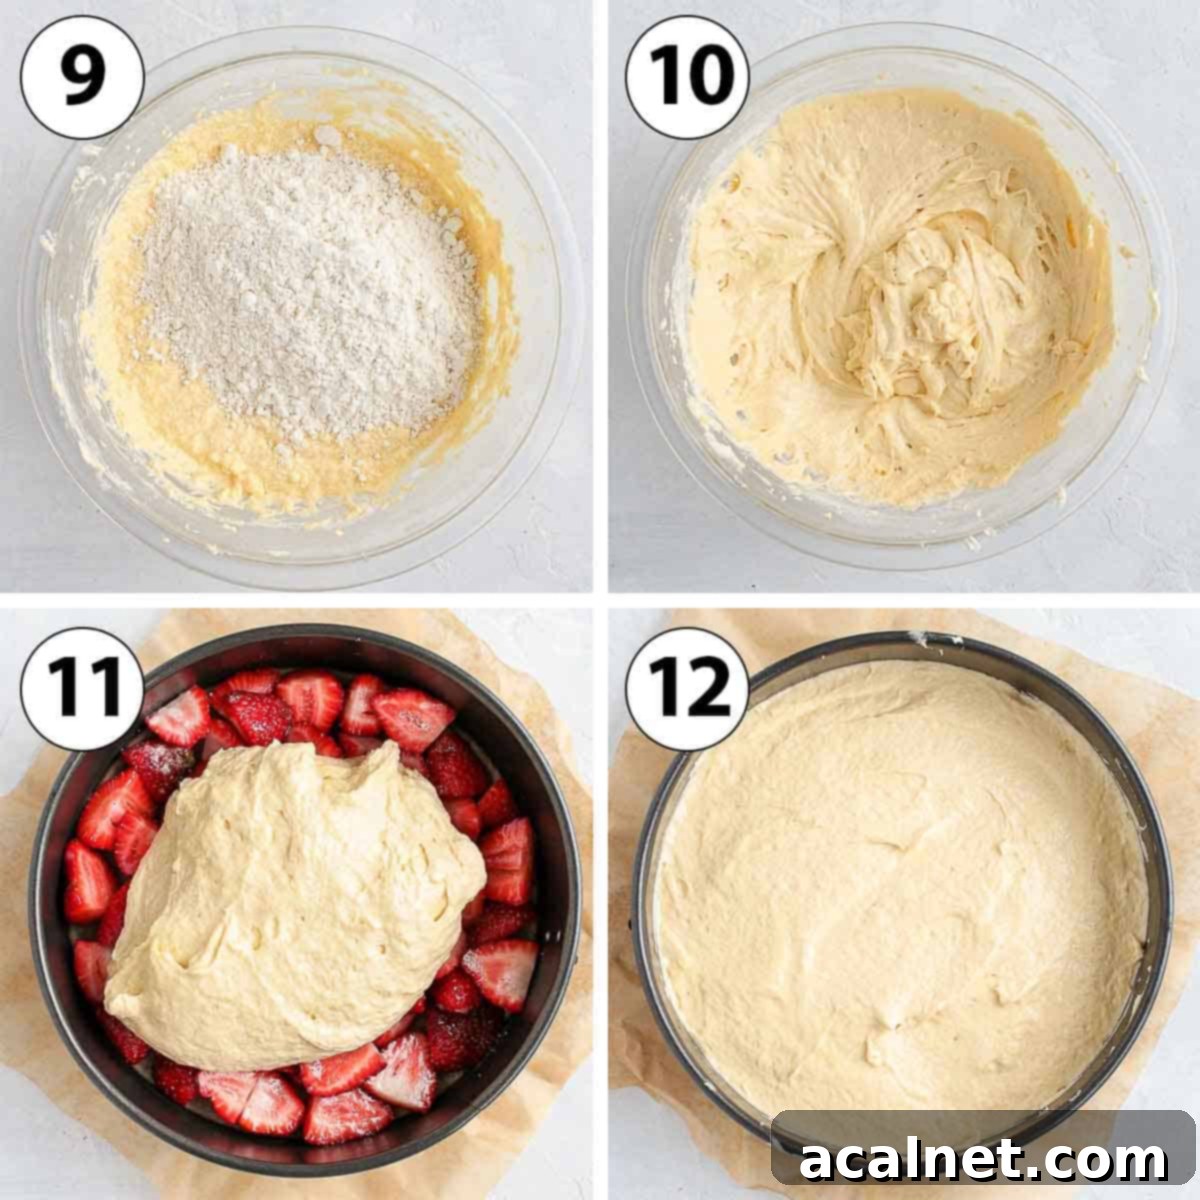
- Fold in Flour (Photo 9 & 10): Add the self-rising flour (preferably sifted, to avoid lumps). Mix on the lowest speed or gently fold it in by hand using a spatula until it is just combined. Stop mixing as soon as you can no longer see streaks of flour. Overworking the batter at this stage can develop gluten, resulting in a tough cake, and will also deflate the air you’ve worked so hard to incorporate.
- Assemble the Cake (Photo 11 & 12): Carefully pour the prepared cake batter over the even layer of strawberries in your pan. Use a small offset spatula or the back of a spoon to gently spread the batter evenly, ensuring it covers all the strawberries right to the edges of the pan.
- Bake to Perfection: Place the cake in your preheated oven and bake for 35 to 45 minutes. Baking times can vary greatly between ovens, so begin checking around the 35-minute mark. The cake is ready when the top is golden brown, and a wooden skewer or the tip of a knife inserted into the center of the cake comes out clean.
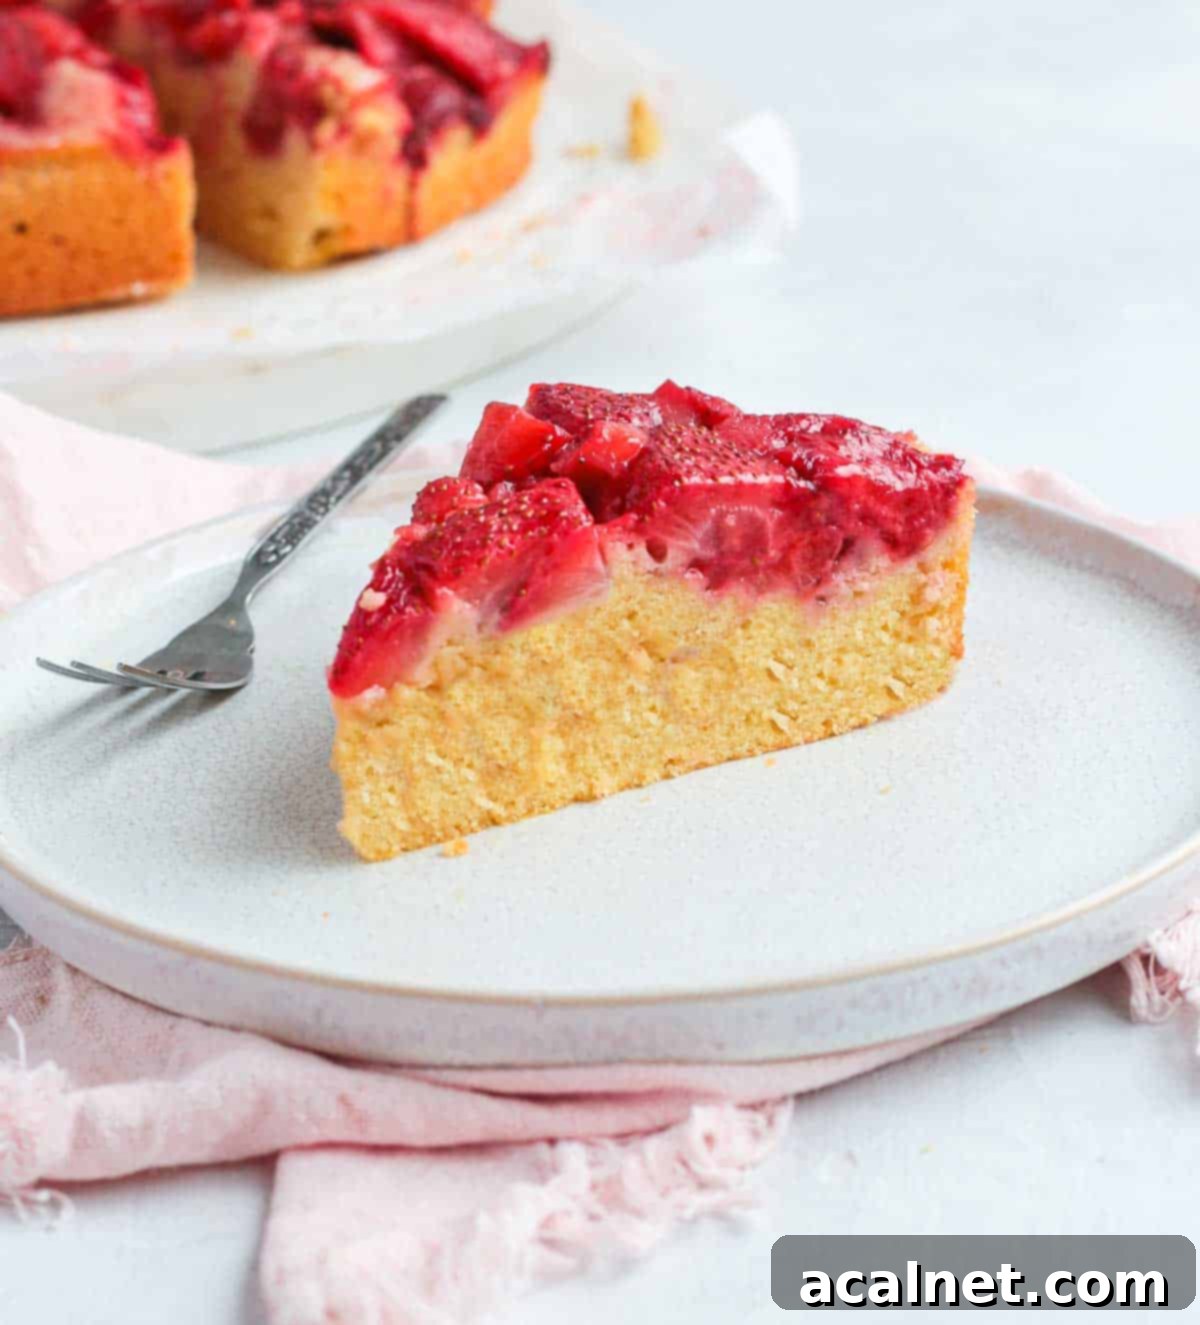
- Cool and Flip: Once baked, remove the cake from the oven. Allow it to cool in the pan for approximately 10 to 15 minutes. This cooling period is critical: if you try to flip it immediately, the cake might be too delicate and break apart. If you wait for it to cool completely in the pan, the luscious caramelized strawberry juices might stick to the bottom. After 10-15 minutes, carefully run a thin knife around the edge of the pan (if not a springform) and then invert the cake onto your chosen serving plate. Gently lift the pan and peel off the baking paper to reveal your beautiful strawberry topping.
Frequently Asked Questions About Strawberry Upside Down Cake
While I’ve primarily tested this recipe with fresh strawberries, you can certainly use frozen strawberries with a few important adjustments. Ensure they are fully thawed before use. Once thawed, it’s crucial to drain them very well to remove excess liquid, and then pat them thoroughly dry with absorbent paper towels. Frozen strawberries tend to release significantly more water when baked, so you might need to increase the amount of cornstarch slightly (by about 1-2 teaspoons) to effectively thicken the extra juices and prevent a soggy cake bottom. Always aim for a firm, dry fruit before mixing with sugar and cornstarch.
Absolutely! If you don’t have self-rising flour, you can easily create your own. For the 250 grams of self-rising flour required in this recipe, simply use 250 grams of Plain / All-Purpose Flour and add 1 ½ teaspoons of baking powder and a generous pinch (about ¼ to ½ teaspoon) of salt. Sift these ingredients together thoroughly before adding them to your wet batter to ensure even distribution of the leavening agents.
Yes, a regular round cake pan of the same size (22cm / 9 inches) can be used. The key is careful preparation to ensure easy release. Start by greasing the pan thoroughly, then line the bottom with a circle of baking paper. For added security, you can also cut a strip of baking paper to line the sides of the pan. This meticulous lining prevents the sticky, caramelized strawberry layer from adhering to the pan, guaranteeing a clean flip and a beautiful presentation.
Definitely! This upside-down cake recipe is incredibly adaptable to various fruits. You can essentially use any other berries, stone fruits, or even sliced apples or pears. Consider experimenting with fruits like Blackberries, Apples, Persimmon, Plums, Raspberries or Blood Oranges! For firmer fruits like apples or pears, you might want to slice them thinner or even lightly pre-cook them with a touch of sugar and butter to ensure they soften sufficiently during the baking process and become beautifully tender.
This cake is best enjoyed on the day it’s baked, or the following day. While it can be stored, the fruit topping is most vibrant and the cake most tender when fresh. If making ahead, store it properly as detailed in the “Storing & Freezing” section.
Expert Tips for a Flawless Strawberry Upside Down Cake
- Choose the Best Strawberries: The quality of your strawberries directly impacts the flavor of your cake. Always opt for naturally sweet, ripe strawberries. For an extra boost of complementary flavor, consider adding a hint of vanilla extract or finely grated lemon zest to the strawberry mixture before baking. The lemon zest particularly brightens the berry flavor without making it tart.
- Prevent Leaks with Proper Pan Prep: If you are using a springform pan, there’s a slight chance some of the delicious strawberry juices might seep out during baking. To avoid a messy oven, it’s a good practice to place a baking sheet lined with parchment paper directly underneath the springform pan on the oven rack. This will catch any drips. If you’re using a regular round pan, ensure it’s very well-lined with baking paper on the bottom and sides as instructed in the “How to Make” section.
- Timing is Everything for Flipping: The cooling time after baking is critical for a beautifully intact upside-down cake. Allow the cake to cool in its pan for about 10 to 15 minutes. Flipping it too soon (straight out of the oven) can cause the tender cake to break or crumble, as it’s still very soft and delicate. However, waiting too long until the cake is completely cold can cause the caramelized strawberry juices to harden and stick stubbornly to the bottom of the pan, making it difficult to release cleanly. The 10-15 minute window allows the cake to firm up slightly while the caramel remains pliable.
- Serve Warm for Best Experience: While delicious at room temperature, this strawberry upside down cake truly shines when served slightly warm. The warmth enhances the fruit’s juiciness and the cake’s tenderness, making for an even more delightful experience.
- Don’t Overmix: As with most cakes, overmixing the batter after adding the flour can lead to a tough cake. Mix until just combined, stopping as soon as no dry streaks of flour remain.
Storing & Freezing Your Strawberry Upside Down Cake
To keep your strawberry upside down cake tasting its best, proper storage is key:
- Room Temperature: This cake can be kept at room temperature for up to 24 hours, especially if your kitchen isn’t too warm. Cover it loosely with plastic wrap or place it under a cake dome to prevent it from drying out.
- Refrigeration: For longer storage, you can store the cake in an airtight container in the refrigerator for up to 3 days. When serving, I highly recommend warming individual slices slightly in the microwave or a low oven for a few minutes. This brings back the moist texture of the cake and the gooey goodness of the caramelized strawberries, making it taste freshly baked.
- Freezing: I generally do not recommend freezing this strawberry upside down cake. Strawberries have a high water content, and when frozen and then thawed, they tend to release a significant amount of water. This can result in a soggy cake with a mushy fruit layer, compromising both the texture and overall quality of the dessert. It’s best enjoyed fresh!
More Delightful Strawberry Recipes to Explore
If you’re a fan of fresh strawberries, you’ll love these other fantastic recipes:
- Strawberry Panna Cotta with Strawberry Sauce
- Almond Strawberry Cake
- Strawberry Mousse Cake
- Strawberry Custard Tart
- 30 Irresistible Strawberry Desserts for Summer
- Strawberry Charlotte Cake
- Classic Fraisier Cake
- Easy Strawberry Mousse Cups
- Strawberry Cheesecake Cookies
Did you make this recipe?
We’d love to hear from you! Please leave a comment below and share your delicious creation on Instagram, tagging us @a.baking.journey with a photo of your masterpiece!

Strawberry Upside Down Cake
This delicious Strawberry Upside Down Cake is an easy summer cake packed with fresh flavors. It combines sweet, caramelized strawberries with a light and fluffy vanilla butter cake, perfect for dessert or afternoon tea!
Author: Sylvie
Prep Time: 20 mins
Cook Time: 40 mins
Total Time: 1 hr
Ingredients
Strawberries
- 500 gr Fresh Strawberries
- 25 gr Caster Sugar (or fine white granulated sugar)
- 10 gr Cornstarch
Vanilla Butter Cake
- 120 gr Unsalted Butter (very soft, at room temperature)
- 75 gr Caster Sugar (or fine white granulated sugar)
- 3 large Eggs (at room temperature)
- 120 ml Full Cream / Whole Milk (at room temperature)
- 1 1/2 teaspoon Vanilla Extract
- 250 gr Self-Rising Flour (or 250g AP flour + 3 tsp baking powder + 1/2 tsp salt)
Instructions
- Preheat your oven to 180°C (350°F). Prepare a 22cm / 9-inch Springform Pan by lining the bottom with baking paper and lightly greasing the sides. (See note 1 in the Notes section below).
Strawberries
- Wash the strawberries, remove their tops, and cut them in half. Place them in a small mixing bowl and toss with the caster sugar and cornstarch until evenly coated.
- Arrange the coated strawberries in a single, even layer at the bottom of the prepared pan. Set aside.
Vanilla Butter Cake
- In a large mixing bowl, cream the soft unsalted butter and caster sugar together for about 5 minutes on medium-high speed until the mixture is light, fluffy, and has doubled in size. (See note 2).
- Add the eggs one at a time, mixing slowly until each egg is fully incorporated before adding the next. Then, mix in the milk and vanilla extract until just combined. (See note 3).
- Add the self-rising flour (preferably sifted) and mix on low speed until just incorporated. Stop as soon as you no longer see any dry flour streaks to avoid overworking the batter.
- Pour the cake batter evenly over the layer of strawberries in the pan. If needed, use a small offset spatula or the back of a spoon to gently spread the batter to the edges.
- Bake for 35 to 45 minutes, or until a skewer or the tip of a knife inserted into the center of the cake comes out clean. Let the cake cool in the pan for 10 to 15 minutes before carefully removing the sides (if using a springform pan) and inverting it onto a serving plate. (See note 4).
Notes
- Yield: This recipe uses a 22cm / 9-inch Springform Pan. A regular round pan of the same size can be used if well-lined with baking paper.
Ingredient Notes:
- If using Frozen Strawberries, make sure they are fully thawed, very well drained, and thoroughly dried with paper towels before tossing with sugar and cornstarch. You may need to add a little extra cornstarch (1-2 tsp) to account for more liquid.
Instruction Notes:
- The strawberries will release juices during baking. If using a springform pan, placing a foil-lined baking sheet under the cake pan will catch any potential drips and keep your oven clean.
- Proper creaming ensures a light texture. To check if the sugar has dissolved, rub a small amount of the creamed mixture between your fingers; it should feel smooth, not gritty.
- It’s common for the batter to look slightly curdled or separated after adding eggs, especially if ingredients aren’t at room temperature. Don’t worry, it will come back together smoothly once the flour is added.
- Oven temperatures vary, so always keep an eye on your cake. The 10-15 minute cooling period before flipping is crucial: too soon and the cake might break; too late and the caramelized topping might stick to the pan.
Nutrition (per serving)
Calories: 326kcal
Carbohydrates: 42g
Protein: 7g
Fat: 15g
Saturated Fat: 9g
Polyunsaturated Fat: 1g
Monounsaturated Fat: 4g
Trans Fat: 1g
Cholesterol: 95mg
Sodium: 138mg
Potassium: 174mg
Fiber: 2g
Sugar: 16g
Vitamin A: 496IU
Vitamin C: 37mg
Calcium: 45mg
Iron: 1mg
