Decadent Coffee Cinnamon Rolls: The Ultimate Make-Ahead Breakfast for Coffee Lovers
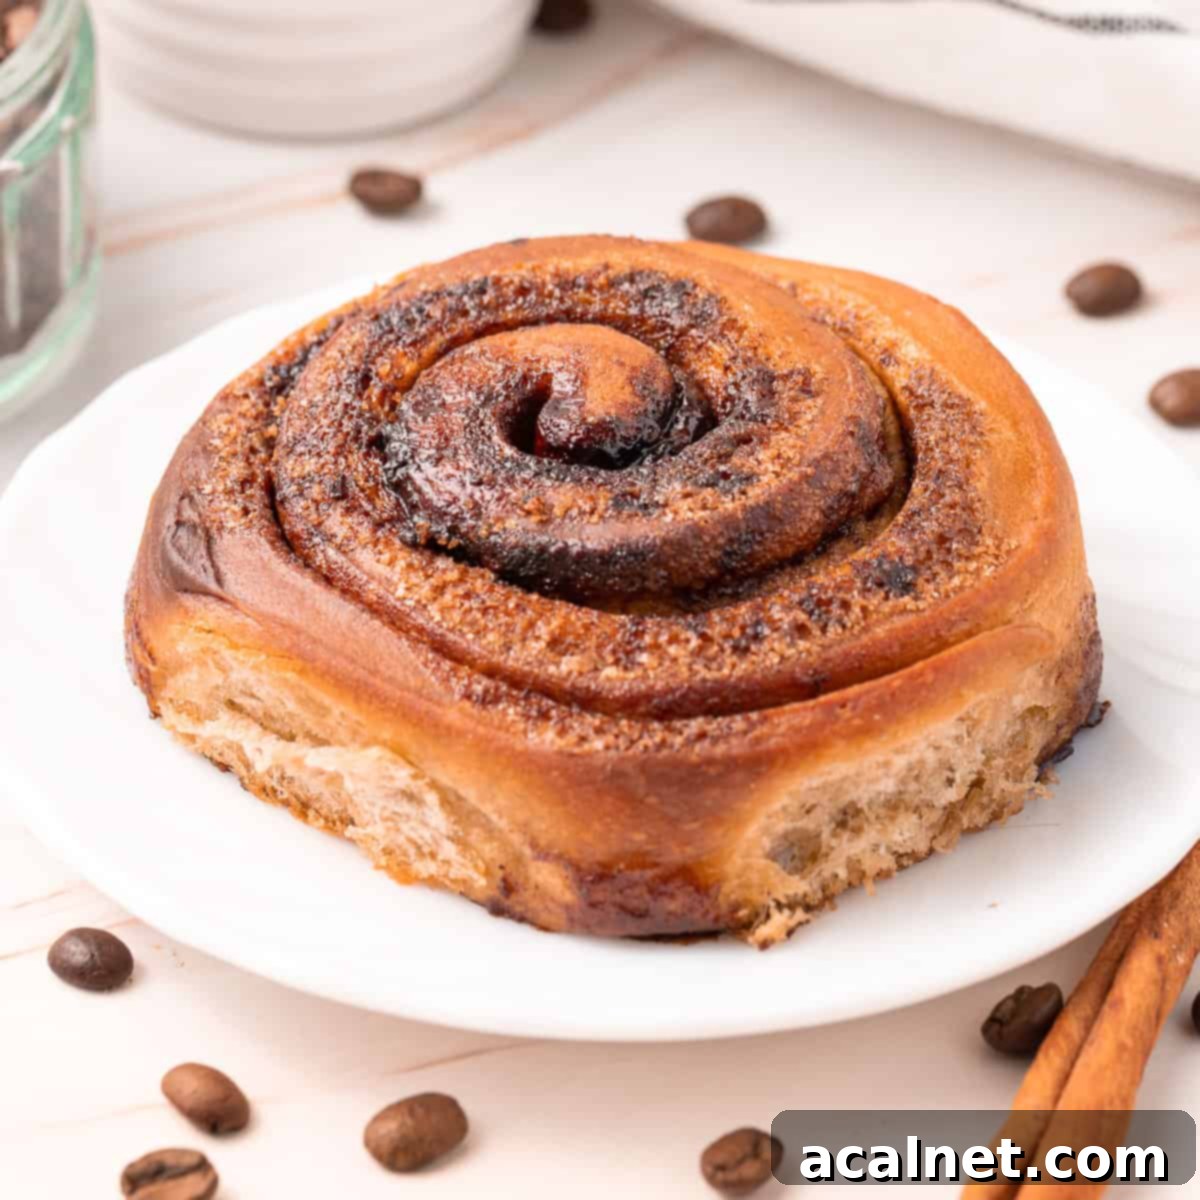
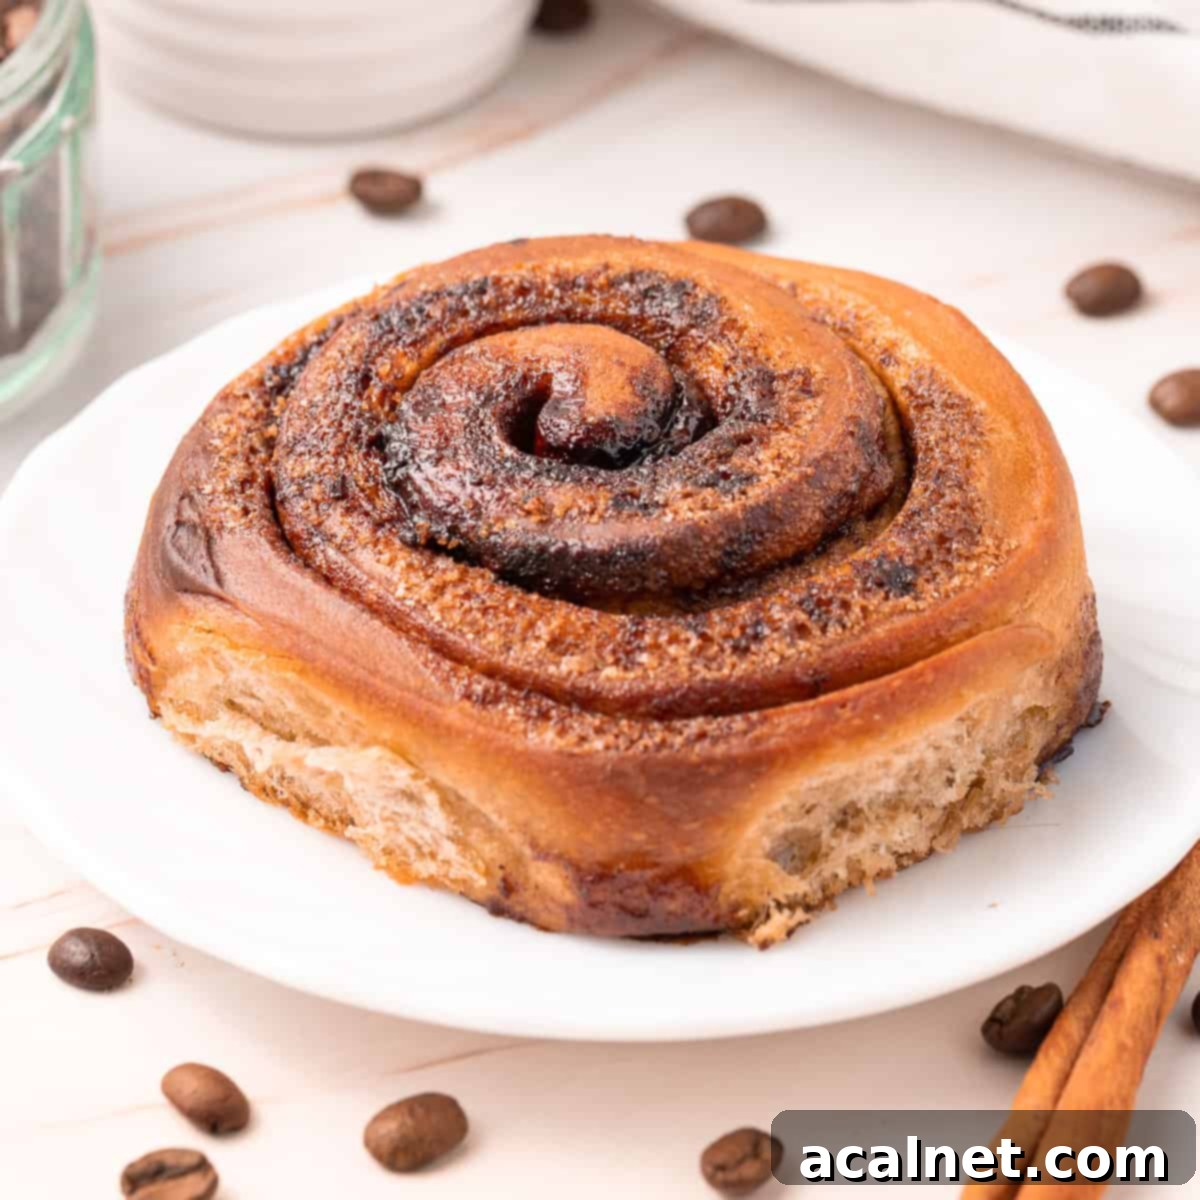
Prepare to elevate your breakfast game with these incredibly decadent and utterly delicious Coffee Cinnamon Rolls. Imagine a soft, fluffy coffee-infused dough, generously swirled with a rich, aromatic coffee cinnamon filling, and crowned with a luscious espresso icing. This is more than just a sweet treat; it’s a true dream come true for any coffee enthusiast, perfect for a leisurely weekend breakfast or a delightful afternoon pick-me-up.
[feast_advanced_jump_to]
Why You’ll Fall in Love with These Coffee Cinnamon Rolls
If the irresistible aroma of coffee combined with the comforting embrace of cinnamon buns is your ultimate indulgence, then get ready for an extraordinary treat! These coffee rolls are a masterful blend, ingeniously crafted to deliver a robust **espresso aroma** that perfectly complements the warm, **spicy cinnamon flavors**. Unlike anything you’ve tried before, they offer a truly unique sensory experience.
The magic begins with the coffee-infused dough, which bakes up incredibly **light and fluffy**, creating a soft base that practically melts in your mouth. But it doesn’t stop there; the filling is where true indulgence lies. Each bite promises a generous swirl of rich coffee and cinnamon, making these rolls utterly irresistible. For those who crave an even more intense coffee hit, finishing them with our simple two-ingredient Espresso Glaze is an absolute must. It adds a beautiful sheen and a concentrated burst of coffee flavor that truly rounds out the experience.
One of the best features of this recipe is its convenience. The sweet dough is designed for an overnight proofing in the refrigerator, making it the **perfect make-ahead breakfast recipe**. This means you can do most of the preparation the night before, then simply wake up, finish shaping the rolls, bake them to golden perfection, and serve them fresh and warm. Imagine waking up to the aroma of freshly baked coffee cinnamon rolls without all the morning rush – pure bliss!
Love cinnamon rolls? Also try my Chocolate Cinnamon Rolls, Classic Cinnamon Scrolls and Bright Lemon Sweet Rolls.
Essential Ingredients for Perfect Coffee Cinnamon Rolls
Crafting these delectable coffee cinnamon rolls requires a few key ingredients, each playing a vital role in achieving their perfect texture and rich flavor. Using quality ingredients and ensuring they are at the correct temperature will make a significant difference in your final bake.
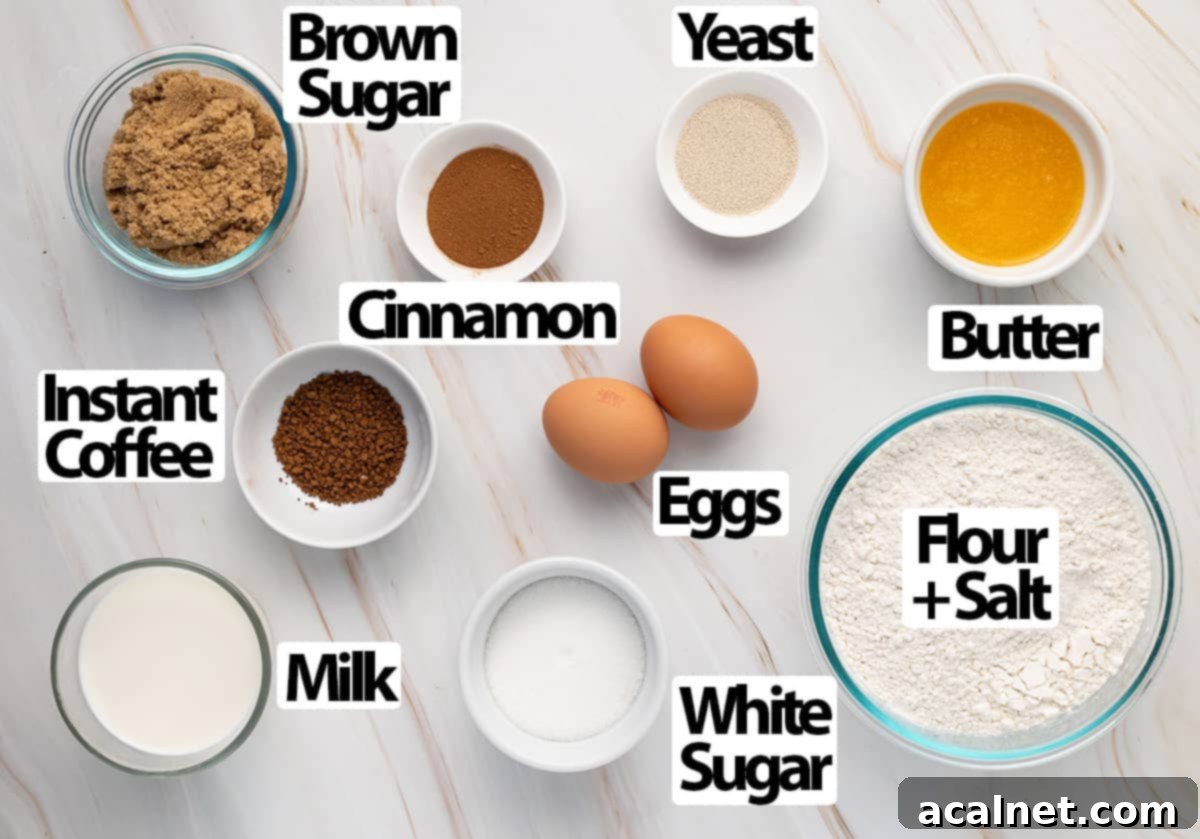
Scroll down to the detailed recipe card below for all exact quantities
For the Fluffy Coffee Bread Dough:
- Milk: Opt for Full Cream or Whole Milk. Its higher fat content contributes significantly to the tender texture and rich flavor of the rolls. Ensure it’s lukewarm, not hot, to activate the yeast without killing it.
- Coffee: Instant Coffee Granules or Coffee Powder are ideal here as they dissolve smoothly into the milk, infusing the dough with a delightful coffee essence. While espresso powder can be used, it might leave a slightly gritty texture if not fully dissolved.
- Yeast: Instant Yeast is recommended for its convenience, requiring no prior activation. If you’re using Active Dry Yeast, remember to rehydrate it in the warm milk first until foamy, confirming its activity.
- Eggs: Use Medium to Large Eggs, and crucially, ensure they are at room temperature. Cold eggs can shock the yeast and hinder the dough’s rise, affecting the final texture.
- Butter: Melted Unsalted Butter adds richness and moisture. A neutral-flavored oil, such as canola oil, can be a suitable substitute if needed, though butter offers superior flavor.
- Flour: Plain / All-Purpose Flour is essential for achieving the softest coffee rolls. Avoid bread flour, which has a higher protein content that develops more gluten, leading to a chewier, spongier texture.
- Salt: A pinch of Fine Table Salt enhances all the flavors in the dough and balances the sweetness.
For the Aromatic Coffee Cinnamon Filling:
This simple yet potent filling combines **Soft Butter**, **Brown Sugar**, **Ground Cinnamon**, and **Instant Coffee Granules**. The brown sugar adds a deep, molasses-rich sweetness and moisture, while the cinnamon provides classic warmth. The instant coffee granules infuse a concentrated coffee flavor directly into the swirl. For an even more pronounced coffee or vanilla note, a few drops of coffee or vanilla extract can be incorporated.
For the Irresistible Espresso Icing:
This effortlessly delicious icing is created by mixing finely sifted **Icing Sugar** (also known as powdered sugar) with a freshly brewed shot of **Espresso**. The espresso not only provides a strong coffee flavor but also a beautiful, dark color. If you don’t have an espresso machine, simply dissolve about 1 teaspoon of instant coffee (adjust to your preferred intensity) in the same quantity of boiling water for an equally effective substitute.
How to Make Coffee Cinnamon Rolls: A Step-by-Step Guide
Making the Perfect Coffee Dough
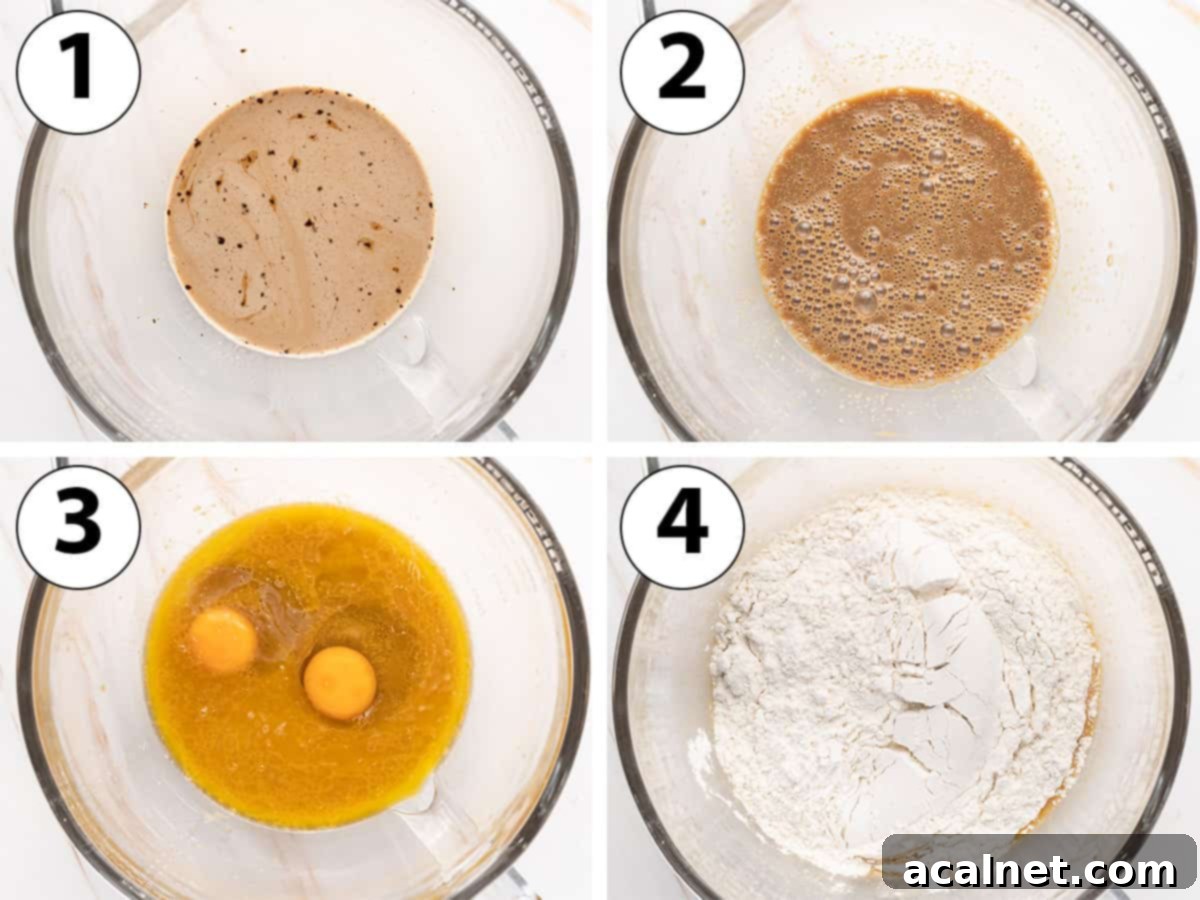
- Photo 1: Begin by pouring the warm Milk into the bowl of your stand mixer. Sprinkle the Instant Coffee Powder evenly over the milk. Stir thoroughly until all the coffee granules have completely dissolved, creating a fragrant coffee milk. Then, set it aside to cool to a lukewarm temperature, ensuring it’s not too hot to harm the yeast.
- Photo 2: Once the coffee milk is lukewarm, add the Sugar and Instant Yeast. Give it a gentle stir and then let it rest for approximately 10 minutes. During this time, small bubbles should begin to appear on the surface. This bubbly activity is a positive sign, indicating that your yeast is alive and active, ready to work its magic.
Note: While “blooming” or rehydrating the yeast is optional for instant yeast, I personally find it a reassuring extra step to confirm its vitality. If you are using Active Dry Yeast, this step is absolutely crucial for successful dough development.
- Photo 3: Next, gently stir the room temperature Eggs and the Melted Butter into the yeast mixture. It’s important that the butter is no longer hot, as excessive heat can deactivate the yeast.
- Photo 4: Finally, add the Plain / All-Purpose Flour and Fine Table Salt to the mixture.
Kneading and Proofing the Dough for Maximum Fluffiness
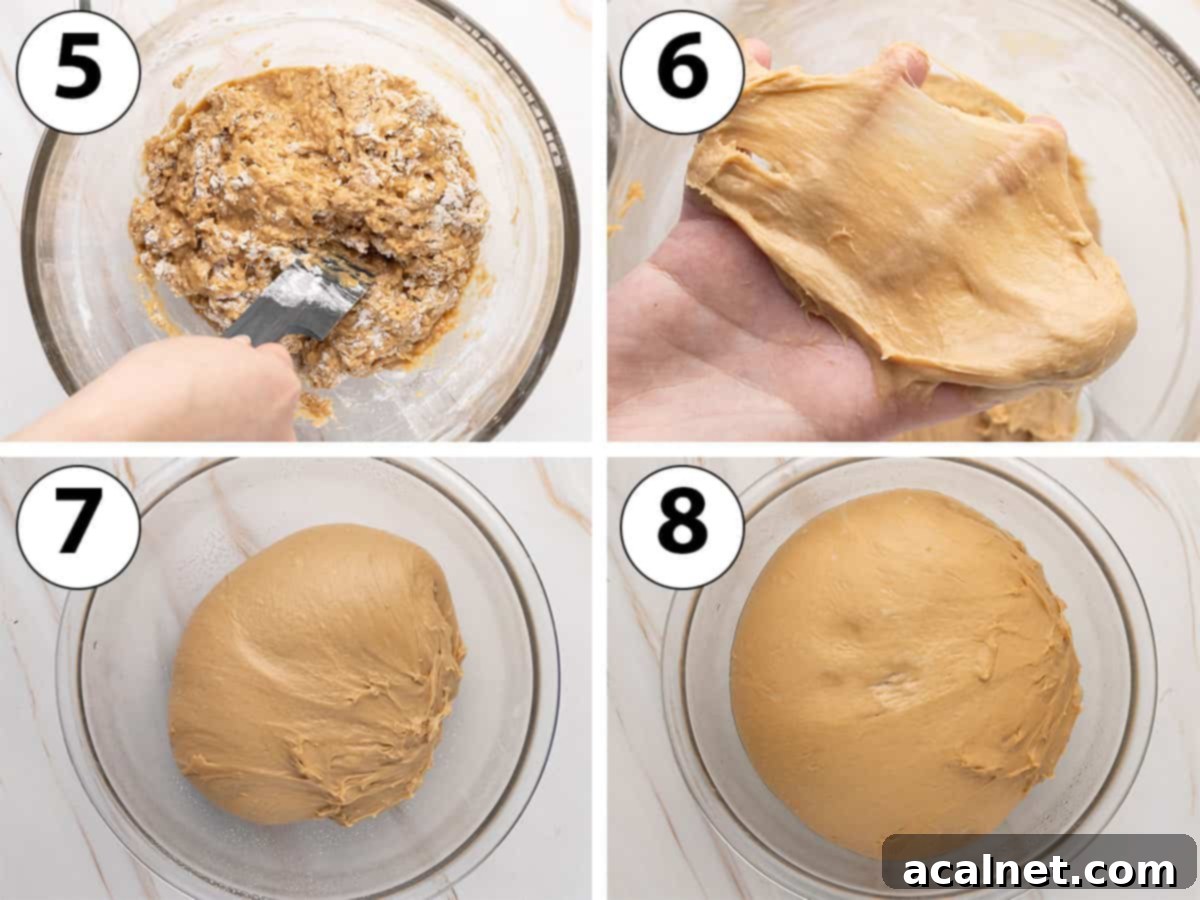
- Photo 5: Using a sturdy spatula, quickly mix all the dough ingredients together until they are just lightly combined. Don’t worry if it looks shaggy and uneven at this stage – a perfectly smooth consistency isn’t necessary yet. Cover the bowl and allow the dough to rest at room temperature for 15 minutes, or up to an hour.
This initial resting period, known as “autolyse,” is an optional but highly beneficial step. It allows the flour to fully hydrate with the liquids before kneading begins, making the kneading process much easier and quicker, and resulting in a smoother, more pliable dough.
- Photo 6: Attach the dough hook to your stand mixer. Begin kneading the dough at a medium speed for about 10 minutes. The dough will gradually transform from a sticky mass into a smoother, more elastic consistency. Increase the speed to high and continue kneading for an additional 2 to 4 minutes, or until the dough becomes incredibly soft, stretchy, and successfully passes the “windowpane test.”
The “windowpane test” is a crucial indicator of proper dough development. To perform it, gently take a small piece of dough and carefully pull and stretch it between your fingers. If the dough tears easily, it requires more kneading. However, if it stretches thin enough to allow light to pass through it without breaking, creating a translucent “windowpane,” then your dough is perfectly kneaded and ready for proofing.
- Photo 7: Carefully transfer the well-kneaded dough into a clean, generously greased large bowl. This prevents sticking as the dough expands.
- Photo 8: Cover the bowl tightly with a clean tea towel or plastic wrap. Place the covered bowl in the refrigerator to proof for an extended period of 8 to 10 hours, or conveniently, overnight. During this slow, cold proof, the dough will beautifully double in size, and the flavors will deepen, creating a superior end product.
While you can proof the coffee dough at room temperature for a quicker 1.5 to 2 hours, be aware that the dough will be much softer and potentially stickier, making it harder to handle and roll. The overnight fridge proof not only enhances flavor but also improves the dough’s workability.
Crafting the Coffee Cinnamon Filling and Rolling the Dough
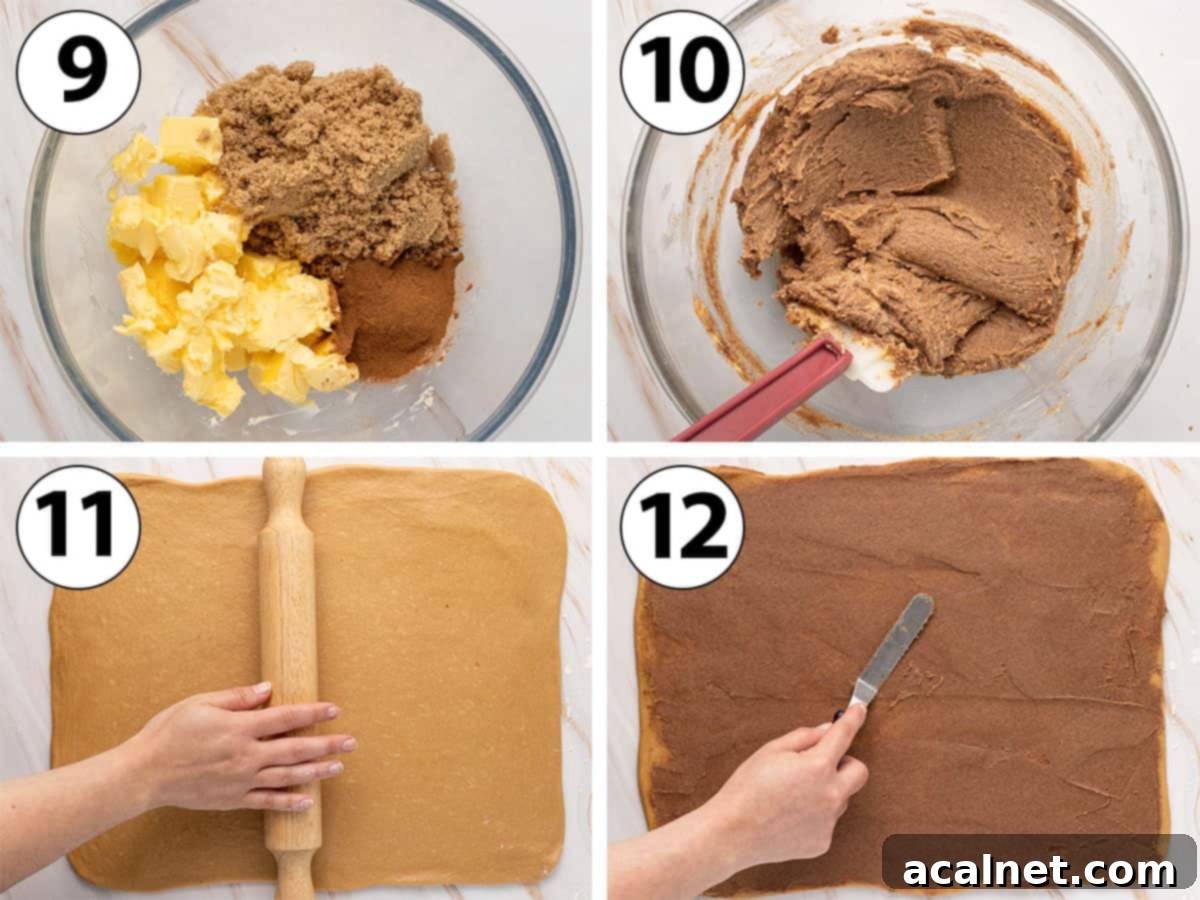
Once your coffee dough has completed its overnight proofing, it’s time to prepare the delectable cinnamon coffee filling and get ready for assembly.
- Photo 9: In a small mixing bowl, combine the very soft, room-temperature Butter, Brown Sugar, and Ground Cinnamon. The butter needs to be soft enough to easily cream.
- Photo 10: Using a silicone spatula or the back of a spoon, work the mixture together thoroughly until it forms a thick, uniform paste. This ensures an even distribution of flavor in your rolls.
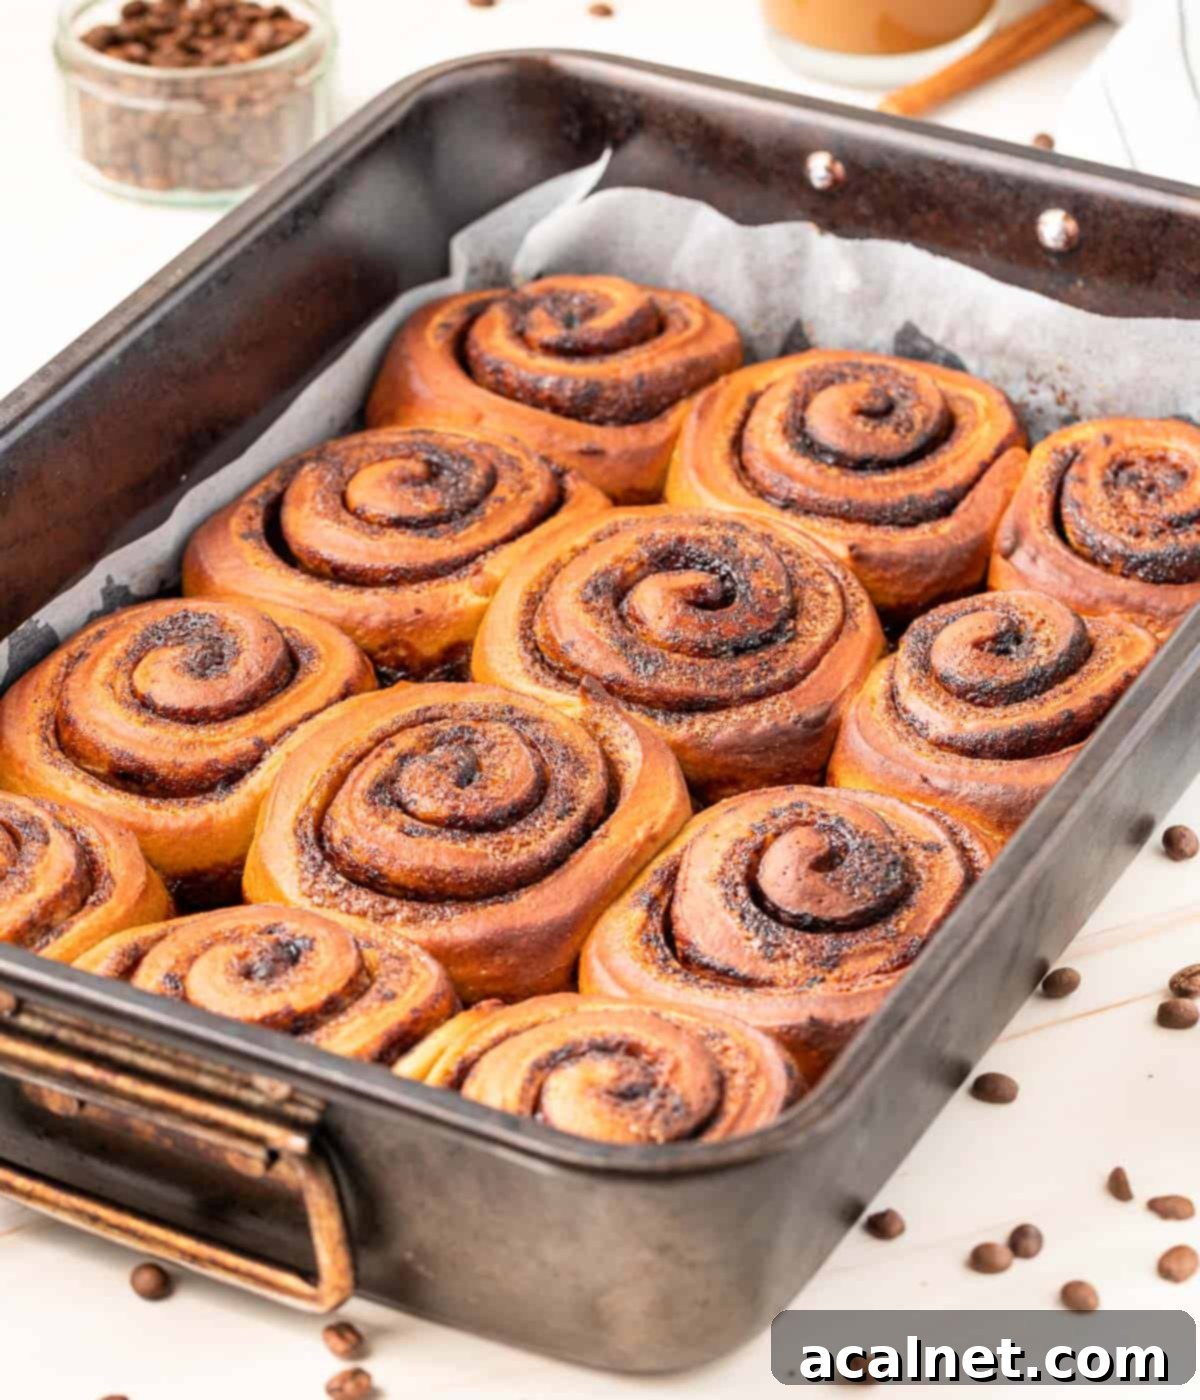
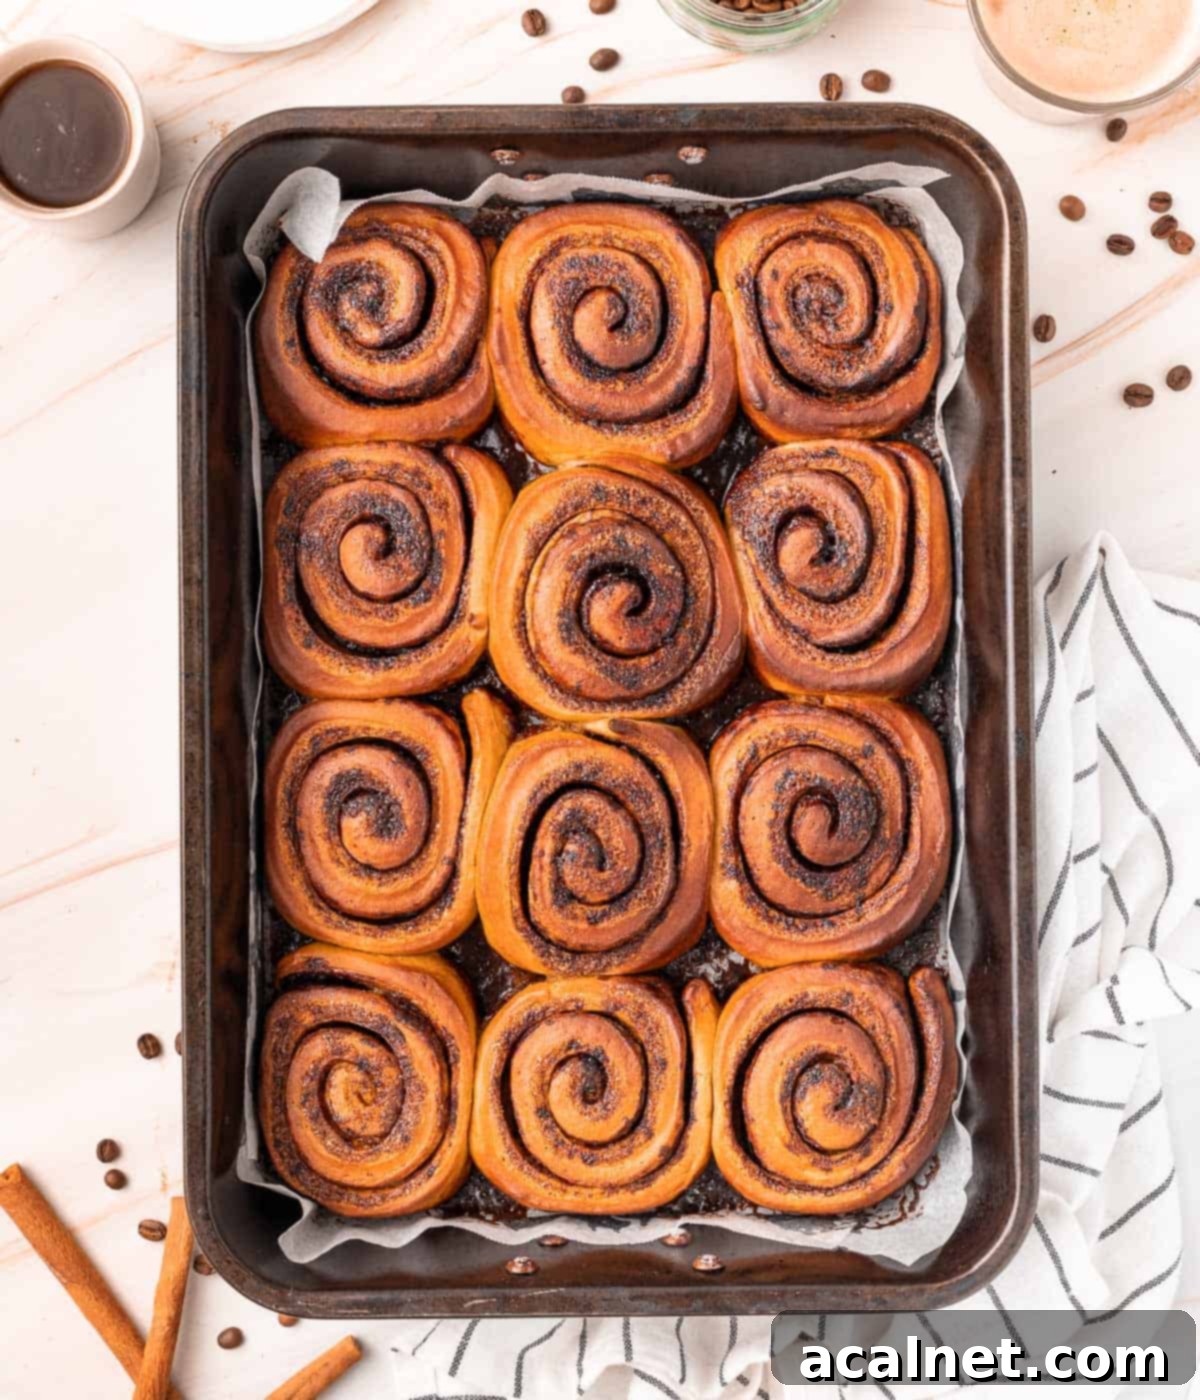
- Before rolling, line a large baking pan with baking paper or parchment paper. A 26 x 38 cm (10 x 15-inch) roasting tray works perfectly to accommodate all 12 rolls with enough space.
- Photo 11: Gently punch down the proofed dough to deflate it. Transfer the dough onto a very lightly floured work surface. Be careful not to use too much extra flour, as this can make the rolls dry. With a rolling pin, carefully roll the dough into a precise 30 x 40 cm (12 x 15 inch) rectangle. Aim for an even thickness across the entire surface.
- Photo 12: Now, transfer the prepared coffee cinnamon filling mixture over the rolled dough. Use a small offset spatula to gently and evenly spread the filling across the entire surface of the rectangle, leaving a small border (about half an inch) on one of the longer edges to help seal the roll.
Precisely Cutting and Arranging the Rolls
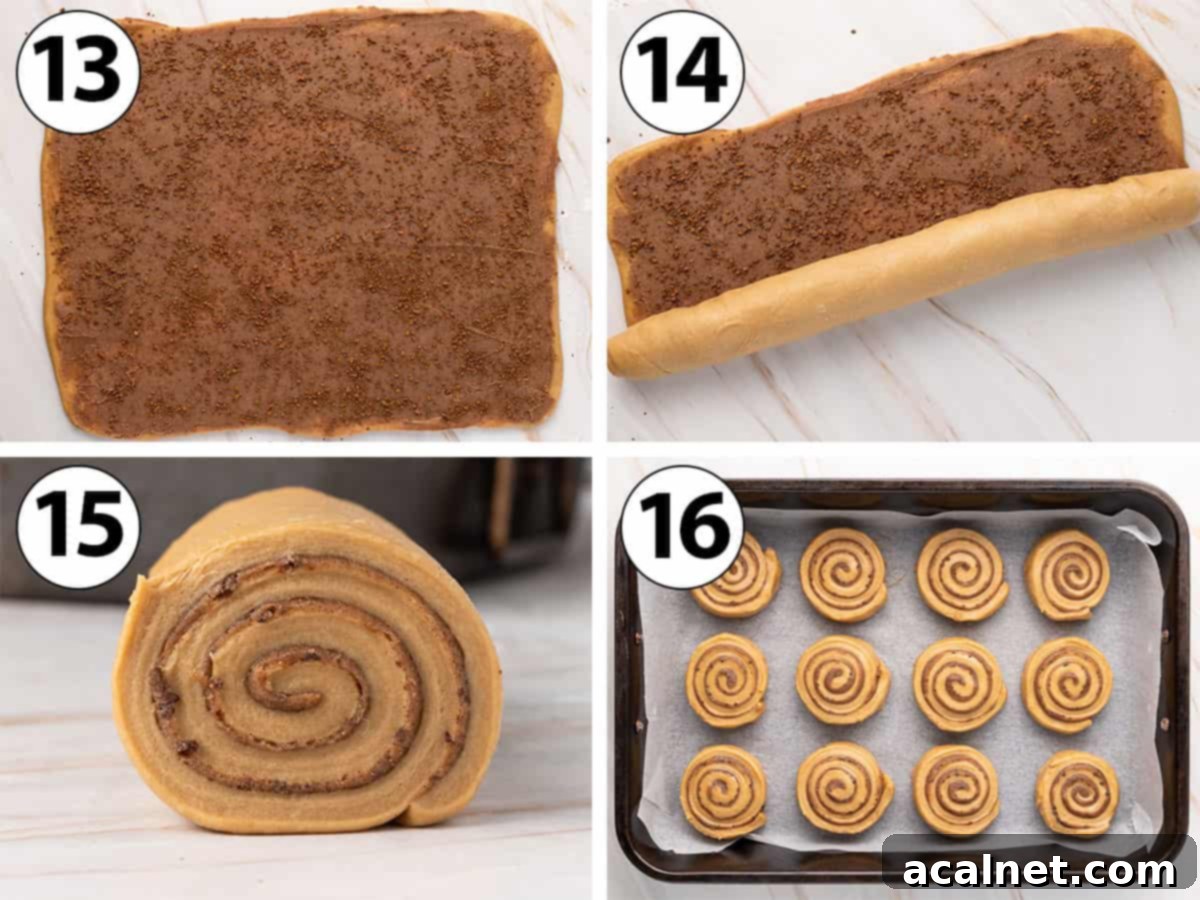
- Photo 13: For an extra boost of coffee flavor and a delightful textural contrast, evenly sprinkle the Instant Coffee Granules or Powder over the cinnamon filling. This adds an aromatic punch that truly defines these rolls.
- Photo 14: Starting from one of the long sides, carefully and tightly roll the dough into a uniform log shape. Ensure each turn is snug to prevent gaps in the finished rolls. Once rolled, gently press the long edge onto the log to securely seal it. This prevents the filling from escaping during baking.
- Photo 15: To achieve beautifully even rolls, use unflavored dental floss or a sharp bread knife to cut the log into 12 individual rolls, each approximately 3 cm (1.2-inches) thick. Floss provides a clean cut without squishing the dough.
- Photo 16: Carefully transfer the freshly cut coffee rolls into your prepared baking dish. Arrange them with a little space between each, as they will expand significantly during their second proof and baking.
It’s crucial to use a baking dish that is sufficiently large. If the dish is too small, the rolls will rise excessively in their centers, resulting in an uneven shape. A larger dish allows them to rise uniformly and beautifully.
- Cover the dish with a clean tea towel and allow the rolls to proof at room temperature for another 30 minutes to 1 hour, or until they have nearly doubled in size. This final proof ensures maximum fluffiness.
- While the rolls are proofing, preheat your oven to 180 degrees Celsius / 350 degrees Fahrenheit. Once proofed, bake the coffee rolls for 23 to 25 minutes, or until they are golden brown on top and have risen magnificently.
- Carefully remove the baking dish from the oven and place it on a wire rack to cool down slightly.
The Perfect Espresso Icing Finish
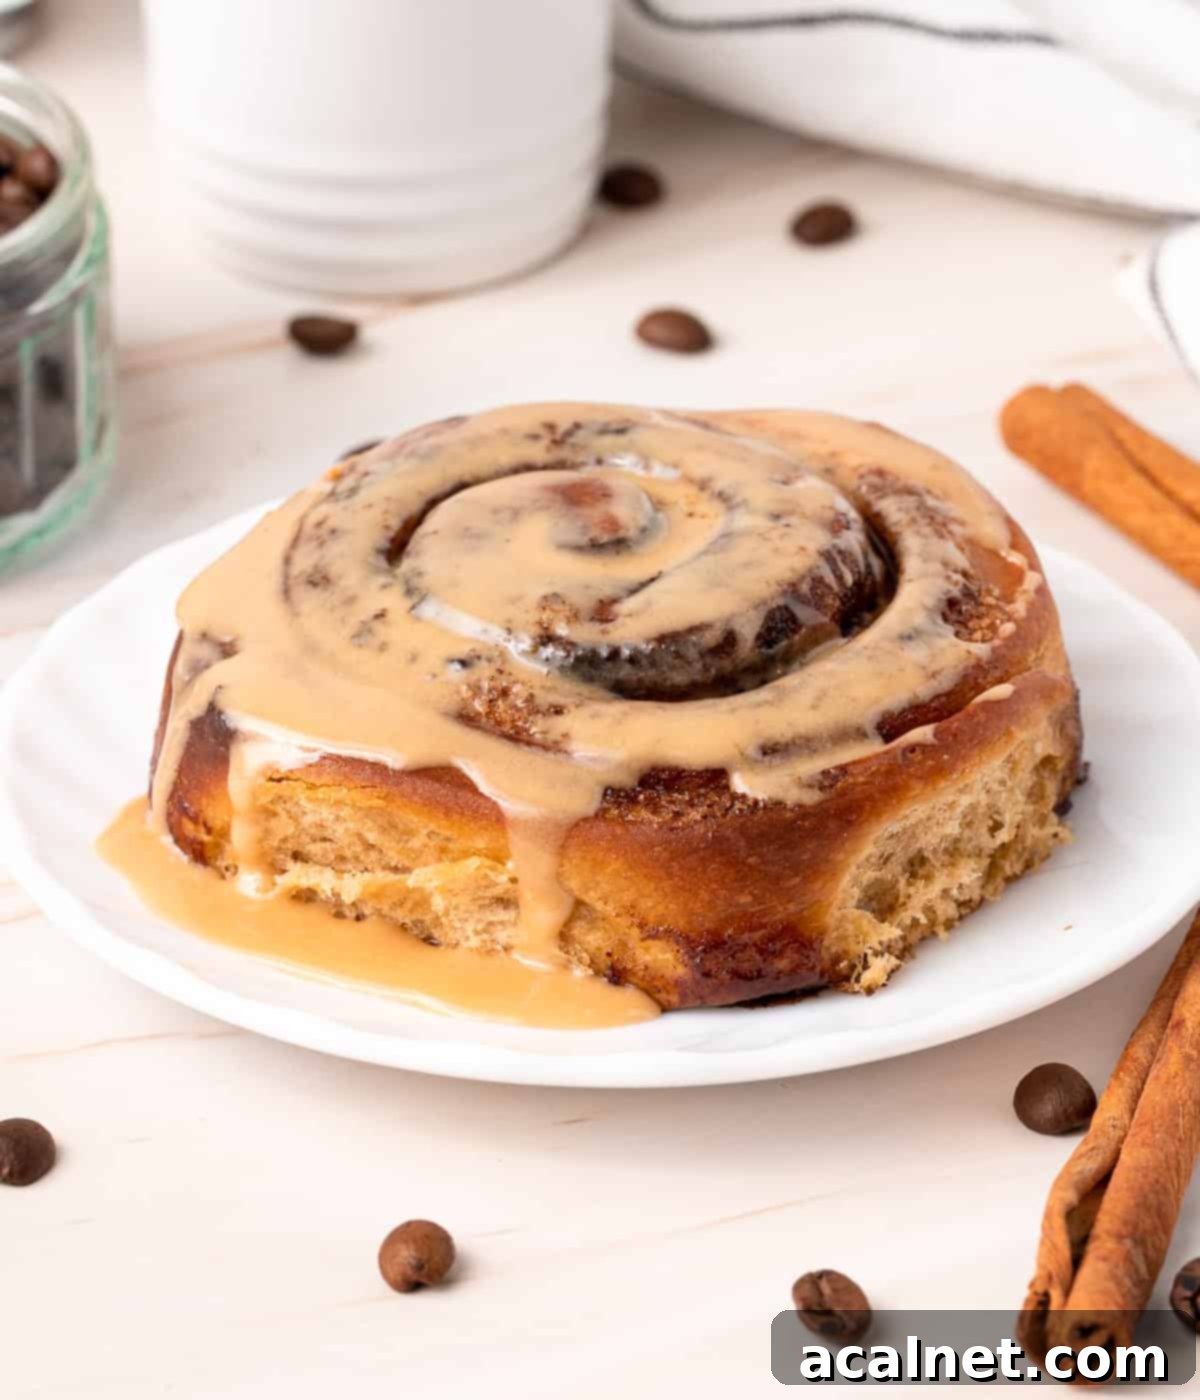
Optionally, once your freshly baked coffee cinnamon rolls have cooled down slightly, you can enhance them with a simple, yet intensely flavorful, espresso icing. This adds a beautiful sheen and an extra layer of coffee goodness.
- To prepare, sift the Icing Sugar into a medium bowl. While the rolls are cooling, prepare a shot of espresso (or make the equivalent amount of instant coffee with boiling water). Pour the warm coffee over the sifted sugar and mix thoroughly with a whisk or spoon until the icing is completely smooth and free of lumps.
- Once the rolls have cooled to a warm or room temperature, generously pour or drizzle the espresso icing over them. Serve immediately and enjoy!
Common Questions About Coffee Cinnamon Rolls
Yes, absolutely, you can proof the dough at room temperature for approximately 1.5 to 2 hours, or until it has doubled in size. However, there are notable benefits to the overnight cold proof in the fridge. Firstly, the cooler temperature allows the yeast to work more slowly, which develops a richer, more complex flavor in the dough. Secondly, the cold dough is significantly firmer and therefore much easier to handle, roll, and cut without sticking or losing its shape. This makes the assembly process smoother and less messy. Opting for the overnight proof also makes this an ideal make-ahead recipe, allowing you to bake fresh rolls in the morning with minimal effort.
While this dough is on the softer and stickier side, making it a bit challenging to knead by hand, it is certainly possible! If you plan to knead manually, I highly recommend increasing the “autolyse” time (the initial resting period after mixing flour and liquids) to a full hour. This extended rest allows the flour to fully hydrate and gluten to begin developing on its own, making the dough much more pliable and easier to work with by hand. You’ll still need to knead it thoroughly on a lightly floured surface until it becomes smooth and elastic, passing the windowpane test.
The simple Espresso Icing (Icing Sugar + freshly brewed Espresso) is a fantastic choice, enhancing the coffee theme beautifully. However, you have many delicious options! For a classic twist, a traditional cream cheese icing made with cream cheese, butter, powdered sugar, and a splash of vanilla extract would be absolutely divine. If you want to lean further into the coffee flavor, consider a coffee cream cheese frosting, which incorporates a bit of instant coffee or espresso into the cream cheese icing. A simple vanilla bean glaze or even just a dusting of powdered sugar would also be lovely for a lighter finish.
Expert Tips & Tricks for Perfect Coffee Cinnamon Rolls
- Monitor Proofing Time, Not Just the Clock: The exact time it takes for dough to proof can vary significantly due to environmental factors like room temperature and humidity. Instead of strictly relying on the recommended proofing times, focus on the visual cues. Always let your dough rise until it has truly doubled in size before proceeding with the coffee cinnamon filling. A warm kitchen will accelerate proofing, while a cooler one will slow it down.
- The Gentle Poke Test for Proofed Dough: To confirm that your dough is perfectly proofed, gently press your finger into it. If the indentation slowly springs back only slightly, leaving a small dent, your dough is ready. If it springs back immediately, it needs a little more time to proof. Conversely, if it deflates completely or stays deeply indented, it might be over-proved.
- Go Easy on the Extra Flour: While the dough might feel a bit sticky when you roll it, resist the urge to add too much extra flour to your work surface or rolling pin. A slightly sticky dough actually helps it adhere to the work surface, making it easier to achieve a tight roll. Excessive flour can result in dry, dense rolls. If you do use some, make sure to brush off any excess before rolling and adding the filling.
- Roll Tightly for Uniform Swirls: Once the filling has been spread, it’s crucial to roll the dough as tightly as possible from the long side. A tight roll ensures beautiful, even swirls of cinnamon-coffee filling in every single bite. If your dough becomes too soft or difficult to handle during this stage, you can briefly transfer the entire rolled rectangle back into the fridge for 10-15 minutes to firm up slightly before cutting out the rolls. This makes for cleaner cuts and better-shaped rolls.
Storing & Freezing Your Delicious Coffee Cinnamon Rolls
To enjoy these coffee cinnamon rolls at their best, they are ideally eaten fresh within 24 hours of baking. However, they can be stored at room temperature for up to 3 days. Keep them either in the covered baking dish you used or transfer them to an airtight container to maintain their softness and prevent them from drying out. Leftover rolls can be easily reheated in the microwave for a few seconds until warm and soft again.
For longer storage, these rolls freeze beautifully! Once the baked rolls have completely cooled down (without any icing), wrap them individually or collectively in an airtight freezer-safe bag or foil, ensuring they are well-sealed to prevent freezer burn. They can be frozen for up to 1-2 months. To enjoy, simply thaw them overnight in the refrigerator or for a few hours at room temperature, then reheat gently in the microwave or oven until warmed through.
More Delightful Sweet Bread Recipes You’ll Love
- Challah Rolls (4 Ways)
- Classic French Brioche Loaf Bread
- Easy Cinnamon Roll Bread Loaf
- Irresistible Chocolate Chip Brioche
- Homemade Cinnamon Babka
- Rich Chocolate Brioche
- Quick No-Yeast Cinnamon Rolls
Made this recipe?
Let us know if you liked it by leaving a comment below, and tag us on Instagram @a.baking.journey with a photo of your creation!
Recipe Card

Coffee Cinnamon Rolls
Servings: 12
Author: Sylvie
Print Recipe
Ingredients
Coffee Dough
- 180 ml (3/4 cup) Full Cream / Whole Milk
- 6 gr (1 1/2 tablespoon) Instant Coffee Granules
- 80 gr (1/3 cup) Caster Sugar
- 9 gr (2 teaspoon) Instant Yeast
- 2 large Eggs
- 75 gr (5 tablespoons) Unsalted Butter, melted
- 480 gr (3 cups + 4 tablespoons) Plain / All-Purpose Flour
- 1/2 teaspoon Fine Table Salt
Coffee Cinnamon Filling
- 120 gr (1/2 cup) Unsalted Butter, soft, at room temperature
- 100 gr (1/2 cup) Brown Sugar
- 1 tablespoon Ground Cinnamon
- 8 gr (2 tablespoons) Instant Coffee Granules
Espresso Icing (optional)
- 150 gr (1 cup) Icing Sugar, sifted
- 30 ml (2 tablespoons) Espresso, freshly brewed
Instructions
Coffee Dough
- Place the warm Milk and Instant Coffee Granules in the bowl of a stand mixer. Mix until the coffee granules have dissolved then leave to cool down for until the milk is lukewarm.
- Mix in the Sugar and Instant Yeast, then leave for about 10 minutes or until small bubbles appear on the surface. Stir in the Eggs and cooled down melted Butter.
- Add the Flour and Salt. Using a spatula, quickly mix the dough to lightly combine the ingredients (it does not need to look smooth). Cover the bowl and leave at room temperature for 15 minutes – or up to an hour (see note 1).
- With the dough hook, knead at a medium speed for about 10 minutes. Increase to high speed and knead for another 2 to 4 minutes, or until the dough is very soft, stretchy and passes the “windowpane test” (see note 2).
- Transfer the dough into a clean, lightly greased large bow. Cover with a tea towel or plastic wrap and place in the refrigerator to proof for 8 to 10 hours – or overnight – until doubled in size (see note 3).
Coffee Cinnamon Filling
- Line a large 26 x 38 cm (10 x 15-inch) baking pan with baking paper / parchment paper.
- Place the very soft Butter, Brown Sugar and Cinnamon in a small bowl. Using a spatula, work the mixture until you get a thick paste consistency.
- Punch the dough to deflate it and transfer it over a very lightly floured surface. Using a rolling pin, roll it into a 30 x 40 cm rectangle (12 x 15 inch).
- Spread the coffee cinnamon filling into an even layer over the rolled dough. Sprinkle the Coffee Granules or Instant Coffee Powder over the filling.
- Tightly roll the long side of the dough to get a log shape. Using unflavoured floss or a bread knife, cut out 12 rolls that are about 3 cm thick each (1,2-inch). Gently transfer the coffee rolls into the prepared baking dish (see note 4).
- Cover the dish with a tea towel and leave to proof at room temperature for another 30 minutes to 1 hour, or until almost doubled in size.
- Preheat your oven on 180 degrees Celsius / 350 degrees Fahrenheit. Bake for 23 to 25 minutes, or until they have risen and are golden brown. Place the baking dish on a wire rack to cool down.
Espresso Icing (optional)
- While the coffee rolls are cooling down, sift the Icing Sugar into a medium bowl. Prepare the espresso (or make the same quantity of instant coffee with boiling water). Pour the coffee over the icing sugar and mix until completely smooth.
- Pour the icing over the rolls once they have cooled down.
Would you like to save this recipe?
We’ll email this post to you, so you can come back to it later!
Notes
- This step called “autolyse” is optional, but a great way to insure that the liquids have started to hydrate the flour before you start kneading it. It will make the kneading process much easier and quicker.
- To do the “windowpane test”: gently pull and stretch a small piece of the dough between your fingers. If the dough breaks quickly, it needs to be kneaded for longer. If it stretches easily without breaking and you can see light coming through it, it has passed the windowpane test.
- If you prefer to proof it at room temperature, leave it for 1,5 to 2 hours or until doubled in size. The dough will be harder to work with when proofed at room temperature. Proofing it in the fridge overnight not only helps develop the flavours in the dough, it also makes it much easier to roll.
- Make sure to use a dish that is large enough to allow for the rolls to rise and expand. If the dish is too small, the rolls will rise more in their centres and won’t have a uniform shape.
Nutrition (per serving)
