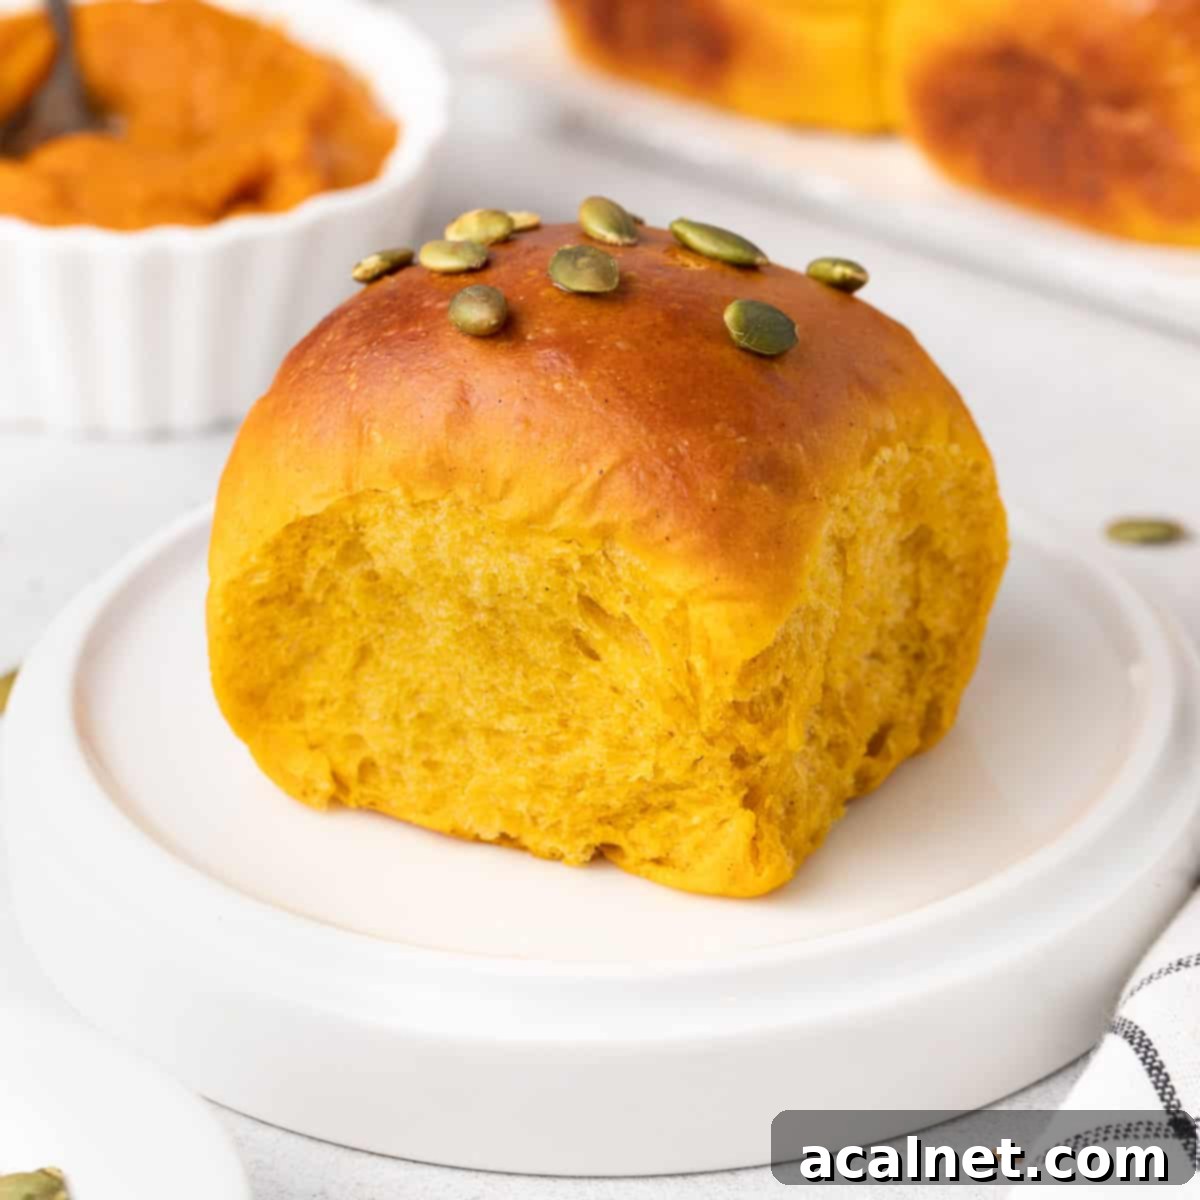
Ultimate Fluffy & Flavorful Pumpkin Buns: Your Go-To Fall Bread Recipe
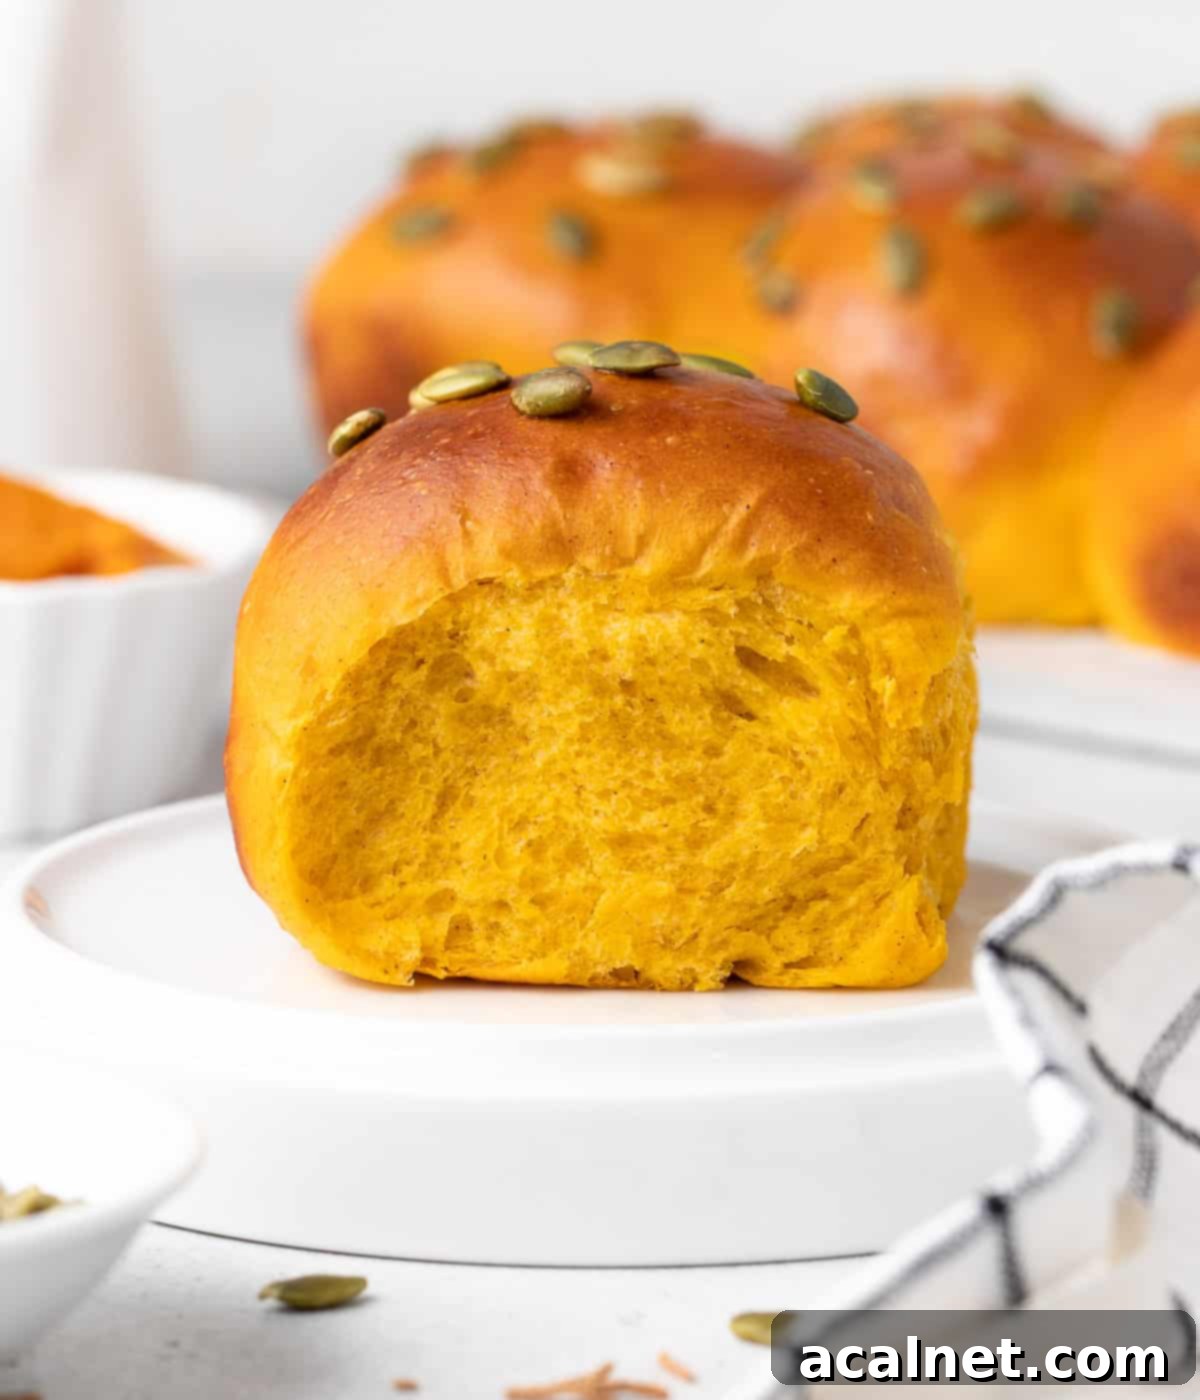
Prepare to be amazed by these incredibly soft, wonderfully fluffy, and intensely flavorful Pumpkin Buns. Each bite is a harmonious blend of rich, homemade pumpkin puree and warm cinnamon spice, making these bread buns a perfect addition to any meal. Whether you’re seeking impressive dinner rolls for a holiday feast, a unique option for sandwiches and burgers, or a comforting appetizer, these pumpkin-infused delights are guaranteed to impress.
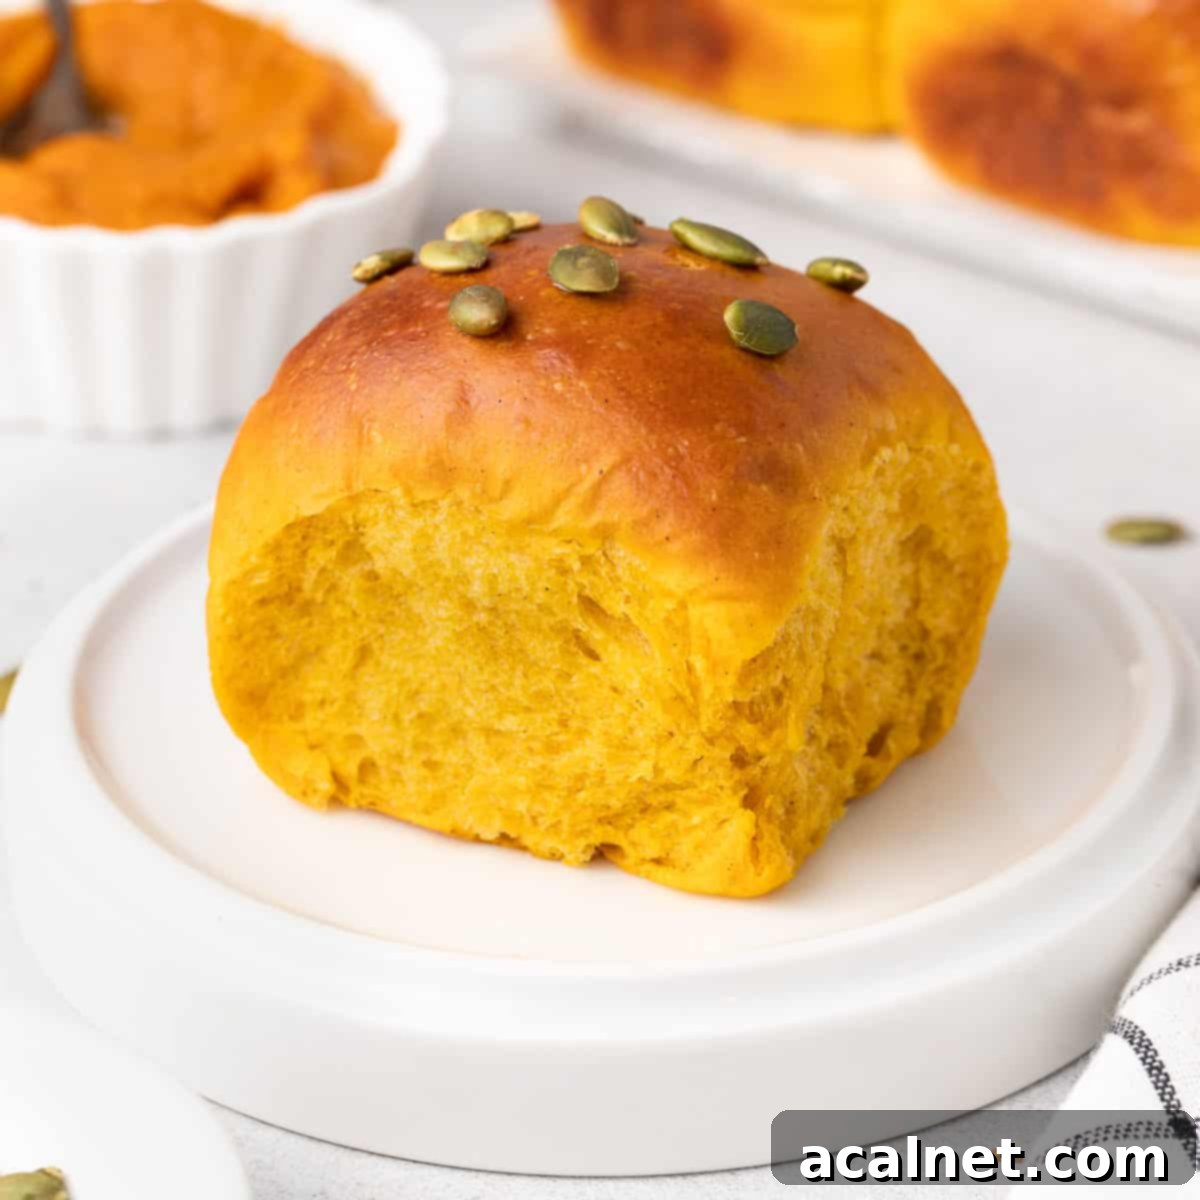
Bringing homemade bread to your table adds an unmatched level of comfort and flavor, and these pumpkin buns are no exception. Imagine the aroma of freshly baked bread filling your home, coupled with the inviting scent of pumpkin and cinnamon – it’s truly a sensory delight that signals the arrival of autumn.
[feast_advanced_jump_to]
Why You’ll Fall in Love with These Pumpkin Buns
If your quest for an exceptionally soft, pillowy, and flavor-packed bread bun recipe ends here. These homemade Pumpkin Bread Buns boast an astonishingly fluffy crumb and a delightful balance of sweet and subtly spicy notes. This irresistible flavor profile comes courtesy of the star ingredients: creamy mashed pumpkin, hints of brown sugar, and aromatic cinnamon, all working together to create a bread that’s simply divine.
Much like our popular Sweet Potato Buns, these pumpkin rolls are incredibly versatile. They serve beautifully as the base for a hearty sandwich, offer a delicious change of pace when toasted for breakfast, or even elevate your burger experience. They are particularly exquisite as elegant dinner rolls for your Thanksgiving dinner or any festive holiday gathering, bringing a touch of autumnal charm to your spread. Their rich color and enticing aroma make them a perfect centerpiece for any fall-themed meal.
Beyond their amazing taste and texture, these pumpkin buns are also relatively straightforward to make, making them an accessible baking project for both seasoned bakers and eager beginners. The process, while involving a few steps, is rewarding and results in a product far superior to store-bought alternatives. Plus, using fresh or homemade pumpkin puree ensures a vibrant, authentic flavor that canned versions often lack.
Essential Ingredients for Perfect Pumpkin Buns
Crafting these delectable pumpkin dinner rolls requires a selection of quality ingredients, each playing a crucial role in achieving their signature taste and texture. We’ve detailed each component below, along with useful tips for substitutions and best practices.
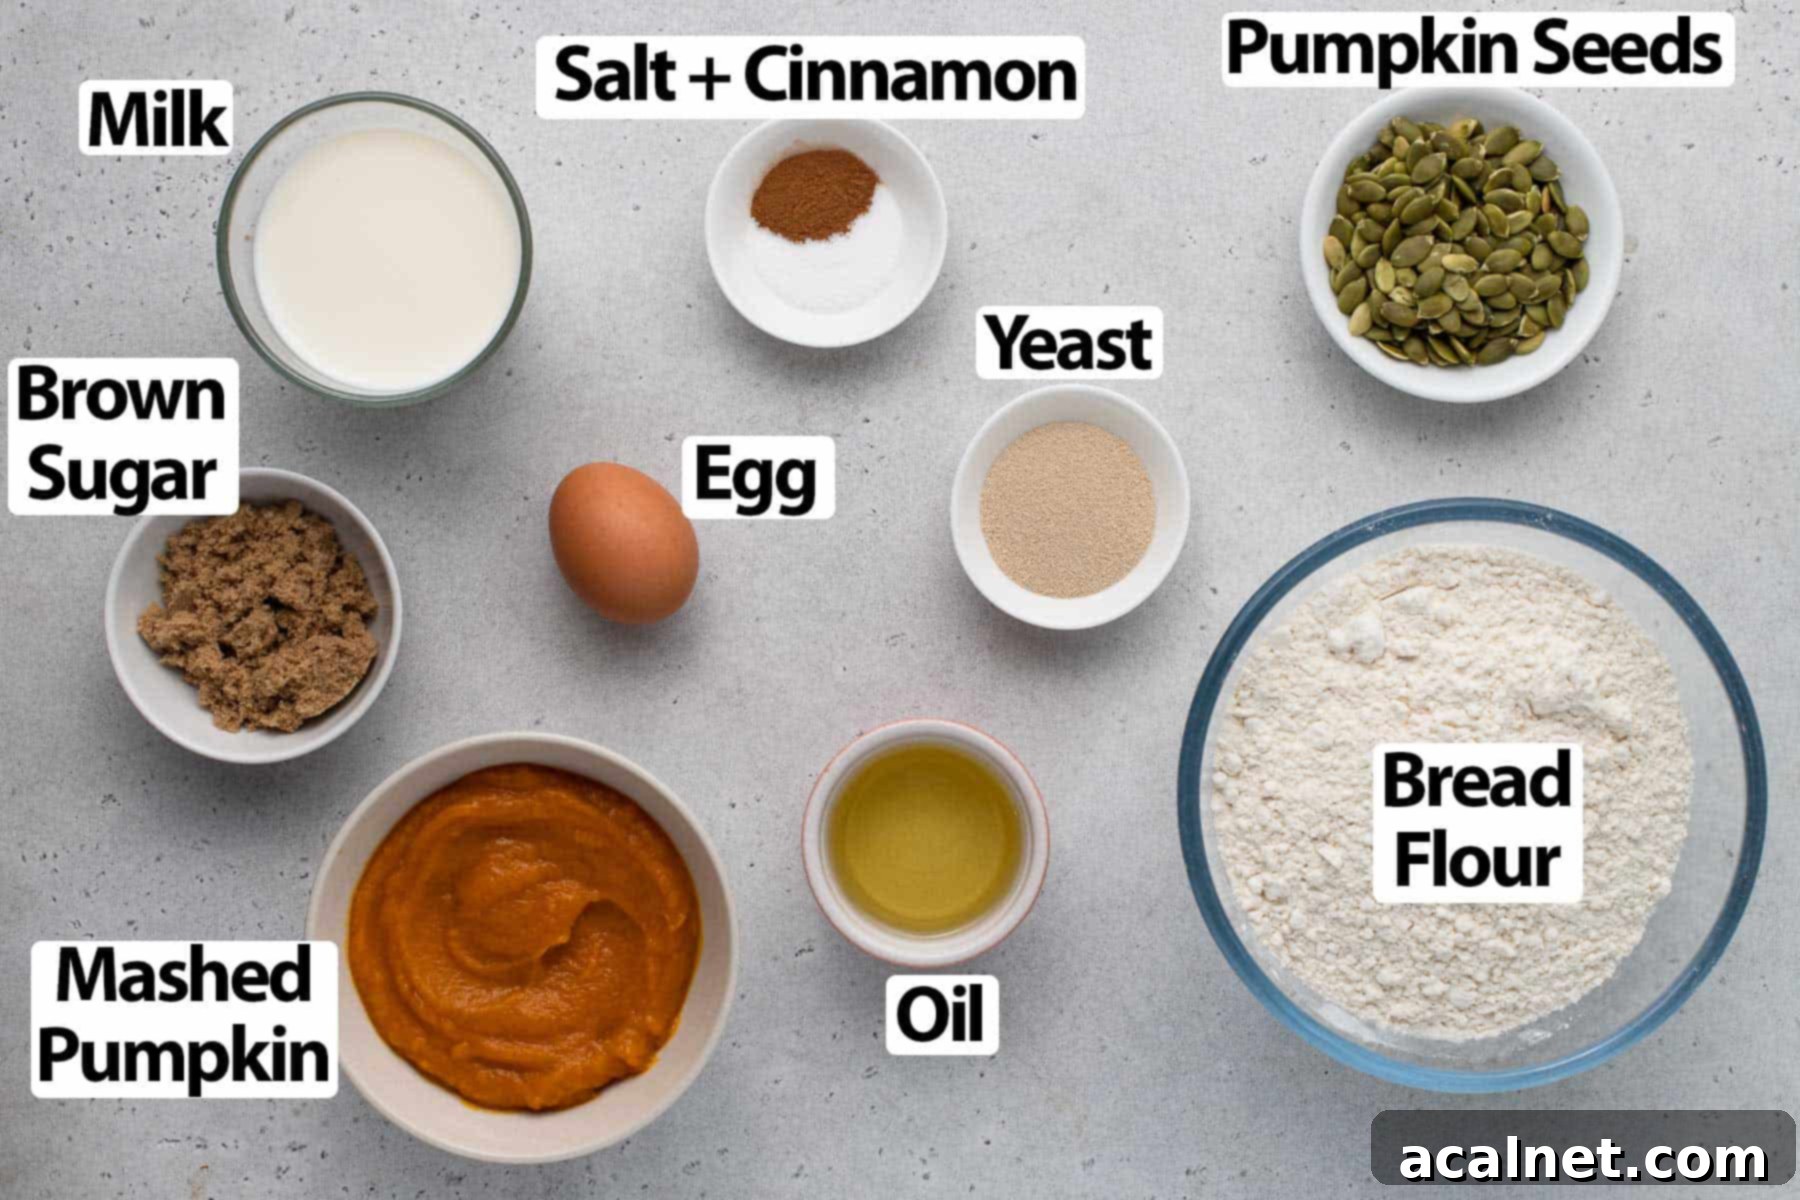
For precise measurements, refer to the full recipe card below.
- Mashed Pumpkin: The heart of this recipe! We highly recommend making your own from scratch for the best flavor and texture. Simply cook your chosen pumpkin (Butternut Pumpkin works wonderfully for its smooth texture and sweet flavor) until very tender, then mash it into a silky-smooth puree. Steaming or roasting are excellent methods. For details on using canned pumpkin puree, refer to our FAQs section.
- Milk: Full Cream or Whole Milk is preferred here. Its higher fat content contributes significantly to the buns’ rich flavor and incredibly soft texture. While water can be used, expect a slightly less indulgent result. For a dairy-free alternative, any unsweetened plant-based milk (like almond or oat milk) can be substituted.
- Yeast: We use Instant Yeast for its convenience as it can be added directly to the dry ingredients. If you opt for Active Dry Yeast, remember to “bloom” it first by dissolving it in the lukewarm milk with a pinch of sugar for about 5-10 minutes until foamy. This step confirms the yeast is active and ready to make your buns rise beautifully.
- Oil: A neutral-flavored oil like Canola Oil or any Vegetable Oil is ideal. It keeps the pumpkin buns moist and tender for longer. While melted butter can be used, oil generally results in a softer crumb and prevents the buns from drying out as quickly.
- Egg: A medium to large egg, at room temperature, is essential for binding the dough, adding richness, and contributing to the golden crust. We have not tested this recipe with egg replacers, so for best results, stick to a real egg.
- Bread Flour: This is a key ingredient for achieving that signature fluffy and chewy texture. Bread flour has a higher protein content than all-purpose (plain) flour, which means it develops more gluten. This gluten network traps gases produced by the yeast, allowing the buns to rise higher and maintain a soft, airy structure. Do not substitute with cake flour.
- Brown Sugar & Salt: Brown sugar adds a deep, molasses-like sweetness that complements the pumpkin perfectly, while salt is crucial for balancing flavors and strengthening the gluten structure.
Optional Additions & Flavor Enhancements
While delicious on their own, a few additions can take your pumpkin buns to the next level:
- Pumpkin Seeds: These add a delightful crunch and a rustic visual appeal to the finished buns. They’re entirely optional, however. Feel free to get creative with other toppings like sesame seeds, rolled oats, chopped pecans, or walnuts – whatever your preference!
- Cinnamon: This spice is paramount in truly highlighting the pumpkin flavor, infusing the buns with a warm, inviting aroma. You can also experiment with other fall spices or substitute the plain cinnamon for a pre-made Pumpkin Spice blend (which often includes nutmeg, ginger, and cloves for a more complex profile).
- Butter Glaze: For an extra touch of indulgence, consider brushing the warm buns straight out of the oven with some melted butter. You can infuse this butter with a hint of honey for sweetness, minced garlic and fresh parsley for a savory twist, or even a dash more cinnamon for intensified spice.
Mastering Homemade Pumpkin Bread Rolls: A Step-by-Step Guide
Creating these delightful pumpkin buns is a rewarding process. Follow these detailed steps to ensure perfectly soft, golden-brown rolls every time. We’ll guide you through preparing the dough, expert shaping techniques, and the crucial final proofing stages.
Crafting the Pumpkin Bread Dough
The foundation of any great bread is a well-prepared dough. Here’s how to create the soft, elastic base for your pumpkin buns:
- The first and most important step is to prepare your **Mashed Pumpkin**. Whether you choose to steam, boil, or roast it in the oven, ensure the pumpkin is cooked until exceptionally soft. Then, mash it thoroughly until you achieve a very smooth puree. A hand masher works well, but for ultimate silkiness, a blender or food processor is ideal. Allow the puree to cool completely before incorporating it into your dough – warm puree can kill the yeast!
- Gently heat the **Milk** until it is lukewarm, reaching approximately 35°C (95°F). This temperature is crucial for activating the yeast without scalding it.
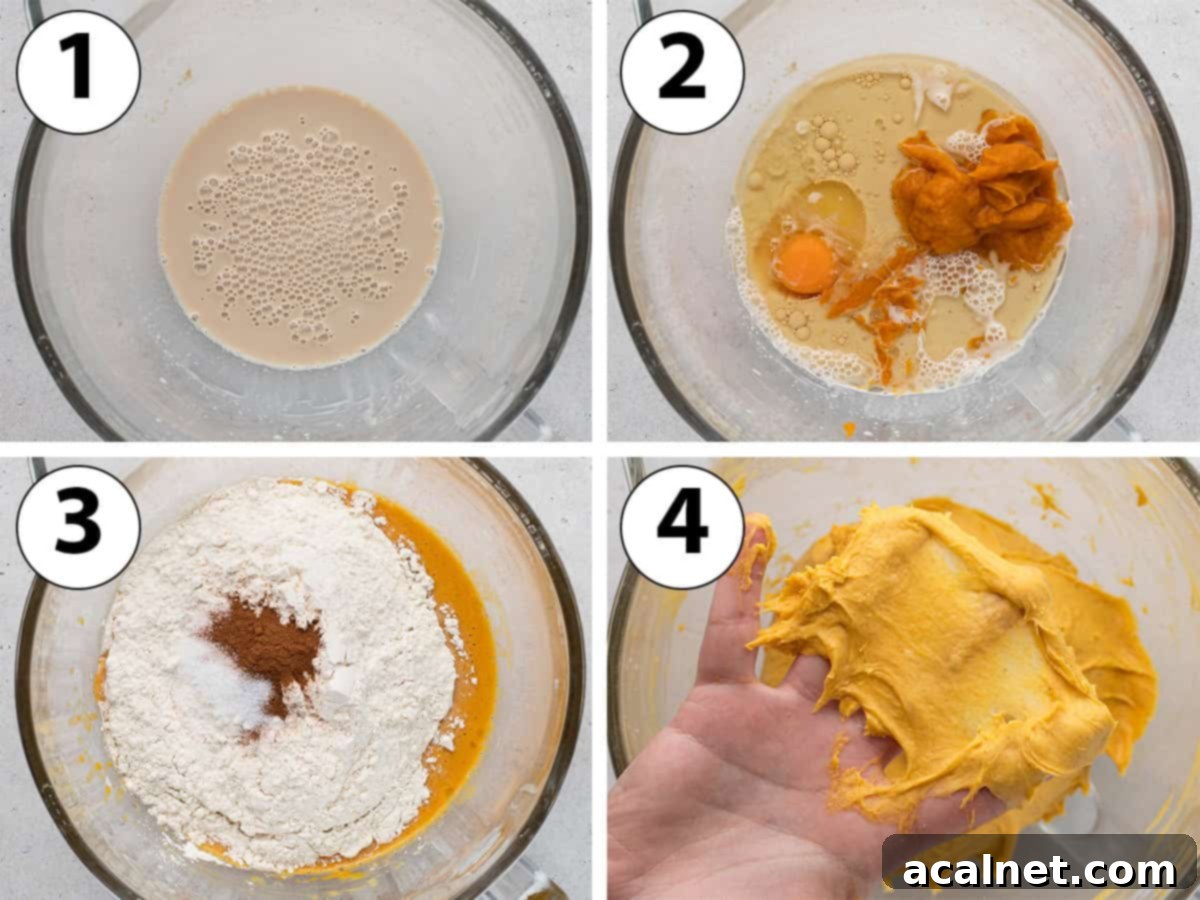
- Photo 1: In the bowl of your stand mixer, combine the lukewarm Milk with the Brown Sugar and Yeast. Whisk these ingredients together thoroughly. Let this mixture rest for about 10 minutes. You should observe small bubbles forming on the surface, which indicates that your yeast is active and thriving. If no bubbles appear, your yeast might be old or the milk temperature was off, and it’s best to start again.
- Photo 2: Once your yeast is active, stir in the Egg, Oil, and the cooled Mashed Pumpkin. Mix until these wet ingredients are well combined.
- Photo 3: Now, add the dry ingredients: Bread Flour, Salt, and Cinnamon. Using a stiff spatula or wooden spoon, mix until a shaggy, rough dough begins to form. At this point, attach the dough hook to your stand mixer.
- Photo 4: Begin kneading the dough on a low speed, gradually increasing to a medium-high speed. Continue kneading for approximately 15 minutes. During this process, periodically stop the mixer to scrape down the sides of the bowl to ensure all ingredients are incorporated. Keep kneading until the dough transforms into a very soft, elastic, and visibly stretchy mass. It should successfully pass the “windowpane test” – a key indicator of proper gluten development (see FAQs below for a detailed explanation of this test).
It’s perfectly normal for the pumpkin dough to remain slightly sticky after kneading; this stickiness is a sign of a well-hydrated and tender dough. To finish, transfer the dough onto a lightly floured surface and give it a few gentle hand kneads or folds to bring it together completely.
- Return the dough to the stand mixer bowl (or a clean, large, lightly greased bowl). Cover the bowl tightly with a clean tea towel or plastic wrap. Place it in a warm, draft-free location to proof for 1.5 to 2 hours, or until it has visibly doubled in size.
For enhanced flavor development, you have the option to cold-proof the dough. Simply place the covered bowl in the refrigerator to proof overnight (approximately 8 to 12 hours). This slow rise deepens the flavors and often makes the dough easier to handle.
Expert Shaping Techniques for Beautiful Buns
Shaping the buns correctly contributes to their even rise and appealing appearance. Here’s how to create perfectly round pumpkin buns:
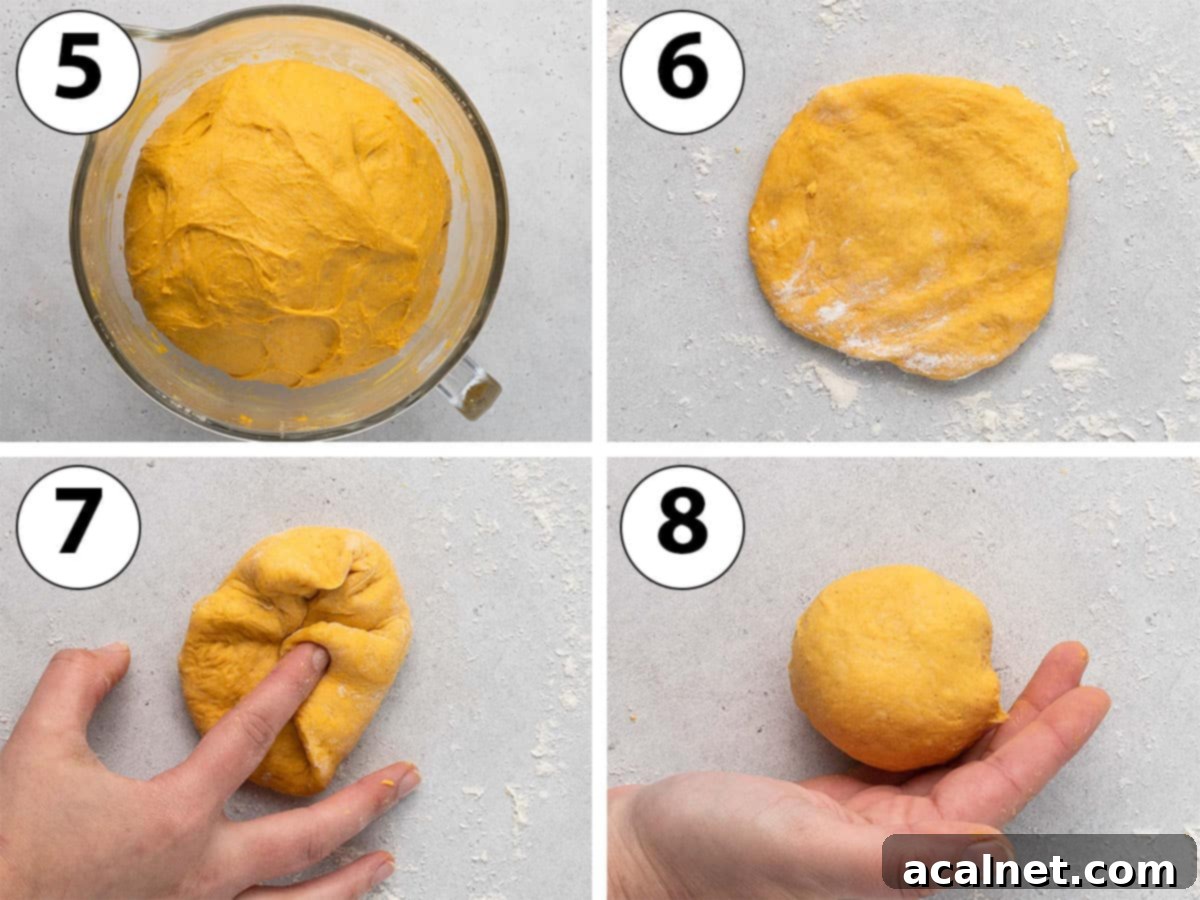
- Photo 5: After the dough has successfully doubled in size, gently punch it down to deflate the air. Transfer the dough onto a very lightly floured work surface. Using a kitchen scale for precision, divide the dough into 12 equal pieces. This ensures uniform bun sizes, which helps them bake evenly. Roughly shape each piece of dough into a ball.
To achieve perfectly smooth and round buns:
- Photo 6: Take one piece of dough and use your fingers to gently flatten it into a small, flat disk.
- Photo 7: Carefully fold the edges of the dough towards the center of the disk, gently pressing them into the middle to create a seamless surface. Continue this folding process until you start to feel tension or resistance in the dough, indicating a tight, well-formed ball.
- Photo 8: Flip the dough ball over so the seam side is down. Using the palm of your hand and slightly cupped fingers, gently pull the bun towards you on the work surface, creating tension. Rotate the bun 90 degrees and repeat this pulling motion. Continue this technique until you feel sufficient tension on the dough’s surface. Finish shaping by rolling the dough ball in a circular motion under your palm until it is perfectly round and smooth.
- Repeat this precise shaping process for all 12 bread rolls.
A crucial tip for shaping: try to avoid using excessive flour on your work surface. A slightly sticky dough is actually easier to shape, allowing it to grip the counter and develop better surface tension. If you find you have excess flour on the shaped rolls, a small pastry brush can be used to lightly brush it off.
The All-Important Final Proofing and Baking
The final rise is just as important as the first for achieving airy, soft buns. Proper baking then locks in all that deliciousness:
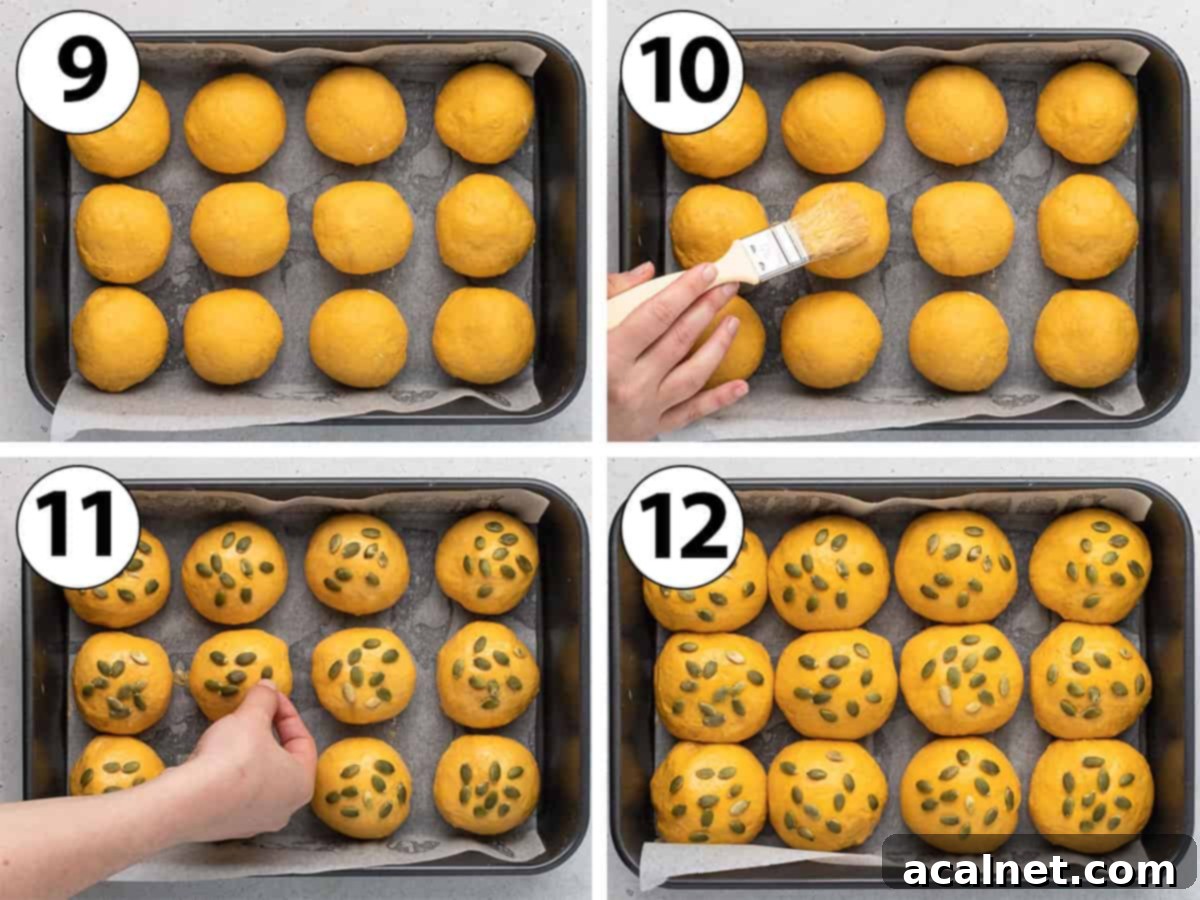
- Photo 9: Carefully arrange the shaped rolls in a large roasting pan (a 28 x 40 cm / 11 x 14 inch pan is ideal) that has been lined with baking paper or parchment paper. Ensure there’s ample space around each bun; they need room to expand significantly during their second rise and baking.
Pro Tip: Using a baking pan with edges is recommended over flat baking sheets. The sides of the pan help to control the way the buns rise, encouraging them to grow upwards and touch each other, resulting in softer sides. This also helps prevent them from spreading too much.
- Photo 10: In a small bowl, prepare your egg wash by whisking one Egg with a splash of Milk. Gently brush this mixture over the top of each bun. This egg wash will give your pumpkin buns that beautiful, glossy golden-brown finish once baked.
- Photo 11: This is your chance to add an optional topping! Sprinkle some Pumpkin Seeds over each bread bun for added texture and a visual cue of their pumpkin goodness. Alternatively, use sesame seeds, oats, or leave them plain.
- Photo 12: Cover the pan loosely with a large, clean tea towel and place it in a warm, draft-free spot for its final proof. This will take approximately 45 minutes to 1 hour, or until the buns have visibly risen again and look puffy. They should almost be touching each other.
- While the buns are proofing, preheat your oven to 180°C (350°F). Ensure your oven is fully preheated before placing the buns inside for consistent baking.
- Bake the pumpkin rolls for 20 to 22 minutes. They are ready when they have nicely puffed up, are beautifully golden brown on top, and sound hollow when tapped on the bottom.
- Immediately after removing from the oven, transfer the pan to a wire rack. It is absolutely essential to let the buns cool down completely on the rack before removing them from the pan or serving. The residual heat within the buns continues to cook the center, ensuring a perfectly cooked and tender interior.
Common Questions About Pumpkin Buns
Making your own pumpkin puree is simpler than you might think and yields superior flavor. You can either steam your pumpkin, boil it, or roast it in the oven wrapped in foil until it’s incredibly soft. I personally prefer to peel a butternut pumpkin, cut it into small cubes, and steam it until fork-tender. Once soft, use a hand masher or, for a super smooth consistency, a blender or food processor to turn it into a silky puree. Remember to let it cool down completely before adding it to your bread dough. Homemade pumpkin puree can also be prepared a few days in advance and stored in the fridge, or frozen for longer storage, making it convenient for future baking.
While homemade pumpkin puree offers the best flavor, you can certainly use canned pumpkin puree as a convenient alternative. The most important rule is to ensure it’s 100% pure pumpkin with no added ingredients like sugar, spices, or flavorings. Be careful not to confuse it with pumpkin pie filling, which contains added sugars and spices and is not suitable for this recipe. If using canned, you might find its consistency slightly thicker than homemade, which could slightly affect dough hydration, but generally it works well.
The “Windowpane Test” is a fundamental technique used by bakers to determine if bread dough has been kneaded sufficiently and if its gluten has developed properly. To perform the test, carefully take a small piece of dough (about the size of a golf ball) and gently stretch it between your fingers. If the dough tears or breaks quickly, it needs more kneading to develop its gluten structure further. However, if you can stretch it thinly enough to see light pass through it without it tearing – resembling a translucent “windowpane” – then your dough has reached optimal gluten development and is ready for proofing. This test ensures your bread will have a light, airy, and chewy texture.
Absolutely! You can transform these delicious buns into adorable little pumpkin shapes, perfect for adding a festive touch to your holiday table, especially for Thanksgiving or Halloween. To achieve this look, you’ll need kitchen-safe string, such as plain cotton twine (avoid plastic string as it won’t withstand oven heat). Before the final proof, cut 2 to 6 pieces of string for each bun. Place the middle of each string under the bun and gently tie it into a loose knot over the top, making sure not to press too hard into the dough. Turn the bun 90 degrees (or 45 degrees if using four strings) and repeat the tying process, creating segments around the bun. Place your pumpkin-shaped buns on baking sheets and bake as directed. Once cooled, carefully snip the strings with scissors or a sharp knife and gently pull them away to reveal perfectly segmented, pumpkin-shaped rolls!
Yes, these pumpkin buns are great for making in advance! You can prepare the dough and let it go through its first proof in the refrigerator overnight (8-12 hours). This slow proof actually enhances the flavor. The next day, simply take the dough out, let it come closer to room temperature for about 30 minutes, then proceed with shaping, final proofing, and baking. Alternatively, you can bake them completely, let them cool, and freeze them as described in the “Storing & Freezing” section.
Pro Tips for Perfect Pumpkin Buns
Achieving bakery-quality pumpkin buns at home is entirely possible with a few insider tips and tricks:
- **Observe the Dough, Not Just the Clock:** The exact proofing time for bread dough can vary significantly based on your kitchen’s ambient temperature. A warm environment will accelerate the rise, while a cooler one will slow it down. Instead of strictly relying on the recommended time, always aim for the visual cue: let the dough rise until it has genuinely doubled in size for both the first and second proofing stages.
- **Embrace the Stickiness During Shaping:** While it might feel counter-intuitive, resist the urge to add excessive flour when shaping the buns, even if the dough seems a bit sticky. A slightly sticky dough actually adheres better to your work surface, allowing you to create more tension on the surface of the bun, which results in a smoother, more uniform shape and better rise. A minimal dusting is all you need.
- **The Gentle Poke Test for Proofing:** To confidently determine if your dough has proofed enough for the second rise, gently poke it with a floured finger. If the dent slowly springs back part-way but leaves a slight indentation, your dough is perfectly proofed and ready for the oven. If it springs back immediately, it needs a little more time. If the dough deflates significantly, it has likely over-proved, which can result in a dense texture.
- **Enhance Flavor with a Post-Bake Brush:** For an extra layer of richness and flavor, brush the hot pumpkin buns immediately after they come out of the oven with some melted butter. You can infuse this butter with various flavors: a touch of honey for added sweetness, minced garlic and fresh parsley for a savory herb twist, or even a sprinkle of pumpkin pie spice to deepen the autumnal notes.
- **Consistency is Key:** Using a kitchen scale to measure your ingredients, especially flour and pumpkin puree, will yield the most consistent and reliable results. Baking is often a science, and precise measurements help ensure success.
- **Warm Environment for Rising:** If your kitchen is cool, create a warm environment for proofing. You can turn your oven on to its lowest setting for a minute, then turn it off and let the dough rise inside with the door slightly ajar. Alternatively, place the bowl in a sunny spot or near a warm appliance.
Storing & Freezing Your Pumpkin Buns
To enjoy the fresh softness of these pumpkin rolls, it’s best to consume them within 24 hours of baking. For storage at room temperature, place them in an airtight container or a bread bag, where they will remain fresh for up to three days. Beyond that, their quality may start to diminish.
These pumpkin buns are also excellent for making ahead and freezing. Once completely cooled after baking, simply transfer them to a freezer-safe bag or airtight container, ensuring they are well-sealed to prevent freezer burn. They can be frozen for up to 2-3 months without a significant loss of quality. To serve, let them thaw for several hours at room temperature. For that “freshly baked” experience, you can gently reheat them in a preheated oven (around 150°C / 300°F) for 5-10 minutes, or a quick zap in the microwave, just before serving. This will restore their soft, fluffy texture and warm aroma, making them seem as if they just came out of the oven.
Explore More Delicious Bread Recipes
If you loved making these pumpkin buns, you might enjoy trying out some of our other popular bread recipes:
- Challah Rolls (4 Ways)
- Homemade Sesame Bagels
- Classic Brioche Loaf Bread
- Irresistible Triple Chocolate Cinnamon Rolls
- Authentic Cinnamon Babka
- Rich Chocolate Brioche Bread
- Easy Lemon Sweet Rolls
- Cinnamon Scrolls from Scratch
- Decadent Coffee Cinnamon Rolls
Made this recipe?
Let us know if you liked it by leaving a comment below, and tag us on Instagram @a.baking.journey with a photo of your creation!
Recipe Card
Pumpkin Buns
Print Recipe
Ingredients
Pumpkin Buns
- 180 ml (3/4 cup) Full Cream / Whole Milk, lukewarm
- 75 gr (1/3 cup) Brown Sugar
- 9 gr (1 1/2 teaspoon) Instant Dry Yeast
- 1 Egg, medium to large size, at room temperature
- 60 ml (1/4 cup) Canola Oil
- 200 gr (7 oz) Mashed Pumpkin, or pumpkin puree
- 550 gr (3 2/3 cup) Bread Flour
- 1 1/2 teaspoon Fine Table Salt
- 1 teaspoon Ground Cinnamon, or pumpkin spice
Egg Wash & Topping
- 1 Egg
- 5 ml (1 teaspoon) Full Cream / Whole Milk
- Pumpkin Seeds, to taste, optional
Instructions
Pumpkin Buns
- Prepare the Mashed Pumpkin: peel the skin off and cook the pumpkin in your preferred way (steam, boil or roast in the oven wrapped in foil) until very soft. Mash until very smooth, either using a hand masher or in a blender. Set aside to cool down completely.
- Place the lukewarm Milk (about 35 degree Celsius / 95 degree Fahrenheit), Brown Sugar and Yeast in the bowl of a stand mixer. Whisk well then leave for about 10 minutes or until small bubbles appear on the surface (see note 1).
- Mix in the Egg, Oil and Mashed Pumpkin, then the Bread Flour, Salt and Cinnamon. Mix with a stiff spatula until a rough dough comes together.
- Fit the dough hook attachment on your mixer and start kneading on low speed, slowly increasing to high speed. Keep on kneading for about 15 minutes, or until the dough is very soft, elastic and passes the windowpane test (see note 2). It will still be slightly sticky, which is normal.
- Cover the bowl with a tea towel (transfer into a clean large greased bowl first if preferred) and leave to proof in a warm spot for 1.5 to 2 hours or until doubled in size. Alternatively, place in the fridge to proof overnight for 8-12 hours for enhanced flavor.
- Punch the dough to deflate it and transfer over a very lightly floured surface. Cut into 12 equal pieces (see note 3 for precision) and bring each piece together into a rough ball.
- To shape the buns: slightly flatten each piece of dough and fold the edges towards the centre, gently pressing to make it stick. Continue to fold until you start feeling resistance in the dough. Turn the ball over (seams side down) and gently pull it towards you, your fingers placed on one side / bottom of the bun. Turn 90 degrees and repeat a few times. Finish shaping the dough by rolling it in a circular movement under the palm or your hands until it’s smooth.
- Repeat the process with all 12 buns, then place them in a 28 x 40 cm (11 x 14 inch) roasting pan (or similar large baking tray) lined with baking paper. Leave some space between each bun so they have room to rise.
Egg Wash & Topping
- In a small bowl, whisk the Egg and Milk for the egg wash. Brush it generously over each bun then optionally top with Pumpkin Seeds, or your choice of topping for added texture and visual appeal.
- Cover the pan with a large tea towel and leave to proof in a warm spot for 45 minutes to 1 hour, or until the buns have risen again and look noticeably puffy.
- Preheat your oven on 180 degree Celsius / 350 degree Fahrenheit then bake the buns for 20 to 22 minutes. They should have nicely puffed up and look beautifully golden brown. Place on a wire rack to cool down completely before removing from the pan to ensure proper setting of the crumb.
Would you like to save this recipe?
We’ll email this post to you, so you can come back to it later!
Notes
- If using Instant Yeast, this step is not technically required as the yeast will not need to be activated directly into liquid. However, I highly recommend doing it anyway as a way to “prove” the yeast – it’s a quick check to ensure your yeast is alive and active before committing to the rest of the ingredients. If using Active Dry Yeast, this step is absolutely mandatory to rehydrate and activate it.
- To perform the Windowpane Test, gently pull and stretch a small piece of the dough between your fingers. If the dough breaks quickly, it indicates that it needs to be kneaded for a bit longer to develop sufficient gluten. If it stretches easily without tearing and becomes thin enough for you to see light coming through it, then it has successfully passed the windowpane test, signaling optimal gluten development.
- For precise and uniformly sized pumpkin buns, which also helps with even baking, I highly recommend using a kitchen scale to divide the dough. Weigh the total dough, then divide that number by 12 to get the target weight for each individual bun. Measure each piece of dough carefully to match this weight.
Nutrition (per serving)
