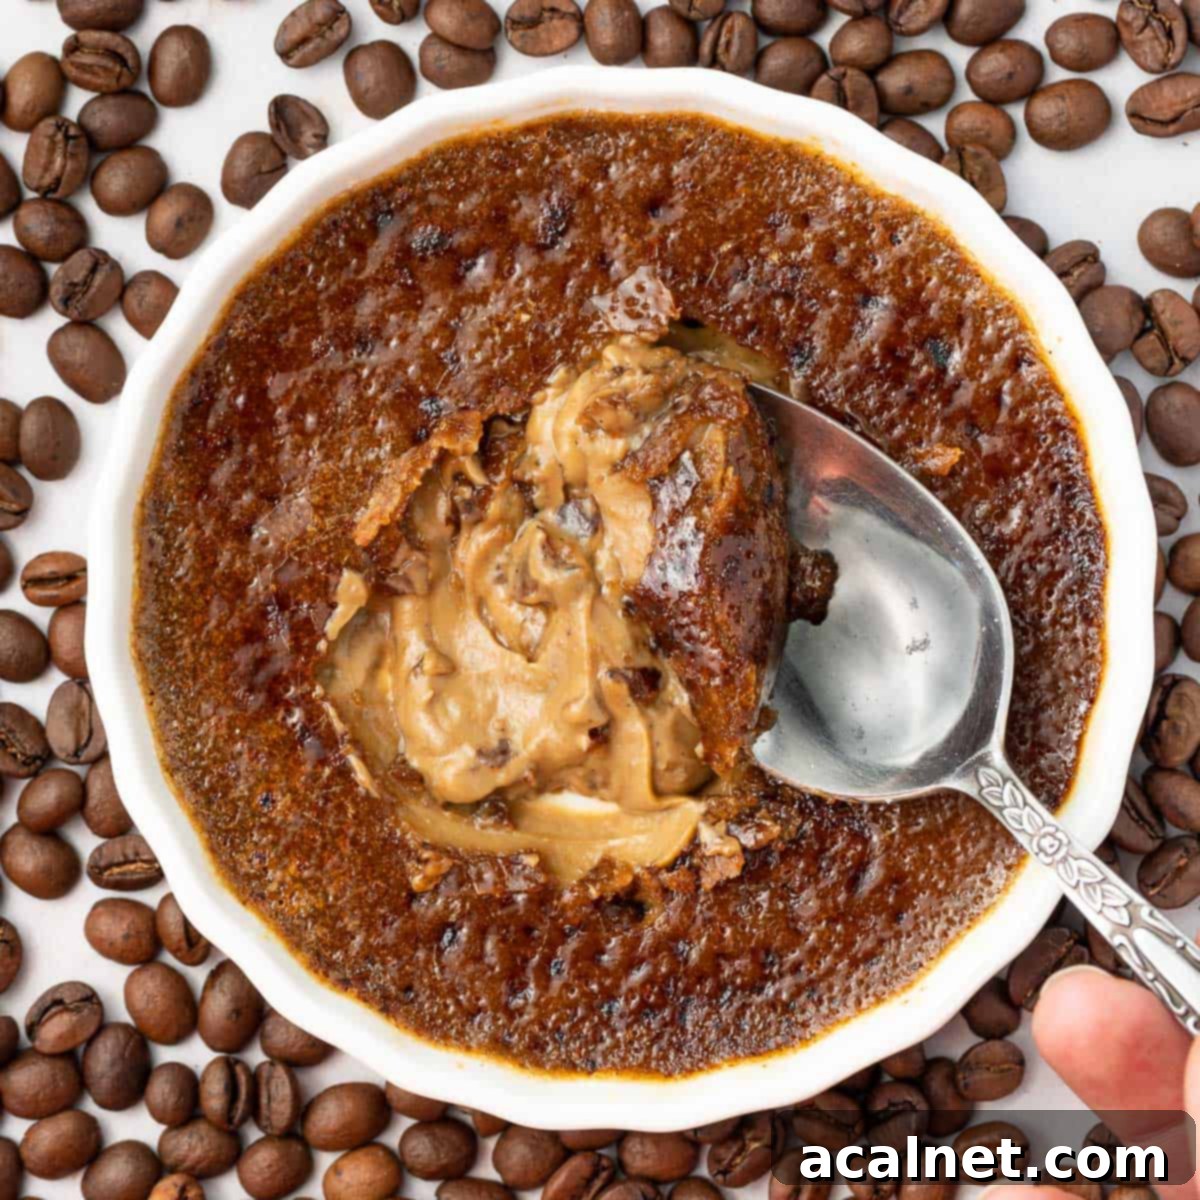
Decadent & Easy Coffee Crème Brûlée: Your Go-To Recipe for a Sophisticated Dessert
Prepare to impress with this incredibly easy Coffee Crème Brûlée recipe, requiring just 5 simple ingredients and a mere 15 minutes of hands-on prep time. This classic French dessert is elevated with the rich, aromatic essence of coffee, creating an irresistible treat that boasts a delightful contrast of textures. Imagine the smooth, velvety coffee-infused custard beneath a perfectly crisp, crackable layer of caramelized sugar – a true symphony for your taste buds. It’s the ultimate dessert for coffee enthusiasts and a surprisingly simple way to bring a touch of elegance to any meal.
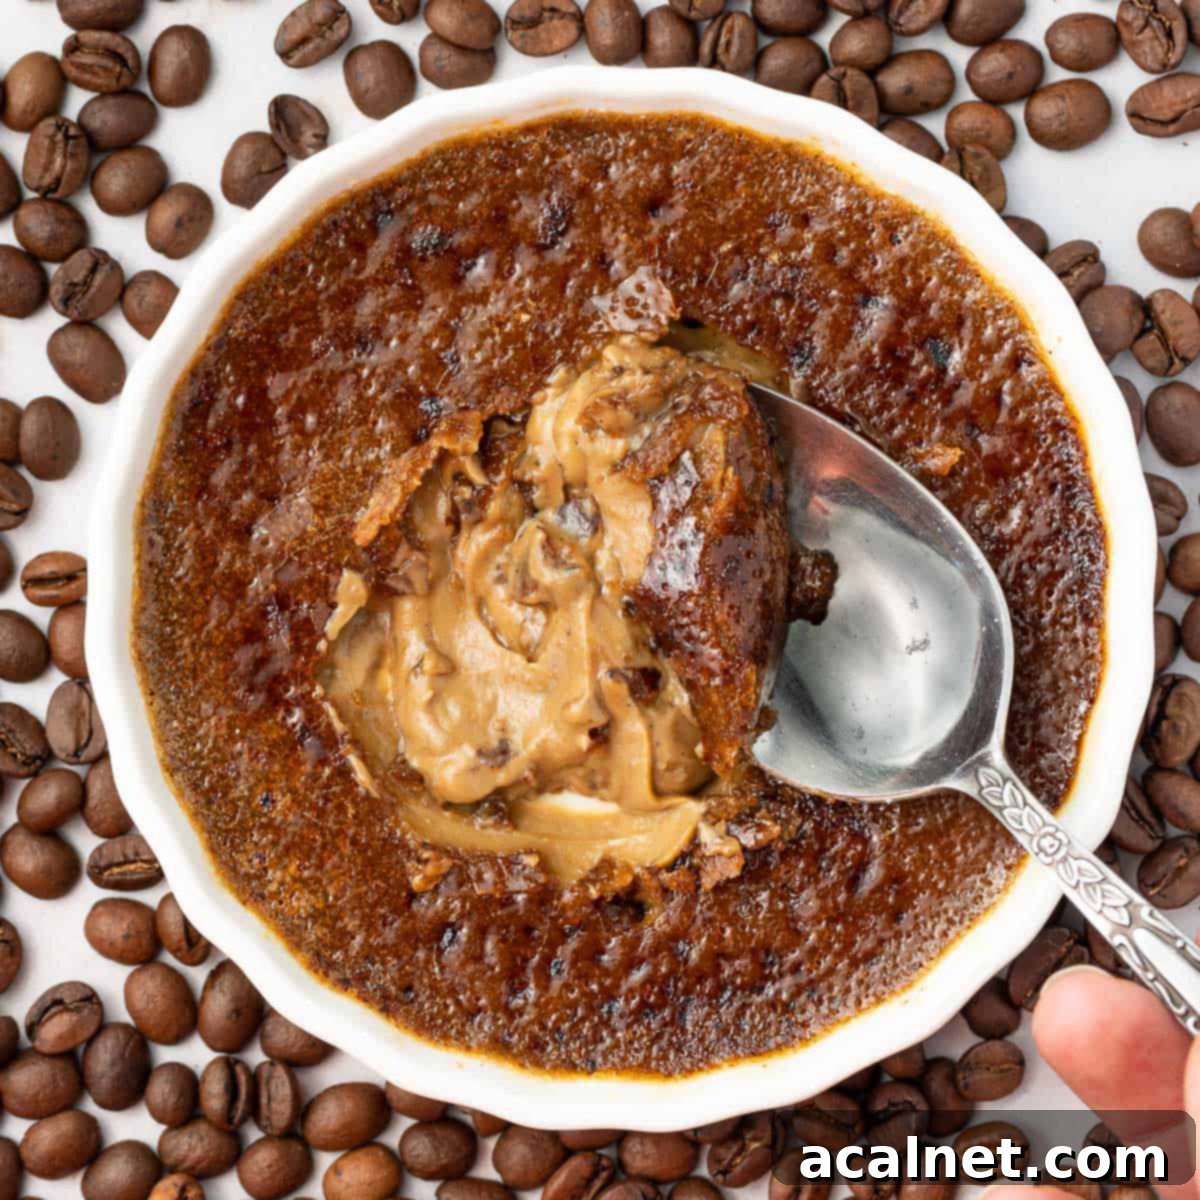
Why You’ll Adore This Easy Coffee Crème Brûlée Recipe
Indulge in the rich and creamy taste of coffee crème brûlée – a classic dessert that is sure to impress your guests without any fuss! This surprisingly simple French dessert is a game-changer for home bakers. It features a lusciously smooth, velvety coffee-flavored custard base, perfectly complemented by a delicate, thin layer of crunchy, caramelised sugar on top. The magic truly happens when you tap your spoon against the golden-brown crust, breaking through to reveal the exquisite, creamy goodness beneath.
This dessert isn’t just about flavour; it’s about the entire sensory experience. The warmth of the coffee, the sweetness of the custard, and the satisfying crack of the caramel make each bite an adventure. It’s perfect for a sophisticated dinner party, a romantic evening, or simply as a well-deserved treat after a long day. Serve your homemade coffee crème brûlée chilled, allowing the flavors to meld beautifully and the textures to shine, promising a truly irresistible finish to any meal.
What Exactly is Crème Brûlée?
“Crème Brûlée,” translating literally to “burnt cream” from French, is a quintessential dessert renowned for its elegant simplicity and delightful contrasts. At its heart, it consists of a rich, creamy custard base, traditionally a crème anglaise, made from a luxurious blend of heavy cream, sugar, and egg yolks. This delicate custard is then baked until just set, resulting in a wobbly, silken texture. What truly sets crème brûlée apart is its iconic topping: a thin, hard, glass-like layer of caramelised sugar, expertly created with a kitchen torch or an oven broiler.
While the classic version often highlights the subtle notes of vanilla, crème brûlée is incredibly versatile. It serves as a perfect canvas for various flavors, from decadent chocolate and vibrant fruit purees to, as we’re exploring here, the bold and invigorating taste of coffee. The science behind this dessert is fascinating; the low, slow baking of the custard ensures a smooth, tender set, while the rapid caramelization of the sugar creates a brittle, aromatic crust that contrasts beautifully with the cool, creamy interior.
Essential Ingredients for Your Coffee Crème Brûlée
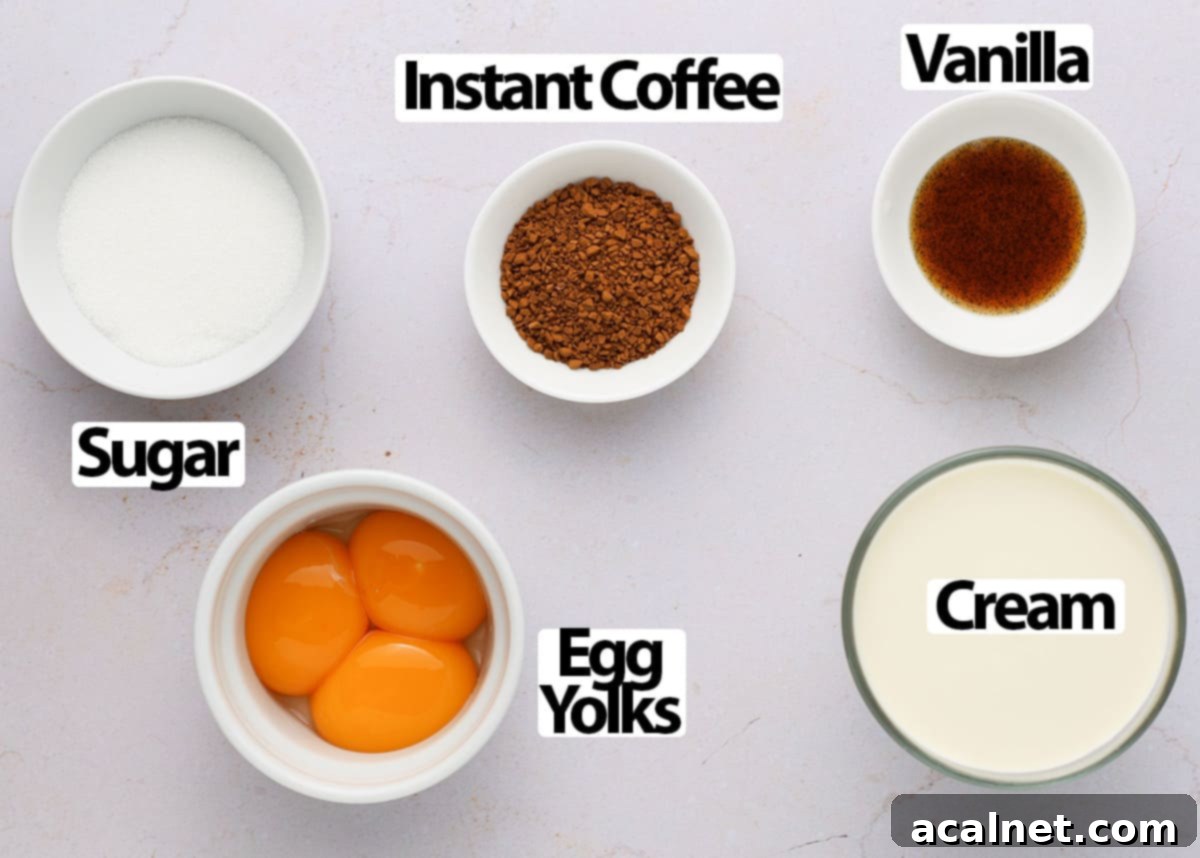
This elegant coffee crème brûlée is made from a few key components. Here’s a closer look at what you’ll need and why each ingredient is important:
Scroll down to the recipe card below for exact quantities
- Cream: Use a high-quality heavy or thickened cream with at least 30% fat content. The fat is crucial for achieving that signature rich, velvety texture. While dairy-free creams with similar fat content (like full-fat coconut cream) can be used as a substitute, be aware they might impart a slight flavor difference. Always check the fat percentage for the best results.
- Vanilla: For the most authentic and aromatic experience, a fresh vanilla bean is always recommended. However, for convenience and consistent flavor, a good quality vanilla paste works beautifully, offering those lovely little flecks you’d get from a bean. Vanilla extract is also an option, though it won’t provide the visual appeal of the flecks. Vanilla acts as a flavor enhancer, perfectly complementing the coffee.
- Coffee: The secret to a smooth coffee custard lies in using instant coffee granules or instant espresso powder. It is absolutely vital that the coffee dissolves completely in the warm cream to prevent a grainy, unpleasant texture in your finished dessert. Avoid using freshly ground coffee beans, as they will not dissolve and will leave a gritty residue. For a more intense coffee flavour, feel free to increase the quantity of instant coffee.
- Egg Yolks: Large egg yolks, preferably at room temperature, are essential for the custard’s structure and richness. If your yolks are too cold, they can curdle when the warm cream is added, leading to an uneven custard. Bringing them to room temperature helps prevent this shock. Don’t discard the egg whites; they can be used for other delicious recipes, such as meringues or my Almond Financiers Cakes.
- Sugar: Caster sugar (or white superfine sugar) is used both in the custard and for the caramelised topping. For the custard, its fine granules dissolve easily. For the topping, caster sugar creates a delicate, brittle crust. Alternatively, you can experiment with raw sugar or light brown sugar for the topping; they will yield a slightly different texture and a deeper, more complex caramel flavor.
For an enhanced flavor profile, a tiny pinch of salt can be added to the custard to balance the sweetness. If you’re a true coffee connoisseur, a few drops of coffee extract can also be added to the cream mixture for an extra boost of rich, roasted notes.
How to Master Homemade Coffee Crème Brûlée
Creating this stunning dessert is simpler than you might think. Follow these detailed steps to achieve perfect, restaurant-quality coffee crème brûlée at home.
1. Preparing the Velvety Coffee Custard Base
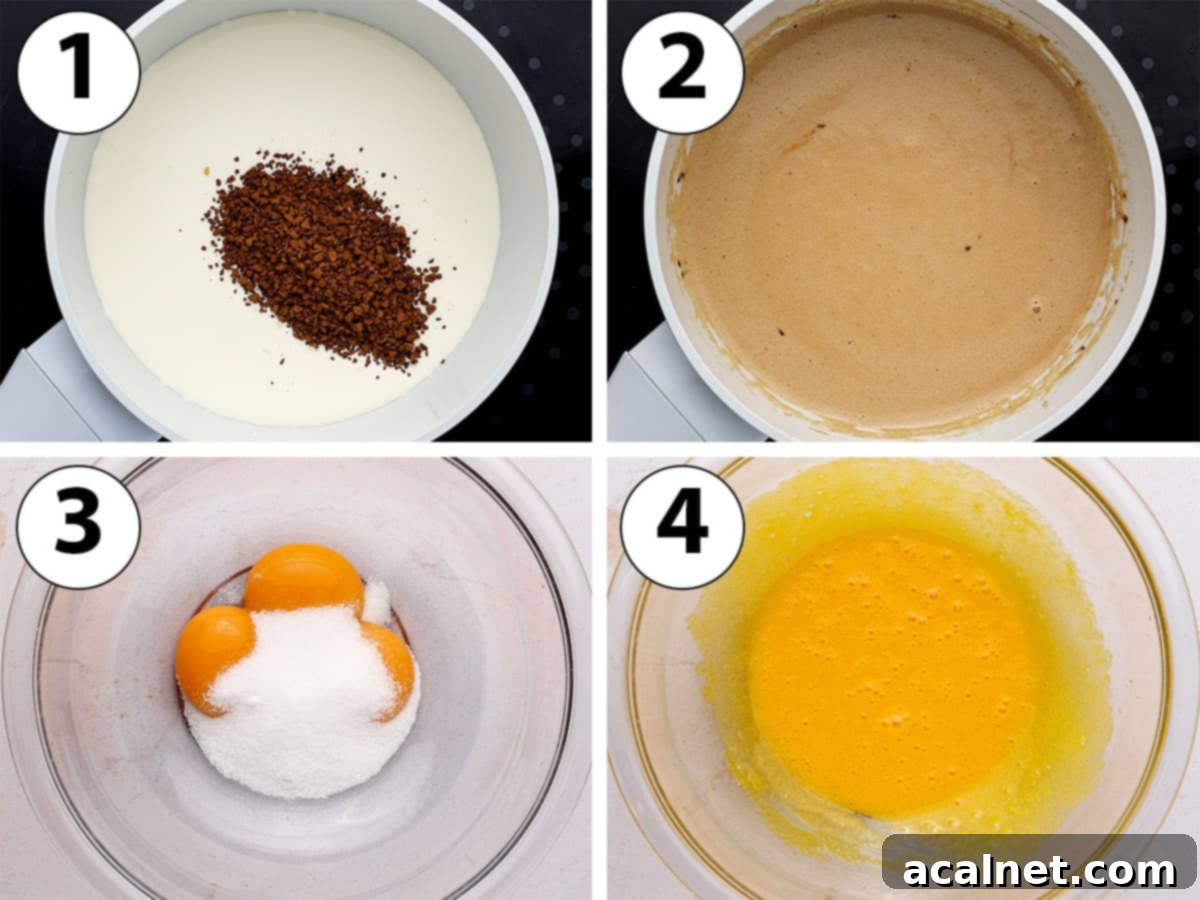
- Begin by preheating your oven to a low 100 degrees Celsius (215 degrees Fahrenheit). This low temperature is key to achieving a silky-smooth custard without a water bath. Prepare a baking sheet or baking dish by lining it with your chosen ramekins. I often use shallow 13 cm (5-inch) wide ramekins, but smaller, deeper 7 cm (2.5-inch) ramekins also work beautifully; just be prepared to adjust baking times.
- Photo 1: In a small saucepan, combine the heavy cream, vanilla paste (or extract), and instant coffee granules. Place the saucepan over low to medium heat.
- Photo 2: Stir continuously until all the instant coffee granules have completely dissolved and the mixture comes to a gentle simmer. It’s crucial not to let the cream boil vigorously, as excessively hot cream can cause the egg yolks to scramble when combined. Once simmering gently, remove the saucepan from the heat.
Ensure the cream does not boil, as this can cook the eggs prematurely when you combine the mixtures, leading to a lumpy custard.
- Photo 3: While your coffee cream mixture is warming, place the room-temperature egg yolks and caster sugar into a heat-proof large bowl.
- Photo 4: Whisk these ingredients together for just a few seconds until they are well combined and a pale yellow. Be careful not to over-mix the egg mixture; excessive whisking can incorporate too much air, which can lead to air bubbles on the surface of your custard, resulting in an uneven top layer after baking.
2. Baking and Caramelizing Your Crème Brûlée to Perfection
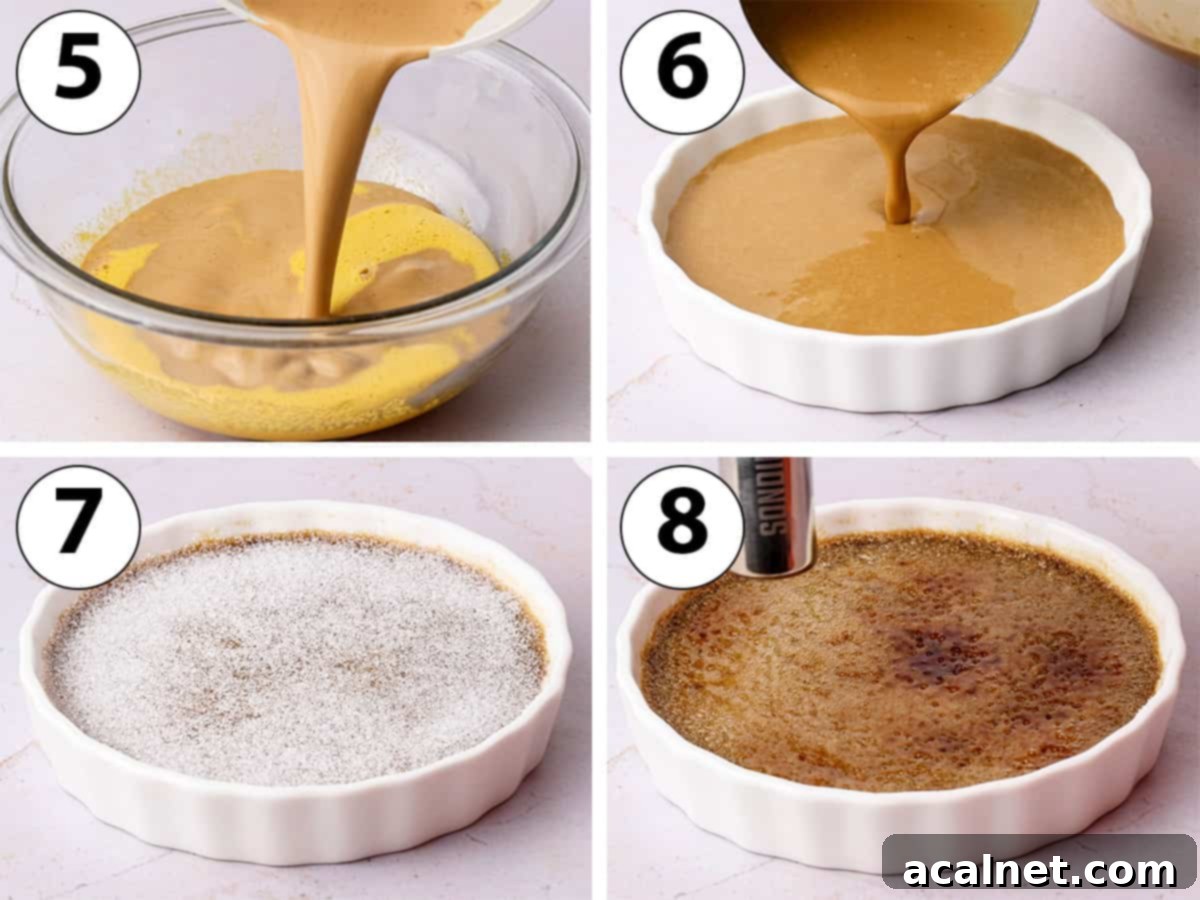
- Photo 5: This is a critical step known as “tempering” the eggs. While continuously stirring the egg yolk and sugar mixture, slowly pour the warm coffee cream into the bowl in a thin, steady stream. Tempering gradually raises the temperature of the egg yolks, preventing them from scrambling due to a sudden temperature change. Continue stirring until you achieve a smooth, well-combined liquid custard.
For the smoothest possible custard, an optional but highly recommended step is to strain the mixture through a fine-mesh sieve. This will catch any small lumps or air bubbles, ensuring an impeccably silky texture.
- Photo 6: Carefully place your ramekins on the prepared baking tray or in your large baking dish. Slowly and evenly pour the coffee custard into each ramekin. Aim to divide the custard equally to ensure consistent baking and setting across all desserts.
As mentioned, I prefer using large shallow 13 cm (5-inch) ramekins for a quicker bake, but deeper 7 cm (2.5-inch) ramekins also work; simply adjust the baking time accordingly. Tapping the baking tray gently on a hard surface will help any trapped air bubbles rise to the surface. If you see a layer of foam, gently skim it off with a small spoon to ensure a perfectly smooth surface for your caramel crust.
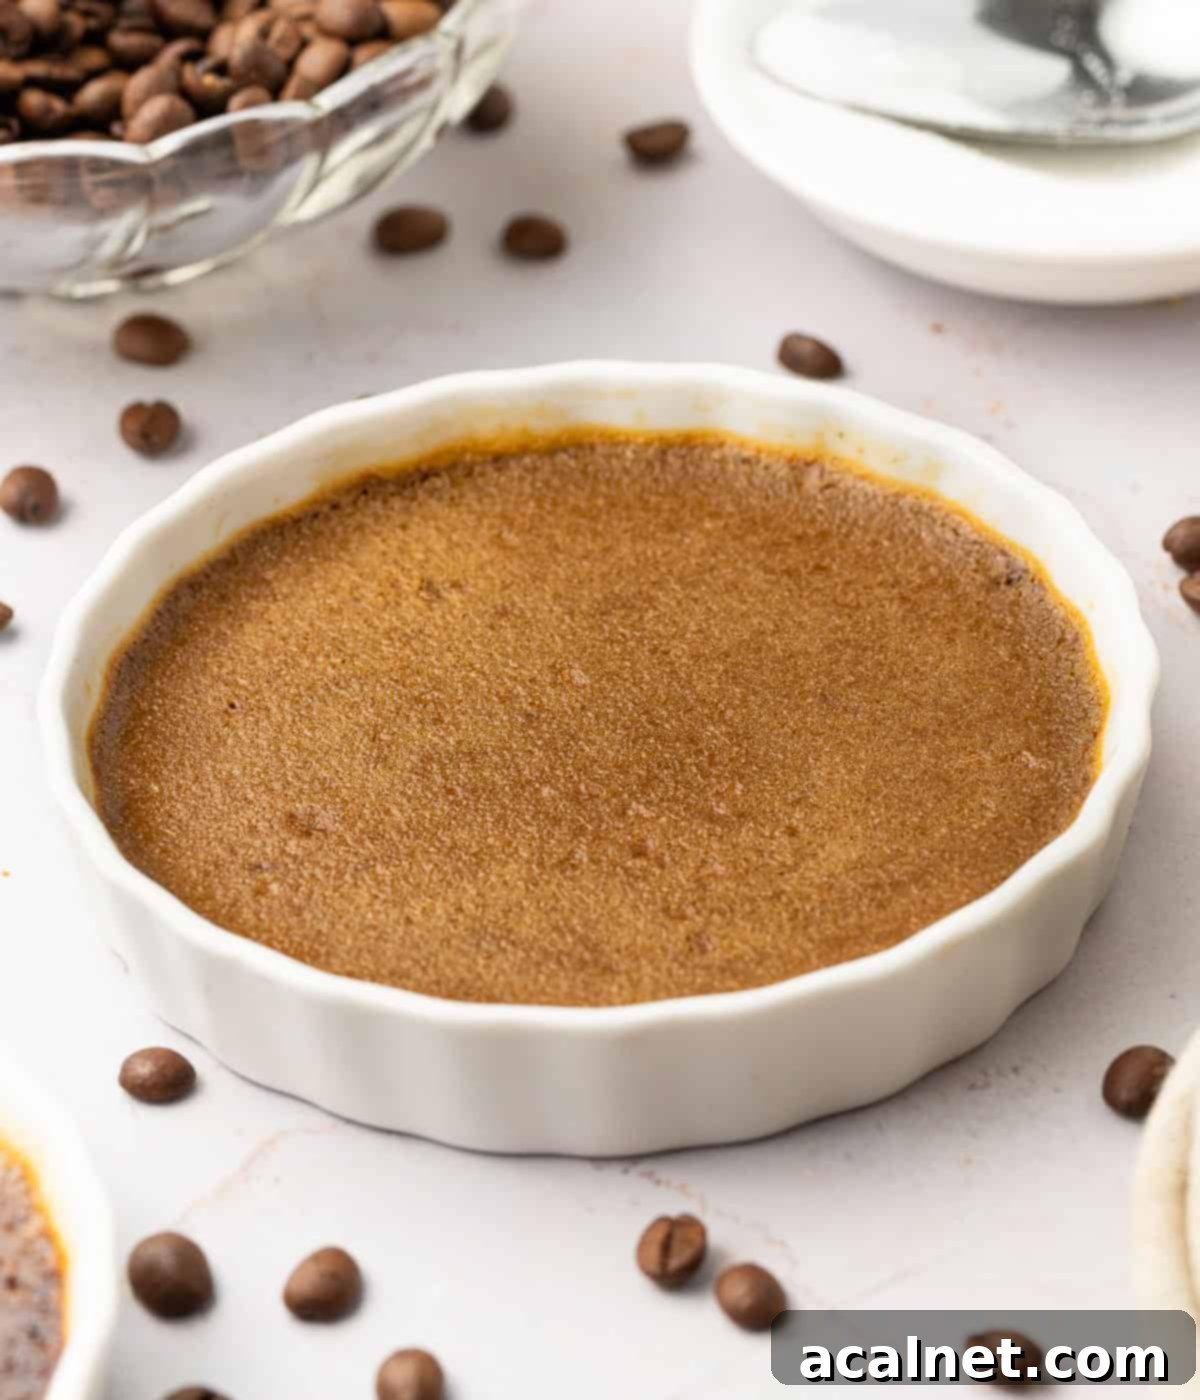
- Bake for approximately 40 to 45 minutes for the larger 13 cm ramekins, or about 60 minutes for the smaller 7 cm ramekins. The crème brûlées are properly baked when their edges are set, but the center still has a very slight, delicate jiggle. This slight movement indicates that the custard is cooked through but remains incredibly creamy, and it will continue to set as it cools.
Note: You might notice that I do not advocate for a water bath (bain-marie) in this recipe. This method of baking at a very low temperature is how I learned to make crème brûlée in pastry school. It results in an exceptionally creamy, less rubbery texture, without the added fuss of handling hot water. While traditional for some custards like crème caramel, it’s not strictly necessary for this crème brûlée!
- Once baked, remove the ramekins from the oven and place them on a wire rack to cool completely at room temperature for about 30 minutes. After cooling, transfer them to the fridge for at least 3 hours, or ideally, overnight, to allow the custard to fully set and chill thoroughly. You can even prepare them up to 24 hours in advance!
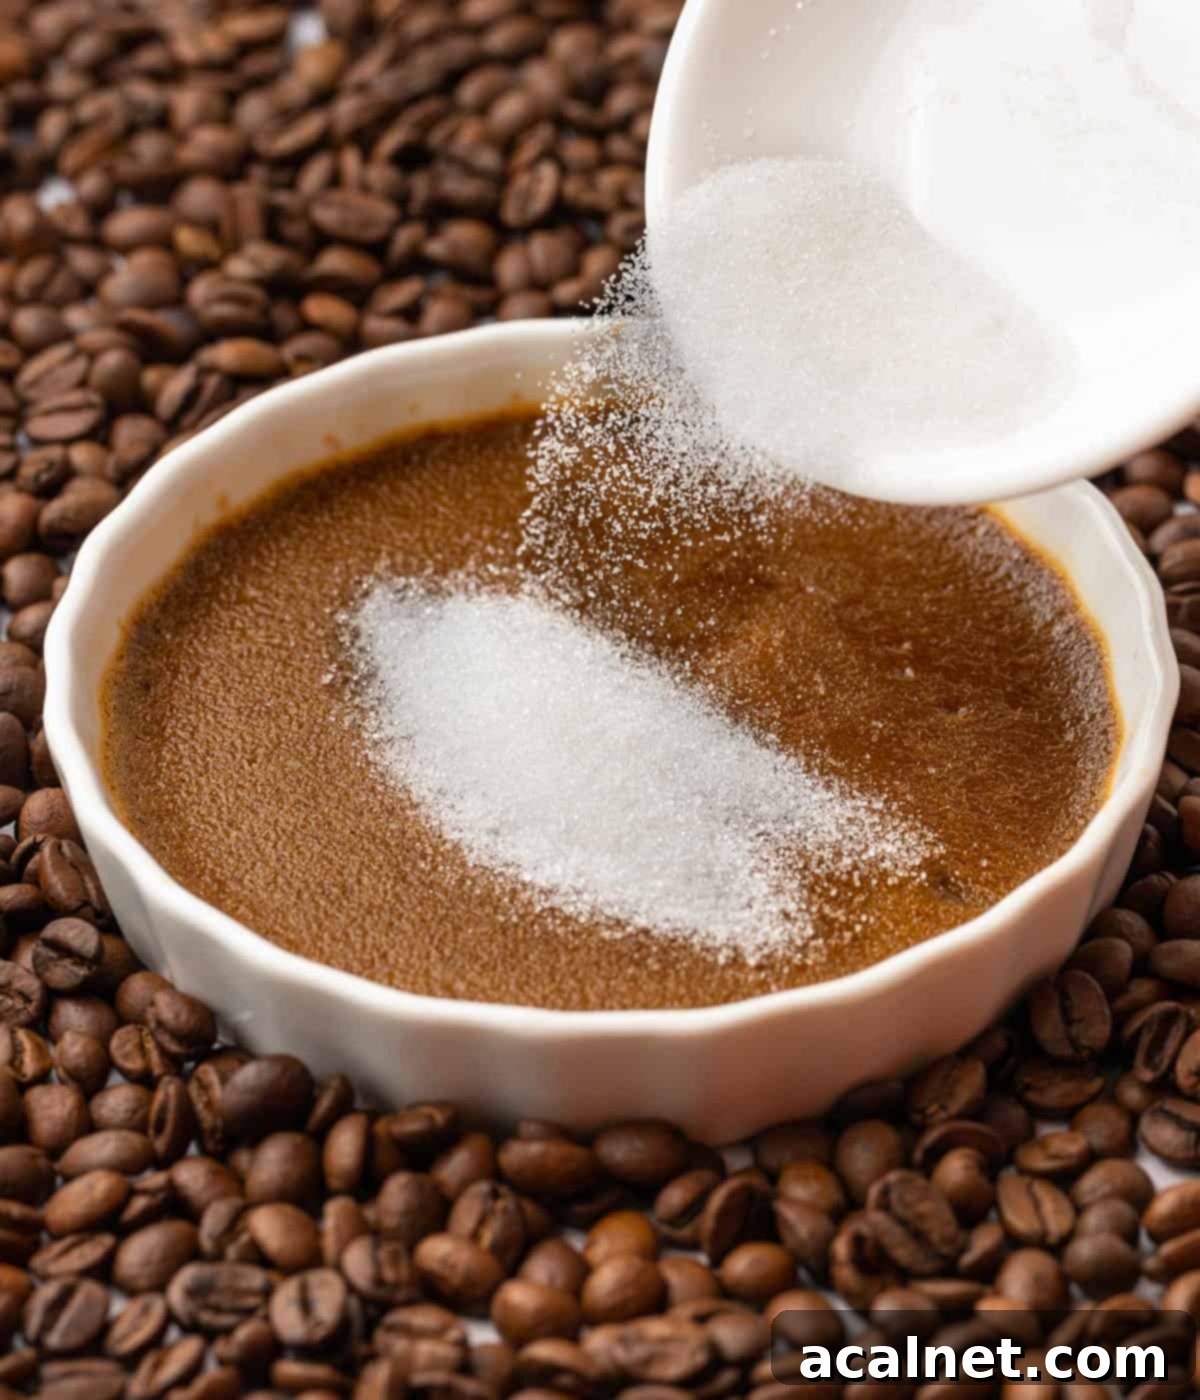
- Photo 7: When you’re ready to serve, carefully sprinkle an even layer of caster sugar over the top of each chilled custard. Gently shake and rotate the ramekins to ensure the sugar covers the entire surface, reaching all the way to the sides. An even layer is crucial for a uniform, beautiful caramel crust.
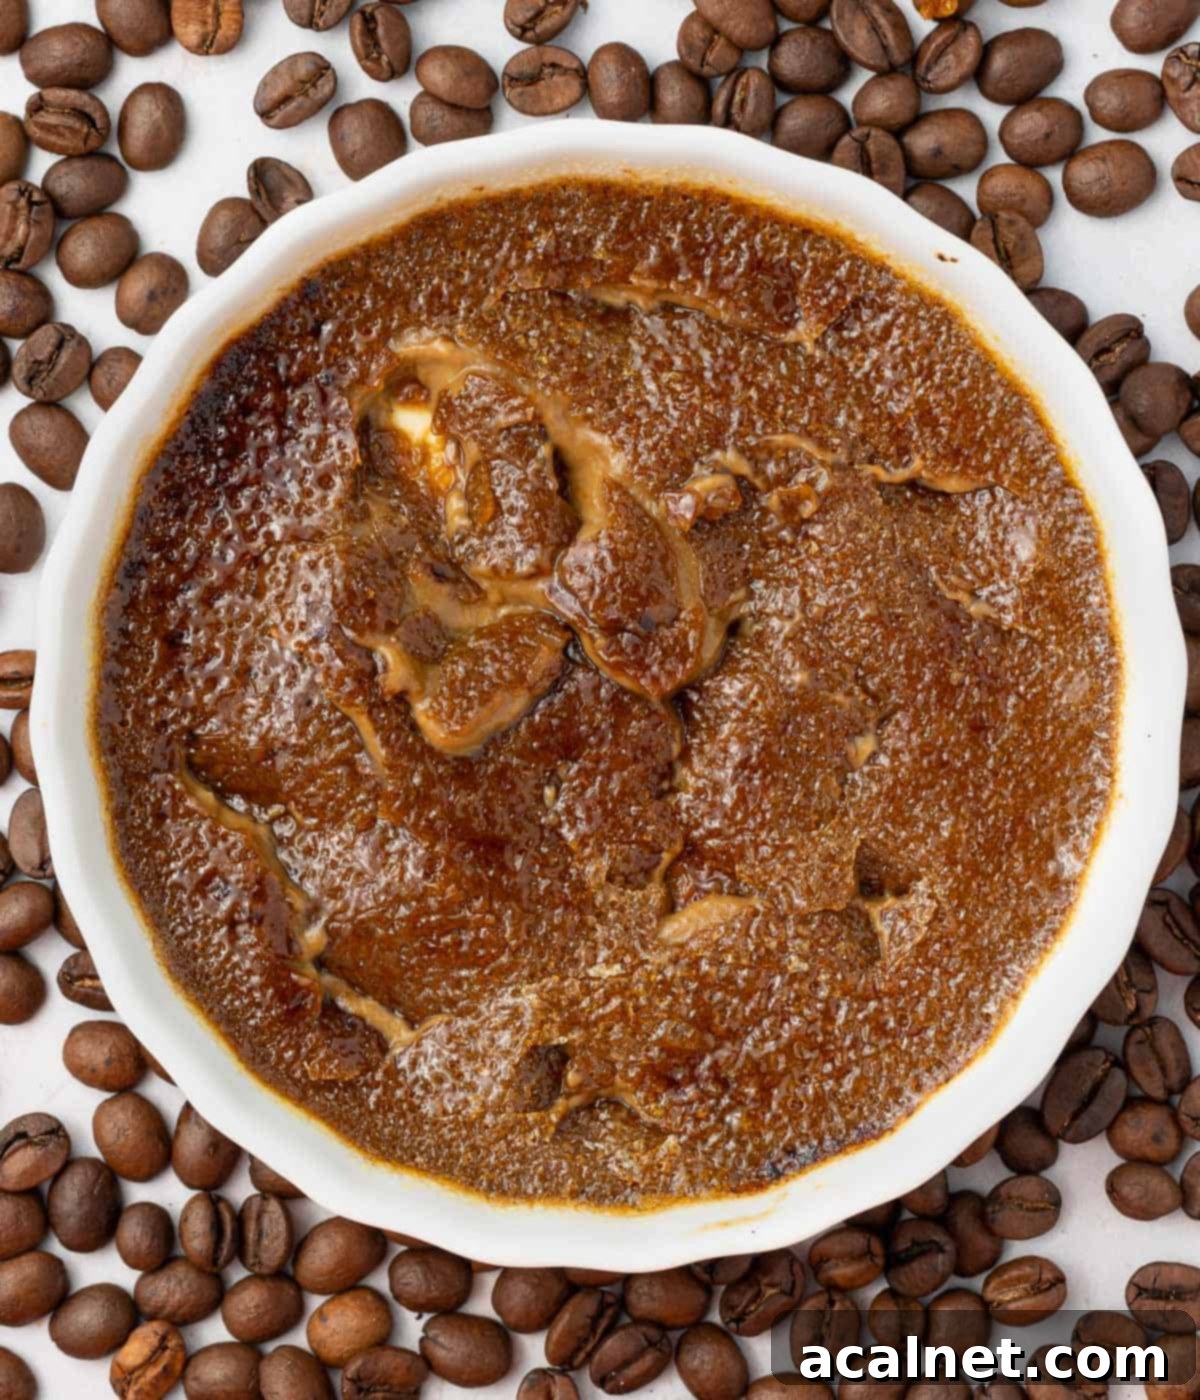
- Photo 8: Using a kitchen blow torch, caramelise the sugar until it transforms into a beautifully crispy, golden-amber shell. Keep the flame constantly moving across the sugar’s surface and avoid direct, prolonged contact in one spot, which can lead to burning. Aim for an even, glistening crust.
- For the ultimate textural contrast, place the torched coffee crème brûlée ramekins in the freezer for about 15 minutes immediately after caramelizing. This quick chill helps the sugar coating harden perfectly and allows the custard underneath to firm up slightly again, ensuring that satisfying crack when served. Serve straight away for the best experience!
Recipe Frequently Asked Questions
Many traditional recipes will indeed instruct you to bake custard in a water bath, as it helps create a gentle, even heat distribution, preventing the edges from cooking too quickly and creating a silkier texture. However, the method taught in pastry school, and used in this recipe, involves baking the custard at a very low temperature for a longer period without a water bath. My French pastry chef always distinguished that crème brûlées are baked at a low temperature, while “crème caramel” (flan) typically uses a water bath. This low-temperature method also yields an incredibly creamy, less rubbery texture and minimizes fuss. If you prefer to use a water bath, you would generally bake the custard at a slightly higher temperature (around 160 degrees Celsius / 325 degrees Fahrenheit) for a shorter period, filling your baking dish with hot water that comes up to about halfway up the sides of your ramekins.
The key to perfectly baked crème brûlée is a delicate balance. You want the custard to be mostly set around the edges, but still have a very slight, gentle jiggle in their center when you carefully tap the ramekin. This subtle movement indicates that the custard is cooked but not overcooked, and it will continue to set as it chills in the refrigerator. Over-baking will result in a firmer, sometimes spongy or rubbery texture, losing that signature creaminess. Always rely on the texture rather than strictly adhering to the recommended baking time, as oven temperatures can vary significantly, and ramekin sizes also influence cooking duration.
No kitchen torch? No problem! You can still achieve that beautiful caramelised crust using your oven’s broiler (grill). First, ensure your oven rack is positioned about 6 inches below the broiler element. Sprinkle the sugar evenly over your chilled custards. Then, place the ramekins under the hot broiler. This method works very quickly, so it’s absolutely crucial to watch them continuously. The sugar can go from perfectly golden to burnt in a matter of seconds. It typically takes about 2-4 minutes, but this can vary depending on your broiler’s intensity. As soon as the sugar is bubbly and golden brown, remove them immediately.
While technically a flame source, using a regular lighter to caramelise crème brûlée is highly discouraged. The flame from a lighter is too small and too weak to effectively and evenly melt and caramelise the sugar. It would take an incredibly long time, likely result in unevenly burnt spots, and could potentially impart an unpleasant taste to your dessert due to incomplete combustion of the lighter fluid. For safety and the best results, stick to a kitchen torch or your oven’s broiler.
Pro Tips & Troubleshooting for Perfect Crème Brûlée
- Why is my crème brûlée not smooth on top? A perfectly smooth custard top is achieved by minimizing air bubbles. This requires two main steps: first, avoid over-mixing the egg yolk and sugar mixture to prevent incorporating too much air. Second, after pouring the custard into the ramekins, gently tap the tray on a hard surface a few times to encourage any trapped air bubbles to rise and pop. If any foam remains on the surface, carefully skim it off with a small spoon before baking. Straining the custard mixture through a fine-mesh sieve before pouring can also significantly help.
- Why is my custard grainy or lumpy? This usually happens if the egg yolks were not properly tempered. If the warm cream is added too quickly or is too hot, the eggs can curdle or scramble. Ensure the cream is only at a gentle simmer (not boiling) and pour it into the egg mixture slowly while constantly whisking. Also, check your oven temperature; baking at too high a temperature can lead to a grainy texture.
- The coffee custard is too liquid: If your custard isn’t setting properly, it’s likely either under-baked or hasn’t been chilled for long enough. The custards should have a slight jiggle in the center when they come out of the oven, but the edges should be set. They will firm up considerably during chilling, so ensure they spend at least 3 hours (preferably overnight) in the fridge. If they are still very liquid after proper chilling, they probably needed more time in the oven.
- How to get the perfect crème brûlée topping: The ideal caramelized crust is all about even distribution and controlled heat.
- Even Sugar Layer: Sprinkle a consistent, thin layer of sugar over the entire surface of the chilled custard. Gently shake the ramekin to distribute the sugar right to the edges. If the layer is too thin in places, it can burn quickly. If it’s too thick, it will take longer to caramelise, risking melting the custard underneath.
- Torching Technique: When using a kitchen torch, keep the flame moving constantly. Do not hold it stationary over one spot, as this will burn the sugar rather than caramelize it evenly. Hold the flame a few inches above the sugar, allowing it to gradually melt and turn golden brown. For an extra thick crust, you can caramelize a first layer, then add a second thin layer of sugar and caramelize again.
Storing & Freezing Your Crème Brûlée
For the best flavor and texture, I highly recommend chilling the baked coffee custards in the fridge overnight, or for at least 3 hours, before you plan to serve them. They can be prepared and stored in the refrigerator for up to 3 days, making them an excellent make-ahead dessert for entertaining. However, it is crucial to add and caramelise the sugar topping just before serving. If the sugar crust is applied too early, it will absorb moisture from the custard and the air, becoming soggy and losing its signature crispness.
I do not recommend freezing crème brûlée. Freezing will significantly alter the delicate, soft texture of the custard, often resulting in a grainy or watery consistency upon thawing, which detracts from the dessert’s luxurious appeal.
More Delicious Coffee Desserts You’ll Love
If you’re a fan of coffee-infused treats, explore these other fantastic recipes to satisfy your cravings:
- Coffee Choux Buns
- Baked Coffee Cheesecake
- Coffee Financiers
- Cinnamon Coffee Rolls
- Coffee Loaf Cake
- Coffee Mousse Cups
- Coffee Panna Cotta
Made this recipe?
We’d love to hear from you! Let us know if you enjoyed it by leaving a comment below, and don’t forget to tag us on Instagram @a.baking.journey with a photo of your delicious creation!
Coffee Crème Brûlée Recipe Card

Coffee Crème Brûlée
Servings:
4
Author:
Sylvie
15
45
3
30
4
30
Print Recipe
Prevent your screen from going dark
Ingredients
Coffee Custard
- 240 ml (1 cup) Heavy / Thickened Cream
- 1 teaspoon Vanilla Paste, or vanilla extract
- 1 1/2 tablespoons Instant Coffee Granules, or instant espresso powder
- 3 large Egg Yolks, equivalent to 60 grams, at room temperature
- 30 gr (2 1/2 tablespoon) Caster Sugar
Sugar Coating
- 4 teaspoons Caster Sugar, divided in 4
Instructions
Coffee Custard
- Preheat your oven to 100 degrees Celsius / 215 degrees Fahrenheit. Place four deep 7 cm wide ramekins, or shallow 13 cm wide ramekins (2.5 inch and 5 inch), on a baking tray or large baking dish.
- In a small saucepan, combine the Heavy Cream, Vanilla, and Instant Coffee. Stir well to dissolve the coffee granules and bring the mixture to a gentle simmer. Remove from heat immediately.
- In the meantime, place the egg yolks and sugar in a heat-proof large bowl. Whisk them together until smooth and well combined (see note 1).
- Slowly pour the warm cream mixture over the sugar and yolks while continuously stirring. Mix until you achieve a smooth, liquid custard mixture (see note 2). For an even silkier texture, optionally strain the custard through a fine-mesh sieve to remove any lumps or air bubbles.
- Pour the custard evenly into the prepared ramekins. Gently tap the baking tray with the ramekins on a hard surface to help any air bubbles rise and pop. If you notice any foam on top of the custard, carefully remove it with a small spoon.
- Bake for approximately 60 minutes for the 7 cm ramekins, or 40 to 45 minutes for the 13 cm ramekins. The custards are done when the sides are set, but the center still has a very slight, delicate jiggle (see note 3).
- Remove from the oven and place on a wire rack to cool down at room temperature for about 30 minutes. Afterward, transfer them to the fridge to chill for at least 3 hours, or ideally, up to 24 hours.
Sugar Coating
- When ready to serve, sprinkle about 1 teaspoon of caster sugar evenly over the top of each chilled coffee custard. Gently shake the ramekins to distribute the sugar completely and ensure a uniform layer across the entire surface (see note 4).
- Using a kitchen blow torch, caramelise the sugar until it forms a crispy, golden-colored shell. Continuously move the flame across the sugar and avoid placing it in direct, prolonged contact to prevent burning.
- For the best results, place the crème brûlée ramekins in the freezer for 15 minutes immediately after caramelizing. This helps the sugar coating harden and the custard firm up slightly. Serve straight away (see note 5).
Video
Would you like to save this recipe?
We’ll email this post to you, so you can come back to it later!
Notes
- Try not to over-mix the egg yolk and sugar mixture, or you will create a lot of air bubbles that can make the top of the custard uneven after baking.
- This step is known as “tempering” the eggs. It’s crucial to slowly increase the temperature of the egg yolks by gradually adding the warm cream while stirring continuously. This prevents any quick temperature change that could cause the eggs to curdle.
- You might notice that this recipe does not use a water bath (bain-marie). This is the method I learned in pastry school, as baking the custard at a very low temperature results in a creamier, less rubbery texture without the added fuss. The custards should be mostly set with a slight jiggle in the center when removed from the oven.
- Depending on your preference for the caramelised shell’s thickness, you can use slightly more sugar than one teaspoon per crème brûlée. For an extra thick and crunchy crust, you could even double coat it: caramelize a first layer, then sprinkle with more sugar and caramelize again.
- Placing the dessert in the freezer for 15 minutes just before serving is a quick trick that allows the freshly caramelized sugar coating to harden perfectly and the custard underneath to firm up again, ensuring that satisfying crack when you break through the crust.
Nutrition (per serving)
Calories:
301
kcal
|
Carbohydrates:
16
g
|
Protein:
4
g
|
Fat:
25
g
|
Saturated Fat:
15
g
|
Polyunsaturated Fat:
1
g
|
Monounsaturated Fat:
7
g
|
Cholesterol:
206
mg
|
Sodium:
23
mg
|
Potassium:
138
mg
|
Sugar:
14
g
|
Vitamin A:
1066
IU
|
Vitamin C:
0.4
mg
|
Calcium:
59
mg
|
Iron:
0.5
mg
