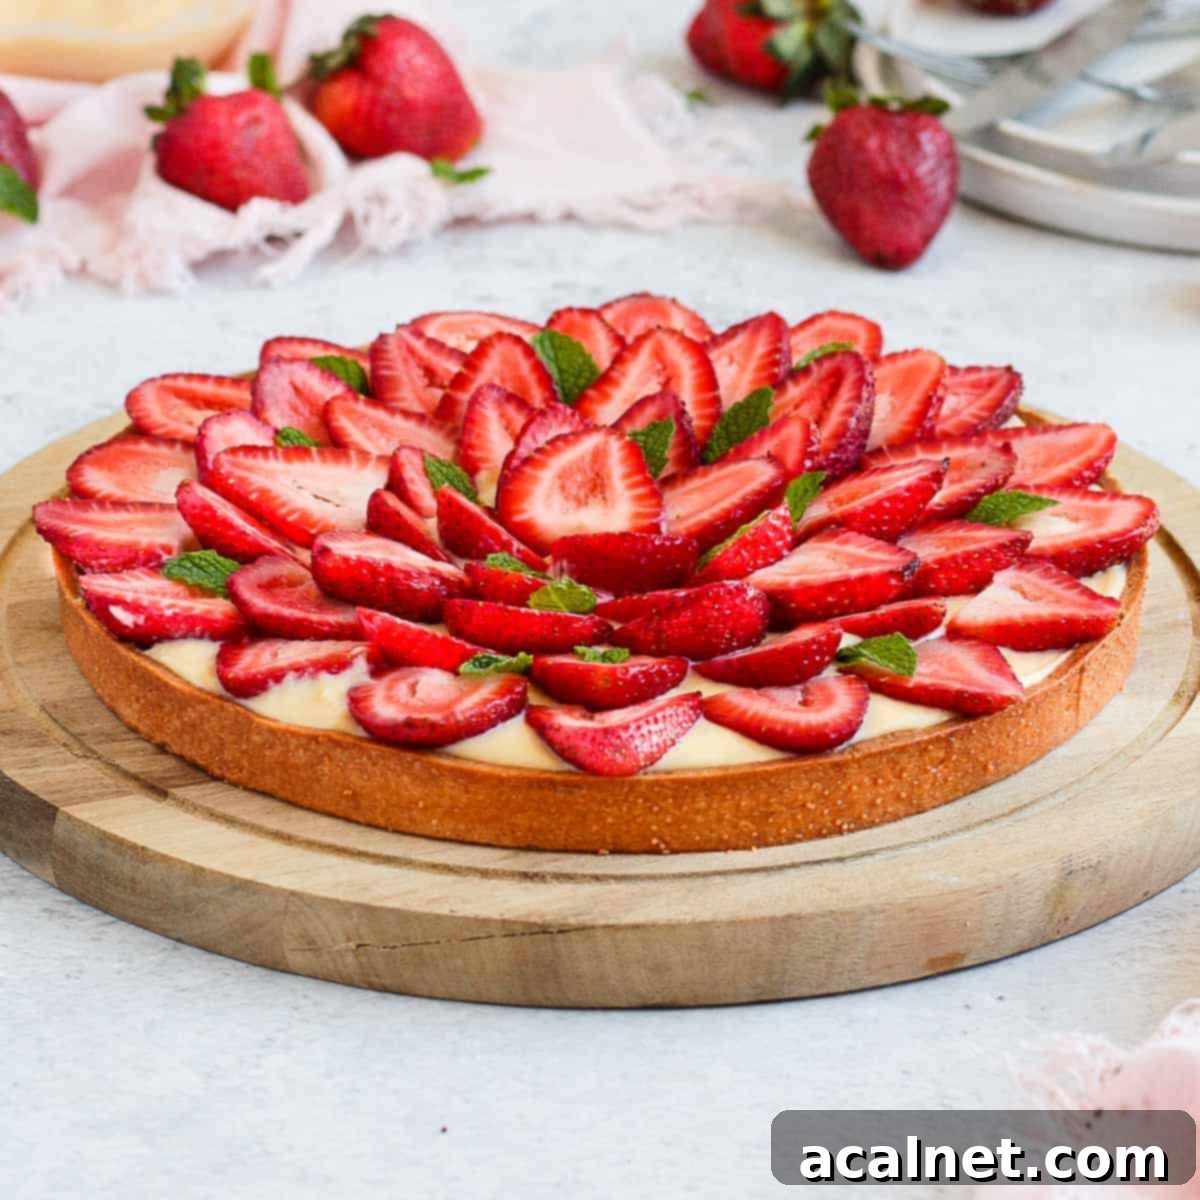
Classic French Strawberry Custard Tart: A Summer Dessert Masterpiece with Pâte Sablée
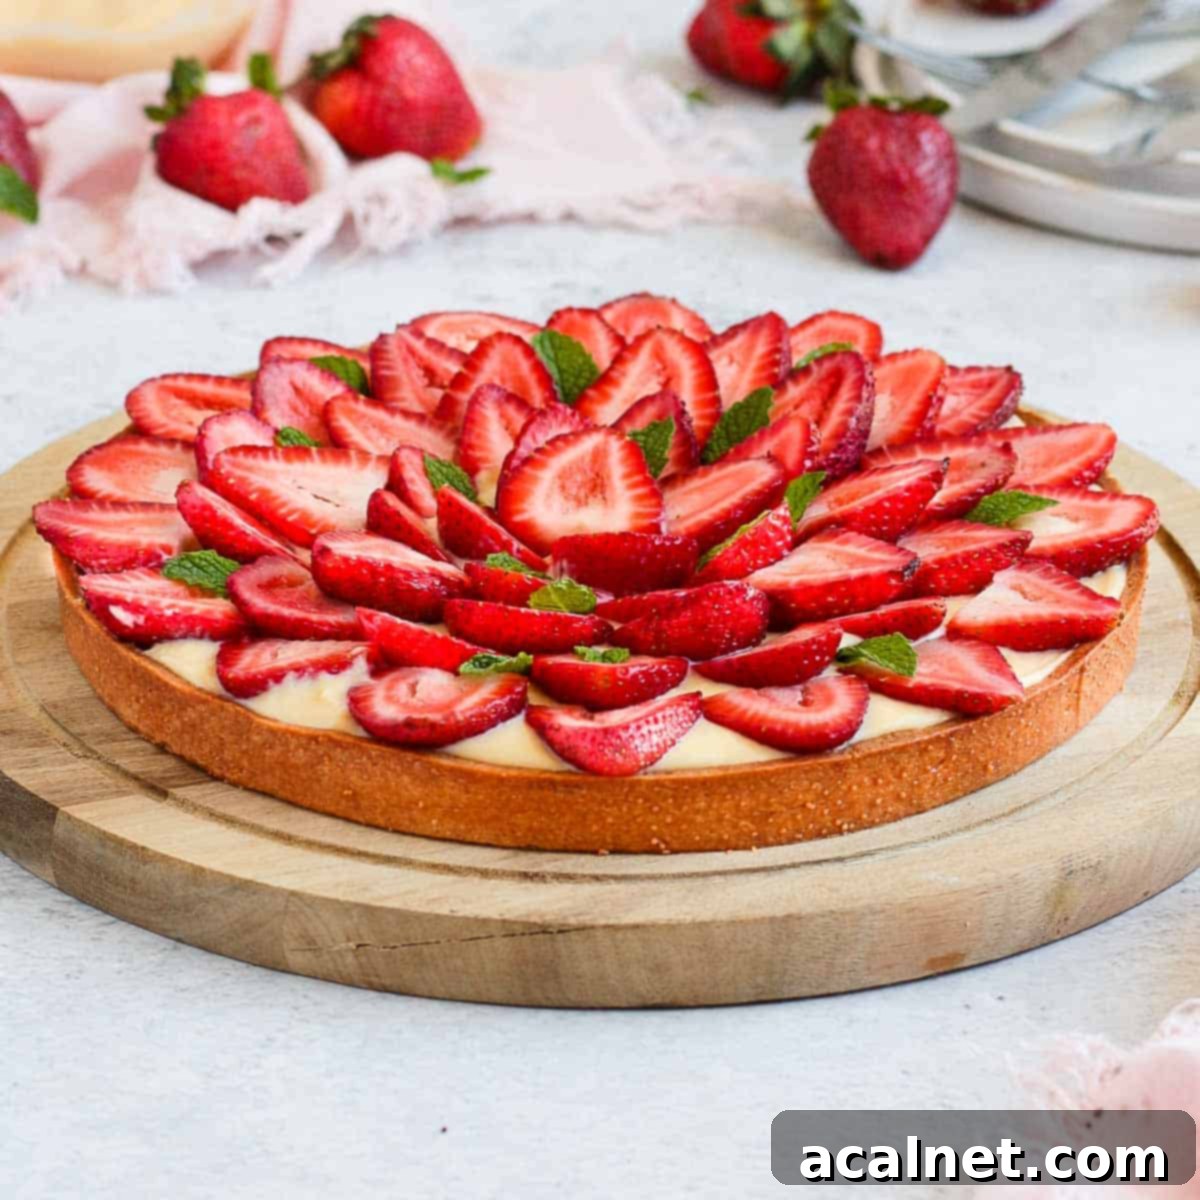
Indulge in the exquisite charm of this French Strawberry Custard Tart, a quintessential summer dessert that effortlessly blends a rich, buttery Shortcrust Pastry with a silky Vanilla Pastry Cream and a vibrant topping of Fresh Strawberries. This elegant confection is not just a treat for the taste buds but also a feast for the eyes, making it an ideal centerpiece for garden parties, celebratory gatherings, or a delightful afternoon tea. Its light, refreshing profile and perfect balance of textures – crunchy crust, creamy filling, and juicy berries – promise a truly unforgettable culinary experience.
[feast_advanced_jump_to]
Why You’ll Adore This French Strawberry Custard Tart
This French Strawberry Custard Tart stands out as a truly exceptional dessert, making it an absolute favorite for many. It’s a symphony of textures and flavors that embodies the essence of summer. Imagine biting into a crisp, buttery crust, followed by a wave of smooth, creamy vanilla custard, all crowned with the sweet, slightly tangy burst of fresh strawberries. It’s light, incredibly fresh, and packed with delightful berry goodness.
At its heart, this Strawberry Cream Tart features two pillars of French patisserie: a perfectly executed homemade Pâte Sablée (a sweet, crumbly shortcrust pastry) and a luxurious Vanilla Crème Pâtissière (classic French pastry cream). The fresh, ripe strawberries are more than just a garnish; they’re the crowning jewels that bring the entire creation to life, adding a vibrant color and an irresistible fruity note.
Whether you’re hosting a grand summer party, a casual outdoor gathering, or simply indulging in a quiet afternoon tea, this tart, much like its charming smaller counterparts, Strawberry Custard Tartlets, is a perfect choice. What makes it even more appealing is the convenience: all individual components can be prepared in advance, allowing for quick and stress-free assembly on the day of serving. This flexibility makes it a fantastic recipe for entertaining or for enjoying fresh, homemade dessert without feeling rushed.
Mastering the Pâte Sablée (French Shortcrust Pastry)
The foundation of this exquisite strawberry custard tart is a crisp, wonderfully buttery, and slightly flaky Pâte Sablée, also known as French Shortcrust Pastry. This pastry is renowned for its melt-in-your-mouth texture and subtle sweetness, which perfectly complements the creamy custard filling. Unlike more traditional flaky pie crusts, Pâte Sablée uses icing sugar (powdered sugar) and often an egg, resulting in a more tender, less elastic dough that bakes up beautifully golden and firm enough to hold a substantial filling.
Key Ingredients for Pâte Sablée:
- Dry Ingredients:
- All-Purpose Flour: Provides the structure for the pastry.
- Icing Sugar (Powdered Sugar): Contributes to the tender texture and prevents gluten development, resulting in a crumbly, delicate crust. It also adds a lovely sweetness without the grainy texture of granulated sugar.
- A Pinch of Salt: Balances the sweetness and enhances all the flavors.
- Wet Ingredients:
- Very Cold Unsalted Butter: Crucial for a flaky and tender pastry. Cold butter creates pockets of steam during baking, contributing to the desired texture. Using unsalted butter allows you to control the salt content precisely.
- One Room Temperature Egg: Binds the ingredients together and adds richness. Using a room temperature egg helps it emulsify more easily with the other ingredients.
Feel free to get creative with the flavors! You can easily enhance this strawberries and cream tart by adding finely grated Orange or Lemon Zest to the pastry dough for a citrusy hint, or a touch more Vanilla Extract for an extra aromatic depth. These small additions can elevate the entire dessert.
Step-by-Step Pâte Sablée Preparation:
While I often use a Food Processor for speed and efficiency, making this pastry by hand is absolutely possible and equally rewarding. For detailed instructions on the hand-mixing method, refer to my comprehensive pâte sablée recipe.
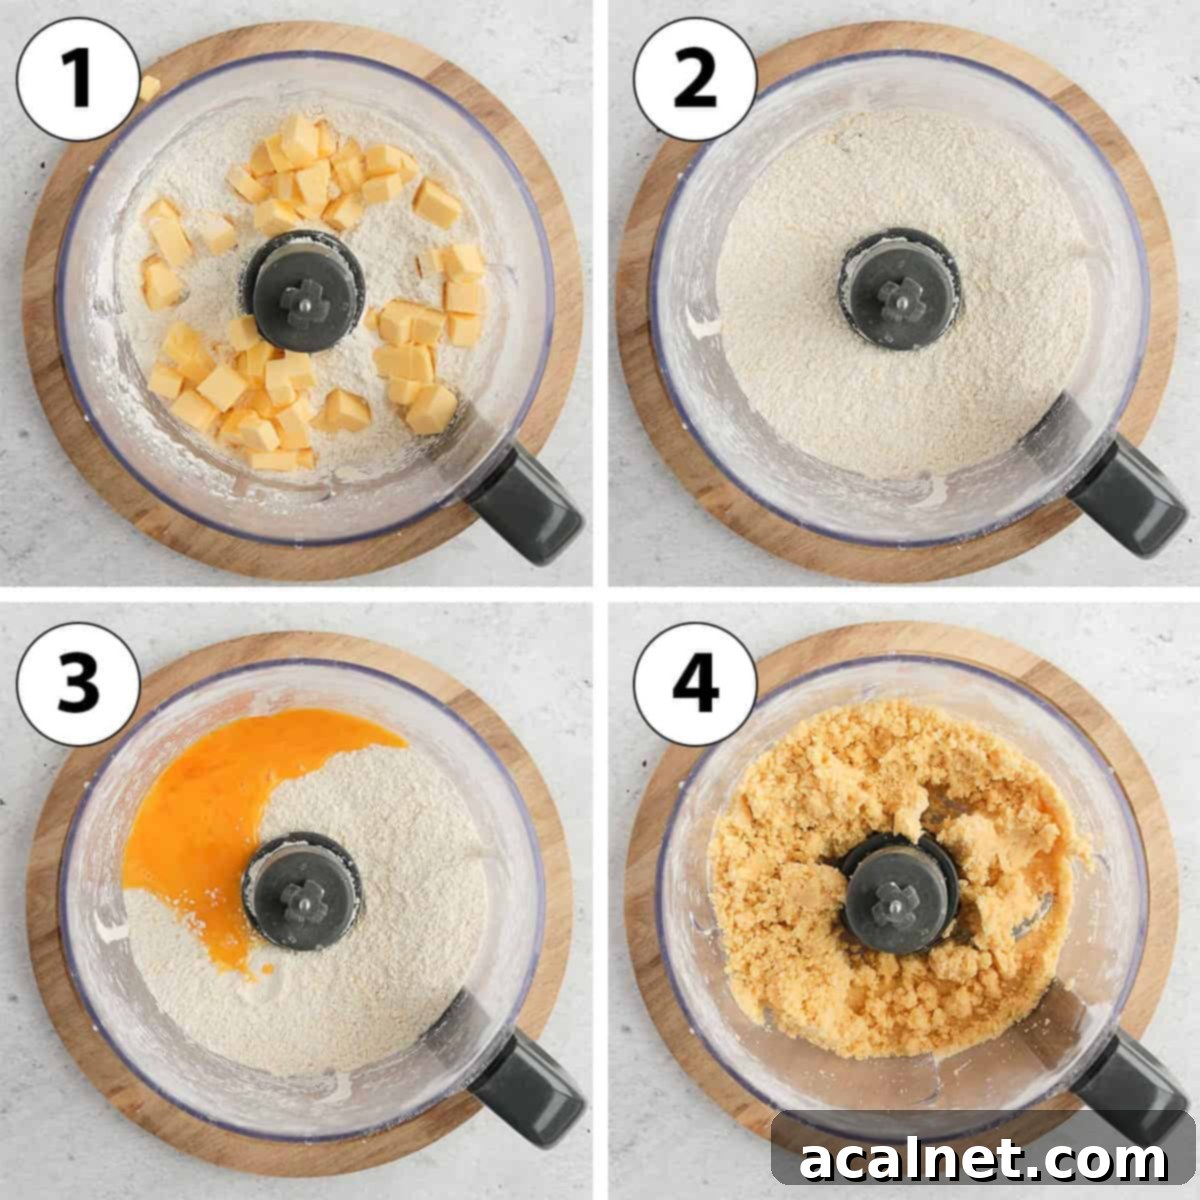
- Photo 1: Combine Dry Ingredients & Add Butter: In the bowl of your food processor, combine the All-Purpose Flour, Icing Sugar, and Salt. Pulse briefly to ensure they are well mixed. Then, add the very cold, cubed Unsalted Butter. The colder the butter, the better your pastry’s texture will be.
- Photo 2: Create Crumbs: Pulse the mixture slowly and incrementally. The goal is to achieve very small, pea-sized crumbs. Remember, the larger the butter crumbs, the flakier your baked pastry will be. Be careful not to over-process at this stage, as you want to avoid generating too much heat.
- Photo 3: Incorporate the Egg: Add the room temperature Egg. For easier incorporation and a smoother dough, I recommend lightly whisking the egg in a separate small bowl before adding it to the food processor.
- Photo 4: Form the Dough: Continue to pulse just until a rough dough begins to come together. It’s vital not to over-work the pastry, as this develops gluten and can result in a tough crust. The dough is ready when you can press the crumbs together with your fingers, and they stick, forming a cohesive mass.
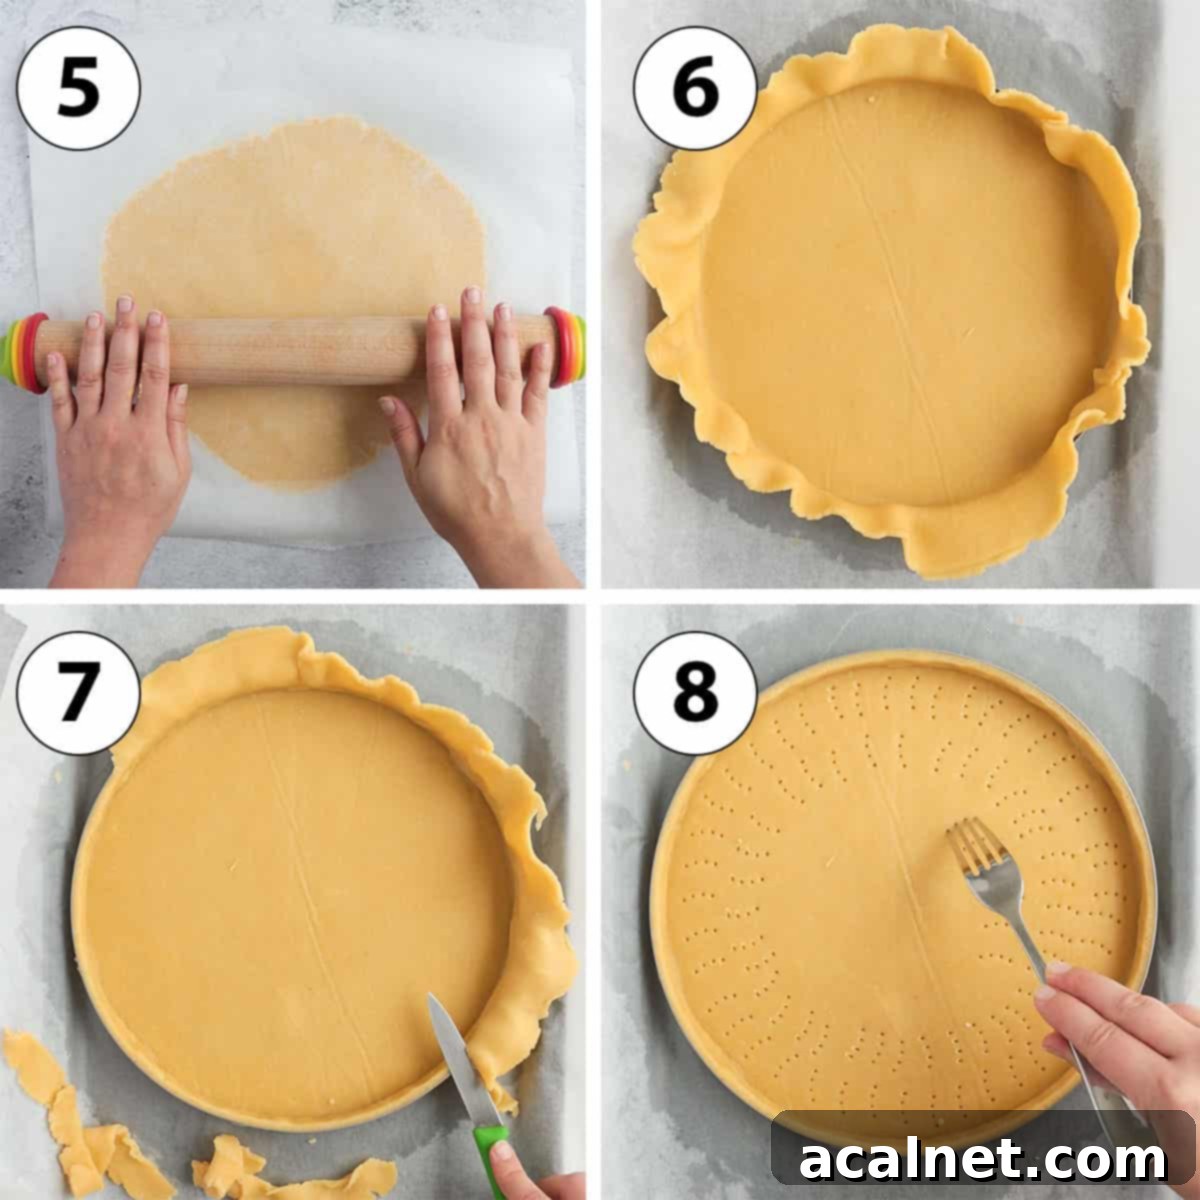
- Photo 5: Chill the Dough: Gather the dough into a cohesive ball and flatten it slightly into a disk. Place it between two sheets of parchment paper, which will prevent sticking and make rolling easier. Roll the dough into a large, even circle, approximately 4 mm (or 1/8 inch) thick. This uniform thickness is key for even baking. Transfer the rolled dough, still between the parchment paper, to the refrigerator. It needs to chill and rest for a minimum of 1 hour, but ideally up to 24 hours. This chilling period is crucial for relaxing the gluten, preventing shrinkage, and making the dough easier to handle.
- Photo 6: Line the Tart Ring: Carefully line your tart ring or tart pan with the chilled pastry. If the dough feels too stiff or starts to crack, let it sit at room temperature for a few minutes to allow the butter to soften slightly, making it more pliable. Gently press the dough where the bottom meets the edges, creating a neat 45-degree angle. This ensures a clean, defined edge and prevents the crust from slumping during baking. I personally recommend using a 25cm (10-inch) wide by 2cm (0.75-inch) deep perforated tart ring for a perfectly crisp crust, though the recipe provides enough pastry for a slightly wider or deeper pan if you prefer.
- Photo 7: Trim Excess Pastry: Using a small paring knife or the edge of your rolling pin, carefully trim away any excess pastry dough from the top edge of the tart ring. This creates a clean finish and ensures your tart looks professional.
- Photo 8: Dock and Chill Again: Gently prick the bottom of the pastry crust all over with a fork (this is called “docking”). Docking prevents the crust from puffing up unevenly during baking. Once docked, place the tart crust back into the refrigerator to chill and rest for at least another 1 hour, or up to 24 hours. This second chill is as important as the first for preventing shrinkage and ensuring a stable crust.
- Bake the Crust: Preheat your oven to 160°C (325°F). While the oven heats, place your chilled tart pastry in the freezer for about 10-15 minutes. This quick freeze helps the butter remain cold, further reducing shrinkage. Blind-bake the crust for 30 to 40 minutes, or until it’s beautifully golden brown and fully baked through. For an extra protective “seal” and a gorgeous golden sheen, you can optionally brush the crust with an egg yolk (or egg white) halfway through the baking process. Once baked, set the crust aside on a wire rack to cool completely before filling. A completely cool crust prevents the pastry cream from melting.
Crafting the Silky Vanilla Pastry Cream (Crème Pâtissière)
While your Pâte Sablée crust is chilling and baking, you can begin preparing the heart of this tart: the irresistible Vanilla Pastry Cream Filling. Known in French as Crème Pâtissière, this thick, creamy, and wonderfully vanilla-infused custard is a cornerstone of French baking, providing a luxurious counterpoint to the crisp tart shell and fresh fruit.
Essential Steps for Perfect Pastry Cream:
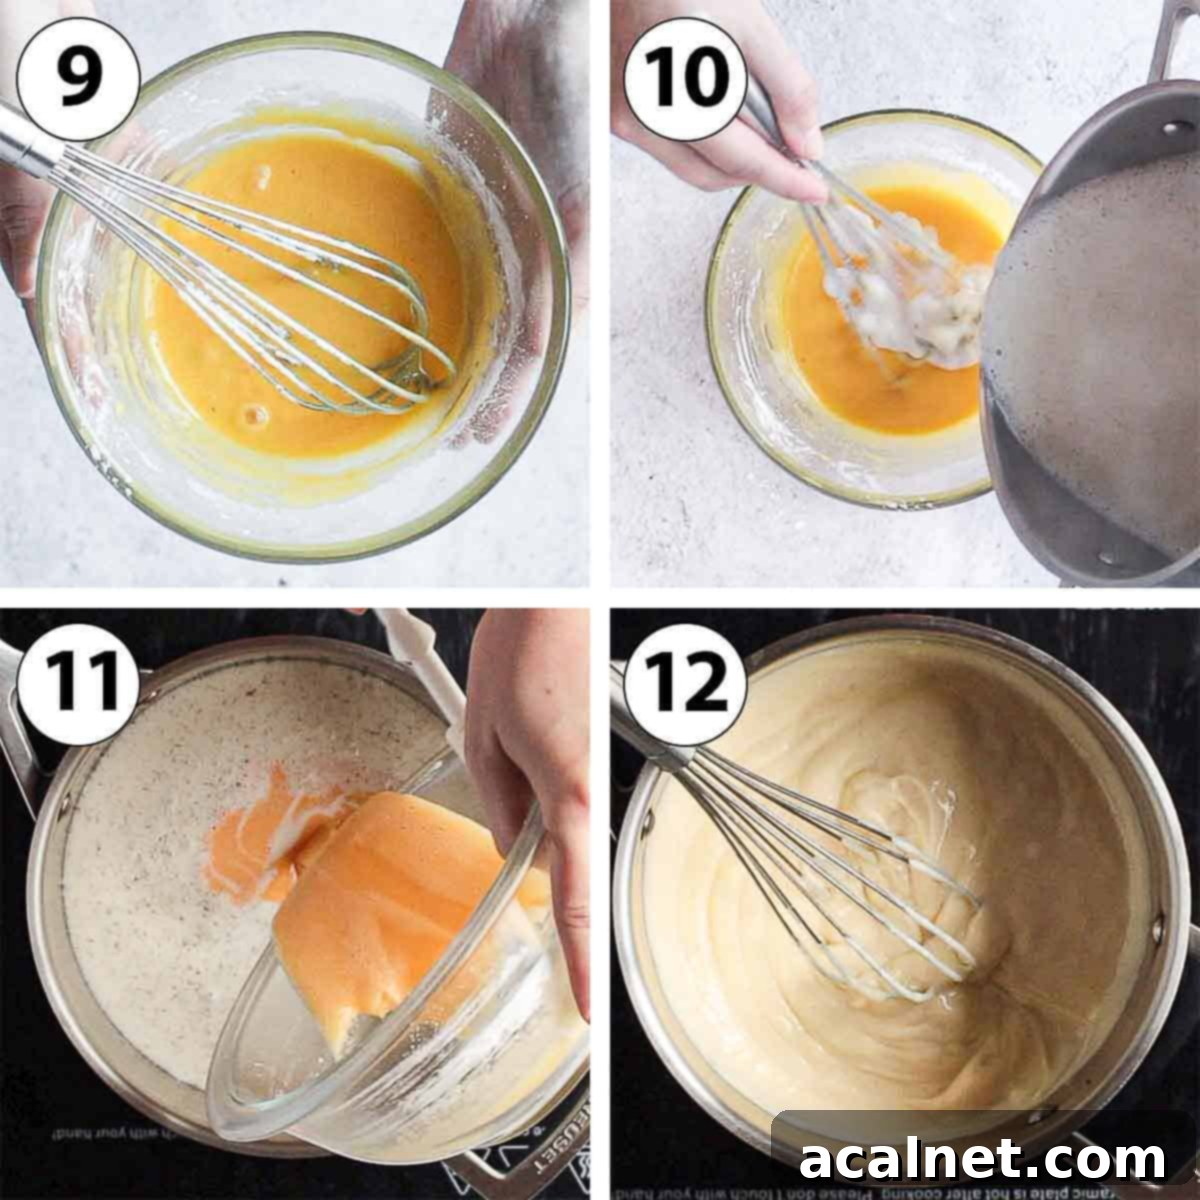
- Photo 9: Whisk Yolks & Sugar: In a medium-sized mixing bowl, vigorously whisk together the Egg Yolks and Caster Sugar until the mixture becomes pale and thick, almost ribbon-like. This aeration is important for the final texture. Then, gradually whisk in the Cornstarch until no lumps remain. The cornstarch acts as our primary thickening agent, ensuring a stable and smooth cream.
- Photo 10: Temper the Eggs: In a small saucepan, gently heat the Full Cream Milk (whole milk is recommended for richness) and Vanilla Paste over low heat until it just begins to simmer, showing small bubbles around the edges. Crucially, do not let it boil vigorously. Remove from heat and slowly pour a thin stream of the hot milk mixture over your egg yolk mixture while continuously whisking. This process, known as “tempering,” gradually raises the temperature of the egg yolks, preventing them from scrambling when added to the remaining hot milk. Once about a third of the milk has been added, pour the tempered egg mixture back into the saucepan with the remaining hot milk.
- Photo 11: Cook to Thicken: Return the saucepan to low heat. Cook the mixture, whisking continuously and vigorously, especially paying attention to the bottom and corners of the pan. This constant stirring is vital to prevent the cream from sticking, burning, or forming lumps. You’ll notice the cream gradually thickening; it should become quite substantial, coating the back of a spoon.
- Photo 12: Achieve Optimal Thickness: Once the cream starts to boil (you’ll see large, lazy bubbles erupting), continue whisking for an additional 30 seconds. This ensures the cornstarch is fully cooked and activated, preventing any starchy taste and guaranteeing maximum thickness. Immediately remove the pot from the stove to prevent overcooking.
- Cool the Cream Correctly: Transfer the hot pastry cream into a clean bowl or, even better, a shallow pan. A shallow pan allows the cream to spread out, which significantly speeds up the cooling process. Immediately cover the surface of the cream directly with plastic wrap. This is crucial to prevent a skin from forming, which can make the cream lumpy. Place the covered cream in the refrigerator to cool completely, a process that usually takes about 2 hours. A thoroughly chilled cream is easier to work with and provides the best texture for your tart.
Assembling Your Beautiful Strawberry Custard Tart
With your perfectly baked and cooled Pâte Sablée crust and your luscious, thoroughly chilled Pastry Cream ready, it’s time for the most visually rewarding part: assembling your stunning French Strawberry Custard Tart. This final stage brings all your hard work together into a beautiful and delicious dessert.
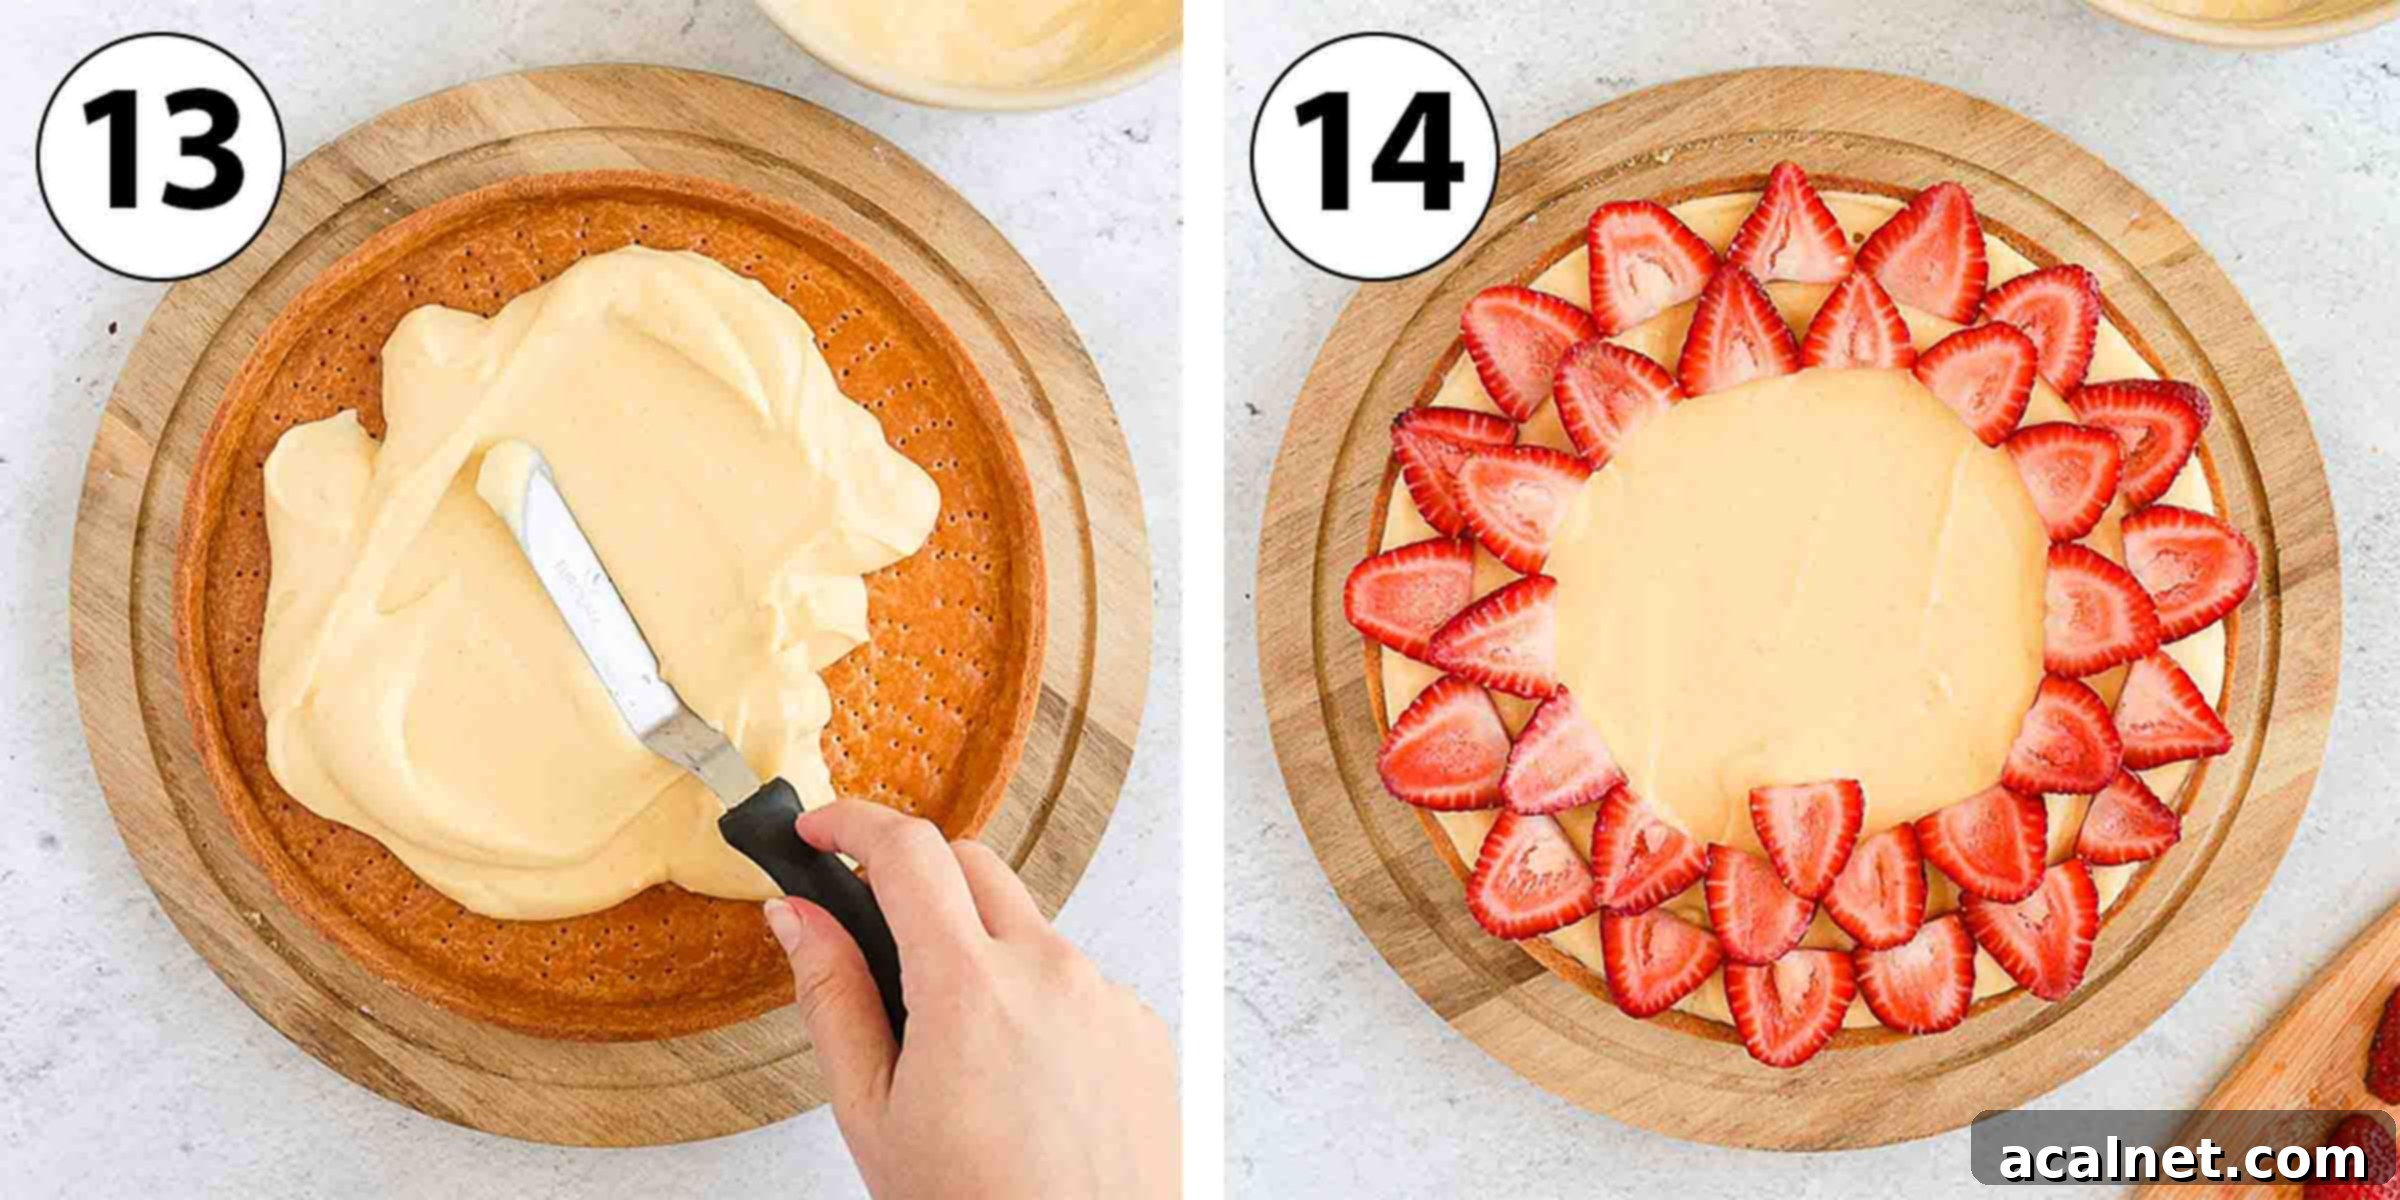
- Photo 13: Fill the Crust with Cream: Gently spoon the cooled pastry cream into the fully baked tart shell. If the cream has become quite stiff in the refrigerator, give it a quick whisk for a few seconds to loosen it up and make it smooth and spreadable. Use a small offset spatula to spread the cream evenly across the bottom of the tart, creating a smooth, flat surface. Ensure you don’t overfill, leaving just enough space for the strawberries.
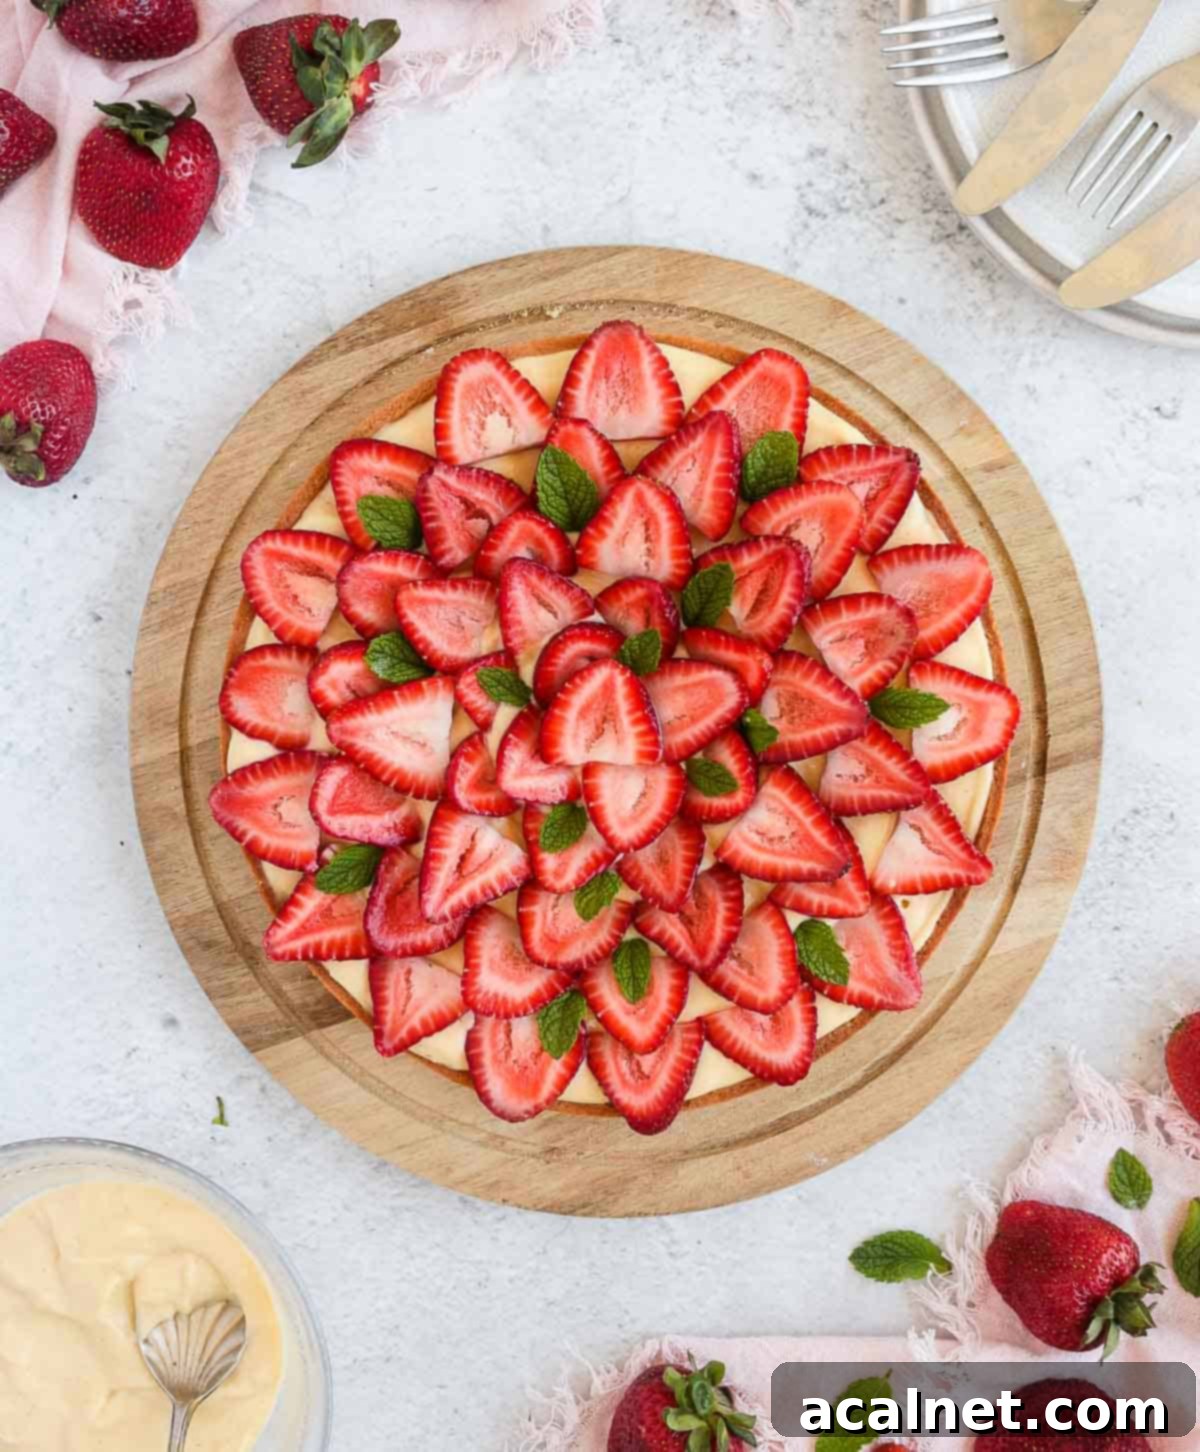
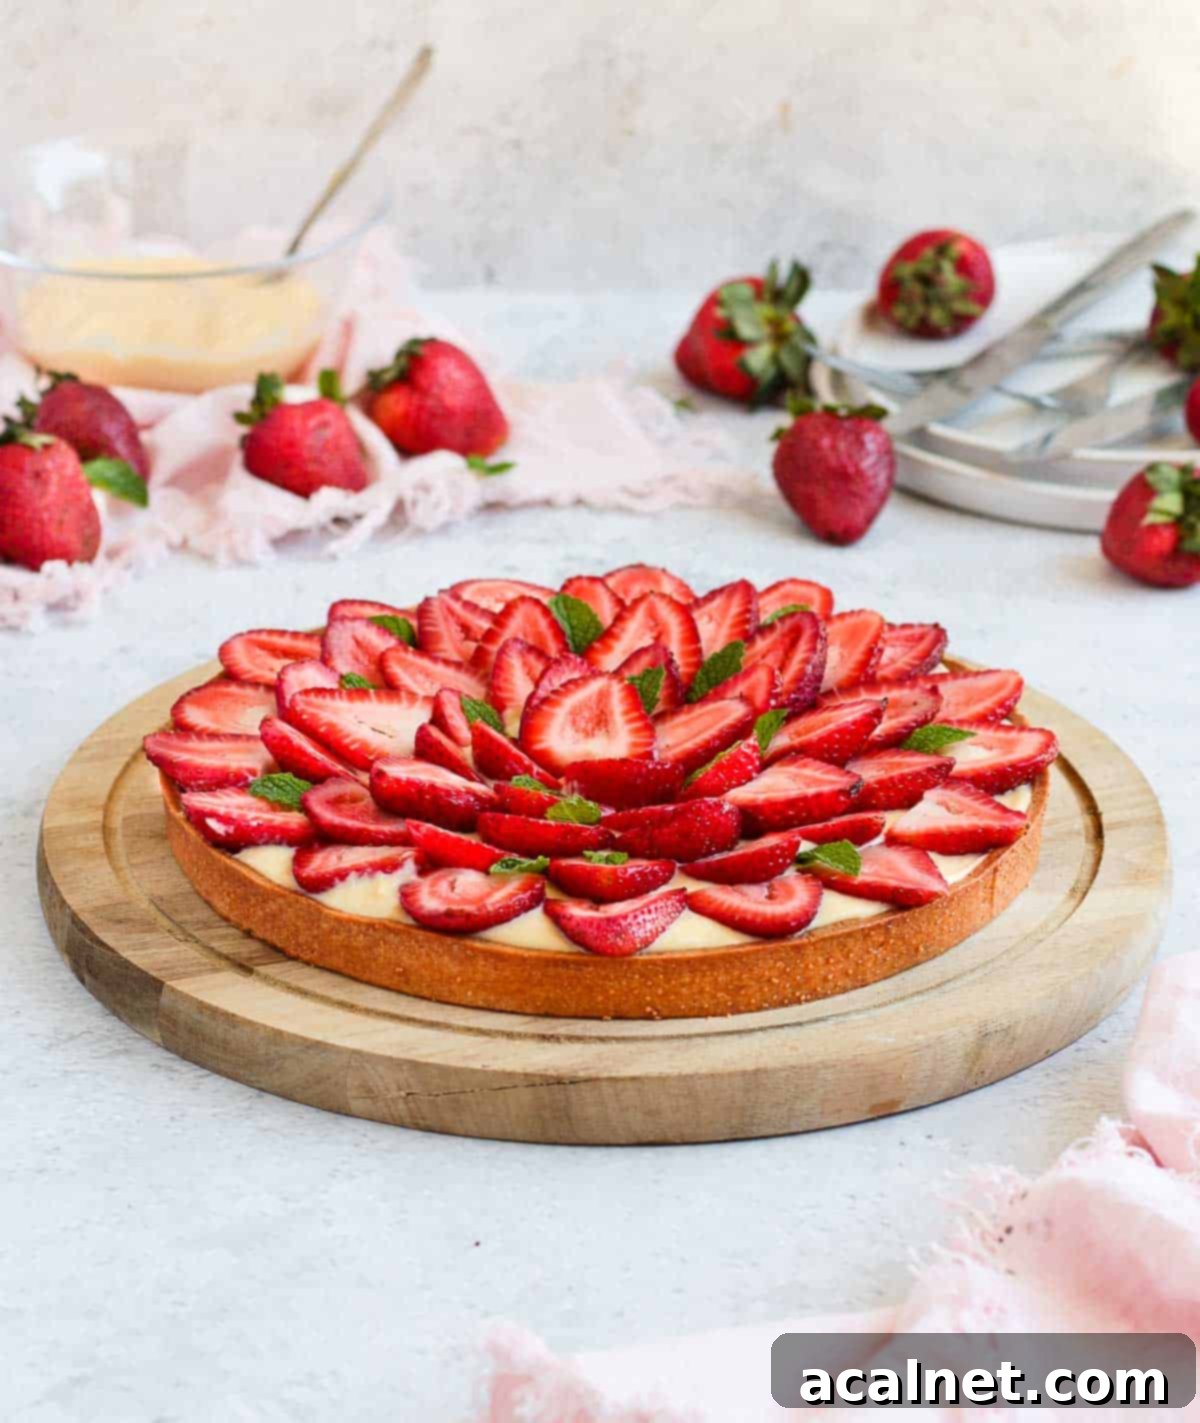
- Photo 14: Arrange the Fresh Strawberries: First, wash your fresh strawberries thoroughly. Carefully remove the green tops and leaves, then slice each strawberry in half lengthwise. Now, for the artistic part: begin arranging the strawberry halves over the pastry cream. A classic and appealing pattern involves starting from the outer edge of the crust and creating concentric rings of strawberries, working your way inward towards the center. Gently press each strawberry half into the pastry cream. This slight pressure helps them adhere to the cream and prevents them from shifting when the tart is sliced.
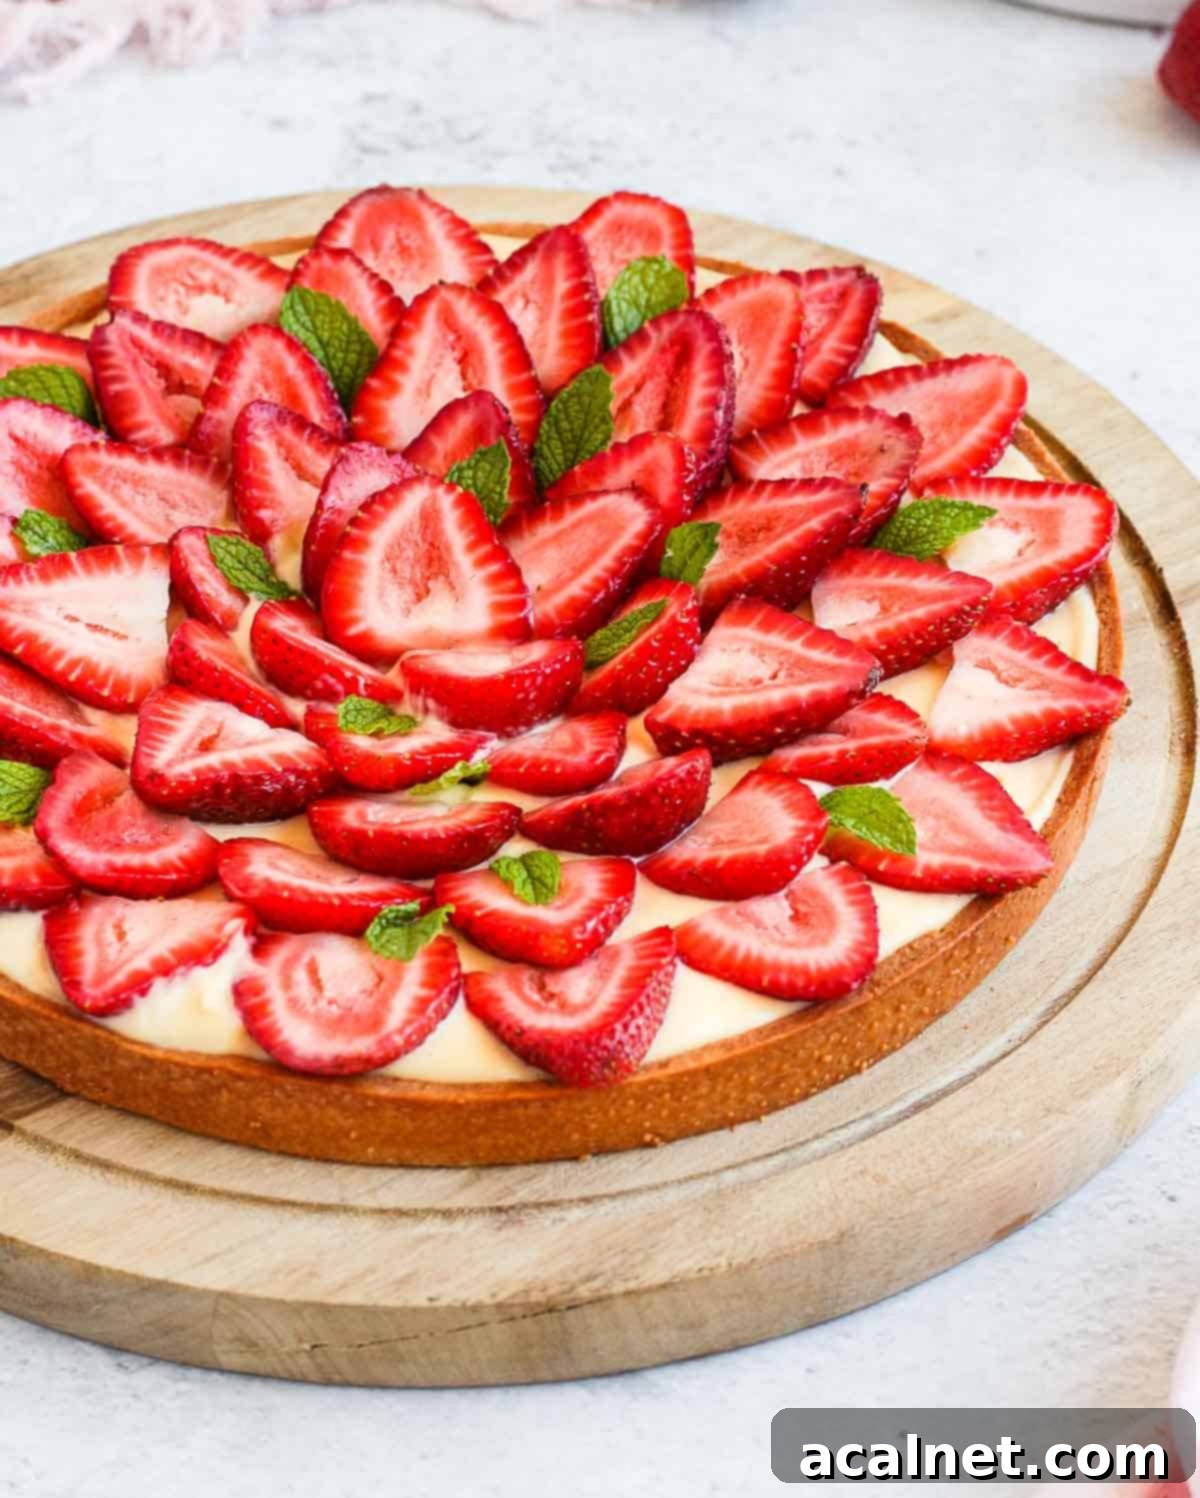
- Optional Garnishes for Extra Flair: To elevate the presentation and add an extra layer of freshness, consider garnishing your finished Strawberry Custard Tart with a few vibrant Mint Leaves. Their bright green color provides a beautiful contrast to the red strawberries and white cream. Alternatively, a delicate dusting of Icing Sugar (powdered sugar) just before serving can add a touch of elegance and a hint of extra sweetness.
- Serving and Storage: This tart is truly best when served fresh, allowing you to enjoy the ultimate crispness of the crust and the vibrant flavor of the strawberries. If not serving immediately, store the tart in the refrigerator. It will remain delicious for up to 24 hours, though the crust may soften slightly over time.
Essential Tips for a Perfect Strawberry Custard Tart
Achieving a truly professional-looking and tasting French Strawberry Custard Tart involves a few key techniques and considerations. Follow these tips to ensure your baking journey is smooth and your final dessert is nothing short of perfection:
- Achieve Uniform Pastry Thickness: For an impeccably even tart crust that bakes consistently, invest in a rolling pin with thickness rings. These rings attach to the ends of your rolling pin and ensure the dough is rolled to a precise, uniform thickness all around. This prevents some parts of the crust from being undercooked or overcooked.
- Maximize Pastry Resting Time: The secret to a tart crust that doesn’t shrink, crack, or collapse during baking is ample chilling time. Always rest and chill your pastry dough for as long as possible – a minimum of one hour, but up to 24 hours for best results – both after rolling and after lining the tart pan. This allows the gluten to relax and the butter to firm up, maintaining the pastry’s shape in the oven.
- Seal the Pastry for Crispness: To create a protective barrier that prevents your crust from becoming soggy, and to give it a beautiful golden hue, brush an egg yolk (or egg white) over the partially baked pastry halfway through its blind-baking. This creates a “seal” that repels moisture from the filling and enhances the visual appeal.
- Infuse More Flavor: Don’t hesitate to personalize your tart with additional flavors. For a bright, zesty note, add some finely grated Lemon Zest or Orange Zest to your Pâte Sablée dough. To give your Crème Pâtissière an extra layer of aromatic complexity, try adding a few drops of Orange Blossom Water – a classic French touch that pairs wonderfully with vanilla and strawberries.
- Dry Your Strawberries Thoroughly: This is a crucial step for the longevity and quality of your tart. Before arranging them on the pastry cream, ensure your washed strawberries are thoroughly dried with paper towels. Any residual moisture can “leak” onto the cream and, more importantly, into the crust, leading to a soggy bottom. A dry berry topping ensures your pastry remains delightfully crispy.
- Avoid Overfilling the Crust: Be mindful of the amount of pastry cream you add to the crust. Overfilling can cause the cream to overflow once the strawberries are added, creating a messy presentation and potentially compromising the crust’s integrity. Aim for a level, even layer that leaves a slight margin at the top edge for the fruit.
Storing Your Strawberry Custard Tart & Freezing Tips
To fully enjoy the delightful textures and fresh flavors of your strawberry tart, it’s generally best served immediately after assembly. The crispness of the Pâte Sablée and the vibrancy of the fresh strawberries are at their peak. However, if you need to prepare it in advance or have leftovers, proper storage is key.
Once assembled, the strawberry tart should be stored in the refrigerator and is best consumed within two days. Beyond this timeframe, the crust may start to soften, and the strawberries might release more moisture, affecting the overall texture.
For convenience, both the Shortcrust Pastry and the Pastry Cream can be prepared ahead of time and stored separately, then assembled on the day you plan to serve. This is often the best strategy for entertaining or if you’re looking to minimize last-minute work.
- Pastry Storage: The unbaked Pâte Sablée dough can be wrapped tightly in plastic wrap and kept in the fridge for up to 2-3 days. Alternatively, a fully baked tart shell can be stored at room temperature for up to 24 hours in an airtight container once completely cooled.
- Pastry Cream Storage: The Vanilla Pastry Cream can be made up to two days in advance. Once cooled, store it in an airtight container in the refrigerator, with plastic wrap pressed directly onto its surface to prevent a skin from forming.
While you can freeze the individual components, I generally do not recommend freezing the finished strawberry custard tart. Freezing and thawing can significantly alter the texture of both the custard (which may become grainy) and the strawberries (which can become mushy and release too much water), leading to a less enjoyable dessert. However, the pastry dough itself can be frozen for up to 3 months. For optimal texture upon baking, it’s preferably frozen unbaked. Wrap it tightly in plastic wrap and then foil to prevent freezer burn.
Frequently Asked Questions About This Tart
Absolutely! While I find immense satisfaction in making my own Pâte Sablée, using a high-quality store-bought or frozen tart crust is a convenient shortcut that won’t compromise the deliciousness of your tart too much. Just ensure it’s blind-baked according to package instructions or until golden brown. If you’re looking for an alternative homemade crust with an even crisper bite, consider my Pâte Sucrée (Sweet Shortcrust Pastry) recipe; it offers a slightly different, delightful texture.
Yes, you certainly can! The provided quantities for the shortcrust pastry are generous enough to accommodate a slightly larger and/or deeper tart pan than the 25cm (10-inch) tart ring I use. While a perforated tart ring is excellent for achieving an exceptionally crisp and evenly baked crust all around, it is by no means mandatory. A standard tart pan with a removable bottom will work perfectly well for this recipe, delivering a fantastic result.
Once fully assembled, this strawberry tart is at its prime when served immediately, though it will still be delicious for up to two days when stored in the fridge. For optimal freshness and texture, especially if preparing for an event, I highly recommend making the individual components – the pastry crust and the vanilla pastry cream – in advance. You can then assemble the tart just a few hours before serving. Refer to the “Storing & Freezing” section above for detailed guidance on how to best prepare and store each element for maximum convenience and quality.
Explore More Delightful Tart Recipes
If you’ve enjoyed crafting this classic French Strawberry Custard Tart, you’re in for a treat! The world of tarts is incredibly diverse and offers a wide array of flavors and textures to explore. Here are some more fantastic tart recipes from my kitchen that I’m sure you’ll love. Each one offers a unique baking adventure and a delicious reward:
- French Chocolate Ganache Tart: A decadent, rich chocolate experience.
- Orange Cream Tart: Bright, zesty, and refreshingly creamy.
- Parisian Flan: A simple yet elegant baked custard tart.
- Lemon Curd Tart with Meringue: Tangy lemon with a sweet, fluffy meringue topping.
- Peach Tarte Tatin: A stunning caramelized upside-down peach tart.
- Chocolate Raspberry Tart: A perfect blend of rich chocolate and tart raspberries.
- Pear Frangipane Tart: Tender pears baked over a rich almond cream.
- Raspberry Tart: Simple, elegant, and bursting with fresh berry flavor.
- Passion Fruit Tart: An exotic and tangy delight.
I am so excited to share that my debut cookbook
“Bite-Sized French Pastries for the Beginner Baker”
is now available for purchase!
Recipe Card: French Strawberry Custard Tart

French Strawberry Custard Tart
Print Recipe
Ingredients
Shortcrust Pastry (Pâte Sablée)
- 250 gr (1 2/3 cups) Plain / AP Flour
- 50 gr (1/2 cup) Icing Sugar
- 1 pinch Salt
- 120 gr (1/2 cup) Unsalted Butter, very cold
- 1 Egg, at room temperature
Vanilla Pastry Cream
- 3 Egg Yolks
- 30 gr (2 1/2 tablesp.) Caster Sugar, or fine white granulated sugar
- 30 gr (1/4 cup) Cornstarch
- 375 ml (1 1/2 cup) Full Cream Milk, (whole milk)
- 1 1/2 teasp. Vanilla Paste
Garnish
- 500 gr (1 lbs) Fresh Strawberries
- Fresh Mint, to taste, optional
Instructions
Shortcrust Pastry (Pâte Sablée)
- Mix the Flour, Icing Sugar and Salt in the bowl of your Food Processor. Add the very cold Butter cut into small cubes, then pulse to blend until you get very thin crumbs (see note 1).
- Add the Egg and pulse until you a dough starts to come together (see note 2).
- Bring together into a ball and place between two sheets of baking paper. Roll into a large thin circle about 4 mm (1/8 inch) thick. Place in the fridge to rest and chill for at least one hour, or up to 24 hours.
- Line your Tart Ring (or pan) with the chilled Pastry, making sure to gently press where the bottom meets the edges to create a 45′ angle (see note 3). Remove any excess pastry with a small pairing knife then dock the bottom of the pastry (poke with a fork). Place back in the frige to rest and chill for at least one hour (or up to 24 hours).
- Preheat your oven on 160’C/325’F and place the pastry in the freezer in the meantime. Blind-bake for 30 to 40 minutes or until golden and fully baked (see note 4). Set aside to cool down.
Vanilla Pastry Cream
- In a small mixing bowl, whisk together the Egg Yolks and Sugar, then add the Cornstarch.
- Heat up the Milk and Vanilla in a small Pot. When it starts to simmer, pour it over the Yolks/Sugar while whisking to temper the eggs, then transfer it all back into the pot.
- Cook for a few minutes on low heat or until the cream starts to thicken while continously whisking. When the cream starts to boil, whisk for an additional 30 seconds then remove from the stove.
- Transfer into a clean bowl or shallow pan (see note 5), cover with plastic wrap touching the surface of the cream and place in the fridge to cool down for about 2 hours, or until completely cool.
Assembling the Tart
- Wash the Strawberries, cut out the top/leaves then slice them in half (see note 6).
- Spread the Pastry Cream over the baked tart crust using a small offset spatula (see note 7).
- Place the strawberry halves over the cream, starting from the edges of the tart then creating rings of strawberries towards the centre. Gently press the strawberries inside the cream to make them stick.
- Optional: finish with a few mint leaves or some icing sugar.
Video Tutorial: How to Make Perfect Pastry Cream
Would you like to save this recipe?
We’ll email this post to you, so you can come back to it later!
Notes
Yield: This recipe is designed to fill a 25 cm (10-inch) wide by 2 cm (0.75-inch) deep Tart Ring. However, the quantity of Pâte Sablée dough is flexible enough to accommodate a slightly larger or deeper tart pan if that’s what you have on hand.
Instruction Notes:
- Making Pastry by Hand: If you prefer not to use a food processor, this tart pastry can be easily made by hand. For step-by-step instructions on the traditional hand-mixing method, please refer to my detailed Pâte Sablée recipe.
- Avoiding Over-mixing Dough: When combining the dough, be careful not to over-mix. The dough is sufficiently mixed when the crumbs just begin to stick together when pressed gently in your hand. Over-mixing can develop too much gluten, resulting in a tough crust.
- Handling Stiff Pastry: If your pastry dough feels too hard or starts to crack while you’re lining the tart ring, simply let it sit at room temperature for a couple of minutes. This allows the butter to soften slightly, making the dough more pliable and easier to work with without tearing.
- Sealing the Pastry (Blind-Baking Tip): For an extra layer of protection against a soggy bottom and to achieve a beautiful golden finish, brush the partially blind-baked pastry with a whisked egg yolk or egg white about halfway through the baking time. This creates a seal that helps maintain crispness.
- Speeding Up Cream Cooling: To significantly reduce the cooling time for your pastry cream, transfer it into a shallow pan rather than a deep bowl. The increased surface area will allow the cream to cool down much faster and more uniformly.
- Drying Strawberries: It is essential to thoroughly dry your washed strawberries with paper towels just before you assemble the tart. Excess moisture from the berries can “bleed” into the pastry cream and, more critically, make your perfectly crisp crust soggy, impacting the tart’s texture and shelf life.
- Loosening Chilled Pastry Cream: If your pastry cream is quite stiff after being refrigerated, give it a good whisk for a few seconds before spreading it into the crust. This will loosen it up, making it smooth, creamy, and easy to spread evenly.
Nutrition (per serving)
Made this recipe?
Let us know if you liked it by leaving a comment below, and tag us on Instagram @a.baking.journey with a photo of your creation!
