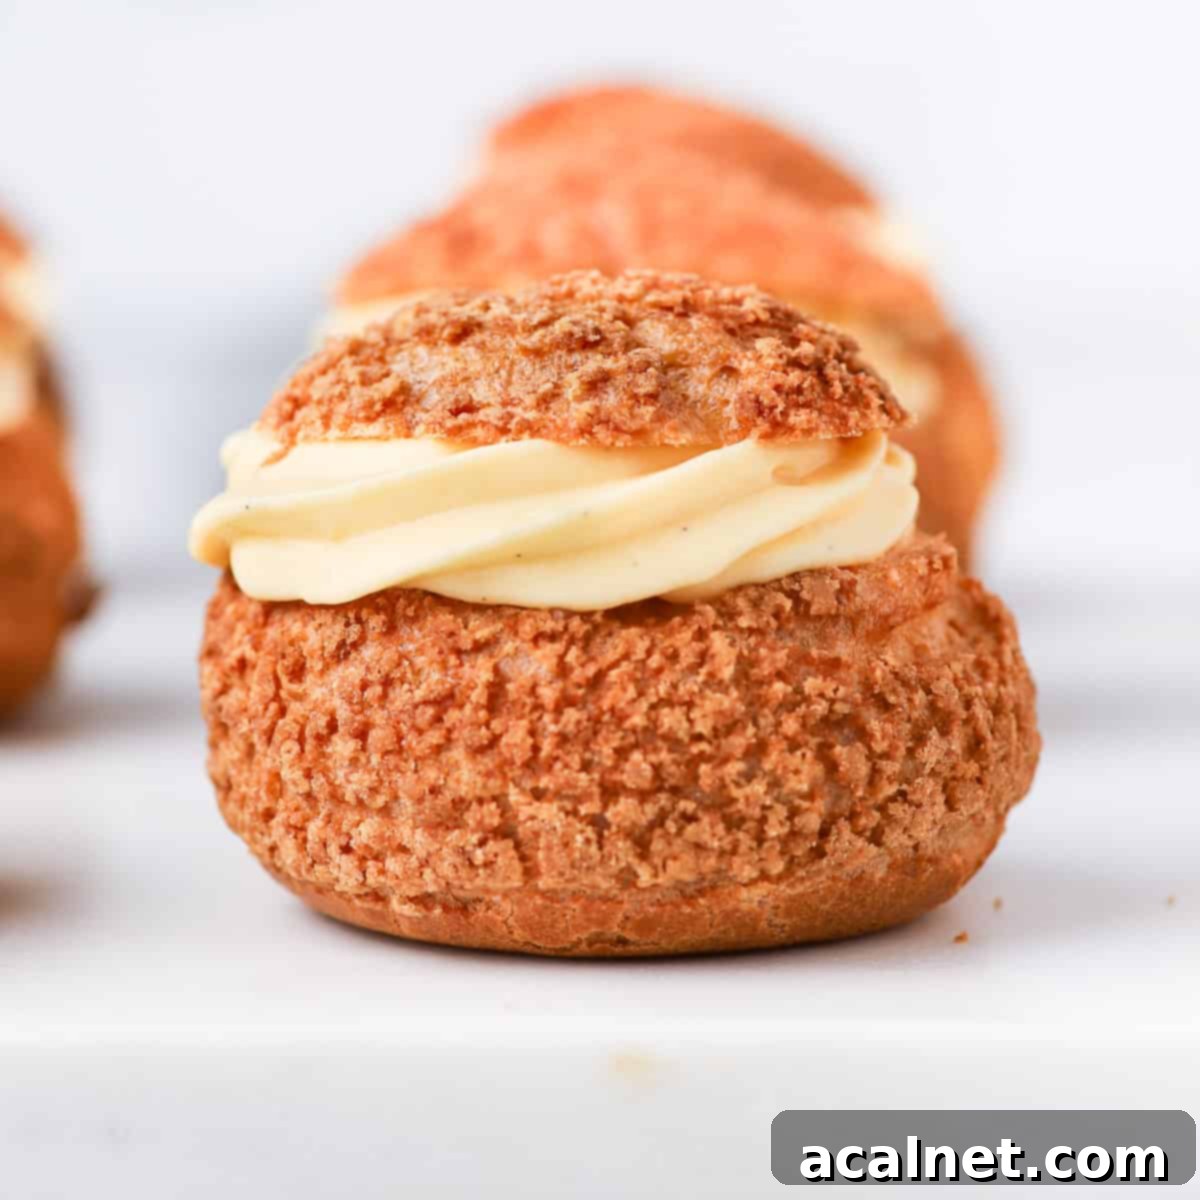
Homemade Choux au Craquelin: The Ultimate Recipe for Crispy Cream Puffs
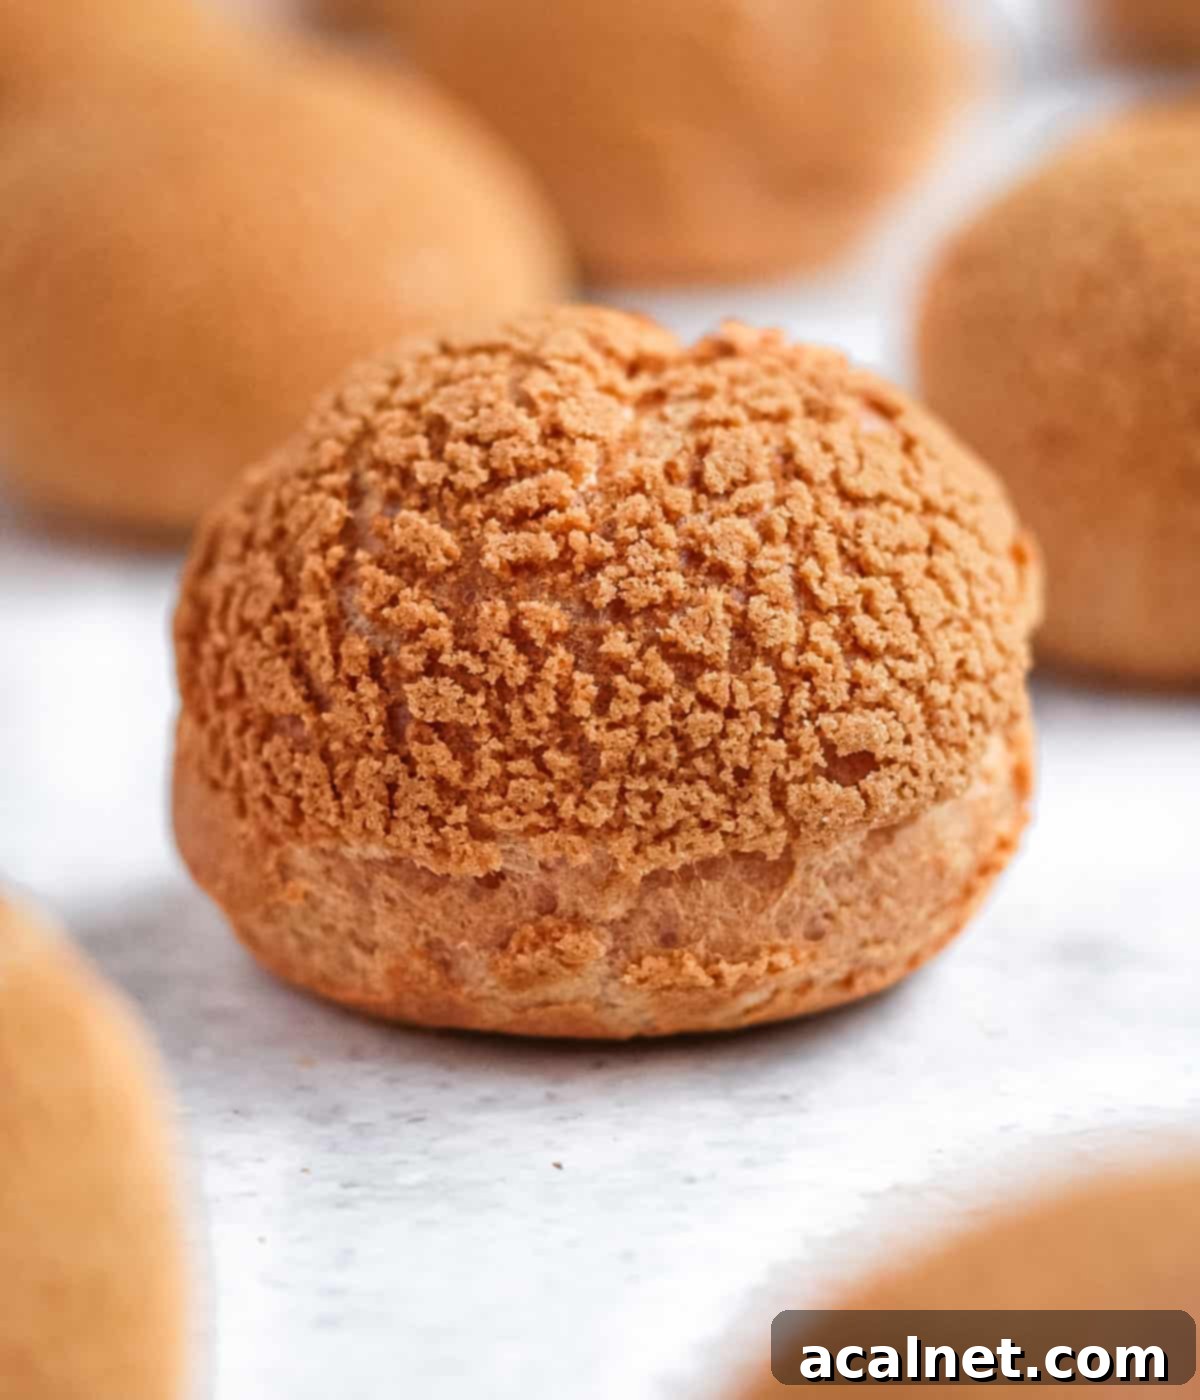
These exquisite Classic French Choux au Craquelin, also known as Crispy Cream Puffs, are more than just a dessert; they are delightful bites perfect for elegant afternoon teas or festive parties. The star of this recipe is the crunchy Craquelin cookie topping, which not only provides a satisfying texture but also helps these beloved choux buns bake into their iconic, perfectly round shape.
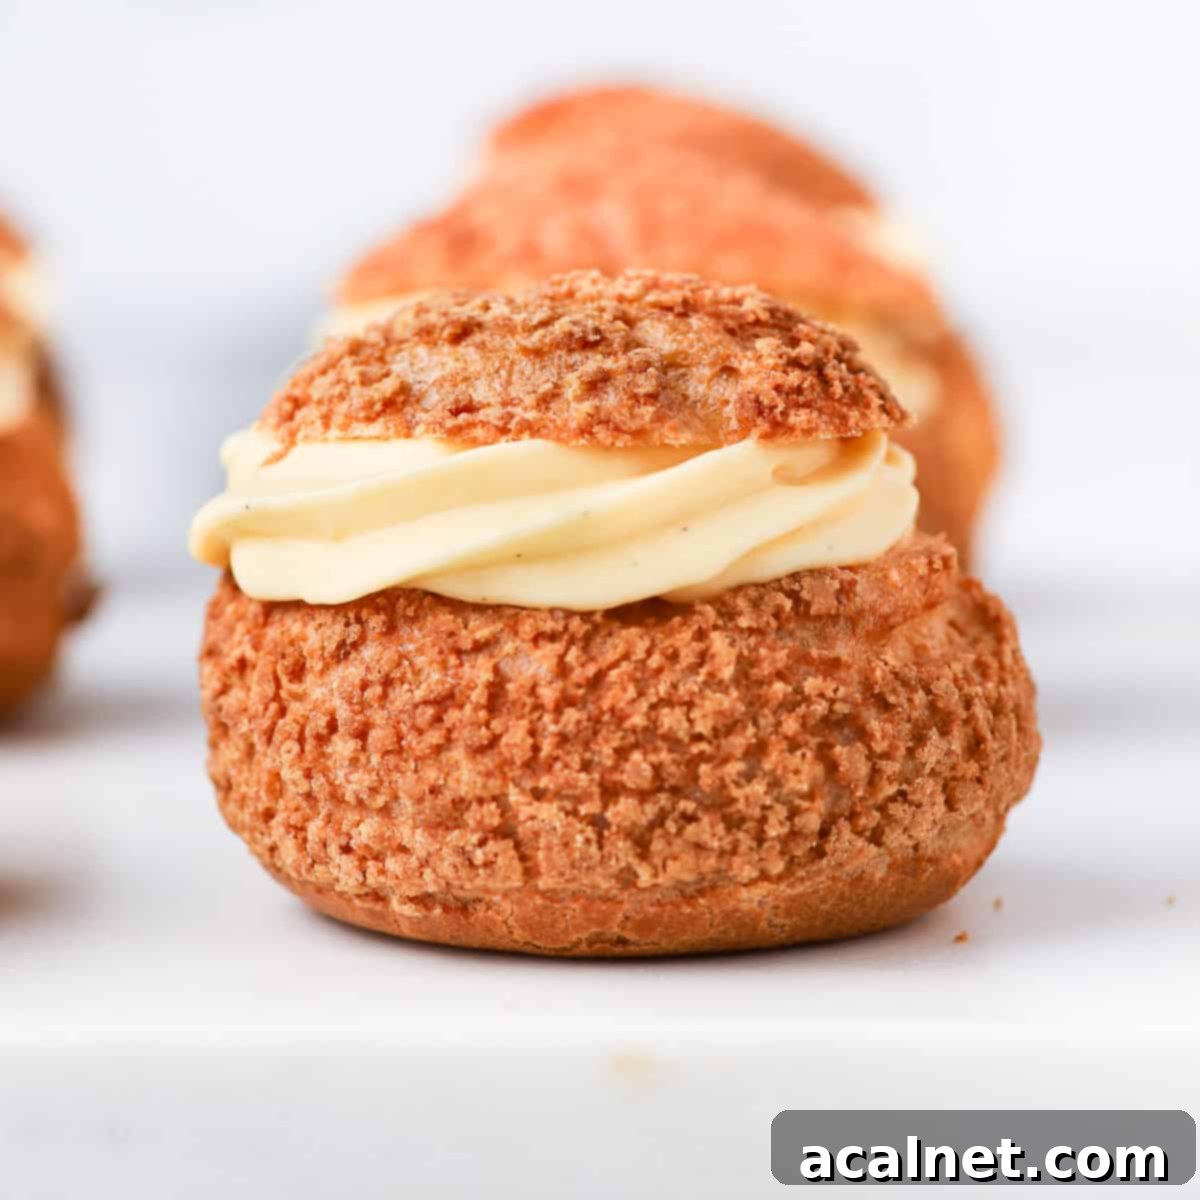
Why You’ll Adore This Choux au Craquelin Recipe
Choux Pastry holds a special place in the world of baking, and it’s certainly one of my favorite foundations to work with. Whether it’s the simple elegance of a classic Choux à la Crème, the sugary delight of Chouquettes, rich Chocolate Choux Buns, delicate Mini Chocolate Éclairs, or classic Profiteroles – anything made with choux pastry is a treat. However, what truly elevates a choux bun from delightful to extraordinary is the addition of a crispy Craquelin cookie topping!
This thin, sweet layer of crackling cookie dough, placed atop your choux pastries before baking, serves a dual purpose. Firstly, it beautifully assists the choux in baking into a perfectly round and uniform shape, preventing any irregular cracks or deflations. Secondly, and perhaps most importantly, it imparts an utterly delicious sweet and crunchy texture, creating a delightful contrast with the light, airy interior of the choux.
This comprehensive Choux au Craquelin recipe will guide you through every step, showing you precisely how to create these impressive crispy cream puffs. With detailed instructions, essential tips, and a focus on achieving the best texture and appearance, you’ll be baking like a French patissier in no time!
What Exactly is Craquelin?
A “Craquelin” (pronounced “Kra-ke-lan” in French) is a delicate, thin cookie layer that is cut into small disks and placed directly on top of choux pastry before it goes into the oven. Its primary function is to form a sweet, crisp shell over the choux pastries, enhancing both their visual appeal and their textural complexity. This signature topping provides a satisfying crunch that complements the soft, hollow interior of the choux.
The name “Craquelin” itself offers a clue to its characteristic appearance. It originates from the French verb “Craquer” (or “craqueler“), which means “to crack.” This perfectly describes the distinctive “cracked” pattern that emerges as the choux pastry expands during baking, causing the thin craquelin layer to break apart beautifully.
The craquelin dough is easily recognizable by its appealing cracked surface, which transforms a simple cream puff into a more sophisticated dessert. While typically left plain to bake to a golden-brown hue, craquelin can also be naturally colored and flavored with various ingredients to match your desired choux creation.
Essential Craquelin Ingredients
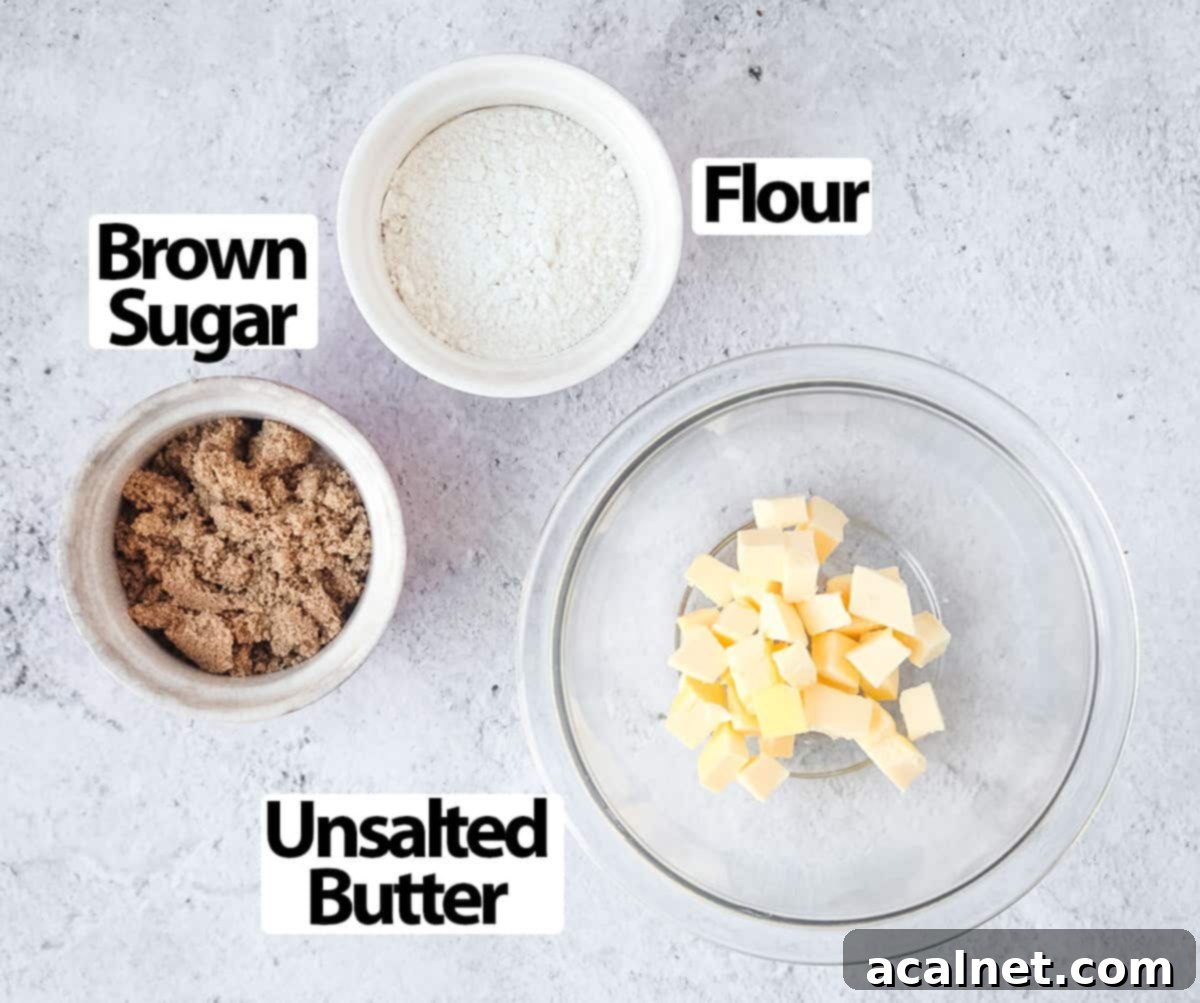
The beauty of craquelin lies in its simplicity. It requires only three fundamental ingredients:
- Unsalted Butter: This should be very soft and at room temperature. It’s crucial for the butter to be pliable enough to mix smoothly with the sugar and flour, forming a consistent dough. Remember to take it out of the fridge a few hours before you plan to make the craquelin.
- Brown Sugar: While traditional craquelin can use raw sugar or thick granulated brown sugar, brown sugar is my preferred choice for its subtle caramel notes and how it contributes to a rich, golden-brown finish.
- All-Purpose Flour: Also known as plain flour, it should be sifted to ensure a lump-free dough. A small pinch of salt can also be added to balance the sweetness, though it’s optional.
While these three ingredients form the basic plain craquelin, you have endless possibilities to customize it. You can easily adapt the flavor and color to complement your choux pastry and filling.
For instance, try replacing a small portion of the flour with unsweetened cocoa powder for a chocolate craquelin, perfect for chocolate cream puffs. You can also infuse it with delightful fruity flavors by adding freeze-dried fruit powders like raspberry or strawberry. For a more sophisticated twist, consider fine coffee powder, vibrant matcha powder, or even aromatic citrus zests from oranges and lemons. These additions allow you to create a truly unique choux experience.
Essential Choux Pastry Ingredients
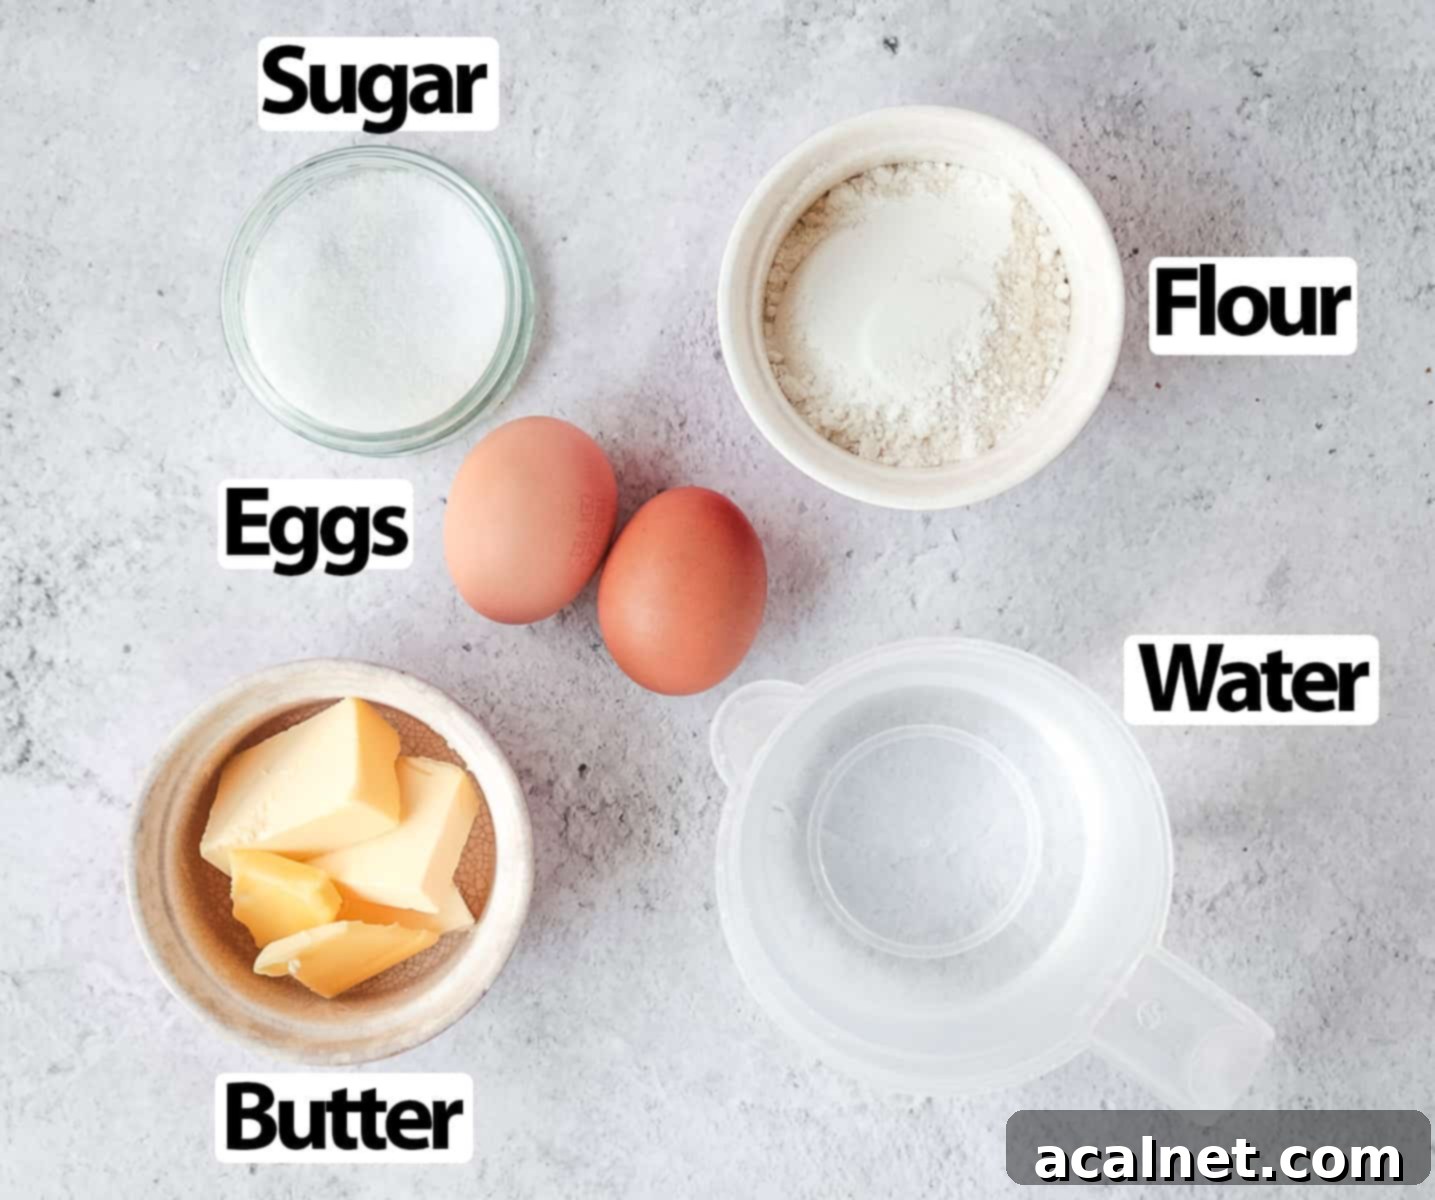
Choux pastry, or pâte à choux, is a fundamental French dough known for its ability to puff up and create a hollow center, ideal for fillings. Here’s what you’ll need:
- Liquid (Water or Milk): I personally prefer using only water for choux pastry as it results in incredibly light and airy puffs. However, you can also use full cream/whole milk, or a 50/50 combination of water and milk. Milk tends to give a slightly richer flavor and a softer crust.
- Sugar & Salt: Only a small amount of both is typically used. Choux pastry itself isn’t meant to be overly sweet; the sweetness largely comes from the craquelin and the filling. The salt enhances the overall flavor.
- Unsalted Butter: Since the butter will be melted almost immediately, it can be used straight from the fridge.
- Plain / All-Purpose Flour: Alternatively, you can use pastry flour. It’s crucial to sift the flour before incorporating it into the mixture to prevent any lumps, ensuring a smooth and even dough.
- Eggs: Medium to large eggs are required, and they should be at room temperature. Cold eggs can seize the butter in the mixture, affecting the final texture.
It’s important to note that the exact quantity of eggs can vary slightly. Factors such as how much the dough was dehydrated on the stove, the specific brand of flour used, and even the size of your eggs can influence how much liquid the dough absorbs. Always gauge the consistency rather than strictly adhering to a set number of eggs.
Step-by-Step Guide: How to Make Choux au Craquelin
1. Preparing the Craquelin Pastry
We begin by preparing the craquelin dough, which requires chilling in the freezer for at least 30 minutes to an hour until it becomes firm and solid. This firmness is essential for clean cuts and easy handling.
- In a small mixing bowl, place the very soft, room-temperature butter. Add the brown sugar and mix them together thoroughly with a stiff spatula until well combined and smooth.
- Next, add the sifted all-purpose flour. Continue to work the mixture vigorously with your spatula until it forms a thick, slightly soft, and homogeneous paste.
- Transfer the craquelin mixture between two sheets of baking paper (parchment paper) or onto a silicone mat with a sheet of baking paper on top. Using a rolling pin, carefully roll the pastry into a very thin, even layer, approximately 2mm (1/16-inch) thick. Consistency in thickness is key for even cracking.
- Place the rolled craquelin, still between the baking paper, onto a flat baking sheet. Freeze it for a minimum of 30 minutes to 1 hour, or until it has completely solidified. This step is critical for successful cutting.
A great advantage of craquelin is that it can be prepared well in advance. You can store the rolled and frozen craquelin dough in the freezer for several months, making it perfect for quick assembly whenever a choux craving strikes!
2. Crafting the Choux Pastry “Panade”
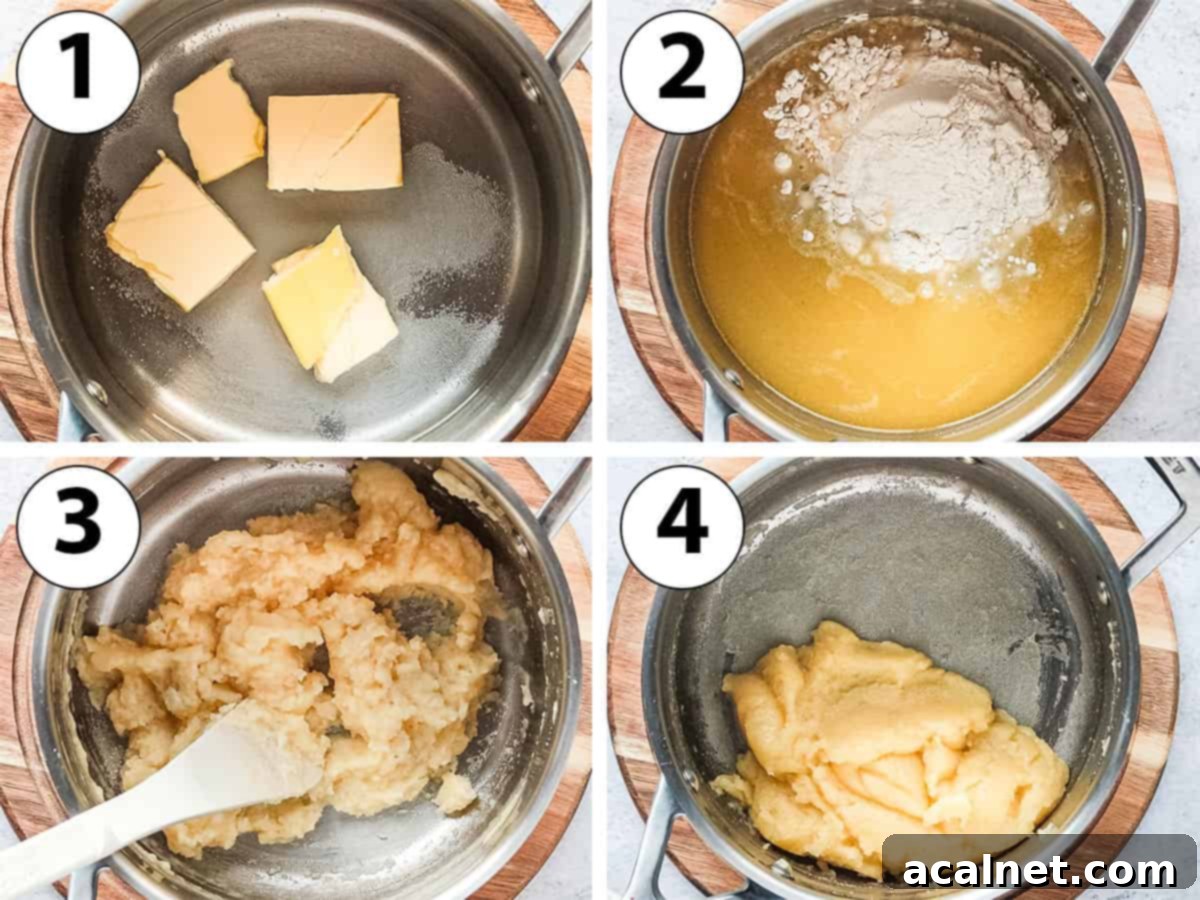
This choux pastry recipe is a reliable foundation, yielding about 15 to 20 choux buns, depending on your preferred size. It can easily be doubled if you’re baking for a larger crowd.
The initial stage of making choux pastry involves preparing a cooked mixture known as a “panade” directly on the stovetop. This step is crucial for developing the dough’s structure.
- Photo 1: Combine the water, sugar, and unsalted butter in a small to medium saucepan. Place it over low to medium-low heat. Allow the mixture to warm until the butter has completely melted and the liquid begins to simmer gently around the edges.
- Photo 2: Immediately remove the saucepan from the heat. Add all of the sifted flour into the liquid mixture at once.
- Photo 3: Using a stiff, heat-proof spatula or a sturdy wooden spoon, vigorously stir the mixture. Continue stirring until the flour is fully incorporated and the mixture transforms into a thick, cohesive paste, pulling away from the sides of the pan.
- Photo 4: Return the saucepan to the stove over low heat. Continue to stir and cook the dough vigorously for another 2 to 3 minutes. This critical step, known as “drying out the panade,” dehydrates the dough. Press the dough against the sides of the pan to maximize moisture evaporation. You’ll notice a thin film or skin forming at the bottom of the pan, indicating it’s sufficiently dried.
Once the dough is homogeneous and has been properly cooked and dried for a few minutes, transfer it immediately to the bowl of a stand mixer fitted with the paddle attachment. If you’re mixing by hand or with a hand mixer, use a large mixing bowl.
3. Incorporating Eggs and Piping the Choux Buns

- Allow the panade to cool down significantly, for at least 10 to 15 minutes. Alternatively, you can mix it with the paddle attachment on low speed (or with a stiff spatula) until it reaches room temperature. Do not skip this cooling step; if the dough is too hot, it will prematurely cook the eggs, ruining the texture.
- In a separate small bowl, lightly whisk your room-temperature eggs.
- Photo 5: With the mixer running on low to medium speed (or mixing by hand), gradually pour a small amount of the whisked egg mixture over the panade.
- Photo 6: Continue mixing until the egg is completely incorporated and the mixture becomes smooth. The dough may appear to separate or “split” at first, but don’t worry—it will come back together as you continue to mix. Add a little more egg and repeat the process.
- When almost all of the whisked egg has been added, pause to check the consistency of the dough. The ideal choux dough should be smooth, slightly fluid, and possess a distinct sheen. When you lift some with a spatula, it should slowly fall back into the bowl, forming an elegant “V” shape or a “beak.”
It’s crucial to understand that the quantity of eggs is flexible. You might need slightly less than two eggs or even a bit more, depending on various factors mentioned earlier. The key is to stop adding eggs as soon as you achieve the desired consistency, rather than relying solely on the exact number specified in the recipe. This careful addition ensures perfect choux.
If you’re preparing the choux pastry in advance, you can store it in the fridge for a few hours. Place it in a bowl, covered tightly with plastic wrap directly touching its surface, or in an airtight container to prevent a skin from forming.
- Preheat your oven to 200 degrees Celsius (390 degrees Fahrenheit).
- Transfer the prepared choux pastry into a piping bag fitted with a large round piping tip.
- Prepare a flat baking tray, either greased, lined with a silicone baking mat, or baking paper. For optimal results, a plain metal baking sheet is often recommended to ensure even baking and proper puffing.
- Photo 7: Pipe small, uniform dollops of pastry onto the prepared tray. Aim for approximately 4 cm (1.5 inches) wide, holding the piping bag perpendicular to the tray, a few centimeters away. Be sure to leave ample space between each choux, as they will expand significantly during baking. You might need a second baking tray.
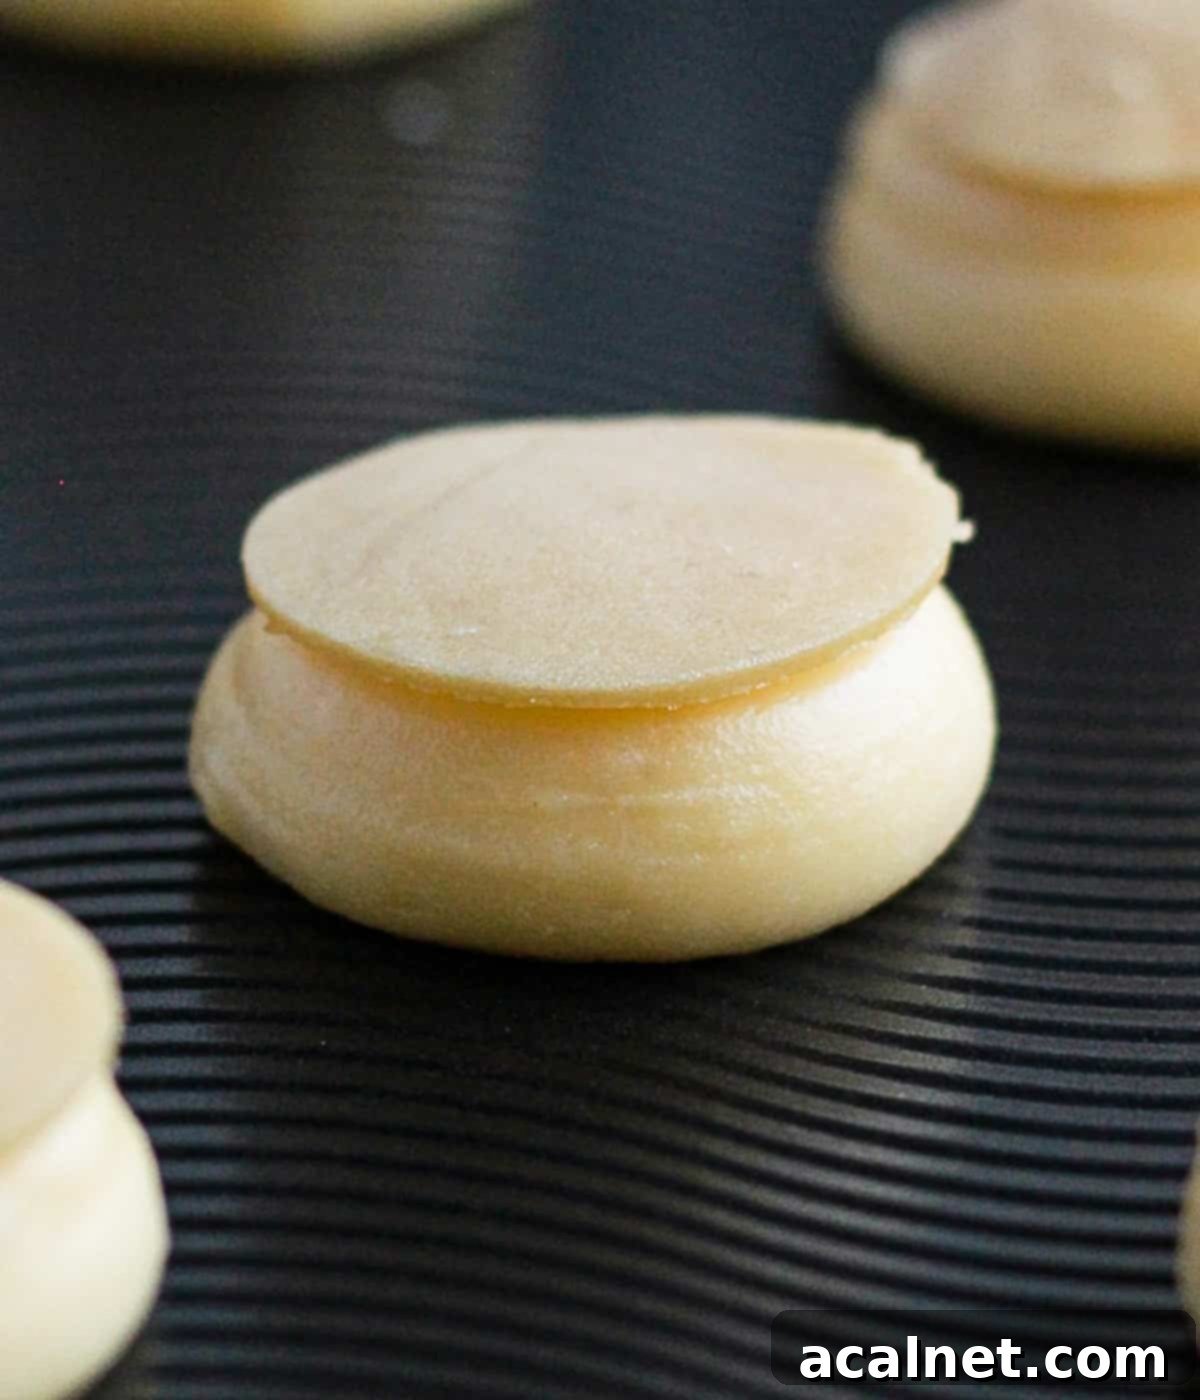
- Retrieve the hardened craquelin pastry from the freezer. Carefully peel off the top layer of baking paper. Using a round cookie cutter that is slightly larger than your piped choux buns (if you want full coverage), cut out individual craquelin disks.
- Photo 8: Gently pick up each craquelin disk with a small offset spatula (to avoid softening it with your warm fingers) and carefully place it centered over each piped choux bun. Press down very lightly to ensure it adheres. If the craquelin begins to soften and becomes difficult to handle or starts to break, simply place it back in the freezer for a few minutes to firm up again.
4. Baking Your Choux au Craquelin to Perfection
- Place the baking tray with the prepared choux au craquelin into the preheated oven. Immediately reduce the oven temperature to 180 degrees Celsius (350 degrees Fahrenheit).
- Bake for approximately 25 minutes. The exact baking time may vary depending on the size of your choux. After 25 minutes, quickly open the oven door for just one second to release some steam, then close it immediately. Continue baking for an additional 5 to 10 minutes, or until the choux have significantly risen, puffed up beautifully, and the craquelin topping is a rich golden brown and feels dry and crisp to the touch.
- Once baked, transfer the choux au craquelin, still on their baking paper, to a wire rack. Allow them to cool down completely before attempting to remove them from the tray or fill them. This cooling period is essential for them to fully set and maintain their crispness.
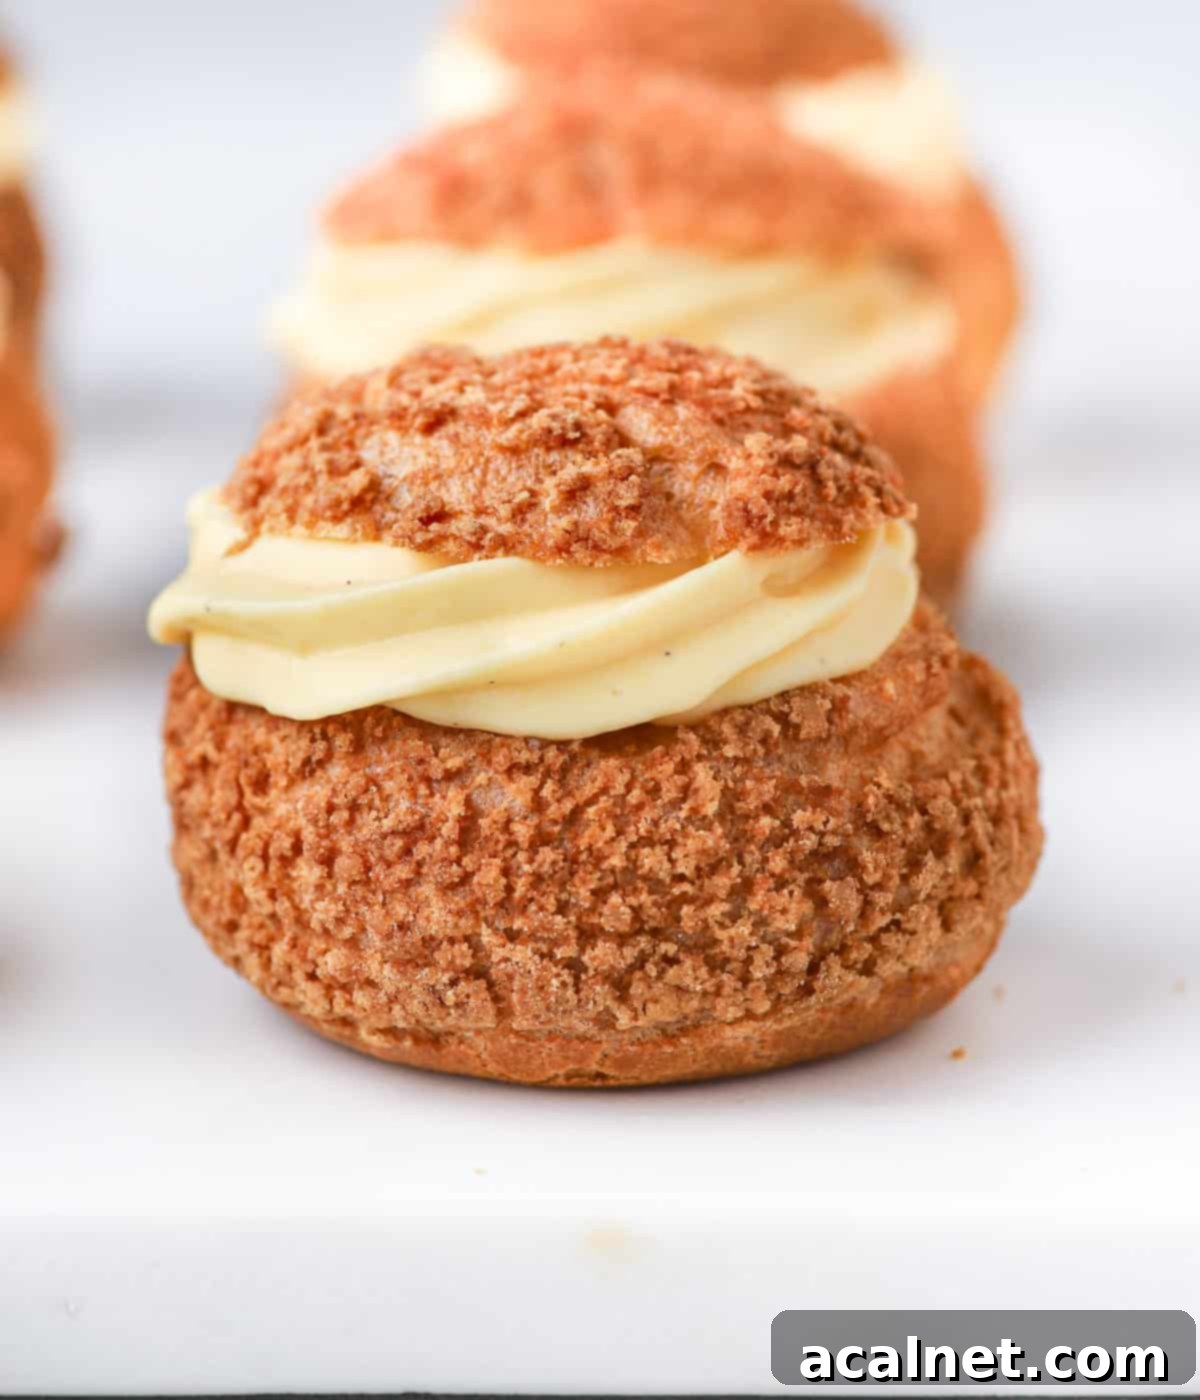
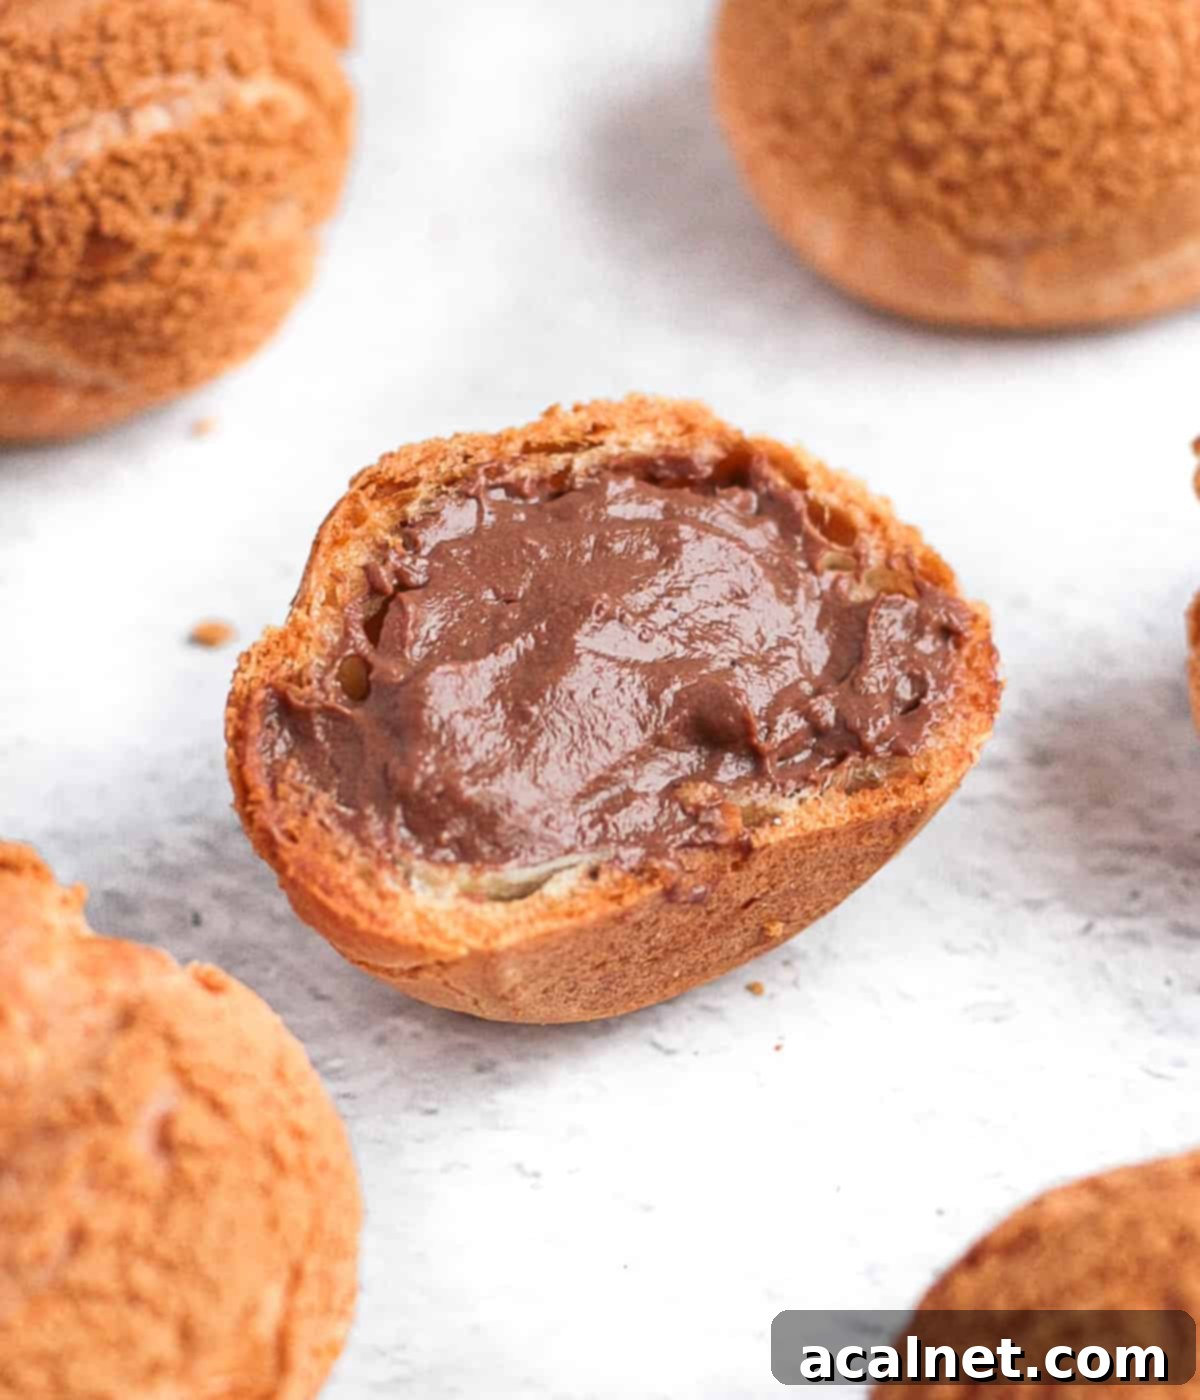
- To fill your cooled choux au craquelin, you have two main options: either poke a small hole in the bottom of each bun with a sharp knife and insert the tip of a pastry bag filled with your chosen cream, or simply slice the choux in half horizontally and spoon in the filling.
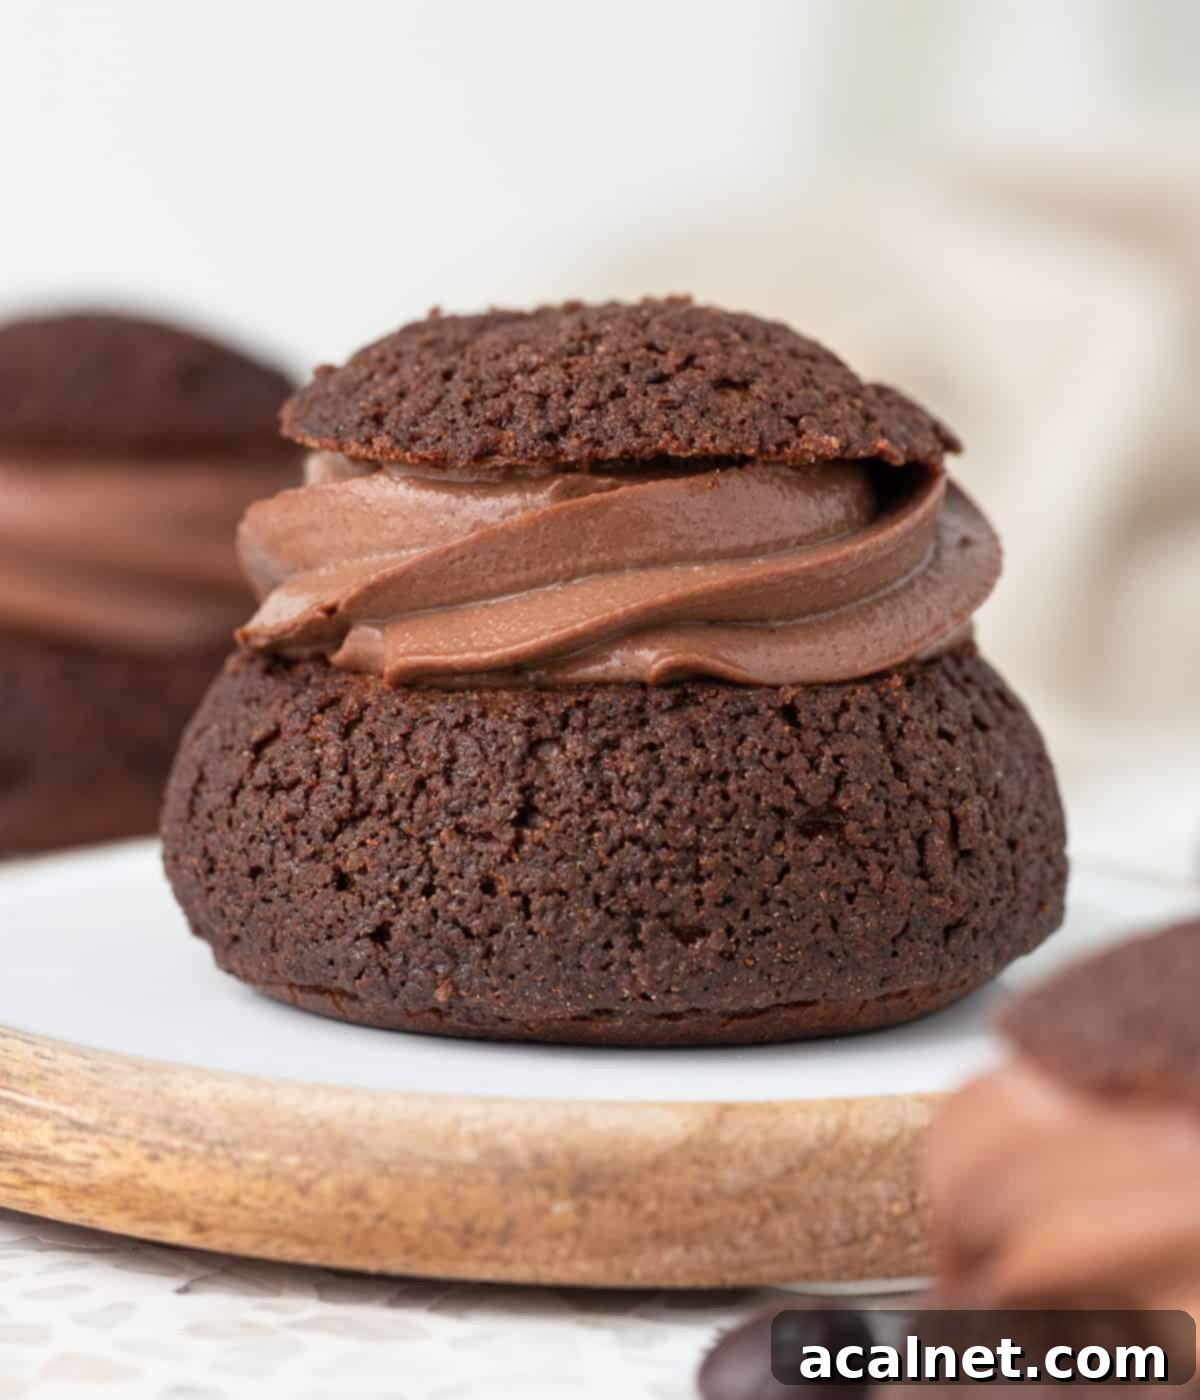
I often opt for a classic vanilla pastry cream filling or a decadent chocolate cream filling, but the choice is entirely yours!
Recipe FAQs: Your Choux au Craquelin Questions Answered
The fundamental difference lies in the addition of the craquelin layer. Regular cream puffs (choux buns) are simply made from choux pastry. Choux au craquelin features a thin, sweet cookie layer – the “craquelin” – placed on top of the choux pastry before baking. This craquelin provides an extra layer of sweetness, a delightful crunch, and helps the choux pastry maintain a perfect, round shape during baking.
Absolutely! While often left plain, craquelin is incredibly versatile for flavoring. You can incorporate a few drops of vanilla extract for a classic touch. For chocolate lovers, replace a small portion of the flour with cocoa powder to create Chocolate Choux Buns. Coffee enthusiasts can add fine coffee powder for Coffee Choux Buns. Matcha powder offers an earthy, vibrant green option, and freeze-dried fruit powders like strawberry or raspberry powder can add a beautiful color and natural fruit flavor.
Yes, craquelin is not limited to just round cream puffs! It can be applied to almost any type of choux pastry, transforming them with its crispy topping. This includes Éclairs, Paris-Brest, or Profiteroles. Simply cut the craquelin pastry to match the desired shape of your choux, whether it’s long strips for éclairs or rings for a Paris-Brest.
Using the correct amount of eggs is paramount for achieving the perfect choux pastry consistency. Too little egg will result in a dry dough that won’t puff up well, leading to dense choux. Conversely, too much egg will make the batter overly runny, causing the choux to collapse and become flat. To ensure the ideal consistency, add the whisked eggs gradually, a little at a time, mixing thoroughly after each addition. Stop as soon as the dough forms a “V” shape when lifted with a spatula – this is the visual cue for perfection, regardless of the precise number of eggs used in the recipe.
Troubleshooting and Expert Tips for Success
Tips for Perfect Craquelin
How large should I cut the Craquelin disks?
The size of your craquelin disks depends on your desired coverage. For a craquelin that partially covers the choux, aiming for a rustic, cracked edge look, cut the disks to be roughly the same size as your piped choux, or even slightly smaller. If you prefer the craquelin to entirely encase the choux for a more uniform, fully covered appearance, then the craquelin disks should be cut slightly wider than the piped choux buns.
Why is my Craquelin becoming soft?
Because craquelin dough is rolled very thinly and has a high butter content, it will soften quickly, especially when handled or in a warm kitchen. If you find the craquelin becoming too soft to work with, simply place it back into the freezer for a few minutes to re-harden. You may need to repeat this process several times if you are working in a warm environment, or if you’re making a large batch.
What if the Craquelin starts breaking?
Craquelin can break if it’s either too cold (brittle), too warm (soft), or if it was rolled too thinly in the first place. If it breaks slightly, you can often patch it up by gently pressing the pieces together with the warmth of your fingers. If it’s breaking significantly, it’s best to gather the dough, re-roll it to the correct thickness (about 2mm), and then freeze it again until firm before cutting.
What can I do with leftover craquelin dough?
One of the fantastic benefits of craquelin is its freezer-friendliness! Any leftover dough can be re-rolled between two sheets of baking paper, wrapped tightly, and stored in the freezer for months. This means you’ll always have some on hand for your next batch of choux, minimizing waste and saving prep time.
Why did my craquelin not crack as expected?
The cracking effect is directly related to the thickness of the craquelin. If the pastry was rolled too thinly, you might end up with large, irregular cracks, or it might disappear into the choux. If it was rolled too thick, it may form a thick, flat layer without the characteristic delicate cracks. For the ideal crackled look, aim for a consistent thickness of about 2mm (1/16-inch).
Why is my craquelin not crunchy?
A lack of crunchiness can stem from several issues. It might be due to an incorrect ratio of ingredients in the craquelin dough itself, which could alter its texture. Another common reason is if the butter in the craquelin was too soft when placed in the oven, causing it to melt too quickly rather than crisp up. Finally, if the oven temperature wasn’t warm enough or the baking time was insufficient, the craquelin might not have had the chance to fully crisp and brown.
Tips for Perfect Pâte à Choux
Why is choux pastry cooked twice?
This “double cooking” method is a unique characteristic of pâte à choux. It’s first cooked on the stovetop to create the “panade,” which serves to thoroughly dehydrate the dough and gelatinize the starches within the flour. This gelatinization is crucial; it helps build the strong gluten structure necessary to trap steam, which then generates the remarkable “puff” and hollow interior during the second cooking phase in the hot oven.
What is the ideal consistency for Pâte à Choux?
As mentioned, the quantity of eggs is highly variable, making the visual consistency check absolutely vital. The perfect choux dough should be smooth, shiny, and fall back slowly into a “V” or “beak” shape when lifted with a spatula. A common test involves poking a finger into the dough and lifting it; a small amount should stick. When you turn your finger upside down, the dough should slowly fall back into an inverted ‘C’ shape. If it stands stiff without falling, more egg is needed. If it’s too liquid and collapses completely, unfortunately, too much egg has been added, and the dough cannot be salvaged. Always add eggs gradually, ensuring the right balance.
Why did my choux au craquelin not rise?
Several factors can contribute to choux not rising properly: the dough might not have been sufficiently dehydrated on the stove, preventing adequate steam production. Insufficient mixing of the eggs could also lead to an underdeveloped structure. Alternatively, you might not have added enough egg, resulting in a too-stiff dough. Finally, an oven that isn’t at the correct temperature (too low) will hinder the initial rapid puff, which is essential for choux expansion.
Why did my Choux collapse or deflate?
This is a common issue and usually indicates that the choux were either not baked for long enough, or the oven temperature was not consistently high enough. The intense heat of the oven causes the water in the dough to turn into steam, creating the puff. However, the choux need to bake long enough for a firm crust to form and stabilize this puffed shape. Opening the oven door too early, before the shells have set, can also cause them to collapse. Ensure you do not open the oven door during the first critical baking phase. Once out of the oven, allow the choux to cool completely on the baking tray; they will continue to firm up and dry out as they cool.
Why are my cream puffs not hollow?
If your “panade” was cooked on the stove for too long, too much water might have evaporated from the dough before it even reached the oven. A certain amount of moisture is essential within the dough to convert into steam and create the characteristic hollow interior of choux pastry. Ensuring the panade is adequately, but not excessively, dried is key.
Why does my choux pastry go soft?
Unfortunately, choux pastry tends to soften relatively quickly due to its thin, delicate shell absorbing moisture from the air. The best way to combat this is to store baked, unfilled choux at room temperature in an airtight container for up to two days. Importantly, only fill them just before you plan to serve them. This will help preserve their crispness for as long as possible.
Recommended Equipment for Choux au Craquelin
- Stiff Spatula or Wooden Spoon: Essential for mixing the panade vigorously on the stove. A hard plastic or sturdy wooden spoon is preferred over a flexible silicone spatula, which might struggle with the thick dough.
- Piping Bag and Round Piping Tip: For consistently shaped choux buns. A large round tip (like an Ateco 808 or Wilton 1A) is ideal. If you don’t have a specific tip, simply cut a clean, round opening at the tip of your piping bag with scissors.
- Baking Sheets: Ideally, unlined metal baking sheets. While silicone baking mats can work, they sometimes lead to uneven baking for choux. Perforated baking mats can promote even baking but can cause the bottom of the choux to stick in the small holes.
- Small Round Cookie Cutter: To cut out your craquelin disks cleanly and uniformly.
- Small Offset Spatula: Invaluable for gently lifting and placing the delicate craquelin disks onto the choux pastry without breaking them or warming them with your fingers.
Inspiring Choux Filling Ideas
When it comes to filling your beautifully baked choux au craquelin, the possibilities are vast and limited only by your imagination!
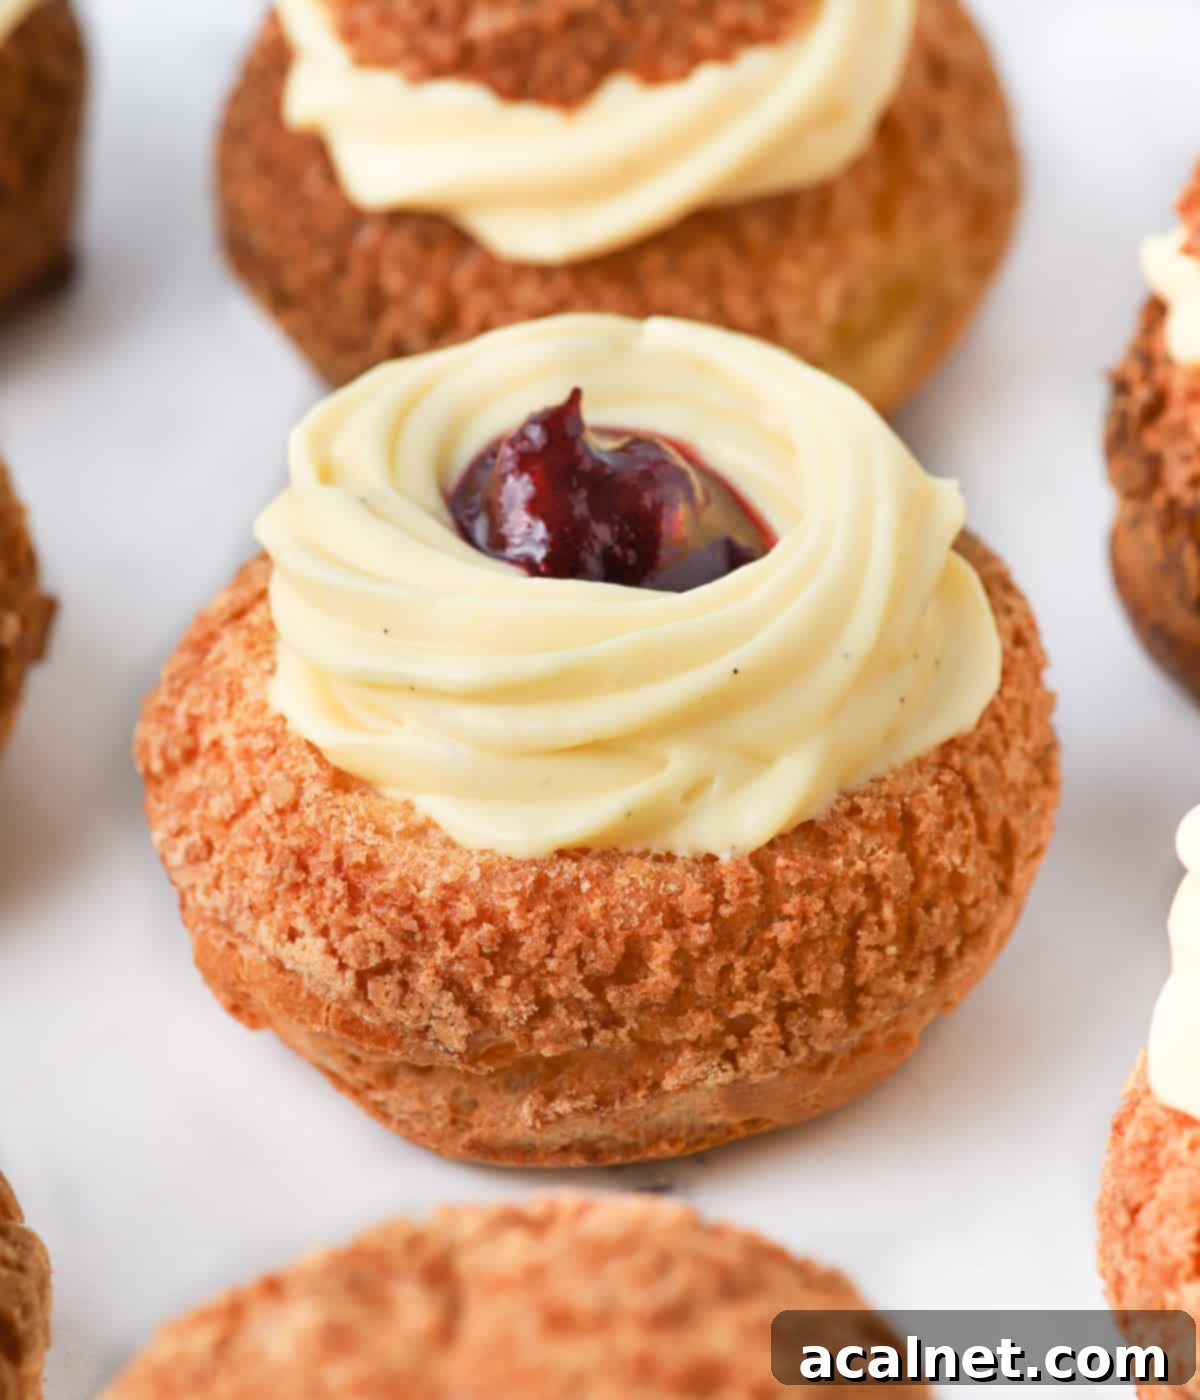
- Classic Vanilla Creams: Opt for a rich Vanilla Bean Pastry Cream (Crème Pâtissière), a lighter Crème Légère (pastry cream mixed with whipped cream), simple Whipped Cream, elegant Diplomat Cream, or a velvety Bavarian Cream.
- Decadent Chocolate Fillings: Indulge with a smooth Chocolate Pastry Cream, a luxurious Chocolate Crémeux, a fluffy Chocolate Whipped Ganache, or a silken Chocolate Namelaka.
- Bright Fruity Fillings: Add a zing with tangy Lemon Curd, sweet Strawberry Compote, or exotic Passion Fruit Curd.
- Rich Nutty Fillings: For a nutty twist, consider a homemade Hazelnut Praline Paste or a pistachio cream.
Storage Guidelines
The best way to store choux au craquelin depends on whether they are filled or not:
- Un-filled Choux au Craquelin: These can be kept at room temperature in an airtight container for up to 2 days. It’s crucial that they are completely dry and cooled before storing, as any residual moisture will make them soggy. For best crispness, I recommend baking them as close to serving time as possible.
- Filled Choux au Craquelin: Once filled with a cream or custard, choux au craquelin are best enjoyed immediately. If you need to store them, keep them in the fridge for no longer than one day. Beyond this, the pastry will inevitably absorb moisture from the filling and lose its crisp texture, becoming soft.
Freezing Instructions
Both the craquelin and choux pastry can be prepared and frozen separately, then assembled and baked when needed. This is a fantastic way to save time for future baking endeavors:
- Craquelin: The rolled craquelin dough can be frozen for up to 2 months (and often longer without significant quality loss). Store it wrapped well in the freezer.
- Unbaked Choux Pastry: Prepare the choux dough as instructed, then pipe the individual buns onto a flat baking tray. Place the tray in the freezer until the piped choux are completely solid. Once frozen, transfer them to an airtight container or freezer bag for up to 3 months.
When you’re ready to bake, take the frozen piped choux directly from the freezer, place them on a baking sheet, and top each with a cut craquelin disk. You’ll need to allow an additional 5 to 10 minutes of baking time for them to thaw and bake properly. It’s generally not recommended to freeze choux au craquelin once they have been baked, as the craquelin topping tends to lose its crisp texture upon thawing.
Explore More French Pastry Recipes
If you loved making Choux au Craquelin, you’ll surely enjoy exploring these other delightful French pastry recipes:
- Pâte Sucrée (Sweet Shortcrust Pastry)
- Basic French Crêpes
- Fraisier Cake with Diplomat Cream
- Strawberry Charlotte Cake
- Strawberry Custard Tartlets
- Triple French Chocolate Tart
- Easy French Apple Tart
- Cannelés de Bordeaux
Made this recipe?
Let us know if you liked it by leaving a comment below, and tag us on Instagram @a.baking.journey with a photo of your creation!
Recipe Card

Choux au Craquelin
Print Recipe
Ingredients
Craquelin Topping
- 40 gr Unsalted Butter, very soft
- 40 gr Brown Sugar
- 40 gr (3 tablespoons) Plain / All-Purpose Flour, sifted
Choux Pastry
- 125 ml Water
- 60 gr Unsalted Butter
- 15 gr Caster Sugar, or fine white granulated sugar
- 75 gr Plain / All-Purpose Flour
- 2 large Eggs, at room temperature (*)
To fill: Chocolate Pastry Cream or Vanilla Pastry Cream
Instructions
Craquelin Topping
- Place the very soft, room temperature butter in a small bowl and mix with a stiff spatula until smooth and free of large lumps.
- Add the brown sugar to the butter and cream them together until the mixture is smooth and well combined.
- Gradually mix in the sifted flour until a smooth, thick paste forms.
- Place the craquelin dough between two sheets of baking paper. Gently flatten by hand, then use a rolling pin to roll it into a thin, even layer, approximately 2mm (1/16-inch) thick (refer to note 1 for thickness guidance).
- Transfer the dough on its baking paper to a flat tray and place in the freezer to chill for at least 30 minutes to 1 hour, or until completely hard.
Choux Pastry
- Preheat your oven to 200 degrees Celsius (390 degrees Fahrenheit).
- In a small pot, combine the water, butter, and caster sugar. Place over medium-low heat until the butter has fully melted and the sugar has dissolved. Bring the mixture to a gentle boil.
- Remove the pot from the heat and immediately add all of the sifted flour at once. Vigorously stir with a stiff spatula until a rough, cohesive dough forms.
- Return the pot to low heat and continue to stir the dough for 2 to 3 minutes, pressing it against the sides of the pan to dehydrate it thoroughly (see note 2). You should see a thin film forming at the bottom of the pan.
- Transfer the dough to the bowl of your stand mixer and allow it to cool for at least 15 minutes, or until it reaches room temperature (see note 3). This prevents the eggs from cooking prematurely.
- In a separate bowl, whisk the eggs lightly. With the mixer on low speed, add the whisked eggs to the dough gradually, a little bit at a time, mixing well until smooth after each addition. When most of the eggs have been added, stop to check the dough’s consistency before adding more (see note 4). The dough should be smooth, shiny, and form a ‘V’ shape when lifted.
- Transfer the prepared choux pastry into a piping bag fitted with a large round piping tip.
- Pipe small, uniform balls of pastry onto a greased or parchment-lined baking tray (see note 5 for size guidelines). Ensure adequate space between each choux, as they will expand considerably during baking.
Assembling and Baking the Craquelin Choux
- Remove the craquelin from the freezer and carefully peel off the top layer of baking paper. Using a round cookie cutter, slightly larger than your piped choux buns, cut out individual craquelin disks.
- With a small offset spatula, gently lift each craquelin disk and carefully place it centered over each piped choux bun. Press lightly to secure it.
- Place the tray of choux into the oven, then immediately drop the oven temperature to 180 degrees Celsius (350 degrees Fahrenheit). Bake for about 25 minutes. Briefly open the oven door for 1 second to release steam, then close it. Continue baking for an additional 5 to 10 minutes, or until the choux are puffed, golden-brown, and dry to the touch.
- Transfer the baked choux au craquelin to a wire rack and allow them to cool down completely before removing them from the tray and filling them with your preferred cream or custard.
Video Tutorial
Would you like to save this recipe?
We’ll email this post to you, so you can come back to it later!
Notes
- Eggs: The exact quantity of eggs can vary based on their size and how much moisture the panade lost. Always add the whisked egg gradually until the dough reaches the perfect consistency (refer to note 4 for a detailed consistency check).
Instruction Notes:
- Craquelin Thickness: It’s important to roll the craquelin dough to an even thickness of about 2mm (1/16 inch). If it’s too thin, it might be difficult to handle and could disappear during baking. If too thick, it might prevent the choux from rising properly and won’t achieve the desired crackled texture.
- Dehydrating the Panade: To effectively dry out the dough, use a stiff spatula to press and rub the dough vigorously against the sides and bottom of the hot pot. This process helps evaporate excess moisture, crucial for the choux to puff correctly.
- Cooling the Dough: Allowing the panade to cool to room temperature (around 15-20 minutes) before adding eggs is essential. If the dough is too hot, it will partially cook the eggs, resulting in a compromised texture. You can speed up cooling by mixing the dough with the paddle/leaf attachment of your mixer on low speed.
- Checking Choux Pastry Consistency: This is a critical step! To determine if you’ve added enough egg, poke a finger into the dough and lift it – a small amount should stick. Turn your finger upside down: the dough should slowly fall back into an inverted ‘C’ shape, or a ‘beak’. If the dough stands stiff without falling back, it needs more egg. If it is too liquid and collapses completely (not forming a ‘beak’), unfortunately, you’ve added too much egg, and the batter cannot be saved.
- Piping Size: My choux buns were piped to be approximately 4 cm (1.5 inches) wide, which resulted in a good individual serving size. Adjust based on your preference for larger or smaller puffs.
Nutrition (per serving)
