Decadent Triple Chocolate Choux Buns: The Ultimate Chocolate Cream Puff Recipe with Craquelin
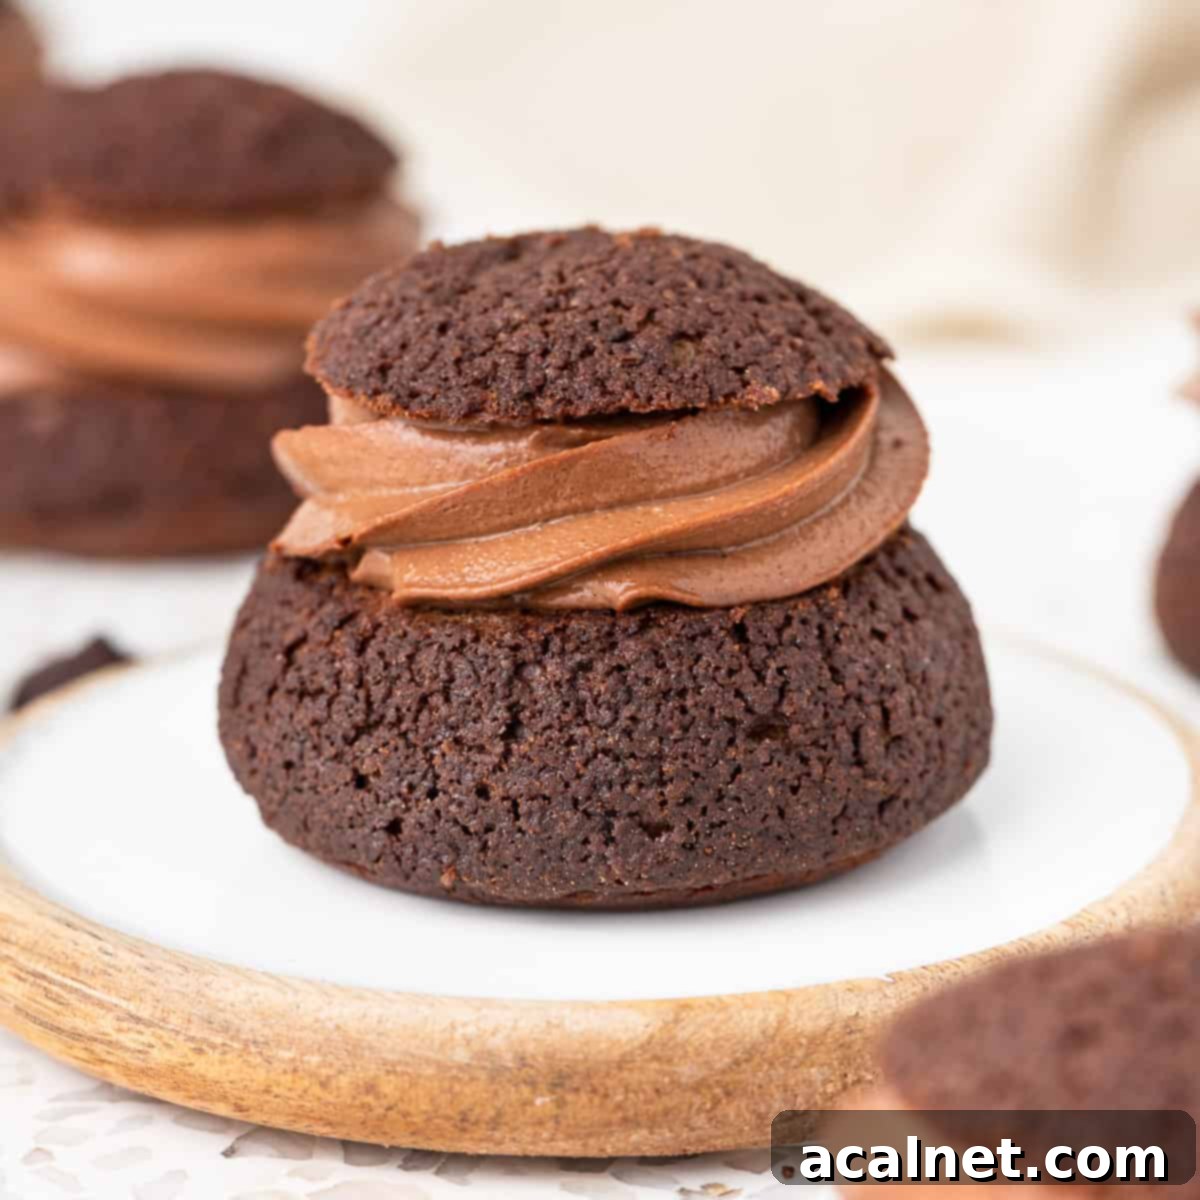
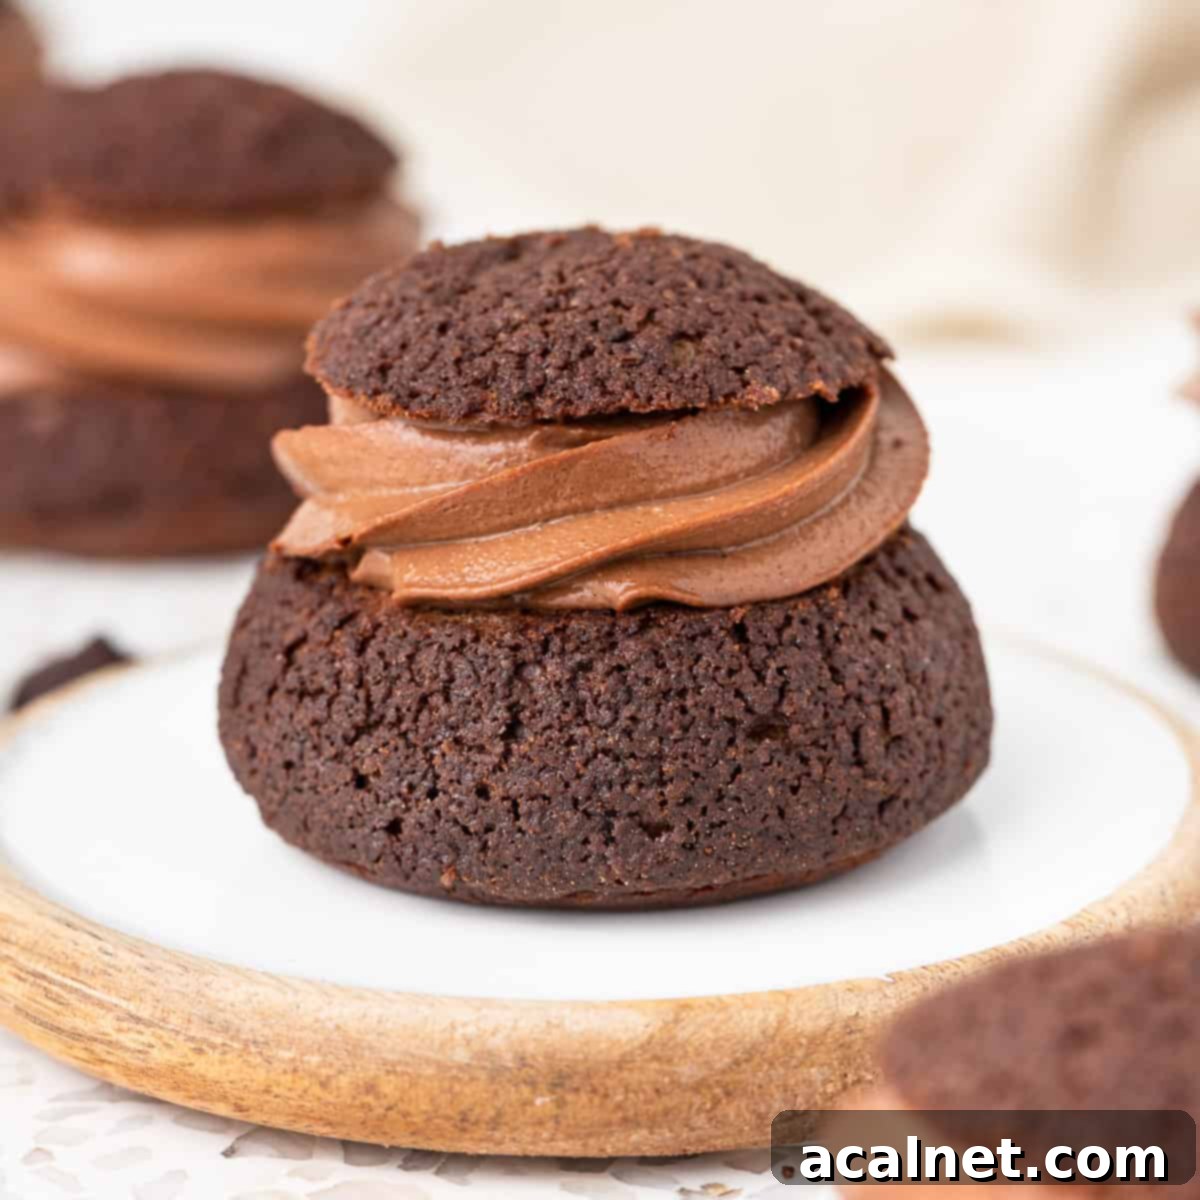
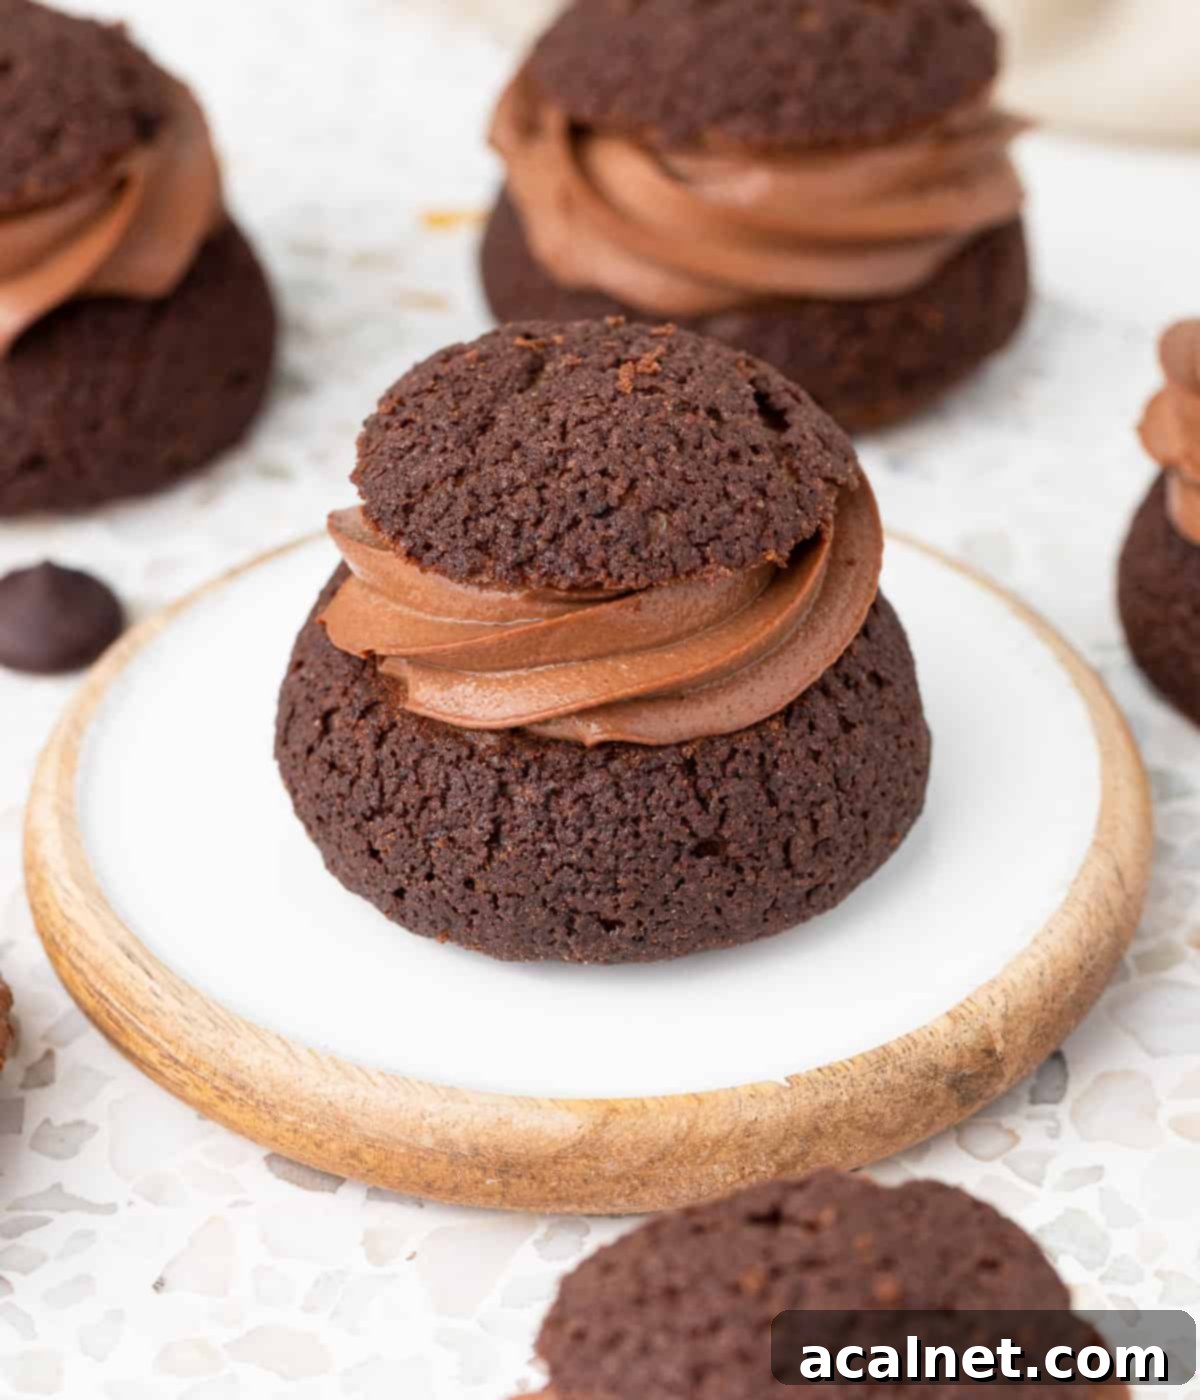
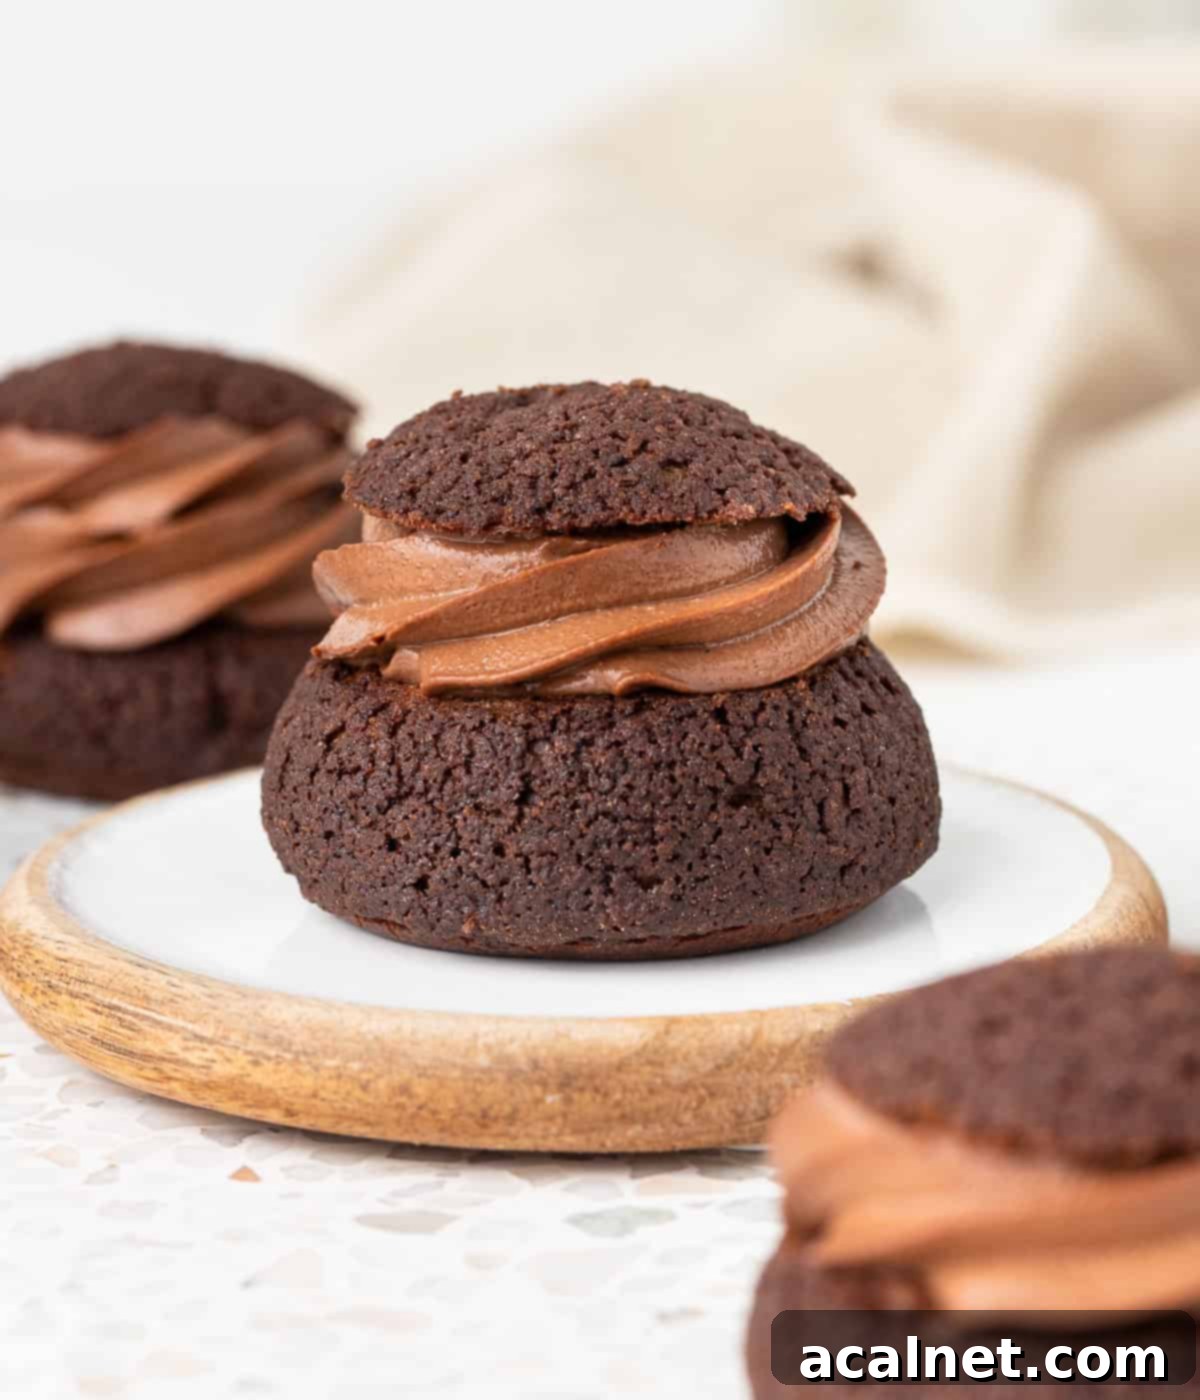
Prepare to embark on a truly indulgent baking journey with these sensational Triple Chocolate Choux Buns. Imagine a delicate, airy chocolate choux pastry, encased in a thin, crispy layer of chocolate craquelin, and generously filled with a luscious, velvety chocolate pastry cream. This recipe is a symphony of textures and rich, deep chocolate flavors, creating a dessert that is nothing short of pure bliss for any chocolate connoisseur. It’s not just a pastry; it’s an experience – a true chocolate heaven that promises to impress and delight.
[feast_advanced_jump_to]
Why You Will Adore This Triple Chocolate Choux Recipe
There’s an undeniable magic to Choux pastries. Their delicate, light, and wonderfully airy structure, coupled with rich, creamy fillings, consistently delivers perfection. This particular chocolate choux au craquelin recipe elevates the classic to an extraordinary level, making it one of the most decadent choux creations you’ll ever taste. It’s a dream come true for anyone who cherishes deep chocolate flavors and sophisticated textures.
What makes these triple chocolate choux buns so special? We infuse a profound, rich chocolate flavor into every component. The classic choux pastry itself is flavored with high-quality cocoa powder, similar to our popular Mini Chocolate Éclairs. But the indulgence doesn’t stop there. We also craft a delicate chocolate craquelin topping.
Adding this thin, crispy cookie layer on top of the cream puffs serves a dual purpose. Firstly, it guides the choux buns to bake into a beautifully perfect round shape, ensuring an appealing presentation. Secondly, and perhaps more importantly, it introduces a delightful crispy shell that provides a much-needed textural contrast to the soft interior, enhancing every bite. This craquelin transforms a simple cream puff into a gourmet delight.
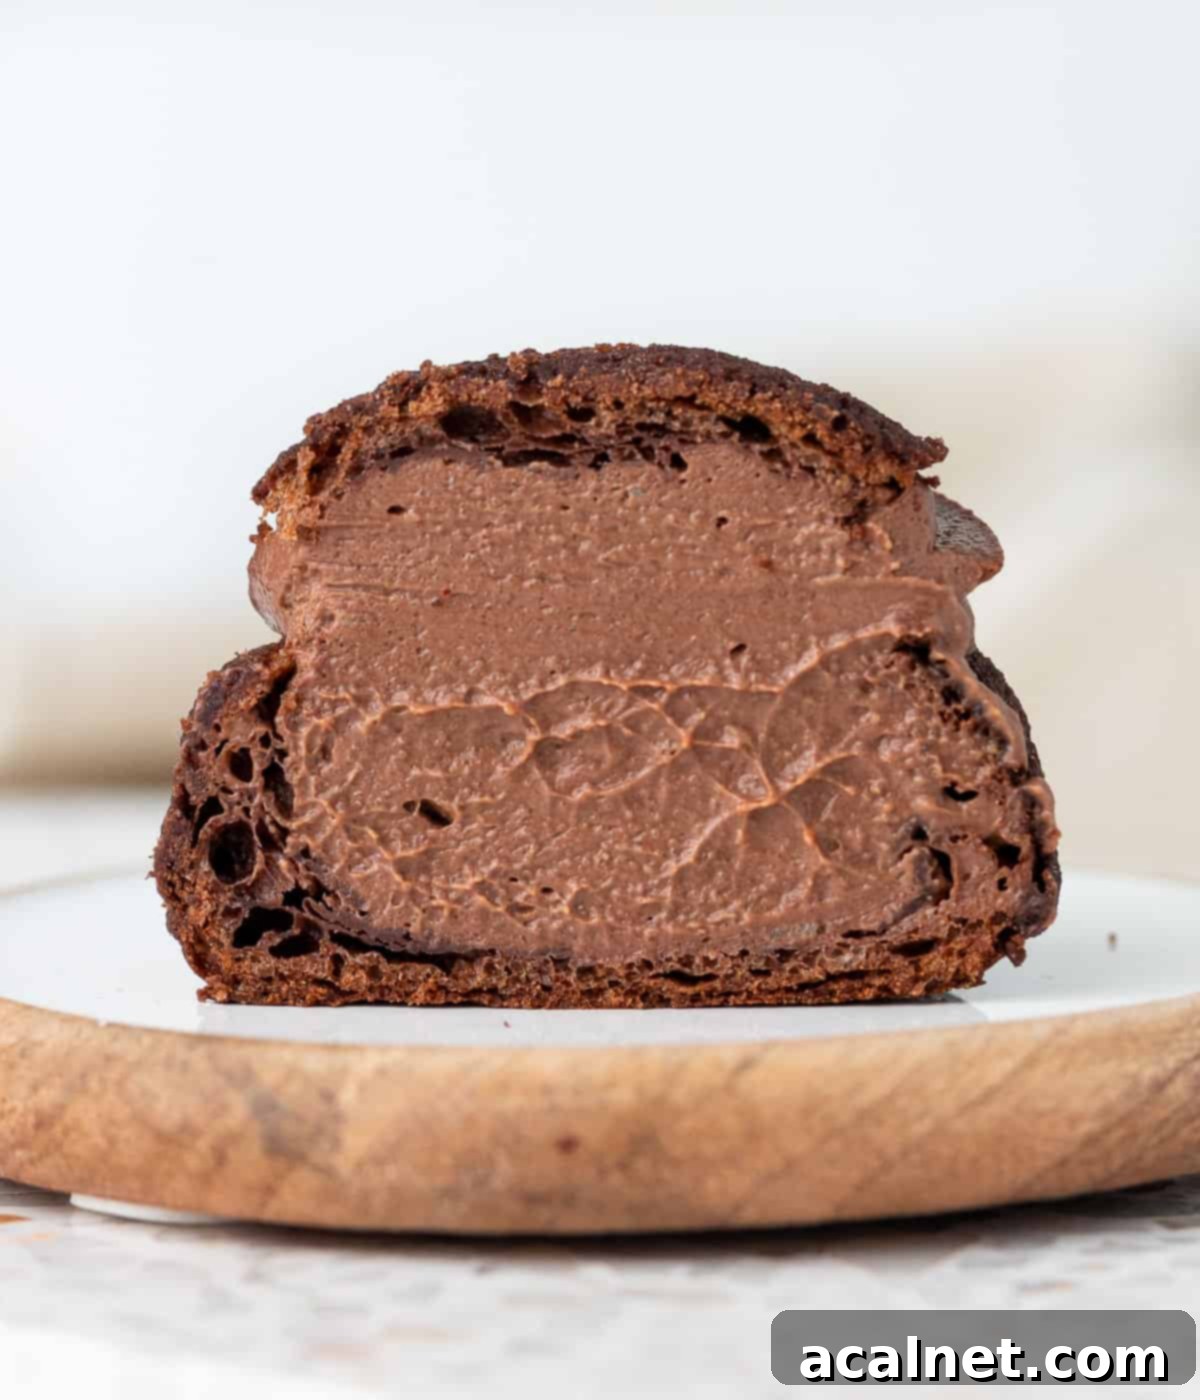
The grand finale is a generous filling of creamy, luscious Chocolate Crème Pâtissière (chocolate pastry cream). This rich, smooth custard completes the “triple chocolate” experience, bringing together the airy chocolate choux, the crispy chocolate craquelin, and the silky chocolate cream into a completely irresistible little treat. If the idea of making choux pastry (pâte à choux) feels intimidating, rest assured! This meticulously detailed, step-by-step recipe is designed to guide you through every stage, providing all the essential information to successfully create these exquisite chocolate cream puffs right in your own kitchen.
Essential Ingredients for Perfect Triple Chocolate Choux Buns
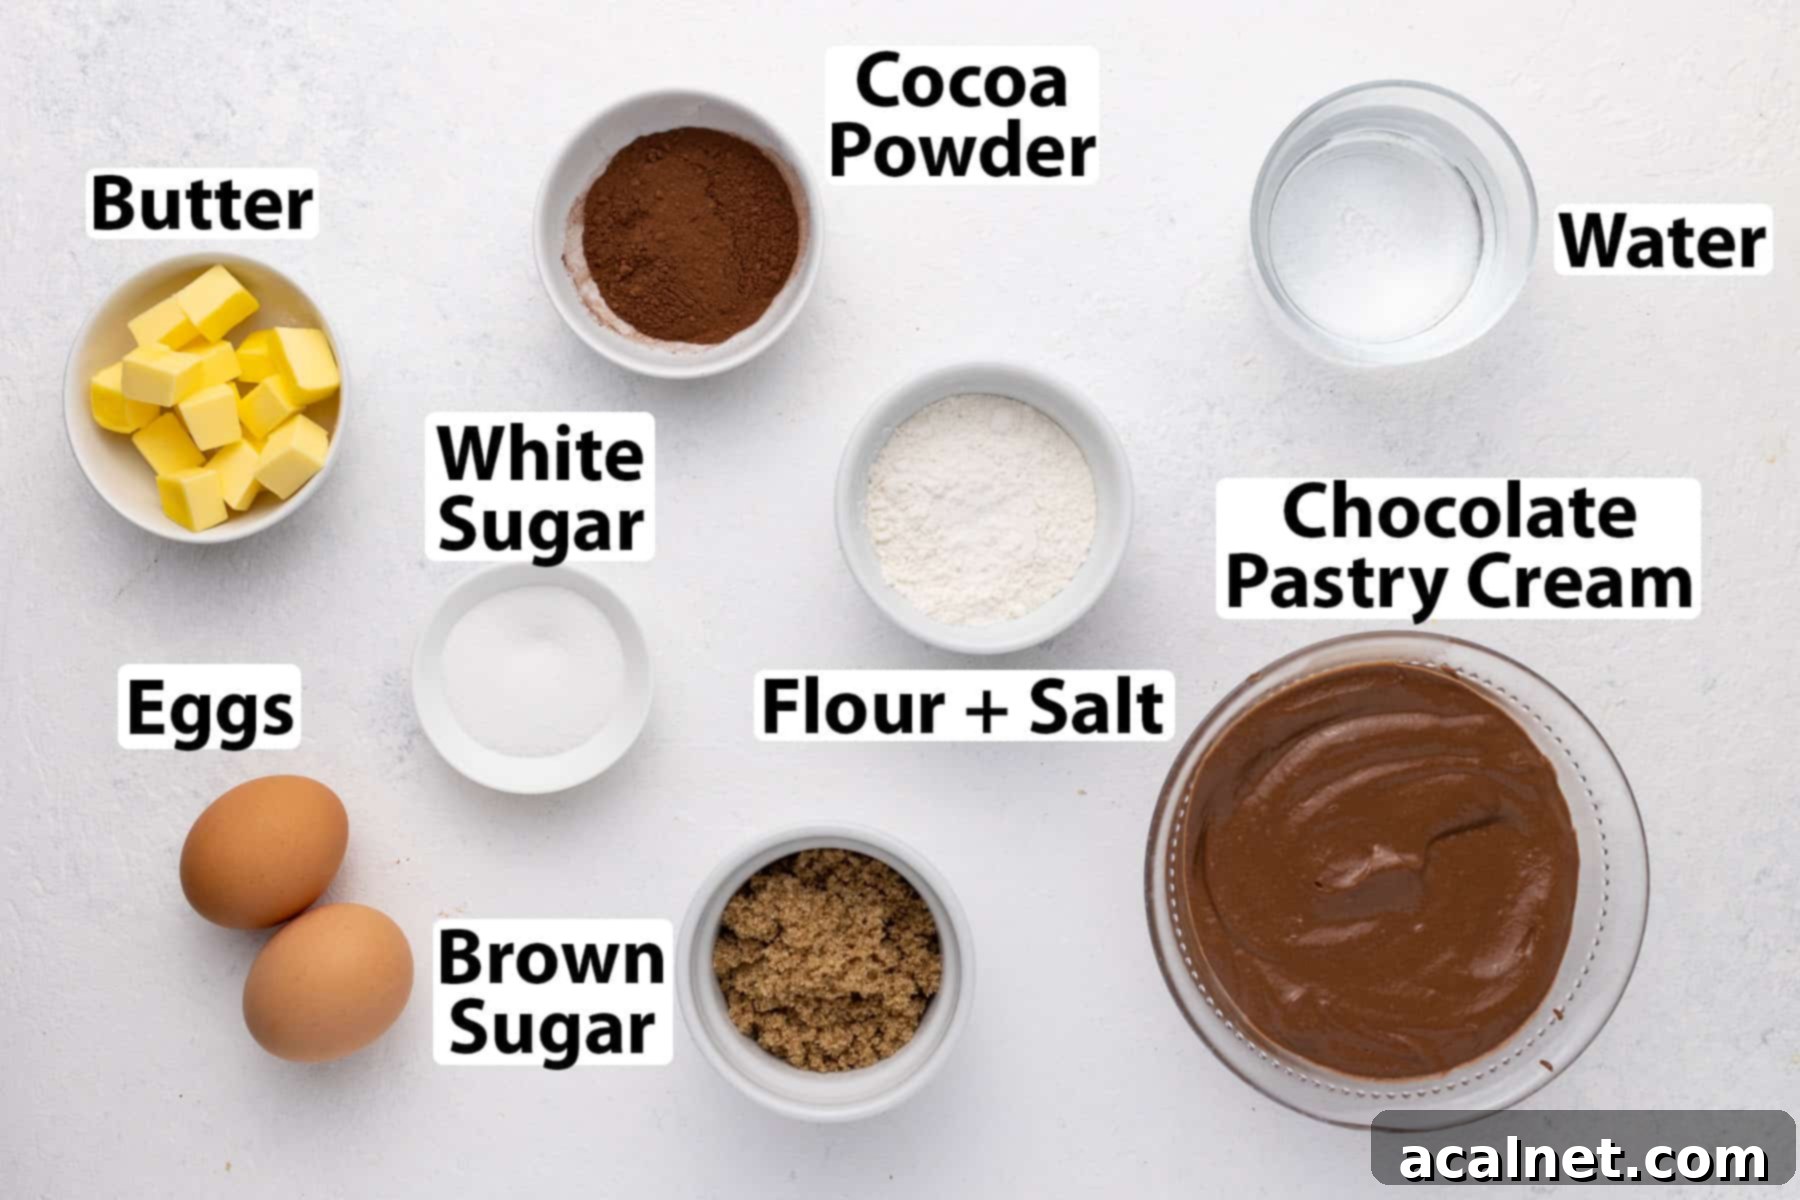
Scroll down to the recipe card below for all quantities and detailed measurements.
For the Rich Chocolate Crème Pâtissière (Pastry Cream):
- Milk: Always opt for Whole Milk or Full Cream Milk. The higher fat content is crucial for achieving that wonderfully creamy, rich texture and full flavor that truly elevates the pastry cream. Using fat-reduced or light milk will unfortunately compromise both the taste and consistency of your custard, resulting in a less luxurious filling.
- Eggs: Only egg yolks are used for this recipe, and it’s vital they are at room temperature. Room temperature yolks mix more evenly into the sugar and cornstarch, preventing lumps. Don’t discard the leftover egg whites; they can be perfectly used for other delicious recipes like delicate Financiers or light meringues.
- Cornstarch: This is our preferred thickener for the pastry cream. Cornstarch provides a silky, smooth, and light texture, which is ideal for a delicate choux bun filling. While you could technically substitute with plain or all-purpose flour, or another type of starch, cornstarch consistently yields the best results for a truly elegant cream.
- Chocolate: For an intense and sophisticated flavor, we recommend using a 70% dark baking chocolate (or high-quality couverture chocolate if available). This provides a deep cocoa note that balances the sweetness. If you prefer a slightly sweeter cream, you can use a chocolate with a lower cocoa percentage, around 50-60%. Crucially, avoid using chocolate chips or eating chocolate bars, as these often contain stabilizers that prevent them from melting smoothly, resulting in a grainy or uneven texture in your finished pastry cream.
For the Crispy Chocolate Craquelin Cookie:
- Butter: Ensure your unsalted butter is very soft, almost at room temperature, but definitely not melted. This pliability allows it to combine effortlessly with the dry ingredients. If the butter is too cold and firm, it will be challenging to mix thoroughly, leading to a lumpy craquelin dough.
- Dry Ingredients: A traditional craquelin typically uses equal parts butter, flour, and brown sugar. For our chocolate version, we slightly reduce the plain/all-purpose flour and replace it with unsweetened cocoa powder to achieve that desirable chocolate flavor. Always remember to sift both the flour and cocoa powder to eliminate any lumps, ensuring a perfectly smooth and even craquelin dough.
For the Airy Chocolate Choux Pastry:
- Liquid: My personal preference for choux pastry is to use water only, rather than milk or a traditional water-and-milk blend. This choice results in choux buns with a distinctly crispier texture, which I find incredibly appealing. However, if you prefer a softer choux texture and a richer taste, you can absolutely substitute the water with milk, or use a 50/50 mix of water and milk. Experiment to find your perfect balance!
- Dry Ingredients: This component is a carefully balanced blend of plain/all-purpose flour and unsweetened cocoa powder. It is absolutely essential to thoroughly mix these two dry ingredients together and then sift them before incorporating them into the liquid. This critical step prevents the formation of lumps, ensuring a smooth and consistent choux dough, which is key to its light and airy structure.
- Eggs: Large eggs, at room temperature, are the most vital ingredient in choux pastry. Their precise quantity is perhaps the most variable factor in this recipe, as it can depend on several elements, such as the specific brand of flour you use, or how much moisture evaporates when you cook the dough (the “panade”) on the stove. It’s crucial to add eggs gradually until the dough reaches the perfect consistency, rather than strictly adhering to a fixed number.
How to Make Triple Chocolate Choux Buns: A Step-by-Step Guide
1. Mastering the Velvety Chocolate Pastry Cream
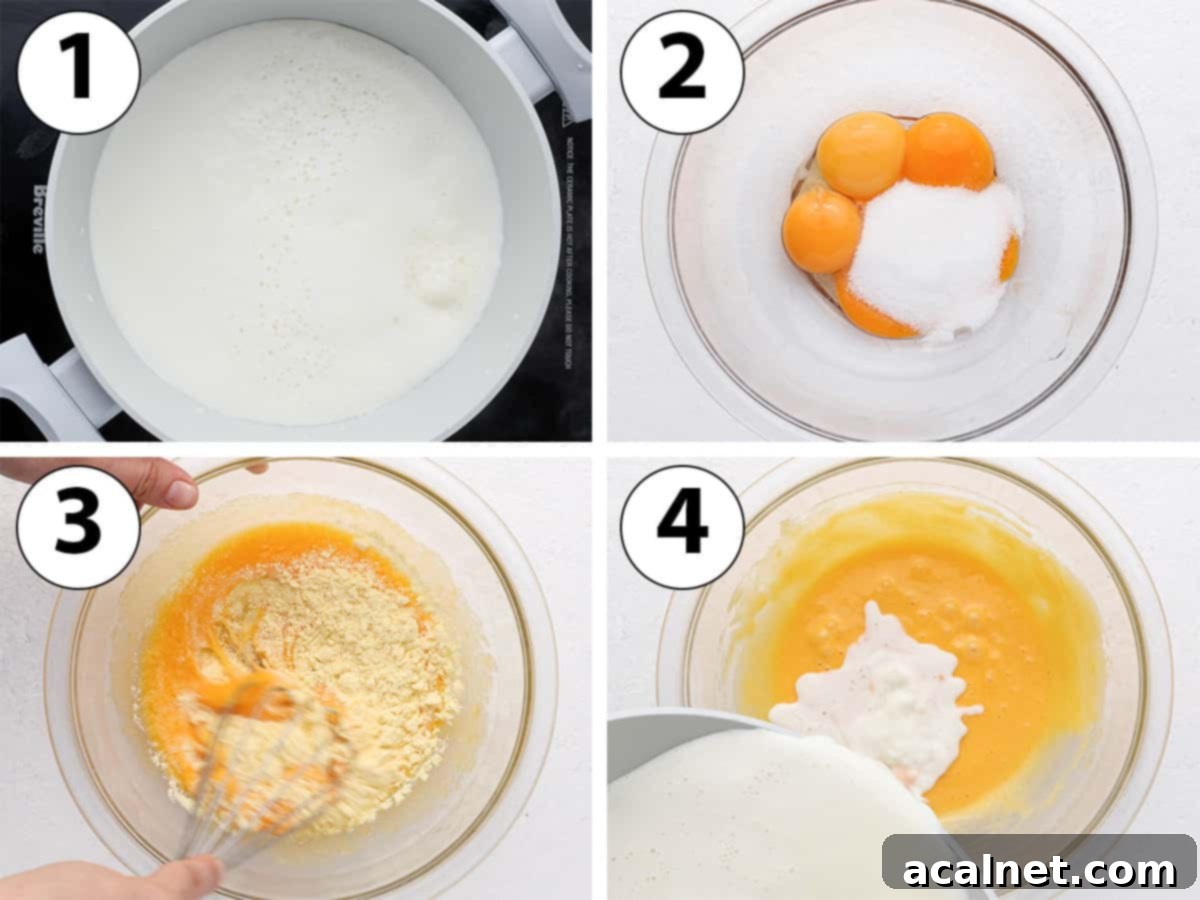
- Photo 1: Begin by placing the specified quantity of whole milk into a small, clean saucepan. Turn the heat to a gentle low setting and gradually bring the milk to a simmer. You’ll know it’s simmering when you see small bubbles forming around the edges of the pan. For an extra layer of flavor, consider adding a vanilla bean pod or a splash of vanilla extract to the milk during this stage.
- Photo 2: While the milk is heating, take a medium-sized, heat-proof bowl. Add the room-temperature egg yolks and caster sugar. Whisk them together thoroughly until they are just combined and the mixture is pale yellow and slightly thickened. Avoid over-whisking at this point; you’re simply aiming for a smooth blend.
- Photo 3: Next, sift the cornstarch directly into the egg yolk and sugar mixture. Continue to whisk until the cornstarch is fully incorporated, and you have a completely smooth, lump-free paste. This ensures a silky-smooth pastry cream later on.
- Photo 4: This is a crucial step called “tempering.” Once the milk is simmering, slowly and gradually pour about one-third of the warm milk over the egg yolk mixture while continuously whisking. This gentle introduction of heat slowly raises the temperature of the egg yolks, preventing them from scrambling when they are later added back to the hot saucepan. After the initial addition, slowly pour in the remaining warm milk, whisking constantly until the entire mixture is smooth and liquid.
Tempering the egg yolks is paramount. By slowly bringing up their temperature with the warm milk, you effectively prevent them from overcooking and scrambling when they are reintroduced to direct heat on the stove. This meticulous step is your secret weapon for a perfectly smooth, silky pastry cream.
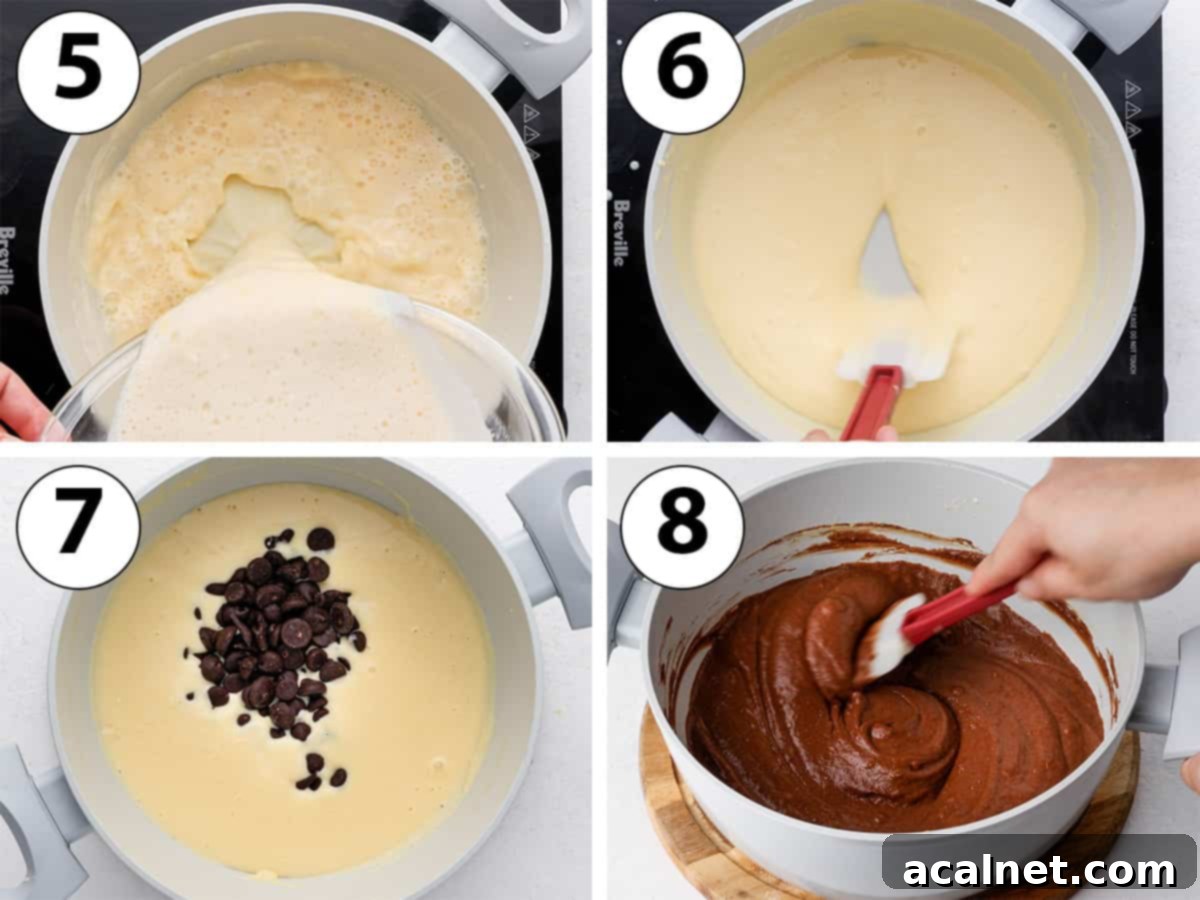
- Photo 5: Carefully pour the entire tempered egg and milk mixture back into the same saucepan. Place the saucepan back on the stove and turn the heat to low.
- Photo 6: Gently cook the mixture over low heat for approximately 5 minutes. The exact cooking time can vary slightly depending on your stove’s temperature, but the goal is for the custard to visibly thicken. It’s incredibly important to whisk continuously during this phase, paying close attention to the bottom and sides of the pan, to prevent sticking and burning. Crucially, ensure the cream does not boil; it should only ever be at a gentle simmer. Boiling will likely scramble the eggs, leading to a lumpy, unappealing pastry cream.
For a perfectly cooked pastry cream, aim for a temperature of 82 to 84 degrees Celsius (around 180 degrees Fahrenheit). Cooking on low heat is essential to avoid overcooking the eggs, which would cause them to scramble and result in an undesirable lumpy texture. Patience is key here!
- Photo 7: Once the pastry cream has thickened to the desired consistency, immediately remove it from the heat. Add the finely chopped dark baking chocolate or couverture chocolate callets/pistols into the hot cream. The residual heat will begin to melt the chocolate.
- Photo 8: Using a spatula, gently stir the mixture until the chocolate has completely melted and is fully incorporated, yielding a beautifully smooth and glossy chocolate pastry cream. For an exceptionally silky texture, you can use an immersion blender at a low speed to emulsify the chocolate and remove any tiny lumps. Be careful not to over-mix, as this can make the cream too liquid.
- Finally, pour the luscious chocolate crème pâtissière into a clean, shallow bowl or a pan (like a brownie pan) to help it cool quickly. Cover the surface directly with plastic wrap, pressing it down so it touches the cream. This prevents a skin from forming. Refrigerate for a minimum of 2 hours, or until thoroughly chilled and set.
2. Crafting the Crispy Chocolate Craquelin Topping
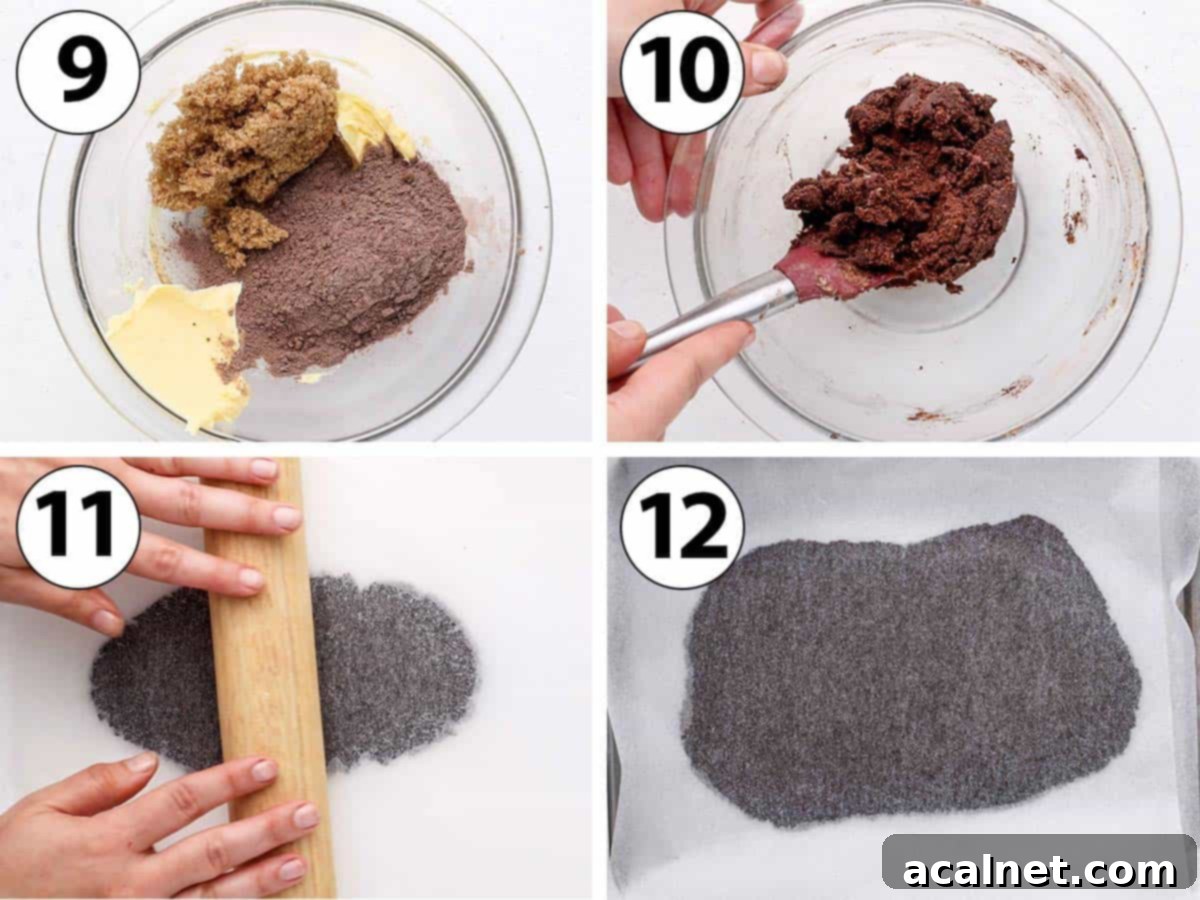
- In a small bowl, combine the specified amounts of plain flour and unsweetened cocoa powder. Whisk them together to ensure they are well-mixed and uniform. Set this aside for a moment.
- Photo 9: Place the very soft unsalted butter into a small mixing bowl. If using a stand mixer, fit it with the paddle attachment. Add the brown sugar. Now, sift in the previously combined flour and cocoa powder mixture directly over the butter and sugar. Sifting is important here to prevent lumps in your craquelin dough.
- Photo 10: Using a sturdy spatula or the paddle attachment of your stand mixer, work the dough by mixing and pressing the ingredients together. Continue until all ingredients are fully incorporated and you achieve an homogeneous, thick, and consistent paste. It should resemble a firm cookie dough.
- Photo 11: Place this craquelin paste between two sheets of baking paper (parchment paper) or two silicone mats. Using a rolling pin, roll the pastry evenly into a very thin layer, aiming for approximately 2mm (1/16-inch) thick. Uniform thickness is key for even baking and a consistent crunch.
- Photo 12: Transfer the rolled craquelin, still between the baking paper sheets, onto a flat baking sheet. Place it into the freezer for at least 30 minutes, or until it becomes completely hard and firm. This firming step is essential for easy handling and cutting. Craquelin can also be made well in advance and stored frozen for several weeks, ready to use whenever you wish to bake choux.
3. Mastering the Chocolate Pâte à Choux Pastry
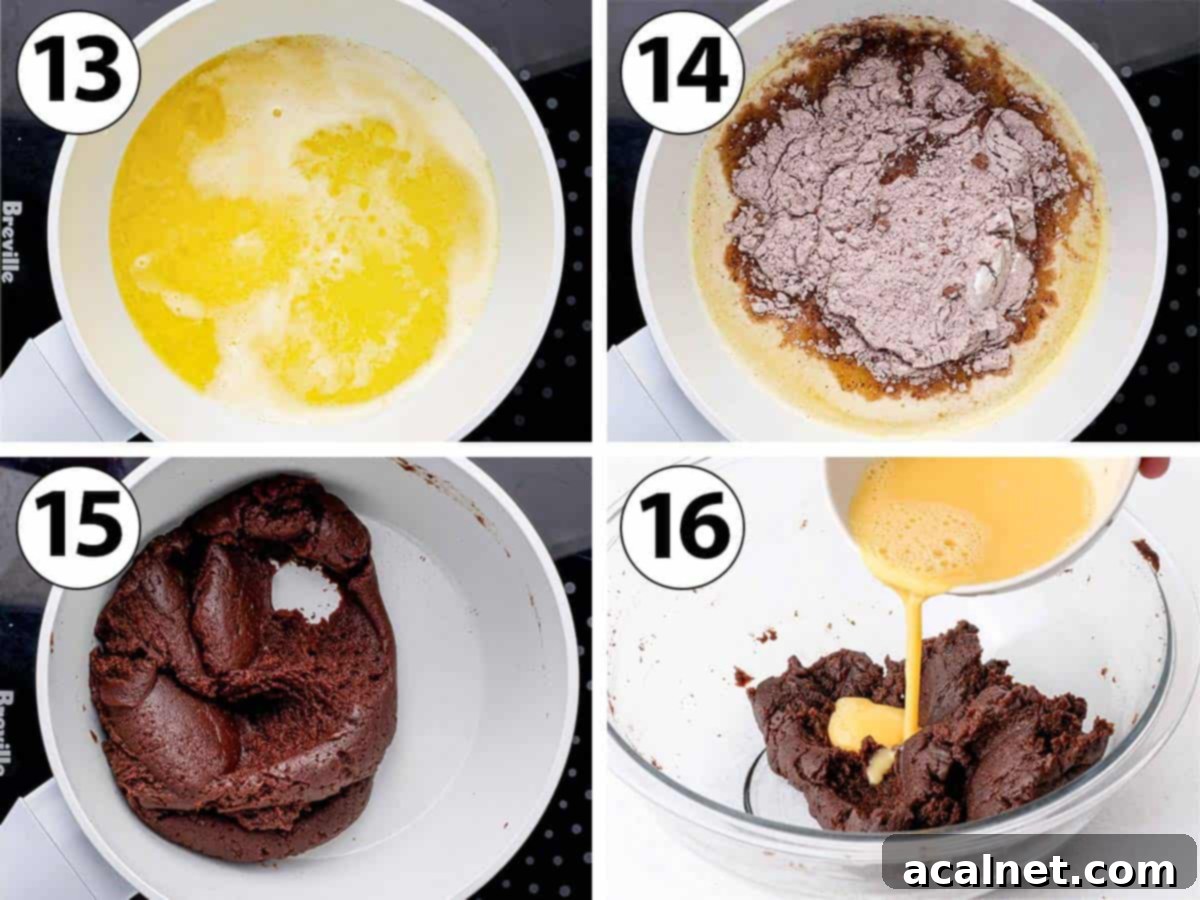
The initial and foundational step in creating exquisite choux pastry is to prepare a cooked mixture known as a “panade.” This involves combining and cooking the base ingredients on the stovetop, forming a paste that will eventually become the light and airy choux.
- Photo 13: In a medium-sized saucepan, combine the water, sugar, a pinch of salt, and the unsalted butter. Place the saucepan over medium-low heat and bring the mixture to a gentle simmer, allowing the butter to fully melt and the sugar to dissolve. While this is heating, in a separate bowl, sift together the plain/all-purpose flour and unsweetened cocoa powder. This pre-sifting ensures an even distribution and prevents lumps.
- Photo 14: Once the liquid mixture is simmering and the butter is melted, remove the saucepan from the heat. Quickly and confidently, dump all of the sifted flour and cocoa powder into the hot liquid at once. Using a sturdy, heat-proof spatula or a wooden spoon, vigorously stir the mixture. Continue stirring and pressing until it rapidly transforms into a thick, uniform paste – this is your “panade.” It should pull away cleanly from the sides of the pan.
- Photo 15: Return the saucepan with the panade to the stove, keeping the heat on medium-low. Continue to cook the mixture for about 2 minutes, constantly mixing and pressing the dough against the bottom and sides of the saucepan. This process is crucial for drying out the dough, which allows it to absorb more eggs later and creates a lighter choux. You’ll notice a thin skin or film forming at the bottom of the pan as the moisture evaporates.
- After drying, transfer the panade into a large, clean mixing bowl (or the bowl of a stand mixer fitted with the paddle attachment). Allow the mixture to cool for 10 to 15 minutes. It’s important that the panade is no longer hot to the touch before you proceed; warm is fine, but hot will scramble the eggs.
- In a separate small bowl, whisk together the large eggs until the whites and yolks are thoroughly combined and no streaks remain. This ensures even incorporation into the dough.
- Photo 16: Now for the most critical stage: gradually incorporating the eggs. Pour a small amount of the whisked egg – approximately 1 to 2 tablespoons at a time – into the cooled panade. Using a stiff spatula (or the stand mixer on medium speed), vigorously mix the egg into the dough until it is fully combined. Initially, the mixture may appear to separate or “split,” resembling curdled dough. Don’t panic! Continue to mix energetically; the dough will eventually come back together and absorb the egg.
- Continue this process, adding the whisked eggs a little at a time and mixing thoroughly after each addition, until you achieve the perfect consistency for choux pastry. This might take slightly more or less than the specified amount of egg, so pay close attention to the dough’s texture.
4. Assembling and Baking Your Exquisite Chocolate Cream Puffs
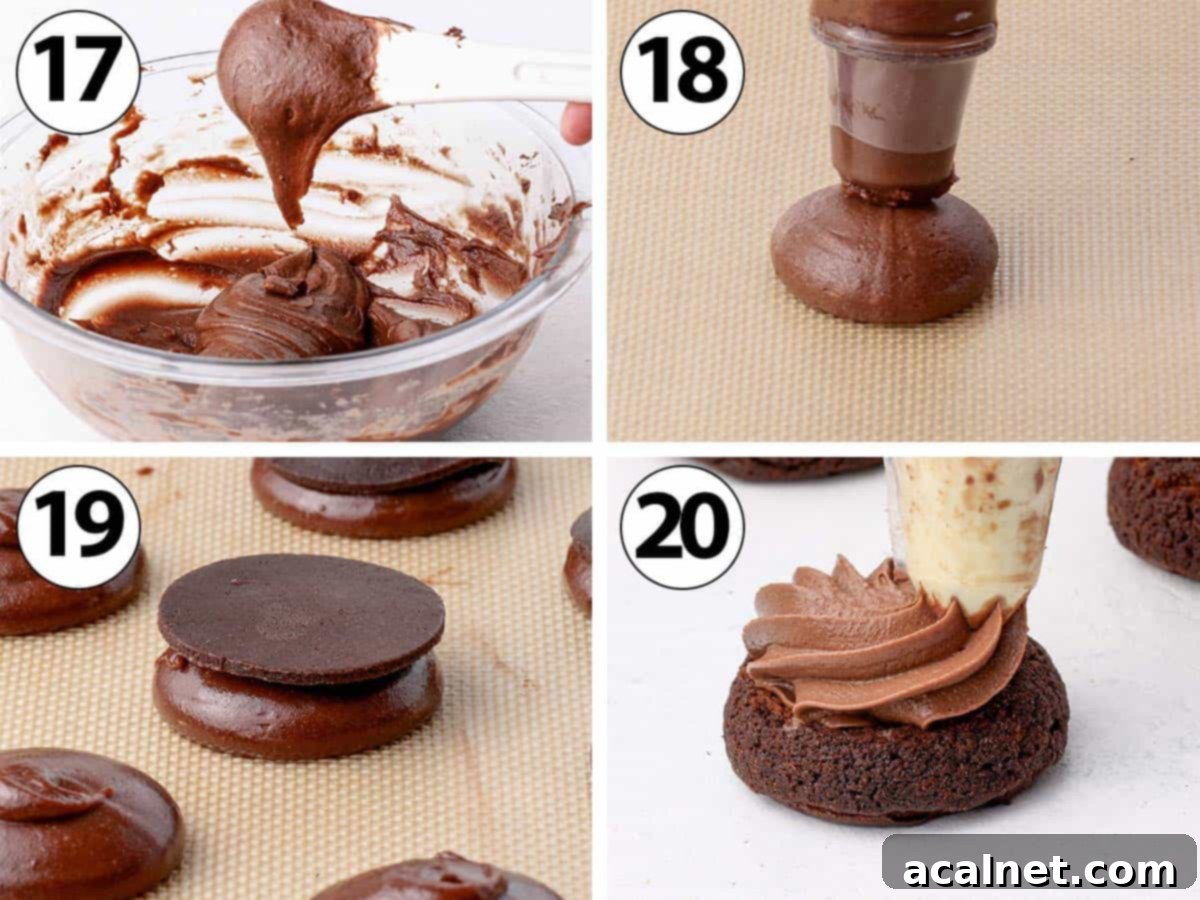
- Photo 17: As you near the end of egg incorporation, pause to carefully assess the choux pastry’s consistency. This is crucial for successful baking. The dough should appear smooth, noticeably shiny, and slightly fluid. To test, pick up a portion of the mixture with your spatula and lift it. When it falls back down into the bowl, it should form a distinct “V” shape, clinging to the spatula for a moment before dropping. If it’s too stiff, add a tiny bit more egg; if too runny, you may have over-egged it (though this is rare if added gradually).
It’s incredibly important to rely on the visual consistency of the dough rather than a precise number of eggs. Factors like flour type and cooking intensity of the panade can alter the exact amount of egg needed. Stop adding eggs once that perfect “V” shape is achieved.
Choux pastry can be prepared in advance. Store it in the fridge, covered tightly with plastic wrap directly touching its surface, for a few hours or even up to 24 hours. Before piping and baking, allow it to return to room temperature for easier handling.
- Preheat your oven to 180 degrees Celsius / 350 degrees Fahrenheit. Line a large baking sheet with baking paper or parchment paper. To prevent the paper from shifting, you can dab a tiny bit of choux pastry in each corner underneath the paper to act as “glue.”
- Photo 18: Transfer the prepared chocolate choux pastry into a piping bag fitted with a 2 cm (¾ inch) round piping tip. Pipe small, neat mounds of pastry onto the prepared baking sheet. Aim for each mound to be about 4 cm (1.5 inches) wide and 2 cm (¾ inch) tall. Remember to leave ample space between each choux bun, as they will expand significantly during baking.
- Carefully retrieve the chocolate craquelin from the freezer. Gently peel off the top sheet of baking paper. Using a round cookie cutter that is the same width as your piped choux buns (4 cm / 1.5 inches), cut out individual disks of the frozen craquelin.
- Photo 19: With delicate hands, or using a small offset spatula for precision, gently lift each craquelin disk. Carefully center and place one craquelin disk on top of each piped choux bun. This craquelin will bake down, providing that signature crispy, rounded top.
If your craquelin starts to soften and becomes difficult to handle or move, simply pop it back into the freezer for a few minutes to re-firm before continuing.
- Place the baking sheet into the preheated oven and bake for 30 to 35 minutes. It is absolutely critical that you do not open the oven door at all during this baking period. Opening the door too early will cause the delicate choux to collapse. The chocolate choux buns should have beautifully puffed up and risen into small, hollow balls with a firm craquelin crust.
- Once baked, turn off the oven. To allow the choux to dry out properly and prevent collapse, place a wooden spoon between the oven door and its frame to keep it slightly ajar. Leave the choux in the cooling oven for an additional 15 minutes. This slow cooling helps them retain their shape and crispness. Finally, remove from the oven and transfer the baking sheet to a wire rack, allowing the choux to cool down completely to room temperature.
The most crucial aspect of baking choux pastry is to provide sufficient time and heat. This allows them to first dramatically puff up due to steam, and then to thoroughly dry out and set their structure. If you open the oven door prematurely or don’t bake them long enough, the internal steam will escape, and your beautifully risen chocolate choux buns will sadly collapse.
- Photo 20: Once the choux buns are completely cool, retrieve the chilled chocolate pastry cream from the fridge. Give it a quick whisk to ensure it’s smooth and pliable. Transfer the cream into a piping bag fitted with a 1.2 cm (½ inch) open star tip. Using a serrated knife, carefully slice each cooled choux bun in half horizontally. Generously pipe the luscious chocolate cream onto the bottom half of each choux. Gently place the top part of the choux back over the cream. Serve these irresistible Triple Chocolate Choux Buns immediately for the best experience!
Frequently Asked Questions About Chocolate Choux Buns
Essentially, yes, “choux buns” and “cream puffs” refer to the same delightful pastry. “Choux” (or “choux à la crème” for cream-filled ones) is the traditional French name for these delicate, hollow pastries made from pâte à choux (choux pastry dough). The term “cream puff” is the common English equivalent. Interestingly, “choux” in French means “cabbage,” a whimsical reference to their typically small, irregular, and round shapes that can somewhat resemble miniature cabbages.
Unlike many other baked goods, choux pastry is unique because it relies entirely on steam for its impressive puff and hollow interior, not traditional chemical leavening agents like baking powder or yeast. The key to this remarkable rise lies in the high water content present in the liquid (whether it’s water, milk, or a combination) and, crucially, in the eggs added to the dough. When the choux pastry enters the hot oven, this trapped water rapidly turns into steam. This steam expands vigorously, pushing the dough outwards and creating that signature airy, hollow cavity characteristic of perfectly baked choux.
Absolutely! While the craquelin layer is a wonderful addition that significantly enhances these choux buns, you can certainly make them without it. The craquelin serves several purposes: it adds an exquisite crispness, contributes a beautiful, uniform round shape to the pastries, and provides an attractive visual element. However, the underlying chocolate choux pastry recipe will bake up perfectly fine on its own, yielding classic chocolate cream puffs, albeit without the added textural crunch and perfectly uniform dome that craquelin offers.
Indeed! While the Chocolate Crème Pâtissière is a time-honored and delicious classic for filling choux pastries, the possibilities for chocolate fillings are extensive. You can certainly experiment with other delightful chocolate frostings and creams to customize your choux buns. Here are a few fantastic alternative options to consider:
- Whipped Chocolate Ganache Frosting or a simple, light Chocolate Whipped Cream for a softer, airier filling.
- Chocolate Crémeux, a richer, more intensely flavored and silken cream with a denser consistency.
- Namelaka, a Japanese-inspired chocolate cream known for its incredibly smooth, melt-in-your-mouth texture and unique stability.
Tips & Troubleshooting for Perfect Triple Chocolate Choux Buns
My Chocolate Pastry Cream is Lumpy – What Went Wrong?
A lumpy pastry cream is typically a sign that the egg yolks may have scrambled. This often occurs if the stove’s heat was too high during cooking, or if the mixture wasn’t consistently whisked, allowing parts of the egg to cook unevenly. The lumps are essentially bits of overcooked egg.
To fix this: First, immediately remove the cream from the heat and try vigorously whisking it by hand. This can often break down minor lumps. If the lumps persist, carefully pour the custard through a fine-mesh sieve into a clean bowl; this will catch any larger scrambled bits. For an extra-smooth finish, especially if there are still tiny lumps, use an immersion blender on its lowest speed. Blend gently until the cream is perfectly smooth, but avoid over-blending, which can make it too thin.
What Consistency Should the Chocolate Choux Pastry Have?
Achieving the correct choux pastry consistency is paramount to its success. It’s truly the key to light, airy, and well-risen choux buns, and it requires careful attention to the egg incorporation stage.
Here’s how to check: The dough should be smooth, glossy, and slightly sticky or fluid. To perform the “V-shape test,” scoop a portion of the pastry with a spatula and lift it. The dough should slowly fall back into the bowl, leaving a distinct “V” shape or a “ribbon” of dough hanging from the spatula, which eventually breaks off. If the dough is too stiff, it won’t form a V; if it’s too runny, it will fall off too quickly. This visual cue tells you precisely when to stop adding eggs, even if you have some egg left over or need a tiny bit more than the recipe suggests.
Why Did My Choux Buns Not Rise?
Several factors can contribute to choux pastry failing to rise in the oven, leading to dense or flat buns:
- Insufficient Panade Cooking: If the “panade” (the cooked flour mixture) wasn’t cooked long enough on the stove, it might retain too much moisture. This prevents the dough from absorbing enough eggs and ultimately impedes steam generation during baking.
- Incorrect Egg Quantity: Adding too much egg makes the dough too wet and heavy, causing it to collapse. Adding too little egg makes the dough too stiff, preventing it from expanding properly. The “V-shape test” described above is vital for this.
- Oven Temperature Issues: An oven that isn’t hot enough (or fluctuates significantly) won’t provide the rapid heat burst needed for the steam to develop quickly and lift the choux. Always preheat your oven thoroughly.
- Under-Baking: If the choux are not baked for a sufficient duration, their internal structure won’t have time to set and dry out, leading to collapse after removal from the oven.
Why Did My Choux Buns Collapse After Baking?
Choux buns are notoriously delicate right after baking. They tend to collapse if they haven’t been baked long enough, and/or if the oven temperature wasn’t properly maintained throughout the baking process.
The science behind it: the intense heat of the oven causes the water in the pastry to rapidly turn into steam, which inflates the choux. For the choux to hold its shape, this steam needs to create a stable, dry crust. If the baking time is cut short, or if the oven door is opened too early, the sudden change in temperature and pressure allows the steam to escape too quickly, causing the still-fragile internal structure to deflate and collapse. Patience and avoiding opening the oven door are your best defenses against collapsed choux.
Why Are My Choux Buns Not Hollow?
The signature hollow interior of choux pastry is a direct result of the steam created during baking. If your choux buns turn out dense rather than light and hollow, it often points back to the “panade” stage.
The cause: If you cook the “panade” for too long on the stove, an excessive amount of water can evaporate from the dough. When there isn’t enough water left in the dough to generate sufficient steam during baking, the choux won’t rise properly or create that desirable hollow cavity. This results in a dense, heavy choux bun instead of the airy perfection you’re aiming for.
How to Store and Freeze Your Delicious Triple Chocolate Cream Puffs
Storing Baked Choux Buns:
Un-filled Chocolate Choux Buns: If you haven’t filled your choux yet, they can be stored at room temperature for up to 2 days. To maintain their crispness, it’s crucial to avoid storing them in an airtight container. Any trapped moisture will quickly make them soggy. Instead, arrange them on a clean baking tray and loosely cover them with a clean tea towel or paper towels to allow for air circulation.
Filled Chocolate Choux Buns: Once filled with chocolate pastry cream, these pastries are best enjoyed immediately for optimal texture and freshness. If you have leftovers, they should be stored in the refrigerator. While they will be safe to eat for up to 3 days, their quality will significantly decrease after about 24 hours in the fridge, as the moisture from the cream will start to soften the choux pastry, making it soggy.
How to Freeze Cream Puffs: Prep Ahead for Future Indulgence!
Choux pastry components are excellent candidates for freezing, making it easy to prepare ahead of time and assemble fresh whenever a craving strikes!
- Freezing the Craquelin Cookie: The chocolate craquelin can be rolled out and frozen for up to 2 months. Keep it flat between sheets of parchment paper in an airtight bag or container. When ready to use, simply take it out, cut out your disks while frozen, and place them directly onto the piped choux before baking.
- Freezing Unbaked Choux Buns: To freeze the choux pastry before baking, prepare the dough as instructed and pipe it onto a parchment-lined baking tray. Place the tray directly into the freezer until the piped choux buns are completely solid. Once frozen, transfer them to an airtight freezer-safe container or bag. They can be stored for up to 3 months.
- Baking Frozen Choux Buns: When you’re ready to bake, take the frozen choux buns from the freezer. Cut out the craquelin disks (if using) and place them on top of each frozen choux. Bake them directly from frozen; you’ll simply need to add an additional 5 to 10 minutes to the regular baking time to account for thawing. Once baked and completely cooled, fill them with your freshly made chocolate pastry cream.
Discover More Choux Pastry Delights!
If you’ve fallen in love with the magic of choux pastry, there’s a world of delicious variations waiting for you to explore. From traditional classics to delightful twists, here are some other fantastic choux-based recipes to try:
- Classic Choux au Craquelin (Crispy Cream Puffs)
- Choux à la Crème (Traditional Cream Puffs)
- Savory Cheese Gougères
- Sweet Chouquettes (French Sugar Puffs)
- Aromatic Coffee Choux Buns
- Elegant Mini Chocolate Éclairs
Made this irresistible recipe?
We’d love to hear from you! Let us know if you liked it by leaving a comment below. Don’t forget to share your beautiful creations and tag us on Instagram @a.baking.journey with a photo!
Recipe Card: Triple Chocolate Choux Buns
Triple Chocolate Choux Buns
Print Recipe
Prevent your screen from going dark
Ingredients
Chocolate Pastry Cream
- 500 ml full cream / whole milk
- 4 large egg yolks, at room temperature
- 30 gr caster sugar
- 30 gr cornstarch
- 120 gr dark cooking chocolate, finely chopped
Chocolate Craquelin
- 35 gr plain flour
- 10 gr unsweetened cocoa powder
- 45 gr unsalted butter, soft
- 45 gr brown sugar
Chocolate Choux Pastry
- 125 ml water
- 50 gr unsalted butter
- 20 gr caster sugar
- 60 gr plain flour
- 10 gr unsweetened cocoa powder
- 1 pinch salt
- 2 large eggs, at room temperature
Instructions
Chocolate Pastry Cream
- Place the milk in a small saucepan, turn on low heat and bring to a simmer. In the meantime, whisk together the egg yolks and sugar in a medium heat-proof bowl until just combined, then mix in the cornstarch until smooth.
- Once the milk starts to simmer, slowly pour it over the egg mixture while constantly whisking to temper the yolks and get a smooth, liquid mixture. Pour the whole mixture back into the saucepan and turn on low heat.
- Cook on low heat for about 5 minutes (adjust based on stove’s exact temperature) or until the custard has thickened, continuously mixing to avoid lumps. Ensure the cream doesn’t boil.
- Remove from the heat and add the finely chopped dark cooking chocolate. Stir with a spatula until the chocolate has completely melted and you have a smooth, shiny cream.
- Pour the cream into a clean bowl or shallow pan, cover with plastic wrap touching its surface, and refrigerate for at least 2 hours until fully chilled and set.
Chocolate Craquelin
- Combine flour and cocoa powder in a small bowl. In another bowl (or stand-mixer), cream very soft unsalted butter with brown sugar, then sift in the flour and cocoa mixture.
- Work the dough with a spatula until it forms an homogeneous, thick paste. Place the paste between two sheets of baking paper and roll into a very thin layer (approx. 2mm / 1/16-inch thick).
- Place on a flat baking sheet and freeze for at least 30 minutes, or until completely hard, for easy cutting.
Chocolate Choux Pastry
- In a medium saucepan, combine water, sugar, salt, and butter; bring to a simmer over medium-low heat. Separately, sift together plain flour and unsweetened cocoa powder.
- Once butter is melted and liquid simmers, remove from heat and add all sifted dry ingredients at once. Vigorously stir with a stiff spatula until it forms a thick “panade” paste.
- Return to medium-low heat and cook for 2 minutes, continuously mixing and pressing the dough against the pan to dry it out. A thin skin should form at the bottom.
- Transfer panade to a large bowl and let cool for 10-15 minutes until no longer hot to the touch.
- In a small bowl, whisk eggs until combined. Add 1-2 tablespoons of whisked egg to the panade and mix vigorously with a spatula (or stand mixer) until fully incorporated.
- Continue adding egg gradually, mixing well after each addition, until the dough is smooth, shiny, and forms a “V” shape when lifted with a spatula (do not rely solely on exact egg quantity).
Baking & Assembling the Choux
- Preheat oven to 180°C / 350°F. Line a large baking sheet with parchment paper.
- Place chocolate choux pastry in a piping bag with a 2 cm (¾ inch) round tip. Pipe small mounds (approx. 4 cm / 1.5 inch wide, 2 cm / ¾ inch tall) onto the sheet, leaving ample space between each.
- Remove craquelin from freezer, peel off top paper. Cut out 4 cm (1.5 inch) disks using a cookie cutter (or size to cover choux).
- Gently lift each craquelin disk with a small offset spatula and place it centered on top of each piped choux bun.
- Bake for 30-35 minutes without opening the oven door. Choux should be puffed and risen. Turn off oven, prop door slightly open with a wooden spoon, and leave for 15 minutes. Remove to a wire rack and cool completely.
- Once cool, transfer chocolate pastry cream to a piping bag with a 1.2 cm (½ inch) open star tip. Slice choux buns in half, pipe cream into the bottom half, place top half back on, and serve immediately.
Video
Would you like to save this recipe?
We’ll email this post to you, so you can come back to it later!
Notes
- Tempering Eggs: This crucial step gradually raises the egg yolks’ temperature with warm milk, preventing them from scrambling when exposed to higher heat later. It’s key for a smooth pastry cream.
- Cooking Pastry Cream: Always ensure the cream cooks over low heat and never boils. Boiling will inevitably scramble the eggs and result in a lumpy, unappealing cream. Aim for a temperature of 82-84°C (around 180°F) for optimal cooking.
- Achieving Silky Cream: For an exceptionally smooth chocolate pastry cream, an immersion blender can be used briefly on low speed after the chocolate is added. Be careful not to over-blend, as this can thin the cream too much.
- Cooling the Panade: Before adding eggs to the “panade,” it must not feel hot to the touch. Residual heat can cook the eggs prematurely, leading to a lumpy or scrambled texture in your choux dough.
- Choux Pastry Consistency: The exact amount of egg needed for choux pastry varies. The goal is a smooth, shiny, and slightly fluid dough that forms a distinct “V” shape when lifted with a spatula. Stop adding eggs as soon as this consistency is achieved, regardless of the recipe’s exact egg count.
- Securing Parchment Paper: To prevent your baking paper from sliding around while piping, dab a small amount of raw choux pastry under each corner of the paper before placing it on the baking sheet. It acts as a natural adhesive.
- Handling Craquelin: If the craquelin becomes too soft and difficult to handle or cut, simply place it back into the freezer for a few minutes until it firms up again. This makes the process much easier.
Nutrition (per serving)
