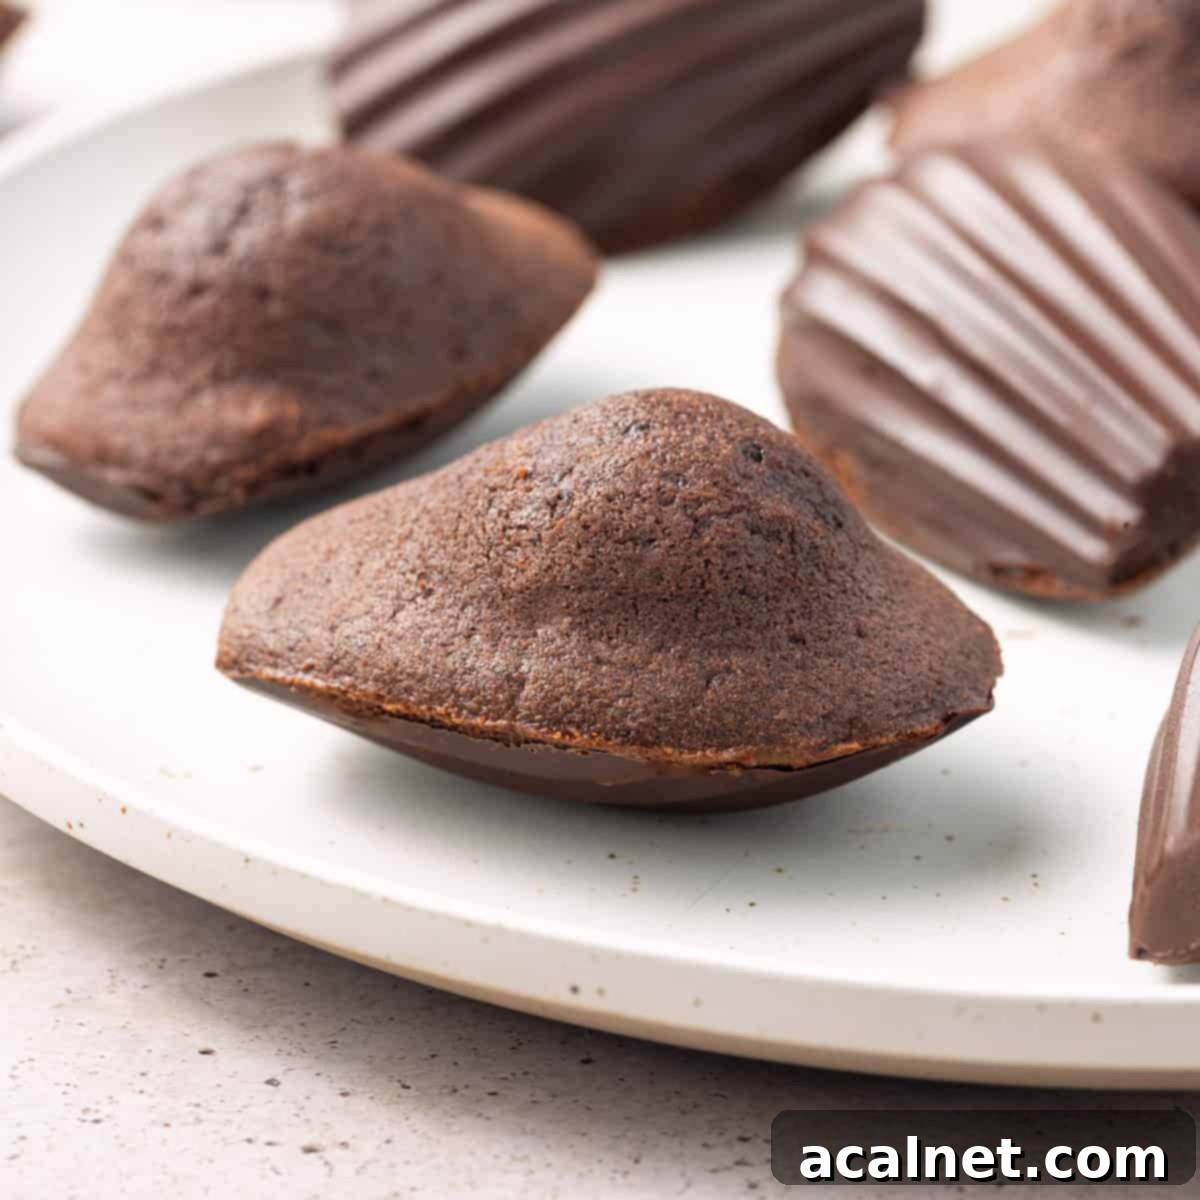
Indulge in French Elegance: The Ultimate Chocolate Madeleines with Crisp Dark Chocolate Shell
Prepare to be enchanted by these exquisite chocolate madeleines, crowned with a luscious dark chocolate shell. This recipe promises an effortlessly elegant treat that is perfect for a sophisticated afternoon tea or a decadent dessert. Each bite offers a delightful contrast: a wonderfully light and airy crumb that yields to the satisfying snap of intense, crunchy dark chocolate. These French beauties are not just delicious; they are incredibly easy to master, making them a must-try for every home baker and chocolate enthusiast.
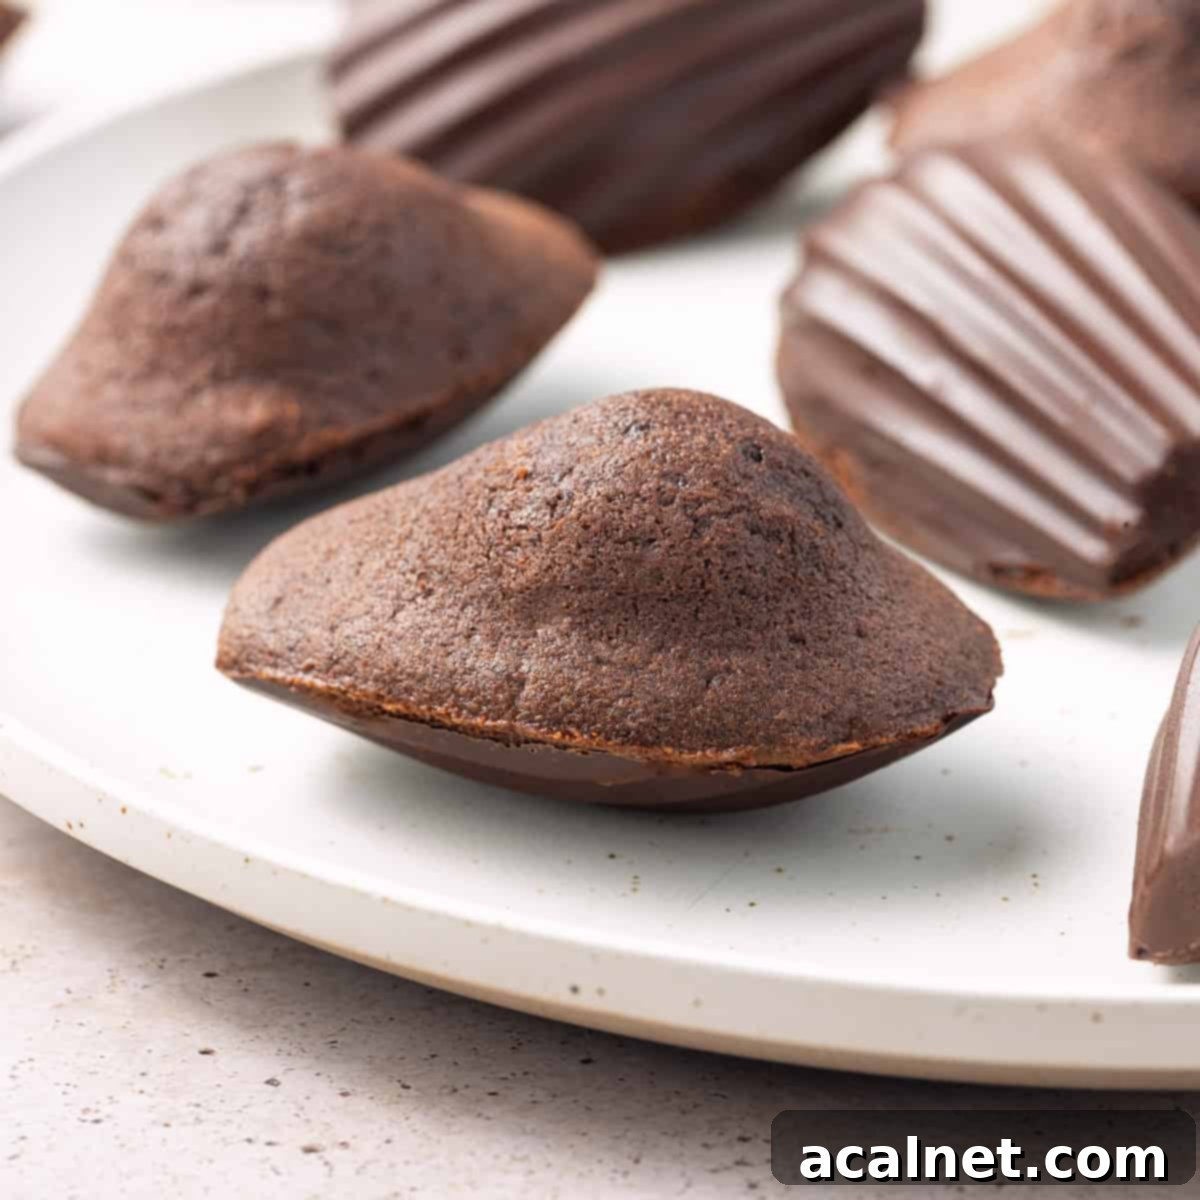
Why You’ll Adore This Chocolate Madeleines Recipe
Madeleines hold a truly special place in the heart of any baker, and for me, they were one of the first French pastries I enthusiastically learned to master. There’s an undeniable charm in their simplicity and the sheer delight of their delicate texture. This particular recipe elevates the classic madeleine experience, offering a decadent twist that will captivate your senses.
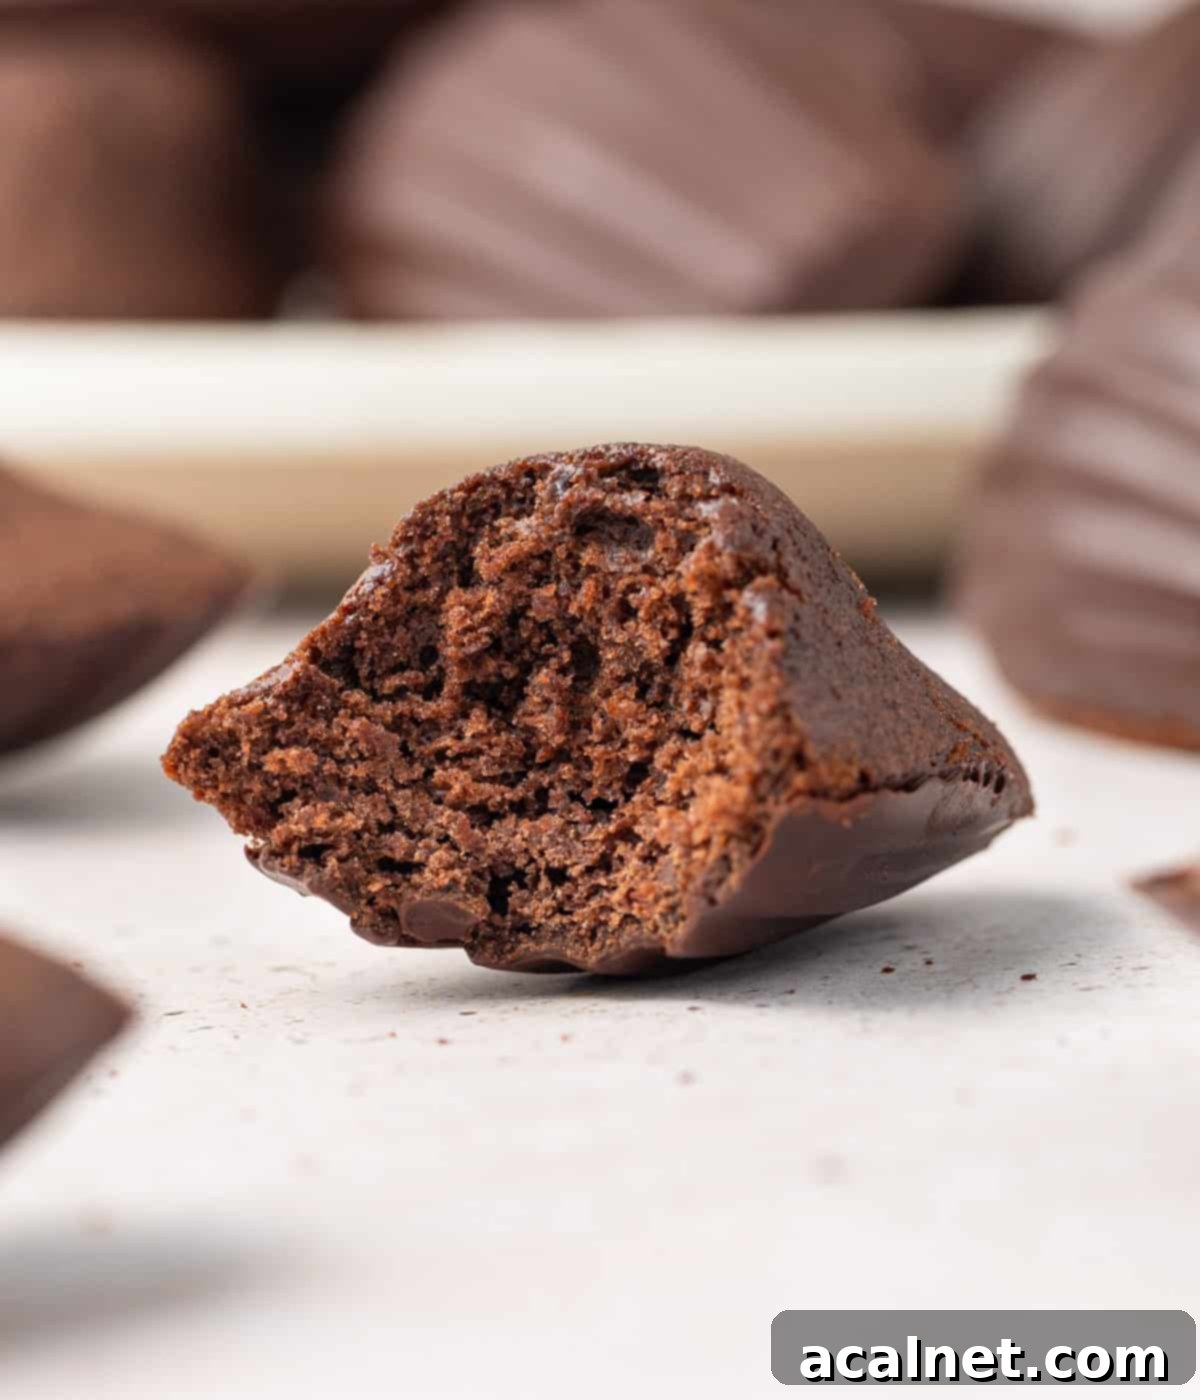
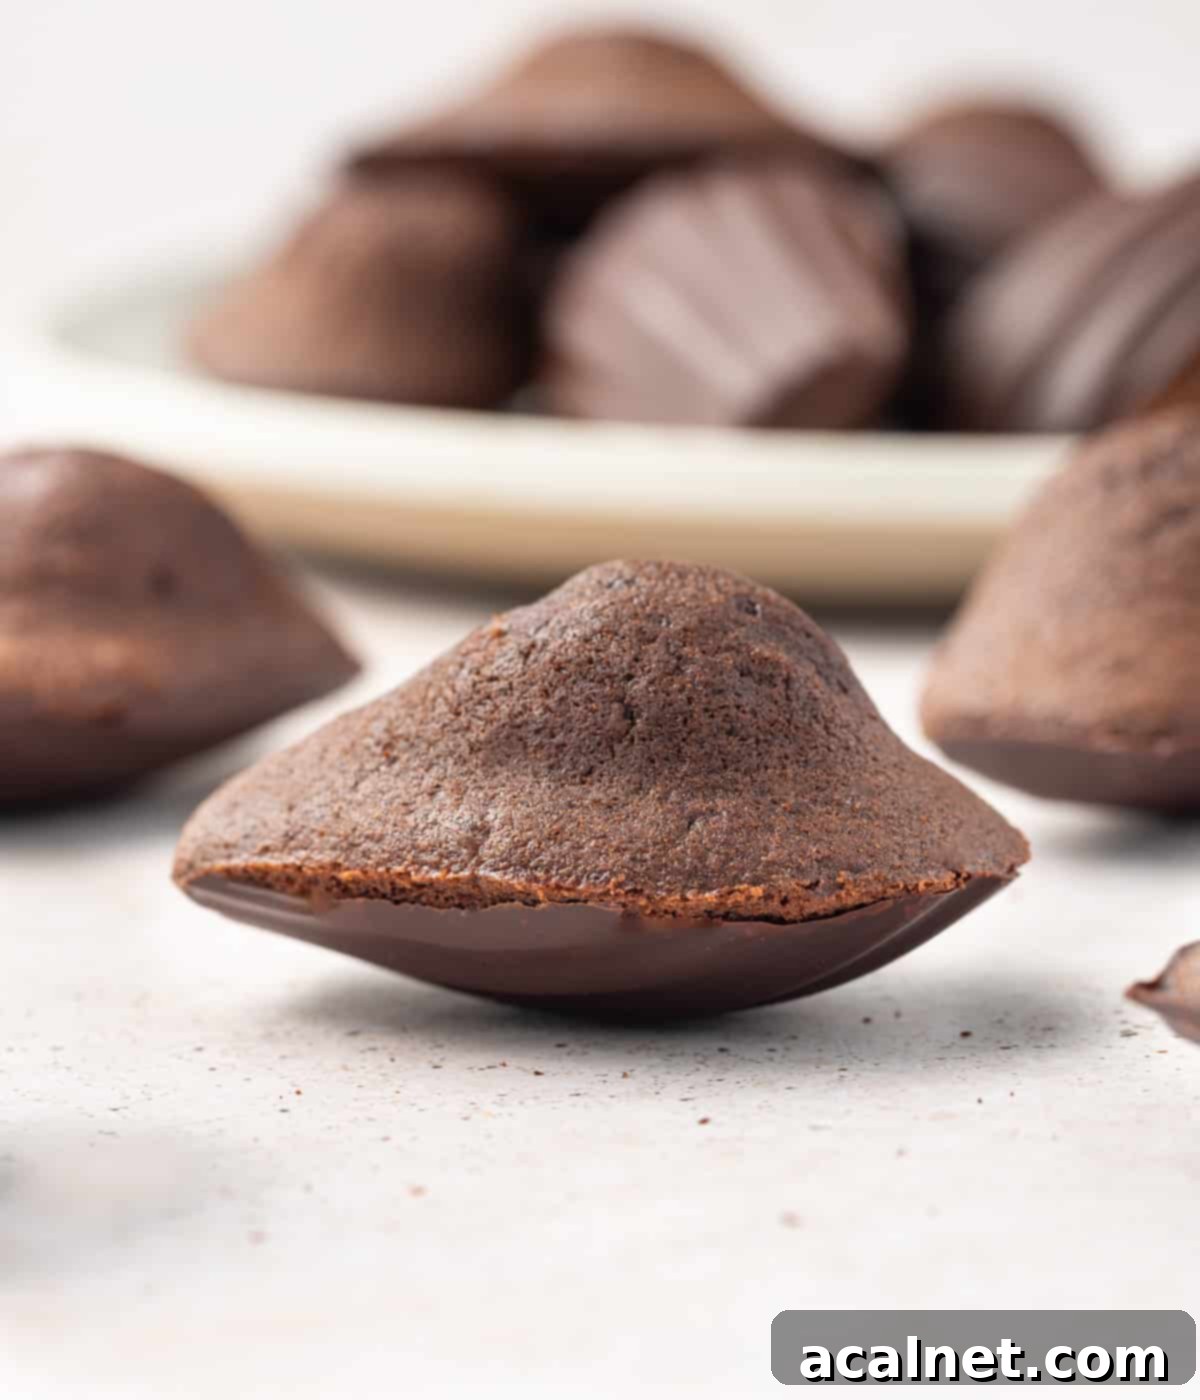
What makes these chocolate-dipped madeleines so utterly irresistible? It’s the harmonious marriage of textures and flavors. Imagine: a tender, airy chocolate madeleine, baked to perfection with its signature “hump,” then lovingly enrobed in a thin, crisp shell of intense dark chocolate. The light, almost cake-like crumb of the madeleine provides a beautiful contrast to the satisfying crunch and deep flavor of the chocolate coating.
Despite their sophisticated appearance, these chocolate madeleines are surprisingly straightforward to prepare. They bring a touch of Parisian elegance to any setting, making them the star of a lavish dessert table or a charming addition to an intimate afternoon tea party. For anyone who cherishes the rich taste of chocolate, these madeleines are not just a recipe; they’re a must-make journey into pure indulgence. They truly are one of the most delicious and visually stunning madeleine variations you can create!
Craving more madeleine magic? Try these other delightful flavours: Almond Madeleines with Raspberry Glaze.
What Exactly Are Madeleines?
Madeleines are an iconic symbol of French patisserie, instantly recognizable by their distinctive scalloped, shell-like shape and characteristic “hump” on one side. These delicate sweet treats are a beloved staple, often served for afternoon tea (goûter) or as a delightful snack alongside coffee. Many describe them as a delightful hybrid, sitting somewhere between a small cake and a soft cookie, offering the best of both worlds.
Their singular form is achieved through baking in a special madeleine pan, which imprints the beautiful shell pattern. The secret to their incredibly light and fluffy texture lies in the batter – a specific mixture known as a “génoise.” This type of cake batter is leavened primarily through the extensive whisking of eggs with sugar, which incorporates a significant amount of air. This airy foundation is what gives madeleines their signature melt-in-your-mouth lightness and delicate crumb, distinguishing them from other small cakes.
The history of the madeleine is as charming as the cake itself, often associated with Marcel Proust’s famous literary passage in “Remembrance of Things Past,” where the taste of a madeleine dipped in tea triggers a flood of childhood memories. This connection has cemented the madeleine’s place not just as a dessert, but as a symbol of nostalgic comfort and sensory pleasure. While traditionally flavored with lemon zest or vanilla, the versatility of the madeleine allows for endless creative variations, with chocolate being one of the most popular and decadent.
Essential Ingredients for Your Chocolate Madeleines
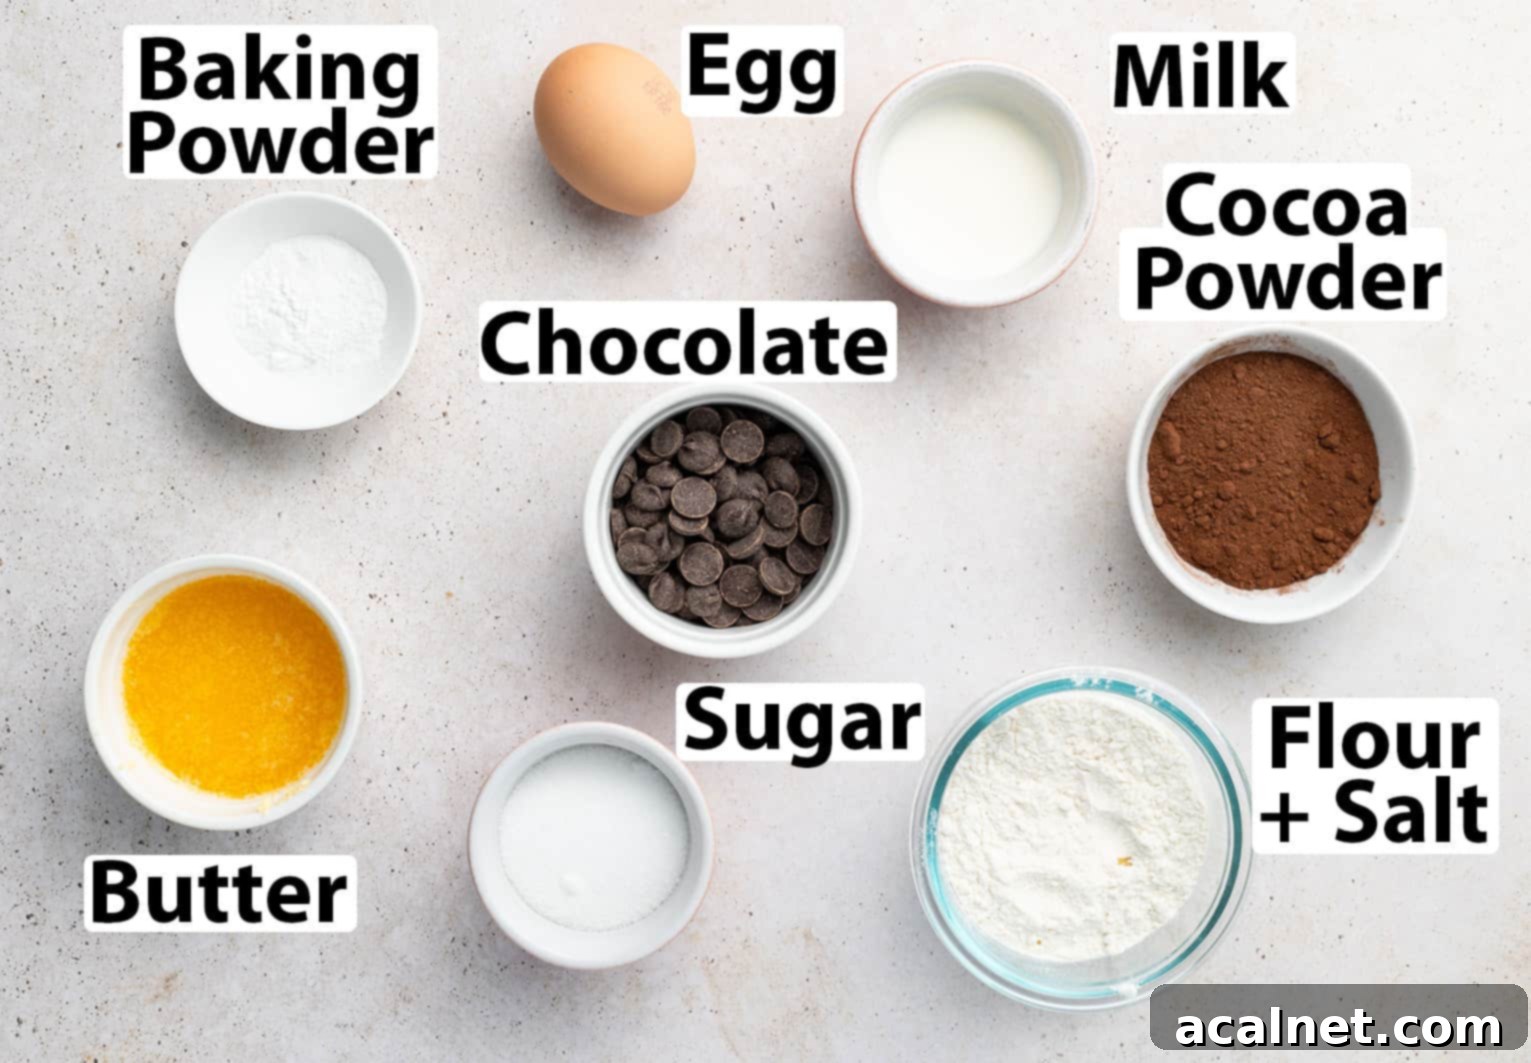
Scroll down to the detailed recipe card below for all exact quantities and measurements.
For the Madeleine Batter:
Dry Ingredients:
- All-Purpose Flour: Simple and effective, plain or all-purpose flour works perfectly for these madeleines. For an even finer, more delicate crumb, you could opt for cake flour or pastry flour, though it’s not strictly necessary for excellent results.
- Unsweetened Cocoa Powder: Choose a good quality natural, unsweetened cocoa powder to achieve a rich, deep chocolate flavor in your madeleines. While Dutch-processed cocoa will give a darker color, natural cocoa typically offers a more intense chocolate taste, which is ideal here.
- Baking Powder: Although the majority of the leavening for a classic madeleine comes from the air whipped into the eggs, a touch of baking powder provides an extra lift, helping to achieve that iconic and pronounced “hump.”
- Fine Table Salt: A small pinch of salt is crucial to balance the sweetness and enhance the overall chocolate flavor, bringing out its nuances.
Wet Ingredients:
- Large Egg: Ensure your egg is at room temperature. This is vital for achieving a stable emulsion with the sugar, which allows for maximum air incorporation during whisking, leading to a lighter, fluffier madeleine.
- Granulated or Caster Sugar: This provides sweetness and, when whipped vigorously with the egg, forms the airy base of our génoise batter.
- Unsalted Butter: Use unsalted butter, melted and then cooled. Cooling the butter before adding it to the batter is important to prevent it from “cooking” the eggs and to maintain the delicate structure of the whipped mixture.
- Whole Milk: Full cream or whole milk is recommended for the richest flavor and most tender texture. The fat content contributes significantly to the madeleines’ luscious mouthfeel.
- Vanilla Extract (Optional): A teaspoon of good quality vanilla extract can be added with the milk to subtly enhance the chocolate flavor.
For the Dark Chocolate Shell:
- Dark Cooking Chocolate or Couverture Chocolate: For an intense, luxurious chocolate experience, I highly recommend using a 70% dark chocolate. This percentage provides a deep, robust flavor that beautifully complements the sweet madeleine. However, feel free to adjust to your preference; a slightly lighter dark chocolate (e.g., 60%) or even milk chocolate or white chocolate could be used for a fun and different flavor profile.
Important Note on Chocolate Fluidity: Be aware that different brands and types of chocolate can vary significantly in their fluidity when melted. If your chosen chocolate appears quite thick once melted, you may need to add a small drop of neutral oil (such as vegetable, grapeseed, or refined coconut oil) to achieve a smoother, more fluid consistency suitable for dipping and coating.
Step-by-Step Guide: Crafting Your Perfect Chocolate Madeleines
Part 1: Preparing the Madeleine Batter
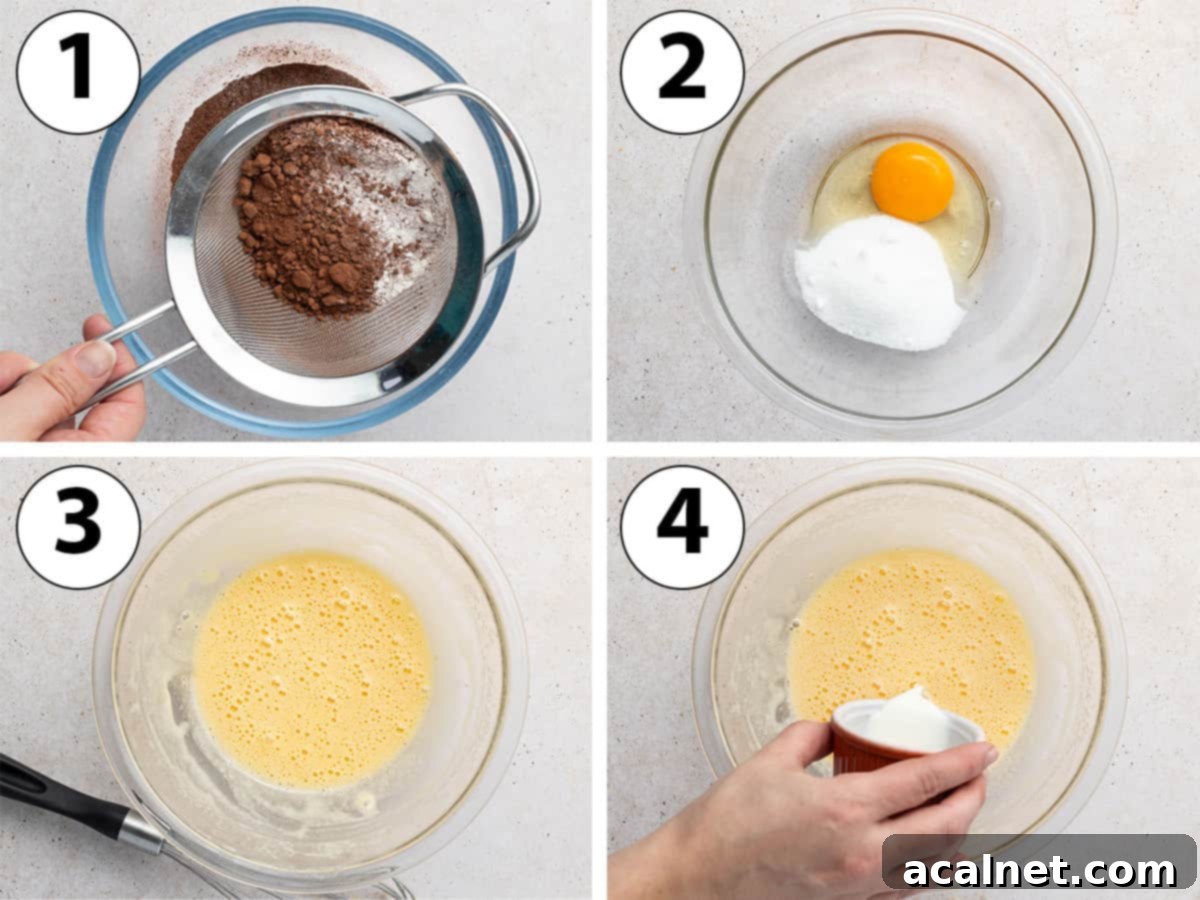
- Begin by melting your unsalted butter. You can do this conveniently in a heatproof, microwave-safe bowl in the microwave (using short bursts) or gently in a small saucepan over low heat on the stovetop. Once melted, set the butter aside to cool completely; it should be lukewarm or cool to the touch before being added to the batter.
- Sift Dry Ingredients (Photo 1): In a large mixing bowl, sift together the all-purpose flour, unsweetened cocoa powder, baking powder, and a pinch of fine table salt. Sifting is an optional but highly recommended step, as it prevents lumps and ensures that all dry ingredients are perfectly combined and aerated for a light crumb. Give them a slight whisk to fully incorporate.
- Whip Egg and Sugar (Photos 2 & 3): In a separate, generously sized bowl, combine the large room-temperature egg and the granulated or caster sugar. Whisk these together vigorously for about 3 to 4 minutes. This step is absolutely crucial for the final texture of your chocolate madeleines! You’re looking for the mixture to significantly double in volume, become pale in color, and thicken considerably, forming ribbons when the whisk is lifted. The more air you incorporate here, the lighter and fluffier your madeleines will be. You can use a hand whisk for a good arm workout, a hand mixer for efficiency, or a stand mixer fitted with the whisk attachment.
- Add Milk (Photo 4): Gently pour in the full cream milk and whisk until it is just combined into the egg and sugar mixture. If you desire a hint of vanilla, now is the perfect time to whisk in a teaspoon of vanilla extract.
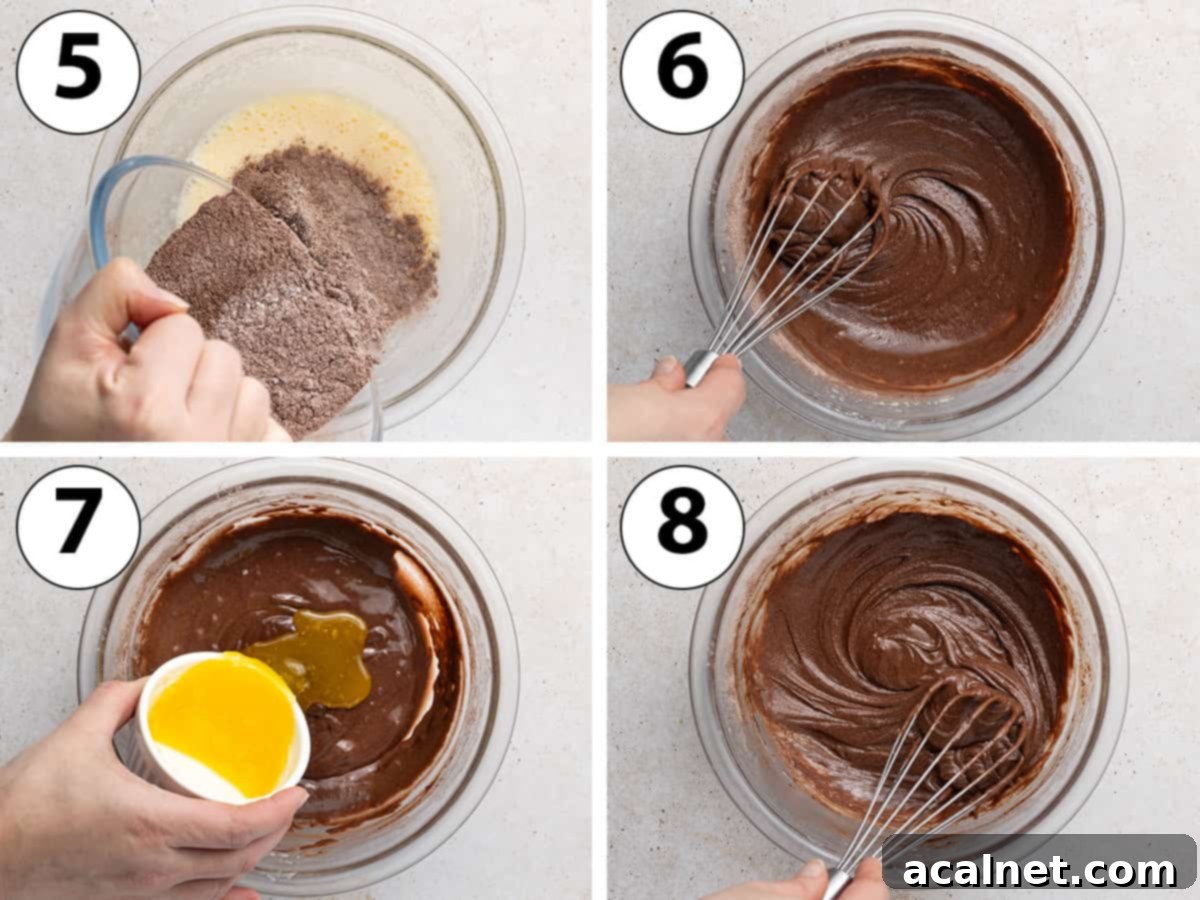
- Incorporate Dry Ingredients (Photo 5): Gradually add the sifted and pre-mixed dry ingredients to the egg mixture. You can sift them again directly into the wet ingredients for extra assurance against lumps.
- Mix Until Smooth (Photo 6): Gently whisk until you achieve a thick, smooth, and uniform batter. Be very careful to avoid over-mixing at this stage, as excessive mixing can develop gluten in the flour, resulting in chewier, denser madeleines instead of the desired light and fluffy texture. If using a stand mixer, switch from the whisk attachment to the paddle attachment for this step to minimize gluten development.
- Fold in Cooled Melted Butter (Photo 7): Pour in the completely cooled melted butter. The butter should not be hot or even warm to avoid deflating the airy batter.
- Whisk to Combine (Photo 8): Whisk gently until the butter is fully incorporated and you have a thick, smooth, and glossy batter.
- Chill the Batter: Cover the bowl tightly with plastic wrap, pressing the wrap directly onto the surface of the batter to prevent a skin from forming. Alternatively, transfer the batter into a smaller airtight container or bowl first. Place the covered batter in the refrigerator to chill for a minimum of 3 hours, but for the absolute best results in both flavor development and achieving that characteristic madeleine hump, chilling overnight is highly recommended. While tempting to bake immediately, this chilling process is absolutely essential for the perfect madeleine texture and rise.
Part 2: Baking the Madeleines
- Prepare Pan & Preheat Oven: Preheat your oven to a hot 200 degrees Celsius (390 degrees Fahrenheit). Meanwhile, generously grease a metal madeleine mold or pan with softened butter. While oil can be used, butter generally provides superior flavor, crispier edges, and helps achieve that desired hump.
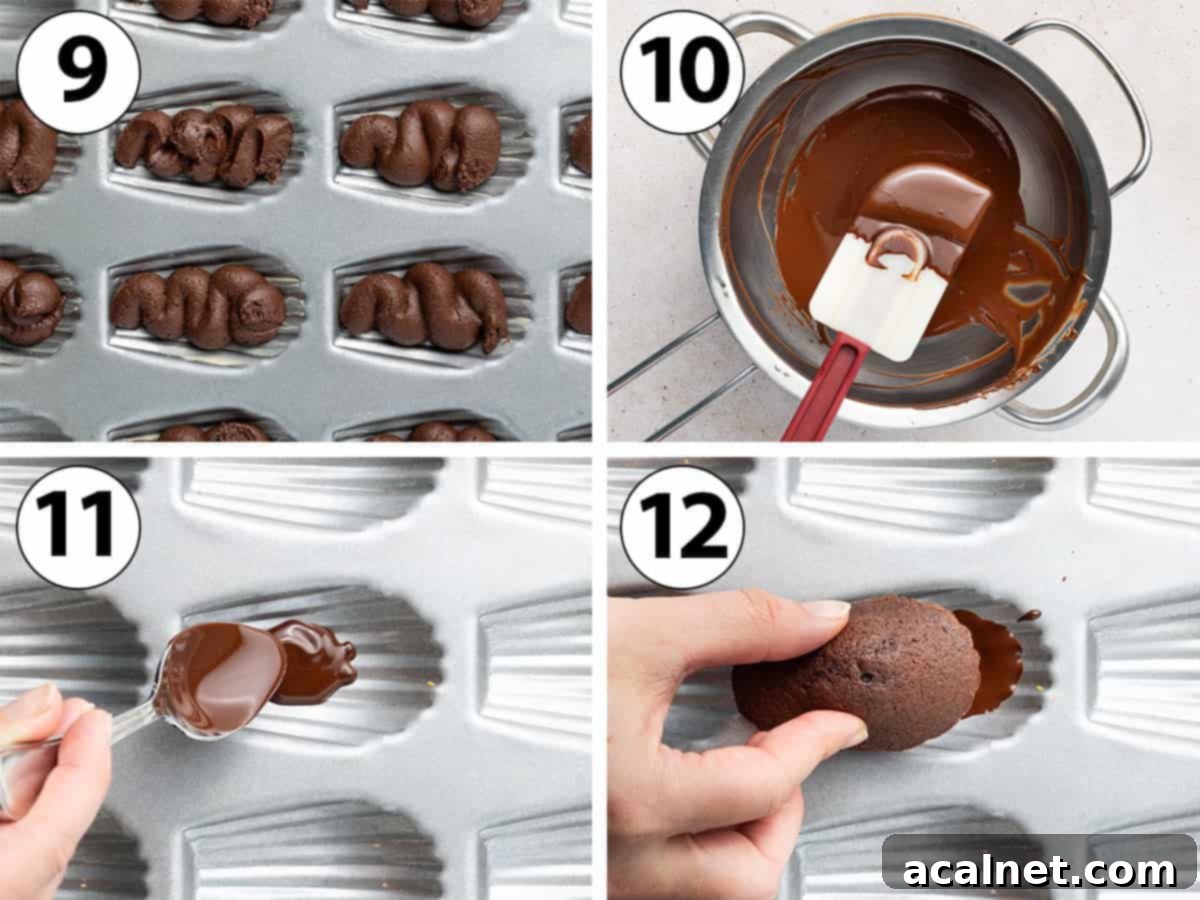
- Pipe Batter (Photo 9): Transfer the thoroughly chilled madeleine batter into a piping bag. Snip off the tip to create an opening of approximately 1 cm (1/2-inch). Using a piping bag is optional but highly recommended for evenly distributing the batter into each mold, ensuring uniform madeleines. If you prefer not to use a piping bag, you can simply scoop the batter in with a spoon. Pipe the batter into each cavity, filling it about halfway. It is critically important not to overfill the molds, as the madeleines will expand significantly in the oven; overfilling can prevent the characteristic hump from forming properly.
- Bake with Temperature Drop: Place the prepared madeleine pan into the preheated oven. Bake at 200 degrees Celsius (390 degrees Fahrenheit) for exactly 3 minutes. This initial burst of high heat creates the crucial temperature shock needed for the madeleines to develop their signature hump. After 3 minutes, without opening the oven door, immediately lower the oven temperature to 180 degrees Celsius (350 degrees Fahrenheit) and continue baking for an additional 4 to 5 minutes, or until the madeleines are golden brown around the edges and have risen beautifully.
- Cooling: Carefully remove the pan from the oven. Let the madeleines rest in the pan for 10 to 15 minutes to firm up slightly before gently lifting them out onto a wire rack to cool completely. Cooling on a wire rack ensures air circulation, preventing any condensation that could make them soggy. Ensure they are fully cooled before proceeding to the chocolate shell step.
Part 3: Crafting the Decadent Chocolate Shell
- Prepare Madeleine Pan: Thoroughly clean your madeleine pan (if reusing the same one) and ensure it is completely dry. Any moisture can cause the chocolate to seize.
- Melt Chocolate (Photo 10): If using a chocolate bar, finely chop it first to facilitate faster and more even melting, reducing the risk of burning. Place the chopped dark cooking chocolate into a heat-proof bowl. Melt it either in the microwave using 30-second increments, stirring well after each, or over a double-boiler, stirring until it is completely smooth and fluid. If, after melting, your chocolate appears quite thick (which can vary by brand and type), add a very small drop (1/4 to 1/2 teaspoon) of neutral oil (such as vegetable, grapeseed, or refined coconut oil) and stir until it reaches a more fluid consistency suitable for dipping and coating.
- Coat Cavities (Photo 11): Using a clean teaspoon, pour a small amount of the melted chocolate into each cavity of the madeleine pan – approximately 1 teaspoon per cavity, adjusting based on the size of your specific pan. Use the back of the spoon to carefully spread the chocolate around, covering almost all the way up the sides of the cavity, creating a thin, even layer.
- Press Madeleines into Chocolate (Photo 12): Take a completely cooled madeleine and gently press its flat side (the bottom) into the melted chocolate in a cavity. Give it a slight wiggle or twist to help the melted chocolate rise up around the edges and ensure the entire bottom surface of the madeleine is fully coated.
- Alternative Dipping Method: As an alternative to coating in the pan, you can simply dip the bottom of each madeleine directly into the melted chocolate and then place them upside down on parchment paper to set. This method is quicker but may result in a slightly less uniform shell.
- Set the Shell: Once all the madeleines have been coated in the pan, place the entire madeleine pan into the refrigerator for 30 minutes. Then, transfer it to the freezer for an additional 15 minutes. This two-step chilling process helps the chocolate shell set quickly and firmly, ensuring easy release.
- Release Madeleines: When the chocolate shells have completely hardened, the madeleines should effortlessly pop out of the mold. If any madeleines prove a little stubborn, gently use a small, blunt knife or an offset spatula to carefully lift them from the edges.

Frequently Asked Questions About Madeleines
The iconic hump on a madeleine is a result of a phenomenon called “temperature shock” or “thermal shock.” When very cold madeleine batter is introduced into a very hot oven, the outer edges of the batter that are in direct contact with the hot madeleine pan begin to bake and set rapidly. However, the center of the batter takes slightly longer to heat up. As the heat eventually reaches the center, the gases trapped within the batter rapidly expand, forcing the still-liquid center upwards, creating that distinctive, beloved hump. It’s a hallmark of a perfectly baked madeleine!
Unfortunately, to achieve the authentic, singular scalloped shell shape and characteristic hump of a madeleine, a proper madeleine pan is essential. While you could technically bake a similar batter in a muffin tin, the result would be more akin to a mini cupcake and wouldn’t possess the unique charm and texture of a true madeleine. Madeleine pans come in various shapes and sizes (standard, mini), allowing you to choose one that suits your preference. If you opt for a mini madeleine pan, remember to adjust the baking time accordingly, as smaller cakes will bake much faster.
For achieving the best results with traditional madeleines, especially when it comes to developing that crisp exterior and prominent hump, I wholeheartedly recommend using a metal madeleine pan. Metal (particularly aluminized steel) conducts heat far more efficiently and evenly than silicone, which is crucial for the temperature shock effect. I personally use and highly recommend an Aluminized Steel Madeleine pan for its superior heat distribution and durability. That being called, if you are specifically making madeleines with a chocolate shell, as in this recipe, a silicone mold can actually be quite advantageous for the chocolate shell step. The flexibility of silicone makes it much easier to pop out the madeleines once the chocolate shell has completely set, minimizing the risk of breakage. For madeleines without a shell, metal is always the winner.
There are a few common reasons: 1) Insufficient Whisking: The most crucial step is vigorously whisking the egg and sugar until pale, thick, and doubled in volume. This incorporates essential air for lightness. 2) Warm Batter: The batter must be very cold before baking to create the necessary temperature shock. Ensure it chills for at least 3 hours, or preferably overnight. 3) Oven Temperature: The initial high oven temperature (200°C/390°F) is key for the hump. Make sure your oven is accurately preheated. 4) Overfilling Molds: Filling cavities more than halfway can hinder the rise. 5) Overmixing Batter: After adding dry ingredients, mix just until combined to avoid developing too much gluten, which results in a dense texture.
Expert Tips & Tricks for Perfect Chocolate Madeleines
- Master the Whisking: The key to those irresistibly light and fluffy madeleines lies in properly whisking the egg and sugar. Dedicate ample time (3-4 minutes, or longer with a hand whisk) to this step until the mixture is pale, thick, and has significantly increased in volume. This creates a stable emulsion packed with tiny air bubbles, which are essential for the madeleine’s rise and delicate crumb. Skimping on this step will result in denser, heavier cakes.
- Chill for Success: Do not skip the chilling process! Refrigerating the batter for at least 3 hours, and ideally overnight, is non-negotiable for superior results. This chilling time allows the flavors to deepen and, crucially, ensures the batter is very cold. The stark contrast between the cold batter and hot oven is what causes the famous “hump” to form and contributes to a wonderfully tender texture.
- Achieve the Perfect Hump: Beyond chilling, a perfectly preheated oven is vital. Start with a higher initial temperature (200°C/390°F) for the first few minutes to trigger that temperature shock. As soon as the humps appear (usually within 3 minutes), reduce the oven temperature to finish baking gently without burning the edges. Avoid opening the oven door during this critical initial phase!
- Grease Your Pan Generously: Always generously grease your madeleine pan, especially if it’s not non-stick. Softened butter is highly recommended as it not only prevents sticking but also contributes to a beautiful golden-brown crust and a delightful flavor. Ensure every crevice is coated.
- Mind the Chocolate’s Fluidity: Melted chocolate can vary greatly in thickness depending on its cocoa content and brand. For a thin, even, and crisp shell, you need your melted chocolate to be quite fluid. If it appears too thick, stir in a very small amount (start with 1/4 teaspoon) of a neutral oil (like vegetable, grapeseed, or refined coconut oil) until you reach the desired pourable consistency.
- Don’t Overbake: Madeleines bake relatively quickly. Keep a close eye on them; they are done when the edges are golden, and the humps are set. Overbaking can lead to dry madeleines.
Storing & Freezing Your Chocolate Madeleines
These delightful chocolate-coated madeleines are truly at their peak when enjoyed within a day of baking, offering the best texture and freshness. However, they will remain delicious for up to 3 days. You have a couple of options for storage:
- Room Temperature Storage: If consumed within 1-2 days, they can be kept at room temperature. However, I advise against storing them in a completely sealed airtight container, as the madeleines tend to absorb moisture from the air and can become slightly sticky. Instead, a container with a loose-fitting lid or simply covered with a clean kitchen towel will allow for better air circulation while protecting them.
- Refrigeration: For longer storage (up to 3 days) or if you live in a warm climate where the chocolate shell might soften or melt, it’s best to store them in the refrigerator. Place them in a single layer in an airtight container once the chocolate is fully set. Allow them to come to room temperature for a few minutes before serving for the best flavor.
Freezing Instructions: Madeleines freeze exceptionally well, but for these chocolate-shelled versions, I recommend freezing them without the chocolate coating. Bake the madeleines as per the recipe, let them cool completely, then arrange them in a single layer on a baking sheet and freeze until solid (about 1-2 hours). Once frozen, transfer them to a freezer-safe airtight container or bag. They can be frozen for up to a month.
When you’re ready to enjoy them, simply thaw the madeleines at room temperature for a few hours. Once fully thawed, you can then proceed with the chocolate shell step as described in the recipe, ensuring a fresh and crisp chocolate coating. This method preserves both the delicate texture of the madeleine and the perfect snap of the chocolate shell.
Explore More Classic French Small Cakes & Desserts
- Cannelés de Bordeaux
- Mini Chocolate Eclairs
- Chocolate Choux Buns
- Chocolate Financiers
- Mini Chocolate Tarts
- Almond Financiers
Made this irresistible recipe?
We’d love to hear from you! Let us know if you liked it by leaving a comment below, and don’t forget to tag us on Instagram @a.baking.journey with a photo of your beautiful chocolate madeleine creations!
Recipe Card: Detailed Instructions for Chocolate Madeleines

Chocolate Madeleines with Dark Chocolate Shell
Print Recipe
Ingredients
For the Chocolate Madeleines
- 50 gr Unsalted Butter, melted and cooled
- 65 gr Plain / All-Purpose Flour
- 15 gr Unsweetened Cocoa Powder
- 1 teaspoon Baking Powder
- 1 pinch Fine Table Salt
- 1 large Egg, at room temperature
- 50 gr Caster Sugar (or fine granulated sugar)
- 40 ml Full Cream / Whole Milk
- 1 teaspoon Vanilla Extract (optional)
For the Dark Chocolate Shell
- 75 gr Dark Cooking Chocolate (70% cocoa recommended), finely chopped if using a bar
- Optional: 1/4 – 1/2 teaspoon Neutral Oil (if chocolate is too thick when melted)
Instructions
Making the Chocolate Madeleine Batter
- Melt the unsalted butter in a heatproof bowl in the microwave or a saucepan on the stove. Set it aside to cool completely to lukewarm or room temperature.
- In a large mixing bowl, sift together the all-purpose flour, unsweetened cocoa powder, baking powder, and fine table salt. Whisk them lightly to ensure they are well combined and lump-free.
- In a separate, large bowl, whisk together the large egg and caster sugar for about 3 to 4 minutes. The mixture should become very pale, double in size, and thicken to a ribbon-like consistency. This step is crucial for the madeleines’ light texture. Then, mix in the full cream milk (and optional vanilla extract) until just combined.
- Gently fold the sifted dry ingredients into the egg mixture. Whisk just until combined, forming a thick but smooth batter. Be careful not to overmix, which can lead to tough madeleines.
- Pour in the cooled melted butter and whisk until it’s fully incorporated, yielding a thick, smooth, and glossy batter.
- Cover the bowl with plastic wrap, pressing it directly onto the surface of the batter to prevent a skin from forming. Refrigerate for at least 3 hours, or preferably overnight, to develop flavor and ensure the characteristic madeleine hump.
Baking the Madeleines
- Preheat your oven to 200 degrees Celsius (390 degrees Fahrenheit). Generously grease a metal madeleine pan with softened butter, ensuring every cavity is well coated.
- Transfer the chilled batter into a piping bag and snip the tip to create a 1cm (1/2-inch) opening. Pipe the batter into each prepared madeleine cavity, filling it about halfway up. Avoid overfilling to ensure a good hump forms. (Alternatively, scoop with a spoon).
- Place the pan in the oven and bake for 3 minutes at 200°C (390°F). Then, without opening the door, lower the temperature to 180 degrees Celsius (350 degrees Fahrenheit) and bake for an additional 4 to 5 minutes, or until the madeleines have risen and the edges are lightly golden.
- Remove from the oven and let the madeleines cool in the pan for 10 to 15 minutes before gently demolding them onto a wire rack. Allow them to cool down completely before proceeding with the chocolate shell.
Creating the Dark Chocolate Shell
- Clean your madeleine pan thoroughly and ensure it is completely dry. Finely chop the dark cooking chocolate if using a bar. Melt it in a heat-proof bowl in 30-second microwave increments (stirring after each) or over a double-boiler until completely smooth and fluid. If needed, stir in 1/4 to 1/2 teaspoon of neutral oil to achieve a good consistency for coating.
- Using a teaspoon, pour about 1 teaspoon of melted chocolate into each madeleine pan cavity (adjust amount for pan size). Use the back of the spoon to spread the chocolate evenly around, almost to the top of the cavity.
- Gently press a cooled madeleine (flat side down) over the chocolate in each cavity. Lightly wiggle or twist it to encourage the chocolate to rise up and fully coat the bottom. Alternatively, simply dip the bottom of each madeleine into the melted chocolate and place on parchment paper to set.
- Once all madeleines are coated in the pan, place the pan in the fridge for 30 minutes, then in the freezer for 15 minutes. Once the shells are completely set, they should easily pop out of the mold. If stubborn, use a small blunt knife to gently lift them out.
Would you like to save this recipe?
We’ll email this post to you, so you can come back to it later!
Nutrition (per serving)
