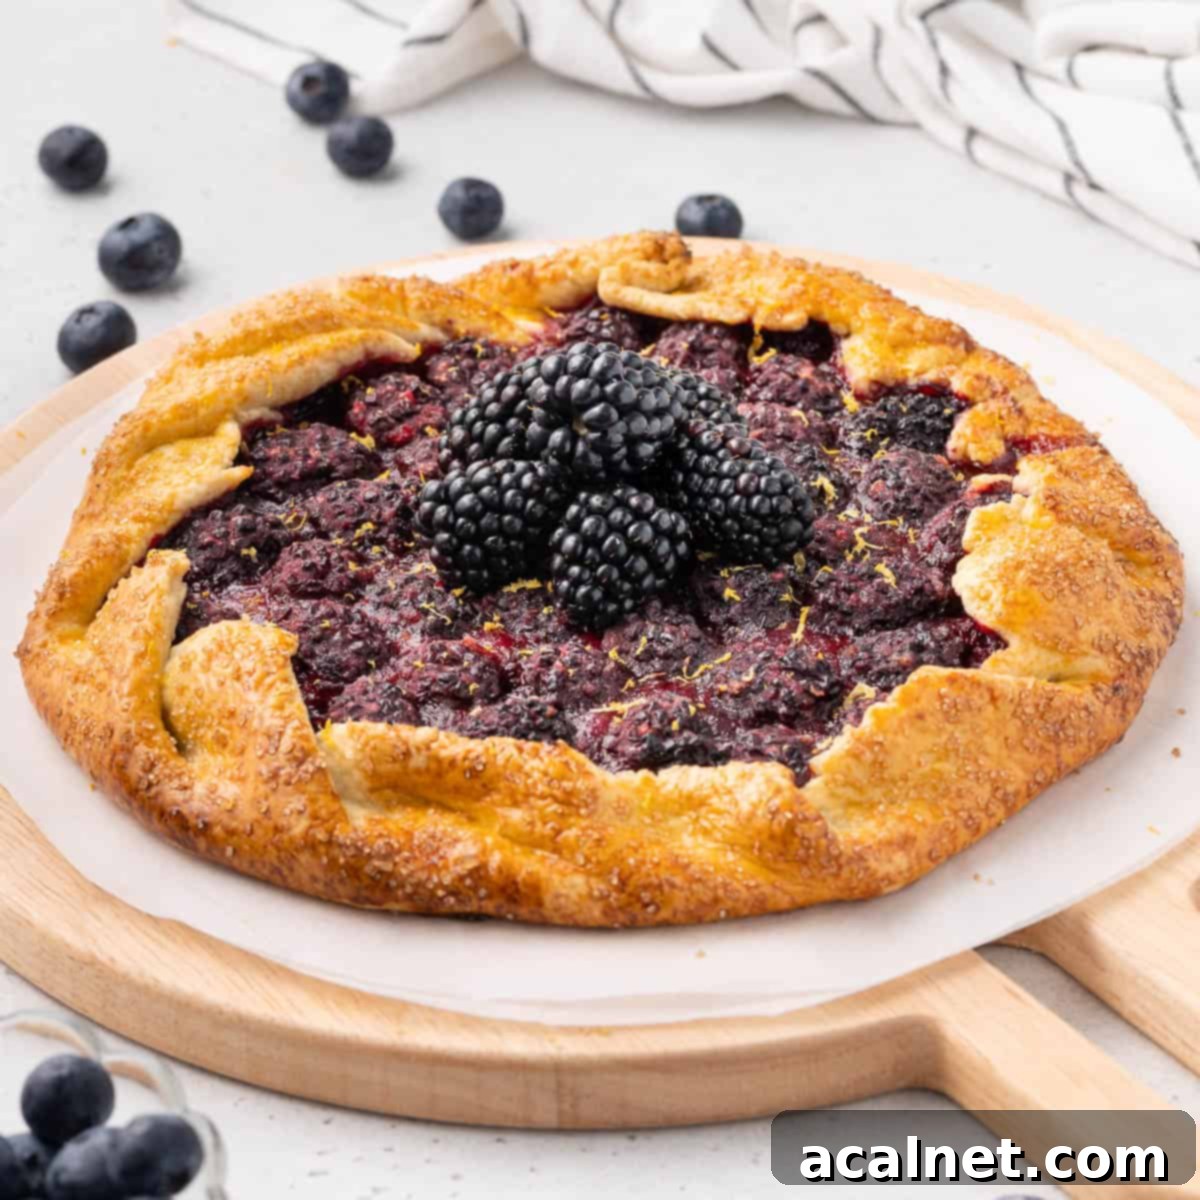
Easy Rustic Blackberry Tart (Galette) Recipe: Flaky Crust, Sweet-Tart Filling
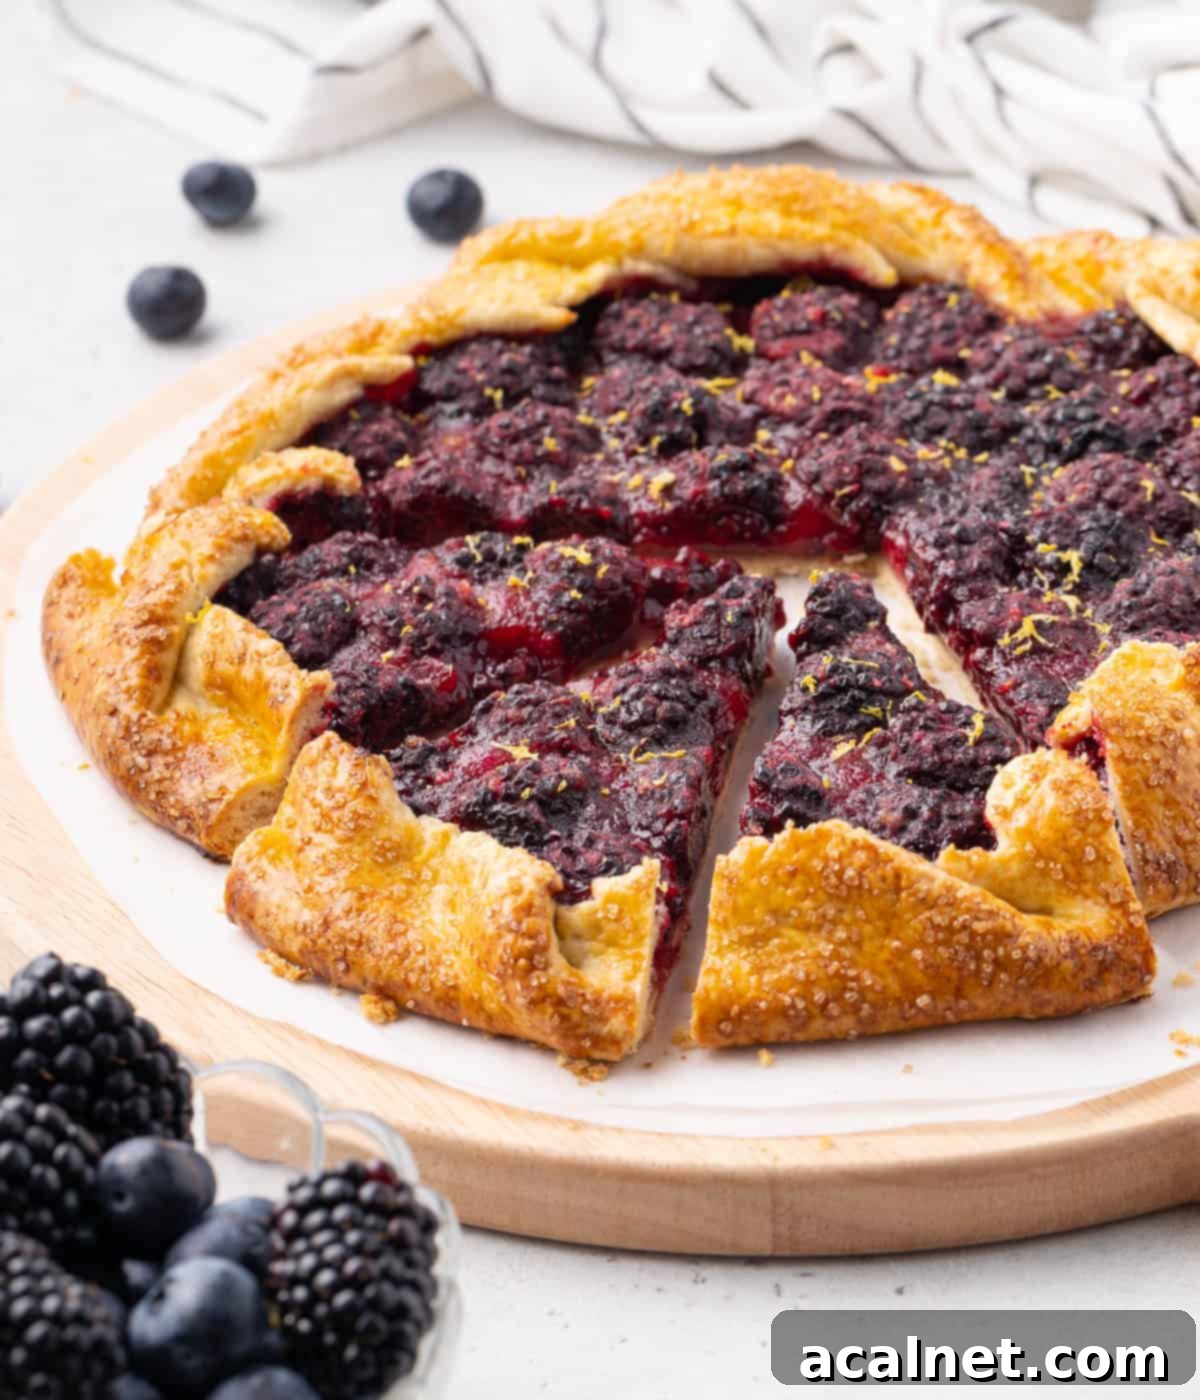
Discover the joy of baking a truly irresistible dessert with this **Rustic Blackberry Tart**, also lovingly known as a Blackberry Galette. This recipe promises a heavenly combination of a buttery, perfectly flaky crust and a sweet yet beautifully tart blackberry filling that bursts with fresh flavor in every bite. Best of all, you don’t need any special tart pans or complicated equipment – its free-form, rustic charm is part of its appeal, making it incredibly quick and easy to prepare. Perfect for impressing guests or simply indulging in a delightful homemade treat, especially when blackberries are at their peak season.
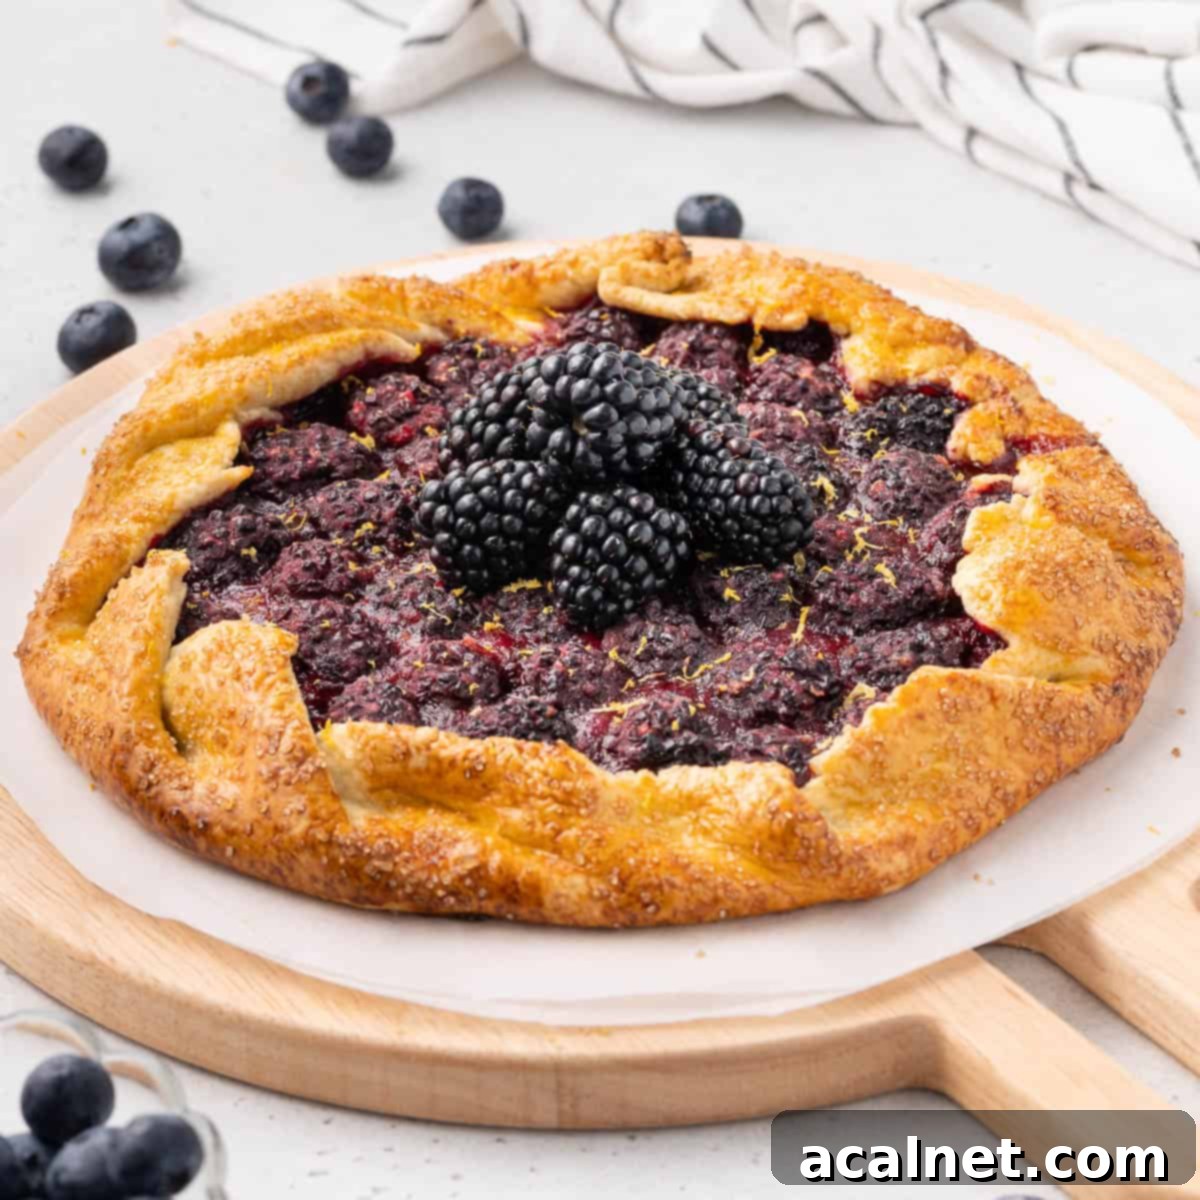
Why You’ll Adore This Rustic Blackberry Tart Recipe
This blackberry galette isn’t just a dessert; it’s a celebration of seasonal bounty and simple baking at its finest. We are absolutely captivated by this recipe for several compelling reasons. First, it offers a wonderfully straightforward yet incredibly impressive way to utilize a generous amount of fresh, in-season blackberries. When berries are plump and flavorful, this tart lets their natural sweetness and tang shine through beautifully.
The magic of a galette lies in its simplicity and minimal fuss. Unlike traditional tarts that often demand precise pan lining and pie weights, this rustic dessert is free-formed. Its buttery, lightly flaky shortcrust pastry, also known as pâte brisée, is simply folded over the filling, creating an effortlessly elegant look. This means no special tart pan is required, making it accessible even for novice bakers. The blackberry filling itself is astonishingly easy to prepare, often taking less than 5 minutes to combine, allowing you to quickly move from prep to oven.
The harmonious blend of the crisp, rich pastry and the juicy, sweet-tart blackberries creates a truly divine experience. Each bite delivers a delightful contrast in textures and an explosion of fresh fruit flavor. Whether served warm from the oven or cooled, it’s a versatile treat that pairs wonderfully with a myriad of accompaniments. Imagine it with a sprinkle of extra fresh blackberries, a generous dollop of homemade whipped cream, or a scoop of creamy vanilla bean ice cream. It’s the perfect ending to any meal, a delightful afternoon snack, or a stunning centerpiece for a casual gathering.
What Exactly is a Galette?
A galette is a term used in French cuisine to describe a flat, round cake of pastry dough, often with a sweet or savory filling, baked without a mold or pan. It’s essentially a rustic, free-form tart. The edges of the pastry are simply folded over the filling, creating an organic, charmingly imperfect border that showcases the delicious contents within. This distinctive method of preparation gives galettes their signature homemade and approachable appeal.
While commonly associated with sweet fruit fillings, much like this delightful blackberry version, galettes are incredibly versatile. They can be transformed into savory dishes using a variety of vegetables, cheeses, and herbs, making them suitable for appetizers or light main courses. The beauty of the galette lies in its unfussy nature; it embraces imperfections and celebrates simple, fresh ingredients, making it a beloved choice for home bakers looking for impressive results without the stress of perfection.
More delightful galette recipes and fruit tarts to explore:
- Easy Peach Galette
- Strawberry Galette
- Apple Galette
- Mini Cherry Tarts
Essential Ingredients for Your Blackberry Tart
Crafting this exquisite blackberry tart requires a few simple, high-quality ingredients, divided into three key components: the flaky crust, the vibrant fruit filling, and the finishing touches that elevate its flavor and appearance. Here’s a detailed look at what you’ll need and why each ingredient plays a crucial role:
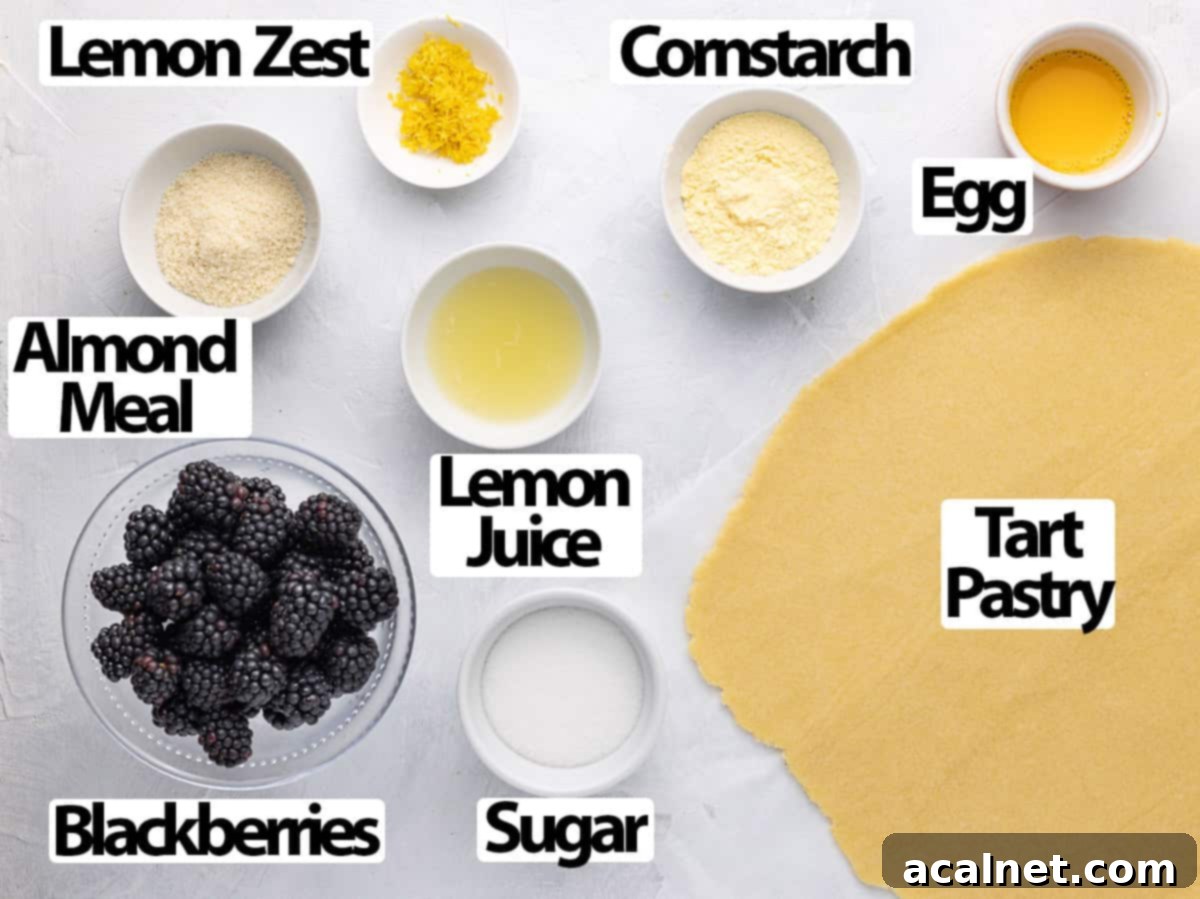
Scroll down to the detailed recipe card below for all exact quantities and measurements.
For the Flaky Tart Crust (Pâte Brisée):
- All-Purpose Flour + Fine Table Salt: These form the foundation of our pastry. The flour provides structure, while a pinch of salt enhances all the flavors and balances the sweetness.
- Caster Sugar: Also known as superfine granulated white sugar, it adds a delicate hint of sweetness to the crust without making it overly dessert-like, perfectly complementing the fruit filling.
- Unsalted Butter: This is the star for flavor and texture! It must be very cold and cut into small cubes. Cold butter is key to achieving that wonderfully flaky, tender crust, as it creates steam pockets during baking.
- Very Cold Water: Essential for bringing the dough together without developing too much gluten, which can lead to a tough crust. The exact quantity can vary slightly based on the brand of flour and humidity, so add it gradually until the desired consistency is reached.
For the Vibrant Blackberry Filling:
- Blackberries: Fresh blackberries are highly recommended for the best flavor and texture, especially when they’re in season. However, you can also use frozen blackberries; just ensure they are fully thawed and thoroughly drained to prevent excess moisture.
- Cornstarch: This acts as a thickening agent, crucial for binding the juices released by the blackberries during baking. It prevents the filling from becoming too watery and ensures a beautifully set tart. You can substitute it with other starches like arrowroot or tapioca, or even a small amount of plain flour.
- Lemon (Juice and Zest): Lemon is vital here! The fresh lemon juice brightens the flavors of the blackberries, cutting through their sweetness and adding a delightful tang. The zest provides an aromatic pop of citrus that perfectly complements the berries.
- Caster Sugar: To sweeten the tart blackberries, balancing their natural acidity and enhancing their fruity notes. Adjust to your taste, depending on the sweetness of your berries.
For the Perfect Finishing Touches:
- Almond Meal (or Alternatives): This is a fantastic secret weapon to prevent a soggy tart bottom! Spreading a thin layer of almond meal (finely ground almonds) over the pastry before adding the filling helps to absorb any excess moisture released by the fruits. Semolina or additional cornstarch can also work effectively.
- Egg: Used for an optional egg wash. A lightly whisked egg brushed over the crust edges before baking gives the tart a beautiful golden-brown sheen and a slightly crisper texture.
- Raw Sugar (e.g., Turbinado or Demerara): Also optional, but a simple and delicious way to add a lovely crunch and sparkling finish to the pastry edges. Its larger crystals hold up well during baking.
How to Craft Your Delicious Blackberry Tart (Galette)
Making this rustic blackberry tart is a straightforward process, broken down into three easy stages: preparing the pastry, mixing the filling, and finally, assembling and baking your galette. Follow these steps for a perfect homemade dessert every time.
1. Preparing the Flaky Galette Pastry
The foundation of any great tart is its crust. While you can opt for store-bought shortcrust pastry or even puff pastry for convenience, making your own Pâte Brisée dough is incredibly rewarding and ensures the best flavor and texture. This recipe guides you through making it in a food processor, though it can certainly be made by hand.
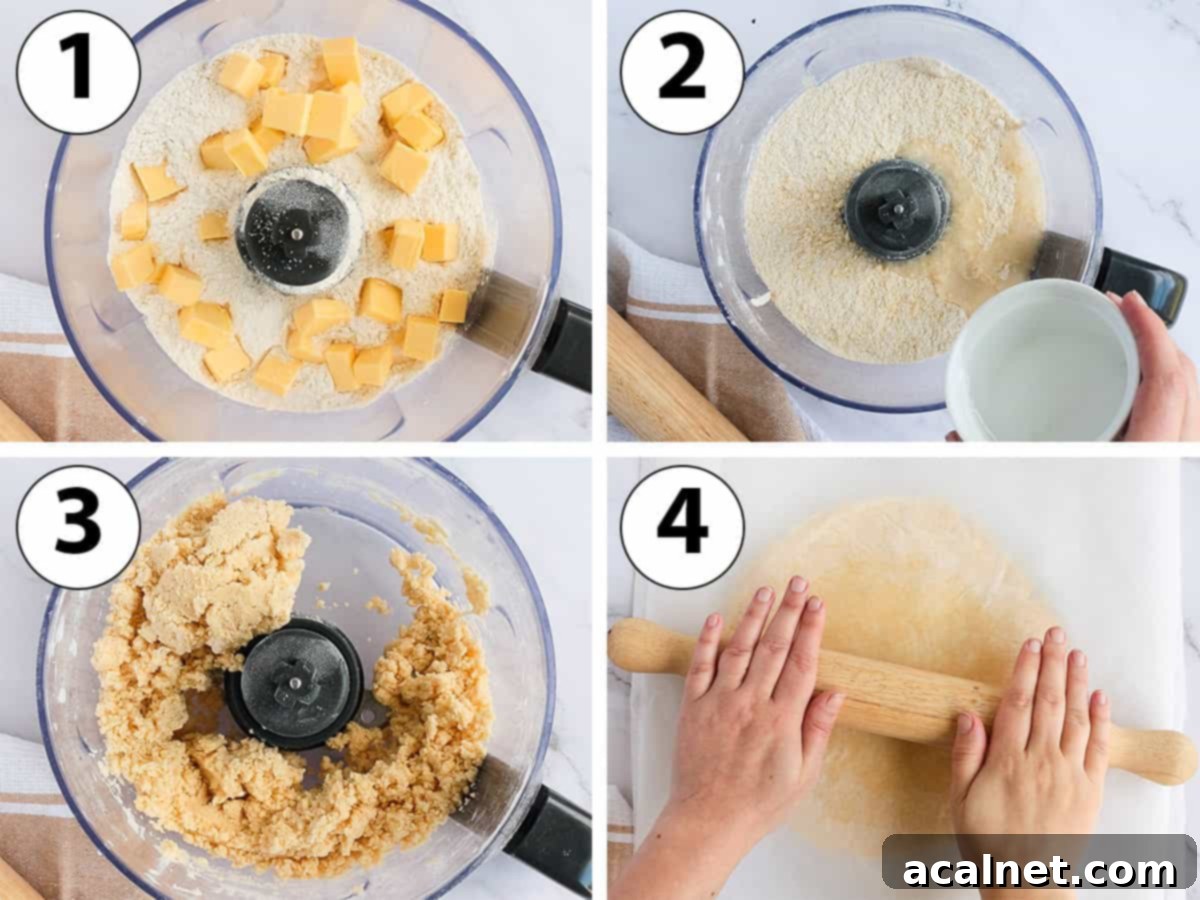
- Photo 1: Begin by combining the all-purpose flour, caster sugar, and a pinch of fine table salt in the bowl of your food processor. Pulse these dry ingredients for just a few seconds to ensure they are well mixed. Next, add the very cold, cubed unsalted butter. Pulse slowly and in short bursts. The goal is to cut the butter into the flour mixture until you achieve very small, pea-sized crumbs of butter. Remember, the larger the chunks of butter that remain, the flakier your pastry will ultimately be, so you can adjust the pulsing time to achieve your desired texture.
- Photo 2: With the food processor running on low, gradually add the very cold water, a little at a time. It’s crucial not to dump all the water in at once, as the exact amount needed can vary based on factors like the humidity in your kitchen and the specific brand of flour you’re using.
- Photo 3: Continue to add water and pulse until a rough, shaggy dough just begins to come together. Stop mixing as soon as this consistency is reached to avoid overworking the dough, which can lead to a tough crust. To check if the pastry has the right consistency, gently press a small amount of the crumbs between your fingers; if they stick together, it’s ready.
- Photo 4: Carefully gather the rough dough and press it gently into a flat disk. Place this disk between two sheets of baking paper (parchment paper). Using a rolling pin, roll the dough evenly into a large circle, approximately 4 mm (about 1/6 inch) thick. For best results and easy handling, place the rolled dough, still between the baking paper, into the fridge to chill for at least 1 hour. This chilling period is vital as it allows the butter to firm up and the gluten to relax, which contributes to a tender, flaky crust that is easy to work with.
This pastry can be prepared in advance, up to 24 hours ahead. Store it wrapped tightly in plastic wrap or already rolled out between baking paper in the refrigerator until you’re ready to use it. This makes the tart assembly even quicker on the day of baking.
2. Preparing the Juicy Blackberry Filling
While your pastry chills, you can swiftly prepare the star of the show: the blackberry filling. This step is incredibly quick and ensures maximum flavor.
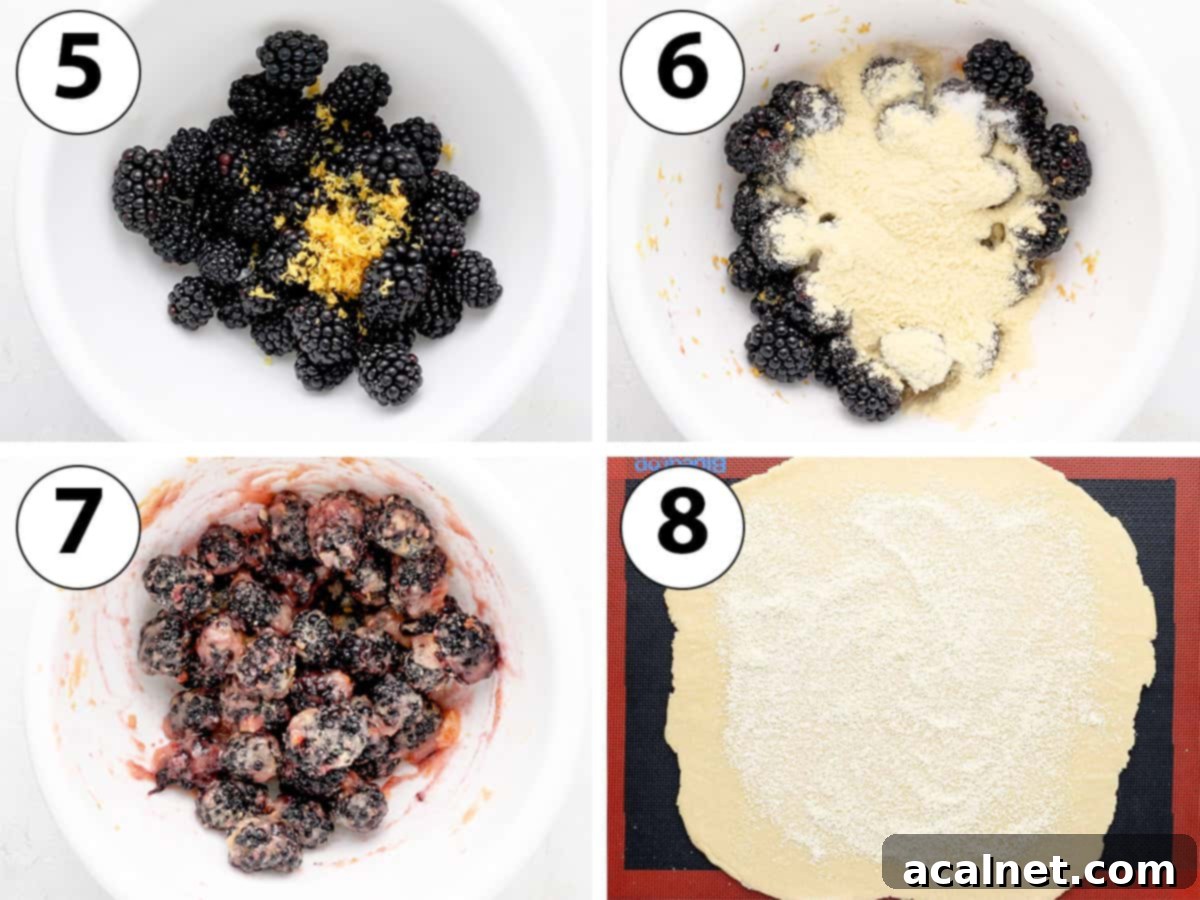
- Preheat your oven to 180 degrees Celsius (350 degrees Fahrenheit). Prepare a flat baking tray by lining it with a sheet of baking paper or a silicone baking mat. For the ultimate crispy bottom crust, using a perforated baking tray lined with a perforated baking mat is highly recommended, as it allows for optimal air circulation.
- Photo 5: In a large mixing bowl, gently combine the fresh blackberries with the bright lemon zest and tangy lemon juice. Toss them carefully to ensure the berries are coated without crushing them.
- Photo 6: Add the cornstarch and caster sugar to the bowl with the berries.
- Photo 7: Gently toss all the ingredients together until the blackberries are evenly coated with the cornstarch and sugar mixture. This ensures that the juices released during baking will thicken nicely and the sweetness will be distributed.
- Photo 8: Remove your chilled pastry from the fridge and carefully peel off the top layer of baking paper. Place the pastry, still on its bottom sheet of baking paper, onto your prepared baking tray. Spread the almond meal evenly over the pastry, leaving a clear border of about 2 to 3 cm (3/4 to 1 inch) around the edges. This almond meal layer is crucial for absorbing moisture and preventing a soggy bottom crust.
3. Assembling and Baking Your Blackberry Galette
With your pastry and filling ready, it’s time for the exciting part – assembling your beautiful, rustic tart. The free-form nature of a galette makes this stage quite enjoyable.
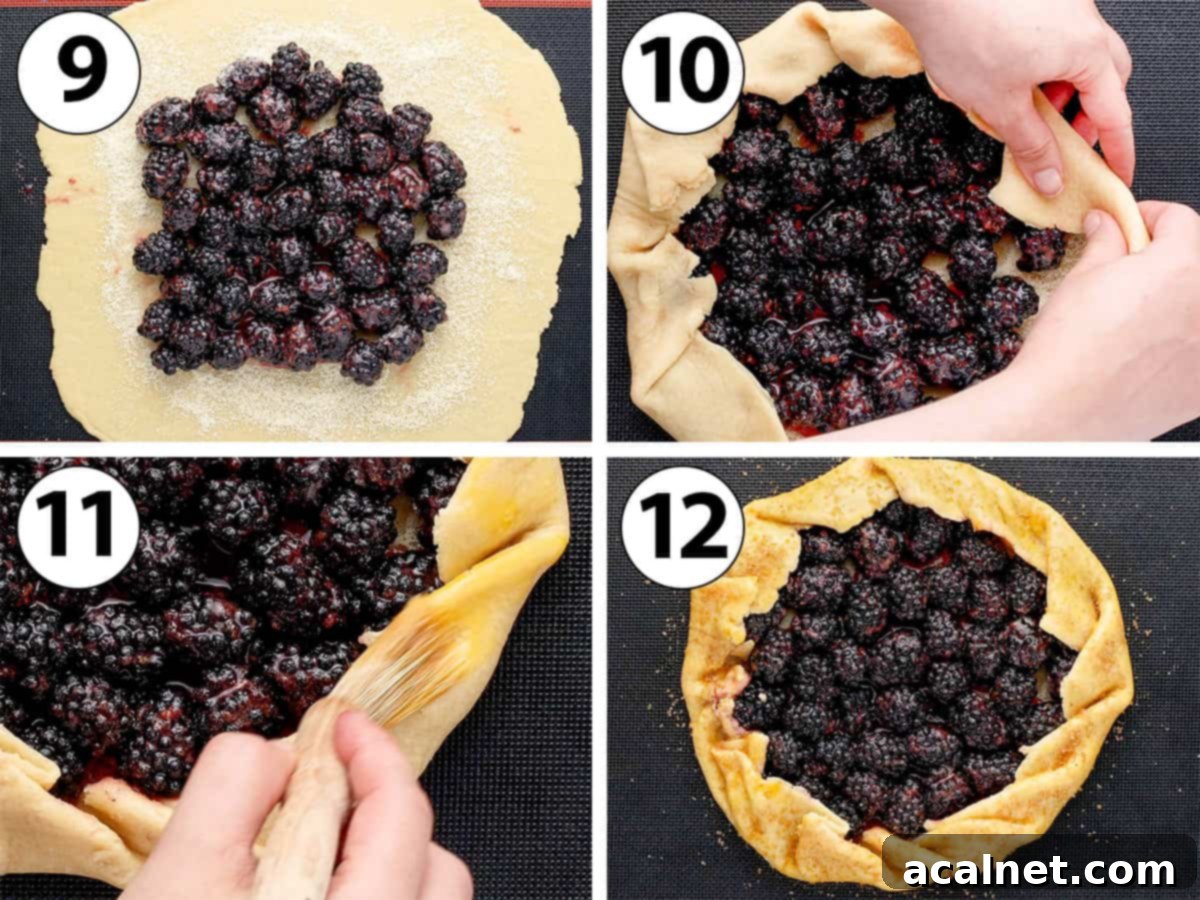
- Photo 9: Carefully pour the blackberry mixture into the center of the almond meal-dusted pastry. Spread the fruit slightly to create an even layer, ensuring it doesn’t extend into the clear border you left earlier. Don’t forget to scrape any delicious leftover juices from the bowl over the berries!
- Photo 10: Now comes the rustic folding. Gently pick up the exposed edges of the pastry and fold them inwards, over the outer ring of blackberries. Work your way around the tart, creating a pleated or crimped edge. The goal is to create a secure border that contains the filling while still leaving the center of the fruit exposed. Ensure there are no large gaps in the folded crust where the juicy filling might bubble out during baking.
- Photo 11: For an extra touch of golden perfection, lightly whisk one egg in a small bowl to create an egg wash. Using a pastry brush, lightly brush this egg wash over the folded edges of the pastry crust. This step is optional but contributes to a beautiful, shiny, and golden-brown finish.
- Photo 12: Optionally, sprinkle a generous amount of raw sugar (like turbinado or demerara sugar) over the egg-washed crust. These coarser sugar crystals add a wonderful sparkle and a delightful textural crunch to the pastry once baked.
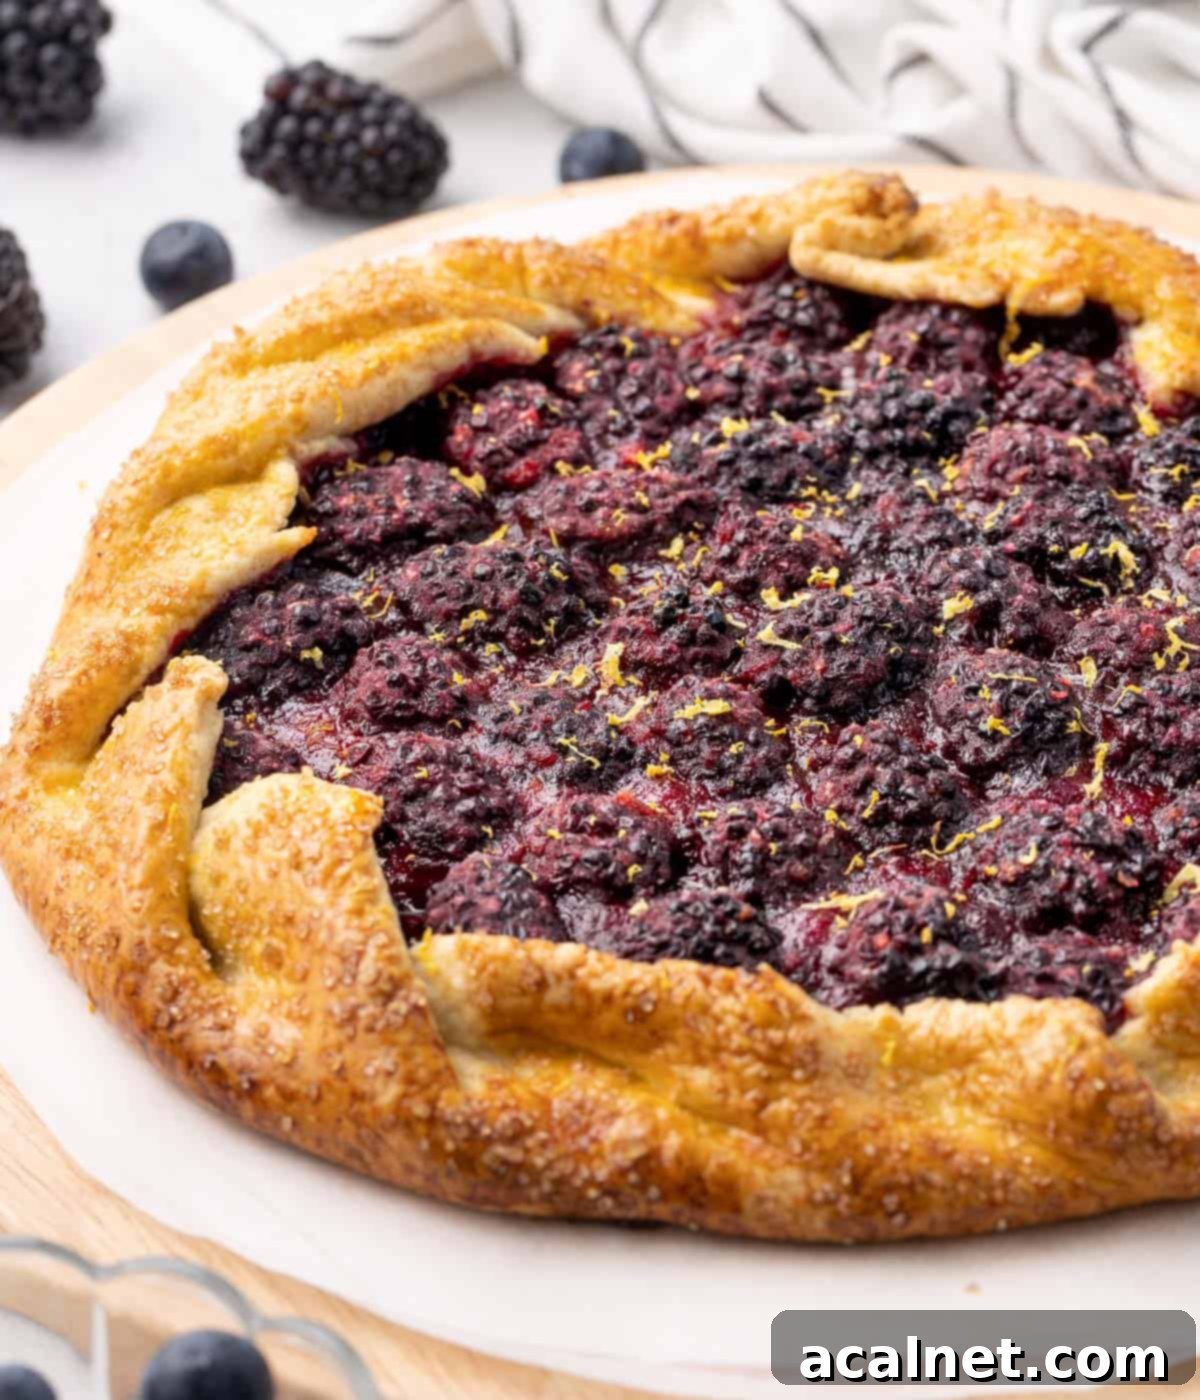
- Bake your assembled blackberry tart for 35 to 40 minutes, or until the pastry edges are beautifully golden brown, and the blackberries in the center are visibly soft, bubbly, and fragrant. The filling should be thickened and set. Once baked, carefully transfer the galette on its baking paper to a wire rack and allow it to cool down before slicing and serving. This cooling time is important for the filling to fully set.
- For an extra flourish, you can optionally grate a little more fresh lemon zest over the cooled tart for a pop of color and an extra citrusy aroma. Serve this delectable blackberry galette with your favorite accompaniments, such as a luxurious dollop of whipped cream, a scoop of premium vanilla ice cream, or even a sophisticated crème anglaise.
Frequently Asked Questions About This Blackberry Galette
Absolutely! While fresh blackberries provide the best texture and vibrant flavor, you can certainly use frozen ones. The key is to make sure they are fully thawed before incorporating them into the filling. Once thawed, thoroughly drain any excess liquid that has accumulated. This prevents the tart filling from becoming too watery and ensures a perfectly set galette.
Yes, you have several delicious options for the pastry! While the recipe features a classic Pâte Brisée for its wonderful flakiness, you could also opt for a Pâte Sablée (French Shortcrust Pastry) for a slightly richer, more delicate crust. Alternatively, a Pâte Sucrée (Sweet Shortcrust Pastry) would give your tart a texture reminiscent of a sugar cookie. For an intriguing flavor twist, consider using my Chocolate Pie Crust, as chocolate and blackberry make an incredibly decadent and complementary pairing!
A soggy bottom crust is a common concern with fruit tarts, but it’s easy to avoid with a simple trick! The secret lies in creating a barrier that absorbs the natural juices released by the fruit during baking. In this recipe, we use almond meal, which works wonderfully. You could also effectively use cornstarch or semolina as an absorbent layer spread over the raw pastry before adding the fruit filling. This helps to keep your crust perfectly crisp and delightful.
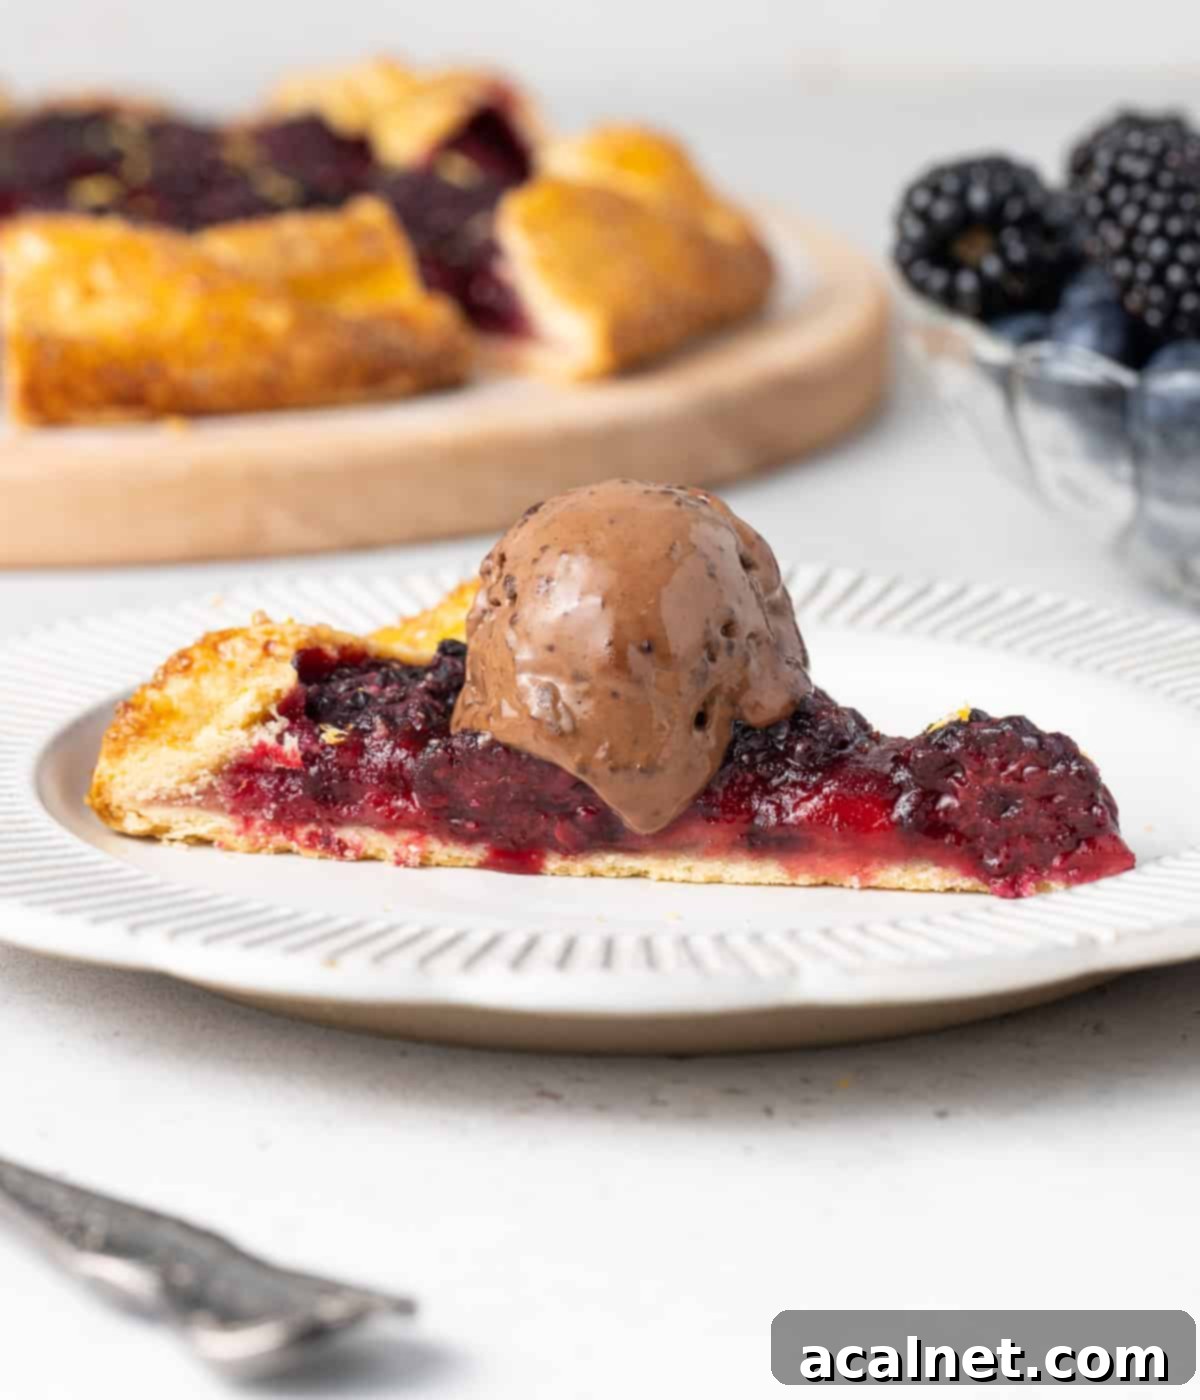
This blackberry galette is incredibly versatile when it comes to serving! For a touch of visual appeal and an extra citrusy kick, I often top it with a little more fresh lemon zest. My personal favorite pairing is with a scoop of rich chocolate ice cream, which complements the tartness of the berries beautifully. However, it’s equally fantastic with classic vanilla ice cream, a generous dollop of freshly whipped cream, or for a more elegant touch, a warm Crème Anglaise (custard sauce). Enjoy it warm or at room temperature!
Expert Tips & Tricks for the Perfect Blackberry Tart
Achieving a bakery-quality rustic blackberry tart at home is easier than you think, especially with these helpful tips and tricks:
- **Roll Your Pastry Thinly for Balance:** It’s important to roll your pastry dough to approximately 4 mm (about 1/6 inch) thickness. If the crust is too thick, it can overwhelm the delicate fruit filling, creating an imbalance in texture and flavor. Using a rolling pin with thickness rings can help you achieve a perfectly even roll every time.
- **Don’t Skip the Chilling Time:** The pastry absolutely needs to rest in the fridge for at least 1 hour before you use it – and even longer, ideally overnight, is often better. This extended chilling time is crucial for two reasons: firstly, it ensures the butter is very cold, which is essential for developing a wonderfully flaky and tender texture. Secondly, it allows the gluten in the flour to relax, making the dough much easier to roll out and fold without tearing or shrinking during baking.
- **Utilize Perforated Baking Equipment:** For the best possible bottom crust, consider investing in a perforated baking tray and a matching perforated silicone baking mat. These specialized tools are designed to promote even airflow around the entire tart, including the underside. This results in a perfectly baked, gloriously crisp bottom crust that will never be soggy.
- **Experiment with Berry Combinations:** While pure blackberry is divine, feel free to get creative with your fruit filling! Replace a portion of the blackberries with other complementary berries like sweet blueberries, juicy strawberries, or tangy raspberries. This not only adds complexity to the flavor profile but also creates a beautiful mosaic of colors in your tart.
Storing & Freezing Your Blackberry Tart
Proper storage is key to enjoying your delicious rustic blackberry tart for as long as possible. Here’s how to keep it fresh:
This tart is best enjoyed fresh, ideally within 24 hours of baking, when the crust is at its crispiest. However, any leftovers can be stored in an airtight container in the fridge for up to 3 days. If you prefer to enjoy it warm, you can slightly reheat individual slices in a preheated oven (around 150°C/300°F) for about 10-15 minutes, or until warmed through, which will help to refresh the crust.
You can also freeze the entire baked galette or individual slices. To freeze, ensure the tart is completely cooled, then wrap it tightly in plastic wrap and then in aluminum foil to prevent freezer burn. It can be stored in the freezer for up to 2-3 months. To thaw, simply transfer it to the fridge overnight or allow it to come to room temperature for a few hours. Reheat gently in the oven if desired for that fresh-baked taste.
For making ahead, the most convenient method is to prepare the pastry dough in advance and freeze it. Once thawed (preferably overnight in the fridge), simply roll it out, top with the fresh blackberry filling, and bake as per the recipe instructions. This ensures a fresh, delicious tart with minimal effort on the day you plan to serve it.
Explore More Delectable Fruit Tarts
- Peach Tarte Tatin
- Pear Frangipane Tart
- Strawberry Custard Tart
- Apple Frangipane Tart
- French Orange Tart
- Lemon Curd Tart
- Raspberry Tart
Did you create this delicious recipe?
We’d love to hear from you! Please let us know if you liked it by leaving a comment below, and don’t forget to tag us on Instagram @a.baking.journey with a photo of your beautiful creation!
Full Recipe Details

Rustic Blackberry Tart (Galette)
Servings:
8
Author:
Sylvie
25 minutes
35 minutes
1 hour
2 hours
Print Recipe
Prevent your screen from going dark
Ingredients
Tart Pastry (Pâte Brisée)
- 180 gr Plain / All-Purpose Flour
- 15 gr Caster Sugar
- 1 pinch Fine Table Salt
- 90 gr Unsalted Butter, very cold
- 60 ml Water, very cold
Blackberry Filling
- 400 gr Fresh Blackberries
- 1 teaspoon Lemon Zest, (about 1 small lemon)
- 30 ml Lemon Juice
- 15 gr Cornstarch
- 65 gr Caster Sugar
To assemble the Tart
- 10 gr Almond Meal
- 1 Egg, for egg wash (optional)
- Raw Sugar, to taste (optional)
Instructions
Tart Pastry
- Place the flour, sugar and salt in the bowl of your food processor and pulse for a few seconds to mix. Add the very cold butter cut into small cubes. Pulse to mix until you get very small crumbs of butter.
- Add the cold Water a little bit at the time while pulsing (see note 1) Stop when a rough dough starts to come together (see note 2).
- Bring the pastry together into a disk and place between two sheets of baking paper Using a rolling pin, roll into a large disk that is about 4 mm (1/6 inch) thick. Place in the fridge to chill for at least 1 hour.
Blackberry Filling
- In a large bowl, toss together the blackberries, lemon zest and lemon juice. Mix in the cornstarch and sugar; the blackberries should be evenly covered with all the other ingredients.
Assembling the tart
- Preheat your oven on 180 degrees Celsius / 350 degrees Fahrenheit. Prepare a flat tray with a sheet of baking paper or baking mat (see note 3).
- Remove the baking paper and place the chilled pastry over the prepared baking tray.
- Spread the almond meal over the pastry in an even layer, leave about 2 to 3 cm clear around the edges (3/4 to 1 inch). Top with the blackberry mixture, spread into an even layer.
- Pick up the edges of the pastry and fold them over, slightly covering the outer ring of blackberries. Make sure there are no gaps within the folded pastry where the filling could escape.
- Optional: lightly whisk the egg in a small bowl and brush it over the rolled edges of pastry. Sprinkle the crust with some raw sugar.
- Bake for 35 to 40 minutes, or until the edges of the pastry are golden and the blackberries are very soft. Leave to cool down on a wire rack before serving.
Video
Would you like to save this recipe?
We’ll email this post to you, so you can come back to it later!
Notes
- Do not add all the water at once; you might need more or less than the recommended quantity depending on your flour. Rely on the consistency rather than the quantity.
- To know the pastry has the right consistency, gently press some of the crumbs together. If they stick together, it is ready.
- You will get the best results by using a perforated tray lined with a perforated baking mat, which will allow for the even baking of the tart.
Nutrition (per serving)
Carbohydrates: 34g |
Protein: 4g |
Fat: 11g |
Saturated Fat: 6g |
Polyunsaturated Fat: 1g |
Monounsaturated Fat: 3g |
Trans Fat: 0.4g |
Cholesterol: 48mg |
Sodium: 9mg |
Potassium: 115mg |
Fiber: 3g |
Sugar: 13g |
Vitamin A: 421IU |
Vitamin C: 12mg |
Calcium: 28mg |
Iron: 2mg
