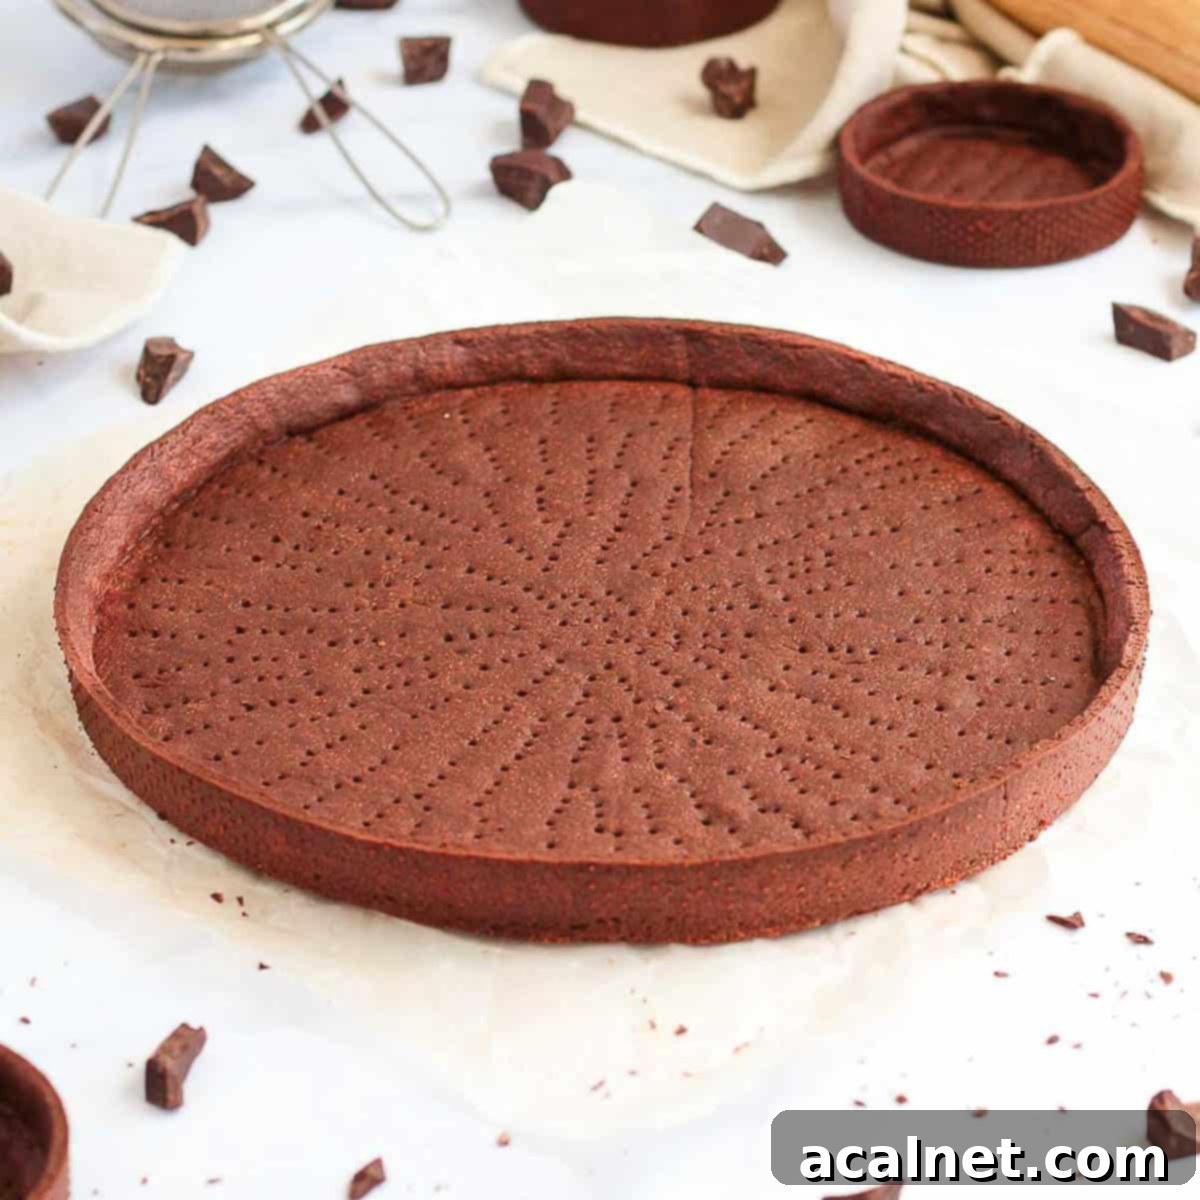
Easy 5-Ingredient Chocolate Tart Crust (Pâte Sablée) for Perfect Homemade Tarts
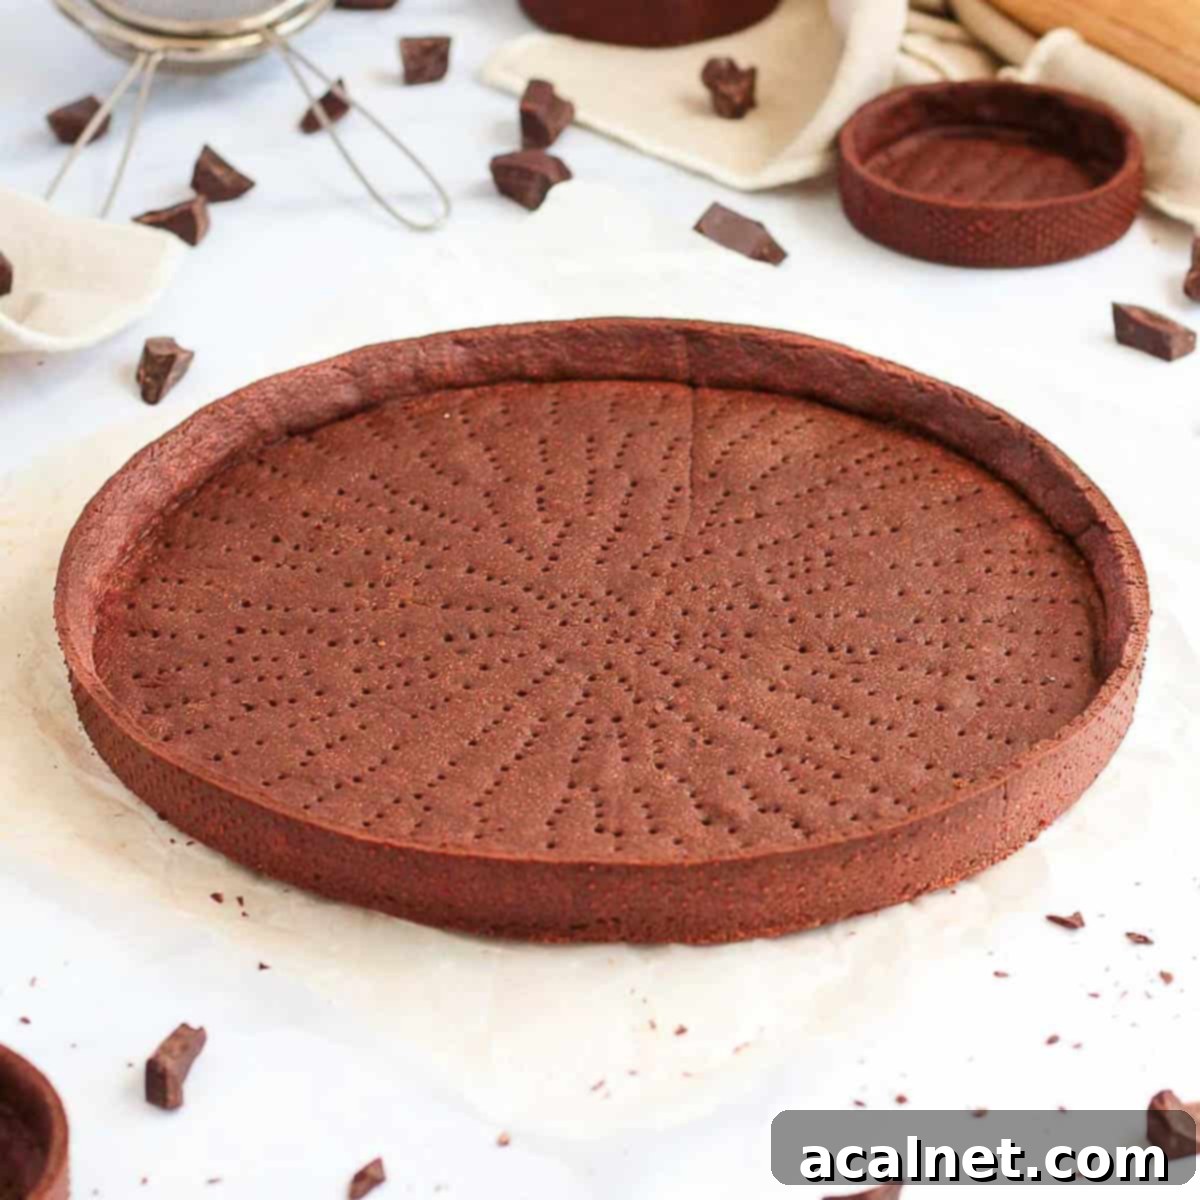
Mastering the art of tart making starts with a phenomenal crust, and this **Chocolate Tart Crust** is nothing short of perfection. Incredibly easy to prepare, either by hand or with a food processor, this recipe requires just 5 essential ingredients. Our Chocolate Pâte Sablée (a delightful shortcrust-style pastry dough) provides a rich, chocolatey foundation that’s wonderfully versatile, serving as the ideal base for a wide array of fillings – from vibrant fruity tarts to decadent creamy or intensely chocolate-filled creations.
[feast_advanced_jump_to]
The Irresistible Charm of Homemade Chocolate Tart Crust
While the convenience of a pre-made pie crust is undeniable, nothing truly compares to the superior taste, texture, and sheer satisfaction of a homemade pastry. This particular **chocolate tart crust** is a delightful adaptation of my classic French Shortcrust Pastry (Pâte Sablée), infused with a rich and delicious chocolate flavor that elevates any dessert.
The world of pie crusts offers a multitude of options, each designed to complement various tart and pie fillings with specific textures and flavors. From the crisp and crumbly perfection of a Sweet Shortcrust Pastry to the simple flakiness of a Savoury Shortcrust Pastry, there’s ample room for experimentation. This chocolate version stands out for its unique blend of cocoa richness and buttery tenderness, creating a cookie-like base that crumbles beautifully with every bite.
For many, making pastry from scratch can seem daunting, especially if it’s your first time. However, I assure you, it’s far simpler than it appears! With a handful of basic ingredients and a few fundamental techniques, you’ll be crafting impressive tart crusts in no time. This comprehensive guide will walk you through two distinct methods for preparing this versatile pastry: by hand, offering a more tactile experience, and with a food processor, for ultimate speed and consistency.
This incredibly versatile pastry is perfect for a variety of dessert applications. Imagine it as the foundation for a vibrant Chocolate Cherry Tart, a deeply satisfying Baked Chocolate Tart, or a silky Chocolate Ganache Tart. Beyond large tarts, this recipe is also fantastic for creating individual Tartlet Shells, as demonstrated with these adorable Mini Chocolate Tarts, offering perfectly portioned treats for any occasion.
Key Ingredients for Your Perfect Chocolate Pâte Sablée
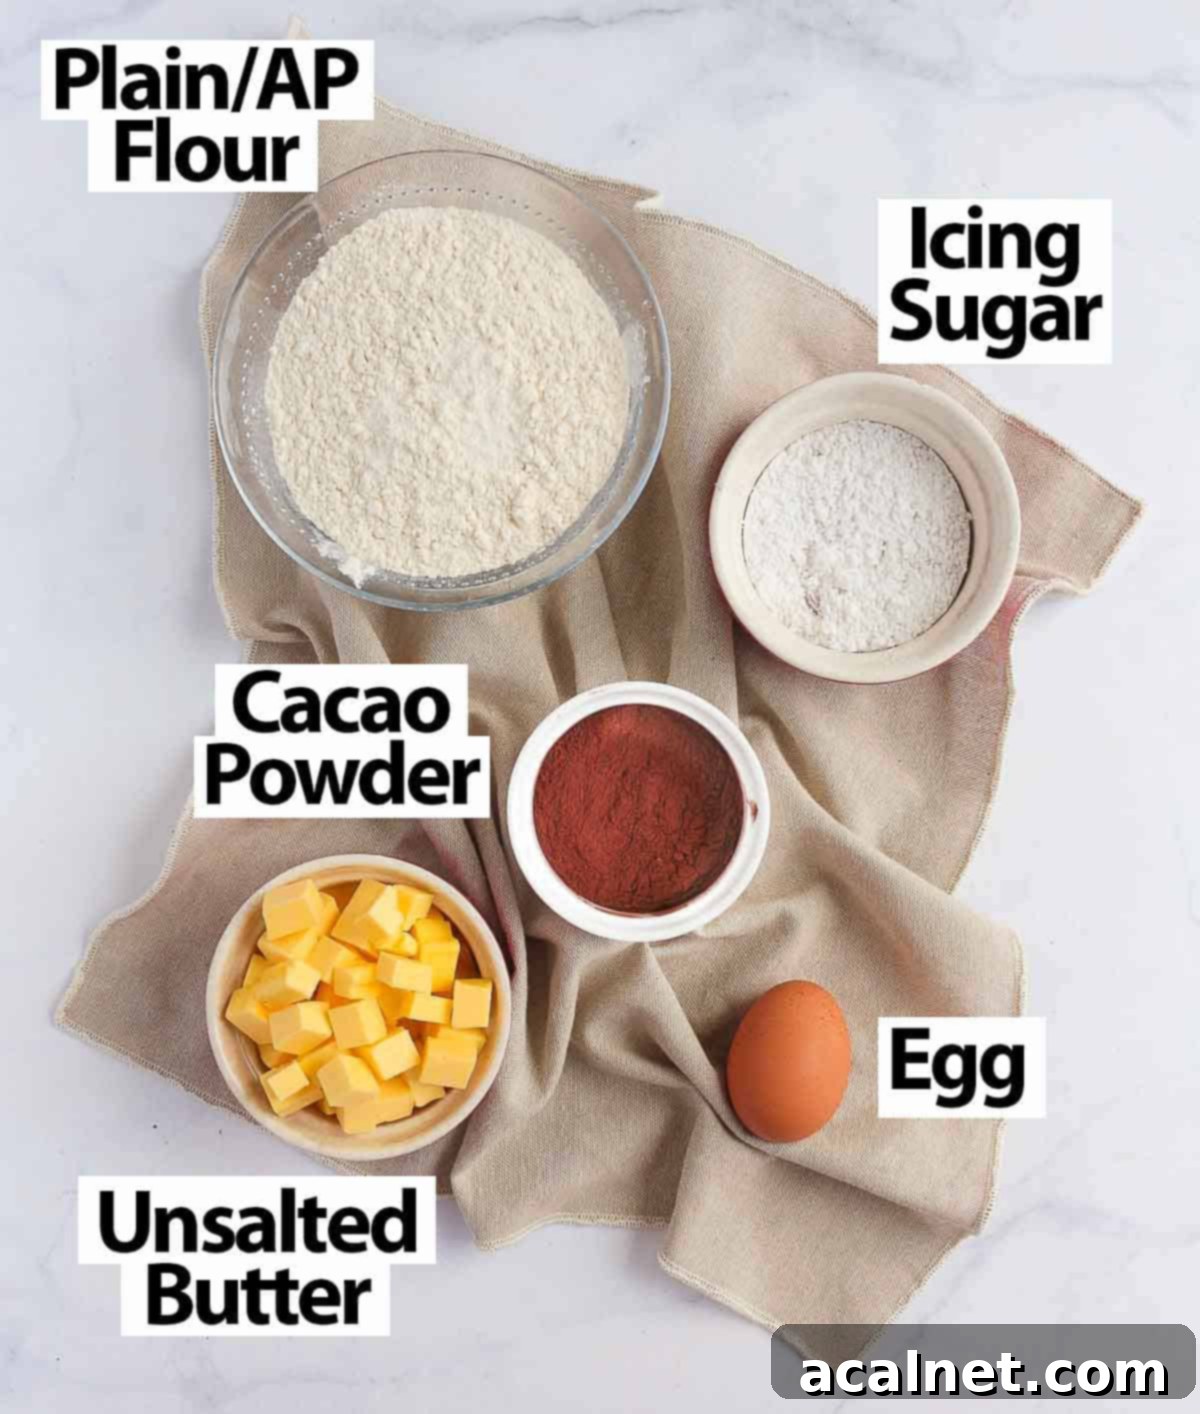
Just like the classic Pâte Sablée this recipe is inspired by, our chocolate tart pastry relies on a minimal list of just 5 fundamental ingredients. The simplicity of the ingredients ensures that the rich flavor of the chocolate and butter truly shines through, creating a superior homemade crust.
Here’s a closer look at what goes into this delectable chocolate pie crust (for precise quantities, please scroll down to the detailed recipe card below):
- Flour: We use Plain / All-Purpose Flour. It is absolutely crucial to sift it beforehand to ensure a smooth, lump-free pastry. Sifting also aerates the flour, contributing to a tender crust. Please note, I have not tested this recipe with gluten-free flours, so I cannot guarantee the same results or texture with a substitution.
- Icing Sugar: Also known as Powdered or Confectioner’s Sugar. While some pastry recipes call for caster or granulated white sugar, I strongly prefer icing sugar for my Pâte Sablée. Its incredibly fine texture blends seamlessly with the other dry ingredients, preventing any grittiness and contributing to the delicate, melt-in-your-mouth quality of the finished crust.
- Cocoa Powder: Always opt for an unsweetened cocoa powder to control the sweetness of your crust. I typically use Natural Cocoa Powder, which provides a classic chocolate flavor, but Dutch-Processed Cocoa Powder will also work beautifully here, offering a darker color and a slightly milder, less acidic taste. Whichever you choose, ensure you sift it well before use, as cocoa powder is notorious for clumping during storage.
- Butter: Unsalted Butter is essential, and it must be very cold. The quality of your butter significantly impacts both the flavor and texture of your pastry. Using good quality, cold butter creates pockets of steam during baking, contributing to a wonderfully short and crumbly texture. If your butter is too warm, it will blend too readily with the flour, resulting in a tougher crust.
- Egg: The egg acts as the primary binder for this pastry dough, bringing all the ingredients together while adding richness and a subtle depth of flavor. I recommend using a medium-sized egg. Whisking it lightly before adding ensures it incorporates smoothly into the dry ingredients without overworking the dough.
To truly make this **chocolate pie crust** your own, consider a few customisation options. Adding a pinch of ground cinnamon or cardamom can introduce a warm, aromatic spice note that beautifully complements the chocolate. A small amount of salt is always a good idea to enhance the overall flavor, balancing the sweetness. For an extra boost of intense chocolate flavor, or a subtle coffee undertone, incorporate 1 to 2 tablespoons of fine coffee powder or espresso powder, adjusting the amount to your personal taste preferences.
Mastering Your Chocolate Shortcrust Pastry: Hand vs. Food Processor Methods
One of the most appealing aspects of this chocolate pie crust recipe is its adaptability; it can be prepared with equal success using two distinct methods: by hand or with a food processor. Personally, I almost always opt for the food processor when making my Sablé (shortcrust) pastries. It consistently yields the most uniform results with minimal effort and mess, making cleanup a breeze.
That being said, don’t despair if you don’t own a food processor! You can absolutely achieve a fantastic chocolate crust entirely by hand. A Pastry Cutter/Blender can be incredibly helpful for cutting the cold butter into the dry ingredients, ensuring an even distribution. However, even without specialized tools, your hands are perfectly capable of getting the job done, just be mindful of keeping the butter as cold as possible throughout the process.
Making the Pastry By Hands: A Traditional Approach
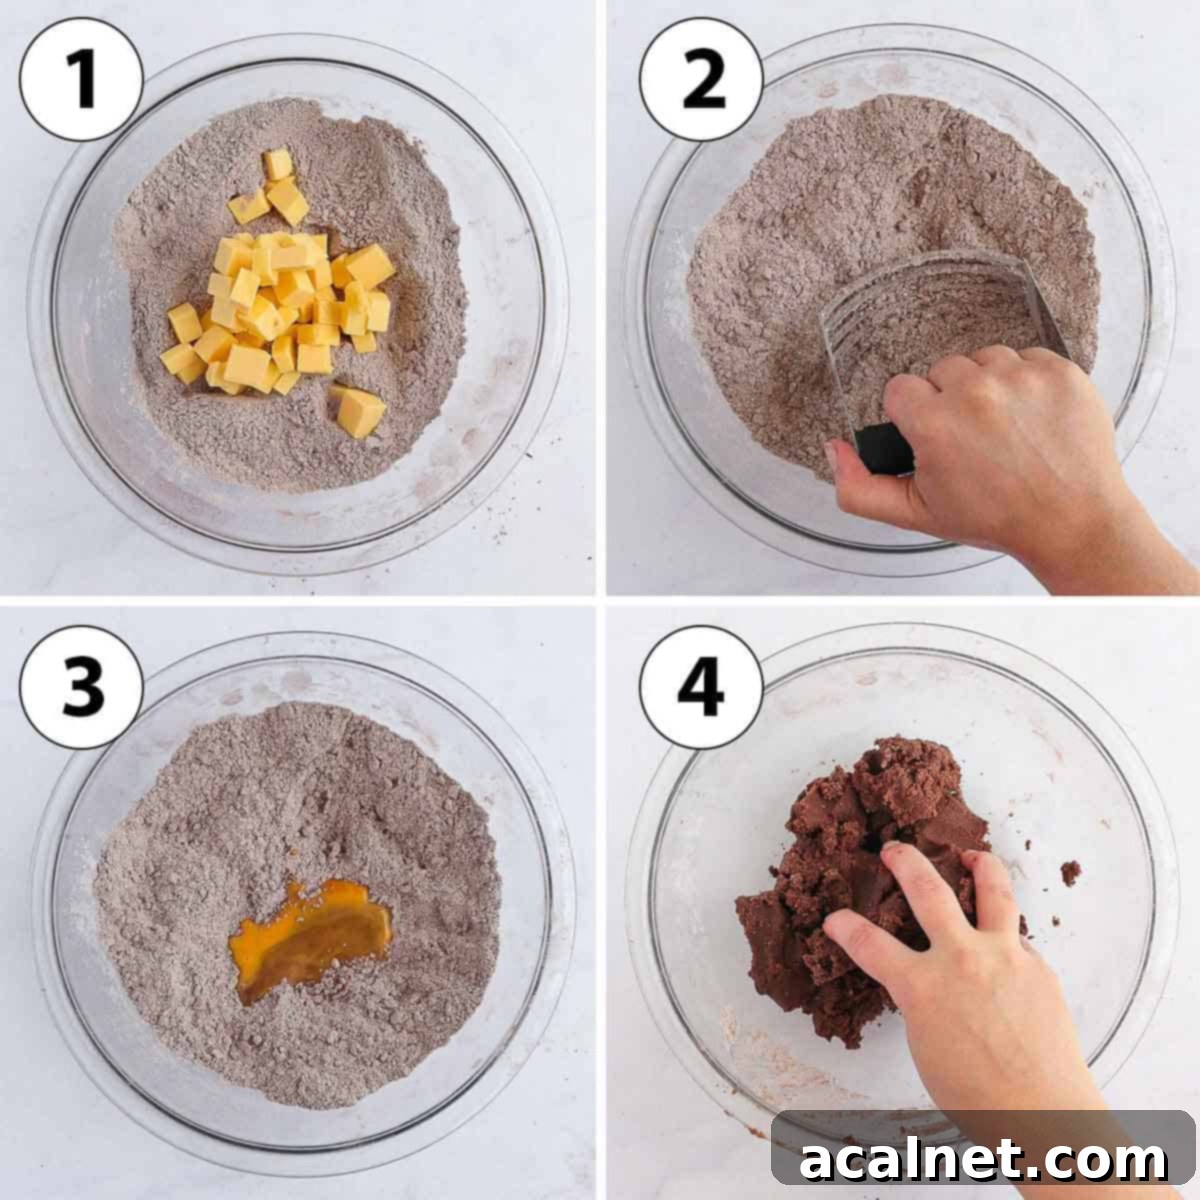
- Begin by meticulously sifting the Flour, Cacao Powder, and Icing Sugar into a large mixing bowl. This crucial step prevents lumps and ensures a smooth, even texture throughout your pastry. Once sifted, give them a gentle whisk to combine thoroughly.
- Photo 1: Introduce the very cold, unsalted Butter, which you’ve pre-cut into small cubes. Keeping the butter cold is paramount for achieving the desired crumbly texture.
- Photo 2: Using your fingertips or a specialized Pastry Blender/Cutter, work the butter into the dry ingredients. The goal is to “cut” the butter, meaning you’re breaking it down into smaller and smaller pieces, coating them with the flour mixture. Continue until you achieve a fine crumb consistency. If working purely by hand, rub the butter and dry powders together between your fingers and palms. The more evenly distributed and smaller the butter pieces, the more “short” or cookie-like your pastry will be. Conversely, slightly larger butter chunks can lead to a flakier result.
At this stage, you should no longer see large, distinct lumps of butter or any pockets of dry, unmixed powders. The mixture should resemble coarse sand or fine crumbs. Remember, the size of your butter crumbs directly influences the final texture; finer crumbs result in a more tender, cookie-like pastry, while slightly larger chunks yield a flakier crust.
- Photo 3: Add the Egg. For easier and more consistent incorporation, it’s always best to lightly whisk the egg beforehand. This helps it combine more readily with the crumbly mixture, preventing streaks of egg in your dough.
- Photo 4: With your hands, gently work the dough. The key here is to bring the ingredients together just until they form a cohesive ball, without over-kneading. You can do this directly in the bowl, or transfer the mixture to a clean kitchen bench if you find it easier. Lightly knead just enough for the dough to come together into a uniform ball that sticks to itself. If the dough is too sticky or too dry to combine, refer to our troubleshooting section below for guidance. Overworking the dough at this stage can develop the gluten, leading to a tough, less tender crust.
Making the Pastry with a Food Processor: Quick & Efficient
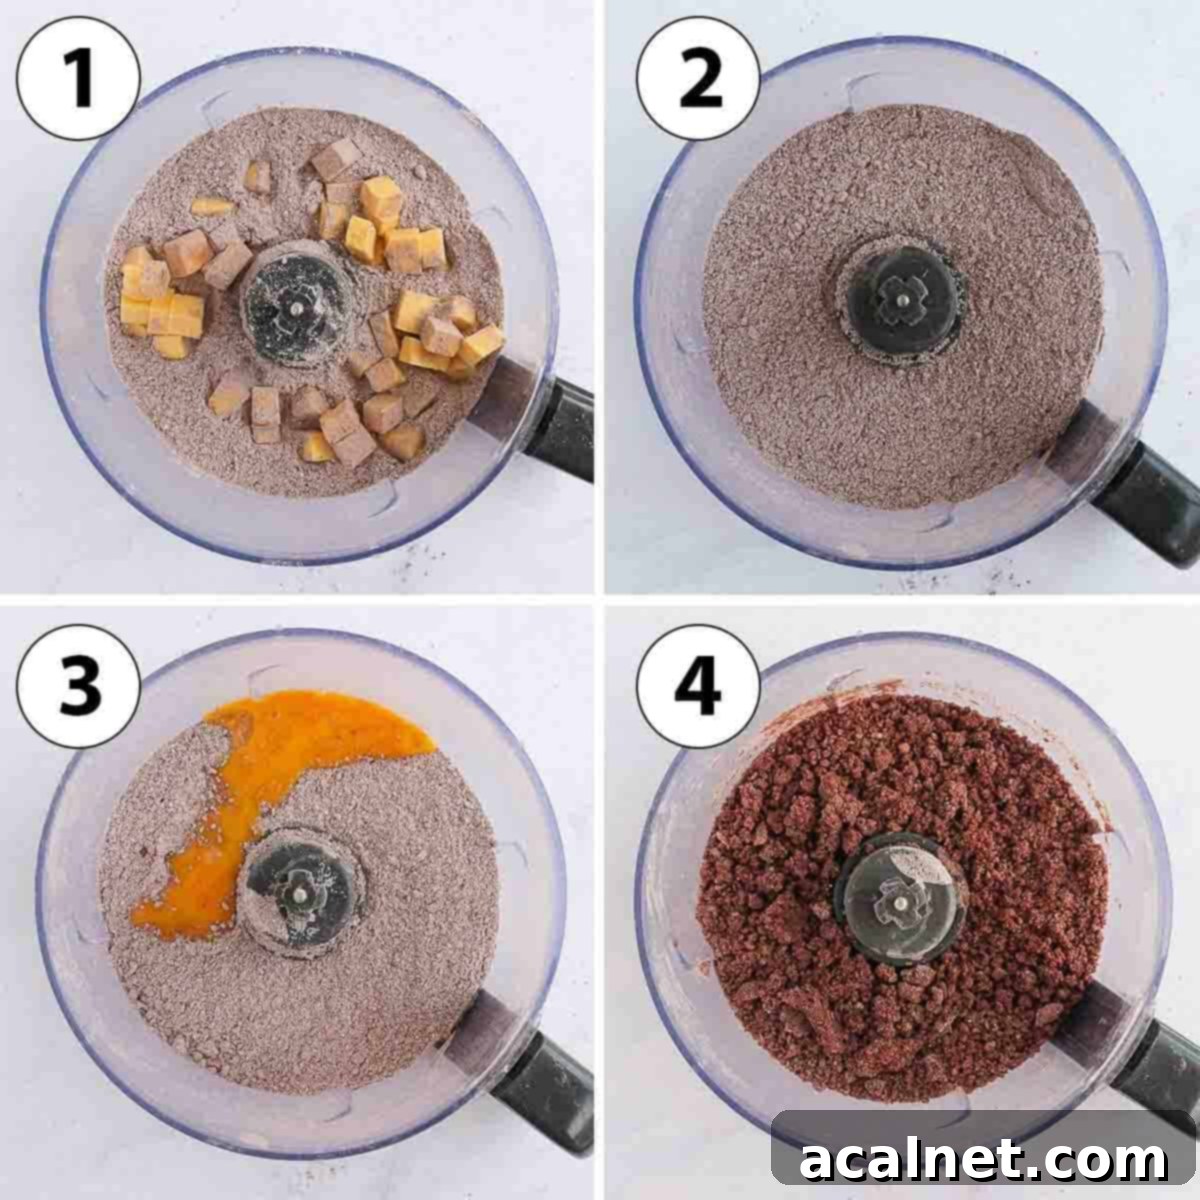
- Place the Flour, Cacao Powder, and Icing Sugar into the bowl of your food processor. Pulse a few times to thoroughly combine the ingredients and eliminate any potential lumps. This ensures an even distribution of flavor and texture from the start.
- Photo 1: Add the very cold Butter, pre-cut into small cubes, to the dry ingredients in the food processor.
- Photo 2: Pulse the mixture for several seconds, or until the butter is finely cut into the dry ingredients. You’re aiming for a consistency that resembles fine crumbs – imagine wet sand. Crucially, there should be no large, visible chunks of butter or unmixed dry powders. The food processor’s speed helps keep the butter cold, which is key for a tender crust.
- Photo 3: Introduce the Egg.
To facilitate smoother integration and prevent overworking, I highly recommend whisking the egg lightly before adding it to the food processor. This helps it combine more easily and evenly with the rest of the ingredients.
- Photo 4: Pulse again, continuing until the dough begins to come together. You’ll notice the mixture darkening and eventually forming larger, sticky clumps. To test for readiness, press some of the crumbs between your fingers; they should easily stick together and form a small ball. If the dough appears too sticky or too dry to cohere, please consult the troubleshooting section below. The goal is to achieve a soft, pliable dough without overprocessing.
Rolling the Pastry: Achieving Uniformity
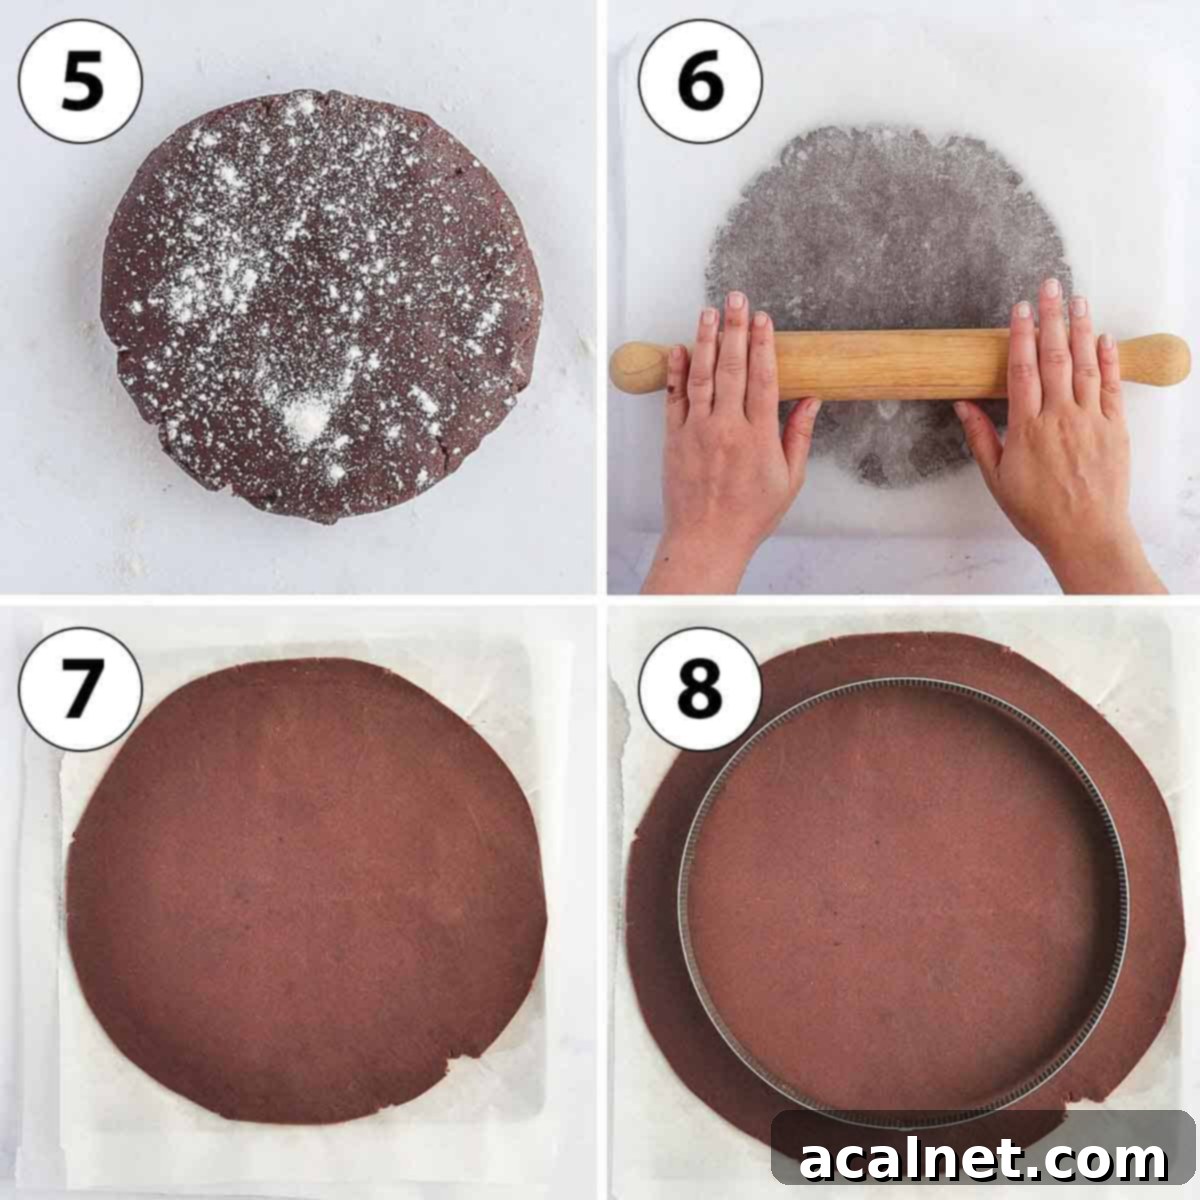
With your chocolate pastry dough now perfectly combined, regardless of whether you used your hands or a food processor, it’s time for the next crucial step: bringing the dough together and rolling it out for your tart pan.
- Photo 5: Gently gather the dough mixture and press it into a cohesive ball. Then, slightly flatten it into a disc shape with your hands. If you find the dough a little sticky, lightly dust both the top and bottom of the pastry with a small amount of flour. This helps prevent sticking during rolling without incorporating too much extra flour.
A common issue when working with pastry is overworking the dough, which can activate the gluten, making it less flexible and harder to roll. If your pie crust pastry feels overly tough or resistant when you try to roll it, simply wrap it in plastic and let it rest in the fridge for 10 to 15 minutes. This allows the gluten to relax, making the dough much more pliable and cooperative.
- Photo 6: For effortless rolling and to prevent sticking, place your pastry dough between two large sheets of baking paper (also known as parchment paper). Using a rolling pin, roll the dough evenly into a large circle. At this stage, the dough should feel quite easy and smooth to roll.
The ideal thickness for your pastry is largely a matter of personal preference, but I generally aim for approximately 3 to 4 mm (about 1/8 inch). This thickness provides a sturdy yet tender crust. While you can roll it slightly thicker if you prefer a more substantial crust, I advise against rolling it any thinner than 3mm, as it can become fragile and challenging to transfer into your tart pan without tearing.
- Once rolled, carefully transfer the pastry (still between its parchment paper sheets) onto a large flat tray. Place it in the fridge to rest and chill for a minimum of 1 hour, or up to 24 hours. This chilling period is vital; it solidifies the butter, prevents shrinkage during baking, and further relaxes the gluten for a perfectly tender crust.
- Photo 7 & 8: After the pastry has thoroughly rested and chilled in the fridge, remove the top sheet of baking paper. Carefully cut the edges of the pastry, making sure they are slightly larger than the tart ring or pan you intend to use. Remember, the higher the sides of your pan, the more excess pastry you’ll need around the edges to fully line it.
As an alternative, if you’re not ready to bake immediately, you can keep the pastry disc wrapped tightly in plastic wrap in the fridge and roll it out just before you’re ready to line your pan and bake.
Lining the Pan: The Final Form
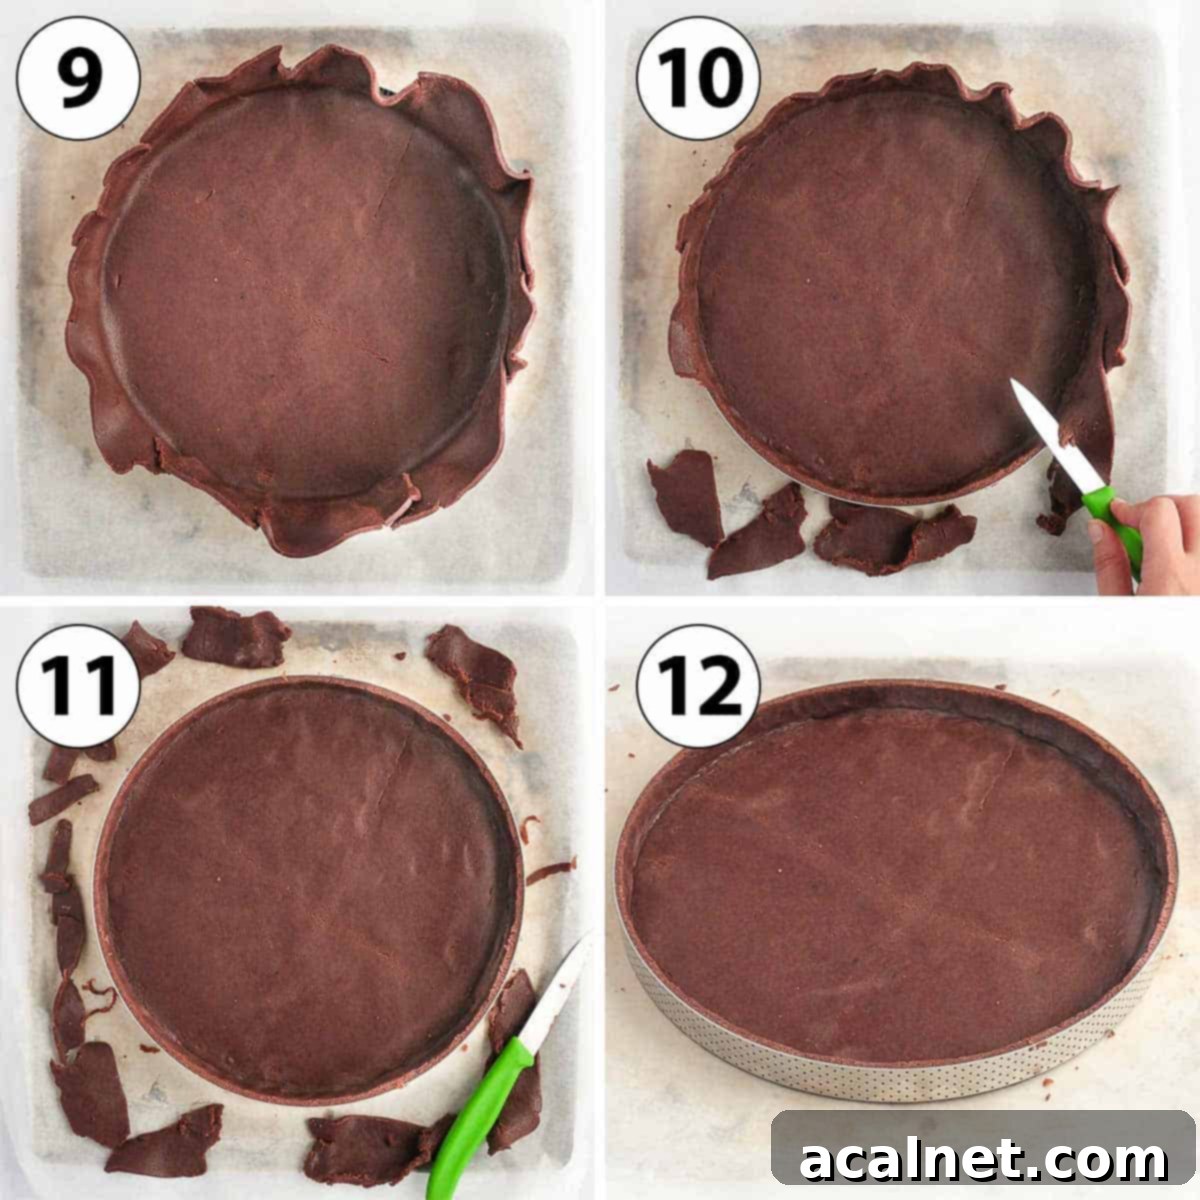
Now, the exciting part – it’s time to line your chosen tart pan or ring! For the crispest and most professional results, I personally favor using perforated tart rings, which allow for better airflow and a more evenly baked crust. However, this versatile recipe works beautifully with any type of pan you might have, be it a traditional metal pie plate, a ceramic dish, or a glass pie plate. You can also easily adapt this recipe to create charming Mini Tarts or Tartlets instead of a single large tart or pie.
Before you begin lining the pan, you might find it beneficial to let the pastry sit at room temperature for a few minutes. If it’s too cold directly from the fridge, the dough can be prone to cracking. But don’t worry if cracks do appear; Pâte Sablée is quite forgiving, and small imperfections can easily be patched up and smoothed over with your fingers.
- Photo 9: Carefully transfer the rolled pastry into your Tart Ring or Pie Dish. Gently ease the pastry down the sides and into the base, pressing it firmly but gently against the edges to create a defined right angle where the bottom meets the sides. This ensures there are no air gaps and that your tart will have sharp, clean edges.
- Photo 10 & 11: Using a small, sharp knife, carefully trim away any excess pastry extending beyond the rim of your pan. For the neatest, straightest edges, position your knife flat and parallel to the top edge of the tart ring or pan as you cut.
If you prefer a more decorative edge, you can also crimp the pastry rather than trimming it flat.
- Photo 12: Take a moment to adjust the crust as needed, patching any minor cracks or reinforcing thinner areas with small pieces of leftover dough. Smooth everything out with your fingertips.
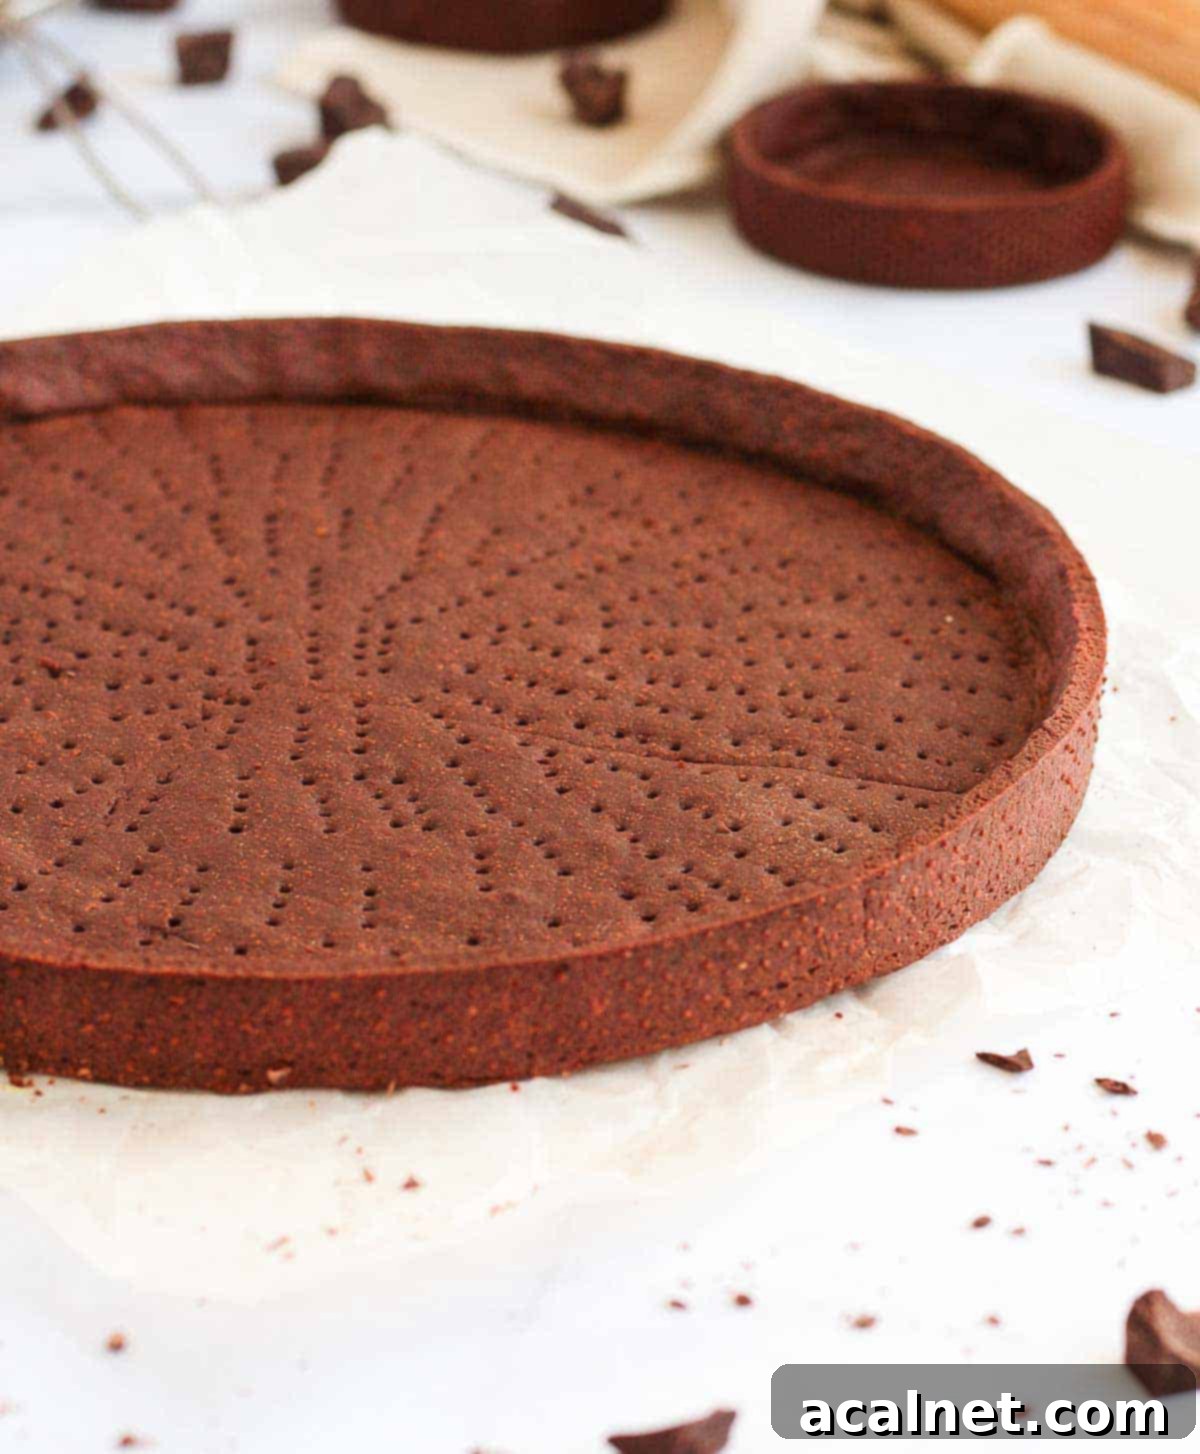
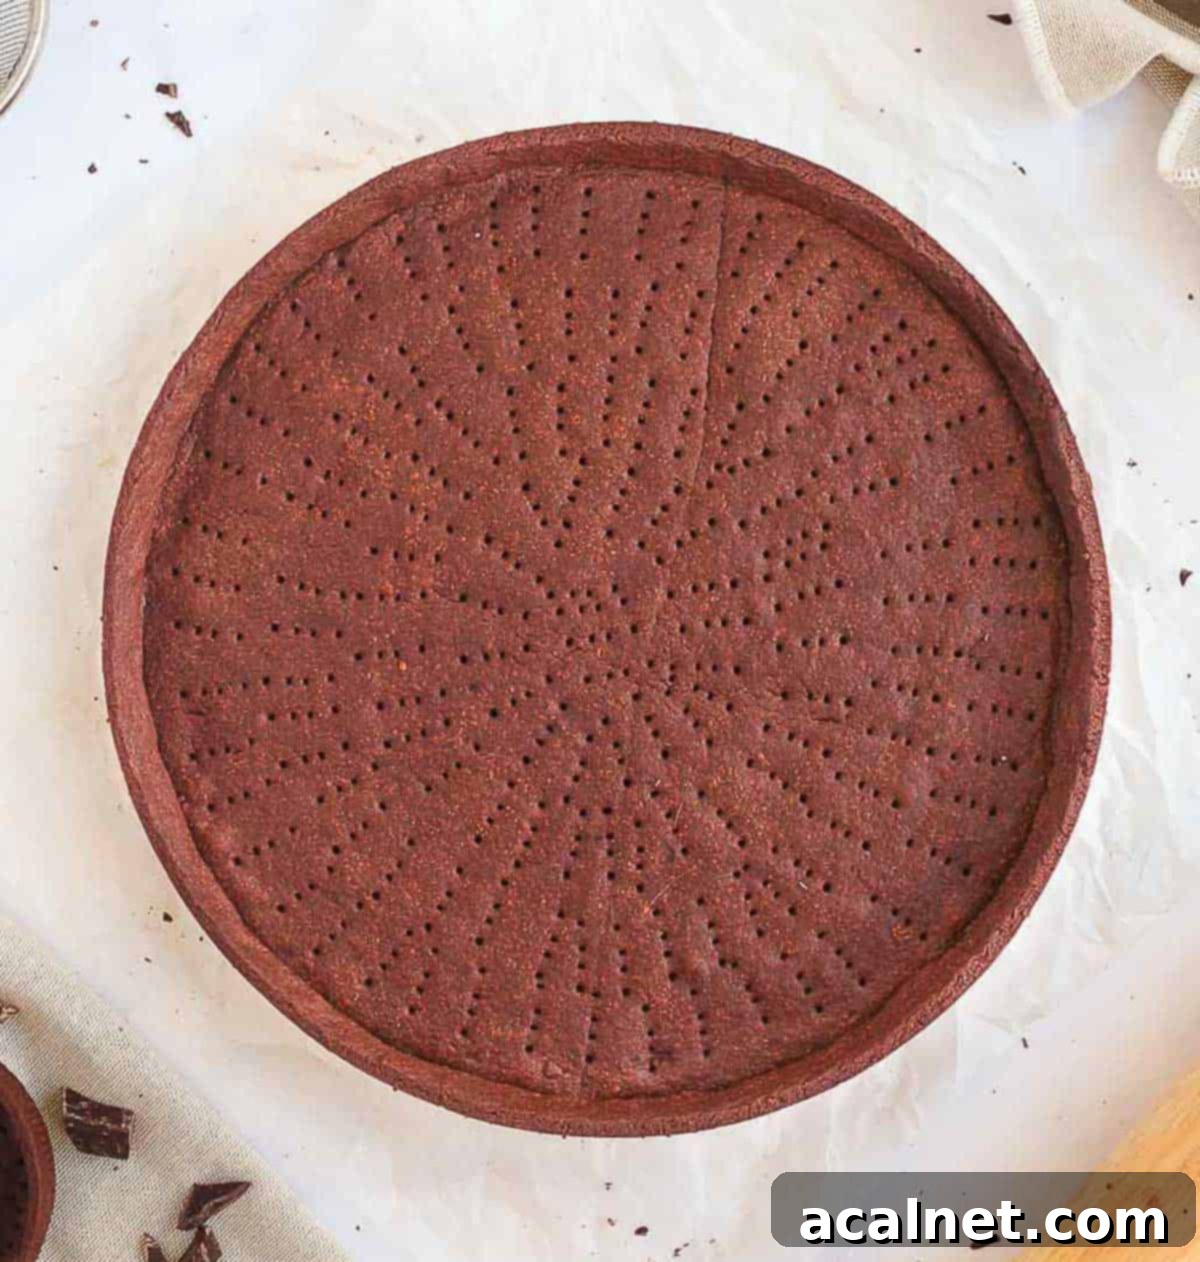
- Once lined and shaped, dock the pastry with a fork. This means gently pricking the bottom of the pastry all over. Docking serves a vital purpose: it allows steam to escape during baking, preventing the crust from puffing up unevenly. After docking, place the lined tart shell back into the fridge to rest for at least another hour, or you can prepare it up to 24 hours in advance. For the absolute best results and to prevent shrinkage, transfer the chilled tart shell to the freezer for 15 minutes while your oven preheats just before baking. This extra cold shock helps the butter maintain its structure.
The baking method for your crust will depend entirely on your chosen filling. You might need to fully blind-bake the pastry, par-bake it, or bake it completely filled from the start. As a general rule, I always recommend blind-baking the crust for at least 15 minutes to help dry out the bottom and set its shape before adding any wet filling. This crucial step prevents a soggy bottom.
You can use pie weights or dried beans to fill the pie shell during blind-baking, which helps keep the sides from slumping. However, if your crust is well-rested and sufficiently chilled, it should hold its shape beautifully in the oven even without weights.
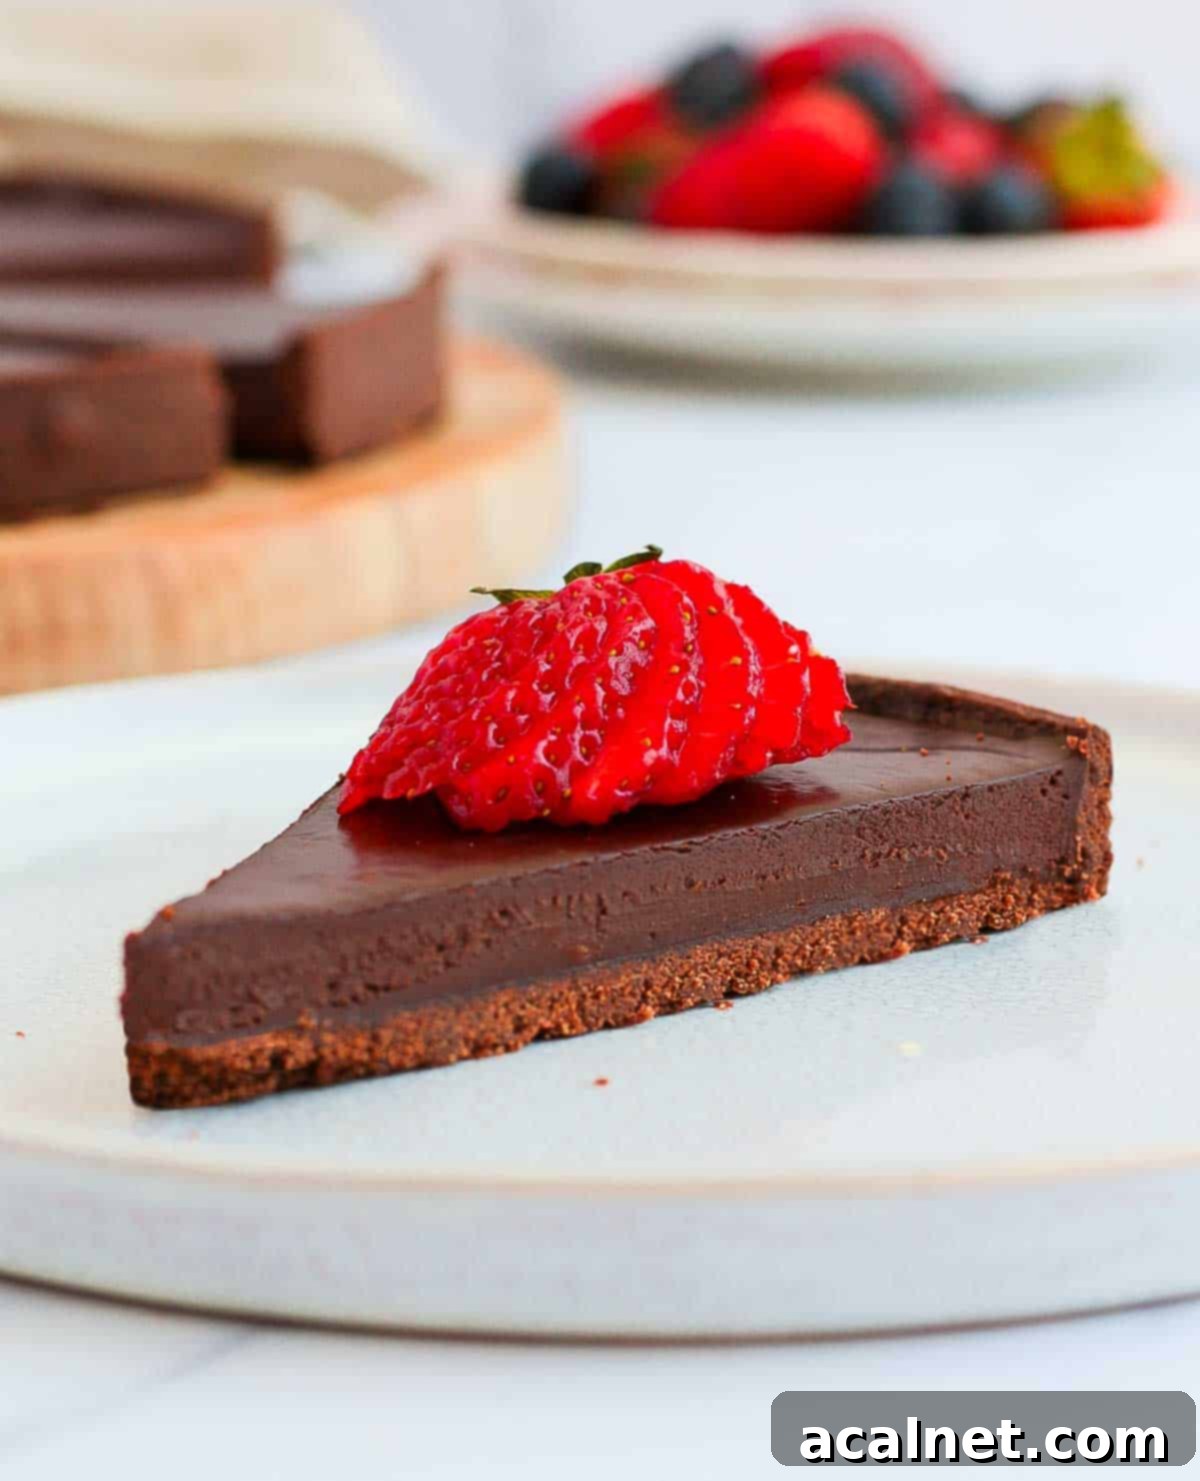
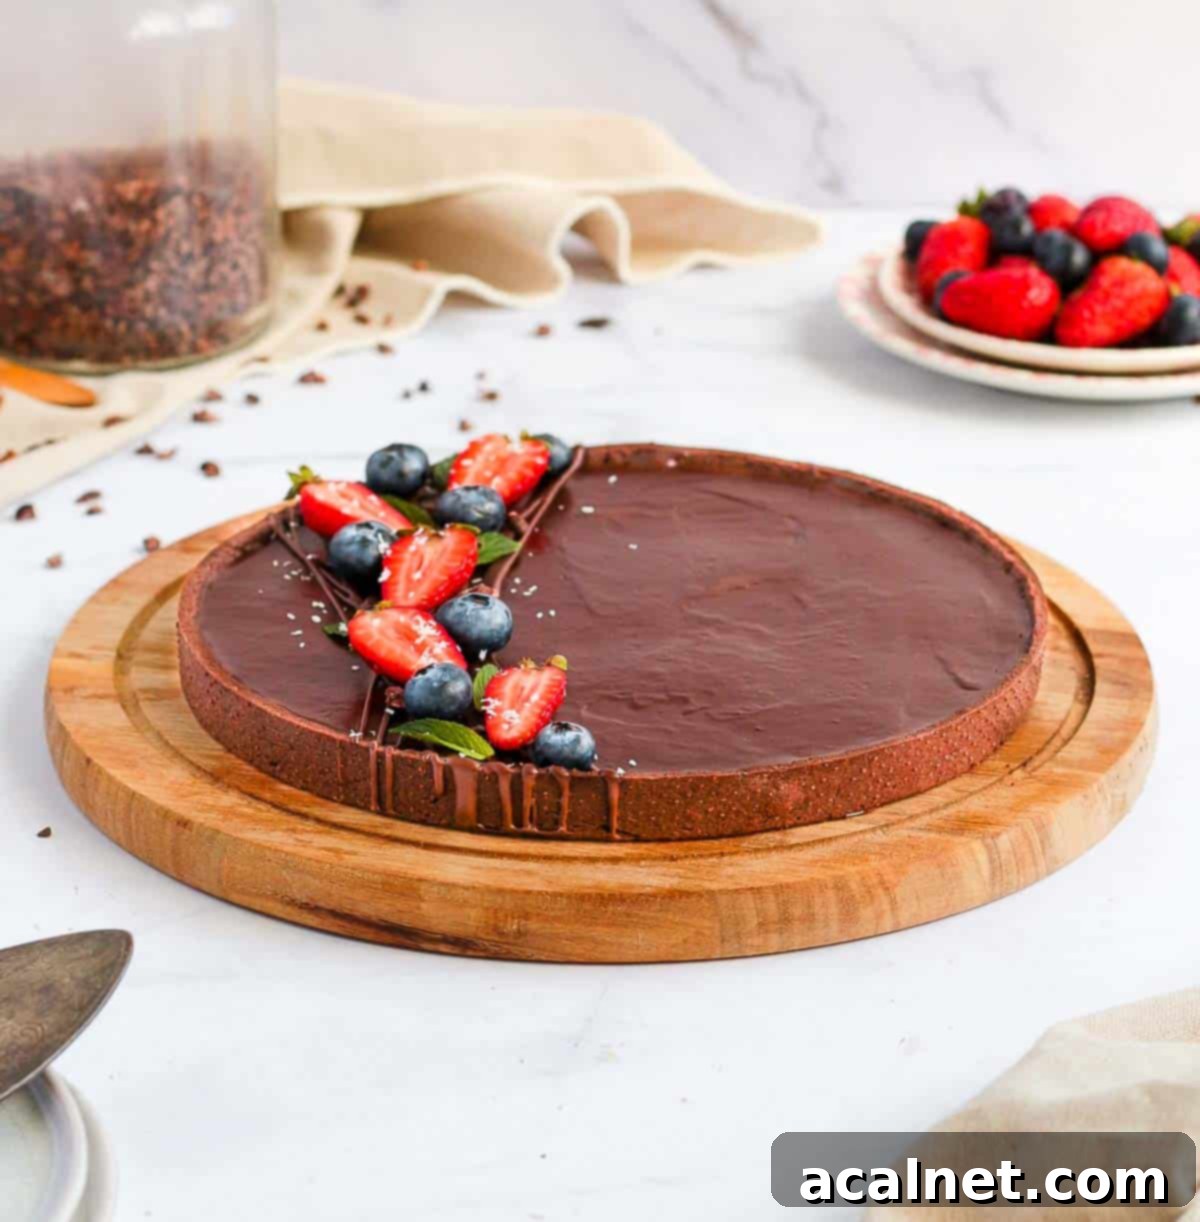
For the specific tart I created with this crust – a luxurious Chocolate Ganache Filling – no further baking was required for the filling itself. Therefore, I fully baked the pastry at 160°C/325°F for approximately 30 to 40 minutes, achieving a crisp, ready-to-fill shell.
Essential Tips for a Flawless Chocolate Tart Crust
- The Larger the Chunks of Butter, the Flakier the Pastry Will Be: The size of your butter pieces has a direct impact on the final texture of your crust. If you desire a distinctly flaky pastry, aim for slightly larger, pea-sized butter chunks, which will create layers as the steam escapes during baking. Using a food processor, which tends to break butter down more finely, generally results in a shorter, more cookie-like or tender texture. For a truly flaky outcome, the by-hand method is often preferred.
- Temperatures are Extremely Important: Success in pastry making often hinges on temperature control. This applies not only to the ingredients themselves, which should be very cold (especially the butter), but also to the chilling of the pastry dough at various stages before it enters the oven. Cold butter creates pockets of steam that expand during baking, contributing to a light, tender, and crisp crust. A thoroughly chilled dough also ensures the pastry holds its shape beautifully, preventing dreaded shrinkage or collapse in the oven.
- Don’t Skip the Recommended Resting Time: While the process might seem extended due to multiple chilling periods, these resting times are non-negotiable for a perfect pastry. Chilling allows the gluten in the flour to relax after being worked, which is crucial for preventing the crust from shrinking excessively during baking. It also re-chills the butter, ensuring a stable structure that won’t slump or move in the heat of the oven. Patience here truly pays off with a superior end product.
- Use a Rolling Pin with Thickness Rings: For consistent and professional-looking results, a rolling pin equipped with thickness rings is an invaluable tool. These rings ensure that your pastry is rolled to a uniform thickness across its entire surface, which guarantees even baking. Additionally, rolling the pastry between two sheets of baking paper (parchment paper) is a fantastic technique to prevent the dough from sticking to your rolling pin and ensures a smooth, flat, and easily transferable pastry sheet.
- Freeze the Pastry for About 15 Minutes Before Baking It: This step is a secret weapon for preventing tart crusts from slumping. Placing your lined tart shell in the freezer for about 15 minutes just before it goes into the preheated oven ensures the butter is absolutely rock-solid cold. This extreme cold helps the pastry maintain its structural integrity, minimizing the chances of shrinkage or the sides collapsing while baking.
- How Do You Keep Chocolate Pie Crust From Getting Soggy?: It’s a common challenge! Any wet filling will, over time, eventually cause the pastry to soften. To combat a soggy bottom, there are a few strategies. Firstly, try to fill your tart as close to serving time as possible. Secondly, a clever trick is to brush the partially baked pastry shell with a thin layer of egg white about halfway through its blind-baking time. The egg white forms a protective barrier, essentially “sealing” the pastry and helping it stay crisp and crunchy for a longer period, especially effective for tarts with high-moisture fillings.
Chocolate Tart Crust FAQs
I personally advocate for butter in my pastry recipes due to its superior flavor and ability to create a tender, rich crust. I have not experimented with lard or shortening for this particular Pâte Sablée. If you prefer to use an alternative fat, I highly recommend seeking out a recipe specifically formulated for lard or shortening, as a direct substitution in a butter-based recipe may drastically alter the texture and outcome.
For this chocolate pastry recipe, both unsweetened Natural Cocoa Powder and Dutch-processed Cocoa Powder will yield excellent results. Since the cocoa powder in this recipe does not need to react with leavening agents like baking powder or baking soda, either type is suitable. Natural cocoa provides a classic chocolate flavor, while Dutch-processed cocoa offers a darker color and a slightly milder, less acidic taste. For an intensely dark and dramatic pie, you could even experiment with Black Cocoa Powder.
Blind-baking is a crucial step for many tart fillings, particularly those that are liquid or don’t require extensive baking themselves. As a general guideline, I always recommend blind-baking your chocolate crust for about 15 minutes at 160°C/325°F. This sets the crust’s shape and prevents a soggy bottom. For fillings that don’t need baking (like a no-bake ganache), the pie crust will typically require a full bake of about 30 to 40 minutes to become fully crisp and golden brown (though the color will be dark due to the cocoa).
Because of its dark chocolate color, it can be tricky to rely on visual browning to determine if the pastry is fully baked. Instead, focus on tactile cues: the pastry should feel firm and dry to the touch, and its edges should be completely set and crisp. If it feels soft or damp, it likely needs a few more minutes in the oven. For a robust crust, it’s always better to slightly over-bake than under-bake.
Common Troubleshooting for Chocolate Pastry Perfection
- The pie dough is too dry to come together: This issue can often stem from variations in flour absorption or the size of the egg used. Flours from different brands or regions can have varying moisture content, affecting the overall hydration of the dough. If your dough is crumbly and won’t form a cohesive ball, gradually add a very small amount of very cold, iced water – literally a few drops at a time. Work it into the dough gently until it just comes together. Be careful not to add too much at once, as you can quickly go from too dry to too sticky.
- The chocolate tart crust is very sticky: If you find your dough excessively sticky and difficult to handle, it might be due to a slightly larger egg, or perhaps your butter was a little too soft. You can try adding a tiny bit more flour, but only if absolutely necessary and sparingly, as too much flour can make the pastry tough. A great trick to manage sticky dough is to always roll it between two sheets of baking paper; this minimizes direct contact and makes it much easier to handle and transfer, even if it feels a bit sticky.
- The pastry pulls when I roll it / is hard to roll: This is a classic sign that you’ve likely over-worked the dough. Excessive handling or kneading develops the gluten in the flour, making the dough elastic and resistant to rolling. The solution is simple: wrap the dough tightly in plastic wrap and let it rest in the refrigerator for 15 to 20 minutes. This resting period allows the gluten strands to relax, making the dough much more pliable and easier to roll out smoothly.
- The pastry cracks when I try to line the pan: If your pastry is cracking when you attempt to transfer and fit it into the tart pan, it’s usually an indication that the dough is too cold and therefore too stiff. While cold dough is crucial, sometimes it needs to temper slightly. Let the pastry sit at room temperature for a few minutes (5-10 minutes) until it becomes more pliable. Minor cracks are common with Pâte Sablée and are easily fixed; simply use your fingers to gently press and smooth them together once the butter in the dough softens a little.
Storing and Freezing Your Chocolate Pastry Dough
The beauty of homemade pastry extends to its excellent keeping qualities, making it ideal for preparation in advance. For optimal freshness, I recommend filling your baked tart shell within a day of baking. The empty baked shell can be stored at room temperature during this time. Once filled, the storage requirements will depend entirely on the nature of your filling (e.g., custard or cream fillings will require refrigeration).
**Unbaked Dough Storage:** Unbaked chocolate pastry dough is wonderfully convenient. You can store it in the refrigerator for 24 hours (and often up to 2 days) using a few different methods:
- In a ball wrapped in plastic: Form the dough into a disc or ball, wrap it tightly in plastic wrap to prevent it from drying out, and store it in the fridge.
- Pre-rolled between baking paper: For ultimate convenience, roll the dough out between two sheets of baking paper as described above, then place it on a flat tray and chill. This way, it’s ready to be transferred directly to your tart pan.
- Already lined in the pie pan: After lining your tart pan, simply cover it tightly with plastic wrap and refrigerate.
**Freezing Options:** This chocolate pastry also freezes exceptionally well, whether it’s baked or unbaked. Freezing offers a fantastic way to prepare ahead for future baking needs.
- Freezing Unbaked: For the best texture and convenience, I highly recommend freezing the unbaked dough already lined in your tart or pie pan. Once lined and docked, cover the entire pan tightly with plastic wrap and then aluminum foil to prevent freezer burn. When you’re ready to bake, you can transfer the frozen shell directly into a preheated oven (no need to thaw), allowing you to have a fresh, perfectly baked crust whenever inspiration strikes.
- Freezing Baked: You can also bake the crust fully, let it cool completely, then wrap it securely and freeze. Thaw at room temperature before filling.
Explore More Basic French Pastry Recipes
If you enjoyed mastering this Chocolate Pâte Sablée, delve into the foundational techniques of French baking with these other essential pastry recipes:
- Vanilla Crème Pâtissière (Classic Pastry Cream)
- Traditional French Crêpes
- Choux à la Crème (Delicate French Cream Puffs)
- Almond Cream Filling (Frangipane)
- How to Make Profiteroles from Scratch
- Light and Airy Dacquoise Sponge
- Rich Chocolate Pastry Cream
- Choux au Craquelin (Crispy Cream Puffs)
Made this recipe?
Let us know if you liked it by leaving a comment below, and tag us on Instagram @a.baking.journey with a photo of your creation!
Recipe Card
Chocolate Pie Crust (Pâte Sablée)
Print Recipe
Ingredients
- 225 gr (1 1/2 cup) Plain / All-Purpose Flour, sifted
- 20 gr (2 tablesp.) Unsweetened Cacao Powder, (Natural or Dutch-Processed, sifted)
- 50 gr (1/3 cup + 2 tablesp.) Icing Sugar, (Powdered or Confectioner’s Sugar, sifted)
- 1 pinch Fine Salt
- 120 gr (1/2 cup or 1 stick) Unsalted Butter, very cold, cut into small cubes
- 1 Large Egg, (lightly whisked)
Instructions
Making the Pastry By Hands
- Sift the flour, cacao powder, icing sugar, and salt into a large bowl. Mix well to combine.
- Add the very cold butter, cut into small cubes. Using your fingers (rubbing method) or a pastry cutter/blender, cut the butter into the dry ingredients until you achieve a fine crumb consistency (see Note 1 below). Ensure no large butter lumps remain.
- Add the lightly whisked egg. Gently work the dough with your hands until it starts to come together and forms a cohesive ball (see Note 2 below). Avoid overworking to keep the crust tender.
Making the Pastry with a Food Processor
- Place the flour, cacao powder, icing sugar, and salt in the bowl of your food processor. Pulse a few times to combine and remove any lumps.
- Add the very cold butter, cut into small cubes. Pulse for a few seconds until you get a fine crumb consistency (see Note 1 below).
- Add the lightly whisked egg. Pulse again until the dough starts to clump together and a sticky dough forms. When pressed, the crumbs should easily stick.
Rolling & Lining the Pan
- Gather the dough into a ball and gently flatten it into a disk. If slightly sticky, dust lightly with flour (see Note 3 below).
- Place the dough between two large sheets of baking paper and roll it evenly into a circle of your desired thickness (see Note 4 below). Transfer the rolled dough (still between paper) onto a flat tray and chill in the fridge for at least 1 hour, or up to 24 hours.
- Remove the chilled pastry from the fridge and let it temper at room temperature for 5 minutes. Peel off the baking paper sheets and carefully transfer the pastry into your tart ring or pie pan. Gently press the pastry into the corners to create a defined right angle along the base and sides.
- Using a small, sharp knife, trim any excess pastry from the edges by holding the knife parallel to the rim of the pan. Prick the bottom of the pastry all over with a fork (docking). Return the lined tart shell to the fridge to chill for at least another hour (or up to 24 hours). Just before baking, place it in the freezer for 15 minutes while your oven preheats.
Baking the Pastry
- Preheat your oven to 160°C (325°F). Place the chilled tart shell in the freezer during oven preheating.
- Blind-bake for 15 minutes if you plan to add a filling that will also be baked. For fillings that require no baking, fully bake the crust for 30 to 40 minutes, until it feels firm and dry to the touch.
Would you like to save this recipe?
We’ll email this post to you, so you can come back to it later!
Notes
Instruction Notes:
- You should not see large lumps of butter anymore or any loose dry powders. The largest the butter crumbs, the flakier the pastry will be; finer crumbs result in a more tender, cookie-like crust.
- You can bring the dough together inside the bowl or by gently kneading the pastry on a clean kitchen bench or flat surface. It’s crucial not to over-work the pastry, as this develops gluten and can make the crust tough.
- If the dough feels excessively sticky to roll, add a very small amount of flour (a teaspoon at a time) to your work surface and rolling pin. If it’s too dry and crumbles excessively, add a few drops of very cold water and gently work it into the dough until it achieves a more pliable consistency.
- I typically roll the pastry to be about 3 mm (1/8 inch) thick. You can roll it slightly thicker if you prefer a more substantial crust, but I strongly advise against rolling it thinner, as it will become too delicate and prone to breaking when transferred to the tart pan.
Nutrition (per serving)
