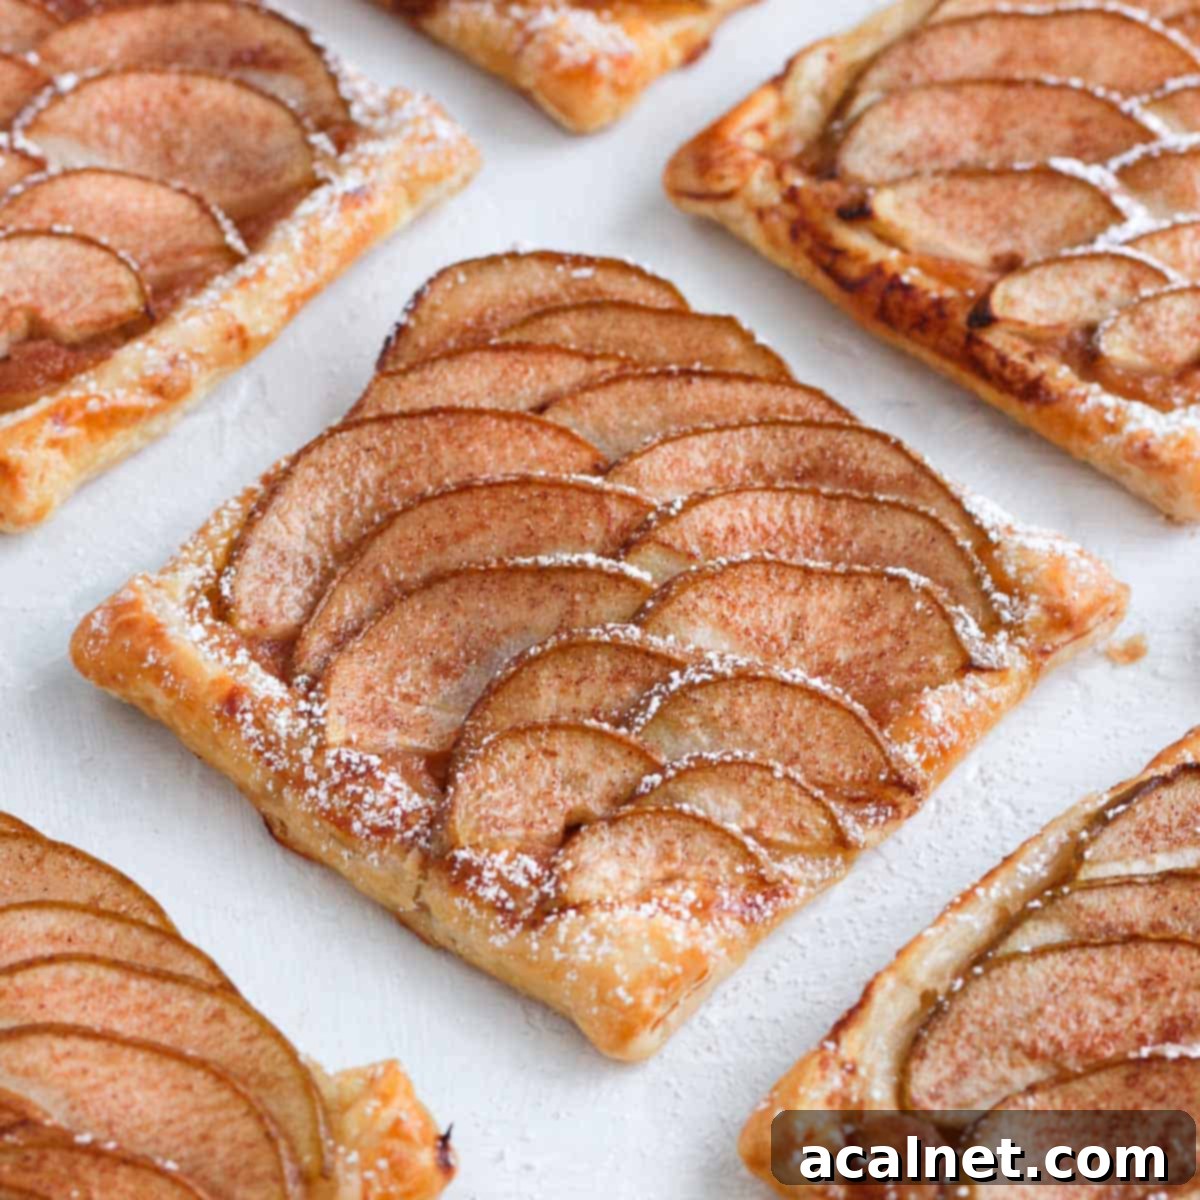
Flaky & Delicious: Easy Puff Pastry Pear Tartlets Recipe
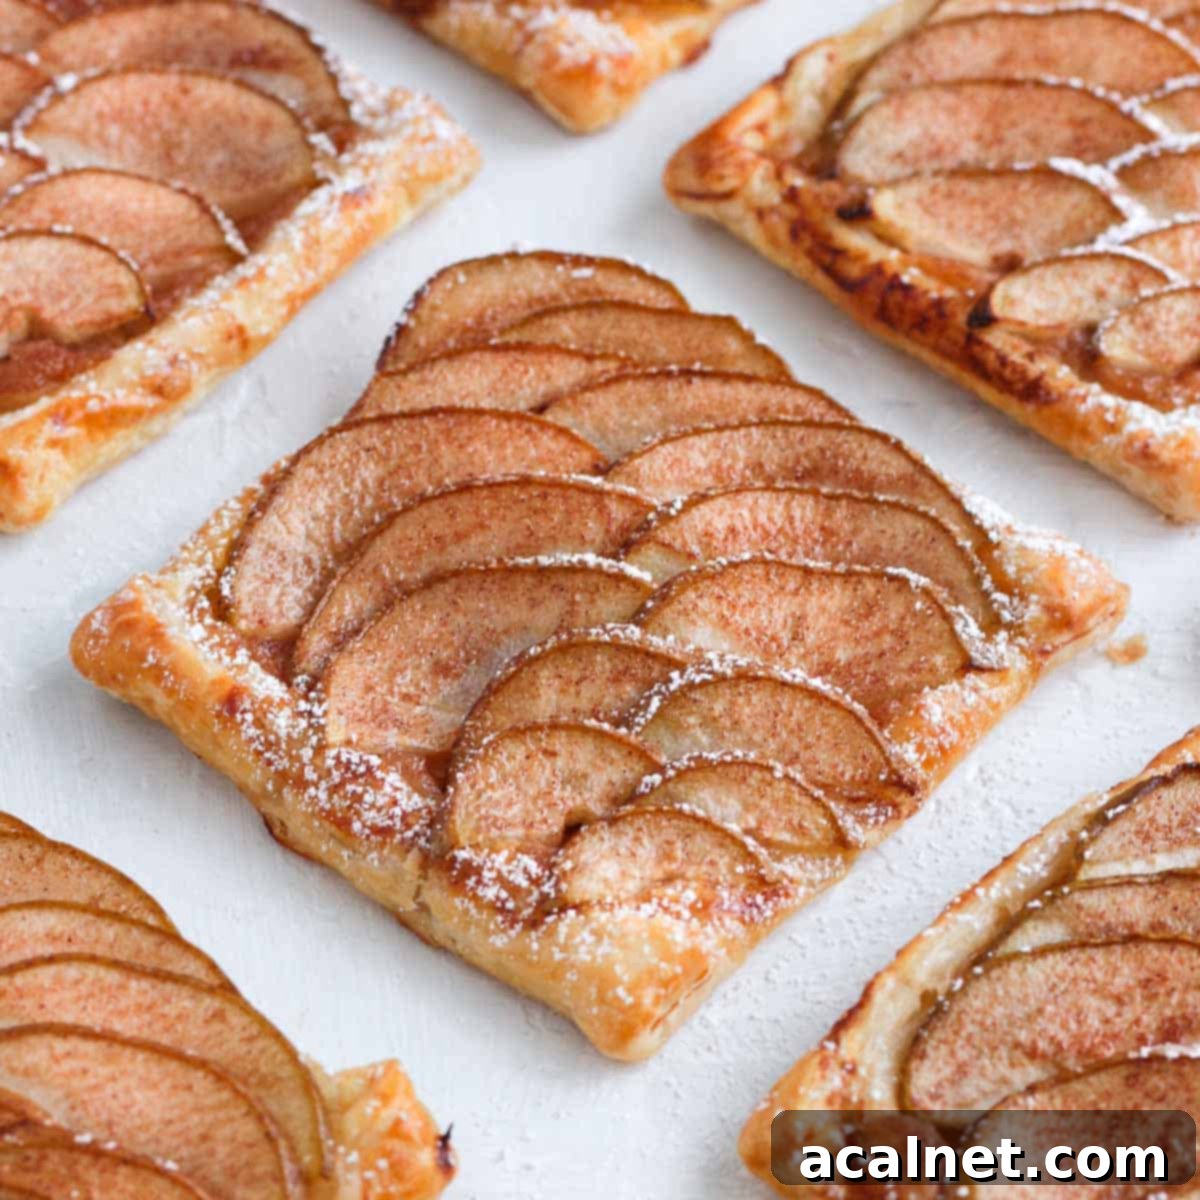
Prepare to fall in love with these Puff Pastry Pear Tartlets! Crafted with a beautifully golden and flaky puff pastry crust, a rich and sweet homemade pear compote filling, and elegantly topped with thinly sliced fresh pears, these individual pastries are an absolute dream. They are incredibly quick to assemble and bake, making them an ideal choice for a delightful breakfast, a charming addition to afternoon tea, or a satisfying sweet snack any time of day. Simple yet sophisticated, they promise to impress with minimal effort.
[feast_advanced_jump_to]
Why You’ll Adore These Easy Pear Tartlets
These Puff Pastry Pear Tartlets are truly a culinary delight, especially during the cooler months when you crave something warm, sweet, and utterly comforting. Their appeal lies not just in their exquisite taste but also in their incredible ease of preparation. Starting with convenient frozen puff pastry, a luscious homemade Pear Compote, and artfully arranged thin slices of fresh pears, you can create bakery-quality treats in your own kitchen with minimal fuss.
The texture profile of these tartlets is simply divine. Imagine biting into the delicate, slightly soft, yet still subtly crunchy fresh pear slices, perfectly complemented by the rich and smooth sweetness of the pear compote. All of this rests upon a base of golden, exquisitely flaky puff pastry that shatters with every bite. This harmonious blend of flavors and textures creates a truly memorable dessert or snack.
Beyond their deliciousness, these tartlets are incredibly versatile. Just like our popular Puff Pastry Apple Tarts and Cherry Tartlets, they make fantastic danishes for breakfast, an elegant treat for morning or afternoon tea, or a perfect everyday sweet indulgence. Their individual size makes them ideal for serving guests or enjoying as a personal treat.
Essential Ingredients for Perfect Pear Tartlets
Crafting these delectable Puff Pastry Pear Tartlets requires only a handful of readily available ingredients. While the full quantities are detailed in the recipe card below, here’s a closer look at what makes these pastries so special and some tips for selecting the best components:
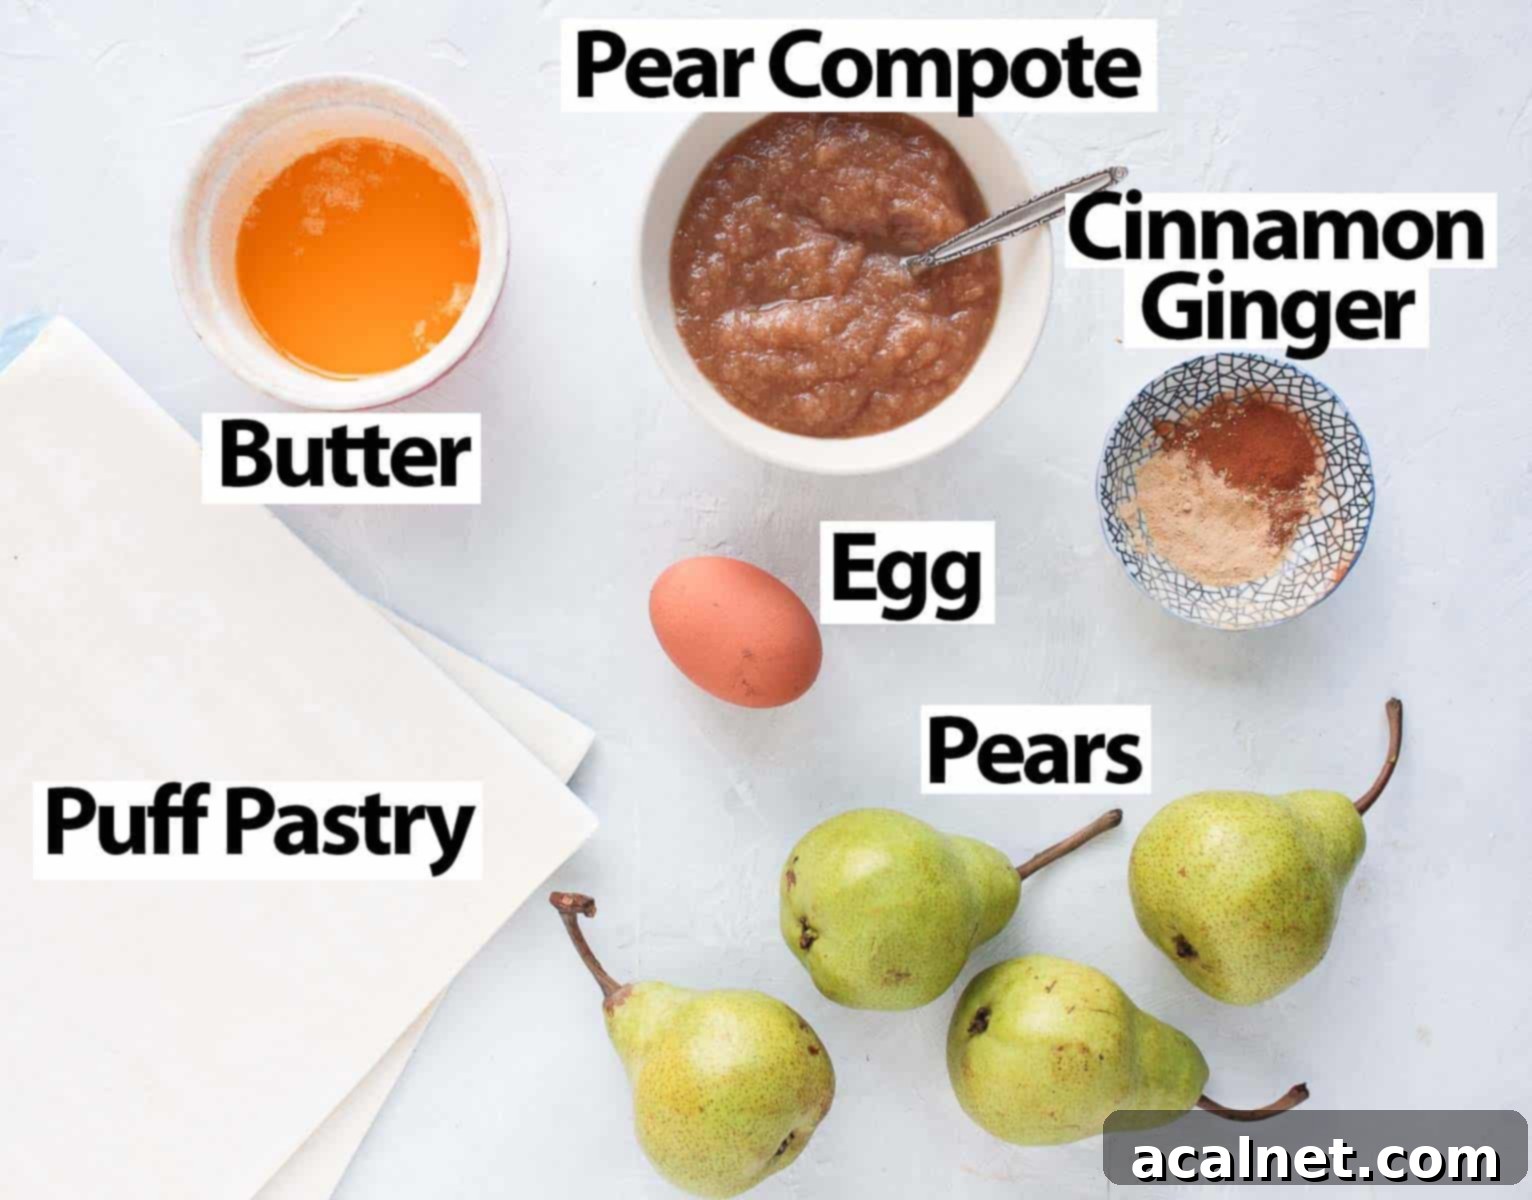
- Puff Pastry: The foundation of our tartlets! I typically use pre-rolled frozen puff pastry sheets, often found in 25x25cm (10×10 inch) squares. This is a fantastic shortcut that delivers incredible flakiness and buttery flavor without the extensive labor of making it from scratch. Don’t worry if your puff pastry comes in a different size or shape; you can easily adjust the dimensions of your tartlets to fit. Opt for an all-butter puff pastry for the best flavor and texture if available.
- Pear Compote: This homemade, fruit-filled Pear Compote acts as a delicious, sweet, and slightly spiced layer under the fresh pear slices. Making it yourself allows for control over sweetness and spice levels, creating a truly bespoke flavor. However, a good quality store-bought pear compote or fruit spread can be used in a pinch.
- Pears: The star of the show! For the best results, choose pears that are somewhere between firm and ripe. You want them firm enough to slice thinly and maintain their shape beautifully during baking, but ripe enough to be naturally sweet and soften appealingly in the oven. For recommended varieties, check out the FAQs section below for specific suggestions that hold up well to baking. Fresh pears not only add a wonderful taste but also provide a stunning visual element.
- Butter, Cinnamon & Ginger: This aromatic trio is brushed over the fresh pear slices before baking. The melted butter helps the pears caramelize and develop a beautiful golden hue, while the ground cinnamon and ginger infuse them with a warm, inviting, and slightly spicy flavor profile. This spice blend perfectly complements the sweetness of the pears, making the tartlets even more irresistible. Feel free to experiment with your favorite warm spices, such as nutmeg or allspice, for a personal touch.
- Egg: An optional but highly recommended ingredient for an egg wash. Brushing a whisked egg over the exposed puff pastry edges before baking gives them a gorgeous golden-brown color and a lovely sheen, making your tartlets look professionally made.
Helpful Substitutions
Don’t have all the exact ingredients? No problem! Here are some excellent substitutions to ensure you can still enjoy these delightful pear tartlets:
- Pear Compote: If you prefer not to make your own Pear Compote or can’t find a pre-made one, there are several delicious alternatives. You could substitute it with a homemade Applesauce for a similar fruit base, an Apricot Jam for a tangy and bright contrast, or even a rich Almond Cream (Frangipane) like the one I use for these Pear Frangipane Tartlets. The almond cream offers a more sophisticated, nutty flavor that transforms the tartlet into a truly decadent dessert.
- Butter: To make these tartlets dairy-free or vegan, you can replace the unsalted butter with margarine or your favorite plant-based butter alternative. While butter offers a unique richness, a good quality margarine will still yield delicious results, especially if you ensure your puff pastry is also dairy-free or vegan-friendly.
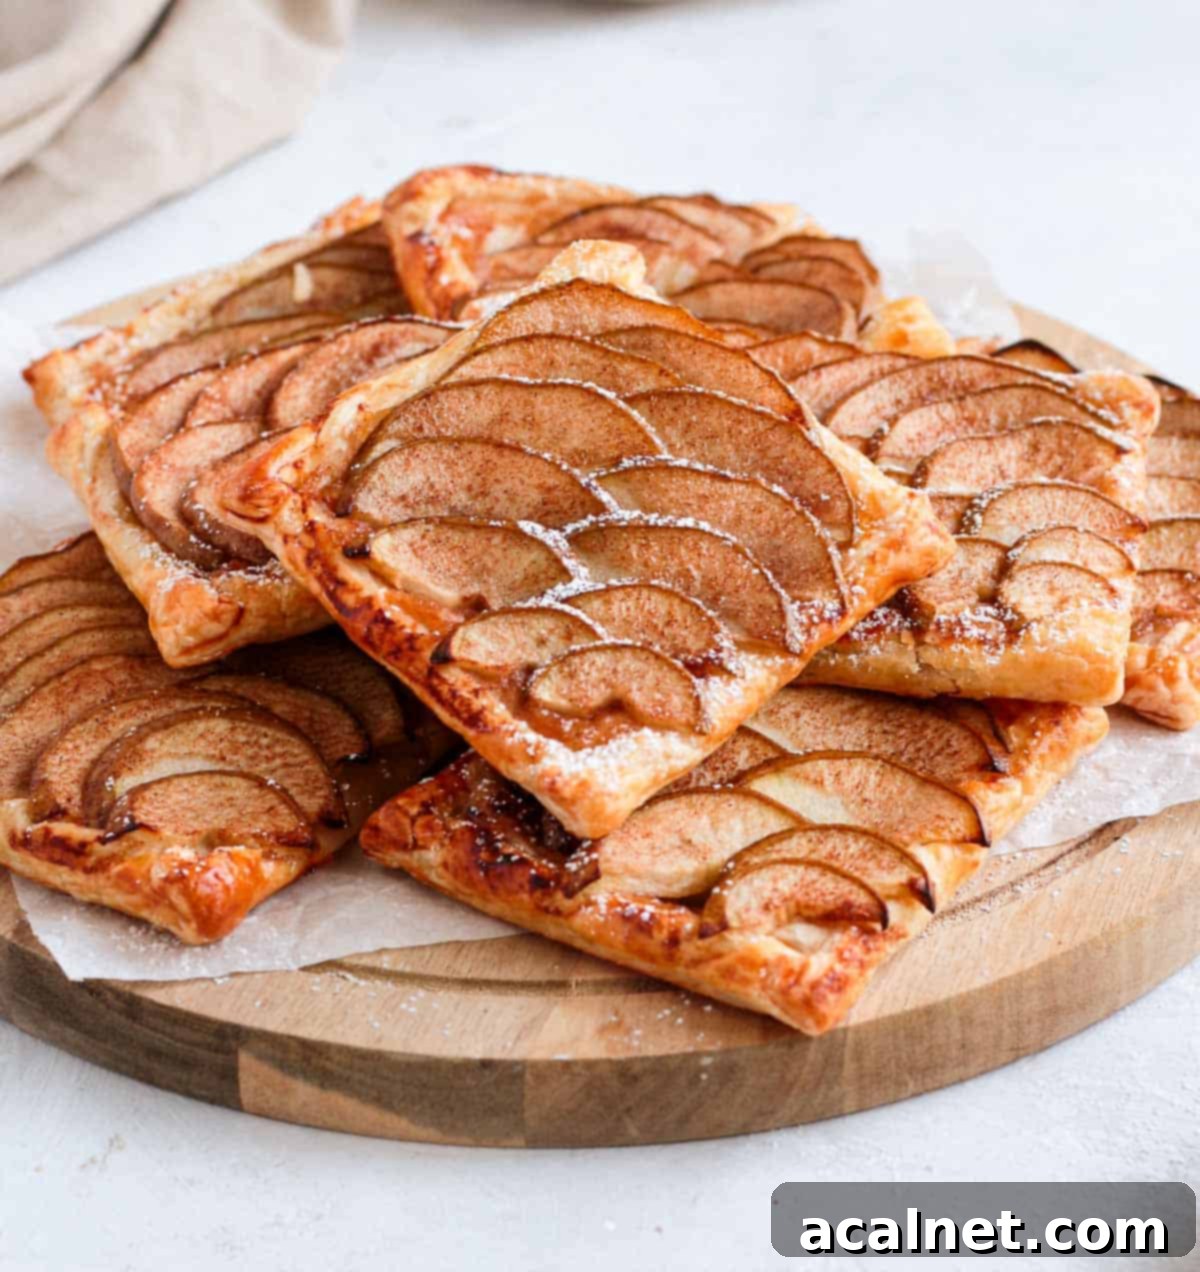
Step-by-Step: How to Make Flawless Pear Tartlets with Puff Pastry
Creating these beautiful and delicious pear tartlets is surprisingly straightforward. Follow these detailed steps to ensure a perfect batch every time:
- Prepare the Compote: If you’re opting for homemade Pear Compote, begin by preparing it according to the recipe instructions. Once cooked, set it aside to cool completely. A cool compote prevents the pastry from getting soggy too quickly.
- Preheat Oven & Prepare Baking Trays: Preheat your oven to 180°C/350°F. Line two baking trays with baking paper or silicone baking mats. Using two trays, especially if your oven isn’t very wide, ensures that the tartlets bake evenly without overcrowding.
- Prepare the Pears (Photo 1): Wash your fresh pears thoroughly. Carefully cut each pear in half, then remove the core. Next, slice the pear halves into very thin strips. Aim for slices that are almost translucent; this thinness is crucial for them to cook through properly and achieve that delicate texture during baking. A mandoline slicer can achieve uniform thinness effortlessly, but a sharp knife works just as well with a steady hand.
- Cut Puff Pastry Squares: Take each pre-rolled puff pastry sheet and cut it into four equal squares. Carefully place these squares onto your prepared baking trays, leaving some space between each for expansion.
- Form the Edges (Photo 2): To create a beautiful border and help contain the filling, gently fold the sides of each puff pastry square inwards, forming a small raised edge. Lightly press down on these folded edges to ensure they stick to the bottom pastry layer. This prevents them from lifting excessively during baking and keeps the tartlets looking neat.
- Optional: Blind Bake the Pastry: Depending on the brand of puff pastry, the type of baking tray you’re using, and your specific oven, you might want to blind bake the pastry for 5 to 10 minutes before adding the filling. This step is particularly helpful in preventing a soggy bottom, especially if your pastry tends to absorb moisture from the filling or if your oven bakes unevenly. If you’re unsure, a quick blind bake is a good preventative measure.
- Add Pear Compote (Photo 3): Spoon a generous dollop of the cooled pear compote into the center of each puff pastry square. Be careful not to overfill, leaving a clear margin around the raised edges.
- Arrange Pear Slices (Photo 4): Now for the artistic part! Arrange your thinly sliced fresh pear slices on top of the pear compote. A popular and visually appealing method is to create a “fish scale” pattern, layering the slices slightly overlapping each other. Feel free to get creative with any pattern you like, but remember to leave the folded, raised edges clear so they can puff up beautifully.
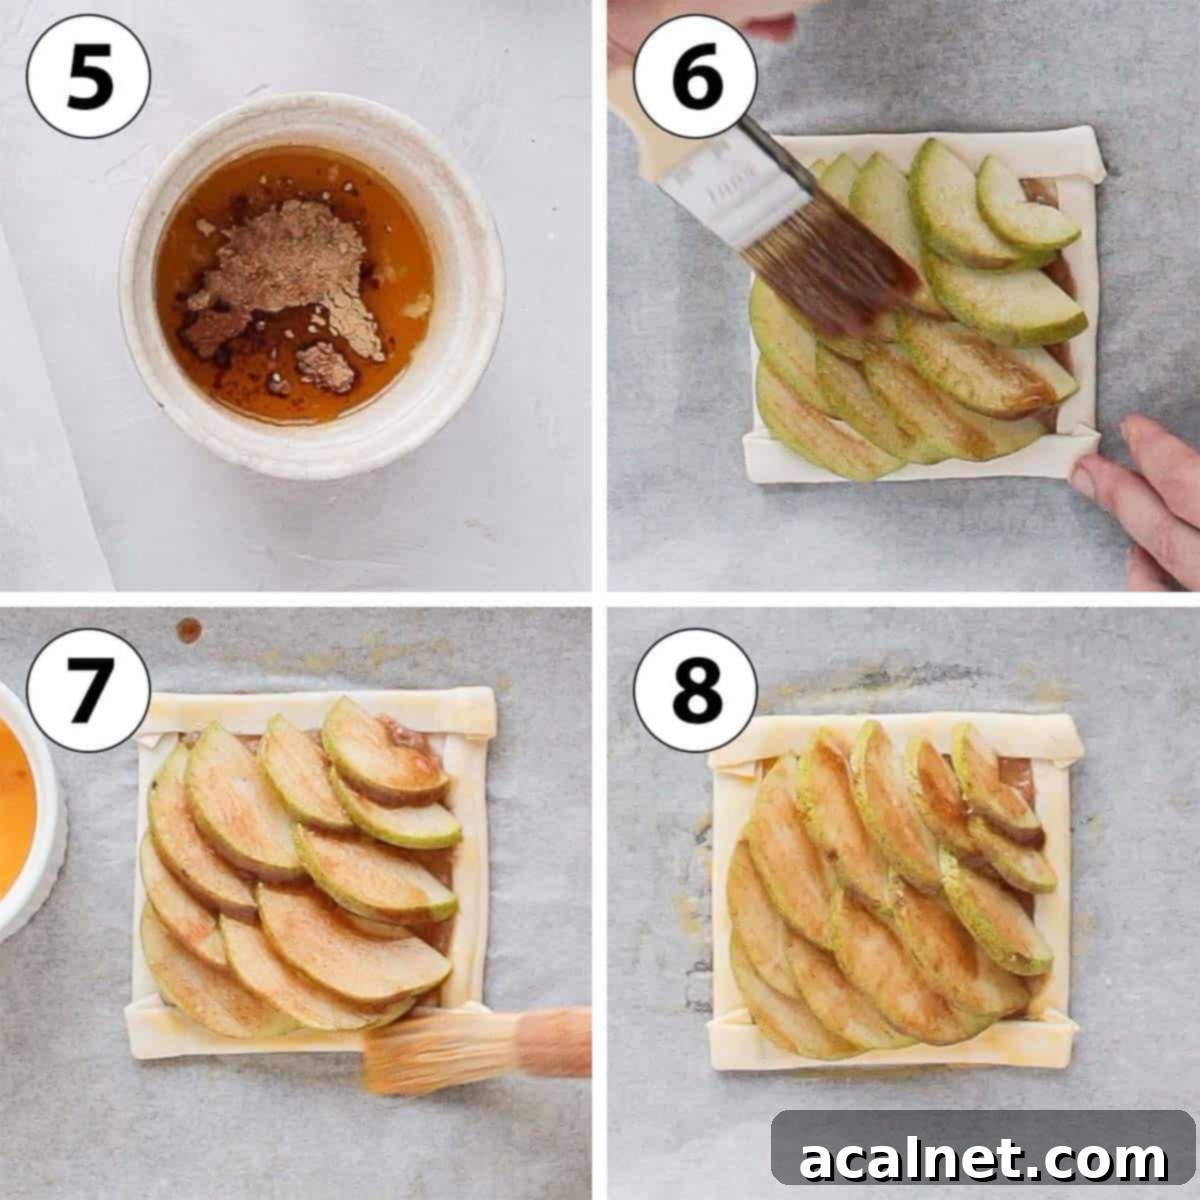
- Prepare Spice Butter (Photo 5): In a small bowl, melt the unsalted butter. Stir in the ground cinnamon and ground ginger until well combined. This spiced butter will add immense flavor and help the pears caramelize.
- Brush Pears (Photo 6): Generously brush the melted butter and spice mixture over the arranged pear slices. Don’t be shy; this step is key for flavor and a golden finish.
- Optional: Egg Wash Edges (Photo 7): For an extra golden and shiny crust, lightly brush the raised edges of the puff pastry (the parts without compote or pears) with a whisked egg. This egg wash adds a beautiful professional sheen and enhances the crispness of the pastry.
- Bake (Photo 8): Place the prepared baking trays into your preheated oven. Bake for approximately 25 minutes, or until the puff pastry is visibly puffed, golden brown, and the pears are tender. (I often bake in two batches to ensure optimal heat circulation and even baking, especially if using two trays).
- Cool & Serve: Once baked, remove the tartlets from the oven and transfer them to a wire rack to cool down completely. For a final elegant touch, optionally dust them with a fine layer of icing sugar just before serving.
Common Questions About Pear Tartlets
Here are answers to some frequently asked questions to help you master your Puff Pastry Pear Tartlets:
The necessity of blind baking can vary significantly. It largely depends on the specific brand of puff pastry you’re using, the type of baking tray (darker trays conduct more heat), and the quirks of your oven. Some high-quality puff pastries and well-calibrated ovens might allow for direct baking without a soggy bottom. However, if you’re ever in doubt, or if you’ve experienced soggy pastry bottoms in the past, blind-baking the pastry for 5 to 10 minutes before adding the filling is highly recommended. This brief pre-bake helps set the base, creating a barrier against moisture from the compote and ensuring a perfectly crisp and golden bottom crust.
For tartlets, you want a pear variety that offers a beautiful balance: it should soften nicely when baked but crucially hold its shape and not turn to mush. My top recommendations for baking are Bosc, Anjou, or Concorde Pears. Bosc pears are known for their firm flesh and subtly spicy-sweet flavor, which holds up wonderfully. Anjou pears are juicy and sweet with a fine texture, while Concorde pears are crisp, sweet, and maintain their elegant shape. Avoid overly soft or watery varieties that might break down too much during baking.
Ideally, your pears should be somewhere in the middle – firm-ripe. This means they are firm enough to be easily sliced into those delicate, thin strips without falling apart. At the same time, a firm-ripe pear will have developed its natural sweetness and will become wonderfully tender and soft as it bakes in the oven, without becoming mushy. Overly ripe pears might be difficult to slice thinly and could release too much moisture, potentially leading to a soggy pastry.
Absolutely, peeling the pears is entirely a matter of personal preference! I typically don’t peel them for these puff pastry pear tartlets because I appreciate the rustic look, the slight textural contrast the skin provides, and the added nutrients. The pear skin also contributes to a beautiful color variation on the finished tartlets. However, if you prefer a smoother texture or simply don’t enjoy pear skin, feel free to peel them before slicing.
Expert Tips for the Best Pear Tartlets
Achieve bakery-perfect results with these handy tips and tricks:
- Slice Pears Very Thinly: This is perhaps the most critical tip. Pears that are too thick will not cook through properly within the 25-minute baking time, resulting in raw or undercooked fruit. Use a sharp knife or a mandoline for consistent, paper-thin slices.
- Secure the Pastry Edges: When folding the edges of the puff pastry, make sure to gently but firmly press them down onto the bottom layer. If they aren’t properly secured, they might lift excessively during baking, which while not affecting the taste, can impact the visual appeal.
- Experiment with Fillings: While pear compote is delicious, don’t hesitate to get creative! Replace the filling with a homemade Applesauce for a classic twist, or a rich Almond Cream (Frangipane) for a more decadent, nutty flavor that transforms these into elegant French-style pastries.
- Add a Sugar Crunch: For an irresistible extra crunch and a beautiful sparkling finish, sprinkle some coarse sugar, such as Demerara sugar or turbinado sugar, over the puff pastry pear tartlets just before placing them in the oven. This creates a delightful caramelized texture on the crust.
- Don’t Overcrowd Your Baking Sheet: Give your tartlets enough space to breathe on the baking sheet. Overcrowding can lead to uneven baking and prevent the pastry from puffing up to its full flaky potential. If necessary, bake in two separate batches.
- Serve Warm for Optimal Enjoyment: While these tartlets are tasty at room temperature, they truly shine when served slightly warm, fresh out of the oven. The warm, flaky pastry and tender, spiced pears create a comforting experience.
Storing & Freezing Recommendations
To enjoy these pear tartlets at their absolute best, we highly recommend serving them fresh and slightly warm, right after they’ve come out of the oven. The puff pastry is at its flakiest and most delightful then.
If you have leftovers, they will keep for approximately 1 day at room temperature in an airtight container, or up to 2 days in the refrigerator. However, be aware that the puff pastry will gradually lose its crispness and become softer, potentially a bit soggy, over time due to the moisture from the fruit filling. For the best experience with stored tartlets, gently re-heat them in a warm oven (around 150°C/300°F) for 5-10 minutes to help revive the pastry’s flakiness before serving.
These puff pastry pear tartlets are not suitable for freezing. Freezing and thawing will significantly degrade the delicate texture of the puff pastry, leading to a very soggy and unappealing result.
Explore More Delightful Tartlet Recipes
If you’ve enjoyed these Puff Pastry Pear Tartlets, you’ll love exploring other sweet and savory tartlet creations from our collection. Expand your baking repertoire with these delicious recipes:
- Bright & Tangy Lemon Curd Tartlets
- Sweet Strawberry Custard Tarts
- Zesty Orange Tartlets
- Classic Mini Lemon Meringue Tarts
- Indulgent Mini Chocolate Tartlets
- Rich Mini Chocolate Orange Tarts
- Fruity Raspberry Chocolate Tartlets
- Decadent Salted Caramel Tartlets
Loved this recipe?
We’d be thrilled to hear about your baking success! Leave a comment below to share your experience, and don’t forget to tag us on Instagram @a.baking.journey with a photo of your beautiful creation!
Recipe Card

Puff Pastry Pear Tartlets
Print Recipe
Ingredients
Pear Compote
- 2 Pears, ripe
- 80 ml (1/3 cup) Water
- 15 ml (1 tablesp.) Maple Syrup
- 1 teasp. Lemon Juice
- 1/3 teasp. Ground Cinnamon
- 1/3 teasp. Ground Ginger
Puff Pastry Pear Tartlets
- 4 small Pears
- 2 Frozen Puff Pastry sheets, 25x25cm / 10x10inch
- 120 ml (1/2 cup) Pear Compote
- 45 gr (3 tablesp.) Unsalted Butter, melted
- 1/2 teasp. Ground Ginger
- 1/2 teasp. Ground Cinnamon
- 1 Egg, optional
Instructions
Pear Compote
- Peel, core and cut the pears into small cubes. Place in a small saucepan with the water, maple syrup, lemon juice, ground cinnamon and ginger. Stir to combine.2 Pears, 80 ml (1/3 cup) Water, 15 ml (1 tablesp.) Maple Syrup, 1 teasp. Lemon Juice, 1/3 teasp. Ground Cinnamon, 1/3 teasp. Ground Ginger
- Turn on medium low to medium heat and leave to cook for 15 to 20 minutes or until very soft, occasionally stirring.
- Blend until smooth with an immersion blender (or mash to keep it chunky). Set aside to cool down.
Puff Pastry Pear Tartlets
- Preheat your oven on 180’C/350’F and prepare two baking trays lined with baking paper or a baking mat (see note 1).
- Wash the Pears, cut them in half, core them then slice into very thin slices. Set aside.4 small Pears
- Cut each Puff Pastry Sheets into 4 squares and place them the trays. Fold the sides of each square to create an edge, pressing on them so they stick to the bottom of the pastry.2 Frozen Puff Pastry sheets
- Optional: blind bake for 5 to 10 minutes (see note 2).
- Spread some Pear Compote in the centre of each pastry square.120 ml (1/2 cup) Pear Compote
- Arrange the Pear Slices on top of the pear compote (see note 3), leaving the raised edges clear.
- In a small bowl, mix together the melted butter, ground cinnamon and ginger. Generously Brush it over the pear slices.45 gr (3 tablesp.) Unsalted Butter, 1/2 teasp. Ground Ginger, 1/2 teasp. Ground Cinnamon
- Optional: brush the raised edges of puff pastry with the whisked egg to give them a golden colour.1 Egg
- Bake for about 25 minutes (I baked the two trays separately), or until puffed and golden. Leave to cool down.
- Optional: dust with some icing sugar before serving.
Video
Would you like to save this recipe?
We’ll email this post to you, so you can come back to it later!
Notes
Ingredient Notes:
- Puff Pastry: I used 25×25 cm (10×10 inch) pre-rolled Puff Pastry Sheets. You can use a different size and just adapt the shape of the tartlets too. For optimal flakiness and flavor, choose an all-butter puff pastry if available.
- Pear Compote: If you don’t want to make your own, you can use a good quality store-bought one or replace it with Applesauce or a rich Almond Cream for a different flavor profile.
- Pears: To ensure they hold their shape and become tender, try to use pears that are between firm and ripe. Bosc, Anjou, or Concorde varieties work exceptionally well for baking.
- Spices: While I used Cinnamon and Ginger for their warm, classic pairing with pears, feel free to use, substitute, or add any of your favorite complementary spices, such as nutmeg or a pinch of cardamom.
Instruction Notes:
- If you have a particularly large oven with excellent heat distribution, you might only need one baking tray. However, using two ensures better air circulation and more even baking, especially for individual pastries.
- The need to blind-bake the pastry is influenced by the puff pastry brand, your oven’s characteristics, and the type of baking tray. If you are unsure or have experienced soggy bottoms in the past, blind-bake the pastry for 5 to 10 minutes. This helps prevent the bottom from becoming undercooked or excessively moist from the filling.
- I arranged the pear slices in a beautiful fish scale pattern for an elegant presentation, but you are welcome to get creative and design any pattern you’d like. The key is to leave a small border around the edges for the pastry to rise.
Nutrition (per serving)
