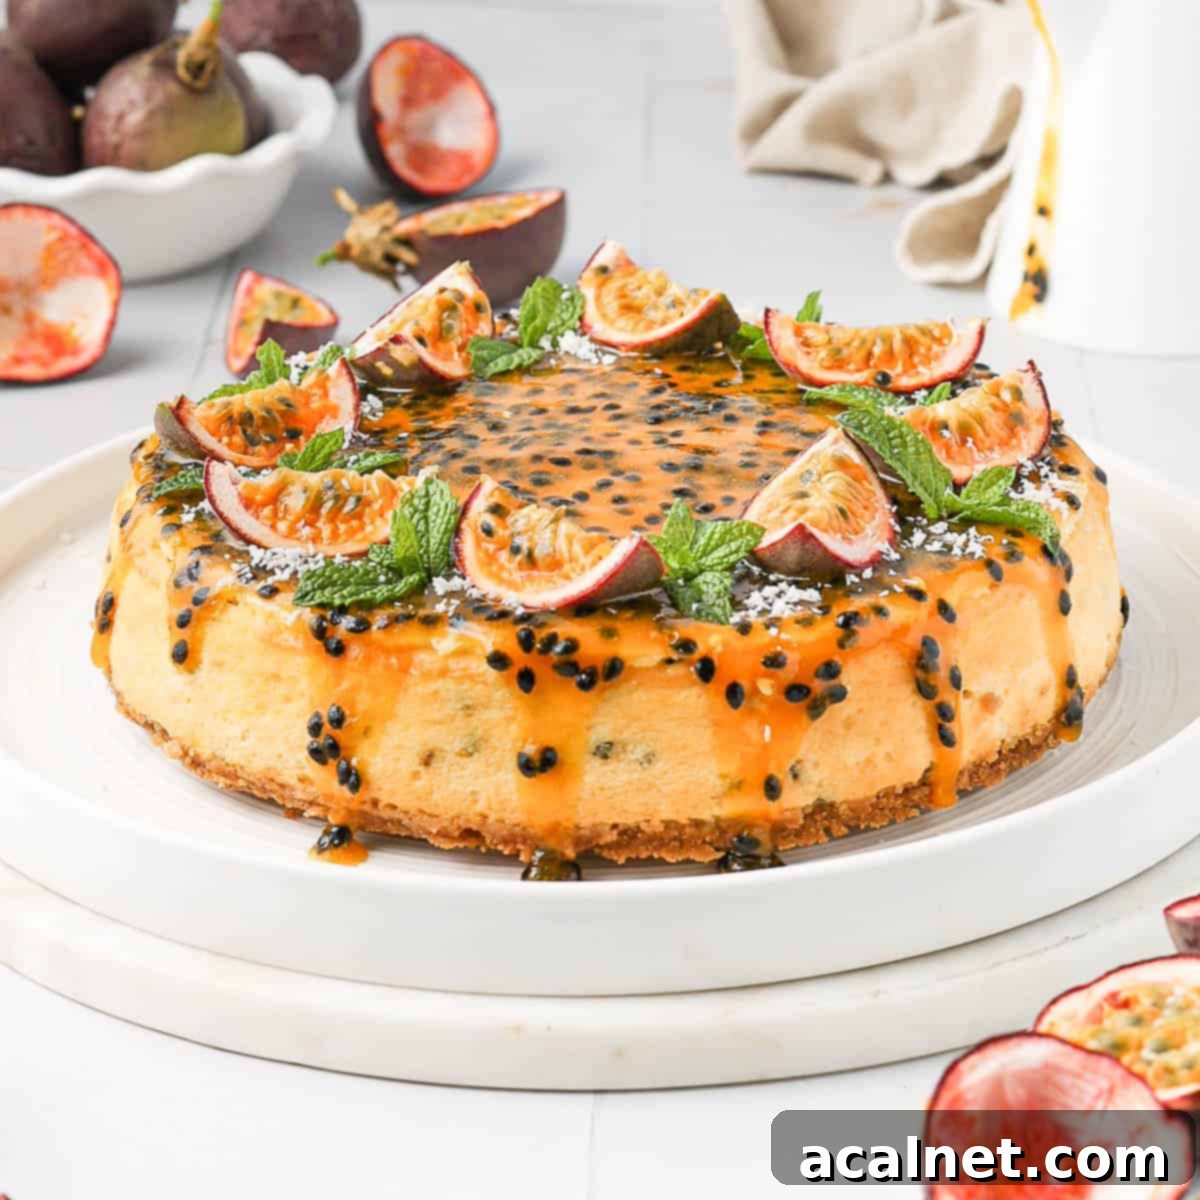
Baked Passion Fruit Cheesecake: Your Guide to a Light, Tangy, and Irresistible Dessert
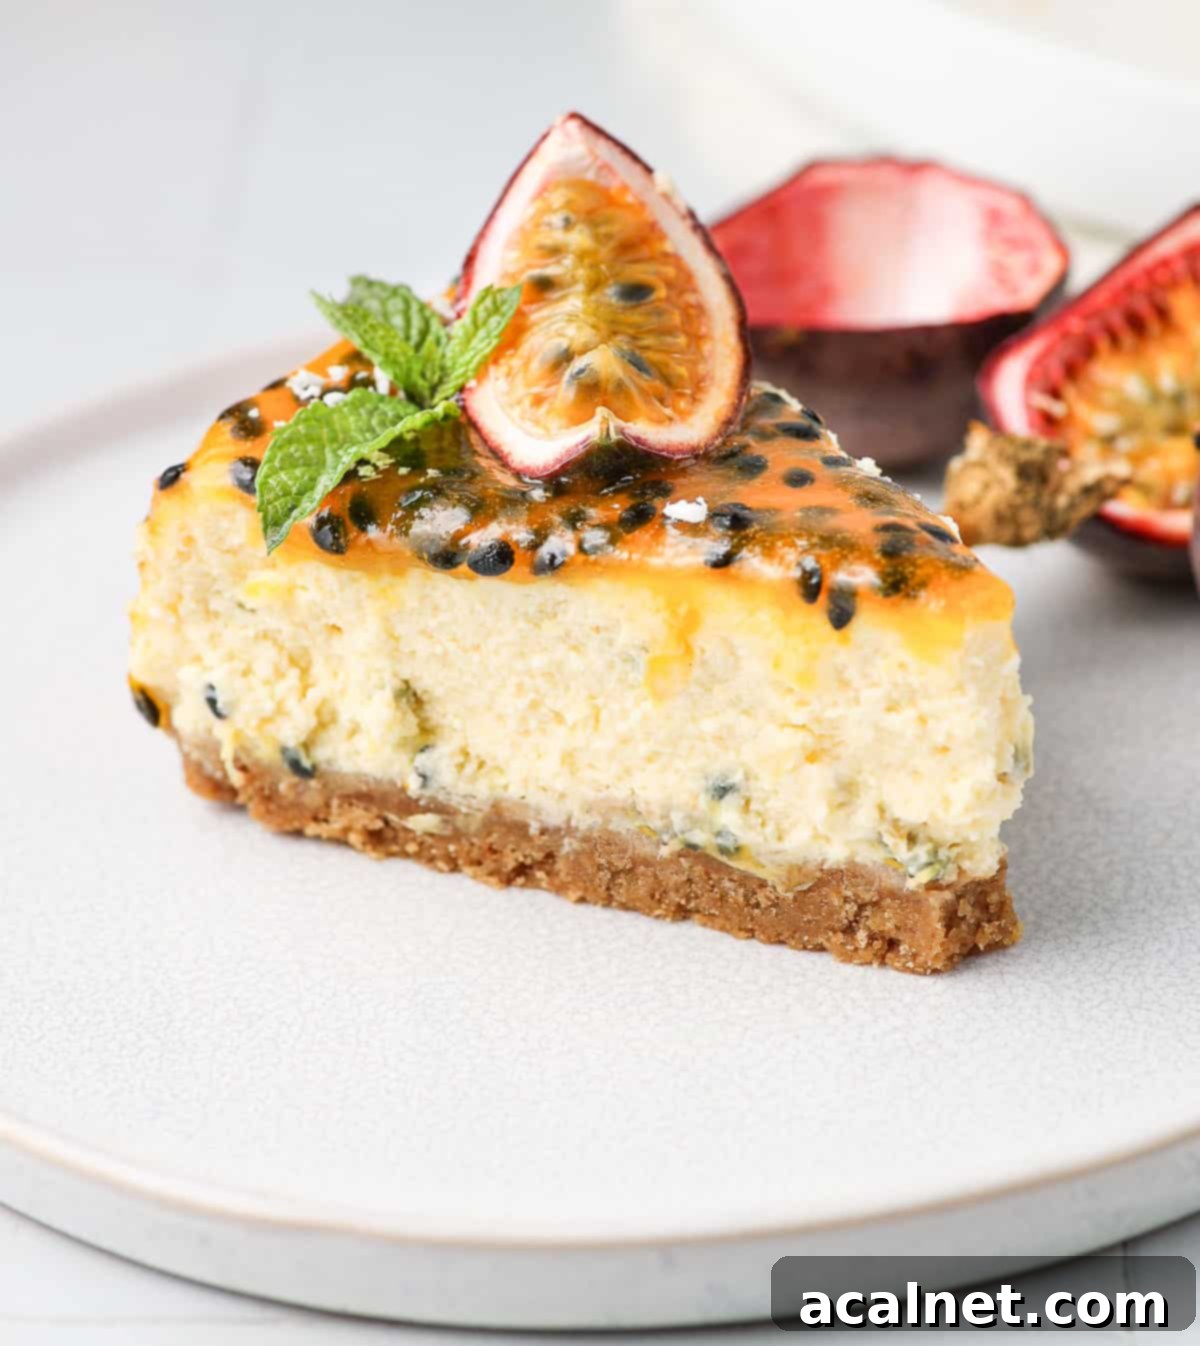
Prepare to embark on a delightful culinary journey with this incredible Baked Passion Fruit Cheesecake. This recipe promises a dessert that is not only exquisitely light and supremely creamy but also bursts with invigoratingly fresh and tropical flavors. Imagine a perfectly simple, buttery biscuit crust providing the ideal foundation for a velvety-smooth passion fruit cheesecake filling. To crown this masterpiece, a vibrant, crunchy, and tantalizingly tangy passion fruit coulis is generously poured over the top, creating a symphony of textures and tastes that will leave a lasting impression.
Whether you’re a seasoned baker or just starting, this guide will walk you through every step to create a show-stopping dessert that’s perfect for any occasion, or simply to brighten an ordinary day. Get ready to impress your family and friends with this homemade passion fruit cheesecake, a true celebration of tropical delight.
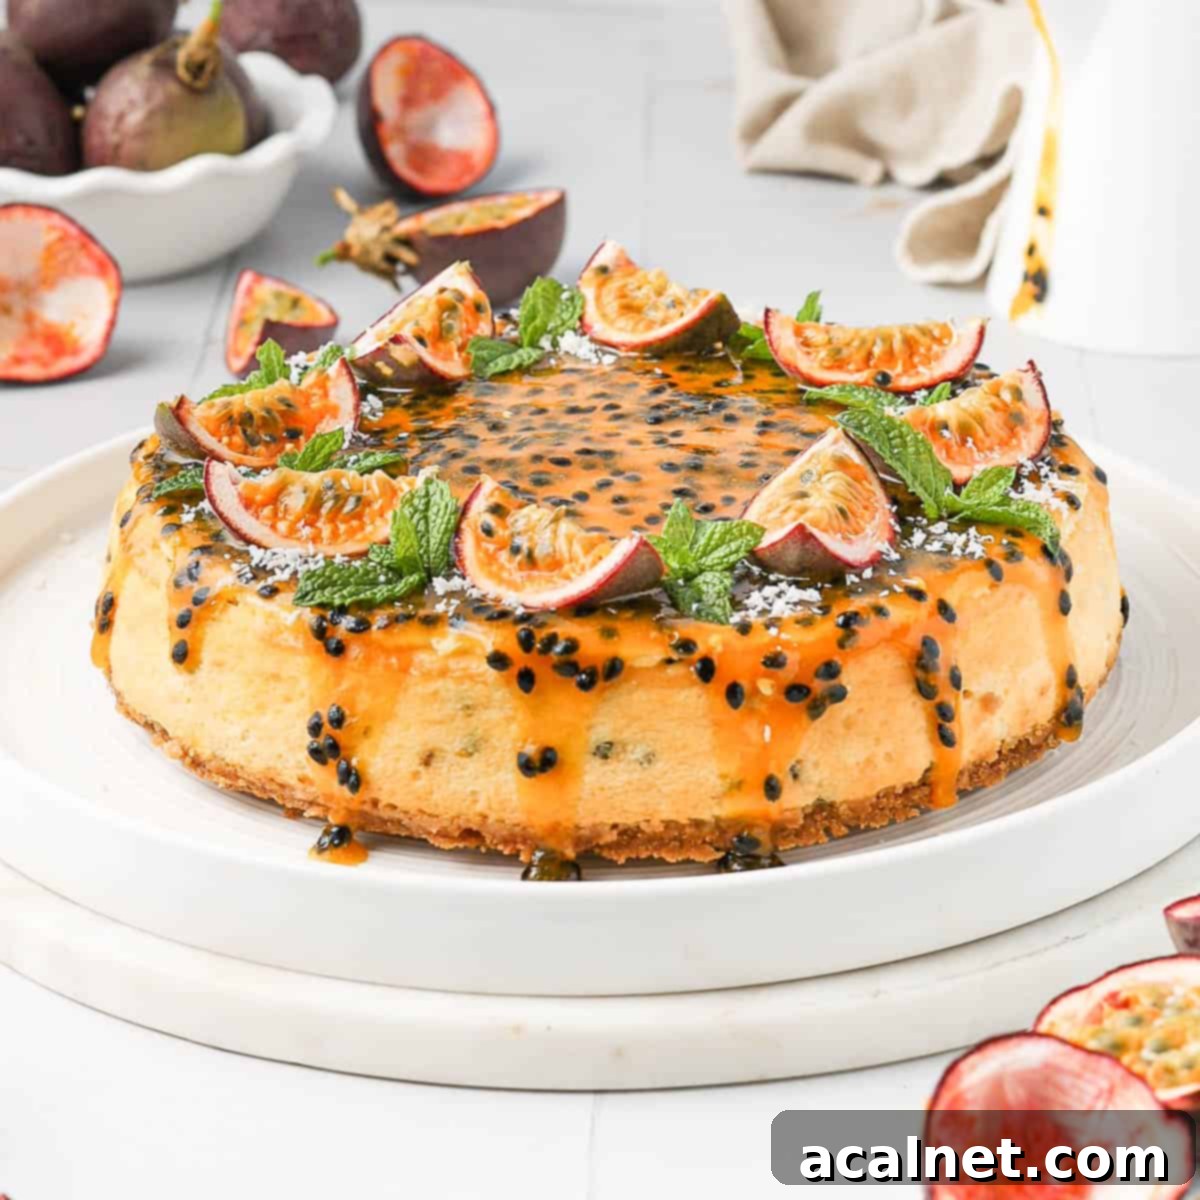
Why You’ll Adore This Passion Fruit Cheesecake Recipe
If your heart beats for the exotic and vibrant taste of passion fruit, then this baked cheesecake recipe is about to become your new obsession! It’s not just a dessert; it’s an experience, combining ease of preparation with a truly impressive presentation that belies its straightforward steps. The bright, inviting colors and the delightful contrast of textures make it a feast for both the eyes and the palate.
Despite being a baked cheesecake, this recipe achieves an astonishingly light and ultra-creamy texture. This isn’t your dense, heavy cheesecake; it’s a dreamily smooth creation that melts in your mouth. The subtly tangy passion fruit cheesecake cream is perfectly balanced by the sweet, buttery biscuit crust, and then elevated by the bright, crunchy seeds and vibrant flavor of the homemade passion fruit coulis on top. This harmonious blend results in a decadent yet refreshing dessert that feels both indulgent and wonderfully fresh.
This passion fruit cheesecake is also an ideal make-ahead dessert, perfect for special occasions, dinner parties, or simply as a treat to enjoy throughout the week. Its flavors deepen and its texture sets beautifully when allowed to chill in the fridge overnight, making your event day stress-free. So go ahead, prepare it in advance and keep it chilled until you’re ready to serve a slice of tropical paradise!
Essential Ingredients for Your Passion Fruit Cheesecake
Crafting the perfect passion fruit cheesecake starts with selecting high-quality ingredients and ensuring they are prepared correctly. Here’s a detailed look at what you’ll need and why each component is crucial for achieving that irresistible flavor and texture.
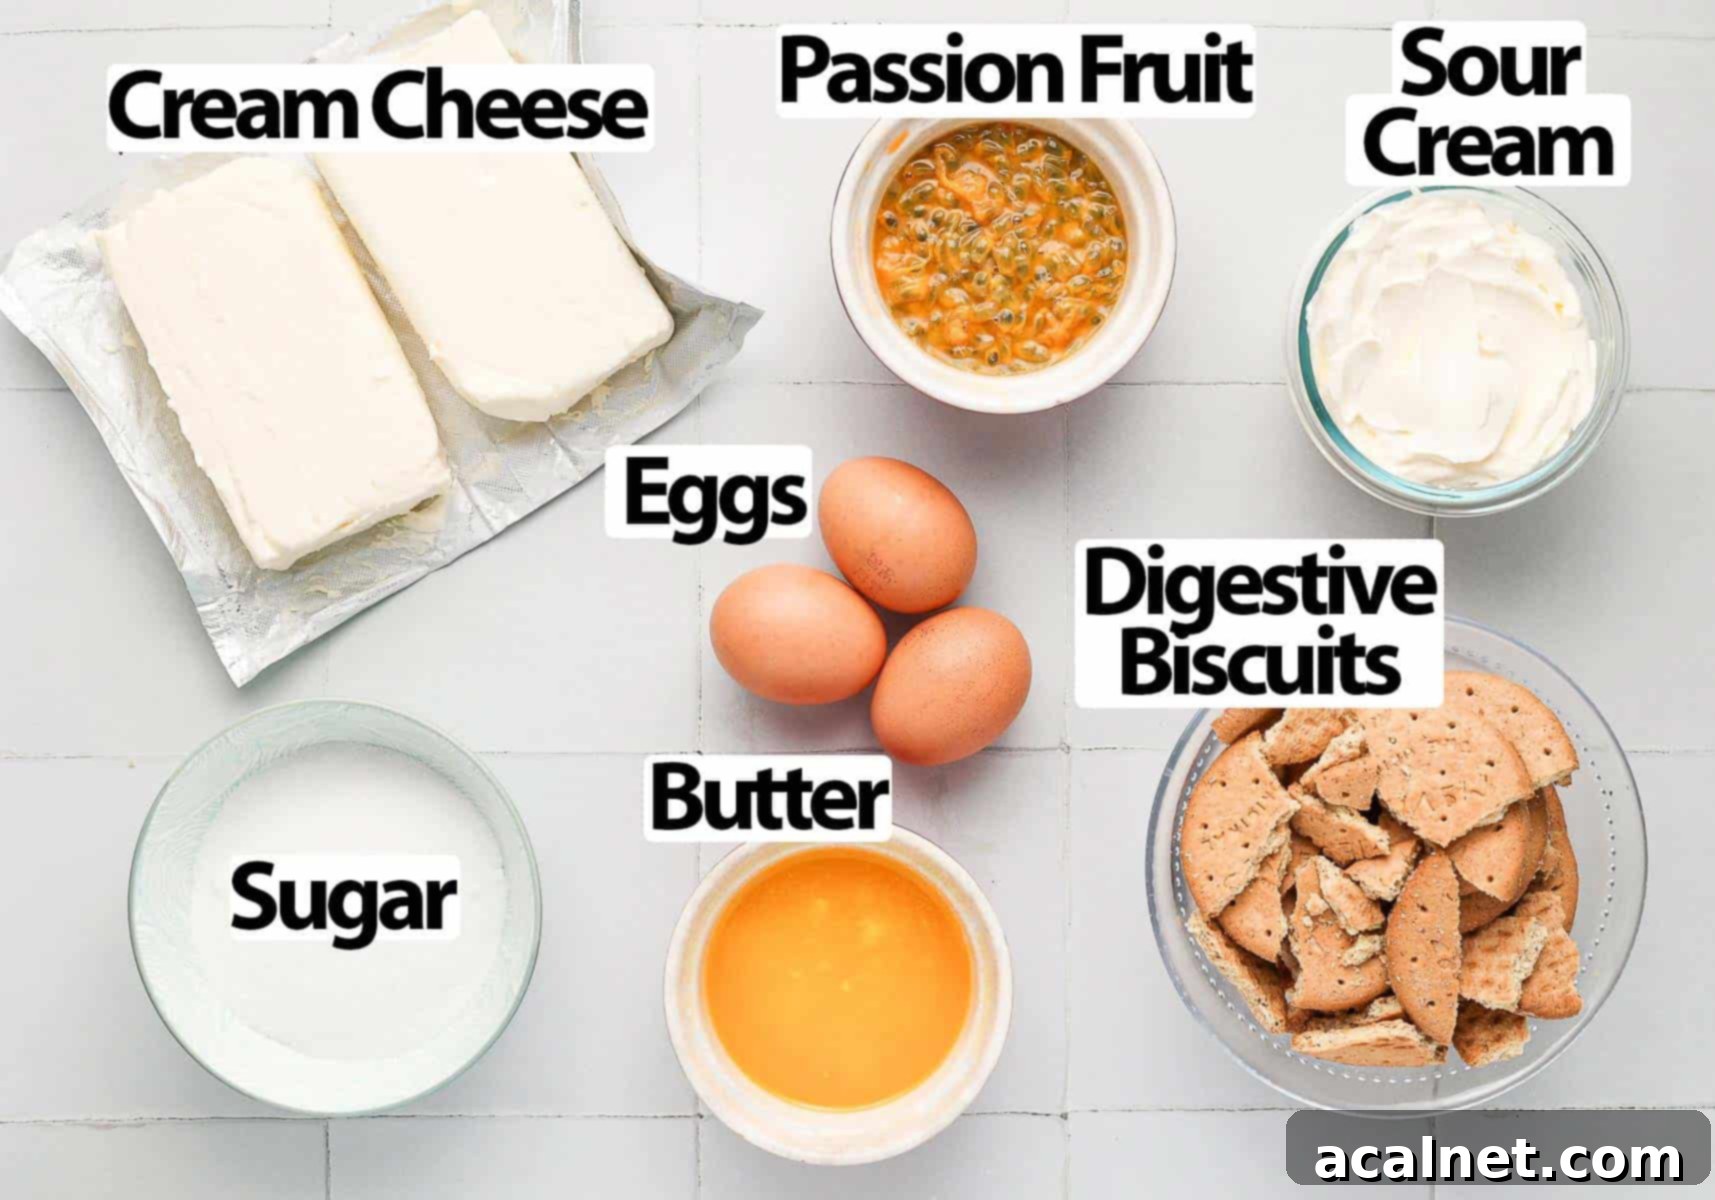
For precise quantities and measurements, please refer to the comprehensive recipe card below.
The Irresistible Cheesecake Base:
- Digestive Biscuits: These classic British biscuits are the perfect choice for a cheesecake crust due to their slightly sweet, buttery flavor and crumbly texture. They crush easily and hold together beautifully with butter. Since they are already sweetened, there’s no need to add extra sugar to your crust. For alternatives, consider graham crackers (you might want to add a tablespoon or two of sugar) or even Biscoff cookies (Speculoos) for a warm, spiced note that pairs wonderfully with passion fruit.
- Melted Butter: The essential binding agent for your crust. Unsalted butter is preferred to control the overall saltiness of the dessert. Melting it allows for easy mixing and ensures the crumbs are evenly coated, creating a firm and cohesive base.
The Velvety Passion Fruit Cream Cheese Mixture:
- Cream Cheese + Sour Cream: This dynamic duo forms the backbone of your cheesecake’s creamy texture. It is absolutely critical that both ingredients are at **room temperature**. If they are too cold, they will not emulsify properly, leading to lumps of unmixed cream cheese in your batter, which can compromise the smooth consistency of the finished cheesecake. Room temperature ensures a silky, lump-free mixture.
- Eggs: Medium-sized and also at **room temperature**. Eggs provide structure and richness to the cheesecake, helping it to set properly during baking. Using room temperature eggs ensures they integrate smoothly into the cream cheese mixture without chilling it down and causing lumps.
- Caster Sugar: A fine-grained sugar that dissolves easily, contributing to the smooth texture and sweetness of the cheesecake.
- Passion Fruit Pulp: The star of the show! This includes both the vibrant juice and the crunchy black seeds from inside fresh passion fruit. You can use fresh passion fruit pulp, or if fresh is unavailable, good quality frozen passion fruit pulp (sometimes labeled as passion fruit puree) works perfectly – just make sure it’s fully thawed and at room temperature. It’s crucial to avoid canned passion fruit syrups, which often contain excessive added sugar and water, diluting the authentic flavor.
- Vanilla (Optional but Recommended): A touch of vanilla bean paste or about 1 ½ teaspoons of vanilla extract can deepen the flavor profile, adding a warm, aromatic note that beautifully complements the tropical passion fruit.
The Bright Passion Fruit Coulis Topping & Garnishes:
- For the topping, I highly recommend a homemade Passion Fruit Coulis. This tangy and bright sauce is made from additional passion fruit pulp, a little sugar for sweetness, cornstarch to thicken it, and a squeeze of fresh lemon juice to enhance its tartness.
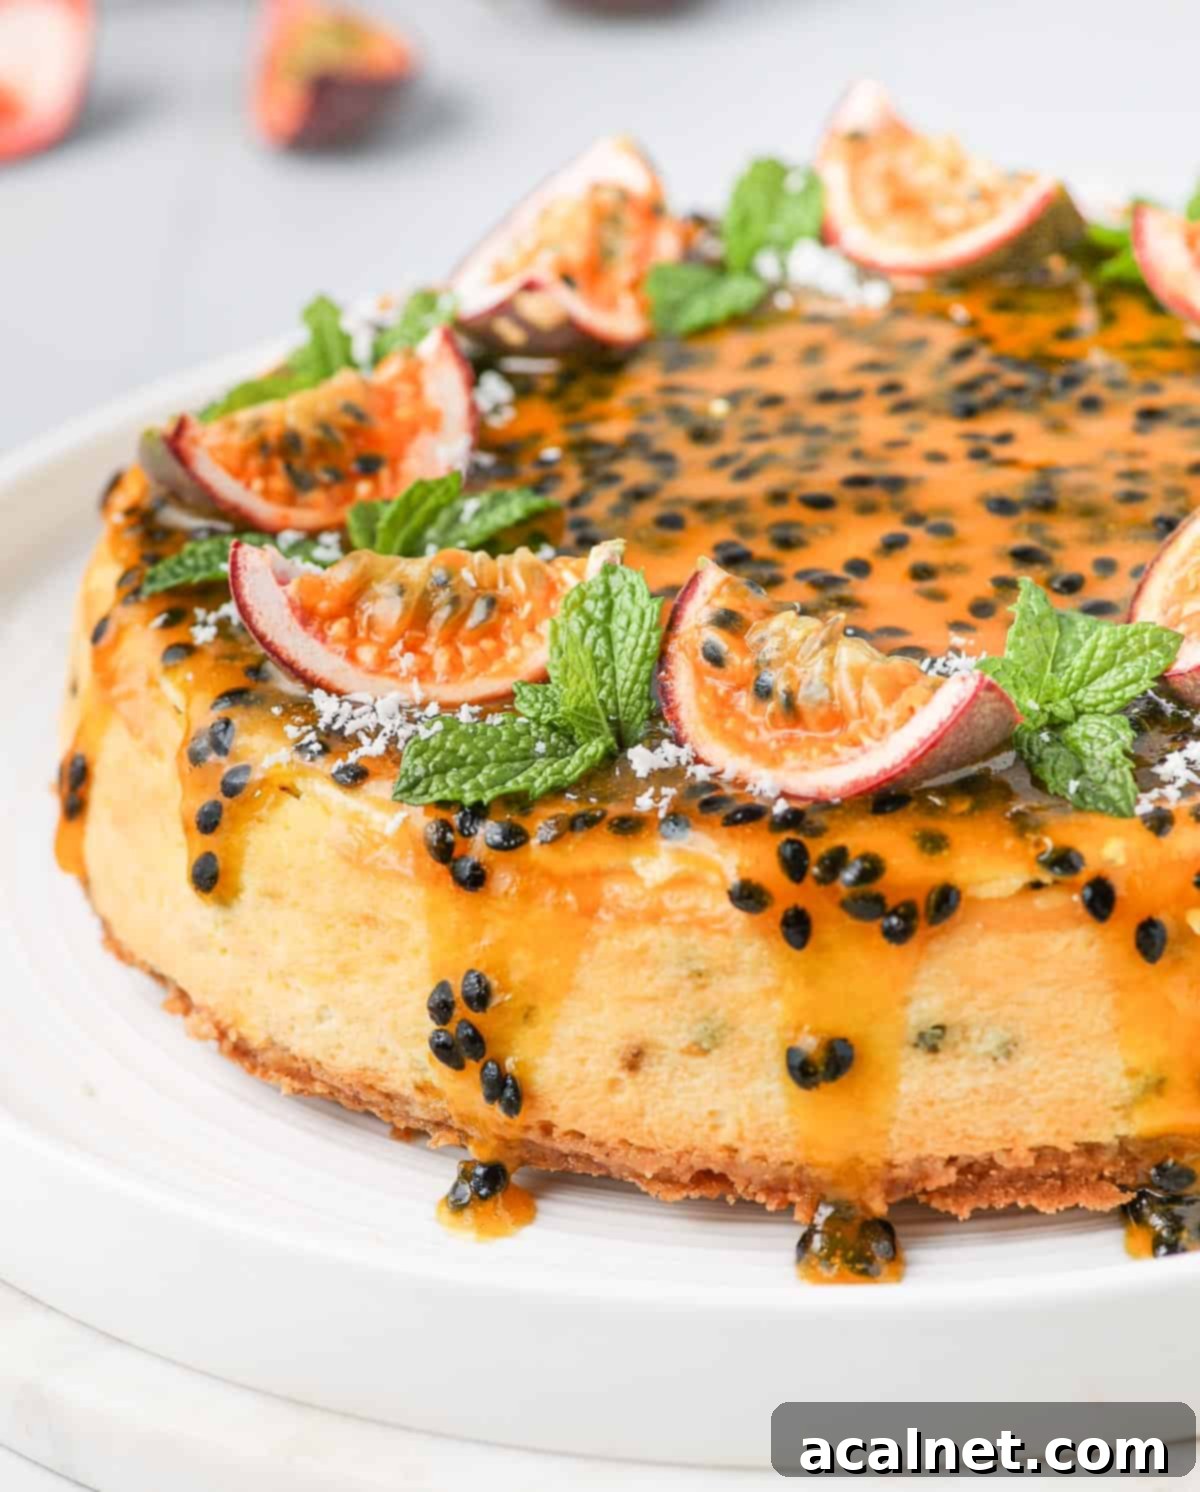
- Optional Garnishes: Elevate your cheesecake’s presentation and add extra layers of flavor with fresh passion fruit halves or slices, vibrant fresh mint leaves for a refreshing aroma, and a delicate sprinkle of desiccated coconut for a subtle tropical crunch.
Crafting Your Dream: How to Make Passion Fruit Cheesecake
Making this baked passion fruit cheesecake is a rewarding process. Follow these detailed steps to ensure a flawless and delicious result. Remember, patience, especially during the mixing and cooling stages, is key to preventing cracks and achieving that perfect creamy texture.
Step 1: Preparing the Digestive Biscuit Base
The foundation of any great cheesecake is a perfectly crafted crust. This simple yet crucial step sets the stage for the creamy filling.
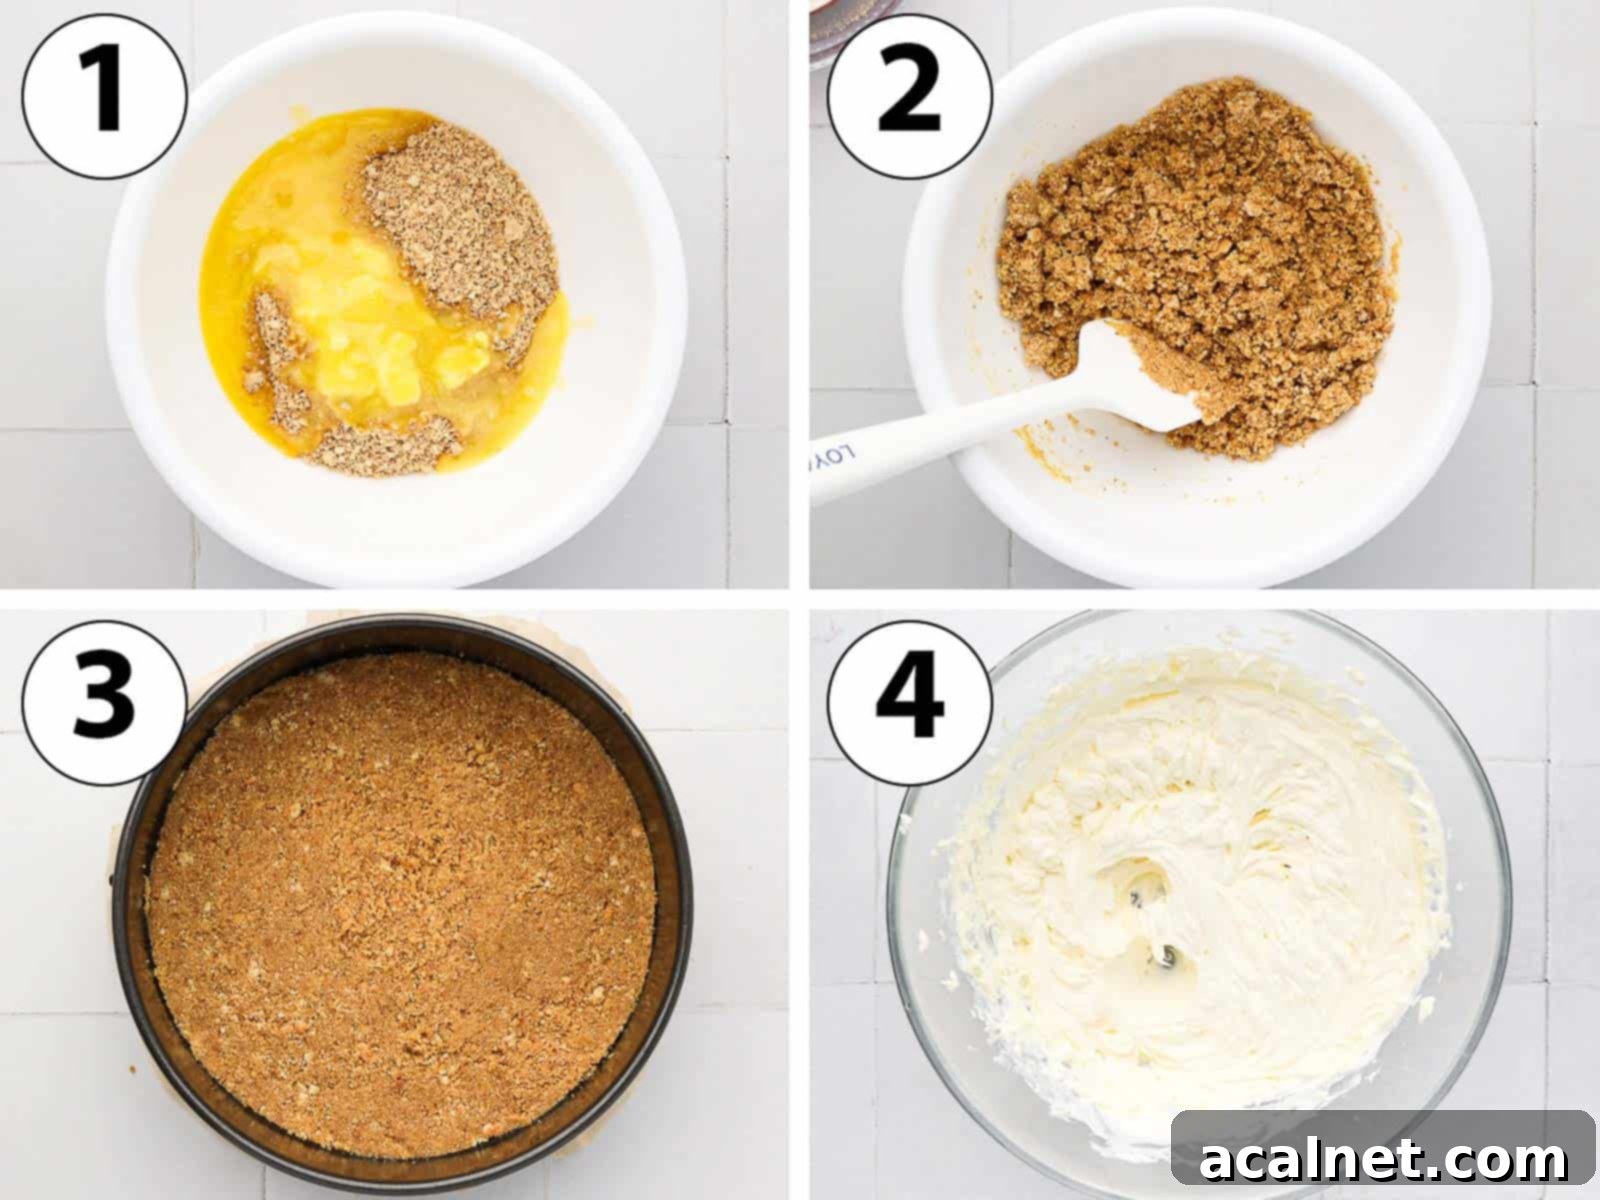
- First, prepare your 22 cm / 9-inch Springform Pan. Line the bottom with a circle of baking paper and lightly grease the sides. This preparation ensures easy removal of your finished cheesecake.
- Crush the Digestive Biscuits: Achieve fine crumbs by either pulsing them in a food processor or by placing them in a freezer bag and crushing them thoroughly with a rolling pin. The finer the crumbs, the more even your crust will be.
- Melt the Butter: Gently melt the butter in the microwave or a small saucepan. Once melted, set it aside for a few minutes to cool slightly. You don’t want it sizzling hot when you mix it with the biscuits.
- Photo 1 (implied): Combine both the finely crushed biscuits and the slightly cooled melted butter in a spacious mixing bowl.
- Photo 2 (implied): Using a spatula or your hands, mix until all the biscuit crumbs are uniformly coated with the butter. The mixture should resemble thick, wet sand – a sign that it will bind together well.
- Photo 3 (implied): Transfer the buttery biscuit mixture to the prepared springform pan. Using the bottom of a cup, a spoon, or a small offset spatula, firmly and evenly press the crumbs onto the bottom of the pan to create a compact crust. Ensure it is very tightly packed, as this prevents it from crumbling when sliced.
- Once packed, place the pan in the fridge to chill for at least 15-20 minutes while you prepare the cheesecake mixture. This chilling helps the crust to set and become even firmer.
Step 2: Crafting the Silky Passion Fruit Cream Cheese Mixture
This is where the magic happens! Careful mixing is essential for a smooth, crack-free cheesecake.

- First, preheat your oven to 140°C / 285°F. Position the oven rack on its lowest setting. A lower temperature and rack position are crucial for slow, even baking and preventing cracks.
- Photo 4 (implied): In a large mixing bowl (or the bowl of a stand mixer fitted with the paddle attachment), combine the Cream Cheese and Sour Cream. As stressed earlier, both *must* be at room temperature. Whisk them together on medium to high speed for several minutes until the mixture is beautifully light, fluffy, and completely smooth. Scrape down the sides of the bowl periodically to ensure everything is fully incorporated. Continue whisking until you can detect absolutely no hard lumps of cream cheese. This is a crucial step for a silky-smooth batter.
- Photo 5 (implied): Reduce the mixer speed to medium. Add the Caster Sugar and the Passion Fruit Pulp. If using frozen pulp, ensure it has completely thawed and reached room temperature before adding.
- Photo 6 (implied): Mix these ingredients on medium speed, just until they are combined. Overmixing at this stage can incorporate too much air, which can lead to cracking during baking.
- Photo 7 (implied): Gently add the Eggs, one at a time. Mix each egg into the batter on a low speed until it is *just* combined before adding the next one. This step is vital: avoid over-mixing at all costs, as excessive air in the batter is a primary cause of cheesecake cracks. You want to integrate the eggs, not whip them.
- Pour the silky passion fruit cheesecake batter carefully over your chilled biscuit crust in the springform pan. Gently tap the pan a few times on a hard surface (like your counter) to release any large air bubbles trapped within the batter. This also helps ensure an even top surface.
- Place the cheesecake in the preheated oven on the lowest rack. Bake for approximately 60 to 70 minutes. The cheesecake is ready when the edges appear set and firm, but the very center still shows a slight, gentle jiggle when the pan is carefully moved. It will continue to set as it cools.
- Once baked, turn off the oven but leave the cheesecake inside with the oven door slightly ajar for 1 hour. This gradual cooling prevents drastic temperature changes that can cause cracks.
- After 1 hour in the cooling oven, remove the cheesecake and let it cool completely at room temperature for another 1 hour.
- Finally, transfer the cheesecake to the fridge to chill for a minimum of 3 hours, but ideally overnight. Thorough chilling is essential for the cheesecake to fully set, develop its rich flavor, and achieve that perfect sliceable texture.
- Once completely chilled and set, carefully release the passion fruit cheesecake from the springform pan and transfer it to a serving dish. Decorate with your chosen toppings just before serving. Ensure it is thoroughly set before attempting to slice it with a large, sharp knife.
Common Questions About Baked Passion Fruit Cheesecake
Here are some frequently asked questions to help you perfect your passion fruit cheesecake and troubleshoot any concerns.
If Digestive Biscuits are not readily available where you live, there are several excellent alternatives. Graham crackers are a very popular choice in North America; if using them, you might want to add 1-2 tablespoons of granulated sugar to the crushed crumbs as they are less sweet than Digestives. For a different flavor profile, Speculoos (Biscoff Cookies) work wonderfully, offering a warm, spiced caramel note that complements passion fruit beautifully, as I’ve done in my Passion Fruit and Raspberry Cheesecake. Essentially, any plain, firm cookie that can be crushed into fine crumbs and mixes well with butter will work for your cheesecake crust.
For the best flavor and texture in your passion fruit cheesecake, I highly recommend using passion fruit pulp that is 100% fruit. Frozen passion fruit pulp is a fantastic option when fresh passion fruits are out of season or hard to find. Just ensure it is completely thawed and brought to room temperature before incorporating it into the batter. I would generally advise against using canned passion fruit that is mixed in a sugary syrup, as this can introduce too much sweetness and a less authentic flavor, as well as affecting the cheesecake’s consistency. However, if the can explicitly states it contains only 100% fruit pulp, then it should be perfectly fine to use.
Preventing cracks in a baked cheesecake is a common concern, but easily achievable by following a couple of key principles. First, and perhaps most importantly, avoid over-mixing the batter, especially after the eggs have been added. Over-mixing incorporates too much air into the mixture. As the cheesecake bakes, these air bubbles expand with the heat, causing the cheesecake to rise rapidly. When it cools, without the structural integrity to hold that rise, it collapses and cracks. Second, ensure you let the cheesecake cool down very gradually. Drastic temperature changes are a major culprit for cracks. Start by leaving it in the turned-off oven with the door slightly opened for an hour, then move it to cool completely at room temperature for another hour, and finally, chill it in the fridge. This slow, gentle cooling allows the cheesecake to contract slowly and evenly, minimizing the risk of unsightly cracks.
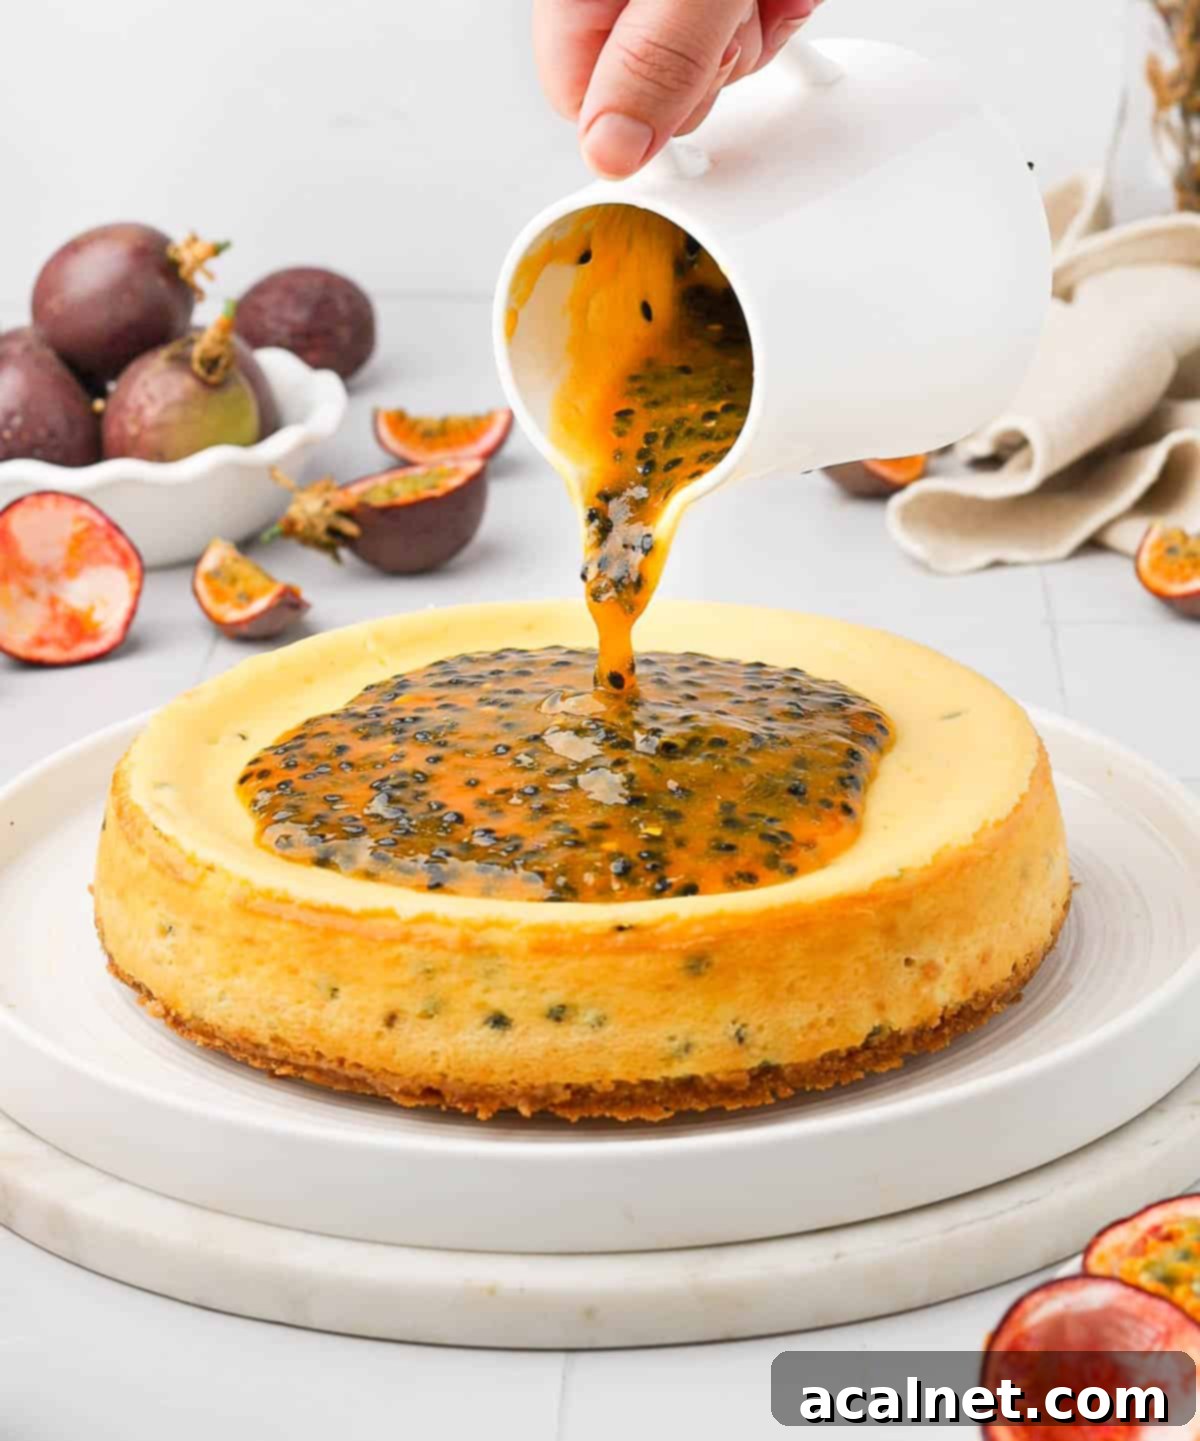
The topping is what truly makes this baked passion fruit cheesecake shine! I highly recommend using my Passion Fruit Coulis recipe. It’s a simple concoction of passion fruit pulp, sugar, cornstarch, and lemon juice, gently cooked until thickened and glossy. Pour this vibrant coulis over your completely chilled cheesecake. For an extra touch of elegance and flavor, decorate the cheesecake with fresh passion fruits (sliced into halves or quarters to expose their juicy seeds), a few sprigs of fresh mint leaves for a refreshing contrast, and a light sprinkle of desiccated coconut for a subtle tropical crunch. If you’re looking for variations, a rich Passion Fruit Curd also makes a magnificent topping. For a slightly different tangy twist, consider a Tangy Lemon Curd or a vibrant Raspberry Compote. And for the ultimate indulgence, serve a slice alongside a scoop of Passion Fruit Ice Cream!
Expert Tips for a Perfectly Baked Passion Fruit Cheesecake
Achieving a flawless, creamy, and crack-free baked cheesecake isn’t difficult if you keep these crucial tips in mind:
- Ensure All Ingredients are at Room Temperature: This cannot be stressed enough, especially for your Cream Cheese, Sour Cream, and Eggs. Cold ingredients, particularly cream cheese, will result in a lumpy batter because they won’t blend smoothly with other ingredients. Room temperature items emulsify beautifully, giving you that coveted silky-smooth consistency.
- Do Not Over-Mix the Batter (Especially After Adding Eggs): Over-mixing is the archenemy of a perfect cheesecake. It incorporates excess air into the batter. This air expands significantly in the oven, causing the cheesecake to puff up. As it cools, this expanded air escapes, leading to a dramatic collapse and unsightly cracks on the surface. Mix only until ingredients are just combined, and then stop.
- Master the “Jiggle Test” to Know When it’s Baked: The cheesecake is properly baked when the edges appear set and firm, but the very center (about a 2-3 inch circle) still has a slight, gentle jiggle when you carefully shake the pan (using oven mitts!). Don’t wait for the entire cheesecake to be firm, as it will continue to set as it cools down. An over-baked cheesecake can also lead to cracks and a drier texture.
- Gradual Cooling is Key to Preventing Cracks: Sudden temperature changes are detrimental to a baked cheesecake. Always allow your cheesecake to cool down slowly. First, leave it in the turned-off oven with the door slightly ajar for an hour. Then, remove it and let it cool completely at room temperature for another hour. Finally, transfer it to the fridge for several hours or, ideally, overnight. This gradual process allows the cheesecake to contract slowly and evenly.
- Proper Springform Pan Preparation: Always line the bottom of your springform pan with parchment paper and lightly grease the sides. This ensures easy removal once the cheesecake is set, preventing it from sticking and potentially tearing the sides.
- Clean Your Knife for Perfect Slices: For elegant, clean slices, dip a sharp knife in hot water and wipe it clean between each cut. This prevents the cheesecake from sticking to the blade and dragging, ensuring every piece looks picture-perfect.
Storing & Freezing Your Passion Fruit Cheesecake
Once baked and thoroughly chilled, this passion fruit cheesecake will keep beautifully in the fridge for up to 3 days. For individual portions, you can store slices in an air-tight container in the refrigerator. In fact, this cheesecake is one of those desserts that truly benefits from being prepared in advance. Its flavors deepen and meld together, and its texture becomes perfectly set after a night in the fridge, making it even more delicious the next day.
I generally do not recommend freezing this baked cheesecake. Freezing can alter the delicate texture of the cream cheese filling, often making it grainy or watery upon thawing. To enjoy this cheesecake at its best, stick to refrigeration and consume it within a few days of baking.
Explore More Delicious Cheesecake Recipes
If you’ve fallen in love with the art of cheesecake baking, there’s a whole world of creamy, dreamy desserts to discover. Here are some other fantastic cheesecake recipes to inspire your next baking adventure:
- Coffee Cheesecake
- Lemon Ricotta Cheesecake
- Mini Lemon Cheesecakes with Lemon Curd
- Apple Crumble Cheesecake
- Mini Blueberry Cheesecakes
- Baked Biscoff Cheesecake
- Mini Strawberry Cheesecakes
- No Bake Biscoff Cheesecake
- Chocolate Orange Cheesecake
Did you create this delicious recipe?
We’d love to hear from you! Please share your thoughts by leaving a comment below, and don’t forget to tag us on Instagram @a.baking.journey with a photo of your delightful creation!
Full Recipe: Baked Passion Fruit Cheesecake

Baked Passion Fruit Cheesecake
Print Recipe
Ingredients
Cheesecake Crust
- 200 gr (7 oz) Digestive Biscuits, finely crushed
- 100 gr (7 tablespoons) Unsalted Butter, melted and slightly cooled
Passion Fruit Cheesecake Filling
- 500 gr (18 oz) Cream Cheese, full-fat, at room temperature
- 180 gr (3/4 cup) Sour Cream, full-fat, at room temperature
- 100 gr (1/2 cup) Caster Sugar
- 3 Eggs, medium-sized, at room temperature
- 100 gr (3.5 oz) Passion Fruit Pulp, from about 5 small fresh passion fruits, or thawed frozen pulp
- 1 1/2 tsp Vanilla Extract or Paste, optional, for added depth of flavor
Passion Fruit Coulis Topping
- 180 gr (6.5 oz) Passion Fruit Pulp, from about 9 small passion fruits, or thawed frozen pulp
- 60 gr Caster Sugar
- 1/2 tablespoon Cornstarch
- 1 tablespoon Lemon Juice, freshly squeezed
Instructions
Cheesecake Crust
- Line the bottom of a 22 cm / 9-inch Springform Pan with baking paper and lightly grease the sides for easy removal later.
- Finely crush the Digestive Biscuits in a food processor or by hand. Place them in a large mixing bowl. Melt the Butter and pour it over the crushed biscuits. Mix thoroughly with a spatula until all crumbs are evenly coated and the mixture resembles thick, wet sand.
- Transfer the biscuit mixture to the prepared pan. Firmly and evenly press the crumbs onto the bottom to create a compact crust. Use the bottom of a cup or a small offset spatula to ensure it’s very tightly packed (See note 1). Place the pan in the fridge to chill while you prepare the cheesecake filling.
Passion Fruit Cheesecake Filling
- Preheat your oven to 140°C / 285°F. Position an oven rack on its lowest setting.
- In a large bowl, or the bowl of a stand mixer with the paddle attachment, combine the Cream Cheese and Sour Cream (both at room temperature). Whisk together on medium-high speed for a few minutes until the mixture is light, fluffy, and completely smooth, with no lumps (see note 2). Scrape down the sides of the bowl as needed.
- Reduce mixer speed to medium. Add the Caster Sugar and Passion Fruit Pulp (ensure pulp is thawed and at room temperature if frozen). Mix until just combined, stopping as soon as the ingredients are incorporated.
- Add the Eggs one at a time, mixing on low speed until just combined before adding the next one. Be careful not to over-mix at this stage to avoid incorporating too much air into the batter (see note 3).
- Pour the smooth passion fruit cheesecake batter over the chilled crust in the springform pan. Gently tap the pan a few times on a hard surface to release any large air bubbles.
- Place the cheesecake in the preheated oven on the lowest rack. Bake for 60 to 70 minutes, or until the edges are set but the center still jiggles slightly (see note 4).
- Once baked, turn off the oven, open the door slightly, and leave the cheesecake to cool in the oven for 1 hour. Remove it and let it cool completely at room temperature for another hour. Then, transfer it to the fridge to chill for at least 3 hours, or preferably overnight, to fully set.
Passion Fruit Coulis Topping
- To make the coulis, combine the Passion Fruit Pulp, Caster Sugar, Cornstarch, and Lemon Juice in a small saucepan. Place on low to medium heat on the stove and simmer for 5 to 10 minutes, stirring occasionally, until the sugar has dissolved and the mixture thickens to a pourable consistency.
- Remove from heat and let the coulis cool down completely before pouring it over your chilled cheesecake.
- Optionally, garnish your finished cheesecake with fresh slices of passion fruit, a few fresh mint leaves, and a sprinkle of desiccated coconut for extra flavor and visual appeal.
Would you like to save this recipe?
We’ll email this post to you, so you can come back to it later!
Notes
- Digestive Biscuits: If you cannot find Digestive Biscuits, you can substitute them for graham crackers (optionally add a little bit of sugar to the crust for sweetness) or virtually any type of firm, plain cookie that can be crushed into fine crumbs, such as Speculoos/Biscoff cookies, which would also pair wonderfully with the passion fruit flavor.
- Passion Fruit Pulp: This refers to the juice and seeds directly from inside the passion fruit. You can use fresh pulp or high-quality frozen passion fruit pulp (sometimes labeled as passion fruit puree). If using frozen, ensure it is fully thawed and brought to room temperature before use. Always avoid canned passion fruit syrup, which typically contains a high amount of added sugar and water, diluting the authentic taste and potentially affecting the cheesecake’s consistency.
Instruction Notes:
- To firmly press the crumbs into the pan, you can use the flat bottom of a cup, the back of a spoon, or a small offset spatula. This ensures a compact and stable crust.
- For a lump-free, smooth cheesecake batter, it is absolutely essential that both the cream cheese and sour cream are at room temperature. Keep whisking until the mixture is uniform and velvety, with no visible hard lumps.
- When adding eggs, mix minimally until just combined. Over-mixing introduces excessive air, which causes the cheesecake to rise too much during baking and then collapse and crack as it cools. Gentle mixing helps maintain a dense, creamy texture.
- The cheesecake is perfectly baked when its edges are set and firm, but the very center (a small area of about 2-3 inches in diameter) still has a slight, gentle wobble when the pan is carefully shaken. The residual heat will continue to cook the center as it cools, leading to a perfectly set cheesecake.
Nutrition (per serving)
