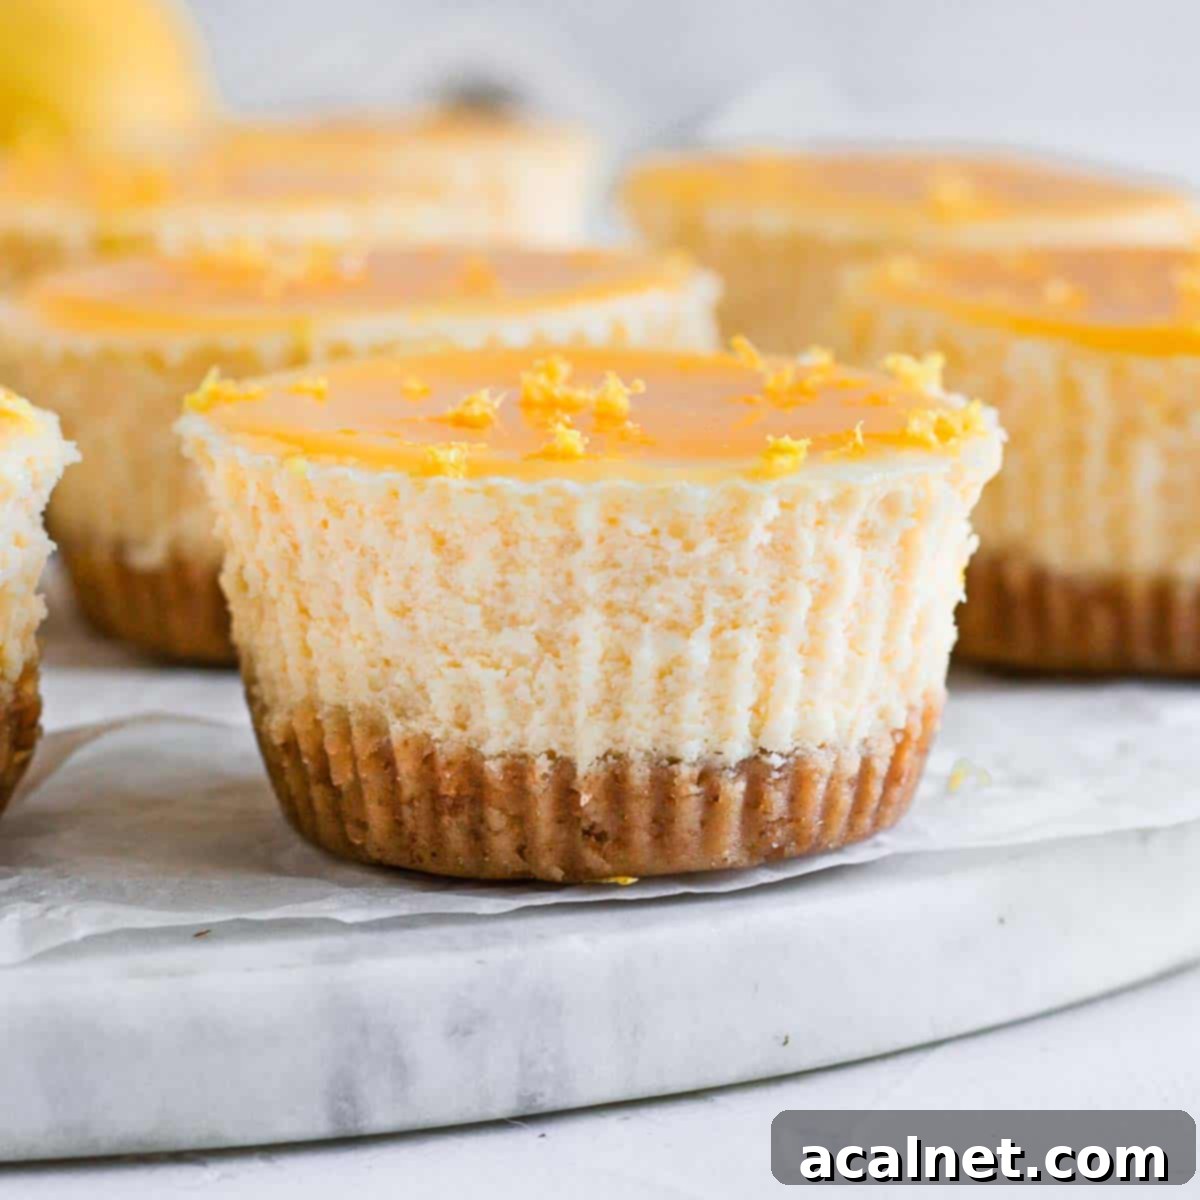
Irresistible Mini Lemon Cheesecakes with Tangy Lemon Curd Topping
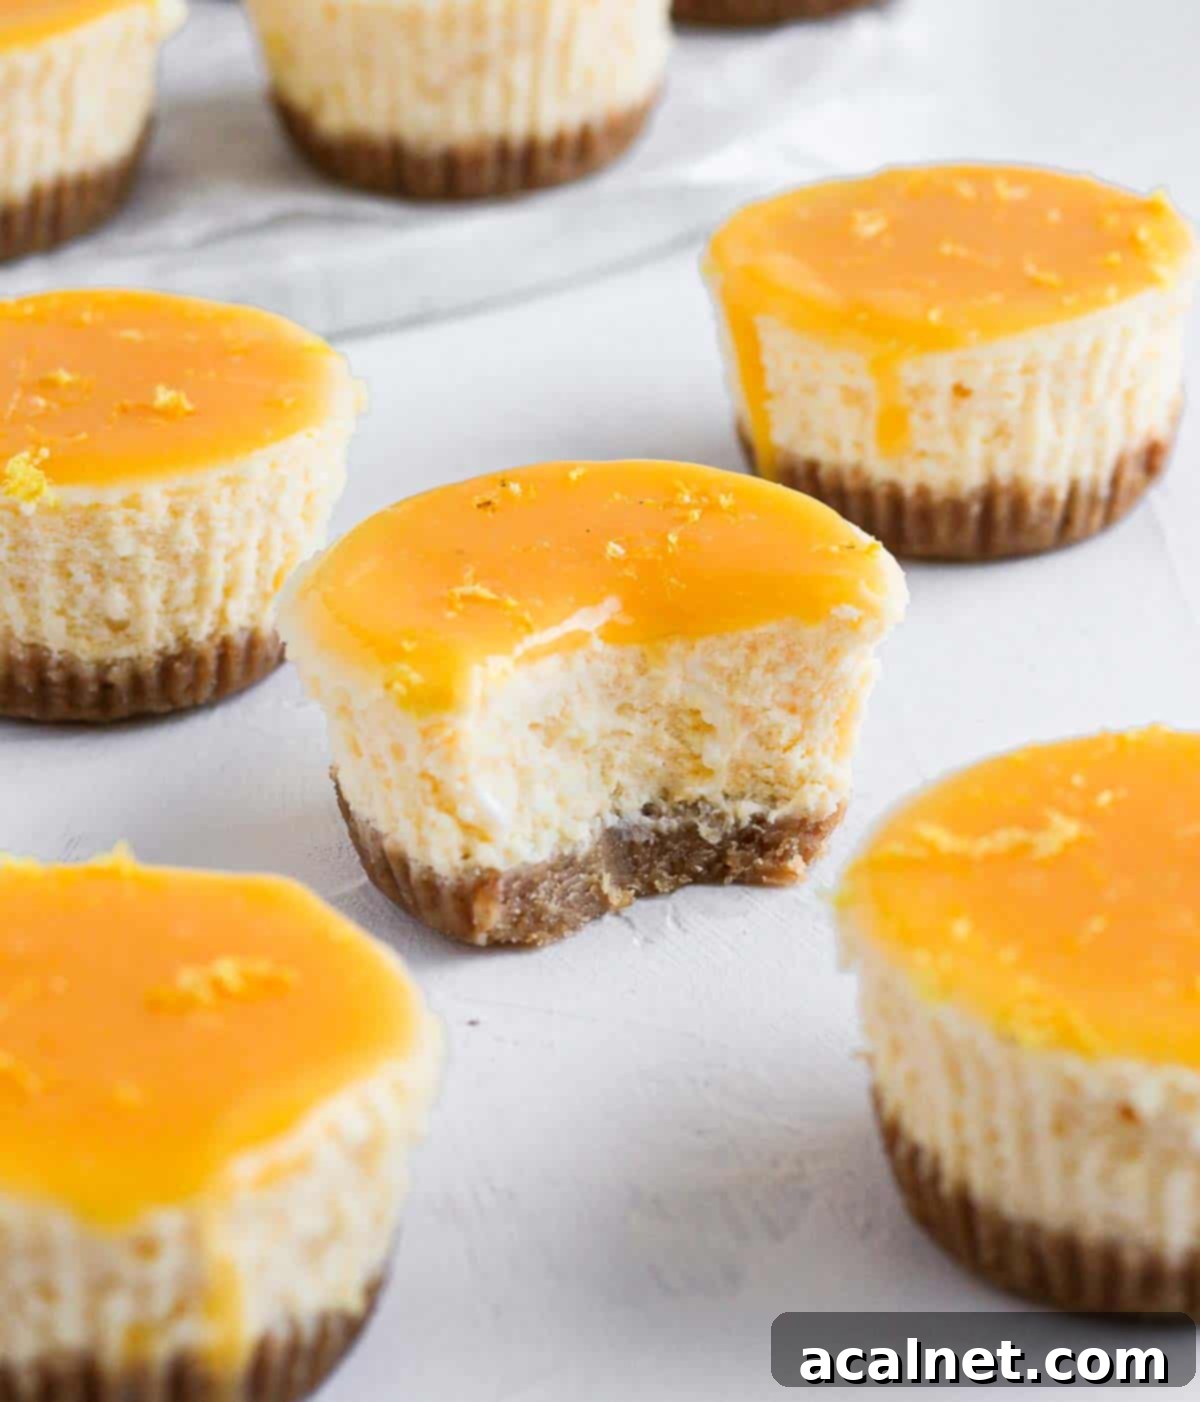
Experience a burst of sunshine with these delectable Mini Lemon Cheesecakes, crowned with a vibrant Lemon Curd Topping. This recipe masterfully combines a delightful symphony of sweet and sour notes, creamy textures, and a satisfying crunchy base. Perfect for any occasion – be it an elegant party, a casual dessert, or a charming afternoon tea – these bite-sized lemon cheesecake treats are an absolute essential for anyone who cherishes the bright, zesty tang of fresh lemons. Prepare to fall in love with their refreshing flavor and elegant presentation!
[feast_advanced_jump_to]
Why You’ll Adore These Lemon Curd Mini Cheesecakes
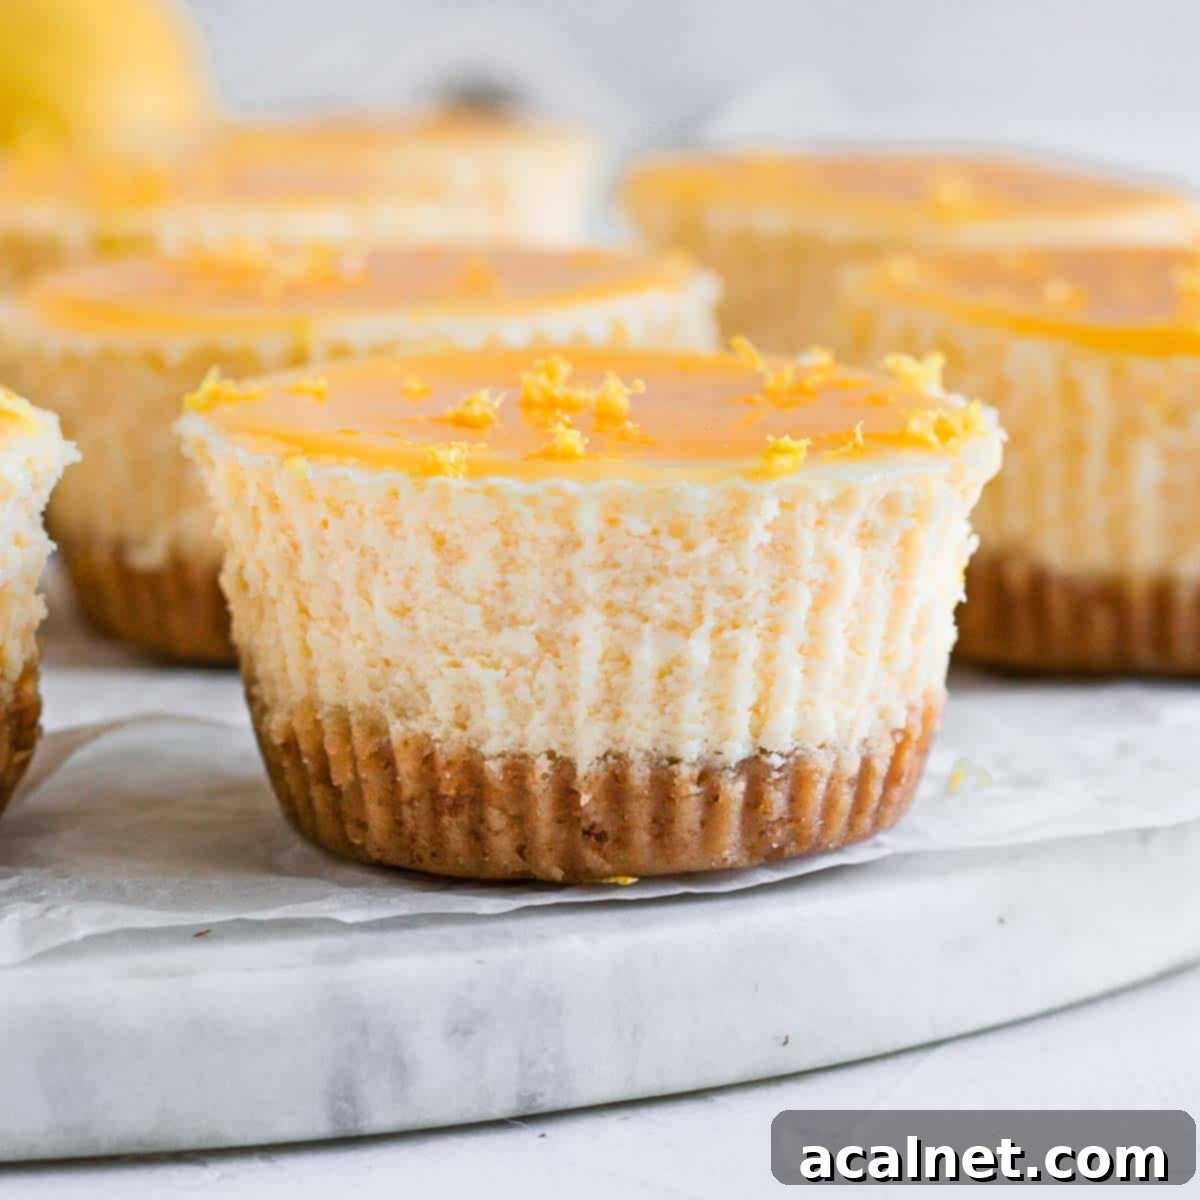
For those who crave a truly tangy and refreshing dessert, these Lemon Curd Cheesecakes are an absolute dream come true. What makes them so special is the harmonious blend of textures and flavors. We start with a remarkably simple, two-ingredient biscuit base that provides a satisfying crunch. This foundational layer is then generously topped with a velvety smooth, lemon-infused cheesecake batter, all culminating in an incredibly vibrant and oh-so-tangy lemon curd topping. Each bite delivers a perfect balance of sweet, sour, creamy, and crunchy – a truly addictive combination!
The homemade Lemon Curd is undoubtedly the star of this recipe. Crafted with just the right amount of sugar, it boasts an extra tangy profile that store-bought versions often lack. This intense citrus kick elevates the entire dessert, infusing each mini cheesecake with an unparalleled burst of sourness and bright lemon flavor that truly sets it apart.
As a passionate baker, I find myself consistently drawn to the delicate yet rich texture of baked cheesecakes over their no-bake counterparts. These Mini Baked Lemon Cheesecakes are a testament to that preference. Much like my beloved Lemon Ricotta Cheesecake and the ever-popular Mini Blueberry Cheesecakes, these individual treats offer an incredibly light, creamy, and fluffy consistency. They bake beautifully, resulting in a cheesecake that’s firm enough to hold its shape but melts delightfully in your mouth.
The versatility of these bite-size lemon cheesecakes makes them ideal for a wide array of occasions. Whether you’re hosting an elegant afternoon tea, planning a lively gathering, celebrating a special holiday, or simply indulging in an everyday dessert, they fit the bill perfectly. Their individual portions make them easy to serve and enjoy, minimizing mess and maximizing charm. Plus, they store wonderfully in the fridge for several days, making them an excellent make-ahead option for busy hosts or anyone who appreciates having a delicious treat readily available.
Essential Ingredients for Zesty Lemon Cheesecakes
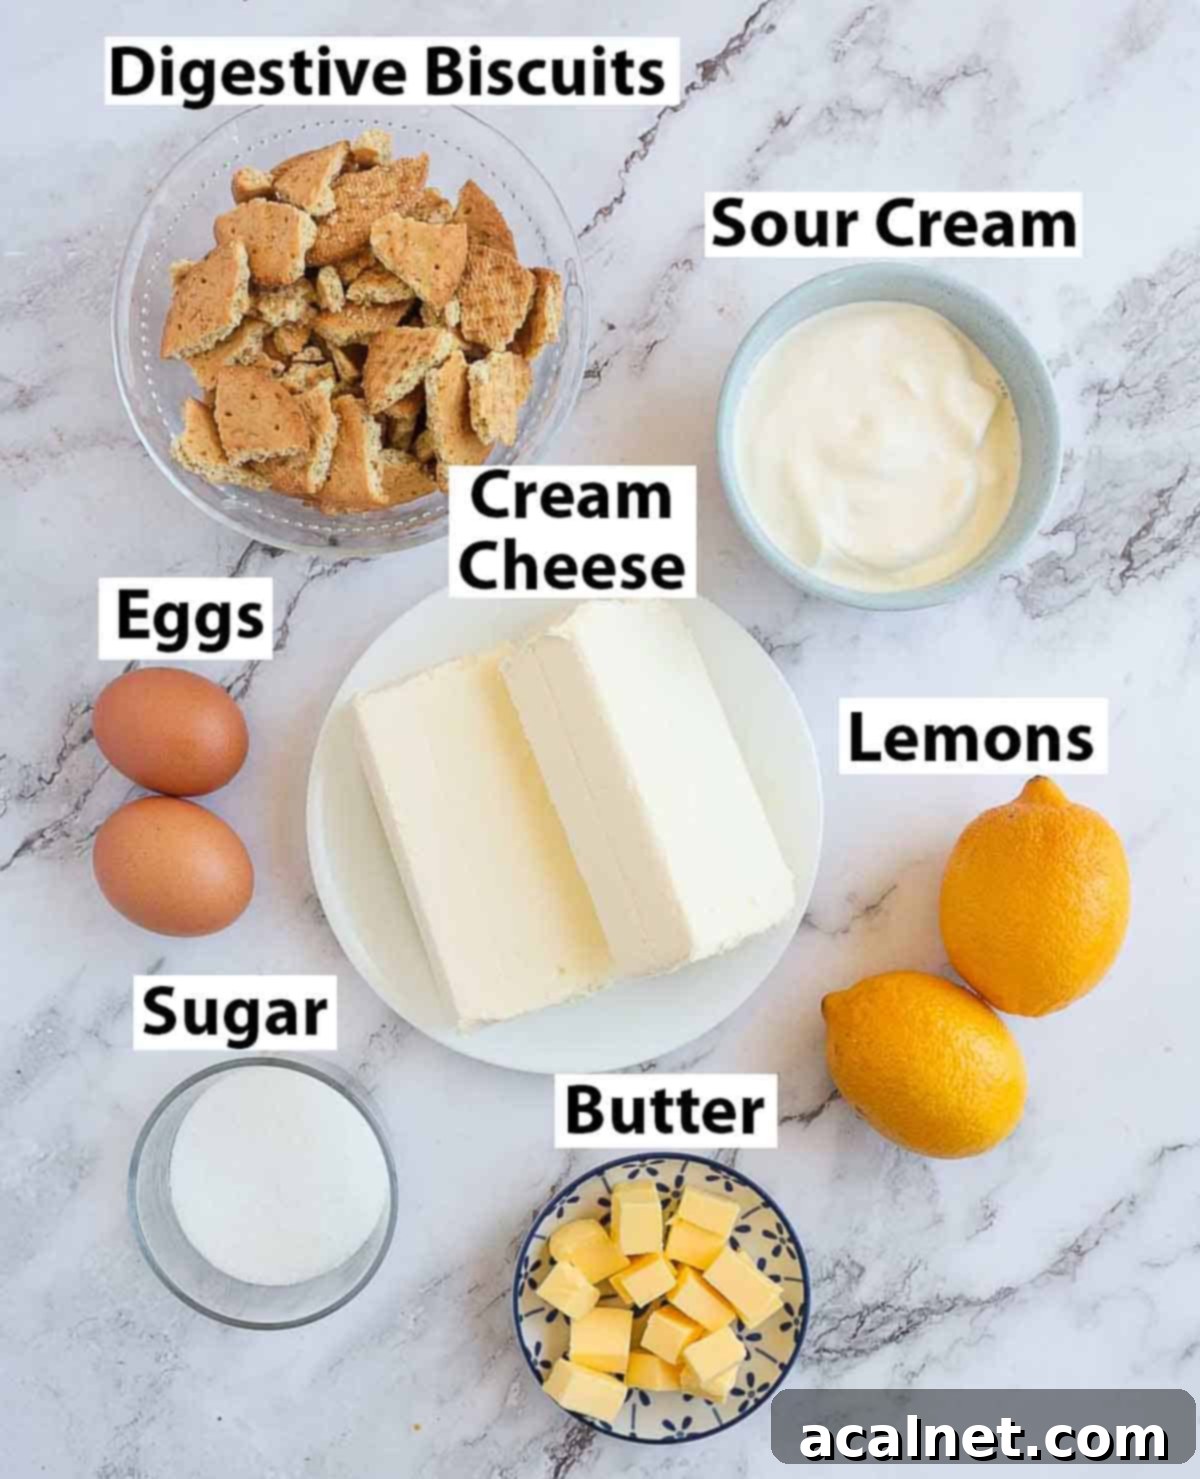
Crafting these delightful Mini Lemon Cheesecake Bites requires a handful of simple, high-quality ingredients. (For precise quantities, please refer to the detailed recipe card below):
- For the Crispy Crust: This easy-to-make base features a blend of finely crushed Digestive Biscuits and rich melted Unsalted Butter. While Digestive Biscuits are a fantastic choice for their neutral flavor and excellent texture, feel free to use any of your preferred biscuits, cookies, or classic graham crackers for a custom twist. The key is to create a firm, buttery foundation.
- For the Creamy Cheesecake Batter: The heart of our mini cheesecakes is this luxurious batter. It combines smooth Cream Cheese, tangy Sour Cream, fresh Lemon (we use both the juice and zest for maximum flavor), Caster Sugar (or fine white granulated sugar for a delicate sweetness), and Eggs. A crucial tip for a lump-free and perfectly blended batter: ensure all these ingredients are at room temperature before you begin mixing. This greatly aids in emulsification and creates a superior texture.
- For the Tangy Lemon Curd Topping: While store-bought lemon curd can be a convenient shortcut, I wholeheartedly recommend making your own for an unparalleled burst of fresh, tangy flavor. Many commercial curds tend to be overly sweet, masking the bright citrus notes. To create your own vibrant homemade lemon curd, you’ll need Egg Yolks, Sugar, Lemon Juice and Zest, and Unsalted Butter. The extra effort is truly worth it for the intense lemon flavor profile!
Ingredients Variation: Get Creative with Your Citrus
Don’t hesitate to experiment and personalize your mini cheesecakes! The recipe is wonderfully adaptable. Instead of classic lemons, you could explore other citrus fruits to create unique flavor profiles. Imagine the delicate floral notes of Meyer lemons, the sharp tang of limes, the sweet brightness of oranges, or even the sophisticated bitterness of grapefruit. Each substitution will lend a distinct character to your dessert.
The crust also offers a canvas for creativity. While Digestive Biscuits are a reliable choice, switching to different types of cookies or graham crackers can introduce subtle yet exciting flavor variations. For instance, using a ginger snap or Biscoff cookie for the base, similar to my Biscoff Cheesecake, would add a wonderful hint of spice that pairs beautifully with the lemon. Feel free to unleash your inner baker and customize this recipe to your heart’s content!
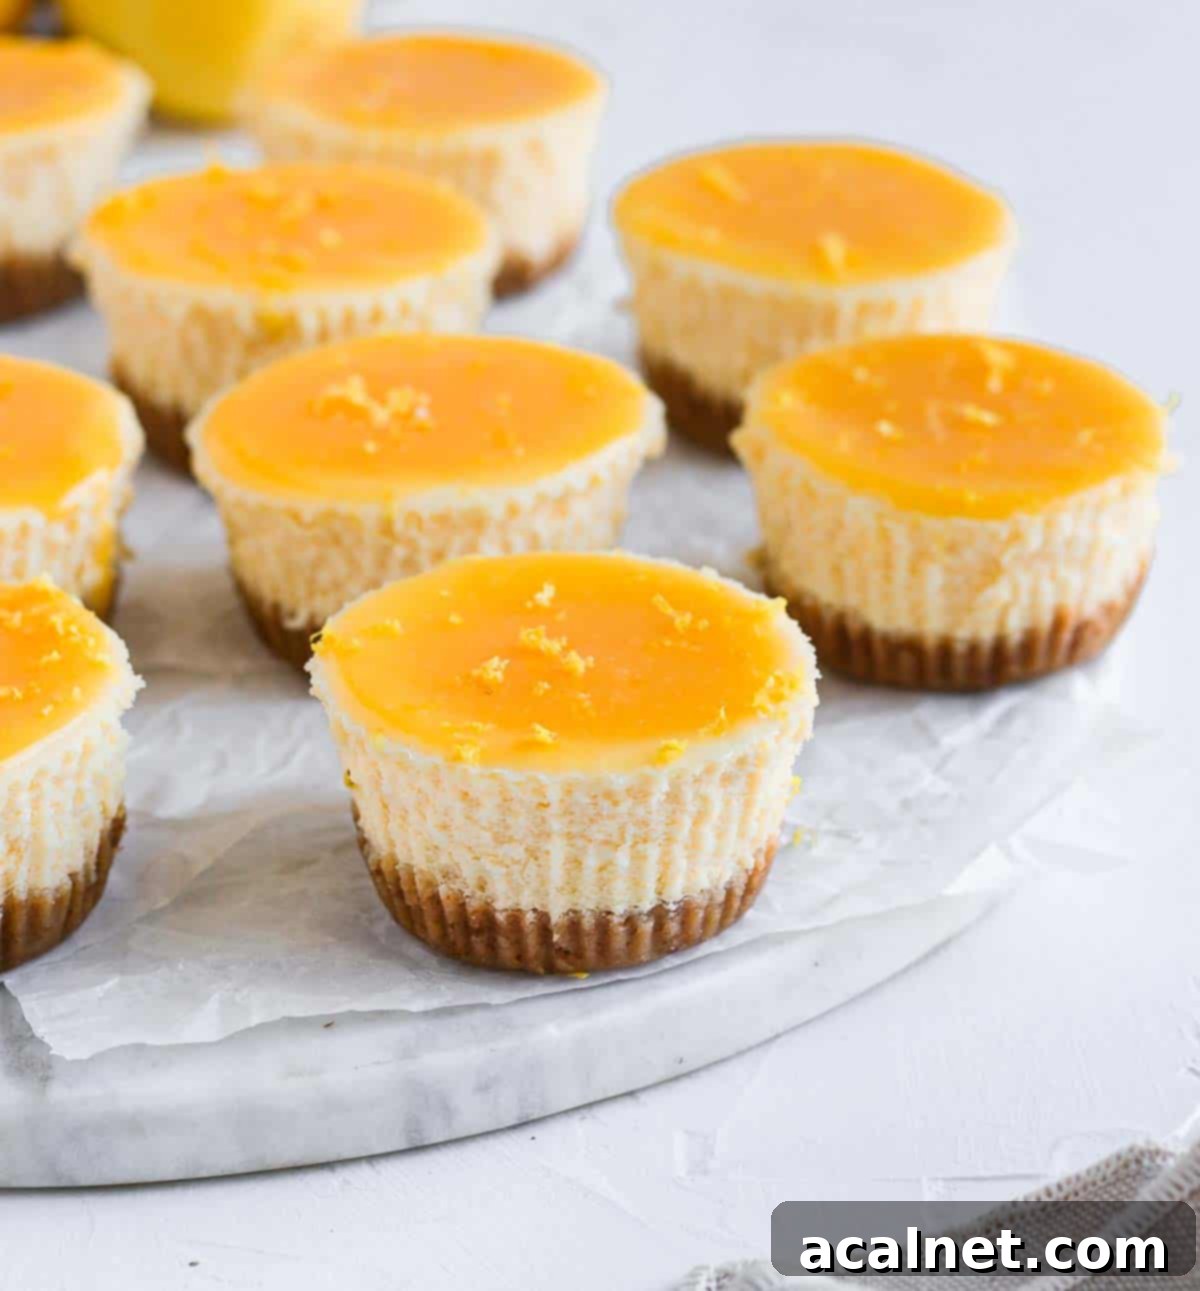
How to Bake Perfect Mini Lemon Cheesecakes in a Muffin Pan
Creating these exquisite lemon cheesecake bites is a straightforward process divided into three main stages: preparing the crisp crust, mixing the luscious lemon cheesecake filling, and finally, crafting the vibrant lemon curd topping. One of the best aspects of this recipe is its simplicity – there’s no need for specialized equipment; a standard muffin pan is all you’ll need!
Step 1: The Flavorful Biscuit Crust
A great cheesecake starts with a fantastic crust. Here’s how to make a perfectly crunchy base for your mini lemon cheesecakes:
- Begin by melting the Unsalted Butter in the microwave. Once melted, set it aside to cool slightly while you prepare the biscuits.
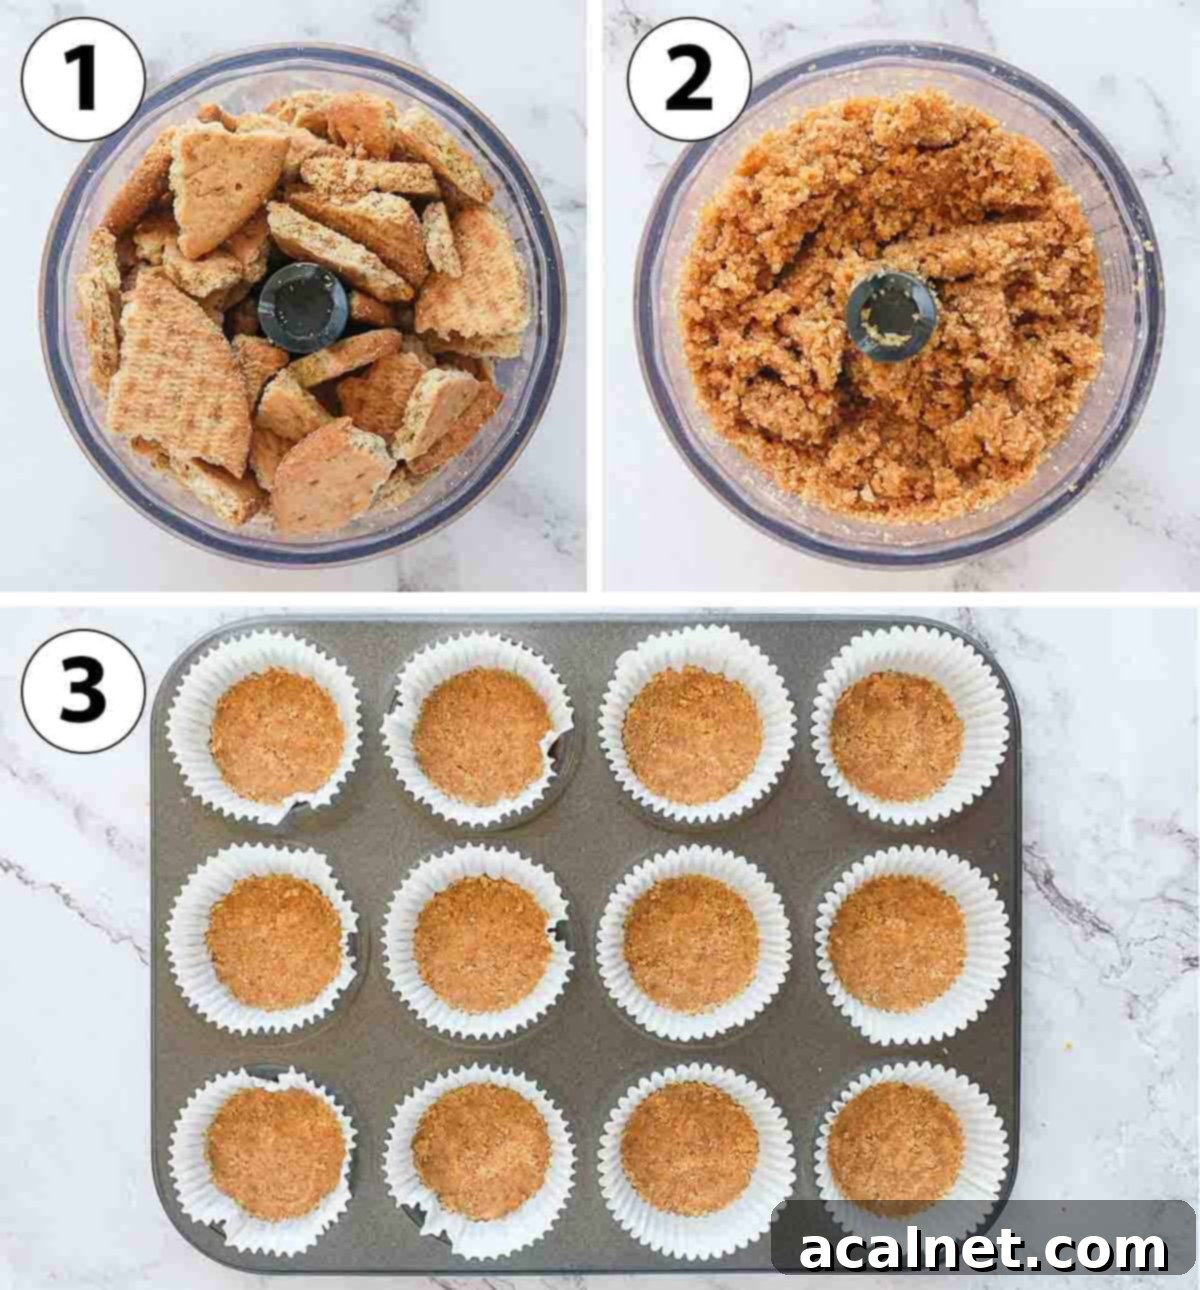
- Photo 1: Take your chosen biscuits (Digestive Biscuits, graham crackers, or other cookies) and place them in a food processor or a sturdy plastic bag. Blend or crush them until you achieve very fine, uniform crumbs. This ensures a consistent crust texture.
- Photo 2: Pour the slightly cooled melted butter over the biscuit crumbs. Process or mix thoroughly until all the crumbs are evenly coated with butter. The mixture should have the consistency of wet sand, holding together when pressed.
- Photo 3: Line a standard muffin pan with paper liners. Spoon an equal amount of the buttered biscuit crumble into the bottom of each liner. Using your fingers, the back of a spoon, or a small cup, firmly press the crumbs down. It’s crucial that they are tightly packed to form a solid, unyielding crust.
- Once all crusts are formed, place the muffin pan in the fridge to chill and set. Allow at least 30 minutes for the butter to solidify again, ensuring a firm crust before you add the creamy filling. This chilling step is essential for preventing the crust from crumbling when the cheesecakes are eventually removed from their liners.
Depending on the specific size of your muffin pan, this recipe will typically yield between 12 to 15 mini lemon cheesecakes. This quantity is perfect for sharing or for enjoying over several days!
Step 2: Crafting the Silky Lemon Cheesecake Batter
While your biscuit crusts are firming up in the fridge, it’s the perfect time to prepare the creamy and zesty lemon cheesecake batter. Adhering to these steps will ensure a smooth, crack-free, and incredibly delicious filling:
- Preheat your oven to a gentle 140°C (285°F). Position the oven rack on its lowest setting. A lower temperature and rack position help prevent over-browning and cracking.
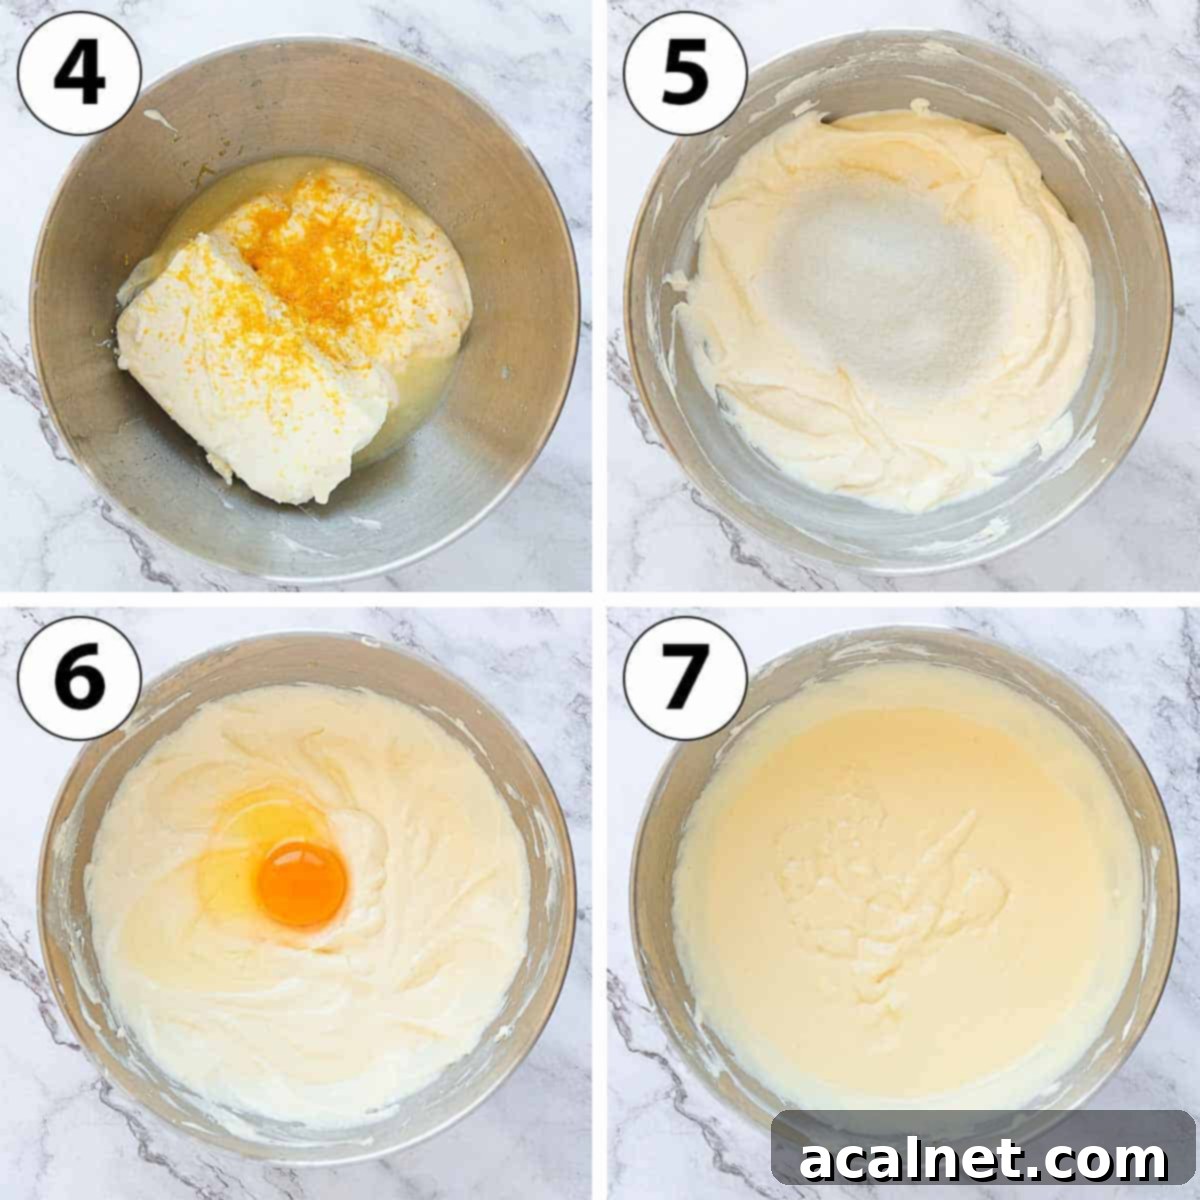
- Photo 4: In the bowl of your stand mixer (fitted with a paddle attachment) or a large mixing bowl if using a hand mixer, combine the Cream Cheese, Sour Cream, fresh Lemon Juice, and fragrant Lemon Zest. Mix on low speed until the mixture is completely smooth and free of any lumps. Remember, all these ingredients must be at room temperature to achieve this effortless, silky consistency. Cold ingredients will result in a lumpy batter.
- Photo 5: Add the Caster Sugar (or fine white granulated sugar) to the cream cheese mixture. Mix gently until just combined. Avoid overmixing at this stage, as incorporating too much air can lead to cracks in your baked cheesecakes.
- Photo 6: Introduce the Eggs one at a time, mixing on the slowest speed possible until each egg is just incorporated. The goal here is to gently combine, not to whip. You can also pre-whisk the eggs in a separate bowl before adding them to help them blend in more smoothly and quickly, further preventing over-mixing.
- Photo 7: Once thoroughly mixed, you should have a slightly runny, perfectly smooth cream. Carefully pour this luscious batter over the chilled biscuit crusts in your muffin pan. Be mindful not to overfill the liners, as the cheesecakes will rise slightly during baking. After pouring, gently tap the muffin pan on a hard surface a few times to release any trapped air bubbles, which helps ensure a smooth top. Place the pan in the preheated oven and bake for 20 to 25 minutes.
- The cooling process is just as crucial as the baking for preventing cracks. Once baked, turn off the oven but leave the mini lemon cheesecakes inside for an additional 30 minutes to 1 hour. This gradual cooling prevents a sudden temperature shock. After this period, remove them from the oven and allow them to cool completely at room temperature before transferring them to the fridge. Chilling thoroughly is essential for them to fully set and achieve that classic cheesecake texture.
Step 3: The Vibrant Lemon Curd Topping
Once your cheesecakes are perfectly baked, thoroughly chilled, and fully set, it’s time to add the crowning glory: the luscious lemon curd topping. If you’re opting for a homemade lemon curd, here’s how to achieve that vibrant, tangy perfection:
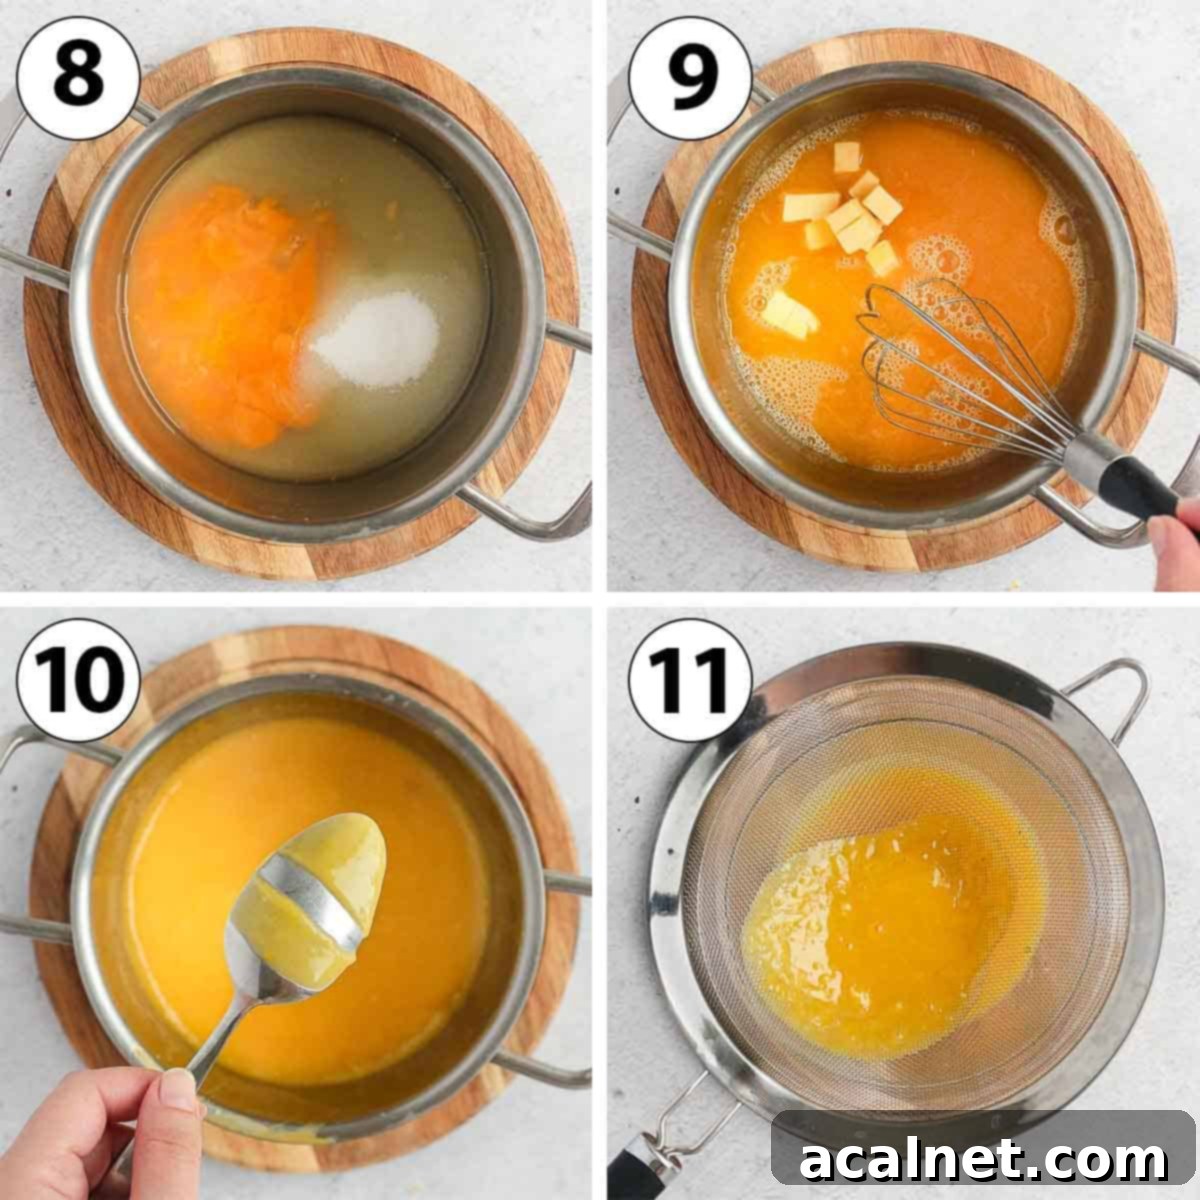
- Photo 8: In a small, heavy-bottomed pot, combine the fresh Lemon Juice and Zest, Egg Yolks, and Sugar. Whisk these ingredients together until well combined. Turn the heat to low and continue whisking constantly. The goal is to gently heat the mixture until the sugar has completely dissolved and the liquid begins to very slightly thicken. Be patient and keep the heat low to avoid scrambling the eggs.
- Photo 9: Once the mixture has started to thicken, begin adding the Unsalted Butter, cut into small cubes and at room temperature, a little bit at a time. Whisk continuously until each addition of butter is fully melted and incorporated before adding the next piece. This gradual addition helps create a smooth, emulsified curd.
- After all the butter has been added, continue to whisk on low heat for another 5 to 15 minutes. The exact time will depend on the temperature of your stove and the pan you’re using. Keep whisking until the curd has visibly thickened. It is absolutely crucial to ensure the curd never boils, as boiling will cause the eggs to cook and create unwanted bits in your beautifully smooth curd.
- Photo 10: To determine if your curd is ready, dip the back of a spoon into the mixture. Draw a line across the back of the spoon with your finger. If the line remains clear and the curd doesn’t run back into the gap, it’s perfectly cooked. If the liquid drips over the line, it needs a little more time on the stove. For those with a food thermometer, the ideal temperature for a perfectly cooked lemon curd is approximately 82°C (180°F).
At this stage, take a moment to taste the warm curd. If you prefer a sweeter topping, you can easily adjust the sweetness by adding a bit more sugar and whisking until it dissolves completely.
- Photo 11: For an impeccably smooth and silken curd, pour the finished lemon curd through a fine-mesh sieve. This step removes any tiny bits of cooked egg or lemon zest, leaving you with a wonderfully luxurious topping.
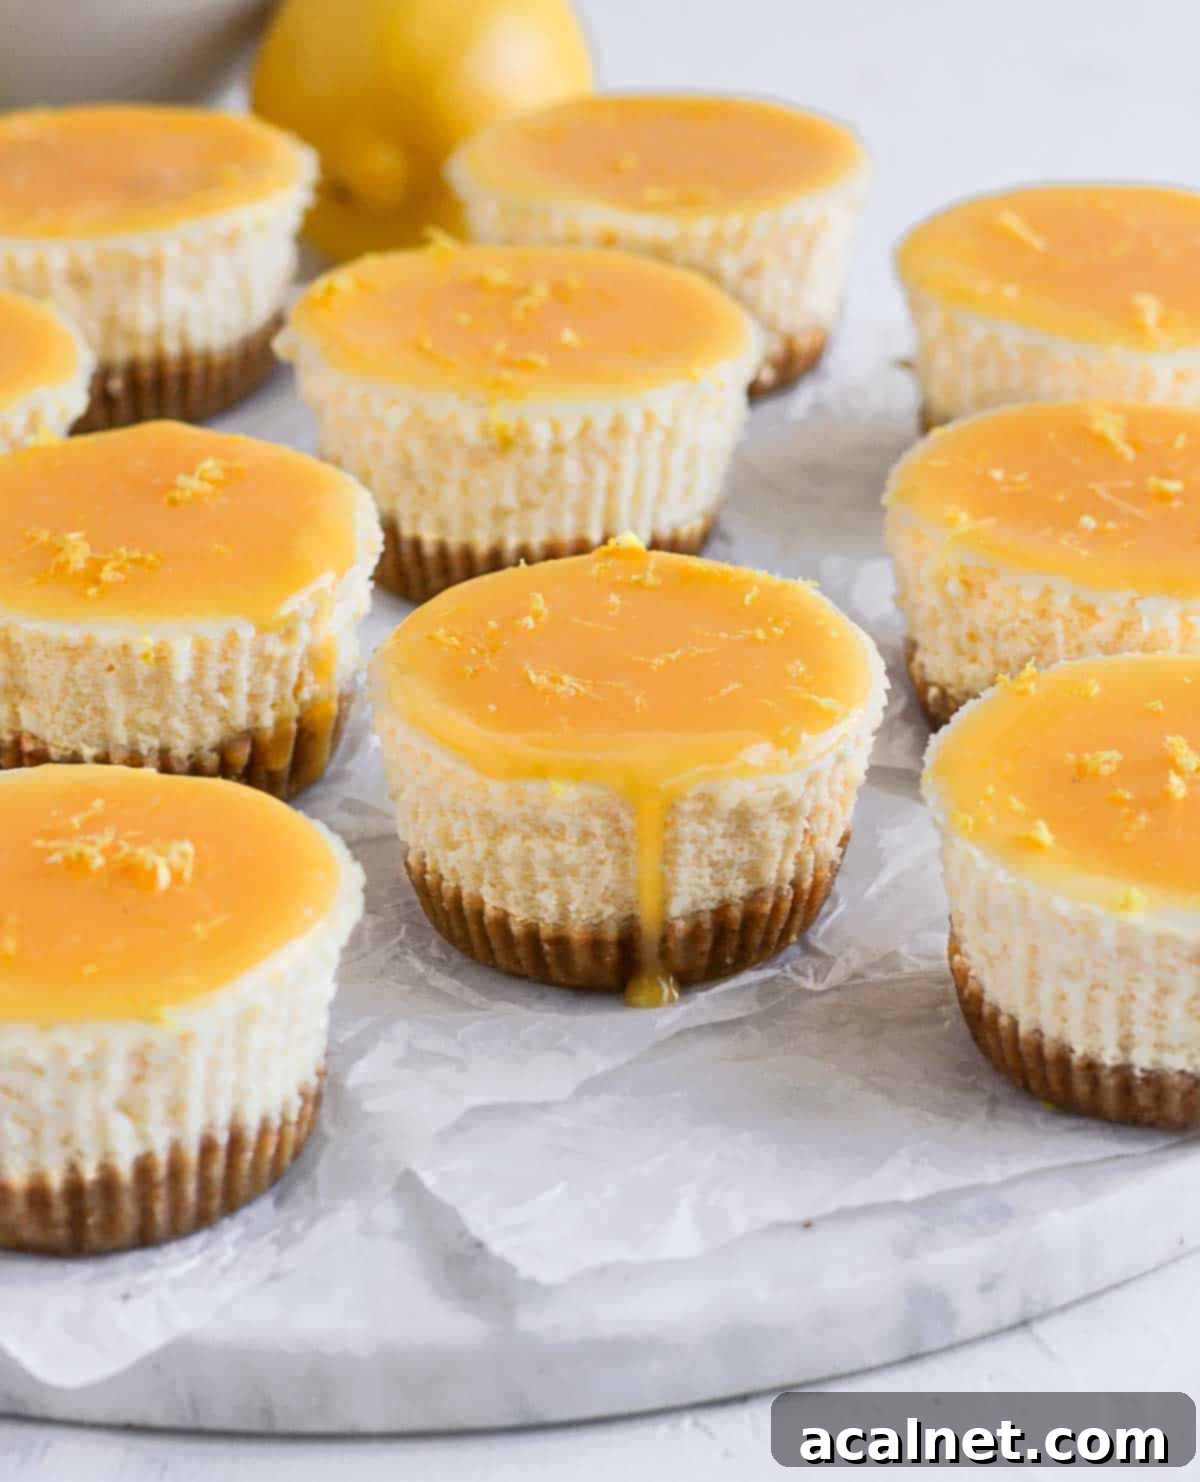
- While the curd is still warm but not hot, spoon about a tablespoon of it over the top of each chilled cheesecake. If desired, gently spread the curd with the back of a spoon to create an even layer. I find it easiest and tidiest to remove the paper liners from the cheesecakes before adding the curd, but you can certainly leave them on if you prefer.
- Finally, return the topped cheesecakes to the fridge to set and chill for at least 1 hour, or until you’re ready to serve. For an extra pop of fresh lemon flavor and visual appeal, consider finishing them with a light sprinkle of fresh lemon zest just before serving. Enjoy this delightful citrus creation!
Recipe FAQs: Your Mini Lemon Cheesecake Questions Answered
Absolutely! While I typically opt for Digestive Biscuits, which are widely available and provide a lovely neutral base (much like in my Coffee Cheesecake), this recipe is incredibly flexible. You can substitute them with almost any type of cookie or biscuit that can be easily crushed into fine crumbs. Graham crackers are a classic choice in many regions and work wonderfully. For a unique flavor twist, consider using spiced cookies like Gingerbread or Speculoos (Biscoff) cookies. As I did for my Biscoff Cheesecake, these can introduce a warm, aromatic element that complements the tangy lemon beautifully. The main goal is to have a firm, crumbly base!
While the tangy Lemon Curd is highly recommended for its bright, zesty finish that perfectly balances the creamy cheesecake, you certainly have other delicious options! If you’re leaning towards a sweeter profile or simply want to try something different, these mini cheesecakes are also fantastic with a dollop of homemade whipped cream. For a more sophisticated and visually stunning presentation, consider topping them with a lightly toasted meringue. The slight char on the meringue adds another layer of flavor and texture that’s truly exquisite.
You can definitely use a specialized Mini Cheesecake Pan if you own one, and it will produce lovely results. However, one of the charms of this recipe is its accessibility – I find the simplicity and convenience of using a standard muffin pan to be a huge advantage. If you opt for a mini cheesecake pan, you won’t need paper liners, but do remember to lightly grease the edges of each cavity to ensure easy release of your perfectly formed cheesecakes.
The secret to perfectly baked mini cheesecakes lies in the “wiggle test”! After the initial 20 minutes of baking, gently and carefully shake the muffin pan. Observe the center of the cheesecakes. If the centers appear mostly set with just a slight, subtle wobble (like Jell-O), they are typically ready. If they are still very wobbly or liquid-like in the center, return them to the oven for an additional 3 to 5 minutes, checking again. Over-baking can lead to dry, cracked cheesecakes, so it’s better to under-bake slightly as they will continue to set as they cool.
Pro Tips for Perfect Mini Lemon Cheesecakes Every Time
Achieving bakery-quality mini lemon cheesecakes is easier than you think with these essential tips:
- Room Temperature Ingredients are Non-Negotiable: This is perhaps the most critical tip for a silky-smooth cheesecake batter. Ensure your cream cheese, sour cream, and eggs are all at room temperature before you begin mixing. Cold ingredients will resist combining, leading to a lumpy batter that can affect the final texture and appearance of your cheesecakes. Softened ingredients emulsify beautifully, creating a uniform and creamy consistency.
- Avoid Over-Mixing the Batter: Once you’ve added the eggs, mix the cheesecake batter on the lowest speed possible and only until just combined. Over-mixing introduces excessive air into the batter, which can cause the mini lemon cheesecakes to puff up too much in the oven. This leads to a dramatic sinking and cracking as they cool, marring their perfect surface. A gentle hand is key to a smooth, unblemished top.
- Slow and Gentle Cooling Prevents Cracks: To keep your mini cheesecakes from sinking or cracking, bake them at a relatively low temperature (140°C/285°F) on the lowest rack of your oven. After baking, do not immediately remove them from the oven. Instead, turn off the oven and allow the cheesecakes to cool down gradually inside the oven for 30 minutes to 1 hour. This gentle transition prevents a sudden temperature shock, which is a common culprit for cracked baked cheesecakes. Once out of the oven, let them cool completely at room temperature before transferring them to the fridge for their final chill.
- Chill Thoroughly Before Removing Liners: Patience is a virtue, especially when it comes to cheesecake. Wait until the mini lemon cheesecakes have completely cooled down and are thoroughly chilled in the fridge before attempting to remove the paper liners. If you try to peel away the liners while the cheesecakes are still even slightly warm, they are much more likely to stick, tear, or lose their shape. A well-chilled cheesecake will release cleanly, leaving you with perfectly formed individual treats.
Storing & Freezing Your Mini Lemon Cheesecakes
Proper storage is key to enjoying your delicious mini lemon cheesecakes at their best:
These delightful mini lemon cheesecakes should always be stored in an airtight container in the fridge. They will maintain their excellent quality and flavor for up to 3 days. If you’re planning to make them in advance, for optimal texture and brightness, I highly recommend adding the lemon curd topping just before you’re ready to serve them. This keeps the curd fresh and vibrant.
While I always encourage enjoying these cheesecakes fresh for the ultimate experience, they can also be successfully frozen. To freeze, ensure the cheesecakes are fully cooled and then place them (without the lemon curd topping, as it’s best added fresh) in a single layer on a baking sheet. Freeze until solid, then transfer them to an airtight, freezer-safe container or bag. They can be stored in the freezer for up to 1 month. When ready to enjoy, thaw them overnight in the refrigerator before adding your fresh lemon curd topping.
More Delightful Small Cake Recipes to Explore
If you’ve enjoyed these mini lemon cheesecakes, you’ll love these other charming small cake and dessert recipes perfect for any occasion:
- Lemon Curd Tartlets
- Israeli Chocolate Rugelach
- Brioche Donuts
- Chocolate Cornflake Cakes
- Mini Lemon Meringue Tarts
- Financiers Cakes
- Mini Strawberry Cheesecakes
- Mini Biscoff Cheesecakes
- Lemon Curd Cookies
Made this recipe?
Let us know if you liked it by leaving a comment below, and tag us on Instagram @a.baking.journey with a photo of your creation!
Recipe

Mini Lemon Cheesecakes
Servings:
15
cheesecakes
Author:
Sylvie
25 minutes
20 minutes
3 hours
3 hours
45 minutes
Print Recipe
Prevent your screen from going dark
Ingredients
Biscuit Crust
- 75 gr (5 tablesp.) Unsalted Butter, melted
- 150 gr (1 1/2 cup crumbs) Digestive Biscuits, see note below
Lemon Cheesecake Batter
- 500 gr (16 oz) Cream Cheese, at room temperature
- 150 ml (1/2 cup + 2 tablesp.) Sour Cream, at room temperature
- 2 Lemons, juice & zest, 75ml / 5 tablesp. of juice
- 80 gr (1/3 cup) Caster Sugar, or fine white granulated sugar
- 2 Eggs, at room temperature
Lemon Curd Topping
- 2 Egg Yolks
- 80 gr (1/2 cup) Caster Sugar, or fine white granulated sugar
- 1 1/2 Lemons, juice & zest, 65ml / 4 tbsp + 1 teasp. of juice
- 40 gr (2 2/3 tablespoon) Unsalted Butter, at room temperature, cut into small cubes
Instructions
Biscuit Crust
- Melt the Butter in the microwave and set aside to cool down. Place the Biscuits/Cookies in your mixer or food processor and blend to get very small crumbs. Add the Melted Butter and mix to combine.
- Place paper liners in your Muffin Pan. Scoop a little bit of the biscuit crumbs at the bottom of each liner and press down until flat and tightly packed. Place in the fridge to set.
Lemon Cheesecake Batter
- Preheat your oven on 140°C/285°F and place the oven rack on its lowest position.
- Place the Cream Cheese, Sour Cream, Lemon Juice and Zest in the bowl of your Mixer (or a large mixing bowl if using a hand mixer) and mix with the paddle attachment until combined and smooth (see note 1).
- Mix in the Sugar, then the Eggs one at the time on the slowest speed (see note 2). Stop as soon as combined to avoid adding too much air into the batter.
- Pour the Lemon Cheesecake Batter over the chilled Biscuit Crust. They will slightly rise in the oven so don’t over fill them. Gently tap the muffin pan over a hard surface to pop any air bubbles.
- Bake for 20 to 25 minutes (see note 3), then turn off the oven and leave to cool down inside the oven for 30 minutes. Take out of the oven and leave to cool down completely at room temperature before placing in the fridge to fully set.
Lemon Curd Topping
- Whisk together the Lemon Juice and Zest, Egg Yolks and Sugar in a small Pot then turn on low heat. Whisk until the sugar has dissolved and the liquid has started to very slightly thicken.
- Add the cubed Butter a little bit at the time, whisking until fully melted before adding more. Continue to whisk on low heat for 5 to 15 minutes until the curd has started to thicken and is fully cooked (see note 4). Taste and adjust the level of sweeteness if needed.
- Pour through a thin mesh sieve to remove any bits of cooked eggs and get a very smooth curd.
- Leave to cool down for a few minutes then pour about 1 tablespoon of curd over each chilled cheesecake (remove the liners first), spreading it with the back of a spoon if needed. Place back in the fridge to set for at least 1 hour.
- Optionally, finish with a little bit of Lemon Zest just before serving.
Would you like to save this recipe?
We’ll email this post to you, so you can come back to it later!
Notes
Yield: This recipe is designed to produce a batch of 12 to 15 individual mini cheesecakes, with the exact number depending on the specific size of your muffin pan cavities.
Ingredients Notes:
- Digestive Biscuits: My recipe calls for approximately 10 Digestive Biscuits, or 150 grams, for the crust. If Digestive Biscuits are not readily available in your area, you can easily substitute them with an equal weight of Graham Crackers or virtually any other firm cookie/biscuit that can be finely crushed. If measuring by volume, aim for about 1 1/2 cups of biscuit crumbs.
- Cream Cheese, Sour Cream, & Eggs: Achieving a perfectly smooth and lump-free cheesecake batter hinges on these ingredients being at room temperature. If they are too cold, they will not combine easily, potentially leading to an over-whipped batter or visible lumps. Plan ahead to let them sit out for at least 30-60 minutes before you begin baking.
- Lemon Juice: The size and juiciness of lemons can vary considerably. To ensure consistency and the correct balance of tang, it’s best to rely on the specified liquid measurements in milliliters or tablespoons rather than solely counting the number of lemons. The number of lemons indicated is primarily a guide for how many you’ll need to zest.
- Sugar: This particular recipe leans towards a more tangy rather than overtly sweet flavor profile, celebrating the bright zest of lemon. If you prefer a sweeter dessert, feel free to increase the quantity of sugar in both the lemon curd and/or the cheesecake batter to better suit your personal taste.
Instruction Notes:
- It is critically important for all the cheesecake batter ingredients (cream cheese, sour cream, eggs) to be at room temperature. This ensures they emulsify smoothly and completely, preventing lumps and the need for over-mixing. Over-whipping can incorporate too much air, which may cause your cheesecakes to crack during baking or sink upon cooling.
- When adding the eggs, you can lightly pre-whisk them in a separate bowl first. This helps them incorporate more quickly into the main batter. Remember to mix on the slowest speed and stop as soon as the eggs are just combined. Preventing excessive air incorporation at this stage is vital for a smooth, crack-free surface on your baked cheesecakes.
- To accurately check if your mini cheesecakes are baked through, perform the “wiggle test.” Gently move the muffin pan: the centers of the cheesecakes should have a slight, delicate wobble, indicating they are mostly set but still creamy. If the center still appears very liquidy or jiggles excessively, bake for another 3 to 5 minutes. Be careful not to over-bake, as this can lead to dryness.
- During the lemon curd preparation, it is paramount that the mixture never comes to a boil. Boiling will cause the egg yolks to curdle, resulting in an unappealing texture with bits of cooked egg. The cooking time for the curd can vary depending on your stove’s heat and your pan’s characteristics. To check for doneness, use the classic spoon test: dip the back of a spoon into the curd and draw a line with your finger. If the line remains clear and the curd doesn’t run back together, it’s ready. Alternatively, if you have a food thermometer, the curd is perfectly cooked when it reaches approximately 82°C (180°F).
Nutrition (per serving)
Calories:
293
kcal
|
Carbohydrates:
22
g
|
Protein:
4
g
|
Fat:
22
g
|
Saturated Fat:
12
g
|
Polyunsaturated Fat:
1
g
|
Monounsaturated Fat:
6
g
|
Trans Fat:
1
g
|
Cholesterol:
106
mg
|
Sodium:
174
mg
|
Potassium:
121
mg
|
Fiber:
1
g
|
Sugar:
15
g
|
Vitamin A:
774
IU
|
Vitamin C:
13
mg
|
Calcium:
61
mg
|
Iron:
1
mg
