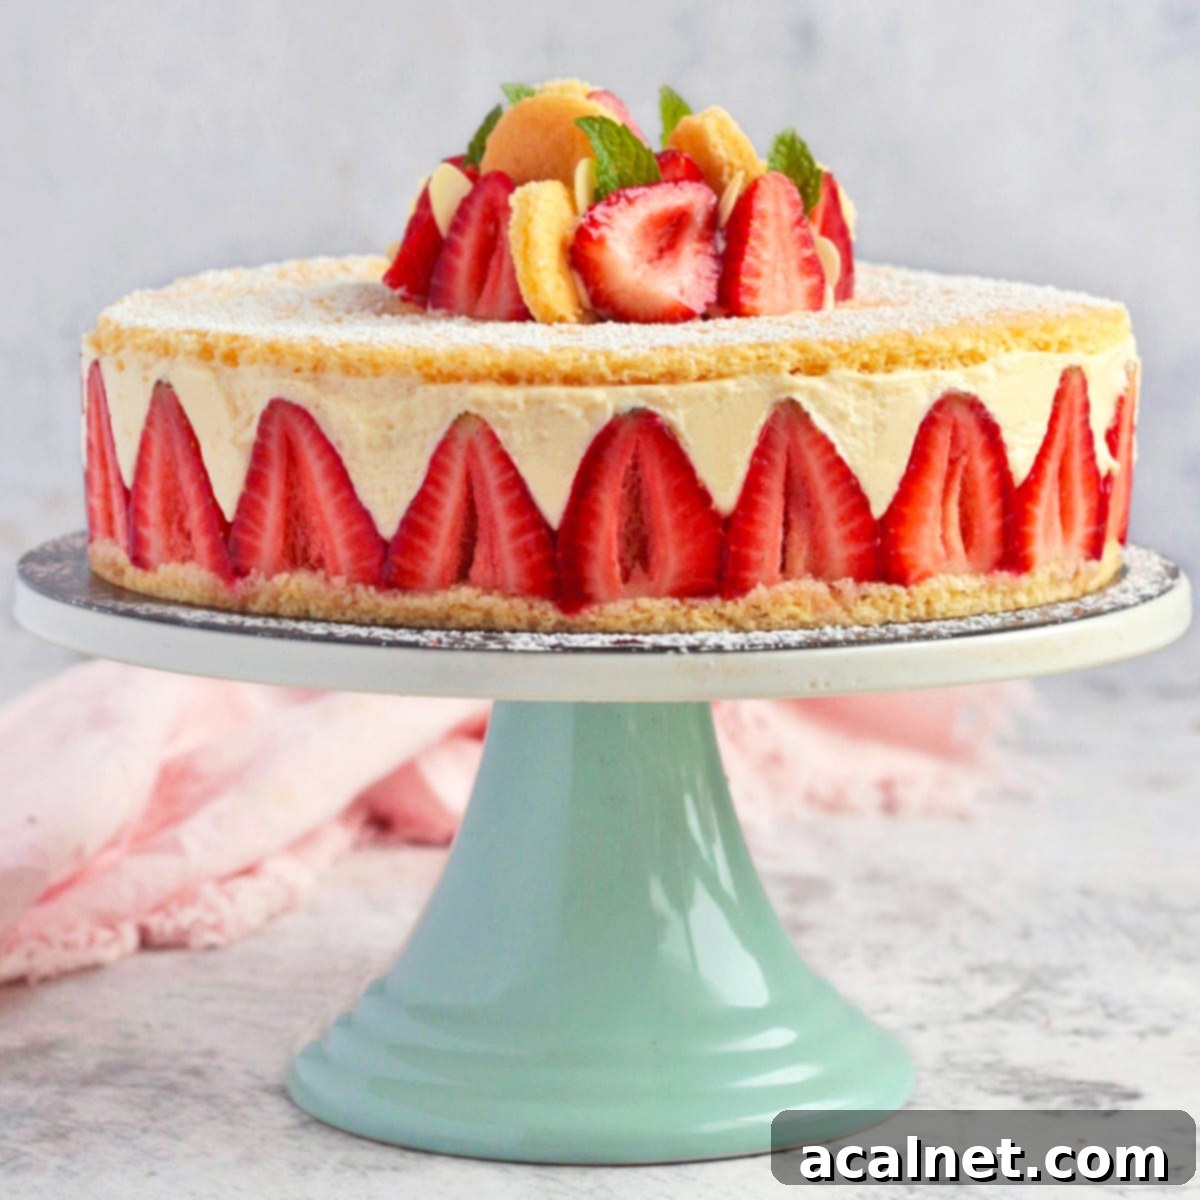
Mastering the Classic French Fraisier Cake: An Authentic Strawberry Dessert with Diplomat Cream
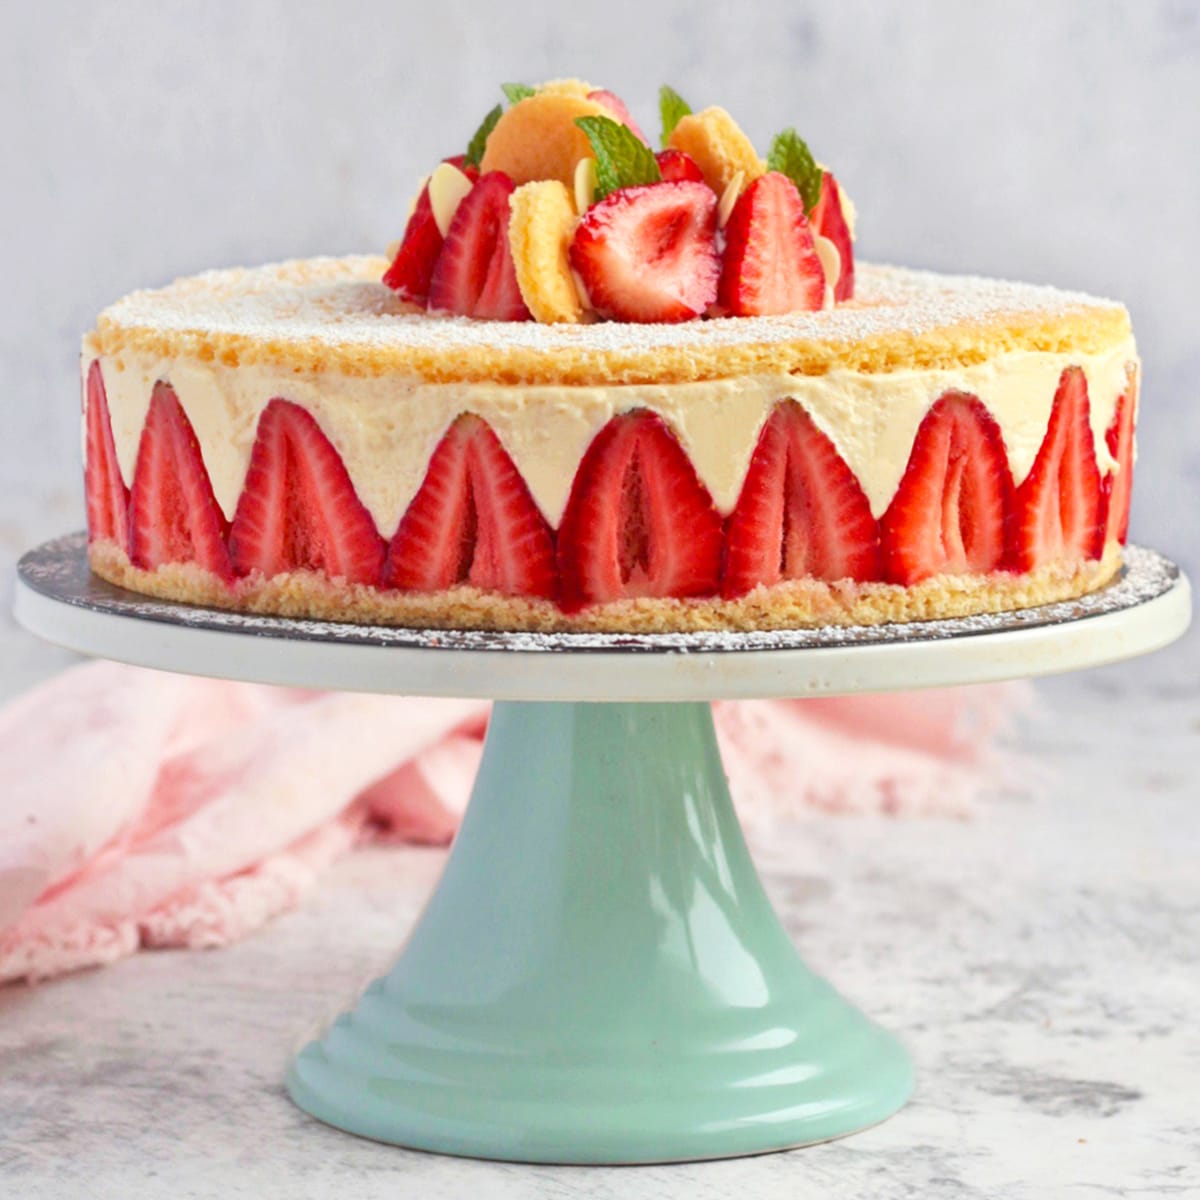
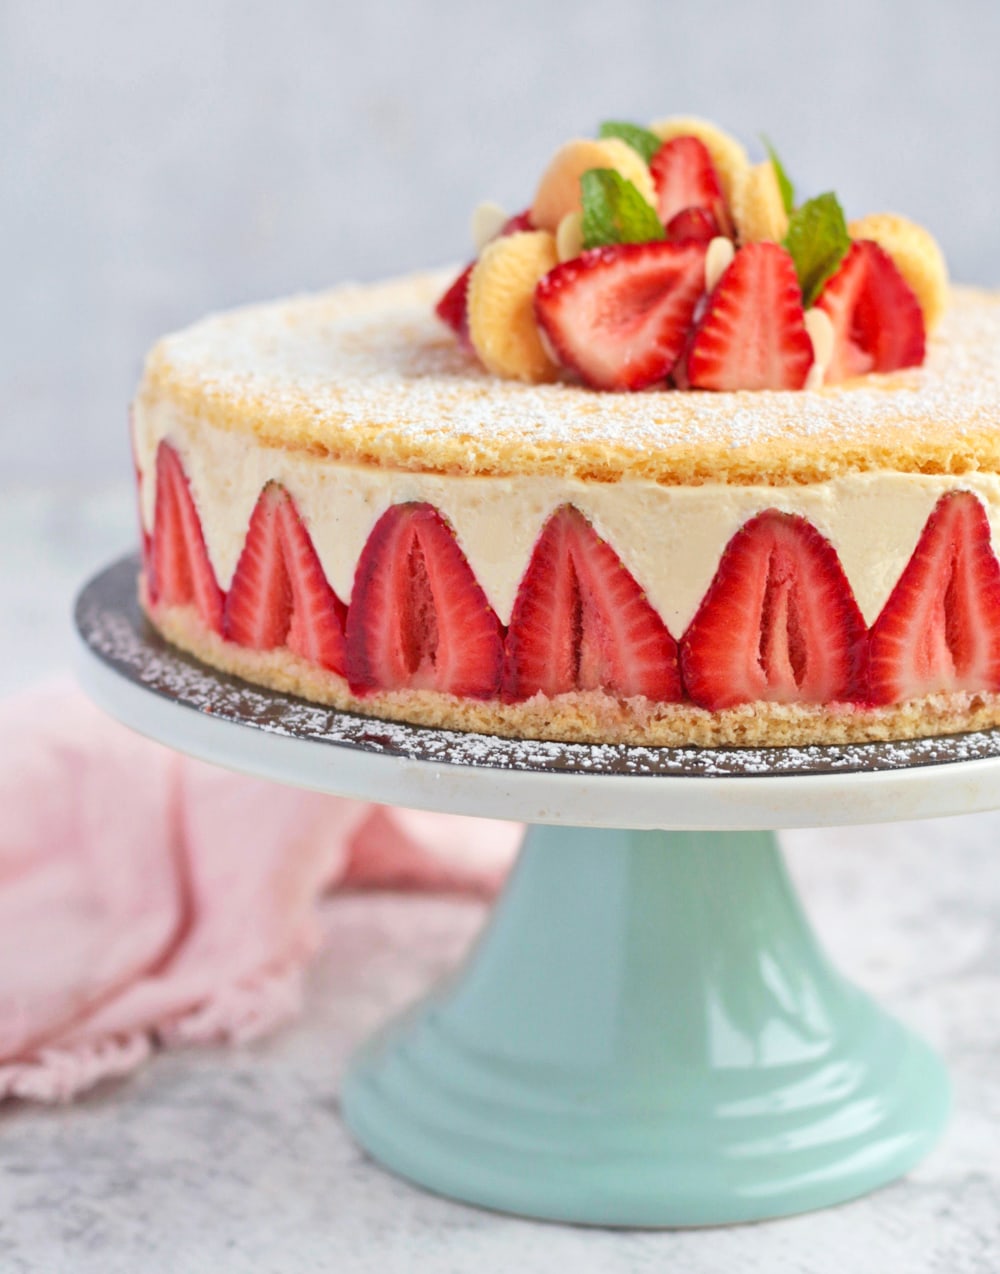
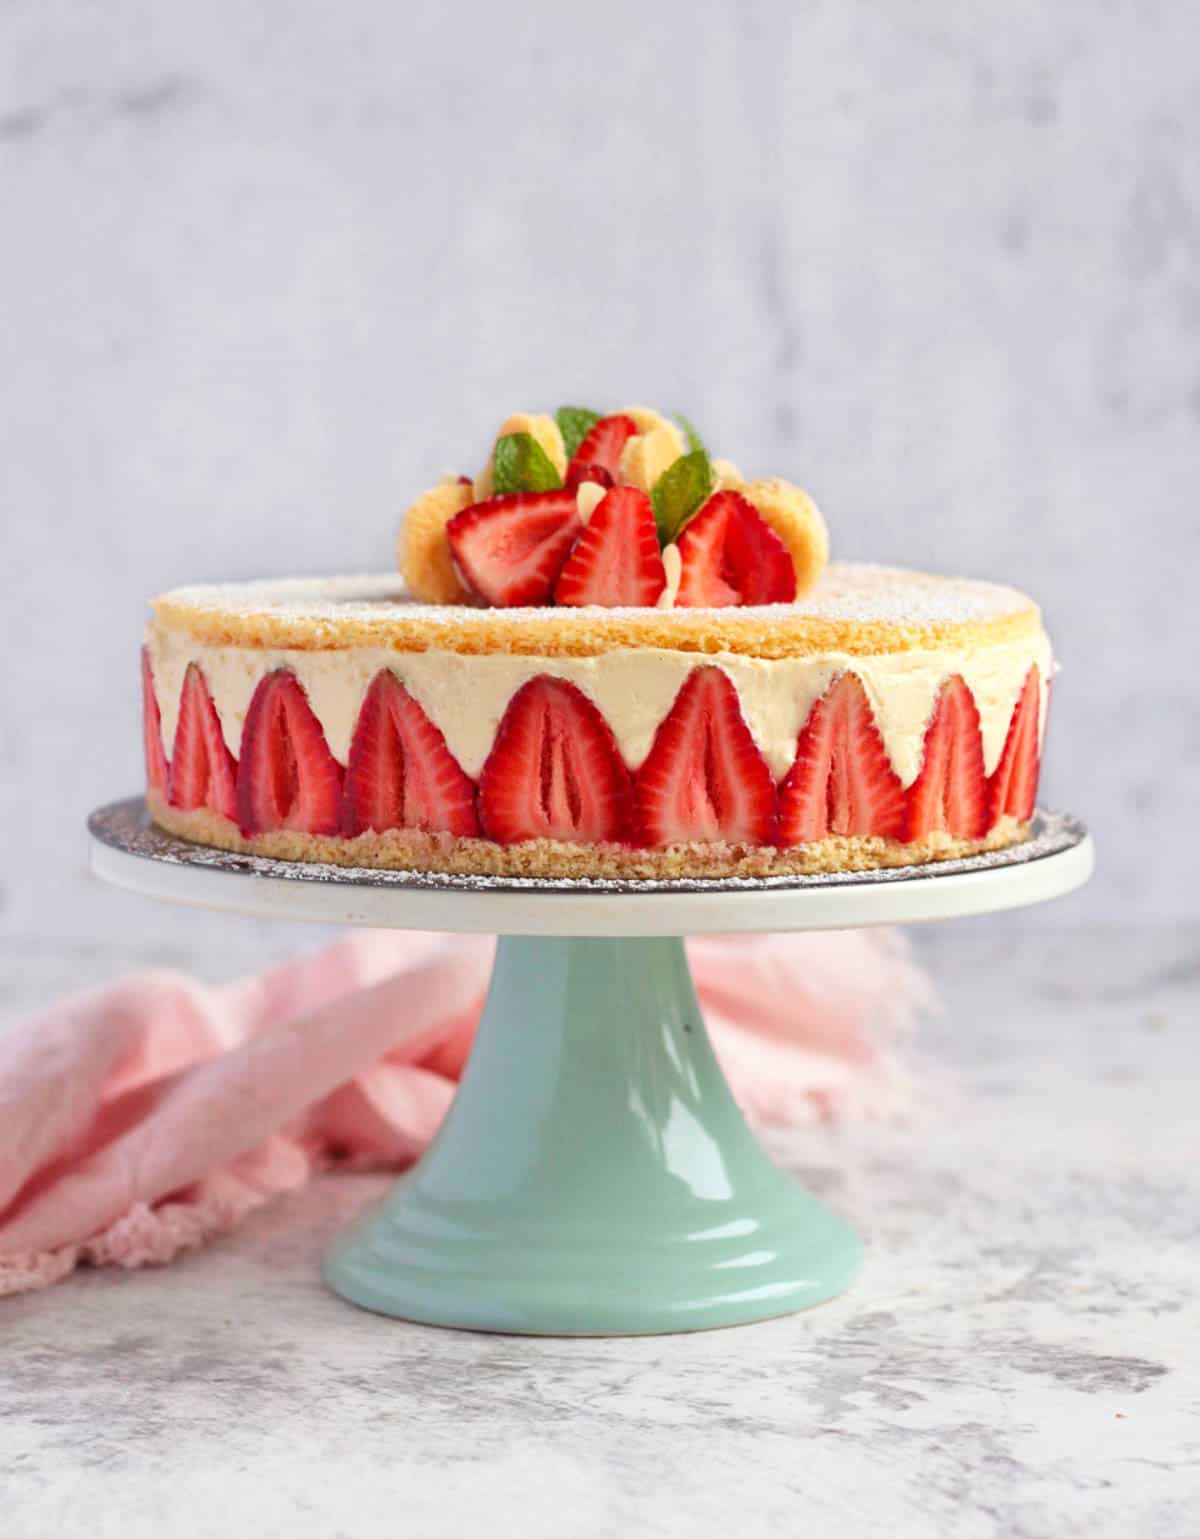
Indulge in the exquisite charm of a traditional French Fraisier Cake, a true masterpiece of patisserie that captures the essence of summer. This delightful dessert features two layers of light-as-air Genoise sponge, a luscious Diplomat Cream infused with vanilla and a hint of orange blossom, a vibrant strawberry soaking syrup, and an abundance of fresh, ripe strawberries. It’s not just a cake; it’s an experience, packed with the vibrant flavors and fresh berries that define the perfect summer treat.
[feast_advanced_jump_to]
Why This Fraisier Cake Recipe is a Must-Try
Among the myriad of French Strawberry Desserts, the classic Fraisier Cake holds a special place in my heart. While I absolutely adore Strawberry Custard Tartlets and the elegant Strawberry Charlotte Cake, there’s an undeniable magic to the Fraisier. Its delicate balance of textures and flavors truly sets it apart.
Perhaps it’s the incredibly light and airy Genoise cake layers, providing a subtle foundation for the stars of the show. Or maybe it’s the generous abundance of fresh, juicy strawberries, meticulously arranged to create a stunning visual and bursting with natural sweetness. Most likely, it’s the luscious Diplomat Cream, perfectly smooth and rich, subtly flavored with fragrant vanilla and the captivating essence of orange blossom water. This harmonious combination elevates the Fraisier from a simple dessert to an unforgettable culinary delight, making it the ultimate French strawberry cake for any occasion.
What is a Fraisier Cake? The Iconic French Strawberry Dessert
A “Fraisier” (pronounced “frey-zee-ay”) is a quintessential traditional French dessert, celebrated as a hallmark of summer. Its name is beautifully straightforward, derived directly from the French word “Fraises,” which simply means “Strawberries.” This elegant cake showcases the vibrant fruit in all its glory, embodying the freshness and sweetness of the season.
While the Fraisier reigns supreme in the strawberry domain, a similar cake can be made with raspberries, known as a Framboisier (from “Framboises,” meaning “Raspberries”). Both cakes follow a similar structural concept, highlighting their respective berries.
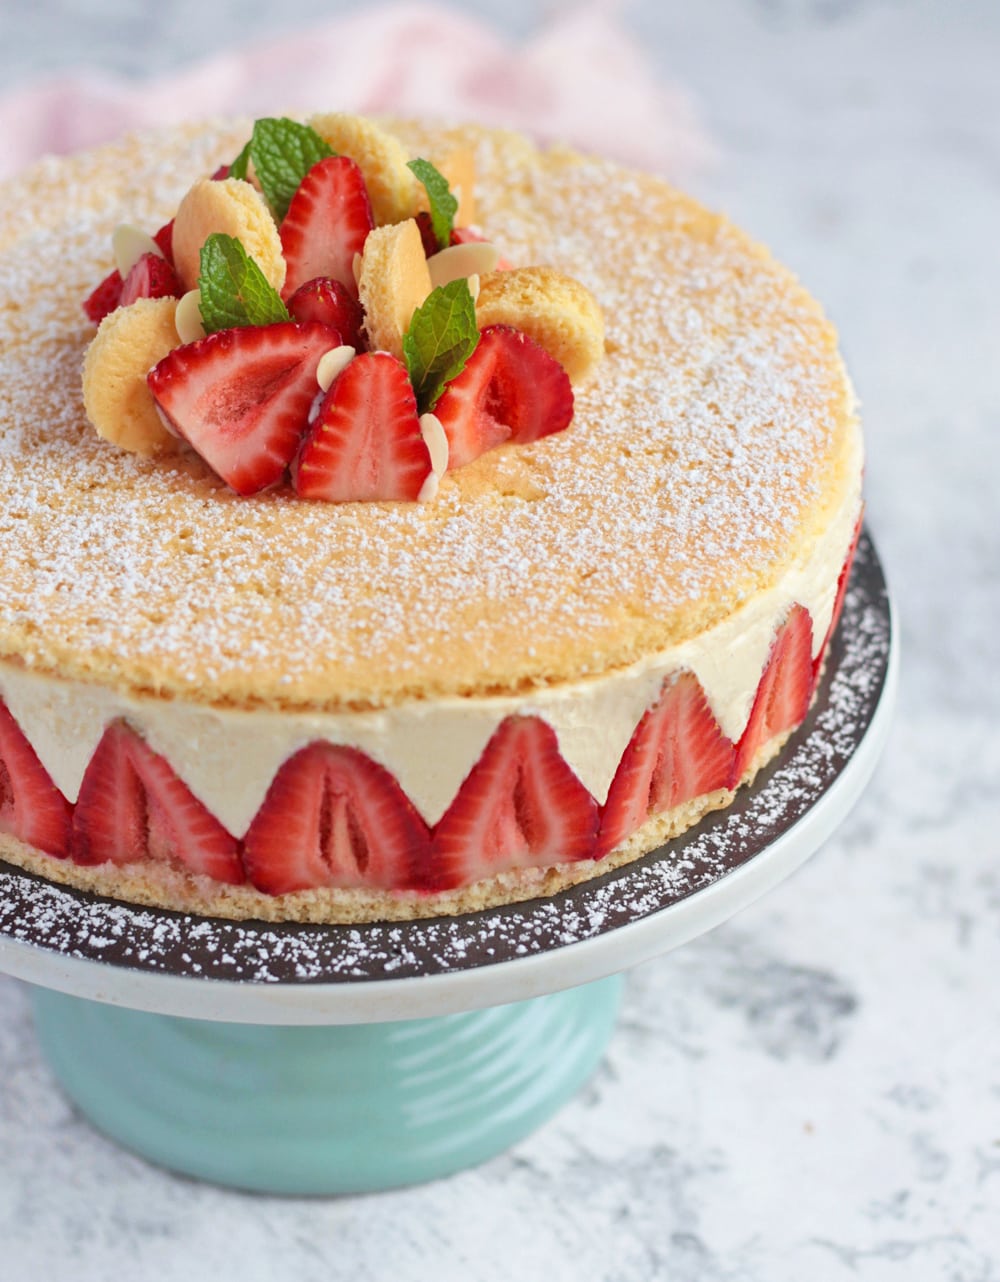
The construction of a Fraisier is a work of art, typically featuring several key elements: delicate layers of Genoise Sponge, meticulously soaked with a fragrant Strawberry Syrup to keep them moist and flavorful. The star filling is traditionally a rich Mousseline Cream, a butter-enriched pastry cream. However, many contemporary bakers, myself included, prefer to use a lighter, yet equally indulgent Diplomat Cream for a less heavy finish. Fresh strawberries are, of course, integral, artfully arranged both on the sides and within the cake. Sometimes, a thin layer of marzipan is used to top the cake, offering another layer of flavor and texture, though it’s often omitted for those who prefer a simpler, fruit-focused presentation. For a slightly simplified take on a strawberry cake, you might enjoy this Strawberry Mousse Cake.
The Essential Components of a Fraisier Cake
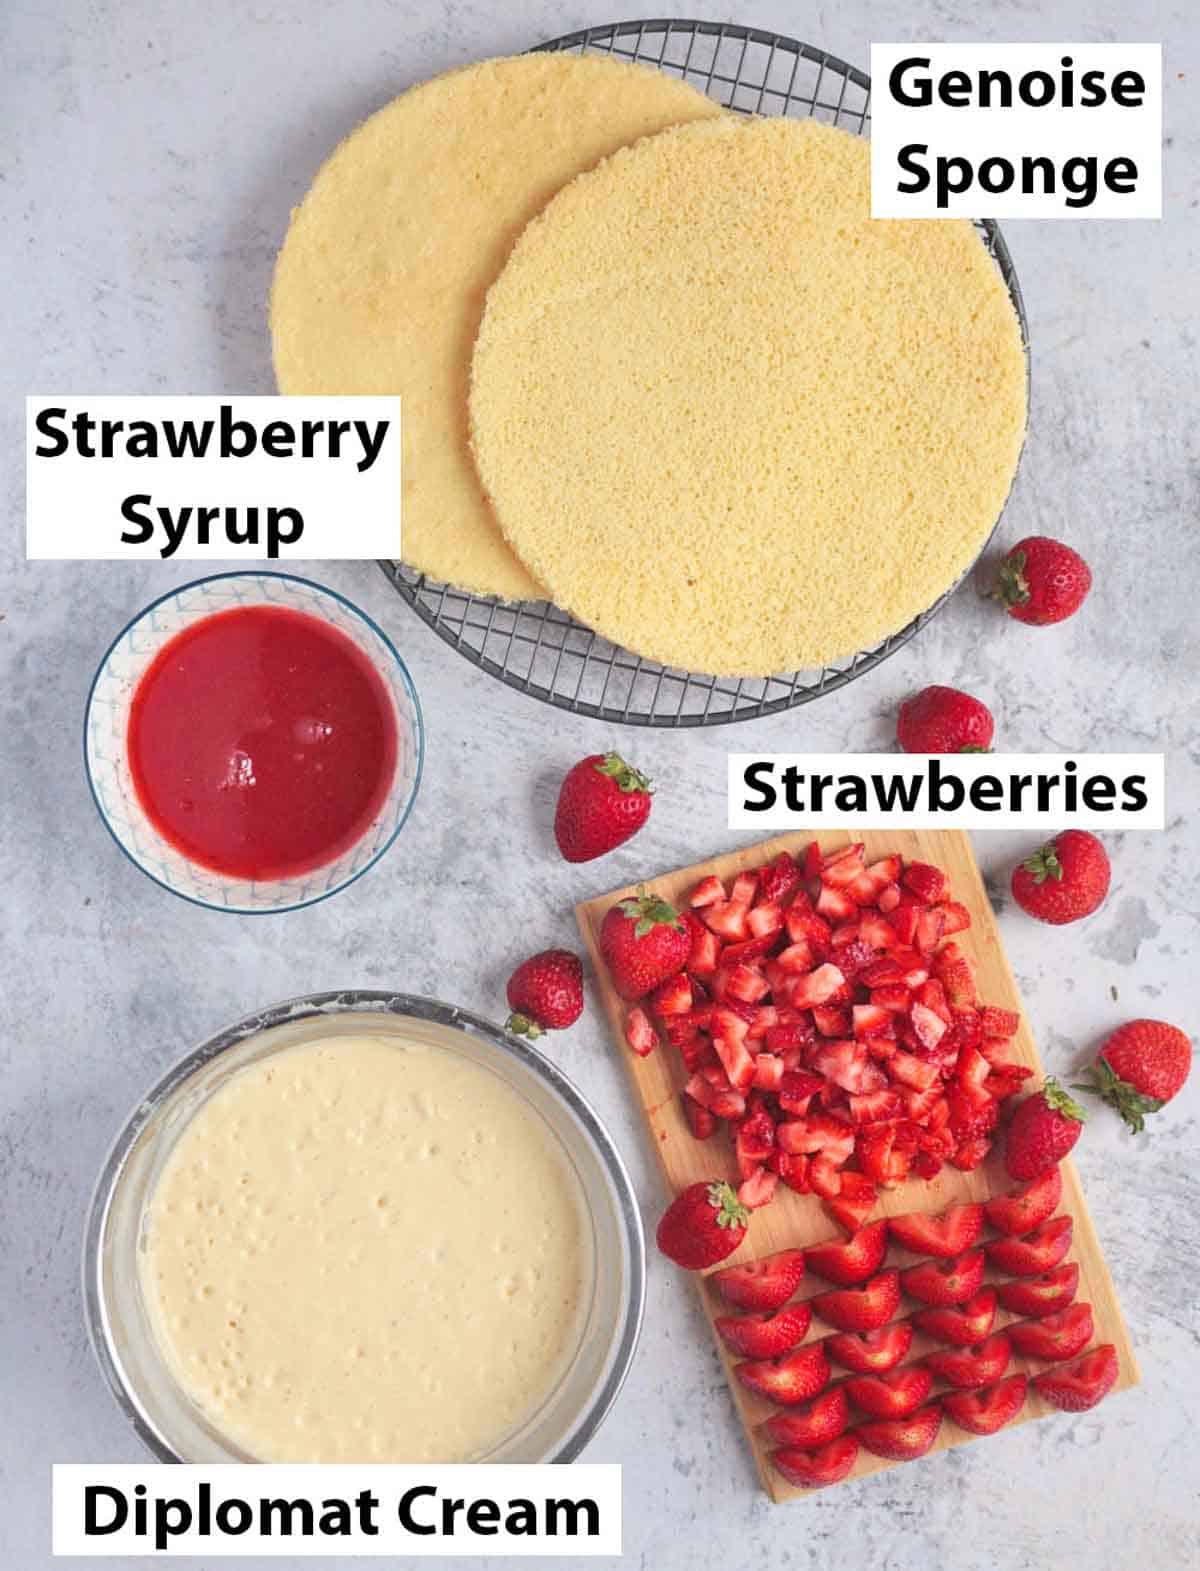
Creating this stunning Fraisier cake involves bringing together four distinct, yet perfectly complementary, elements. Each component plays a vital role in achieving the iconic look, texture, and flavor of this beloved French dessert:
- Genoise Sponge: The foundation of our cake consists of two exquisitely light and airy layers of Genoise, a classic French sponge cake known for its delicate crumb. It’s designed to absorb the strawberry syrup beautifully without becoming soggy.
- Diplomat Cream Filling: While a Mousseline Cream is traditionally used, I find the Diplomat Cream to be a superior choice for its lighter texture and delightful creaminess. This versatile custard-based cream provides a rich, smooth counterpoint to the fresh fruit.
- Strawberry Soaking Syrup: A simple yet essential element, this syrup is brushed generously over the Genoise cake layers. It not only adds a burst of subtle strawberry flavor but also ensures the sponge remains wonderfully moist and tender, enhancing the overall sensory experience.
- Fresh Strawberries: The undisputed star of the Fraisier! These are carefully selected and prepared. Some are sliced in half to create the beautiful, iconic border around the cake, while others are diced into small cubes to be generously layered inside, ensuring a burst of fresh berry flavor in every bite.
Traditionally, some Fraisier cakes are crowned with a layer of marzipan. However, my personal preference leans towards finishing this dessert with a fresh, vibrant touch. I often opt for a sprinkle of fresh strawberries, a few aromatic mint leaves, and a scattering of delicate flaked almonds, which add a lovely textural contrast and a hint of nutty flavor without overpowering the strawberries and cream.
Essential Equipment for Your Fraisier Cake
To successfully assemble this beautiful Fraisier cake, having the right tools on hand will make the process much smoother and more enjoyable. Here’s a list of key equipment:
- Stand Mixer (or a Hand Mixer): Absolutely essential for whipping the eggs and sugar for the Genoise to their full volume, as well as for preparing the whipped cream component of the Diplomat Cream. A whisk attachment is a must.
- Flat Baking Tray: You’ll need a large tray, approximately 30 x 45 cm (12 x 18 inches), to bake the Genoise sponge in a thin, even layer. This allows you to cut out perfect circles. Alternatively, you can use two round baking pans or two smaller flat trays if you don’t have one large enough.
- Offset Spatula: Invaluable for spreading the Genoise batter evenly on the baking tray and for smoothing the Diplomat Cream during assembly, ensuring a professional finish.
- Large Round Pastry Ring (or Mousse Ring): This is crucial for shaping the Fraisier. I recommend a 20×5 cm / 8×2 inch ring to create the perfect cylindrical shape. A springform pan can be used as an alternative, though a pastry ring offers a cleaner edge.
- Piping Bag and large round Piping Tip: While not strictly mandatory, using a piping bag makes distributing the Diplomat Cream much easier and ensures even coverage, especially when filling the gaps between the strawberries on the sides.
- Optional: Acetate Roll (Cake Collars or Cake Strips): Lining your pastry ring with an acetate strip helps achieve an incredibly clean, smooth side finish on your Fraisier and makes demolding effortless. Highly recommended for a polished look!
Crafting the Perfect Easy Genoise Sponge
The Genoise is the heart of many classic French desserts, and for good reason. It’s renowned for its incredibly light, airy, and delicate texture. This characteristic lightness comes from the unique method of preparation: the eggs and sugar are vigorously whipped together for an extended period, incorporating as much air as possible into the mixture. This aeration creates a stable foam that forms the structure of the cake, rather than relying solely on chemical leaveners.
Traditionally, a Genoise is made by warming the eggs and sugar over a double boiler (bain-marie) while whisking, which helps stabilize the foam and achieve maximum volume. However, for a simpler and quicker approach without compromising on quality, this recipe uses a modern method that still yields a fantastic result. You’ll achieve a beautifully light Genoise without the extra step of a bain-marie, making this Genoise sponge cake accessible to all home bakers.
Our simplified Genoise sponge requires just four basic ingredients (refer to the full recipe card below for exact quantities):
- Eggs: The primary structural component, whipped to incorporate air.
- Caster Sugar: Sweetens the cake and aids in stabilizing the whipped egg mixture.
- Plain / All-Purpose Flour: Provides structure to the cake.
- Cornstarch: A secret weapon that adds an extra touch of tenderness and lightness to the crumb, making it even more delicate. If unavailable, you can substitute with an equal amount of plain flour, but the cornstarch is highly recommended for that signature Genoise texture.
Here’s how to create your flawless Genoise:
- In the bowl of your stand mixer (or using a hand mixer), combine the Eggs and Caster Sugar. Whisk on medium to high speed for a surprisingly long 5 to 8 minutes. You’re looking for a dramatic transformation: the mixture should have at least doubled, if not tripled, in volume, becoming very pale, thick, and wonderfully fluffy. When you lift the whisk, a ribbon should slowly fall back into the bowl.
- Next, carefully sift the Flour and Cornstarch directly over the whipped egg mixture. This step is crucial. Using a spatula, gently fold the dry ingredients into the eggs with a light, lifting motion. Be patient and work carefully to avoid deflating the precious air you’ve incorporated. Stop folding as soon as the dry ingredients are fully incorporated – overmixing will lead to a dense cake.
- Pour the delicate batter evenly onto a flat baking tray that you’ve lined with baking paper. Ensure the tray is large enough to cut out two uniform circles of sponge later. If you don’t have one large tray, you can divide the batter between two smaller flat trays or bake it in a round baking pan.
- Using an Offset Spatula, gently but swiftly spread the batter to an even thickness across the tray. Consistency is key for uniform baking.
- Bake for a short 10 to 12 minutes, or until the sponge is beautifully puffed and golden brown. Once baked, transfer it to a wire rack and allow it to cool down completely. Once cool, carefully remove the baking paper and use your Pastry Ring to cut out two perfect circles of Genoise, which will form the layers of your Fraisier.
Whipping Up a Quick Strawberry Soaking Syrup
The strawberry syrup might seem like a small detail, but it’s an essential component that elevates the Fraisier. Brushed generously over the Genoise sponge layers, this syrup ensures the cake remains incredibly moist and light, preventing it from drying out. Beyond hydration, it infuses a subtle, fresh strawberry flavor directly into the sponge, tying all the berry elements of the cake together beautifully.
You’ll need just a few simple ingredients for this fragrant syrup:
- Strawberries: Fresh or frozen work perfectly.
- Water: To create the liquid base for the syrup.
- Caster Sugar: To sweeten and help thicken the syrup slightly.
Making the syrup is a straightforward process:
- First, blend the strawberries until you achieve a smooth purée. If using frozen strawberries, ensure they are thawed first. Once blended, pour the purée through a fine-mesh sieve, pressing down to extract all the liquid. Discard any remaining solids or seeds.
- Combine the strained strawberry juice, water, and sugar in a small saucepan. Place it over medium heat and bring the mixture to a gentle simmer. Continue to cook for approximately 5 minutes, stirring occasionally, until the sugar has completely dissolved and the liquid has visibly thickened slightly. This brief simmering process concentrates the flavors and creates a beautiful, brushable syrup.
- Once the desired consistency is reached, remove the pot from the heat and set it aside to cool down completely before you begin assembling your Fraisier cake.
Creating Velvety Diplomat Cream (Crème Diplomate)
The Diplomat Cream, or Crème Diplomate in French, is a truly magnificent staple in French patisserie. It’s a luxurious, yet surprisingly light, cream that forms the heart of our Fraisier filling. Essentially, it’s a sophisticated blend of a rich Pastry Cream (Crème Pâtissière), stabilized with gelatine, and then gently folded with fluffy whipped cream. It shares similarities with a Light Cream (Crème Légère) or Princess Cream (Crème Princesse), with the key distinction being the addition of gelatine in the Diplomat Cream, which provides extra stability and a beautifully smooth texture.
This cream is absolutely fundamental to the Fraisier’s structure and flavor profile. While you could technically substitute it with another cream filling, I strongly advise against using just plain whipped cream. While delicious, it simply doesn’t offer the depth of flavor or the necessary stability for such a grand cake. The Diplomat Cream provides that perfect balance of richness and airiness that makes the Fraisier so special.
To master this exquisite Crème Diplomate, you will need (refer to the full recipe card below for exact quantities):
- Full Cream / Whole Milk: The base of your pastry cream.
- Vanilla: Essential for classic flavor. A vanilla bean or paste offers the best results, but extract can be used in a pinch.
- Orange Blossom Water: This ingredient is optional but highly recommended! It imparts a subtle, fragrant, and truly authentic French touch that elevates the entire cake.
- Egg Yolks: Provide richness, color, and act as a natural thickener for the pastry cream.
- Caster Sugar: Sweetens the cream to perfection.
- Cornstarch: The primary thickening agent for the pastry cream, ensuring a smooth, lump-free consistency.
- Gelatine Powder: Crucial for stabilizing the Diplomat Cream, giving it its beautiful structure, especially important for a layered cake like the Fraisier. You’ll need a small amount of cold water to hydrate it first.
- Heavy / Thickened Cream: This needs to be a cream that can be whipped, typically with a minimum of 30% fat content, to create the light, airy component.
How to make Diplomat Cream, step-by-step:
First, prepare the Pastry Cream (Crème Pâtissière) and incorporate the Gelatine:
- In a small saucepan, combine the Milk, Vanilla (if using a bean, infuse it first, then scrape the seeds into the milk; for paste/extract, simply whisk in), and Orange Blossom Water. Heat this mixture gently over low heat until it just begins to simmer.
- While the milk heats, whisk together the Egg Yolks and Caster Sugar in a separate bowl until pale and creamy. Then, add the Cornstarch and whisk thoroughly until a smooth paste forms, ensuring there are no lumps.
- Once the milk is simmering, carefully temper the egg mixture: gradually pour about half of the hot milk into the egg yolk mixture, whisking continuously to prevent the eggs from scrambling. Then, pour this tempered mixture back into the saucepan with the remaining milk.
- Return the saucepan to low heat. Continue whisking constantly until the mixture thickens significantly and reaches its first boil. Continue to cook, stirring, for about 30 seconds to fully cook the cornstarch and eggs, ensuring a stable pastry cream. Remove from heat immediately. This is your perfectly cooked Pastry Cream Base.
- In a small bowl, rehydrate the Gelatine Powder with a small amount of cold water as per package instructions (usually 1.5 tsp gelatine with 2 tbsp cold water). Once dissolved and bloomed, add it directly to the hot Pastry Cream and whisk vigorously until the gelatine is completely dissolved and smoothly incorporated.
- Transfer the hot pastry cream into a clean bowl or a shallow tray (like a brownie pan). The key here is to spread it thinly; this allows it to cool down evenly and relatively quickly. Cover the surface directly with plastic wrap to prevent a skin from forming and place it in the fridge to cool.
The second step involves blending the Pastry Cream with Whipped Cream:
- Once the Pastry Cream has cooled down to approximately room temperature (*), begin whipping the cold Heavy / Thickened Cream in a clean, chilled bowl. Whip on high speed for several minutes until it forms stiff peaks.
- Take the cooled Pastry Cream (if it was chilling on a tray, scrape it into a clean bowl) and whisk it vigorously to loosen it and ensure it’s smooth and pliable.
- Using a large spatula, gently fold the Whipped Cream into the loosened Pastry Cream in 3 or 4 additions. The goal is to combine them thoroughly without deflating the air from the whipped cream, resulting in a light and airy Diplomat Cream.
- Keep the finished Diplomat Cream at room temperature until you are ready to assemble the cake. Avoid placing it back in the fridge at this stage, as the gelatine will start to set, making it firm and difficult to pipe smoothly.
(*) The temperature of your pastry cream is absolutely critical for the Diplomat Cream’s success. Gelatine begins to set as it cools, typically around room temperature (20°C / 70°F). If your pastry cream is too cold, the gelatine will have already set, making it stiff and difficult to blend smoothly with the whipped cream, resulting in a lumpy texture. Conversely, if it’s too warm, it will melt the delicate whipped cream, leaving you with a runny mixture. Aim for a pastry cream that is cool to the touch but still soft and pliable, around 20°C (70°F), before folding in the whipped cream.
How to Assemble an Elegant Fraisier Cake, Step-by-Step
Assembling a Fraisier cake is where all your hard work comes together to create a stunning masterpiece. The key to a beautiful and structurally sound cake is careful organization and ensuring all components are prepared and ready before you begin.
Before you start the assembly process, double-check that:
- Your two Genoise layers are completely cool and precisely cut into circles matching the size of your pastry ring.
- The Strawberry Syrup has cooled to room temperature.
- The Diplomat Cream is freshly prepared and at room temperature, ready to be piped.
- Your Strawberries are prepped: select uniform, firm strawberries and slice them in half for the cake’s decorative edge (try to pick ones of similar height for a neat border). Dice the remaining strawberries into small, even cubes for the interior filling.
Assembly – Steps 1 to 4: Building the Foundation
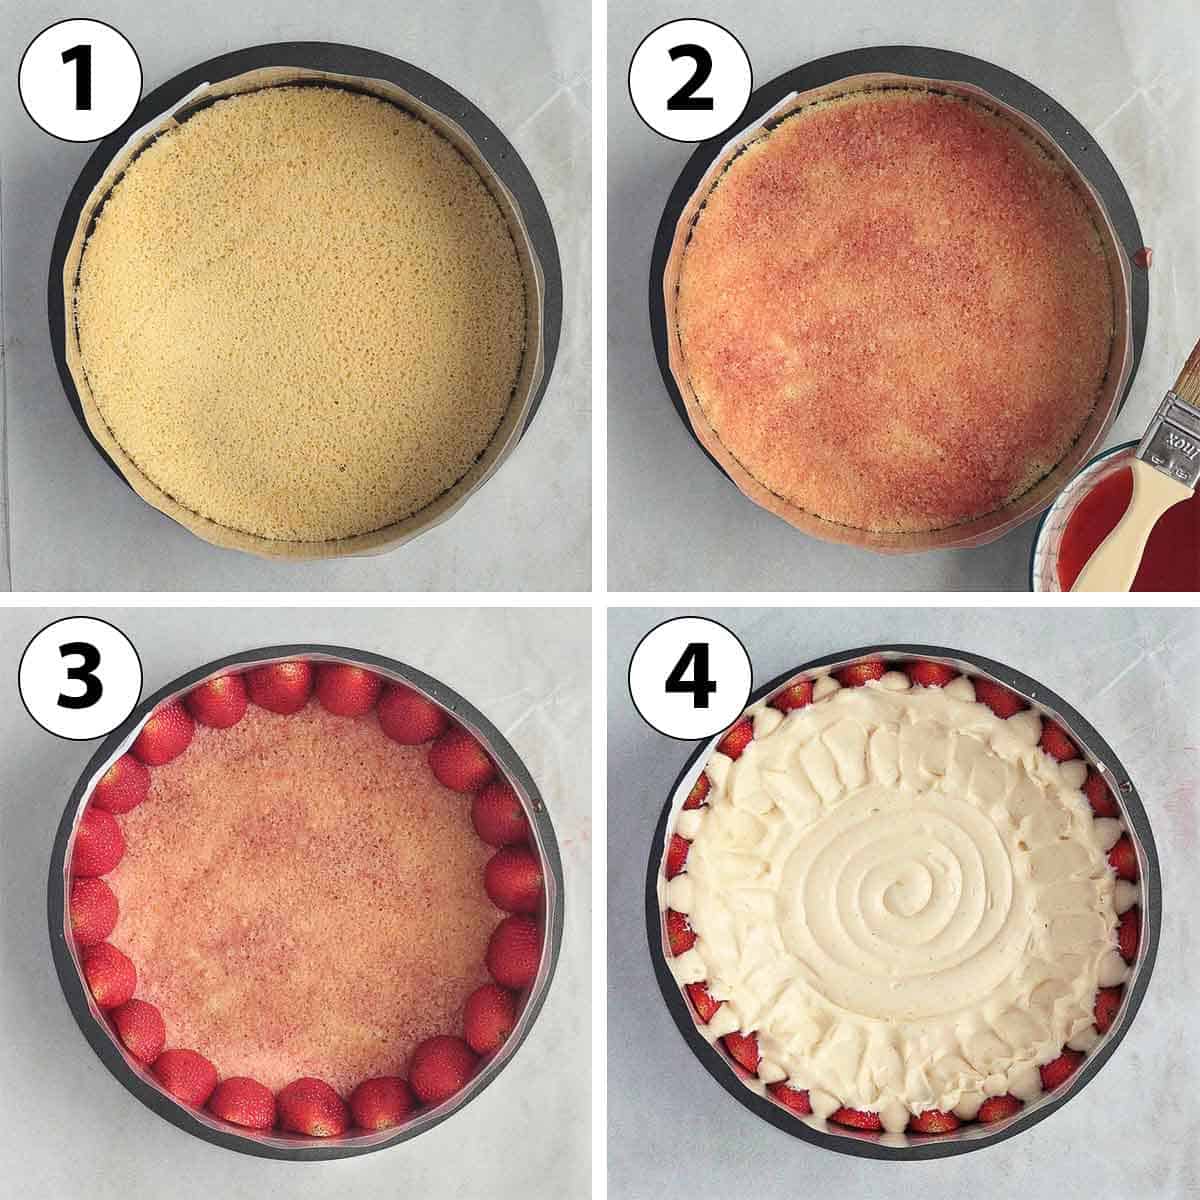
- Step 1: Set up your base. Place one of your Genoise sponge layers at the very bottom of your Pastry Ring. (Optional but highly recommended: For an exceptionally clean finish and easier demolding, line the inside of your pastry ring with an Acetate Roll or “Cake Collar.”) – Refer to photo 1
- Step 2: Moisten the sponge. Using a pastry brush, generously brush the bottom Genoise layer with the cooled Strawberry Syrup. This adds moisture and a subtle burst of flavor. – Refer to photo 2
- Step 3: Create the strawberry border. Arrange the strawberries you sliced in half around the entire circumference of the cake, standing them upright against the inside edge of the pastry ring. Place them as tightly as possible, ensuring the flat, sliced side of each strawberry faces outwards (touching the pastry ring or acetate strip). This creates the iconic visual border of the Fraisier. – Refer to photo 3
- Step 4: Pipe the first cream layer. Now, it’s time for the Diplomat Cream. The easiest and neatest way to do this is with a Piping Bag and a large round piping tip. Start by carefully piping cream into the small gaps between each strawberry around the edge. This is crucial for a smooth exterior finish. Then, pipe the remaining half of the Diplomat Cream over the Genoise in the center, working in a spiral motion from the middle towards the edges. – Refer to photo 4
Use a small Offset Spatula to gently smooth out the cream, ensuring it’s level and fills any gaps, particularly around the edges where it meets the strawberries. Remember, piping cream between the strawberries and going as high as the strawberries themselves is essential for a flawless, smooth side when the ring is removed.
Assembly – Steps 5 to 8: Layering and Finishing
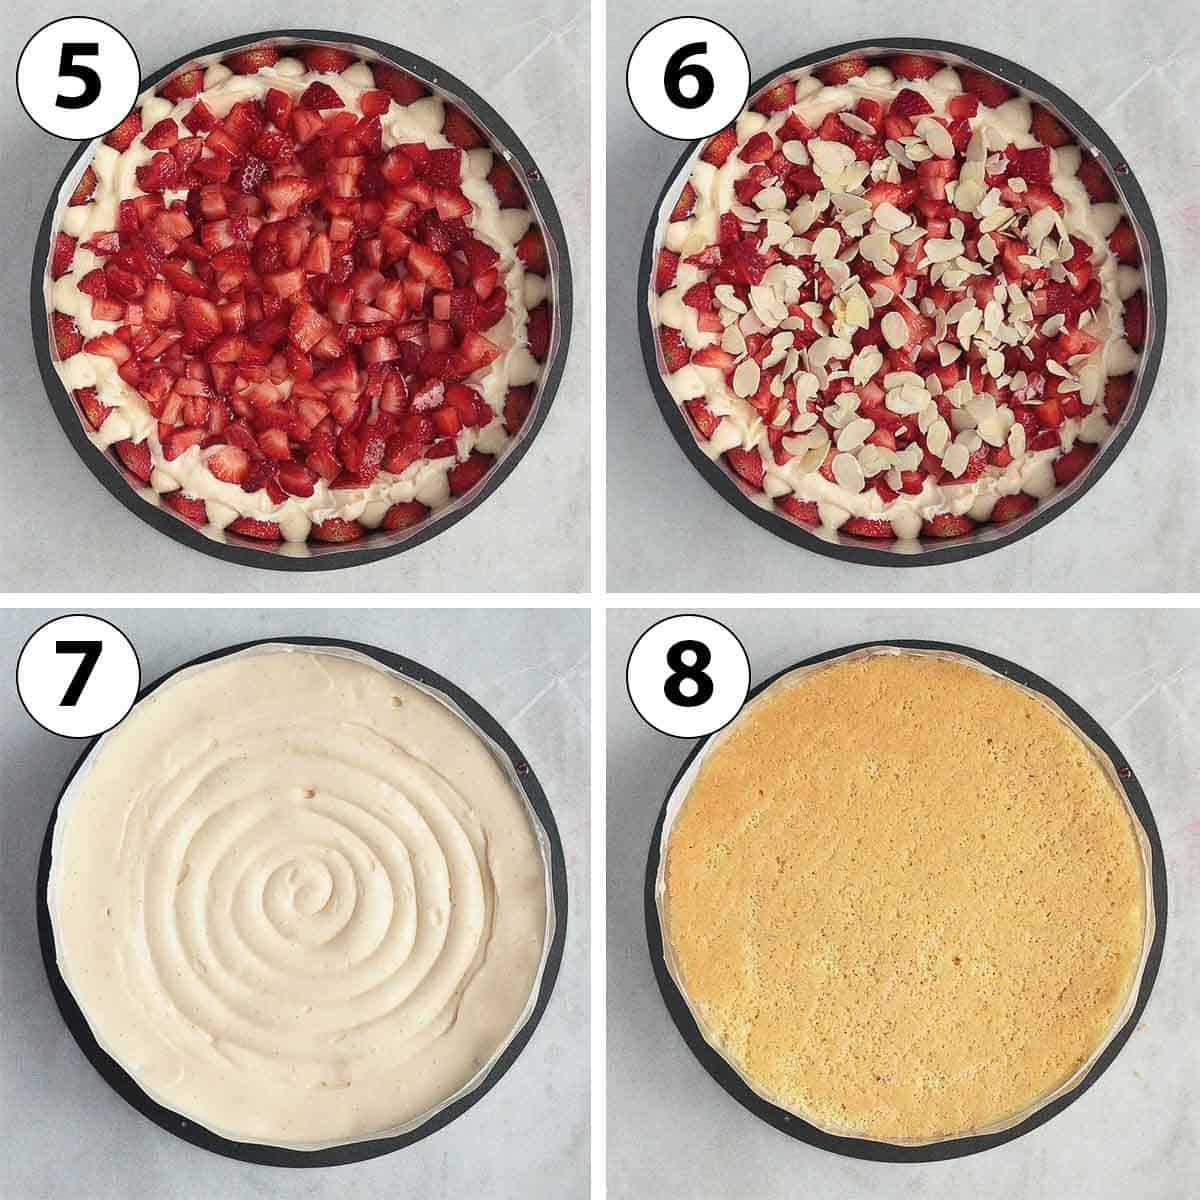
- Step 5: Add cubed strawberries. Evenly distribute the cubed strawberries over the first layer of Diplomat Cream. Gently press them down to eliminate any large air pockets, ensuring a dense, fruit-filled center. – Refer to photo 5
- Step 6: (Optional) A nutty crunch. If desired, sprinkle the flaked almonds over the cubed strawberries. You can toast them lightly in the oven beforehand for enhanced flavor, or even substitute with coconut flakes for a different twist. – Refer to photo 6
- Step 7: The final cream layer. Pipe the remaining Diplomat Cream over the cubed strawberries and almonds. Again, start from the center and spiral outwards, ensuring you cover all the fruit and extend the cream right to the edges, slightly over the side strawberries for a seamless look. Use your offset spatula to spread and smooth this layer. – Refer to photo 7
- Step 8: Top with Genoise. Take your second Genoise layer and brush one side generously with the remaining Strawberry Syrup (this brushed side will face inwards, resting on the cream). Carefully place this syrup-brushed Genoise layer on top of the cream filling. Gently press down to ensure it’s level and adheres well to the cream. – Refer to photo 8
- Chill to set: Place the assembled cake in the fridge to set for a minimum of 2 to 3 hours. For best results and to ensure firm setting, it’s highly recommended to chill it overnight.
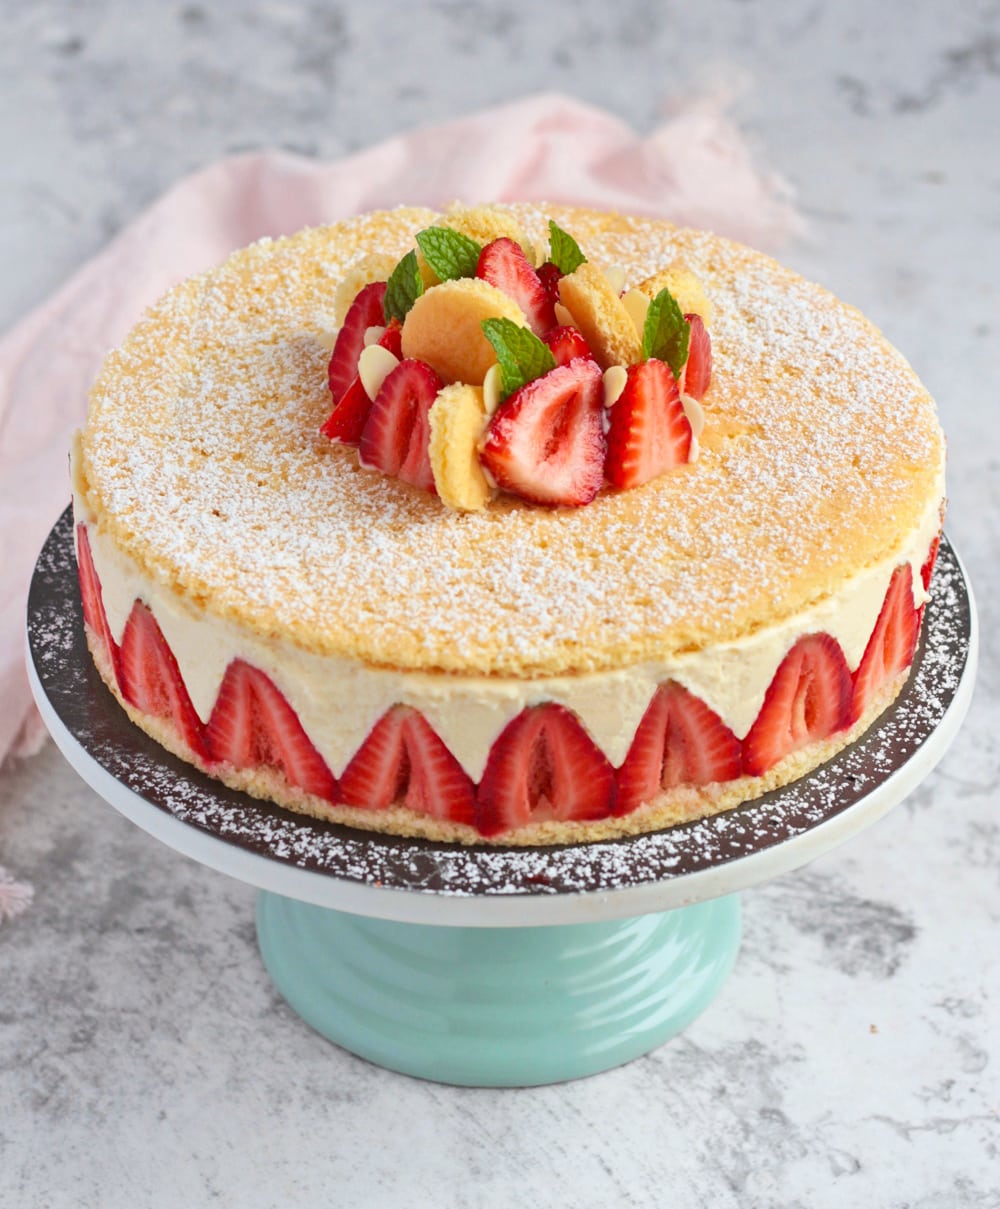
To finish and decorate the cake, I typically dust a delicate layer of Icing Sugar over the top Genoise. For additional flair and flavor, I arrange some fresh strawberries (often sliced in half), sometimes incorporating small rounds cut from leftover Genoise offcuts, a sprinkle of flaked almonds, and a few vibrant leaves of fresh mint. These garnishes add both beauty and freshness.
Expert Tips for a Flawless Fraisier Cake
Creating a stunning Fraisier cake requires attention to detail and a few insider tricks. Follow these top tips to ensure your French strawberry cake turns out perfectly:
- Respect Cooling and Setting Times: This is paramount, especially for the Diplomat Cream. If the pastry cream is too hot when mixed with whipped cream, it will melt. If it’s too cold, the gelatine will have set, making it lumpy and unworkable. Aim for room temperature (around 20°C / 70°F) for the pastry cream before folding in the whipped cream for a perfectly smooth, pipeable consistency.
- Even Genoise Batter Spread: When spreading the Genoise batter onto your baking sheet, strive for consistent thickness. A too-thin layer will result in a dry, brittle sponge that cracks easily, while uneven sections will bake inconsistently. An evenly spread batter ensures a tender, flexible sponge that won’t crack during assembly.
- Be Well-Organized (Mise en Place): This complex cake benefits immensely from proper “mise en place.” Before you even think about assembly, ensure all individual components – cooled Genoise layers, chilled strawberry syrup, ready-to-pipe Diplomat Cream, and prepared strawberries – are complete and at the correct temperature. You don’t want to rush or discover you’re missing an element halfway through!
- Assemble Promptly: Once all elements are ready, begin assembling the cake without delay. The Diplomat Cream is best worked with at room temperature, but it will start to set over time.
- Assemble on Your Serving Plate: To avoid the precarious task of transferring a delicate, freshly assembled cake, build your Fraisier directly on the serving plate or cake stand you intend to use. This minimizes movement and potential damage.
- Choose the Best Genoise Side: Examine both sides of your two Genoise sponge layers. Select the most aesthetically pleasing, perfectly golden side to be your top layer, showcasing it beautifully.
- Uniform Strawberries for the Edge: For that signature, neat Fraisier border, select strawberries that are roughly the same height. This ensures a consistent, professional-looking edge when you slice the cake.
- Thorough Cream Piping for Edges: When piping the Diplomat Cream, pay extra attention to filling the spaces between each strawberry on the edge. Pipe the cream not just into these gaps but also slightly over the top of the strawberries to create a smooth, continuous surface that will look flawless once the pastry ring is removed.
- Creative Garnish with Leftovers: Don’t discard Genoise offcuts! Use a small round cookie cutter to create decorative mini sponge rounds. These, along with fresh strawberry slices, flaked almonds, and vibrant mint leaves, make for elegant cake toppings.
- Last-Minute Toppings: If you’re not serving the Fraisier immediately, hold off on adding fresh fruit and mint garnishes until just before serving. This keeps the strawberries looking plump and fresh, and the mint vibrant.
- Removing the Pastry Ring with Ease: If you used an acetate strip, removing the ring will be simple. If not, and the cream is sticking, a quick trick is to gently warm the outside of the pastry ring with a blow torch for a few seconds. This will slightly melt the outer layer of cream, allowing the ring to slide off cleanly.
Recipe FAQs: Fraisier Cake
Once your Fraisier cake is fully assembled and set, it is crucial to store it properly in the fridge. Before placing it in the refrigerator, make sure to cover the strawberry cake meticulously with plastic wrap or transfer it to an airtight container. This prevents it from absorbing any unwanted odors from other foods in the fridge and, more importantly, keeps the sponge from drying out. When you’re ready to serve, carefully remove the Pastry Ring (and acetate collar, if used). Any leftovers can be kept in the fridge, well-covered, for an additional 2 days, maintaining its freshness and deliciousness.
The Fraisier cake is a rich and complete dessert on its own, a true showstopper. I often serve it as is, allowing its complex flavors and textures to shine. However, if you wish to offer an accompaniment, here are some delightful options:
– A simple side of more fresh, ripe Strawberries to amplify the berry flavor.
– A small scoop of high-quality Vanilla Ice Cream, providing a creamy, cool contrast.
– A light drizzle of homemade Strawberry Coulis or Raspberry Coulis for an extra burst of fruitiness.
– A delicate spoonful of Mixed Berry Compote, adding another layer of berry goodness.
Explore More Classic French Desserts
If you’ve fallen in love with the elegance and flavor of the Fraisier, you’ll be delighted by the vast world of French patisserie. Here are a few more classic French dessert recipes to inspire your baking journey:
- Choux à la Crème (French Cream Puffs): Light, airy pastry shells filled with a rich, creamy custard.
- Classic Profiteroles: Small, crisp choux pastry balls typically filled with ice cream and drizzled with chocolate sauce.
- French Buckwheat Crepes: Savory and subtly nutty crepes, perfect for a delightful meal or snack.
- Triple Chocolate Tart: An indulgent and decadent dessert for serious chocolate lovers.
- French Apple Tart: A simple yet elegant tart showcasing thinly sliced apples over a tender crust.
- Sablé Breton Cookies: Rich, buttery, and crumbly shortbread cookies from the Brittany region.
- Pear Frangipane Tarts: Delicate tartlets filled with a sweet almond cream and tender poached pears.
Made this recipe?
We’d love to hear from you! Let us know if you liked it by leaving a comment below, and don’t forget to tag us on Instagram @a.baking.journey with a photo of your beautiful creation!
Recipe

Fraisier Cake with Diplomat Cream
Print Recipe
Ingredients
Genoise Sponge
- 4 large Eggs
- 80 gr Caster Sugar
- 100 gr Plain / All-Purpose Flour
- 20 gr Cornstarch
Strawberry Syrup
- 60 gr Strawberries, fresh or frozen
- 90 ml Water
- 50 gr Caster Sugar
Diplomate Cream
- 500 ml Full Cream / Whole Milk
- 1 1/2 teaspoon Vanilla Paste, or 1 fresh Vanilla Bean
- 1 teaspoon Orange Blossom Water, optional
- 4 large Egg Yolks, at room temperature
- 40 gr Caster Sugar
- 40 gr Cornstarch
- 1 1/2 teaspoon Gelatine Powder, + 2 tablespoon cold water
- 250 ml Thickened / Heavy Cream, 35% fat content min.
Cake Filling
- 500 gr Fresh Strawberries, or more to taste
- 20 gr Flaked Almonds, optional
Cake Toppings
- Icing Sugar, to taste
- Fresh Strawberries, to taste
- Flaked Almonds, to taste
- Mint Leaves, to taste
Instructions
Genoise Sponge
- Preheat your oven to 160°C (325°F). Line a 30 x 45 cm (12 x 18 inch) flat baking tray (see note 1) with Baking Paper and set aside.
- In the bowl of your stand mixer, whisk the Eggs and Caster Sugar on medium to medium-high speed for about 10 minutes. The mixture should become very pale, thick, frothy, and at least double in size.
- Sift the Flour and Cornstarch over the egg mixture and very gently fold it in using a spatula. Stop as soon as the dry ingredients are fully incorporated. Pour the mixture into the lined baking tray and gently spread with an offset spatula to level the batter.
- Bake for 10 to 12 minutes or until puffed and golden. Transfer to a cooling rack and leave to cool down completely before removing the baking paper and cutting two circles of sponge using a 20 cm / 8-inch Pastry Ring.
Strawberry Syrup
- Blend the Strawberries (thawed if using frozen) until smooth, then pour through a thin mesh sieve to retain only the liquid.
- Place the Strawberry juice, Water, and Sugar into a small pot on low to medium heat. Cook for about 5 minutes, stirring occasionally, or until the sugar has dissolved and the liquid has slightly thickened. Set aside to cool down completely.
Diplomate Cream
- Place the Milk, Vanilla Paste (2) and Orange Blossom Water in a small saucepan and heat up on low heat.
- In a separate bowl, whisk together the Egg Yolks and Sugar. Add the Cornstarch and whisk until combined.
- Once the milk starts to simmer, pour about half of it over the Sugar/Egg Yolks mixture, whisk well, then transfer it all back into the pot. Cook on low to medium-low heat for about 5 minutes or until the mixture has thickened (ideally, use a kitchen thermometer to check the cream has reached 82 degrees Celsius). Remove from the heat.
- In a small bowl, stir the Gelatine Powder and a little bit of Cold Water to dissolve it (3). When thick, add to the hot custard and whisk well until dissolved. Transfer the pastry cream into a clean bowl or tray (4), cover with plastic wrap touching the surface, and place in the fridge to cool down.
- Once the Pastry Cream has reached room temperature (5), start whipping the cold Cream until you reach stiff peaks.
- Whisk the Pastry Cream to loosen it (if you used a tray to cool it down, you may want to transfer it back into a large bowl), then gently fold in the whipped cream in 3 or 4 stages. Transfer into a Piping Bag with large round Piping Tip.
Assembling the Cake
- Pick strawberries that have about the same height to create the edges of the cake, and slice them in half (6). Cut the rest of the strawberries into small cubes and set aside.
- Place the 20×5 cm/ 8×2 inch Pastry Ring over a flat serving surface (7) and surround the interior of the ring with an Acetate Strip (8).
- Put the first layer of Genoise at the bottom of the ring and brush it with Strawberry Syrup.
- Place the Strawberries sliced in Half around the edges of the cake, sliced side facing out. Try to place them as tightly against each other as possible.
- Pipe the Diplomat Cream between each strawberry, going as high as the pastry ring. Add about half of the Cream over the Genoise (9) and spread with an offset spatula if needed.
- Cover the cream with the cubed Strawberries and Almond Flakes (optional). Gently press on them to avoid any large air pockets.
- Pipe the rest of the Diplomat Cream over the cubed Strawberries and Almonds, going all the way to the edges of the Pastry Ring (and slightly over the strawberries on the edges).
- Brush the second layer of Genoise with the Strawberry Syrup (on one side only) and cover the cream with it, brushed side facing in. Gently press on it to even it out.
- Place in the fridge to set for at least 3 to 4 hours, preferably overnight.
Cake Toppings
- To finish the cake, I sprinkled a little bit of Icing Sugar over the Genoise. I also added some slices of Fresh Strawberries in the centre of the cake with Fresh Mint Leaves and Flaked Almonds (10).
- Carefully remove the Pastry Ring and Acetate Strip (11) just before serving.
Video
Would you like to save this recipe?
We’ll email this post to you, so you can come back to it later!
Notes
- You can use a regular flat baking tray lined with baking paper or a flat silicone baking with slightly raised edges. Either way, make sure the tray is large enough to cut 2 x 20cm disks of sponge to fit into the pastry ring. Alternatively, use 2 smaller baking trays or a round Baking Pan.
- If using a whole Vanilla Bean, leave it to infuse in the warm milk for 5 to 10 minutes. Then slice it in half, scrap the seeds and add the seeds to the milk.
- I used about 2 tbsp of Cold Water for 1 1/2 tsp of Gelatine Powder. Read the instructions on the pack of gelatine you use as it may recommend another ratio.
- I use a baking tray similar to a large brownie pan to cool down the pastry cream. The thickest the layer of pastry cream, the longer it will take to cool down and it will cool down unevenly. Spreading it thinly on a tray provides a great way to cool it down evenly and quickly.
- You do not want the Pastry Cream to get too cold or the Gelatine will start to set. The ideal temperature is around 20’C/70’F or room temperature – as it will be warm enough for the gelatine not to have set but cool enough not to melt the whipped cream.
- With a Pastry Bag, start at the centre of the cake and make your way toward the edges in a spiral movement.
- Check if you have enough to go create the edges before you cube the rest of the strawberries
- Using an Acetate Strip (or ‘cake collar’) is optional, but it creates a much cleaner finish. It also makes it easier to remove the Pastry Ring when ready to serve as no cream will be sticking to it.
- Use the Plate you will serve the cake on – it is much easier to assemble the cake on the serving plate straight away rather than try to transfer it later on.
- If you have some cream left, you can use it as a “glue” for the cake toppings.
- If you did not use an Acetate Strip, you may find it a bit harder to remove the Ring as the cream may be sticking to it. A tip to remove the ring if stuck is to use a blow torch on the outside of the ring for a couple of seconds to ‘melt’ the cream.
Nutrition (per serving)
Read this recipe as a Web Story!
