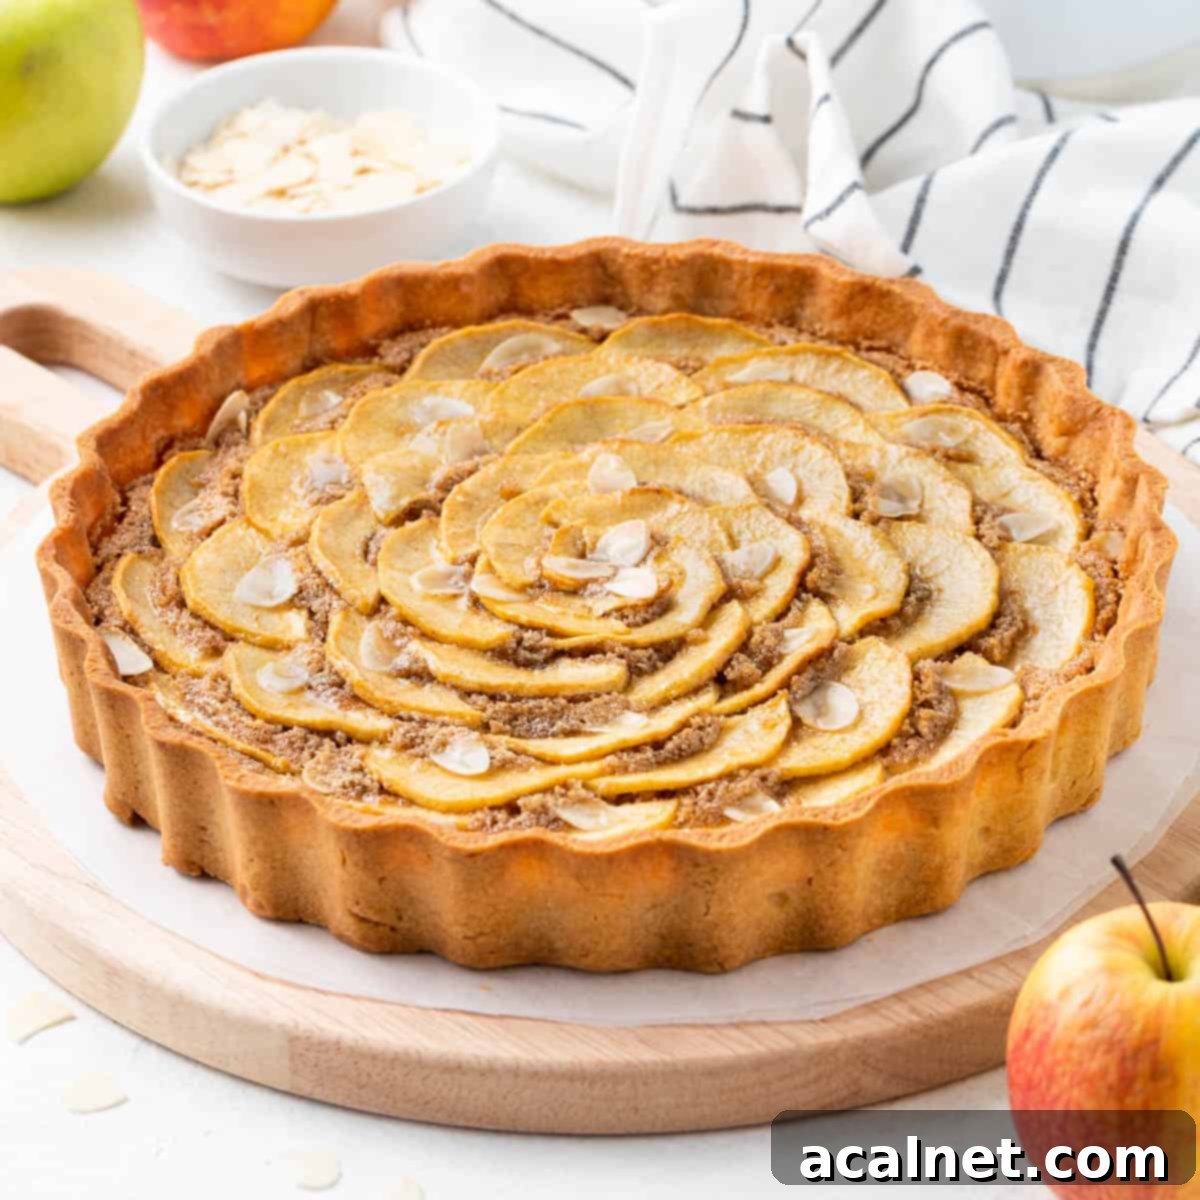
Ultimate Apple Frangipane Tart Recipe: Buttery Pastry, Cinnamon Almond Cream & Fresh Apples
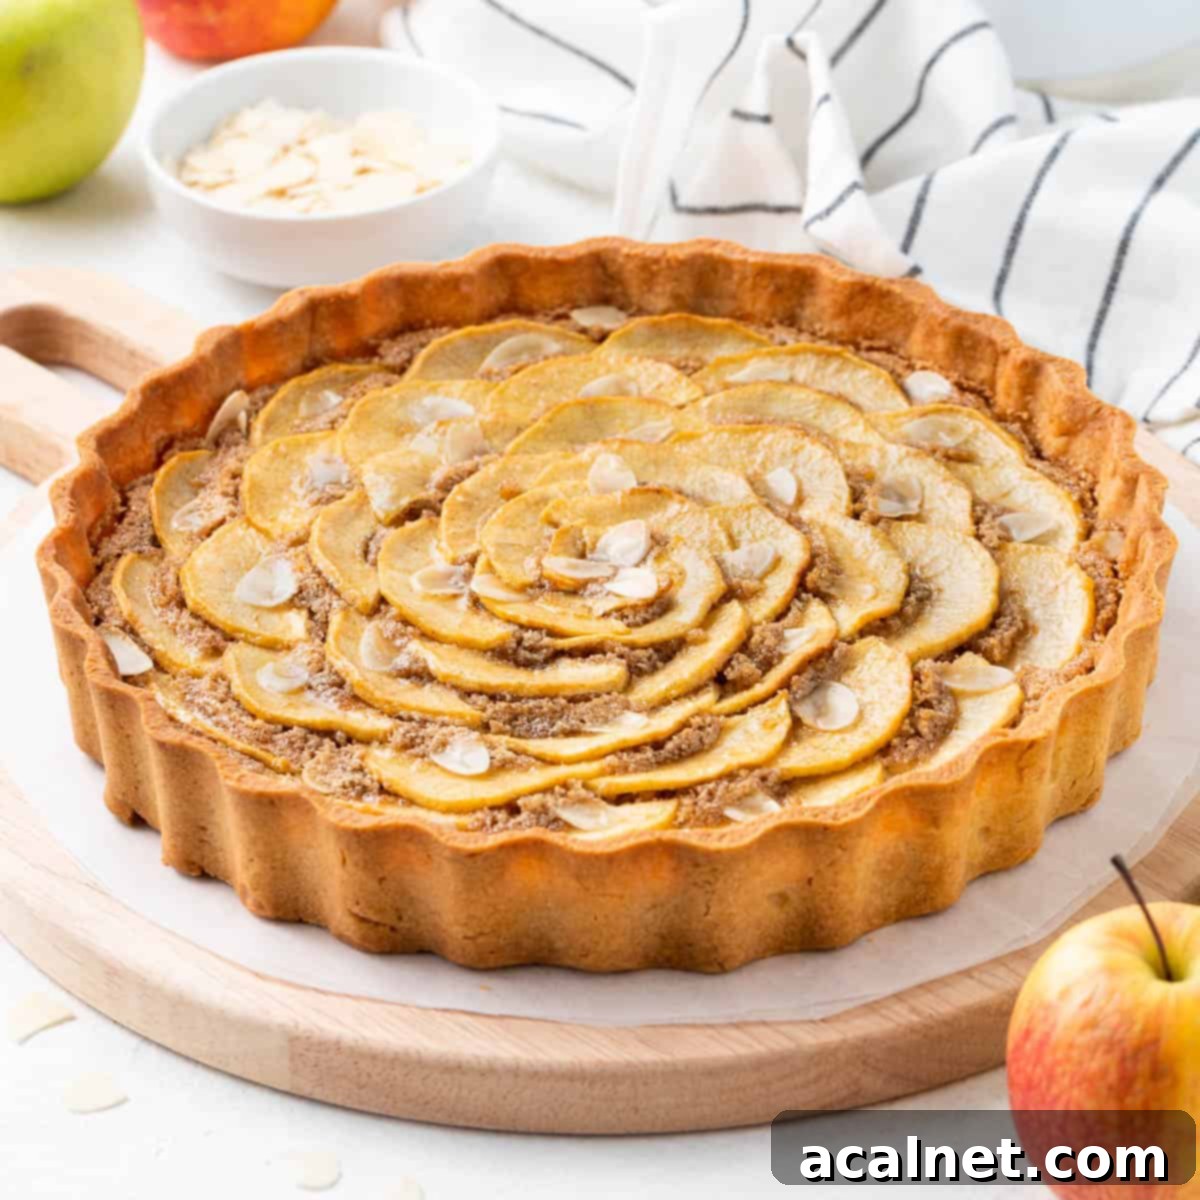
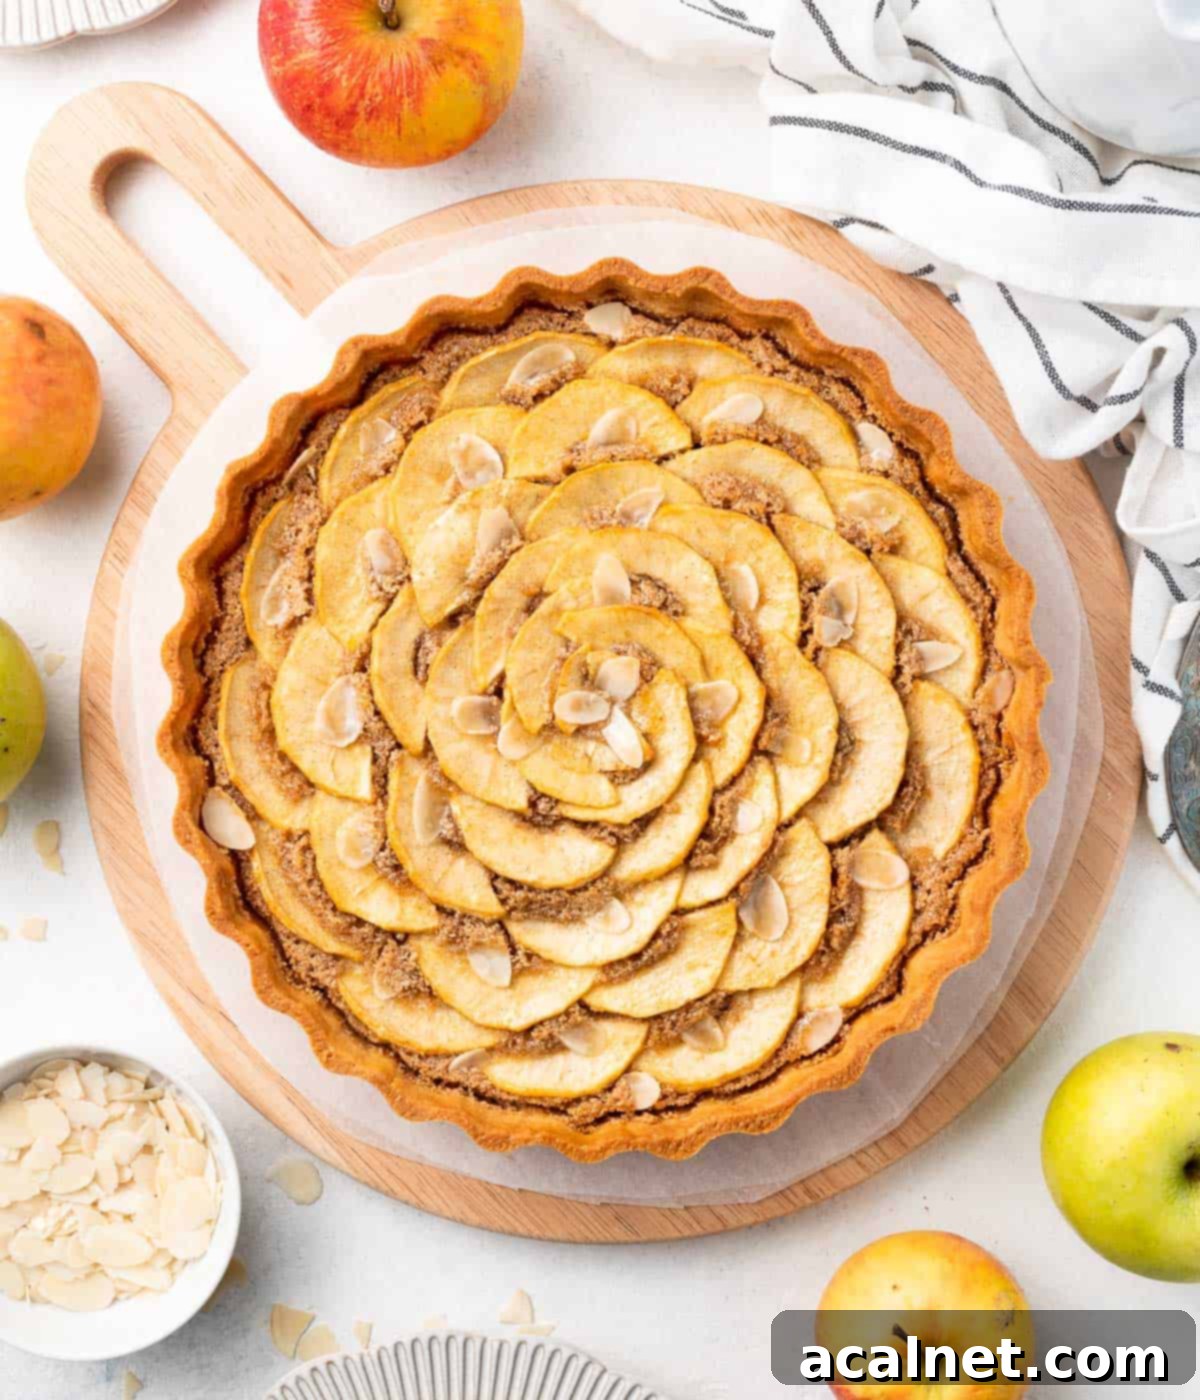
Indulge in the exquisite charm of a classic French dessert with this incredible Apple Frangipane Tart. This recipe masterfully combines a golden, buttery Sweet Shortcrust Pastry (Pâte Sucrée) with a rich, aromatic Cinnamon Almond Cream Filling, crowned with delicate slices of fresh apple. It’s more than just a dessert; it’s a beautiful, elegant, and deeply comforting treat that is absolutely perfect for any occasion. Whether you’re hosting an afternoon tea, a sophisticated dinner party, or searching for a show-stopping dessert for the holidays, this Apple Frangipane Tart promises to impress and delight every palate with its harmonious blend of flavors and textures.
[feast_advanced_jump_to]
Why This Apple Frangipane Tart Will Become Your Favorite
This Apple Frangipane Tart offers a delightful and refreshing twist on the beloved classic French Pear Frangipane Tart (Tarte Bourdaloue). While it retains the signature elements that make frangipane tarts so appealing – a perfectly crisp, sweet pastry shell and a rich, moist almond cream filling – the addition of fresh, seasonal apple slices elevates it to a new level. The apples introduce a subtle tartness and a wonderful textural contrast, cutting through the richness of the almond cream and the inherent sweetness of the pastry, creating a more dynamic flavor profile.
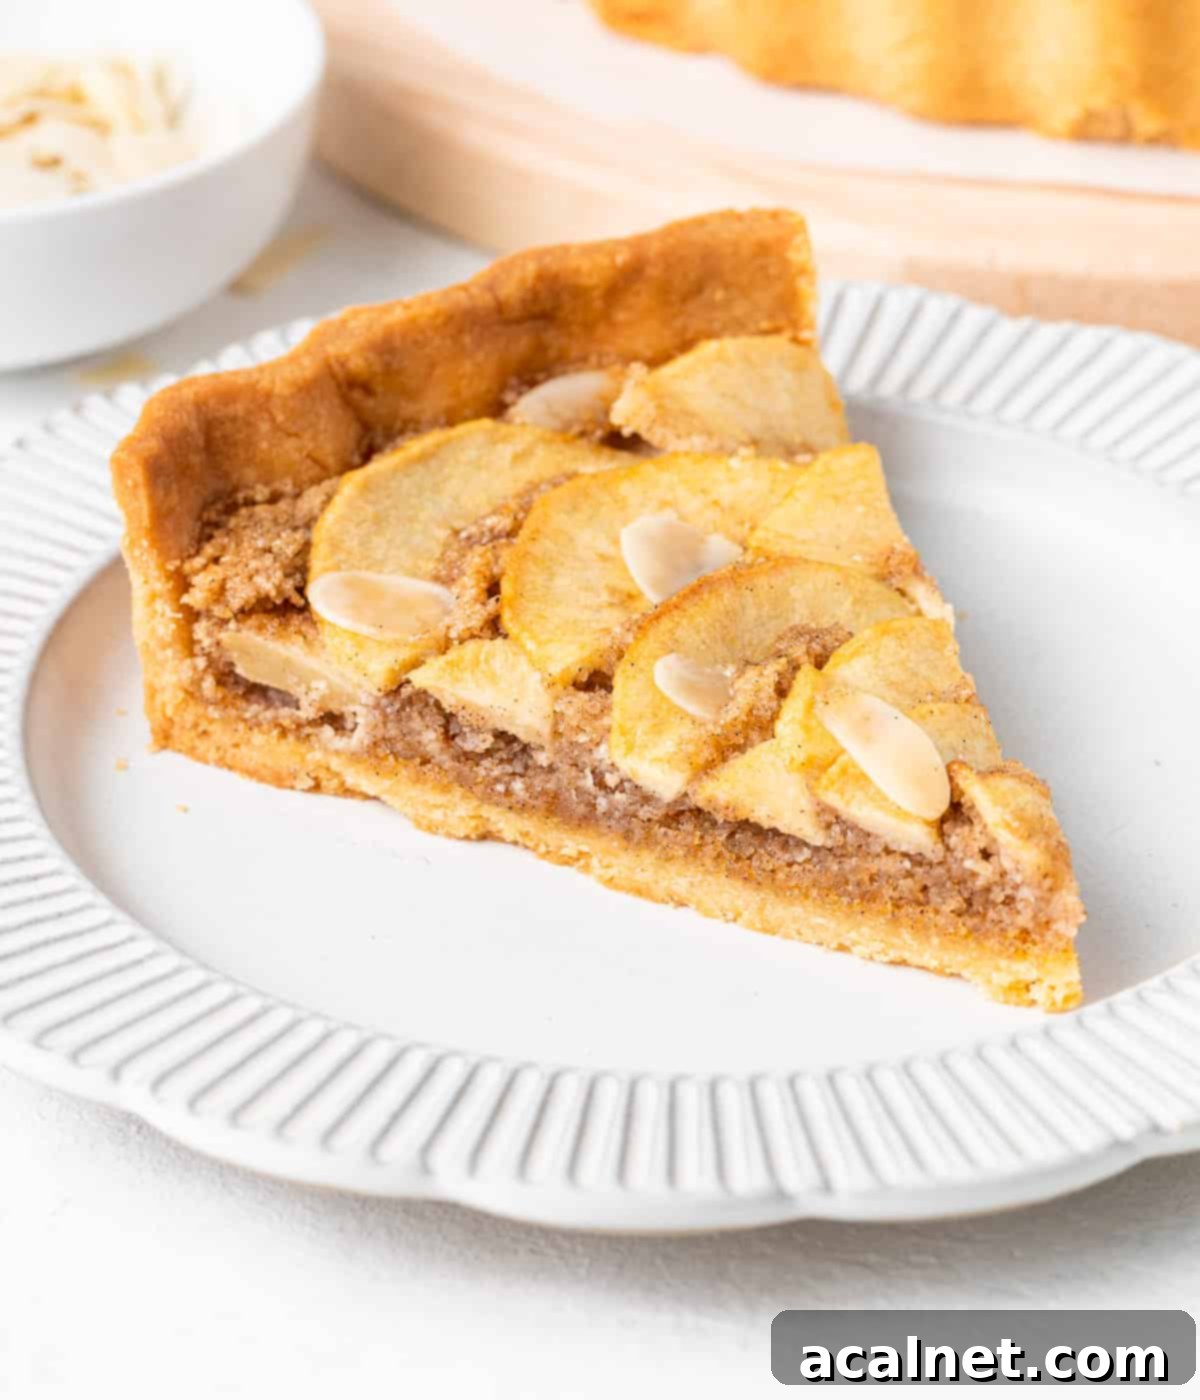
The magic of this apple almond tart truly lies in its harmonious blend of distinct flavors and complementary textures. Imagine the satisfying crunch of the cookie-like Sweet Shortcrust Pastry, giving way to a tender, fragrant Cinnamon Almond Cream, subtly spiced and utterly luxurious. On top, the fresh apple slices soften beautifully in the oven, offering a delicate chew and a burst of natural, slightly tart fruit flavor. This combination results in a dessert that is not only incredibly delicious but also remarkably balanced and visually appealing, making it a true crowd-pleaser for any gathering. It’s comforting yet sophisticated, rustic yet elegant, and guaranteed to leave a lasting impression on your guests and family alike.
Understanding the Classic: What is a Frangipane Tart?
A Frangipane Tart is a cornerstone of French patisserie, renowned for its simple elegance and deeply satisfying flavors. At its heart, it’s a baked tart featuring a sweet pastry crust, most commonly Pâte Sucrée, filled with an indulgent almond-based cream. This almond cream, often simply referred to as “frangipane filling” in modern recipes, is a smooth, buttery mixture made with finely ground almonds, sugar, butter, and eggs.
Historically, in strict classic French baking, a true “frangipane cream” is a more elaborate preparation. It’s traditionally made by combining this basic almond cream with a creamy Crème Pâtissière (pastry cream). This richer, more complex cream is typically reserved for pastries like the famous Galette des Rois. However, in common culinary usage, especially when referring to the delicious tarts that bear its name, “frangipane” has become a widely accepted term for the delightful almond-based filling itself. This versatile filling provides a moist, rich base that pairs exceptionally well with a wide variety of seasonal fruits.
Beyond apples, frangipane tarts are traditionally adorned with other beloved fruits that complement the almond notes beautifully. Popular variations include delicate Pear Frangipane Tartlets, luscious Peach Frangipane Tart, and sweet Apricot Frangipane Tart. For those who prefer a purely almond experience, the filling can be baked without any fruit topping to create an Amandine Tart, often simply known as a French Almond Tart. This inherent versatility makes the frangipane tart a timeless and adaptable dessert that can be enjoyed year-round.
Essential Ingredients for Your Apple Frangipane Tart
Crafting the perfect Apple Frangipane Tart begins with selecting high-quality ingredients. Each component plays a vital role in achieving that signature golden, buttery crust, the rich and aromatic almond filling, and the tender, flavorful apple topping. Paying attention to ingredient quality and temperature will make a significant difference in your final result. Here’s a detailed look at what you’ll need:
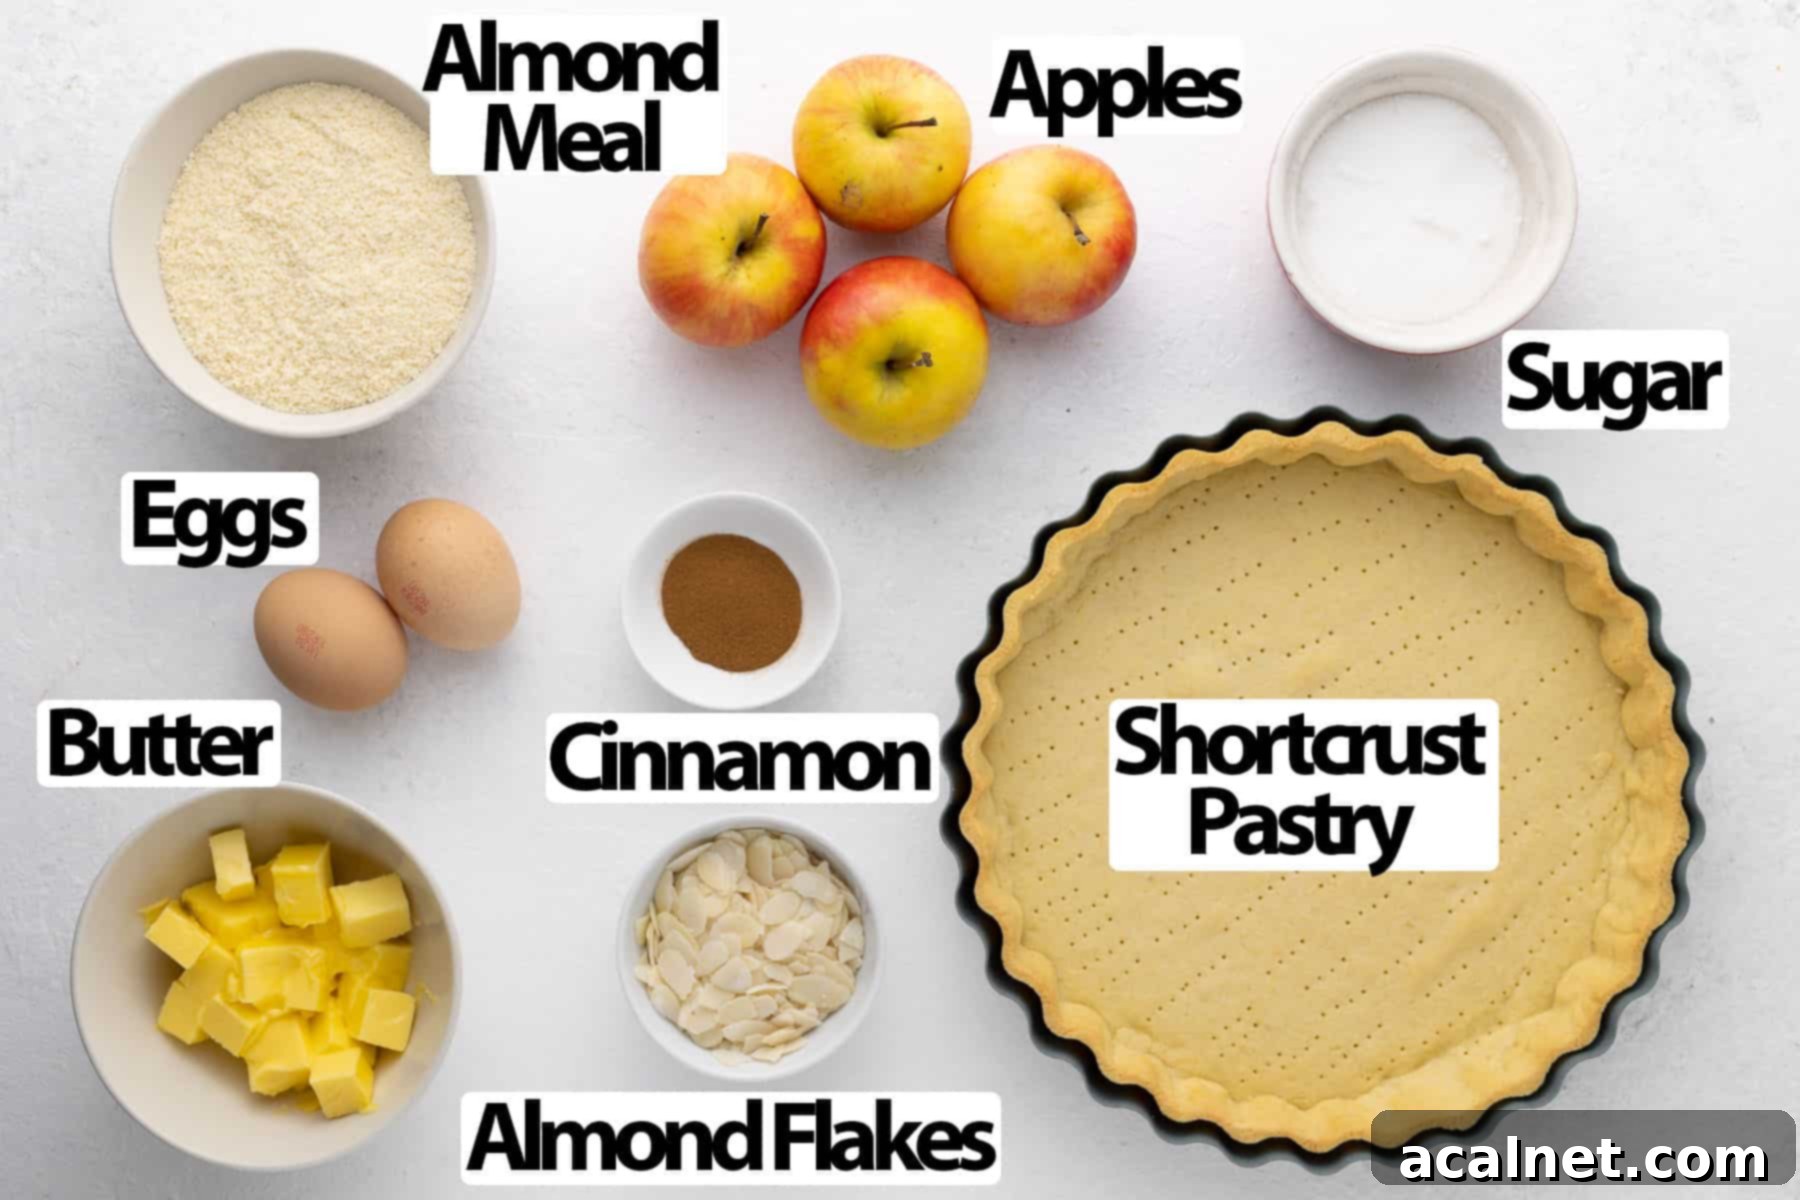
Scroll down to the recipe card below for all exact quantities and measurements.
For the Sweet Shortcrust Pastry (Pâte Sucrée)
- Wet Ingredients: You’ll need very soft, unsalted Butter at a true room temperature (but not melted) for easy creaming, ensuring a tender pastry. Icing Sugar (also known as Confectioner’s Sugar) is preferred over granulated sugar for its fine texture, which contributes to the pastry’s delicate crumb and prevents a grainy mouthfeel. One large Egg, also at room temperature, is essential to bind the dough and add richness; its temperature helps emulsify with the butter and sugar smoothly.
- Dry Ingredients: A precise blend of finely ground Almond Meal (or Almond Flour), All-Purpose Flour (also known as Plain Flour), and a tiny pinch of Fine Salt. The almond meal contributes to the pastry’s delicate, crumbly texture and introduces a subtle, nutty flavor that complements the frangipane filling. The all-purpose flour provides structure, and the salt is crucial for balancing the sweetness and enhancing all the flavors.
For the Cinnamon Almond Cream Filling
- Unsalted Butter: Just like for the pastry, the butter for the filling should be unsalted and very soft, at room temperature. This ensures it creams effortlessly with the sugar, creating a light, airy, and well-emulsified base for your rich filling.
- Caster Sugar: A fine-grain sugar that dissolves quickly and thoroughly, contributing to the filling’s smooth, luscious texture and balanced sweetness without grittiness.
- Eggs: Two large eggs, at room temperature, are fundamental for binding the cream, providing moisture, and giving it that characteristic custardy yet firm texture once baked. For optimal consistency, aim for the same approximate weight of eggs as butter and almond meal.
- Almond Meal: This is the star ingredient that gives the frangipane its signature flavor and texture. You can use either blanched or un-blanched almond meal, made from coarsely ground almonds. While finely ground almond flour will also work, almond meal often provides a slightly more rustic texture with a subtle, pleasing crunch that enhances the overall experience of the tart.
- Cinnamon: While optional, a touch of ground cinnamon truly elevates the flavor profile of the almond cream, adding a delightful warmth and inviting spice that perfectly complements the natural sweetness and tartness of the apples.
Optional Flavor Enhancers: For a deeper, more complex flavor in your almond cream, consider adding a splash of pure Vanilla Extract for classic sweetness and aroma, or Almond Extract for an intensified nutty essence that truly amplifies the frangipane experience.
For the Apple Topping & Glaze
- Apples: You’ll typically need 2 to 3 small to medium apples, with the exact quantity depending on their size and how generously you wish to layer them on your tart. Choosing the right variety is a critical step for a successful bake, as discussed in detail in the FAQs section below.
- Melted Butter: A small amount of unsalted butter, melted, is gently brushed over the apple slices before baking. This crucial step helps them caramelize beautifully in the oven, develop a lovely golden hue, and prevents them from drying out, ensuring tender, flavorful fruit.
- Flaked Almonds: Optionally, a sprinkle of delicate flaked almonds over the apples before baking adds a lovely visual appeal and introduces a delightful, extra textural crunch to the finished tart.
To give the baked tart a professional, irresistibly glossy finish, I often prepare a simple syrup glaze. This elegant glaze is made from equal parts water and sugar, simmered gently with a hint of vanilla until it reaches a slightly thickened consistency. Brushing this warm syrup over the apples immediately after the tart emerges from the oven not only imparts a beautiful shine but also helps to lock in moisture and further enhance the overall sweetness and aroma, though it remains an entirely optional step that adds a touch of gourmet flair.
Delicious Variations to Explore for Your Frangipane Tart
While this classic Apple Frangipane Tart is undeniably perfect as is, the beauty of baking lies in customization and experimentation. Feel free to unleash your creativity with these delicious variations to tailor the tart to your preferences or explore new flavor profiles:
- Nutty Alternatives: For a deeper, more earthy, and perhaps even more robust flavor profile, consider replacing the almond meal with an equal amount of Hazelnut Meal. The hazelnuts offer a richer, more toasted taste that pairs wonderfully with the sweet-tart notes of apples. Alternatively, finely ground pistachios could provide a unique, subtly sweet, and vibrant green twist to your frangipane.
- Spice It Up: Elevate the warming notes of the cinnamon by incorporating a blend of other complementary spices into the almond cream. A pinch of ground nutmeg, a dash of fragrant cardamom, or even a subtle touch of ground ginger can introduce complex layers of flavor that beautifully complement both the apples and the nutty frangipane. A hint of allspice or clove could also be considered for an even more pronounced autumnal or festive feel.
- Poached Perfection: For an incredibly soft, luscious, and melt-in-your-mouth fruit texture, consider gently poaching the apple halves (or even quarters) in a light sugar syrup infused with a vanilla bean or a cinnamon stick before arranging them over the almond cream. This technique ensures the apples are perfectly tender, infused with delicate flavors, and provides a sophisticated contrast to the pastry.
- Add a Citrus Brightness: Introduce a refreshing, zesty note by finely grating some lemon or orange zest directly into the almond cream mixture. The vibrant citrus oil brightens the rich, sweet flavors and adds an invigorating aroma that cuts through the decadence.
- A Boozy Kick: For an adult-friendly and deeply flavored twist, a tablespoon or two of a complementary liqueur or spirit can be added to the almond cream. Options like dark rum, a fine brandy, or traditional Calvados (apple brandy) will enhance the depth of flavor and add a sophisticated warmth to the tart.
How to Bake the Perfect Apple Frangipane Tart: A Step-by-Step Guide
Making this stunning Apple Frangipane Tart is a rewarding baking project that, while requiring a few distinct steps, is straightforward with a little patience and attention to detail. Follow these comprehensive instructions to achieve a beautifully crafted, show-stopping dessert that tastes as good as it looks.
1. Preparing the Sweet Shortcrust Pastry (Pâte Sucrée)
The foundation of this exquisite tart is a tender, crisp, and buttery Pâte Sucrée. This pastry can be prepared in advance, stored unbaked in the fridge for up to 24 hours, or baked and kept at room temperature for the same duration. Planning ahead makes the assembly process much smoother and allows for the crucial chilling periods.
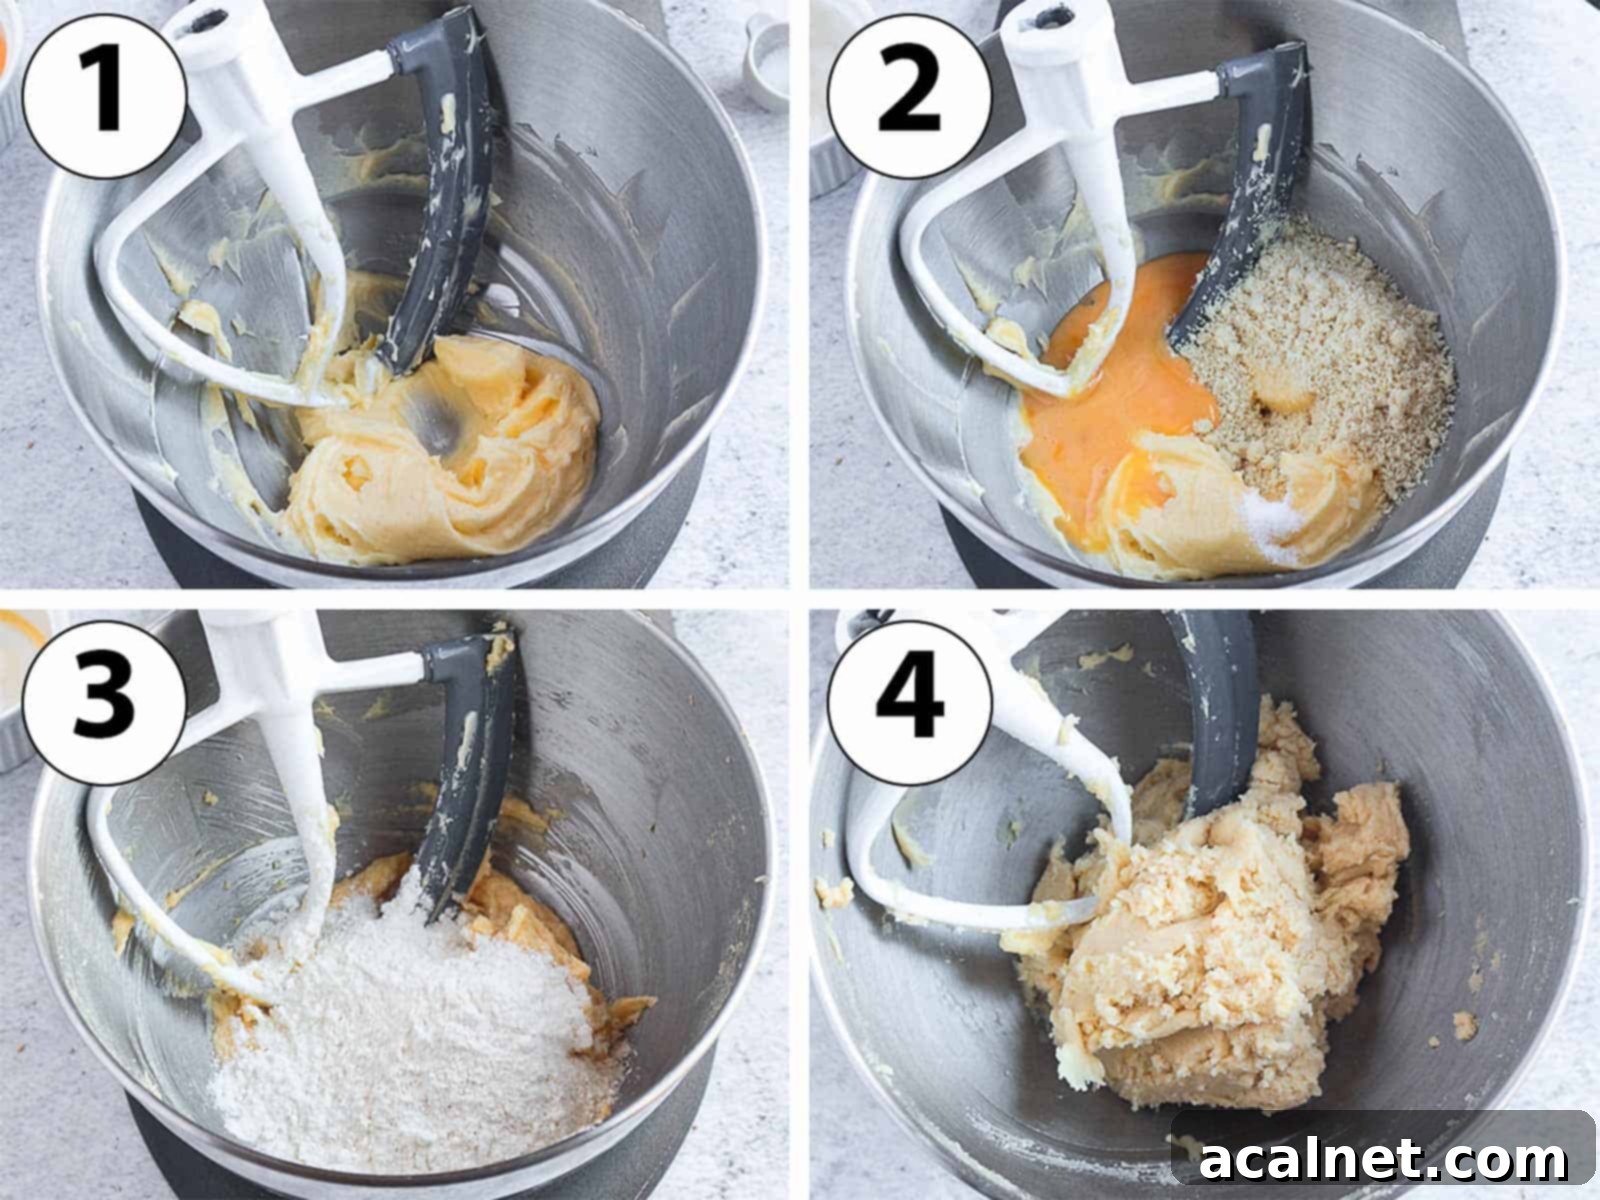
- Step 1 (Photo 1): In the bowl of your stand mixer fitted with the paddle attachment (or a large bowl with a sturdy hand mixer), combine the very soft, unsalted Butter and sifted Icing Sugar. Cream these ingredients together on medium speed for about 2-3 minutes, or until the mixture becomes visibly light, fluffy, and smooth. This essential step incorporates air, which contributes significantly to the pastry’s tender and crumbly texture.
- Step 2 (Photo 2): Next, add the room temperature Egg (for easier incorporation, you can whisk it lightly beforehand) and the Almond Meal. Mix on low speed until just combined, stopping periodically to scrape down the sides of the bowl with a spatula to ensure all ingredients are thoroughly incorporated. At this stage, the mixture should resemble a coarse, somewhat crumbly paste.
- Step 3 (Photo 3): Gently add the sifted All-Purpose Flour and the pinch of Fine Salt. Sifting the flour is crucial as it prevents lumps and ensures a more homogenous and fine-textured dough.
- Step 4 (Photo 4): Mix on the lowest speed possible. It is critically important to stop mixing as soon as the dry ingredients are just incorporated and the dough merely begins to come together into a rough mixture. Overworking the pastry will develop gluten, which can lead to a tough, chewy crust rather than the desired crisp and tender texture.
The “Fraisage” Technique for a Perfect Pâte Sucrée: For a truly tender and uniform pastry, consider performing a traditional French “fraisage” at this stage. Transfer the rough dough onto a clean, cool countertop. Using the palm of your hand, gently press and smear small portions of the dough away from you, spreading it thinly, then gather it back towards the center. Repeat this motion only a few times until the dough becomes perfectly smooth and homogenous. This specific technique helps to evenly distribute the fat throughout the dough without overdeveloping too much gluten, resulting in an exquisitely tender and uniform crust.
2. Rolling the Pastry & Lining the Tart Pan
- Gather the prepared pastry dough together into a cohesive ball. Gently flatten it slightly into a disk shape and place it between two large sheets of baking paper or parchment paper. This method is incredibly helpful as it prevents the dough from sticking to your rolling pin and countertop, making the rolling process much cleaner and easier.
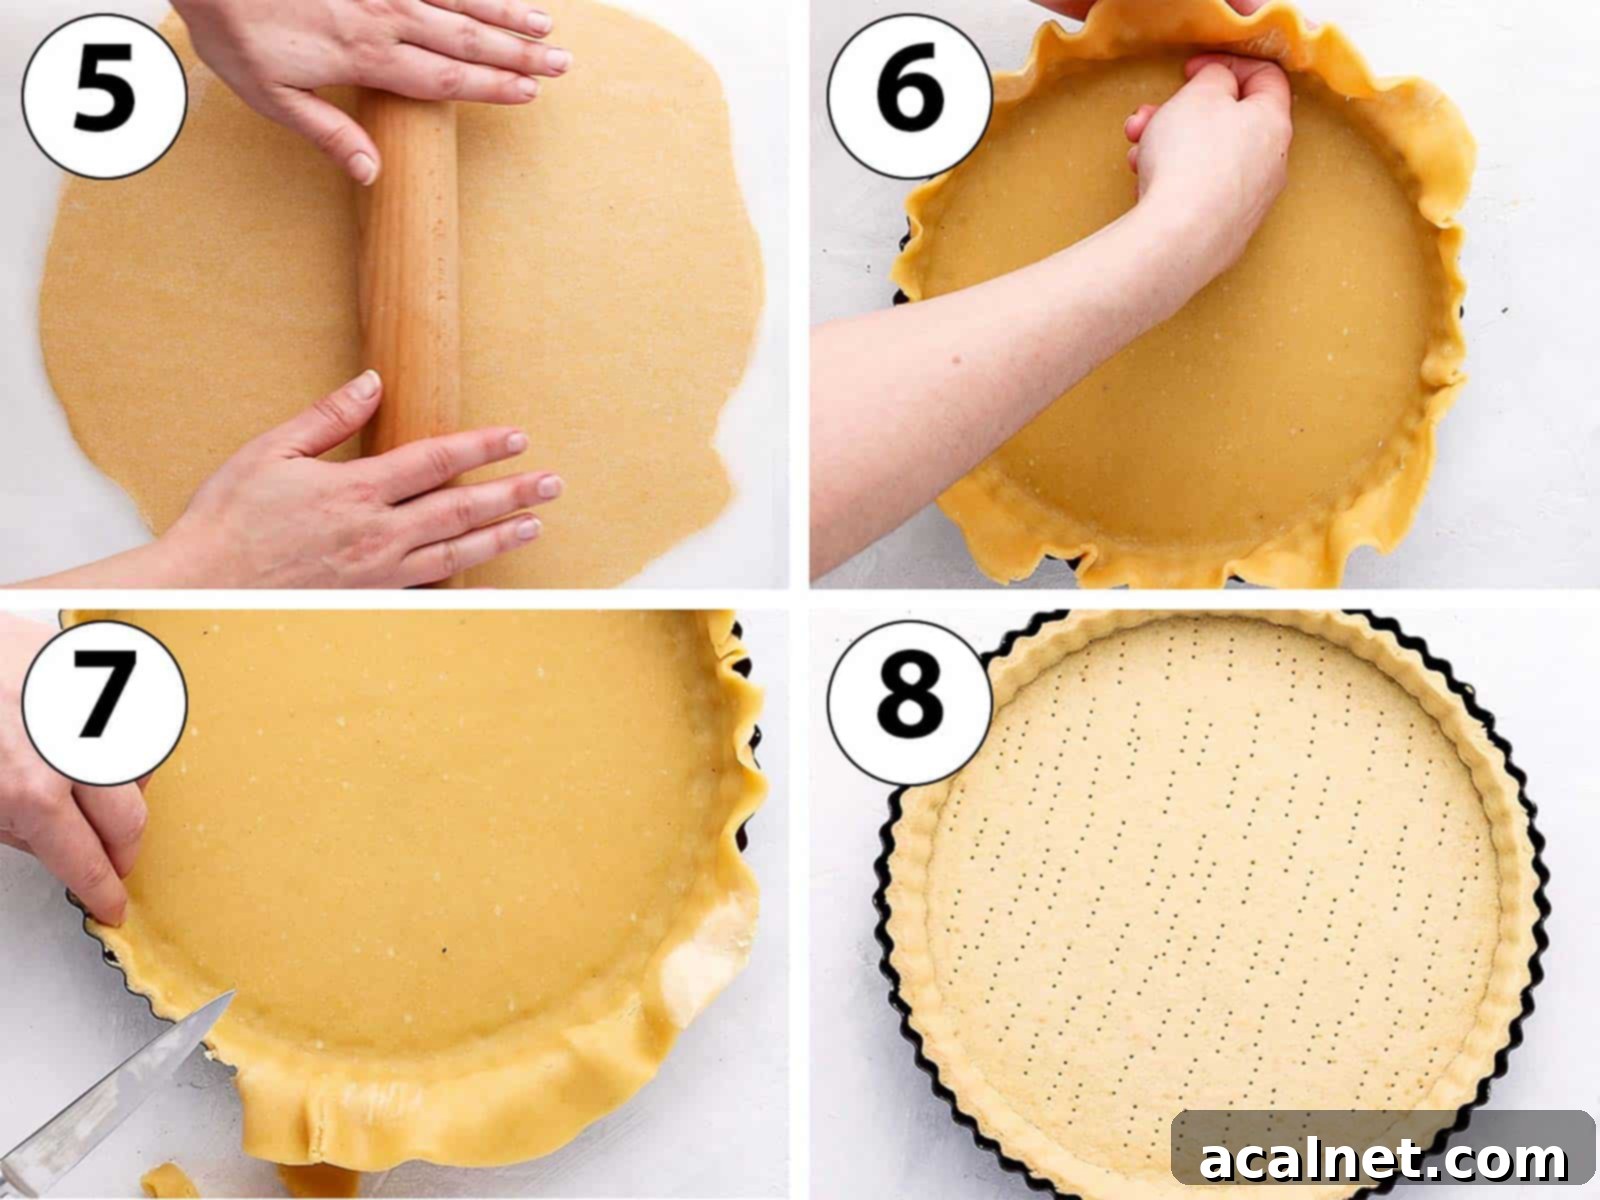
- Step 5 (Photo 5): Roll the pastry evenly to a thickness of approximately 4 mm (about 1/6 inch). For the most consistent results, especially if you’re aiming for a professional finish, I highly recommend using a rolling pin with thickness rings, which ensures a uniform thickness across the entire dough. Once rolled, place the entire pastry, still nestled between the parchment paper sheets, into the fridge to chill and rest for at least 1 hour, or ideally up to 24 hours. This chilling period is absolutely crucial to relax the gluten and firm up the butter, which prevents the pastry from shrinking excessively during baking.
- Step 6 (Photo 6): Carefully remove one sheet of baking paper and then gently invert the pastry into a 24 cm (9.5-inch) tart pan. A tart pan with a removable bottom is highly recommended for easy demolding and a pristine presentation. Gently peel off the second sheet of baking paper.
- Working quickly and gently, press the pastry dough down into the corners of the tart tin, ensuring it forms a neat 90-degree angle between the bottom and the sides. If the pastry cracks during this process, don’t worry—this is common with Pâte Sucrée. Simply use your fingers to gently patch up any tears. If the dough becomes too soft and difficult to handle at any point, place it back in the fridge for a few minutes to firm up. Conversely, if it’s too firm and resistant, let it sit at room temperature for a very short while to become pliable.
- Step 7 (Photo 7): Use a small, sharp pairing knife to carefully trim off any excess pastry around the edges, creating a clean and even finish. Once trimmed, place the lined tart pan back into the fridge for at least another hour, or preferably overnight (up to 24 hours). This second chilling period is paramount for preventing the crust from shrinking during the blind baking process.
- Step 8 (Photo 8): Preheat your oven to 160 degrees Celsius / 325 degrees Fahrenheit. While the oven preheats, “dock” the pastry by pricking the bottom all over with a fork. This prevents unsightly air bubbles from forming and keeps the base flat during baking. Place the tart tin directly into the freezer for a quick chill for about 10-15 minutes before baking.
- Blind Bake: Transfer the chilled, docked pastry directly to the preheated oven and blind bake for 15 to 20 minutes, or until the bottom appears dry to the touch and slightly golden. This step is absolutely essential for achieving a crisp base and preventing a soggy tart, especially with a moist filling like frangipane. If the pastry has been sufficiently chilled and rested as instructed, you should not need pie weights, dry beans, or rice for this par-baking step. We want the bottom to bake as much as possible and dry out before adding the wet filling. Once baked, carefully remove the tart crust from the oven and set it aside to cool completely on a wire rack.
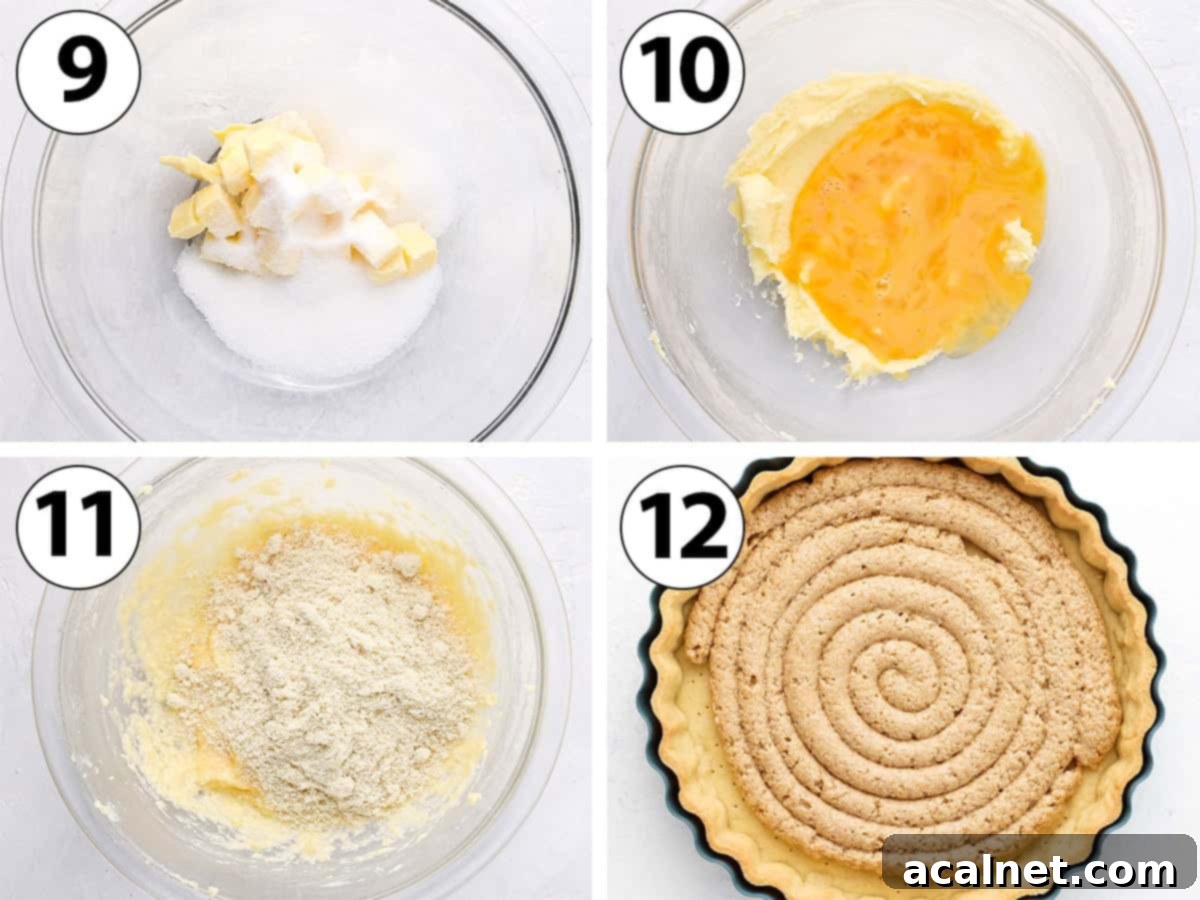
- Step 9 (Photo 9): In a medium-sized mixing bowl, combine the very soft, room temperature Unsalted Butter and Caster Sugar. Cream them together using either a hand mixer on medium speed or the paddle attachment of your stand mixer for about 2 to 3 minutes. The mixture should transform into a visibly light, fluffy, and very creamy consistency. This aeration is key to a tender and well-textured filling.
- Step 10 (Photo 10): In a separate small bowl, lightly whisk the Eggs until just combined. Gradually add the whisked eggs to the butter and sugar mixture, mixing slowly on low speed until they are fully incorporated. If your butter was a little too cold initially, the mixture might appear slightly curdled at first. Do not worry; this is normal, and it will smooth out once the almond meal is added.
- Step 11 (Photo 11): Gently fold in the Almond Meal and the optional Ground Cinnamon. Mix slowly and carefully until a thick, homogenous paste forms. Be diligent not to overmix at this stage; simply combine until all ingredients are well incorporated and the cream is smooth.
- Step 12 (Photo 12): Evenly spread the prepared almond filling over the cooled, par-baked tart crust. For a neat and consistent layer, I often find it helpful to place the cream in a pastry bag and pipe it, working from the outside in. However, a simple spoon or a small offset spatula will work just as effectively to spread the filling smoothly and evenly. Set the filled crust aside while you proceed with preparing the apples.
- Preheat your oven to 160 degrees Celsius / 325 degrees Fahrenheit once more.
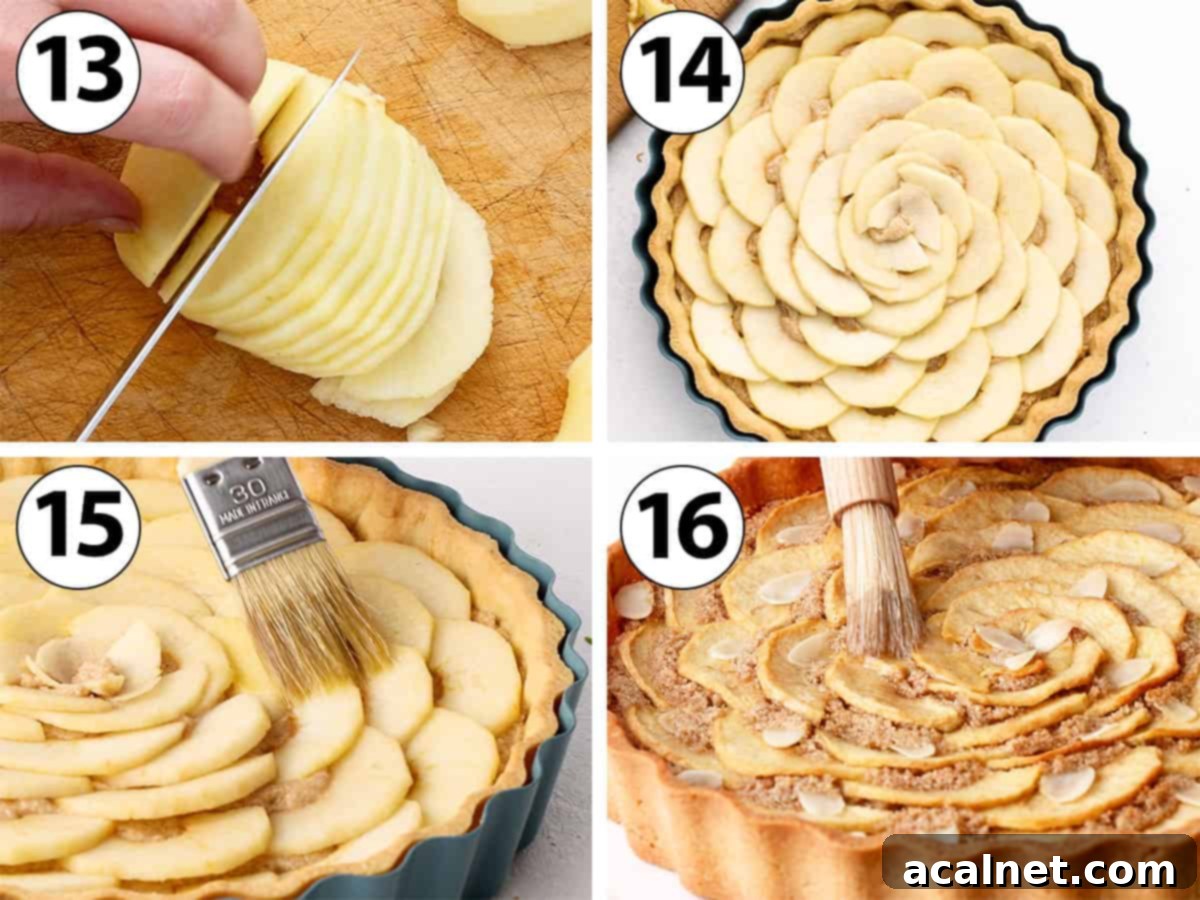
- Step 13 (Photo 13): Begin by carefully peeling, coring, and cutting your chosen apples in half. Using a very sharp knife, carefully slice each apple half into thin, uniform slices. The thinner and more consistent your slices, the more elegantly they will arrange on the tart, and the more evenly and tenderly they will cook during baking.
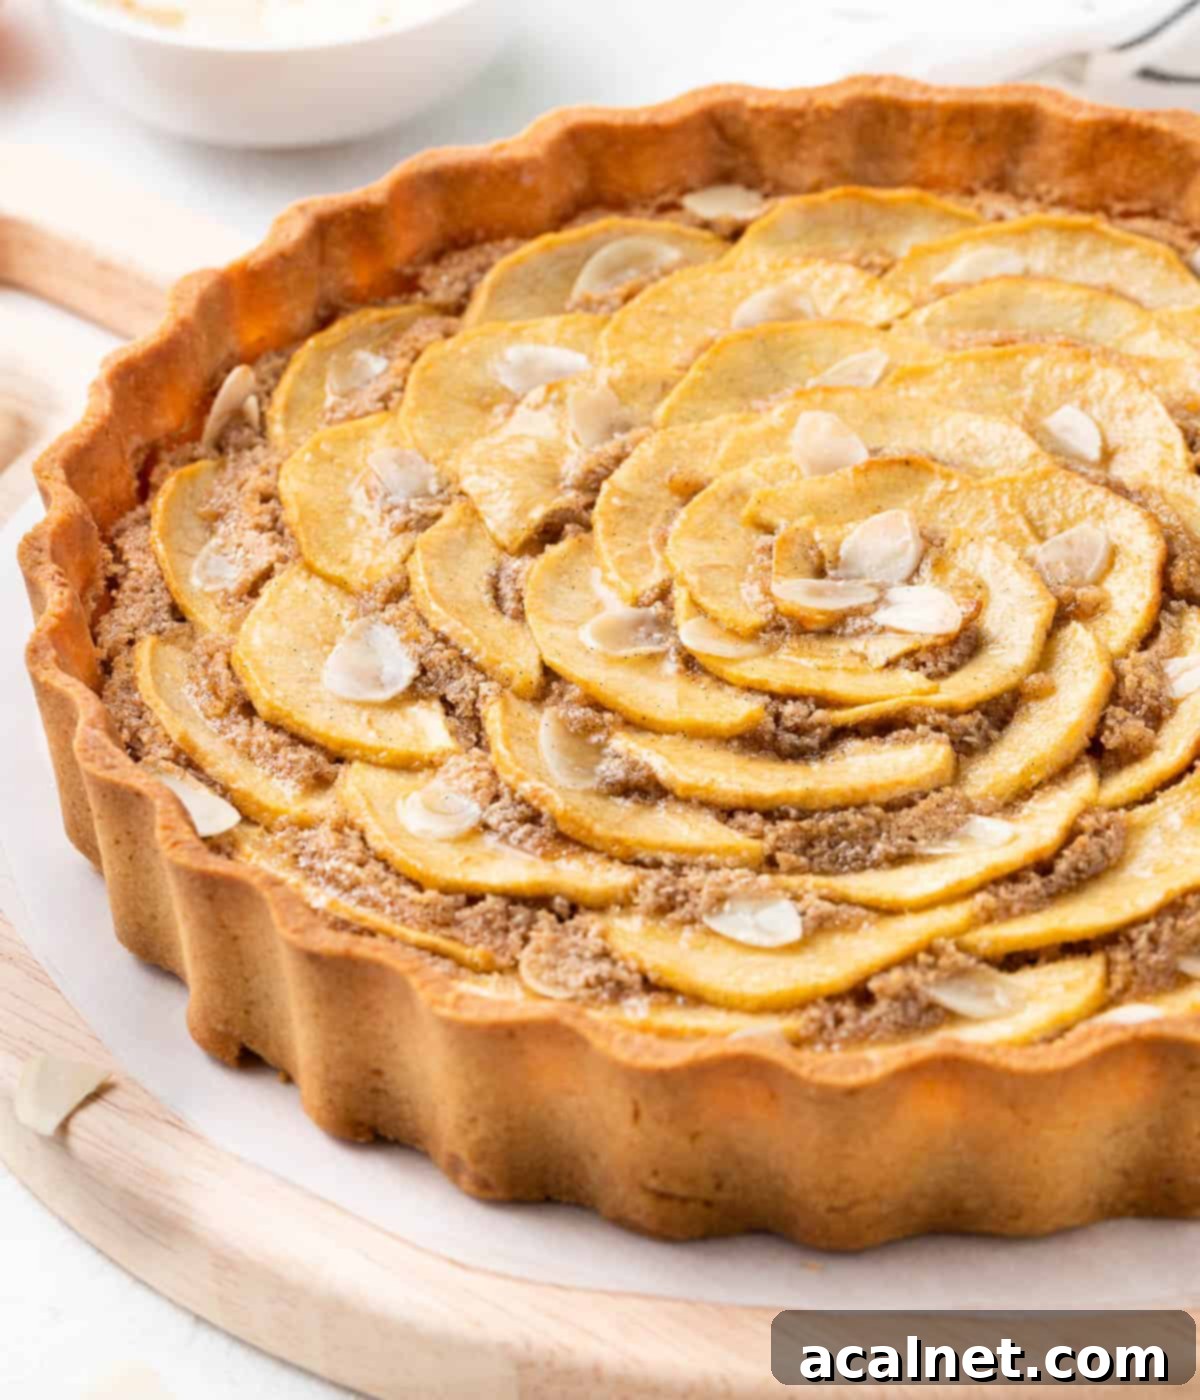
- Step 14 (Photo 14): Now, artfully arrange the thin apple slices over the almond cream filling. For a visually stunning “rose” pattern, start by creating concentric circles of apple slices, slightly overlapping each one. Begin from the outer edges of the tart and gracefully work your way inward towards the center. You have complete creative freedom here; use as many or as few apples as you prefer, layering them more tightly for a denser apple topping or more loosely for a lighter touch. I typically find that about 2 small apples are sufficient for a beautiful and balanced display.
- Step 15 (Photo 15): Melt the specified amount of butter and, using a clean pastry brush, gently and evenly brush it over all the arranged apple slices. This step is not just for flavor; it helps the apples caramelize beautifully, achieve a lovely golden-brown color, and prevents them from drying out in the oven, ensuring they remain tender.
- For an extra touch of texture and nutty flavor, optionally sprinkle some flaked almonds evenly over the top of the apples before baking. You could also sprinkle a little raw turbinado sugar over the tart for an additional crisp layer and a hint of sparkle on the fruit.
- Bake the assembled tart for 40 to 45 minutes, or until the almond filling has beautifully puffed up, appears golden brown, and the apples are tender when pierced with the tip of a knife. If you notice the apples browning too quickly before the tart is fully baked, you can loosely cover the tart with a piece of aluminum foil to prevent over-browning. Once baked to perfection, carefully remove the tart from the oven and place it on a wire rack to cool down completely.
- Step 16 (Photo 16): If you choose to add the optional vanilla syrup glaze, prepare it just as the tart is finishing its baking time. In a small saucepan, combine water, caster sugar, and a teaspoon of vanilla paste (or vanilla extract). Bring the mixture to a gentle simmer over medium-low heat for a few minutes. Allow it to simmer until the sugar has completely melted and the syrup begins to slightly thicken, coating the back of a spoon. Immediately after taking the warm apple frangipane tart out of the oven, gently brush the warm syrup over the entire surface of the apples. The syrup will thicken and become quite sticky as it cools, giving your tart a beautiful, professional shine and an extra layer of sweetness.
- Allow the tart to cool completely on the wire rack before attempting to remove it from the tart pan. Serving it lukewarm or cold, either on its own or accompanied by a dollop of pouring custard, a scoop of premium vanilla ice cream, or a spoonful of tangy crème fraîche, will create a truly decadent and memorable experience.
- Pink Lady Apples: My personal favorite, as they offer a fantastic balance of sweetness and tartness, and importantly, they maintain a lovely firm-yet-tender texture when baked. Their beautiful pink hue also adds visual appeal.
- Granny Smith Apples: For those who prefer a more tangy and crisp tart, Granny Smiths are an excellent, classic option. Their pronounced tartness beautifully contrasts the sweet almond cream, providing a refreshing bite.
- Crispin Apples (also known as Mutsu): These large, firm apples are wonderfully sweet and juicy, yet they remarkably hold their shape perfectly during baking, providing a satisfyingly tender bite without becoming mushy.
- Golden Delicious Apples: Another great choice for a sweeter finish, these apples become incredibly soft, mellow, and aromatic when baked, offering a comforting, classic apple flavor.
- Honeycrisp or Fuji: These popular varieties also work exceptionally well in tarts, offering a good balance of sweetness, slight tartness, and a desirable crisp-tender texture after baking.
- Apricot Jam Glaze: Warm about 2-3 tablespoons of good quality apricot jam with one or two teaspoons of water or fruit juice in a small saucepan over low heat until it thins out and becomes easily brushable. For an extra smooth and refined glaze, you can press it through a fine-mesh sieve before brushing over the warm tart.
- Powdered Sugar Dusting: For a simpler, yet undeniably elegant finish, allow the tart to cool completely, then lightly dust the top with a fine layer of powdered sugar (also known as confectioner’s sugar) just before serving. This creates a beautiful, delicate snowy effect.
- The Secret to a Non-Shrinking Crust: Chilling is Key! The single most important factor for preventing your Pâte Sucrée from shrinking, cracking, or collapsing in the oven is ample chilling and resting time. After you’ve rolled the pastry and carefully lined your tart tin, place it back into the fridge for a substantial amount of time – ideally overnight (for at least 8-12 hours), or for a minimum of 2 hours. This extended chilling period allows the gluten strands in the dough to fully relax and the butter to firm up completely, ensuring the pastry holds its delicate shape beautifully during baking. Do not rush this critical step!
- Preparing the Almond Cream in Advance: For ultimate convenience and to break down the baking process, the almond cream filling can be prepared up to 24 hours ahead of time. Store it in the fridge in an airtight container, or if you prefer, keep it in its mixing bowl, ensuring you cover the surface directly with plastic wrap. This prevents a skin from forming and keeps the cream fresh. Before assembling your tart, remember to let the cream come back to room temperature for about 15-30 minutes. This will soften it sufficiently, making it much easier to spread smoothly and evenly over the par-baked crust.
- How to Tell When Frangipane is Cooked: A perfectly baked frangipane filling will have risen and puffed up slightly, becoming beautifully golden brown on top. When gently pressed in the center, it should feel firm to the touch but still have a slight, delicate give, indicating a moist and tender interior. It’s absolutely crucial to bake the tart at the recommended lower temperature (160°C/325°F). A high oven temperature can cause the butter within the filling to melt too quickly and seep out, resulting in a dense, greasy, or even soggy cream rather than the desired light, custardy texture. Slow and steady baking ensures a beautifully set and tender filling.
- Thin Apple Slices for Elegance and Even Cooking: Always aim for uniformly thin apple slices. This not only allows for a more elegant and artful arrangement (such as the rose pattern shown) but also ensures that the apples cook evenly and become perfectly tender without being overly soft or disintegrating. A mandoline slicer can be an invaluable tool for achieving consistent thickness if you have one, but a sharp chef’s knife and careful technique will work just as well.
- Preventing a Soggy Bottom: Your best defense against a dreaded soggy tart bottom is the proper blind baking of your Pâte Sucrée. Ensure the crust feels thoroughly dry to the touch after its initial bake. Additionally, avoid stacking too many apples directly over the center of the tart, as this can release excess moisture. If your apples are particularly juicy, you might even consider tossing them lightly with a teaspoon of flour or cornstarch before arranging them, which helps absorb any released liquid.
- Pastry: The prepared pastry dough can be stored for up to 24 hours in the fridge. You have two convenient options: either roll it out flat between two sheets of baking paper or, for even greater convenience, line it directly into your tart tin. In either case, ensure it is thoroughly covered with plastic wrap or a crumpled piece of baking paper to prevent it from drying out and absorbing fridge odors.
- Almond Cream: The almond cream should be stored in the fridge. It’s crucial to cover it with plastic wrap that directly touches the surface of the cream. This prevents a dry skin from forming and keeps the cream fresh and moist. Before using, allow it to sit at room temperature for 15-30 minutes to soften slightly, which will make it much easier to spread smoothly onto the tart crust.
- Vibrant and Zesty French Orange Tart
- Sweet and Tangy Rhubarb Tart with Creamy Custard
- Rich and Decadent French Chocolate Ganache Tart
- Simple yet Elegantly Classic French Apple Tart
- Indulgent Chocolate and Tart Raspberry Tart
- Classic and Creamy Strawberry Custard Tart
- Bright, Zesty, and Refreshing Lemon Curd Tart
- Caramelized and Delicious Peach Tarte Tatin
- Charming Rustic Blackberry Tart (Blackberry Galette)
- Quick & Easy Puff Pastry Apple Tart
- Exotic and Tangy Passion Fruit Tart
- 100 gr Unsalted Butter, soft, at room temperature
- 50 gr Icing Sugar, sifted
- 1 large Egg, at room temperature
- 50 gr Almond Meal
- 200 gr Plain / All-Purpose Flour
- 1 pinch Fine Table Salt
- 100 gr Unsalted Butter, soft, at room temperature
- 75 gr Caster Sugar
- 2 large Eggs
- 100 gr Almond Meal
- 1 teaspoon Ground Cinnamon, optional
- 15 gr Unsalted Butter, melted
- 2 to 3 small Apples
- Almond Flakes, to taste, optional
- 30 ml Water
- 30 gr Caster Sugar
- 1 teaspoon Vanilla Paste, or vanilla extract
- Place the soft Butter and sifted Icing Sugar in the bowl of your stand mixer fitted with the paddle attachment. Cream together for a couple of minutes or until light and smooth.
- Mix in the Egg and Almond Meal, stopping to scrape the side of the bowl when required. Add the sifted Flour and Salt and slowly mix until it the mixture comes together into a rough mixture (see note 1).
- Place the pastry over a large sheet of baking paper. Do a “fraisage“: With the palm of your hand, gently press the dough out then pick it back and place back over the centre of the pastry. Keep on going until the dough is very smooth.
- Cover with a second sheet of baking paper. Roll into a large disk that is about 4 mm (1/8 inch) thick (see note 2). Place in the fridge to chill and rest for at least 1 hour, or up to 24 hours.
- Remove the baking paper and place inside a 24 cm / 9,5-inch Tart Pan with Removable Bottom. Gently press the pastry down into the corner of the pan to create a 90 degree angle (see note 3). Cut off any excess with a small pairing knife and place back in the fridge for at least 1 hour, preferably overnight (or up to 24 hours).
- Dock the pastry (prick the bottom of the pastry with a fork) and place it in the freezer while you preheat your oven on 160 degree Celsius / 325 degree Fahrenheit. Take out of the freezer and bake for 15 to 20 minutes or until the bottom feels dry to the touch (see note 4). Set aside to cool down.
- In a medium size bowl, cream together the soft Butter and Sugar on medium speed for about 3 minutes (using a hand mixer – or in your stand mixer). The mixture should appear soft and smooth.
- Slowly mix in the eggs (I pre-whisk them separately first) until fully incorporated (see note 5). Add the Almond Meal and Cinnamon and slowly mix until a thick paste comes together.
- Spread the almond filling over the par-baked tart crust (see note 6) and set aside.
- Preheat your oven on 160 degree Celsius / 325 degree Fahrenheit.
- Melt the butter and set aside. Peel, core and cut the apples in half. Using a sharp knife, cut out each halve into thin slices.
- Place the apple slices over the almond cream. To make a rose pattern, layer the apple slices in circles (slightly overlapping each slice), starting from the edges of the tart and making your way towards the centre (see note 7)
- Brush the apple slices with the melted butter and optionally top with some flaked almonds.
- Bake for 40 to 45 minutes, or until the almond filling has puffed up slightly and the apples are soft.
- Optionally, preparing a simply syrup while the tart is finishing baking (see note 8). Place the water, sugar and vanilla in a small saucepan and cook on medium low for a few minutes. Leave to simmer until the sugar has melted and the syrup starts to slightly thicken.
- Brush the hot syrup over the tart when just out of the oven. Leave to cool down completely before removing from the tart pan.
- Stop mixing as soon as all the flour has been incorporated to avoid overworking the pastry.
- I recommend using a rolling pin with thickness rings to get an even thickness.
- If the pastry seems to be too hard to easily handle, leave it to come back to room temperature for a few minutes. If it gets too soft, place back in the fridge for a few minutes. If the pastry cracks, simply patch it up with your fingers.
- I am not using any pie weights here as we are trying to bake the bottom of the pastry as much as we can before adding the filling. If the pastry has been properly chilled and rested, it shouldn’t need any weights to keep its shape.
- If the butter was too cold, the mixture might start to curdle. Don’t worry, it will come back together later.
- I placed the cream in a pastry bag to evenly pipe it over the tart but you can simply use a spoon or small offset spatula.
- You can add as much or as little apples as you want here; simply layer the apple slices more tightly to use more apples. I ended up using about 2 small apples.
- Alternatively, you could also mix some apricot jam with a little bit of water to thin it out. It will give you a similar sweet glaze effect.
3. Crafting the Luxurious Almond Cream Filling
The almond cream is what truly defines the frangipane tart, providing a rich, moist, and wonderfully flavorful core that beautifully complements the crisp pastry and tender apples. This filling is surprisingly quick and easy to make, and like the pastry, it can also be prepared in advance to streamline your baking process.
Make Ahead Tip: The almond cream filling is very stable and can be prepared up to a day (24 hours) in advance. Store it in an airtight container in the fridge, or if keeping it in your mixing bowl, ensure you press plastic wrap directly onto the surface of the cream. This prevents a skin from forming and keeps the cream fresh. Before assembling your tart, allow the filling to return to room temperature for about 15-30 minutes so it softens sufficiently, making it much easier to spread smoothly and evenly over the par-baked crust.
4. Preparing the Apples and Assembling for Baking
Apple Frangipane Tart: Your Frequently Asked Questions Answered
While often used interchangeably in home baking, in classic French patisserie, “frangipane” and “almond cream” (crème d’amande) are technically distinct. Almond cream is a simple, rich blend of butter, sugar, ground almonds, and eggs. Frangipane cream, on the other hand, is a more elaborate and richer mixture made by combining almond cream with Crème Pâtissière (pastry cream). This more complex cream is traditionally used for specific, elaborate pastries such as the Galette des Rois. However, for most home baking recipes, especially for fruit tarts like this Apple Frangipane Tart, the term “frangipane” is commonly used to refer to the dessert as a whole, with almond cream serving as its delightful, nutty filling.
No, a Bakewell Tart and a Frangipane Tart are distinct desserts, though both proudly feature an almond-based filling. A classic Bakewell Tart, a beloved British pastry, typically consists of a shortcrust pastry base, a generous layer of fruit jam (most commonly raspberry or strawberry), and then a layer of almond sponge or frangipane, often topped with a sprinkling of flaked almonds and sometimes a decorative icing. A Frangipane Tart, as featured in this recipe, also uses a sweet pastry crust and a rich almond cream filling but is almost always topped with fresh or poached fruits and doesn’t traditionally include a jam layer unless specified as a specific variation. The key difference primarily lies in the essential inclusion of a fruit jam layer in the Bakewell Tart, along with its characteristic almond sponge top, versus the direct fruit topping on a Frangipane Tart.
Choosing the right apple variety is absolutely crucial for a successful and delicious apple tart. You want apples that hold their shape and texture well during baking, softening beautifully without turning mushy or releasing excessive amounts of water, which could easily make your pastry crust soggy. Here are some excellent choices that bakers often recommend:
It’s best to avoid overly soft or very watery apple varieties (like Red Delicious), as they tend to break down too much and can lead to a less appealing, soggy texture in the finished tart. Sometimes, a mix of two varieties (one tart, one sweet) can provide the most complex flavor profile.
A simple syrup glaze provides a beautiful, irresistible glossy finish to your Apple Frangipane Tart, making it look professionally baked and enhancing its visual appeal. To make this easy glaze, simply combine equal quantities of water and caster sugar (for example, 30ml water and 30gr sugar) in a small saucepan. For an extra layer of flavor and aroma, you can add an optional hint of vanilla paste or vanilla extract. Bring the mixture to a gentle simmer over medium-low heat, stirring occasionally until all the sugar has completely dissolved and the syrup begins to slightly thicken, enough to lightly coat the back of a spoon. Immediately after taking the tart out of the oven, generously brush this warm syrup over the entire surface of the apples.
Alternative Glazes for a Shiny Finish: If you prefer not to make a simple syrup or are looking for different flavor notes, you can achieve a similar sweet glaze effect using these alternatives:
Expert Tips & Tricks for a Flawless Apple Frangipane Tart
Achieving a truly exceptional Apple Frangipane Tart comes down to understanding and implementing a few key techniques and helpful tricks. Keep these expert tips in mind to ensure your tart is perfectly baked, beautifully presented, and utterly delicious every single time:
Storing & Freezing Your Apple Frangipane Tart
Making Ahead: Both the Sweet Shortcrust Pastry and the Almond Cream Filling are excellent candidates for advance preparation, which can significantly reduce stress and save time on your baking day. You can easily prepare both components up to 24 hours before you plan to bake the complete tart.
Storing Baked Tart: Once fully baked and cooled, the Apple Frangipane Tart should be stored in an airtight container in the fridge. It will remain wonderfully delicious and fresh for up to 3 days. While it can certainly be enjoyed cold, many people find that its flavors and textures truly shine when it’s slightly re-heated in a warm oven (around 150°C/300°F) for about 10-15 minutes before serving. This gentle reheating allows the butter and spices to bloom again, enhancing its comforting aroma and taste.
Freezing: I generally do not recommend freezing the fully baked Apple Frangipane Tart. The delicate texture of the pastry can become somewhat soft and crumbly upon thawing, and the apples might release too much moisture, potentially impacting the overall quality and delightful crispness. However, you can successfully freeze the unbaked pastry dough. Freeze it either rolled out flat between parchment paper (which makes it easy to store) or already lined in your tart pan. Ensure it’s wrapped very tightly in multiple layers of plastic wrap and then foil to prevent freezer burn. When ready to use, thaw the frozen pastry in the fridge overnight before proceeding with the blind baking and assembly steps of the recipe.
Discover More Delicious Tart Recipes from Our Kitchen
If you’ve fallen in love with the art of tart making and are eager to explore more delightful creations, you’re in for a treat! Expanding your baking repertoire with new and exciting tart recipes is a rewarding journey. These other fantastic tart creations from our kitchen are perfect for any occasion, from casual family desserts to elegant gatherings:
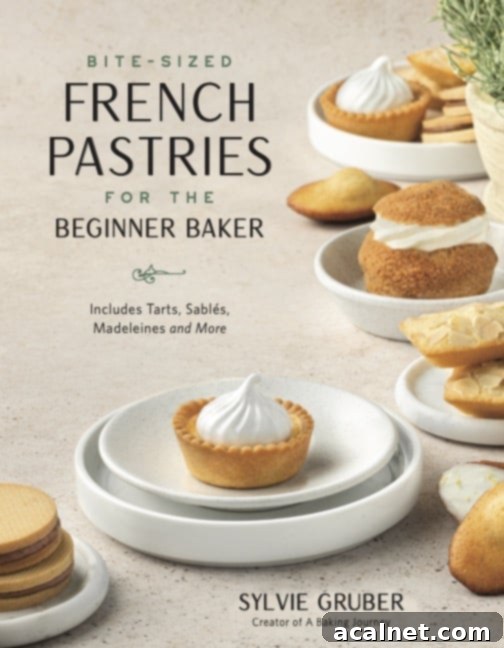
I am so excited to share that my debut cookbook
“Bite-Sized French Pastries for the Beginner Baker”
is now available for purchase!
Recipe Card

Apple Frangipane Tart
Print Recipe
Ingredients
Sweet Shortcrust Pastry (Pate Sucree)
Almond Cream Filling
Apple Topping
Vanilla Syrup Glaze (optional)
Instructions
Sweet Shortcrust Pastry (Pate Sucree)
Almond Cream Filling
Apple Topping
Vanilla Syrup Glaze (optional)
Video
Would you like to save this recipe?
We’ll email this post to you, so you can come back to it later!
Notes
Nutrition (per serving)
Made this recipe?
Let us know if you liked it by leaving a comment below, and tag us on Instagram @a.baking.journey with a photo of your creation!
