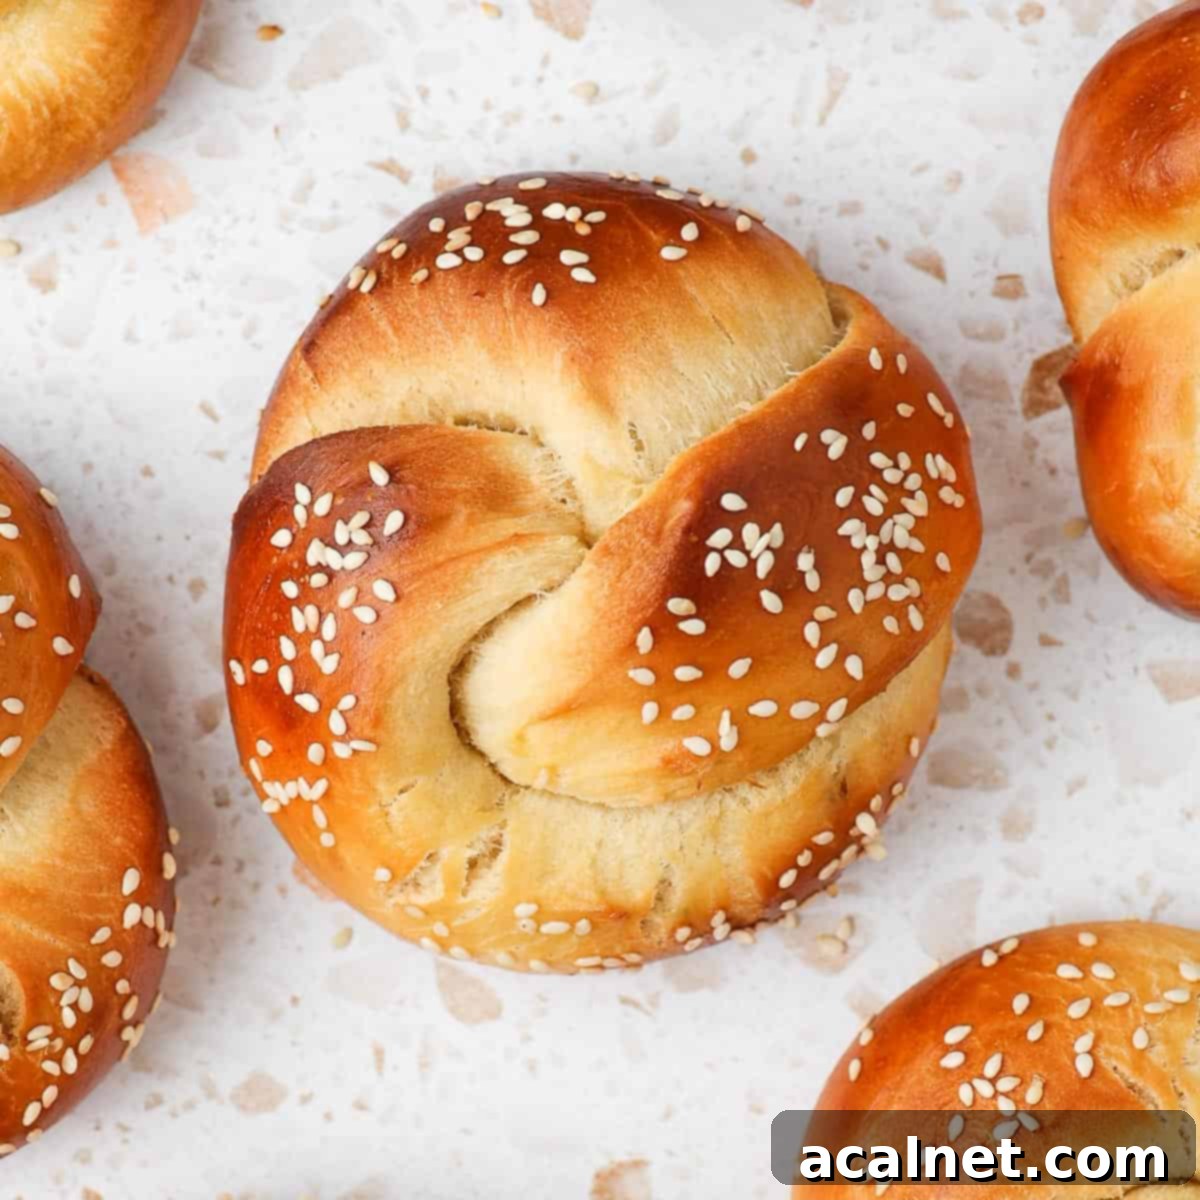
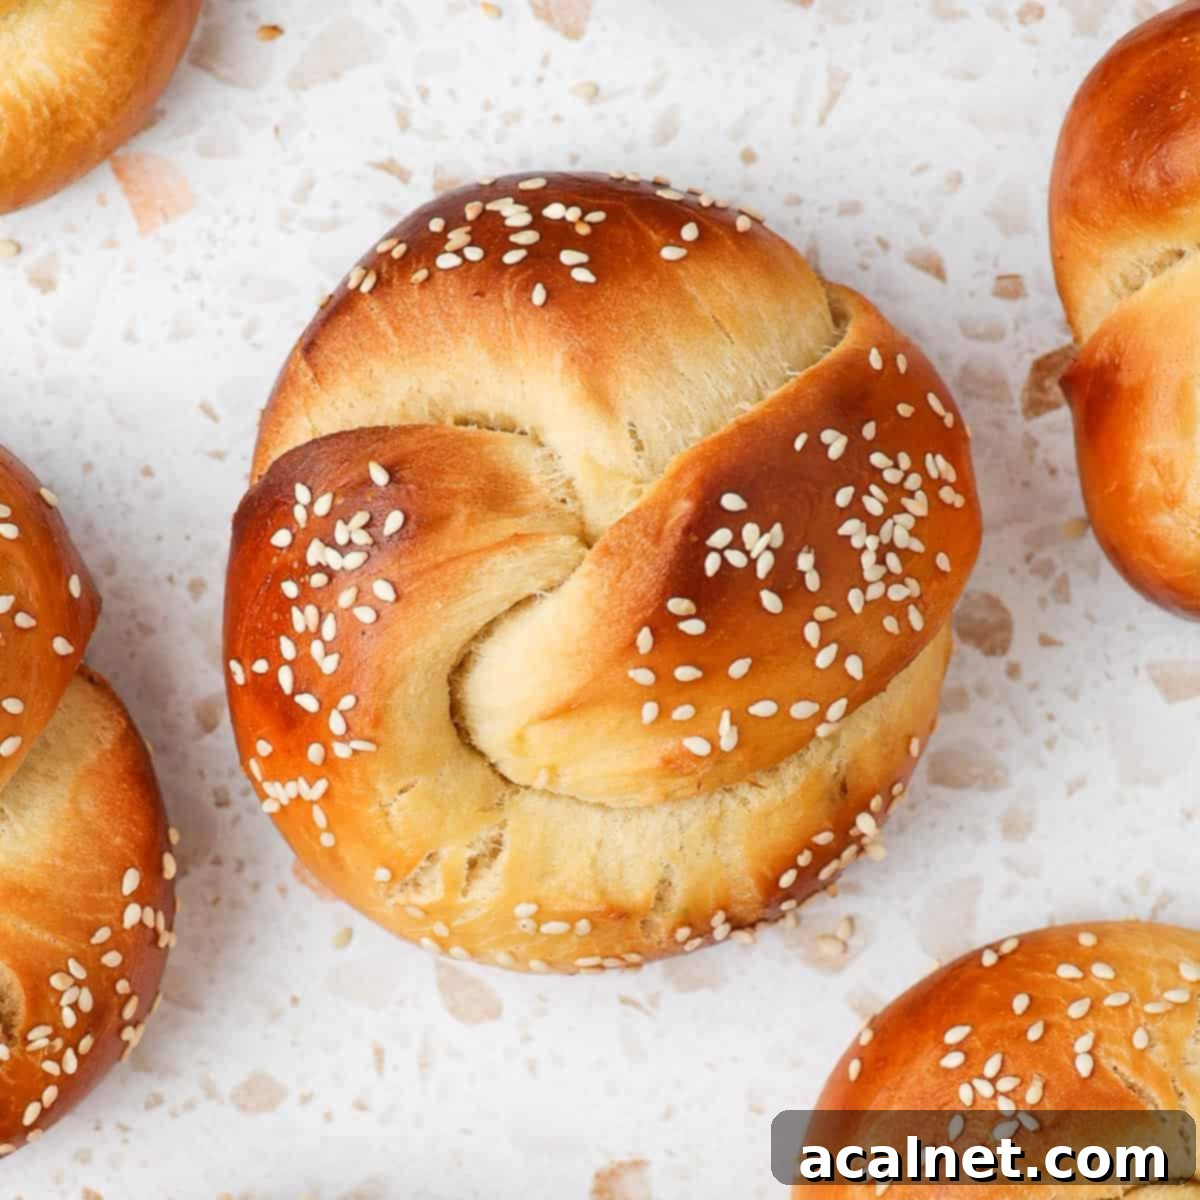
Mastering Mini Challah Rolls: Your Guide to Soft, Sweet, and Beautifully Braided Buns
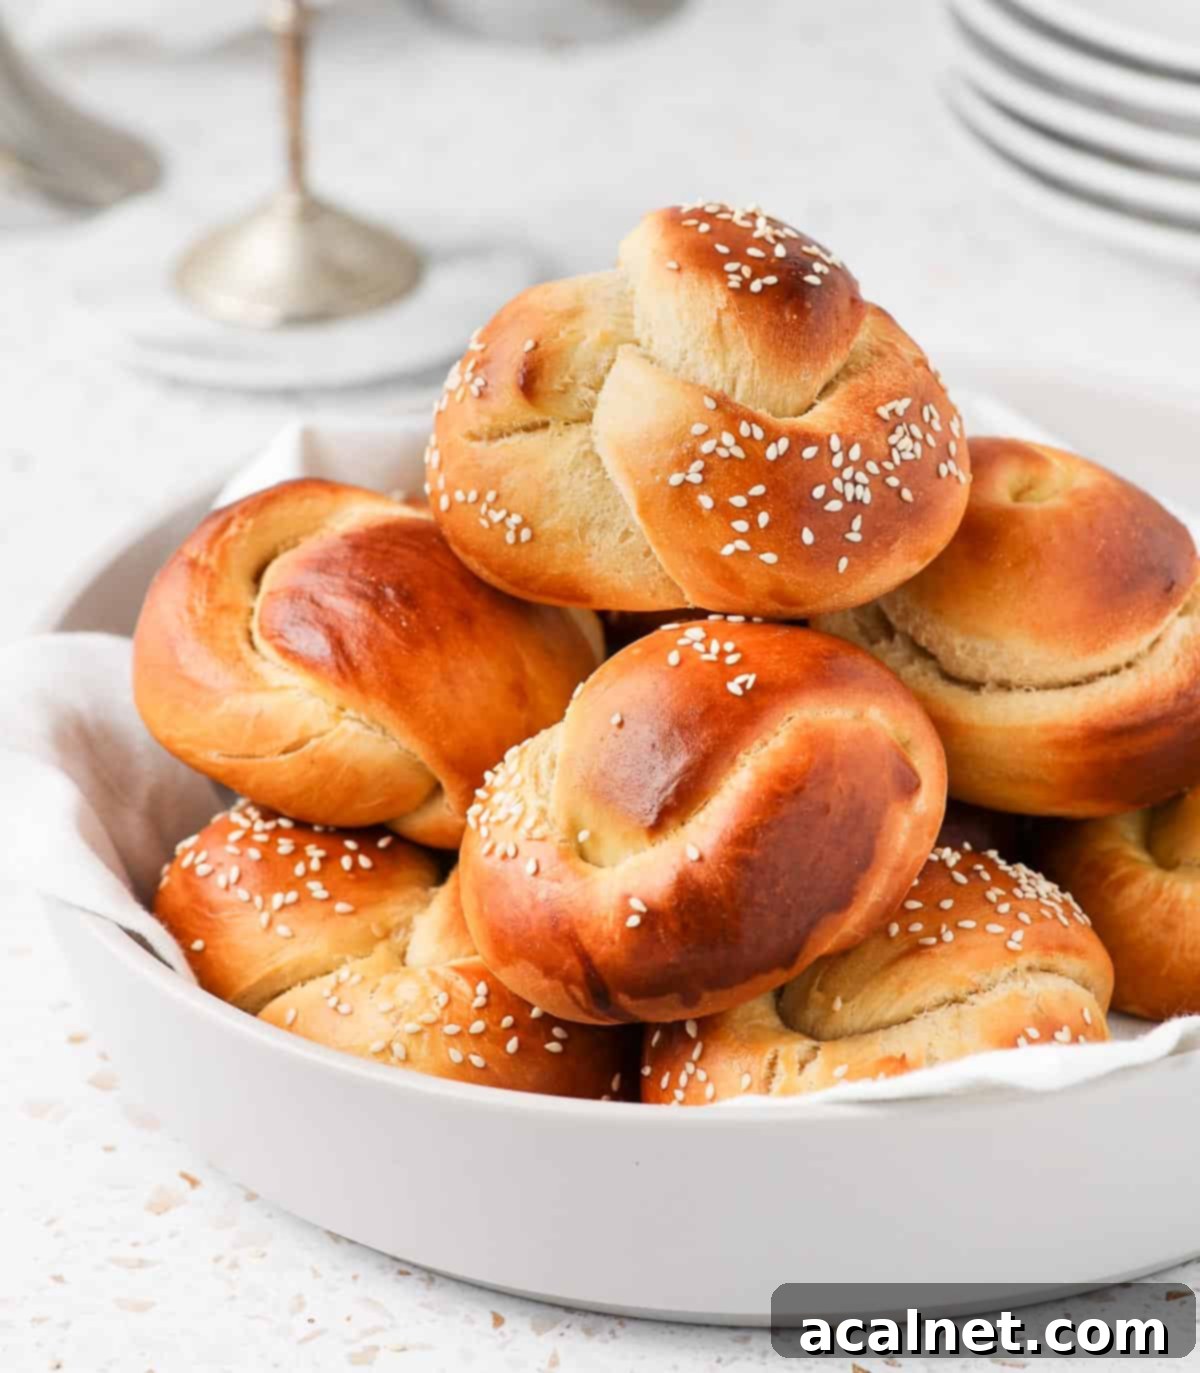
Prepare to delight your senses with these incredible Mini Challah Rolls – a smaller, more versatile take on the classic Jewish braided bread. Each roll is a masterpiece of baking: wonderfully soft, irresistibly fluffy, and delicately sweet, making them truly melt-in-your-mouth tender. Whether you’re planning a cherished Shabbat dinner, celebrating a special holiday, or simply seeking the perfect accompaniment for your weeknight meals, these individual challah buns are an absolute dream. This comprehensive guide will walk you through every step of making challah dough from scratch, and we’ll unveil four distinct and beautiful techniques to shape them, ensuring your homemade challah is both delicious and visually stunning.
[feast_advanced_jump_to]
Why You’ll Adore This Mini Challah Rolls Recipe
For many, Challah is more than just bread; it’s a symbol of warmth, tradition, and togetherness. At my house, the aroma of freshly baked challah fills the air every Friday night for Shabbat, instantly bringing to mind cherished family moments. This delicious, sweet, and enriched bread truly tastes like comfort and tradition.
These challah rolls offer a delightful modern twist on the classic large braided loaf traditionally served for Shabbat and other Jewish Holidays. Instead of the communal tearing of a single large loaf, these individual mini challah buns provide a perfectly portioned, elegant serving for each guest. They’re not just convenient; they’re incredibly charming and add a touch of personal hospitality to any gathering.
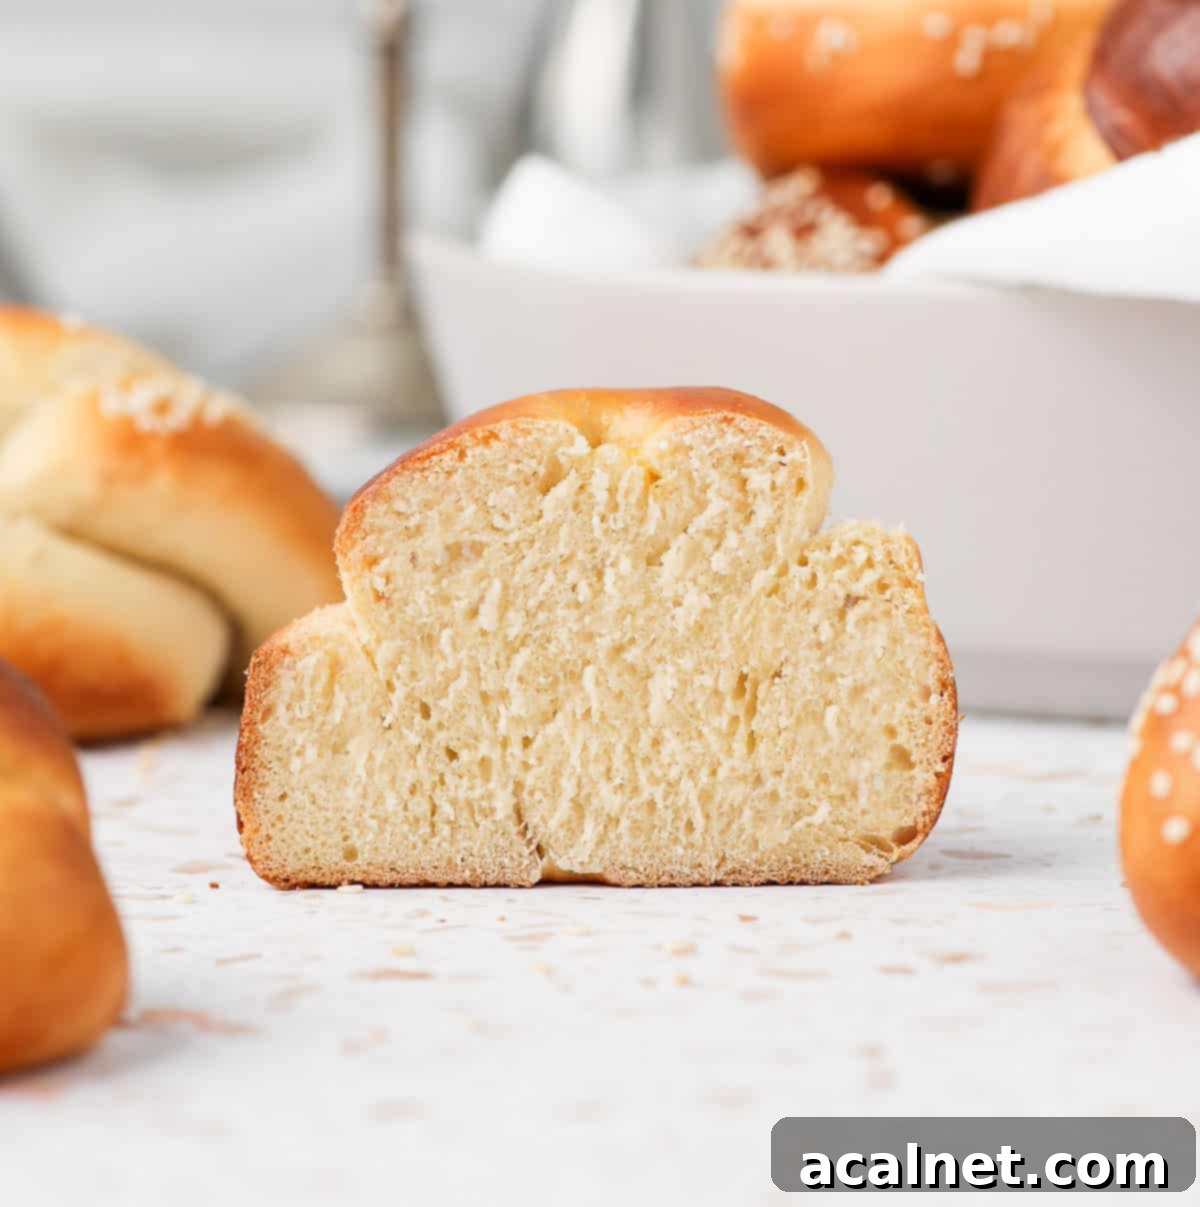
This particular mini challah rolls recipe is meticulously crafted to yield an impossibly light, wonderfully fluffy, and perfectly sweet bread bun. The exterior bakes to a beautiful golden hue, offering a satisfyingly tender crust, while the interior remains extraordinarily soft and airy. You can further enhance their appeal and texture by topping them with your favorite seeds, such as classic Sesame Seeds or Poppy Seeds, for an added layer of crunch and flavor. These toppings don’t just look great; they elevate the entire sensory experience of biting into a freshly baked challah roll.
Beyond their traditional role, these versatile rolls shine in many culinary applications. They are fantastic served simply as dinner rolls, complementing any meal. But their magic doesn’t stop there! Imagine them transformed into the most incredible French Toast the very next morning – their enriched, slightly sweet crumb makes them ideal for soaking up custardy batter. They are also perfectly sized to be used as soft, tender slider buns for mini burgers, or as the foundation for gourmet sandwiches, proving their adaptability in any kitchen.
Essential Ingredients for Perfect Challah Rolls
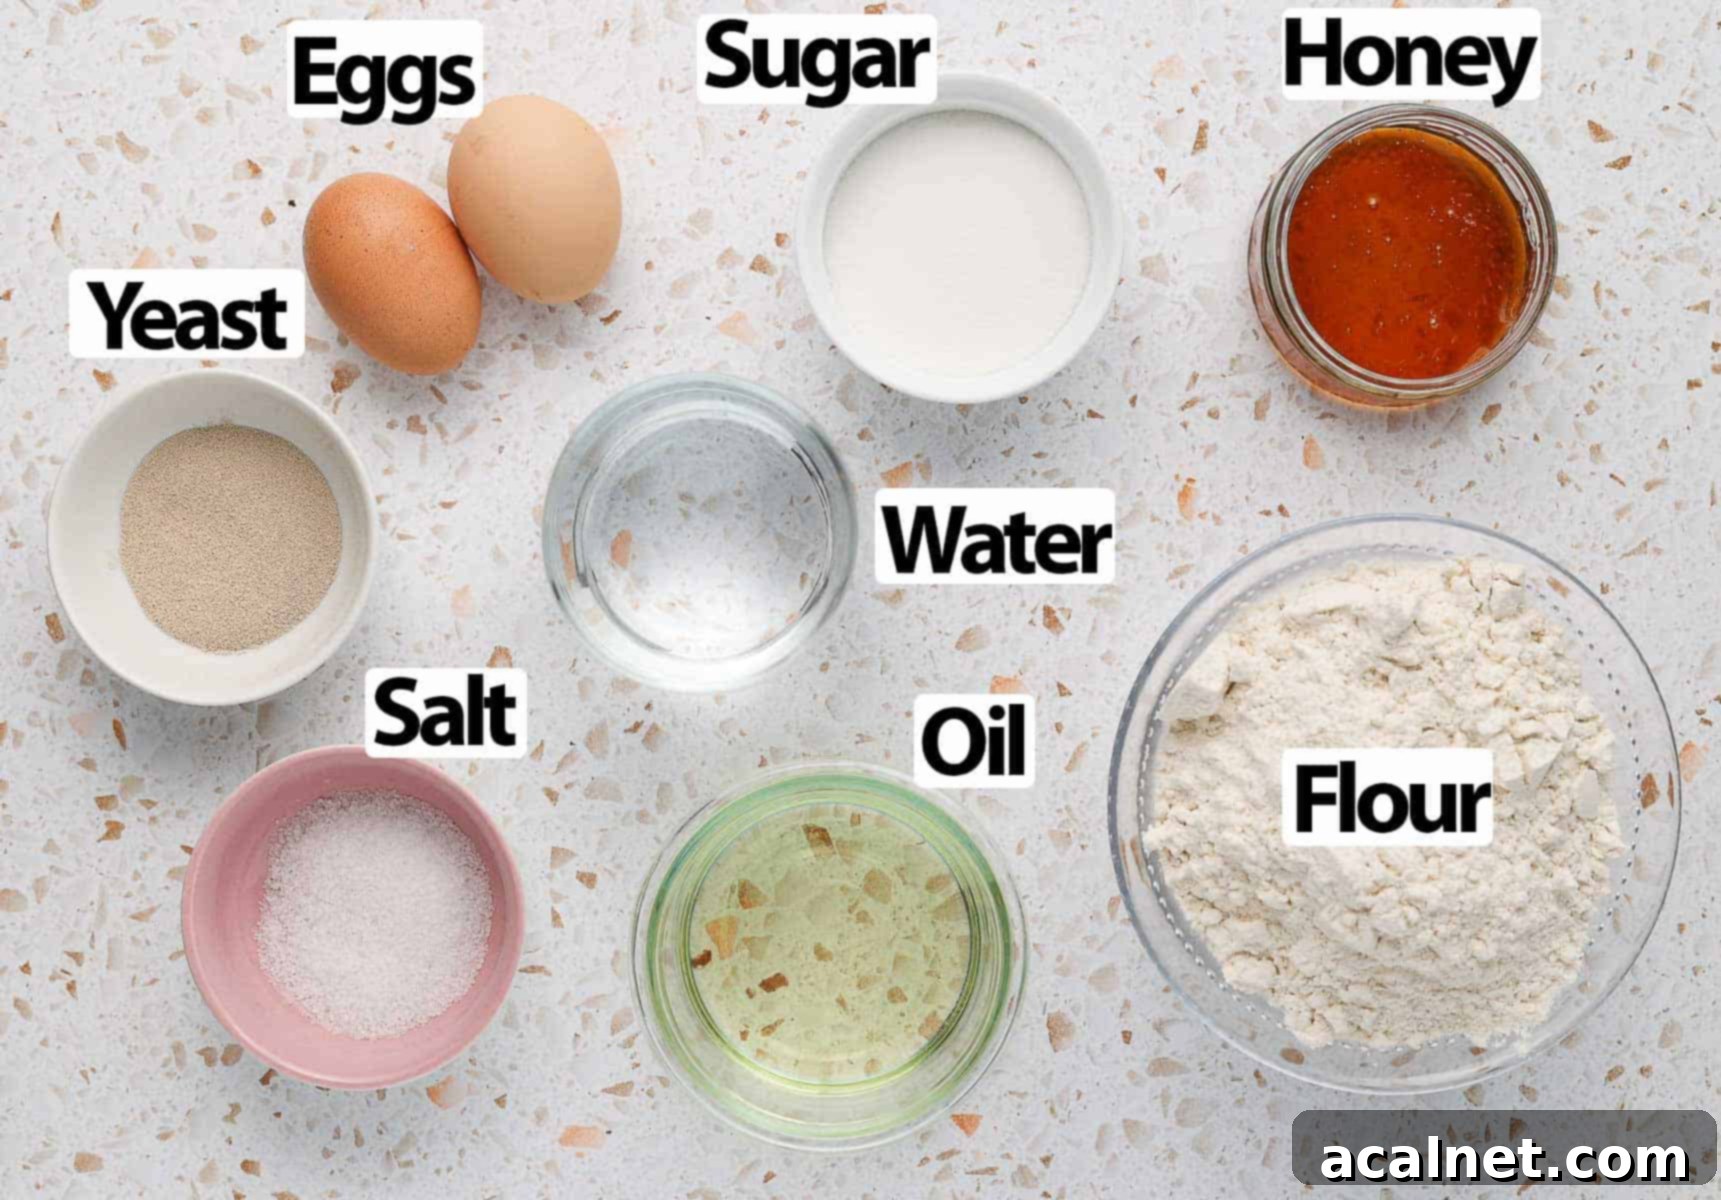
Challah dough is a distinguished type of enriched yeasted dough, sharing many characteristics with its French cousin, Brioche. However, a key traditional difference is that challah is made without any dairy products, making it a dairy-free enriched bread. The following ingredients are crucial for achieving the perfect soft and sweet challah rolls. All specific quantities can be found in the recipe card below.
- Water: Use lukewarm water, ideally around 35 degrees Celsius (95°F). The temperature is vital; water that’s too hot will kill the yeast, preventing your dough from rising, while water that’s too cold will significantly slow down or halt its activation.
- Yeast: I’ve opted for Instant (dry) Yeast for its convenience and reliability, as it can be mixed directly with the dry ingredients. If you’re using Active Dry Yeast, remember to properly bloom it in the lukewarm water and sugar mixture first to ensure it’s active and ready to work its magic.
- Eggs: Medium-sized eggs, brought to room temperature, are essential for this recipe. Eggs contribute to the rich color, tender crumb, and overall structure of the challah. While I haven’t tested this specific recipe with egg replacers, many excellent vegan challah recipes are available if you prefer a plant-based option.
- Honey: The use of honey is what makes this challah recipe truly special. It imparts a unique, delicious sweet and subtly floral taste that granulated sugar alone cannot replicate. Honey also helps the crust achieve that beautiful golden-brown color. If you don’t have honey, maple syrup can be used as a suitable substitute.
- Oil: Canola Oil is my go-to for its neutral flavor, allowing the natural taste of the challah to shine. However, any neutral-flavored cooking oil, such as vegetable oil or grapeseed oil, will work equally well. The oil provides richness and moisture, contributing to the challah’s characteristic softness without introducing dairy.
- Flour: A distinguishing characteristic of this enriched bread is its reliance on Plain / All-Purpose Flour, rather than high-protein bread flour. This choice of flour is deliberate, as it helps achieve the lighter, incredibly soft, and tender crumb that challah is famous for.
Optional Additions to Customize Your Challah
This versatile challah bread recipe serves as a fantastic base for customization. Feel free to infuse the dough with your favorite complementary ingredients. For a touch of warmth and spice, consider adding a pinch of ground cinnamon to the dough. If you enjoy a fruity note, raisins or dried cranberries can be kneaded in, adding bursts of sweetness and texture. Other creative additions include orange zest for a bright citrus aroma, or even a hint of saffron for an exotic, golden hue and unique flavor.
How to Bake Delicious Challah Rolls: A Step-by-Step Guide
Crafting the Perfect Challah Bread Dough
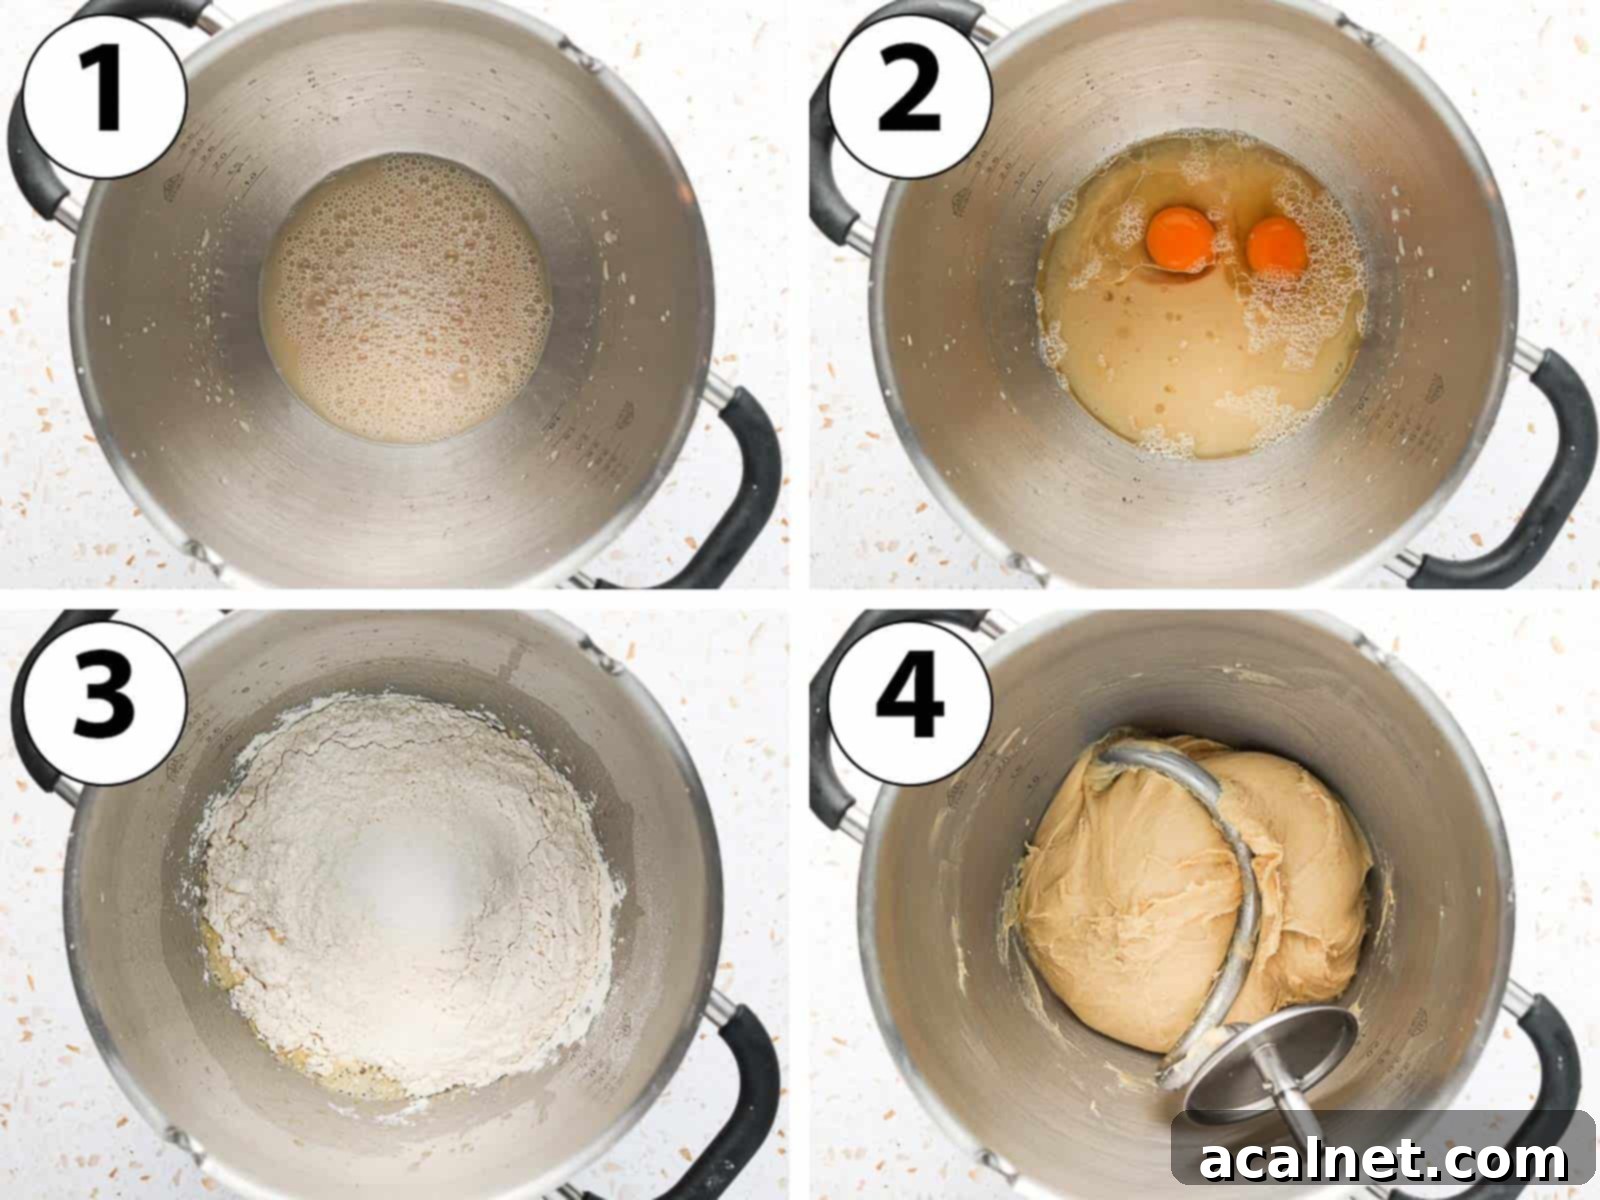
- Photo 1: Begin by combining the Warm Water (ensure it’s not too hot, ideally around 35°C / 95°F), Caster Sugar, and Instant Dry Yeast in the bowl of your stand mixer. Give it a gentle stir to combine the ingredients. Then, set the bowl aside for approximately 10 minutes. During this time, you should observe small bubbles or a frothy layer forming on the surface, which indicates that your yeast is active and thriving. This crucial step confirms your yeast is alive and ready to leaven your dough, even though instant yeast doesn’t strictly require blooming.
If the liquid is too cold, the yeast might take much longer to show any activity, or worse, remain dormant. While this pre-activation isn’t strictly necessary for Instant Yeast (though it’s mandatory for Active Dry Yeast to ensure activation), I personally find it a reassuring step to confirm the yeast’s vitality before committing to making the bread. It saves time and ingredients if the yeast isn’t active.
- Photo 2: Once the yeast is active, add all the remaining wet ingredients to the yeast mixture: the Oil, Honey, and Eggs (remember to bring them to room temperature for better incorporation). Whisk these ingredients together until they are well combined and evenly distributed.
- Photo 3: Next, carefully add the Plain / All-Purpose Flour to the bowl, followed by the Fine Table Salt. Optionally, you can give the dough a rough preliminary mix with a spatula or your hands. I find this helps the stand mixer begin kneading the dough more uniformly, preventing dry pockets of flour.
- Photo 4: Attach the dough hook attachment to your stand mixer. Set the mixer to a medium to medium-high speed and allow it to knead the dough for a substantial 15 to 20 minutes. This extended kneading time is critical for developing the gluten structure, which is essential for the characteristic soft and chewy texture of challah.
While challah dough can certainly be kneaded by hand in a large bowl or on a lightly floured surface, it’s considerably more challenging. This type of enriched dough is inherently quite soft and sticky, and the extended kneading period it requires can be physically demanding. Using a stand mixer greatly simplifies the process and ensures optimal gluten development for the best results.
Achieving the Perfect Texture: Kneading & Bulk Proofing
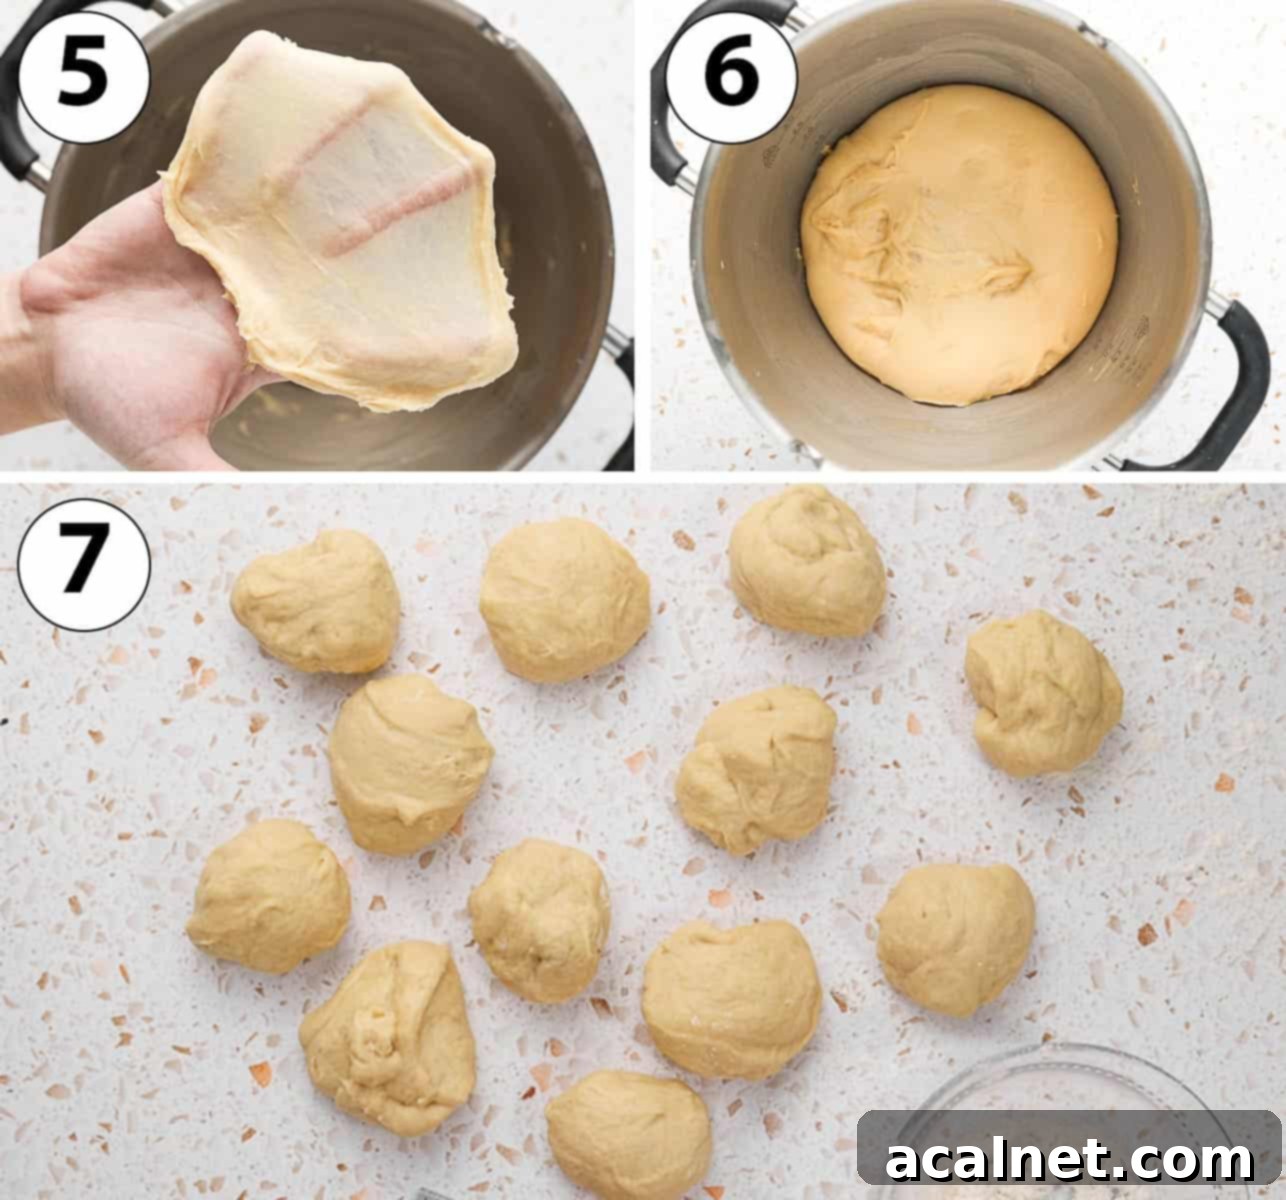
- Photo 5: Continue kneading until your dough successfully passes the crucial “windowpane test.” This test is a reliable indicator of sufficient gluten development.
To perform the “windowpane test,” gently pull and stretch a small piece of dough (about the size of a golf ball) between your fingers. Carefully stretch it until it forms a thin, translucent membrane, almost like a windowpane, through which light can pass without the dough tearing. If the dough breaks quickly or feels very stiff, it needs to be kneaded for a bit longer. If it stretches easily and thinly without breaking, forming that translucent “window,” it has passed the test, and your gluten is perfectly developed for a light and airy challah.
- Photo 6: Once kneaded, cover the bowl tightly with a clean tea towel or plastic wrap to prevent the dough from drying out. Place it in a warm, draft-free spot for its first proof (also known as bulk fermentation). Allow it to rise for about 1.5 hours, or until it has visibly doubled in size. A warm environment (like a slightly warmed oven with the door ajar, or near a sunny window) will encourage a faster rise.
For a more complex and developed flavor profile, you have the option to proof the dough overnight in the refrigerator. This “cold proofing” method slows down the fermentation process, allowing the flavors to deepen beautifully. An added benefit is that cold dough is generally less sticky and much easier to handle and shape, making your work smoother in the morning. For overnight proofing, the dough will typically need 8 to 12 hours, or until doubled in size, in the fridge.
- Photo 7: Gently “punch down” the dough to deflate it, releasing the air pockets. Transfer the dough onto a very lightly floured work surface. Using a kitchen scale for precision, divide the challah dough into 12 equal pieces. A bench scraper is an invaluable tool for cleanly cutting the dough and helping to manage its stickiness.
Be mindful not to use excessive additional flour during this stage. In fact, you’ll find it slightly easier to shape the individual challah rolls if the dough maintains a slight stickiness to your working surface, providing a little grip as you roll.
- Take each divided piece of dough and shape it into a thin, long rope. It’s best to leave the other pieces of dough covered on a lightly floured surface while you work on shaping them one by one.
To create the rope, gently flatten each piece of dough with your fingers to form a rough rectangular shape. Fold one of the longer edges towards the center, then roll it over onto itself to create a compact cylinder. Then, using the palms of your hands, roll the cylinder back and forth on your work surface, applying gentle, even pressure, to stretch it into a long, uniform rope. Aim for consistency in thickness for even baking.
Artful Shaping: Four Ways to Form Your Challah Rolls
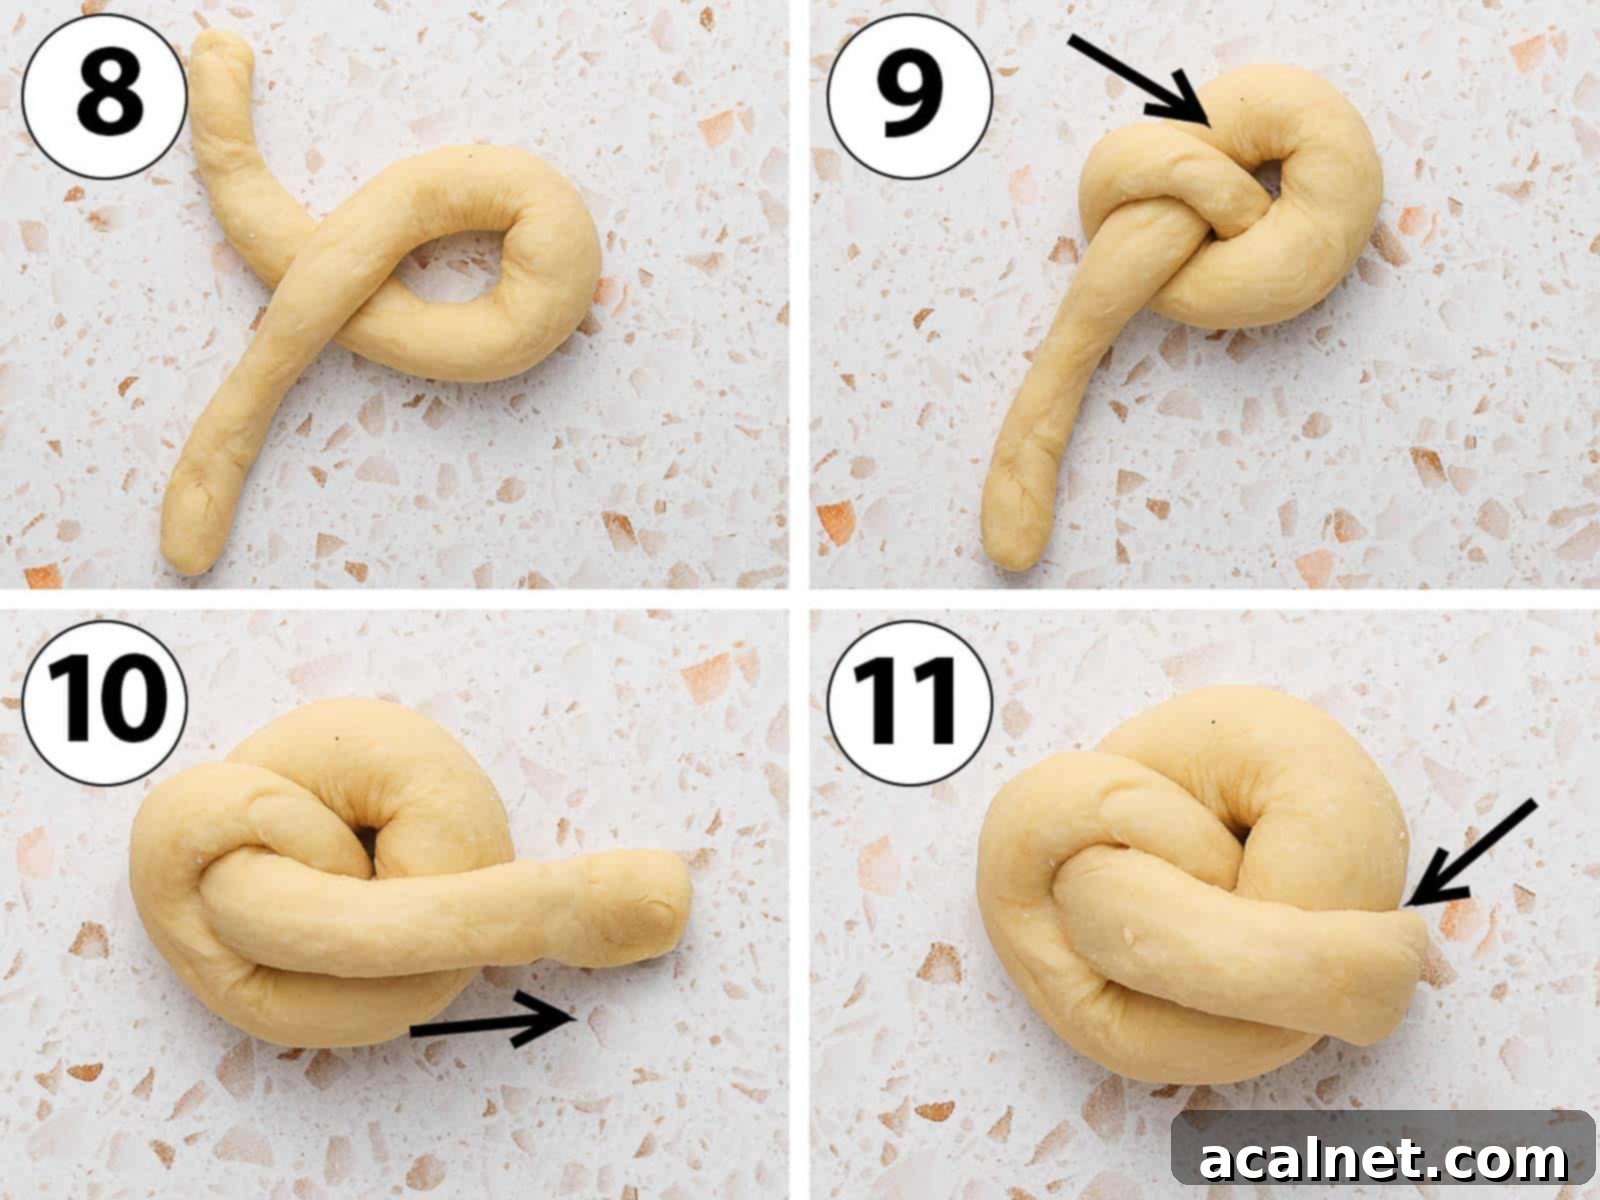
My preferred and most popular method for shaping these Mini Challah Rolls is “the knot” technique, which creates an elegant and perfectly portioned bun. However, don’t limit yourself! Below, you’ll find instructions for several other beautiful ways to shape your challah buns. For a visual demonstration of all four shaping techniques discussed here, be sure to watch the video located below the ingredients list in the recipe card.
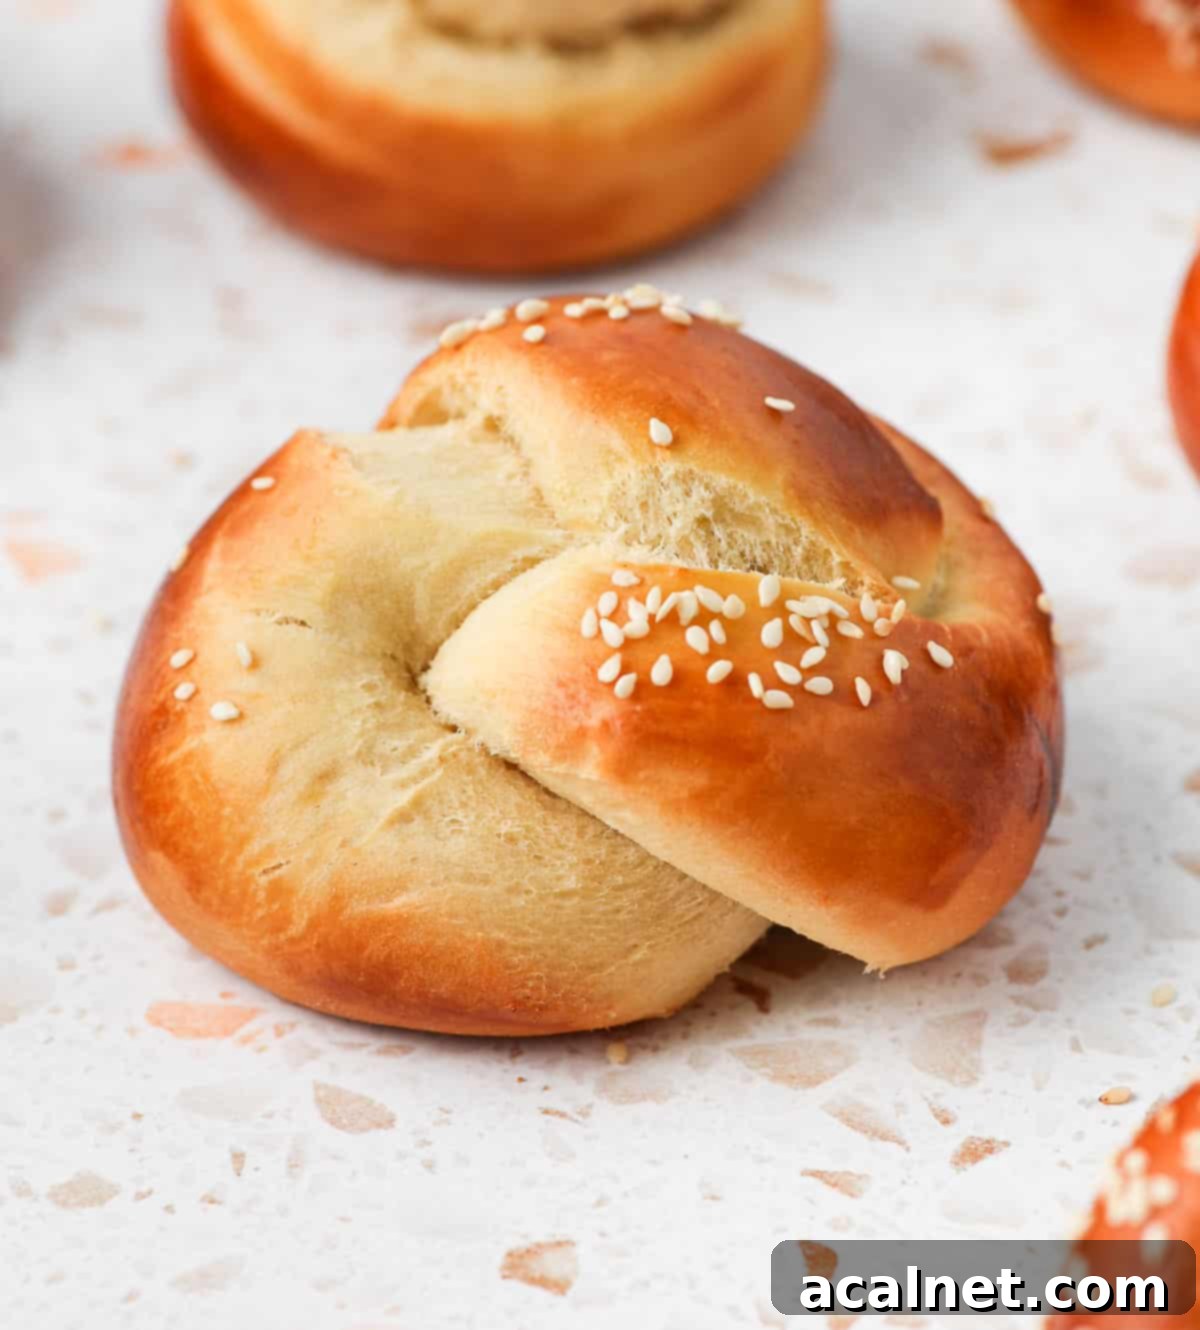
To create beautiful Mini Challah Knots, follow these steps:
- Photo 8: Lay one long dough rope horizontally in front of you. Take the right side of the rope and gently bring it over to the left, creating a hollow loop. Ensure that both ends of the rope extend outwards, one on each side of the loop.
- Photo 9: Now, take the left “wing” (the loose end of the rope on the left) and pull it towards the center of the loop. Then, tuck it underneath the outside edge of the loop, bringing it through the center from the bottom.
- Photo 10: Next, pick up the right “wing” (the loose end on the right). Pull it up and over the top of the hole you’ve created and also over the outside circle of the dough.
- Photo 11: To complete the knot, tuck this right wing underneath the entire challah roll from the bottom. Gently adjust the knot to ensure it’s neat and even. This creates a charming, self-contained knot shape.
Creative Alternatives: Other Ways to Shape Your Challah Rolls
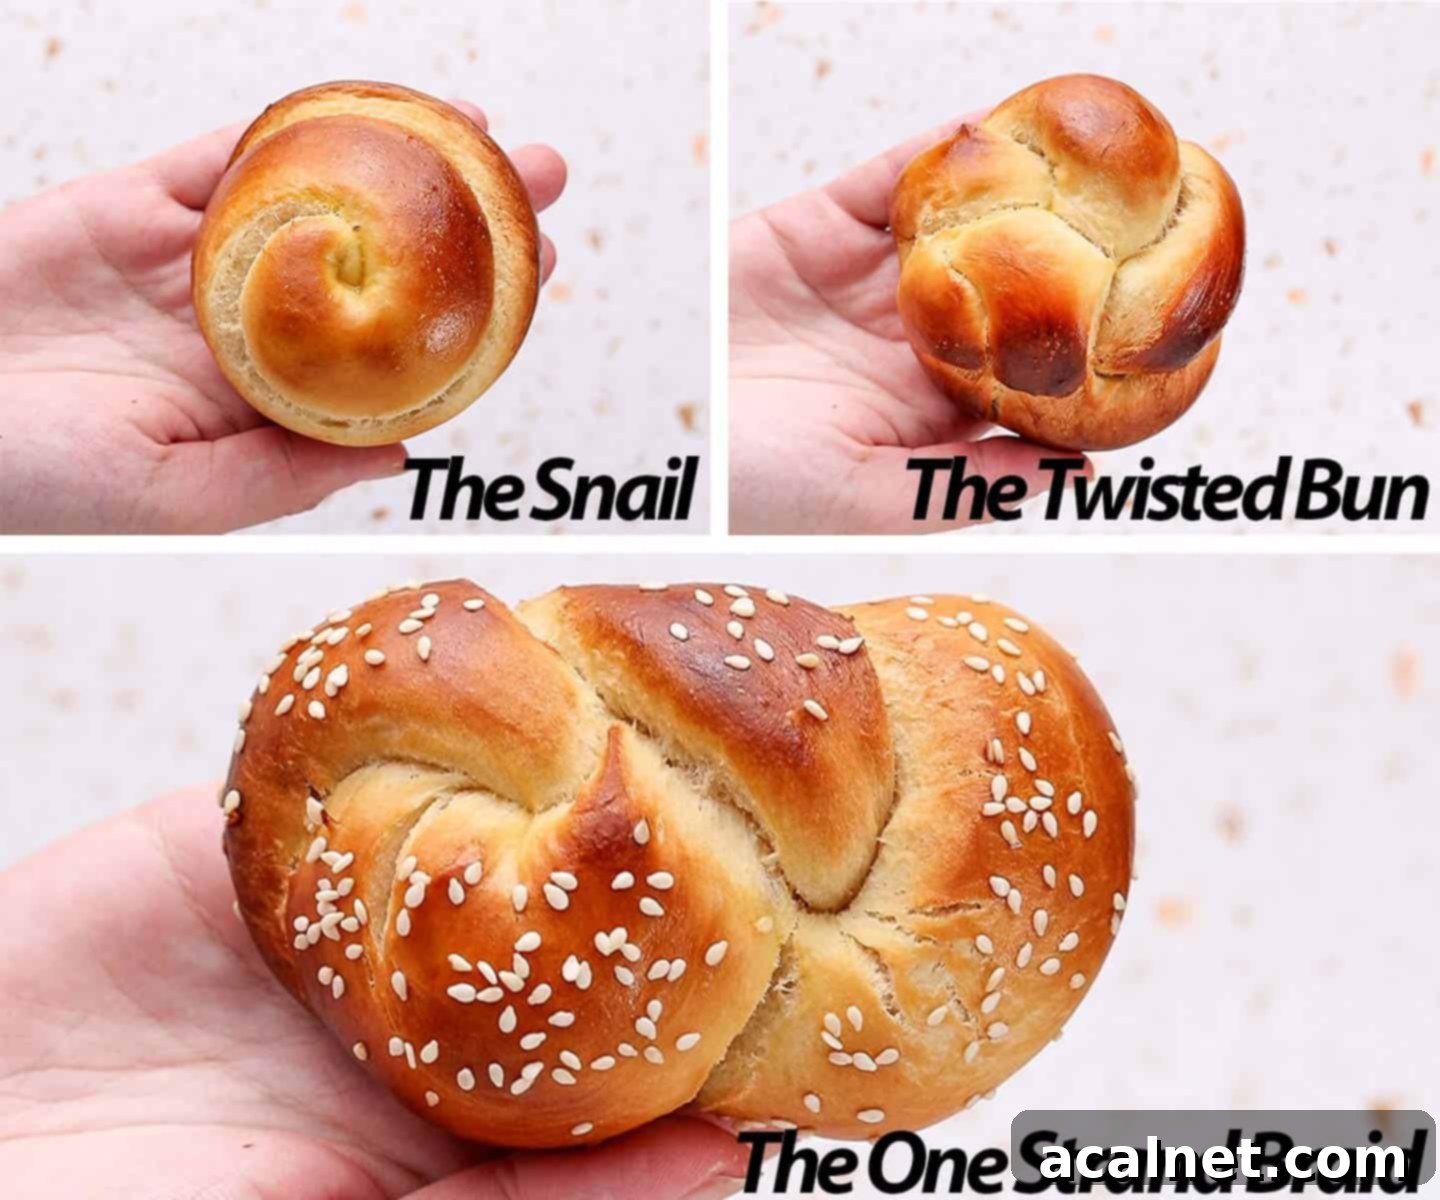
For those who enjoy variety or want to try different styles, here are three more captivating ways to shape your challah buns. Each technique is demonstrated clearly in the video found within the recipe card below, providing a helpful visual guide.
- The Snail (or Spiral) Bun: This is a beautifully simple yet elegant shape. Take one of your long dough ropes. Starting from one end, begin to tightly coil the rope around itself, much like a snail’s shell. Continue spiraling until you reach the other end, tucking the final tip underneath to secure the shape. This creates a lovely, round, and swirled challah roll.
- The Twisted Bun: For a slightly more intricate look, take one of your 12 dough pieces and divide it in half, shaping each half into a shorter, thinner rope. Lay these two ropes parallel to each other. Gently pinch them together at one end, then twist them around each other, creating a two-strand twist. Once twisted, coil this twisted rope just as you would for “the snail” technique above, spiraling it into a bun and tucking the end securely.
- The One-Strand Braid: Achieve a mini braided look with just a single rope of dough. Take one rope and fold it in half, creating a “U” shape. Then, begin to twist the two resulting strands around each other from the fold down to the open ends. Once twisted, you can either leave it as a twisted length or coil it into a small bun, tucking the ends under for a neat finish. This method creates a miniature version of the classic challah braid, perfect for individual servings.
The Final Rise & Golden Bake: Second Proofing & Baking
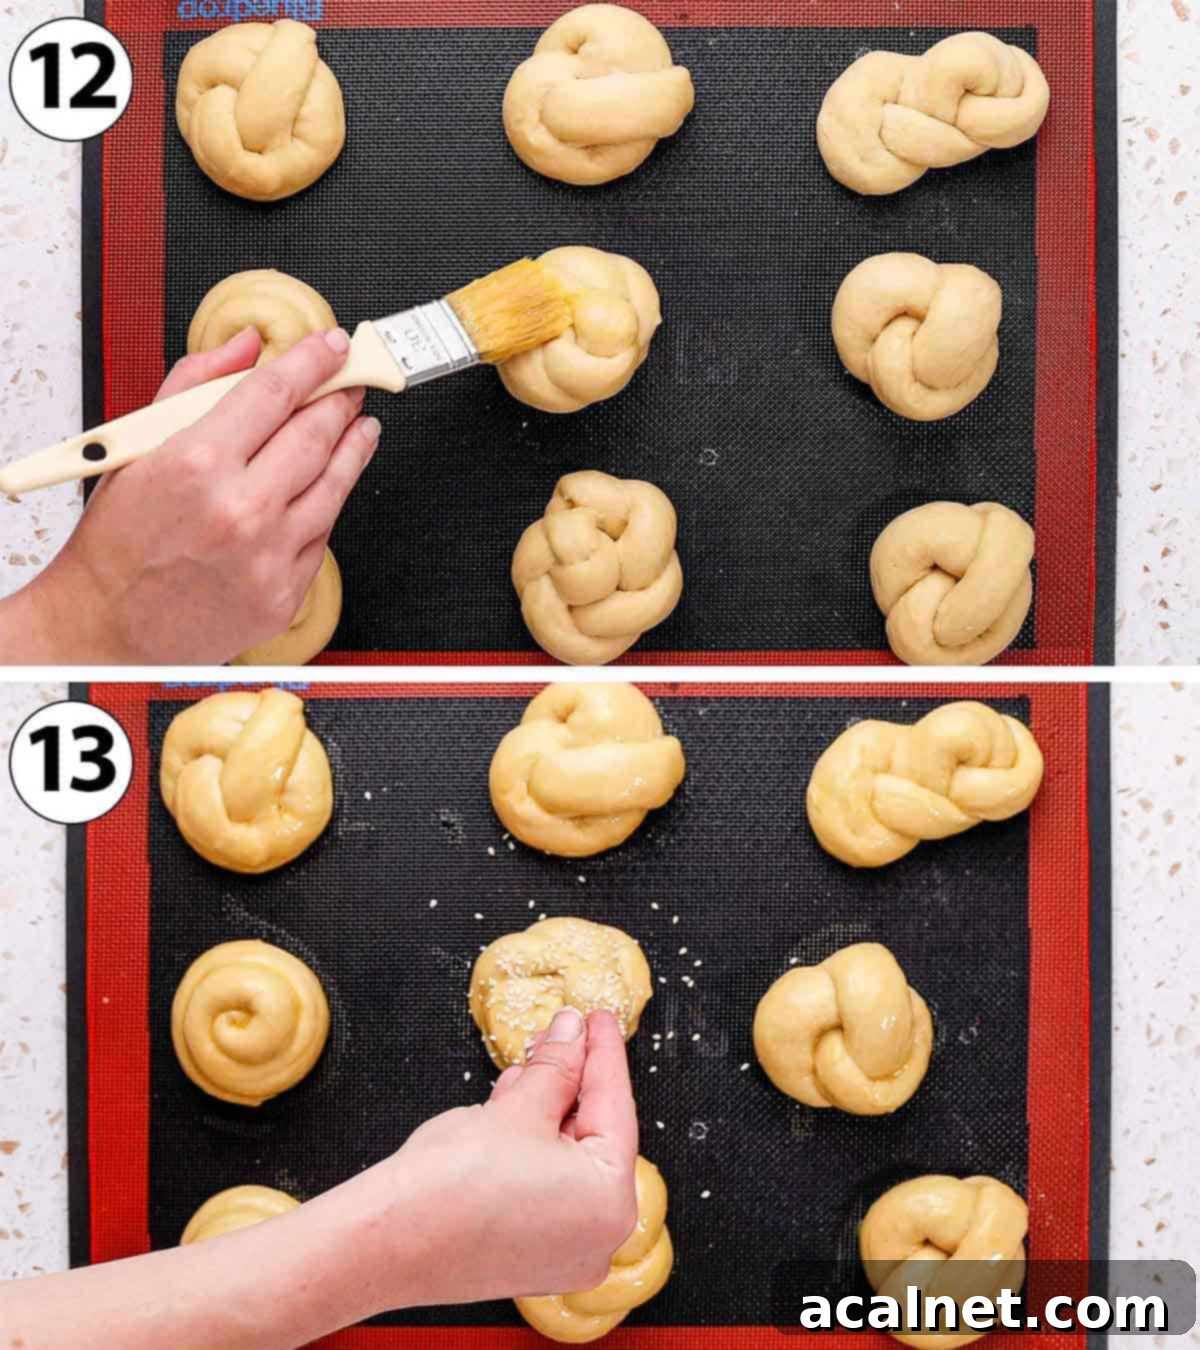
- Carefully arrange all your shaped Challah Rolls on a large baking tray that has been lined with either baking paper or a silicone parchment mat. For professional-quality, perfectly even baking and a beautiful golden crust all around, consider using a perforated baking tray in conjunction with a perforated baking sheet. These tools allow for optimal air circulation and heat distribution.
- Photo 12: Prepare your egg wash by lightly whisking one whole egg in a small bowl until smooth. With a pastry brush, gently brush the egg wash generously over the entire surface of each challah roll. This step is crucial for achieving that characteristic shiny, deep golden-brown crust. For an even richer, deeper golden color, you can opt to use egg yolks only. If you prefer a slightly lighter color, dilute the whisked egg with a small amount of water or milk (if not strictly dairy-free).
- Photo 13: This is your chance to add a delicious finishing touch! Optionally, sprinkle your favorite topping over each roll. Classic choices include Sesame Seeds (white or black), Poppy Seeds, or even a savory Everything Bagel Seasoning blend for a unique twist. These toppings not only add visual appeal but also enhance texture and flavor.
Depending on the dimensions of your oven and baking trays, you might need to bake your rolls in two separate batches. If so, a clever trick is to place the second tray of shaped rolls in the refrigerator while the first batch undergoes its second proofing and then bakes. This prevents the dough in the second batch from over-proofing, which can lead to a less desirable texture.
- Allow the rolls to proof for a second time at room temperature for another 30 to 45 minutes. During this period, preheat your oven to 180°C (350°F). The rolls should look visibly puffier and larger, indicating a successful second rise.
- Bake the challah rolls for approximately 16 to 18 minutes. They are ready when they have significantly risen, expanded, and achieved a beautiful, even golden-brown color. The internal temperature should reach around 90-93°C (195-200°F).
If you are baking in two batches, remember to take the second tray of rolls out of the refrigerator just as you place the first batch into the oven. Allow these chilled rolls to come back to room temperature for about 15-20 minutes before baking them, ensuring they bake properly and achieve the best texture.
- Once baked, transfer the golden challah rolls to a wire rack and allow them to cool down completely before serving. This cooling period is important for the internal structure to set, resulting in the best possible texture and flavor.
Challah Rolls: Your Most Asked Questions Answered
Challah stands out as a unique type of dairy-free enriched yeasted dough. Unlike many standard bread recipes, challah is significantly enriched with both a fat (typically oil) and multiple eggs, which contribute to its distinctive golden color, rich flavor, and incredibly soft, tender crumb. It is a deeply traditional Jewish bread, central to Friday Shabbat dinners and various special holidays, instantly recognizable by its beautiful braided shape.
Both Challah and Brioche are classified as enriched bread doughs, characterized by their high fat content that contributes to their luxurious texture. The primary and most traditional distinction lies in their dairy content: Challah is characteristically and entirely Dairy-Free, using water and oil as its liquid and fat. In contrast, Brioche traditionally incorporates rich dairy products like milk and butter, giving it a slightly different flavor profile and crumb structure.
Absolutely, and it’s a highly recommended technique! Like many artisanal breads, proofing your challah dough in the refrigerator (a method known as “cold proofing”) offers several advantages. It significantly slows down the fermentation process, allowing the flavors within the dough to develop more complexity and depth. Furthermore, cold dough is typically firmer and less sticky, making it much easier to handle and shape, especially if you’re working with the more intricate braided designs. For best results with cold proofing, the dough will need to rest in the fridge for 8 to 12 hours, or until it has doubled in size.
The versatility of challah means you can customize its topping to your preference. Many enjoy the simplicity of leaving the Challah rolls plain, allowing the golden, egg-washed crust to be the star. However, traditional toppings abound and add wonderful flavor and texture. Popular choices include a sprinkle of Sesame Seeds or Poppy Seeds. For those who prefer a sweeter touch, a sugar streusel topping can be added before baking, or a dusting of cinnamon sugar once cooled.
Traditionally, Challah is a centerpiece, served plain as a symbol of celebration for Shabbat or other Jewish Holidays. However, the deliciousness of these challah buns extends far beyond that! They make exceptional bases for gourmet burgers or sliders, serve as delightful Challah Dinner Rolls alongside any meal, and elevate simple sandwiches to a new level. Don’t forget the power of toast: try them toasted with butter and jam for a heavenly breakfast. And for a truly indulgent treat, any leftover challah makes the most incredible, rich French Toast imaginable!
Pro Tips & Troubleshooting for Perfect Challah Rolls
- The dough is too sticky: If your dough feels excessively sticky, it’s often a sign that it hasn’t been kneaded enough. Enriched doughs, with their higher fat content, require longer kneading times to properly develop the gluten, which gives the dough structure and reduces stickiness. Keep kneading until it passes the windowpane test. Additionally, proofing the dough in the fridge (cold proofing) can make it much firmer and easier to handle, as the cold stiffens the fats.
- The dough did not rise: This is a common issue and usually points to one of two things: either your yeast wasn’t active, or the proofing environment wasn’t ideal. This is precisely why I recommend blooming the yeast in warm water first – it’s a simple check to ensure your yeast is alive. If the yeast is active, ensure your dough is proofing in a warm, draft-free spot, and give it ample time to rise until doubled in size. Cold temperatures will severely inhibit yeast activity.
- If you need to bake the challah rolls in two batches due to oven or tray size limitations, here’s a smart strategy: shape all your rolls and divide them onto two separate trays. Brush both sets of rolls with the egg wash and sprinkle with your chosen toppings. Allow the first tray to proof at room temperature, then bake it. Critically, place the second tray directly into the refrigerator during this time. This cold storage will significantly slow down its proofing, preventing the dough from over-proofing. Once the first batch is out of the oven, take the second batch from the fridge and let it come to room temperature for about 15-20 minutes before baking.
- For an exceptionally even bake and that coveted golden-brown crust all around your rolls, I highly recommend using a perforated baking tray paired with a perforated baking mat. These tools are designed to allow superior air circulation underneath and around the rolls, ensuring that heat is distributed uniformly. This results in a consistently baked, beautifully colored crust, free from soggy bottoms.
- Over-proofing: Be careful not to let your dough over-proof, especially during the second rise. Over-proofed dough can lose its structure, leading to dense, collapsed rolls with a less desirable texture and a yeasty, off-flavor. The dough should look visibly puffed but still hold its shape; if it looks very bubbly or starts to sag, it’s likely gone too far.
Storing & Freezing Your Challah Rolls
These delectable challah bread rolls are undeniably at their peak when served fresh, ideally within 24 hours of baking, offering the softest texture and most vibrant flavor. While they will remain delicious for up to three days, their characteristic softness will gradually diminish over time. To maintain their quality, store them at room temperature in an airtight container or a tightly sealed bread bag, away from direct sunlight.
For longer preservation, challah bread freezes exceptionally well, making it perfect for meal prep or enjoying a taste of homemade goodness anytime. Once the rolls have completely cooled after baking, simply place them in a single layer on a baking tray lined with parchment paper and freeze until solid. Once frozen solid, transfer them to a freezer-safe bag or an airtight container, ensuring as much air is removed as possible to prevent freezer burn. They can be stored for up to 2-3 months. To enjoy, thaw them at room temperature, or for a quick refresh, pop them directly into a toaster or a preheated oven (around 150°C / 300°F) for a few minutes until warmed through and soft again.
Explore More Delicious Bread Recipes
If you’ve enjoyed baking these irresistible challah rolls, you’re in for a treat with more of our favorite bread recipes:
- Cinnamon Babka: A stunning swirled sweet bread, rich with cinnamon and often chocolate.
- Chocolate Chip Brioche Bread: Indulge in a buttery brioche loaf studded with decadent chocolate chips.
- Homemade Sesame Bagels: Master the art of chewy, New York-style bagels with a classic sesame seed topping.
- Cinnamon Roll Bread Loaf: All the comforting flavors of cinnamon rolls, conveniently baked into a loaf.
- Chocolate Brioche Bread: A luxurious, buttery brioche infused with rich chocolate.
- Sweet Potato Buns: Soft and subtly sweet buns, perfect for burgers or sandwiches, with a lovely hint of sweet potato.
- Pumpkin Buns: Seasonal and delightful, these pumpkin-infused buns are moist and flavorful, ideal for autumn meals.
Made this recipe?
Let us know if you liked it by leaving a comment below, and tag us on Instagram @a.baking.journey with a photo of your creation! We love seeing your baking journey unfold!
Recipe Card

Challah Rolls
Print Recipe
Ingredients
- 240 ml Water
- 30 gr Caster Sugar
- 9 gr Instant Dry Yeast
- 60 ml Vegetable Oil, such as canola oil
- 60 gr Honey
- 2 large Eggs, at room temperature
- 600 gr Plain / All-Purpose Flour
- 10 gr Fine Table Salt
- 1 Egg, for Egg Wash
- Sesame Seeds or Poppy Seeds for topping, to taste, optional
Instructions
- Place the Warm Water (around 35’c / 95’f), Sugar and Yeast in the bowl of your stand mixer. Mix then set aside for about 10 minutes or until you can see small bubbles or froth appear on the surface (See note 1).
- Whisk in the Oil, Honey and Eggs. Add the Flour and the Salt. Attach the dough hook attachment to the stand mixer. Set it on medium to medium high speed and knead for 15 to 20 minutes or until very soft and stretchy (see note 2).
- Cover the bowl with a tea towel or plastic wrap and let the dough proof in a warm spot for about 1,5 hours, or until doubled in size (See note 3).
- Punch the dough to deflate it and transfer it over a very lightly floured surface. Cut the challah dough into 12 even pieces (see note 4).
- Shape each piece of dough into a thin, long rope and place them on a lightly floured surface.
- Shape or braid each rope your preferred way (see video for different shaping techniques) and place the challah rolls on a large baking tray lined with baking paper or mat (see note 5).
- Lightly whisk the Egg in a small bowl for the Egg Wash, and brush it over each challah roll. Optionally, sprinkle the rolls with your choice of topping.
- Leave to proof at room temperature for another 30 to 45 minutes.
- Preheat your oven on 180’C / 350’F. Bake the challah rolls for 16 to 18 minutes, or until golden. Leave to cool down completely.
- If baking in two batches, repeat with the second half of the rolls (refer to note 5).
Video
Would you like to save this recipe?
We’ll email this post to you, so you can come back to it later!
Notes
- If the liquid is too cold, it could take much longer to see any effect from the yeast. Although not necessary with Instant Yeast (but mandatory with Active Dry Yeast to active the yeast), I like to do this step to check if the yeast is alive before making the bread.
- To know you have kneaded the dough enough, do the “windowpane test”: gently pull and stretch a small piece of dough. If the dough breaks quickly, it needs to be kneaded for longer. If it stretches easily without breaking and you can see light coming through it, it has passed the windowpane test.
- Alternatively, you can proof the dough overnight in the fridge. It will give you more developed flavours. The dough will also be a bit less sticky and easier to work with when cold.
- To get even sizes, use a kitchen scale. Weight the entire dough, divide that into 12 and cut the dough into small pieces of that weight.
- If you have some, use a perforated baking tray and perforated baking sheet for a perfectly even baking. Depending on the size of your oven / tray, you might need to use two trays. Place the second tray in the fridge once the rolls are shaped to avoid overproofing them. Take them out of the fridge when you place the first batch in the oven.
Nutrition (per serving)
