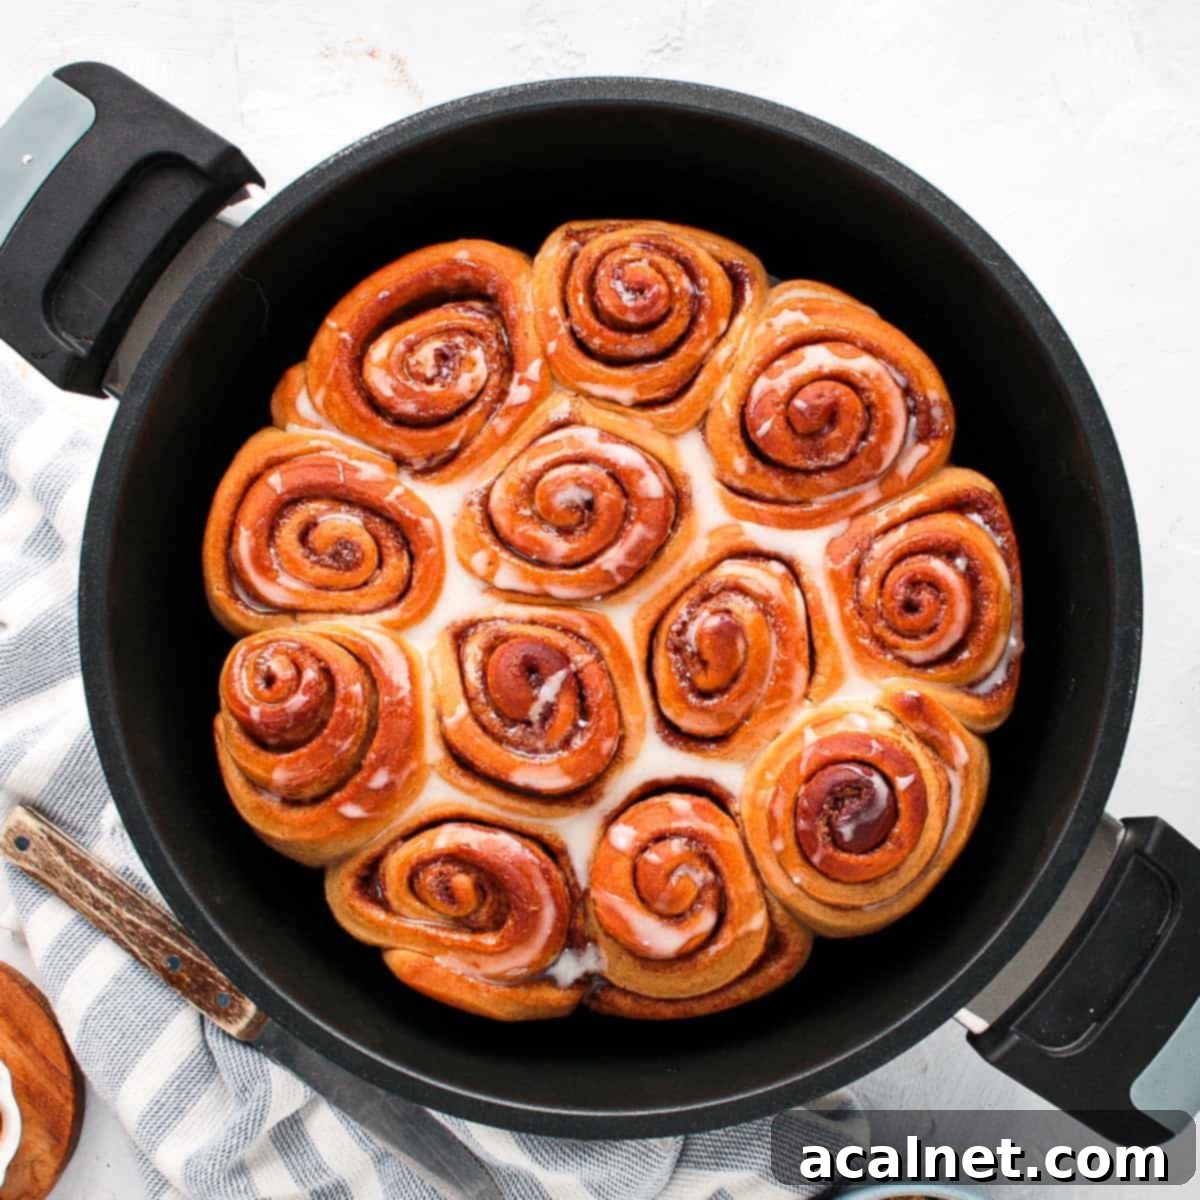
Mastering Remoska Cinnamon Rolls: Your Guide to Fluffy, Oven-Free Perfection
Imagine waking up to the irresistible aroma of freshly baked cinnamon rolls, their fluffy texture and warm, spiced sweetness calling your name. Now, imagine achieving this blissful experience without ever needing a conventional oven! With the innovative Remoska, those dreams become a delicious reality. These classic cinnamon rolls, lovingly prepared in your Remoska, are not just perfectly light and incredibly fluffy, but also wonderfully convenient. They are the ideal treat for a leisurely breakfast, a delightful morning tea, or a comforting afternoon snack, easily prepared anywhere you have access to power.
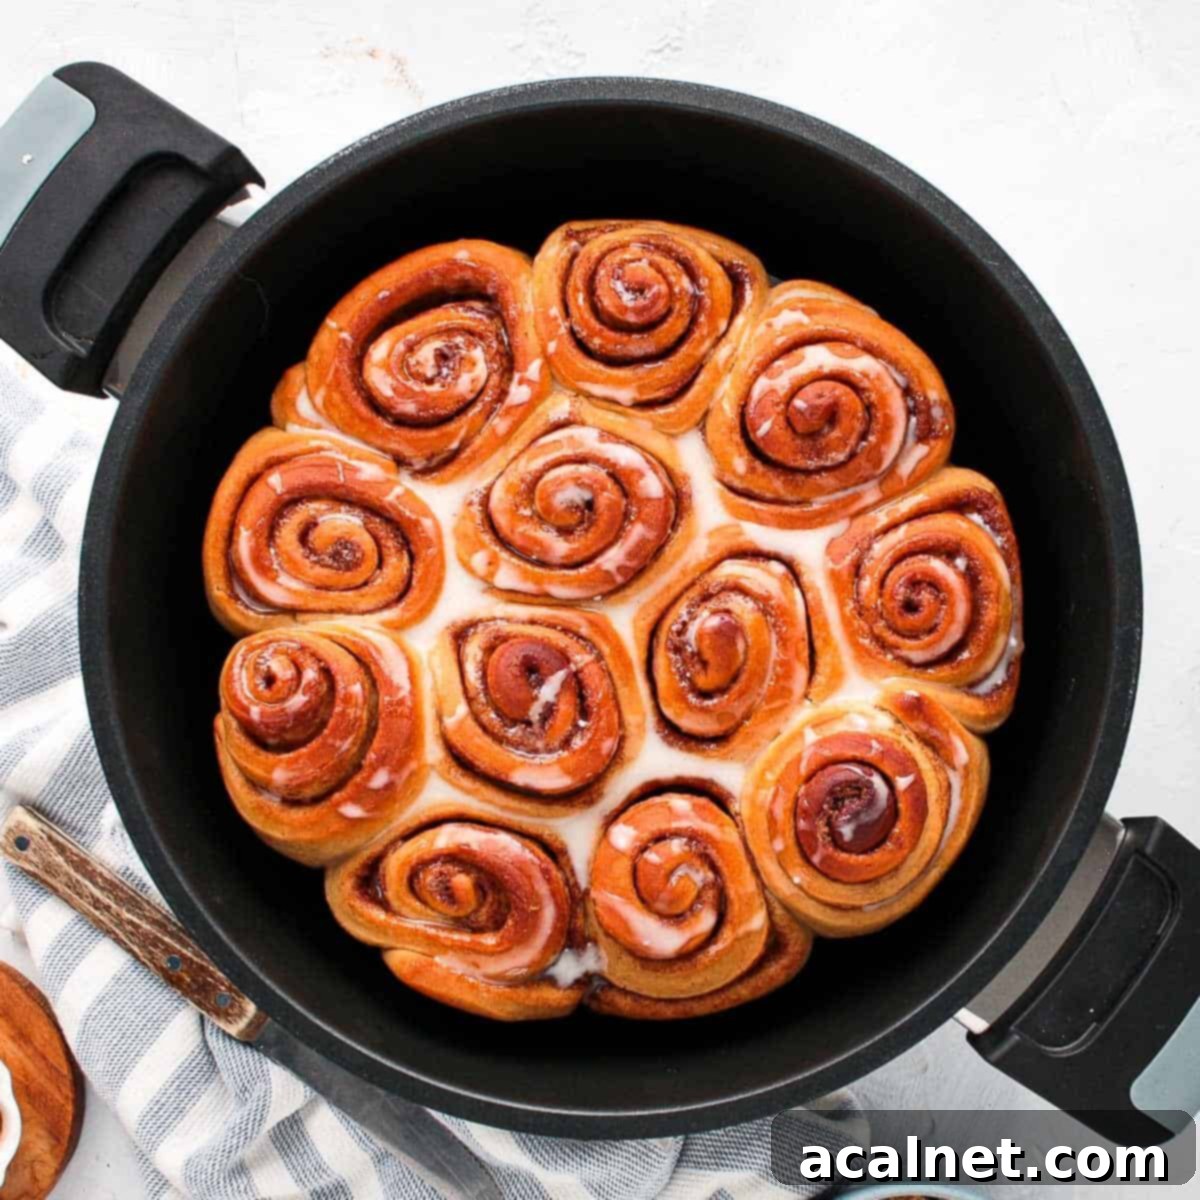
This recipe is proudly sponsored by Remoska
[feast_advanced_jump_to]
Why You’ll Fall in Love with This Remoska Cinnamon Roll Recipe
Who would have thought you could bake the most incredibly light and fluffy cinnamon scrolls without a traditional oven? We understand if you’re a little skeptical, but after experiencing the magic of the Remoska, you might find yourself saying goodbye to your conventional oven for future cinnamon roll endeavors!
The Versatility of the Remoska Tria: Your Portable Baking Solution
The Remoska Tria is much more than just a cooker; it’s a revolutionary three-in-one culinary device that offers unparalleled versatility. Its ingenious design features three interchangeable lids, each unlocking different functionalities:
- Glass Lid: Transforms the pot into a conventional cooking pot, perfect for use on your stovetop.
- Soft-Pressure Lid: Converts the Remoska into a slow cooker or pressure cooker, ideal for tender stews, soups, and more.
- Baking Lid: This is where the magic happens for our cinnamon rolls! When plugged in, the baking lid turns the Remoska into a portable oven, allowing you to bake delicious treats anywhere with a power source.
This remarkable feature means you can enjoy freshly baked goods like these cinnamon rolls, along with fluffy Scones, wholesome No-Knead Bread, moist Banana Cake, or comforting Baked Apples. Whether you’re on a caravan adventure, enjoying a camping trip, sailing on a boat, relaxing in your backyard, or simply baking outdoors, the Remoska brings your kitchen with you.
Energy Efficiency You Can Appreciate
Beyond its portability, the Remoska offers a significant advantage even if you have a traditional oven readily available: energy efficiency. Baking cinnamon rolls in the Remoska uses only about a fifth of the electricity that a standard oven consumes. This makes it an incredibly eco-friendly and cost-effective alternative for everyday baking, allowing you to indulge in your favorite treats while being mindful of your energy usage.
Curious to see the Remoska Tria in action? You can watch a demonstration here.
Exciting Offer: You can now pre-order the Remoska Tria and receive 25% off plus free shipping when you use the code “BakingJourney” at checkout! (valid only in Australia and New Zealand).
Essential Ingredients for Perfect Remoska Cinnamon Rolls
Crafting these delectable cinnamon buns in your Remoska uses the same straightforward ingredients as our traditional Cinnamon Scrolls from Scratch recipe. No exotic or hard-to-find items here – just pantry staples that come together to create something truly special!
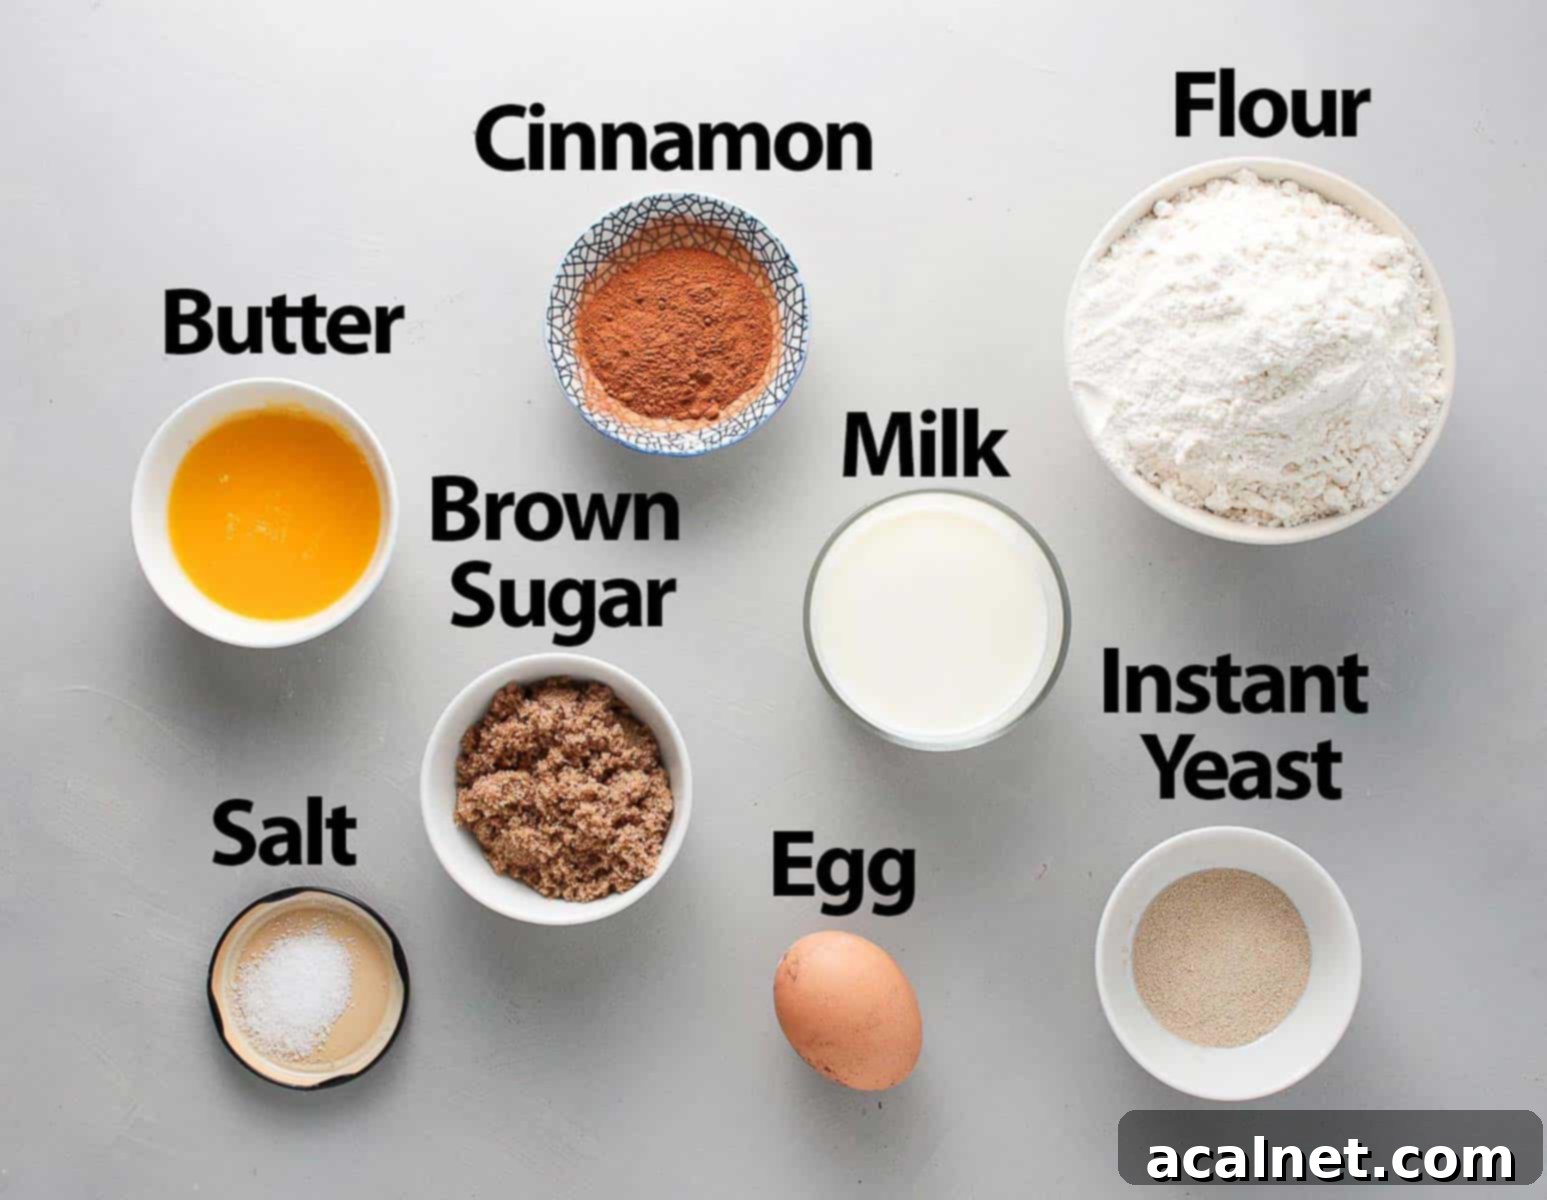
For exact quantities, please refer to the detailed recipe card at the bottom of this post.
- Flour: We typically use Plain or All-Purpose Flour, which yields a beautifully soft dough. For an even fluffier, chewier texture, you could opt for Bread Flour, as its higher protein content develops more gluten.
- Sugar: Brown Sugar is our preferred choice. Its rich, molasses notes perfectly complement the warm spices of cinnamon, adding depth to both the dough and the filling. If brown sugar isn’t available, granulated white sugar can be used as a substitute.
- Milk: Full Cream Milk (Whole Milk) is highly recommended for the best flavor and a wonderfully tender crumb. Ensure the milk is lukewarm when added to the yeast, as this temperature is crucial for activating the yeast without killing it.
- Egg: A single large egg, at room temperature, is incorporated into the dough. It adds richness, moisture, and helps create that desirable soft structure. No need for an egg wash on the outside; the Remoska’s unique baking environment ensures a perfectly golden top naturally!
- Butter: Use very soft, unsalted butter for both the dough and the filling. Softened butter incorporates more easily into the dough, leading to a smoother texture, and creates a spreadable, luscious filling.
- Instant Yeast: This type of yeast is incredibly convenient as it doesn’t strictly require blooming (pre-dissolving in liquid). However, we often choose to bloom it anyway as a quick test to ensure the yeast is active and alive, guaranteeing a good rise. If using Active Dry Yeast, blooming it in the lukewarm milk and a pinch of sugar *is* essential before adding it to the rest of the ingredients.
- Salt: A small pinch of fine table salt is crucial. It balances the sweetness, enhances the overall flavor of the cinnamon rolls, and helps regulate yeast activity.
- Ground Cinnamon: The star of the show! Use good quality ground cinnamon for that signature warm, spicy flavor in the filling.
While optional, finishing your Remoska cinnamon rolls with a classic Vanilla Icing adds a delightful touch of extra sweetness. Alternatively, for a tangy contrast, consider making a Cream Cheese Frosting!
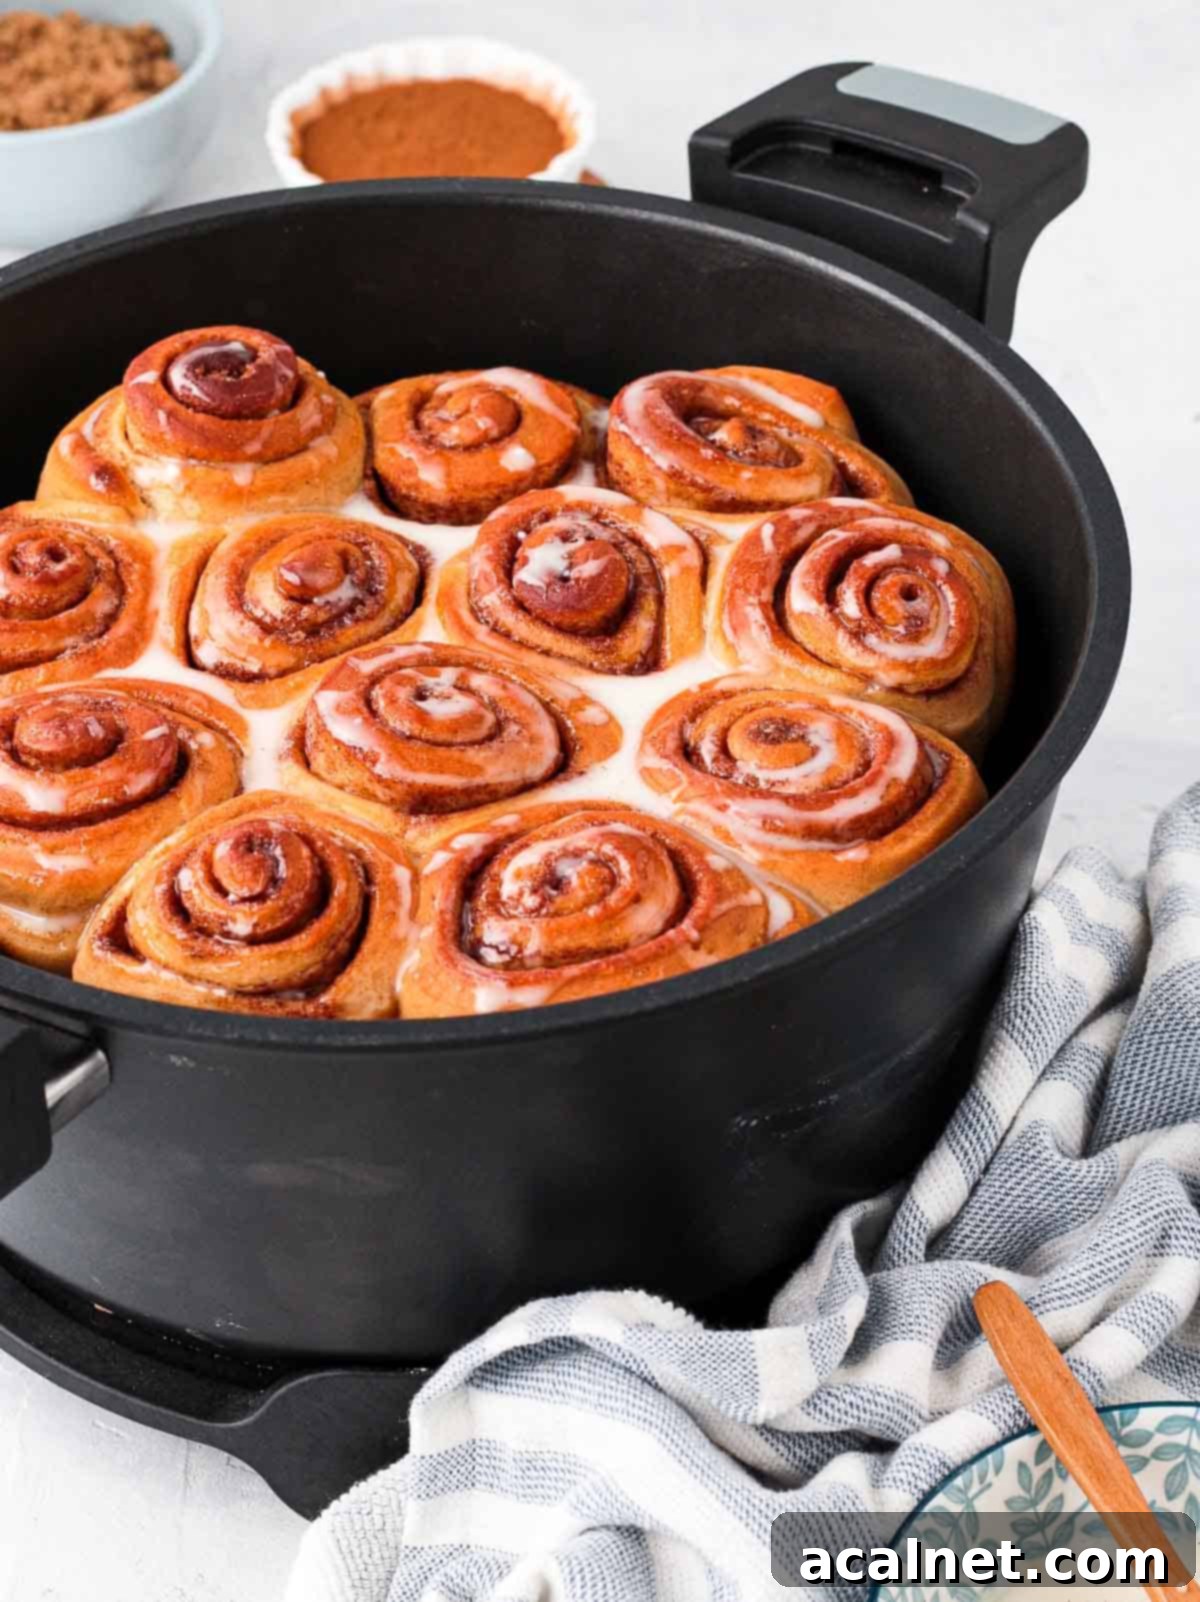
Step-by-Step: How to Make Cinnamon Rolls in a Remoska
Making delicious cinnamon rolls in your Remoska Tria is surprisingly similar to baking them in a conventional oven, but with the added convenience of proofing directly in the Remoska pot. Follow these detailed steps for perfect results every time.
1. Prepare the Dough: The Foundation of Fluffy Rolls
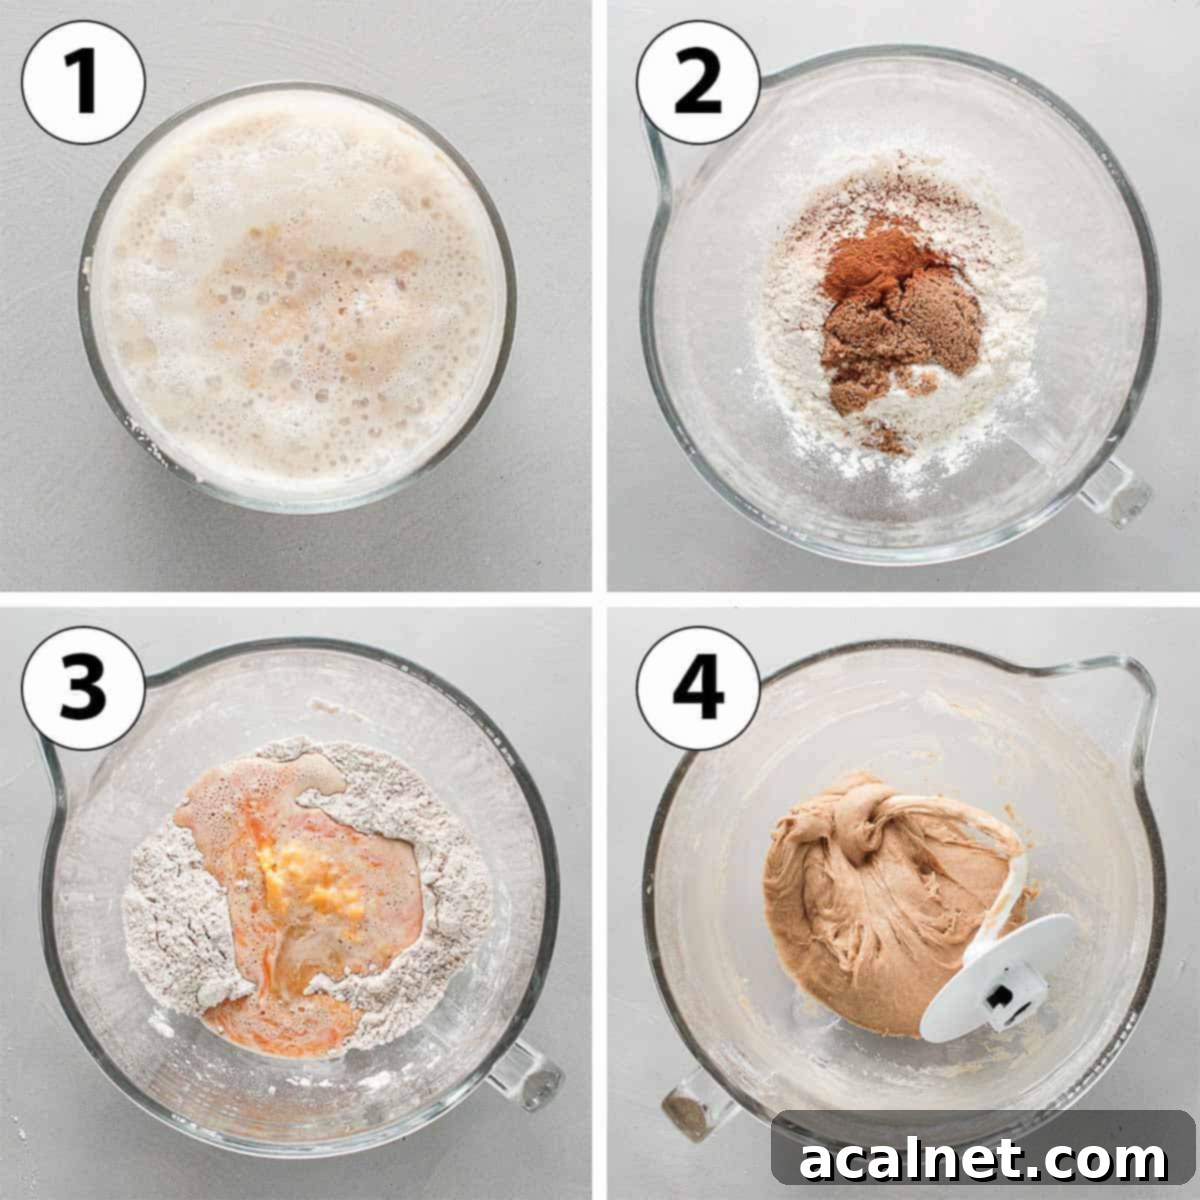
- Photo 1: Yeast Activation. In a small bowl, combine the lukewarm milk (ensure it’s around 40°C / 105°F – it should feel warm but not hot to the touch, as too much heat will kill the yeast), one tablespoon of brown sugar, and the instant yeast. Stir well until the sugar dissolves. Set this mixture aside for 10 to 15 minutes. You’re looking for a frothy, bubbly layer to appear on the surface, which indicates your yeast is active and ready to work its magic.
Note: While instant yeast doesn’t strictly require blooming, we like to perform this step to confirm its vitality. If you’re using active dry yeast, this blooming step is absolutely essential for the dough to rise properly.
- Photo 2: Combine Dry Ingredients. In the bowl of your stand mixer (fitted with a dough hook), or a large mixing bowl if kneading by hand, whisk together the flour, the remaining brown sugar, and ground cinnamon.
- Photo 3: Incorporate Wet Ingredients. Create a well in the center of your dry ingredients. Pour in the activated milk/yeast mixture, the room-temperature egg, and the very soft unsalted butter. Begin kneading on medium speed for a couple of minutes until all ingredients are just combined. Then, add the salt.
- Photo 4: Knead to Perfection. Continue kneading on medium-high speed for another 5 to 8 minutes. You’ll know the dough is ready when it starts pulling away from the sides of the bowl, feels incredibly soft and elastic, and passes the “windowpane test” (where a small piece of dough can be stretched thin enough to see light through it without tearing).
- First Proof. Cover the mixing bowl with a clean tea towel. Place the bowl in a warm spot (like a sunny windowsill, near a warm appliance, or even in a turned-off oven with the light on) and allow the dough to proof for approximately 1 to 1.5 hours, or until it has visibly doubled in size. In colder environments, this process might take a little longer.
2. Assemble the Cinnamon Rolls: Creating the Swirls
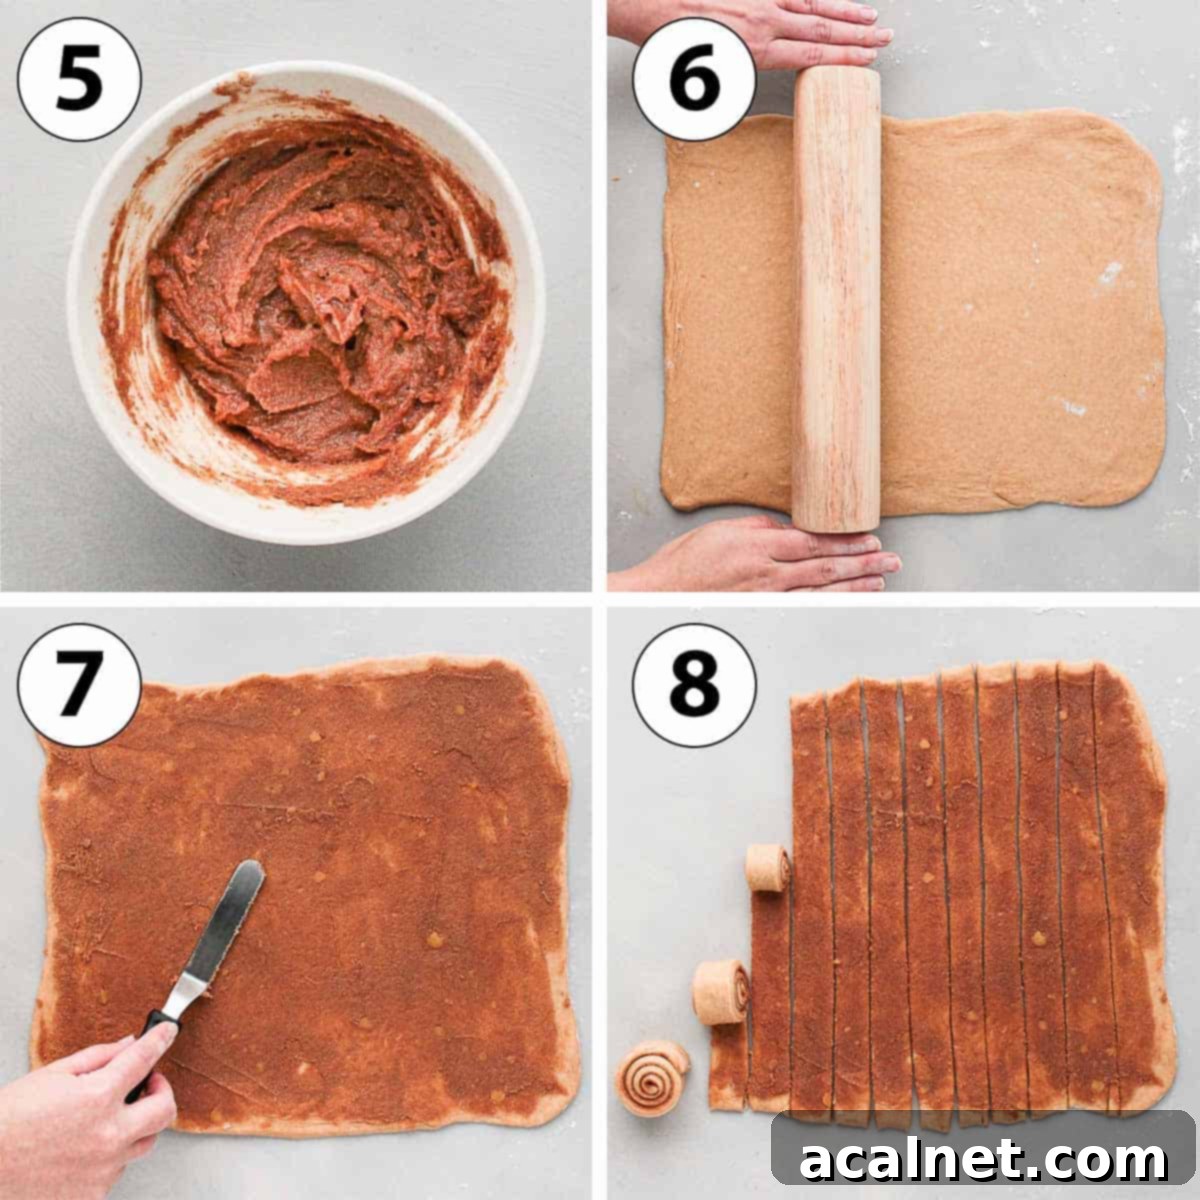
- Photo 5: Prepare the Filling. In a separate small bowl, combine the very soft unsalted butter, brown sugar, and ground cinnamon. Mix thoroughly until you achieve a smooth, spreadable paste. Set this delicious filling aside.
- Photo 6: Roll Out the Dough. Once your dough has doubled in size, gently punch it down to deflate. Transfer the dough onto a lightly floured surface. Using a rolling pin, roll the dough into a large rectangle, aiming for dimensions of approximately 30x40cm (12×15 inches). Try to keep the thickness as even as possible for uniform rolls.
- Photo 7: Spread the Filling. With a small offset spatula or the back of a spoon, carefully spread the cinnamon filling evenly over the entire surface of the rolled-out dough, leaving a small border (about 1 cm or half an inch) along one of the long edges.
- Photo 8: Cut and Roll. For neat, uniform rolls, cut the dough into 12 long strips, each roughly 3-4 cm (1.2-1.5 inches) wide. Then, carefully roll each strip from one end to the other to create your classic cinnamon roll spirals. (See our FAQ section below for an alternative, more traditional rolling method if preferred).
3. Proofing and Baking in the Remoska: The Final Steps
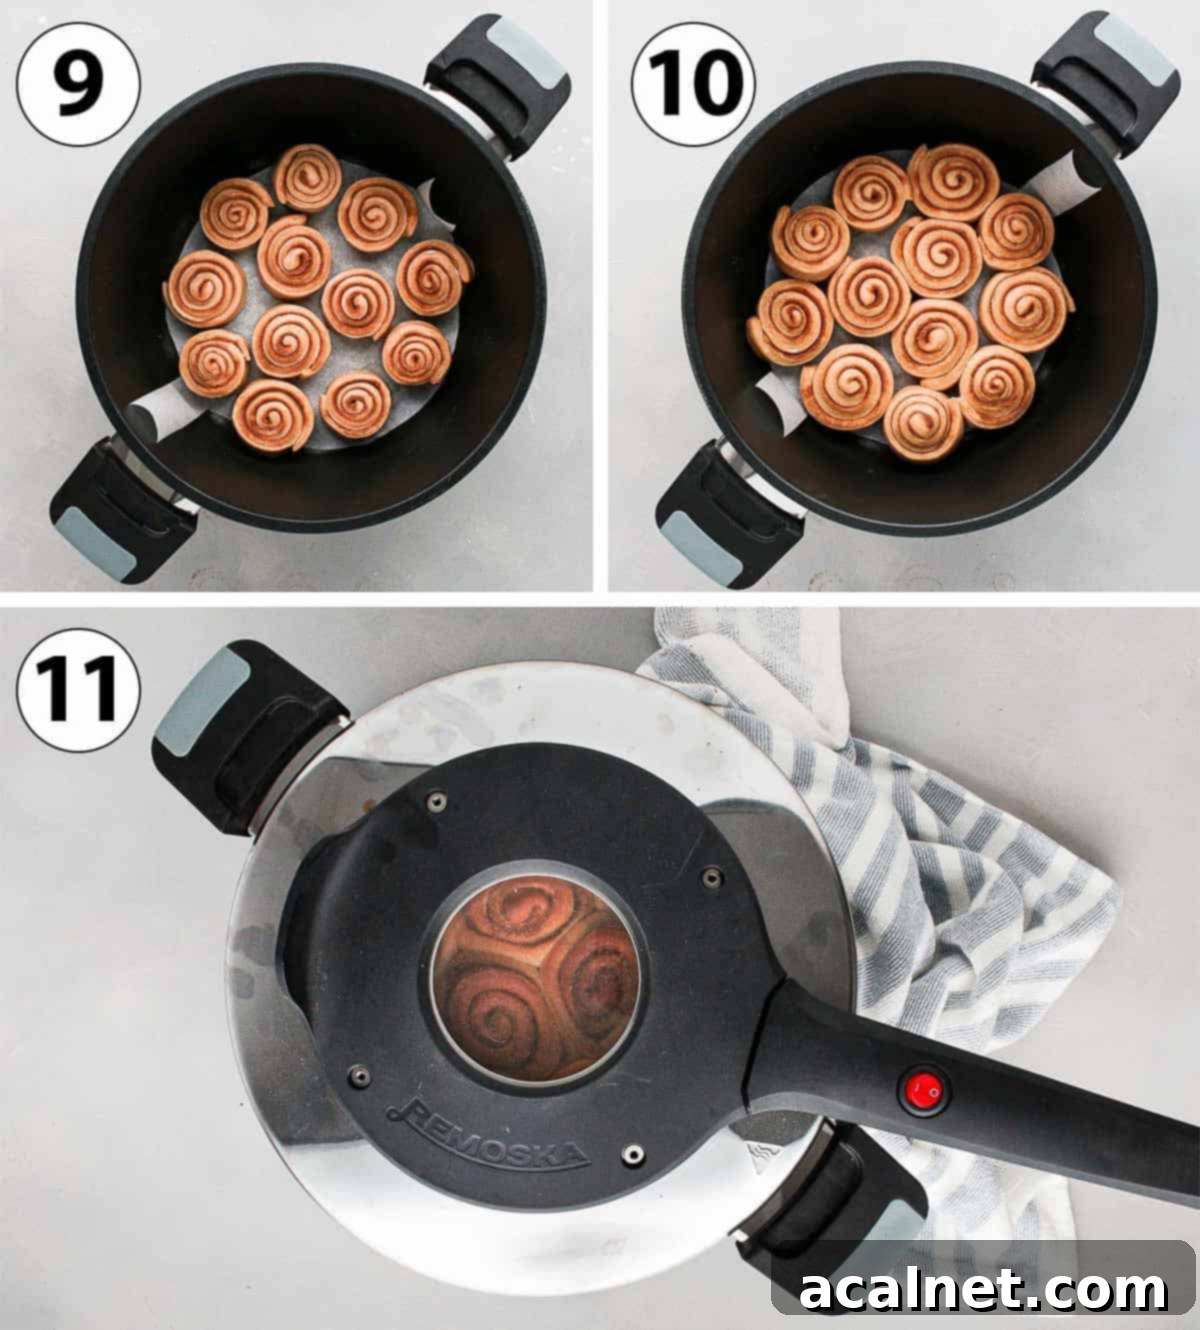
- Optional Lining. You can choose to line the Remoska Pot with baking paper. This isn’t strictly necessary as the pot is non-stick, but it can make it easier to lift the baked cinnamon rolls out once they’re done.
- Photo 9: Arrange in Pot. Carefully place the prepared cinnamon rolls inside the Remoska pot. Ensure you leave a little space between each roll, as they will expand during the second proofing and baking.
- Photo 10: Second Proof. Cover the Remoska pot with the glass lid. Place it in a warm spot and let the rolls proof for approximately 30 minutes, or until they have visibly risen again and are touching each other.
- Photo 11: Bake to Golden Perfection. Remove the glass lid and replace it with the Remoska Baking Lid. Plug in the Remoska and turn it on. Bake the cinnamon rolls for 22 minutes. Once the baking time is complete, turn off the Remoska lid, but leave it covered on the pot for another 5 minutes. This allows the rolls to finish baking gently with residual heat and keeps them moist. After 5 minutes, remove the lid.
- Cool and Serve. Allow the cinnamon rolls to cool down slightly in the Remoska pot before carefully lifting them out. They are best enjoyed warm, fresh from the Remoska. If not serving immediately, store them at room temperature until ready to eat.
Frequently Asked Questions About Remoska Cinnamon Rolls
Absolutely! While a stand mixer makes the process quicker and easier, you can certainly knead the dough by hand. Just be prepared to dedicate more time and effort – usually about twice as long as with a mixer. Continue kneading until the dough feels very soft, pliable, and passes the famous “windowpane test,” indicating good gluten development.
Yes, there is! Our method of cutting strips and then rolling each one individually tends to give very neat, uniform cinnamon rolls, and you avoid the mess of cutting through a sticky, filled log of dough. However, if you prefer the more traditional approach, simply roll the entire filled dough into a long, tight log shape. Then, use a sharp knife or even a piece of unflavored dental floss to cut off 12 individual rolls from the log.
Lining the Remoska pot with baking paper is entirely optional. The Remoska pot features a high-quality non-stick coating, so your cinnamon rolls shouldn’t stick. The main benefit of using baking paper is simply to make it easier to lift the entire batch of rolls out of the pot once they’re baked, especially if you plan to transfer them to a cooling rack or serving platter.
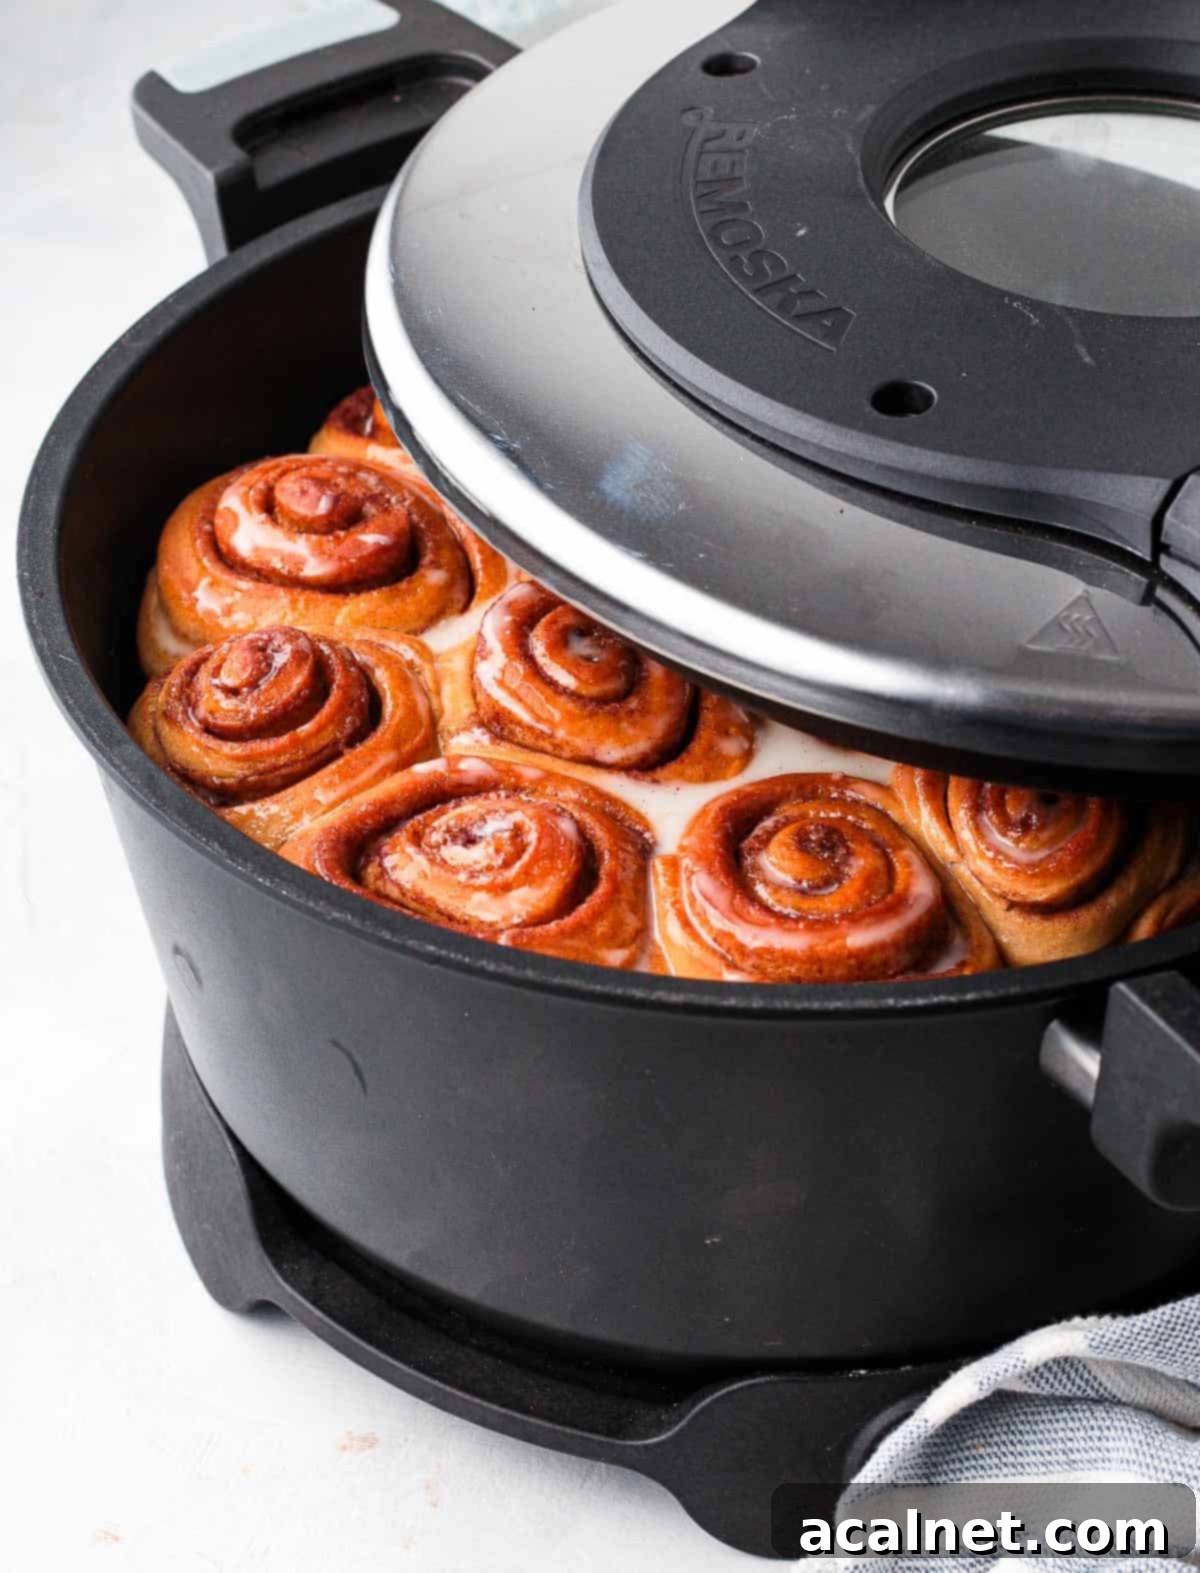
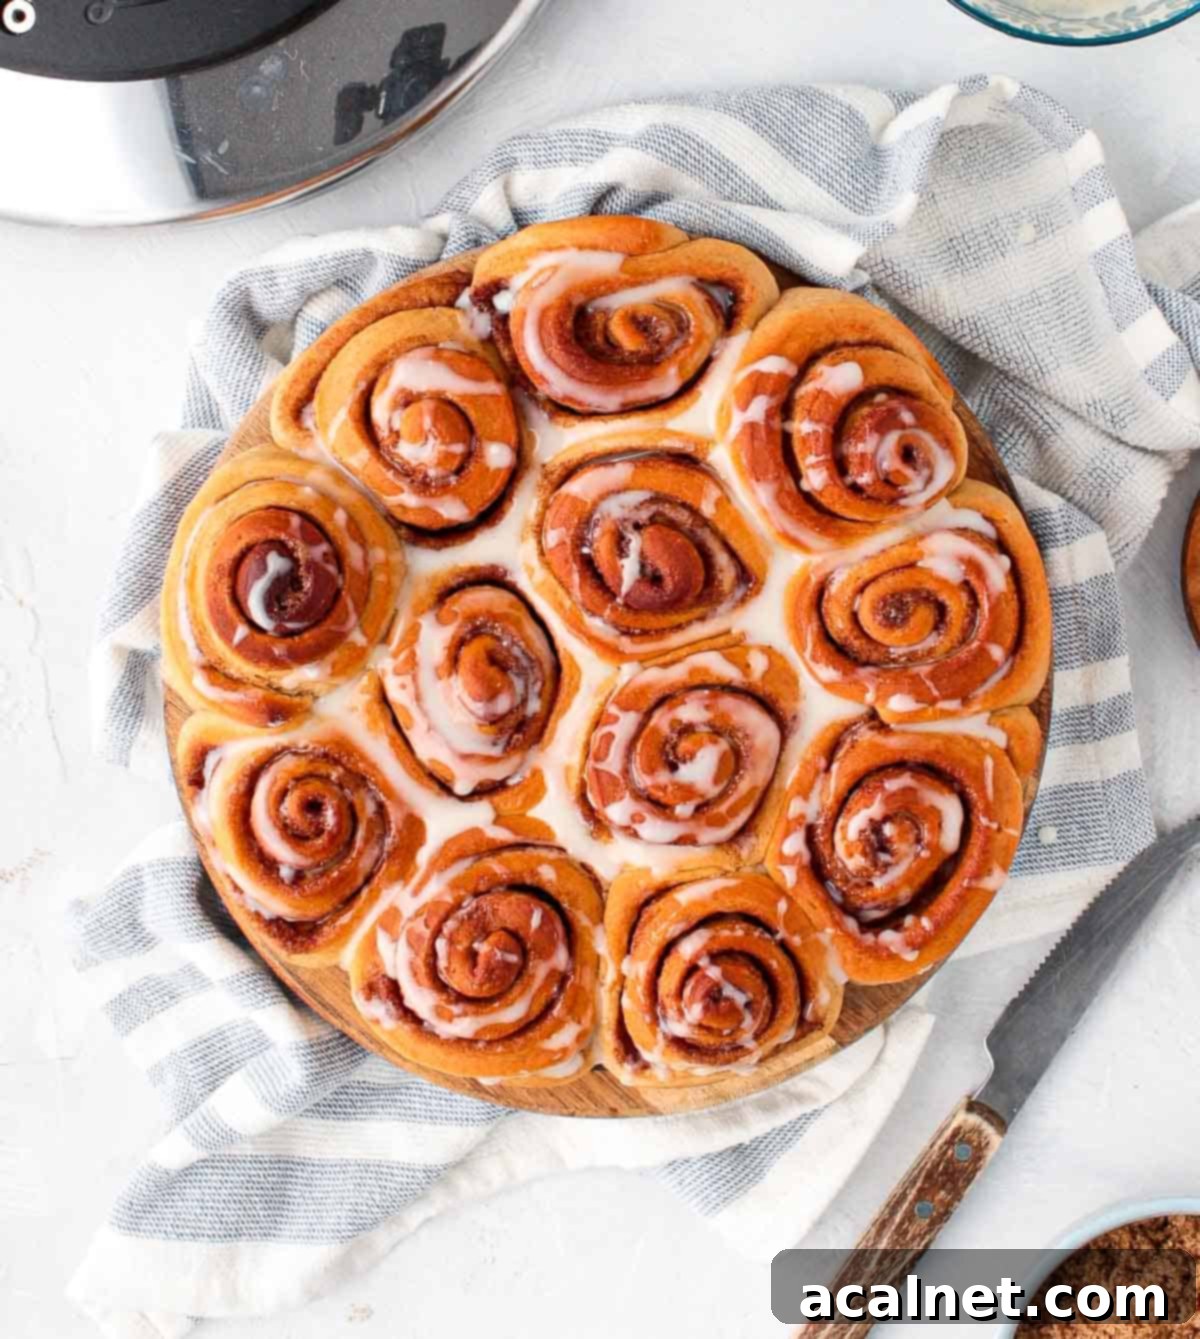
An egg wash isn’t necessary for these Remoska cinnamon rolls. As you can see from our photos, the unique baking environment of the Remoska naturally gives the rolls a beautiful, golden-brown top without any extra brushing. This saves you an extra step and still delivers a perfectly appealing finish.
Absolutely! You can prepare the dough up to the first proofing stage. After the dough has doubled in size, gently punch it down, cover the bowl tightly with plastic wrap, and refrigerate it overnight (up to 12-18 hours). The next day, let the dough come to room temperature for about 30-60 minutes before proceeding with rolling, filling, and baking. This slow fermentation can even enhance the flavor!
If your yeast mixture doesn’t become frothy, it likely means the yeast is no longer active (expired) or the milk was either too hot (which kills the yeast) or too cold (which won’t activate it). Ensure your milk is lukewarm (around 40°C / 105°F) and always check the expiration date on your yeast packet. It’s best to discard the inactive yeast and start over with fresh yeast to ensure a good rise.
Expert Tips for Perfect Remoska Cinnamon Rolls
Achieving bakery-quality cinnamon rolls in your Remoska is straightforward with a few key tips:
- Warmth is Key for Proofing: Yeast loves warmth! Always place your dough in a consistently warm, draft-free spot for proofing. If your kitchen is cool, consider turning on your oven light (without heat) and placing the covered bowl inside, or find a sunny spot. This will significantly speed up and improve the rise.
- Overnight Fermentation for Enhanced Flavor: For a deeper, more complex flavor in your cinnamon rolls, you can prepare the dough and complete the bulk fermentation (first proofing) overnight in the refrigerator. This slow, cold proof develops the yeast’s flavors more fully. Just remember to let the dough come to room temperature for about 30-60 minutes before rolling it out the next day.
- Get Creative with Flavors: While classic cinnamon is always a winner, don’t hesitate to experiment! Try incorporating additional ingredients like mini chocolate chips, a blend of other warming spices (cardamom, nutmeg), or even finely diced fruits such as apple chunks or fresh berries into your filling.
- Icing/Frosting Patience: If you plan to finish your cinnamon rolls with a vanilla icing or cream cheese frosting, ensure they have cooled down completely (or at least to lukewarm) first. Applying frosting to hot rolls will cause it to melt and run off, making a mess.
- Measure Accurately: Especially for baking, precise measurements are critical. We highly recommend using a kitchen scale to measure your dry ingredients in grams for the most consistent and best results.
Storing and Freezing Your Delicious Cinnamon Rolls
These homemade Remoska cinnamon rolls are truly at their peak when enjoyed fresh, straight out of the pot. However, if you have leftovers or want to plan ahead, here’s how to store them:
- Room Temperature: Store baked cinnamon rolls in an airtight container at room temperature for up to three days. To revive their soft texture and warm appeal, we highly recommend gently reheating them in the microwave for 15-30 seconds, or in the Remoska itself for a few minutes, before serving.
- Freezing for Later: Cinnamon rolls freeze beautifully (without any icing or frosting applied). Once completely cooled, wrap individual rolls tightly in plastic wrap, then place them in a freezer-safe bag or container. They can be frozen for up to two months.
- Thawing Frozen Rolls: To thaw, simply leave them at room temperature for a few hours. For a quick thaw and warm treat, you can also finish defrosting them in the microwave. Once thawed and reheated, you can then add your fresh icing or frosting.
More Irresistible Sweet Bread & Roll Recipes
If you’ve enjoyed baking these Remoska Cinnamon Rolls, you’ll love exploring other sweet bread and roll recipes from our collection. They’re perfect for satisfying your sweet tooth or sharing with loved ones:
- Decadent Chocolate Chip Brioche Bread
- Unique Red Bean Sweet Rolls
- Comforting Apple Cinnamon Pull Apart Bread
- Bright and Zesty Lemon Sweet Rolls
- Quick & Easy No Yeast Cinnamon Rolls
- Elegant Chocolate Brioche Bread Wreath
- Luscious Chocolate Raspberry Swirl Brioche Buns
- The Ultimate Cinnamon Roll Bread Loaf
- Invigorating Coffee Cinnamon Rolls
Made this recipe?
Let us know if you liked it by leaving a comment below, and tag us on Instagram @a.baking.journey with a photo of your creation! We love seeing your delicious bakes!
Full Recipe: Remoska Cinnamon Rolls

Cinnamon Rolls in the Remoska
Print Recipe
Ingredients
Dough
- 125 ml (1/2 cup) Full Cream Milk (Whole Milk), lukewarm
- 40 gr (3 1/2 tablesp.) Brown Sugar
- 7 gr (3/4 teasp.) Instant Yeast
- 225 gr (1 1/2 cup) Plain / AP Flour, (plus a little bit more if needed)
- 1 teasp. Ground Cinnamon
- 30 gr (2 tablesp.) Unsalted Butter, very soft
- 1 Egg, at room temperature
- 1 pinch Table Salt
Cinnamon Filling
- 45 gr (3 tablesp.) Unsalted Butter, very soft
- 45 gr (4 tablesp.) Brown Sugar
- 2 teasp. Ground Cinnamon
Instructions
Dough
- In a small bowl, mix the lukewarm Milk, one tablespoon of Brown Sugar and Yeast. Set aside for 10-15 minutes, or until froth/bubbles appear on the surface (see note 1).125 ml (1/2 cup) Full Cream Milk (Whole Milk), 40 gr (3 1/2 tablesp.) Brown Sugar
- Place the Flour, rest of the Brown Sugar and Cinnamon in the bowl of your mixer (or a large mixing bowl of making by hands). Add the Milk/Yeast, Egg and soft Butter. Knead for a couple of minutes on medium speed until combined, then add the Salt.40 gr (3 1/2 tablesp.) Brown Sugar, 225 gr (1 1/2 cup) Plain / AP Flour, 1 teasp. Ground Cinnamon
- Continue to knead on medium high speed for another 5 to 8 minutes, or until the dough is pulling from the edges, is very soft and stretchy (see note 2). Cover the bowl with a tea towel and leave to proof in a warm place for about 1 to 1,5 hours, or until doubled in size30 gr (2 tablesp.) Unsalted Butter, 1 Egg, 1 pinch Table Salt
Cinnamon Filling
- Mix the soft Butter, Brown Sugar and Cinnamon in a small bowl to get a paste. Set aside.45 gr (3 tablesp.) Unsalted Butter, 2 teasp. Ground Cinnamon, 45 gr (4 tablesp.) Brown Sugar
- Punch the dough to deflate it, then transfer it over a lightly floured surface. Roll into a large rectangle, about 30x40cm (12x15inch).
- Spread the Cinnamon filling over the dough with a small offset spatula. Cut the dough into 12 long strips, then roll each strip to create your cinnamon rolls (see note 3).
- Optional: line the Remoska Pot with baking paper (see note 4).
- Place the cinnamon rolls inside the pot, leaving a little bit of space between each rolls. Cover with the glass lid and leave to proof in a warm spot for about 1/2 hour, or until the rolls have risen again.
- Replace the glass lid with the Baking Lid, plug it in and turn it on. Bake for 22 minutes, then turn off the lid. Leave covered with the (turned off) lid for another 5 minutes, then remove the lid. Leave to cool down slightly, then lift the rolls out of the pot.
- Enjoy warm straight away, or keep at room temperature until ready to be eaten (it is recommend it to reheat them up slighty before eating).
Would you like to save this recipe?
We’ll email this post to you, so you can come back to it later!
Notes
Ingredients Notes:
- Milk: The milk should be lukewarm, ideally around 40°C (105°F). This temperature is perfect for activating yeast. Be careful not to let it get too hot, as excessive heat will kill the yeast, preventing your dough from rising.
- Yeast: Instant Yeast is convenient because it doesn’t always need to be bloomed. However, pre-mixing it with warm milk and sugar (as in step 1) is a great way to confirm it’s active before you commit to making the dough. If you’re using Active Dry Yeast, this initial blooming step is crucial for its activation.
- Flour: While Plain/All-Purpose Flour works wonderfully for a soft crumb, substituting it with Bread Flour can yield a slightly lighter and chewier texture due to its higher protein content.
Instruction Notes:
- Note that if you are using Instant Dry Yeast, this step of blooming the yeast is optional. We recommend it as a safety check to ensure your yeast is alive. If you are confident in your yeast’s freshness, you can add all the dough ingredients (except salt) directly into your mixing bowl in step 2. If using Active Dry Yeast, this step is absolutely essential.
- The “windowpane test” is a simple method to check for sufficient kneading. Take a small piece of dough and gently stretch it between your fingers. If it can stretch thin enough to allow light to pass through without tearing (like a windowpane), your dough is perfectly kneaded and ready for its first proof.
- Our method of cutting strips and then rolling them individually is designed to give you uniformly shaped cinnamon rolls with clean spirals. Alternatively, for a more traditional approach, you can roll the entire filled dough into a long, cylindrical log and then cut it into 12 equal individual rolls using a sharp knife or even unflavored dental floss.
- Lining the Remoska pot with baking paper is purely for convenience, making it easier to lift the baked rolls out. The Remoska pot itself is designed with a non-stick surface, so sticking should not be an issue.
Nutrition (per serving)
