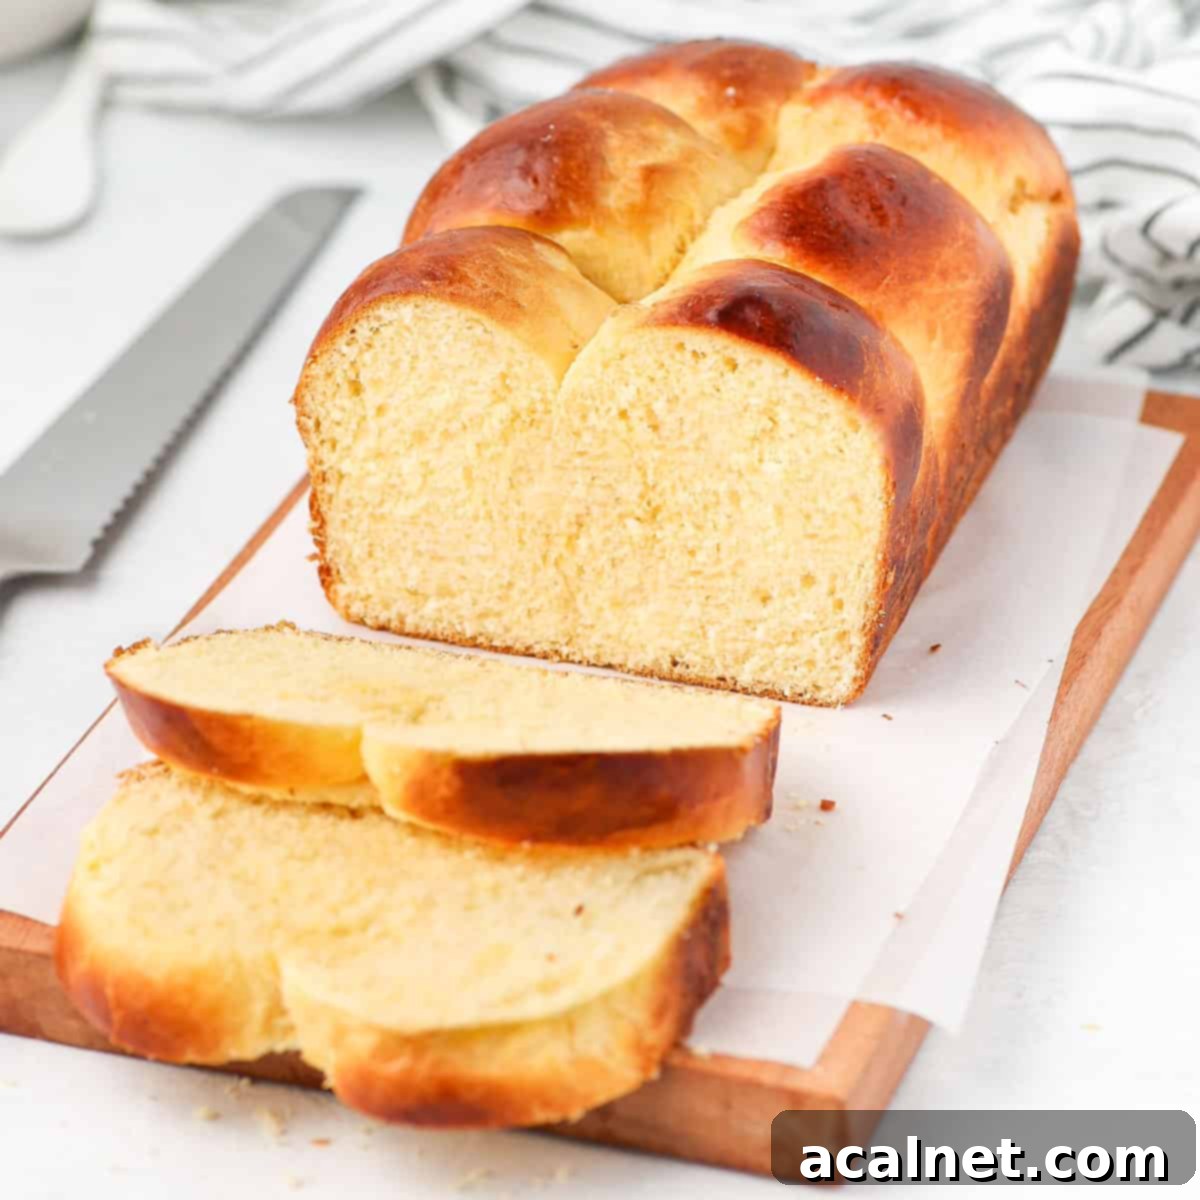
The Ultimate Guide to Baking Homemade French Brioche Loaf Bread: Rich, Fluffy, and Buttery Perfection
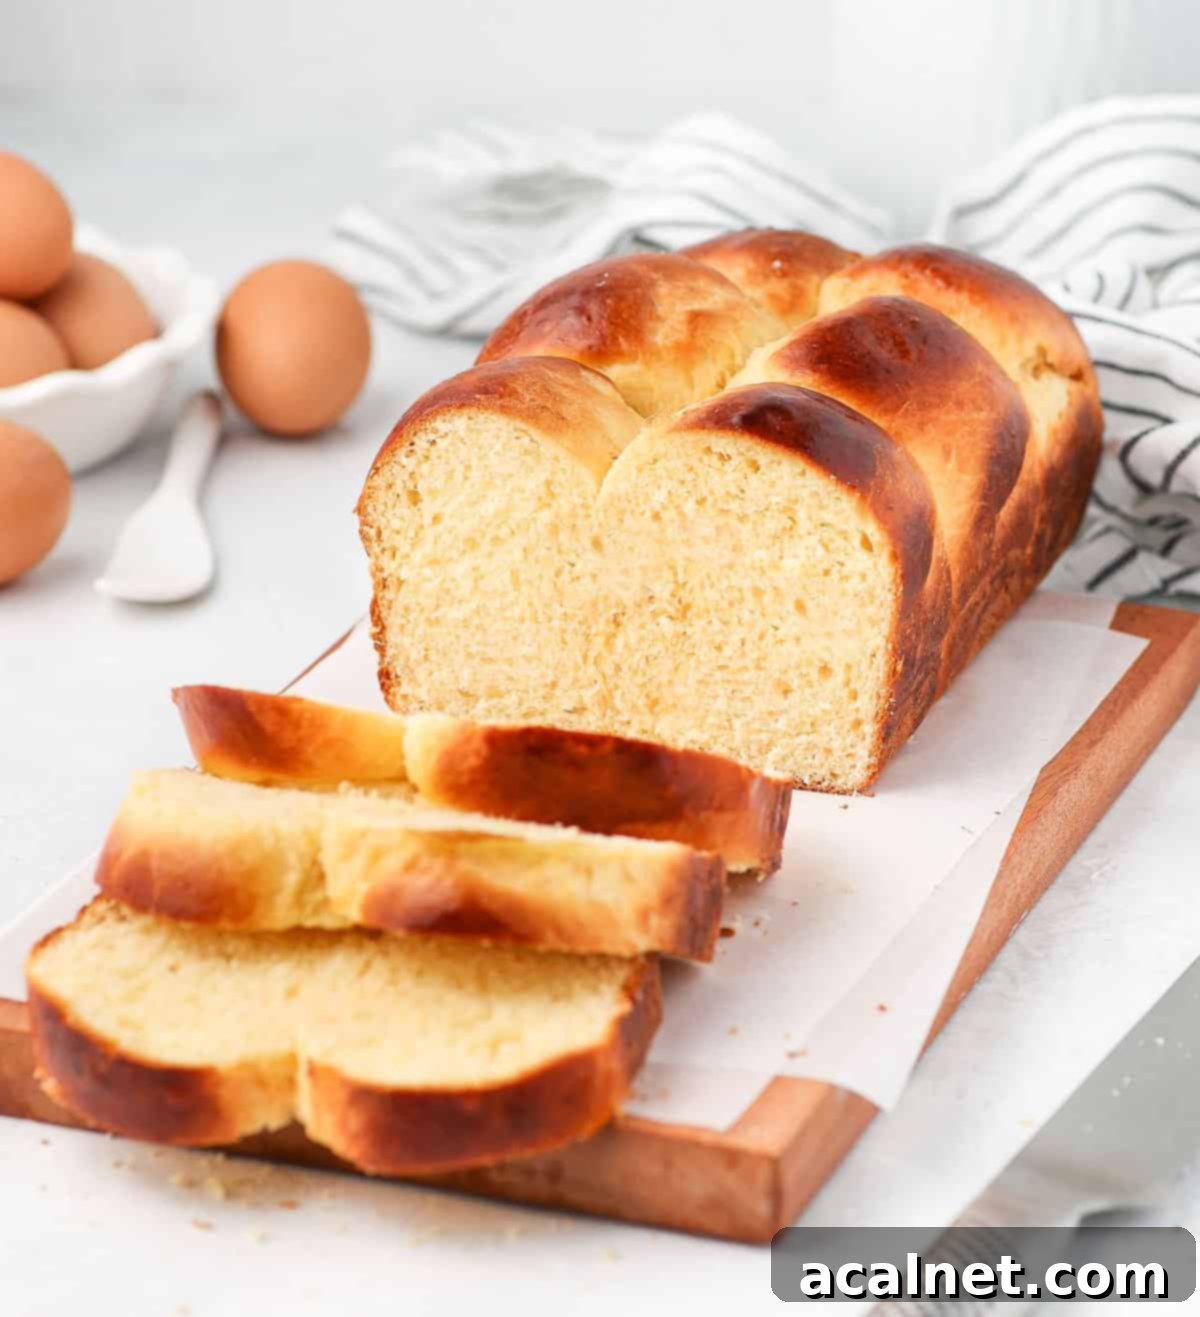
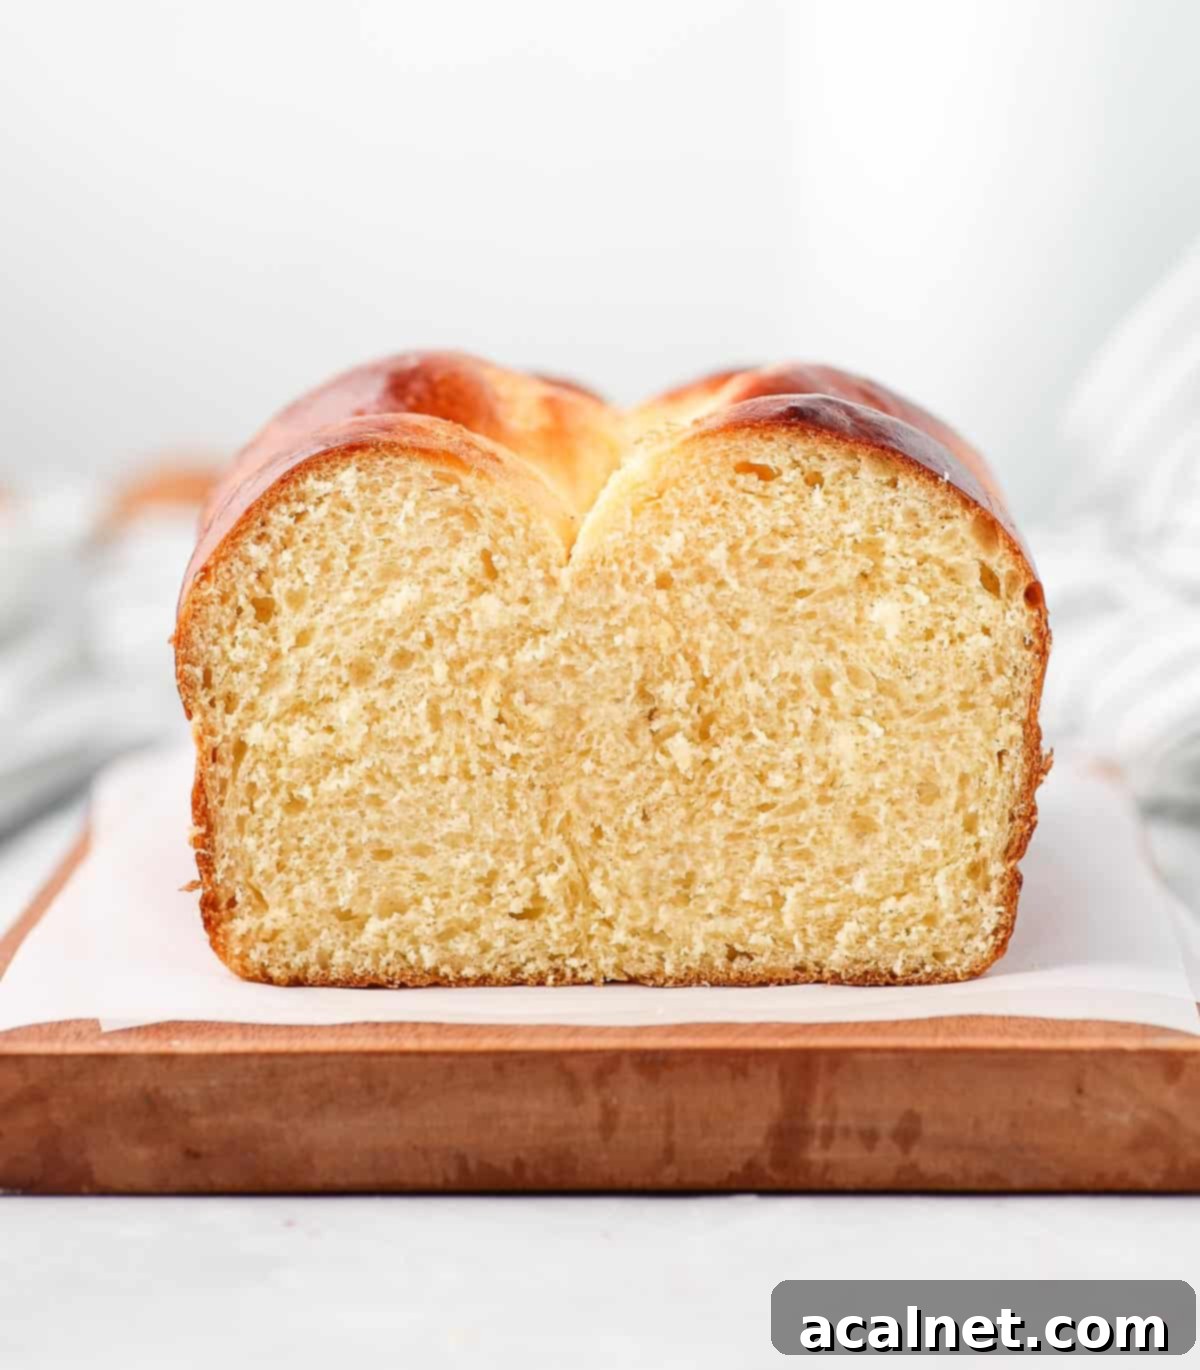
There’s nothing quite like the irresistible aroma and taste of freshly baked brioche bread. This classic French Brioche Loaf Bread recipe delivers a truly decadent experience: a rich, impossibly fluffy, and wonderfully buttery crumb that will instantly elevate your breakfast, brunch, or dessert. Perfect for enjoying with a smear of butter or your favorite jam, transforming into luxurious French toast, or simply savoring on its own as a sweet treat, a homemade brioche is a revelation. Once you experience the superior flavor and texture of a brioche baked in your own kitchen, you’ll find yourself wondering why you ever considered buying it from the store again!
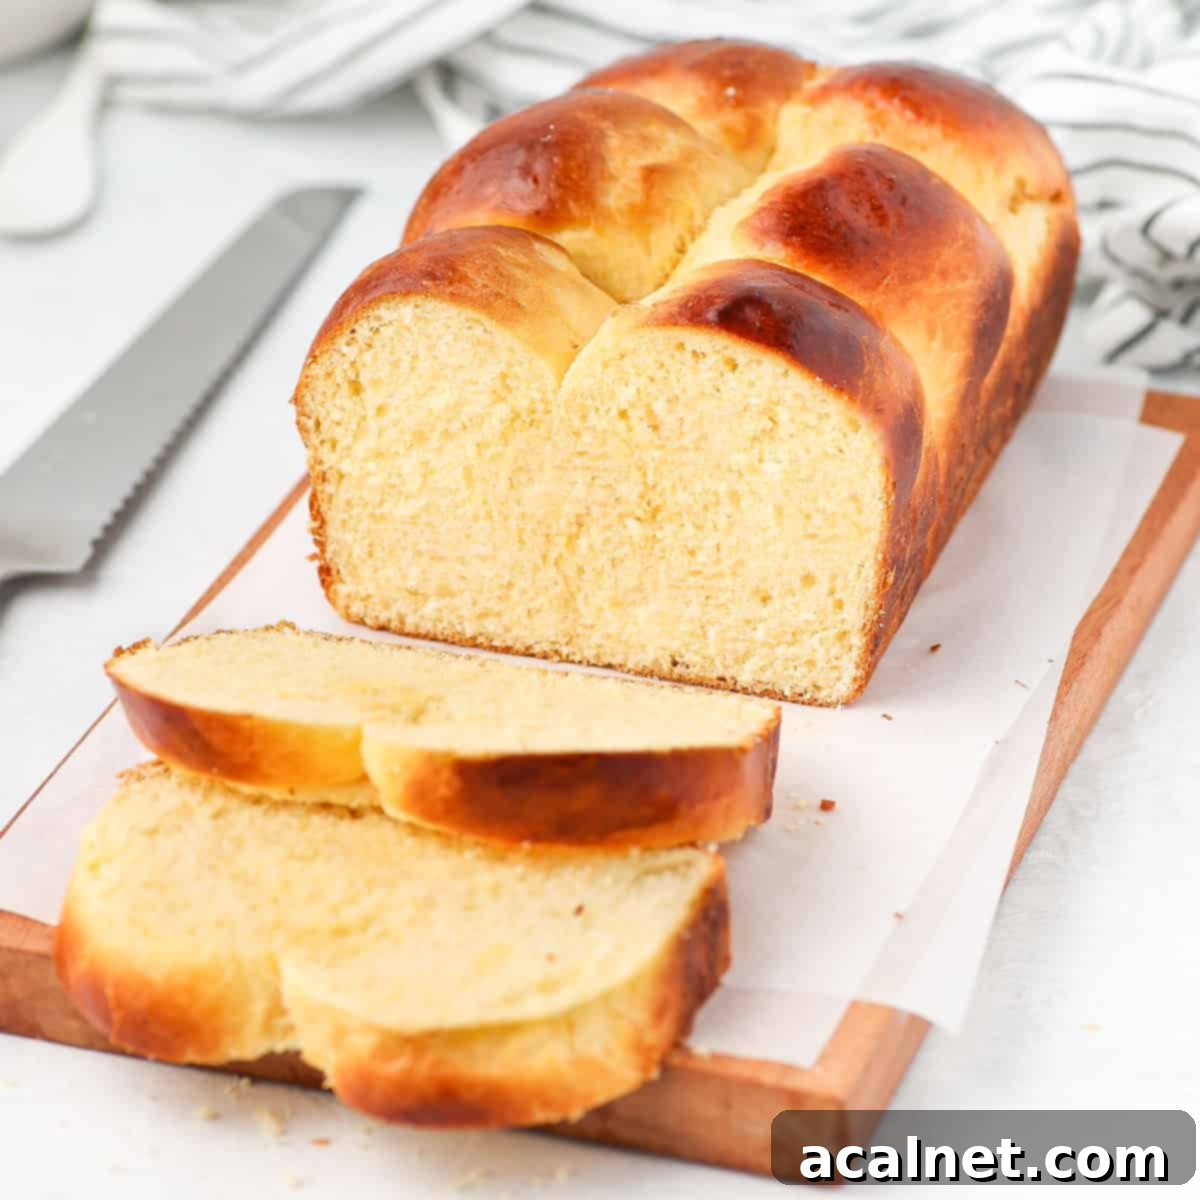
[feast_advanced_jump_to]
Why You’ll Adore This Homemade Brioche Recipe
There’s an undeniable magic to baking a homemade brioche loaf. The scent that fills your kitchen, the golden-brown crust, and the exceptionally tender crumb are simply unparalleled. This isn’t just any bread; it’s a true French *Viennoiserie*, a delightful category of baked goods that gracefully bridges the gap between traditional bread and decadent pastry. Our classic brioche recipe yields the softest, fluffiest, most buttery, and utterly moorish sweet bread you’ll ever taste.
What makes a brioche so special? It’s an “enriched bread,” meaning the dough is lavishly enriched with eggs, butter, and milk, setting it apart from leaner, everyday bread varieties. This generous addition of fats and dairy gives brioche its signature rich flavor, golden hue, and incredibly tender, melt-in-your-mouth texture. This specific French brioche loaf is incredibly versatile, making it a perfect foundation for a multitude of culinary creations. You can transform slices into the most heavenly Brioche French Toast, whether it’s a classic individual serving or a comforting Brioche French Toast Casserole. It’s also fantastic for creating gourmet sandwiches, making delightful Brioche Donuts, or even crafting elegant bread puddings. Don’t forget its potential for savory applications, like homemade burger buns or slider rolls that will elevate any meal!
While this recipe provides instructions for a simple, elegant plain brioche loaf, it’s also a fantastic canvas for your creative baking endeavors. Feel free to customize it with delightful additions, much like our popular Chocolate Chip Brioche or a visually stunning Chocolate Brioche Braid. The possibilities are truly endless when you start with a perfect homemade brioche base.
Essential Ingredients for Your Perfect Brioche Loaf
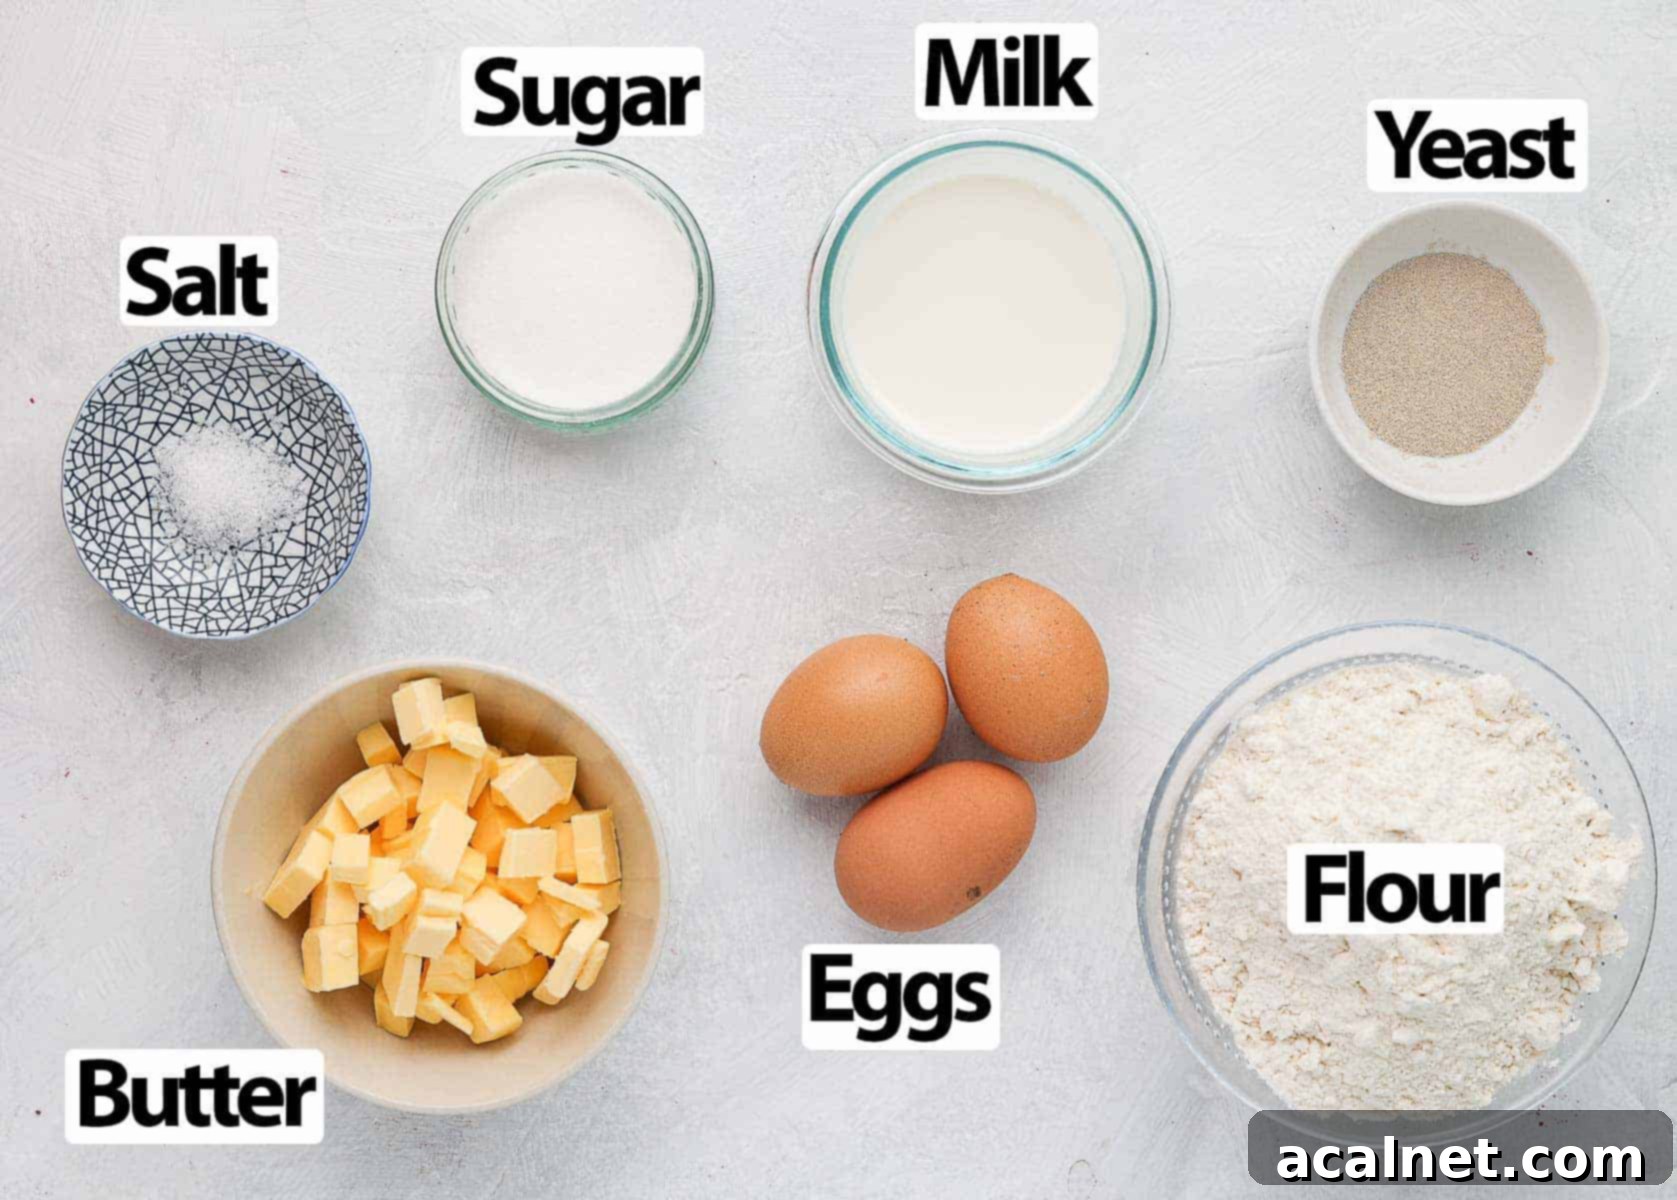
This simple yet foundational brioche recipe calls for just seven core ingredients, each playing a vital role in achieving that coveted rich and fluffy texture. (For precise quantities, please refer to the recipe card below):
- Milk: Opt for Full Cream or Whole Milk to impart the richest flavor and most tender crumb. The milk needs to be lukewarm, ideally between 30 to 35 degrees Celsius (85 to 95 degrees Fahrenheit), to properly activate the yeast without killing it. If it’s too hot, the yeast will die, and your bread won’t rise. If it’s too cold, the yeast will be sluggish.
- Yeast: We recommend using Instant (dry) Yeast for convenience as it can be added directly to the dry ingredients. If you prefer Active Dry Yeast, ensure you “bloom” it first by dissolving it in the warm milk with a pinch of sugar and letting it sit until foamy, confirming its activity before proceeding with the rest of the recipe.
- Sugar: Caster Sugar or fine white granulated sugar is ideal for this recipe. Sugar not only sweetens the brioche but also provides food for the yeast, aiding in fermentation and achieving that beautiful golden crust. We haven’t tested this recipe with liquid sweeteners, so stick to granulated sugar for best results.
- Eggs: Medium-sized eggs, brought to room temperature, are crucial. Room temperature eggs emulsify better with the other ingredients, creating a smoother, more uniform dough and contributing significantly to the brioche’s richness and color. Whisking them lightly in a separate bowl before adding them to the mixture can help them incorporate more easily into the dough, though this step is optional. You will also reserve a small amount of egg for an egg wash, which gives the baked loaf a glossy, golden finish.
- Flour: Use Plain or All-Purpose Flour. A unique characteristic of brioche, unlike many other breads, is its use of standard baking flour rather than high-protein bread flour. This choice of flour contributes to brioche’s signature light, soft, and fluffy crumb, rather than a chewy texture.
- Salt: A small amount of fine Table Salt is essential to balance the sweetness of the bread and enhance all the other flavors. Remember to add it towards the end of the dry ingredients to prevent it from directly contacting the yeast, as salt can inhibit yeast activity.
- Butter: Unsalted butter, at a soft, room temperature consistency, is paramount. Avoid salted butter as it can interfere with the salt balance and yeast. The butter’s temperature and softness are key for it to be smoothly incorporated into the dough. If it’s too cold, it will form chunks; if it’s too warm, it can make the dough greasy and difficult to knead.
Optional Additions & Flavor Variations
While a plain brioche loaf is a delight on its own, this versatile dough provides an excellent base for a myriad of flavor enhancements and fillings. Get creative and customize your brioche to suit any craving!
- Chocolate: Elevate your brioche with chocolate chips, as seen in our beloved Chocolate Chip Brioche recipe. For a more elaborate treat, consider a swirled design with chocolate and jam, like our Chocolate Raspberry Swirl Brioche Buns, or even a laminated dough with a rich chocolate filling, reminiscent of our Chocolate Brioche Bread.
- Dried Fruits & Zest: Incorporate plump raisins, finely chopped dried apricots, or candied orange peel for a touch of fruitiness. A hint of fresh orange zest or a splash of fragrant orange blossom water can add a beautiful aromatic dimension to your brioche.
- Nuts & Spices: Gently fold in toasted chopped nuts like pecans or almonds, or a sprinkle of warming spices like cinnamon or cardamom for an extra layer of flavor.
Crafting the Perfect French Brioche Loaf: A Step-by-Step Guide
Preparing the Enriched Brioche Dough
Making traditional brioche involves a patient, multi-step process, often started the night before you plan to bake. This cold fermentation not only enhances flavor but also makes the dough much easier to handle.
- Begin by combining the lukewarm Milk, half of the Caster Sugar, and the Instant Yeast in the bowl of your stand mixer. Stir gently to combine, then let this mixture rest for approximately 10 minutes. During this time, small bubbles or a frothy layer should appear on the surface. This “blooming” step confirms that your yeast is active and ready to work its magic. (Note 1: It’s critical that the milk is not too hot—ideally 30-35°C / 85-95°F. If it feels warm to the touch, it’s too hot and risks killing the yeast. While blooming is technically optional for instant yeast, it’s a good practice to verify yeast activity.)
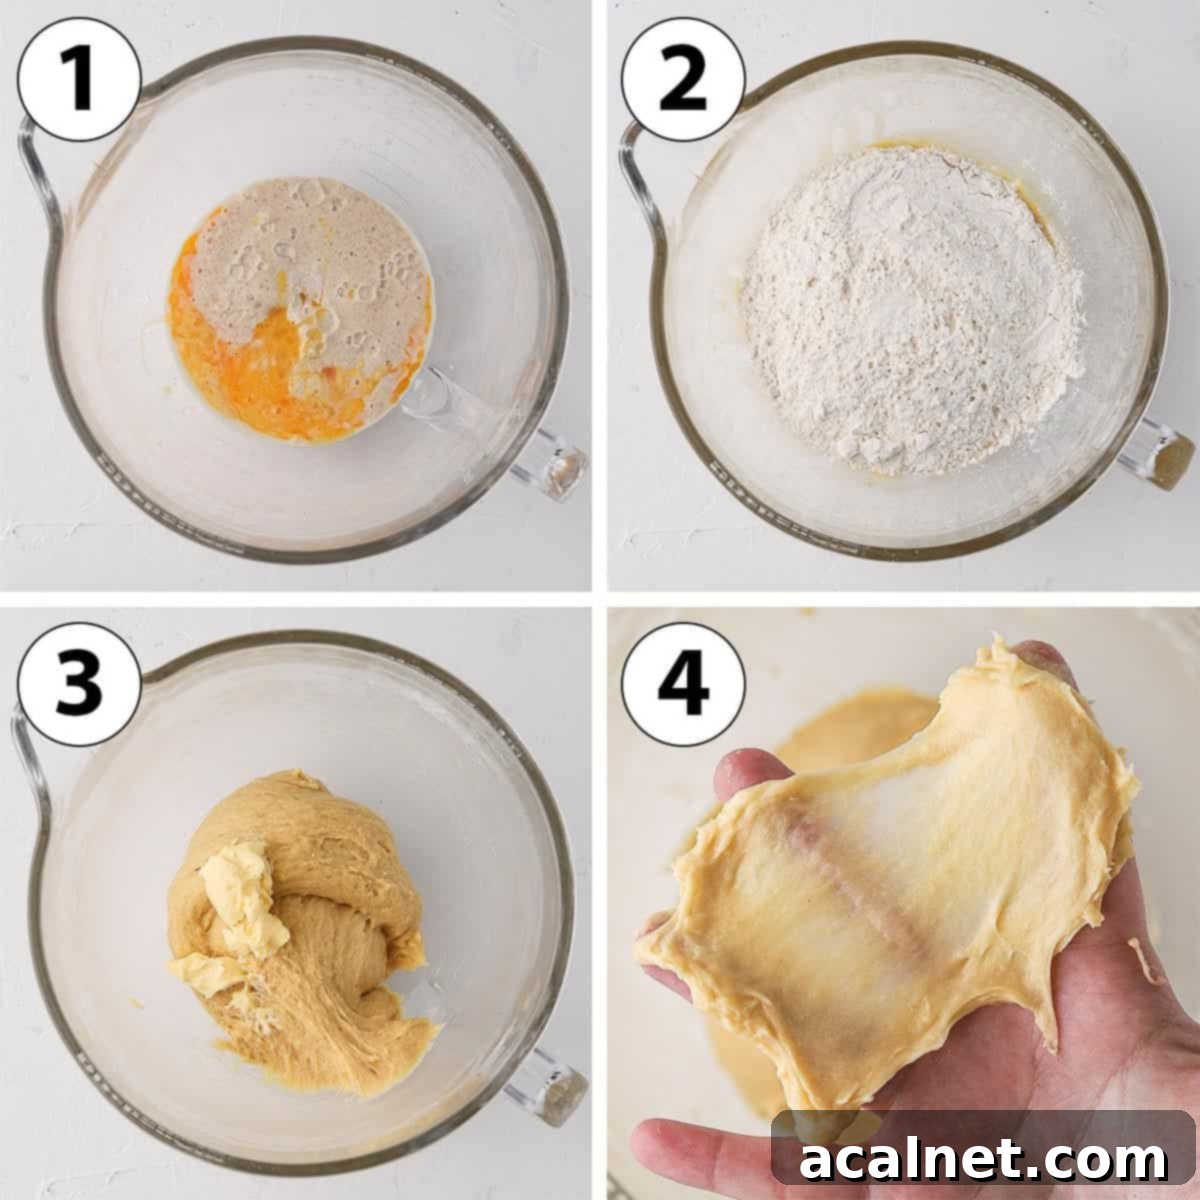
- Photo 1: Next, add your room temperature Eggs. If you lightly whisked them beforehand, they’ll integrate more seamlessly into the dough.
- Photo 2: Incorporate the remaining Sugar, the Flour, and finally the Salt. The salt should be added last to avoid direct contact with the yeast, as high concentrations of salt can inhibit yeast activity. Attach your stand mixer with the dough hook and knead on medium speed for about 5 minutes. At this point, the ingredients will come together to form a shaggy, rough dough.
- Photo 3: Now, it’s time to add the softened, unsalted Butter. This step requires patience. Add the butter gradually, a small piece at a time, allowing each addition to be fully incorporated into the dough before adding the next. Knead on low to medium-low speed. If the dough seems to resist incorporation, stop the mixer and scrape down the sides of the bowl to ensure everything is mixed in. (Note 2: Adding too much butter at once can make the dough greasy and difficult to manage. Slow and steady wins the race here for a perfectly smooth dough.)
- Photo 4: Once all the butter is incorporated, increase the mixer speed to medium-high and continue kneading for an extended period, typically 15 to 20 minutes. The goal is to develop significant gluten, resulting in a dough that is very soft, highly elastic, and passes the “windowpane test” (see tips section below and Note 3 for detailed explanation). You should have a dough that feels slightly sticky but is incredibly smooth and pliable. (If the dough seems hesitant to come together, give it a 10-15 minute rest, then resume kneading. The long kneading time is crucial for enriched doughs like brioche, as the high fat content slows gluten development. Do not shorten this step!)
- After kneading, cover the mixer bowl securely with a tea towel or plastic wrap. Transfer the bowl to the fridge for a long, slow proofing. This “cold fermentation” should last overnight, approximately 8 to 12 hours, or even up to 24 hours. The dough will slowly double in size. (While you can proof in a separate lightly greased bowl, the mixer bowl usually works fine as the dough’s fat content prevents sticking. Cold proofing not only makes the dough much easier to handle — less sticky and firm — but also dramatically deepens the brioche’s flavor profile, resulting in a more complex and delicious bread. While a quicker room temperature proof (around 1.5 hours) is possible, it will result in a stickier dough and a less developed flavor.)
Shaping Your Brioche Loaf for Baking
Shaping is where your brioche truly comes to life. Watch the video in the recipe card below for a visual guide on shaping the brioche loaf bread.
- Once your dough has doubled in size after its cold proof, remove it from the fridge. Gently punch out the air to degas it. Transfer the dough onto a lightly floured work surface. Using a sharp knife or bench scraper, divide the dough into 8 equal portions. For precision, we recommend using a kitchen scale to ensure each piece has the same weight, which promotes even baking and a uniform appearance. Set these portions aside.
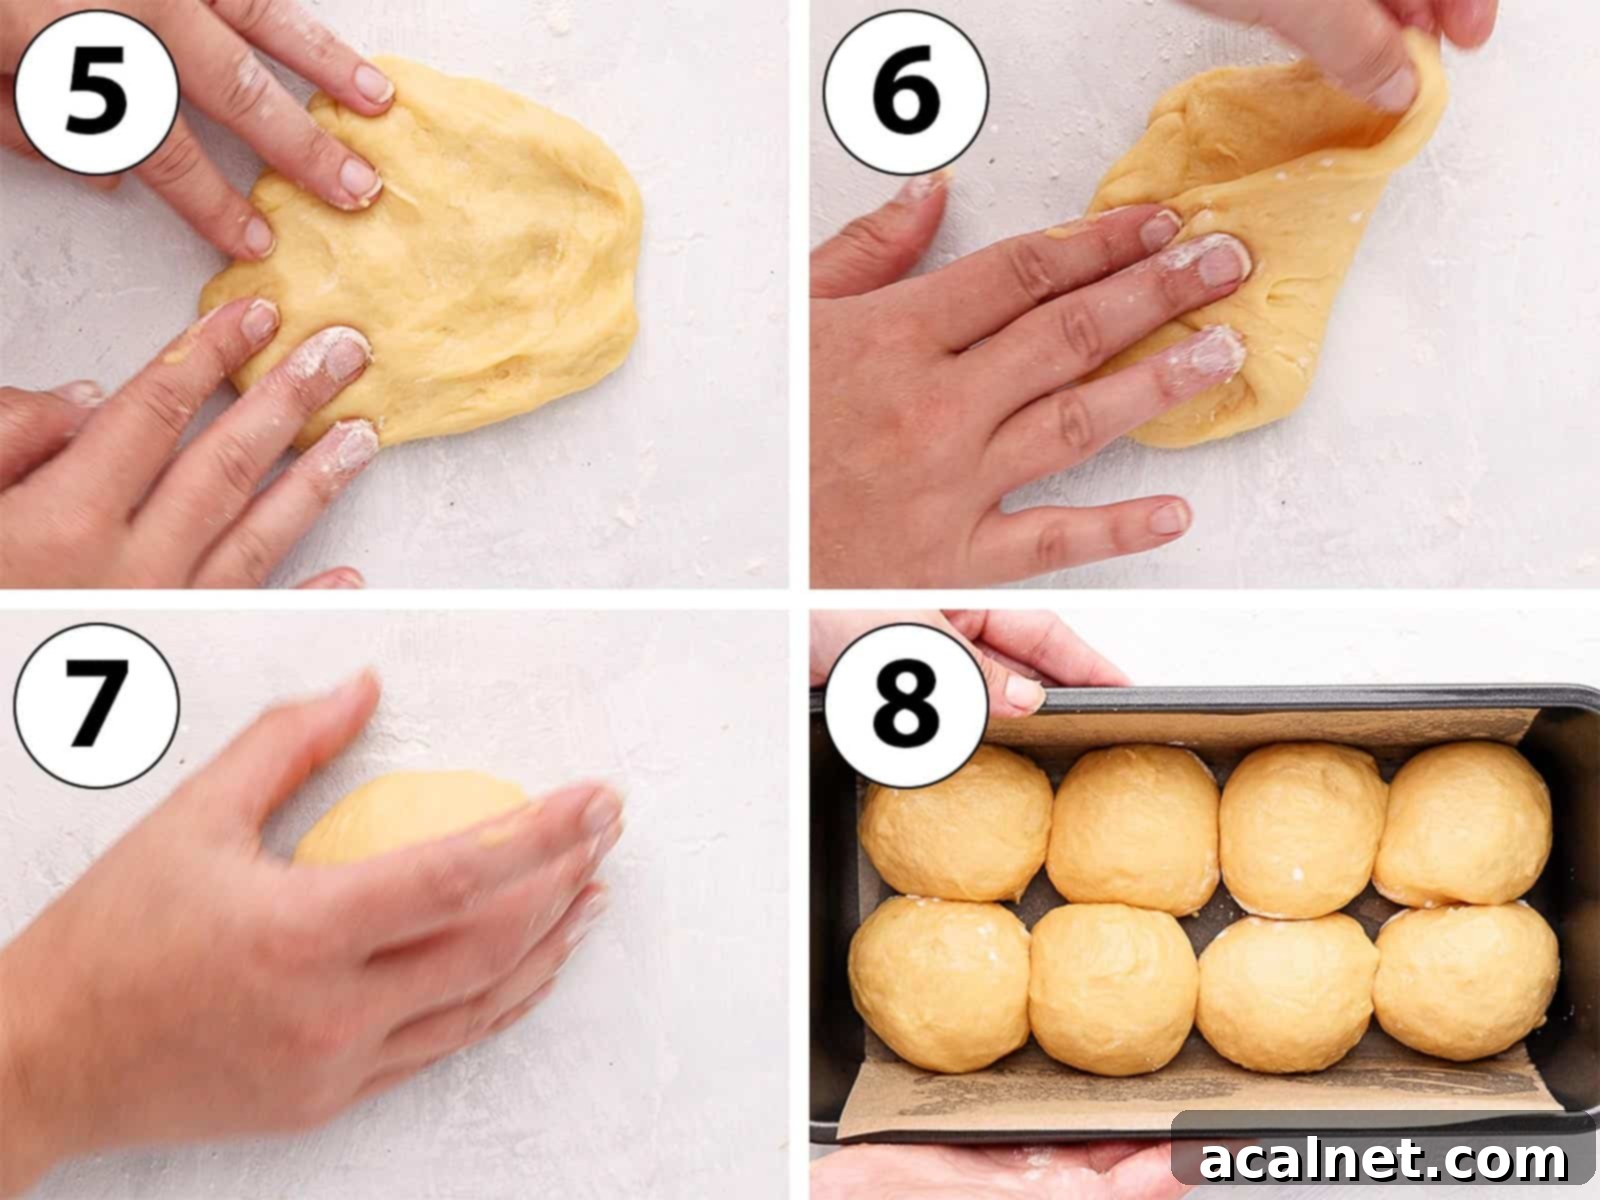
- Photo 5: Take one portion of dough and gently flatten it with your fingers into a rough disc shape.
- Photo 6: Working around the edges of the flattened dough, pull each edge towards the center and gently press it down to seal. Continue this motion until you form a round, bun-like shape with the seams gathered at the bottom. Flip the dough over so the smooth side is facing up and the seams are underneath.
- Photo 7: Now, to create surface tension and a tight, even bun, cup your hand around the dough, placing your fingers at the bottom/side. Gently pull the dough towards you, maintaining light pressure. Rotate the dough 90 degrees and repeat the pulling motion. Continue this rotation and pulling until you feel a noticeable tension on the surface of the dough, indicating a taut skin. Finish shaping by rolling the bun in a circular motion under the palm of your hand on the work surface. (A lightly floured surface is key here; a slight stickiness between the dough and the surface helps create the necessary tension for a well-shaped bun.)
- Repeat this shaping process for all remaining dough pieces.
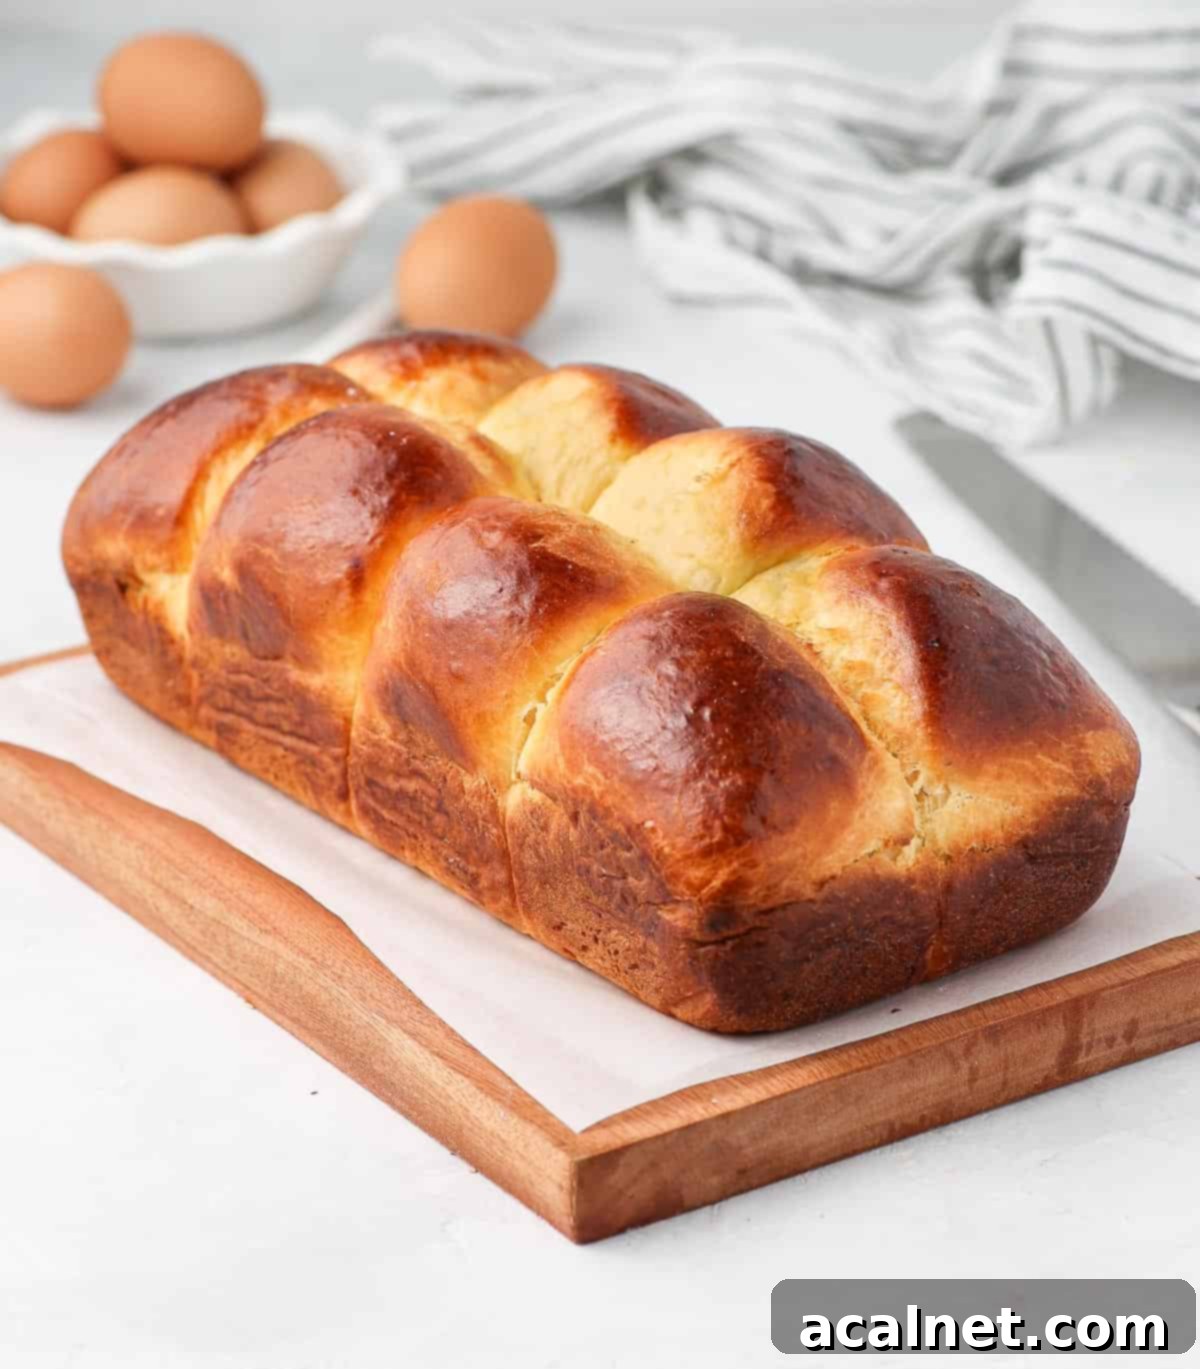
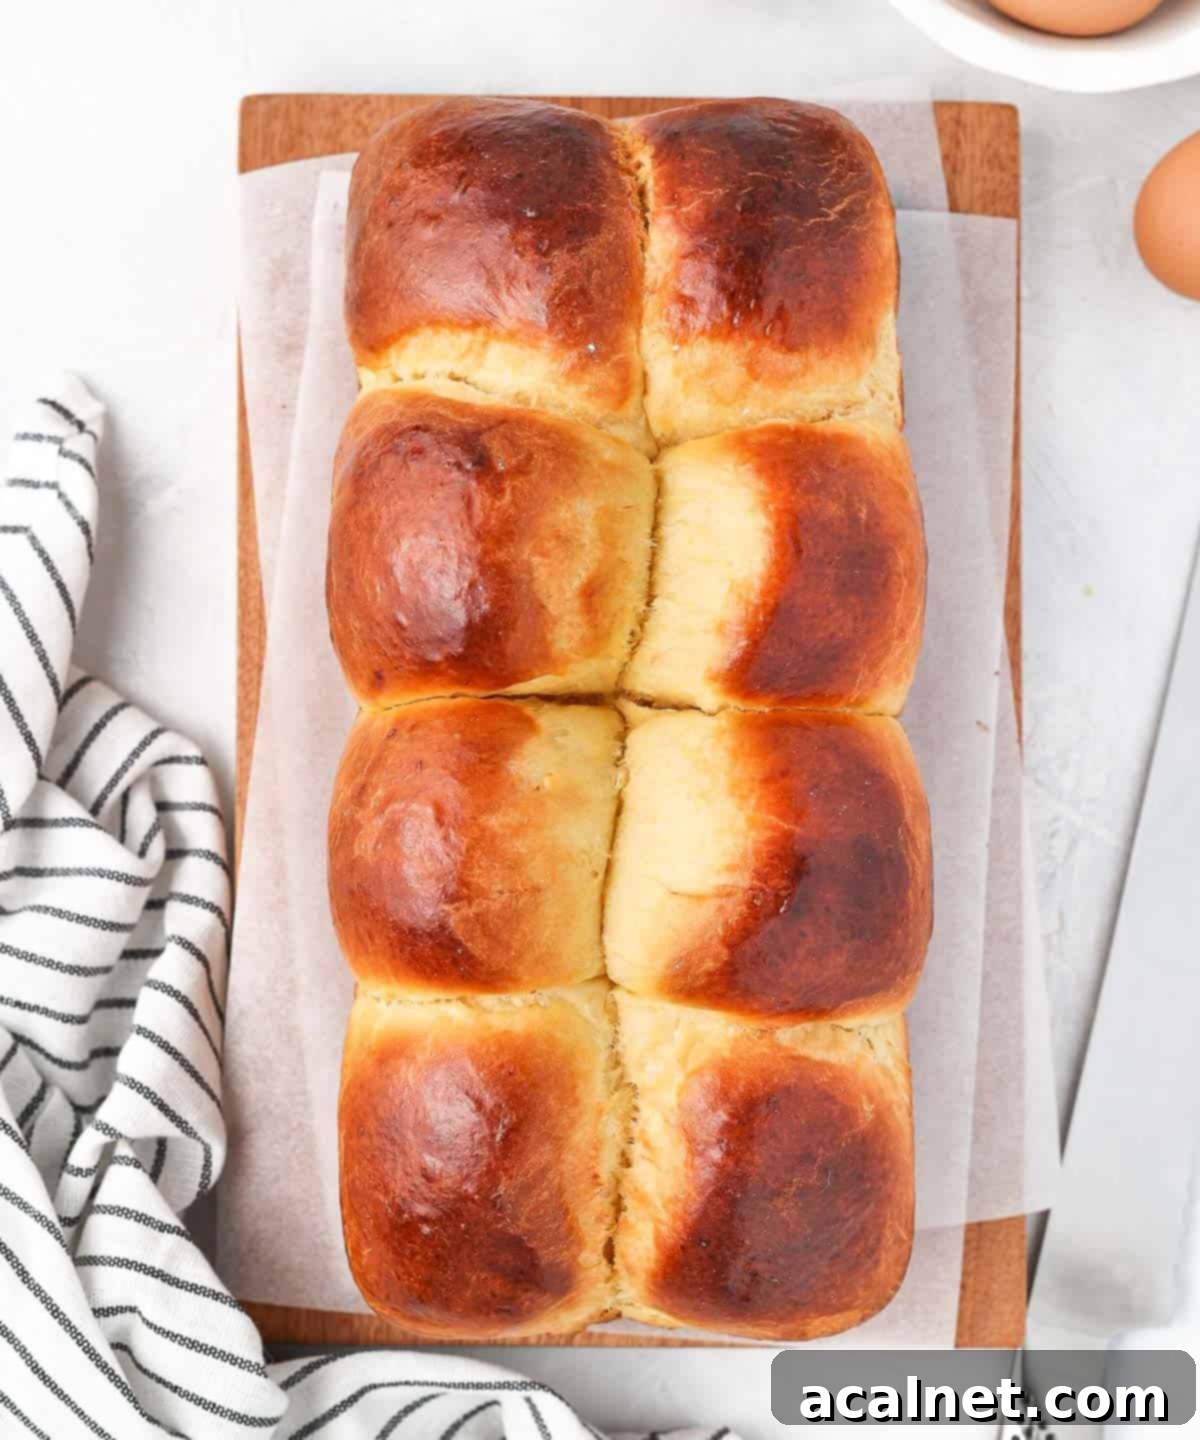
- Photo 8: Prepare a 14 x 28 cm (5.5 x 11 inch) loaf pan by lightly greasing it and lining it with baking paper. Carefully arrange the shaped brioche buns into the prepared loaf pan. For this specific loaf, we placed the buns in 4 rows of 4, with two buns side-by-side in each row, creating a beautiful pull-apart effect.
- In a small bowl, lightly whisk one egg to create an egg wash. Gently brush this egg wash over the tops of the buns in the loaf pan. This wash will give your brioche a gorgeous golden-brown color and a lovely sheen once baked. Cover the loaf pan with a kitchen towel or plastic wrap and allow it to proof at room temperature for a second time, for about 1 to 1.5 hours, or until the buns have visibly doubled in size and are puffy.
- Preheat your oven to 180°C / 350°F. Once preheated, bake the brioche loaf for approximately 20 to 25 minutes, or until the top is beautifully puffed, deeply golden brown, and the internal temperature reaches 88-93°C (190-200°F). After baking, let the brioche loaf cool in the pan for at least an hour before carefully removing it and transferring it to a wire rack to cool completely. (Note 5: It is crucial not to slice the brioche while it’s warm. Cutting it too early will allow steam to escape, which can lead to a dry crumb. The residual heat also continues to cook the bread, ensuring it’s perfectly baked through.)
- The dough is excessively sticky and hard to handle: This is a common characteristic of brioche due to its high fat and egg content. Resist the urge to add too much extra flour, as this can make your final bread tough. Keep kneading! It takes a considerable amount of time for the gluten to develop sufficiently in enriched doughs. If it’s still unmanageable, chilling the dough in the fridge for 20-30 minutes can firm it up, making it easier to work with. The cold fermentation step already greatly assists with this.
- The brioche dough didn’t rise: This usually points to inactive yeast or insufficient proofing time. First, check the expiration date on your yeast. If it’s old, it may have lost its potency. Ensure your milk was at the correct lukewarm temperature (30-35°C / 85-95°F) – too hot kills yeast, too cold slows it down significantly. Remember that cold fermentation in the fridge will make the dough rise much slower than at room temperature, so it’s possible your dough simply needs more time. Give it another few hours in the fridge if it hasn’t doubled.
- The bread is hard or not as soft after a day: Brioche, with its generous butter content, is truly at its peak when enjoyed fresh. It tends to dry out relatively quickly when exposed to air at room temperature. To maintain its freshness, store it properly (see “Storing & Freezing” below). For longer storage, freezing individual slices is an excellent method to preserve its soft texture.
- How to know the dough has been kneaded enough? (The “Windowpane Test”): This is a crucial test for enriched doughs. To perform it, gently pull and stretch a small piece of dough (about the size of a golf ball) with wet or lightly floured hands. Carefully stretch it outwards. If the dough tears quickly, it needs more kneading to develop the gluten. If you can stretch it thin enough to see light pass through it without tearing (like a delicate windowpane), then the gluten is sufficiently developed, and your dough is ready.
- How to know that the brioche is ready to be baked (properly proofed)? For the second proof (after shaping), gently poke the dough with a floured finger. A perfectly proofed dough will show a slight indentation that slowly springs back halfway. If the indentation immediately springs back, the dough is under-proofed and needs more time. If the entire dough deflates or collapses, it is over-proofed, and unfortunately, it might result in a denser crumb.
- Classic Breakfast: My absolute favorite way to enjoy brioche is lightly toasted, then slathered with butter and a generous dollop of homemade jam or a tangy spread like Lemon Curd. The warmth intensifies its buttery notes.
- Sweet Snack: Simply enjoy a slice of plain brioche as a luxurious sweet snack. Its inherent sweetness and tender crumb make it a satisfying treat any time of day.
- Decadent French Toast: Brioche is the ultimate bread for making French Toast, or “pain perdu” (lost bread) as it’s known in French. Its rich, fluffy texture absorbs the custard beautifully, leading to an incredibly tender and flavorful French toast. Try our Brioche French Toast recipe, or scale it up for a comforting French toast bake or casserole.
- Bread Pudding: Transform leftover (or intentionally dried) brioche into an incredibly rich and satisfying bread and butter pudding. The enriched nature of the bread makes for a truly indulgent dessert.
- Savory Croutons: Cut brioche into cubes, toss with olive oil and herbs, and bake until golden and crisp for gourmet croutons that add a touch of luxury to salads and soups.
- Sweet & Savory Sandwiches: Use brioche for elevated breakfast sandwiches, or even for savory applications like pulled pork sliders, where its slight sweetness perfectly balances rich, savory fillings.
- Butter Temperature and Incorporation are Key: The butter must be soft and at room temperature (not melted or hard) to properly emulsify with the dough. Add it gradually, a small piece at a time, and allow each portion to fully incorporate before adding more. If the dough becomes greasy, it might be too warm; chill the bowl in the fridge for 5-10 minutes before resuming kneading. If you see chunks of unmixed butter, it’s too cold; let it warm up slightly.
- Embrace the Long Kneading: Do not rush the kneading process. After all the butter has been added, knead the dough for at least 15-20 minutes on medium to high speed in a stand mixer. This extended kneading is critical for developing strong gluten networks, which are necessary to support the rich, heavy dough and create that signature light, airy, and fluffy crumb. Enriched doughs require more time for gluten development due to the interference of fats.
- Prioritize Overnight Cold Proofing: While you can proof brioche at room temperature, an overnight cold fermentation in the refrigerator is highly recommended. This slow proofing not only allows the flavors to deepen and become more complex and buttery but also firms up the dough, making it significantly easier to handle, shape, and prevent sticking.
- Experiment with Shaping Variations: The way you shape your brioche loaf can completely change its appearance and texture. Instead of the 8 buns combined into a loaf as shown here, consider these alternatives:
- Classic Braid: Divide the dough into three equal pieces, roll each into a long log, and braid them together for an elegant presentation.
- Nantaise Brioche: Arrange individual rolls in a zigzag pattern within the loaf pan. This technique creates the visual impression of a braid without the actual braiding, resulting in a beautiful pull-apart loaf.
- Individual Buns: Shape the dough into smaller, individual buns (e.g., for hamburger buns or dinner rolls). Just remember to adjust the baking time, as smaller items will bake faster.
- Sandwich Loaf Style: Roll the dough into a large rectangle with a rolling pin, then tightly roll it up into a log shape and place it seam-side down in the loaf pan. This will yield a more traditional sandwich-style loaf with uniform slices.
- Proper Cooling is Non-Negotiable: Resist the temptation to cut into your brioche while it’s still warm. Allowing it to cool completely (at least an hour in the pan, then on a wire rack) is vital. This allows the internal structure to set fully and prevents steam from escaping prematurely, which can lead to a dry or gummy texture.
- Room Temperature Storage: I recommend storing your brioche at room temperature. Keep the loaf either in its pan, covered tightly with plastic wrap or a clean kitchen towel, or transfer it to an airtight container. While refrigeration will extend its shelf life, it causes the butter in the brioche to harden, which can make the crumb dense and less appealing.
- Freezing for Extended Freshness: Freezing is an excellent method for preserving brioche and keeping it fresh for much longer. You have a couple of options:
- Whole Loaf: Once completely cooled, wrap the entire loaf tightly in plastic wrap, then again in aluminum foil, and place it in a freezer-safe bag. It can be frozen for up to 2-3 months. Thaw at room temperature for several hours before serving.
- Individual Slices: For ultimate convenience, slice the cooled brioche and place a small piece of baking paper between each slice to prevent them from sticking together. Stack them, then wrap tightly in plastic wrap and foil before placing in a freezer bag. You can then pull out individual slices as needed. Thaw slices at room temperature, or pop them directly into a toaster for a quick and warm treat.
- Cinnamon Babka
- Sweet Potato Buns
- Cinnamon Roll Bread Loaf
- Spinach & Ricotta Rolls
- Chocolate Brioche Bread Wreath
- Triple Chocolate Cinnamon Rolls
- Apple Cinnamon Pull Apart Bread
- Sesame Bagels
- Pumpkin Buns
- 75 ml (5 tablespoons) Full Cream / Whole Milk, lukewarm
- 9 gr (1 1/2 teaspoon) Instant (dry) Yeast
- 80 gr (1/3 cup) Caster Sugar
- 3 Eggs, medium, at room temperature
- 350 gr (2 1/3 cup) Plain / All-Purpose Flour
- 1/2 teaspoon Fine Salt
- 120 gr (1/2 cup) Unsalted Butter, soft, at room temperature
- 1 Egg, for Egg Wash
- Place the Lukewarm Milk, half of the Sugar and Yeast in the bowl of your stand mixer. Mix to combine then let it sit for about 10 minutes or until small bubbles/froth appears on the surface (see note 1).
- Add the whisked Eggs then the rest of the Sugar, Flour and lastly the Salt. Fit your mixer with the dough hook attachment and knead on medium speed for about 5 minutes or until a rough dough comes together.
- Add the soft unsalted Butter to the mixture, a little bit at the time. Knead on low speed until the butter is fully incorporated before adding more (see note 2).
- Knead on medium to high speed for about 15 to 20 minutes or until the dough is very soft, stretchy and passes the “windowpane test” (see note 3). Cover with plastic wrap or a tea towel and place in the fridge to proof for 8 to 12 hours (or up to 24 hours).
- Take the dough out of the fridge and punch out the air. Transfer over a lightly floured work surface and cut into 8 pieces, using a scale to measure even portions.
- Flatten each piece of dough with your fingers. Fold the edges of the dough towards the centre and press to make it stick. Turn the dough over, seams down, then pull it towards you, your fingers placed on one side / bottom of the roll. Turn it 90 degrees and repeat until you feel tension on the dough. Continue to shape the dough into a bun by rolling it in a circular movement under the palm or your hands. Repeat with each piece of dough.
- Place the buns in a 14 x 28 cm Loaf Pan (5.5 x 11 inch) Loaf Pan that has been lightly greased and lined with baking paper (see note 4).
- Lightly whisk an egg in a small bowl and brush it over the buns. Cover the pan and let the dough proof again at room temperature for about 1 to 1,5 hour, or until the buns have doubled in size.
- Preheat your oven on 180’C / 350’F then bake for 20 to 25 minutes or until risen and golden. Let the brioche loaf cool down for about an hour before removing from the pan and placing on a wire rack to finish cooling (see note 5).
- Make sure the milk is not too hot or it will kill the yeast. It should be at around 30 to 35′ celsius (85 to 95′ F); if you touch it with your finger you shouldn’t feel its warmth. Also note that “blooming” the yeast (what we are doing here) is not technically required when using Dry Yeast but it is mandatory if using instant yeast. This step is used to check that the yeast is alive before making the bread.
- If you add too much butter at once, the dough will struggle to incorporate it and it will turn quite greasy. Make sure to slowly add it to get the perfect smooth dough. It is also very important for the butter to best very soft and at the right temperature. If the butter is too warm, it will struggle to incorporated in the dough and you will notice the dough is very greasy. Place the bowl in the fridge for 5 minutes then keep kneading. If the dough is too cold, you will notice chunks of unmixed butter in the dough. Place the butter for a few seconds in the microwave or leave at room temperature for a bit longer.
- The dough does require a long kneading – much longer than most breads. That is because the dough is enriched with lots of fat (butter, eggs and milk) which slows down the gluten formation and development. Do not skip this long kneading step to get the perfectly fluffy brioche – it needs to be well kneaded!
To do the “windowpane test”: gently pull and stretch a small piece of dough. If the dough breaks quickly, it needs to be kneaded for longer. If it stretches easily without breaking and you can see light coming through it, it has passed the windowpane test. - I placed the buns in 4 rows of 4, having 2 buns side by side. You could also place them in a zigzag pattern to create the effect of a braid (called a “Nantaise brioche”).
- It is important not to cut the brioche when slice warm or it will turn dry. The residual heat will also finish cooking the bread and if you cut it too early, the steam will escape and the dough won’t be fully baked.
Common Questions About Baking Brioche
Brioche is a quintessential French sweet bread renowned for its incredibly fluffy, tender, and rich crumb. It’s distinguished by its high ratio of eggs and a significant amount of butter, which impart its luxurious texture and deep flavor. Brioche falls into a category of French baked goods known as “viennoiseries,” which are considered a delightful hybrid between a pastry and a bread. Other familiar *viennoiseries* include croissants and pain au chocolat.
The term “enriched dough” refers to bread doughs that have ingredients like eggs, butter, milk, and sugar added, beyond the basic flour, water, yeast, and salt. These enriching ingredients create a softer, more tender, and often sweeter crumb compared to lean bread doughs. For example, while Challah Rolls are also an enriched bread, they typically use oil rather than butter and often have a different sweetness profile than brioche.
While you technically *can* use bread flour, we generally don’t recommend it for brioche. Bread flour has a higher protein content, which promotes stronger gluten development and typically results in a chewier bread. For brioche, the goal is a super soft, tender, and almost cake-like crumb, which is best achieved with plain or all-purpose flour. Using bread flour might lead to a brioche that is denser and less melt-in-your-mouth.
While it’s possible to knead brioche dough by hand, it’s a significant undertaking and generally not recommended for beginners. Brioche dough is notoriously soft and sticky, requiring a prolonged kneading time—often 20 to 30 minutes—to properly develop the gluten due to its high fat content. A stand mixer with a dough hook attachment is truly your best friend for this recipe, making the process much easier, more efficient, and ensuring the best possible results in terms of dough consistency and gluten development.
Yes, you can proof the dough at room temperature for a quicker turnaround (usually about 1.5 to 2 hours until doubled in size). However, this approach comes with a few trade-offs. A room-temperature-proofed dough will be much softer and stickier, making it significantly harder to handle and shape without adding excessive flour. More importantly, the long, slow cold fermentation in the fridge is essential for developing the complex, deep, buttery flavors that truly define a classic French brioche. It allows the yeast to work slowly, creating more aromatic compounds. For superior flavor and easier handling, overnight refrigeration is strongly recommended.
Brioche Baking Troubleshooting Tips
Even experienced bakers can encounter challenges with brioche. Here are solutions to common issues you might face:
Delicious Ways to Enjoy Your Homemade Brioche
The beauty of homemade brioche lies in its versatility. While it’s utterly divine on its own, here are some of our favorite ways to savor every rich, buttery bite:
Essential Tips for Brioche Baking Success
Achieving a perfect homemade brioche is deeply rewarding. Keep these key tips in mind to ensure your baking journey is a success:
Storing & Freezing Your Homemade Brioche
To enjoy your brioche at its best, proper storage is key. Brioche is truly best savored fresh, ideally within a couple of days of baking.
Explore More Delicious Bread Recipes
If you loved baking this brioche loaf, you’ll surely enjoy these other delightful bread recipes from our collection:
Made this recipe?
Let us know if you liked it by leaving a comment below, and tag us on Instagram @a.baking.journey with a photo of your creation!
Recipe Card: Homemade French Brioche Loaf Bread

Brioche Loaf Bread
Print Recipe
Ingredients
Instructions
Video Tutorial
Would you like to save this recipe?
We’ll email this post to you, so you can come back to it later!
Notes
Nutrition (per serving)
French Brioche Loaf Bread Story.
