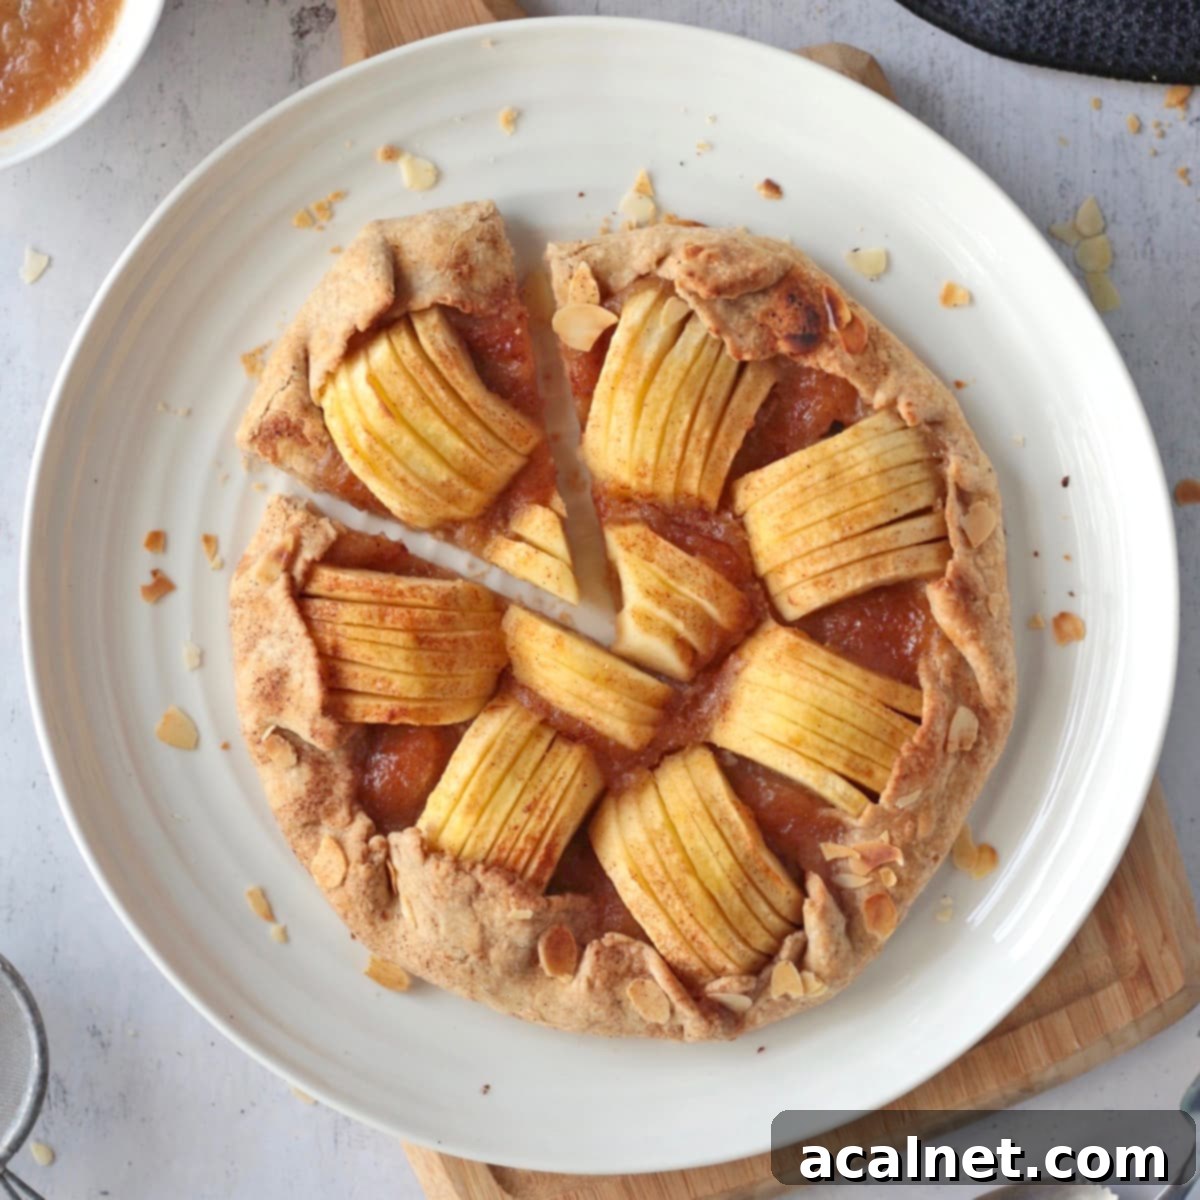
Easy Rustic Apple Galette with Applesauce: Your Simple & Delicious Apple Pie Alternative
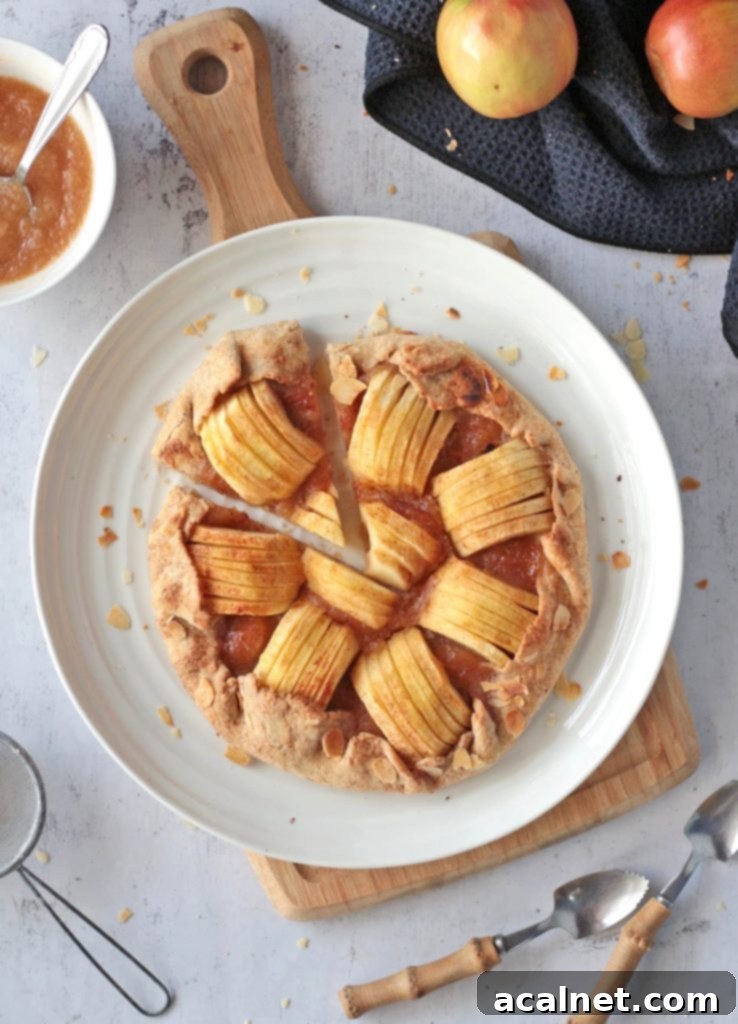
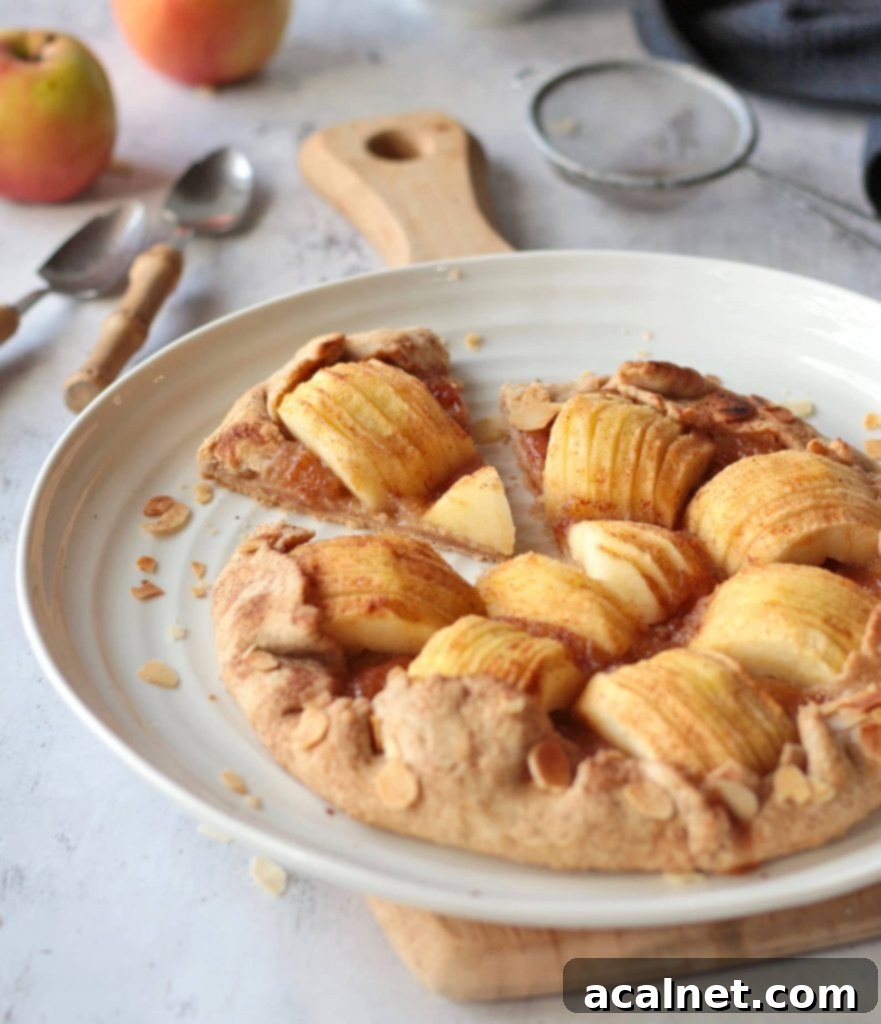
This incredibly easy Rustic Apple Galette with Applesauce is a fantastic and heartwarming way to transform surplus apples into a delightful dessert. Featuring a fragrant cinnamon-infused pastry and a luscious applesauce filling, this freeform apple pie offers a quick, delicious treat perfect for autumn and winter gatherings, or really, any time you crave a comforting apple dessert. Enjoy it warm with a scoop of vanilla ice cream, a dollop of whipped cream, or simply cold with your afternoon tea. Its charmingly rustic appearance and straightforward preparation make it a favorite for both novice and experienced bakers alike.
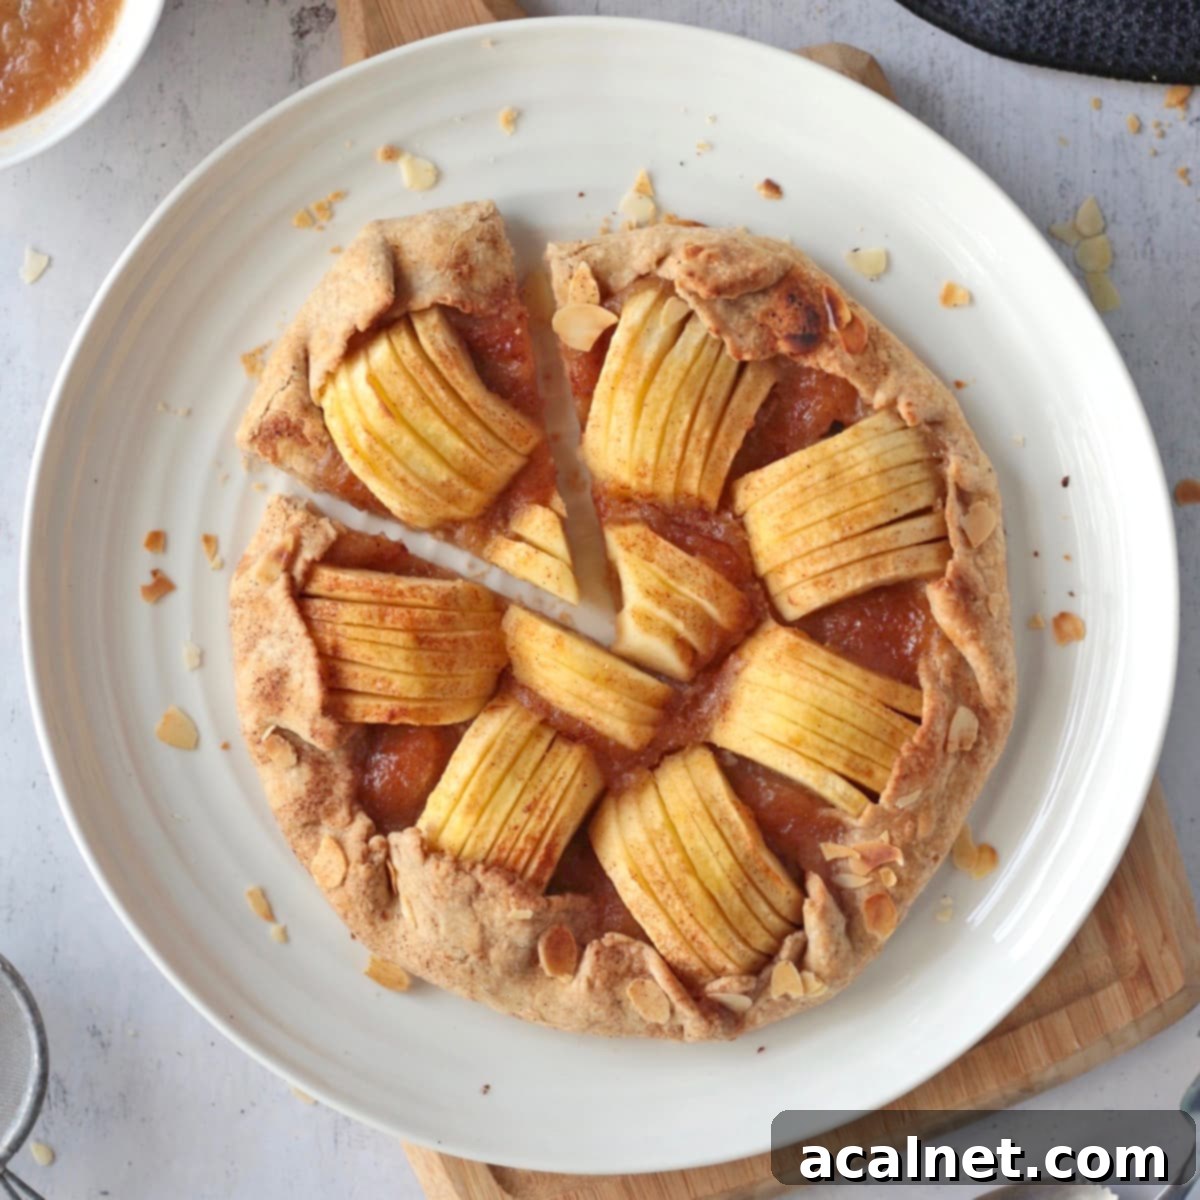
What is a Galette? Unveiling this Rustic French Tart
A Galette (pronounced gah-LET) is a delightful term in French cuisine used to describe a variety of flat, round, or freeform cakes. Unlike its more structured counterparts like tarts or pies, a galette is characterized by its rustic, open-faced appearance. It’s typically made without the constraint of a specific pie dish or pan, allowing the baker to simply fold the edges of the dough casually over the filling. This creates a beautifully imperfect, freehand aesthetic that is both charming and inviting.
Originating from the heart of France, galettes are incredibly versatile. They can be prepared sweet, often showcasing seasonal fruits like apples, peaches, or berries, or savory, filled with vegetables, cheeses, or meats. The base can range from a flaky pastry dough, like the one used in this recipe, to crepes or even bread doughs. This adaptability, combined with their unpretentious elegance, makes galettes a cherished dish, embodying the philosophy of simple, ingredient-focused cooking that is at the heart of French culinary tradition.
Crostata vs. Galette: A Tale of Two Rustic Tarts
The culinary world often features similar dishes with different names, and the crostata and galette are prime examples. Many curious bakers wonder about the distinction between these two rustic, freeform tarts. The good news is, for all practical purposes, they are fundamentally the same in their construction and charmingly imperfect aesthetic. Both are characterized by a flat, round base of pastry dough with the edges casually folded inwards over the filling, baked without a specialized pie dish.
The primary and virtually sole difference between a crostata and a galette lies in their geographical heritage. A Crostata is an Italian invention, a beloved staple of Italian baking that can be found in various sweet and savory forms across the country. Conversely, a Galette is distinctly French, deeply rooted in the traditions of French patisserie and home baking. So, whether you’re enjoying a crostata filled with fruit in a sun-drenched Italian piazza or a galette fresh from a French oven, you’re savoring a deliciously simple, unpretentious dessert that celebrates seasonal ingredients with rustic charm.
Explore More Delicious Galette Recipes:
Once you fall in love with the simplicity and charm of galettes, you’ll want to try them with every seasonal ingredient! Here are a few more delightful galette recipes to inspire your baking adventures, from sweet summer fruits to savory meal options:
- Almond Peach Galette: A perfect summer treat, combining juicy peaches with a hint of almond.
- Cherry Tomato Galettes with Pesto: Individual savory galettes bursting with fresh cherry tomatoes and vibrant pesto.
- Tomato Galette with Basil Whipped Feta: A Mediterranean-inspired savory galette featuring ripe tomatoes and a creamy, herbaceous feta topping.
- Cinnamon Strawberry Galette: Sweet, juicy strawberries paired with a warm, spiced cinnamon crust.
- Rustic Blackberry Tart (Blackberry Galette): A simple yet elegant tart showcasing the rich, slightly tart flavors of fresh blackberries.
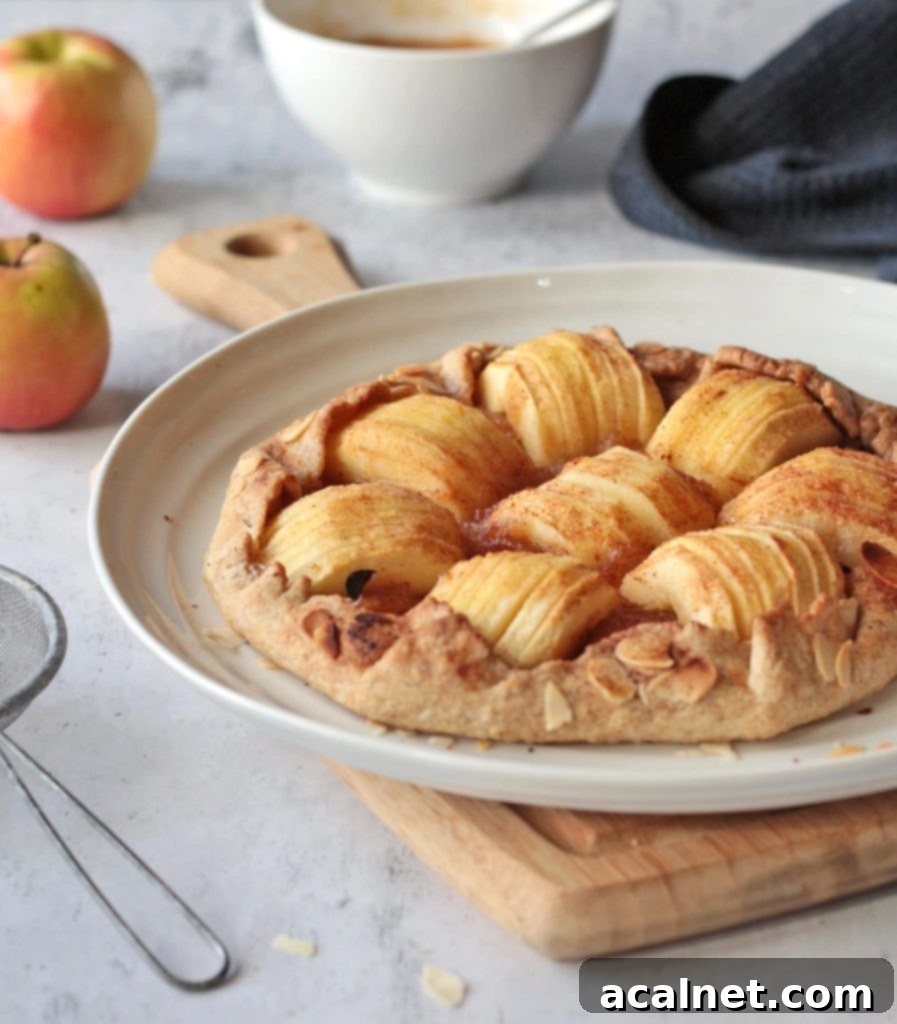
Crafting the Perfect Homemade Galette Pastry with a Cinnamon Twist
Creating a truly delicious galette begins with a superb pastry, and fortunately, galette pastry is far less intimidating than traditional pie crusts. The core principle remains the same—a flaky, tender crust—but the rustic, freeform nature of a galette means there’s no pressure for perfection. This makes it an ideal baking project for anyone seeking a low-stress yet impressive dessert. We’re aiming for a charmingly homemade look, where every fold tells a story of deliciousness!
For this delightful apple galette, we’ve taken a classic shortcrust pastry and infused it with warming spices. Instead of traditional granulated sugar, we’re opting for pure Maple Syrup to add a subtle, natural sweetness, making this a wonderful refined-sugar free dessert. The aromatic Ground Cinnamon is blended directly into the pastry dough, creating a beautiful flavor synergy with the apple filling and filling your kitchen with an irresistible scent as it bakes.
To create this wonderfully aromatic Cinnamon Pastry, gather these simple ingredients:
- All-Purpose (Plain) Flour: The essential base for a tender, flaky crust.
- Ground Cinnamon: Infuses the pastry with a warm, inviting spice that perfectly complements apples.
- Cold Unsalted Butter: Keeping butter very cold and in small pieces is paramount for achieving those desirable flaky layers.
- Pure Maple Syrup: A natural sweetener that adds a nuanced depth of flavor, replacing refined sugars.
- Ice-Cold Water: Used sparingly to bring the dough together without overdeveloping the gluten, thus keeping the pastry tender.
You have two convenient methods for preparing this galette pastry: by hand or with the help of a food processor. Both approaches yield excellent results, but I often lean towards the food processor for its efficiency and minimal cleanup. It’s a fantastic time-saver, particularly when you want to whip up a delicious dessert without a fuss!
Here’s how to prepare the cinnamon pastry using your food processor for an effortlessly flaky crust:
- First, place the All-Purpose Flour and Ground Cinnamon into the bowl of your food processor. Pulse a few times to ensure they are thoroughly combined. This even distribution of cinnamon is key to a flavorful crust.
- Next, add the very cold Unsalted Butter, cut into small cubes, along with the Maple Syrup. Process the mixture in short, quick pulses. You’re looking for a texture that resembles coarse, thick sand, where all the butter pieces are fully coated by the flour mixture. This prevents the butter from melting too quickly and helps create a flaky texture.
- Finally, gradually drizzle in the Ice-Cold Water. Pulse just until the dough begins to come together and forms large clumps. It’s crucial not to overmix at this stage; overworking the dough will develop too much gluten, resulting in a tough rather than tender crust.
- Carefully transfer the dough from the food processor onto a lightly floured surface. Gently bring it together with your hands, forming it into a flat disk. Wrap the dough tightly in plastic wrap and gently press to flatten it slightly—this will make it easier to roll out later. Refrigerate the dough for at least 30 minutes, or ideally 1 hour. This chilling period allows the gluten to relax and the butter to firm up, both essential for a truly flaky and manageable pastry.
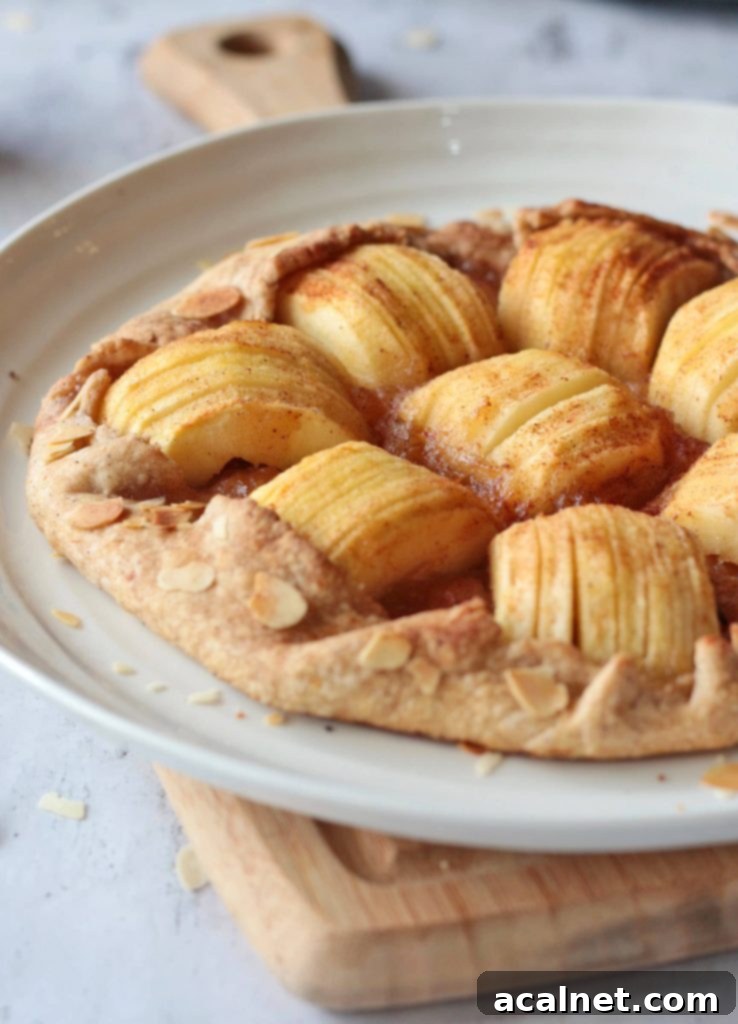
Crafting the Irresistible Rustic Apple Tart Filling
The filling for this Apple Galette is designed for maximum flavor with minimal effort, making the entire dessert incredibly easy to assemble! It draws inspiration from the straightforward yet satisfying approach of my Apple Tartlets, focusing on the pure essence of apples. This simple, two-part filling ensures a moist, flavorful, and beautifully textured galette every time:
- Creamy Applesauce: This provides a wonderfully sweet, smooth base, ensuring the galette remains incredibly moist and enhances the overall apple flavor.
- Fresh Apples, thinly sliced: These add crucial texture, vibrant fresh apple taste, and allow for a stunning, artful arrangement on top of the galette.
The first component, the Applesauce, is spread generously over the cinnamon pastry base. This layer serves multiple important functions: it introduces a delightful sweetness and a smooth, comforting consistency, and crucially, it acts as a protective barrier for the pastry, helping to prevent a soggy bottom. For the best flavor and to control the sugar content, I highly recommend making your own Applesauce. If you opt for a naturally sweet apple variety for your applesauce, you might find that you don’t need to add any additional sugar at all, letting the fruit’s natural sugars shine!
For the fresh Apples, selecting the right variety is key. Choose apples that are known for holding their shape well during baking, providing a pleasant chewiness, and offering a good balance of sweet and tart flavors. Once you have your apples, wash, peel, core, and thinly slice them. The thinner your slices, the more tender they will become in the oven and the easier they will be to arrange beautifully in a decorative pattern on top of the applesauce. To finish the filling, a simple brush of melted butter over the arranged apple slices will add a rich flavor and give them a lovely sheen, while a sprinkle of ground cinnamon will enhance their natural sweetness and complement the spiced pastry. These simple additions elevate the natural goodness of the fruit without overpowering its delicate taste.
Step-by-Step Guide: How to Make an Easy Apple Galette
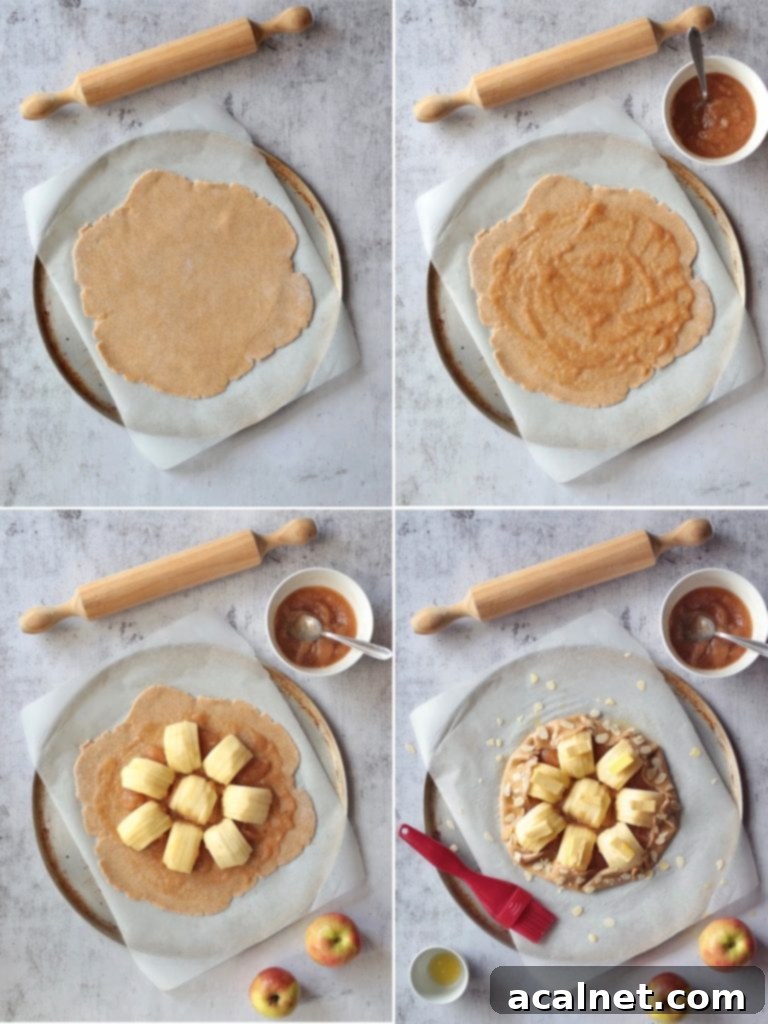
Making a galette is truly one of the most rewarding and least stressful baking experiences. Its inherent simplicity and the lack of a need for a pie pan or multiple chilling stages make it much quicker and easier than preparing a traditional tart or pie. The rustic, freeform nature of a galette ensures that even a first-timer can achieve a stunning and delicious dessert with minimal fuss. Here’s a detailed, step-by-step guide to assembling and baking your beautiful apple galette:
- Prepare and Chill the Pastry: The first and most critical step is ensuring your cinnamon pastry is perfectly chilled. After preparing the dough, let it rest in the fridge for at least 30 minutes, and ideally up to an hour. This chilling period is essential for making the dough easier to roll out and for developing that desirable flaky texture when baked. A cold dough is key to preventing a tough crust.
- Roll Out the Dough: On a lightly floured surface, take your chilled pastry disk and roll it out into a large, thin circle. Don’t stress about achieving a perfectly round shape; the charm of a galette is its beautiful imperfection! Aim for a consistent thickness, about 1/8 inch (3-4 mm), to ensure even baking. Carefully transfer the rolled pastry onto a flat baking tray that has been lined with baking paper or a silicone baking mat.
- Spread the Applesauce Base: Evenly spread a generous layer of your delicious applesauce over the rolled pastry. It’s important to leave a clear border of about 1.5 to 2 inches (3-5 cm) around the entire edge of the pastry. This will be the portion of the crust that you fold over the filling later.
- Artfully Arrange the Fresh Apples: Take your peeled, cored, and thinly sliced fresh Apples and artfully arrange them over the applesauce layer. You can create a beautiful concentric pattern, layer them neatly, or simply scatter them in an appealing way. Overlap the slices slightly to create a full and bountiful look.
- Add Flavor and Shine: Gently brush some melted Butter over the arranged apple slices. This not only adds a rich depth of flavor but also helps the apples caramelize beautifully in the oven, giving them a lovely glossy finish. Finish by sprinkling a generous amount of Ground Cinnamon over the apples for an extra layer of warm, inviting spice.
- Fold the Edges: Now for the signature galette technique! Gently lift and fold the clear edges of the pastry back over the outermost layer of the apples. As you go, pinch and pleat the dough casually, creating that characteristic rustic border. Ensure the folds are pressed lightly to seal and help contain the fruit filling during baking.
- Optional Embellishment: For an added textural element and a hint of nutty flavor, consider sprinkling some flaked almonds over the folded pastry edges before the galette goes into the oven. This adds a lovely crunch.
- Bake to Golden Perfection: Carefully transfer your assembled galette to your preheated oven. Bake for approximately 30 to 35 minutes, or until the pastry is a beautiful golden brown and the apples are tender and slightly caramelized. The incredible aroma filling your kitchen will be your delicious reward! Allow the galette to cool slightly on the baking tray before carefully transferring it to a wire rack to cool further.
Why You’ll Adore This Easy Apple Galette
Beyond its incredibly simple preparation, this Rustic Apple Galette offers a multitude of reasons why it will quickly become a cherished recipe in your baking repertoire. Its versatility is unmatched, making it suitable for both elaborate dinner parties where it can shine as a show-stopping dessert, or for a casual, cozy evening treat. The harmonious blend of the sweet, comforting applesauce with the slightly tart, fresh apple slices creates a perfectly balanced flavor profile that appeals to everyone. Furthermore, the delightful crunch and buttery richness of the cinnamon-infused crust provide a wonderful textural contrast to the soft, tender fruit filling. It’s a dessert that feels inherently special and indulgent, yet remarkably requires minimal effort, truly embodying the spirit of effortless, rustic baking.
Perfect Pairings & Serving Suggestions
While this Apple Galette is undeniably delicious on its own, its flavors truly come alive when paired with thoughtfully chosen accompaniments. For the quintessential dessert experience, serve it warm, allowing the rich aromas to envelop you. A generous scoop of premium vanilla bean ice cream is a classic choice, its creamy texture and cool temperature providing a luxurious contrast to the warm, tender apples and flaky crust. Alternatively, a dollop of freshly whipped cream adds a touch of airy elegance and lightens the richness of the dessert. For those who enjoy an extra layer of indulgence, a drizzle of homemade salted caramel sauce or a sprinkle of toasted pecans or walnuts can elevate this rustic tart to new heights of deliciousness. Don’t hesitate to enjoy it cold the next day; it makes a surprisingly delightful breakfast treat with your morning coffee or a satisfying afternoon snack.
Recipe FAQs: Your Questions Answered
Selecting the right apples is crucial for a successful galette. The best varieties are those that maintain their structure during baking, preventing the filling from becoming mushy, while also offering a good balance of sweetness and tartness. Highly recommended apples include: Granny Smith (for a firm, tart bite that balances sweetness), Cortland, Crispin, Fuji (sweet and crisp, holds shape well), Jonagold, and Pink Lady (sweet with a pleasant tang). Feel free to experiment by combining two different varieties—for example, one tart and one sweet—to achieve a more complex and nuanced flavor profile in your galette. For a comprehensive guide on choosing the ideal apples for all your baking needs, explore more about picking the right variety of apples for your dessert here!
Yes, this apple galette is an excellent dessert to prepare in advance! You can bake the galette up to 24 hours before you plan to serve it. Once baked and completely cooled, simply store it covered tightly in the refrigerator. While it truly shines when enjoyed fresh from the oven, it will maintain its delicious flavor and texture for about a day. Beyond 24 hours, the pastry might begin to absorb too much moisture from the apple filling, potentially becoming softer. For the best possible experience, I highly recommend a quick reheat in the oven just before serving to refresh the crust and warm the filling.
Absolutely! Galettes are remarkably freezer-friendly, whether baked or unbaked, making them perfect for future enjoyment or unexpected guests. To freeze an unbaked galette, assemble it fully on a parchment-lined baking sheet, then transfer it to the freezer until it is completely solid. Once frozen, wrap it tightly in several layers of plastic wrap, followed by aluminum foil, and store it in the freezer for up to 2-3 months. When ready to bake, you can place it directly into a preheated oven (adding 10-15 minutes to the typical baking time to allow for thawing). For a baked galette, let it cool completely before wrapping it securely in plastic wrap and foil. It can be frozen for up to a month. Thaw it overnight in the refrigerator, then reheat as described below.
For the most enjoyable experience, particularly if your galette has been made ahead or refrigerated, I strongly recommend reheating it before serving. A warm or lukewarm galette truly enhances both the flavor of the apples and the crispness of the pastry. To reheat, simply place the galette on a baking sheet and pop it into a preheated oven at approximately 150°C (300°F) for 5 to 10 minutes, or until the filling is warmed through and the crust feels crisp. Be sure to monitor it closely to prevent the pastry from over-browning. If you are baking a frozen, unbaked galette, you can place it directly into the preheated oven, adding an additional 10-15 minutes to the initial baking time to ensure it thaws and cooks properly. For a pre-baked frozen galette, allow it to thaw completely in the refrigerator overnight before reheating for 5-10 minutes just before serving.
Discover More Irresistible Apple Recipes
If you have a fondness for baking with apples, you’re in for an absolute treat! Apples are incredibly versatile, lending their unique flavor profile, natural sweetness, and wonderful texture to an extensive array of desserts and baked goods. From classic, comforting cakes to delightful crumbles and elegant tarts, there’s always a new and exciting way to enjoy this beloved fruit. Here are some more fantastic apple-centric recipes to inspire your next baking adventure, ensuring you make the most of this seasonal bounty:
- Easy French Apple Cake: A wonderfully tender and moist cake generously studded with chunks of fresh apple.
- Apple and Pear Crumble: A classic, comforting dessert featuring a delightful blend of apples and pears under a buttery, crunchy streusel topping.
- Apple Upside-Down Cake: A visually stunning cake where caramelized apple slices form a beautiful topping.
- Apple Cinnamon Pull-Apart Bread: A fun, shareable bread, rich with the flavors of apple and warm cinnamon, perfect for brunch.
- Apple Cinnamon Muffins with Streusel Topping: Fluffy muffins bursting with apple and cinnamon, crowned with a sweet, crunchy streusel. Ideal for breakfast or a sweet snack.
- Easy French Apple Tart: A traditional, elegant apple tart, showcasing thinly sliced apples in a beautiful pattern.
- Apple Loaf Cake: A simple, moist, and flavorful loaf cake, perfect for everyday indulgence or a quick treat.
- Gluten-Free Apple Cake: A delicious and accessible option for those seeking a wonderful apple cake without gluten.
- Apple Cinnamon Baked Oatmeal: A wholesome and satisfying breakfast or brunch dish, packed with apple and cinnamon goodness.
Made this recipe?
We’d absolutely love to see your delicious creation! Please let us know if you liked it by leaving a comment below, and be sure to tag us on Instagram @a.baking.journey with a photo!
Full Recipe: Easy Apple Galette with Applesauce

Easy Apple Galette with Applesauce
Servings: 6 people
Author: Sylvie
Print Recipe
Ingredients
Cinnamon Pastry
- 120 (3/4 cup) gr All-Purpose Flour
- 1/2 teasp. Ground Cinnamon
- 60 (1/4 cup) gr Cold Unsalted Butter, cut into small cubes
- 1/2 tbsp Maple Syrup
- 2 1/2 tbsp Ice-Cold Water
Apple Filling
- 4 to 5 tbsp Applesauce, preferably homemade
- 4 Medium Apples, peeled, cored, and thinly sliced
- 1 tbsp Melted Butter
- 1 teasp. Ground Cinnamon, for sprinkling
- Flaked Almonds , optional, for garnish
Instructions
Cinnamon Pastry Preparation
- Combine the All-Purpose Flour and Ground Cinnamon in the bowl of your food processor (see note 1 for making by hand). Pulse a few times to mix thoroughly. Add the cold butter, cut into small cubes, and the maple syrup. Process in short bursts until the mixture resembles coarse breadcrumbs, ensuring all butter is coated by the flour.
- Gradually add the ice-cold water, pulsing just until the dough starts to come together into large clumps. Be careful not to overmix.
- Transfer the dough onto a lightly floured surface. Gently gather it into a cohesive disk. Wrap tightly in plastic wrap and slightly flatten. Refrigerate for at least 1 hour to chill and firm up.
Assembling and Baking the Galette
- Preheat your oven to 180°C (350°F).
- Prepare the apples: Wash, peel, core, and thinly slice the medium apples. Set aside.
- On a lightly floured surface, roll the chilled cinnamon pastry into a large, thin circle (approximately 12-14 inches or 30-35 cm in diameter). Carefully transfer it onto a flat baking tray lined with parchment paper.
- Spread the applesauce evenly over the pastry, stopping a 1.5 to 2-inch (3-5 cm) border clear around the edge. Arrange the thinly sliced apples over the applesauce, overlapping them slightly for a full appearance.
- Brush the melted butter over the sliced apples (see note 2), then lightly sprinkle them with the remaining ground cinnamon.
- Gently fold the clear edges of the pastry over the outermost apples, creating a rustic, pleated border. Press lightly to seal any seams.
- Optional: Sprinkle some flaked almonds over the folded pastry edges for extra crunch and flavor.
- Bake for 30 to 35 minutes, or until the pastry is golden brown and the apples are tender. Allow to cool slightly before serving warm or at room temperature.
Want to save this recipe for later?
We’ll email this delicious recipe directly to you, so you can easily find it when you’re ready to bake!
Notes
- Making the Pastry by Hand: If you prefer to make the pastry by hand, combine the All-Purpose Flour and Ground Cinnamon in a large mixing bowl. Add the small cubes of very cold butter. Use your fingertips or a pastry cutter to rub the butter into the flour until the mixture resembles coarse breadcrumbs and no large pieces of butter remain. Stir in the maple syrup, then gradually add the ice-cold water, mixing just until the dough comes together. Be careful not to overwork the dough to maintain tenderness.
- Butter Application Tip: Instead of brushing melted butter, you can also simply place tiny dots of cold butter evenly over the sliced apples. These small pieces will melt beautifully in the oven, basting the apples as they bake and adding richness.
Nutrition (per serving)
