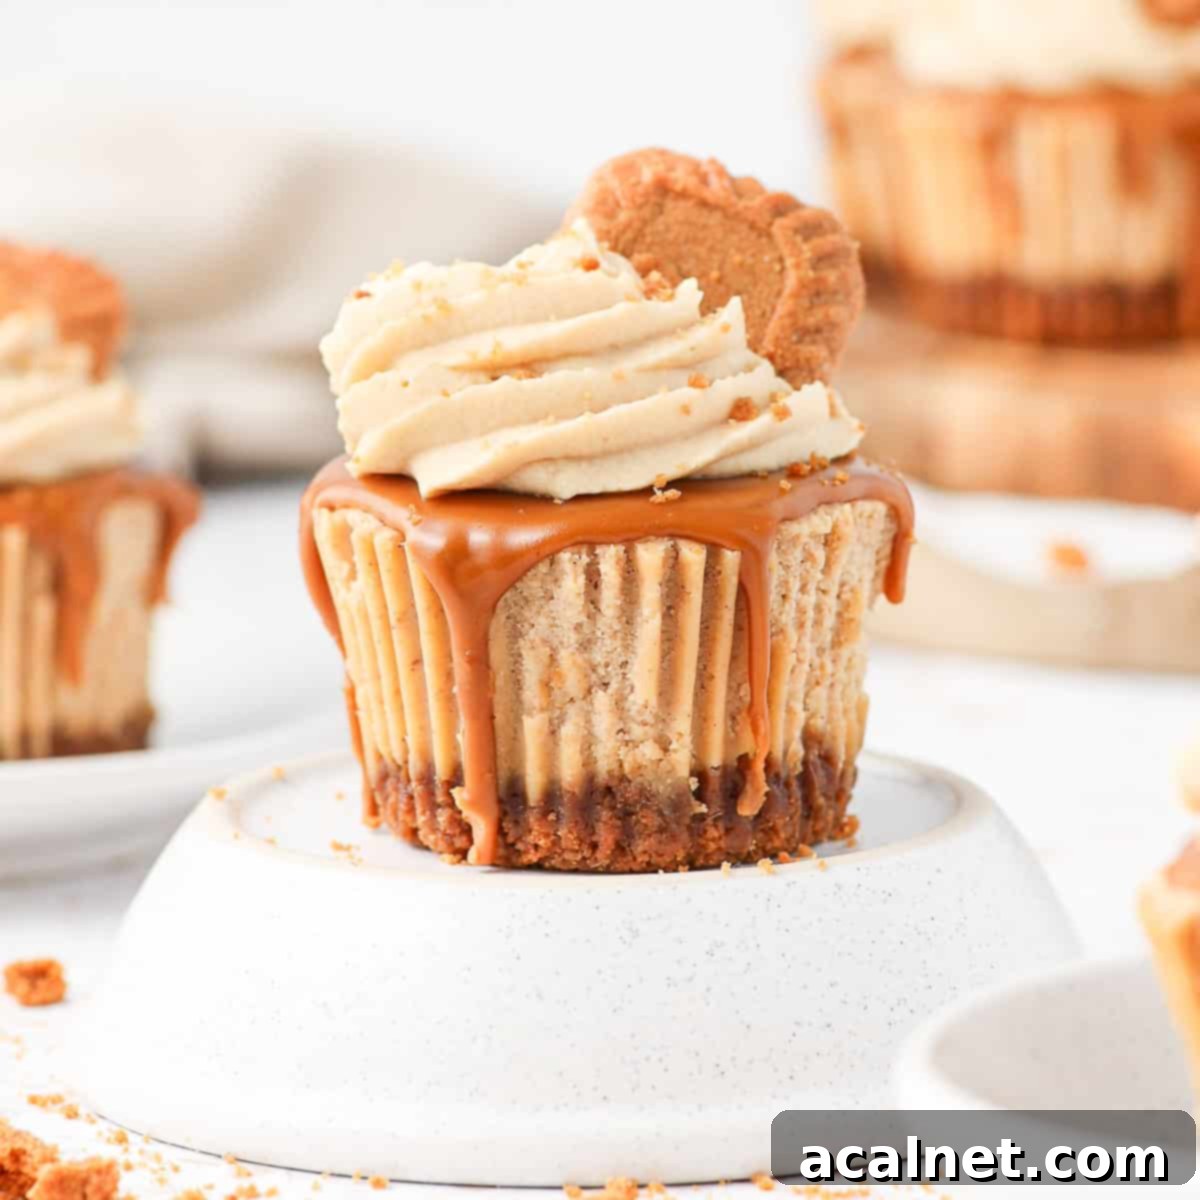
Irresistible Mini Biscoff Cheesecakes with Creamy Biscoff Whipped Topping
Prepare to be enchanted by these Mini Biscoff Cheesecakes, each a delightful bite-sized indulgence crowned with a luxurious Biscoff Whipped Cream topping. These decadent little treats are not just delicious; they are incredibly versatile, making them an ideal choice for any gathering – from lively parties and festive Holiday celebrations to simply elevating an everyday dessert experience. If you’re a fan of the unique, spiced caramel notes of Biscoff, you’re about to discover your new favorite sweet obsession.
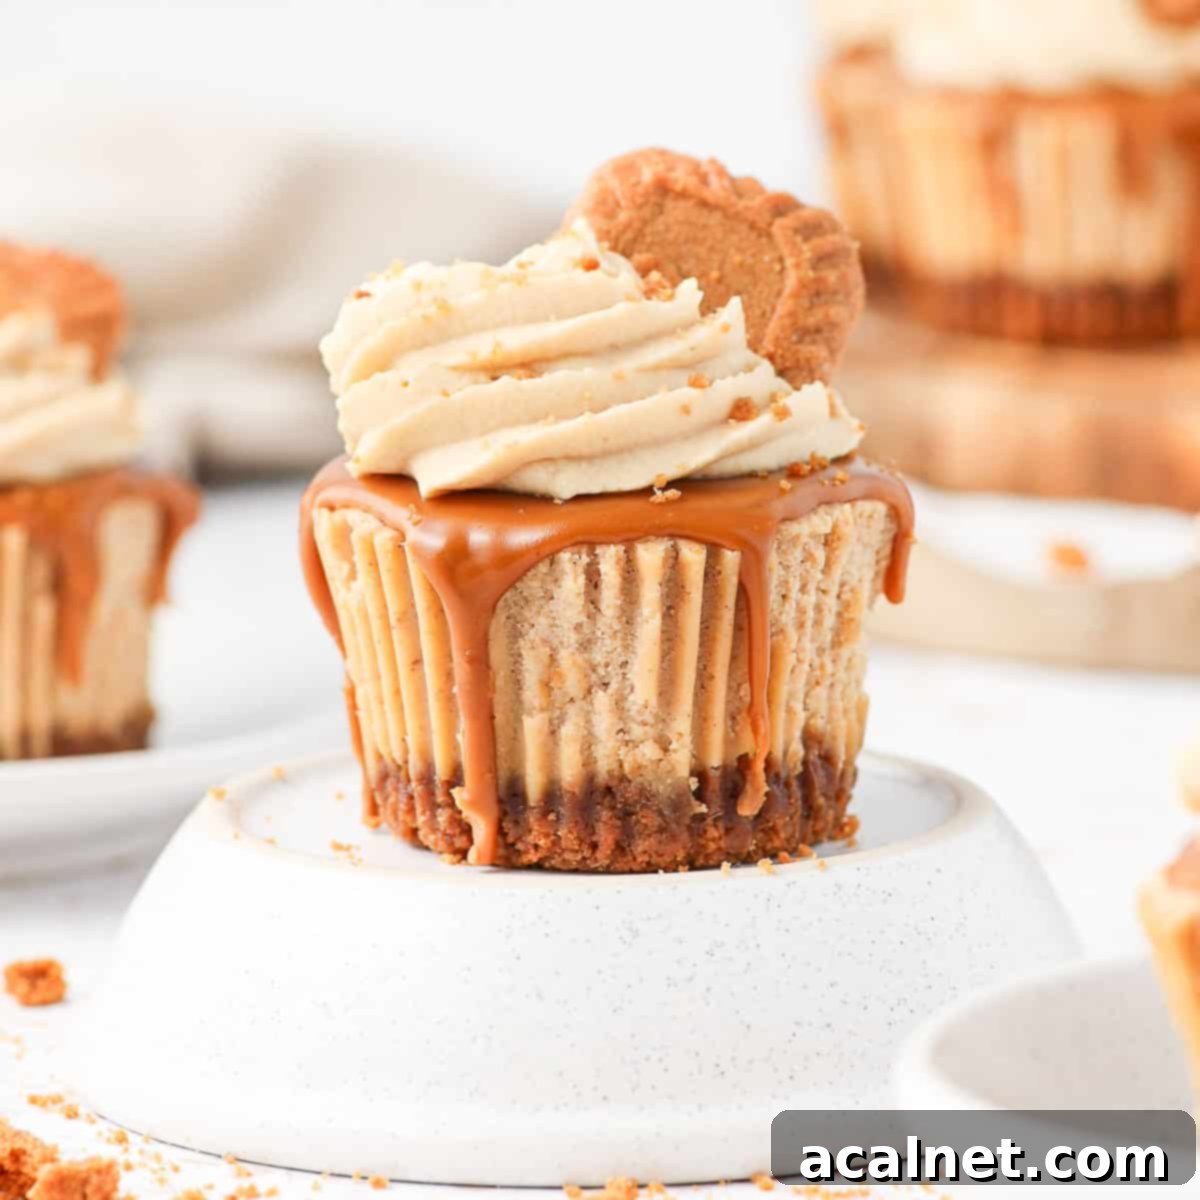
[feast_advanced_jump_to]
Why You’ll Fall in Love with These Mini Biscoff Cheesecakes
If the rich, spiced aroma and caramelized flavor of Biscoff cookies already captivate you, then prepare for an extraordinary culinary experience. These Mini Biscoff Cheesecakes are a dream come true for any Biscoff enthusiast, meticulously crafted to deliver an intense Biscoff flavor in every single bite. Unlike many desserts that offer just a hint of their namesake, these mini cheesecakes are absolutely *packed* with Biscoff goodness across every layer, creating a harmonious symphony of textures and tastes.
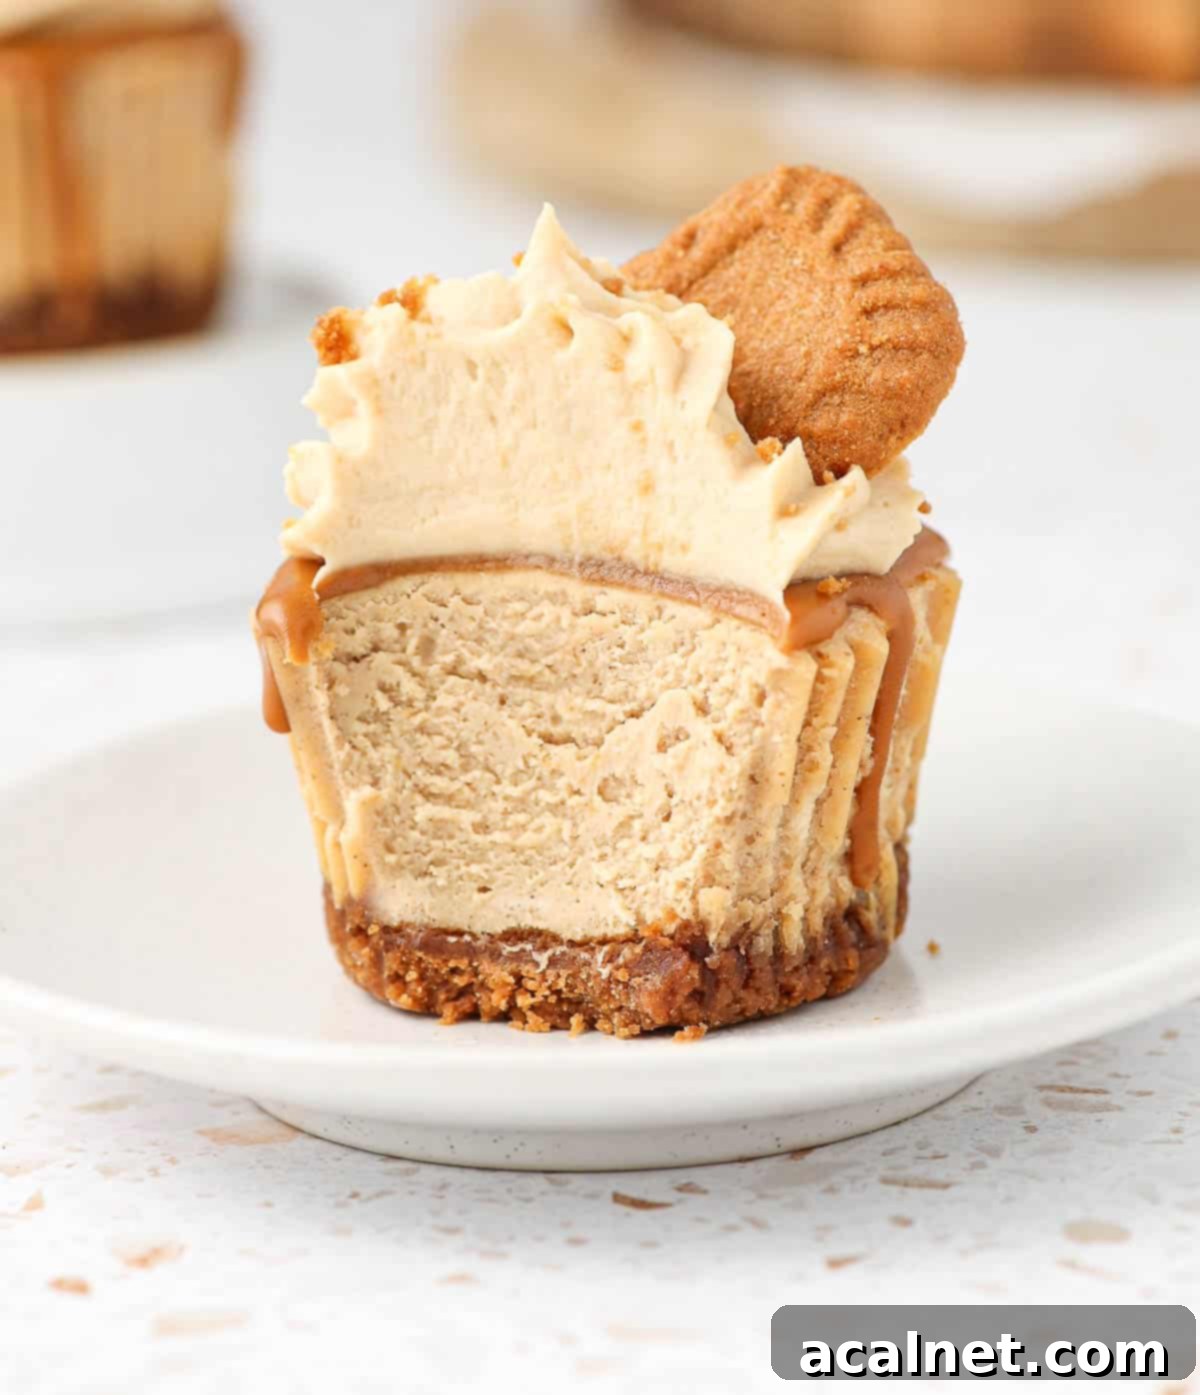
Imagine this: a perfectly crunchy crust made from finely crushed Biscoff cookies, providing that signature spiced foundation. Above this, a luxuriously smooth and creamy cheesecake filling, generously infused with luscious Biscoff cookie butter spread. But the indulgence doesn’t stop there. Each mini cheesecake is then graced with a delicate, glossy Biscoff glaze, adding another layer of caramelized sweetness. Finally, they are crowned with a light-as-air Biscoff whipped cream topping, completing the ultimate Biscoff journey.
Much like their larger counterparts, such as the Baked Biscoff Cheesecake and the effortless No-Bake Biscoff Cheesecake, these individual treats offer a profoundly comforting experience. The unique spicy, caramelised notes of Speculoos Cookies and the rich Biscoff Spread are simply irresistible. This makes these mini cheesecakes the absolute perfect dessert for the cooler months of Fall and Winter, and an especially delightful addition to your Holiday season celebrations. Their individual size also makes them perfect for portion control and easy serving at any party or gathering, eliminating the need for cutting and plating larger cakes.
Explore More Biscoff Delights:
- Biscoff Truffles
- Biscoff Brownies
- Easy Biscoff Donuts
- Speculoos Tiramisu
- Biscoff Butter Cookies
- Biscoff Cookie Butter Ice Cream
- Easy Biscoff Cake
- Biscoff Cupcakes
- Biscoff Muffins
Essential Ingredients for Your Mini Biscoff Cheesecakes
Crafting these delectable Mini Biscoff Cheesecakes requires a selection of high-quality ingredients, each playing a vital role in achieving that perfect balance of flavor and texture. Pay close attention to the details, especially concerning ingredient temperatures, as they can significantly impact the final result. Below, you’ll find a breakdown of what you’ll need for each layer of this magnificent dessert.
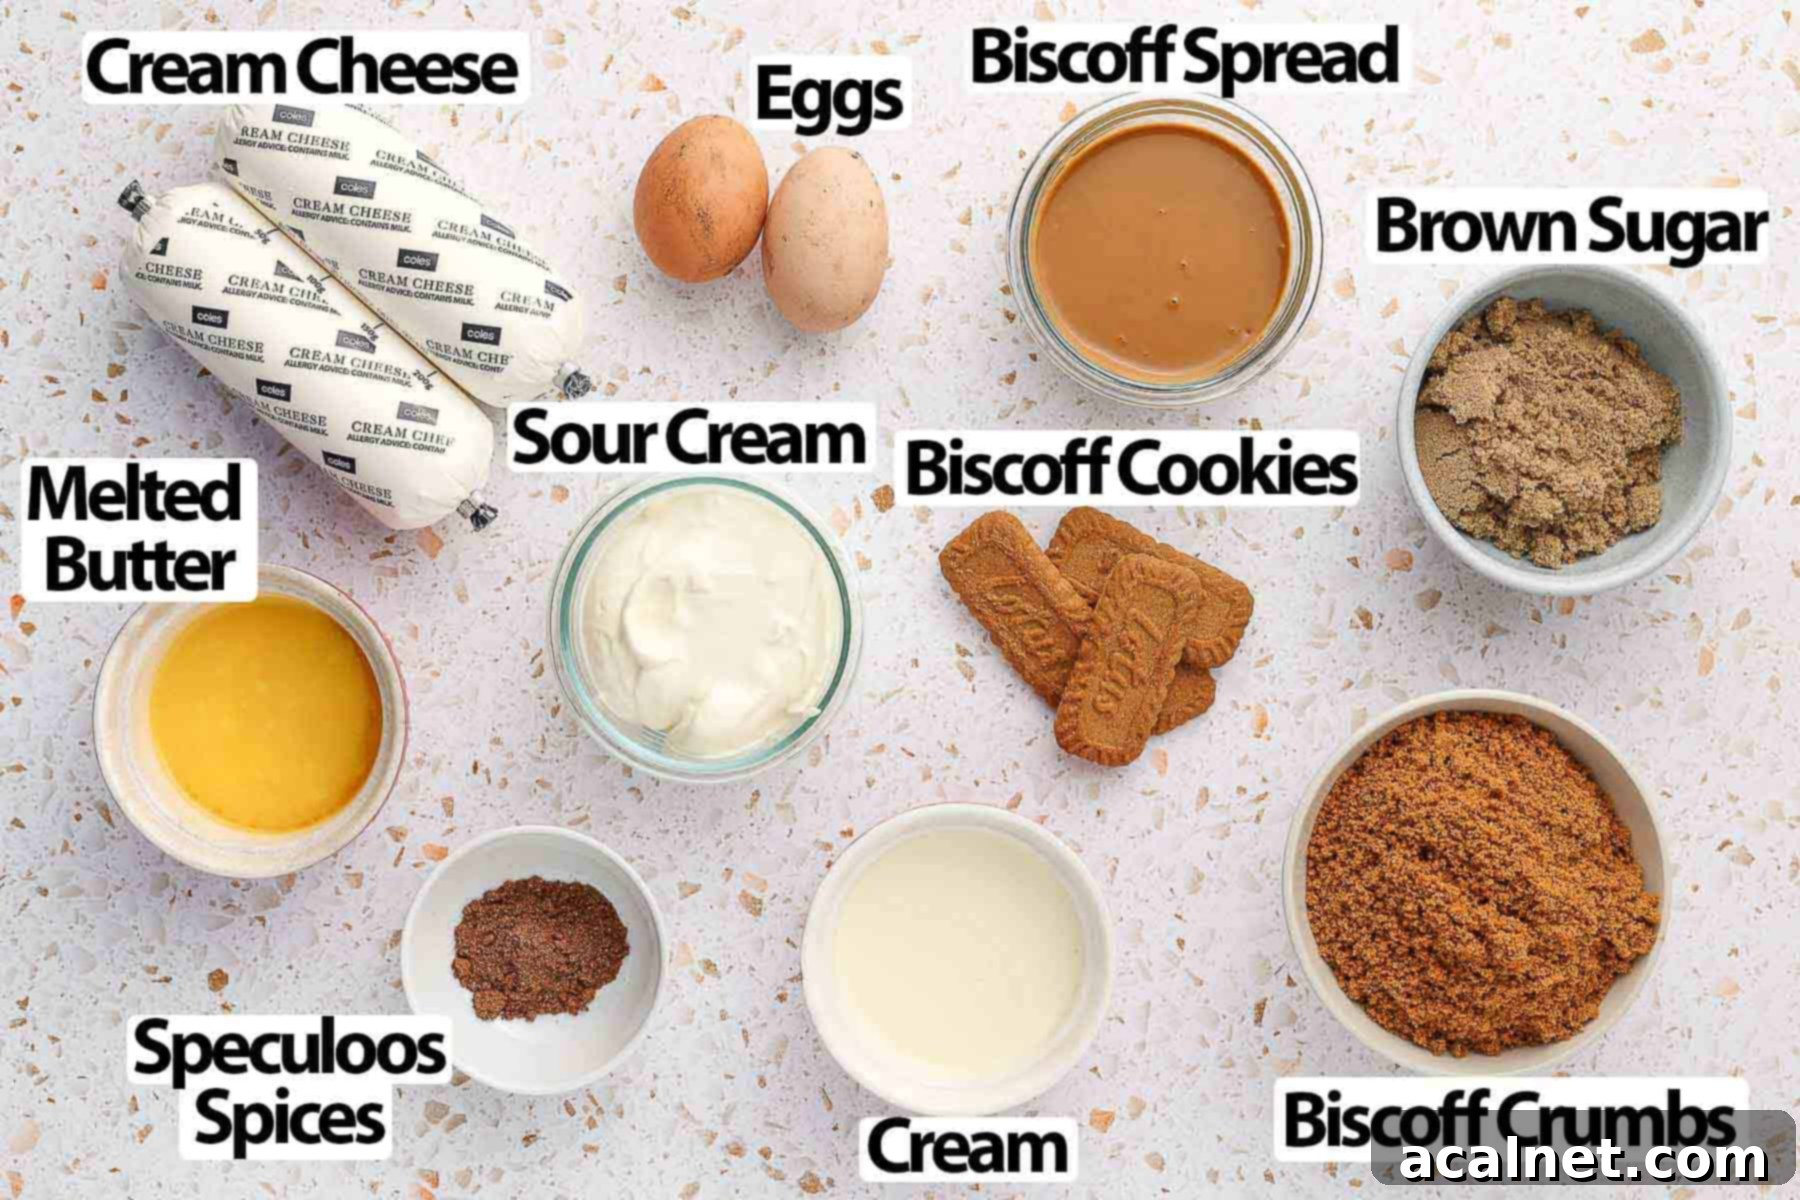
For precise quantities, please refer to the detailed recipe card conveniently located further down the page.
For the Irresistible Biscoff Cookie Crust:
- Biscoff or Speculoos Cookies: These iconic Belgian spiced cookies are the heart of your crust. They need to be finely crushed into crumbs to ensure a smooth, uniform base that holds together beautifully. The fine crumbs also help absorb the melted butter evenly, creating that perfect “wet sand” texture for a sturdy crust.
- Butter: Unsalted and fully melted. The butter acts as the binding agent, transforming the cookie crumbs into a cohesive crust that will firm up perfectly when chilled, providing a wonderful contrast to the creamy cheesecake filling.
For the Silky Biscoff Cheesecake Mixture:
- Cream Cheese: Always opt for full-fat cream cheese for the richest flavor and most luxurious, velvety texture. It’s absolutely crucial that your cream cheese is at room temperature. Cold cream cheese will inevitably lead to lumps in your batter, preventing that perfectly smooth, uniform cheesecake consistency we’re aiming for.
- Sour Cream: Also at room temperature, sour cream adds a delightful tang and extra creaminess, balancing the sweetness and richness of the Biscoff. If sour cream isn’t available, full-fat Greek Yogurt can be a suitable substitute, as demonstrated in our larger Biscoff Cheesecake recipe.
- Biscoff Cookie Butter Spread: This is where the magic happens! Ensure you use the smooth variety (not crunchy) and gently melt it until it’s very fluid. This allows it to blend seamlessly into the cheesecake batter, infusing it with that unmistakable caramelized biscuit flavor.
- Brown Sugar: Adds a deeper, more molasses-like sweetness that complements the Biscoff flavor profile beautifully, enhancing its caramelized notes.
- Speculoos Spices: This unique blend of warm spices is what truly defines the traditional Speculoos (Biscoff) flavor. While a specific mix is ideal, common components include cinnamon, ginger, nutmeg, and cloves. Refer to our FAQs section below for more details on these spices and recommended substitutes if you don’t have the exact blend.
- Eggs: Essential for binding the cheesecake mixture and providing structure as it bakes. Like the other dairy ingredients, ensure your eggs are at room temperature. This helps them incorporate smoothly into the batter without curdling, contributing to a consistently smooth and lump-free cheesecake.
Optionally, a touch of Vanilla Extract can be added to enhance the overall aroma and flavor of the cheesecake, providing a subtle warmth that beautifully complements the Biscoff and speculoos spices.
For the Luscious Toppings:
- Cookie Butter Spread (for the glaze): A small amount of Biscoff spread, lightly melted to a very fluid consistency, is used to create a beautiful, glossy drizzle over each cheesecake. This glaze not only adds another layer of Biscoff flavor but also gives a professional, appealing finish.
- Biscoff Whipped Cream: This delightful topping is a simple yet effective blend of cold Thickened or Heavy Cream (ideally with at least 30% fat content for stable whipping) and some Biscoff Spread or Cookie Butter Spread. It creates a light, airy, and intensely flavorful crown for your cheesecakes.
- Additional Biscoff Cookies (for garnish): Crushed Biscoff cookies and halves of whole cookies are perfect for adding a final textural contrast and a visual cue to the star flavor.
Step-by-Step Guide: Crafting Your Delicious Mini Biscoff Cheesecakes
Creating these individual Biscoff cheesecakes is a rewarding process, broken down into simple, manageable steps. Follow these instructions carefully to ensure a perfect batch of creamy, spiced treats every time. Visual aids are included to guide you through each stage.
Crafting the Perfect Biscoff Cookie Crust
A sturdy and flavorful base is essential for any great cheesecake. Here’s how to create yours:
- Crush the Biscoff biscuits until they form very fine, even crumbs. You can achieve this efficiently using a food processor for speed and consistency. Alternatively, for a more hands-on approach, place the cookies inside a sturdy freezer bag and use a rolling pin to tap and crush them until finely ground. The goal is a uniform crumb that will pack well.
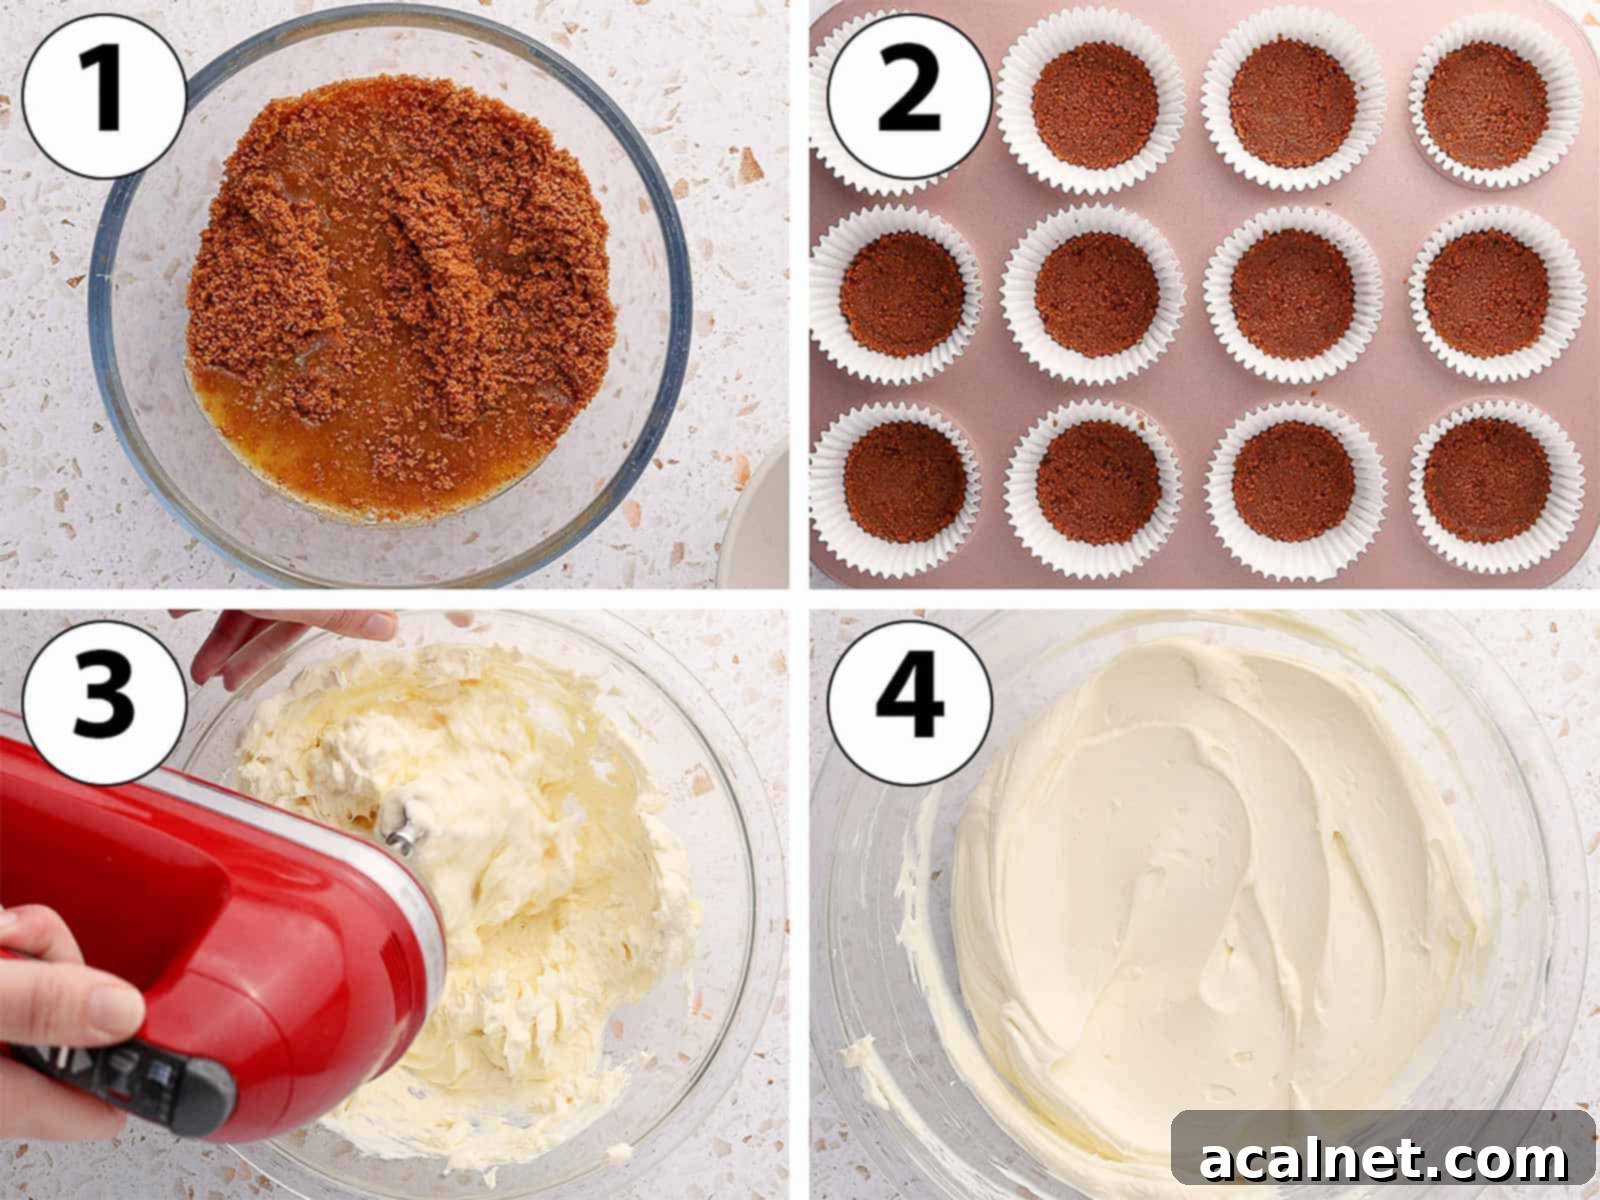
- Photo 1: In a small mixing bowl, combine the finely crushed biscuit crumbs with the completely melted unsalted butter. Stir thoroughly with a spatula until all the crumbs are evenly coated and the mixture resembles wet sand. This consistency is crucial as it indicates the butter has adequately coated the crumbs, preparing them to bind together.
- Prepare your baking pan by lining a Muffin Pan or Mini Cheesecake Pan with paper muffin liners. While optional, these liners make it significantly easier to remove the individual cheesecakes once they are baked and chilled, preventing sticking and ensuring a clean presentation.
- Photo 2: Distribute the crust mixture evenly among the prepared muffin liners. Using your fingers, the back of a spoon, or the bottom of a small cup, press the crumbs down firmly and tightly. A well-packed crust is key to preventing it from crumbling when you bite into your cheesecake.
- Chill the biscuit base in the refrigerator for at least 15-20 minutes. This chilling period allows the butter to solidify, setting the crust and making it firm and stable before the filling is added.
Preparing the Creamy Biscoff Cheesecake Filling
Now for the star of the show – the rich, smooth, and aromatic Biscoff cheesecake filling:
- Preheat your oven to a low temperature of 140 degrees Celsius / 285 degrees Fahrenheit. A lower temperature and longer baking time are essential for cheesecakes to prevent cracking and ensure a creamy, uniform texture.
- Photo 3: In a large mixing bowl or the bowl of your stand mixer fitted with the paddle attachment, combine the room temperature Cream Cheese and Sour Cream. Mix on medium-low speed for several minutes, scraping down the sides of the bowl occasionally, until the mixture is completely smooth and free of any lumps. Patience here is key!
- Photo 4: Continue mixing until the cream cheese mixture is perfectly smooth and has a uniform consistency. Be very careful not to over-mix at this stage, as incorporating too much air can cause the cheesecake to puff up excessively during baking and then crack or sink dramatically as it cools.
A crucial tip: It is paramount that both your cream cheese and sour cream are at room temperature. If these ingredients are too cold, they will not emulsify properly, leading to a lumpy batter and a less-than-perfect cheesecake texture. Plan ahead and take them out of the fridge at least an hour before you start baking.
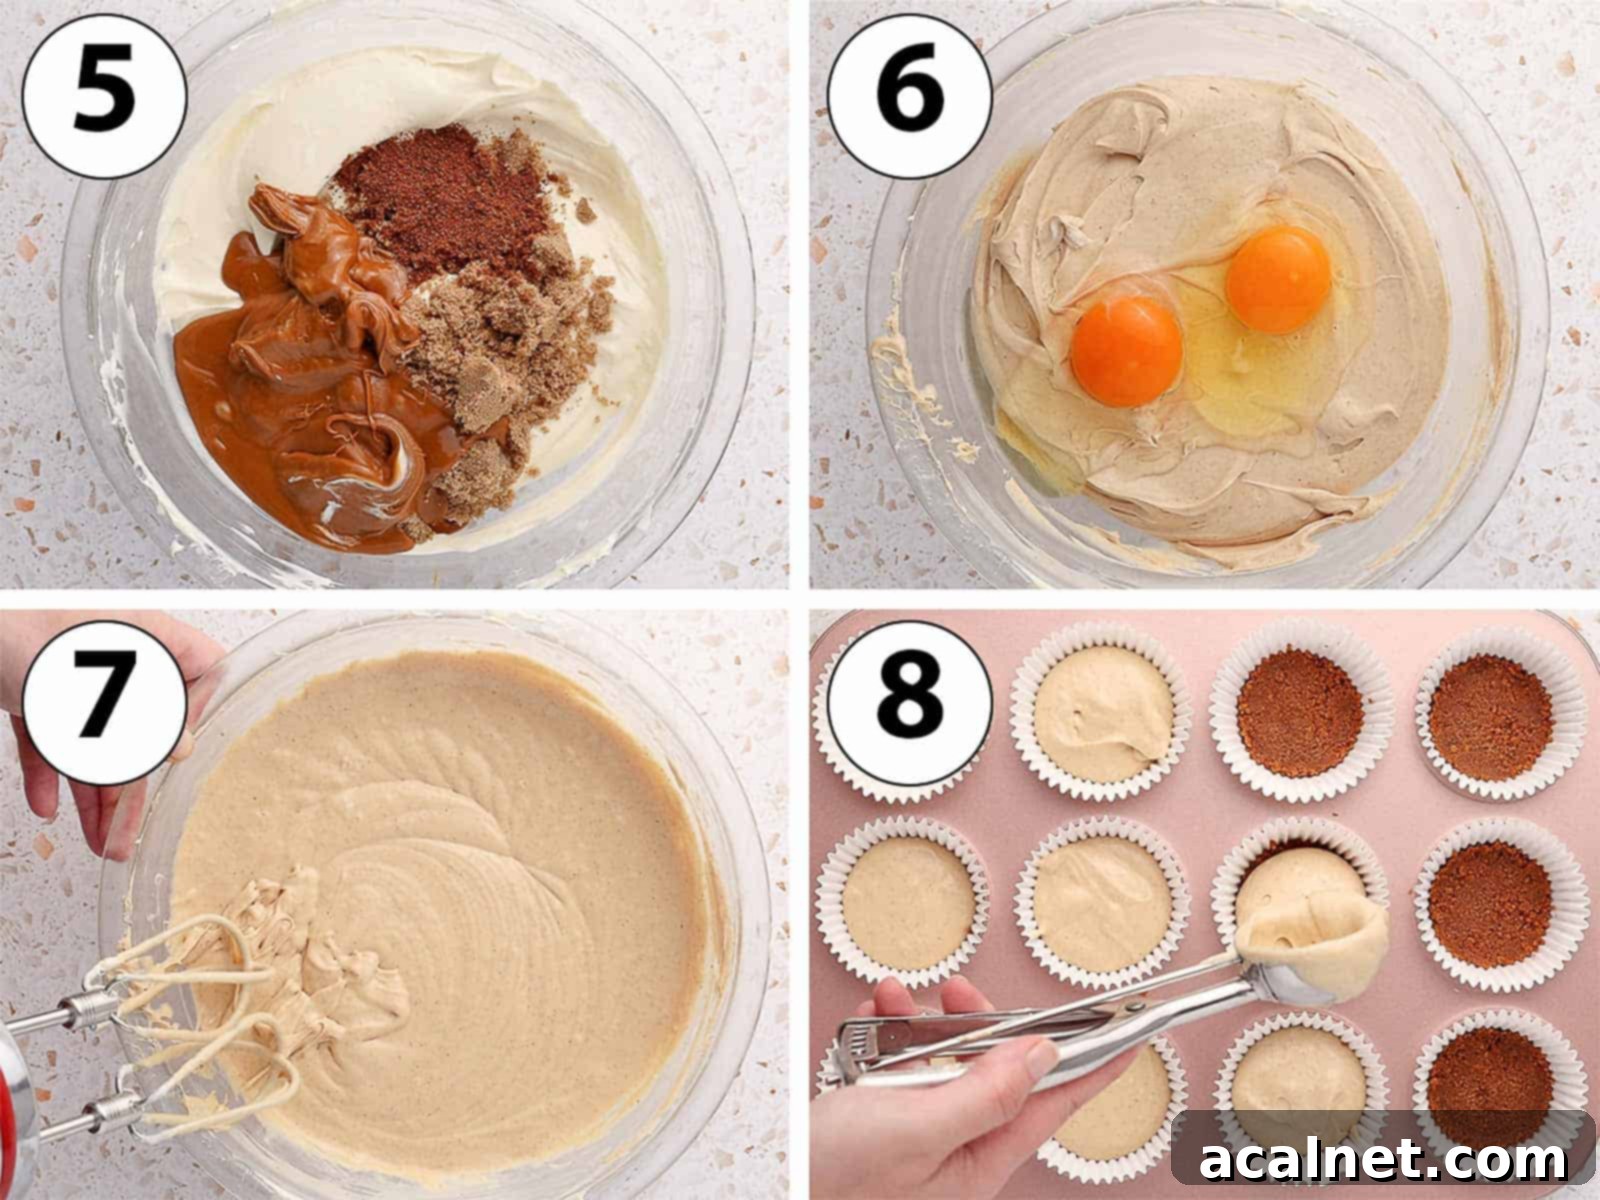
- Photo 5: To your smooth cream cheese mixture, add the melted Biscoff Spread, Brown Sugar, and Speculoos Spice. Mix on low speed until these ingredients are just combined. Again, avoid overmixing to maintain that desirable smooth texture and prevent excess air incorporation.
- Photo 6 & 7: Gently incorporate the Eggs (also at room temperature) into the mixture. Mix them in slowly, stopping the moment they are just combined. Overmixing the eggs can introduce too many air bubbles, which can cause the cheesecake to rise rapidly and then crack as it cools.
- Photo 8: Carefully scoop the creamy cheesecake mixture over the chilled Biscoff crusts in your muffin tin. Fill each liner almost to the top. After filling, gently tap the muffin tin on a hard, flat surface a few times. This action helps to release any trapped air bubbles within the batter, ensuring a denser, smoother cheesecake texture.
- Bake the cheesecakes on the lowest rack of your preheated oven for 20 to 25 minutes. The center of each cheesecake should still be slightly wobbly when gently shaken – this is a good sign! It indicates the cheesecake is cooked through but not overbaked, and it will continue to set as it cools.
- Cooling is crucial for perfection: Once baked, turn off your oven, crack the door slightly (leaving it ajar by an inch or two), and allow the mini cheesecakes to cool down gradually inside the oven for 30 minutes. This slow cooling process prevents drastic temperature changes that can lead to cracks. After this, remove them from the oven and let them sit at room temperature for another 30 minutes before finally transferring them to the fridge for at least 1 more hour (preferably 2-4 hours, or even overnight) to chill thoroughly and fully set.
Finishing Touches: Biscoff Glaze and Whipped Cream Topping
Once your Mini Biscoff Cheesecakes are completely chilled and firm, it’s time to add the beautiful and delicious toppings that elevate them to a truly irresistible dessert.
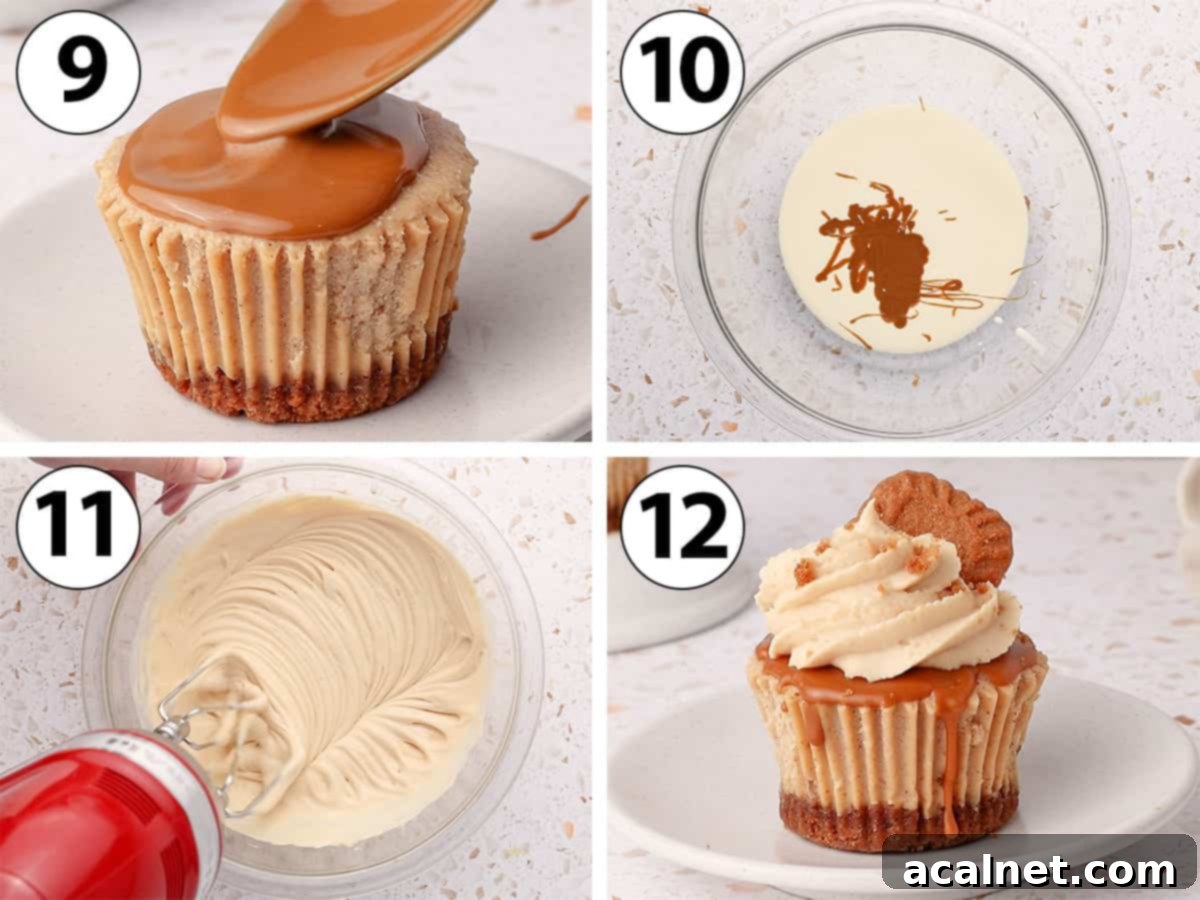
- Photo 9: For the Biscoff Glaze: Gently melt the designated Biscoff Spread (1) until it’s warm and very liquid. You can do this in the microwave in short bursts or over a double boiler. If desired, carefully remove the paper liners from the cheesecakes. Then, pour a small amount of the fluid Biscoff glaze over the top of each cheesecake, allowing it to naturally cascade down the sides. Immediately place the cheesecakes back into the fridge for about 10-15 minutes to allow the glaze to set.
Tip: If you are glazing multiple cheesecakes and notice the Biscoff spread for the glaze starting to thicken, simply re-melt it slightly to maintain its warm, fluid, and easily pourable consistency.
- For the Biscoff Whipped Cream: First, slightly melt the second batch of Biscoff Spread (2) until it becomes fluid, then set it aside to cool down for a few minutes. It should be fluid but not hot.
- Photo 10: In a large mixing bowl, combine the cold Heavy/Thickened Cream with the cooled, melted Biscoff Spread. Ensure your cream is very cold, as this helps it whip up light and airy.
- Photo 11: Using a hand mixer or stand mixer, whip the cream and Biscoff mixture on medium to medium-high speed until you achieve stiff peaks. The cream should hold its shape firmly. Be vigilant and stop mixing as soon as stiff peaks form to prevent overwhipping, which can result in a grainy or curdled texture.
- Photo 12: Transfer the freshly made Biscoff Whipped Cream topping into a piping bag fitted with your favorite star nozzle (or any decorative tip). Pipe generous swirls of whipped cream over each chilled and glazed cheesecake.
Make Ahead Tip: The Biscoff whipped cream can be prepared up to 24 hours in advance and stored in the refrigerator. Just give it a quick whisk by hand before piping if it needs to loosen slightly.
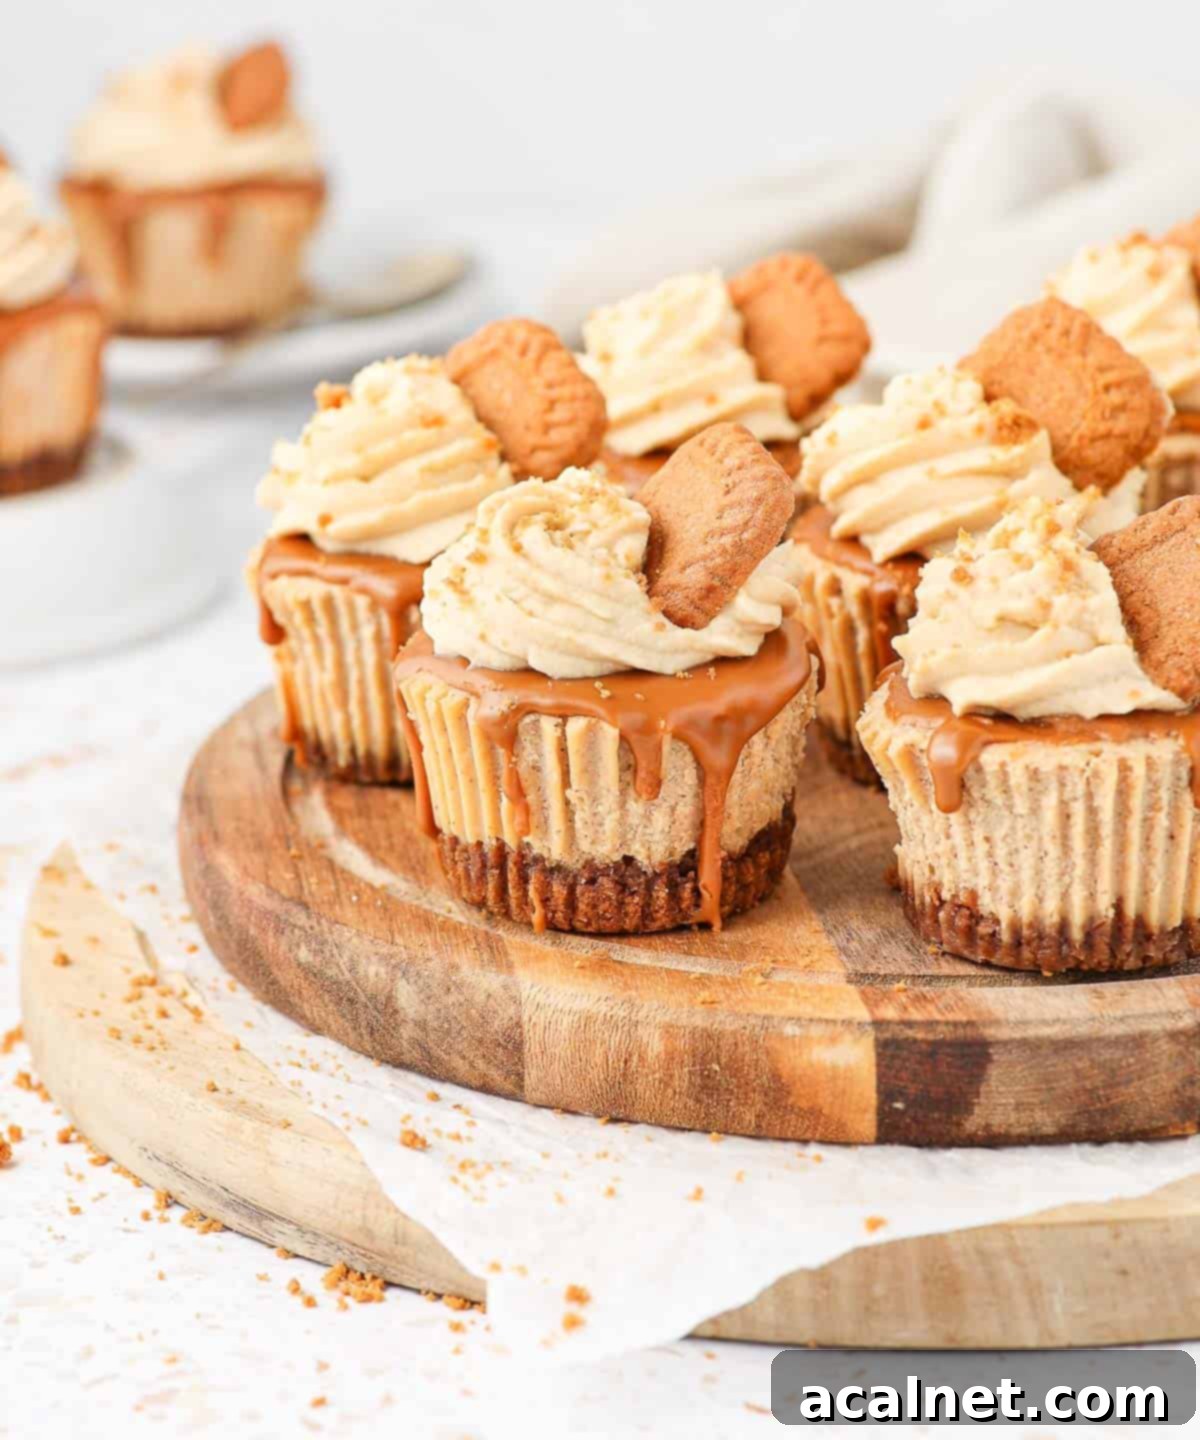
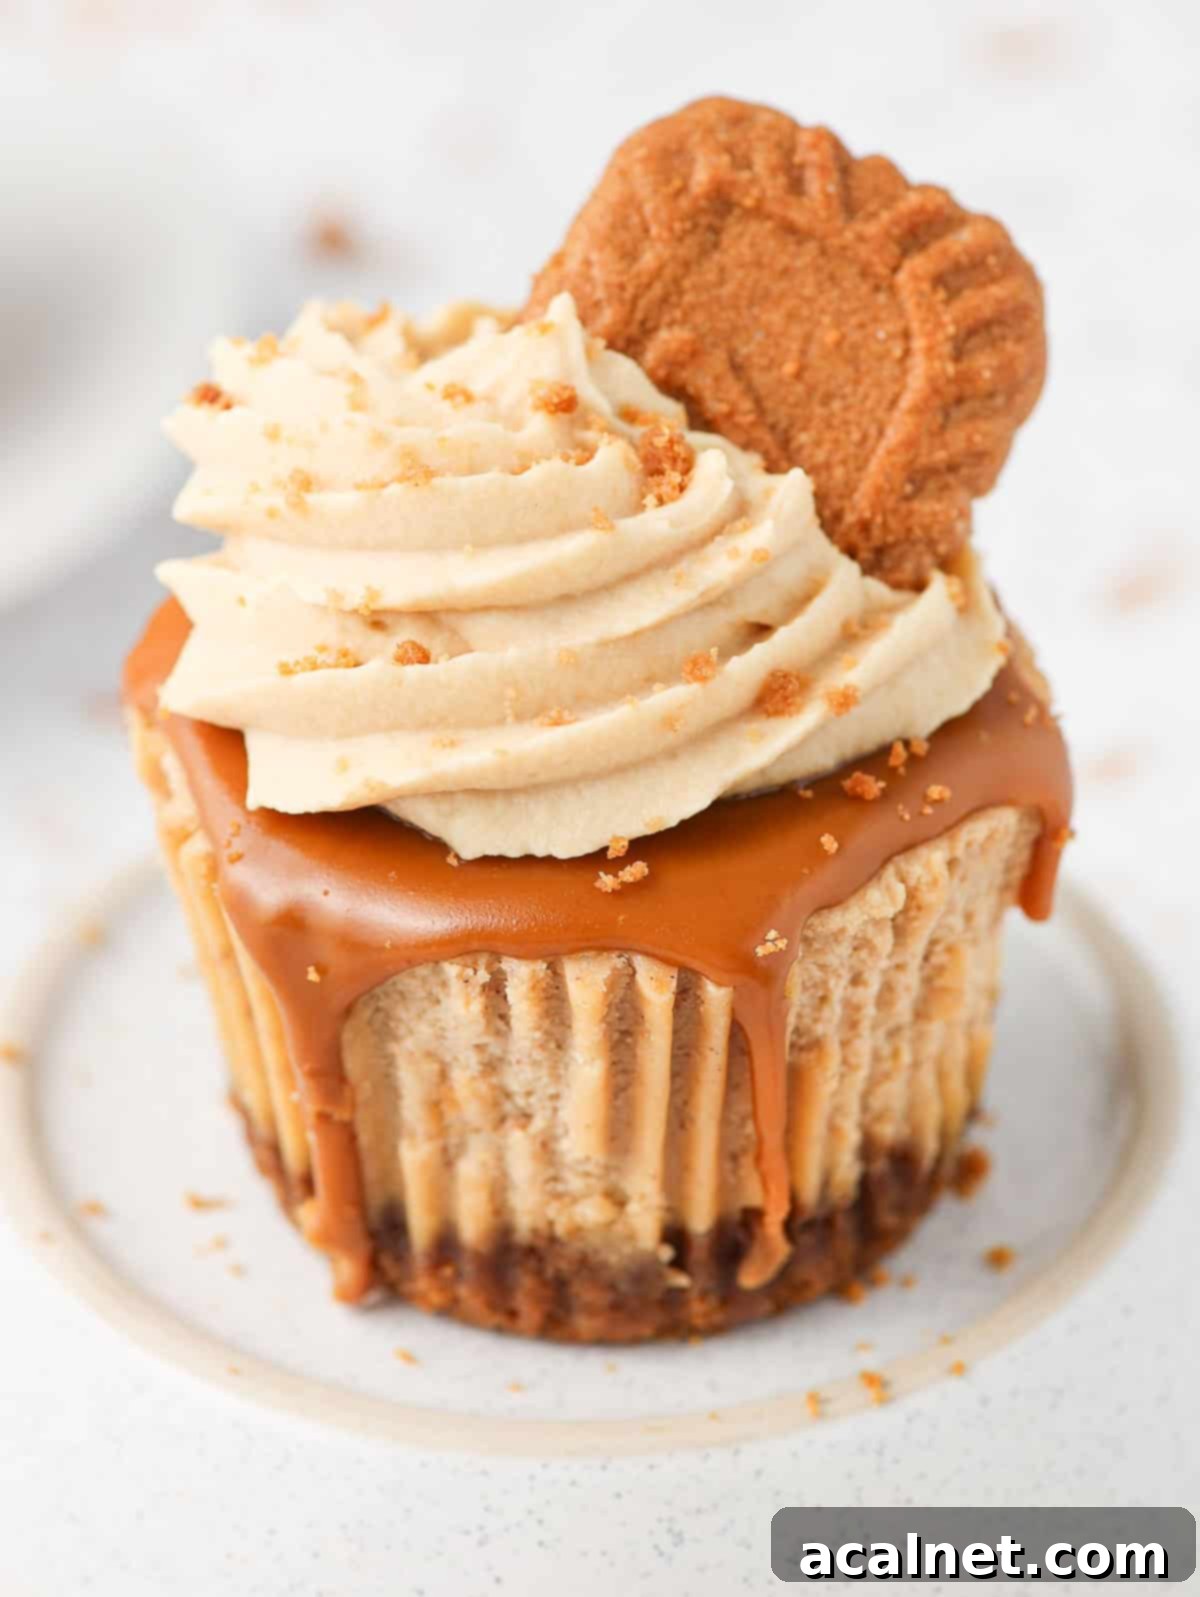
- To complete these stunning treats, garnish each with a sprinkle of additional crushed Biscoff cookies for extra crunch and visual appeal. For an elegant touch, press half of a whole Biscoff cookie into the center of the whipped cream on each cheesecake.
Keep your finished Mini Biscoff Cheesecakes refrigerated until you are ready to serve them. This ensures they maintain their perfect texture and freshness.
Frequently Asked Questions About Biscoff & Mini Cheesecakes
Yes, in essence, they are! The original, traditional Belgian spiced cookie is known as “Speculoos.” These delightful biscuits are deeply rooted in European culinary traditions, especially enjoyed around Christmas Time (and prominently on St. Nicholas Day in Belgium and the Netherlands). Lotus Bakeries, a Belgian company, introduced these cookies to a wider international audience under the brand name “Biscoff.” Therefore, Biscoff is essentially a branded version of the traditional Speculoos cookie, making them synonymous in flavor and heritage.
While often used interchangeably, there can be slight variations. Both Biscoff spread (specifically Lotus Biscoff Spread) and generic “Cookie Butter Spread” are made from finely crushed Speculoos (Biscoff) cookie crumbs, which are then blended with fat, flour, and sugar to create a smooth, spreadable consistency. The exact recipes might vary slightly between different brands, leading to minor differences in spice levels or sweetness. However, for most recipes, including these mini cheesecakes, you can generally use any type of smooth cookie butter or Speculoos spread interchangeably to achieve delicious results.
Speculoos Spice refers to the distinctive blend of warm, aromatic spices traditionally used to create Speculoos Cookies. While the precise composition can vary slightly from one brand or regional recipe to another, it commonly includes a comforting mix of Cinnamon, Coriander Seed, Nutmeg, Ginger, Caraway Seed, and Cloves. This combination provides a complex, deeply fragrant, and slightly peppery flavor profile. If you don’t have a dedicated Speculoos spice blend, you can use a good quality Mixed Spice or Pumpkin Pie Spice as a relatively close substitute. These blends often contain similar warm spices. However, it’s important to note that simply using only cinnamon is not recommended as a direct replacement. Speculoos spices offer a much richer, more nuanced, and complex flavor than cinnamon alone, which is vital for the authentic Biscoff taste in your cheesecakes.
Absolutely! While the Biscoff Whipped Cream topping is highly recommended for an all-out Biscoff experience, it is indeed optional. You could certainly finish these mini cheesecakes with just the simple Biscoff glaze for a slightly less decadent, yet still incredibly flavorful, option. Alternatively, for a different creamy texture and tang, you might consider topping them with a delightful Biscoff Cream Cheese Frosting, which would offer another layer of rich flavor. Get creative with your garnishes too – a dusting of cocoa powder, chocolate shavings, or even a sprinkle of sea salt could add an interesting twist.
Expert Tips for Perfect Mini Biscoff Cheesecakes Every Time
Achieving bakery-quality mini cheesecakes at home is entirely possible with a few key techniques. Keep these expert tips in mind to ensure your Biscoff cheesecakes are perfectly smooth, creamy, and free from cracks.
- Embrace Room Temperature Ingredients: This is arguably the most critical tip for any cheesecake recipe. Ensure your cream cheese, sour cream, and eggs are all at room temperature before you begin mixing. Cold ingredients will not emulsify properly, leading to a lumpy batter that simply won’t yield that silky-smooth cheesecake texture. Plan ahead and take them out of the fridge at least 1-2 hours before you start baking.
- Bake Low and Slow, Cool Gradually: To prevent your Mini Biscoff Cheesecakes from sinking or developing unsightly cracks, a gentle baking and cooling process is essential. Always bake them on the lowest rack of your oven at a low temperature (140°C/285°F). After baking, the cooling process should be slow and gradual: first, allow them to cool in the turned-off oven with the door slightly ajar, then transfer them to room temperature, and finally, chill them thoroughly in the fridge. A rapid change in temperature is the primary culprit for cracks and sinking.
- Patience with the Paper Liners: It can be tempting to remove the paper muffin liners as soon as the cheesecakes are cool enough to handle, but resist the urge! Wait until the cheesecakes are completely cold and fully set after their refrigeration period. If you attempt to remove the liners while they are still even slightly warm, they tend to stick to the delicate cheesecake, potentially tearing them or leaving residue.
- Master the Whipping Cream: When preparing your Biscoff whipped cream, precision is key. Keep a close eye on the cream as you whip it. As you approach stiff peaks – where the cream holds its shape firmly – slow down your mixer or switch to whisking by hand. Overwhipping can quickly turn beautifully smooth whipped cream into a grainy, curdled mess.
- Don’t Overmix the Batter: After the initial creaming of the cream cheese and sour cream, mix in subsequent ingredients (especially the eggs) only until just combined. Overmixing introduces too much air into the batter, which can cause the cheesecakes to puff up in the oven and then deflate and crack dramatically upon cooling.
Storage & Freezing Guidelines for Your Mini Biscoff Cheesecakes
To keep your delicious Mini Biscoff Cheesecakes fresh and enjoyable, proper storage is key. Following these guidelines will ensure they maintain their creamy texture and spiced flavor.
- Storage in the Fridge: These mini cheesecakes are best stored in an airtight container in the refrigerator. When properly stored, they will remain fresh for up to three days. However, for the absolute best taste and texture, we highly recommend enjoying them within 24 hours of preparation. The Biscoff whipped cream topping can be prepared in advance and kept refrigerated for up to 24 hours before you pipe it onto the chilled cheesecakes, giving you flexibility in your dessert preparation.
- Freezing Not Recommended: Unfortunately, we do not recommend freezing these cheesecakes. The delicate texture of cream cheese-based desserts can change significantly after thawing, often becoming grainy or watery, which would compromise the delightful experience of these Mini Biscoff Cheesecakes. It’s always best to enjoy them fresh or within the recommended refrigeration period.
Discover More Delectable Cheesecake Creations
If you’ve enjoyed the sweet and spicy perfection of these Mini Biscoff Cheesecakes, you’re in for a treat! Our collection features a wide array of cheesecake recipes, from classic fruit-infused delights to rich, decadent flavors, all designed to satisfy your sweet tooth. Explore these other fantastic cheesecake options:
- Mini Strawberry Cheesecakes
- Apple Crumble Cheesecake
- Mini Lemon Cheesecakes
- Coffee Cheesecake
- Mini Blueberry Cheesecakes
- Lemon Ricotta Cheesecake
- Baked Biscoff Cheesecake
Made this recipe?
Let us know if you liked it by leaving a comment below, and tag us on Instagram @a.baking.journey with a photo of your creation!
Recipe Card: Mini Biscoff Cheesecakes

Mini Biscoff Cheesecakes
Print Recipe
Ingredients
Biscoff Cookie Crust
- 75 gr Unsalted Butter, melted and cooled slightly
- 150 gr Biscoff Cookies, finely crushed
Biscoff Cheesecake Filling
- 500 gr Full-Fat Cream Cheese, at room temperature
- 180 ml Sour Cream, at room temperature (or Greek Yogurt)
- 150 ml Smooth Biscoff Spread, lightly melted until fluid
- 75 gr Brown Sugar
- 1/2 teaspoon Speculoos Spices, (see notes below for substitute)
- 2 Large Eggs, at room temperature
- 1/2 teaspoon Vanilla Extract, (optional)
Biscoff Glaze & Whipped Cream Topping
- 80 ml Smooth Biscoff Spread (1), for the glaze, melted until very liquid
- 45 ml Smooth Biscoff Spread (2), for the whipped cream, melted and cooled
- 240 ml Cold Heavy / Thickened Cream, (minimum 30% fat)
- 6 Biscoff Cookies, for garnish (crushed or halved)
Instructions
Prepare the Biscoff Cookie Crust
- Melt the 75gr Unsalted Butter in a small microwave-safe bowl or saucepan, then set aside to cool slightly while you prepare the cookies.
- Finely crush the 150gr Biscoff Cookies. You can do this quickly in a food processor or by placing them in a sealed freezer bag and crushing with a rolling pin until uniform crumbs are formed. Transfer the crumbs to a medium mixing bowl. Pour the slightly cooled melted butter over the cookie crumbs and stir thoroughly with a spatula until the mixture resembles wet sand and all crumbs are evenly moistened.
- Line a 12-cup muffin pan or a dedicated mini cheesecake pan with paper muffin liners. Distribute the Biscoff crust mixture evenly among the liners, typically about 1-2 tablespoons per liner. Firmly press the crumbs into the bottom of each liner using your fingers, the back of a spoon, or a small tamper. Place the prepared muffin pan in the refrigerator to chill for at least 15 minutes while you prepare the filling.
Bake the Creamy Biscoff Cheesecakes
- Preheat your oven to 140°C / 285°F. Ensure the oven rack is in the lowest position to promote even, gentle baking.
- In a large mixing bowl (or the bowl of a stand mixer with a paddle attachment), combine the 500gr room temperature Full-Fat Cream Cheese and 180ml room temperature Sour Cream (or Greek Yogurt). Mix on medium-low speed for 3-5 minutes, scraping down the sides as needed, until the mixture is perfectly smooth and free of any lumps. Avoid over-mixing at this stage to prevent incorporating too much air. (See Note 1 below for why room temperature ingredients are crucial).
- Add the 150ml melted Biscoff Spread, 75gr Brown Sugar, and 1/2 teaspoon Speculoos Spices to the cream cheese mixture. Mix on low speed until just combined. Next, add the 2 room temperature Large Eggs and the optional 1/2 teaspoon Vanilla Extract. Mix slowly until the eggs are just incorporated; stop mixing immediately to avoid introducing excess air bubbles.
- Pour or scoop the cheesecake batter evenly over the chilled Biscoff cookie crusts in the muffin pan. Fill each liner nearly to the top. Gently tap the muffin tin on your counter a few times to release any trapped air bubbles, which helps ensure a smooth, dense cheesecake texture.
- Bake on the lowest rack for approximately 20 to 25 minutes. The cheesecakes are ready when the edges are set, but the center still has a slight wobble when gently shaken. Turn off the oven, prop the door open slightly (about 1-2 inches), and let the mini cheesecakes cool inside the oven for 30 minutes. This slow cooling prevents cracking. Remove from the oven and allow them to cool completely at room temperature for another 30 minutes. Finally, transfer them to the refrigerator for at least 1 hour (preferably 2-4 hours, or overnight) to chill thoroughly and firm up.
Add the Biscoff Glaze & Whipped Cream Topping
- For the Biscoff Glaze: Melt the 80ml Biscoff Spread (1) until it is warm and very liquid (use a microwave in 15-second intervals or a double boiler). Once the cheesecakes are fully chilled, carefully remove the paper liners (optional, but recommended for aesthetics). Drizzle a small amount of the fluid Biscoff glaze over the top of each cheesecake. Return them to the fridge for 10-15 minutes to allow the glaze to set. If the glaze thickens during application, re-melt it slightly.
- For the Biscoff Whipped Cream: Slightly melt the 45ml Biscoff Spread (2) until fluid, then set aside to cool down for a few minutes. It should be liquid but not hot to touch.
- In a large, chilled mixing bowl, combine the 240ml cold Heavy/Thickened Cream and the cooled, melted Biscoff Spread (2). Using a hand mixer or stand mixer, whip on medium to medium-high speed until you reach stiff peaks – the cream should hold its shape firmly. (See Note 2 below for tips on avoiding overwhipping). Place the whipped cream in the fridge if not using immediately.
- Transfer the Biscoff Whipped Cream into a piping bag fitted with a star nozzle (or your preferred tip). Pipe a generous swirl of whipped cream over each glazed and chilled cheesecake. To complete the presentation, finish each cheesecake with a sprinkle of crushed Biscoff cookies and/or press half of a Biscoff cookie gently into the whipped cream. Keep refrigerated until serving.
Video Tutorial
Would you like to save this recipe?
Enter your email address to receive this delightful recipe directly in your inbox, so you can easily come back to it later!
Notes
Instruction Notes:
- Room Temperature Ingredients: It is critical for the cream cheese, sour cream, and eggs to be at room temperature. Cold ingredients will not blend smoothly, resulting in a lumpy cheesecake batter. Also, avoid over-mixing the batter after adding the eggs, as this can incorporate too much air, leading to cracks in the baked cheesecakes.
- Whipping Cream: When preparing the Biscoff whipped cream, be careful not to overwhip. As the cream approaches stiff peaks, reduce mixer speed or switch to a hand whisk. Overwhipping can cause the cream to become grainy or even curdle.
Nutrition (per serving)
