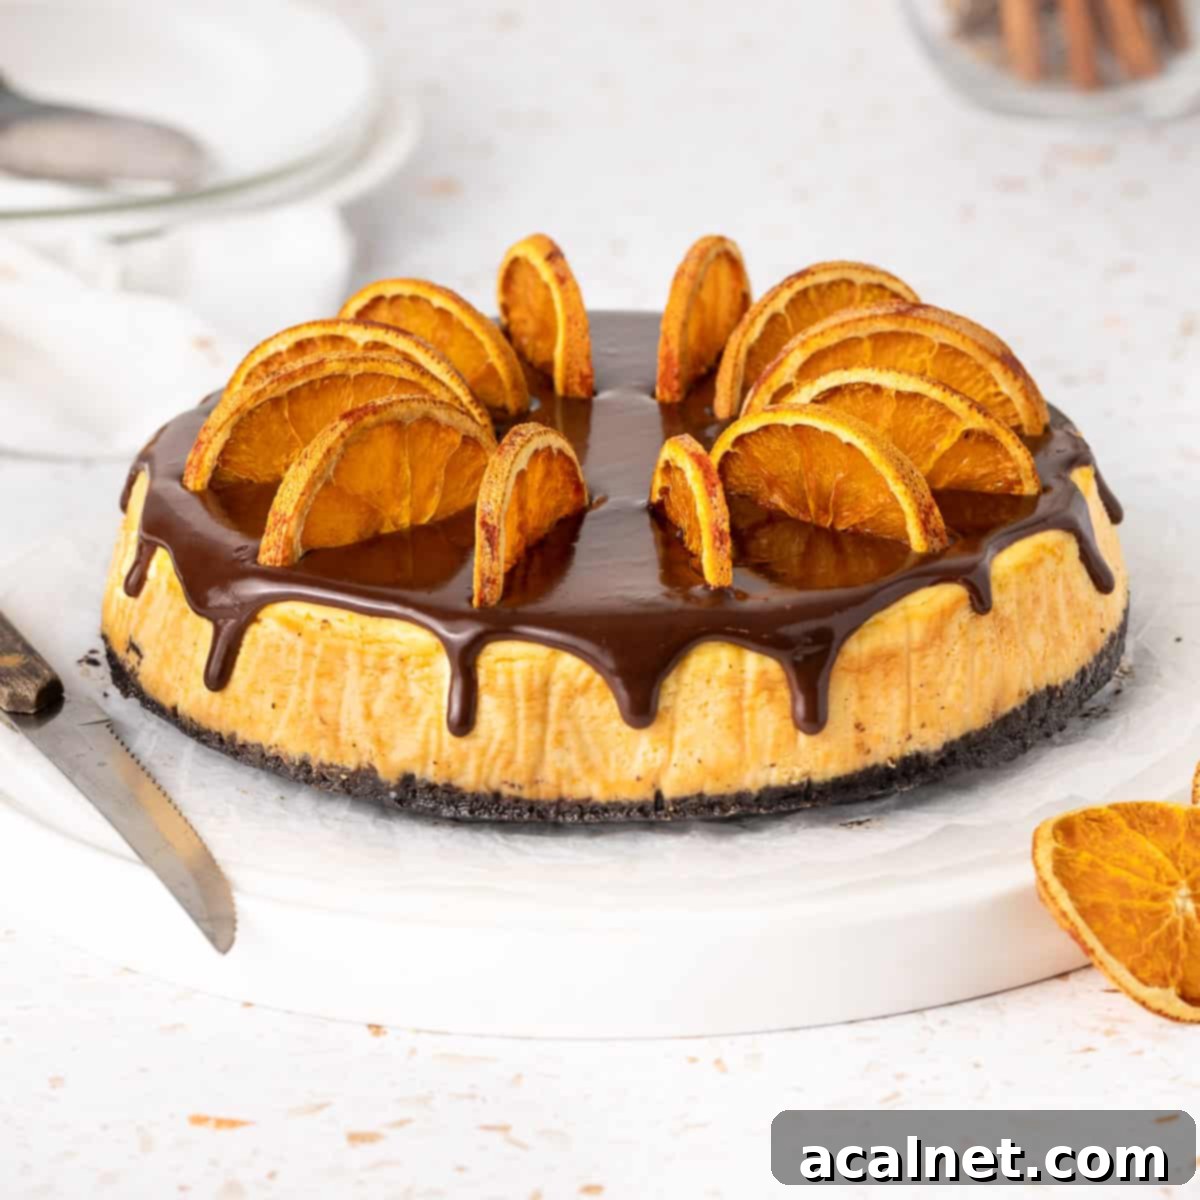
Decadent Chocolate Orange Cheesecake: The Ultimate Recipe for a Zesty, Creamy Delight
Prepare to tantalize your taste buds with this sensational Chocolate Orange Cheesecake recipe. It perfectly marries the beloved combination of rich dark chocolate and bright, zesty orange into a dessert that’s both comforting and elegant. Featuring a deeply flavorful Oreo Cookie Crust, a velvety smooth Orange Cheesecake Filling, and a luxurious Dark Chocolate Ganache Topping, this cheesecake is truly a showstopper. Whether you’re planning a festive holiday feast, celebrating a special occasion, or simply craving an extraordinary treat, this recipe promises to deliver an unforgettable dessert experience.
[feast_advanced_jump_to]
Why You’ll Adore This Chocolate Orange Cheesecake
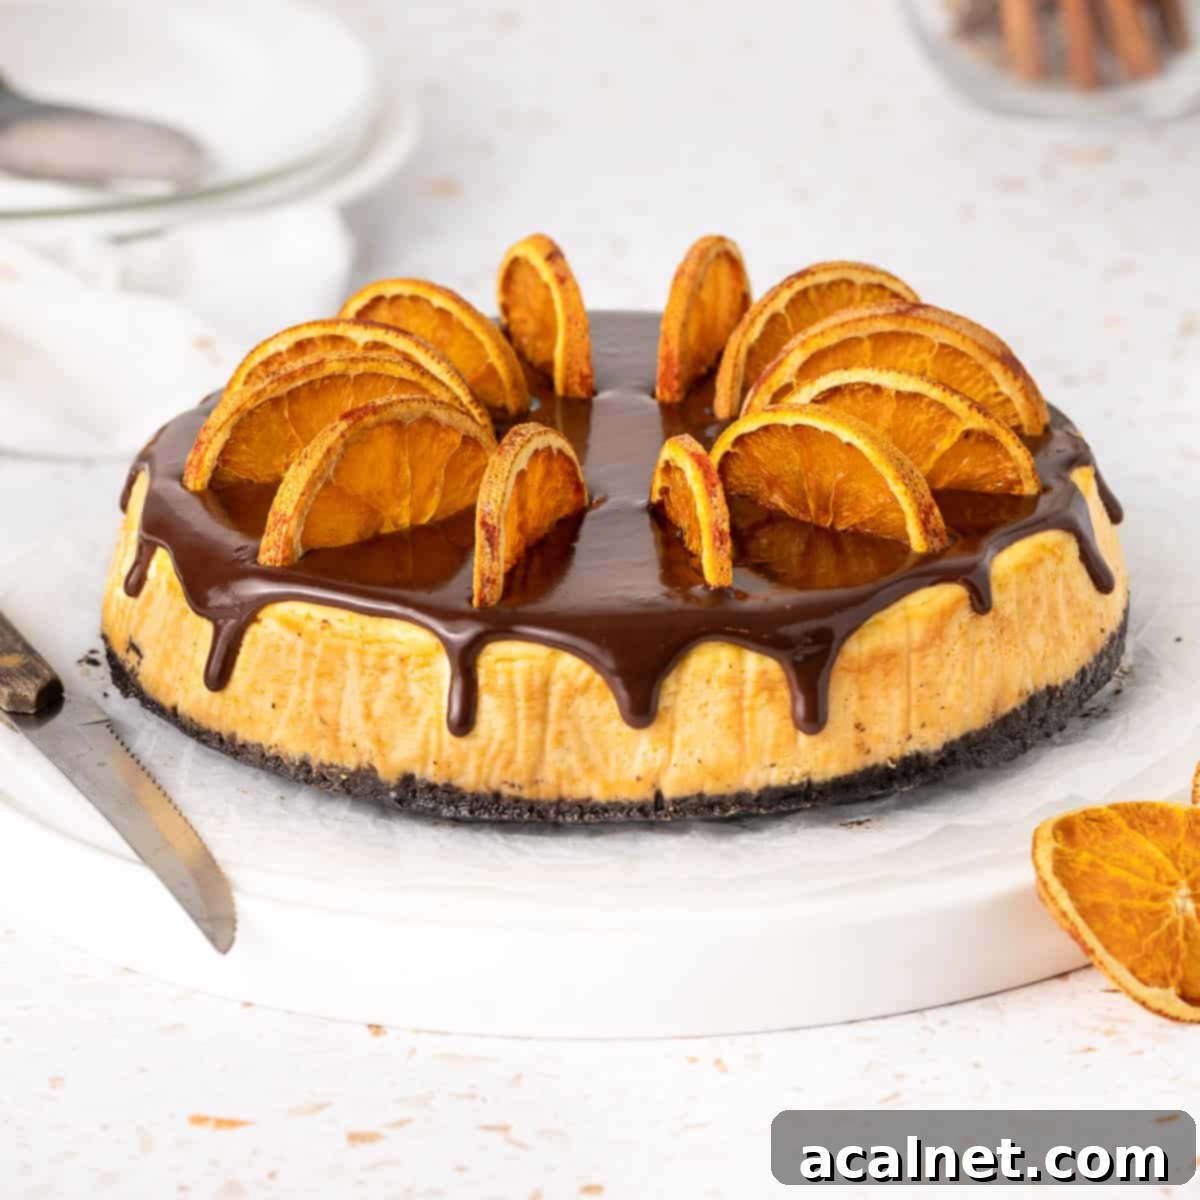
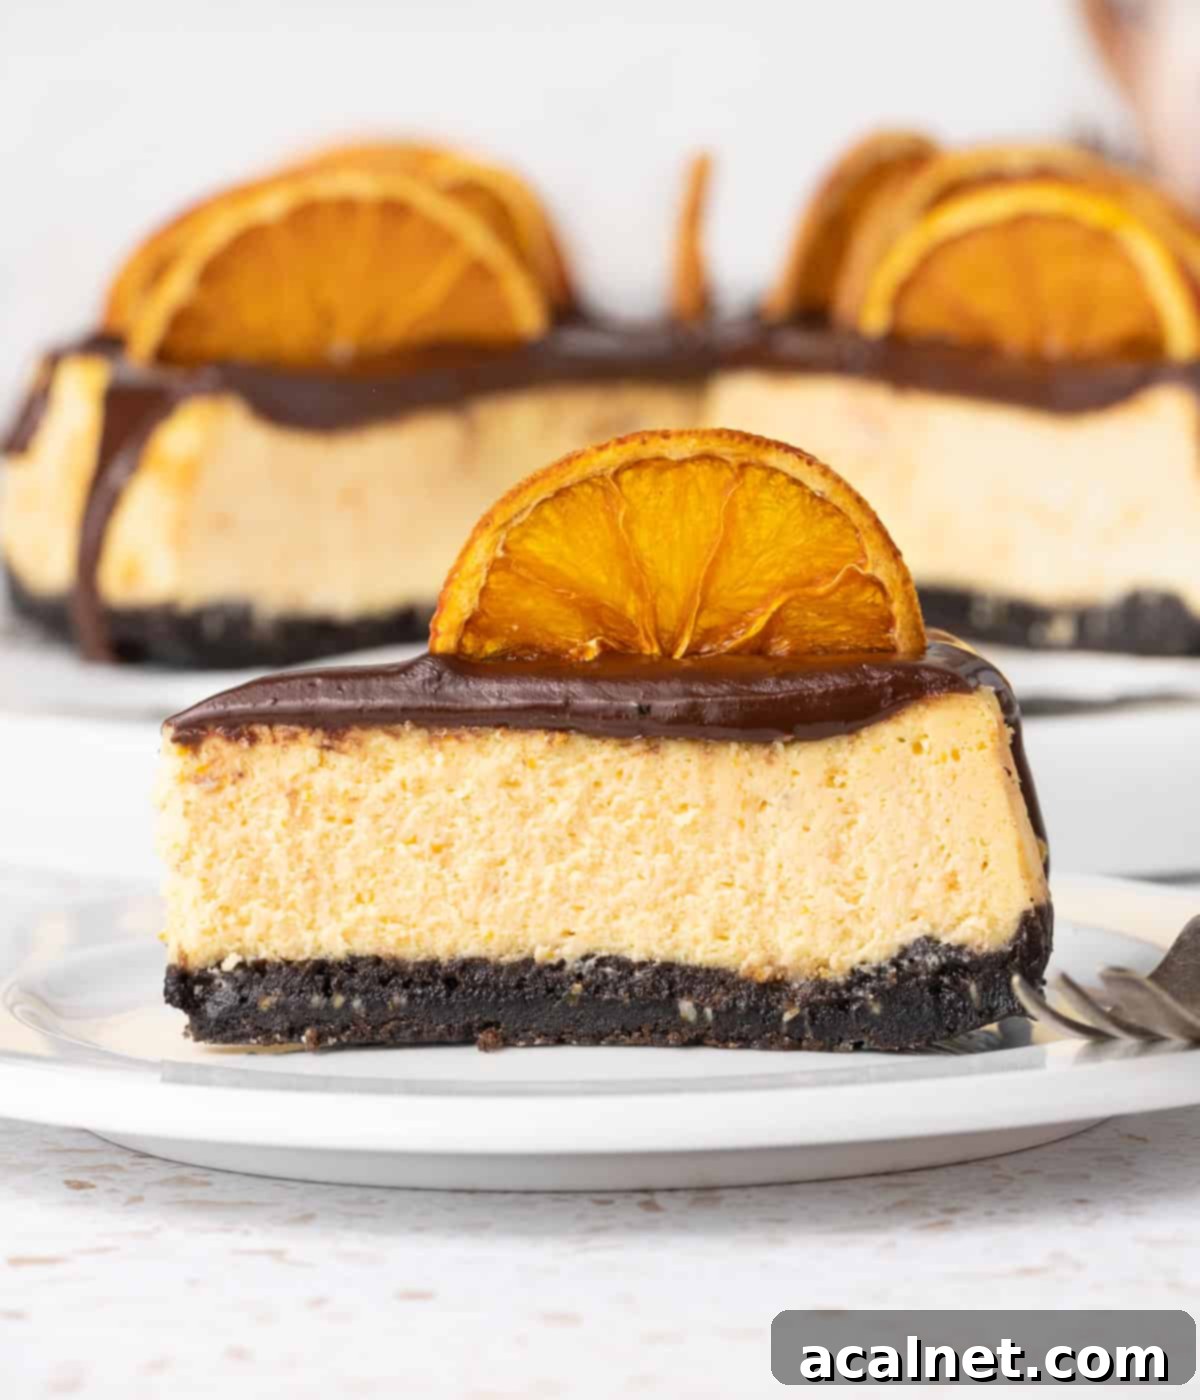
If the irresistible blend of robust Dark Chocolate and vibrant, fresh Orange flavor makes your heart sing, then this Chocolate Orange Cheesecake is an absolute must-try! This isn’t just any cheesecake; it’s a symphony of textures and tastes designed to captivate. Each slice begins with a delightful crunch from the rich Oreo cookie crust, which perfectly complements the smooth, creamy orange cheesecake filling. The experience is then crowned with a luscious layer of melted dark chocolate ganache, often garnished with elegant dehydrated orange slices, adding both visual appeal and an intensified citrus note.
What sets this particular orange cheesecake apart is its exceptional balance. It’s wonderfully creamy and silky, offering a melt-in-your-mouth texture that contrasts beautifully with the firm, flavorful base. The orange provides a refreshing brightness that cuts through the decadence of the dark chocolate, creating a harmonious and addictive flavor profile. This makes it an ideal dessert for any occasion, from an elaborate holiday dinner to a casual gathering, or simply as a luxurious everyday treat to elevate your baking journey. It’s elegant enough for a special event, yet surprisingly approachable to make, ensuring a consistently delicious result that will impress everyone.
More Chocolate Orange Delights:
- Irresistible Chocolate Orange Tartlets
- Easy-to-Make Chocolate Orange Brownies
- Light and Airy Chocolate Orange Mousse
Essential Ingredients for Your Perfect Chocolate Orange Cheesecake
Crafting a truly spectacular cheesecake begins with selecting the right ingredients. For this Chocolate Orange Cheesecake, quality and temperature are key to achieving that signature creamy texture and vibrant flavor. Here’s a detailed look at what you’ll need:
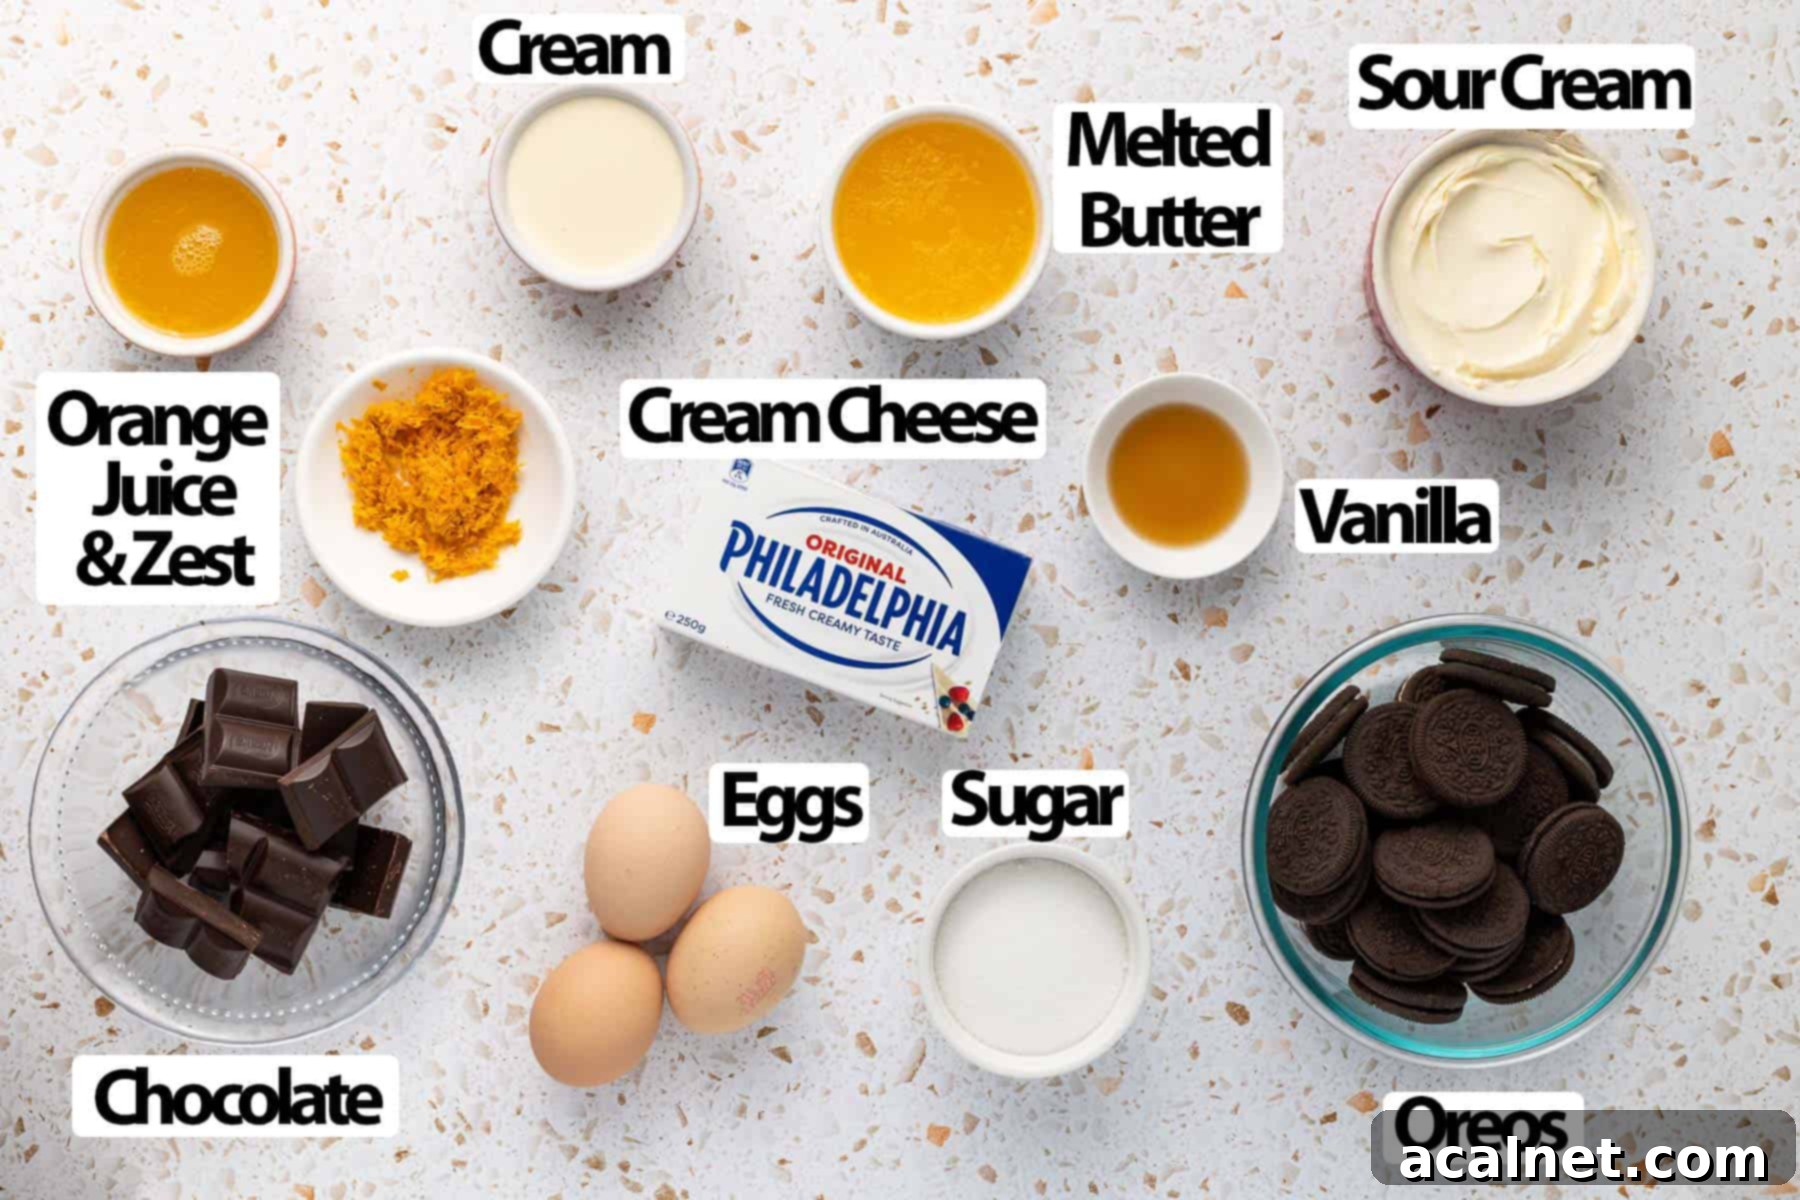
Scroll down to the recipe card below for exact quantities.
For the Indulgent Oreo Crust:
- A simple yet brilliant combination of finely crushed Oreo Cookies and Melted Unsalted Butter. While you could use graham cracker crumbs, the rich chocolate flavor from the Oreos is truly unparalleled and adds an extra dimension to this chocolate orange cheesecake. Ensure your butter is unsalted, as this allows you to control the overall saltiness of the crust.
For the Creamy Orange Cheesecake Filling:
- Full-Fat Cream Cheese: This is non-negotiable for the best flavor and a wonderfully rich, creamy texture. It is absolutely crucial that your cream cheese is softened and at room temperature. Cold cream cheese will result in a lumpy batter, no matter how much you mix it.
- Sour Cream: Also needs to be soft and at room temperature. Sour cream adds a lovely tang that balances the sweetness of the cheesecake and contributes to its silky-smooth consistency.
- Large Eggs: Ensure these are at room temperature. Cold eggs can cause the batter to seize and affect the cheesecake’s texture, leading to cracks. They act as a binder, giving the cheesecake its structure.
- Fresh Oranges: You’ll need both the vibrant Zest and the juicy Juice of fresh oranges. For the best flavor and to avoid any unwanted chemicals, opt for organic oranges or wash them thoroughly before zesting. The zest provides intense orange aroma, while the juice infuses the cheesecake with its characteristic citrus flavor.
- Vanilla Extract: A touch of vanilla enhances the overall flavor profile without overpowering the star orange and chocolate notes. For an even more pronounced citrus kick, you could substitute this with a good quality Orange Extract.
For the Decadent Dark Chocolate Ganache Topping:
- A classic, foolproof mix of high-quality Dark Cooking Chocolate and rich, thickened Heavy Cream (also known as Double Cream). The type of chocolate truly makes a difference here; choose one you enjoy eating on its own. I find a 70% dark chocolate works beautifully, offering a deep, bittersweet contrast to the sweet orange.
- Honey (optional): A small amount of honey can be added for extra sweetness and to give the ganache a beautiful shine and even smoother texture. If you’re using a chocolate that’s already quite sweet, or prefer a less sweet ganache, you can easily omit it.
Mastering Your Chocolate Orange Cheesecake: A Step-by-Step Guide
Creating this stunning Orange Chocolate Cheesecake is a rewarding process. Follow these detailed steps to ensure a flawless, delicious result every time.
Crafting the Perfect Oreo Crust
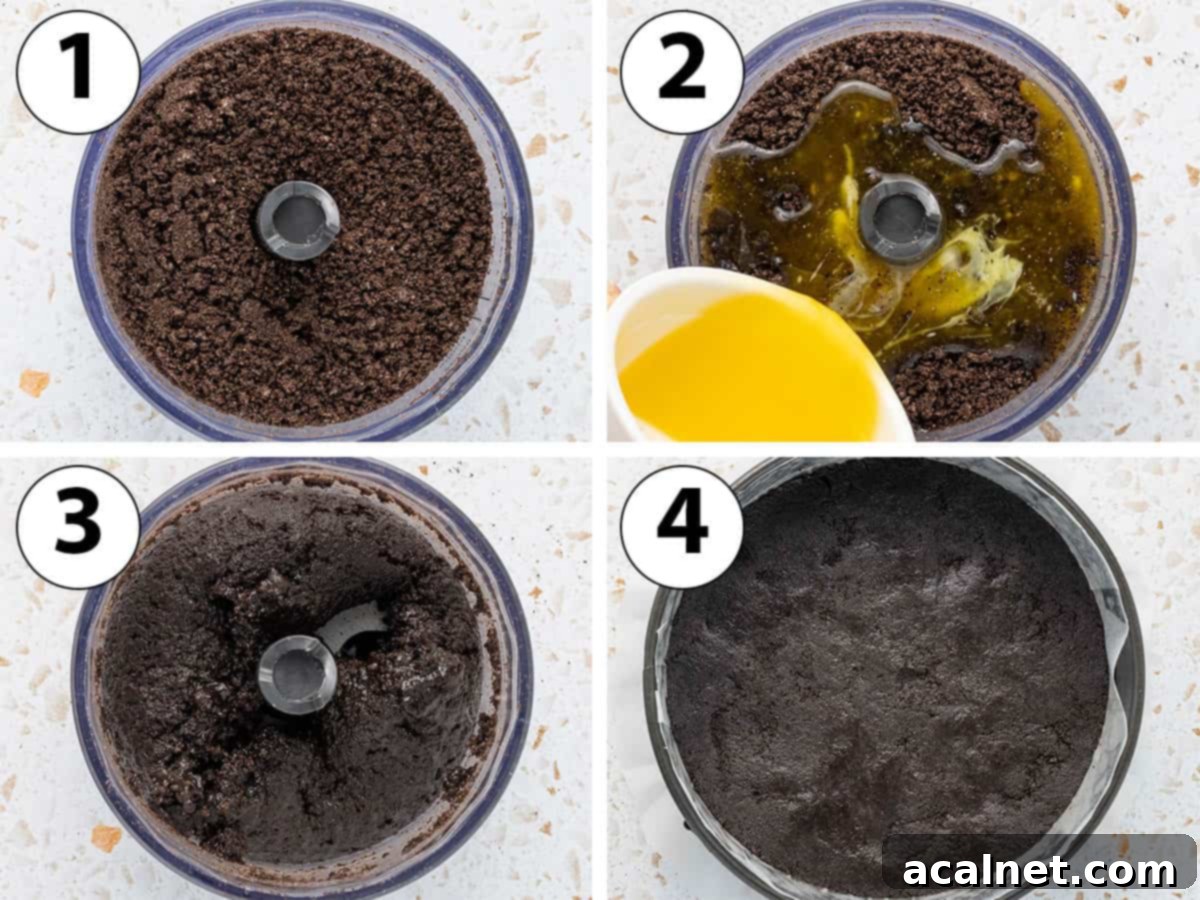
The foundation of this incredible cheesecake is its crunchy Oreo biscuit crust, which requires a brief chill in the freezer to set properly.
- Begin by melting the Unsalted Butter in a small saucepan or microwave-safe bowl until it’s completely liquid. Set it aside to cool slightly while you prepare the Oreos.
- Prepare your 22 cm / 9-inch Springform pan. Line the bottom with a circle of baking paper or parchment paper. This makes transferring the finished cheesecake much easier. Lightly grease the inner sides of the pan, and for extra reassurance against sticking, you can optionally line them with strips of baking paper as well.
- Photo 1: Place the Oreo Cookies (cream filling included!) into a small blender or food processor. Pulse until you achieve very fine crumbs, ensuring no large chunks of cookies remain. If you don’t have a food processor, you can place the Oreos in a sturdy freezer bag or plastic bag and crush them thoroughly with a rolling pin.
- Photo 2: Pour the cooled Melted Butter over the crushed Oreo crumbs.
- Photo 3: Continue blending or mixing until the crumbs are fully saturated and resemble a thick, wet sand texture. This ensures the crust holds together perfectly.
- Photo 4: Transfer the moist Oreo crumbs into your prepared Springform Pan. Using the back of a spoon, a flat-bottomed cup, or your clean hands, firmly press the crumbs into an even layer across the bottom of the pan. The more compact the crust, the less likely it is to crumble when sliced. Place the pan in the freezer to chill and set while you prepare the filling.
Preparing the Silky Orange Cheesecake Filling
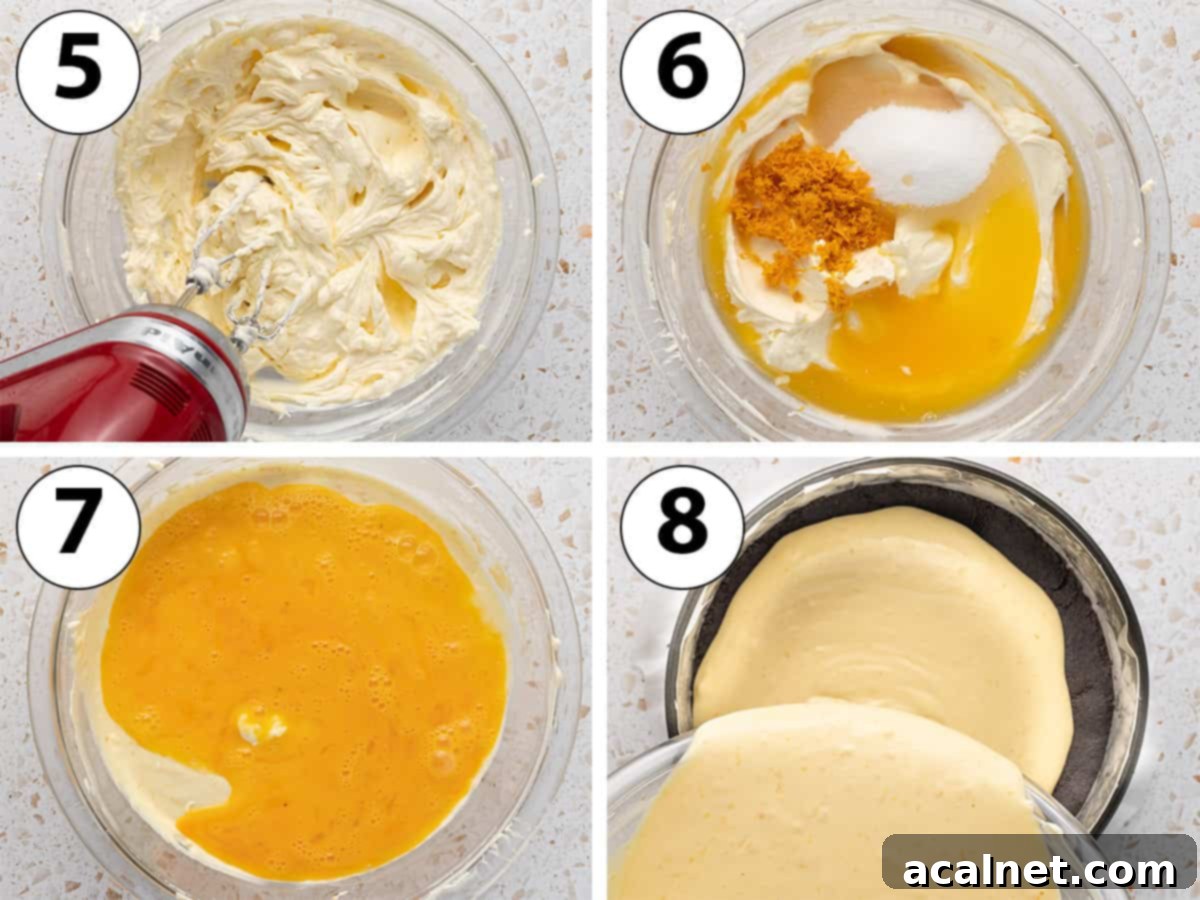
While your Oreo crust is chilling, it’s time to create the creamy, zesty orange filling.
- Preheat your oven to a low temperature: 140 degrees Celsius / 285 degrees Fahrenheit. A low and slow bake is crucial for a crack-free cheesecake.
- Photo 5: In a large mixing bowl (if using a hand-held electric mixer) or the bowl of a stand mixer fitted with the paddle attachment, combine the softened Cream Cheese and Sour Cream. Both should be at room temperature to ensure a smooth, lump-free batter. Mix for several minutes on low speed until the mixture is completely smooth and homogeneous. Stop occasionally to scrape down the sides and bottom of the bowl to ensure everything is incorporated.
- Photo 6: Add the Caster Sugar, freshly grated Orange Zest, fresh Orange Juice, and Vanilla Extract to the cream cheese mixture. Mix slowly on low speed until just combined. Overmixing at this stage can incorporate too much air, which can lead to cracks in the baked cheesecake.
- Photo 7: Gently whisk the Eggs together in a separate small bowl before adding them to the batter. This helps them incorporate more evenly without overmixing. Add the pre-whisked eggs to the cream cheese mixture and stir very slowly, just until they are fully combined. As soon as the mixture is smooth, stop mixing immediately to avoid creating excess air bubbles.
- Photo 8: Retrieve your chilled Springform Pan from the freezer. Carefully pour the smooth Cream Cheese Mixture evenly over the firm Oreo crust.
- Gently tap the springform pan a few times on a hard surface (like your counter) to help any trapped air bubbles rise to the surface and pop. This also contributes to a smooth finish.
- Place the cheesecake on the lowest rack of your preheated oven and bake for 60 to 70 minutes. The cheesecake is ready when the edges appear set and firm, but the center still has a slight, gentle jiggle when the pan is carefully moved. It will continue to set as it cools.
A note on baking: no water bath is required for this recipe! Baking at a very low temperature on the lowest rack helps achieve a perfectly creamy texture without the added hassle of a water bath. If you notice the top of your cheesecake browning too quickly, you can loosely cover the tin with aluminum foil.
- Once baked, turn off the oven but leave the cheesecake inside. Prop the oven door slightly ajar (a wooden spoon works perfectly to keep it open just a crack) and allow the cheesecake to cool down gradually inside the oven for 1 hour. This slow cooling process is vital for preventing cracks.
- After 1 hour in the oven, remove the cheesecake and continue cooling it at room temperature for another hour. Finally, transfer it to the fridge to chill for at least 2 hours, or for best results, overnight. Slow and gradual cooling is the secret to a perfectly smooth, crack-free Orange Chocolate Cheesecake.
Luxurious Dark Chocolate Ganache Topping
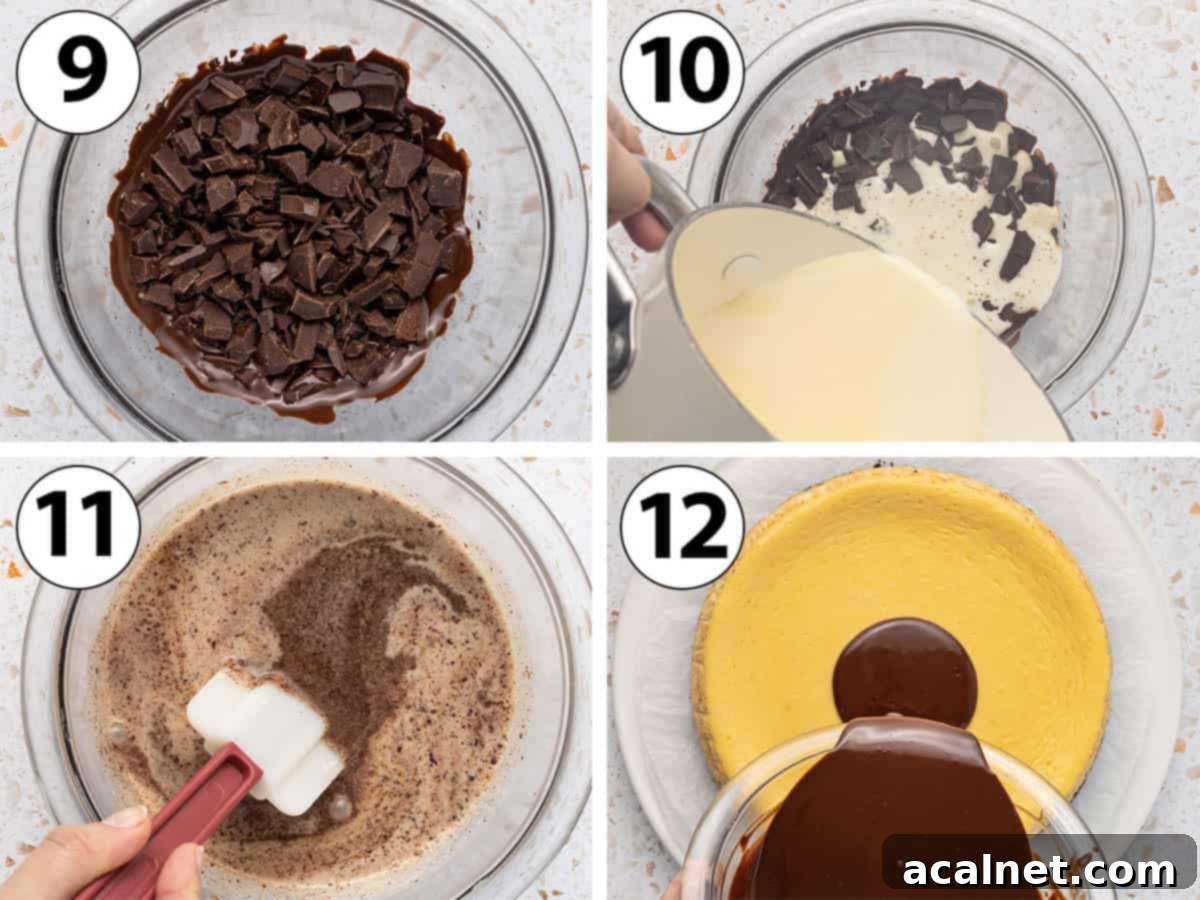
Once your orange cheesecake has completely chilled and set, it’s time to add the final touch: a glossy, rich dark chocolate ganache.
- Carefully remove the thoroughly chilled cheesecake from its springform pan and transfer it to your chosen serving plate or cake stand.
- Photo 9: Finely chop your Dark Cooking Chocolate and place it in a medium-sized, heat-proof bowl. Microwave the chocolate for 30 seconds to 1 minute, or just until the bottom layer has started to melt. You don’t need to melt it completely at this stage. Fine chopping ensures even melting.
- Photo 10: In a small saucepan, combine the Heavy Cream and optional Honey. Heat over low heat, stirring continuously, until the honey has fully dissolved and the cream begins to gently simmer around the edges. Do not let it boil vigorously.
- Photo 11: Immediately pour the hot cream mixture over the semi-melted chocolate in the bowl. Let it sit undisturbed for about 2 minutes. This allows the heat from the cream to gently melt the chocolate. Then, using a heat-proof spatula, gently stir in a circular motion, starting from the center and working your way outwards, until you achieve a completely smooth, shiny, and emulsified ganache. If you still have small lumps, you can gently heat it over a double boiler or in the microwave for very short bursts (10-15 seconds), stirring after each, until smooth.
- Photo 12: Without delay, pour the warm, fluid ganache directly over the top of the chilled orange cheesecake. Use the back of a spoon or a small offset spatula to gently spread it evenly towards the edges of the cake. For an elegant drip effect, carefully push a small amount of ganache over the sides, allowing it to naturally cascade down.
- Before the chocolate ganache has a chance to fully set, decorate your masterpiece with your favorite garnish. This is your chance to add a personal touch!
- Return the decorated cheesecake to the fridge to allow the ganache to set completely before serving. This will take at least 30 minutes to an hour.
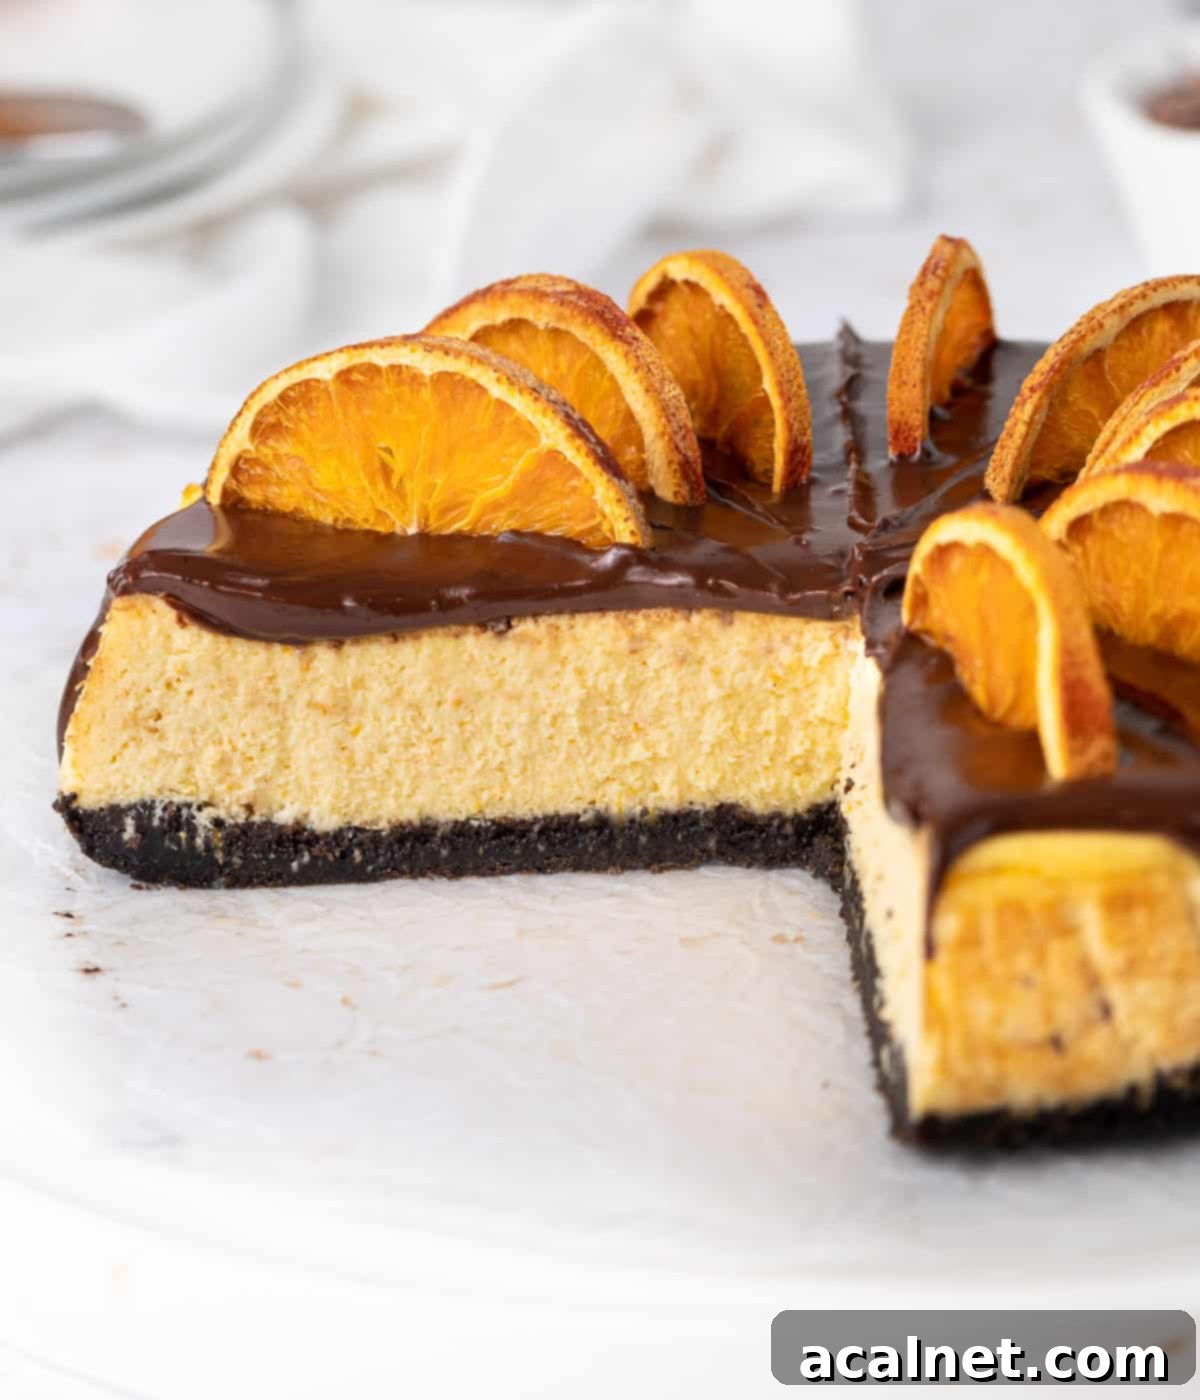
Common Questions About Chocolate Orange Cheesecake
For a truly luxurious ganache, always reach for good quality Cooking Chocolate, typically found in bar form, or professional Couverture Chocolate. These types of chocolate are formulated to melt smoothly and create a stable emulsion with cream, resulting in a glossy, silky ganache. Avoid using everyday eating chocolate bars (which often contain stabilizers) or standard chocolate chips, as they tend not to melt as smoothly and can result in a grainy or split ganache. I personally love an intense 70% Dark Chocolate for its rich flavor that beautifully contrasts the sweet orange, but feel free to choose any dark chocolate with a cacao percentage you enjoy.
While many cheesecake recipes call for a water bath to prevent cracking and ensure a creamy texture, this particular recipe was specifically developed to achieve fantastic results without one! This makes the process much simpler and less intimidating for home bakers. The trick lies in baking the cheesecake at a very low temperature (140°C / 285°F) and placing it on the lowest rack of your oven. This gentle, indirect heat allows the cheesecake to bake slowly and evenly, preventing the rapid temperature changes that often lead to cracks, while still producing that desired delicious, creamy texture.
For an elegant and thematic finish, I used beautiful dehydrated orange slices to top this Chocolate Orange Cheesecake. You can often find these in specialty food stores, or you can easily make your own by thinly slicing fresh oranges and baking them slowly at a low temperature until dried. Alternatively, there are many other delightful ways to garnish your cheesecake: a sprinkle of fresh Orange Zest will add a burst of color and aroma, fresh Orange Slices or Segments provide a juicy counterpoint, or for a playful touch, shards of a classic Terry’s Chocolate Orange can be arranged on top. Feel free to get creative and choose a decoration that matches your style!
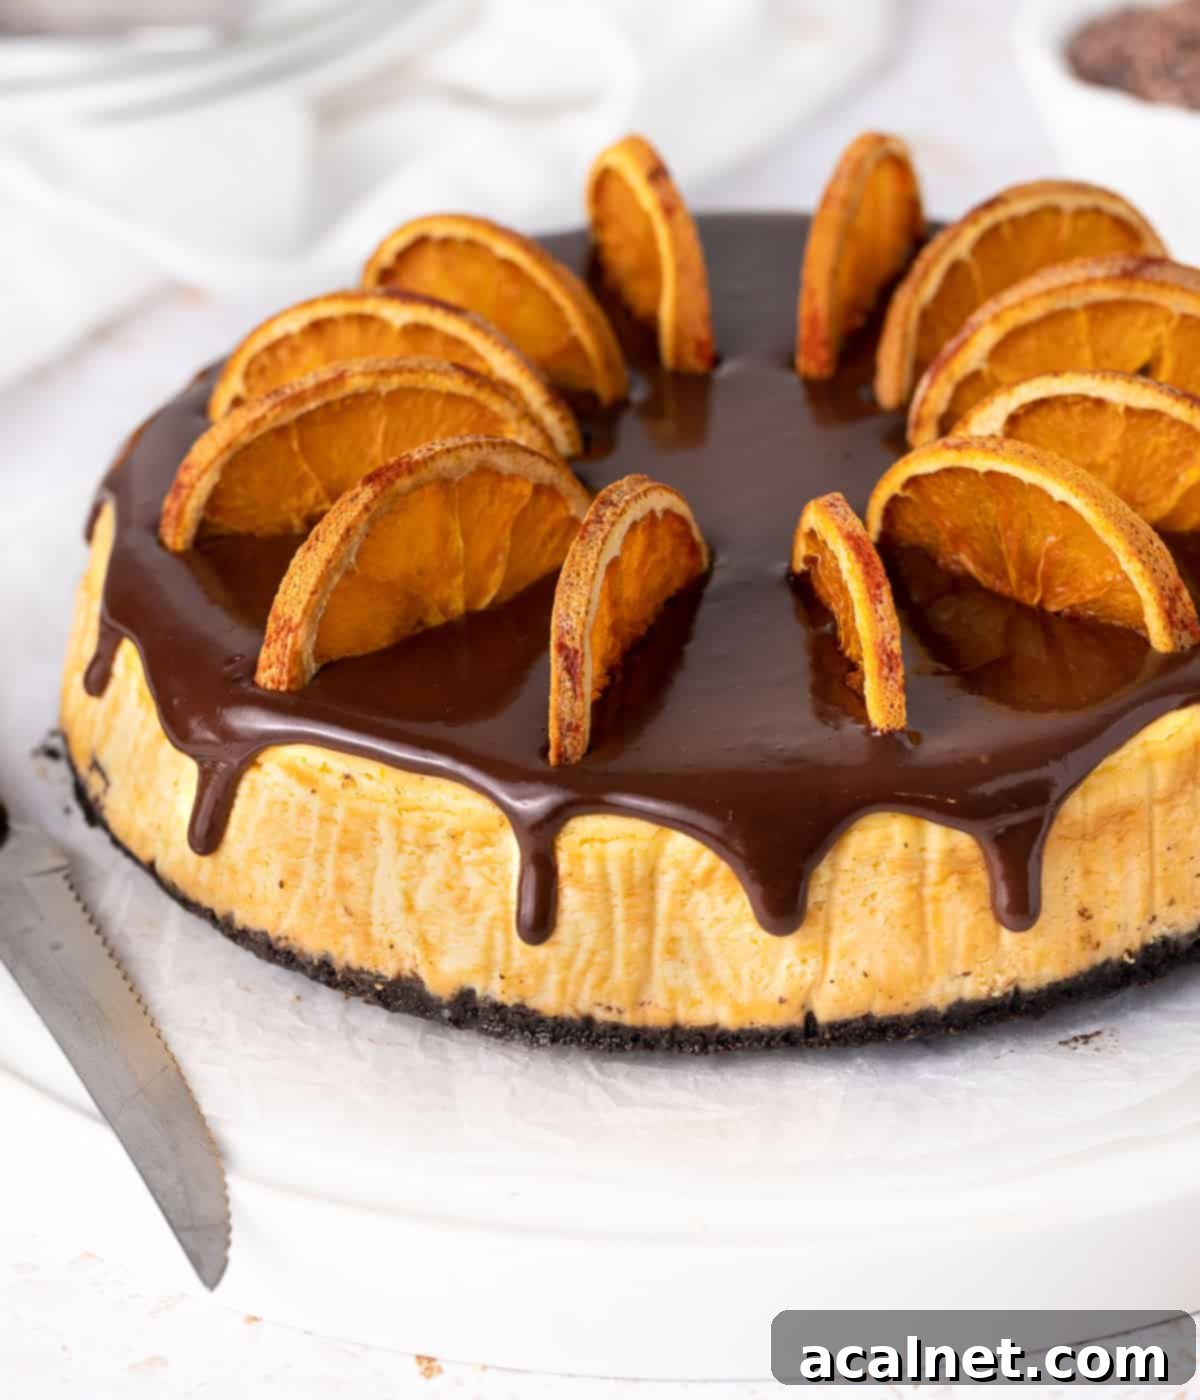
Expert Tips for a Flawless Baked Cheesecake
Achieving a perfectly creamy, crack-free baked cheesecake is simpler than you think with these crucial tips:
- Ensure All Ingredients are at Room Temperature: This is arguably the most important tip! Especially for the cream cheese, sour cream, and eggs. Cold ingredients don’t emulsify properly, leading to a lumpy batter and a less smooth finished texture. Plan ahead and take them out of the fridge at least 1-2 hours before baking.
- Do Not Over-Mix the Eggs: Once the eggs are added to the cream cheese mixture, mix just until they are fully incorporated and the batter is smooth. Over-mixing introduces too much air into the batter, which causes the cheesecake to puff up significantly in the oven and then inevitably collapse and crack as it cools. Gentle stirring is key.
- Bake Low and Slow: Since this recipe skips the water bath, a low oven temperature and a longer baking time are essential. Placing the cheesecake on the lowest rack ensures it bakes gently and evenly from the bottom up. This prevents the top from browning too quickly or the edges from setting before the center, leading to a perfectly smooth, uncracked surface.
- Gradual Cooling is Critical: An abrupt change in temperature is the cheesecake’s worst enemy. Allow your cheesecake to cool down very gradually: first in the turned-off oven with the door ajar, then at room temperature, and finally in the refrigerator. This gentle cooling process allows the cheesecake to slowly contract and set without cracking. Patience here will be greatly rewarded!
Storing & Freezing Your Chocolate Orange Cheesecake
This exquisite orange and chocolate cheesecake is at its peak flavor and texture when served within 24 hours of preparation. However, any leftovers can be stored beautifully in the fridge for up to 3 days. To maintain its freshness and prevent it from absorbing other odors, ensure the cheesecake is tightly covered with plastic wrap, or store individual slices in an airtight container.
For longer storage, the base cheesecake (without the ganache topping) can be frozen. Wrap it tightly in several layers of plastic wrap, then a layer of aluminum foil, and place it in an airtight container or freezer bag. It can be frozen for up to 1 month. When ready to enjoy, thaw it slowly in the refrigerator overnight. While freezing is an option, for the absolute best texture and creamy consistency, I highly recommend serving this cheesecake fresh.
Explore More Delicious Cheesecake Recipes
If you’ve fallen in love with the art of cheesecake making, you’re in for a treat! Discover other delightful cheesecake creations from our kitchen:
- Rich and Aromatic Coffee Cheesecake
- Light and Zesty Lemon Ricotta Cheesecake
- Adorable Mini Lemon Cheesecakes with Lemon Curd
- Irresistible Speculoos Biscoff Cheesecake
- Charming Mini Blueberry Cheesecakes
- Comforting Apple Crumble Cheesecake
- Sweet Mini Strawberry Cheesecakes
- Exotic Passion Fruit Cheesecake
- Effortless No-Bake Biscoff Cheesecake
Made this recipe?
Let us know if you liked it by leaving a comment below, and tag us on Instagram @a.baking.journey with a photo of your creation!
Recipe Card: Chocolate Orange Cheesecake

Chocolate Orange Cheesecake
Print Recipe
Ingredients
Oreo Crust
- 200 gr (7 oz) Oreo Cookies, about 20 cookies
- 75 gr (5 tablespoons) Unsalted Butter, melted
Orange Cheesecake Filling
- 500 gr (18 oz) Cream Cheese, soft, at room temperature
- 80 gr (1/3 cup) Sour Cream, soft, at room temperature
- 120 gr (1/2 cup) Caster Sugar
- 1 tablespoon Orange Zest, about 2 large oranges
- 80 ml (1/3 cup) Orange Juice
- 1 1/2 teaspoon Vanilla Extract
- 3 large Eggs, at room temperature
Chocolate Ganache
- 120 gr (4 oz) Dark Cooking Chocolate, finely chopped
- 150 ml (1/2 cup + 2 tablespoons) Heavy / Thickened Cream
- 15 gr (1 tablespoon) Honey, optional
Instructions
Oreo Crust
- Line the bottom of a 22 cm / 9-inch Springform pan with baking paper / parchment paper. Lightly grease the sides and optionally line them with strips of baking paper.
- Place the Oreo Cookies in a small blender / food processor and blend until you get very fine crumbs and no large chunks remain. Alternatively, crush them inside a freezing bag or plastic bag with a rolling pin.
- Add the Melted Butter and blend until you get a thick paste that resembles wet sand.
- Transfer the crumbs into the prepared Springform Pan. Spread the crumbs around then firmly press with the back of a spoon or cup to pack the crumbs into an even layer.
- Place in the freezer.
Orange Cheesecake Filling
- Preheat your oven on 140 degrees Celsius / 285 degrees Fahrenheit.
- In a large mixing bowl (if using a hand mixer) or the bowl of a stand mixer fitted with the paddle attachment, mix the very soft room temperature Cream Cheese and Sour Cream (see note 1) until completely smooth and no lumps remain.
- Add the Sugar, Orange Zest, Orange Juice and Vanilla. Slowly mix to combine, stopping to scrape the bowl when required.
- Add in the Eggs (preferably pre-whisked together) and very slowly stir until you get a smooth mixture. Stop as soon as combined to avoid creating air bubbles (see note 2).
- Take the Springform Pan out of the freezer and pour the Cream Cheese Mixture over it. Tap the pan over a hard surface a few times to pop any air bubbles.
- Place on the lowest rack of your oven and bake for 60 to 70 minutes. The centre of the cheesecake should will still be very slightly jiggly but the edges should be fully set (see note 3).
- Turn off the oven, slightly open the oven door (use a wooden spoon to keep it open) and leave the cheesecake to cool down inside the oven for 1 hour. Take out of the oven and leave at room temperature for 1 hour, then transfer in the fridge for at least 2 hours or overnight (see note 4).
Chocolate Ganache
- Remove the chilled cheesecake from the springform pan and place on a serving plate.
- Finely chop the Cooking Chocolate and place in a heat-proof bowl. Place in the microwave for 30 seconds to 1 minutes or until the bottom of the chocolate has started to melt slightly.
- Place the Cream and Honey (optional) in a small saucepan and heat on low until the honey has melted and the cream starts to simmer.
- Pour the hot cream over the partially melted chocolate and leave for 2 minutes. Using a silicone spatula, gently stir in a circular motion to mix the chocolate and cream until you get a smooth, shiny ganache (see note 5).
- Directly pour the warm ganache over the cheesecake. If required, use the back of a spoon or small offset spatula to spread it around towards the edges of the cheesecake. Optionally, slightly push the ganache off the side of the cake to create a drip effect.
- Before the chocolate has started to set, decorate with your favourite garnish such as dehydrated oranges, orange zest or Terry’s Chocolate Oranges.
- Keep in the fridge until ready to serve.
Would you like to save this recipe?
We’ll email this post to you, so you can come back to it later!
Notes
- It is very important for the ingredients to be at room temperature. If too cold, you will find lumps of unmixed cream cheese in the cheesecake.
- Over-mixing the eggs into the cream cheese mixture will create air bubbles that will make the cake rise in the oven then collapse, creating cracks.
- If the cheesecake seems to be browning too quickly, lower the temperature or cover the tin with aluminium foil.
- Gradually cool down the cheesecake, first in the turned off oven, then at room temperature and finally in the fridge. An abrupt change of temperature will make the cheesecake sink and crack.
- If you had not chopped the chocolate, it is possible that you will still find small chunks of unmelted chocolate. If this happens, place the heat-proof bowl over a double-boiler or in the microwave for 30 seconds to finish melting the chocolate.
Nutrition (per serving)
