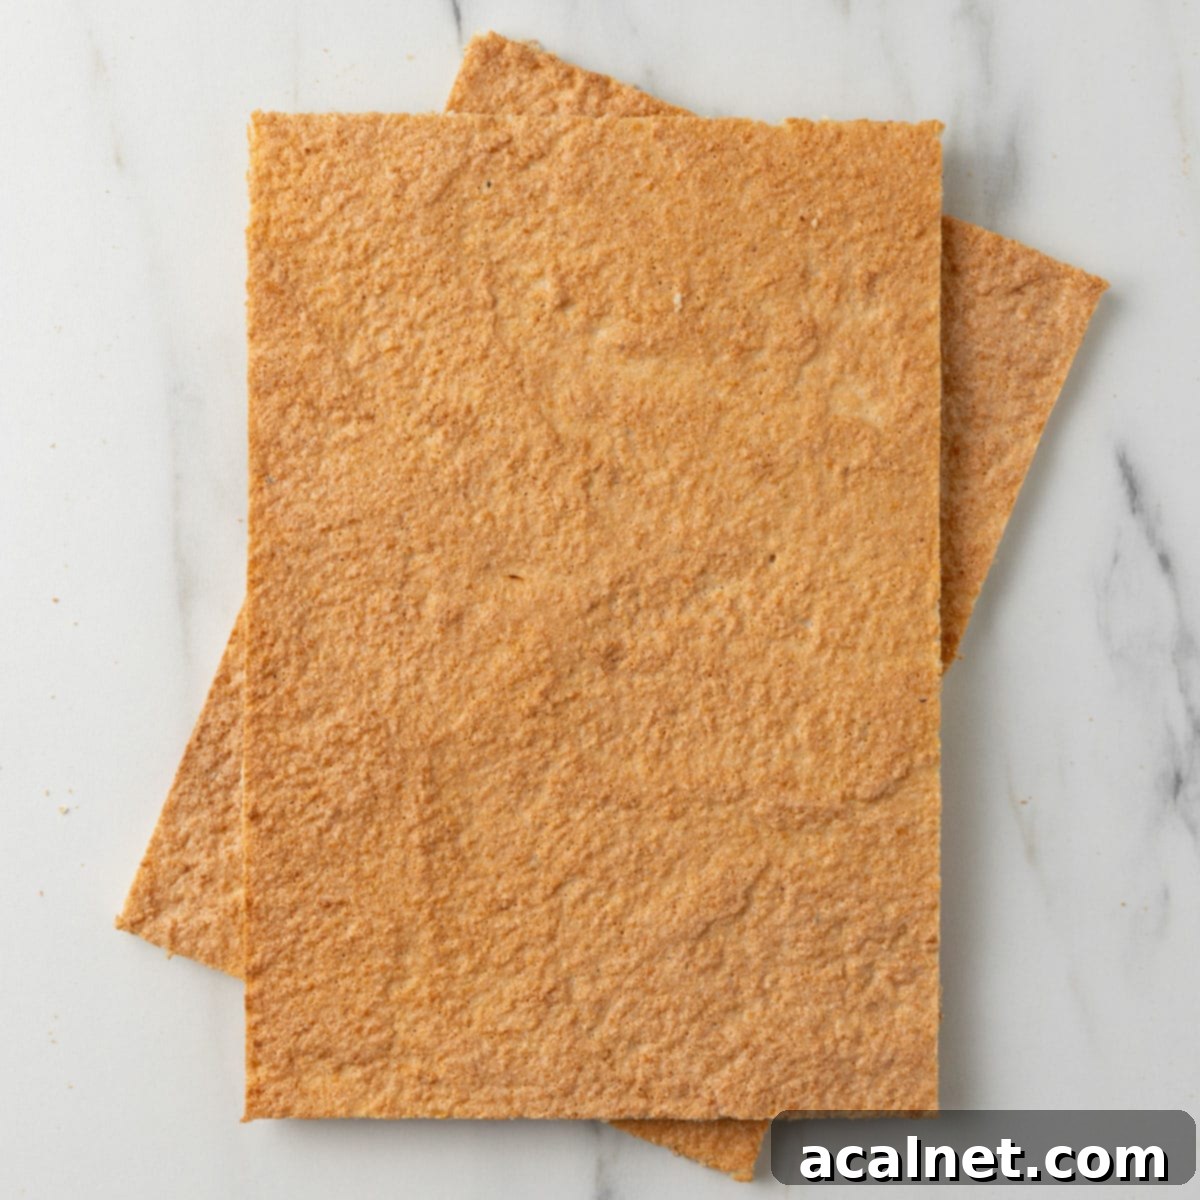
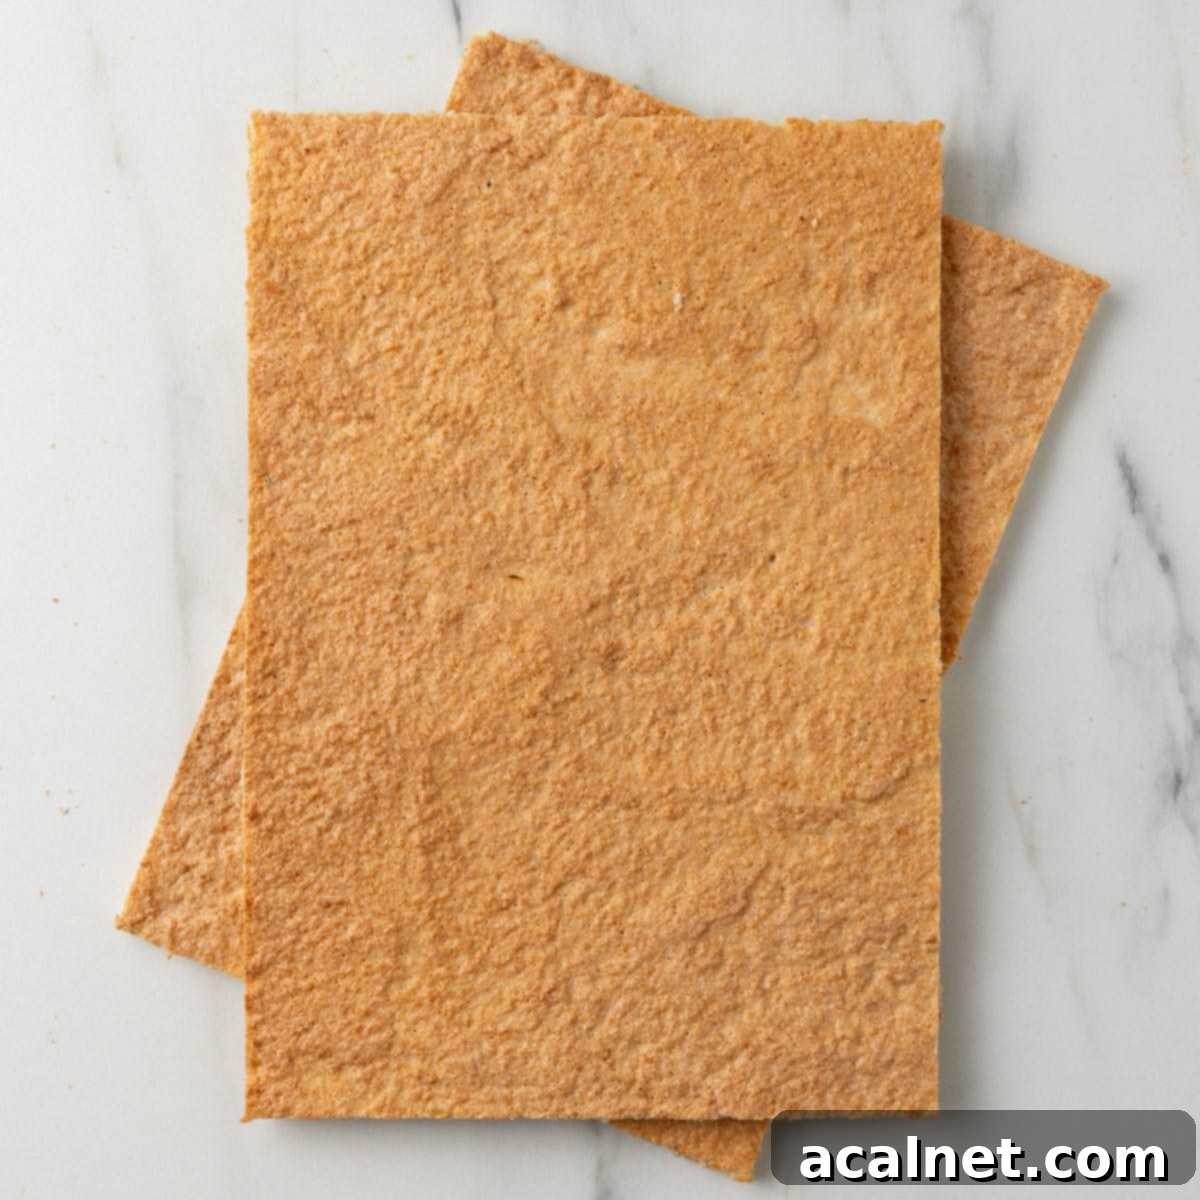
Perfect Dacquoise Sponge: Easy, Light, and Versatile French Nut Meringue Layers
Step into the world of sophisticated French baking with the incredibly simple yet elegant Dacquoise Sponge, known in France as Biscuit Dacquoise. This delightful confection is a game-changer for anyone looking to create impressive layered cakes, exquisite entremets, or simply a light, nutty base for their favorite desserts. Despite its fancy name, preparing a Dacquoise is surprisingly straightforward, requiring just a handful of ingredients and a few fundamental techniques.
Imagine a sponge that is simultaneously delicate, slightly crispy on the outside, and wonderfully chewy on the inside, infused with the rich flavor of ground nuts. That’s the magic of Dacquoise. It’s a naturally gluten-free option that brings a unique texture and depth of flavor to any dessert it graces. Whether you’re a seasoned baker or just beginning your culinary journey, this detailed recipe will guide you to perfection, allowing you to create a versatile and elegant base that elevates your creations to patisserie-level quality. Get ready to impress with this airy, nutty, and subtly sweet French delight!
[feast_advanced_jump_to]
What is Dacquoise? Unveiling this Classic French Meringue-Based Sponge
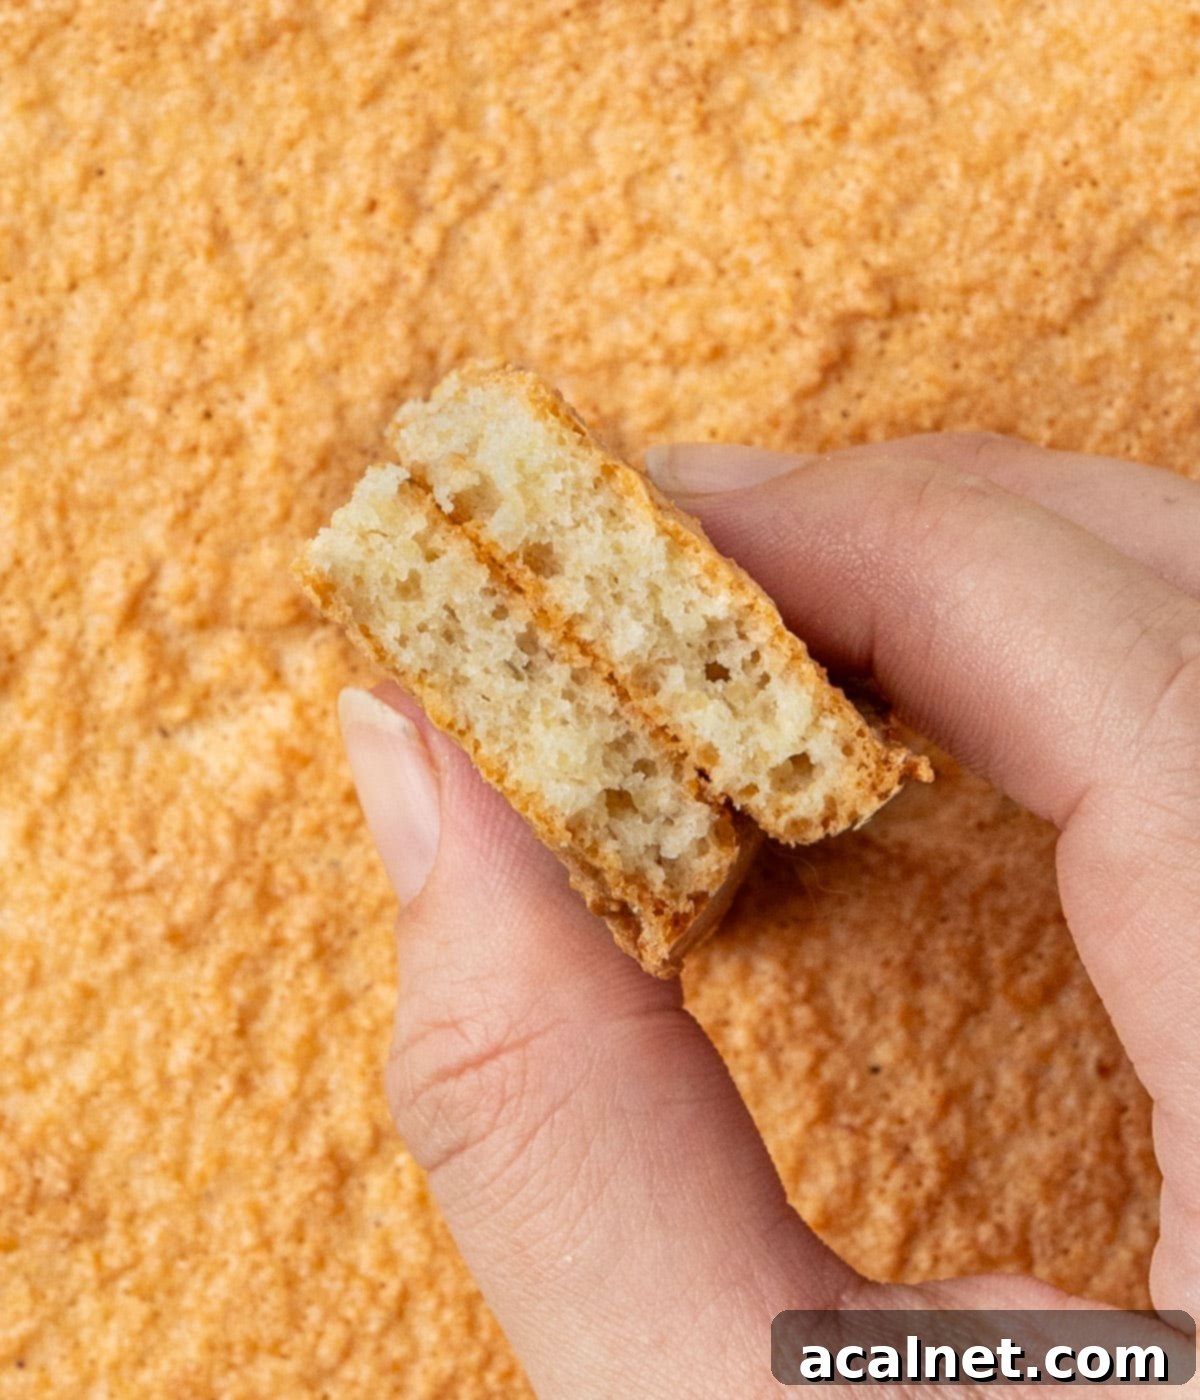
A Dacquoise, or Biscuit Dacquoise, is a celebrated classic in French pastry, best described as a baked nutty meringue. At its core, it’s a wonderfully light and airy sponge cake made from a French meringue base, into which finely ground nuts are delicately folded. Traditionally, these nuts are almonds or hazelnuts, lending a distinctive flavor and a delightful texture that is slightly crispy on the exterior and wonderfully soft and chewy within.
The culinary journey of the dacquoise begins in the charming French town of Dax, from which it derives its elegant name. This delicate biscuit sponge shares many similarities with another beloved French treat, the macaron, in terms of its ingredients and initial preparation method. However, the key distinction lies in the folding technique and final texture, resulting in a more rustic yet equally sophisticated outcome for the dacquoise. Unlike the smooth, consistent shell of a macaron, a dacquoise embraces a more textured, airy crumb, making it an indispensable element in a range of gourmet desserts.
This versatile dacquoise recipe offers endless possibilities in the kitchen. It serves as an exquisite component within entremets (layered mousse cakes), providing a crucial layer of texture and flavor. Its delicate crunch and nutty aroma also make it perfect for constructing elegant layered cakes, where it beautifully complements creamy fillings. Beyond complex pastries, it can be incorporated into other desserts like tarts or simply enjoyed on its own, paired with a rich whipped cream, a luscious custard, or fresh fruit for a lighter, naturally gluten-free indulgence.
Essential Ingredients for a Perfect Dacquoise Sponge
Crafting a sublime Dacquoise Sponge requires only a few high-quality ingredients. Each plays a vital role in achieving that signature light, airy, and nutty texture, forming the delicate balance characteristic of this French pastry.
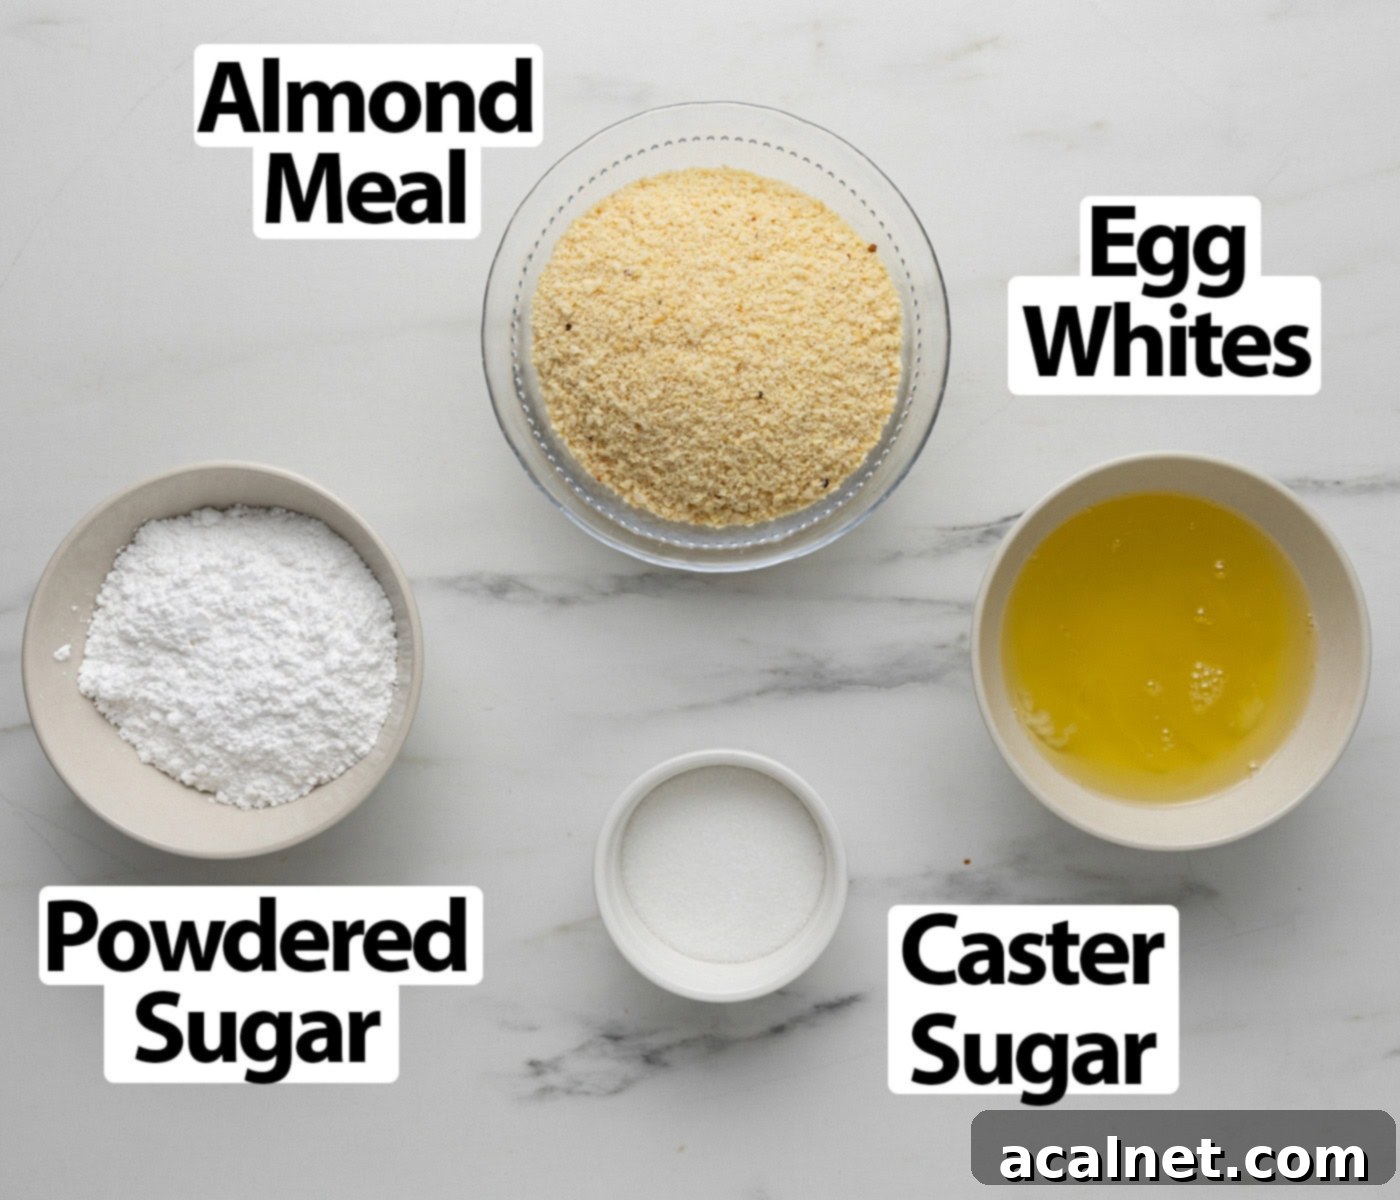
Scroll down to recipe card below for all quantities
What is “Biscuit Dacquoise” made of:
- Ground Nuts: These are the heart of your Dacquoise’s flavor and texture. Most traditionally, it’s crafted with ground almonds (often labeled as almond meal or finely ground almond flour). However, this is a fantastic opportunity to customize! You can use any type of ground nuts such as hazelnuts, walnuts, pecans, or even pistachios, each imparting its unique aroma and taste. The specific coarseness of your ground nuts also significantly influences the final sponge texture; a slightly coarser grind will yield a dacquoise with a delightful, more noticeable crunch, while a very fine grind (like superfine almond flour) will result in a softer, more delicate, and uniform crumb. You can either purchase high-quality pre-ground almond meal or almond flour, or make your own at home. To do this, simply process whole almonds (skinned or unskinned, raw or lightly toasted) in a food processor until a fine, slightly coarse powder is achieved. Be cautious not to over-process, as the nuts will quickly release their oils and turn into a paste or butter. Lightly toasting the nuts before grinding them can dramatically enhance their flavor, adding a deeper, roasted note to your dacquoise.
- Egg Whites: These are the critical component for forming the stable French meringue base that gives dacquoise its signature lift and airy structure. Always ensure you use egg whites from large eggs. Don’t let the leftover egg yolks go to waste; they are perfect for enriching other delightful recipes like Crème Pâtissière, custards, or ice cream bases. While some traditional bakers advocate for using room temperature egg whites to achieve maximum volume and stability in meringues, many modern chefs find that impeccably clean mixing bowls and a powerful mixer are more crucial factors. Therefore, whether your egg whites are at room temperature or taken directly from the refrigerator, you can still achieve excellent results by ensuring your equipment is grease-free.
- Caster Sugar: Also referred to as superfine or fine white granulated sugar, this sugar is indispensable for creating a stable, glossy, and voluminous French meringue. Its fine granules dissolve quickly and smoothly into the egg whites as they are whipped, helping to build a robust, airy structure that can hold its shape beautifully. The gradual addition of caster sugar is key to ensuring it fully incorporates and stabilizes the egg whites without deflating them.
- Powdered Sugar: Known also as icing sugar or confectioners’ sugar. This ingredient is combined with the ground nuts to form the dry component that will be folded into the meringue. Its fine texture helps to tenderize the dacquoise sponge and adds sweetness without contributing to the structural development of the meringue itself. It is absolutely essential to sift your powdered sugar before combining it with the ground nuts and before incorporating it into the meringue. This step prevents any lumps from forming in your batter, ensuring a smooth, even texture in your finished dacquoise.
For an extra layer of flavor and to help stabilize the meringue, a tiny pinch of salt can be added to the egg whites. A dash of pure vanilla extract or a specific nut extract (like almond or hazelnut extract, chosen to complement your ground nuts) can also be added to the meringue, infusing your finished sponge with a beautiful, aromatic complexity.
Delicious Dacquoise Variations to Inspire Your Creativity
Once you’ve mastered the basic Dacquoise recipe, you’ll discover its incredible versatility. It’s a fantastic canvas for flavor experimentation, allowing you to tailor this elegant French sponge to various dessert themes and personal preferences. Here are some delightful variations to explore:
- For a rich and decadent twist, incorporate unsweetened cocoa powder into your ground nuts and powdered sugar mixture. This creates a stunning chocolate dacquoise that pairs exquisitely with raspberry, coffee, or even mint-flavored fillings. The cocoa adds a deep, complex flavor that elevates the entire dessert.
- To intensify the natural nutty essence of your dacquoise, add a few drops of complementary extract. For an almond dacquoise, a touch of almond extract works wonders. If you’re using hazelnuts, a hazelnut extract will deepen that rich flavor profile. These extracts are best added to the egg whites during the meringue whipping stage, ensuring even distribution and a wonderfully aromatic sponge.
- Don’t limit yourself to just almonds! The dacquoise can be made with various ground nuts, each lending a unique character. Experiment with roasted hazelnuts for a classic and robust flavor, earthy walnuts for a more pronounced bitterness, delicate pecans, or even vibrant green pistachios for a visually stunning and distinctively flavored dacquoise. The choice of nut can completely transform the final taste experience.
- Consider adding finely grated citrus zest (from lemons, oranges, or limes) to the dry ingredients. This introduces a bright, refreshing note that beautifully cuts through the sweetness of the meringue and complements the nutty base, making for a lighter, more aromatic dessert.
- For a hint of warmth and spice, a pinch of ground cinnamon, cardamom, or even a subtle touch of nutmeg can be folded into the dry ingredients. This is especially delightful when using nuts like walnuts or pecans, creating a cozy, comforting flavor profile.
- To add a contrasting texture, sprinkle a small amount of chopped nuts or pearl sugar over the surface of the dacquoise before baking. This creates an extra layer of crunch and visual appeal.
How to Make Dacquoise: A Step-by-Step Guide to Light & Airy Perfection
Creating this elegant French sponge is a rewarding process that relies on careful technique. Follow these detailed steps to ensure a flawless, light, and airy Dacquoise every time.
1. Preparing Your Meringue Base
Before you begin, ensure your mixing bowl (preferably stainless steel or glass) and whisk attachment are impeccably clean and completely free of any grease, oil, or egg yolk. Even a tiny speck of fat can prevent egg whites from whipping properly, leading to a flat meringue.
- Preheat your oven to 160 degrees Celsius / 325 degrees Fahrenheit. This relatively low temperature is crucial for slowly drying out the meringue rather than baking it quickly, which creates the characteristic crispy yet chewy texture without burning the nuts.
- Prepare your baking surface: you can either use a large silicone sheet pan (approximately 30 x 40 cm / 12 x 15 inches) or two lightly greased pastry rings (20 cm / 8 inches each) placed on baking sheets lined with parchment paper or a silicone baking mat. Silicone is highly recommended for its non-stick properties, which ensure easy and clean removal of the delicate dacquoise once baked and cooled.
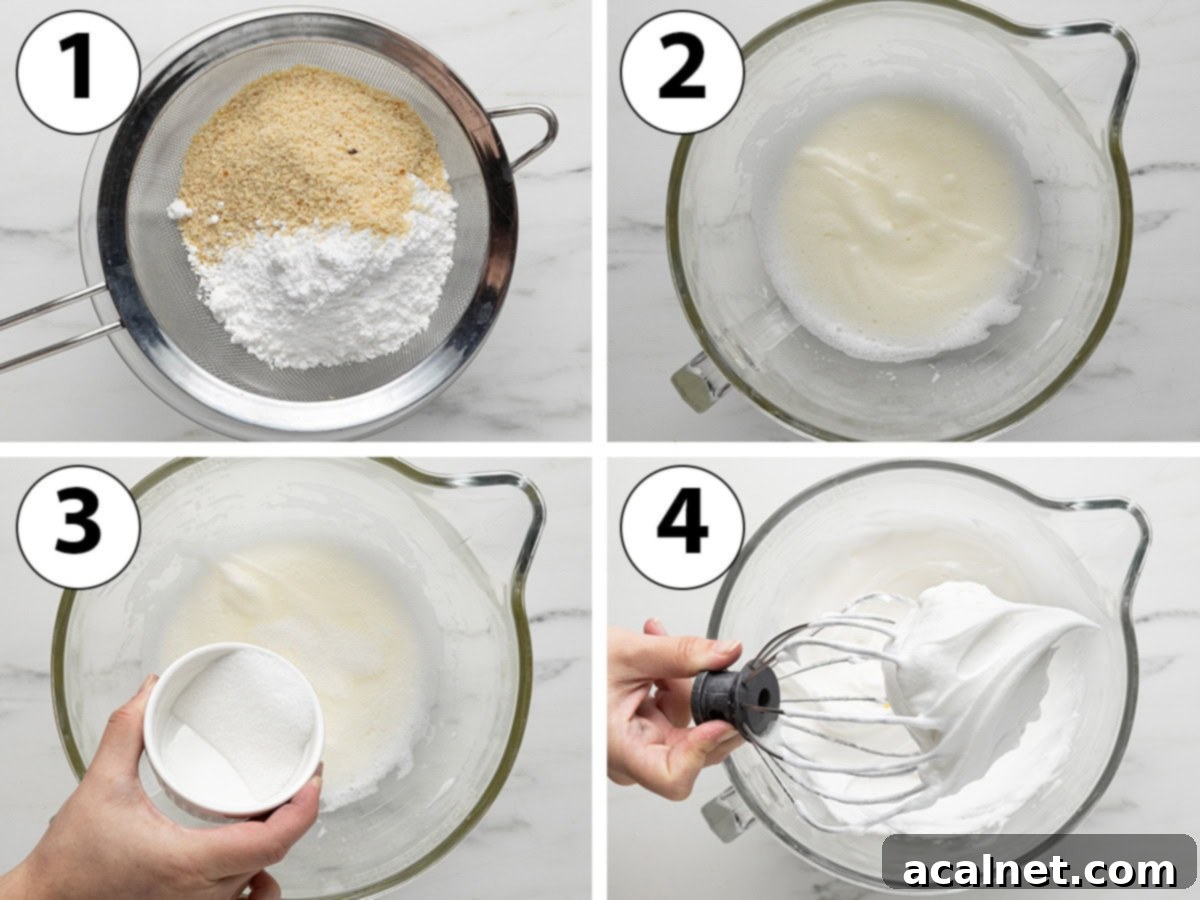
- Photo 1: In a large mixing bowl, meticulously sift together the ground almond meal (or your chosen ground nuts) and powdered sugar. Sifting is an essential step here to eliminate any lumps in both ingredients and ensure a perfectly even distribution when incorporated into the final batter. Set this well-combined dry mixture aside.
- Photo 2: Place the egg whites into the bowl of your stand mixer fitted with the whisk attachment. If you’re using a hand mixer, a large, impeccably clean mixing bowl will suffice. Begin whipping the egg whites on medium speed. After a few minutes of whisking, they will start to foam, gradually double in volume, and turn opaque white, reaching a consistency often described as light shaving cream or soft, frothy peaks. This is the ideal stage to begin incorporating the granulated sugar.
- Photo 3: With the mixer still running on medium speed, begin adding the caster sugar very gradually, a little bit at a time (ideally about a tablespoon every 10-15 seconds). This slow and steady addition is crucial as it allows the sugar granules to fully dissolve into the egg whites, creating a stable, glossy, and resilient meringue structure. Avoid adding it all at once, as this can shock the egg whites, deflate the meringue, or result in a grainy, unstable texture.
- Photo 4: Once all the caster sugar has been completely incorporated, increase the mixer speed to high and continue to whisk. You are aiming for stiff, firm, and glossy peaks. The meringue should appear very thick, brilliantly shiny, and have more than tripled in volume. When you lift the whisk, the peaks should stand firm and hold their shape without drooping. A good test is to gently tilt the bowl; the meringue should not slide. Be careful not to over-whisk, which can dry out the meringue and make it difficult to fold with the nuts.
2. Gently Folding in the Dry Ingredients for Airiness
This stage is where the dacquoise gets its unique light and airy structure. Gentleness is absolutely paramount to preserve the precious air you’ve carefully whipped into the meringue, which is the key to its delicate crumb.
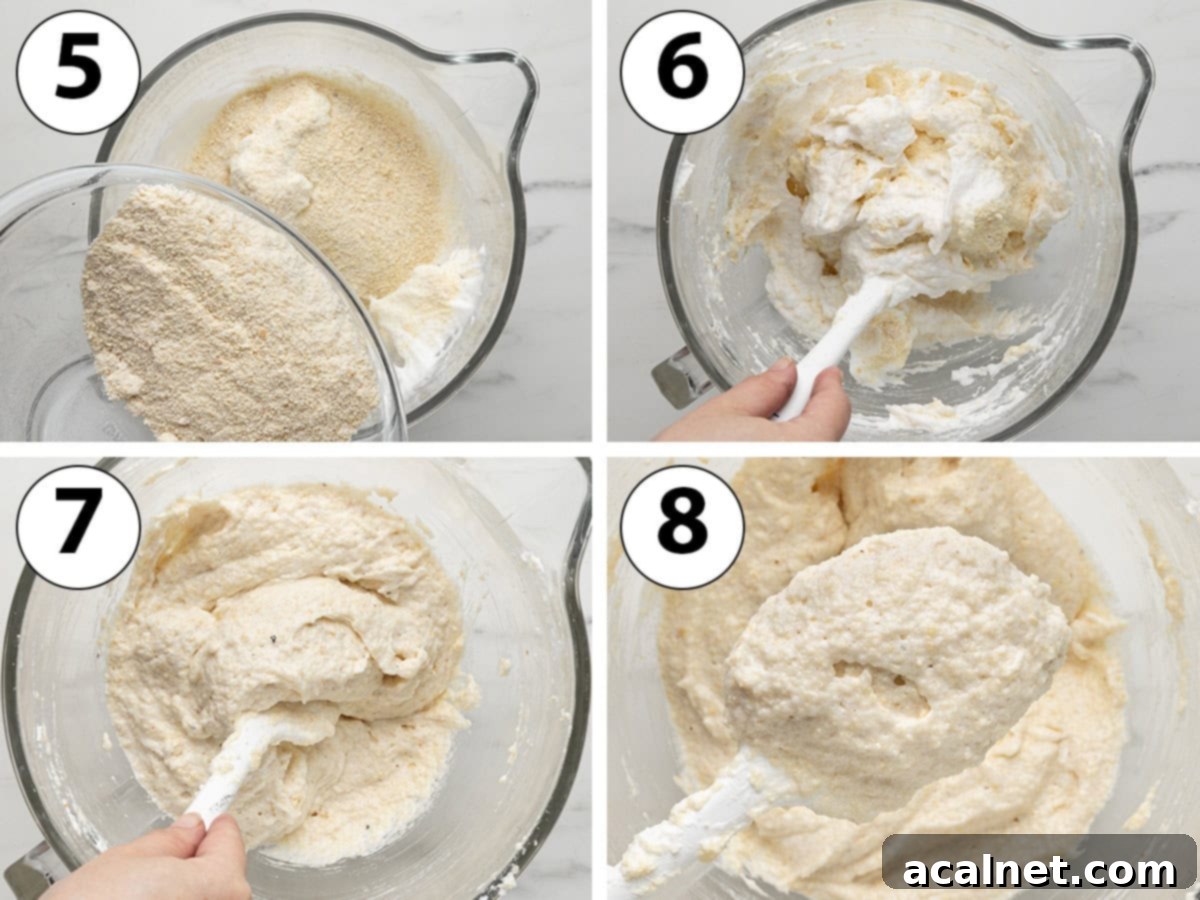
- Photo 5: Carefully remove the bowl from the mixer. Add approximately one-third of your thoroughly sifted almond meal and powdered sugar mixture directly onto the stiff, glossy meringue.
- Photo 6: Using a large rubber spatula, begin to very gently fold the dry ingredients into the meringue. Employ a light hand and a “cut-and-fold” motion: slice through the center of the meringue mixture, scoop up from the bottom of the bowl, and carefully fold it over the top. Rotate the bowl as you go to ensure even incorporation. The absolute goal here is to combine the dry ingredients without deflating the egg whites, as the air trapped within is responsible for the dacquoise’s characteristic lightness and volume.
- Photo 7 & 8: Add the remaining dry ingredients in one or two further additions, continuing the gentle folding process until they are just combined. Stop folding as soon as no streaks of dry ingredients are visible. It’s important to note that a slight deflation of the meringue is normal during this process due to the weight of the nuts, but vigorous or excessive folding will result in a dense and heavy dacquoise. You should be left with a light, fluffy batter that is slightly sticky, granular from the nuts, and still holds a good amount of air and volume.
3. Spreading and Baking Your Dacquoise to Perfection
The way you spread the delicate dacquoise batter will significantly impact the final shape, thickness, and evenness of your baked dacquoise, ensuring consistent texture and appearance.
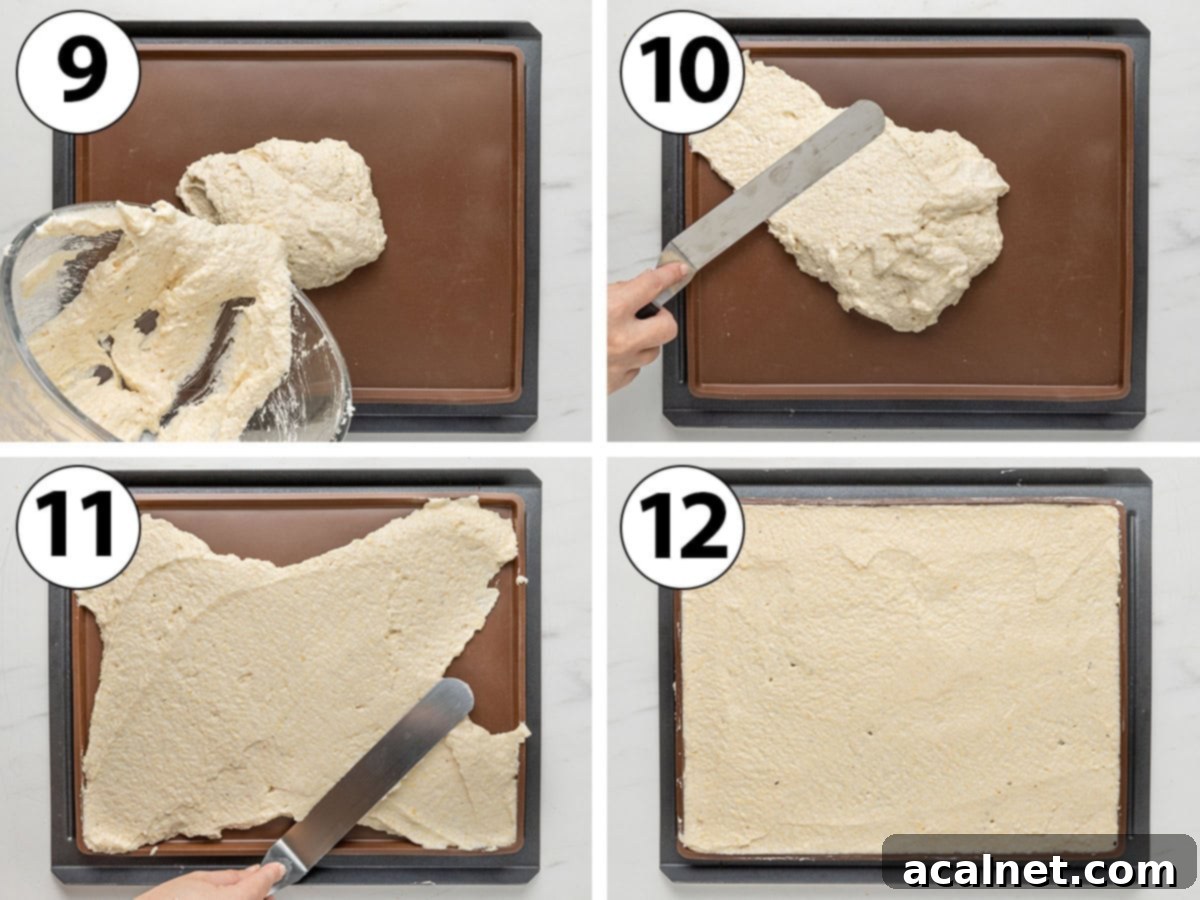
If using a silicone sheet pan:
- Photo 9: Carefully pour the dacquoise batter into the very center of your prepared silicone sheet pan.
- Photo 10 & 11: Using a large offset spatula or the clean back of a spoon, gently and evenly spread the batter from the center of the pan outwards, working towards all four corners. It’s important to work quickly but with a very gentle hand to avoid deflating the delicate batter.
- Photo 12: Continue spreading until you achieve a uniform, even layer across the entire surface of the pan. This is a critical step for consistent baking; any sections that are thicker than others will bake differently, potentially leading to uneven doneness or texture. Try to avoid going back over the batter too many times with the spatula once it’s initially spread, as excessive handling can compress the air out and lead to a denser texture.
If using round pastry rings:
For the most precise and even layers, particularly for round cakes or entremets, I highly recommend transferring the dacquoise batter into a piping bag fitted with a large round piping tip. Carefully pipe the batter directly inside your greased and lined pastry rings, starting from the center and spiraling outwards, until each ring is evenly filled. This method provides excellent control and helps create perfectly round, uniform layers. Alternatively, you can carefully pour half the batter into each ring and use a small offset spatula to gently spread it around, taking care to maintain an even thickness.
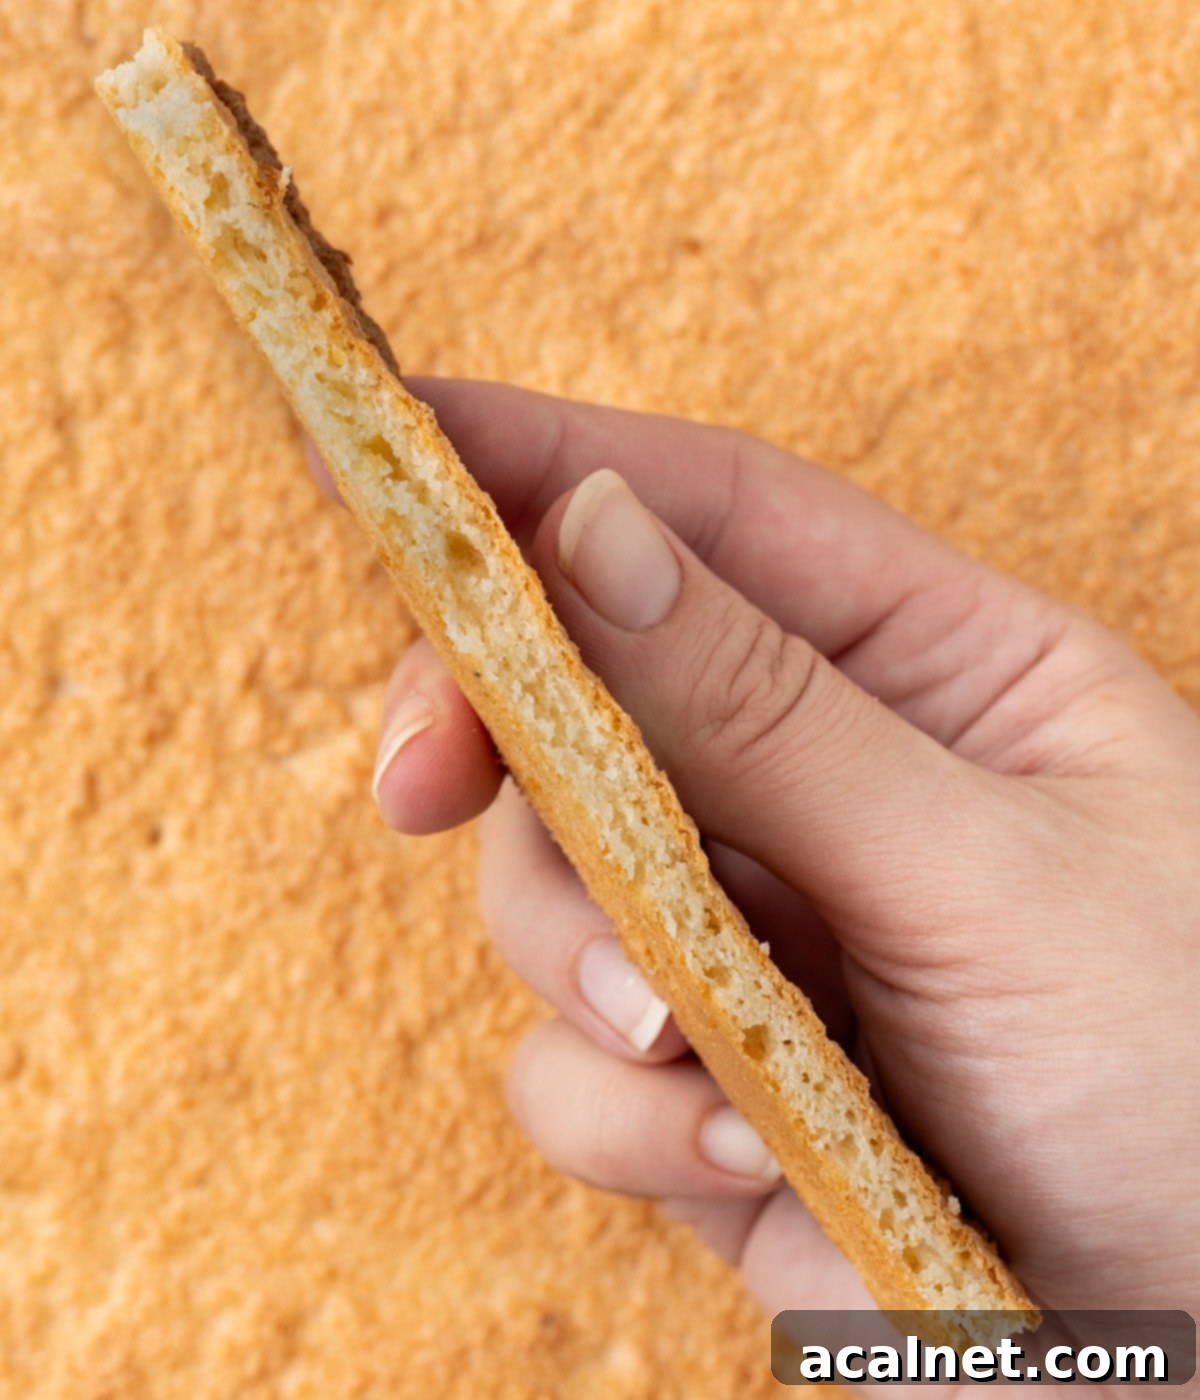
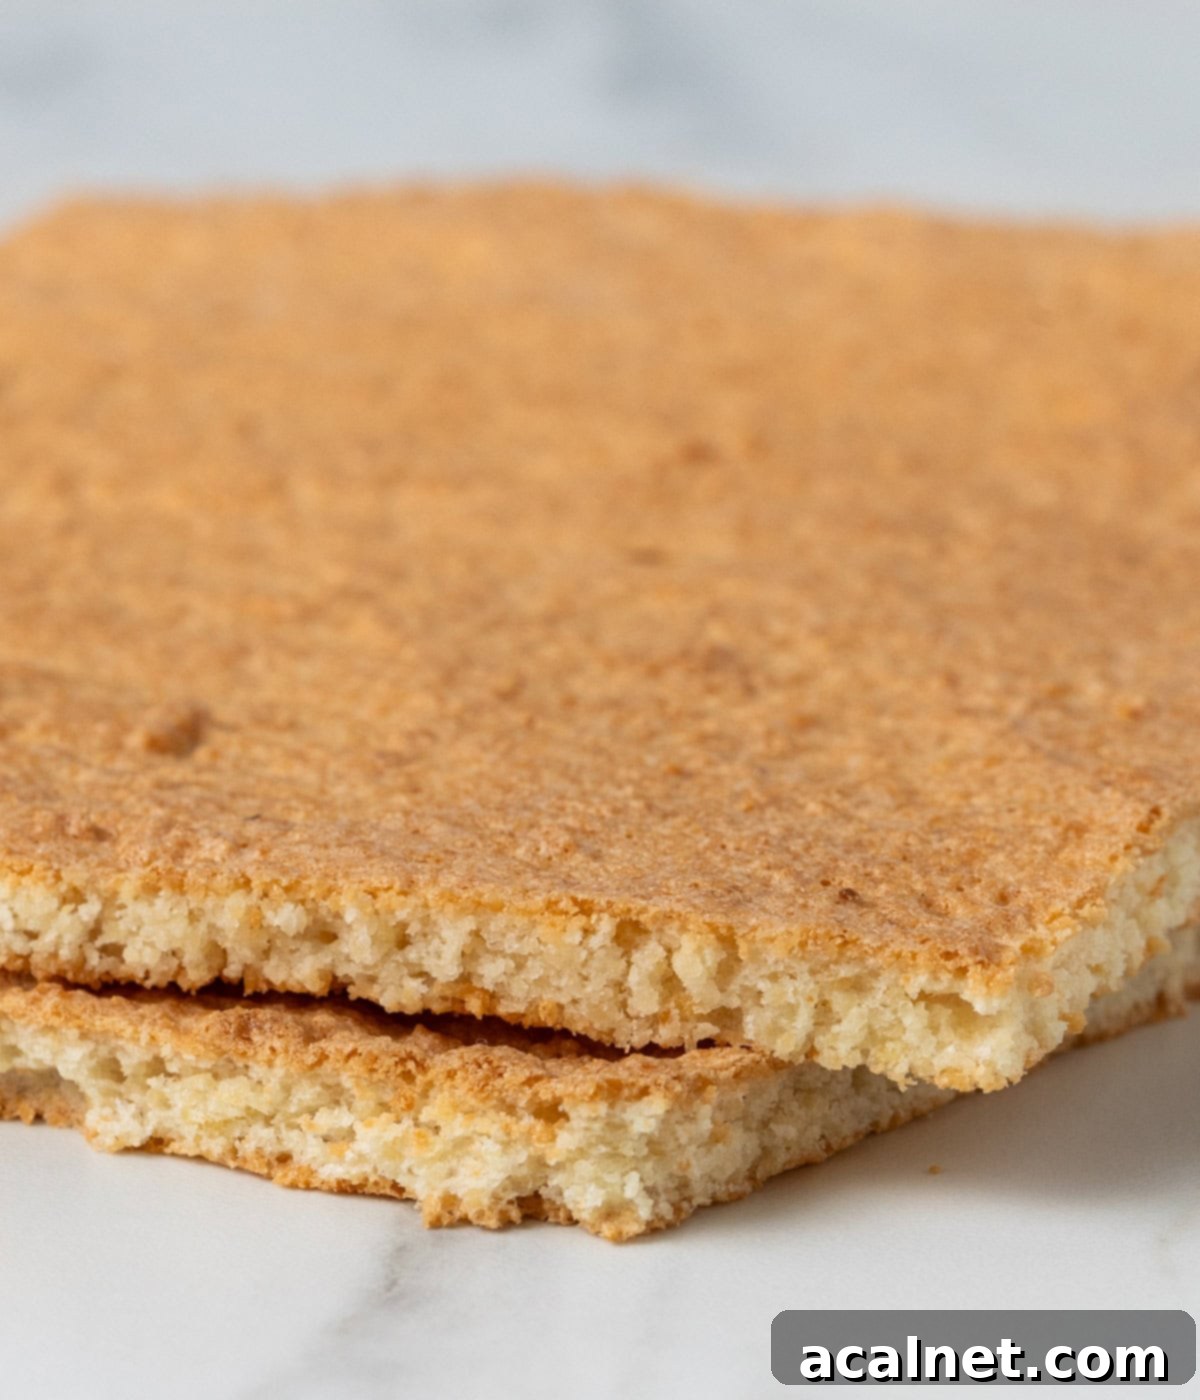
- Place the prepared pan(s) in the preheated oven. Bake for approximately 18 to 20 minutes for a thin layer in a sheet pan, or 22 to 24 minutes if you’ve opted for thicker layers in pastry rings. The exact baking time can vary based on your oven’s calibration and the precise thickness of your dacquoise. The top should appear lightly golden brown and feel slightly firm to the touch, but the center will still feel relatively soft and chewy. It will continue to firm up and achieve its characteristic texture as it cools.
- Once baked, remove the pan from the oven and immediately transfer it to a wire rack to cool down completely. It is absolutely imperative that the dacquoise is fully cool before attempting to peel it off the silicone sheet or remove it from the pastry rings. Rushing this step can cause the delicate sponge to tear, crack, or break apart.
Once cooled, your beautiful, airy, and nutty Dacquoise Sponge is ready to be used as the base for your desired dessert masterpiece. Its unique texture and flavor will undoubtedly elevate any creation.
Dacquoise Sponge: Frequently Asked Questions & Expert Answers
While both dacquoise and macarons share a remarkably similar ingredient list—egg whites, sugar, and finely ground nuts—their preparation methods and resulting final textures are quite distinct. The primary difference lies in the mixing technique employed after the meringue is formed. For macarons, the batter undergoes a specific and crucial process called “macaronage.” This involves deliberately working and deflating a portion of the air from the meringue until the batter reaches a lava-like, flowing consistency. This technique is what ultimately results in the characteristic smooth, shiny shell, distinct “foot” (pied), and chewy interior of a macaron.
In stark contrast, for a dacquoise, the dry ingredients (ground nuts and powdered sugar) are very gently folded into the meringue to retain as much air as possible. This careful, light-handed folding yields a much lighter, airier, and more sponge-like texture, with a slightly rougher, more “rustic” and less uniform appearance compared to the perfectly smooth macaron shell. The dacquoise offers a delightful, crisp-chewy texture and a pronounced nutty flavor that truly sets it apart from its smoother cousin.
Making your own almond meal (often interchangeable with almond flour, though store-bought flour is usually finer) at home is simple, cost-effective, and ensures the freshest possible ingredient for your dacquoise. You have the flexibility to use either blanched (skinned) almonds, which will result in a lighter-colored dacquoise, or un-skinned almonds for a slightly more rustic look and robust flavor. For an even deeper, more complex nutty taste, you can lightly toast the almonds in a dry pan over medium heat for 5-7 minutes, stirring frequently, or spread them on a baking sheet and toast in the oven at 150°C (300°F) for about 8-10 minutes, until fragrant. Allow them to cool completely before grinding.
To grind, place the cooled almonds in a food processor. Pulse them in short bursts, typically 5-10 seconds at a time, stopping frequently to scrape down the sides of the bowl and check the consistency. You are aiming for a fine but slightly coarse powder, similar in texture to cornmeal or coarse sand. It’s crucial to be very careful not to over-process the almonds, as their natural oils will quickly release, turning the mixture into almond butter rather than a flour. Once the desired texture is reached, immediately transfer the homemade almond meal to an airtight container or use it directly in your recipe.
The dacquoise sponge is incredibly versatile and can be used in a multitude of elegant and delicious desserts. Its light, airy texture and distinct nutty flavor make it an ideal base or component that adds sophistication and depth to many culinary creations:
- Entremets and Layered Cakes: This is arguably its most common and celebrated use. Dacquoise layers excel as a critical element in intricate mousse cakes (entremets) or classic layered cakes, providing a delightful textural contrast to creamy fillings like mousses, ganaches, or buttercreams. Its chewiness perfectly balances the softness of other components.
- Standalone Cake: You can use baked dacquoise layers as the sole cake component, creating a simple yet incredibly elegant dessert. These layers can be filled with a variety of luxurious components such as rich whipped cream, smooth pastry cream (crème pâtissière), decadent buttercream, a luscious chocolate ganache, or even fresh fruit. When used in this way, the dessert itself is often simply called a “dacquoise” (which, as mentioned, can sometimes be a bit confusing!). A quintessential French example is the “Succès,” which traditionally features multiple layers of dacquoise sponge paired with a delightful Praline Mousseline Cream filling.
- Tart Bases: Crumbled dacquoise can be pressed into a tart shell or used as a light, flavorful, and naturally gluten-free base for fruit tarts, offering a wonderful alternative to traditional shortcrust pastry.
- Individual Desserts: Cut into smaller, precise shapes (rounds, squares, rectangles), dacquoise can form the base for individual parfaits, trifles, petit fours, or elegant dessert cups, adding a gourmet touch to single servings.
- Rolled Cakes (Roulades): A thin sheet of dacquoise can be carefully rolled with a complementary cream filling to create an impressive and beautiful roulade or log cake, perfect for festive occasions.
- Petit Fours: Small squares or circles of dacquoise can be sandwiched with ganache or buttercream, then enrobed in chocolate for bite-sized delights.
Pro Tips & Troubleshooting for Dacquoise Success
Achieving a perfect Dacquoise is entirely within your reach, even for beginner bakers. Follow these expert tips and solutions to common challenges to ensure a beautifully light, crispy, and flavorful meringue sponge every time.
- Baking Time is Key to Texture: The exact baking time for your dacquoise will significantly depend on its thickness and the calibration of your individual oven. For the thinner layer created on a silicone sheet pan, baking time is relatively short (18-20 minutes). If you opt for a thicker layer, perhaps baked in smaller pastry rings or a deeper pan, anticipate a longer baking duration (22-24 minutes or more). It’s crucial to keep a close eye on it! The dacquoise should be lightly golden brown on top and feel firm but still slightly yielding and chewy in the center. Remember, it will continue to firm up and achieve its characteristic crisp-chewy texture as it cools. Over-baking can lead to a very dry, brittle, and crumbly texture, while under-baking will result in a soggy, overly sticky, and undercooked sponge. Trust your senses and don’t hesitate to do a gentle touch test.
- Choosing the Right Pan for Easy Release: Silicone pans or baking mats are highly recommended for baking dacquoise. Their superior non-stick properties make it incredibly easy to “peel off” the delicate sponge once it has completely cooled, minimizing the risk of breakage or sticking. If you’re using traditional metal baking pans, it’s absolutely essential to prepare them thoroughly: line them with parchment paper, ensuring the paper extends slightly above the edges for easy lifting, and lightly grease the sides. For round shapes, tracing circles on your parchment paper before piping can help you achieve perfectly consistent sizes and shapes.
- Customize Your Dacquoise Texture with Nut Grind: You have direct control over the final texture of your dacquoise by adjusting the coarseness of your ground nuts. For a dacquoise with a delightful, more pronounced crunch and rustic feel, opt for a slightly coarser almond meal or ground nuts. If you prefer a lighter, more uniformly soft, and melt-in-your-mouth texture that is exceptionally delicate, then using a very finely ground almond flour is your best choice. Experiment with different grinds and nut types to discover your personal favorite textural experience!
- Gentle Handling is Crucial for Airiness: Once you’ve painstakingly whipped your egg whites to stiff, glossy peaks, remember that the air incorporated into that meringue is what gives your biscuit dacquoise its signature lightness and volume. When gently folding in the dry ingredients and subsequently spreading the batter into your prepared pan, use the gentlest touch possible with your rubber spatula. Avoid any aggressive mixing, stirring, or overworking of the batter, as this will quickly deflate the meringue and result in a dense, flat, and less appealing dacquoise rather than the desired airy and delicate sponge.
- Troubleshooting a Flat Dacquoise: The most common reasons for a dacquoise turning out flat or dense are either under-whipped meringue or over-folding the dry ingredients. Ensure your meringue reaches those stiff, glossy peaks described in step 1-4 before attempting to fold in the nuts. When folding, work quickly and gently, focusing on incorporating the dry ingredients with minimal air loss.
- Preventing Stickiness: To prevent your dacquoise from sticking to the pan or being difficult to handle, ensure it is baked thoroughly until golden and firm-soft, and then allow it to cool completely on a wire rack. Residual warmth can make the delicate meringue very sticky and prone to tearing when handled. Humidity can also contribute to stickiness, so store cooled dacquoise in an airtight container.
- Cracked Surface: Minor cracks are normal and add to the rustic charm. However, excessive cracking can occur if the oven temperature is too high, causing the exterior to set too quickly before the interior can fully expand. Ensure your oven temperature is accurate.
Storing & Freezing Your Dacquoise Sponge
Proper storage is essential to maintain the delicate texture and fresh flavor of your Dacquoise Sponge, whether you plan to use it immediately or save it for later use in your elegant dessert creations.
- Room Temperature Storage: A freshly baked and completely cooled dacquoise sponge can be stored at room temperature for up to one day. To best preserve its delicate crispness and prevent it from absorbing too much moisture from the air (which can make it soft) or drying out (which can make it brittle), it’s crucial to store it in an airtight container or wrap it tightly in several layers of plastic wrap.
- Refrigeration: For slightly longer storage of the plain dacquoise layers, you can keep them in the refrigerator for up to 2-3 days. However, be aware that the cold, dry environment of a refrigerator can cause meringues to dry out more quickly and potentially lose some of their delicate chewiness and crispness. If refrigerating, ensure it’s stored in a very airtight container or double-wrapped to protect it from moisture and odors from other foods.
- Once Assembled in a Dessert: If your dacquoise has been incorporated into an entremet, a layered cake, or another dessert with a cream, mousse, or custard filling, it’s imperative to follow the specific storage instructions for that particular cream or filling, as it will almost certainly require refrigeration. Generally, these assembled desserts should be consumed within 2-3 days for optimal freshness and safety.
- Freezing for Longer Shelf Life: Dacquoise freezes exceptionally well, making it a fantastic component to prepare in advance for future baking projects. You can freeze individual dacquoise layers on their own or as part of an assembled entremet (if the other components are also freezer-friendly). To freeze individual layers, first allow them to cool completely. Then, wrap each layer tightly in several layers of plastic cling film, ensuring no air is trapped, followed by an additional layer of aluminum foil to provide extra protection against freezer burn. Label with the date. Frozen dacquoise can be stored for up to one month without significant loss of quality.
- Thawing Frozen Dacquoise: To thaw frozen dacquoise, simply transfer the wrapped layers to the refrigerator overnight. For a quicker thaw, you can leave them at room temperature for a few hours, depending on their thickness. Once thawed, it’s best to use the dacquoise promptly to enjoy its best texture. Do not refreeze thawed dacquoise.
Elevate Your Baking: More Basic French Pastries
If you’ve enjoyed mastering the Dacquoise Sponge and are eager to further refine your French baking skills, you’re ready to explore more fundamental techniques. Expanding your repertoire with these classic recipes will open up a world of exquisite dessert possibilities, allowing you to create a wide array of gourmet treats from your own kitchen.
- Pâte Sucrée: Master this foundational sweet shortcrust pastry, which is perfectly suited for elegant fruit tarts, chocolate tarts, and various dessert shells that require a delicate, buttery crumb.
- Savoury Shortcrust Pastry: An essential recipe for savory baking, providing the perfect tender and flaky base for classic quiches, hearty savory tarts, and other delightful appetizers.
- Pâte Sablée: Discover this tender, crumbly French shortbread-like pastry, which is ideal for creating delicate tartlets, sophisticated cookies, and buttery bases that melt in your mouth.
- Chocolate Tart Crust: Learn to prepare this rich and flaky chocolate crust, the perfect decadent base for luxurious chocolate ganache tarts, creamy custards, or other indulgent fillings, offering a beautiful contrast in flavor and texture.
I am so excited to share that my debut cookbook
“Bite-Sized French Pastries for the Beginner Baker”
is now available for purchase!
Dacquoise Sponge (Biscuit Dacquoise) Recipe
Dacquoise Sponge (Biscuit Dacquoise)
Print Recipe
Equipment
- 1 x 30 by 40 cm / 12 by 15 inch silicone sheet pan
- or
- 2 x 20 cm / 8 inch pastry rings
Ingredients
- 180 gr Almond Flour, or almond meal
- 100 gr Powdered Sugar, sifted
- 180 gr Egg Whites, (about 6 egg whites)
- 50 gr Caster Sugar
Instructions
- Preheat your oven on 160℃ / 325℉. Prepare a 30 x 40 cm / 12 x 15 silicone sheet pan or two lightly greased 20 cm / 8 inch lightly greased pastry rings placed on a lined baking tray (see note 1).
- Sift the Almond Flour and Powdered Sugar into a large bowl to combine them. If using coarse ground almond, only sift the powdered sugar and mix in the ground almond. Set aside.
- Place the egg whites in the bowl of a stand mixer fitted with the whisk attachment (or large mixing bowl if using a hand mixer). Whisk on medium speed for about 5 minutes or until the egg whites have increased in volume, turned white and frothy (see note 2).
- While still whisking on medium speed, slowly add the caster sugar about 1 tablespoon at the time. Once all the sugar has been incorporated, increase the mixer speed to high and keep on whisking for another 3 to 5 minutes or until you have reached stiff peaks (see note 3).
- Remove the bowl from the mixer. Add about a third of the almond flour / powdered sugar mix to the meringue and very gently fold it in with a spatula. Add the remaining mix in one or two times and very gently fold until all incorporated (see note 4). The mixture will have slightly deflated – that’s normal; but try to avoid over-folding to keep as many air bubbles as possible.
- If using a 30 x 40 cm / 12 x 15 silicone sheet pan: gently pour the dacquoise batter in the centre of the sheet pan. Using an offset spatula, gently spread the batter towards the corner of the sheet pan then continue to spread into an even layer.
- If using two 20 cm / 8 inch pastry rings, either pour half the batter into each rings and spread into an even layer with a small offset spatula, or use a pastry bag fitted with a large round piping tip to pipe a spiral of batter into the rings.
- Place in the oven and bake for 18 to 20 minutes for the sheet pan or 22 to 24 minutes for the pastry rings (see note 5). The top of the dacquoise should look golden but still feel soft. Place on a wire rack and allow to cool down completely before using as intended.
Would you like to save this recipe?
We’ll email this post to you, so you can come back to it later!
Notes
- You can use a silicone sheet pan and cut the sponge to the shape you require, or use pastry rings the size of your cake (if making a layer cake for example). You can really use any shape of pan you need, simply make sure to adjust the baking time to the thickness of the batter. For best results, ensure your chosen pan is non-stick or adequately lined and greased.
- I call this the “shaving cream” consistency; it should still be quite soft and loose (more loose than soft peaks) but have turned white rather than lightly yellow and translucent. This stage is crucial for slowly incorporating sugar and building a stable meringue.
- The meringue should have more than doubled in volume and appear quite stiff and glossy. If you pick some of the meringue with the whisk, it should hold its shape without dripping back down or moving. This indicates strong, stable peaks ready for folding.
- Make sure to go all the way down to the bottom of the bowl to ensure the mixture is evenly combined, without leaving any pockets of dry ingredients. Do this with gentle, deliberate movements to minimize air loss.
- The exact baking time will vary based on the thickness of your sponge and your individual oven. I spread the dacquoise mixture on a silicone sheet pan to create a rather thin layer here, so the baking time was quite short (18-20 mins). If you are baking the sponge into a thicker layer or using deeper molds, you will need to bake it for longer (22-24 mins for pastry rings), adjusting as needed until lightly golden and firm-soft to the touch.
Nutrition (per serving)
Made this recipe?
Let us know if you liked it by leaving a comment below, and tag us on Instagram @a.baking.journey with a photo of your creation! We love seeing your baking triumphs!
