Exquisite Chocolate Orange Tartlets: Your Ultimate Guide to a Perfect Festive Dessert
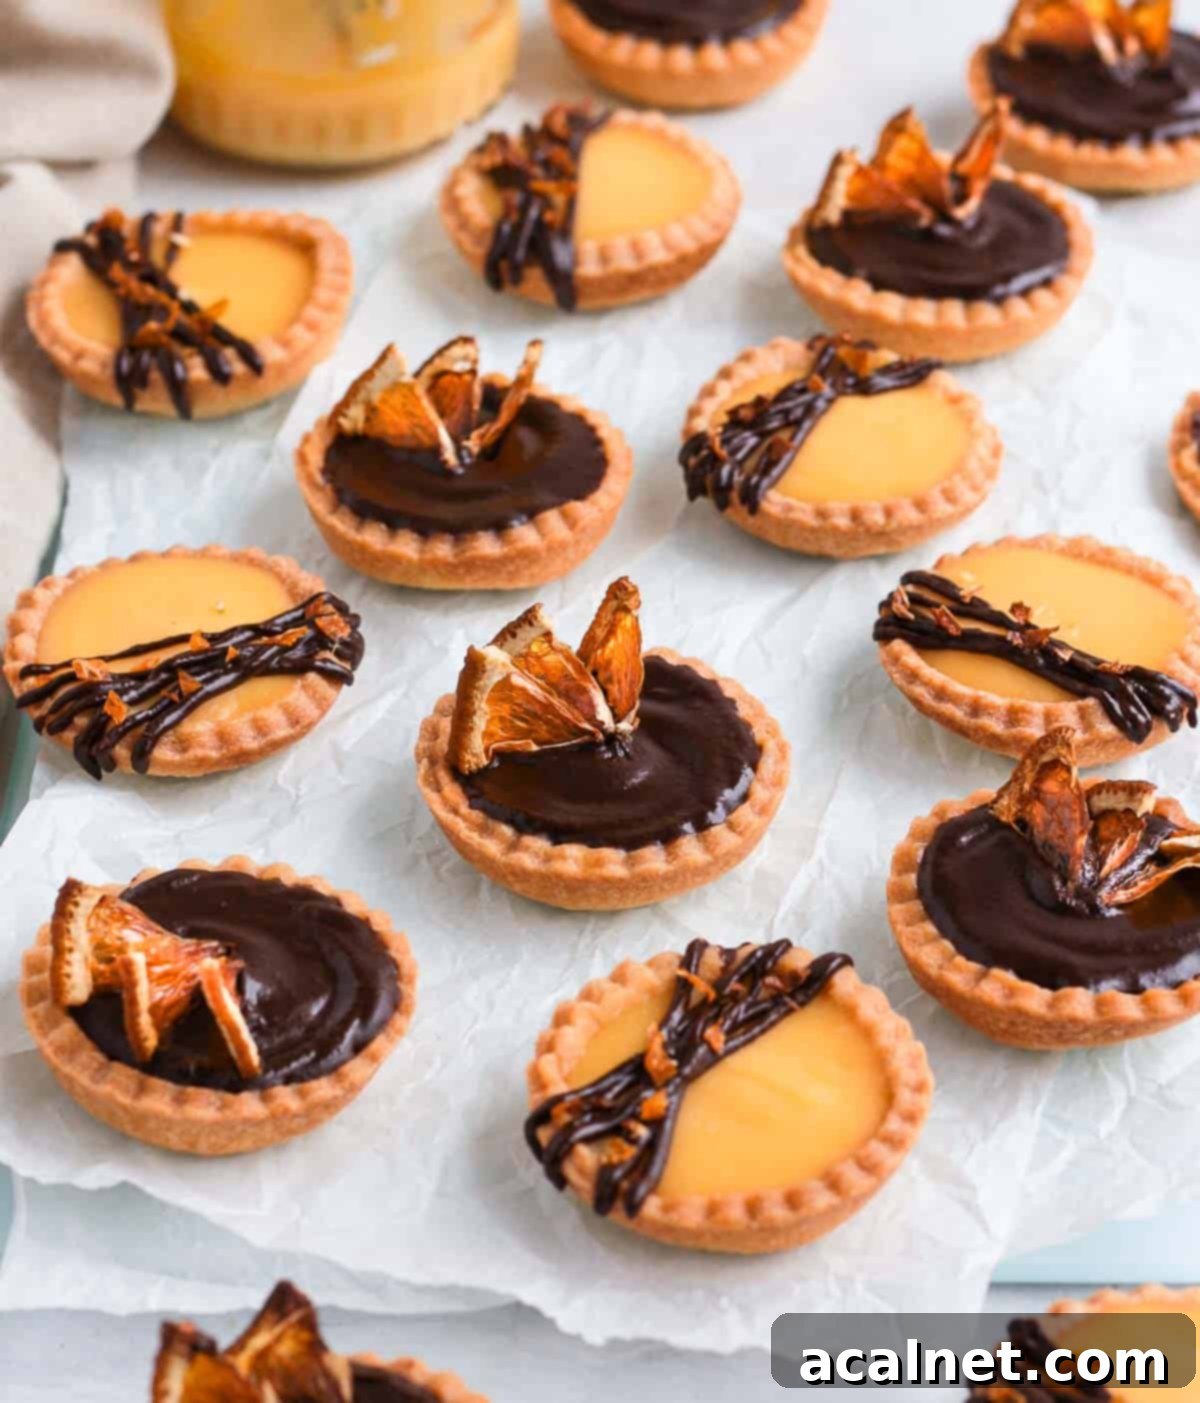
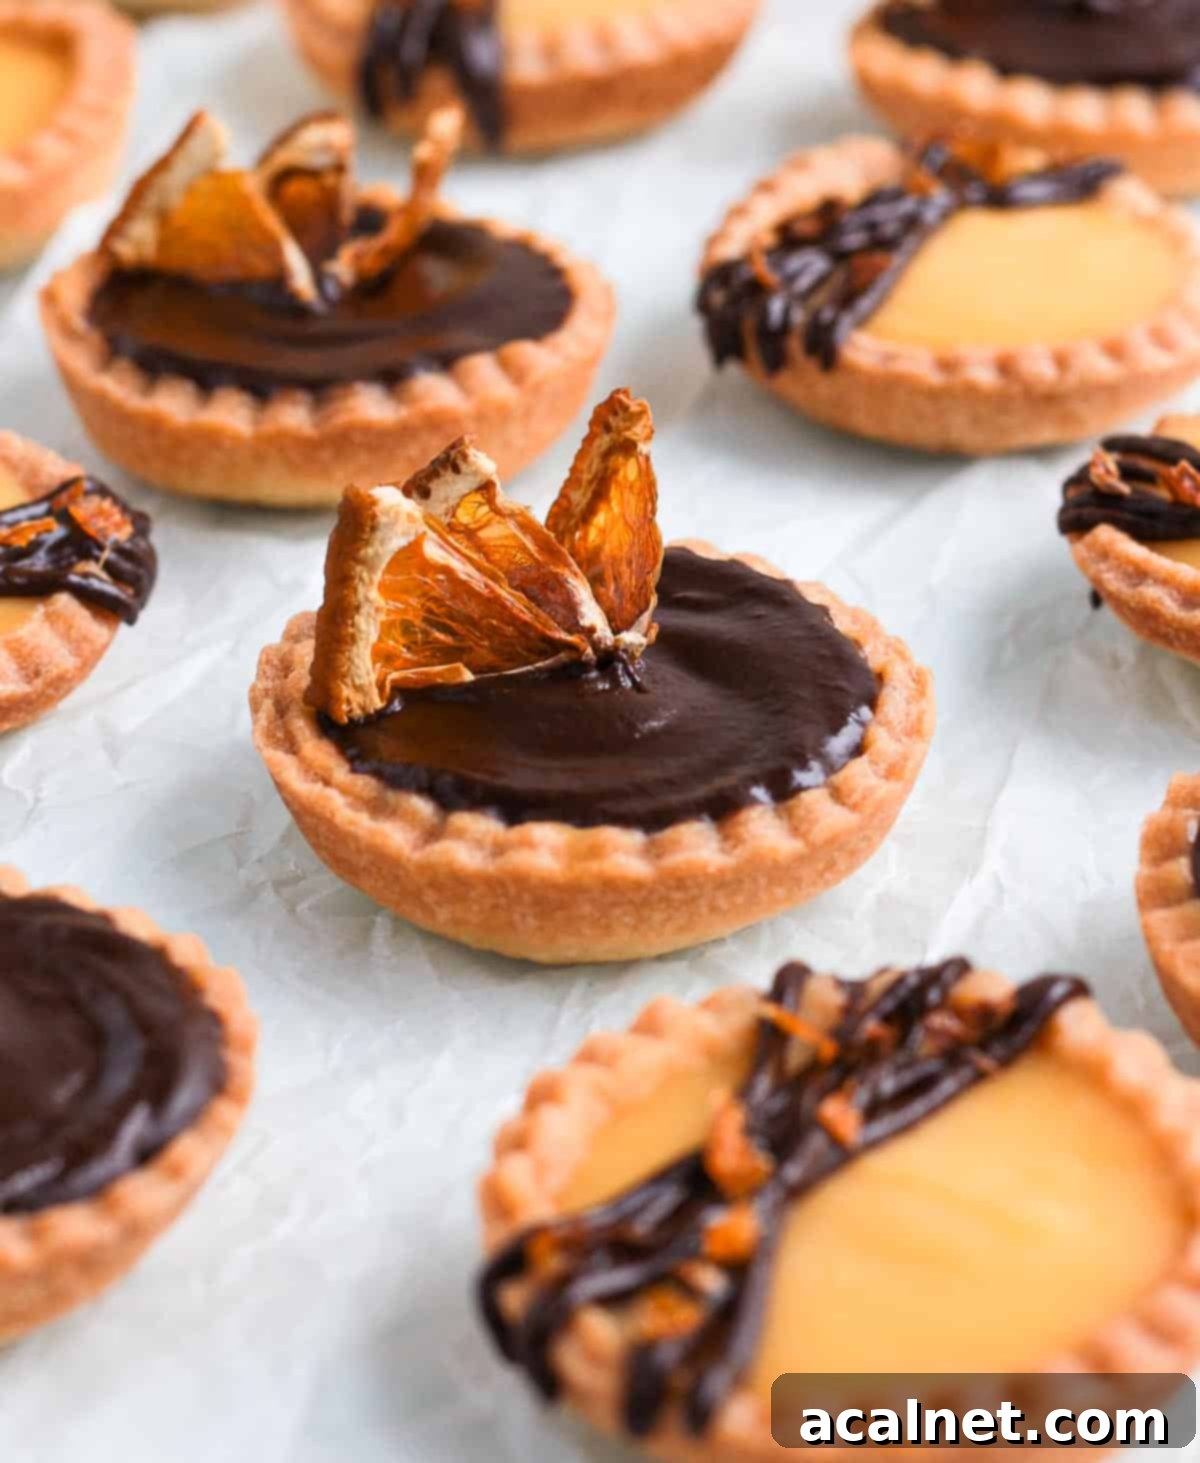
Prepare to delight your senses with these **Exquisite Chocolate Orange Tartlets**. A truly perfect sweet treat, these miniature desserts are ideal for elevating any party, a sophisticated afternoon tea, or simply enjoying a moment of pure indulgence. Each tartlet is a masterful blend of textures and flavors, featuring delicately crisp, buttery **homemade tartlet shells**, a vibrant and tangy **orange curd filling**, and a rich, velvety **dark chocolate ganache topping** that melts in your mouth. This recipe guides you through creating these show-stopping delights, ensuring a rewarding baking journey from start to finish.

[feast_advanced_jump_to]
Why These Chocolate Orange Tartlets Are a Must-Make
There’s an undeniable magic in the combination of rich chocolate and bright, zesty orange, and these **mini chocolate orange tarts** encapsulate it perfectly. They are more than just a dessert; they’re an experience, making them the ultimate decadent treat for any celebration. Whether you’re planning for the festive **Holidays**, hosting an elegant **afternoon tea party**, or simply gathering friends and family, these beautiful tartlets promise to be the star of your dessert table.
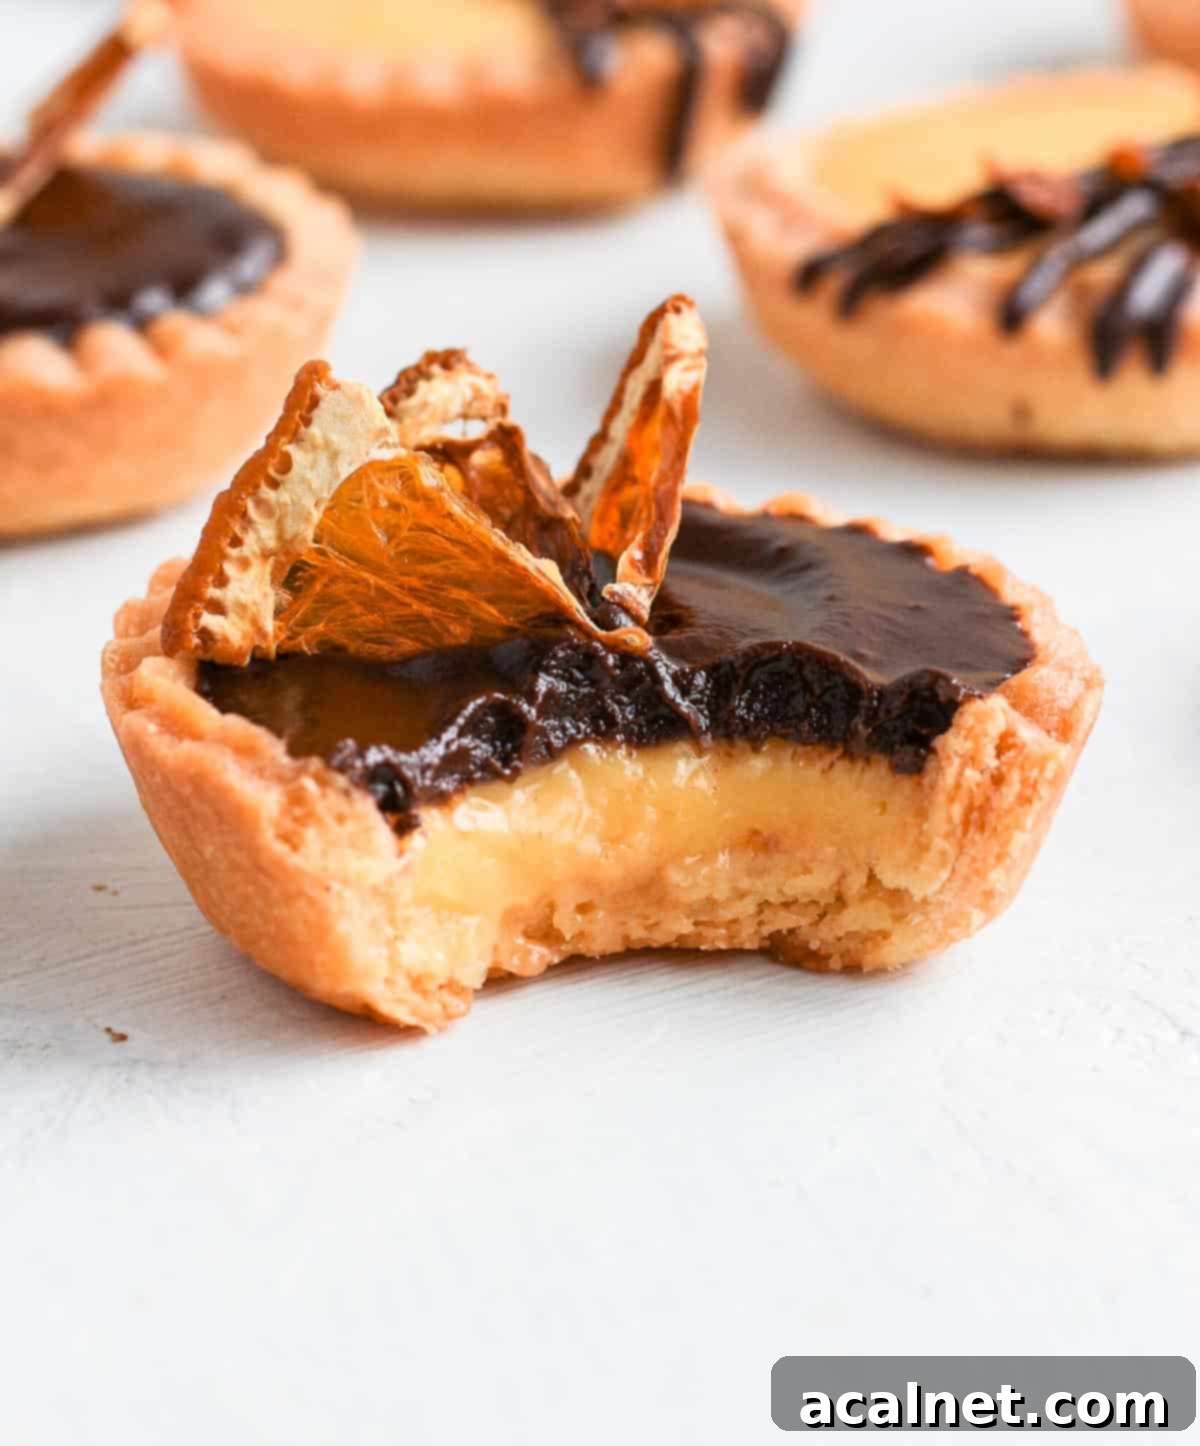
What makes this recipe truly special is the exquisite harmony of three distinct, yet complementary, layers. We start with exceptionally **buttery homemade Mini Tartlet Shells**, providing a delicate crunch that beautifully contrasts the smooth fillings. Nestled within is a refreshingly simple yet intensely flavored **Orange Curd filling**, bursting with citrus notes. Capping it all is a luxurious, intense **dark chocolate ganache layer** that brings depth and richness. If you’re a fan of the classic Jaffa Cake flavor profile, these tartlets will transport you straight to dessert heaven with every bite.
These **orange chocolate pastries** represent a delightful fusion, taking the best elements from classic Orange Tartlets and sophisticated Mini Chocolate Tarts. The result is a dessert that’s both familiar and exciting, offering a balanced sweetness and tang. Lovers of this iconic flavor pairing will recognize the same irresistible combination found in our beloved Chocolate Orange Cheesecake, the airy Chocolate Orange Mousse, and the delightfully fudgy Chocolate Orange Brownies! They are designed to impress, yet crafted to be approachable for home bakers of all skill levels.
Essential Ingredients for Chocolate Orange Tartlets
Crafting these exquisite chocolate orange ganache tarts involves bringing together three distinct yet harmonious elements. Each component is crucial for the perfect balance of flavor and texture. Below is a detailed look at what you’ll need for each layer (for precise quantities, please scroll down to the comprehensive recipe card below):
- For the Tartlet Shells: The foundation of our tartlets, these shells are made using my reliable classic Pâte Sablée (French Shortcrust Pastry) recipe. This pastry delivers a wonderful snap and buttery flavor. You’ll need:
- All-Purpose Flour: The structural base for a tender crust.
- Icing Sugar (or powdered/confectioner’s sugar): Adds a delicate sweetness and contributes to the pastry’s fine texture.
- Salt: A pinch enhances all the other flavors.
- Unsalted Butter (very cold): Crucial for achieving that desired flaky, melt-in-your-mouth texture without making the pastry tough. Keeping it cold is key!
- Egg: Binds the ingredients together, adding richness and moisture.
- For the Orange Curd Filling: This creamy, tangy filling provides a burst of fresh citrus. Its smooth consistency beautifully complements the pastry and ganache. Ingredients include:
- Fresh Oranges (Juice + Zest): The star of the show, providing intense natural orange flavor and aroma.
- Egg Yolks: Give the curd its rich, creamy texture and vibrant color.
- Caster Sugar (or fine granulated sugar): Sweetens the curd and helps achieve a smooth consistency.
- Unsalted Butter: Adds silkiness and richness, making the curd incredibly luxurious.
- Cornstarch: Acts as a thickening agent, ensuring your curd is perfectly set.
- For the Chocolate Topping: The luscious crown of these tartlets, a simple yet incredibly decadent **Chocolate Ganache**. For this, you’ll need:
- Heavy (or Thickened) Cream: Provides the liquid base and richness for a smooth ganache.
- Dark Cooking Chocolate: The quality of your chocolate will shine here. Opt for a good quality dark chocolate (I used 70%) for a deep, intense flavor that balances the orange.
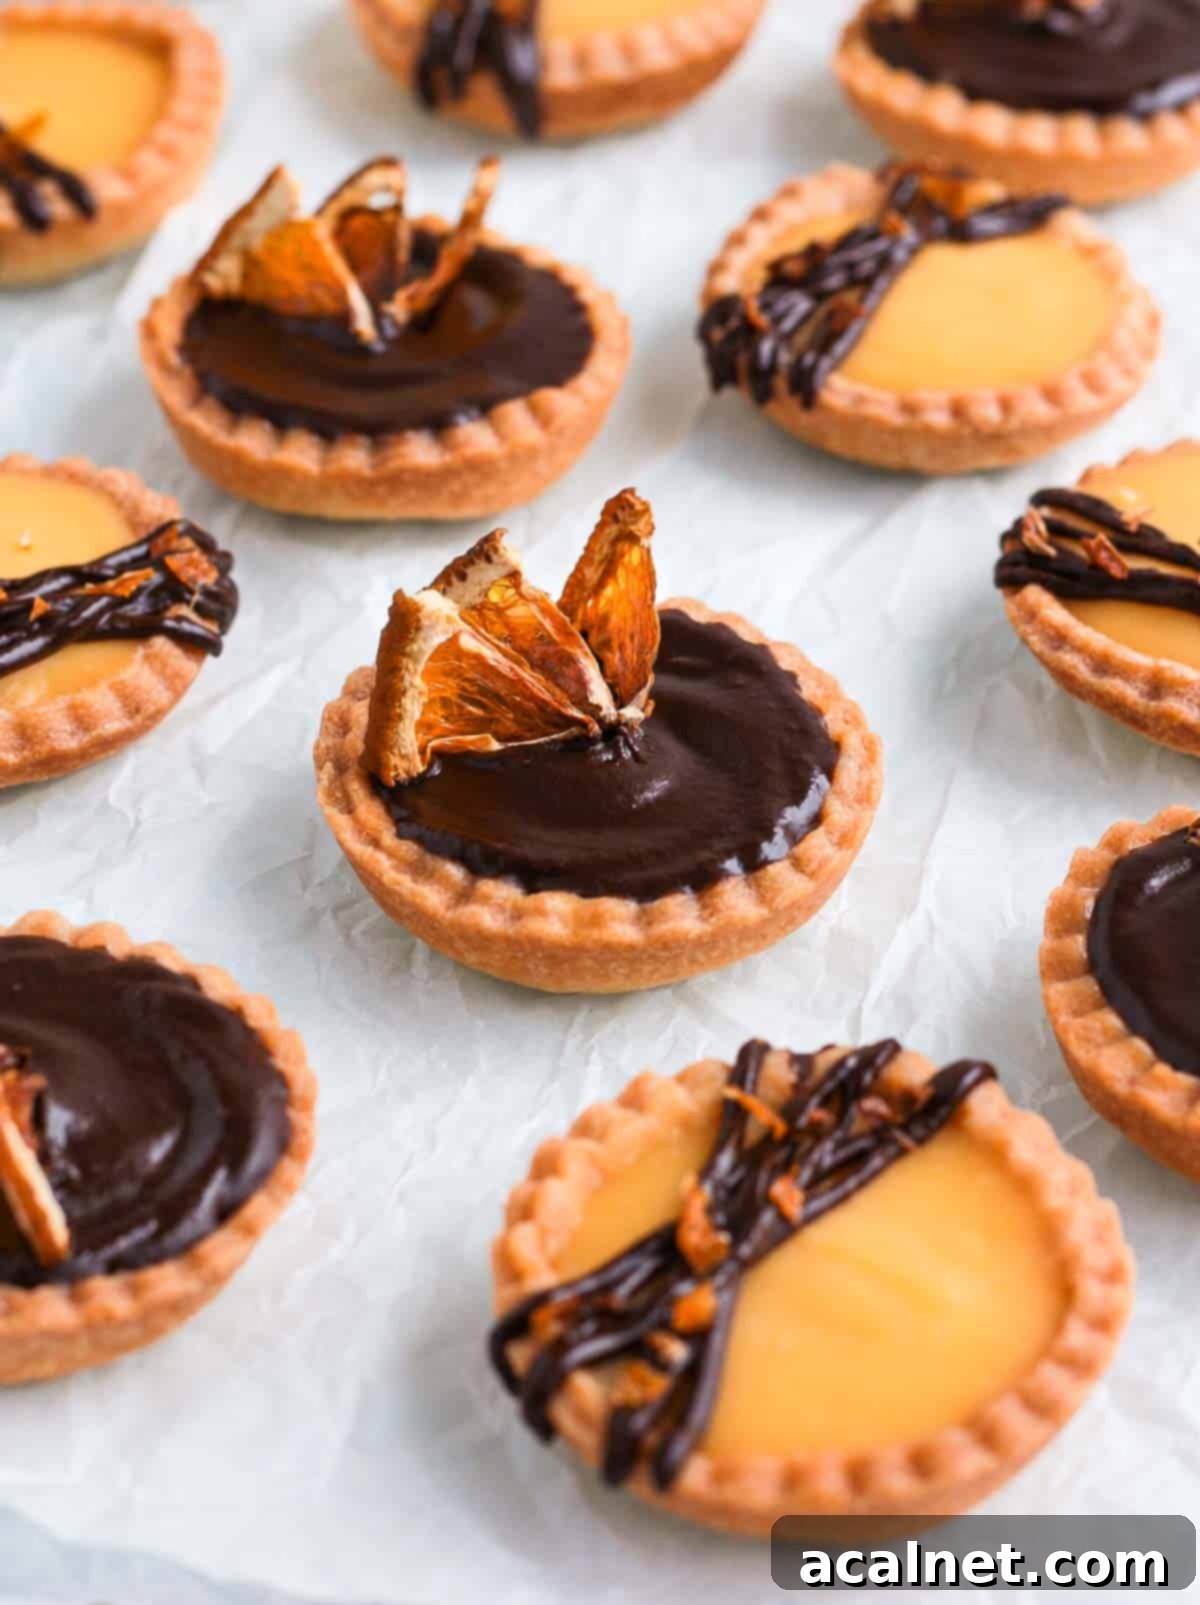
To add a final touch of elegance and reinforce the orange theme, I adorned these tartlets with some dehydrated orange slices (easily prepared by drying in the oven). Alternatively, you could use a simple sprinkle of fresh Orange Zest, delicate Chocolate Curls, or even a dusting of cocoa powder for a different aesthetic and flavor accent.
How to Make Decadent Chocolate Orange Tartlets: A Step-by-Step Guide
Crafting these stunning **Chocolate Orange Tartlets** is a rewarding process divided into three main stages: preparing the crisp tartlet shells, filling them with the luscious orange curd, and finally, topping them with a smooth chocolate ganache. Each step is designed for success, leading you to a dessert that’s as beautiful as it is delicious.
Crafting the Perfect Tartlet Shells
Our Tartlet Shells are based on a classic French shortcrust pastry, Pâte Sablée, renowned for its tender, buttery texture. For convenience, we’ll use a food processor for the dough and shape them in a muffin pan. If you prefer to work by hand, don’t worry – the ingredient list and foundational process are identical to my detailed Pâte Sâblée recipe, which you can consult for extra guidance.
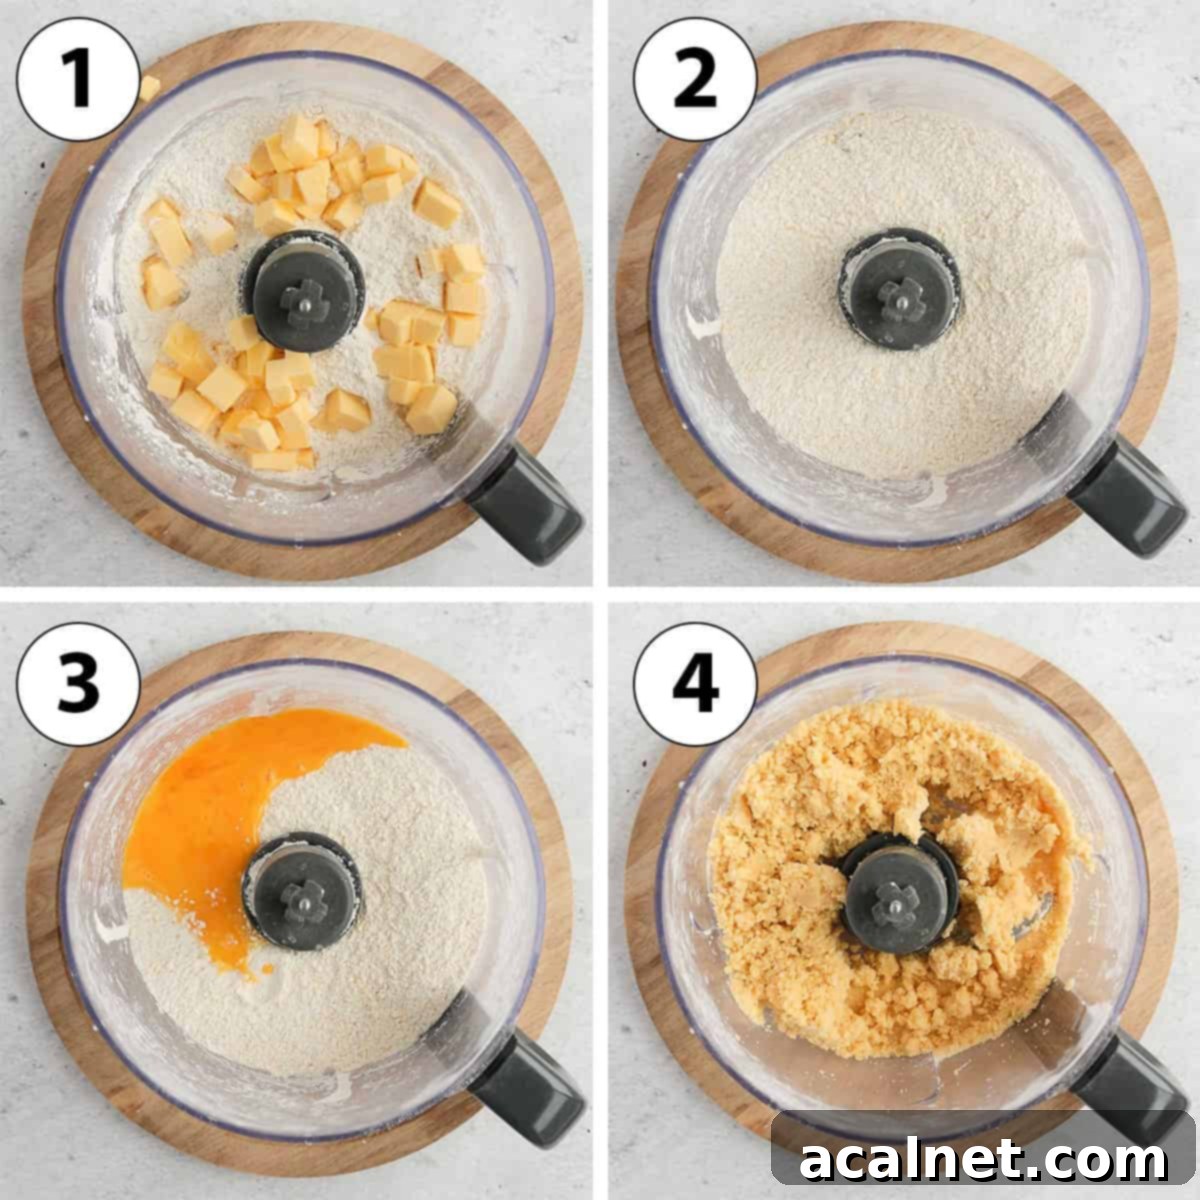
- Photo 1: Initial Dry Mix. Begin by combining the Flour, Icing Sugar, and a pinch of Salt in the bowl of your food processor. Pulse a few times until these dry ingredients are thoroughly mixed. This ensures an even distribution throughout the pastry.
- Photo 2: Incorporating Cold Butter. Next, add the very cold Butter, cut into small, even cubes. Pulse the food processor until the butter is broken down into very small, pea-sized crumbs. The key here is to avoid large chunks of butter, which can lead to a pastry that puffs too much and isn’t as uniformly crisp. We’re aiming for a tender, shortcrust, not a flaky puff pastry.
- Photo 3 & 4: Forming the Dough. Introduce the Egg to the mixture. Continue to pulse until the dough just starts to come together in a rough, shaggy mass. It’s crucial not to overwork the pastry at this stage, as overmixing can develop the gluten too much, resulting in a tough crust. To check if it’s sufficiently mixed, gently press a handful of the dough together; it should hold its shape.
- Once the dough is formed, carefully remove it from the food processor bowl and gently bring it together into a cohesive ball. Place this dough between two sheets of baking paper (parchment paper) and roll it out into a large, uniform disk, approximately 3 mm or 1/8 inch thick. This ensures your tartlet shells will be delicate and evenly baked. Transfer the rolled dough, still between the baking paper, onto a flat tray and place it in the fridge to rest and chill for a minimum of 1 hour, or ideally up to 24 hours. This chilling step is vital for preventing shrinkage during baking.
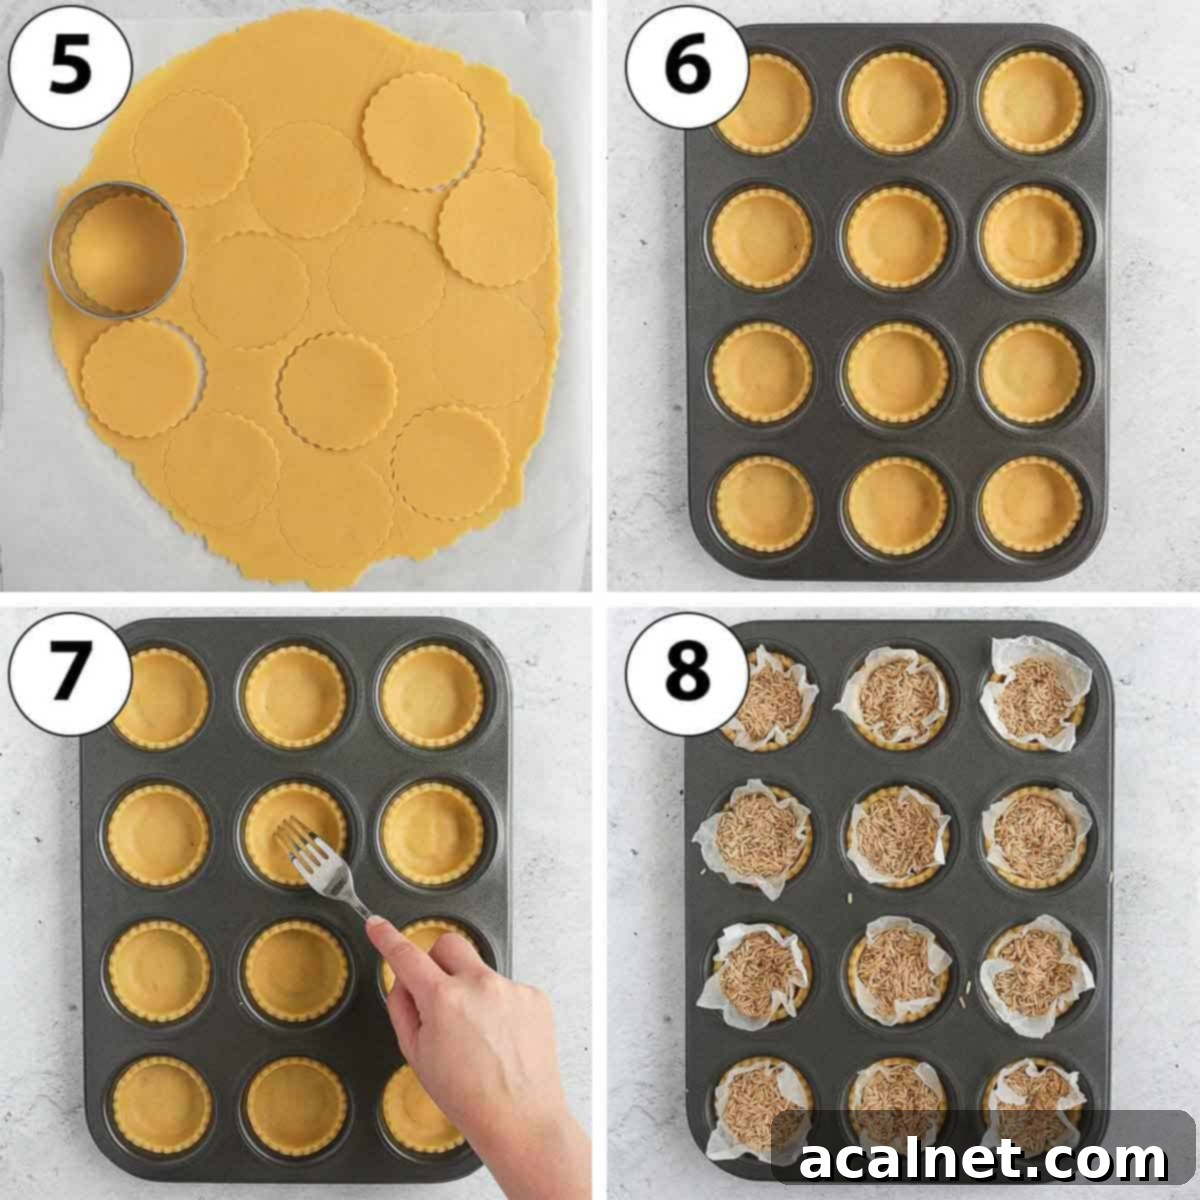
- Photo 5: Cutting the Pastry Disks. After chilling, remove the top sheet of baking paper. Using a small fluted or rounded cookie cutter, cut out individual disks of pastry. The size of your cutter will determine the depth of your tartlets. I recommend cutting them to be at least as wide as the openings of your muffin pan to create sufficiently deep shells for the filling.
- Photo 6: Lining the Muffin Pan. Carefully slide each pastry disk into the individual openings of your muffin pan. Gently press the pastry into the corners where the bottom meets the sides, working out any trapped air bubbles. Ensure the pastry adheres well to the sides of the pan. This meticulous step helps maintain the tartlet’s shape during baking.
- Photo 7: Final Chill Before Baking. Use a fork to prick the bottom of each tartlet pastry several times. This prevents the base from puffing up excessively during baking. Place the muffin pan back into the fridge to rest for at least another hour, or up to 24 hours. This second chilling period further stabilizes the pastry.
- Preheat your oven to 160°C (325°F). While the oven is preheating, transfer the muffin pan from the fridge to the freezer. Getting the pastries very cold just before baking helps them hold their shape better and minimizes shrinkage.
- Photo 8: Blind Baking the Shells. Line each pastry shell with a small piece of crumpled baking paper, then fill with baking weights (such as ceramic beads, dry beans, or rice). Blind bake for 15 minutes. After this initial bake, carefully remove the paper and weights, and return the tartlet shells to the oven for another 15 minutes, or until they are golden brown and feel dry to the touch. This ensures a fully cooked, crisp crust. Once baked, set them aside to cool completely in the pan before handling.
Preparing the Zesty Orange Curd Filling
The orange curd is the vibrant heart of these tartlets, offering a delightful tang that cuts through the richness of the chocolate. Achieving a perfectly smooth and creamy curd is simple with these steps:
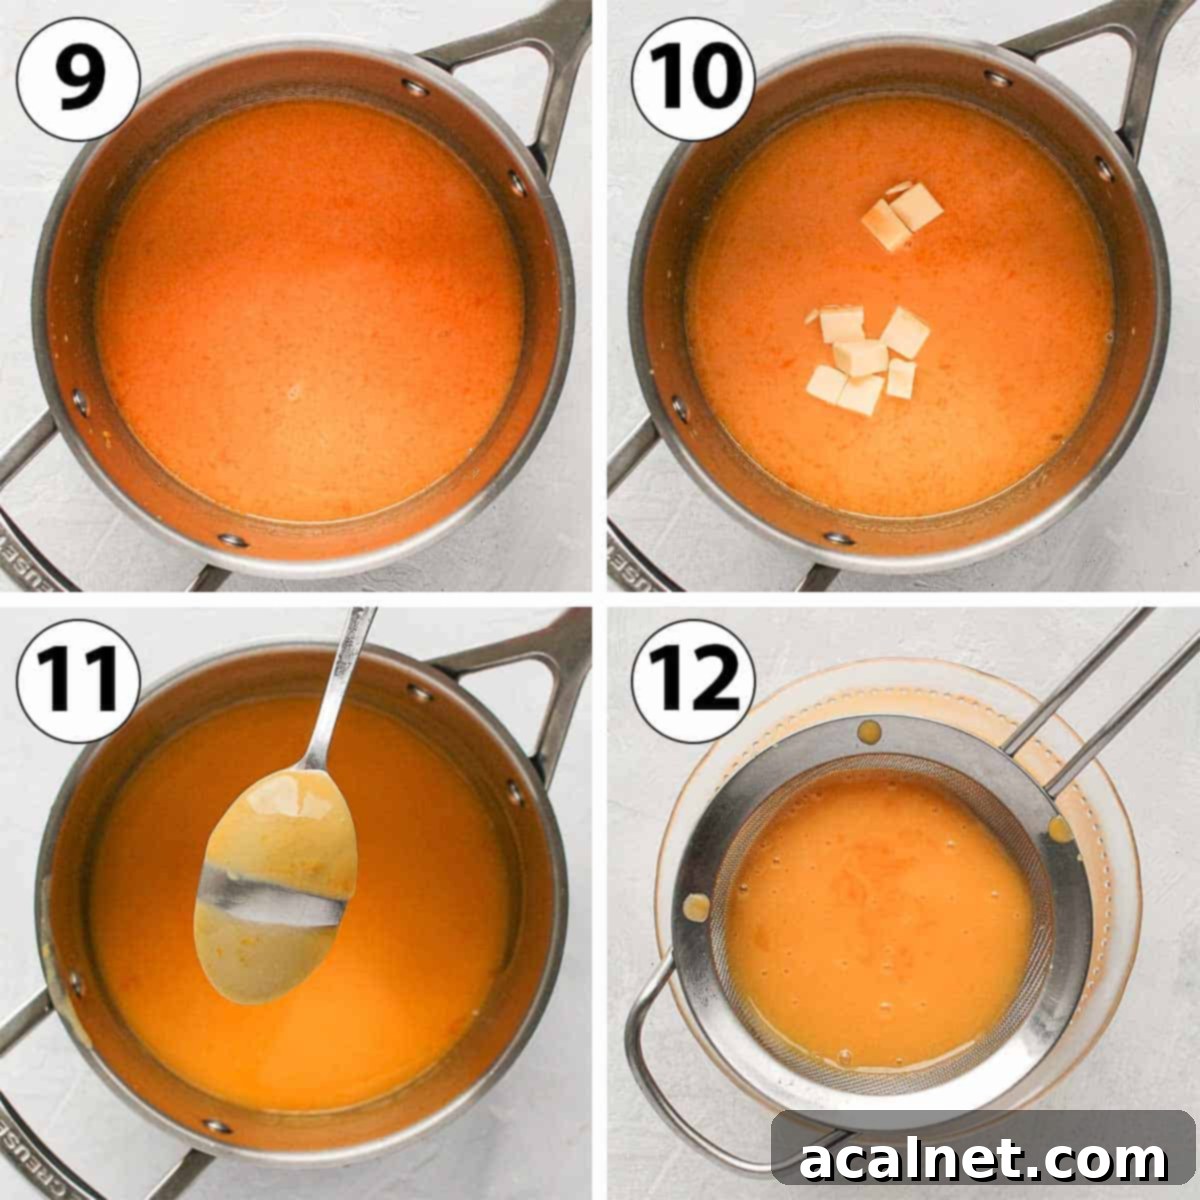
- Photo 9: Combining Wet Ingredients. In a small saucepan, whisk together the Orange Juice, Orange Zest, Egg Yolks, Caster Sugar, and Cornstarch until well combined and smooth. Place the saucepan over very low heat. Begin cooking, stirring constantly with a whisk or spatula. The goal is to gently warm the mixture and dissolve the sugar while preventing the eggs from scrambling. You’ll notice the liquid starting to thicken slightly within 3 to 5 minutes.
- Photo 10: Enriching with Butter. Once the mixture has slightly thickened, begin adding the unsalted butter in small cubes, a little at a time. Stir continuously until each addition of butter is fully melted and incorporated before adding more. This gradual process ensures the butter emulsifies properly into the curd, creating a wonderfully smooth and glossy texture.
- Photo 11: Achieving Perfect Thickness. Continue to cook the curd on low heat, never stopping stirring, for a few more minutes until it reaches a thick, custard-like consistency. The exact time depends on your stove’s temperature, but typically ranges from 5 to 10 minutes. It’s crucial that the curd never comes to a rolling boil, as this can cause the egg yolks to curdle. A very low simmer, however, is acceptable. To test for readiness, dip the back of a spoon or spatula into the curd, then draw a horizontal line across it with your finger. If the line remains clear, without the curd dripping over it, your orange curd is perfectly cooked. If it runs, it needs a bit more time on the stove.
- Photo 12: Straining for Smoothness. For the ultimate silky-smooth texture, pour the freshly cooked curd immediately through a fine-mesh sieve into a clean bowl. This step is essential for removing any potential bits of cooked egg, orange zest, or small lumps, ensuring your filling is impeccably smooth. Cover the surface of the curd directly with plastic wrap to prevent a skin from forming as it cools.
Crafting the Chocolate Ganache Layer & Assembling the Tarts
With your tartlet shells baked and orange curd ready, the final steps involve assembling these layers and creating the irresistible chocolate ganache topping. Patience is key for a beautifully set and delicious final product.
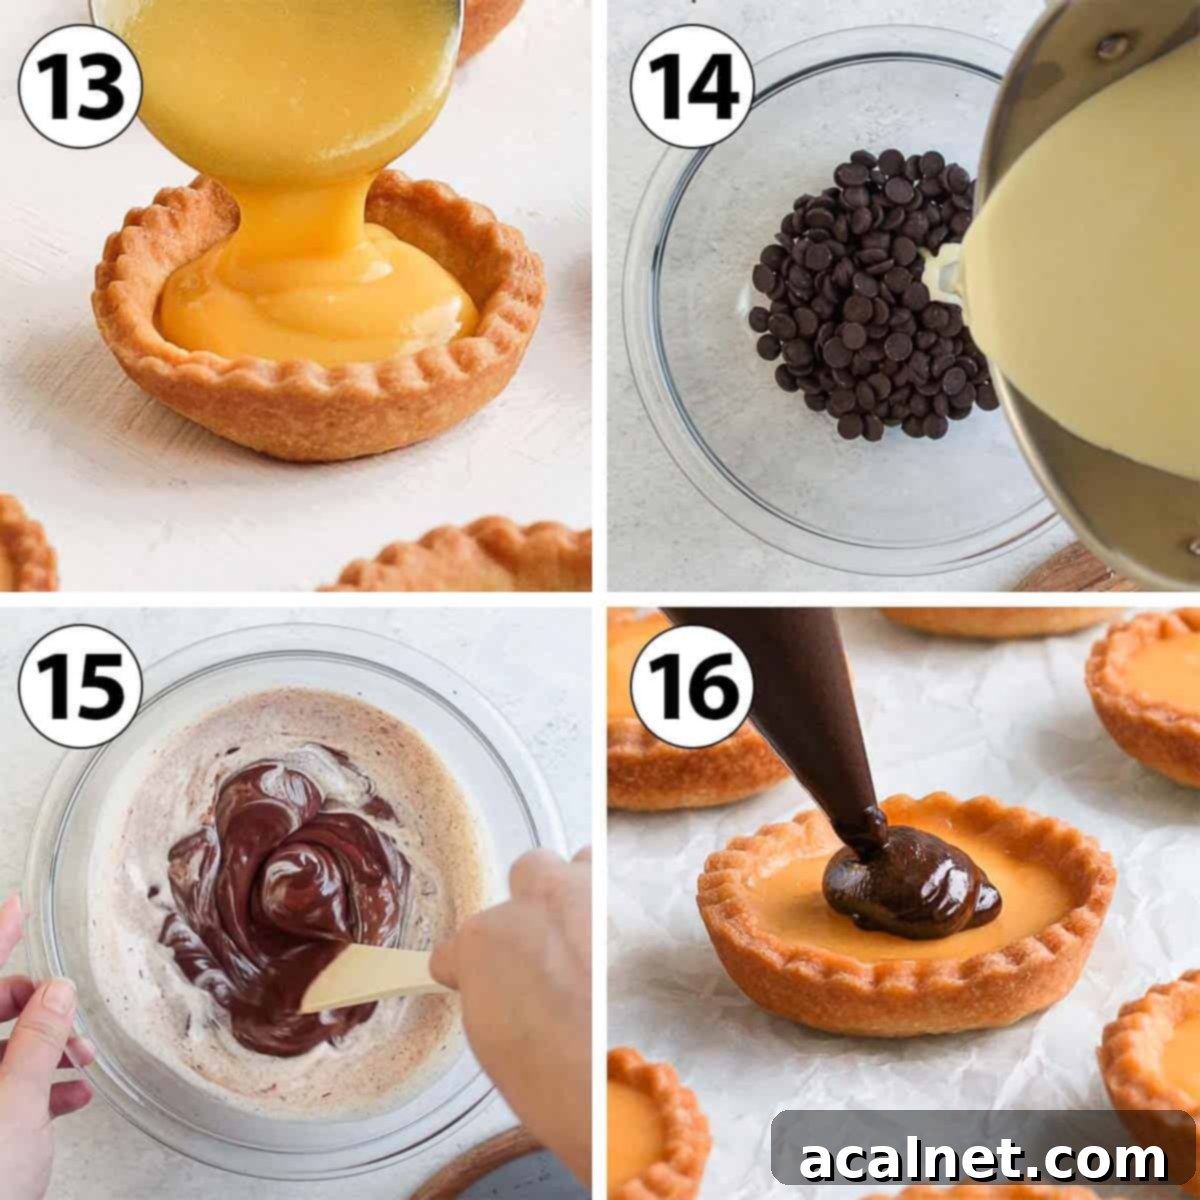
- Photo 13: Filling and Chilling the Curd. While the orange curd is still warm and pourable, carefully fill the completely cooled and baked Tartlet Shells. Fill them nearly to the brim. Gently tap each tartlet on a hard surface a few times; this helps to pop any air bubbles and creates a smooth, level top surface for your ganache. Transfer the filled tartlets to the fridge and allow them to set for a minimum of 2 hours, or ideally overnight, until the curd is firm.
Once your orange curd filling has completely set, it’s time to prepare the luxurious chocolate ganache layer.
- Photo 14: Preparing for Ganache. Place your Dark Cooking Chocolate (either in callets or finely chopped from a bar) into a heat-proof mixing bowl. In a small saucepan, gently heat the heavy cream until it just begins to simmer, showing small bubbles around the edges. Do not let it boil vigorously. Pour half of this hot cream directly over the chopped chocolate.
- Photo 15: Emulsifying the Ganache. Let the chocolate and cream sit undisturbed for 2 to 3 minutes. This allows the heat from the cream to begin melting the chocolate. After this resting period, gently start stirring the mixture with a spatula. Begin stirring from the center of the bowl in small, circular movements, gradually working your way outwards until the chocolate and cream begin to combine into a smooth, shiny emulsion. Add the remaining half of the hot cream (reheat it slightly if it has cooled down too much) and repeat the stirring process until you achieve a perfectly smooth, homogeneous, and glossy ganache. If, after thorough mixing, you still find a few unmelted pieces of chocolate, you can gently warm the ganache over a double boiler or microwave it in short 10-15 second bursts, stirring well after each interval, until fully melted.
- Photo 16: Topping the Tartlets. When the chocolate ganache is still warm and pourable, transfer it into a piping bag (you can skip the piping bag and just spoon it if you don’t mind a less precise look). Snip off the tip of the piping bag and pipe the ganache evenly over the set orange curd. Gently tap each tartlet on the counter again to help the ganache spread smoothly and level out. For a different presentation, you could opt for a delicate chocolate drizzle instead of a thick layer. Return the assembled tartlets to the fridge for about 1 hour, or until the ganache is fully set and firm.
Remember, if your chocolate ganache starts to stiffen before you’ve finished topping all the tartlets, you can gently re-heat it. A quick warm-up in the microwave or over a double boiler will restore its runny consistency, making it much easier to pipe or spread.
Frequently Asked Questions About Chocolate Orange Tartlets
While you absolutely can use store-bought tartlet shells for convenience, be aware that the taste and texture might differ from homemade. Homemade pastry, especially a good Pâte Sablée, generally offers a superior buttery flavor and a delicate, fresh crispness that complements the rich fillings perfectly. If time is a constraint, good quality store-bought shells are a viable option, but for the best results, I highly recommend making your own.
For a truly exceptional ganache – one that is gorgeously smooth, shiny, and stable – **Couverture Chocolate** is your best choice, if you have access to it. It has a higher cocoa butter content, which contributes to its superior melt and luxurious finish. If couverture chocolate isn’t available, it’s essential to use a proper **Cooking Chocolate** bar (not an eating chocolate bar or standard chocolate chips, which often contain stabilizers that can prevent a smooth melt). I used a 70% dark chocolate for these tartlets, providing a rich, deep chocolate flavor that beautifully contrasts the tangy orange. Since there’s no added sugar in the ganache itself, you can adjust the bitterness level by choosing a chocolate with a cocoa percentage that suits your personal taste and sweetness preference.
Once fully assembled with all three layers, these tartlets are best enjoyed fresh, ideally within a day or two of assembly, and after adequate chilling. However, you can certainly prepare key components in advance to streamline your baking process. The baked tartlet shells can be stored at room temperature in an airtight container for up to 2 days, or they can be frozen for several weeks (preferably un-baked for optimal texture upon baking). The orange curd can be made up to 3 days ahead and stored in an airtight container in the fridge. Before filling the crusts with the prepared curd, you might need to gently re-heat it to make it more fluid and easier to work with, ensuring a perfectly smooth filling.
For the most vibrant flavor and color in your orange curd, I recommend using fresh, ripe oranges with good juicing qualities. Navel oranges or Valencia oranges are excellent choices as they are typically juicy and have a balanced sweetness and tang. Organic oranges are also ideal if you plan to use the zest, as they are less likely to have pesticide residues. Always wash and dry your oranges thoroughly before zesting and juicing.
Tips for Achieving Perfect Chocolate Orange Tartlets
- Chill Your Pastry Thoroughly: This is arguably the most crucial step for perfect tartlet shells. Resting and thoroughly chilling the pastry dough, both before rolling and again after lining the muffin pan, is essential. Skipping these steps will almost certainly result in your shells shrinking significantly or collapsing during baking, leading to a less appealing and harder-to-fill result. Cold pastry retains its shape better under heat.
- Choose the Right Muffin Pan Size: For delightful mini tartlet bites, similar to our Mini Lemon Meringue Tartlets, use a mini muffin pan. For a more substantial dessert, a regular-sized muffin pan works wonderfully. The size of your pan will dictate the final yield and the portion size of your tartlets.
- Proper Chocolate for Ganache: Always use **Callets** (large chips of couverture chocolate) or a good quality, finely Chopped Cooking Chocolate Bar when preparing your ganache. This type of chocolate melts more evenly and quickly when combined with hot cream, significantly reducing the risk of your chocolate seizing or burning. Avoid using standard chocolate chips, as they often contain less cocoa butter and more stabilizers, which can make achieving a smooth, glossy ganache challenging.
- Warm the Curd (If Made in Advance): If you’ve prepared your orange curd ahead of time and stored it in the fridge, it will likely be quite firm. Before filling your tart crusts, gently re-heat the curd slightly over very low heat or in short bursts in the microwave, stirring frequently. This will make it more fluid, easier to pour, and allow it to settle more smoothly into the tartlet shells, preventing any uneven surfaces.
- Room Temperature Serving: While the assembled tartlets are stored in the fridge, for the absolute best texture and flavor experience, I highly recommend letting them come back to room temperature for about 20-30 minutes before serving. This allows the chocolate ganache to soften slightly and become more yielding, and the orange curd’s flavors to truly shine.
Storing & Freezing Chocolate Orange Tartlets
For optimal freshness and enjoyment, these **Chocolate Orange Tartlets** should be stored in an airtight container in the fridge until you are ready to serve them. They will maintain their quality for up to two days, but truly, they are at their absolute best when eaten fresh, shortly after they have had sufficient time to chill and set. To experience the ultimate texture, allow them to sit at room temperature for approximately 30 minutes before serving; this lets the chocolate ganache soften just enough to be perfectly creamy, rather than hard and brittle straight from the cold.
I generally do **not recommend freezing** these fully assembled chocolate orange tartlets. The texture of the orange curd and the ganache can degrade significantly upon thawing, potentially becoming watery or grainy. However, the tartlet shells offer great flexibility: they can be prepared in advance and frozen. For best results, freeze the un-baked shells, wrapped tightly, and bake them directly from frozen when you’re ready to assemble your tartlets. This ensures a crisp, fresh crust every time.
Explore More Delicious Tartlet Recipes
If you’ve enjoyed making and tasting these Chocolate Orange Tartlets, you’re in for a treat! Our collection of tartlet recipes offers a diverse range of flavors and styles, perfect for any occasion. From classic citrus delights to rich, nutty creations, there’s a tartlet for every palate. Dive into these other favorites:
- Bright & Tangy Lemon Curd Tartlets
- Sweet & Fruity Raspberry Frangipane Tartlets
- Classic Strawberry Custard Tartlets
- Elegant Pear Frangipane Tartlets
- Colorful Mini Fruit Tarts with Pastry Cream
- Irresistible Salted Caramel Tartlets
- Decadent Mini Chocolate Caramel Tarts
- Rich Mini Butterscotch Tartlets
Made this recipe?
We’d love to hear from you! Let us know if you enjoyed it by leaving a comment below, and don’t forget to tag us on Instagram @a.baking.journey with a photo of your delightful creation!
Recipe

Chocolate Orange Tartlets
Print Recipe
Ingredients
Tartlet Shells
- 250 gr (1 2/3 cup) Plain / AP Flour
- 50 gr (1/2 cup) Icing Sugar, or powdered sugar
- 1 pinch Table Salt
- 120 gr (1/2 cup) Unsalted Butter, very cold, cut into small cubes
- 1 Egg, preferably cold
Orange Curd Filling
- 4 Egg Yolks
- 50 gr (4 tablesp.) Caster Sugar, or fine white granulated sugar
- 120 ml (1/2 cup) Orange Juice, freshly squeezed, from about 3 medium oranges
- 1 Orange Zest, from a medium-sized orange
- 1 tablesp. Cornstarch
- 75 gr (5 tablesp.) Unsalted Butter, cubed, room temperature
Chocolate Ganache
- 70 gr (2.5 oz) Dark Cooking Chocolate, good quality, 70% cocoa or to taste, finely chopped or callets
- 70 ml (1/4 cup + 2 teasp.) Heavy / Thickened Cream, at least 35% fat
Instructions
Tartlet Shells
- In the bowl of your food processor, combine the Plain / AP Flour, Icing Sugar, and Table Salt. Pulse briefly to ensure they are well mixed (refer to note 1 if preparing the pastry by hand). Add the very cold Unsalted Butter, cut into small cubes, and pulse until the mixture resembles fine breadcrumbs with no large pieces of butter remaining. This creates a tender, rather than flaky, crust texture.250 gr (1 2/3 cup) Plain / AP Flour, 50 gr (1/2 cup) Icing Sugar, 1 pinch Table Salt, 120 gr (1/2 cup) Unsalted Butter
- Add the cold Egg (you can lightly whisk it first). Pulse the food processor slowly and briefly until the dough just begins to come together in a rough mass, without overworking it. To test for proper consistency, press some dough between your fingers – it should stick together without being too crumbly or sticky (see note 2 for troubleshooting).1 Egg
- Remove the dough from the bowl and gently form it into a ball. Place it between two sheets of baking paper and roll it out into a large, even disk about 3mm (1/8 inch) thick. Transfer the dough (still between paper) to a flat tray and refrigerate for at least 1 hour, or up to 24 hours. This chilling step is vital to prevent shrinkage during baking.
- Once chilled, remove the top sheet of baking paper. Using a round or fluted cookie cutter, cut out small disks of pastry. The width of your cutter should be at least as wide as the opening of your muffin pan to create adequately deep tartlet shells (see note 3).
- Carefully slide each pastry disk into an opening of the muffin pan. Gently press the pastry into the bottom and sides to eliminate any air bubbles and ensure it adheres to the pan. Prick the bottom of each tartlet shell several times with a fork to prevent it from puffing excessively. Return the muffin pan to the fridge to chill for at least another hour, or up to 24 hours.
- Preheat your oven to 160°C (325°F). Place the muffin pan in the freezer while the oven preheats; this helps the pastry hold its shape. Line each tartlet shell with a small piece of crumpled baking paper and fill with baking weights (such as ceramic beads, dry beans, or rice). Bake for 15 minutes. Carefully remove the weights and baking paper, then bake for another 15 minutes, or until the crusts are golden brown and dry to the touch. Let the shells cool completely in the pan before carefully removing them.
Orange Curd Filling
- In a small saucepan, combine the Orange Juice & Zest, Egg Yolks, Caster Sugar, and Cornstarch. Whisk continuously until well blended. Place the saucepan over very low heat. Continue stirring constantly for 3 to 5 minutes, until the sugar has fully dissolved and the mixture begins to thicken slightly. Avoid high heat to prevent scrambling the eggs.4 Egg Yolks, 50 gr (4 tablesp.) Caster Sugar, 120 ml (1/2 cup) Orange Juice, 1 Orange Zest, 1 tablesp. Cornstarch
- Gradually add the cubed Unsalted Butter, a little at a time, stirring continuously until each addition is fully melted before adding more. Continue to cook on low heat for a few more minutes, still stirring constantly, until the orange curd has noticeably thickened to a custard-like consistency (see note 4 for doneness test). Strain the curd immediately through a fine-mesh sieve into a clean bowl to remove any potential lumps or cooked zest, ensuring a perfectly smooth filling.75 gr (5 tablesp.) Unsalted Butter
- Pour the warm orange curd into the cooled tartlet shells, filling them almost to the top. Gently tap each tartlet on a hard surface to release any air bubbles and smooth the surface. Place the filled tartlets in the fridge to set for at least 2 hours, or ideally overnight, until the curd is completely firm.
Chocolate Ganache
- Ensure your Dark Cooking Chocolate is finely chopped or use chocolate callets, then place it in a large, heat-proof mixing bowl.70 gr (2.5 oz) Dark Cooking Chocolate
- Heat the Heavy / Thickened Cream in a small pot until it just begins to simmer (small bubbles form around the edges). Pour half of the hot cream directly over the chopped chocolate in the bowl. Let it sit undisturbed for 2 to 3 minutes to allow the chocolate to melt. Then, using a stiff spatula, begin stirring gently from the center of the bowl in small circular movements, gradually expanding to the edges until the chocolate and cream are mostly combined (see note 5).70 ml (1/4 cup + 2 teasp.) Heavy / Thickened Cream
- Pour the remaining hot cream over the ganache (reheat it briefly if it’s no longer hot) and continue stirring in circular movements until all the chocolate has melted and you achieve a perfectly smooth, glossy ganache (see note 6 for troubleshooting unmelted chocolate).
- Transfer the still-warm ganache into a piping bag (or use a spoon for a rustic look). Cut off the tip of the piping bag and pipe the ganache over the set orange curd, filling the tartlets. Gently tap each tartlet on the counter to help the ganache spread evenly and remove any air bubbles. Alternatively, for a different presentation, you can simply drizzle the chocolate over the curd (see note 7).
- Place the finished tartlets back in the fridge to set for at least 1 hour, or until the ganache is firm.
- Before serving, you can optionally decorate your tartlets with dehydrated orange slices, a sprinkle of fresh orange zest, or elegant chocolate shavings/curls. For the best possible texture and flavor, allow the tartlets to sit at room temperature for approximately 30 minutes before indulging.
Would you like to save this recipe?
We’ll email this post to you, so you can come back to it later!
Notes
Yield: This recipe typically yields around 18 mini tartlets. However, the exact number can vary slightly depending on how thinly you roll your pastry dough and the diameter of the cookie cutter you use for the shells. I rolled the pastry to approximately 3mm (1/8 inch) thick and utilized a standard muffin pan for this batch.
For more in-depth information, detailed step-by-step guidance, essential tips, and troubleshooting advice regarding the two core components of this recipe, I encourage you to consult my dedicated recipes for Mini Tart Shells and Orange Curd. These resources provide comprehensive instructions to ensure your success.
Instruction Notes:
- If you don’t own a food processor, rest assured you can still make this delicious pastry by hand or using a pastry blender. You’ll find detailed, step-by-step instructions on how to prepare the dough by hand here.
- It’s crucial to avoid over-mixing the pastry dough. Stop processing or kneading as soon as the ingredients come together to form a rough dough. A good test for readiness is to press a small lump of pastry between your hands; it should stick together without crumbling apart. If the dough seems too dry, add a tiny bit of very cold water (half a teaspoon at a time) until it binds. Conversely, if it’s overly sticky, incorporate a small amount more flour.
- The depth of your tartlet shells is largely determined by the diameter of the pastry circles you cut out. Feel free to adjust the size according to your preference, but I highly recommend ensuring the pastry circles are at least as wide as the openings of your muffin pan. Cutting them too small will result in shallow crusts that won’t hold enough filling.
- The precise cooking time for the orange curd will depend on the heat of your stove, typically ranging from 5 to 10 minutes after adding butter. It’s imperative that the curd never comes to a vigorous boil, as this risks scrambling the egg yolks. A very gentle simmer, however, is perfectly acceptable. To confirm the orange curd is fully cooked, you can either check its temperature (it should reach 82°C/180°F with a food thermometer) or use the spoon test: dip the back of a spoon or spatula into the curd, then draw a horizontal line across it with your finger. If the line remains clear and the curd doesn’t drip over it when you tip the spoon downwards, it’s ready. If it drips, continue cooking for another minute or two and retest.
- At this initial stage of making the ganache, it’s completely normal for the chocolate not to be fully melted. The goal is to gently warm the chocolate and start the emulsification process. Continue to mix carefully until the first half of the cream is fully incorporated into the melting chocolate, forming a somewhat thick and smooth paste.
- If you find that there are still small, unmelted chunks of chocolate in your ganache after adding the second half of the cream and stirring thoroughly, there are two effective ways to fix this. You can either place the bowl over a double boiler (a bowl set over a saucepan of simmering water, ensuring the bowl does not touch the water) and stir until smooth, or you can microwave it in very short intervals (no longer than 15-20 seconds at a time), stirring vigorously after each interval until the ganache is perfectly smooth and shiny. Be careful not to overheat.
- If the chocolate ganache begins to harden or become too thick to work with before you’ve finished assembling all your tartlets, you can gently re-warm it. A brief stint over a double boiler or a few seconds in the microwave (stirring well) will restore its fluid consistency, making it much easier to pipe or spread smoothly over the orange curd.
Nutrition (per serving)
