Irresistible Baked Apple Crumble Cheesecake: Your Ultimate Fall and Holiday Dessert
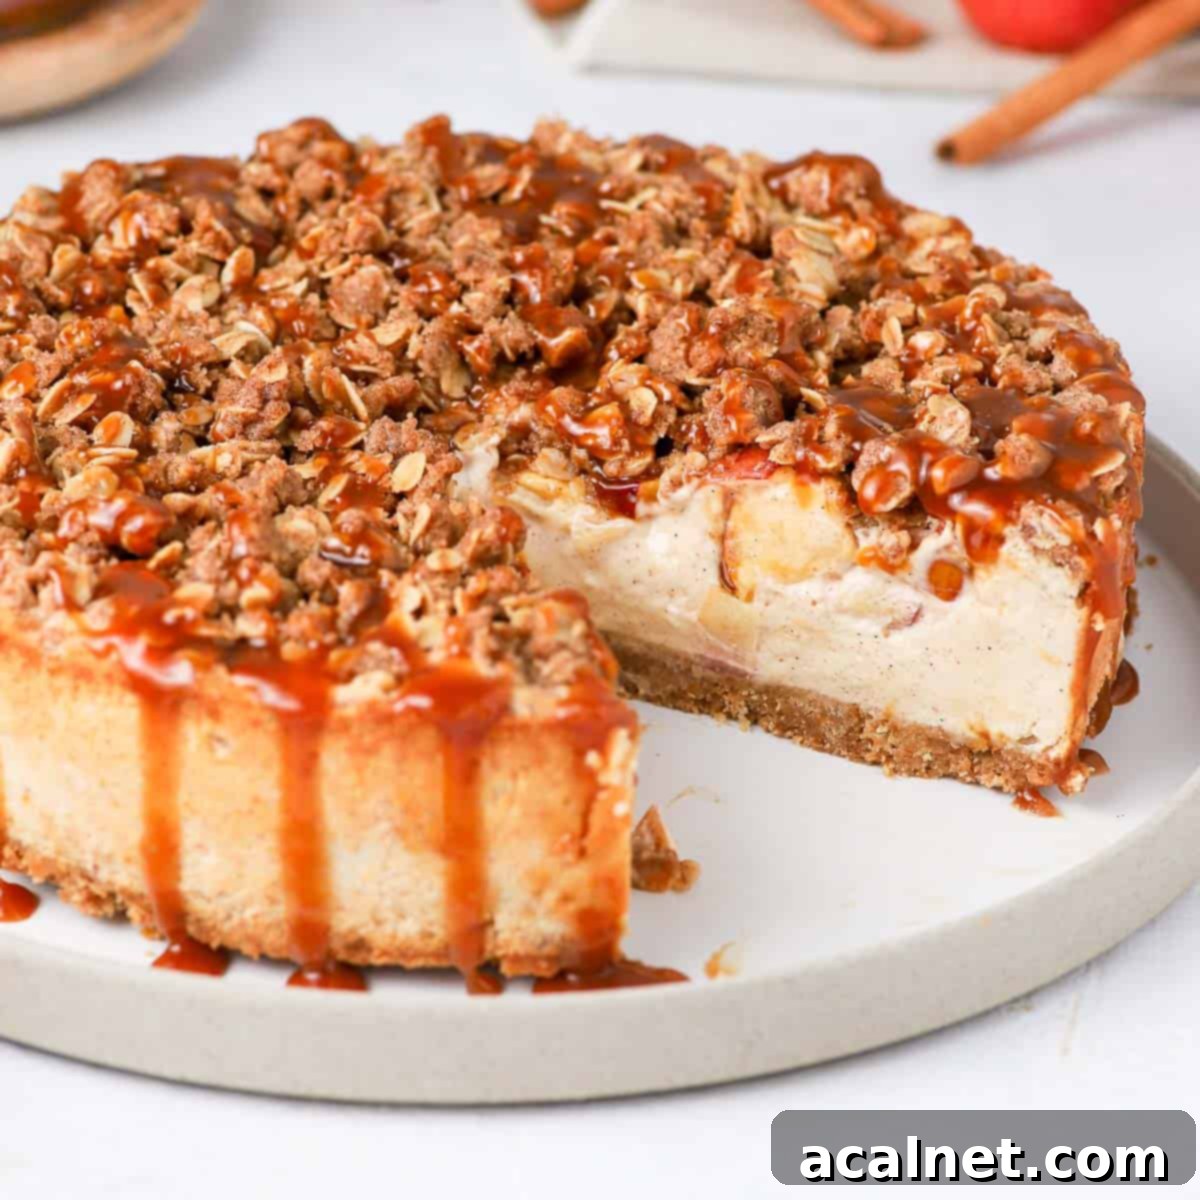
Prepare to delight your senses with this Apple Crumble Cheesecake – a truly decadent dessert that expertly marries the comforting flavors of a classic apple crumble with the luxurious creaminess of a baked cheesecake. This masterpiece features a simple yet perfectly crisp cookie crust, a luscious cinnamon-spiced cheesecake filling studded with tender apple chunks, all crowned with a golden, crunchy oat crumble. It’s not just a dessert; it’s an experience, offering a harmonious blend of textures and the quintessential tastes of autumn and the festive season.
[feast_advanced_jump_to]
Why You’ll Adore This Apple Crumble Cheesecake Recipe
Ever found yourself in a delicious dilemma, torn between the comforting warmth of an apple crumble and the silky indulgence of a classic baked cheesecake? You’re not alone! This Baked Apple Crumble Cheesecake is the quintessential solution, offering the very best of both beloved desserts in one spectacular creation. It’s a dessert that truly has it all, delivering an unforgettable culinary experience with every bite.
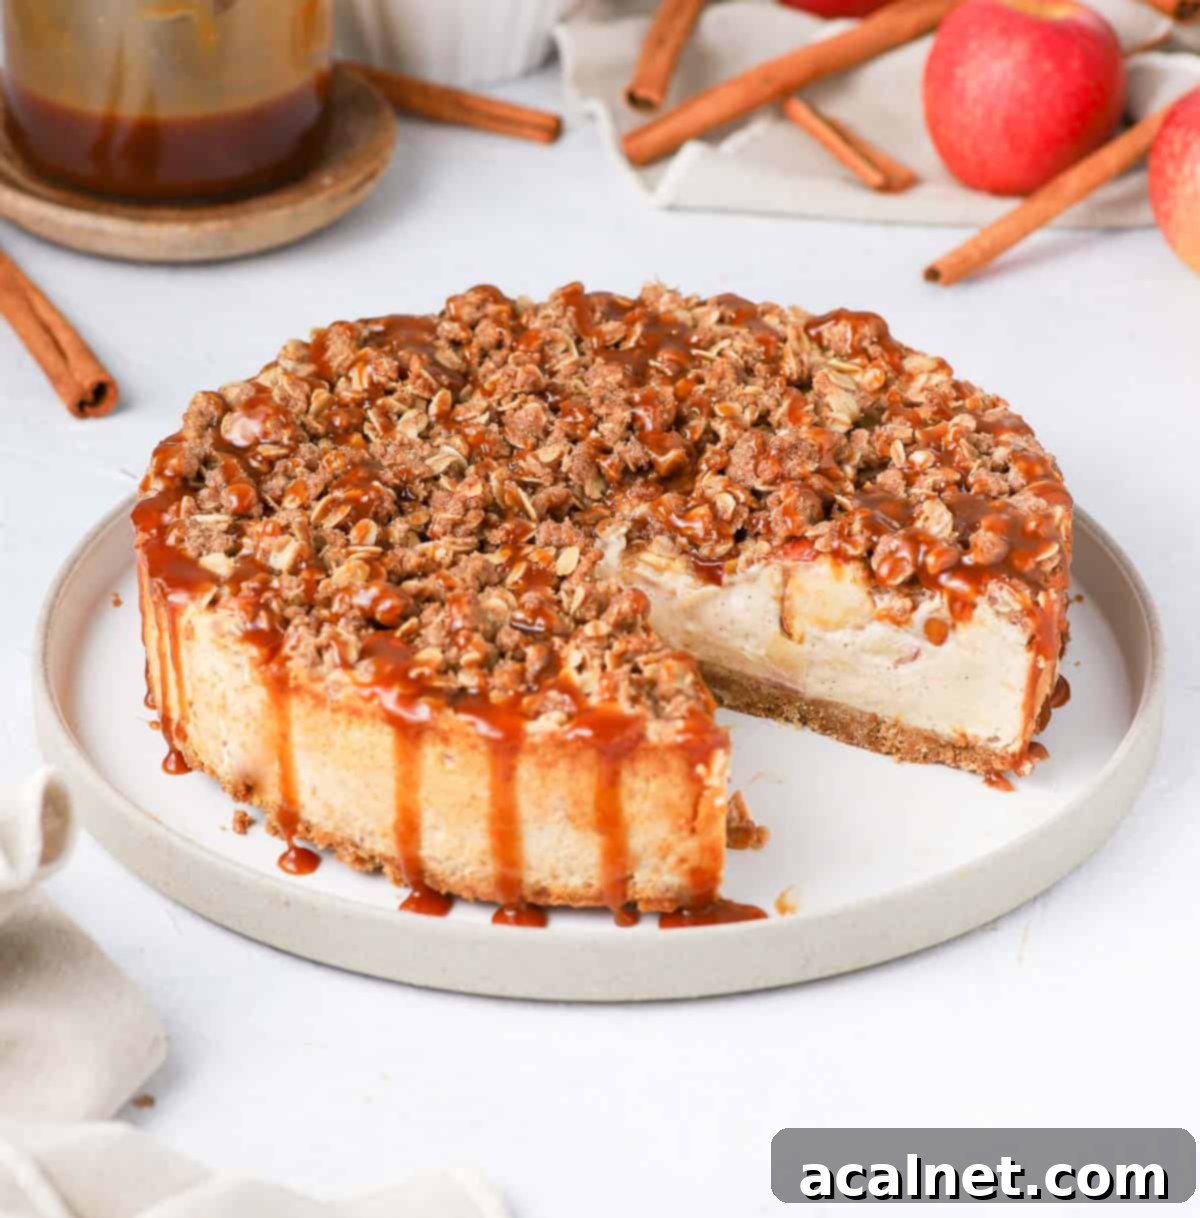
What makes this apple crisp cheesecake so special? It’s the delightful symphony of textures and flavors. Imagine a smooth, rich apple cinnamon cheesecake filling that melts in your mouth, perfectly balanced with the gentle tang of tender apple pieces. This creamy layer rests upon a sturdy, subtly sweet digestive biscuit crust, providing a satisfying foundation. And then there’s the crowning glory: a crispy, golden spiced oat crumble topping, offering a delightful crunch that contrasts beautifully with the soft interior. The warm notes of cinnamon, combined with the fresh apples and creamy cheese, make this dessert the epitome of fall flavors and a perfect addition to any festive table.
Beyond its incredible taste and texture, this apple crumble cheesecake is also a fantastic choice for various occasions. Whether you’re looking for an impressive dessert for the holiday season, a comforting treat for a cozy evening, or simply a decadent way to elevate an everyday meal, this recipe fits the bill. It’s designed to impress without being overly complicated, making it a reliable choice for bakers of all skill levels. The combination of classic flavors and a unique presentation ensures it will be a showstopper at any gathering, earning you rave reviews.
Explore More Delicious Cheesecake Recipes:
- Coffee Cheesecake
- Mini Lemon Cheesecakes
- Lemon Ricotta Cheesecake
- Baked Biscoff Cheesecake
- Mini Blueberry Cheesecakes
- Passion Fruit Cheesecake
- No Bake Biscoff Cheesecake
- Chocolate Orange Cheesecake
Essential Ingredients for Your Apple Crumble Cheesecake
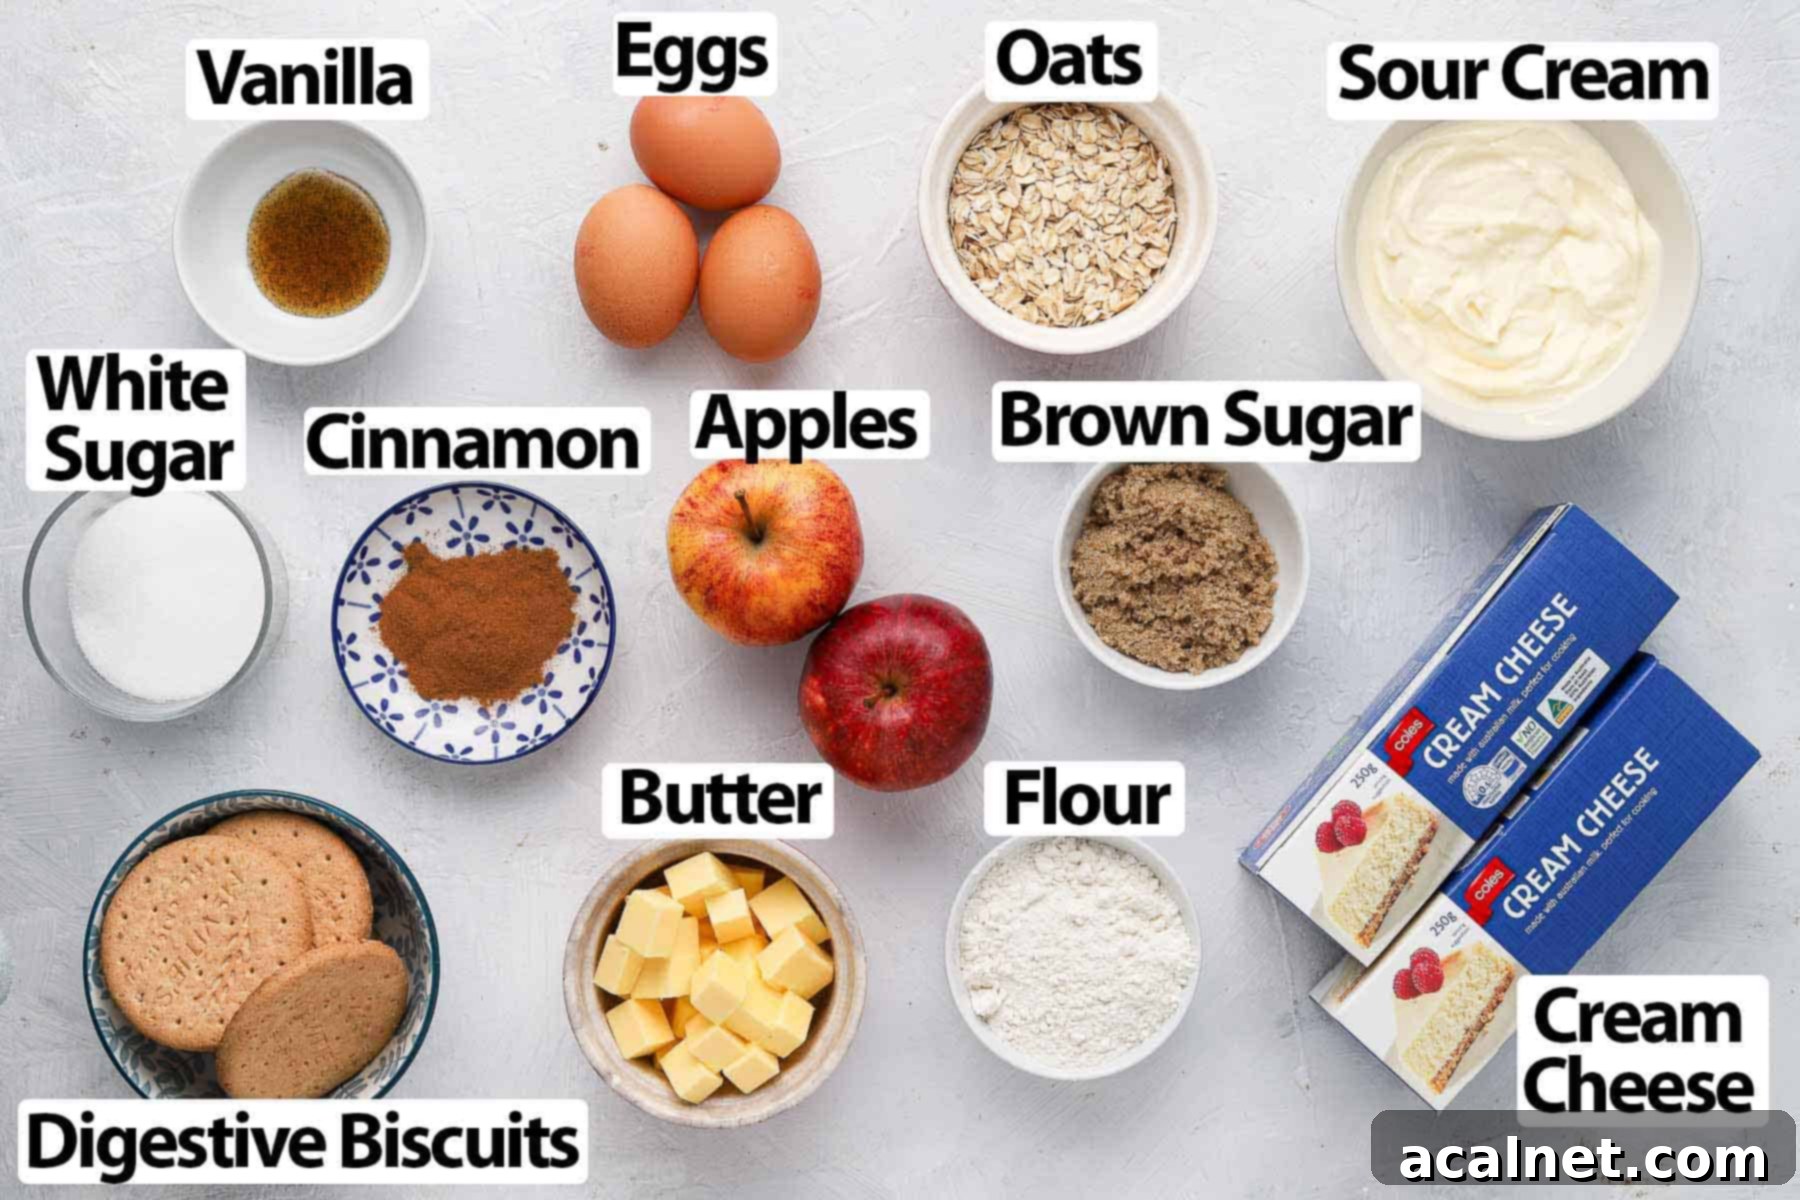
Crafting this incredible Apple Crumble Cheesecake involves three distinct yet perfectly harmonized layers, each contributing to the dessert’s overall appeal. Using high-quality ingredients and ensuring they are at the correct temperature is key to achieving the best results. (For precise quantities, please refer to the comprehensive recipe card below.)
For the Golden Cookie Crust:
- A straightforward blend of crushed Digestive Biscuits and rich Melted Butter forms the foundation. Digestive biscuits create a perfectly crisp and buttery base, but feel free to experiment with other varieties like Graham Crackers, Biscoff cookies, or even gingerbread for a holiday twist. The melted butter binds the crumbs, ensuring a firm, sliceable crust.
For the Creamy Apple Cinnamon Cheesecake Filling:
- Cream Cheese & Sour Cream: The cornerstone of any truly creamy cheesecake. It is absolutely crucial for both these ingredients to be at room temperature and very soft. If they are too cold, you’ll struggle to achieve a smooth, lump-free batter, which can affect the final texture of your cheesecake. Plan ahead and take them out of the fridge at least an hour before you begin baking.
- Eggs: Use medium to large-sized eggs, also at room temperature. For easier incorporation into the cheesecake batter and to further prevent lumps, you can lightly whisk them in a separate bowl before adding them one by one.
- Cinnamon: This warm, aromatic spice is directly mixed into the cheesecake batter, infusing it with that comforting fall flavor. Don’t hesitate to get creative with other spices! Consider adding a pinch of Cardamom, Nutmeg, or Ground Ginger for an even richer, more complex taste profile that truly evokes the spirit of the season.
- Apples: These provide a lovely textural contrast and a natural sweetness. I prefer to keep the peel on for an extra pop of color and rustic charm, but you can certainly peel them if that’s your preference. Ensure you core them and cut them into small, even cubes. The smaller the apple chunks, the softer and more integrated they will become within the creamy cheesecake layer, creating a delightful harmony.
- A touch of Vanilla Paste (or high-quality vanilla extract) further enhances the overall flavor profile, adding a subtle warmth and sweetness to the filling.
For the Irresistible Crumble Topping:
- This crunchy topping is a classic blend of Plain / All-Purpose Flour, moist Brown Sugar, chilled Butter (which creates the crumbly texture), hearty Rolled Oats (for an extra layer of crunch and nuttiness), and fragrant Ground Cinnamon. While the oats are optional, they significantly contribute to the desired texture and visual appeal of the streusel.
- To add another dimension of flavor and texture, consider incorporating some finely chopped walnuts or pecans into the crumble mixture. These nuts toast beautifully in the oven, imparting a wonderful depth and crunch.
Step-by-Step Guide: How to Bake the Perfect Apple Crumble Cheesecake
Creating this layered dessert is a straightforward process when approached systematically. Follow these steps for a beautifully crafted and delicious Apple Crumble Cheesecake.
Crafting the Perfect Cookie Base
The first crucial step is to prepare the sturdy and flavorful crust. This component can easily be made in advance and chilled in the refrigerator for a few hours, allowing you to manage your baking time efficiently.
- Begin by preparing your 22 cm / 9 inch springform pan. Line the bottom with a circle of baking or parchment paper, then lightly grease the sides to prevent sticking and ensure easy release later.
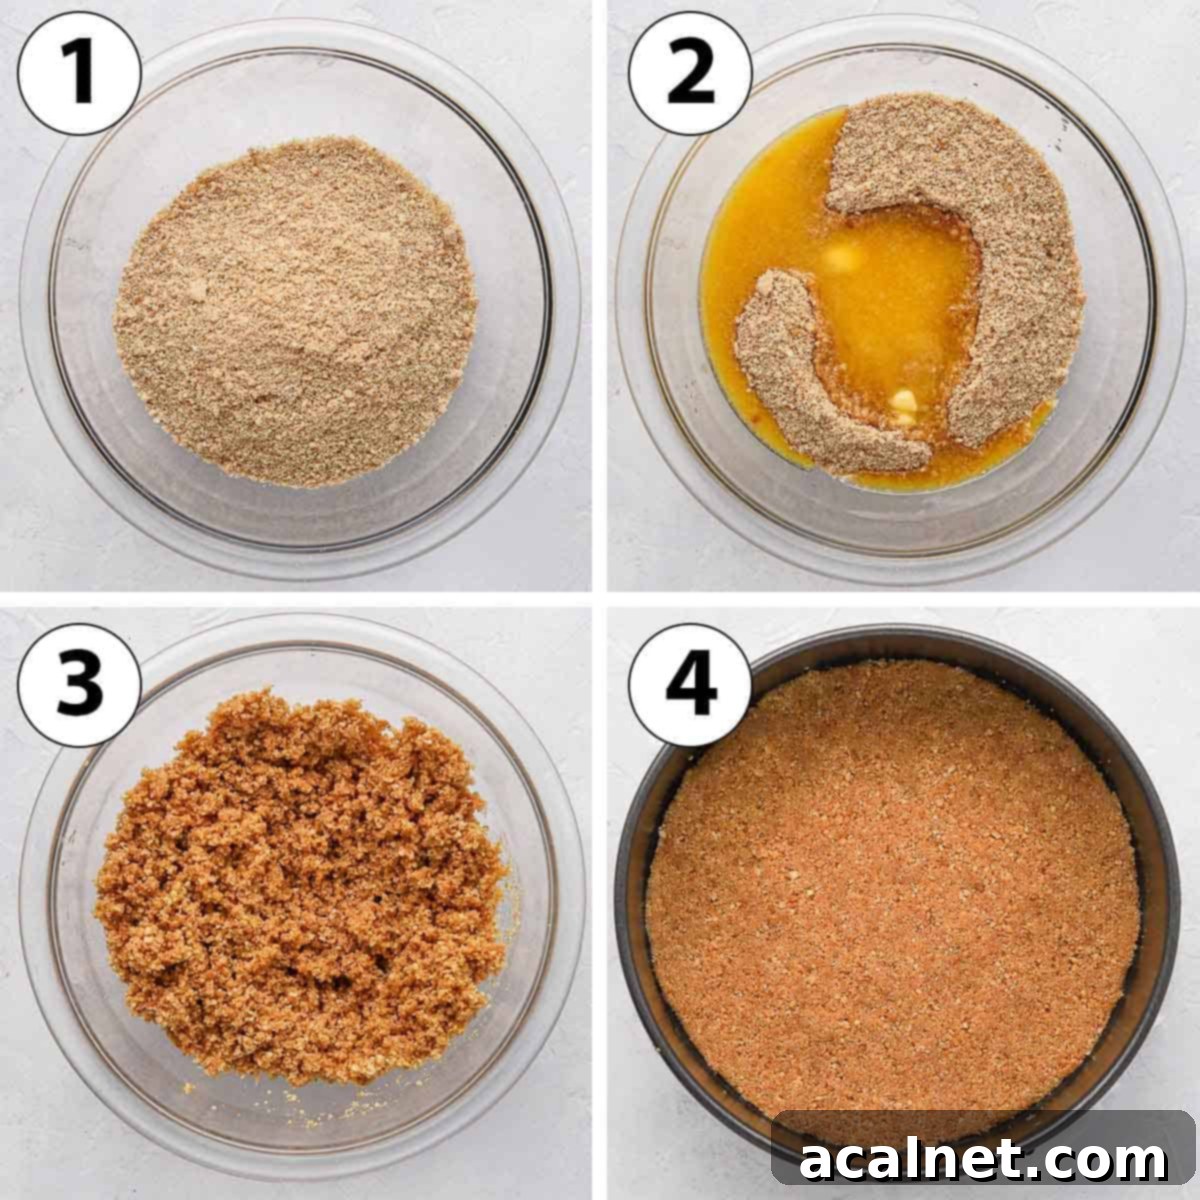
- Photo 1: Take your chosen biscuits (Digestive biscuits are ideal) and crush them into fine crumbs. A food processor makes this task incredibly quick and easy, simply pulsing the cookies until uniformly fine. Alternatively, you can place them in a freezer bag and crush them with a rolling pin for a more rustic approach.
- Photo 2: Once the crumbs are ready, melt your unsalted butter. Pour the warm, melted butter evenly over the biscuit crumbs.
- Photo 3: Using a spatula or your hands, thoroughly mix the crust ingredients until the crumbs are completely coated in butter and resemble wet sand. This ensures proper binding.
- Photo 4: Transfer the buttered crumbs to the prepared springform pan. Press them down firmly and evenly over the entire bottom surface. It’s important to press well to eliminate any loose crumbs and create a compact, stable base that won’t crumble when sliced. You can use the back of a cup, a flat-bottomed spoon, or a small offset spatula to achieve a perfectly smooth and tight crust. Place the pan in the fridge to chill while you prepare the other elements.
Preparing the Apple and Crumble Topping
Next, we’ll get the delicious, crunchy topping and the fresh apple pieces ready. Just like the crust, these elements can be prepared ahead of time and stored in an airtight container in the fridge for convenience.
- Preheat your oven to 140°C/285°F. It’s important to set the rack on the lowest part of your oven, which helps the cheesecake bake evenly without over-browning the top too quickly.
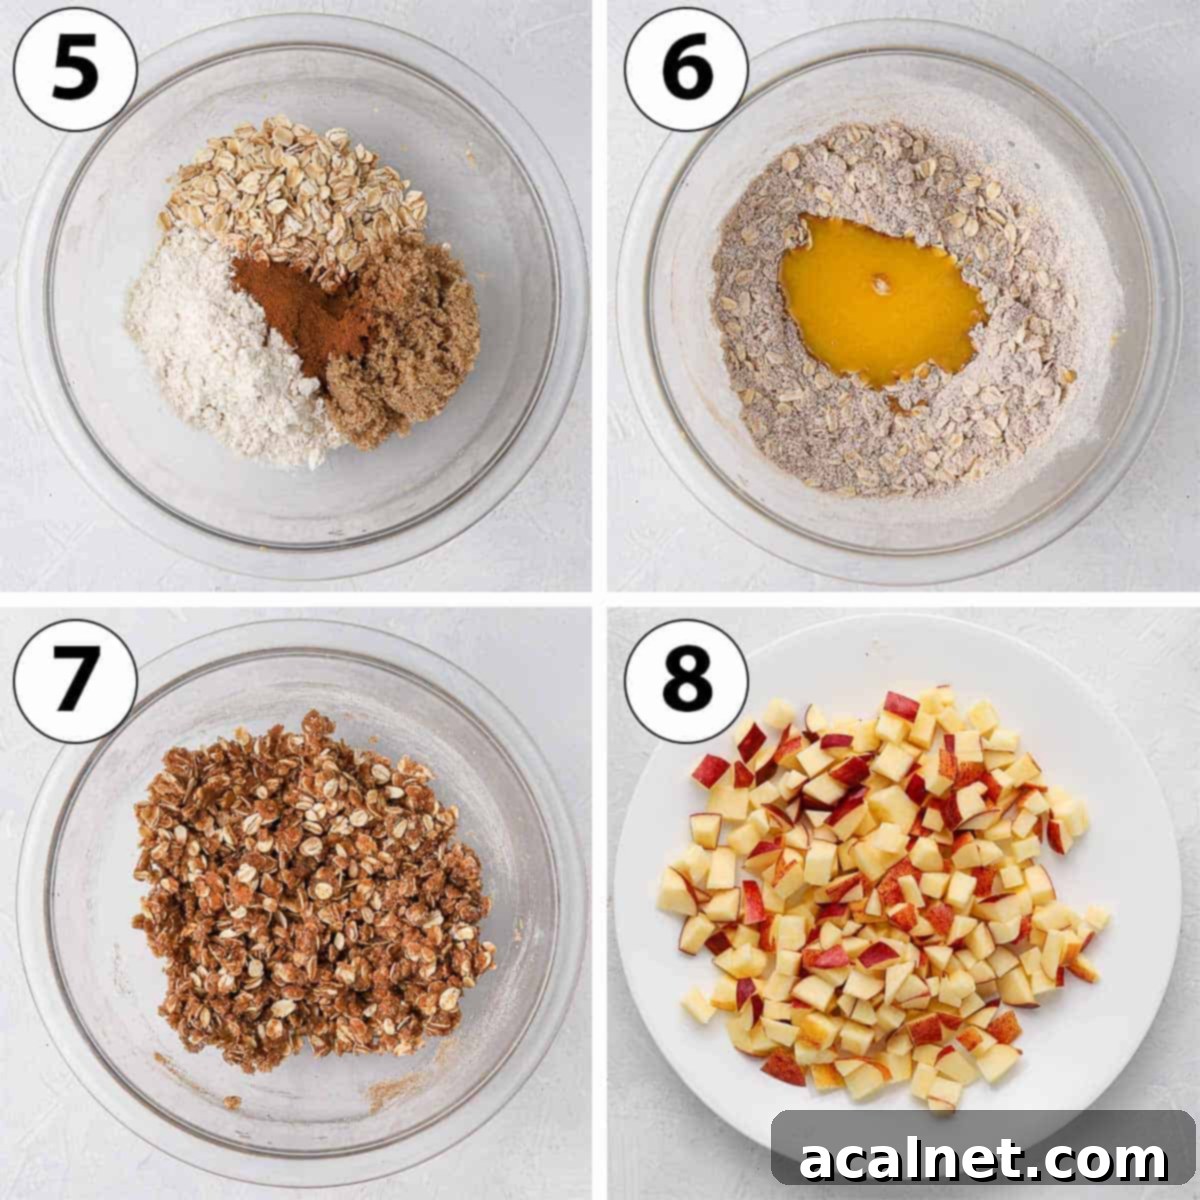
- Photo 5: In a large mixing bowl, combine the all-purpose Flour, Rolled Oats, Brown Sugar, and Ground Cinnamon. Whisk them together thoroughly to ensure the spices are evenly distributed.
- Photo 6: Pour the melted butter over the dry ingredients.
- Photo 7: Using a spatula or your fingertips, gently mix the ingredients until large, cohesive crumbs form. All the dry components should be well-coated with butter. Avoid overworking the mixture; you want distinct crumbs, not a paste. Set this aside, or if preparing in advance, store it in the refrigerator.
- Photo 8: Wash and core your apples. Then, cut them into small, even cubes. As mentioned earlier, keeping the peel on provides a beautiful visual and some extra nutrients, but you can remove it if you prefer. Setting the apples aside until needed will prevent them from browning.
Crafting the Silky Cinnamon Cheesecake Layer
Now it’s time to create the star of the show – the creamy, spiced cheesecake filling. Remember, room temperature ingredients are your best friend here!
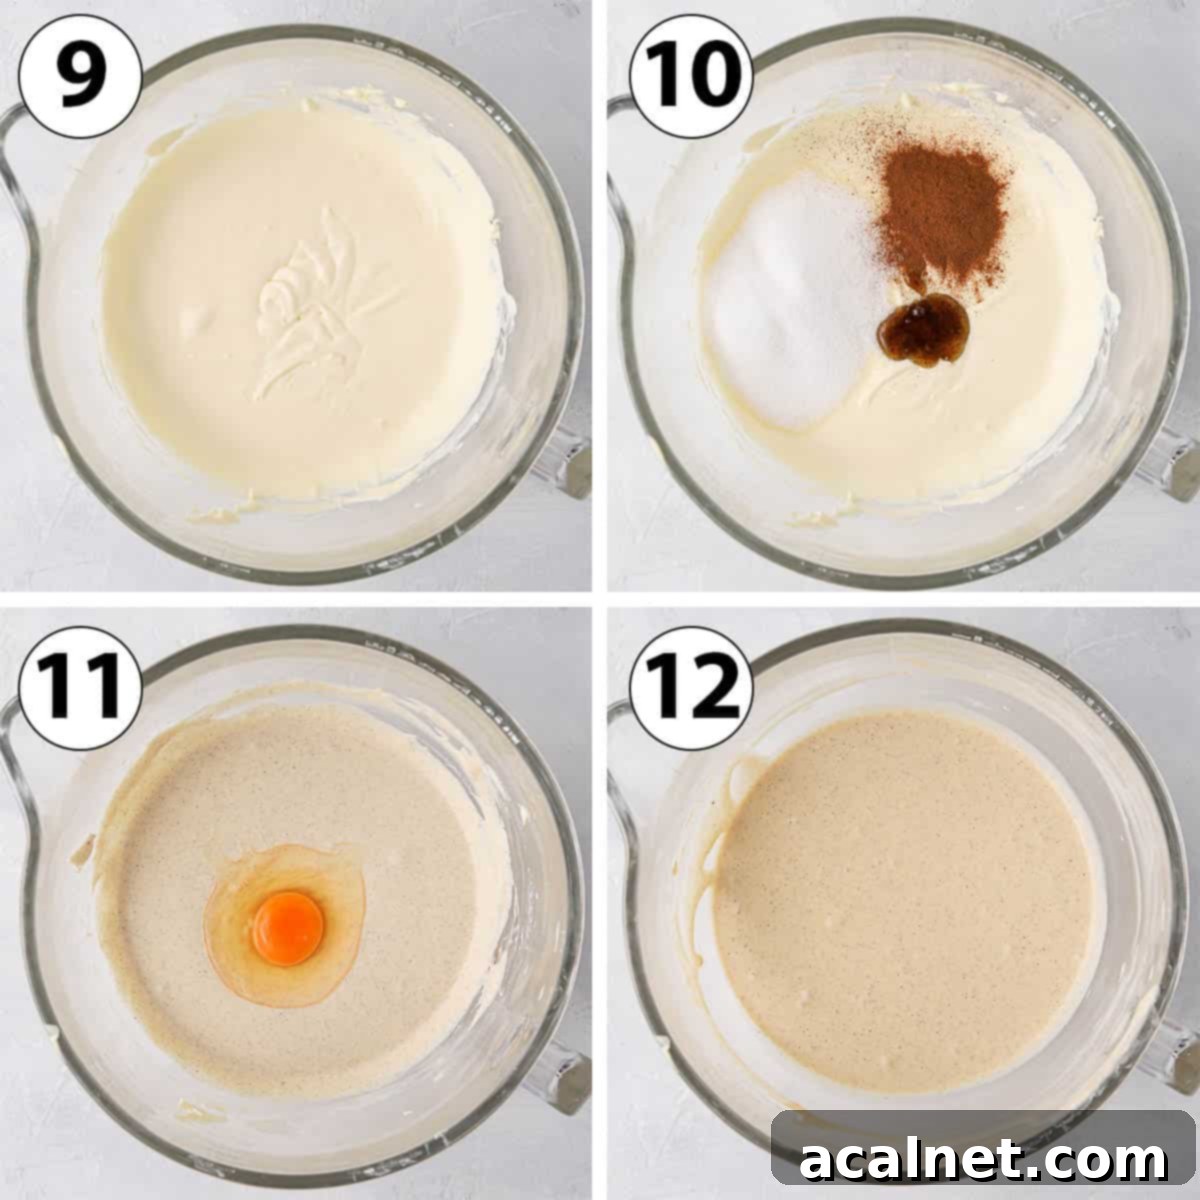
- Photo 9: In the bowl of a stand mixer fitted with the paddle attachment (or a large bowl if you’re using an electric hand mixer), combine the softened Cream Cheese and Sour Cream. Beat them together on medium speed for several minutes until the mixture is completely smooth, airy, and free of any lumps. This step is critical for achieving that signature silky cheesecake texture.
As emphasized before, ensuring both cream cheese and sour cream are at room temperature is paramount. Cold ingredients will resist blending, resulting in a lumpy batter that won’t bake as smoothly.
- Photo 10: Reduce the mixer speed to low, then add the Sugar, a generous sprinkle of Cinnamon, and the Vanilla paste (or extract). Mix just until these ingredients are fully combined. Avoid over-mixing at this stage.
- Photo 11: Add the room temperature eggs one at a time, mixing only until each egg is just incorporated. The key here is to avoid over-mixing. Excessive mixing introduces too much air into the batter, which can cause your cheesecake to puff up significantly in the oven and then tragically crack and collapse as it cools. Gentle mixing ensures a dense, creamy result.
- Photo 12: Continue mixing briefly until you have a smooth cheesecake batter. It will be quite fluid, which is perfectly normal for a baked cheesecake and contributes to its creamy texture.

Assembling and Baking Your Masterpiece
With all your delicious components prepared, it’s time for the exciting part: assembling the cheesecake and getting it ready for baking!
- Photo 13: Retrieve your springform pan with the chilled biscuit crust from the refrigerator. Carefully pour the smooth cinnamon cheesecake mixture evenly over the crust.
- Photo 14: Gently tap the baking pan a few times on a hard, flat surface. This helps to release any large air bubbles trapped in the batter, which can prevent cracks during baking.
- Photo 15: Now, arrange the cubed apples over the cheesecake batter. Distribute them gently and a little bit at a time. Be mindful not to apply too much pressure or place them too heavily, as the cheesecake batter is still soft, and the apples might sink to the bottom.
- Photo 16: Finally, generously sprinkle the streusel crumble topping evenly over the layer of apples, ensuring a delightful crunchy cover.
- Carefully place the assembled apple crumble cheesecake into your preheated oven, positioned on the lowest rack. Bake for approximately 60 to 70 minutes. The cheesecake is ready when the edges appear set, but the center still has a slight, delicate jiggle. Don’t worry, it will continue to firm up as it cools.
If you notice the crumble topping is browning too quickly during baking, simply reduce the oven temperature slightly or loosely cover the top of the cheesecake with aluminum foil to protect it. This ensures the crumble achieves a golden-brown finish without burning.
- Once baked, turn off the oven completely. Prop the oven door open slightly (a wooden spoon works perfectly to hold it ajar) and allow the cheesecake to cool down gradually inside the oven for about 1 hour. This slow cooling process is crucial for preventing cracks. After this, remove it from the oven and let it cool completely at room temperature for another hour. Finally, transfer the cheesecake to the refrigerator and chill for at least two to three hours, or ideally, overnight, to allow it to fully set and develop its incredible flavors.
Apple Crumble Cheesecake: Your Questions Answered
Here are some common questions to help you perfect your Apple Crumble Cheesecake:
Absolutely! The beauty of a cookie crust is its versatility. While Digestive Biscuits provide a fantastic neutral and buttery base, you can certainly experiment with other cookie varieties. Gingerbread cookies or Biscoff (Speculoos) biscuits, for example, would introduce wonderful spiced notes that beautifully complement the apple and cinnamon flavors. For a classic American touch, a Graham Cracker Crust is an excellent choice, though I recommend adding a little extra granulated sugar to the graham cracker crumbs as they are typically less sweet than digestive biscuits.
For this recipe, I found that Pink Lady apples offer a lovely balance of sweetness and a firm texture that holds up well during baking. However, you have several great options! If you prefer a tangier flavor to cut through the richness of the cheesecake, Granny Smith apples are an excellent choice. Gala apples are another good all-rounder, offering a sweeter and milder flavor. For more in-depth information and recommendations on choosing the perfect fruit, be sure to read my comprehensive guide on the best apples for baking.
One of the most appealing aspects of this particular baked cheesecake recipe is that it does not require a water bath! While water baths are often used to create a very smooth, crack-free surface on traditional cheesecakes, I’ve found that this recipe yields an equally delightful texture without the added hassle. Skipping the water bath simplifies the process while still producing a wonderfully creamy and perfectly baked cheesecake. The gentle oven temperature and slow cooling method ensure a tender crumb and minimal cracking, allowing you to enjoy a perfect baked cheesecake with less effort.
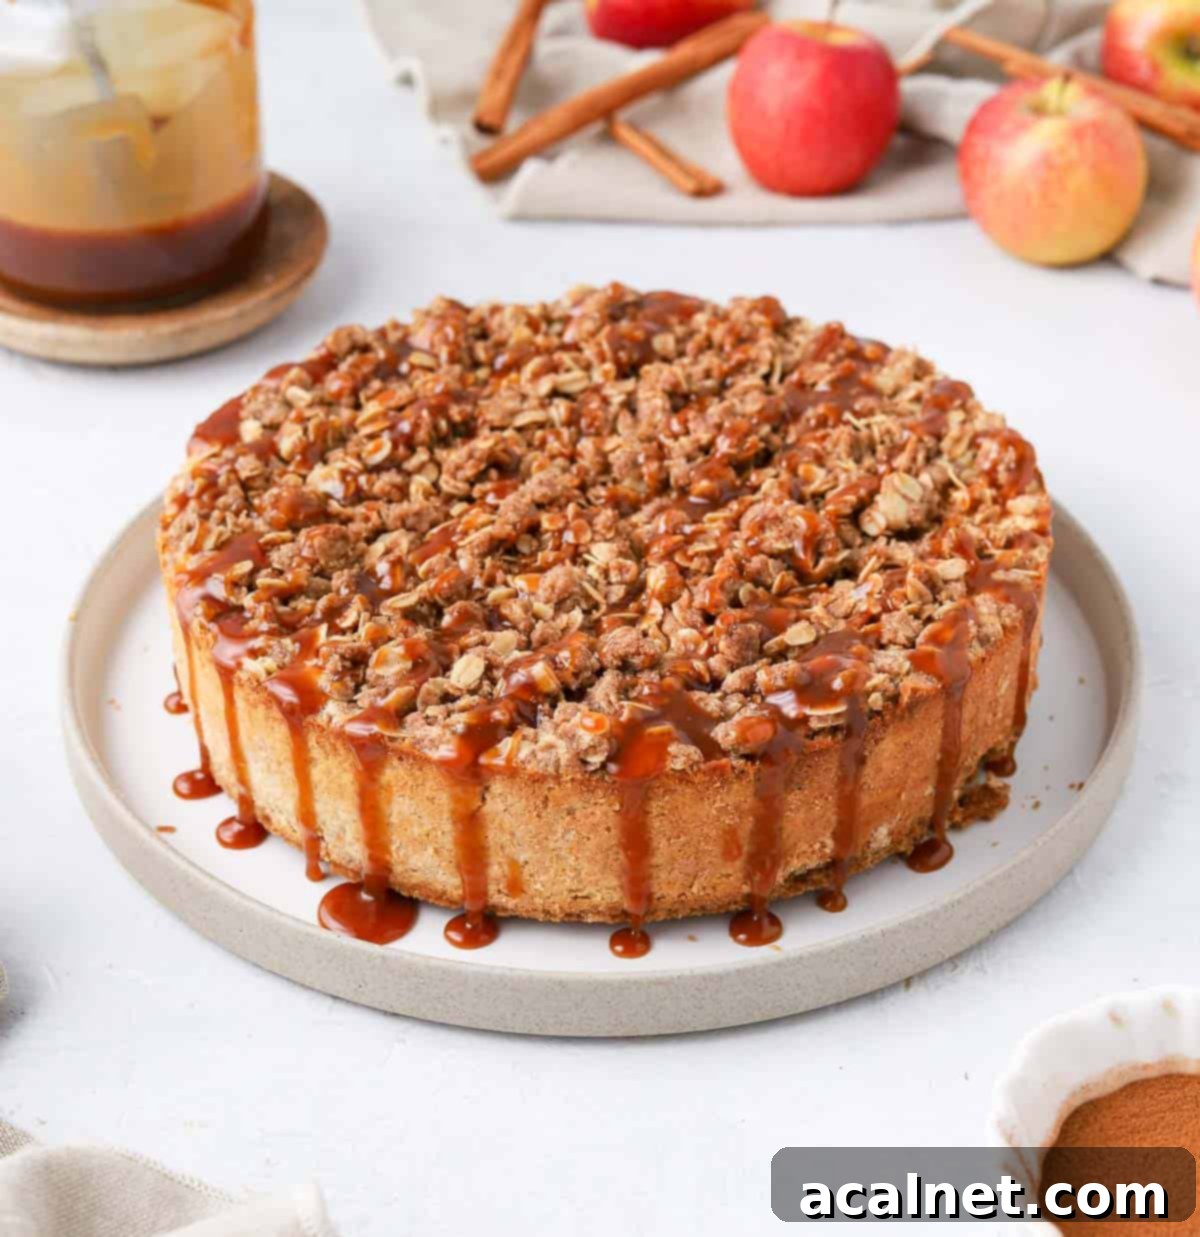
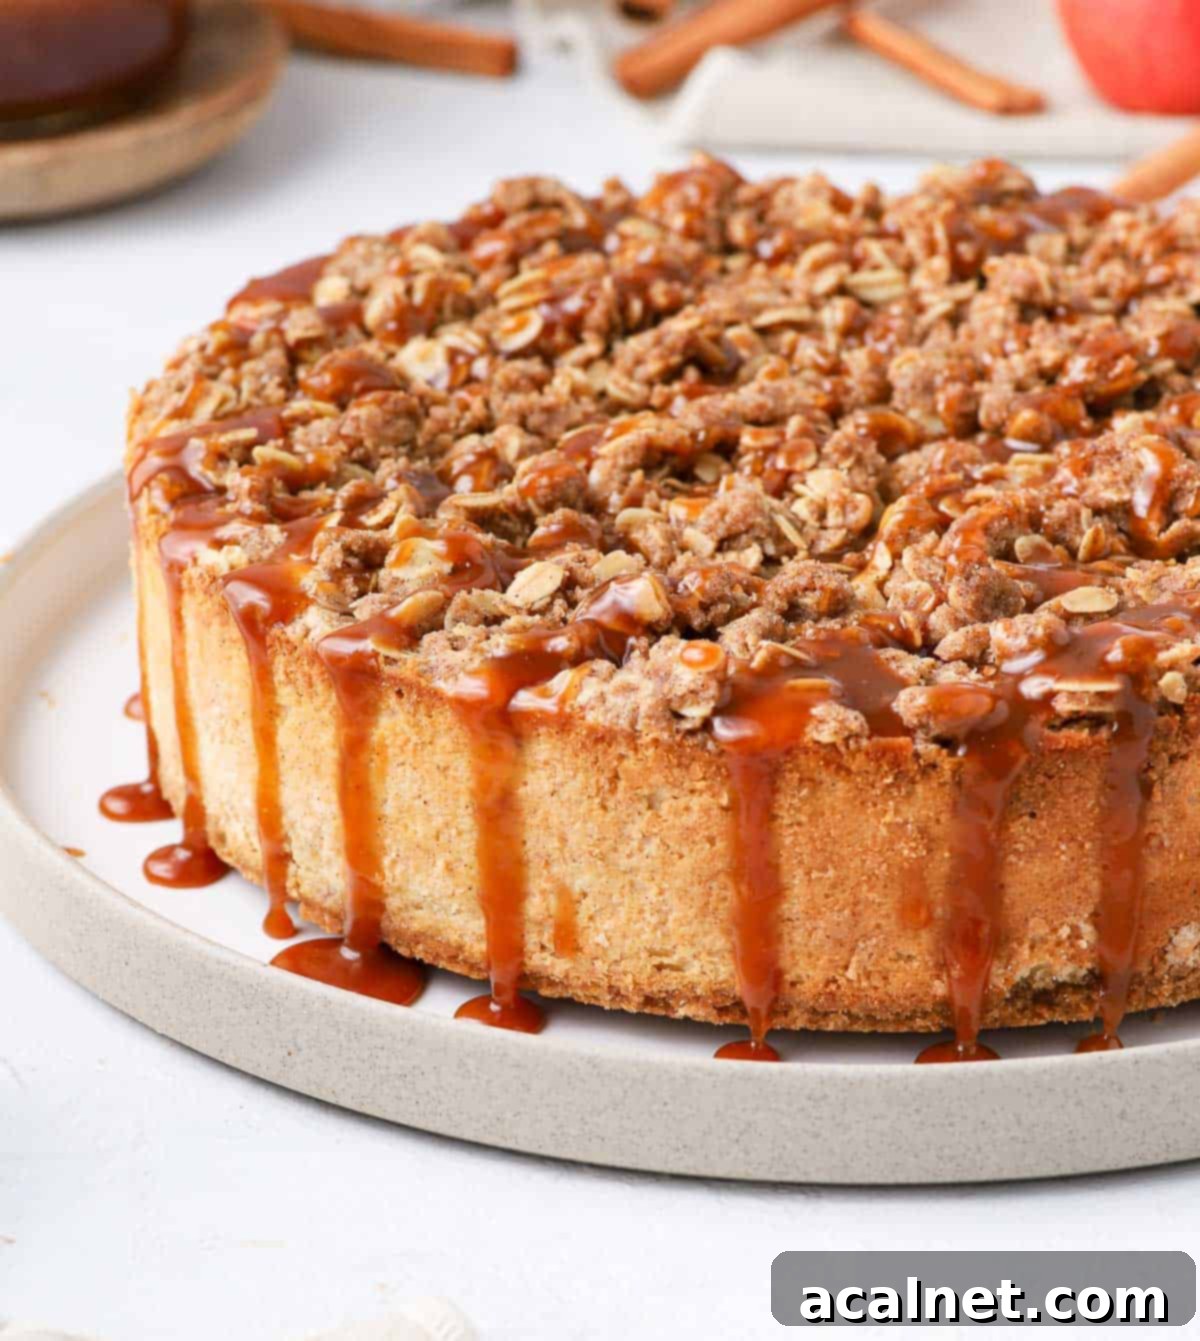
This cheesecake is absolutely divine on its own, but a few garnishes can truly elevate the experience. I personally love serving this cheesecake with a decadent drizzle of Salted Caramel Sauce, which creates a sensational “caramel apple cheesecake” flavor profile and a beautiful presentation. It would also be incredibly delicious with a generous scoop of creamy vanilla ice cream, a dollop of freshly whipped cream, or for an extra fruity touch, some warm homemade applesauce. Don’t shy away from experimenting with your favorite toppings!
Expert Tips for Baking the Best Apple Crumble Cheesecake
Achieving a perfectly creamy, crack-free, and flavorful cheesecake is easier than you think with these expert tips:
- Room Temperature Ingredients are Key: This cannot be stressed enough! For the smoothest, lump-free cheesecake batter, ensure all cold ingredients, especially the Cream Cheese, Sour Cream, and Eggs, are at true room temperature. If your cream cheese is too cold, it will be impossible to achieve a uniformly smooth mixture, resulting in an undesirable lumpy texture.
- Do Not Over-mix the Batter: Once you add the eggs, mix the cheesecake batter just until combined. Over-mixing incorporates too much air into the batter, which causes the cheesecake to rise rapidly in the oven. This rapid rise is often followed by a dramatic collapse and cracking as the cheesecake cools, spoiling its smooth surface.
- Slow and Gentle Cooling Prevents Cracks: The secret to a beautiful, crack-free baked cheesecake lies in a slow, gradual cooling process. After baking, turn off the oven but leave the cheesecake inside with the oven door slightly ajar (a wooden spoon is perfect for this) for 30 to 60 minutes. This allows it to adjust to the temperature change slowly. Then, remove it from the oven and let it cool completely at room temperature for another hour before finally transferring it to the fridge. Chilling for at least 2-3 hours, or preferably overnight, ensures it sets perfectly and develops its full flavor.
- Prepare Crumble Topping in Advance: For added convenience, the delicious oat crumble topping can be prepared up to a couple of days ahead of time. Store it in an airtight container in the refrigerator until you’re ready to assemble your cheesecake. This is also a great opportunity to customize your crumble! Feel free to add a pinch of other warm spices like allspice or ginger, a handful of finely chopped nuts (like walnuts or pecans), or even a few dried cranberries for an extra burst of flavor and texture.
Storing & Freezing Your Apple Crumble Cheesecake
This Apple Crumble Cheesecake is actually best when made in advance, as it truly benefits from a long chilling period to fully set and for its flavors to meld beautifully. You can prepare it the day before your event and keep it stored in the refrigerator until it’s time to serve. It will maintain its delicious taste and texture for up to 3 days when properly stored in an airtight container in the fridge.
While some cheesecakes freeze well, I generally do not recommend freezing this particular dessert. The apple chunks and oat crumble topping may lose some of their ideal texture and crispness upon thawing, potentially compromising the overall experience that makes this cheesecake so special. For the best enjoyment, always serve it fresh and well-chilled.
More Irresistible Apple & Cinnamon Desserts
If you love the warm, comforting flavors of apple and cinnamon, you’ll definitely want to try these other delightful recipes:
- Apple Cinnamon Pull Apart Bread
- Baked Apples with Crumble Topping
- Apple Crumble Muffins
- Puff Pastry Apple Tartlets
- Apple Cinnamon Baked Oatmeal
- Apple and Blueberry Crumble
- Applesauce Crumb Cake
Made this recipe?
Let us know if you liked it by leaving a comment below, and tag us on Instagram @a.baking.journey with a photo of your creation!
Recipe Card

Apple Crumble Cheesecake
Print Recipe
Ingredients
Cookie Crust
- 180 gr (1 3/4 cup -crushed) Digestive Biscuits, crushed
- 90 gr (6 tablespoons) Unsalted Butter, melted
Crumble Topping
- 50 gr (1/3 cup) Plain / All-Purpose Flour
- 50 gr (1/2 cup) Rolled Oats
- 45 gr (4 tablespoons) Brown Sugar
- 1 teaspoon Ground Cinnamon
- 45 gr (3 tablespoons) Unsalted Butter, melted
Apple Cinnamon Cheesecake Filling
- 2 Small Apples, cubed
- 500 gr (18 oz) Cream Cheese, at room temperature
- 120 gr (1/2 cup) Sour Cream, at room temperature
- 80 gr (1/3 cup) Caster Sugar, or fine white granulated sugar
- 1 teaspoon Vanilla Paste, or vanilla extract
- 1 teaspoon Ground Cinnamon
- 2 large Eggs, at room temperature
Instructions
Cookie Crust
- Line the bottom of a 22 cm / 9 inch Springform Pan with Baking Paper and grease the edges.
- Crush the Digestive Biscuits into fine crumbs, either by hands in a small plastic bag or in the food processor. Add the melted Butter and mix until it looks like wet sand.
- Firmly press the biscuit crumbs on the bottom of the prepared pan then place in the fridge.
Crumble Topping
- Preheat your oven on 140°C/285°F.
- In a large mixing bowl, mix together the Flour, Rolled Oats, Brown Sugar and Ground Cinnamon. Pour over the Melted Butter then mix with a spatula until you get large crumbs. Set aside.
Apple Cinnamon Cheesecake Filling
- Wash and core the apples, then cut into small cubes (see note 1). Set aside.
- In the bowl of a stand mixer fitted with the paddle attachment (or large bowl if using a hand mixer), mix together the Cream Cheese and Sour Cream for a few minutes on medium speed until completely smooth (see note 2).
- Mix in the Sugar, Cinnamon and Vanilla then the Eggs one at the time. Mix until just combined (see note 3). The cheesecake batter will be quite liquid – that’s normal.
Assembling the Cheesecake
- Take the springform pan with the chilled crust out of the fridge and pour the cinnamon cheesecake mixture over it. Tap the pan over a hard surface a few times to remove any air bubbles.
- Place the cubed apples over the cheesecake mixture (see note 4), then top them with the crumble.
- Place the apple crumble cheesecake on the lowest rack of your oven and bake for 60 to 70 minutes. The cheesecake should still jiggle a little bit when fully baked.
- Turn off the oven and leave the cheesecake to cool down inside it with the door opened slightly for 1 hour. Take it out of the oven and leave to cool down at room temperature for 1 other hour, then in the fridge for at least two to three hour, or preferably overnight.
Would you like to save this recipe?
We’ll email this post to you, so you can come back to it later!
Notes
- I kept the peel but you can remove it if preferred.
- It is really important for the two ingredients to be at room temperature or you won’t get a smooth mixture and get lumps in the batter.
- You want to avoid over-mixing at this point or you risk adding a lot of air into the batter, which will make the cheesecake rise then collapse in the oven.
- Add the apples a little bit at the time as you don’t want to put too much weight on the soft cheesecake batter, which might make the apples sink.
Nutrition (per serving)
