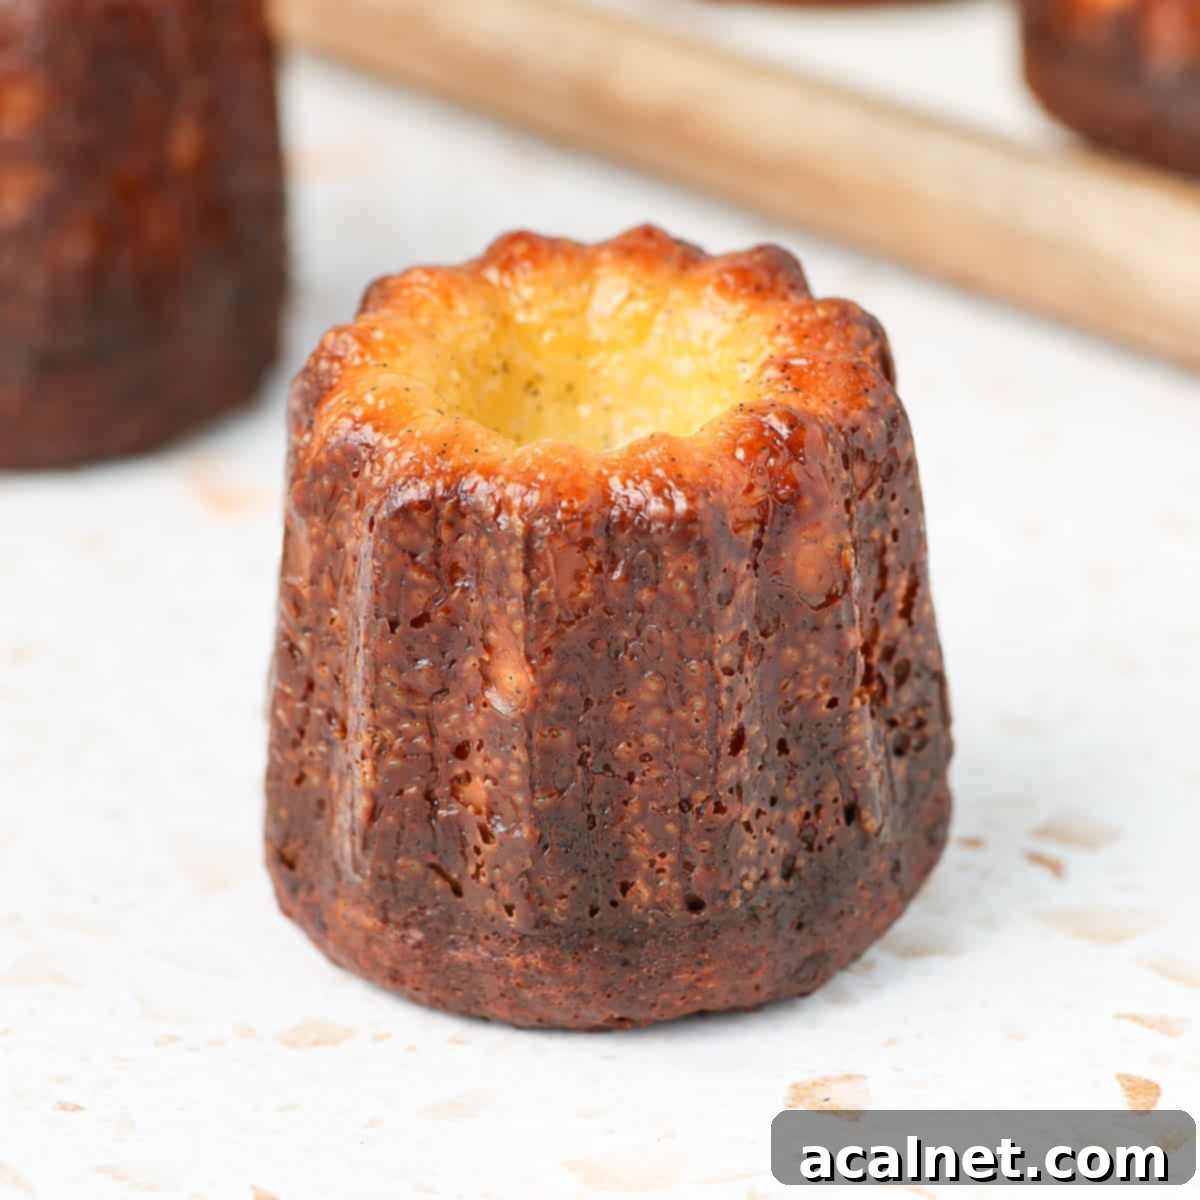
Authentic French Cannelés de Bordeaux Recipe: Achieving the Perfect Crispy Crust and Custardy Center
Welcome to the exquisite world of Cannelés, a classic French pastry that captivates with its remarkable contrasts. Often spelled Canelés, these delightful individual cakes are famed for their deeply caramelized, irresistibly crispy exterior, which beautifully encases a wonderfully soft, moist, and perfectly baked custard center. Each bite is a symphony of textures and flavors, boasting rich notes of fresh vanilla bean and a subtle, sophisticated hint of spiced rum. Originating from the Bordeaux region, Cannelés are more than just a dessert; they are a culinary experience that transports you straight to a Parisian patisserie with their unique charm and unforgettable taste.
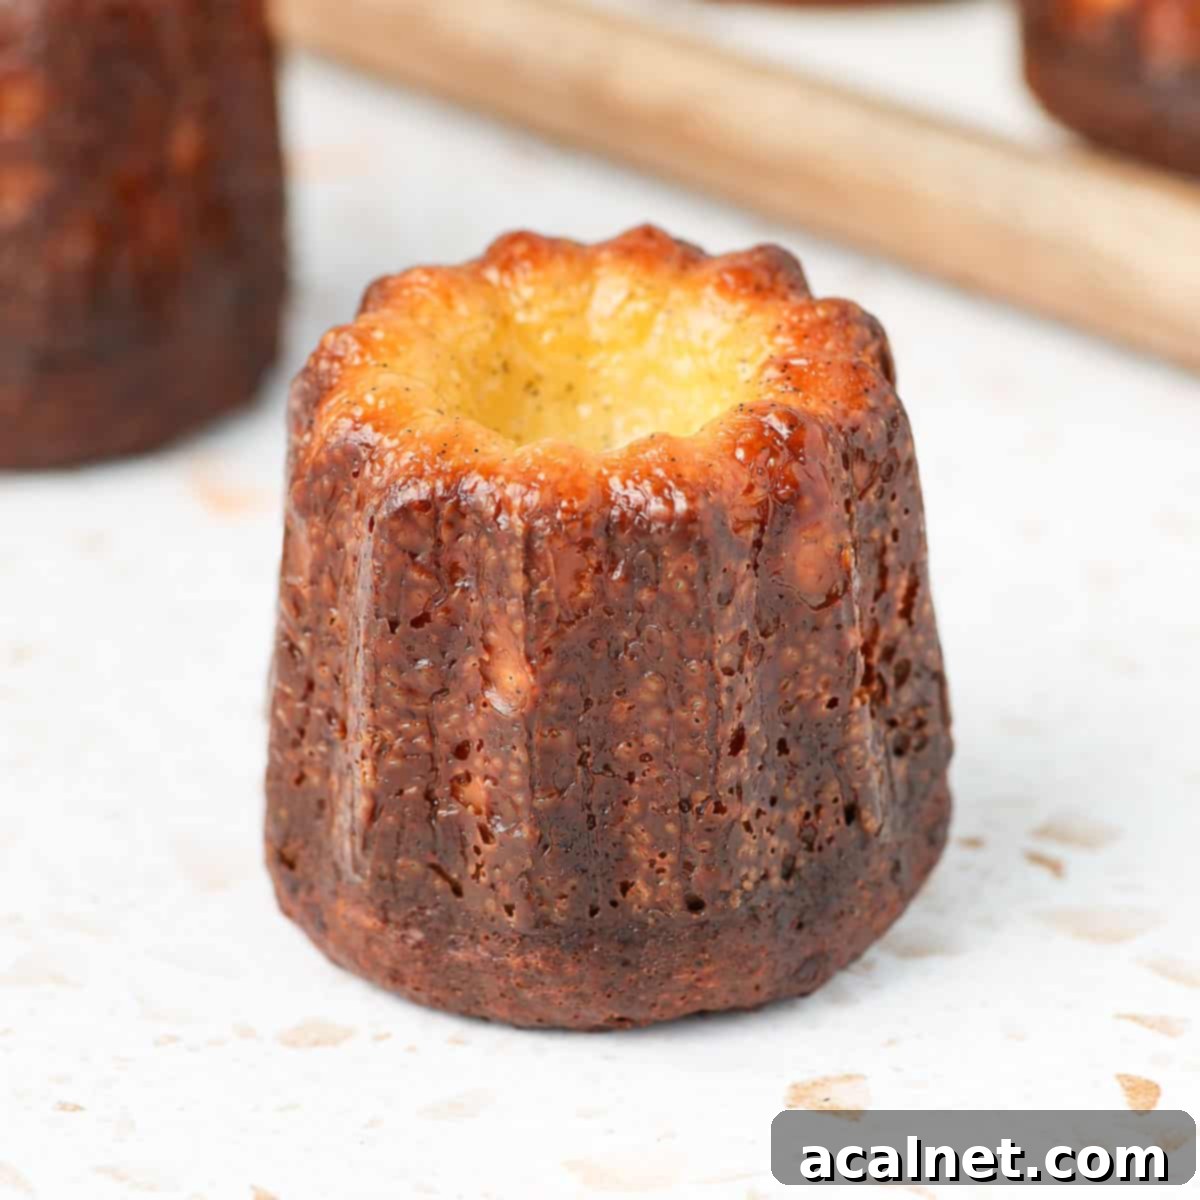
Why You’ll Fall in Love with This Cannelés Recipe
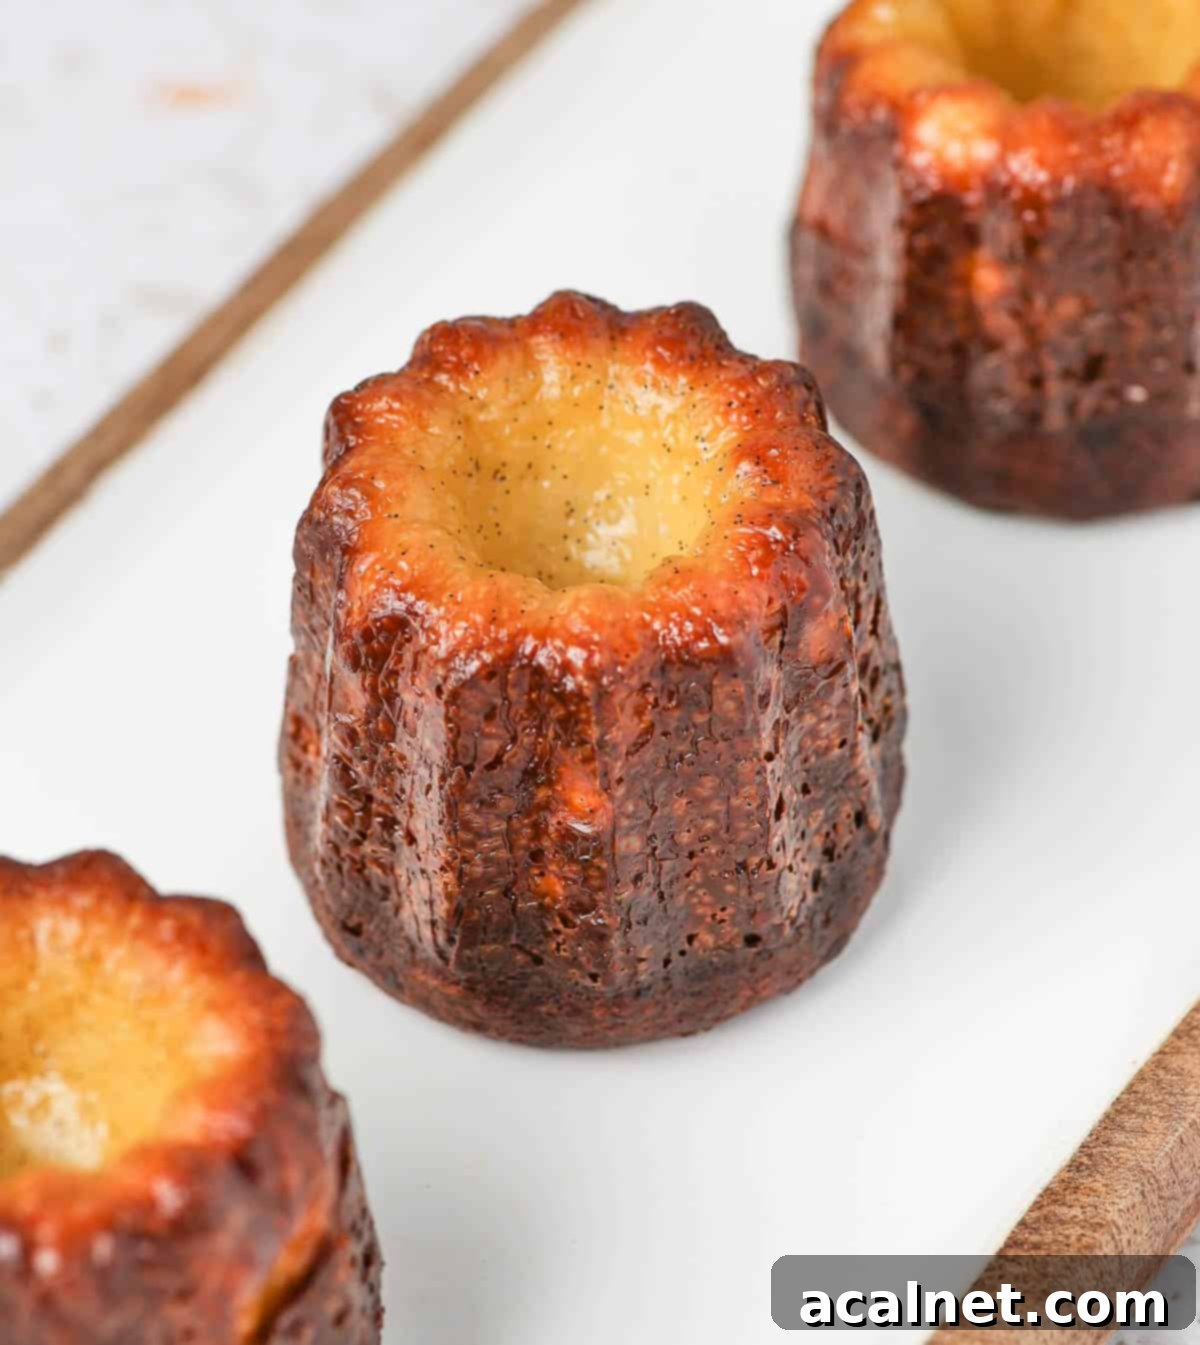
There’s an undeniable magic to Cannelés Bordelais that makes them utterly irresistible. What sets them apart and makes this recipe a true gem is the incredible textural contrast. Imagine biting through a wonderfully crisp, almost brittle, caramelized crust to discover a silky, tender, and intensely flavored custardy interior. This dual texture is the hallmark of a perfectly baked cannelé.
Beyond texture, the flavor profile is simply unforgettable. The generous infusion of fresh vanilla bean, combined with the warming spice of rum, creates a sophisticated and comforting taste that lingers pleasantly on the palate. These small wonders are perfect for any occasion, from an elegant dessert table to a simple afternoon treat with a cup of coffee or tea. Enjoy them while they’re still slightly warm, and we guarantee you won’t be able to stop at just one!
Crafting Cannelés at home is a rewarding journey, offering a taste of authentic French patisserie that’s hard to find elsewhere. This detailed guide ensures you have all the tips and tricks to master these delightful pastries, bringing a touch of Bordeaux right into your kitchen.
What Exactly Are Cannelés (or Canelés)? A French Pastry Deep Dive
Cannelés or Canelés (pronounced “kan-lay“) are a traditional, small French pastry originating from the Bordeaux region of France. Their history is as rich as their flavor, often attributed to nuns from the Annonciades convent in Bordeaux during the 17th or 18th century. Legend has it that they were created from leftover egg yolks, which were abundant due to winemakers using egg whites to clarify their wines. This resourceful culinary innovation led to the birth of a beloved regional specialty.
These distinct cakes are easily recognized by their unique fluted cylinder shape, traditionally achieved using copper molds. This characteristic shape, often with a slight depression on top, is crucial for developing their iconic crust. Cannelés are baked at a very high temperature for an extended period, which is essential for developing that wonderfully crispy, dark caramelised crust while allowing the interior to remain exceptionally soft, almost like a baked custard or flan.
The name “cannelé” itself means “fluted” or “grooved” in French, referring to the characteristic shape of the molds. While sometimes simply called “Bordeaux cakes,” their full name, Cannelés de Bordeaux, emphasizes their proud regional heritage. They embody the essence of French baking: simple ingredients transformed through precise technique into something extraordinary.
Essential Ingredients for Perfect Cannelés
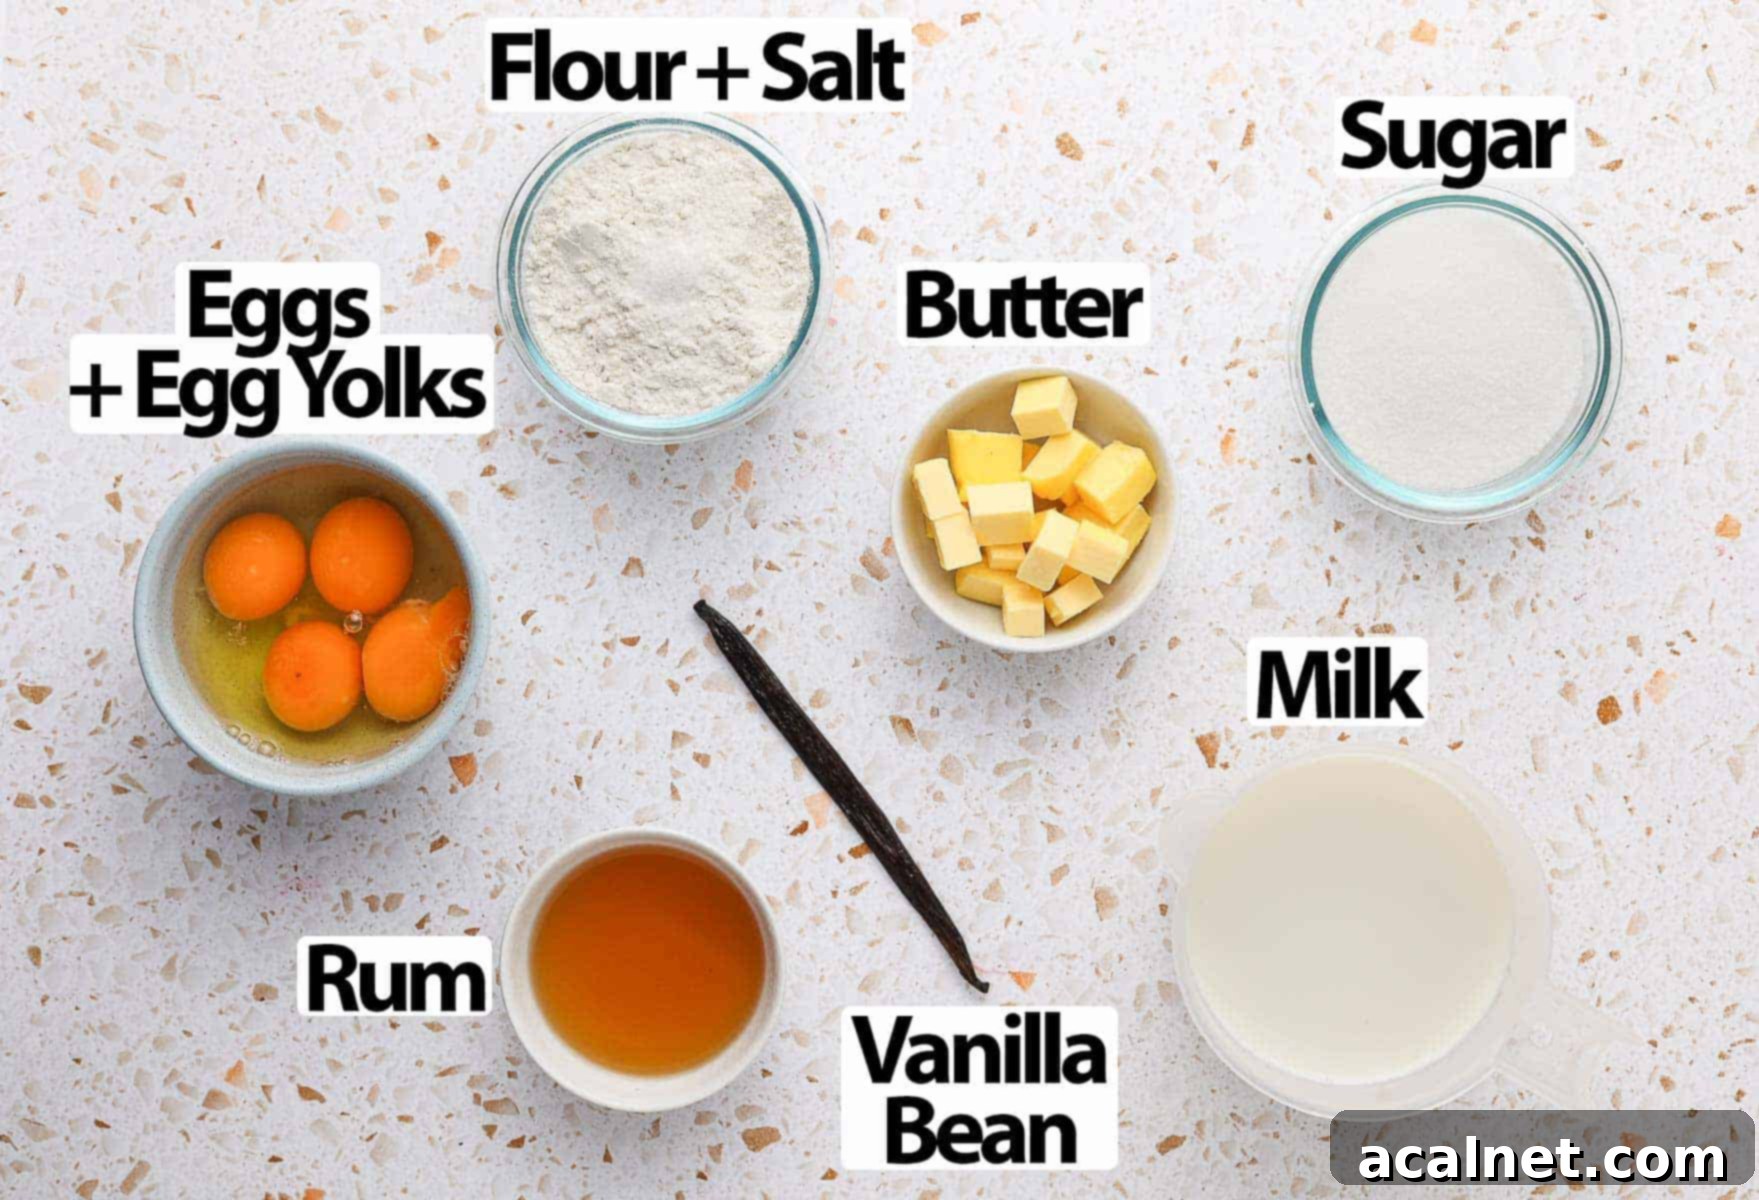
The beauty of Cannelés lies in their simplicity, using a handful of high-quality ingredients to create something truly magical. (Scroll down to the recipe card below for all precise quantities).
- Milk: For the richest flavor and most luxurious texture, always opt for Full Cream or Whole Milk. This type of milk, with its 3% to 4% fat content, contributes significantly to the custardy mouthfeel and overall richness of the cannelés. Skim or low-fat milk will yield a less satisfying result.
- Butter: Unsalted butter is preferred, as it allows you to control the total salt content. Since it will be melted directly into the milk, there’s no need to bring it to room temperature beforehand, making preparation even easier. Butter also plays a crucial role in buttering the molds, helping achieve that desirable crisp crust and easy release.
- Vanilla: This is where Cannelés truly shine, and it’s absolutely worth investing in real, fresh vanilla bean. The delicate, aromatic notes of vanilla are central to the pastry’s identity. If a fresh bean isn’t available, high-quality vanilla paste is the next best alternative, offering concentrated flavor and visible specks. Avoid vanilla extract or essence if possible, as their flavor is often less complex and can be diluted by the baking process.
- Eggs: This recipe calls for a specific combination of whole eggs and egg yolks only. Using extra yolks enriches the custard, giving it that signature silky texture and vibrant golden hue. Ensure your eggs are at room temperature, as this helps them emulsify more effectively with the other ingredients, leading to a smoother batter. Don’t discard the leftover egg whites! They can be used for meringues, macarons, or an egg white omelet.
- Sugar: Caster Sugar or fine white granulated sugar is ideal. Its fine granules dissolve easily, creating a smooth batter and contributing to the caramelization of the crust.
- Flour + Salt: Plain / All-Purpose Flour works perfectly here. Sifting the flour is recommended to prevent lumps and ensure a smooth, airy batter. Pastry flour can also be used for a slightly softer crumb. A pinch of fine table salt is essential to balance the sweetness and enhance all the other flavors, making them pop.
- Rum: A touch of rum is a traditional ingredient in Cannelés, adding a distinctive warmth and depth of flavor that complements the vanilla beautifully. We recommend using a spiced rum or dark rum for an extra layer of complexity. While optional, it truly elevates the pastry. If you prefer to omit alcohol, you can simply leave it out without significantly altering the texture, though the flavor will be slightly different.
How to Master the Art of Making Cannelés: A Step-by-Step Guide
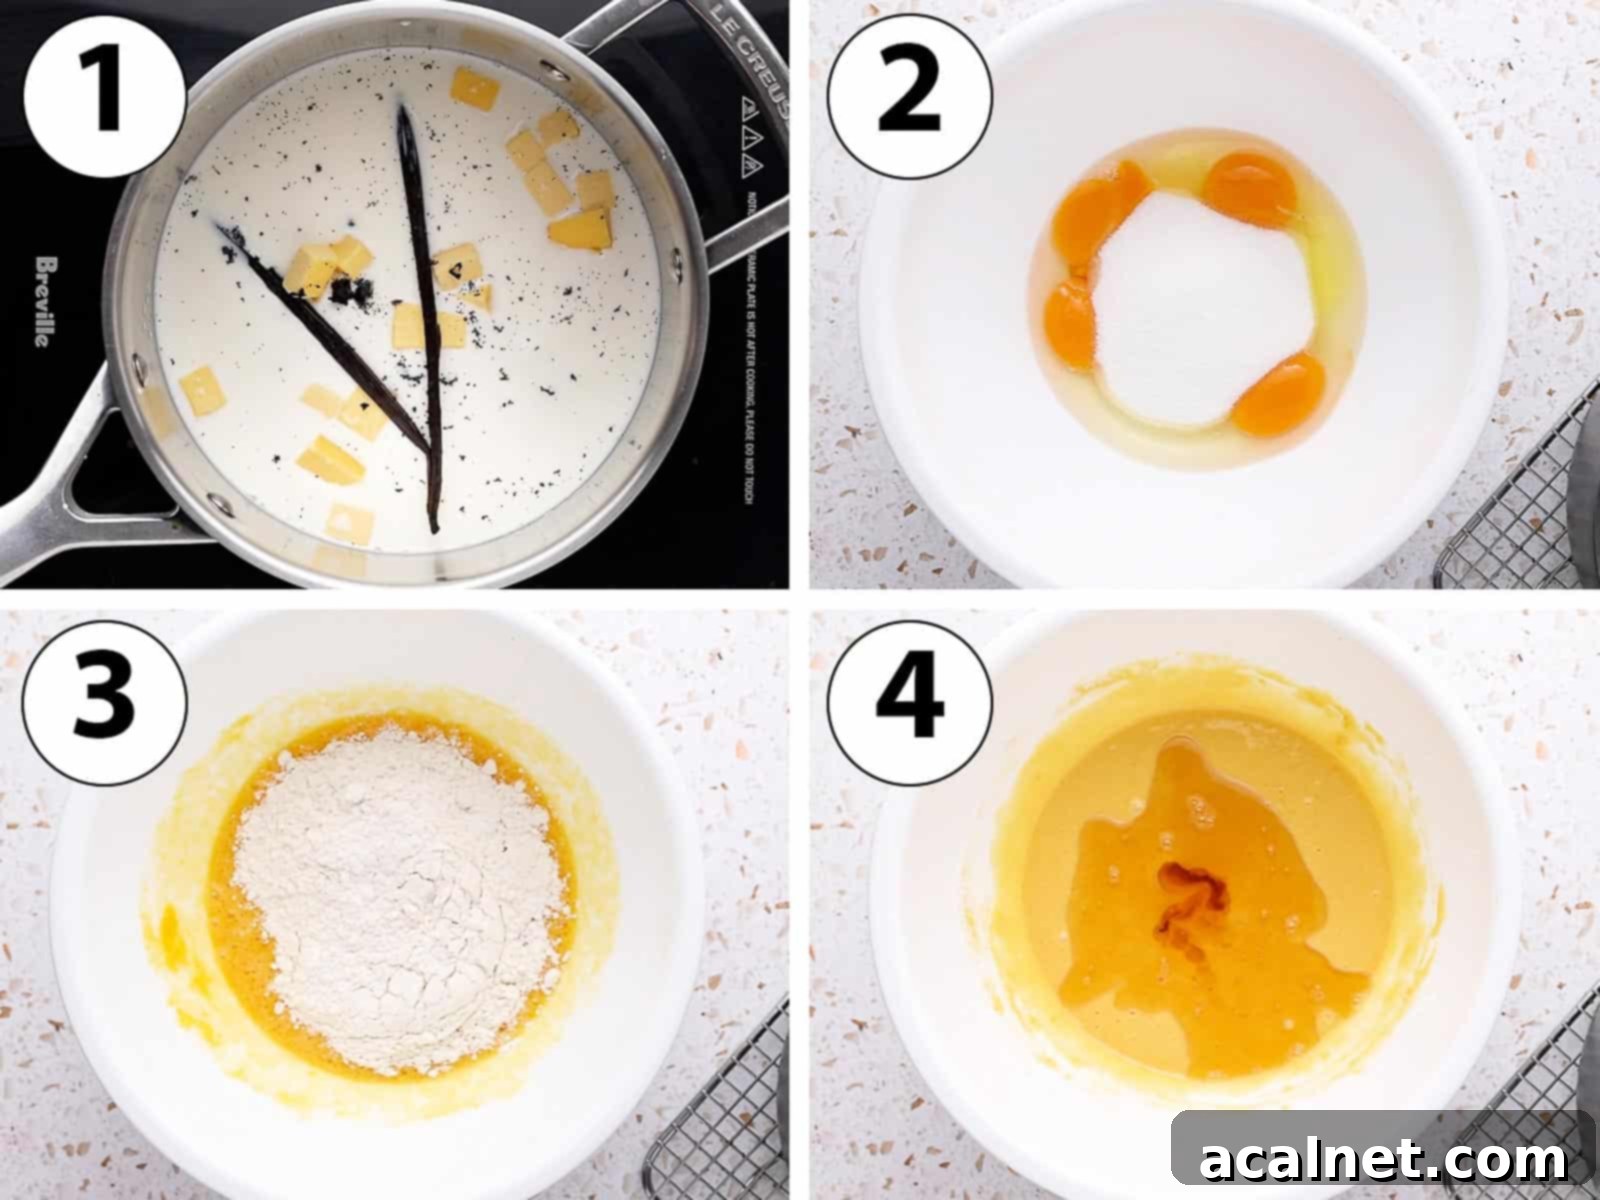
For the most authentic flavor development and ideal texture, Cannelés are traditionally made over two days. This crucial resting period in the fridge allows the flavors to meld and deepen beautifully. Begin your baking journey on the first day by preparing the batter:
- Photo 1 (Prepare Vanilla Milk): In a small saucepan, combine the Milk, Butter, and fresh Vanilla. To extract the maximum flavor from your vanilla bean, carefully slice it in half lengthwise and use the tip of a small knife to gently scrape out the tiny, fragrant seeds. Add both the seeds and the empty vanilla pod to the milk mixture.
- Heat the mixture over low heat, stirring occasionally, until it just begins to simmer and the butter has fully melted. It’s important not to bring it to a rolling boil. Once simmering, remove from heat, cover the saucepan with a lid, and let it infuse for 10 to 15 minutes. This step allows the vanilla’s aromatic compounds to fully steep into the milk, enriching its flavor. Afterward, remember to remove and discard the vanilla pod.
- Photo 2 (Combine Eggs & Sugar): While the vanilla milk infuses, take a heat-proof mixing bowl and whisk together the Eggs, Egg Yolks, and Sugar until they are well combined and slightly pale.
- Photo 3 (Add Dry Ingredients): Gradually stir in the sifted Plain/All-Purpose Flour and Salt. Sifting helps prevent lumps, ensuring a perfectly smooth batter. Continue mixing until no dry streaks of flour remain.
- Photo 4 (Incorporate Rum): Finally, whisk in the Rum (if using). Continue to whisk gently until you achieve a smooth, light batter, free of any lumps.
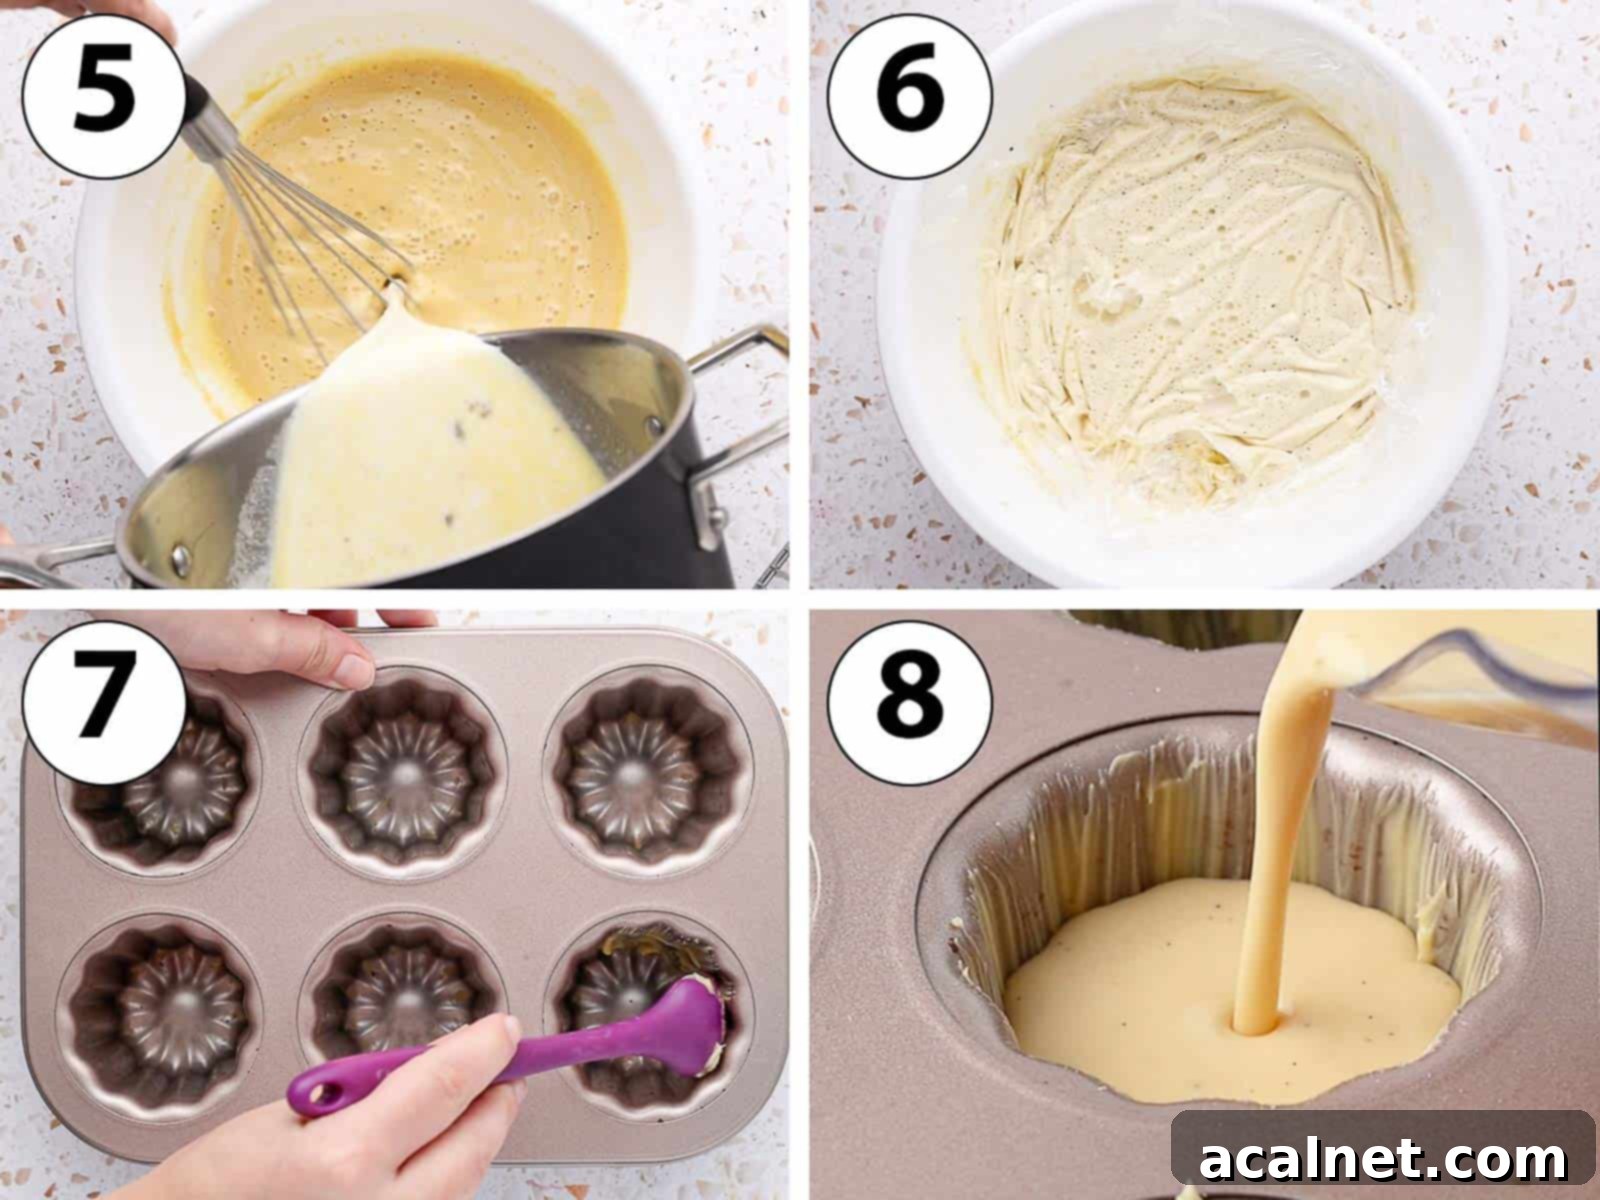
- Photo 5 (Combine Mixtures): Slowly pour the warm, vanilla-infused milk into the egg and flour mixture while continuously whisking. This gradual addition, known as tempering, helps prevent the eggs from scrambling. Whisk well until the batter is completely smooth and homogeneous. Don’t be alarmed if the batter appears quite liquid; this is perfectly normal for cannelés.
- Photo 6 (Chill the Batter): Cover the cannelé batter directly with plastic wrap, ensuring it touches the surface to prevent a skin from forming. Place the bowl in the fridge to rest overnight, or for a full 24 hours. This extended chilling period is vital for developing the deep flavors and achieving the signature chewy-soft interior.
You will truly achieve the best flavors and most desirable texture by allowing the batter to rest for this prolonged period – ideally 24 hours. This step allows the flour to fully hydrate and the flavors to fully bloom.
On the second day, it’s time to bake your masterpieces:
- Remove the batter from the fridge. Give it a few gentle whisks for a few seconds to ensure all ingredients are evenly distributed, as some flour might have settled at the bottom. Let the batter come back to room temperature for 30 minutes to 1 hour before baking. This helps with even baking.
- Preheat your oven to a high temperature: 215 degrees Celsius / 420 degrees Fahrenheit. The initial high heat is key to creating that super crispy crust.
- Photo 7 (Prepare Molds): Using a pastry brush, generously coat each cannelé mold with soft, unsalted butter. Ensure every crevice of the mold is thoroughly and evenly buttered. This crucial step not only prevents sticking but is also fundamental for developing the beautifully caramelized, crispy shell. You can also mix soft butter with a tiny bit of beeswax for an even more traditional coating, though pure butter works wonderfully.
- Photo 8 (Fill Molds): Carefully pour the rested batter into the prepared molds, filling each one to about 3/4 full. It’s important not to overfill, as the pastries will rise significantly in the oven during the initial high-heat phase.
- Bake for 20 minutes at the initial high temperature. Then, without opening the oven door unnecessarily, reduce the heat to 180 degrees Celsius / 350 degrees Fahrenheit and continue baking for an additional 35 to 40 minutes. The Cannelés should achieve a rich, deep golden-brown, almost mahogany color, indicating a well-caramelized crust.
- Once baked, remove the molds from the oven and place them on a wire cooling rack for about 5 minutes. Then, carefully flip the molds over to release the Cannelés. Be cautious, as there might be some hot melted butter dripping out. Allow the cakes to cool down completely to room temperature on the rack before serving. This cooling period is important for the crust to fully firm up.
Cannelés Recipe FAQs & Essential Tips
The choice of mold significantly impacts the final texture of your Cannelés. You’ll find a few different types on the market:
- Copper Molds: These are the most traditional and highly recommended choice, often sold as individual fluted molds. Copper is an excellent heat conductor, which means it distributes heat very efficiently and evenly. This results in the crispiest, most beautifully caramelised exterior possible. The downside is their higher cost, making them less accessible for some. They also traditionally require seasoning with beeswax for optimal release and crust formation.
- Metal (Aluminium) Pans: A fantastic and more budget-friendly alternative to copper molds. High-quality aluminium pans, often sold as trays with multiple fluted cavities, will still provide a wonderfully caramelised and crisp crust. They offer a great balance between performance and price and typically do not require seasoning with beeswax. This is often the best compromise for home bakers.
- Silicone Molds: These are the cheapest and easiest to find, and undeniably convenient for demolding. However, silicone is not a good conductor of heat. While it will bake the Cannelés, you will find it much harder to achieve the intensely crispy, dark caramel crust that is the hallmark of a true Cannelé. The texture often ends up softer and more cake-like rather than custardy with a crisp shell.
I personally use this Metal Cannele Mold, which I’ve found offers excellent results, striking the perfect balance between price and quality.
Traditionally, especially with copper molds, the interior is coated with melted beeswax. This creates a highly non-stick surface and contributes to the ultra-crispy, dark crust. I’ve experimented with both soft butter and beeswax with my aluminium pan.
Beeswax can be challenging to work with. It hardens extremely quickly, requiring very fast application, and can be quite difficult to clean from the molds afterward. Butter, on the other hand, is readily available, much easier to apply with a pastry brush, and far less messy to clean up. In my trials, there was no significant discernible difference in the taste or texture between batches made with beeswax or butter when using a good quality metal mold. Therefore, for ease and excellent results, I highly recommend using soft unsalted butter to coat your molds thoroughly.
Absolutely! Mini Cannelés are adorable and make for perfect bite-sized treats. The process remains the same, but you will need to adjust the baking time. Mini Cannelés will bake much faster, so keep a close eye on them and reduce the initial high-heat baking time and the subsequent lower-heat baking time accordingly. Start checking for doneness after about 10-15 minutes at high heat and 20-25 minutes at lower heat, adjusting as needed until they achieve that signature caramel color.

Key Tips for Cannelés Baking Success
Achieving perfect Cannelés requires attention to detail, but with these tips, you’ll be well on your way to mastering these French delights:
- Don’t Skip the Resting Time: This is arguably the most critical step. Resting the batter in the fridge overnight, or ideally for 24 hours, is essential. This allows the flour to fully hydrate, the gluten to relax, and all the flavors (especially vanilla and rum) to meld and deepen. This long chill period contributes significantly to the unique, chewy-soft interior texture. Plus, it’s a great make-ahead strategy for entertaining!
- Butter Your Molds Generously and Evenly: A well-buttered mold is non-negotiable. Use a pastry brush to ensure every single groove and surface of your copper or metal mold is coated with a generous layer of soft, unsalted butter. You can also use a small piece of paper towel or even your fingers for thorough coverage. This butter layer not only acts as a non-stick agent but also plays a vital role in creating that desirable, deeply caramelised, and crispy exterior. Any uncovered spots can lead to sticking or an uneven crust.
- Master the Two-Stage Baking Temperature: The exact baking time and temperature can vary slightly based on your oven’s calibration and the specific material of your molds. However, the general principle is crucial: always start with a higher heat (e.g., 215°C/420°F) to shock the batter and rapidly develop that crispy, dark crust. After an initial period (usually 15-20 minutes), drop the temperature to a moderate heat (e.g., 180°C/350°F). This lower temperature allows the custard center to bake through completely and set without burning the exterior. You might need to experiment slightly with your specific oven to find the perfect balance for your Cannelés.
- Cool Properly Before Serving: Patience is a virtue when it comes to Cannelés. Once removed from the oven, allow them to cool on a wire rack to room temperature before slicing or eating. Slicing them when they are still hot can cause the delicate interior custard to deflate, resulting in a dense rather than airy texture. The cooling process also allows the crust to fully crisp up and the interior to set properly.
Storing & Freezing Cannelés
Cannelés are truly at their peak when enjoyed fresh, ideally while still slightly warm from the oven, or within 24 hours of baking. To maintain their quality, store them at room temperature in an airtight container. Avoid refrigerating them, as the moisture in the fridge can quickly make the crust soggy, diminishing their signature crispness.
While Cannelés are safe to eat for a few days, be aware that their delicious crispy crust will gradually soften over time. If you find your Cannelés have lost some of their crunch after 24 hours, you can easily revive them by reheating them in a preheated oven at around 180°C (350°F) for about 5 minutes. This quick reheat helps to re-crisp the exterior, bringing them closer to their freshly baked glory.
Although Cannelés can be frozen, I personally recommend serving them fresh for the absolute best texture and flavor experience. If you do choose to freeze them, ensure they are completely cooled before placing them in an airtight, freezer-safe container or bag. When ready to enjoy, allow them to thaw at room temperature, then place them back in a hot oven for 5 to 10 minutes to re-crisp the shell. While convenient, frozen and reheated Cannelés may not achieve the exact same pristine texture as those freshly baked.

Explore More French Pastry Delights
If you loved making these Cannelés, you’ll surely enjoy exploring other classic French pastries. Dive into more delightful recipes to expand your baking repertoire:
- Choux à la Crème (Cream Puffs)
- Classic Profiteroles
- Delicate Financiers Cakes
- Sweet Chouquettes (French Sugar Puffs)
- Rich French Chocolate Truffles
- Choux au Craquelin (Crispy Cream Puffs)
- Buttery Sablés Bretons (French Shortbread Cookies)
- Indulgent Chocolate Financiers
- Classic Chocolate Madeleines
Recipe Card
Cannelés de Bordeaux
Print Recipe
Ingredients
- 500 ml Full Cream Milk, or whole milk
- 1 fresh Vanilla Bean, see notes for substitution
- 50 gr Unsalted Butter
- 150 gr Caster Sugar, or fine white granulated sugar
- 2 Eggs, at room temperature
- 2 Egg Yolks, at room temperature
- 120 gr Plain / All-Purpose Flour
- 1/4 teaspoon Fine Salt
- 45 ml Rum, optional
- Unsalted Butter, for coating the molds
Instructions
- Place the Milk, Butter and Vanilla seeds & pod in a small saucepan (see note 1 on how to prepare the vanilla bean). Turn on low heat and occasionally stir. When it starts to simmer and the butter has melted, turn off the heat, cover the saucepan with a lid and set aside for 10 to 15 minutes to let the vanilla infuse in the milk.
- In a separate heat-proof bowl, whisk together the Sugar, Eggs and Egg Yolks. Mix in the sifted Flour and Salt, then the Rum. The batter should be smooth and have no lumps.
- Remove the vanilla pod from the milk mixture (see note 2). Slowly pour the warm milk over the egg mixture while whisking. Mix until completely smooth then cover with plastic wrap touching the surface.
- Place in the fridge to rest overnight, or preferably for 24 hours (see note 3).
- Take the cannele batter out of the fridge, whisk it for a few seconds (see note 4) and let it come back to room temperature for 30 minutes to 1 hour.
- Preheat your oven on 215 degree Celsius / 420 degree Fahrenheit.
- Brush the copper or aluminium cannele mold with soft butter, making sure each molds is well coated. Fill about 3/4 of the mold with the batter (see note 5).
- Bake for 20 minutes, then drop the temperature to 180 degree Celsius / 350 degree Fahrenheit and bake for an additional 35 to 40 minutes (see note 6).
- Take out of the oven and leave to cool down slightly for 5 minutes before carefully flipping the pan over and get the Cannelés out. Leave the cakes to come back to room temperature then serve straight away.
Video
Would you like to save this recipe?
We’ll email this post to you, so you can come back to it later!
Notes
Mold: I used this metal cannele mold. I only recommend using copper or aluminium; you won’t get the same textures if using a silicone mold.
Recipe Notes:
- To get the vanilla out of the pod, slice it in half lengthways leaving one of the edges attached. Gently scrape the seeds out of each side with a small knife and put them in the milk. Place the rest of the pod in the milk as well, it contains a lot of flavors, but remember to remove it after the milk has infused.
- The vanilla pod can be lightly washed to remove any milk then stored to make homemade vanilla extract or a vanilla powder, ensuring no waste.
- It is crucial to let the batter rest for a long time to create the best flavors and texture. If a full 24 hours isn’t feasible, ensure you chill it for at least 12 hours or overnight.
- The flour will naturally settle at the bottom of the bowl, causing the batter to be thicker there. Whisking it again gently ensures all ingredients are well combined before you bake the cakes for even results.
- The Cannelés will rise rapidly in the oven during the initial high-heat phase, so make sure not to overfill the molds. About 3/4 full is ideal.
- The top and edges should be a rich, dark brown and look well-caramelised. If the top appears light in color, it likely needs a little more baking time to develop that signature crust. Note that exact baking time and heat may vary based on your specific pan type and oven, so a little experimentation might be needed to find your perfect timing.
Nutrition (per serving)
