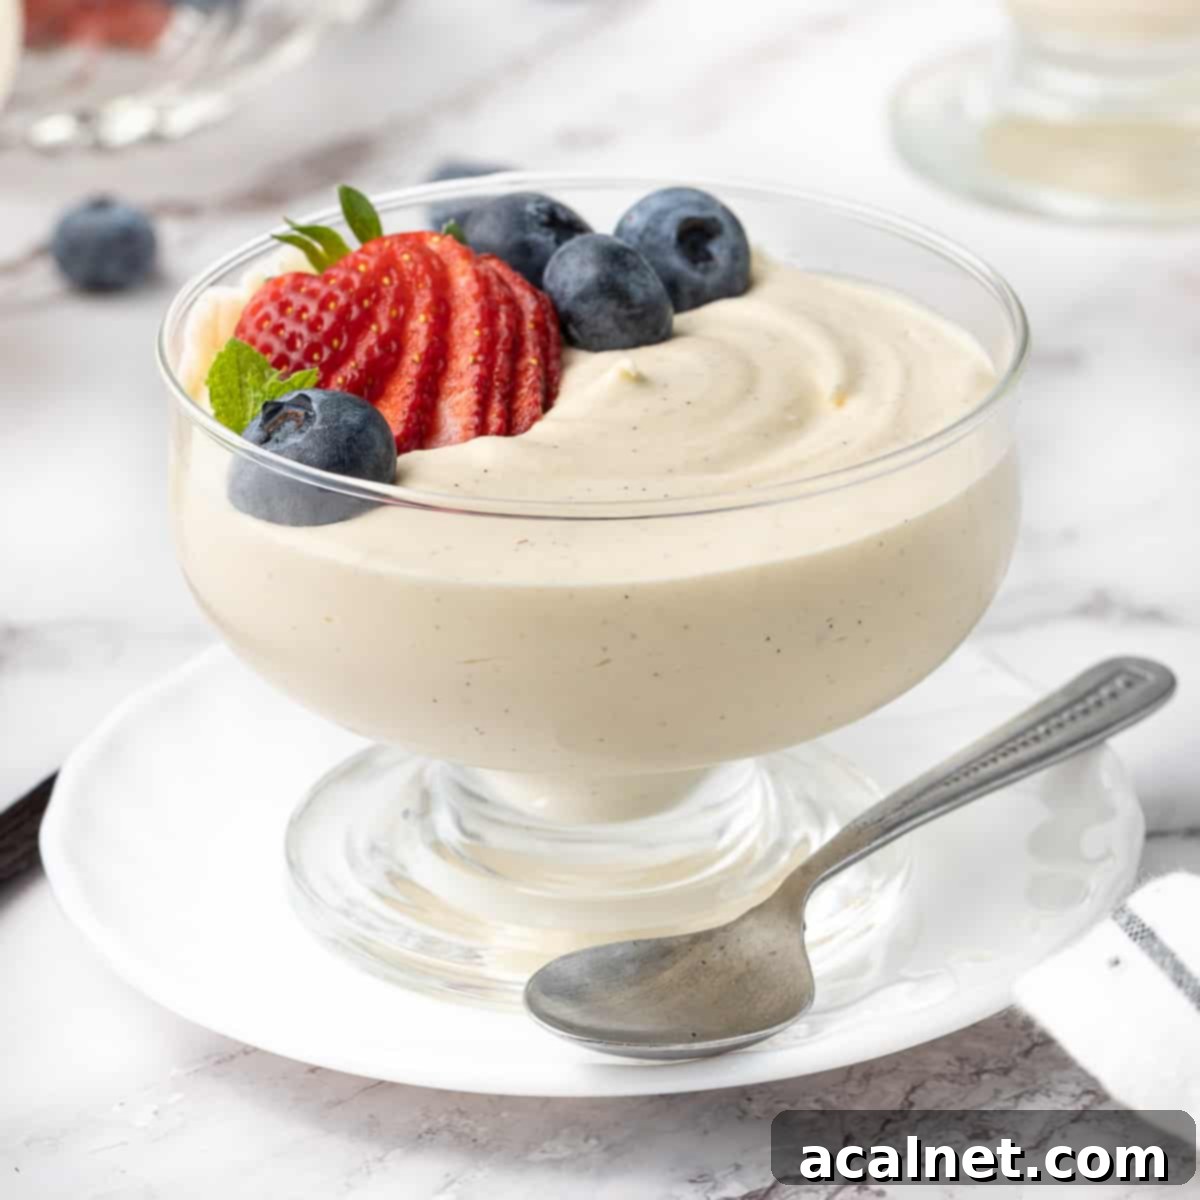
Easy Homemade Vanilla Mousse Recipe: Light, Creamy, & Perfectly Flavorful
Indulge in the sheer delight of this incredible **Vanilla Mousse recipe**, a dessert that effortlessly combines a light, airy texture with a rich, intense vanilla flavor. Crafted with just a few simple ingredients, this mousse is an ideal make-ahead treat, perfect for elevating any special occasion or dinner party. Its elegant presentation and irresistible taste are sure to impress your guests, making it a go-to for effortless entertaining.
[feast_advanced_jump_to]
This recipe was first published in January 2023 and updated in April 2025 to provide a more stable mousse. While the core ingredients remain the same, the method has been thoughtfully refined to ensure perfect setting every time.
Why You’ll Adore This Vanilla Mousse
There’s so much to love about these **easy whipped vanilla mousse cups**. They are not just a dessert; they are a truly luscious experience, brimming with the pure, fragrant taste of fresh vanilla bean. This recipe stands out for its simplicity, allowing even novice bakers to create a show-stopping treat. Its inherent versatility means you can customize it with a myriad of toppings, making it suitable for any taste preference or seasonal celebration.
Our **vanilla mousse recipe** is built upon a foundation of creamy, sweetened vanilla bean custard, which is then delicately folded into light and airy whipped cream. The magic here is that **no gelatin is needed** to achieve its wonderfully light, fluffy, and rich texture. This natural setting allows the vanilla flavor to truly shine through. However, if you prefer a notably firmer mousse – perhaps for intricate plating or a more robust cake filling – a touch of gelatin can certainly be incorporated, as we’ll discuss later.
Understanding Mousse: A Culinary Delight
The term “mousse” is derived from the French word meaning “foam” or “froth,” perfectly describing the characteristic light and airy texture of this beloved dessert. At its heart, a mousse is a culinary creation where a whipped element – typically heavy cream or egg whites – is skillfully combined with a richly flavored base. In this particular recipe, our base is a luscious vanilla-infused pastry cream (crème pâtissière).
Traditionally, mousses are crafted from incredibly simple ingredients like eggs, sugar, and dairy, such as milk and/or cream. Once expertly prepared and chilled, the mixture transforms into an irresistibly fluffy and ethereal consistency. Mousses are incredibly versatile; they can be served as elegant individual desserts, making them perfect for portion control and sophisticated presentation, or they can be integrated as a key component in larger, more complex creations like layered cakes, tarts, or parfaits.
The flavor possibilities for mousse are endless, ranging from decadent coffee mousse and rich chocolate mousse to vibrant fruit mousses. My own collection boasts delightful variations like Raspberry Mousse and a zesty Lemon Mousse. Each offers a unique flavor journey, but few are as universally appealing and comforting as classic vanilla.
Love a mousse dessert and looking for more ideas?
Don’t miss my curated collection of 15+ delicious Mousse Recipes for endless inspiration!
Essential Ingredients for Perfect Vanilla Mousse
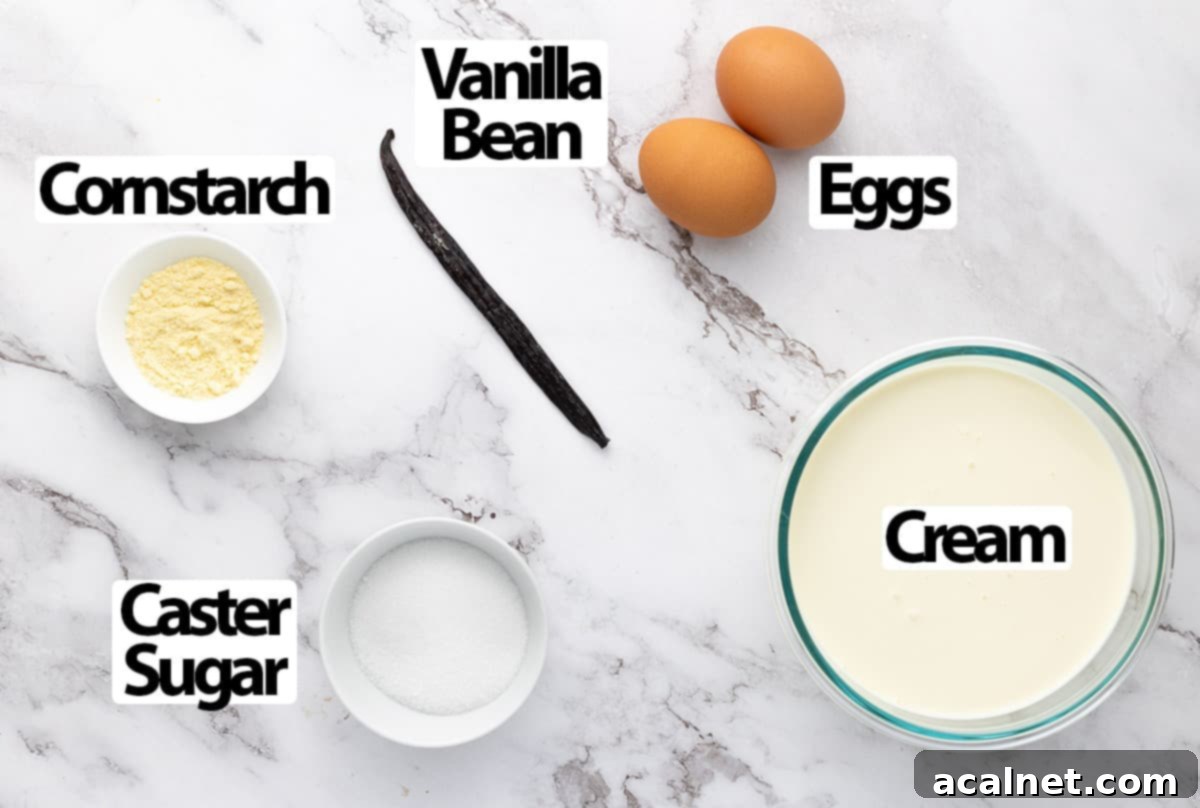
Scroll down to the detailed recipe card below for exact quantities and measurements.
Here’s what you’ll need to make this exquisite vanilla mousse:
- Cream: You’ll need **thickened cream**, also known as heavy whipping cream in the US or double cream in the UK. The critical factor here is the fat content: ensure your cream contains **at least 35% fat**. This high fat percentage is absolutely essential for achieving stable, well-whipped cream that holds its structure and prevents your mousse from deflating. Lower fat creams will simply not whip to the desired consistency.
- Vanilla: For an unparalleled flavor experience, this is truly a recipe where investing in a **fresh vanilla pod** is incredibly rewarding. The tiny black specks and intense aroma it imparts cannot be replicated. As a excellent alternative, you can use high-quality vanilla bean paste. While vanilla extract or vanilla essence can be used in a pinch, be aware that you won’t achieve the same depth of natural vanilla flavor or the beautiful visual specks.
- Eggs: Use **large eggs** and ensure they are at **room temperature**. This is crucial for two reasons: room temperature eggs blend more smoothly with other ingredients, and they are far less likely to curdle when you introduce warm liquids, a key step in creating our custard base. We are using whole eggs in this recipe, not just the yolks as you would for a traditional Pastry Cream, contributing to the mousse’s unique texture.
- Sugar: **Caster sugar**, also known as superfine white sugar, is my preferred choice. Its fine granules dissolve quickly and seamlessly into the cream, resulting in a perfectly smooth custard. Regular white granulated sugar can be used, but you might need to whisk a little longer to ensure it’s fully incorporated without any graininess.
- Cornstarch: This is our secret weapon for thickening the custard base, giving it the necessary body before we fold in the whipped cream. If cornstarch isn’t available, you can substitute it with an equal amount of plain/all-purpose flour, or other starches like tapioca starch or arrowroot starch. Ensure any substitute is thoroughly whisked to avoid lumps.
Crafting Your Vanilla Mousse Cups: A Step-by-Step Guide
**Important Note:** This recipe was initially published in January 2023 and has been carefully revised in April 2025. These adjustments were made specifically to address feedback regarding the mousse’s setting consistency, ensuring a foolproof result every time. The ingredients themselves remain unchanged, but the procedural steps have been slightly enhanced for optimal performance.
Let’s begin by preparing the aromatic vanilla bean custard, which forms the luscious heart of our mousse:
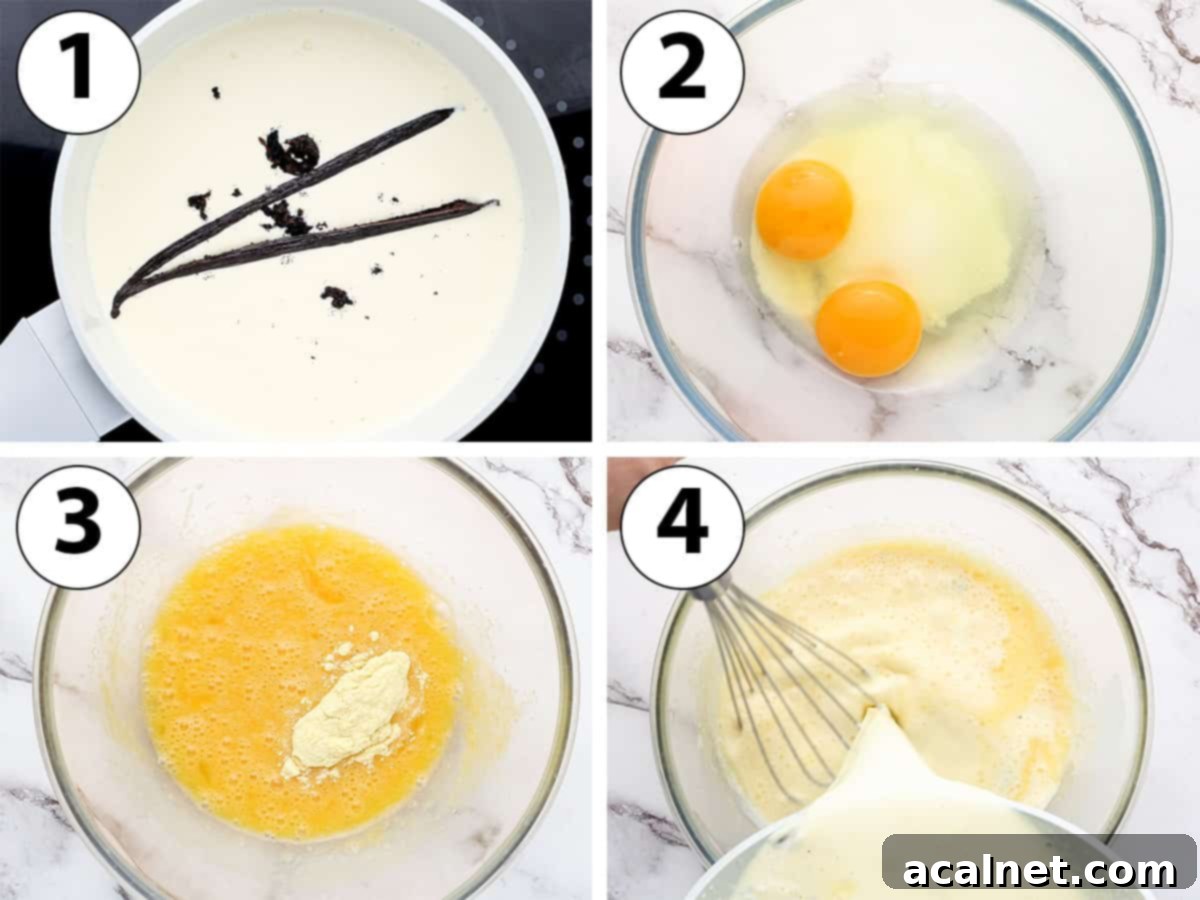
- Photo 1: Start by pouring the first portion of your heavy cream into a medium to large saucepan. Take your fresh vanilla bean pod, slice it lengthwise, and use a small paring knife to carefully scrape out all the tiny, flavorful seeds. Add both the scraped seeds and the empty vanilla pod into the saucepan with the cream.
- Gently stir the mixture to combine the vanilla seeds with the cream. Heat this mixture over a low heat, ensuring it doesn’t come to a rapid boil, but rather just begins to simmer gently around the edges. Once simmering, immediately turn off the heat, cover the saucepan with a lid, and allow it to infuse for 10 to 15 minutes. This steeping process is crucial for extracting maximum vanilla flavor. If you’re using vanilla paste, you can skip the infusion step and simply add it directly to the cold cream before heating.
- Photo 2: While the cream is infusing, in a large mixing bowl, combine the caster sugar and your room-temperature eggs. Whisk them together vigorously for approximately one minute, aiming for a pale, uniform mixture.
- Photo 3: Next, carefully whisk the cornstarch into the egg and sugar mixture until it is completely smooth and free of any lumps. This ensures a silky-smooth custard later on.
- Photo 4: Retrieve your infused cream. Remove and discard the vanilla pod from the warm cream (or save it to make homemade vanilla extract – a fantastic zero-waste tip!). Gradually, and while continuously whisking, slowly pour the warm vanilla cream into the egg mixture. Keep whisking diligently until the combined mixture is entirely smooth. This technique, known as “tempering the eggs,” slowly raises the temperature of the eggs, preventing them from scrambling or curdling due to a sudden heat shock.
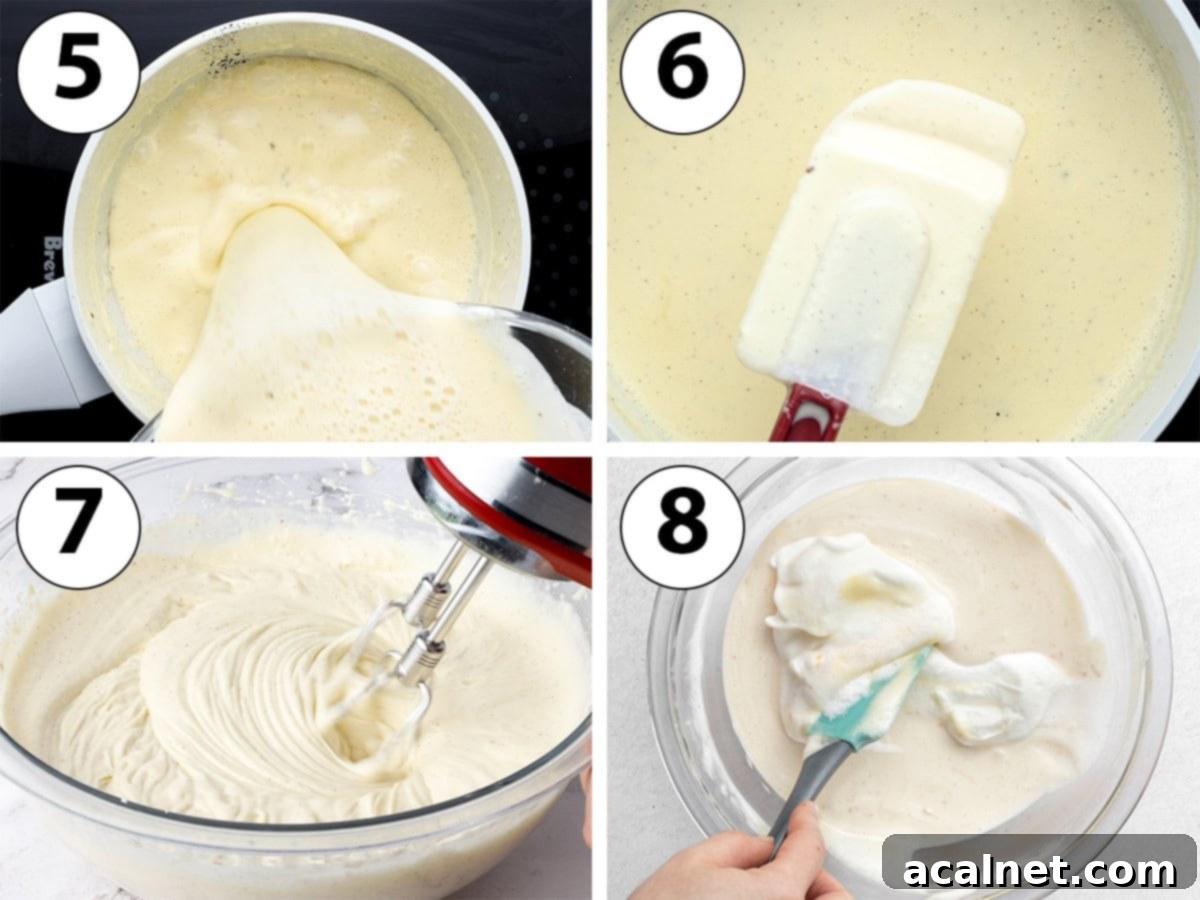
- Photo 5: Pour the tempered egg and cream mixture back into the same saucepan you used earlier.
- Photo 6: Return the saucepan to low heat. Cook the custard for approximately 5 minutes, or until it has noticeably thickened. It’s vital to stir continuously with a heat-proof spatula, scraping the bottom and sides of the pan to prevent scorching and ensure an evenly cooked, smooth custard. The mixture should be thick enough to coat the back of a spoon or spatula, and a clear line should remain if you run your finger across it. For precision, the custard should reach a temperature between 82 to 84 degrees Celsius (180 to 183 degrees Fahrenheit). Avoid high heat, as this can easily overcook the eggs, resulting in a gritty or lumpy custard.
- Once thickened, immediately transfer the cooked vanilla custard into a clean bowl or a large, airtight container. To prevent a skin from forming and keep it fresh, press plastic wrap directly onto the surface of the custard. Refrigerate for 1 to 2 hours, or until it is completely chilled throughout. This cooling step is critical for the mousse’s final texture.
- Photo 7: In a separate, very clean bowl (or the bowl of your stand mixer fitted with the whisk attachment), pour the remaining portion of the heavy cream (part 2). Whip the cream on medium to medium-high speed until it reaches stiff peaks. This means the cream will hold its shape firmly when the whisk is lifted. Remember, it’s generally better to slightly under-whip than over-whip for mousse, as over-whipped cream can become grainy. You can stop at medium peaks for an even lighter, more delicate mousse, or continue to stiff peaks for a more stable and firm texture.
- Photo 8: Remove the thoroughly chilled custard from the fridge and give it a light whisk to loosen its consistency. Now, add the whipped cream to the custard in 3 to 4 gradual additions. Using a spatula, gently fold the whipped cream into the custard. The key here is to be very gentle to preserve as much of the air in the whipped cream as possible. Continue folding until the mixture is uniform, light, and wonderfully fluffy, without being overly firm or dense.
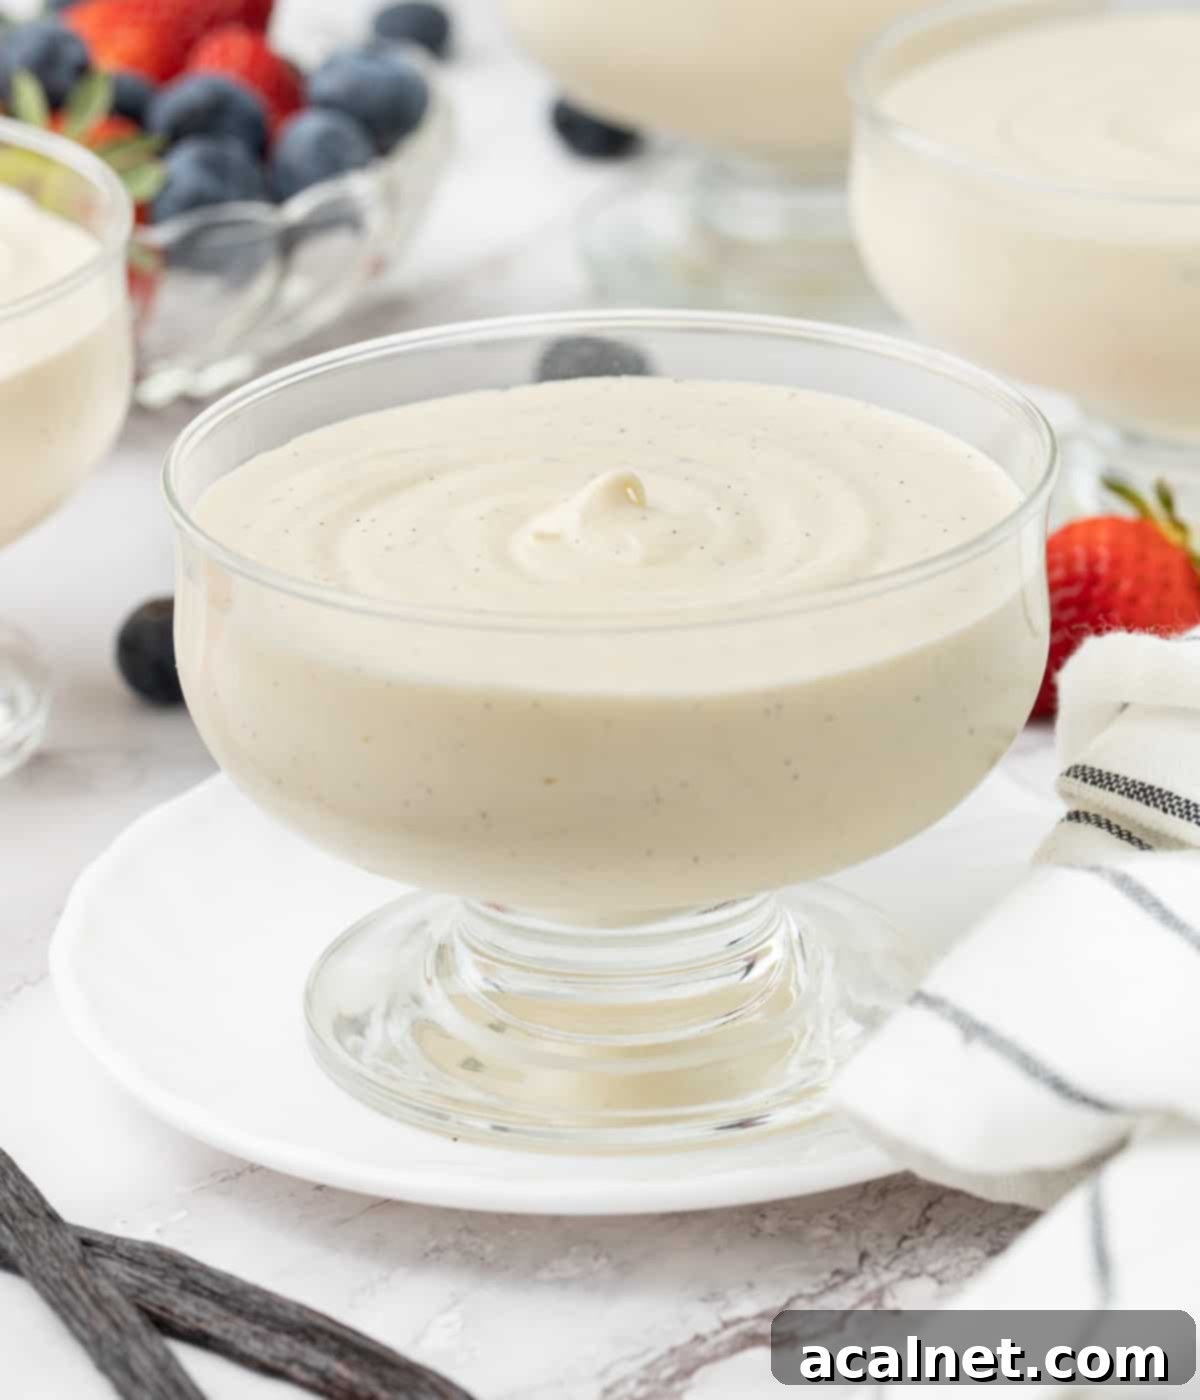
- Carefully spoon or pipe the vanilla mousse into your chosen serving cups. Refrigerate for a minimum of 3 hours, but for the best results and a fully set, perfectly flavored mousse, **preferably chill overnight**. Take care to be gentle when transferring the mousse to avoid deflating its airy structure.
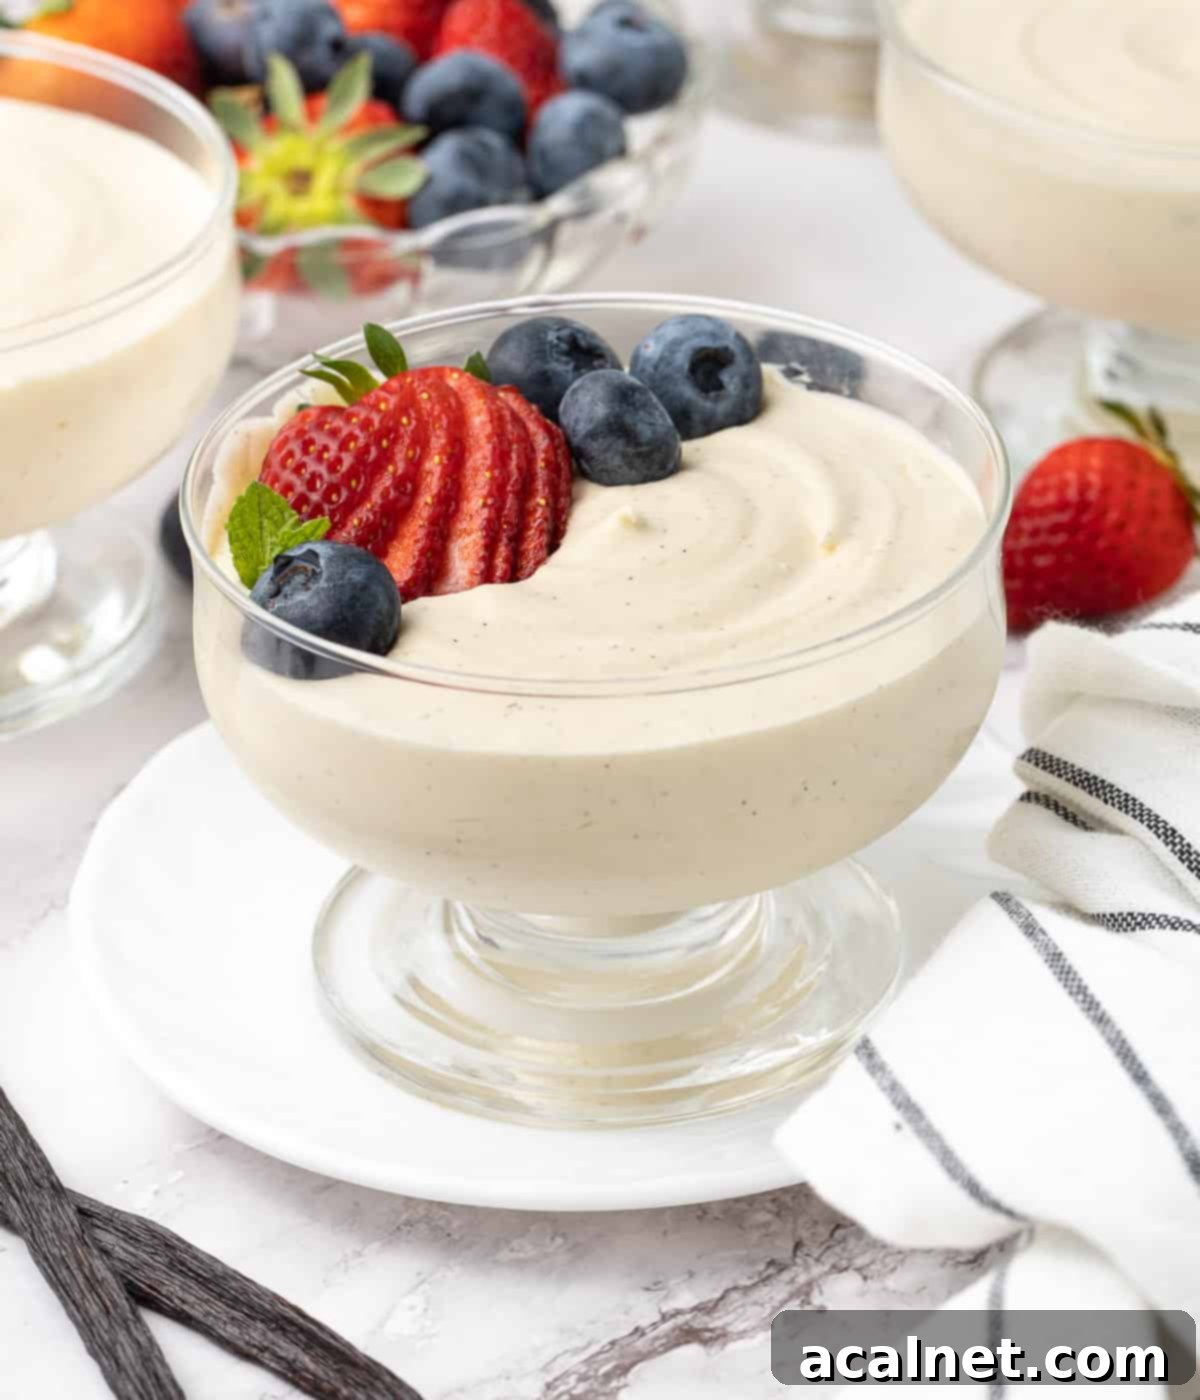
- Just before serving, enhance your delicious vanilla mousse with your choice of garnish.
Vanilla Mousse Recipe FAQs
The name originates from the French word “mousse” (or the verb “mousser“), which literally means “foam” or “froth.” This perfectly encapsulates the airy and light texture that defines a typical mousse dessert, characterized by countless tiny air bubbles delicately incorporated into its structure. This foamy consistency is what gives mousse its delightful mouthfeel and elegant appearance.
While both involve whipping cream, they are distinct. **Whipped cream** is simply heavy cream that has been vigorously whisked to incorporate air, creating a light, airy consistency. The high fat content (minimum 35%) in the cream helps to stabilize these air bubbles, allowing it to hold its shape. A **mousse**, on the other hand, is a more complex dessert. It typically combines a whipped element (like whipped cream or whipped egg whites) with a distinct, flavored base. This base, which can be fruit puree, chocolate ganache, or a custard like in this recipe, gives the mousse a richer, more profound flavor and a more substantial, yet still airy, texture. Essentially, a mousse builds on whipped cream (or egg whites) by adding a foundational flavor and a more structured body.
For the absolute best and most authentic vanilla flavor, I enthusiastically recommend using a fresh vanilla bean pod. The depth of flavor and beautiful black specks are unmatched. However, if a fresh bean isn’t available, **vanilla bean paste** is an excellent alternative that still delivers a robust vanilla taste and those coveted specks. While **vanilla extract** will certainly work in this recipe, please be aware that the vanilla flavor won’t be as intense or complex, and you’ll miss out on the visual appeal of the vanilla specks. Choose according to your preference and what you have on hand.
This particular vanilla mousse recipe is designed to be incredibly light and airy, making it quite soft when set. While this is perfect for individual dessert cups, if you intend to use it as a more stable cake filling for tiered cakes or those requiring significant structure, I highly recommend incorporating a small amount of **gelatin**. Adding gelatin will provide the extra stability needed to hold its shape within a cake. Without gelatin, this mousse is perfectly suited for filling delicate desserts like Choux au Craquelin (crispy cream puffs), Brioche Donuts, or as a luxurious tart filling where a softer set is desirable.
Expert Tips & Troubleshooting for Vanilla Mousse
- How to tell if the custard base is perfectly cooked: There are two reliable methods to ensure your custard is cooked to perfection. First, the “coating the spoon” test: dip the back of a spoon or spatula into the custard. If the mixture is still very liquid and drips off immediately, it needs more cooking. If it’s thick enough to coat the utensil and you can draw a clean line with your finger across the back of the spoon, it’s ready. Second, for ultimate precision, use a kitchen thermometer. The custard is fully cooked when it reaches a temperature between 82 to 84 degrees Celsius (180 to 183 degrees Fahrenheit).
- Why is my custard lumpy or curdled? This common issue usually arises from overcooking the eggs. If the stove temperature is too high, or if there’s a sudden, drastic change in heat, the eggs can scramble, resulting in a lumpy or curdled custard. To prevent this, always cook over low heat and stir continuously. If your custard does end up with small lumps, don’t despair! You can salvage it by carefully pouring the mixture through a fine-mesh sieve to remove the solid bits, or for a smoother result, use an immersion blender to blend out the lumps until silky smooth.
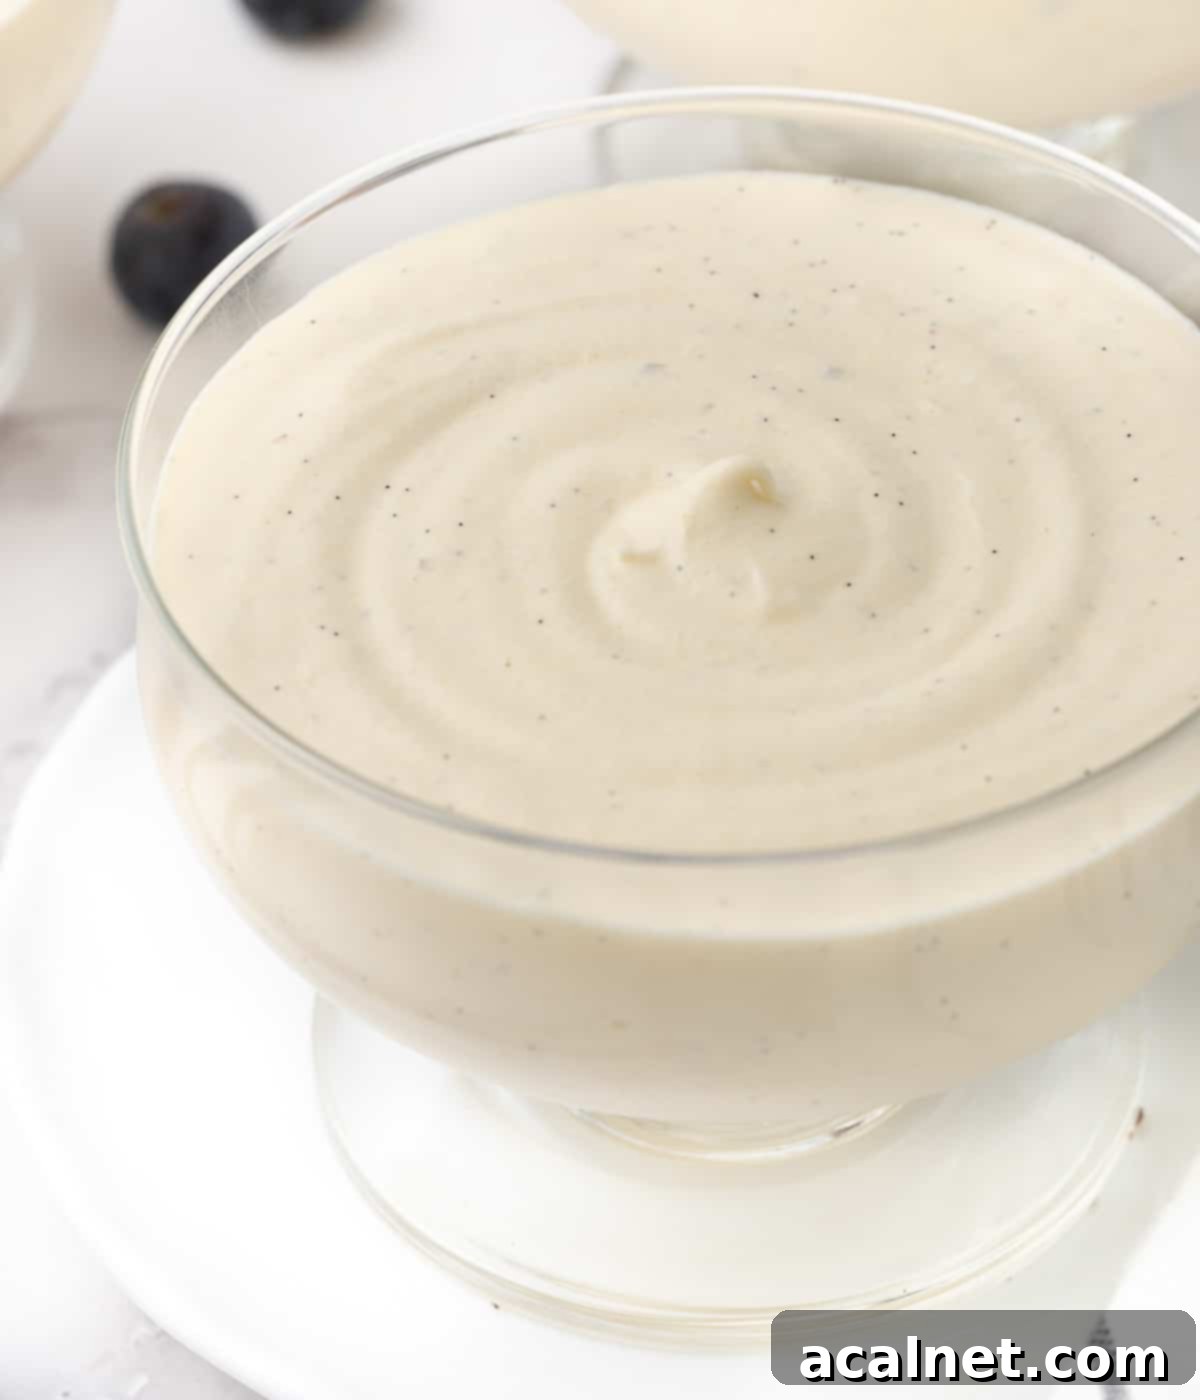
- My vanilla mousse isn’t setting, what went wrong? The most frequent culprits for a mousse that fails to set properly are issues with the whipped cream or insufficient chilling time. If your cream was either under-whipped (too soft) or over-whipped (separated and grainy), it won’t provide the stable structure needed for the mousse to hold. Ensure you achieve stiff peaks but stop before it turns into butter. Crucially, **allow plenty of time for the mousse cups to chill**. A minimum of 3 hours is needed, but for the best, most stable, and flavorful results, refrigerating the mousse overnight is highly recommended. This allows the custard to fully firm up and the flavors to meld beautifully.
Delightful Serving Suggestions for Your Vanilla Mousse
This easy vanilla mousse recipe is wonderfully versatile and can be enjoyed simply on its own, showcasing its pure flavor, or enhanced with a variety of delicious toppings and base layers. Here are some ideas to customize your dessert and make it truly your own:
Irresistible Topping Ideas:
- Fresh Berries or Fruit Coulis: A vibrant burst of fruit beautifully complements the creamy vanilla. Consider a homemade Raspberry Coulis, a sweet Strawberry Coulis, rich Blueberry Coulis, exotic Passion Fruit Coulis, or tropical Mango Coulis. Fresh berries like raspberries, blueberries, or sliced strawberries are also a classic and visually appealing choice.
- Homemade Fruit Compotes: For a more textured and comforting topping, fruit compotes are perfect. Try a luscious Mixed Berry Compote, sweet Peach Compote, summery Strawberry Compote, classic Blueberry Compote, fragrant Pear Compote, rich Cherry Compote, or tart Stewed Rhubarb.
- Tangy Curds: The bright, zesty flavor of fruit curds provides a wonderful contrast to the sweet vanilla. Explore the possibilities with a vibrant Orange Curd, classic Lemon Curd, or an aromatic Passion Fruit Curd.
- Chocolate Enhancements: For chocolate lovers, a drizzle of warm chocolate sauce or a scattering of delicate chocolate shavings adds an elegant touch and a complementary flavor profile.
Creative Base Layer Ideas:
- Crumbed Cookies: A crunchy base adds fantastic texture. Think finely crushed Sablés Bretons for a buttery shortbread note, popular Biscoff cookies for a spiced caramel flavor, or classic Graham Crackers for a hint of honey and cinnamon.
- A simple **sponge cake**: For a dessert resembling individual trifle jars, a delicate base of Dacquoise Sponge provides a lovely, light cake layer that absorbs some of the mousse’s creaminess.
Storage and Freezing Guidelines
To maintain their optimal taste and texture, these delightful vanilla mousse cups should always be stored in the refrigerator. They are at their absolute best when served within two days of preparation. If you’re not planning to serve them immediately after they have set, ensure each individual cup is carefully covered with plastic wrap or aluminum foil. This step is crucial to prevent the mousse from drying out or absorbing any unwanted odors from the fridge.
It is important to note that this particular dessert recipe is **not suitable for freezing**. Freezing and then thawing this vanilla mousse will significantly alter its delicate, airy texture, often resulting in a grainy or watery consistency that is less enjoyable. For the best experience, always enjoy it fresh and chilled.
Explore More Exquisite Mousse Desserts
- Decadent Coffee Mousse Cups
- Lush Double Raspberry Mousse
- Effortless Strawberry Mousse
- Tropical Passion Fruit Mousse
- Silky Eggless Mango Mousse
- Zesty Lemon Curd Mousse
- Indulgent Chocolate Orange Mousse
- Bright Orange Mousse Cups
Have you made this delightful vanilla mousse recipe?
We’d love to hear from you! Please leave a comment below to share your thoughts and experience. Don’t forget to tag us on Instagram @a.baking.journey with a photo of your beautiful creation!
Recipe Card: Easy Vanilla Mousse Cups

Easy Vanilla Mousse Cups
Servings:
4
to 6 servings
Author:
Sylvie
30 minutes
10 minutes
5 hours
5 hours
40 minutes
Print Recipe
Prevent your screen from going dark
Ingredients
-
240
ml
Thickened Cream / Heavy Whipping Cream (part 1),
min. 35% fat content -
1
fresh
Vanilla Bean Pod,
or 2 teaspoon vanilla paste -
40
gr
Caster Sugar -
2
large
Eggs,
at room temperature -
8
gr (1 tablespoon)
Cornstarch -
360
ml
Thickened Cream / Heavy Whipping Cream (part 2),
min. 35% fat content
Instructions
- Note: This recipe was first published in January 2023 and edited in April 2025 to address issues with the mousse not setting. The ingredients remain the same but the process has been slightly adjusted for improved stability.
- Pour the first part of the cream (part 1) into a large saucepan. Slice the vanilla bean in half lengthwise and carefully scrape off the seeds with a small paring knife. Add both the vanilla seeds and the remaining vanilla pod to the saucepan. Stir to combine, then heat gently over low heat until it just begins to simmer. Once simmering, turn off the heat, cover with a lid, and set aside to infuse for 10 to 15 minutes.
- In the meantime, place the caster sugar and room-temperature eggs in a large bowl. Whisk for about a minute to combine thoroughly, then mix in the cornstarch until the mixture is smooth and lump-free.
- Remove the vanilla pod from the warm infused cream (see note 1) then slowly pour the warm cream over the egg mixture while continuously whisking. Whisk well until the mixture is completely smooth and evenly combined (see note 2).
- Pour the combined mixture back into the saucepan. Cook over low heat for approximately 5 minutes, or until the custard has visibly thickened. Make sure to continuously stir with a heat-proof spatula, scraping the bottom and sides of the pan to prevent burning and ensure an even consistency. It’s crucial not to let it boil (see note 3 for doneness cues).
- Transfer the cooked vanilla custard into a clean bowl. Cover the surface directly with plastic wrap to prevent a skin from forming and refrigerate for 1 to 2 hours, or until it is completely cool throughout.
- Pour the second part of the cream (part 2) into a large bowl (if using an electric mixer) or into the bowl of a stand mixer fitted with the whisk attachment. Whip the cream on medium to medium-high speed until you achieve stiff peaks (see note 4).
- Take the thoroughly chilled custard out of the fridge and gently whisk it to loosen its texture. Add the whipped cream to the custard in 3 or 4 stages, gently folding it in with a spatula after each addition. The goal is a light, fluffy mixture that is not too firm, maintaining as much air as possible.
- Gently pour the vanilla mousse into 4 to 6 serving cups (depending on desired portion size). Refrigerate for a minimum of 3 hours – for the absolute best set and flavor, chilling overnight is highly recommended. Serve plain or garnish with your preferred topping once completely set.
Would you like to save this recipe?
We’ll email this post to you, so you can come back to it later!
Notes
- You can keep the leftover vanilla pod to make homemade vanilla extract, an excellent way to reduce waste and enhance future baking!
- This crucial step is known as “tempering the eggs.” It serves to gradually raise the temperature of the eggs, preventing a sudden heat shock that could cause them to curdle or scramble. This ensures a smooth and cohesive custard base.
- To confirm your custard is cooked to the correct consistency, it should be thick enough to coat the back of a spoon or spatula, and you should be able to draw a clean line through it with your finger. For accuracy, the custard should reach an internal temperature of 82 to 84 degrees Celsius (180 to 183 degrees Fahrenheit).
- When whipping the cream, it’s generally safer to slightly under-whip than to over-whip for mousse. You can stop at medium peaks for a particularly lighter dessert, or continue whipping until you achieve stiff peaks for a firmer, more stable vanilla mousse. Avoid whipping past stiff peaks, as the cream can become grainy and lose its smooth texture.
Nutrition (per serving)
Calories:
596
kcal
|
Carbohydrates:
16
g
|
Protein:
7
g
|
Fat:
57
g
|
Saturated Fat:
35
g
|
Polyunsaturated Fat:
3
g
|
Monounsaturated Fat:
15
g
|
Trans Fat:
0.01
g
|
Cholesterol:
264
mg
|
Sodium:
77
mg
|
Potassium:
178
mg
|
Fiber:
0.02
g
|
Sugar:
14
g
|
Vitamin A:
2353
IU
|
Vitamin C:
1
mg
|
Calcium:
114
mg
|
Iron:
1
mg
