Authentic Parisian Flan (Flan Pâtissier): A Timeless French Custard Tart Recipe
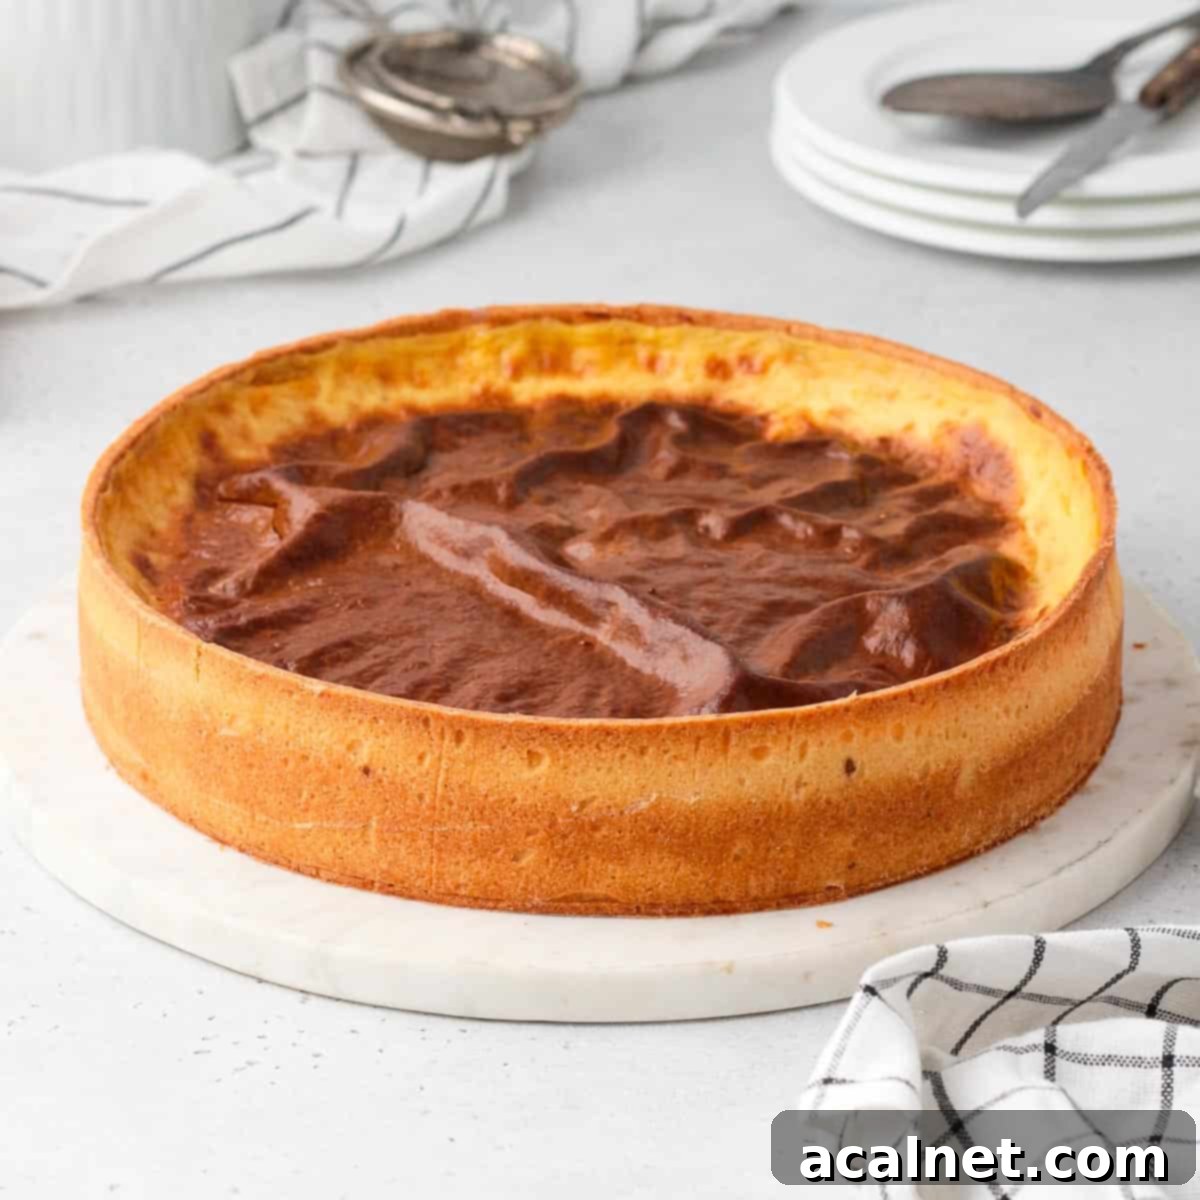
Step into the heart of French pâtisserie with this exquisite Parisian Flan, known in France as “Flan Pâtissier.” This traditional French dessert is a beloved classic, cherished for its elegant simplicity and deeply satisfying flavors. It masterfully combines a rich, buttery sweet shortcrust pastry with an incredibly smooth, intensely creamy, and perfectly baked vanilla custard filling. The result is a sophisticated yet comforting dessert that elevates any occasion, making it the perfect treat to serve for afternoon tea, a special dessert, or simply to indulge in a slice of French culinary heritage.
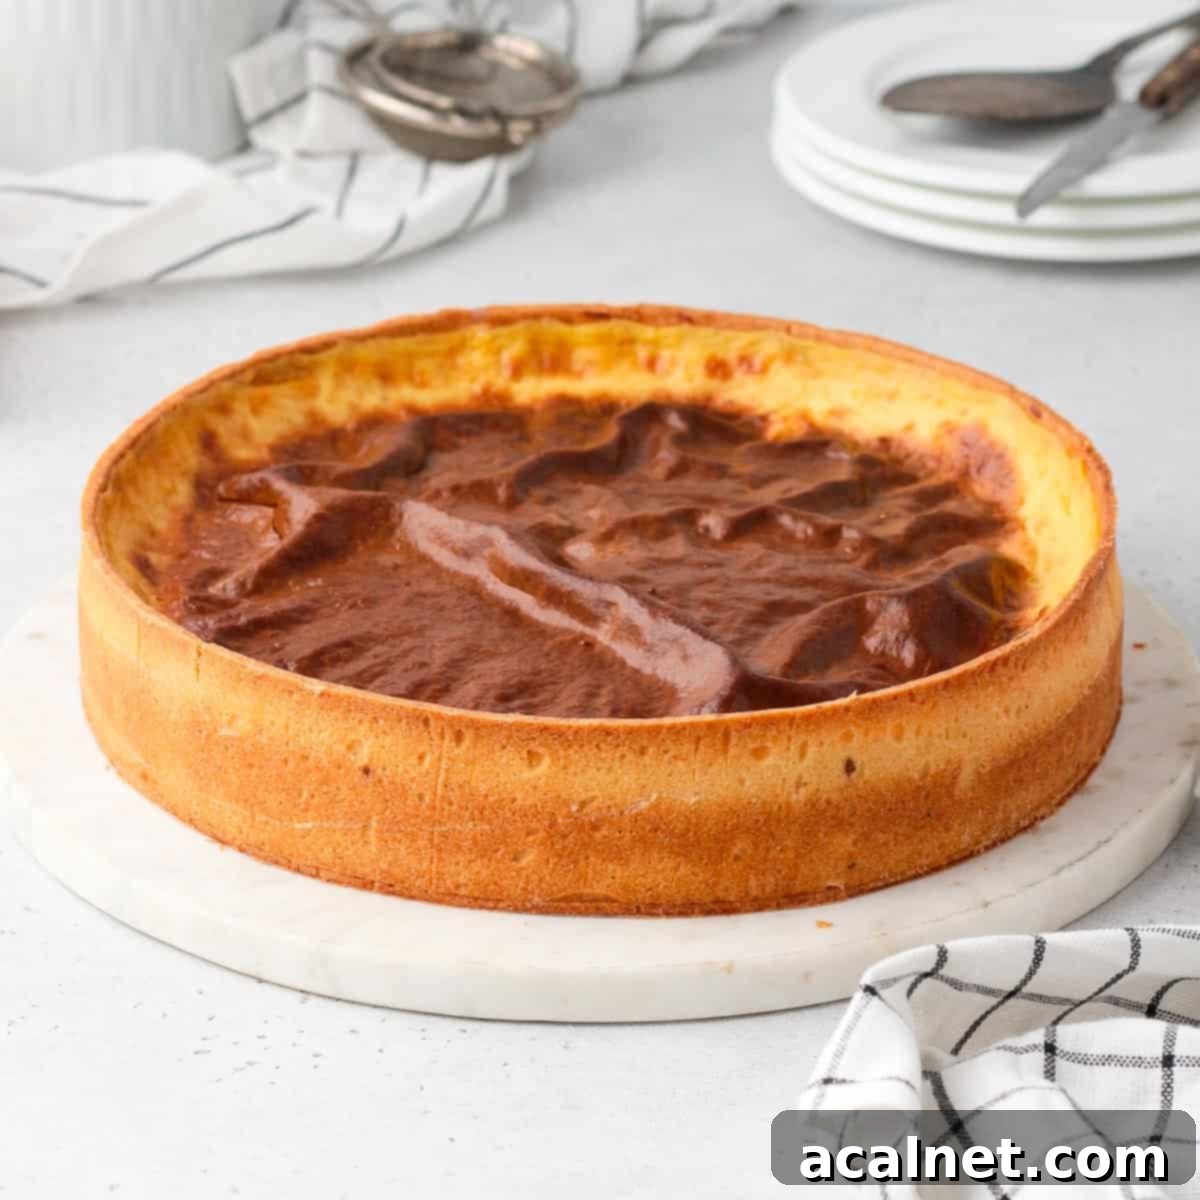
The Parisian Flan holds a special place in the hearts of many, a staple you’ll find gracing the windows of every French Pâtisserie. It’s a classic for a very compelling reason: its sheer deliciousness. For those who grew up in France, this super comforting dessert often conjures up a flood of cherished childhood memories. I vividly recall the joy of picking up a slice from the local bakery after school, a delightful ritual every other week. It’s more than just a dessert; it’s a taste of nostalgia.
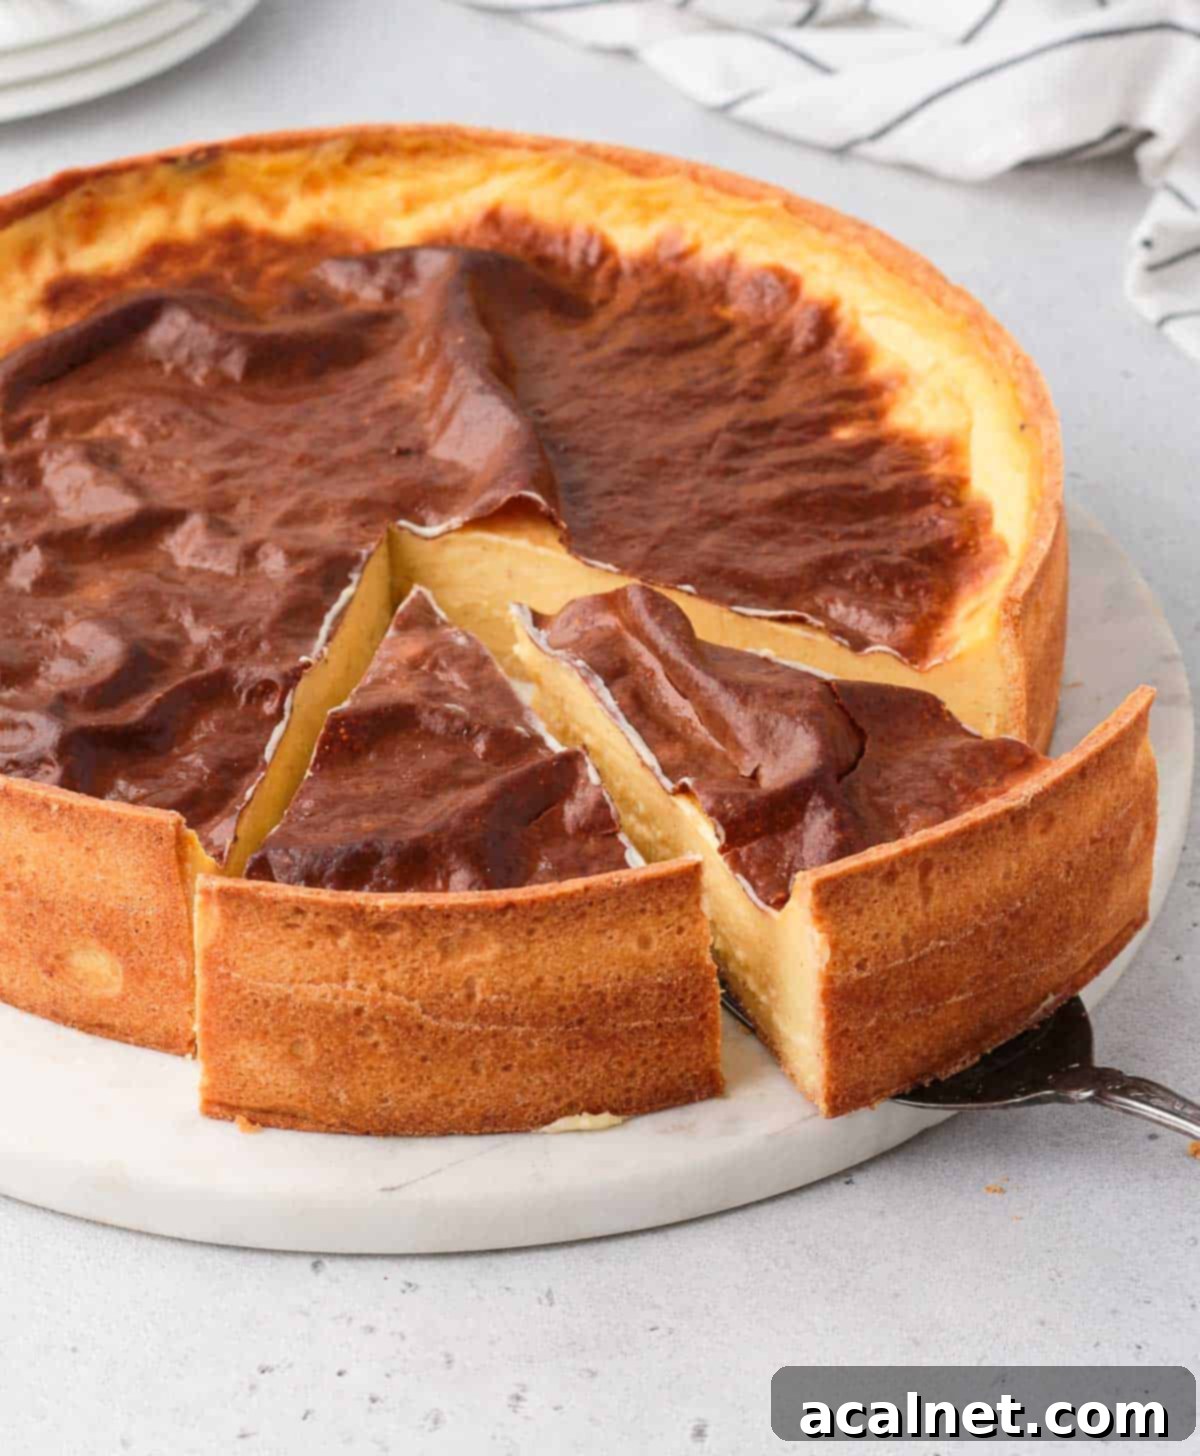
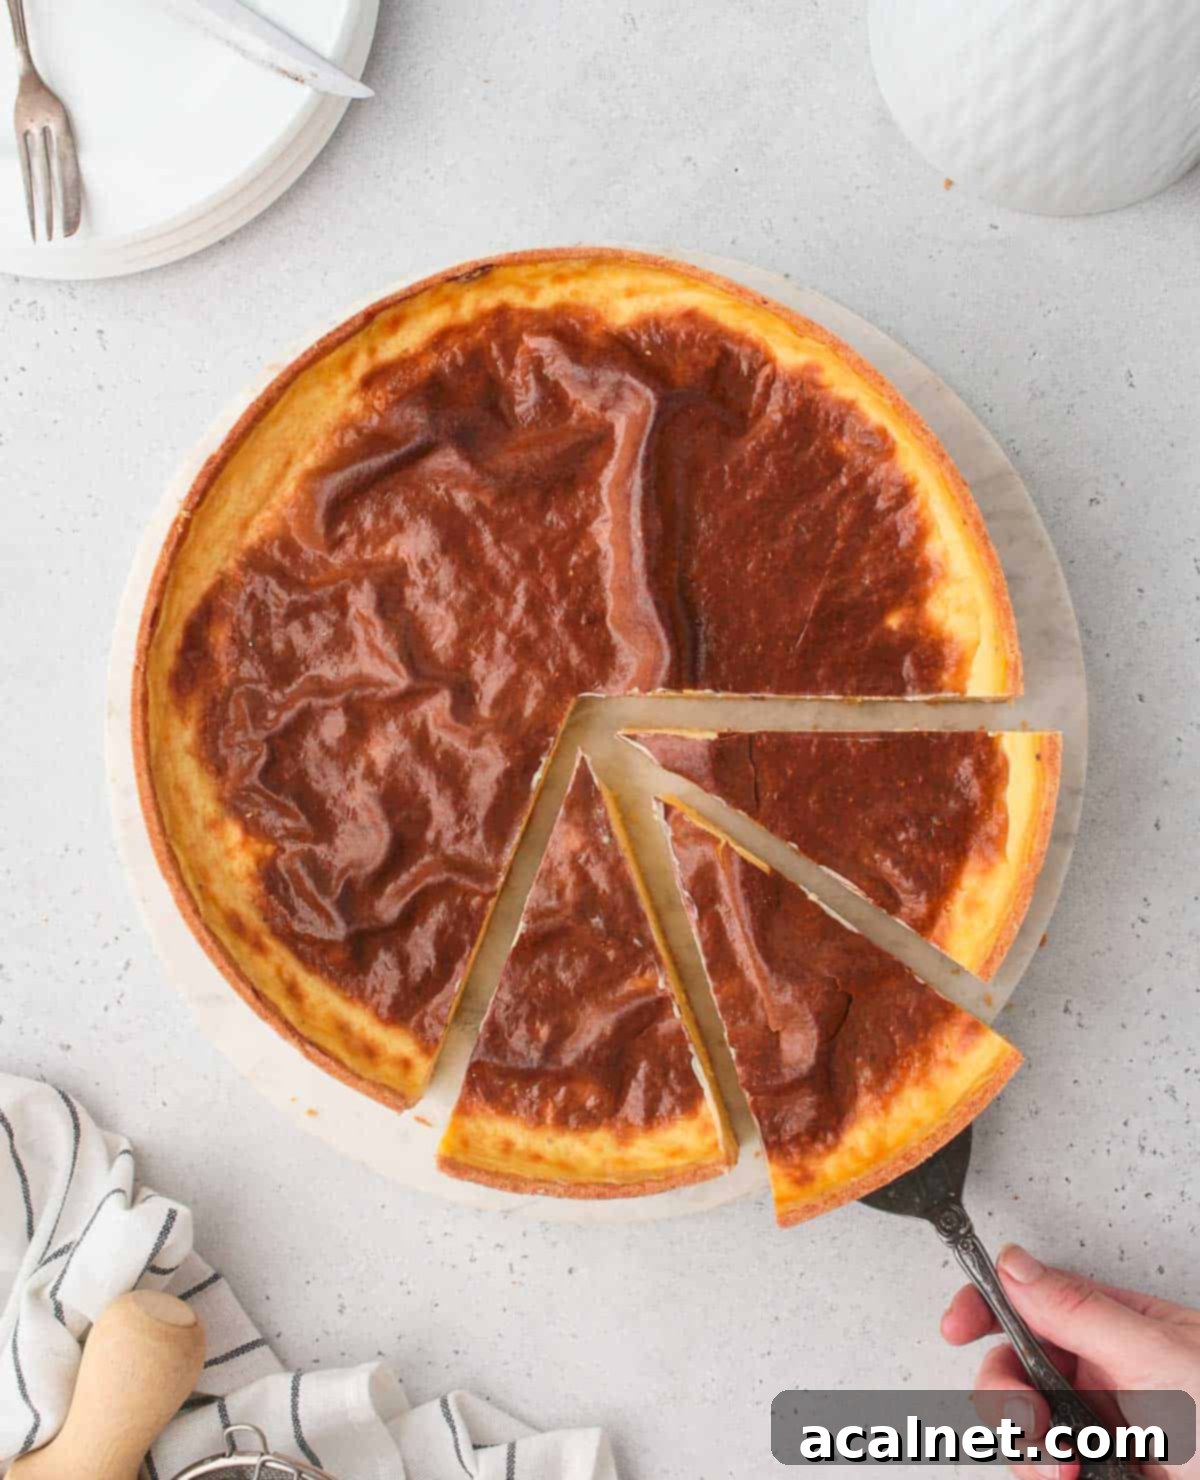
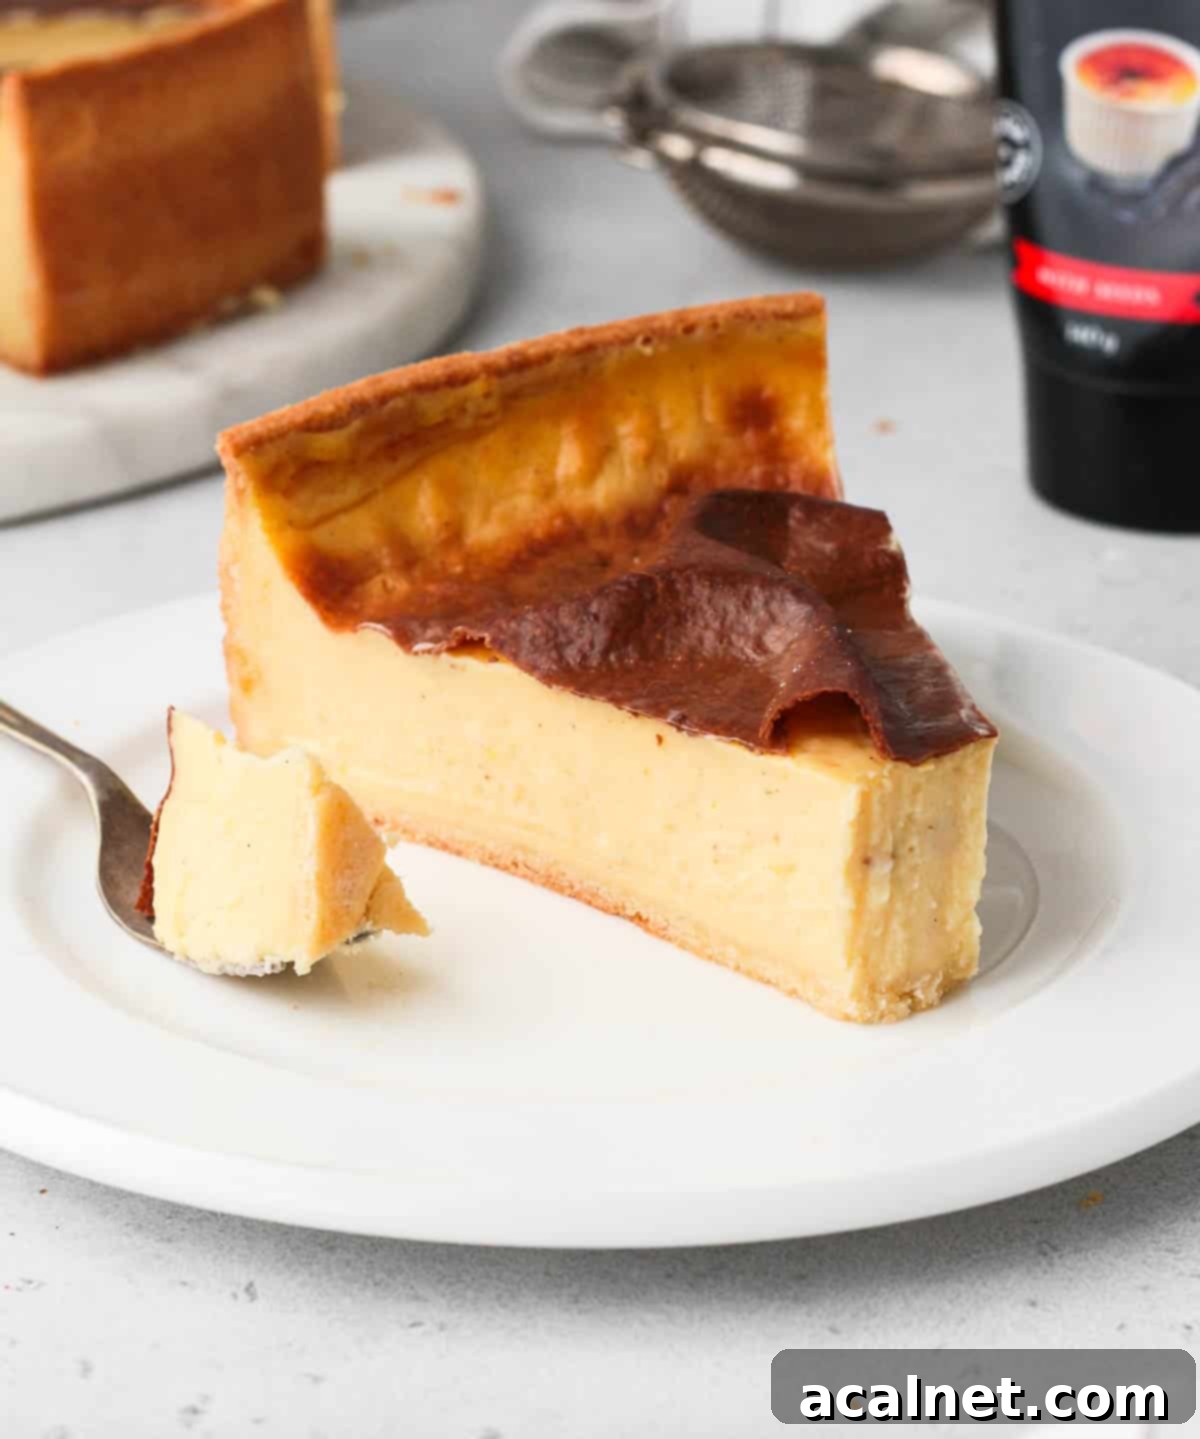
This iconic custard tart is a symphony of textures and flavors. It begins with a crispy, golden, and incredibly buttery Sweet Shortcrust Pastry, or “Pâte Sucrée,” which forms a sturdy yet delicate base. Nestled within is a thick, velvety baked custard filling, reminiscent of a luxurious Pastry Cream. This filling is generously infused with the aromatic essence of vanilla, delivering an incredibly creamy and luscious texture that simply melts in your mouth. The dessert is then baked to perfection until its surface develops a distinctive caramelised, thin crust, giving it that unmissable, signature look that is both inviting and utterly irresistible.
Why This Parisian Flan Recipe Stands Out
While many recipes for Flan Pâtissier exist, this particular guide focuses on achieving that authentic, rich, and deeply satisfying texture and flavor. We’ll emphasize the importance of quality ingredients and precise techniques to ensure your homemade Parisian Flan is nothing short of perfection. From the crispness of the Pâte Sucrée to the silken custard, every element is designed to replicate the cherished experience of a traditional French bakery. This recipe balances sweetness with the robust notes of vanilla, creating a harmonious dessert that’s not overly sweet but profoundly flavorful.
Essential Ingredients for Your Parisian Flan
Crafting the perfect Parisian Flan requires just a few simple, high-quality ingredients. The beauty of this dessert lies in its ability to transform basic components into something truly extraordinary. Here’s a detailed look at what you’ll need to create this classic French indulgence:
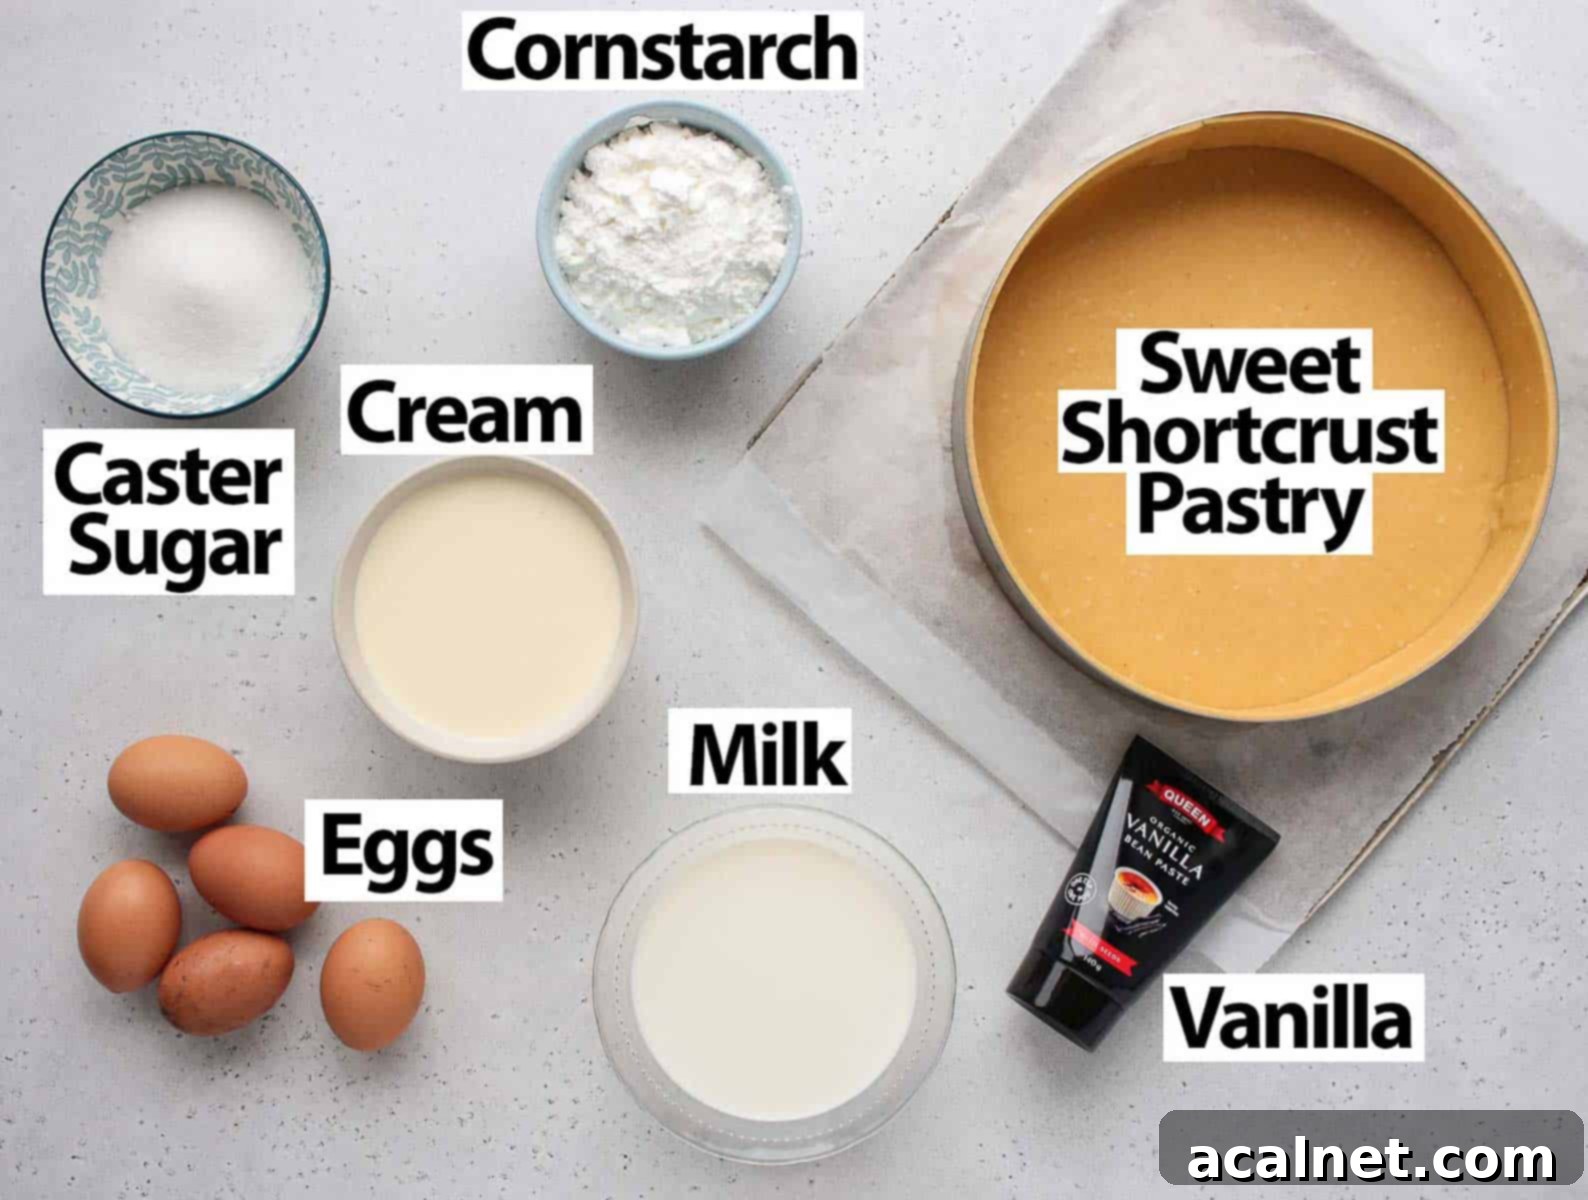
Scroll down to the recipe card below for exact quantities.
This French Flan Tart is composed of two primary, equally important elements: a robust pastry crust and a rich vanilla custard filling. While I’ve opted for a Pâte Sucrée (Sweet Shortcrust Pastry) for its delightful texture and flavor, some traditional versions of Flan Pâtissier are also made with Puff Pastry. Both offer a wonderful contrast to the creamy filling, but the shortcrust provides a satisfying crispness.
For the Sweet Shortcrust Pastry (Pâte Sucrée)
- Unsalted Butter: Use very soft, room-temperature butter. This is crucial for creaming smoothly with the sugar and preventing an overly tough pastry.
- Confectioner’s Sugar (Powdered Sugar): Its fine texture helps create a tender, melt-in-your-mouth pastry and blends seamlessly without grittiness.
- Egg: A large, room-temperature egg binds the ingredients and adds richness.
- Almond Meal (Almond Flour): This is a secret ingredient for many French pastries, adding a subtle nutty flavor and contributing to a more tender and delicate crumb.
- Fine Table Salt: Just a pinch to enhance all the other flavors.
- Plain/All-Purpose Flour: The base of the pastry. Avoid overworking it to prevent gluten development, which can lead to a tough crust.
For the Luxurious Vanilla Custard Filling
- Eggs: Medium-sized and at room temperature. Using room temperature eggs helps them emulsify better with other ingredients, creating a smoother custard.
- Sugar: Caster Sugar or Fine White Granulated Sugar is ideal. This recipe offers a balanced sweetness. If you prefer a sweeter dessert, feel free to slightly increase the sugar quantity to your liking.
- Cornstarch (or Corn Flour): This acts as the primary thickening agent, ensuring a perfectly set and smooth custard. Make sure it is sifted to prevent lumps. While Plain/AP Flour can be used, cornstarch typically yields a lighter, more delicate texture in the baked custard.
- Heavy/Thickened Cream: Opt for cream with a minimum of 30% to 35% fat content. This is key for achieving the rich, creamy, and luscious texture characteristic of an authentic Parisian Flan.
- Vanilla: This is where the magic happens! I highly recommend using Vanilla Paste for its intense flavor and visible vanilla specks, making it an excellent alternative to fresh Vanilla Beans. If possible, a fresh Vanilla Bean, with its scraped seeds and infused pod, will deliver the most profound vanilla aroma. Alternatively, Vanilla Essence/Extract can be used, but be aware that you might lose some depth of flavor.
- Milk: Full Cream (Whole Milk) is essential for the best flavor and creamy consistency. Its higher fat content contributes significantly to the richness of the custard. For a slight flavor variation, you could experiment with a full-fat plant-based milk like Coconut Milk or Almond Milk, which will impart a subtle nuance to the dessert.
Optional Flavor Additions and Variations
While classic vanilla is the most traditional and widely adored flavor for Parisian Flan, this versatile dessert lends itself beautifully to various creative interpretations. Don’t hesitate to experiment with different flavor profiles to suit your taste or the season:
- Chocolate Flan: Infuse the milk with high-quality dark chocolate or cocoa powder for a rich, decadent chocolate custard.
- Coffee Flan: Add a shot of espresso or strong brewed coffee to the milk, or infuse coffee beans during the heating process for an aromatic coffee-flavored custard.
- Citrus Zest: Incorporate finely grated lemon, orange, or lime zest into the custard for a bright, refreshing twist.
- Berries: While not typically mixed into the custard itself, fresh berries can be served alongside a slice of flan for a burst of color and tartness.
- Spices: A hint of cinnamon, nutmeg, or cardamom can add warmth and complexity to the vanilla base.
- Alcohol Infusion: A tablespoon of rum, Grand Marnier, or even a good quality brandy can add an adult touch to your flan. Add it to the custard after it’s cooked and slightly cooled.
How to Master the French Flan Tart: A Step-by-Step Guide
Creating a perfect French Flan Tart, or Flan Pâtissier, is a rewarding process that involves two main stages: preparing the crisp sweet shortcrust pastry and then crafting the silky vanilla custard filling. Each step is crucial to achieving the iconic texture and flavor of this classic French dessert.
Part 1: Crafting the Sweet Shortcrust Pastry (Pâte Sucrée)
Starting with the pastry is key, especially if you’re making it from scratch. The Pâte Sucrée requires chilling time, so preparing it first allows it to rest and develop its structure. This pastry can also be made ahead of time and stored unbaked in the fridge or even frozen for later use, making it incredibly convenient.
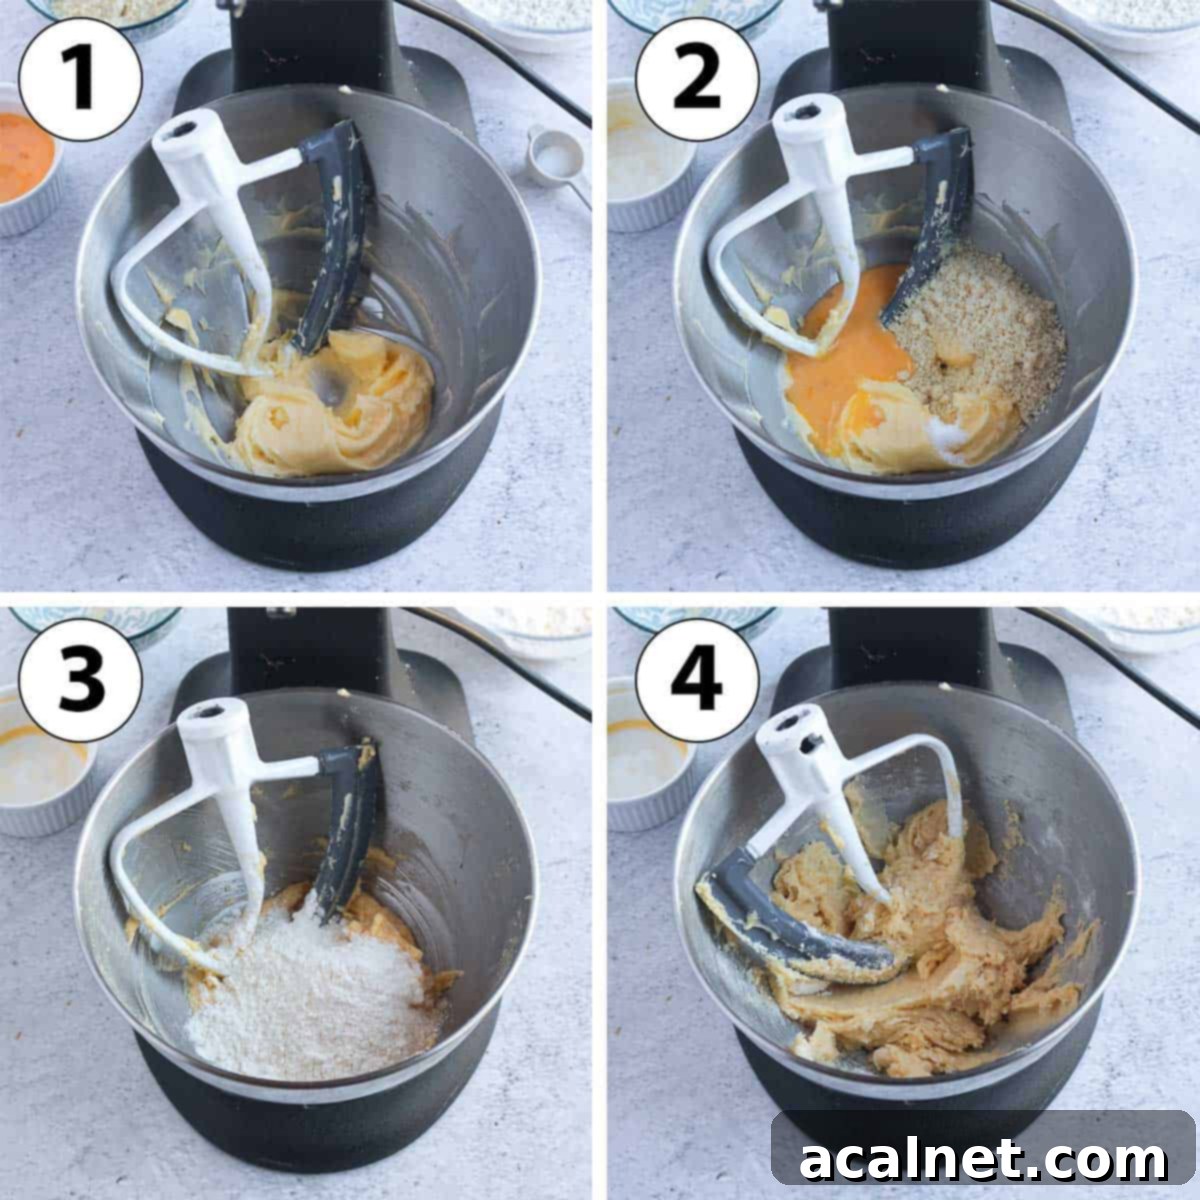
- Photo 1: Begin by creaming together the very soft unsalted butter and confectioner’s sugar in the bowl of your stand mixer. Mix for just about a minute, or until well combined and lightened. It’s important not to over-mix here; we’re simply combining, not incorporating excessive air into the pastry, which can make it tough.
- Photo 2: Next, add the room-temperature egg and almond meal to the butter-sugar mixture. Continue mixing until these ingredients are fully incorporated, ensuring a smooth base for your pastry. The almond meal adds a delightful tenderness and subtle flavor.
- Photo 3: Finally, introduce the sifted plain/AP flour and a pinch of salt to the bowl. Sifting the flour prevents lumps and ensures a smoother dough.
- Photo 4: Mix these dry ingredients on a slow speed until they are *just* combined. This is a critical step: avoid overworking the pastry at all costs. Overworking develops gluten, which can lead to a tough, chewy crust instead of the desired tender, crumbly texture. The dough will appear very soft at this stage, which is perfectly normal.
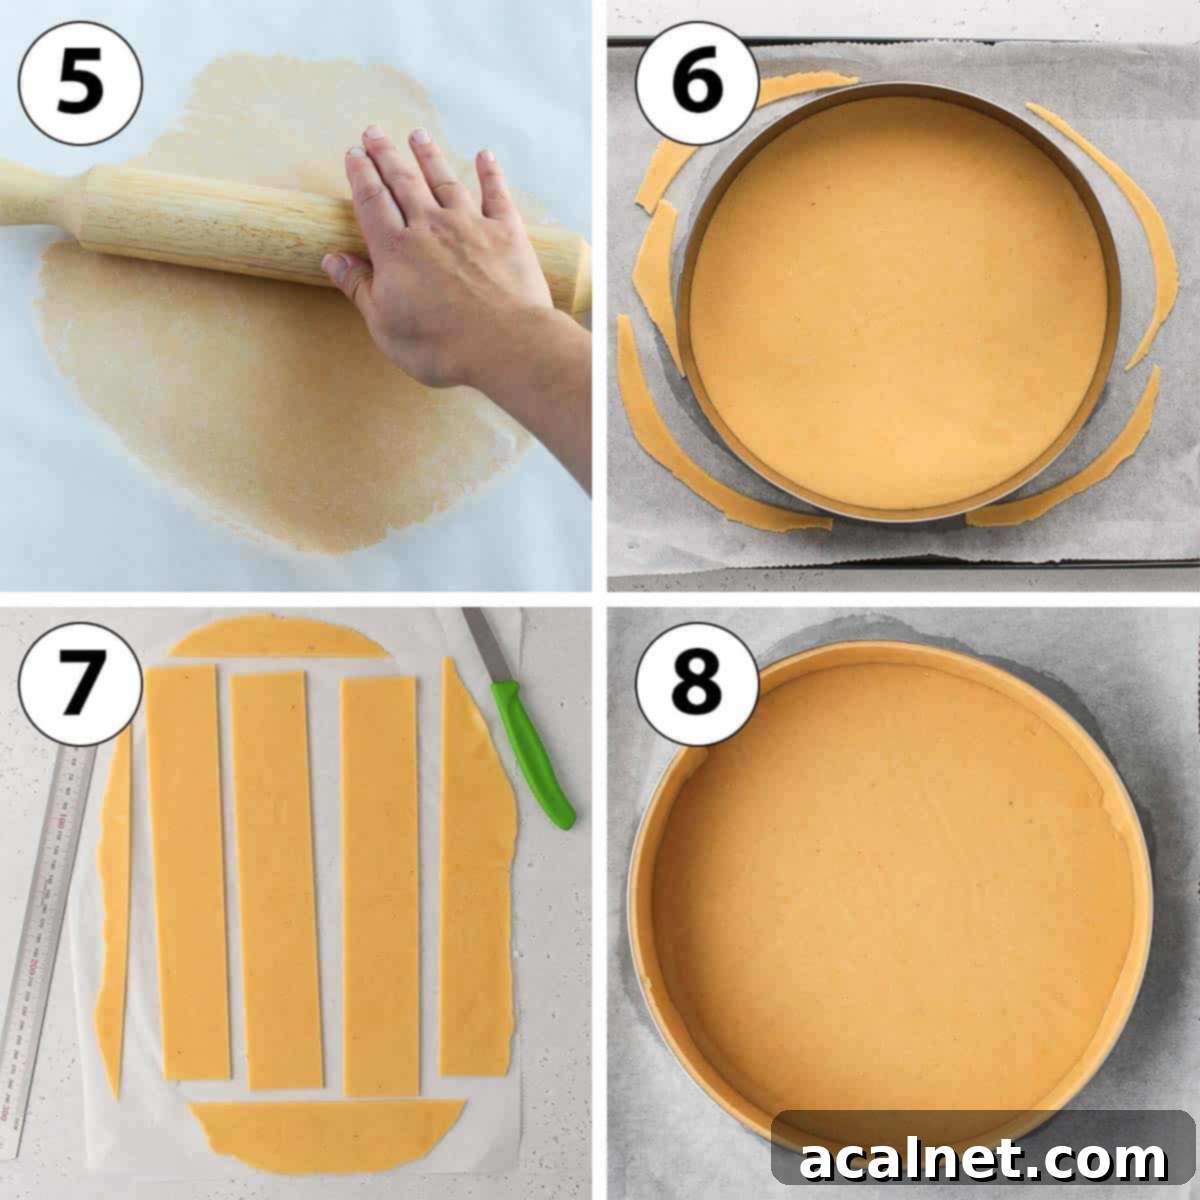
- Photo 5: Divide the soft pastry dough into two equal portions. Place each portion between two sheets of baking paper. Using a rolling pin, roll them out thinly, aiming for a thickness of about 2 to 3mm (1/16 to 1/8 inch). The pastry needs to be quite thin to ensure you have enough to line your tart ring and achieve the desired crispness. The first portion should be rolled wide enough to form the base of your pastry ring, while the second should be shaped into a long rectangle from which you’ll cut strips for the sides.
- For this recipe, I recommend using a 25 cm wide x 5 cm high (10 inch wide x 2 inch high) Pastry Ring. Alternatively, a deep-dish tart or pie dish can also be used.
- Carefully transfer the rolled pastry sheets (still between baking paper) to the fridge. Allow them to chill and rest for at least 1 hour, or up to 24 hours. This chilling period is crucial for relaxing the gluten and firming up the butter, which prevents shrinkage during baking. You can also freeze the rolled pastry at this point if you wish to prepare it well in advance.
- Photo 6: Once chilled, take the first rolled dough. Place your 25 cm / 10 inch Pastry Ring over it and cut out a perfect circle to form the bottom of your crust. I find it easiest to cut directly onto the lined baking tray that I will use to bake the Parisian Flan, minimizing handling.
- Photo 7: With the second dough, cut out long strips that are the same height as your pastry ring (5 cm or 2 inches). Try to cut them as long as possible to reduce the number of seams.
- Photo 8: Carefully line the edges of your pastry ring with these strips of dough, slightly overlapping each strip. Gently press on the seams to connect them, ensuring a continuous seal. Pay special attention to the corner where the bottom meets the sides, pressing gently to make sure there are no gaps that could lead to leakage of the custard filling during baking. Trim any excess pastry with a small, sharp knife to create a neat edge.
- Return the lined pastry ring to the fridge to chill and rest again for at least 1 hour, or up to 24 hours. For an extra measure of success and to prevent any potential shrinkage, I like to place the lined pastry in the freezer for about 15 minutes just before filling it and baking. This ensures it is thoroughly cold when it enters the hot oven.
Once your pastry crust is perfectly prepared and sufficiently chilled, it’s time to move on to the star of the show: the rich and creamy vanilla custard filling.
Part 2: Preparing the Velvety Vanilla Custard Filling
- Preheat your oven to 200°C (390°F). It’s important to have your oven at the correct temperature before you start cooking the custard.
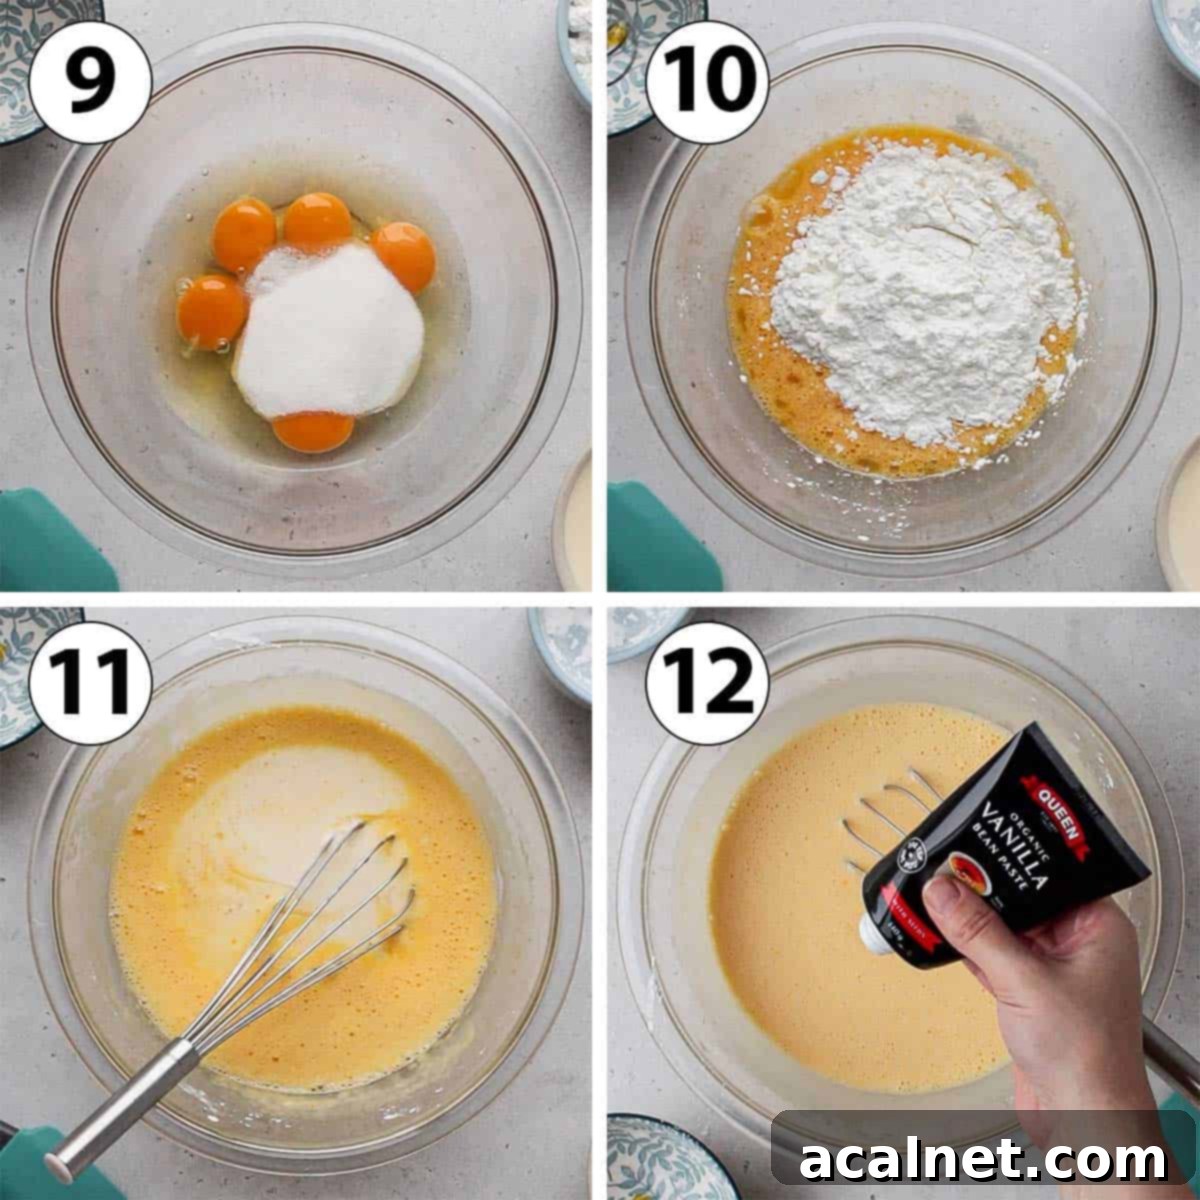
- Photo 9: In a large, heat-proof mixing bowl, whisk together the room-temperature eggs and caster sugar until they are just combined. There’s no need to whisk vigorously or for an extended period; we want to avoid incorporating too much air, which can cause the custard to puff up excessively and then collapse.
- Photo 10: Gradually whisk in the cornstarch, ensuring it’s sifted to prevent any lumps. Cornstarch is key to a smooth, thick custard.
- Photo 11: Next, whisk in the heavy/thickened cream until fully incorporated. The cream adds incredible richness and ensures a truly luscious texture.
- Photo 12: Finally, add the vanilla paste to the mixture. The vanilla paste will infuse the custard with its signature aroma and flavor.
Note on Vanilla Beans: If you are using a fresh vanilla bean, you’ll want to incorporate it differently. First, split the vanilla bean in half lengthwise and scrape out the tiny seeds. Add both the scraped pods and seeds directly to the milk in step 13. Heat the milk as directed, then turn off the heat, cover the pot, and let it infuse for about 20 minutes to extract maximum flavor. Re-heat the infused milk slightly before proceeding to step 14.
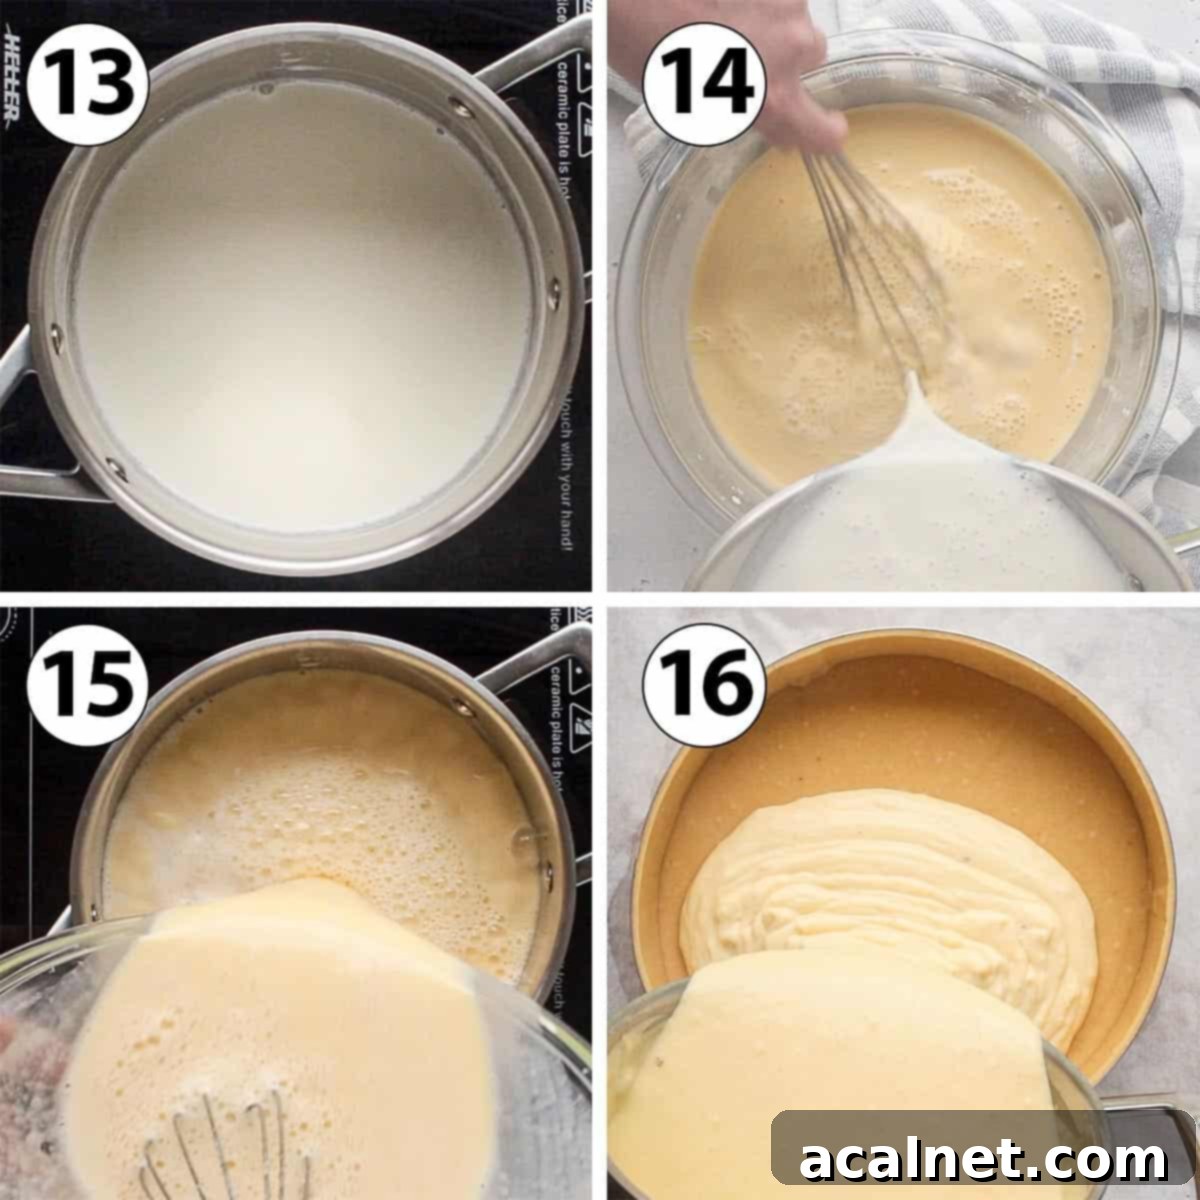
- Photo 13: In a separate large pot, gently heat the full cream milk on low to medium-low heat until it just begins to simmer. Watch carefully to ensure it doesn’t boil over.
- Photo 14: Slowly pour the hot milk over the egg, sugar, cornstarch, cream, and vanilla mixture in the mixing bowl. While pouring, continuously whisk the egg mixture. This process is called tempering the eggs, and it prevents them from scrambling by gradually raising their temperature.
- Photo 15: Whisk the combined mixture well, ensuring everything is fully integrated, then transfer it all back into the same pot on the stove. Cook the custard on low to medium-low heat, continuously whisking. This constant movement is essential to prevent lumps and ensure even thickening. Continue cooking until the liquid visibly thickens to a consistency similar to a thick cream or béchamel sauce.
- Photo 16: Pour the hot, thickened custard filling directly into your prepared, rested, and chilled sweet shortcrust pastry shell. Smooth the top gently with a spatula.
- Carefully place the tart into the preheated oven and immediately drop the temperature to 180°C (350°F). Bake for approximately 50 minutes, or until the top of the baked custard develops a beautiful, golden-brown caramelized “skin.” The center of the custard should still have a slight wobble when you gently move the baking tray; this indicates it’s cooked through but will fully set as it cools and chills.
- Once baked, remove the Parisian Flan from the oven. Allow it to cool down completely at room temperature for about 1 hour. After that, transfer it to the fridge to chill for a minimum of 3 hours, though preferably overnight. This chilling period is crucial for the custard to fully set and achieve its signature firm yet creamy texture, as well as for the flavors to meld beautifully.
Recipe FAQs: Your Questions Answered
The primary distinction lies in their structure and presentation. The French version, or Flan Pâtissier, is traditionally baked within a pastry crust, creating a substantial tart. The Spanish Flan, on the other hand, is a smooth, pudding-like baked custard, typically prepared in a water bath and often features a caramel topping (like Crème Caramel). While ingredients are quite similar, Spanish Flan usually omits cornstarch and is often made with milk only. Interestingly, the French have a similar dessert to the Spanish Flan called “Crème Caramel” (sometimes simply called “Flan”), which is also a crustless baked custard.
Yes, absolutely! While a sweet shortcrust pastry (Pâte Sucrée) is my personal preference for its robust, buttery crunch, Flan Pâtissiers are also frequently made with puff pastry. If opting for puff pastry, ensure it’s a good quality, all-butter variety for the best flavor. However, be aware that because this recipe does not involve blind-baking the pastry, puff pastry might occasionally remain slightly raw at the bottom if not baked correctly. The sweet shortcrust pastry generally yields a more consistent and reliably crisp base.
Absolutely! Using a store-bought shortcrust pastry is a fantastic time-saver and perfectly acceptable. It allows you to focus more on perfecting the creamy custard filling. Depending on the size of the store-bought sheets, you might need to use two packages to cover both the bottom and sides of your tart ring. Just make sure to choose a good quality pastry for the best results.
Indeed, making Parisian Flan in advance is not only possible but often recommended! The flavors and textures truly deepen and meld together beautifully after a good rest. The baked flan requires a minimum of 3 hours of chilling in the fridge to set properly, but for the ultimate creamy and firm texture, leaving it to chill overnight is highly recommended. Furthermore, the pastry itself is excellent for advance preparation. You can make the dough and keep it rolled between sheets of baking paper in the fridge for up to 24 hours, or even freeze it for a couple of months. Once the tart ring is lined, the unbaked crust can also be chilled for up to 24 hours before filling and baking.
Expert Tips & Troubleshooting for a Perfect Flan
Achieving a flawless Parisian Flan is within your reach with these invaluable tips and troubleshooting advice:
- Chill Your Pastry Generously: Do not, under any circumstances, skip or shorten the resting and chilling times for your pastry. This is arguably the most crucial step for a perfect crust. The longer the pastry rests and chills, the more relaxed the gluten will become, and the colder the butter will be. This directly translates to preventing the pastry shell from shrinking, collapsing, or becoming tough in the oven, ensuring a crisp, stable base.
- Handle Custard Gently: When whisking the custard batter, try to avoid over-whisking. Excessive whisking introduces too much air, which can cause the custard to puff up dramatically during baking and then deflate or crack once it’s removed from the oven. Aim for thorough mixing without creating a frothy mixture.
- Fixing Lumpy Custard: If, despite your best efforts, the custard develops lumps after cooking, don’t despair! First, try whisking it vigorously for a minute or two to break up any smaller lumps. If larger lumps persist, pour the custard through a fine-mesh sieve to remove them. For an even smoother consistency, an immersion blender used on its lowest speed can quickly blend out any remaining lumps, creating a silky-smooth custard.
- Flavor Exploration: Beyond classic vanilla, the custard filling is a fantastic canvas for other flavors.
- Coffee: Infuse coffee grounds or instant coffee into the milk when heating it up.
- Chocolate: Melt quality dark chocolate into the hot milk or whisk in cocoa powder with the cornstarch.
- Citrus Zest: Add grated lemon, orange, or lime zest to the milk during heating for a bright, aromatic custard.
- Orange Blossom Water or Rose Water: A few drops can add a delicate, floral note, especially popular in Middle Eastern and some French pastries.
- Alcohol: A tablespoon of rum, Grand Marnier, or even a good quality brandy can be stirred into the custard after it’s cooked and slightly cooled for an adult twist.
- Achieving the Perfect Golden Top: If your flan’s top isn’t caramelizing sufficiently at the end of baking, you can carefully turn on the broiler (grill) for a minute or two. Keep a very close eye on it, as it can go from perfectly golden to burnt in seconds!
Storing Your Parisian Flan for Optimal Enjoyment
Proper storage is key to maintaining the exquisite texture and flavor of your freshly baked Parisian Flan.
- Storing the Baked Flan: Once baked and completely cooled to room temperature, your Parisian Flan must be stored in the refrigerator. For the best creamy texture and to allow the flavors to fully develop and set, ensure it chills for as long as possible – overnight is truly ideal. When covered loosely with plastic wrap or in an airtight container, it will last beautifully for up to 3 days in the fridge. However, for peak freshness, creaminess, and overall enjoyment, I highly recommend consuming it within 24 to 48 hours of baking.
- Freezing the Flan: While the baked French Flan can technically be frozen, I generally do not recommend it. Freezing and thawing can alter the delicate creamy texture of the custard, sometimes making it slightly watery or grainy. For this reason, it’s best enjoyed fresh.
- Freezing the Pastry: The sweet shortcrust pastry, however, freezes exceptionally well! This is a great way to get a head start on your baking. You can freeze it in a couple of ways:
- Rolled Dough: After rolling the dough between two sheets of baking paper, simply wrap it well and freeze it flat for a couple of months. Thaw in the fridge before use.
- Lined Tart Ring: If you’ve already lined your pastry ring, you can carefully freeze the unbaked pastry shell for a few days (ensure it’s well-wrapped). This is convenient if you plan to bake within a week or so. If freezing for longer, it’s better to freeze the dough flat.
More French Tart Recipes to Explore
If you’ve fallen in love with the art of French tarts after making this Parisian Flan, there’s a whole world of delightful pastries waiting for you to discover. Here are some other classic French tart recipes that are sure to impress:
- Strawberry Custard Tart: A seasonal delight with fresh berries and creamy custard.
- Chocolate Ganache Tart: Rich, intense, and utterly decadent for chocolate lovers.
- Orange Cream Tart: A vibrant and zesty tart with a silky orange-infused cream.
- Rhubarb Custard Tart: A perfect balance of tart rhubarb and sweet, smooth custard.
- Peach Galette: A rustic, free-form tart bursting with juicy peaches and almond notes.
- French Apple Tart: A timeless classic featuring thinly sliced apples atop a tender crust.
- Baked Chocolate Tart: A deep, rich chocolate experience in a buttery shell.
- Chocolate Raspberry Tart: The perfect pairing of sweet chocolate and tart raspberries.
Made this recipe?
Let us know if you liked it by leaving a comment below, and tag us on Instagram @a.baking.journey with a photo of your creation!
Recipe
Parisian Flan (Flan Pâtissier)
Servings:
12
Author:
Sylvie
40 minutes
50 minutes
6 hours
7 hours
30 minutes
Print Recipe
Prevent your screen from going dark
Ingredients
Sweet Shortcrust Pastry (Pâte Sucrée)
-
100
gr
Unsalted Butter,
very soft -
40
gr
Confectioner’s Sugar,
or Powdered Sugar -
1
large
Egg,
at room temperature -
40
gr
Almond Meal -
1
pinch
Fine Table Salt -
200
gr
Plain / All-Purpose Flour
Vanilla Custard
-
5
large
Eggs,
at room temperature -
100
gr
Caster Sugar -
100
gr
Cornstarch,
sifted -
250
ml
Heavy / Thickened Cream,
35% fat -
2
teaspoon
Vanilla Paste,
or two fresh vanilla bean pods -
1000
ml
Full Cream / Whole Milk
Instructions
Sweet Shortcrust Pastry (Pâte Sucrée)
- Place the soft butter and Confectioner’s Sugar in the bowl of your mixer and cream it until just combined. Mix in the Egg and Almond Meal.
- Add the Salt and Flour and mix on the lowest speed until just combined.
- Divide the pastry in two equal parts. Place them each between two sheets of baking paper each and roll them thinly, about 2 to 3mm or 1/16 to 1/8 inch (see note 1). Place in the fridge to chill and rest for at least 1 hour.
- Prepare a large baking tray and line if with a sheet of baking paper or a baking mat. With the first rolled pastry, cut out the bottom of the crust with a 25 cm / 10 inch Pastry Ring (see note 2).
- With the second rolled pastry, cut out long strips that are as high as your pastry ring. Place the strips of pastry against the edges of the pastry ring to create the sides of the crust. Slightly overlap each strip and press on the seam to connect them. Gently press on the corner between the bottom and sides to make sure they are touching and avoid any leakage. Cut out any excess pastry with a small sharp knife.
- Place back in the fridge to chill and rest for at least 1 hour – or up to 24 hours.
Vanilla Custard
- Preheat your oven on 200’C/390’F.
- In a large heat-proof mixing bowl, whisk together the Eggs and Sugar until just combined. Whisk in the sifted Cornstarch, then the Cream and Vanilla (see note 3 if using fresh vanilla bean).
- Heat up the Milk on low to medium low heat until it simmers. Pour it over the Egg batter while continuously whisking to temper the eggs, whisk well until combined, then transfer it all back into the pot on the stove.
- Cook on low to medium low heat until the liquid starts to thicken, continuously whisking to avoid lumps (see note 4). Pour it into the Sweet Shortcrust Pastry.
- Place it in the oven and drop the temperature to 180’C/350’F. Bake for about 50 minutes, or until the skin created on top of the baked custard is golden brown (see note 5).
- Remove from the oven and leave to cool down at room temperature for about 1 hour, then place in the fridge to chill for at least 3 hours – preferably overnight.
Video
Would you like to save this recipe?
We’ll email this post to you, so you can come back to it later!
Notes
I used a 25 cm wide by 5 cm high Pastry Ring (10 inch by 2 inch) for this recipe. You can use a deep pie or tart pan if preferred. Note that if you are using a different size pastry ring or tart/pie pan, the baking time might need to be adjusted.
For more details, tips and troubleshooting on the pastry used here, read my Sweet Shortcrust Pastry recipe.
Instruction Notes:
- Both pieces of pastry need to be quite thin or you won’t have enough. The first part of the pastry should be rolled wide enough to fill the bottom of the pastry ring that is 25 cm wide by 5 cm high (10 x 2 inch). The second part should be shaped more into a long rectangle as we will cut out strips of pastry to create the edges of the crust.
- I usually place the pastry on top of the lined baking tray then cut it out with the pastry ring directly on it so I don’t have to move the pastry again. If you don’t have a pastry ring, you can use a deep pie or tart pan.
- If you are using fresh Vanilla Bean pods, you will want to add it to the Milk during the next step. Cut the Vanilla Beans in half and scrap the seeds. Add both the pods and seeds to the Milk, heat it up, then turn off the the heat, cover the pot and let it infuse for 20 minutes.
- If the custard gets lumpy after you cook it, try to whisk it vigorously to break out any lumps first. If that does not work, pour it through a sieve to remove any large lumps and/or use an immersion blender on its lowest speed to blend it and smooth it out.
- The custard should be still slightly moving when you move the tray – it will fully set when it chills.
Nutrition (per serving)
Calories:
371
kcal
|
Carbohydrates:
38
g
|
Protein:
8
g
|
Fat:
21
g
|
Saturated Fat:
11
g
|
Polyunsaturated Fat:
1
g
|
Monounsaturated Fat:
5
g
|
Trans Fat:
1
g
|
Cholesterol:
137
mg
|
Sodium:
80
mg
|
Potassium:
176
mg
|
Fiber:
1
g
|
Sugar:
16
g
|
Vitamin A:
768
IU
|
Vitamin C:
1
mg
|
Calcium:
132
mg
|
Iron:
1
mg
