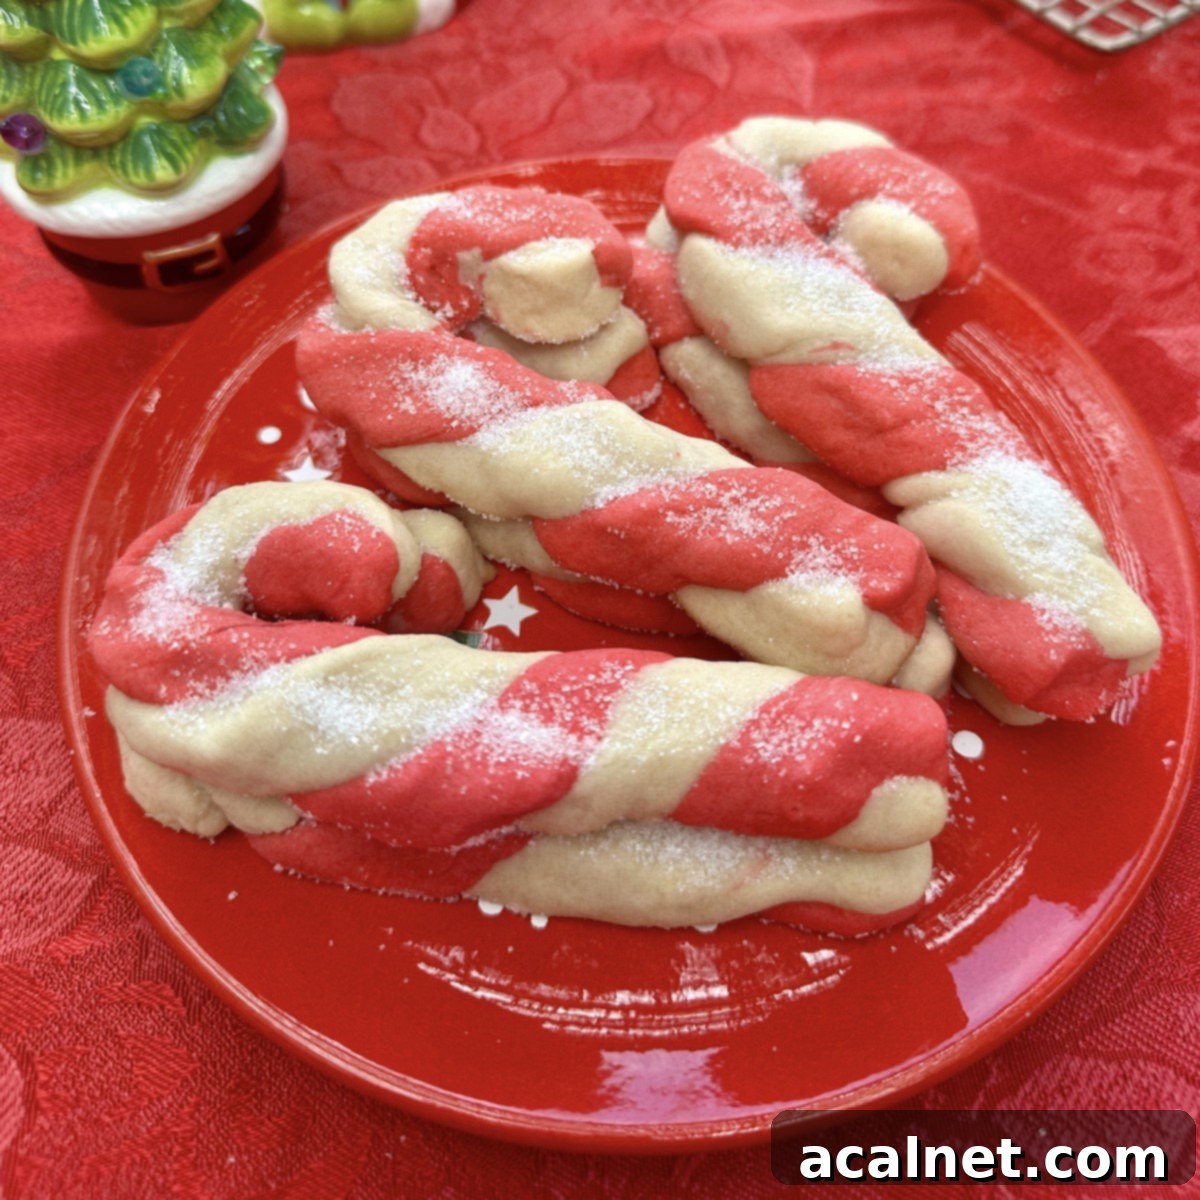
The Best Classic Candy Cane Cookies: A Festive Holiday Baking Tradition
Step into the magic of the holiday season with these enchanting Candy Cane Cookies! This recipe brings to life a truly nostalgic Christmas cookie, shaped like the beloved, iconic candy cane—a universal symbol of holiday cheer. Whether you’re creating cherished memories baking with children, preparing a delightful assortment for a festive cookie exchange, or simply getting a plate ready for Santa’s arrival, these Candy Cane Cookies are more than just a sweet treat. They are a charming, memorable, and absolutely essential addition to your holiday baking repertoire, guaranteed to bring smiles and a touch of yuletide wonder to everyone who tries them.
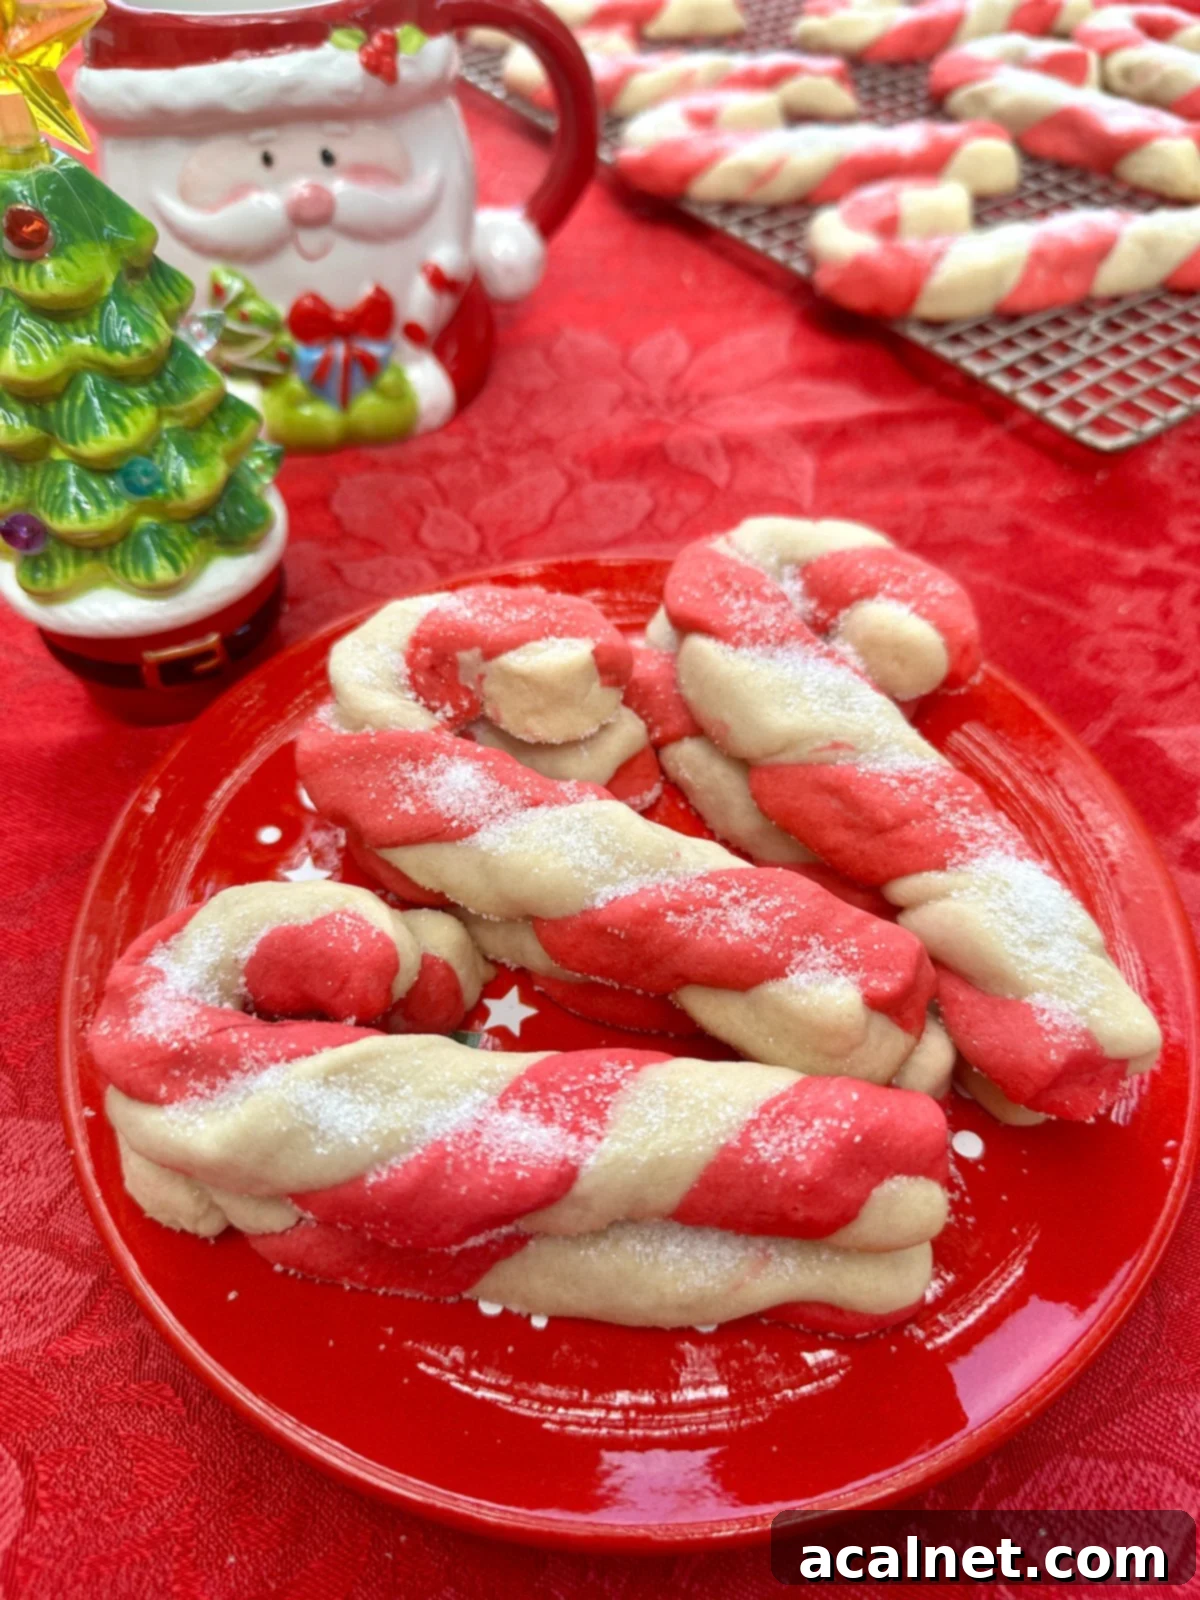
Dive into the delightful process of making these iconic holiday cookies that not only look festive but also melt in your mouth with every bite. Their distinctive swirl of red and white, combined with a delicate almond and vanilla flavor, makes them truly irresistible. This recipe is designed to be straightforward and fun, ensuring that even novice bakers can achieve perfectly shaped, deliciously tender candy cane cookies.
[feast_advanced_jump_to]
⭐ Why You’ll Love These Candy Cane Cookies

These beautiful swirl cookies are more than just a recipe; they are a cherished holiday tradition in my home, a legacy that has spanned decades! My children, now grown, eagerly request them every single year, proving that some traditions truly stand the test of time. An incredible added bonus, much like my No Chill Sugar Cookie recipe, is that there’s absolutely no need to chill the dough. This saves precious time during the busy holiday season, allowing you to whip up batches of these festive treats with ease and spontaneity.
The original inspiration for this classic Christmas cookie recipe comes straight from the “crinkled” and well-loved pages of a vintage Betty Crocker Cookbook from the 1970s. This timeless recipe ensures an authentic, old-fashioned flavor that evokes warmth and nostalgia.
The secret to their signature, distinctive taste lies in the harmonious blend of almond and vanilla extracts. These two flavorings work in perfect symphony to give these shortbread-like, buttery holiday cookies their uniquely delightful aroma and taste. The almond extract provides a subtle, sophisticated nutty note that is quintessentially holiday, while the vanilla extract rounds out the sweetness with its comforting, familiar essence. Together, they create a flavor profile that is both festive and utterly delicious.
Beyond the delightful taste, the visual appeal of these candy cane cookies is unmatched. The striking red and white swirls make them a centerpiece on any holiday platter, a joyous addition to gift baskets, and a fun project for all ages. Their tender, melt-in-your-mouth texture complements their rich flavor, making each cookie a small piece of holiday heaven. You’ll truly love the simplicity, tradition, and exquisite taste these cookies bring to your festive celebrations.
Note: Some of the links in this recipe post are Amazon affiliate links, which means I make a small commission from Amazon if you link to and purchase the item. The affiliate process never affects your cost and I only link to products that I use and highly recommend, ensuring you get the best tools for your baking success.
🥣 Essential Ingredients for Perfect Candy Cane Cookies
Crafting these iconic Candy Cane Cookies requires a few simple yet essential ingredients. Each component plays a crucial role in achieving the perfect balance of flavor, texture, and that signature festive look. Here’s what you’ll need and why each ingredient is important:
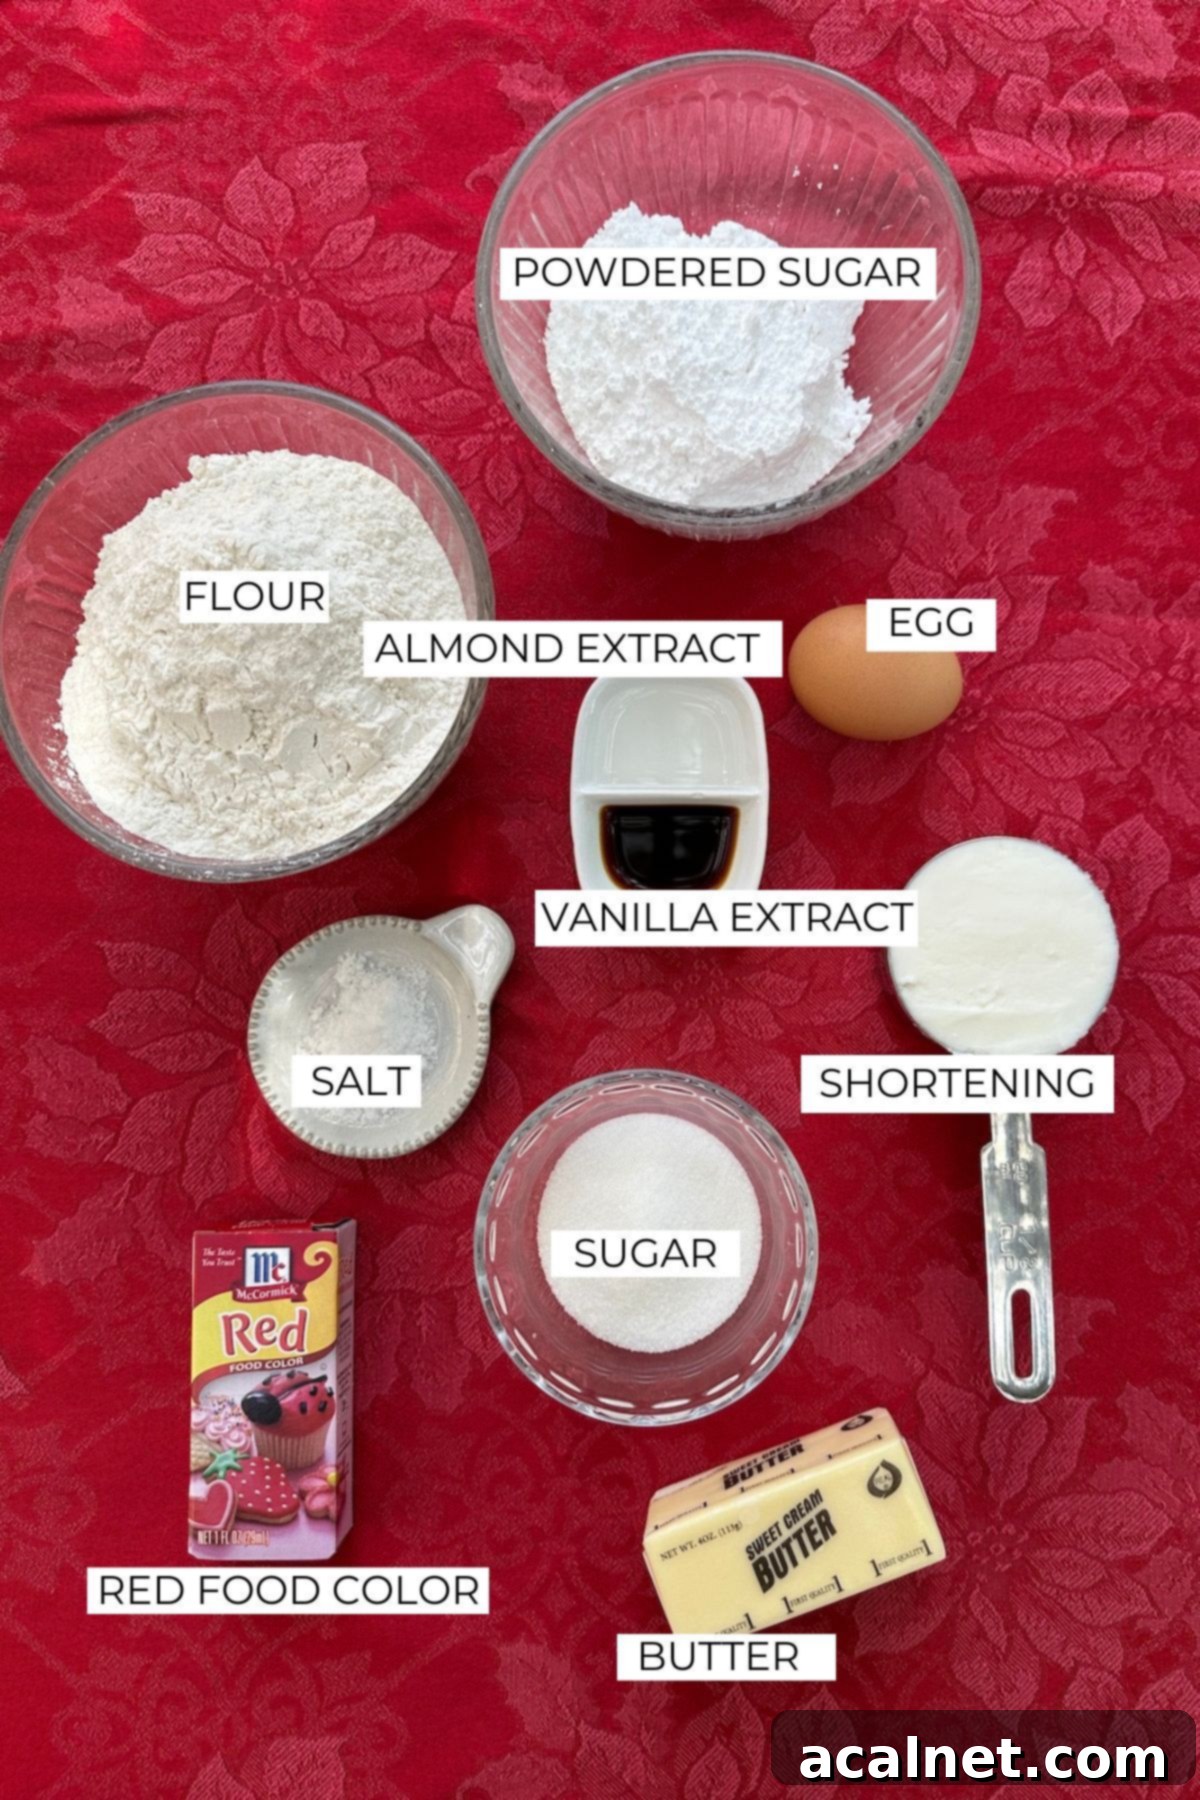
All-Purpose Flour: This is the foundation of our cookie dough. Regular all-purpose flour is perfectly suited for this recipe; there’s no need for sifting or any specialized types. It provides the necessary structure, ensuring your cookies hold their delightful shape while maintaining a tender crumb. Having plenty of flour on hand during the holidays is always a good idea, whether you’re baking Old Fashioned Peanut Butter Cookies, making a special Homemade Brownie Mix as a gift, or embarking on any festive baking project.
Butter and Shortening: This dynamic duo is the secret to the exquisite texture and flavor of these cookies. The butter contributes that rich, unmistakable buttery taste that is a hallmark of delicious holiday cookies. Meanwhile, the shortening is crucial for achieving a wonderfully soft texture and, most importantly, helps the cookies maintain their intricate candy cane shape during baking. It prevents the dough from spreading too much and becoming crumbly, making them much easier to handle and ensuring those beautiful swirls stay intact.
Powdered Sugar (Confectioners’ Sugar): Unlike granulated sugar, powdered sugar dissolves more completely into the dough, creating a remarkably tender and somewhat dense cookie. It contributes to a smooth, sweet bake that melts in your mouth. This type of sugar also makes the silkiest and most delicious Homemade Buttercream Frosting, showcasing its versatility in the kitchen.
Vanilla & Almond Extract: It’s quite unique to combine both of these extracts in one cookie recipe, but in these Christmas Candy Cane Cookies, the combination is pure magic! The vanilla extract enhances the rich, buttery notes of the dough, providing a comforting and familiar sweetness. The almond extract, on the other hand, adds a distinctive, sophisticated, and festive flavor that truly makes these cookies stand out as a holiday treat. Together, they create an irresistible aroma and taste that embodies the spirit of Christmas.
(Affiliate Link) Red Food Coloring: The vibrant red hue is iconic for candy canes, instantly signaling holiday cheer. While red is the traditional choice, don’t hesitate to experiment! You could easily use green, blue, or even a mix of colors to create a whimsical and festive assortment of holiday cookies that reflect your personal style or a specific theme. Gel food coloring often provides a more intense color without adding too much liquid to the dough.
Salt: A small amount of salt is essential to balance the sweetness and enhance all the other flavors in the cookie dough. It brings out the richness of the butter and the nuanced notes of the extracts, ensuring a well-rounded and delicious cookie.
For a precise list of all ingredients and their exact measurements, please scroll down to the detailed recipe card below.
👩🏻🍳 Step-by-Step Instructions: Crafting Your Candy Cane Cookies
Creating these beautiful and delicious Candy Cane Cookies is a fun and rewarding process. Follow these detailed steps to ensure your cookies turn out perfectly swirled, tender, and full of holiday cheer. Remember, precision and a gentle touch are key to their classic look!
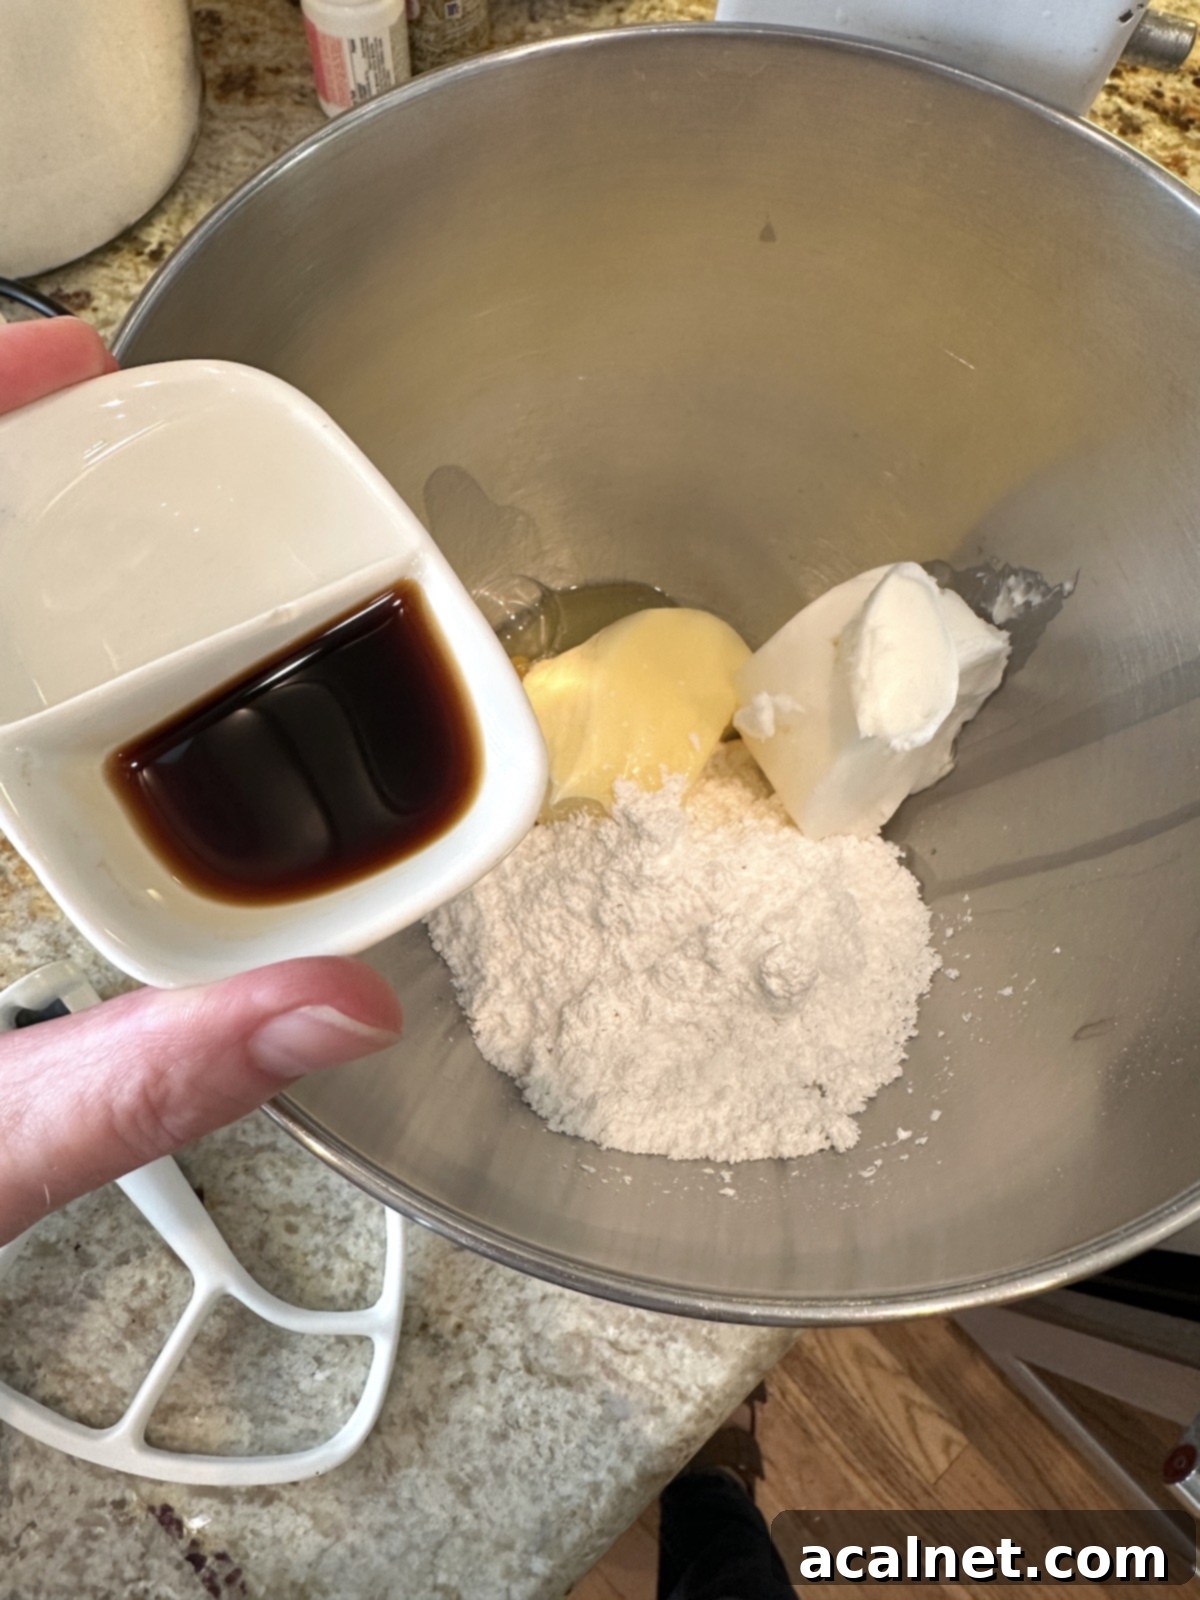
Step 1: Blend the Wet Ingredients. In a large mixing bowl, combine the softened butter, shortening, powdered sugar, egg, and both almond and vanilla extracts. Beat these ingredients together until they are light, fluffy, and well-creamed. This initial step is vital for incorporating air and ensuring a tender cookie texture.
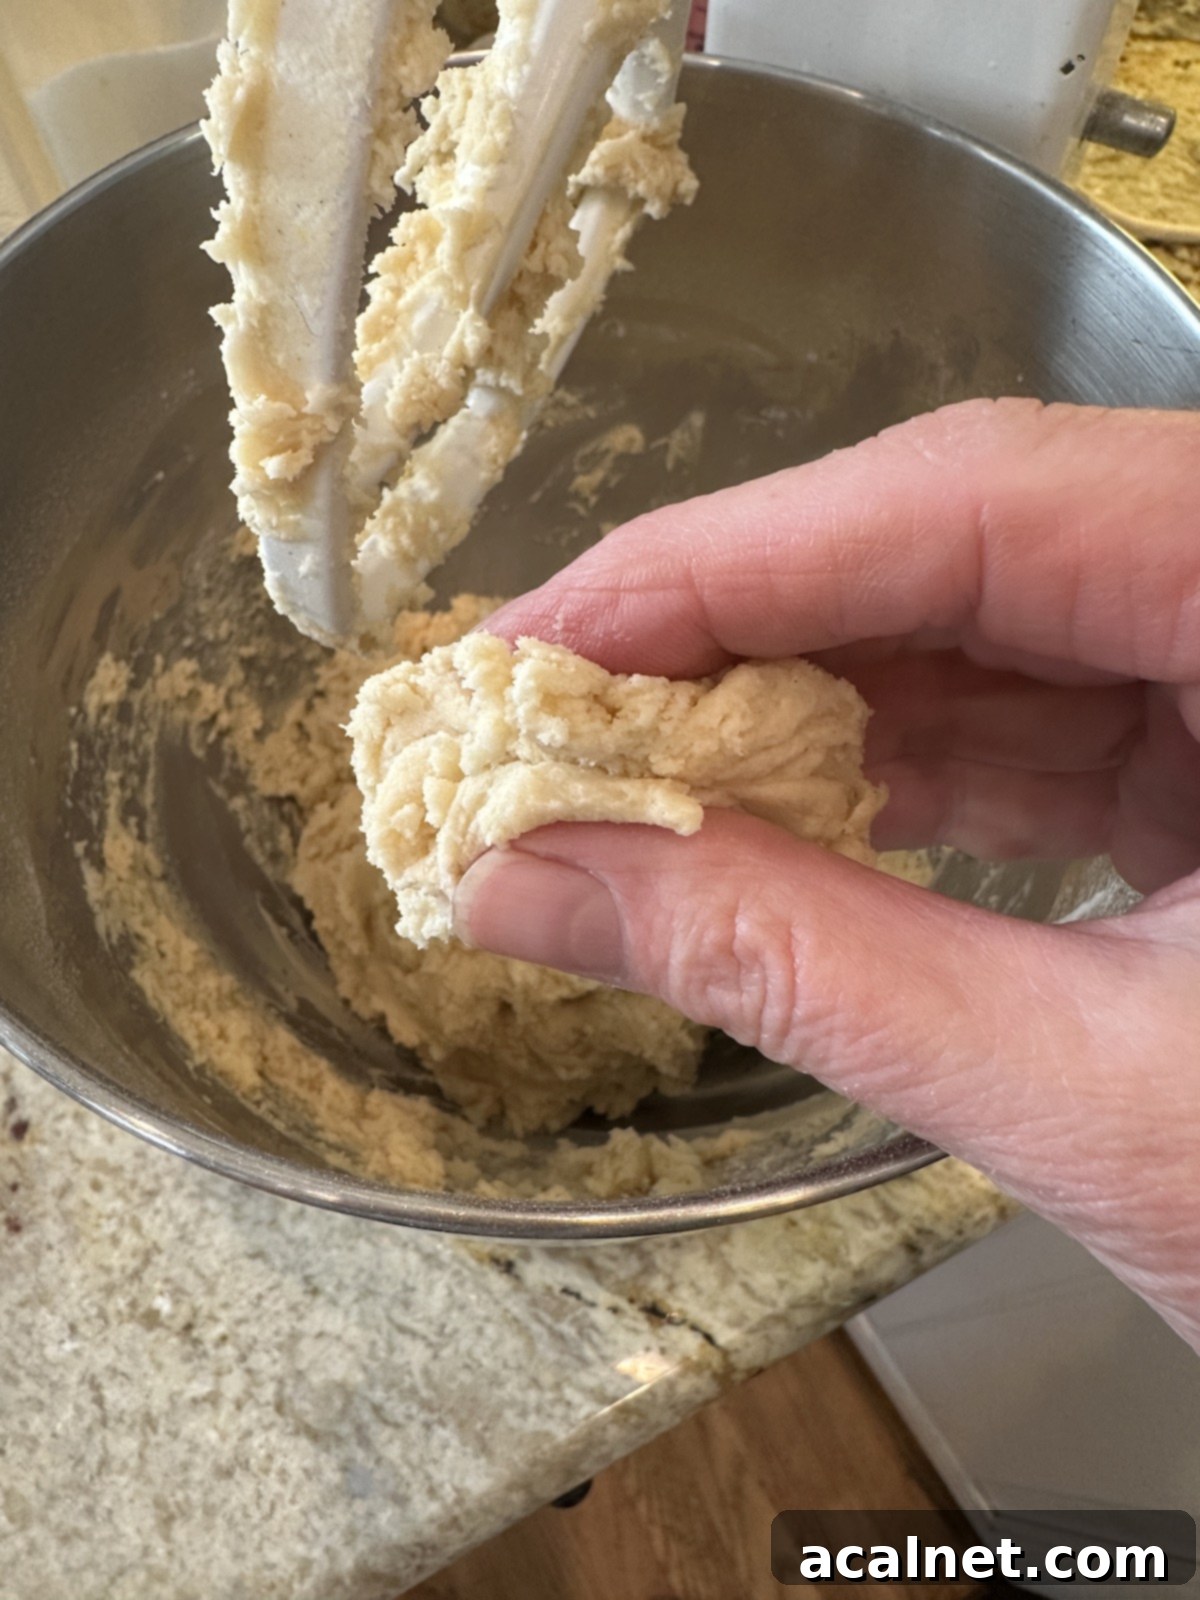
Step 2: Incorporate Dry Ingredients. Gradually add the flour and salt to the wet mixture. Mix on low speed until the ingredients are just combined and a soft, pliable cookie dough forms. Be careful not to overmix, as this can lead to tough cookies. The dough should be tender, easy to handle, and not overly sticky.
⭐ Pro Tip: Evenly Divide Your Dough
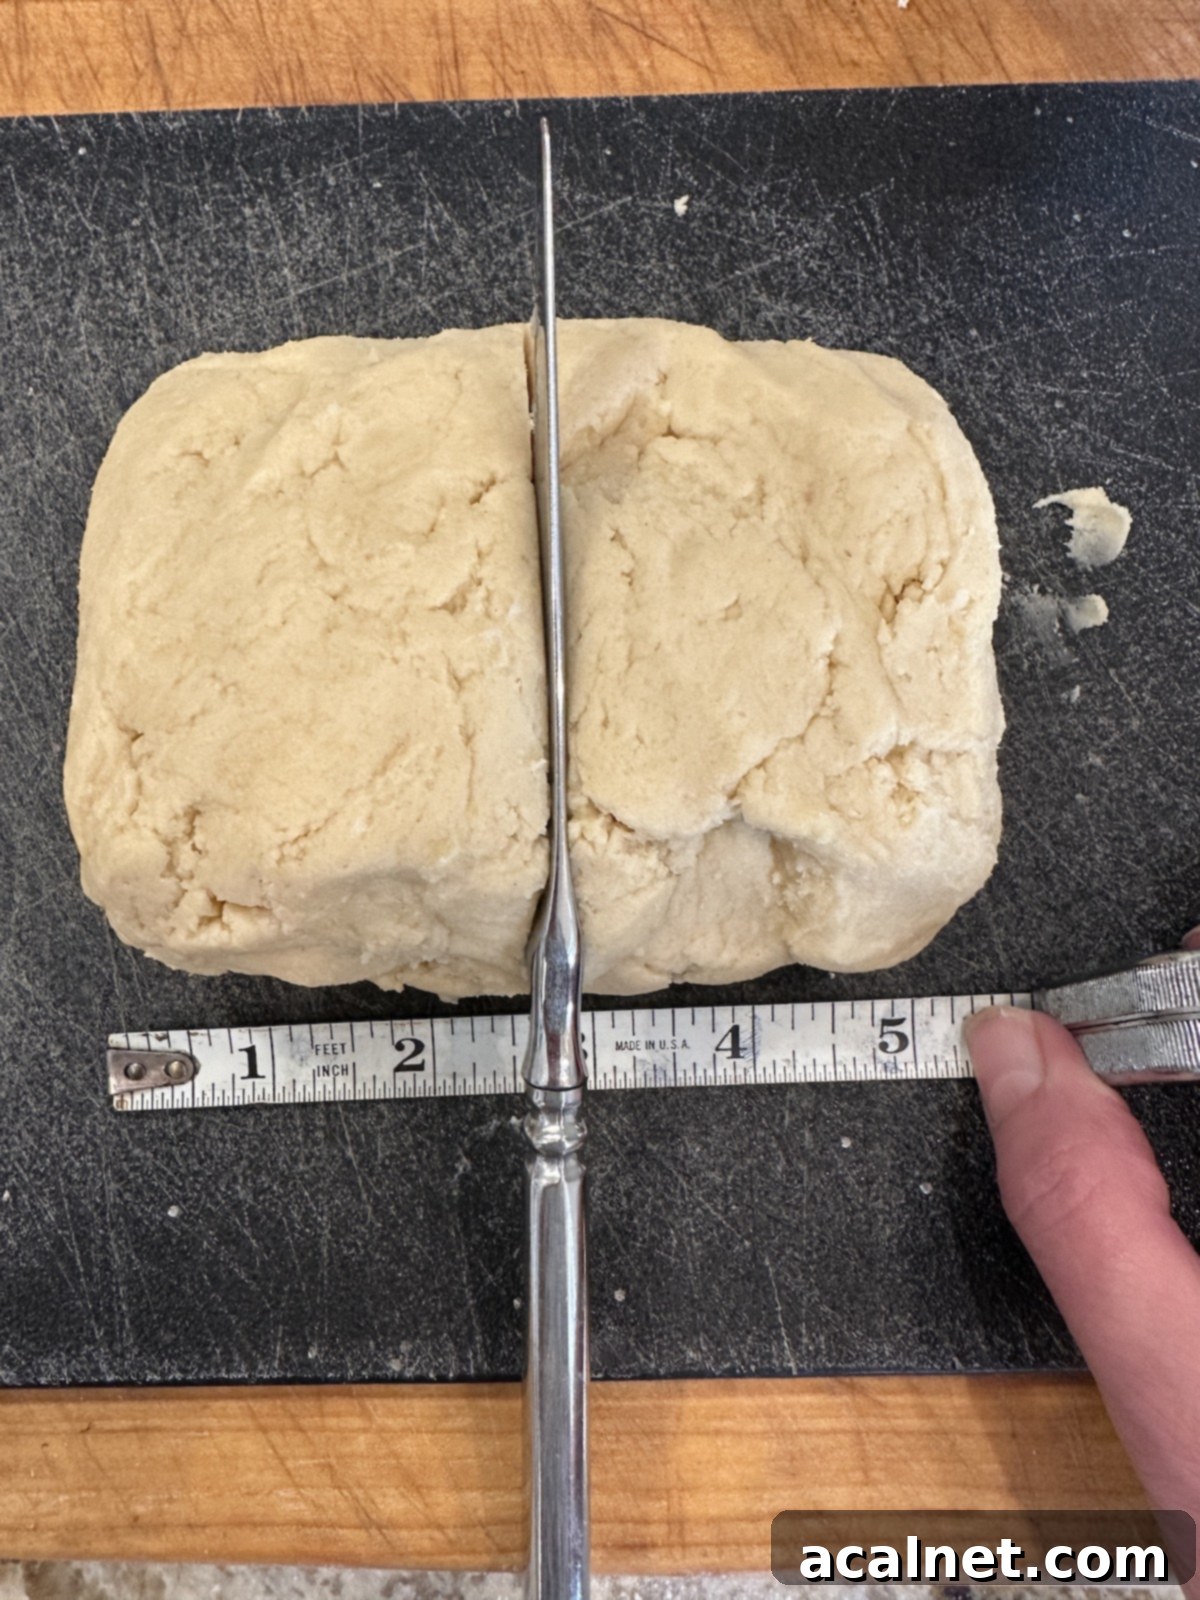
For truly striking candy cane cookies with consistent red and white stripes, try to divide the dough as evenly as possible before adding the red food coloring. I’ve found that a helpful method is to gently pat all of the blended dough into a uniform rectangle on a cutting board, then use a sharp knife or even a tape measure (yes, really!) to precisely slice it in half. This meticulous approach prevents you from ending up with too much or not enough of either the red or plain colored cookie dough, ensuring a balanced and visually appealing finished product.
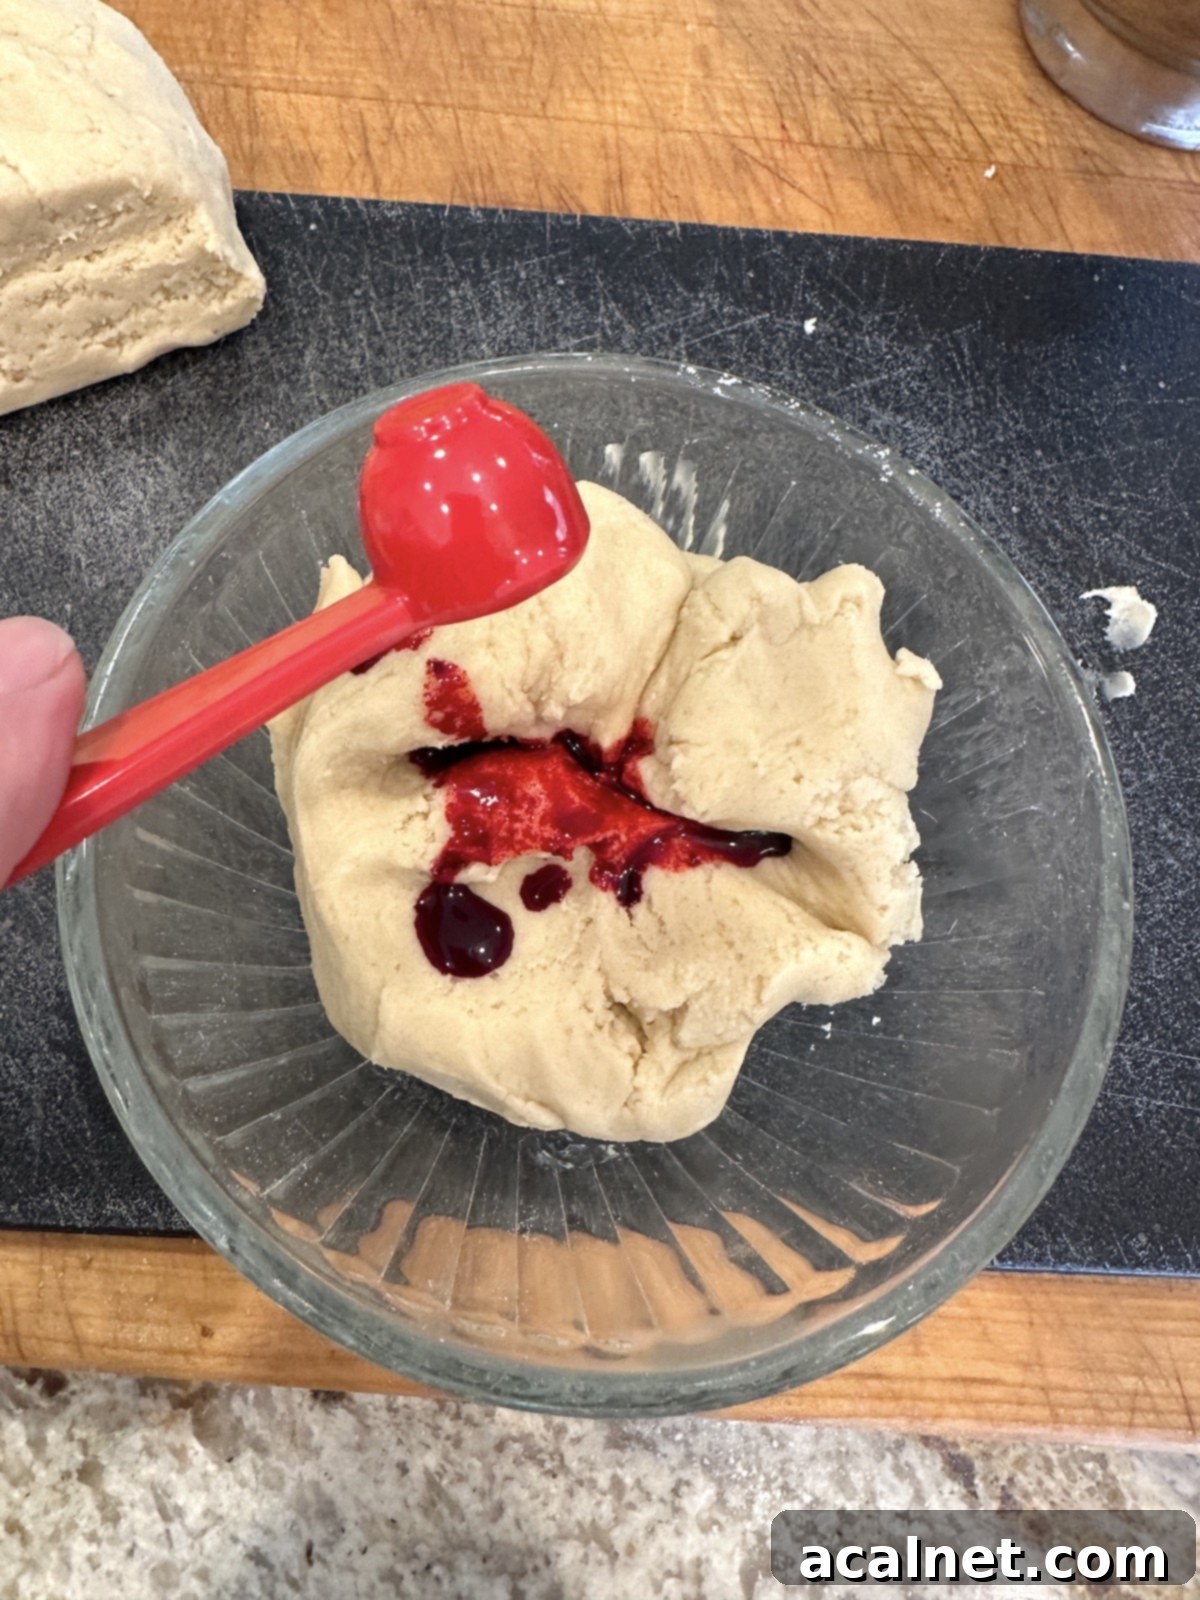
Step 3: Color Half the Dough. Take one half of your evenly divided dough and place it into a separate small bowl. Add the red food coloring and mix thoroughly until the color is vibrant and uniformly distributed throughout the dough. You want a rich, festive red!
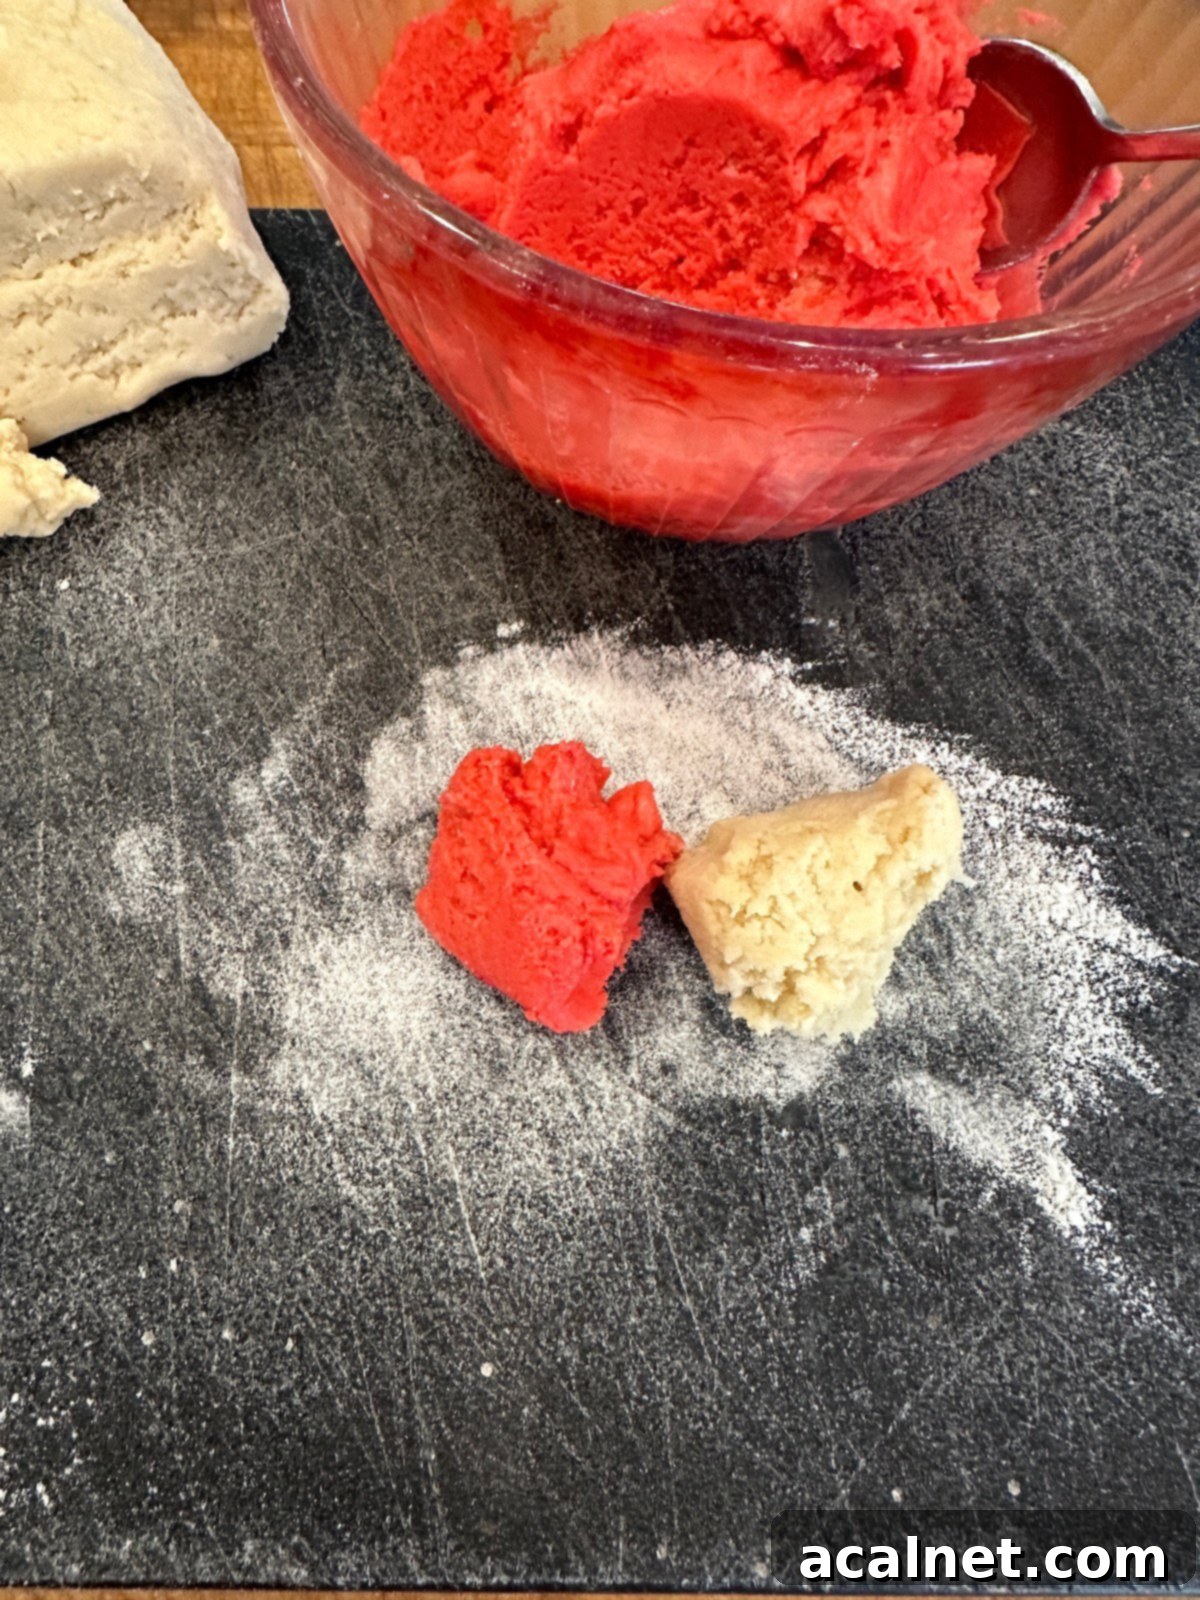
Step 4: Portion the Dough. Using a teaspoon, remove a rounded teaspoon of dough from both the red and the plain (uncolored) cookie dough. Try to make these portions as equal in size as possible to ensure consistent candy cane shapes.
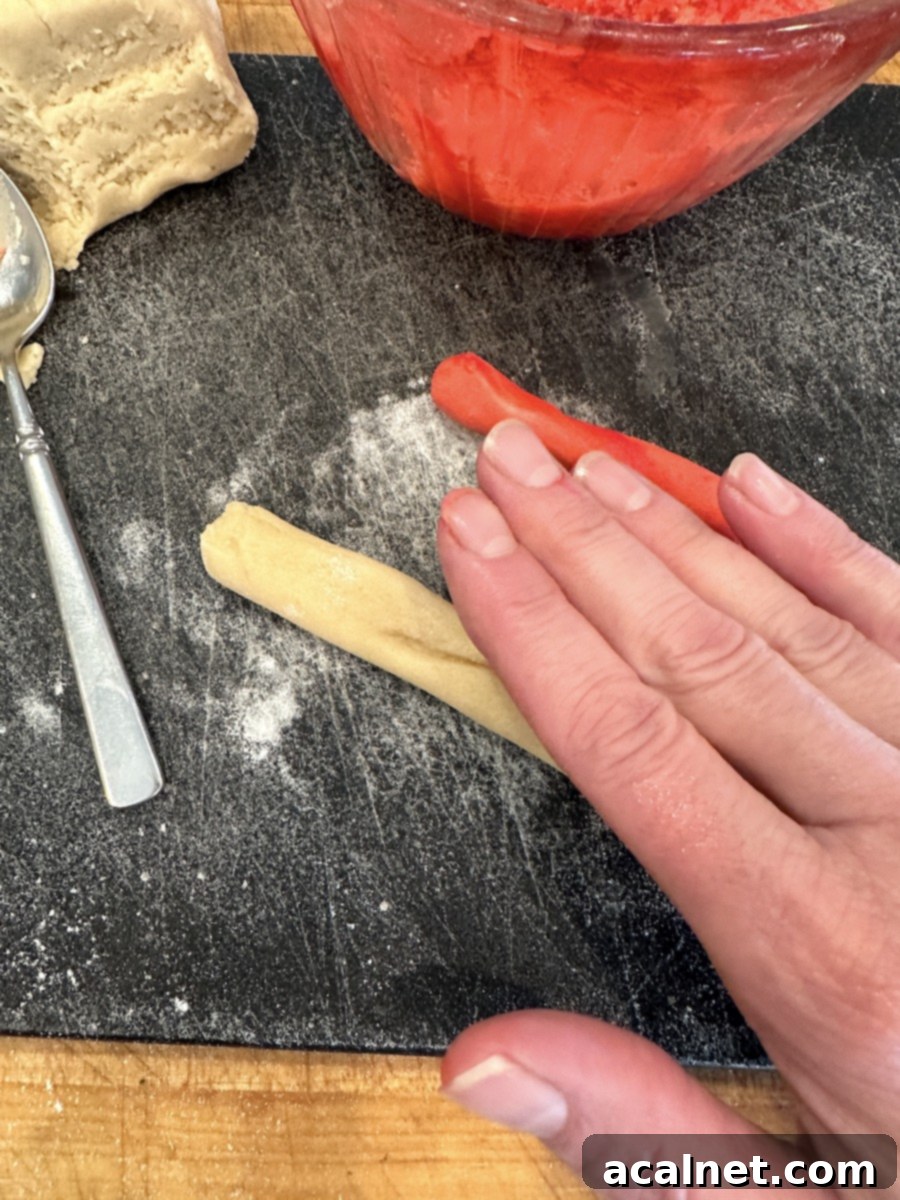
Step 5: Roll into Ropes. On a lightly floured surface (a cutting board works well), roll each portion of dough (one red, one white) into a slender rope. Aim for a length between 4 to 5 inches, ensuring they are relatively even in thickness. This takes a gentle but steady hand.
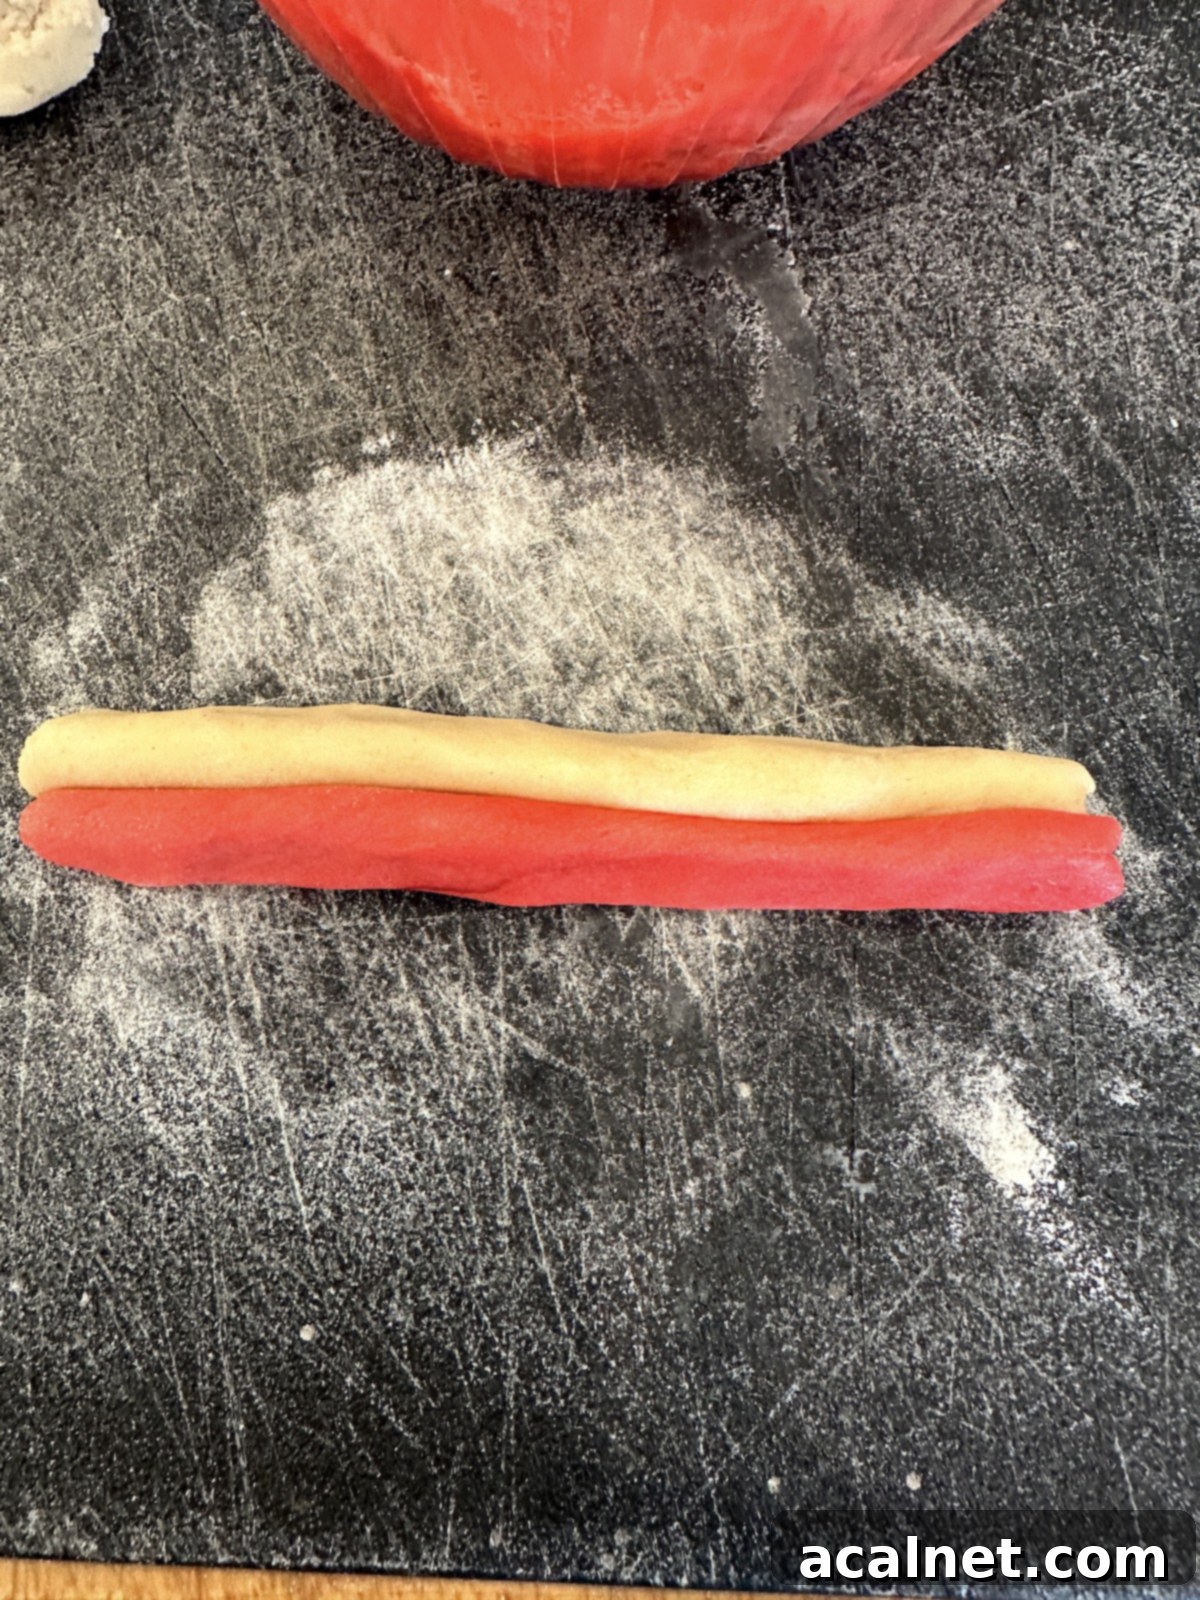
Step 6: Join the Ropes. Carefully place a red rope and a plain rope side-by-side. Gently but firmly squeeze them together along their entire length. You want them to adhere without squishing the dough too much, creating a single, bicolored strip.
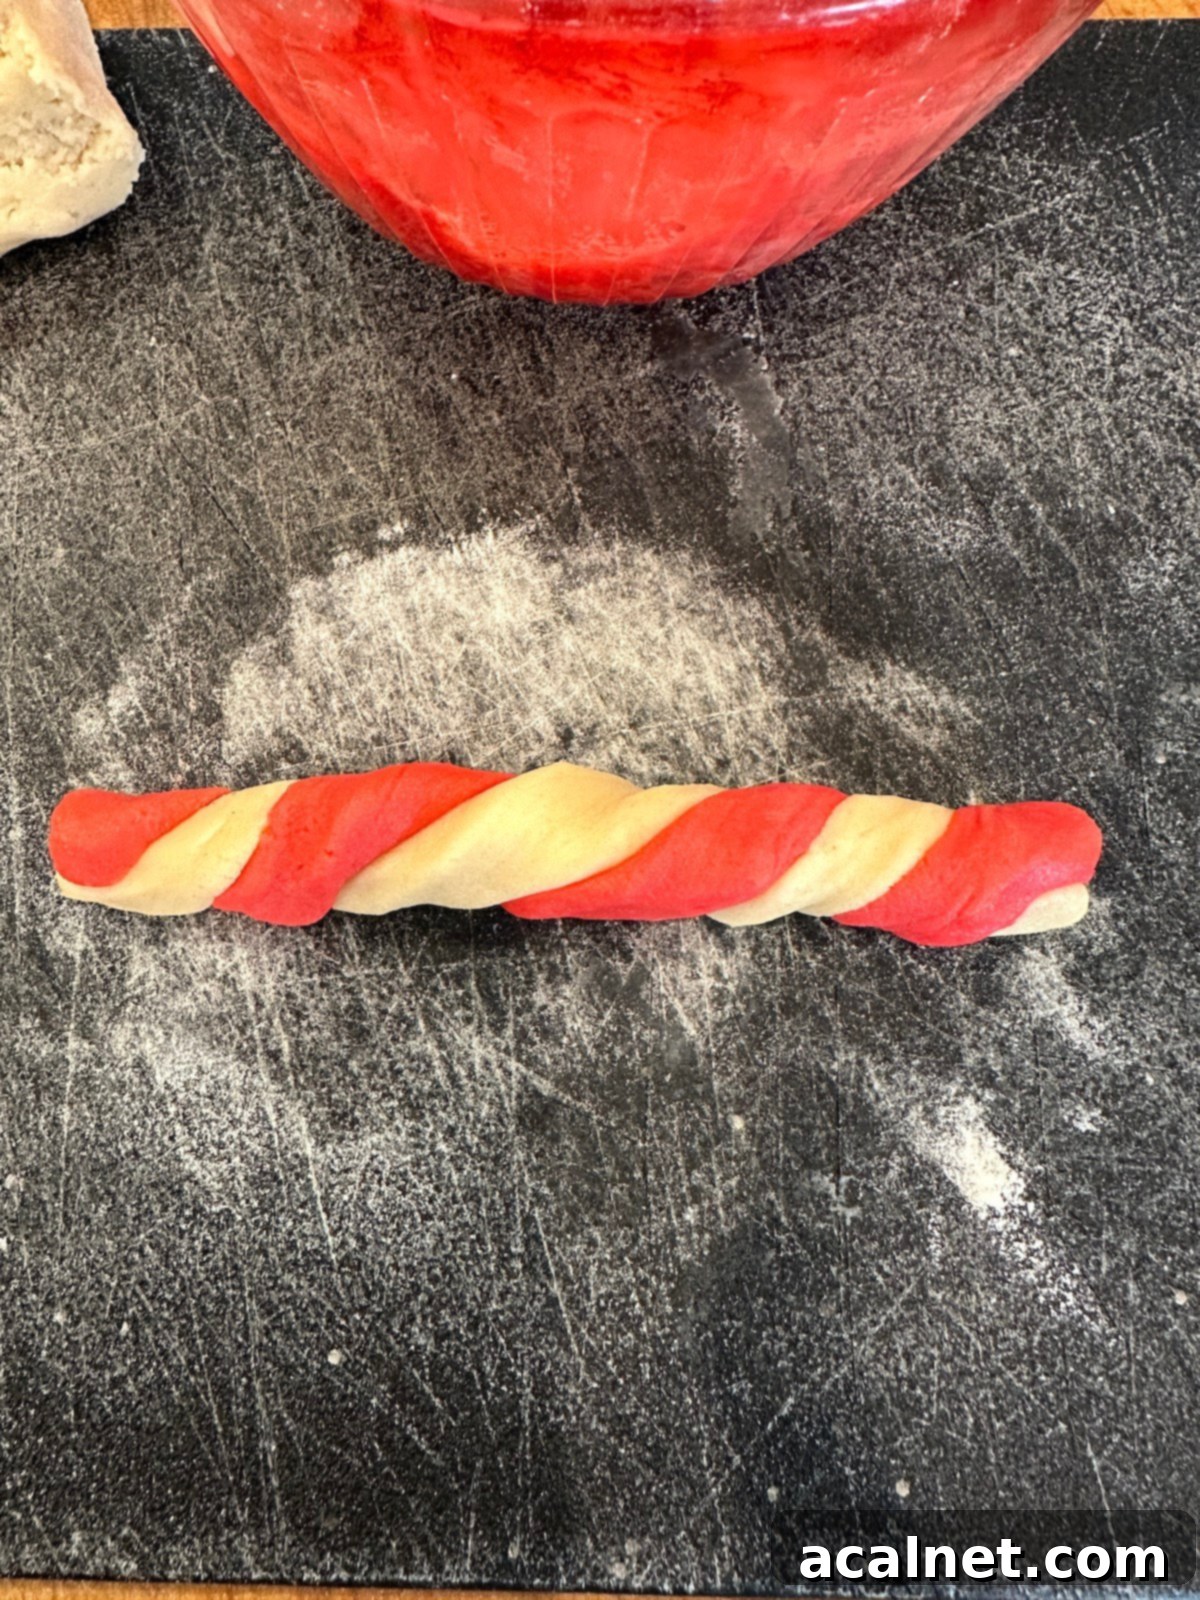
Step 7: Create the Swirl. Once the two ropes are joined, gently twist the entire bicolored strip to create that distinctive swirled candy cane effect. Twist just enough to form the stripes without breaking the dough. This is where the magic happens!
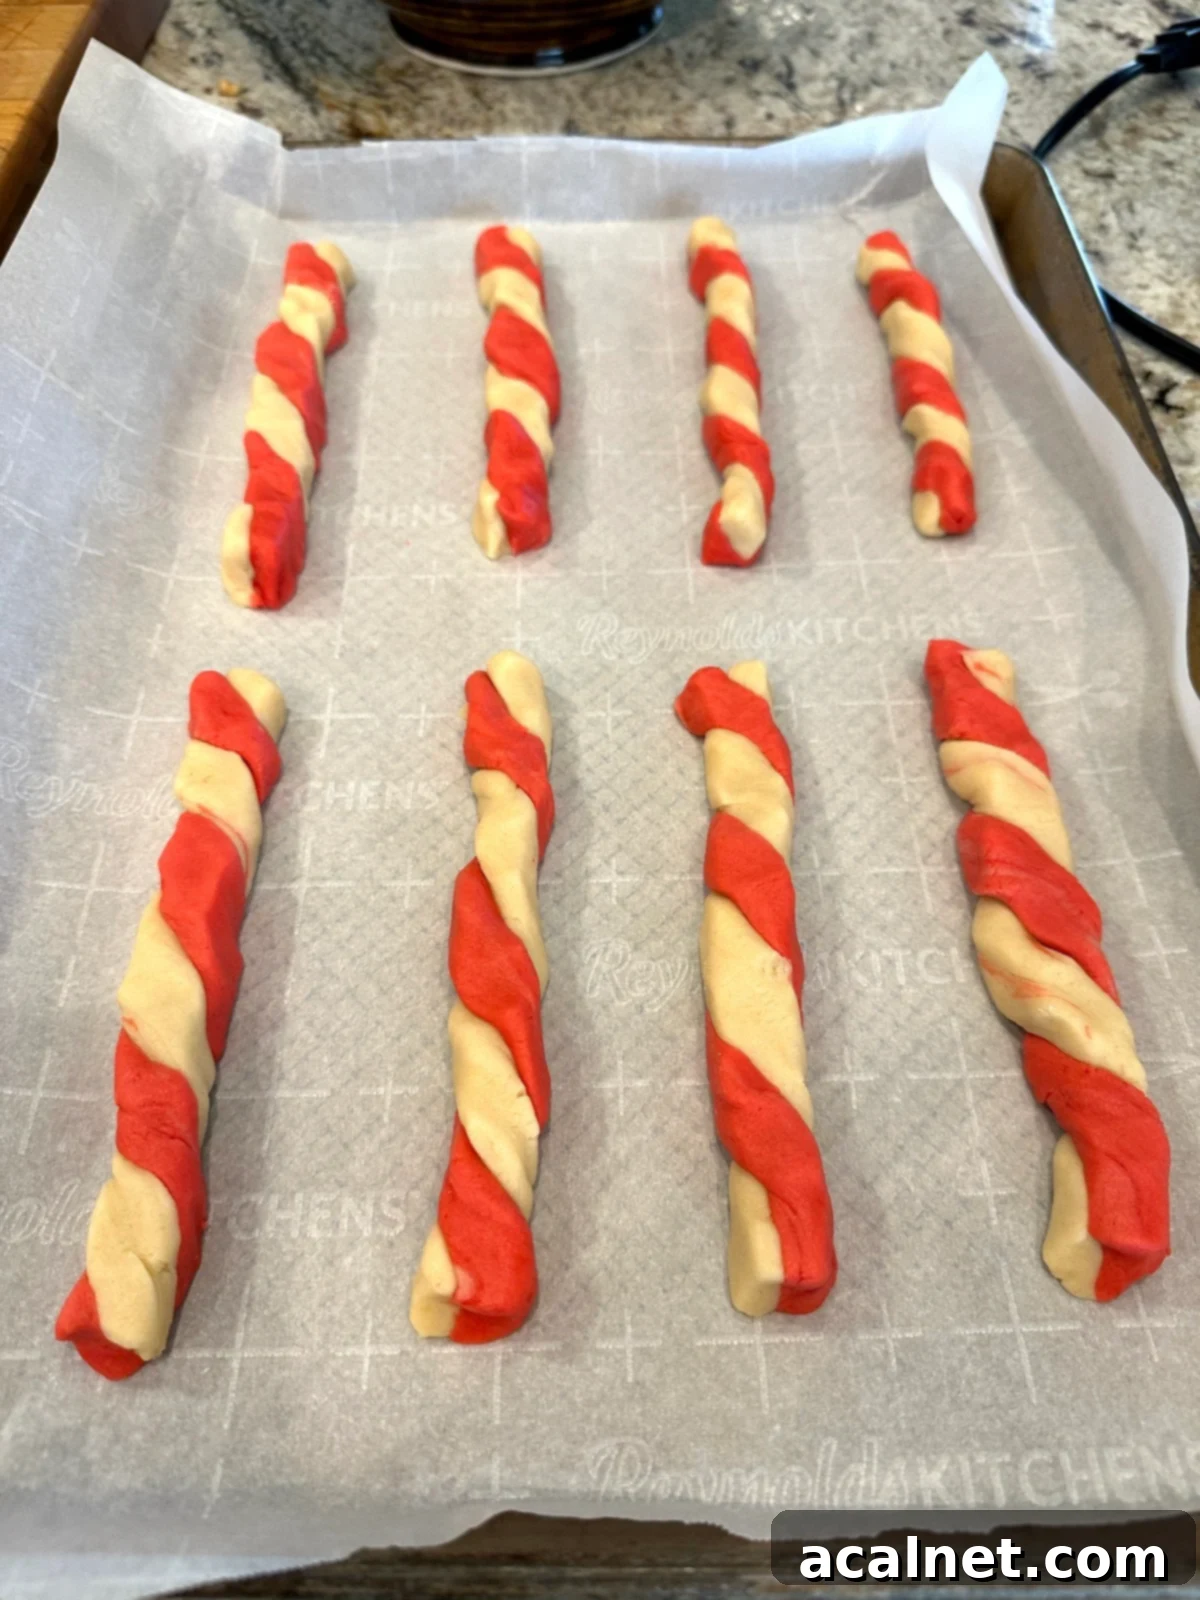
Step 8: Prepare for Baking. Line your baking sheet with parchment paper to prevent sticking and ensure even baking. Carefully place your swirled cookie strips onto the prepared baking sheet, leaving a little space between each one to allow for slight spreading.
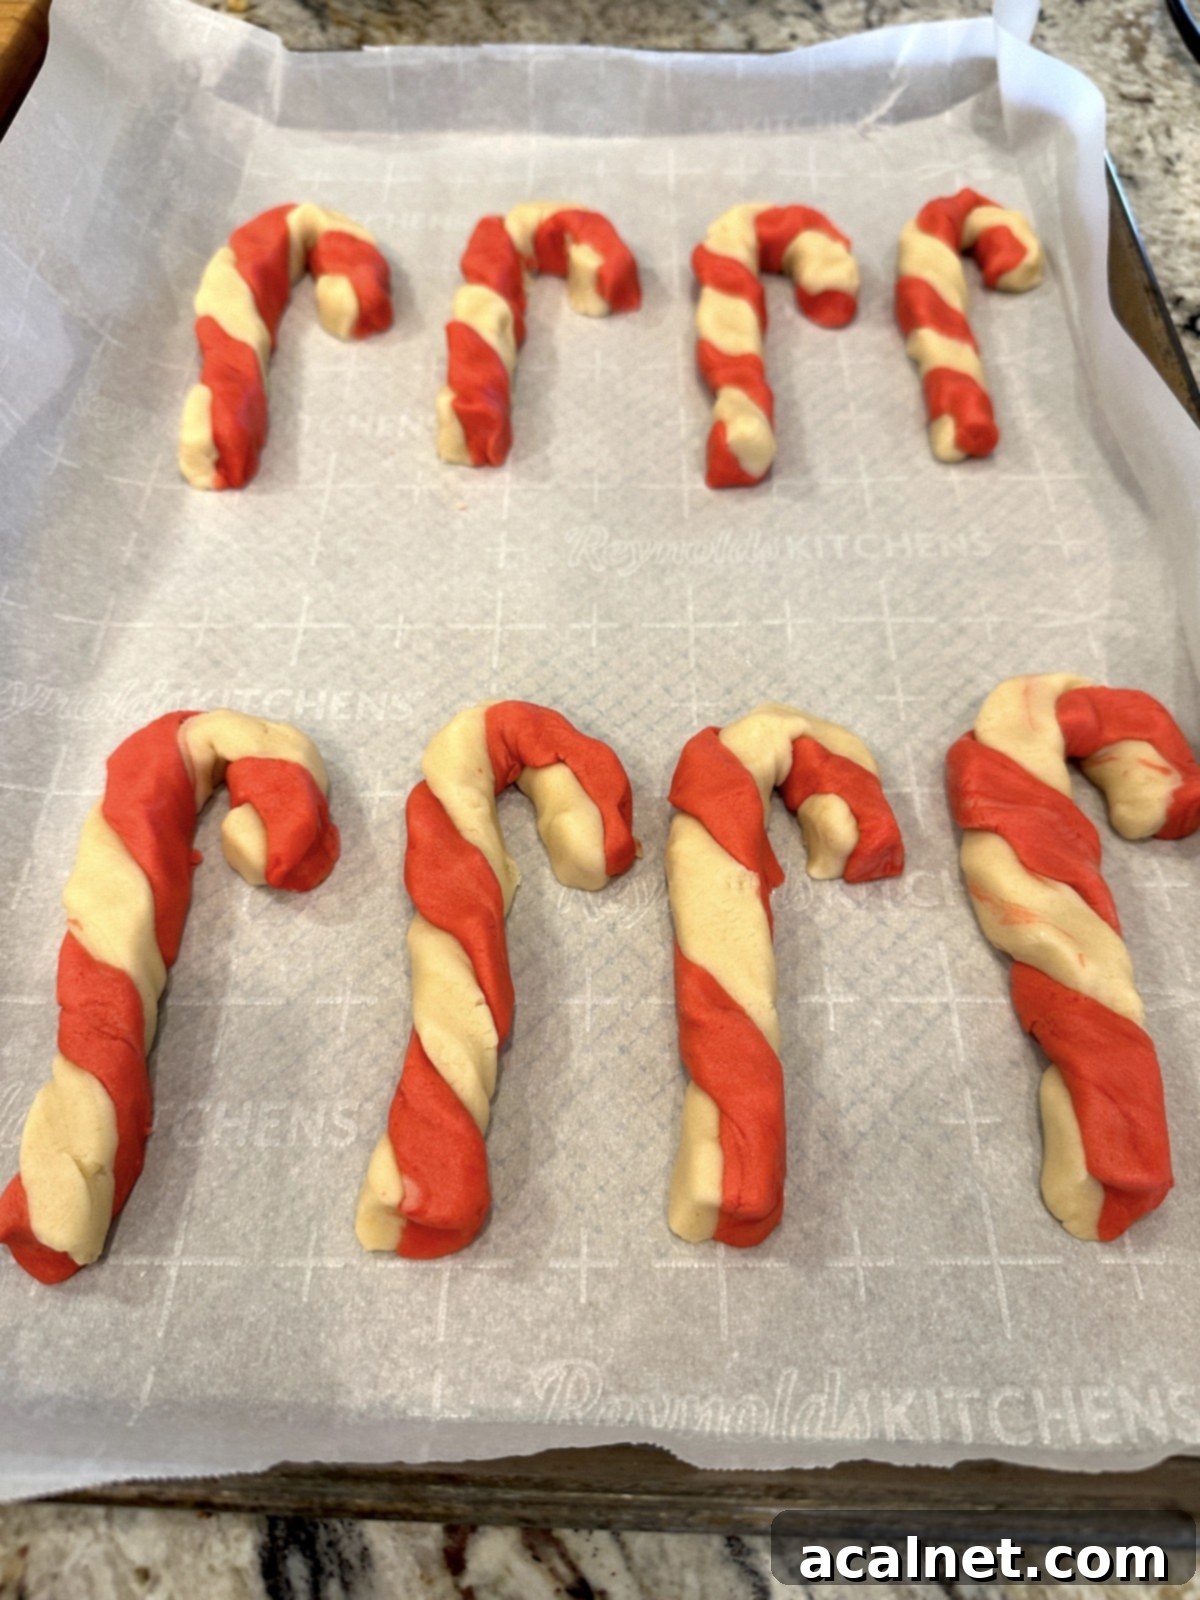
Step 9: Shape the Cane. Before baking, gently curve the top end of each swirled cookie strip to form the iconic hook of a candy cane. Be delicate to avoid distorting the beautiful red and white swirls you’ve just created.
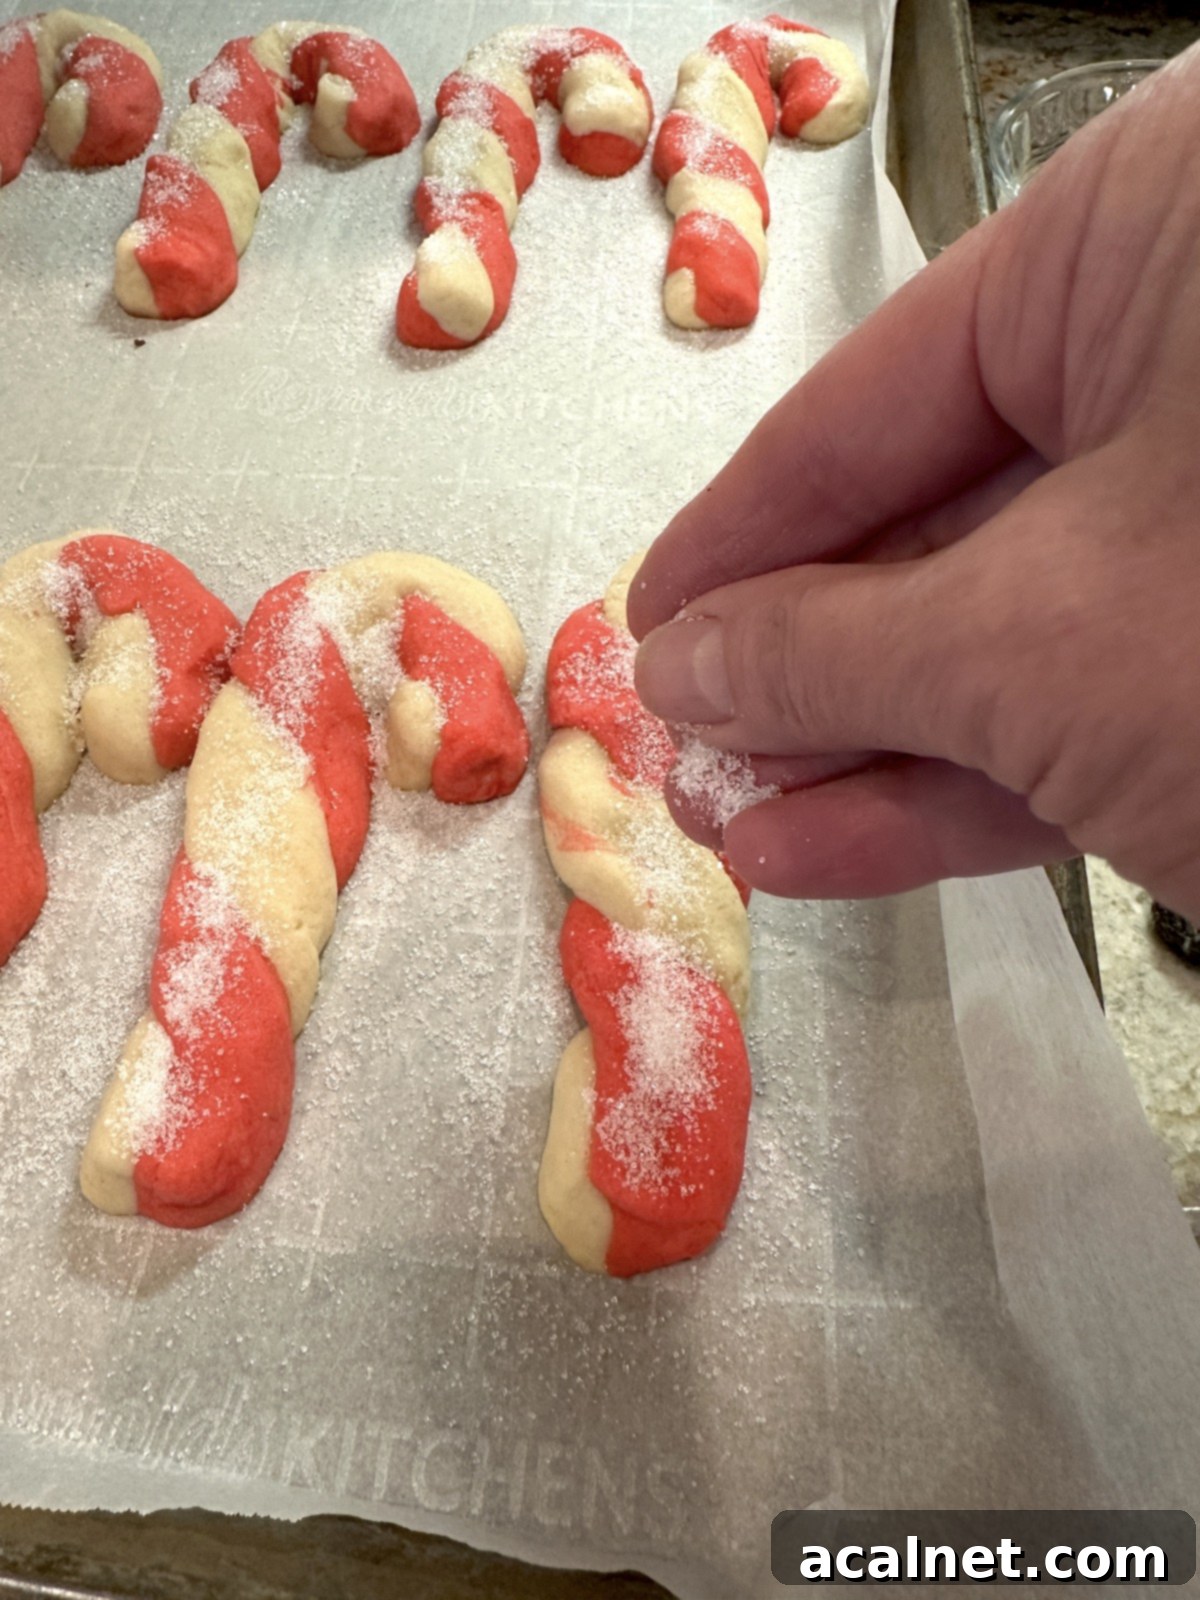
Step 10: Bake and Sugar. Bake your candy cane cookies in a preheated oven (375°F / 190°C) for 8-9 minutes, or until the edges are just set and very lightly golden. They should still be soft. Immediately upon removing them from the oven, while they are still hot, gently sprinkle a little granulated sugar over the entire surface of each cookie. The heat will help the sugar adhere, adding a delightful sparkle and extra sweetness. Transfer carefully to a cooling rack to cool completely.
⭐ Pro Tip: Handling Warm Cookies
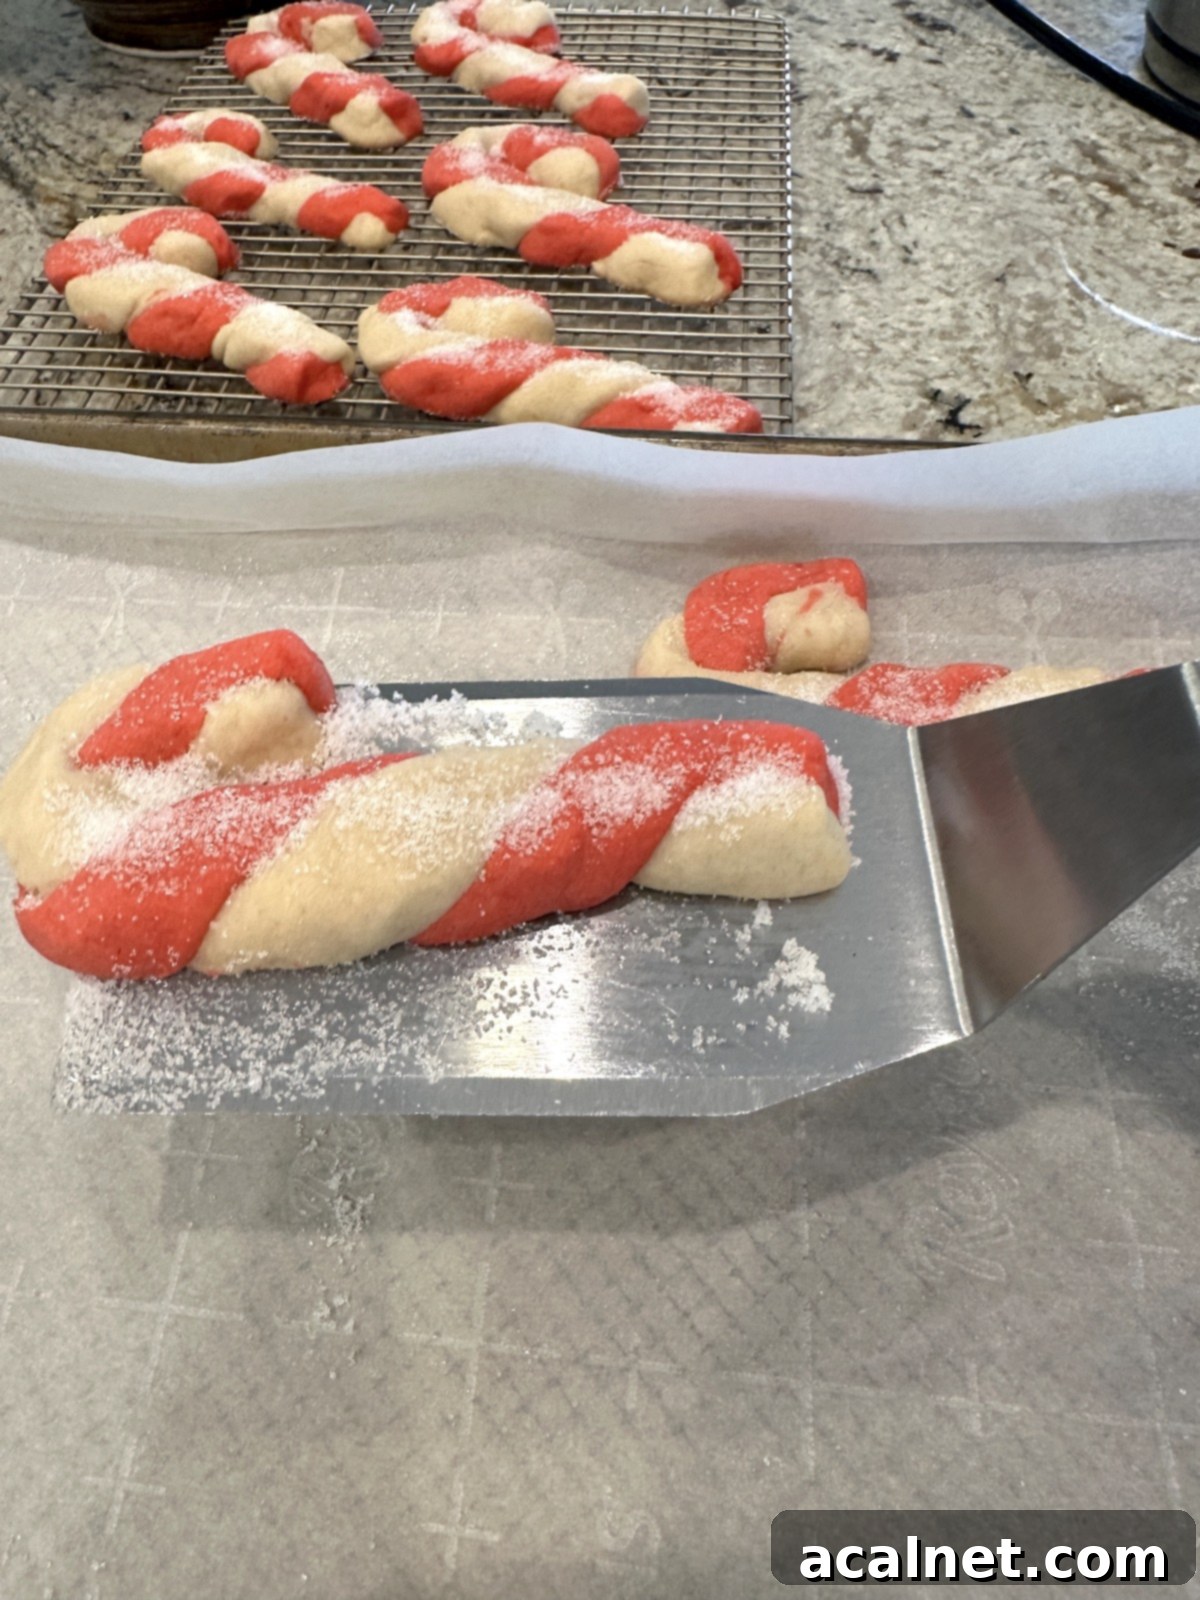
Christmas Candy Cane Cookies are wonderfully tender, especially when they are fresh and warm right out of the oven. Their delicate structure means they can break easily if not handled with care. To ensure your beautiful cookies make it safely from the baking sheet to the cooling rack without any breakage, a flat, thin (affiliate link) metal spatula is an invaluable tool. Its thin edge slides easily under the cookie, providing full support. This type of spatula is a handy essential for all your cookie baking endeavors; I also find it indispensable when making my Sour Cream Sugar Cookies.
💭 Recipe FAQs: Your Questions Answered
Got questions about baking these delightful Candy Cane Cookies? Here are some common queries and helpful answers to ensure your holiday baking is a complete success!
Absolutely! Preparing the dough in advance can be a fantastic time-saver during the busy holiday season. If you prefer to make the dough ahead of time and refrigerate it until you’re ready to bake, simply wrap it tightly in plastic wrap to prevent it from drying out. When you’re ready to bake, it’s crucial to bring the dough to room temperature first. Dough that is too cold will be stiff, crumbly, and very hard to handle and shape into those delicate ropes. Allow it to sit on the counter for 30-60 minutes until it’s pliable and easy to work with.
The combination of butter and shortening is a key element for both the delicious flavor and the ideal texture of these Candy Cane Cookies. While you *can* use all butter, you might find that the cookies spread more during baking, leading to less defined shapes and potentially a slightly less tender crumb. The shortening helps the cookies maintain their intricate candy cane shape, ensuring they look as good as they taste. For the best results and the classic tender texture, I highly recommend sticking to the butter and shortening combination as specified in the recipe.
No, I do not recommend substituting granulated sugar for powdered sugar in the dough. Powdered sugar (confectioners’ sugar) has a much finer texture and contains a small amount of cornstarch, which contributes to a more tender, melt-in-your-mouth cookie texture and helps prevent spreading. Granulated sugar, ounce-for-ounce, has a different sweetness level and its larger crystals will affect the consistency and overall texture of the cookie dough significantly. To achieve the intended tender and sweet result, it’s best to use powdered sugar in the dough and save a sprinkling of granulated sugar for adding on top of the cookies immediately after baking.
🍭 Candy Cane Cookie Storage & Make-Ahead Tips
These festive cookies are absolutely perfect for baking ahead and freezing, making your holiday hosting and gifting much easier! Whether you’re preparing a day or two in advance or getting a head start a month early, here’s how to keep your Candy Cane Cookies fresh and delicious:
Room Temperature Storage: For the absolute best flavor and tender texture, plan to serve and enjoy your freshly baked Candy Cane Cookies within the first 2 or 3 days. However, they can be stored in an airtight container at room temperature for up to 5 days. Ensure the container is truly airtight to prevent them from drying out and losing their delightful chewiness.
Freezer Storage: Freezing these cookies is a fantastic way to prepare for the holidays without last-minute stress. Once your Candy Cane Cookies are completely baked and cooled, arrange them in a single layer on a baking sheet and flash freeze for about 30 minutes until firm. Then, transfer the frozen cookies between layers of wax paper into a freezer-safe airtight container or a heavy-duty freezer-storage bag. They will keep beautifully for up to 2 months. When you’re ready to enjoy them, simply thaw at room temperature. Be extra careful when handling frozen cookies, as they can be more brittle and break apart easily.
Freezing Unbaked Dough: You can also prepare the dough in advance and freeze it. Once you’ve twisted your red and white ropes, but before curving them into candy canes, arrange them on a parchment-lined baking sheet and flash freeze until solid. Transfer to a freezer-safe bag or container, separating layers with parchment. Thaw the ropes in the refrigerator overnight, then bring to room temperature before shaping and baking as directed.
🍭 Creative Substitutions & Fun Variations
While the classic Candy Cane Cookie recipe is perfect as is, there are many ways to get creative and personalize these festive treats. Here are some delightful substitutions and variations to try:
- Crushed Candy Cane Topping: For an extra festive touch and a burst of minty flavor, replace the granulated sugar with crushed candy canes on top of the cookies immediately after baking. This step is actually part of the original recipe from the 1975 Betty Crocker Cookbook, adding a truly authentic and refreshing twist!
- Rainbow of Colors: Don’t limit yourself to just red! Have fun experimenting with different food colors to create a whimsical rainbow of candy canes. Green food coloring works wonderfully for a Grinch-themed holiday treat, but you could also use blue for a winter wonderland effect, yellow for a sunny twist, or even orange for a unique fall-holiday blend. Imagine a platter with multi-colored candy canes!
- Shape-Shifted Holiday Cookies: This recipe is incredibly versatile. If you’re making these cookies at another time of year or simply want a different look, skip the candy cane twist! You can roll the dough into straight “candy sticks” or simply shape them into twisted sugar cookies. The dough is also excellent for traditional cookie cutters, allowing you to make stars, hearts, or any other festive shapes. The flavor profile of almond and vanilla works beautifully in any form.
- Flavor Boosts: While almond and vanilla are a winning combination, consider other extracts for a twist. A touch of pure peppermint extract (instead of or in addition to almond) would enhance the candy cane theme even more. Lemon zest can add a bright, citrusy note, or even a hint of rum extract for a more grown-up flavor.
- Glaze or Icing: Instead of granulated sugar, you could cool the cookies completely and then drizzle them with a simple powdered sugar glaze (powdered sugar mixed with a touch of milk or water) for a smoother finish.
🍽 More Delightful Dessert Recipes for Christmas
Candy Cane Cookies are a beloved part of my holiday baking tradition every single year! But of course, no holiday celebration feels truly complete with just one sweet treat. The festive season is the perfect excuse to indulge in a variety of delightful desserts. Here are more sweet treasures from my kitchen that I know you and your loved ones will absolutely enjoy, perfect for sharing, gifting, or simply savoring by the fireplace:
- Chocolate Zucchini Cake
- Tiramisu Cake for Dessert
- Old Fashioned Sour Cream Cookies
- 15 Best Apple & Pumpkin Desserts
If you make these delightful Candy Cane Cookies, I would absolutely love to hear how they turned out for you! Please take a moment to leave a 🌟🌟🌟🌟🌟 star rating and a comment below to share your experience. Your feedback is so valuable, and I’m eagerly looking forward to hearing from you!
Recipe Card: Classic Candy Cane Cookies
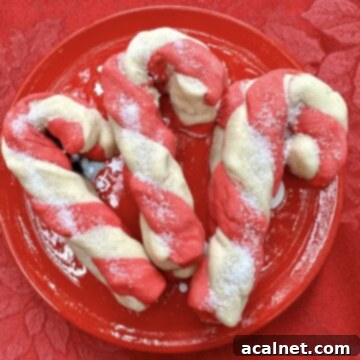
Candy Cane Cookies
Print
Rate
Pin Recipe
Ingredients
- ½ cup unsalted butter, softened
- ½ cup vegetable shortening
- 1 cup powdered sugar (confectioners’ sugar)
- 1 large egg
- 1 ½ teaspoons almond extract
- 1 teaspoon vanilla extract
- 2 ½ cups all-purpose flour
- 1 teaspoon salt
- ½ teaspoon red gel food coloring (or more for desired vibrancy)
- 2 -3 tablespoons granulated sugar, for sprinkling
Instructions
Preheat Oven & Blend Dough
- Preheat your oven to 375°F (190°C). Prepare a large baking sheet by lining it with parchment paper.
In a large mixing bowl, using an electric mixer, cream together the softened butter, shortening, powdered sugar, egg, almond extract, and vanilla extract until the mixture is light, fluffy, and well combined.
Gradually add the flour and salt to the wet ingredients. Mix on low speed until a cohesive dough forms. Be careful not to overmix; stop as soon as the flour is just incorporated. The dough should be soft, pliable, and easy to handle.
½ cup butter, ½ cup shortening, 1 cup powdered sugar, 1 egg, 1 ½ teaspoons almond extract, 1 teaspoon vanilla extract, 2 ½ cups flour, 1 teaspoon salt
Color Half the Dough
- Divide the prepared cookie dough as evenly as possible into two halves. Place one half into a separate small bowl.
Add the red food coloring to the dough in the small bowl. Mix thoroughly, either with a spoon or your hands (wearing gloves is recommended to prevent staining), until the food coloring is completely blended and the dough is a uniform, vibrant red.
½ teaspoon red food color
Shape the Dough into Candy Canes
- Take about 1 rounded teaspoon of dough from both the plain and the red halves. Roll each portion into a thin rope, approximately 4-5 inches long. For best results and smooth, even ropes, roll them back and forth gently on a lightly floured cutting board or clean countertop, applying even pressure.
- Carefully place one red rope and one uncolored rope side by side. Gently but firmly press them together along their entire length. Then, gently twist the combined ropes to create a beautiful, swirled cane effect. Continue this process, one candy cane at a time, until all of the dough has been used.
- Place the finished swirled ropes onto your prepared baking sheet, leaving a small space between each cookie. Now, gently curve one end of each rope downwards to form the classic hooked handle of a candy cane.
Bake to Perfection
- Bake the cookies for 8-9 minutes. Keep a close eye on them; you want the cookies to be set and only very lightly browned around the edges. They should still be slightly soft when removed from the oven.
Sprinkle with Sugar & Cool
- As soon as you remove the cookies from the oven, immediately sprinkle the granulated sugar generously over the entire length of each hot cookie. The heat will help the sugar adhere beautifully.
Using a thin metal spatula, carefully lift the delicate hot cookies from the baking sheet and transfer them to a wire cooling rack to cool completely. This prevents them from sticking and ensures air circulation for even cooling.
2 -3 tablespoons sugar
Serve & Enjoy!
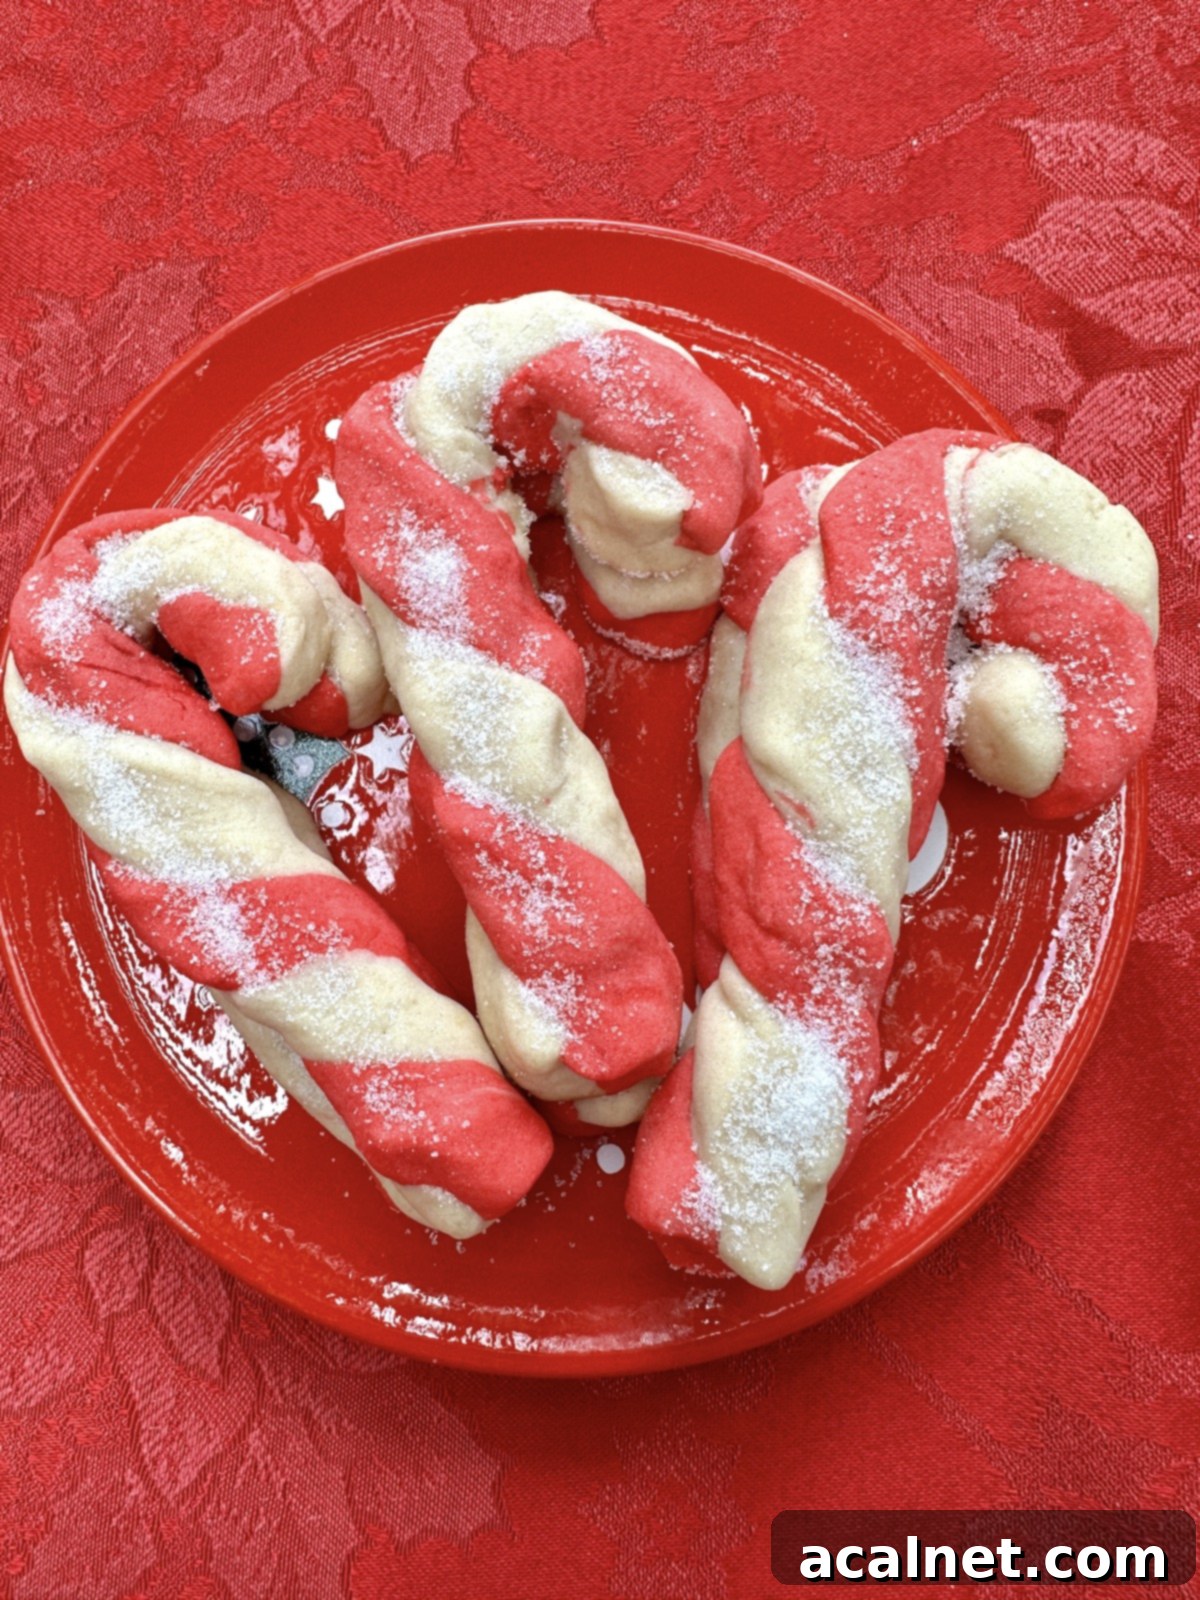
- Once cooled, your beautiful Candy Cane Cookies are ready to be served and enjoyed! This recipe typically makes about one dozen to 14 candy cane cookies, depending on the size and thickness you roll each one.
Notes
Feel free to experiment with different food coloring colors to create a unique and personalized batch of festive cookies for any occasion!
Please note, the nutrition details are estimated using a food database and should be considered a rough estimate rather than an exact scientific measurement. Individual results may vary based on exact ingredients and preparation methods.
