Irresistible Homemade Orange Rolls with Zesty Orange Icing: A Family Favorite Recipe
There’s nothing quite like the comforting aroma and delightful taste of freshly-baked sweet rolls filling your home. While classic cinnamon rolls are always a treat, our homemade Orange Rolls elevate this beloved pastry to a new level of deliciousness. This recipe masterfully combines the bright, vibrant flavor of orange with the warm, spicy notes of fresh ginger, cinnamon, and brown sugar, all topped with a dreamy, zesty orange icing. If you’re searching for the ultimate homemade sweet roll with a citrusy twist, your quest ends here.
Orange is an incredibly versatile ingredient, lending its bright flavor to both sweet and savory dishes. Beyond these delightful rolls, you might also enjoy exploring other orange-infused creations. I think you’ll find joy in my Orange-Spiced Sweet Potato Casserole for a cozy side dish, or give Easy-Baked Orange Tofu a try for a flavorful plant-based main meal.

(Recipe Jump To Placeholder)
Essential Ingredients for Perfect Orange Rolls
Crafting exceptional orange rolls starts with selecting high-quality ingredients. While the full list with precise measurements is in the recipe card below, here’s a closer look at the key components that give these rolls their distinctive flavor:
- Fresh Orange Juice & Zest: The heart of our orange rolls! Freshly squeezed orange juice in both the dough and the icing provides an unparalleled vibrant citrus flavor that store-bought simply can’t match. Orange zest further intensifies this aroma and taste.
- Lemon Zest: A touch of lemon zest works wonders, brightening the overall citrus profile without overpowering the orange. It adds a subtle layer of complexity.
- Fresh Ginger: This might seem like an unexpected addition for Orange Rolls, but it’s truly a game-changer! Freshly grated ginger introduces a warm, subtly spicy, and slightly peppery undertone that perfectly complements the sweet and citrus notes. It adds a sophisticated twist that makes these rolls stand out.
- Butter: High-quality softened butter is crucial for a tender, rich dough and a luscious filling.
- Cinnamon & Brown Sugar: The classic duo for any sweet roll, providing that familiar comforting warmth and sweetness. The brown sugar also contributes to a moist, chewy filling.
- Flour & Yeast: The foundation of our soft, fluffy rolls. Active dry yeast ensures a beautiful rise, resulting in that irresistible light and airy texture.
Fresh ginger adds an intriguing dimension to these Orange Rolls, offering a warm, slightly peppery taste with hints of citrus that beautifully elevate the traditional sweet roll profile. Don’t skip it if you can – it truly transforms the experience!
For a comprehensive list of all ingredients and precise measurements, please scroll down to the detailed recipe card below.
Why These Homemade Orange Rolls Will Become Your New Favorite
There are countless reasons to fall in love with these Homemade Orange Rolls, making them an ideal treat for any occasion, from a leisurely weekend breakfast to a festive holiday brunch:
- Unforgettable Citrus Burst: Unlike standard cinnamon rolls, these are infused with bright, fresh orange flavor from both orange juice and orange zest in the dough. This creates a wonderfully aromatic and flavorful base that perfectly harmonizes with the sweet filling.
- Exquisitely Balanced Sweetness: While undeniably sweet, these rolls are crafted to be perfectly balanced, preventing them from being cloyingly rich. The tangy orange icing cuts through the sweetness beautifully, creating an irresistible interplay of flavors that will have you reaching for another.
- Aromatic and Inviting: The moment these rolls start baking, your kitchen will be filled with an enticing aroma of fresh orange, warm cinnamon, and subtle ginger. It’s a scent that promises comfort and deliciousness, drawing everyone to the kitchen.
- Tender, Fluffy Texture: With a perfectly proofed yeast dough, these rolls boast an incredibly soft, tender, and pillowy texture that simply melts in your mouth. Each bite is a delightful combination of soft dough and gooey, flavorful filling.
- Versatile and Convenient: Just like my popular Banana and Carrot Muffins, Crockpot Banana Bread, and Blueberry Rhubarb Muffins, these Orange Rolls are not only delicious but also offer fantastic versatility. You can enjoy them warm from the oven on a quiet morning, or take advantage of the convenient freezer option to have homemade sweet rolls ready for any occasion, even on the busiest holiday mornings.
- A Timeless Family Recipe: This recipe has been cherished and enjoyed for years, much like my Old Fashioned Chocolate Pound Cake. It’s a true family favorite, tried and tested through generations, guaranteeing a consistently delicious outcome every time.
The sweet and tangy icing, bursting with fresh orange flavor, creates an absolutely irresistible combination with the warm, spiced cinnamon rolls. It’s a symphony of sweet and citrusy flavors that will leave a lasting impression.
How to Craft Delicious Homemade Orange Sweet Rolls
Making homemade sweet rolls can seem daunting, but with a clear step-by-step guide, you’ll find the process incredibly rewarding. The key to these fluffy, flavorful rolls lies in careful dough preparation and generous citrus infusion. Let’s walk through the process:
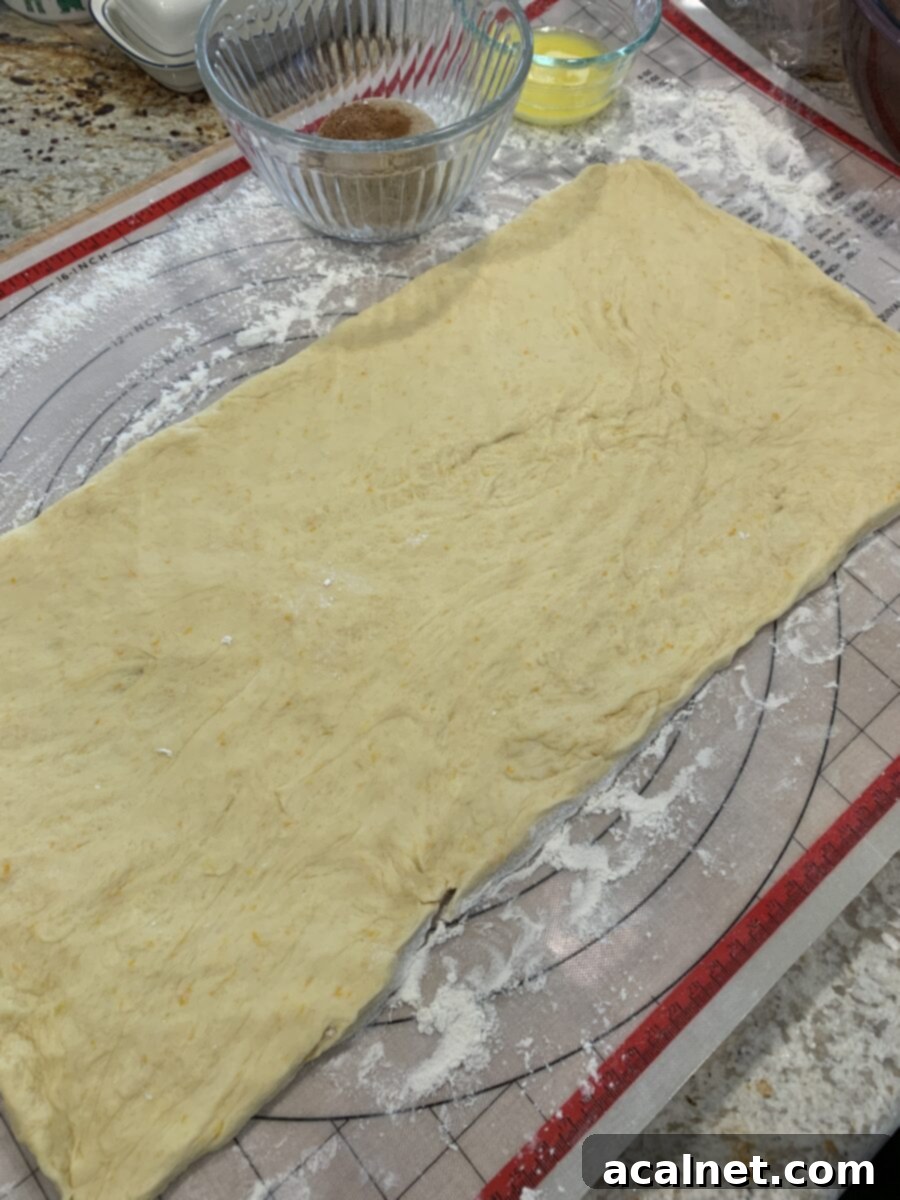
Step 1: Prepare and Roll the Dough. After you’ve mixed your dough and allowed it to rise until beautifully doubled in size (this typically takes about an hour in a warm place), gently turn it out onto a lightly floured surface. Roll the dough into an even 18″x 8″ rectangle. I highly recommend using a silicone pastry mat for this step. Not only does it prevent sticking, but the measurements printed on the mat make it incredibly easy to achieve the perfect size and ensures a consistent thickness for all your rolls.
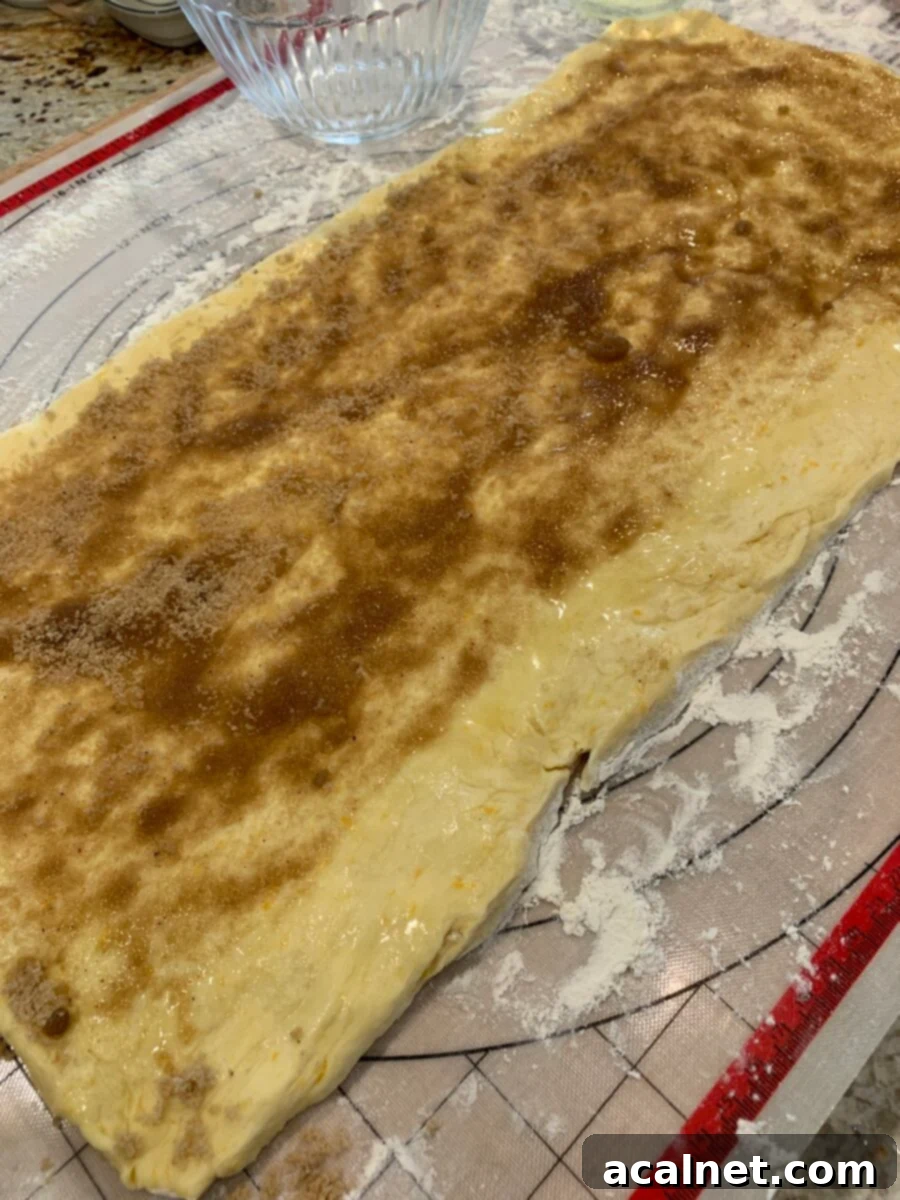
Step 2: Spread the Flavorful Filling. Evenly spread a layer of melted butter over the surface of your rolled-out dough. This acts as a delicious glue for the filling. Then, generously sprinkle your pre-mixed brown sugar, cinnamon, and nutmeg mixture over the butter. Be sure to leave a small border (about 1-2 inches) along one of the long edges of the rectangle. This clean edge will help seal the roll, preventing the filling from oozing out during baking.
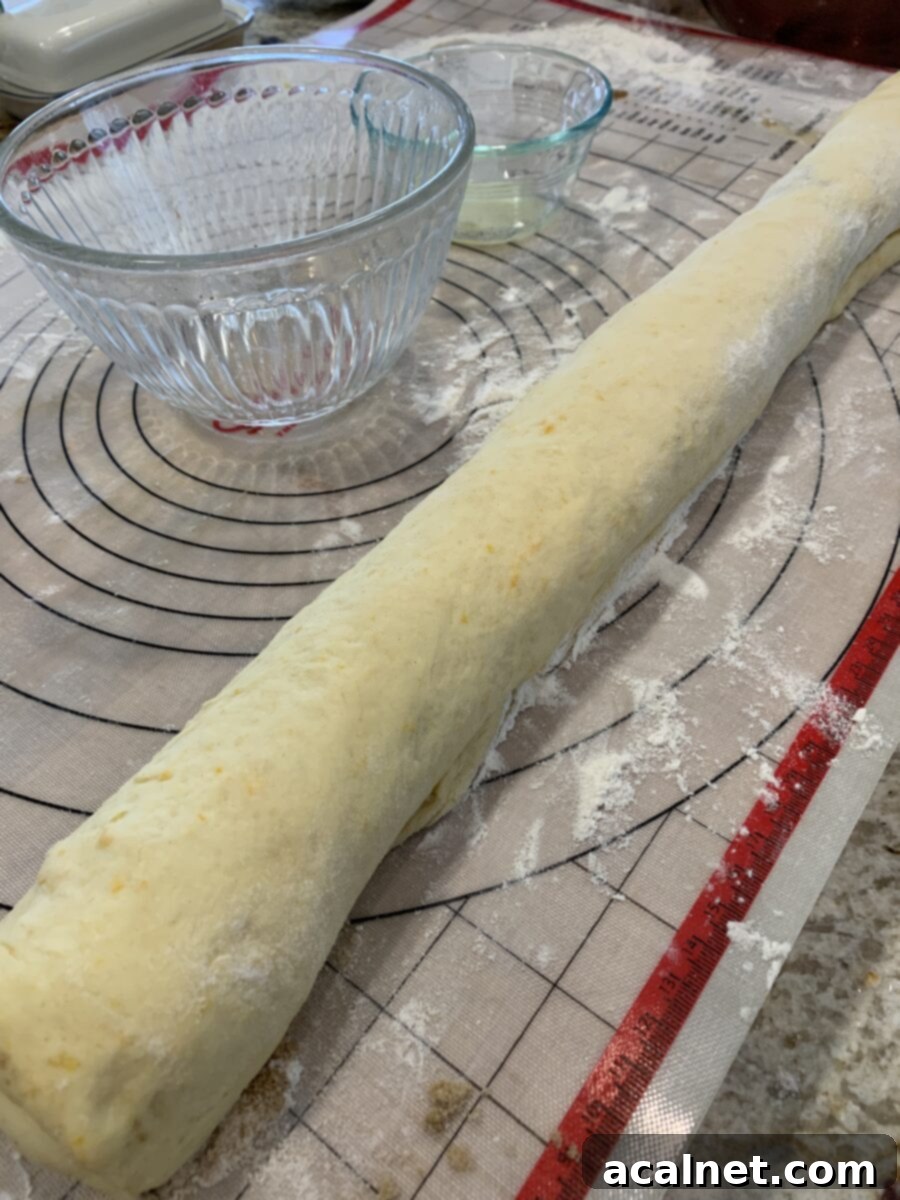
Step 3: Roll Up the Dough. Starting from the long side opposite the empty border, carefully and tightly roll the dough into one long, uniform cylinder. A tight roll is essential for creating those beautiful, distinct spirals of filling in your finished rolls. Take your time to ensure it’s as even as possible.
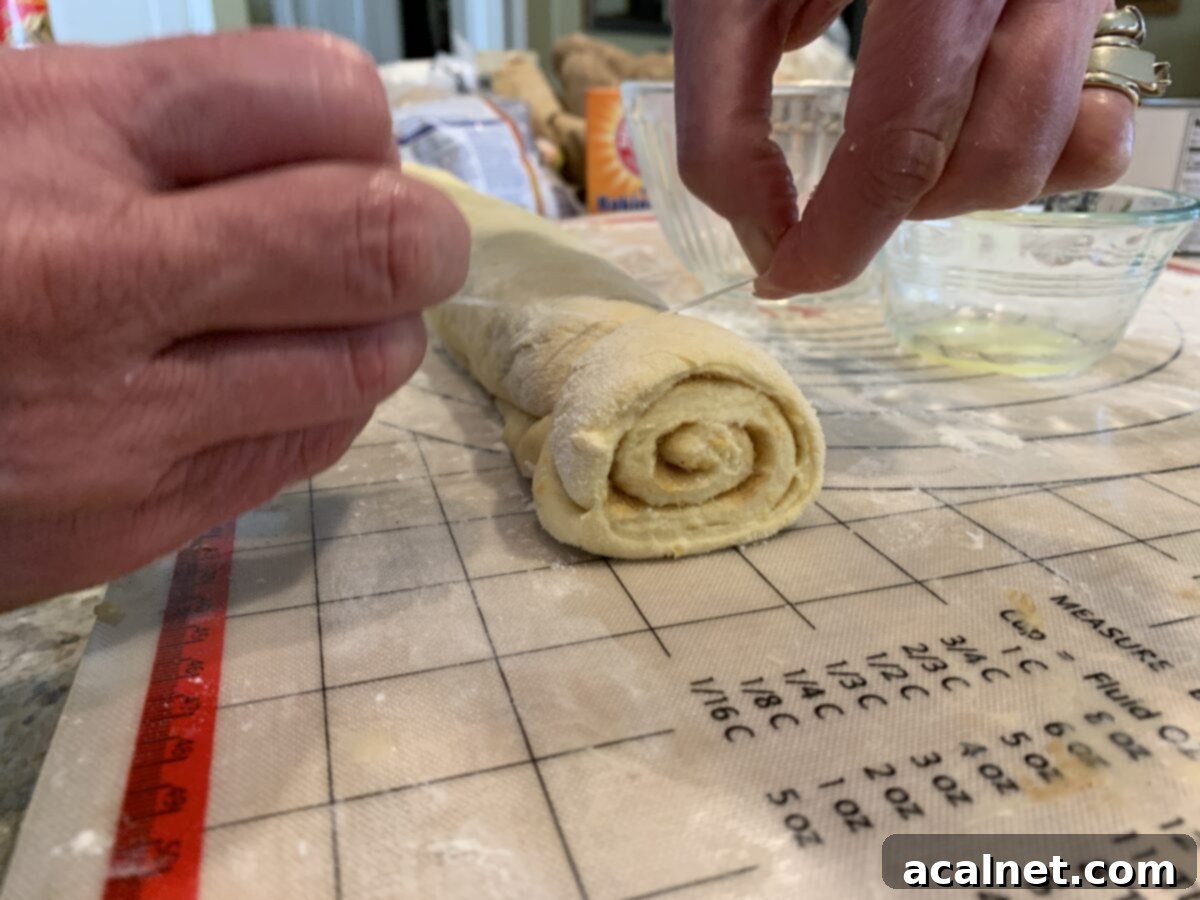
Step 4: Slice into Individual Rolls. Once your dough cylinder is formed, it’s time to slice it into individual rolls. Aim for approximately 1-inch thick sections. Consistent sizing ensures that all your rolls bake evenly.
Pro Tip: For the cleanest, most perfectly shaped rolls, bypass the knife! Use plain, unflavored dental floss to slice the dough. Simply slide a piece of floss underneath the roll, cross the ends over the top, and pull firmly to cut through. This method creates a much cleaner cut than even the sharpest knife, preventing the dough from squishing and preserving those beautiful spirals. I always keep a container of dental floss specifically for this purpose in my kitchen drawer.
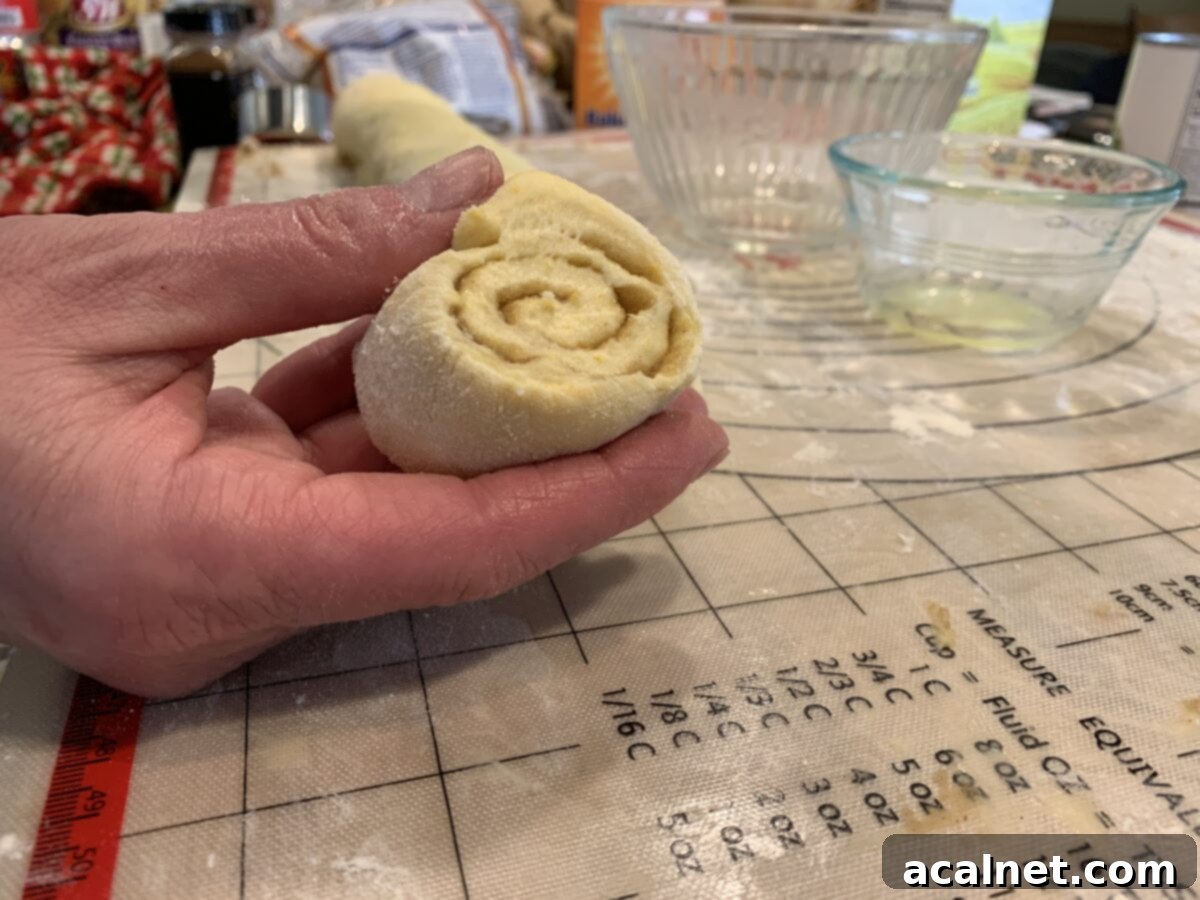
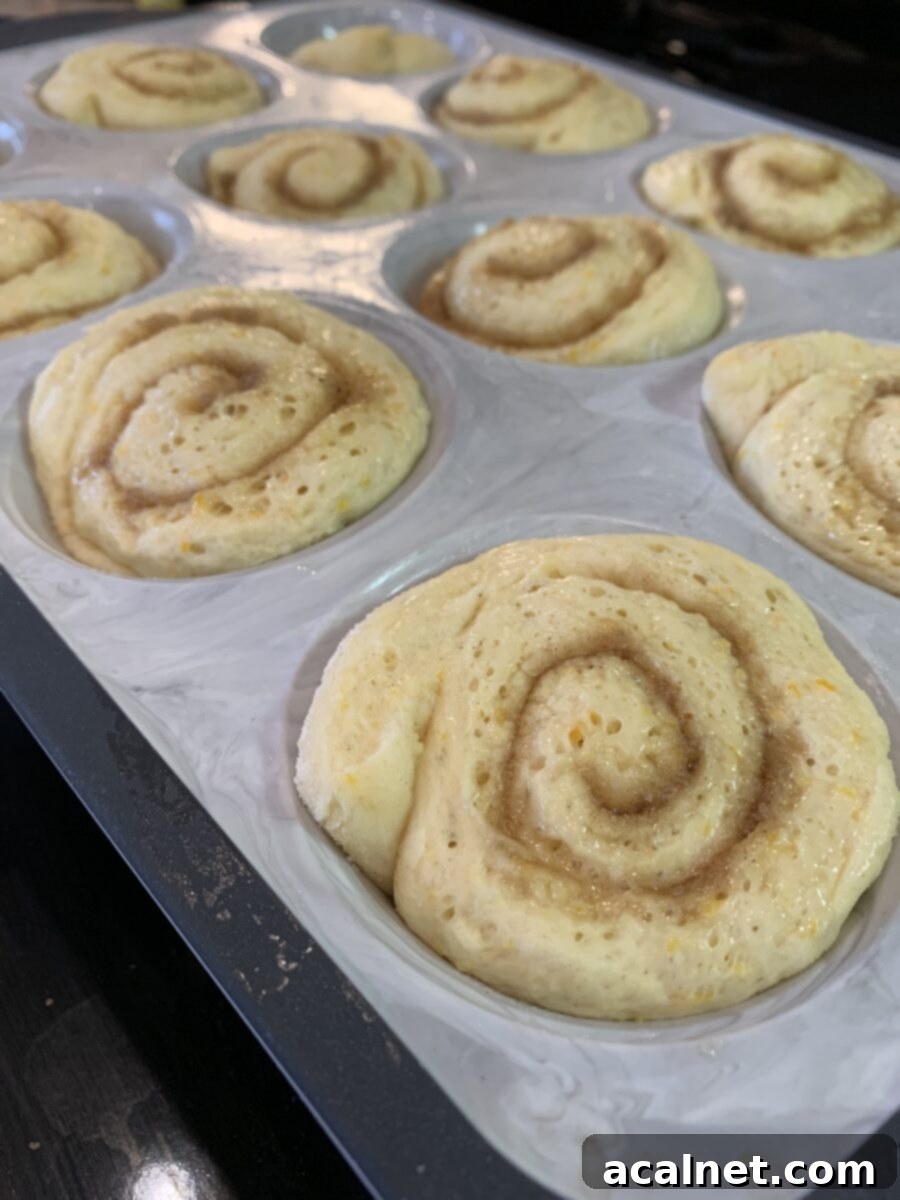
Step 5: Second Rise and Bake. Arrange your sliced rolls on a baking sheet lined with parchment paper (or in greased muffin cups for more individual portions), leaving a little space between them for expansion. Cover them loosely and let them rise in a warm, draft-free place for another hour, or until they have visibly doubled in size and look puffy. This second rise (proofing) is crucial for a light and airy texture. Once risen, bake them in a preheated oven according to the recipe instructions until golden brown and cooked through. Allow them to cool slightly on a rack before generously drizzling with the zesty orange icing.
Perfect Pairings: What to Serve with Orange Rolls
While these Orange Rolls are absolutely divine on their own, pairing them with the right complements can elevate your meal. For many, sweet rolls are a quintessential breakfast or brunch item, but their versatility allows for unexpected and delicious combinations.
I’m a big fan of the classic, beloved combination of cinnamon rolls with chili! Full disclosure, this pairing holds a special, somewhat nostalgic place in my heart, reminding me of my school lunch days growing up in Sunnyside, Washington. It might sound unusual at first, but the sweet and savory contrast is surprisingly addictive and satisfying.
As it turns out, chili and cinnamon rolls are a culinary tradition enjoyed in many other regions across the country as well. And when it’s cinnamon rolls with bright, zesty orange icing, the combination with hearty chili somehow seems even more perfectly balanced. The citrus brightens the richness of the chili, creating a truly unique and comforting meal. Try serving your orange rolls with my classic, stovetop Idaho Chili Recipe or, for a slightly different spin, enjoy the sweet rolls with my flavorful Pinto Bean Chili. This is a family-favorite flavor combination that truly can’t be beat.
Beyond chili, these orange rolls are, of course, a phenomenal addition to any breakfast or brunch spread. Consider serving them alongside:
- Freshly brewed coffee or a soothing cup of tea.
- A vibrant fruit salad for a light and refreshing counterpoint.
- Scrambled eggs or a savory omelet for a more substantial meal.
- Crispy bacon or savory breakfast sausage to complete a hearty breakfast.
- A glass of fresh orange juice (of course!) to double down on the citrus goodness.
Recipe Frequently Asked Questions
Here are some common questions you might have about making these delightful orange rolls:
While you can absolutely roll your dough on a cutting board or a kitchen counter dusted with flour, I’ve found that using a silicone pastry mat is incredibly helpful and highly recommended. The non-stick surface makes handling the dough much easier, and the printed measurements allow you to precisely gauge the size of your dough rectangle, ensuring uniform rolls. This consistency is key for even baking and presentation. I bought my pastry mat a few years ago, but this one looks very similar and works wonderfully.
Yes, for sure! While the fresh ginger adds a delightful, unique, and slightly peppery fresh flavor to these orange sweet rolls that truly makes them stand out, if you don’t have it on hand or if your family isn’t a fan of ginger, by all means, simply leave it out. The orange rolls will still turn out wonderfully delicious and bright. The primary citrus flavor will still shine through beautifully.
For the first rise, the dough should double in size, appearing visibly larger and puffy. A good test is the “poke test”: gently press two fingers into the dough about half an inch deep. If the indentations remain, the dough is ready. If they spring back quickly, it needs more time. For the second rise (after shaping), the rolls should look noticeably puffier and lighter. This process can vary based on the warmth and humidity of your kitchen, so rely on visual cues rather than strict timing.
Absolutely! While you can use bottled orange juice in a pinch, using freshly squeezed orange juice for the icing makes a significant difference in the flavor. Fresh juice provides a much brighter, more authentic, and less artificial citrus taste that truly elevates the icing and the overall experience of the orange rolls. It’s a small step that yields a big reward in flavor.
Enjoy Freshly Baked Anytime: Freezing Orange Rolls
One of the best features of this recipe is the option to freeze the dough, allowing you to enjoy fresh-from-the-oven orange rolls whenever the craving strikes, even on the busiest mornings. This makes them perfect for holiday breakfasts or unexpected guests.
Here’s a detailed guide on how to prepare and freeze your Orange Rolls for ultimate convenience:
Step 1: Flash Freeze Individual Rolls. After you have rolled and precisely sliced your dough into individual rolls, arrange them in greased muffin cups or on a parchment-lined baking sheet, making sure they aren’t touching. Place them in the freezer until they are completely frozen solid. This “flash freezing” step prevents the rolls from sticking together once bagged. Once solid (usually a few hours), remove the rolls from the muffin cups or baking sheet and transfer the frozen rolls to a large, zip-top freezer bag. Don’t forget to date the bag so you know when they were prepared. They can be frozen for up to 1-2 months.
Pro Tip for Icing: Don’t forget the icing! Prepare the orange icing according to the recipe instructions, then place it in a freezer-safe, airtight container. This can be frozen alongside your rolls. When you’re ready to use it, simply defrost the icing in the refrigerator overnight. While your rolls are proofing on the counter, the icing will come to the perfect consistency for drizzling.
Step 2: Overnight Thaw and Rise. On the night before you plan to indulge in freshly baked rolls, remove the desired number of frozen rolls from the freezer bag. Arrange them on a cookie sheet lined with parchment paper, leaving enough space between each roll for them to expand during their final rise. Cover the baking sheet loosely with plastic wrap or a clean kitchen towel.
Step 3: Morning Bake and Enjoy. Let the orange sweet rolls defrost and complete their final rise overnight on your kitchen counter at room temperature. By morning, they should have thawed and doubled in size, ready for baking. In the morning, preheat your oven and bake them as usual according to the recipe instructions. Once baked, allow them to cool for a few minutes before generously frosting them with the defrosted orange icing. Pair them with your morning coffee or tea for a truly delightful and effortless fresh sweet roll experience!
A Cherished Family Tradition: Auntie’s Favorite Orange Rolls
Baking from scratch is more than just a culinary task in my family; it’s a cherished tradition passed down through generations. Homemade cinnamon rolls, in particular, have always been a staple, a symbol of warmth and togetherness. I owe a huge hat tip to my Auntie Iva and Auntie Faye, who were truly masters of the craft and made the most delicious homemade rolls when I was growing up. Their kitchens were always filled with the comforting scent of freshly baked goods, and their recipes were legendary.
These Orange Rolls have now become my personal go-to recipe any time I want to recreate that magical experience of fresh sweet rolls. While the dough itself is wonderfully soft and flavorful, it’s truly the vibrant, fresh orange icing that sets these rolls apart from any other. The bright, tangy citrus glaze provides a perfect counterpoint to the rich, spiced dough, creating an unforgettable taste experience that feels both classic and uniquely fresh.
Pro Tip: To achieve that exceptional, bright flavor in the icing, be absolutely sure to use freshly squeezed orange juice. This seemingly small detail makes a remarkably big difference, infusing the glaze with a genuine, vibrant citrus note that simply can’t be replicated with bottled juice.

The Sweet Origin: A Recipe Inspired by Tradition
The inspiration for these Orange Rolls stems from a wonderful bread recipe I discovered in a charming little cookbook that my Auntie Maureen thoughtfully sent me years ago. I’ve always loved experimenting and adapting recipes to put my own spin on them, and this particular bread recipe immediately sparked the idea for a citrusy sweet roll. I’m absolutely delighted (“tickled,” as we say!) with how beautifully it turned out. By incorporating fresh orange juice and zest into the dough and developing that bright, zesty orange icing, I was able to transform a simple bread into these incredible orange cinnamon rolls that my family now adores.
Explore More Delicious Baking Recipes
If these Orange Rolls have put you in a baking mood and you’re eager to get back into the kitchen, be sure to try these other fantastic recipes as well! From simple no-yeast options to decadent desserts, there’s something for every baker:
- Homemade Biscuits (Easy, No Yeast Recipe)
- Chocolate Zucchini Cake
- Candy Cane Cookies
- Tiramisu Cake for Dessert
If you tried Homemade Orange Rolls or any other recipe on my website, please leave a 🌟🌟🌟🌟🌟 star rating and let me know how it goes in the comments below. Your feedback means the world to me!
Recipe Card: Homemade Orange Rolls

Orange Rolls
Print
Rate
Pin Recipe
Ingredients
Dough
- ⅓ cup orange juice
- ⅔ cup milk
- 2 ¼ teaspoons active dry yeast – or one ¼ ounce envelope
- 3 tablespoons butter – softened
- ½ teaspoon fresh ginger – grated
- 1 teaspoon lemon zest
- 2 tablespoons orange zest – about 2 oranges
- 1 teaspoon salt
- 3 tablespoons sugar
- 3 cups flour
Filling
- 2 teaspoons butter – melted
- ⅓ cup brown sugar – packed
- ⅛ teaspoon cinnamon
- ⅛ teaspoon nutmeg
Glaze
- 1 cup powdered sugar
- 1 teaspoon softened butter
- ½ teaspoon vanilla
- 1 tablespoon orange juice – freshly squeezed
- pinch of salt
Instructions
- Warm the orange juice and milk to 120°F (49°C). In the bowl of a stand mixer (or a large bowl if mixing by hand), combine the warmed liquid with the active dry yeast. Let it sit for 5-10 minutes until foamy, indicating the yeast is active. Then, add the remaining sweet roll dough ingredients: softened butter, grated fresh ginger, lemon zest, orange zest, salt, sugar, and flour.
If using a stand mixer with a dough hook, mix on low speed until combined, then increase to medium and knead for about 5-7 minutes until the dough is smooth, elastic, and pulls away from the sides of the bowl. (If kneading by hand, transfer the dough to a lightly floured surface and knead for 8-10 minutes until smooth and elastic.)
Lightly grease a large bowl. Place the dough in the bowl, turning it once to ensure the top is also greased. Cover the bowl loosely with plastic wrap or a clean kitchen towel and let it rise in a warm, draft-free place for approximately 1 hour, or until the dough has doubled in size.
While the dough is rising, prepare the filling: In a small bowl, combine the brown sugar, cinnamon, and nutmeg. Set aside. In another small bowl, whisk together all the glaze ingredients (powdered sugar, softened butter, vanilla, freshly squeezed orange juice, and a pinch of salt) until smooth. Set aside, covering lightly to prevent it from drying out.
Once the dough has doubled in size, gently punch it down to release the air. Turn it onto a lightly floured surface (a silicone pastry mat is highly recommended for its non-stick properties and helpful measurements). Roll the dough into an even 18″x 8″ rectangle. This precision helps in creating uniform rolls and ensures consistent baking.
Evenly spread the melted butter over the entire surface of the dough, leaving a 1-2 inch border along one of the long edges. Follow with an even layer of the brown sugar, cinnamon, and nutmeg mixture, ensuring good coverage without going past the buttered area.
Starting from the long side opposite the un-filled border, tightly roll up the dough into a cylinder. The tighter the roll, the better the spirals in your finished rolls will be. Using plain dental floss, slice the dough into 1-inch sections (see Pro Tip in the main article for details). Place the sliced rolls onto a baking sheet lined with parchment paper, or into greased muffin cups for more defined individual rolls, leaving some space for them to expand.
Cover the rolls loosely and allow them to rise for another 1 hour in a warm place, or until they have visibly doubled in size and appear puffy. This second rise is crucial for a light and tender texture.
Preheat your oven to 375°F (190°C). Bake the rolls in the preheated oven for about 9-11 minutes, or until they are golden brown and cooked through. Keep an eye on them to prevent overbaking.
Remove the rolls from the oven and transfer them to a cooling rack. Allow them to cool for just a few minutes – they are best drizzled with the prepared orange icing while still warm, allowing the glaze to melt slightly and seep into the nooks and crannies. Serve immediately and enjoy!
Notes
On the night before you plan to enjoy freshly baked rolls in the morning, remove the desired number of frozen rolls from the freezer and place them on a cookie sheet lined with parchment paper. Cover them loosely.
The sweet rolls will defrost and complete their second rise overnight on your kitchen counter. In the morning, bake as usual (375°F for 9-11 minutes), then frost with the defrosted icing and enjoy fresh sweet rolls with your morning coffee or tea. This makes holiday mornings incredibly easy!
For another delicious breakfast idea, enjoy scratch-made Carrot and Banana Muffins or Blueberry Rhubarb Muffins.
Please note, the nutrition details are estimated using a food database, so they’re just a rough estimate not an exact science.
