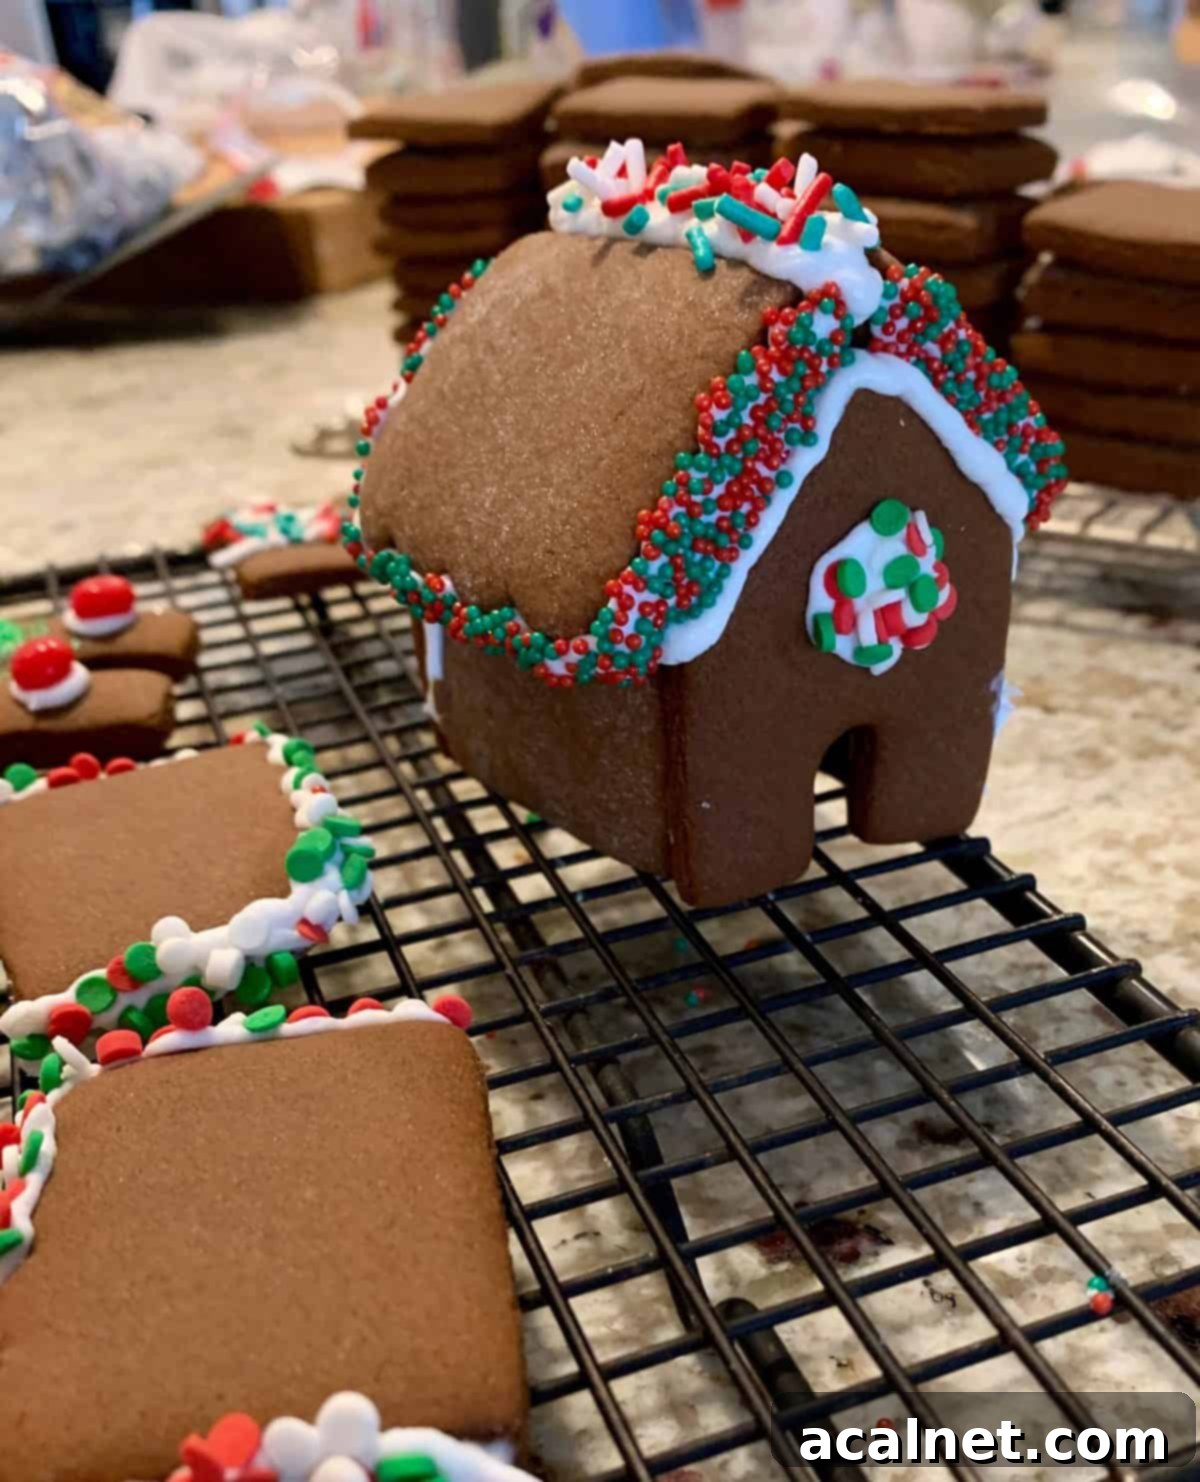
The Ultimate Guide to Making Adorable Mini Gingerbread Houses for Festive Fun
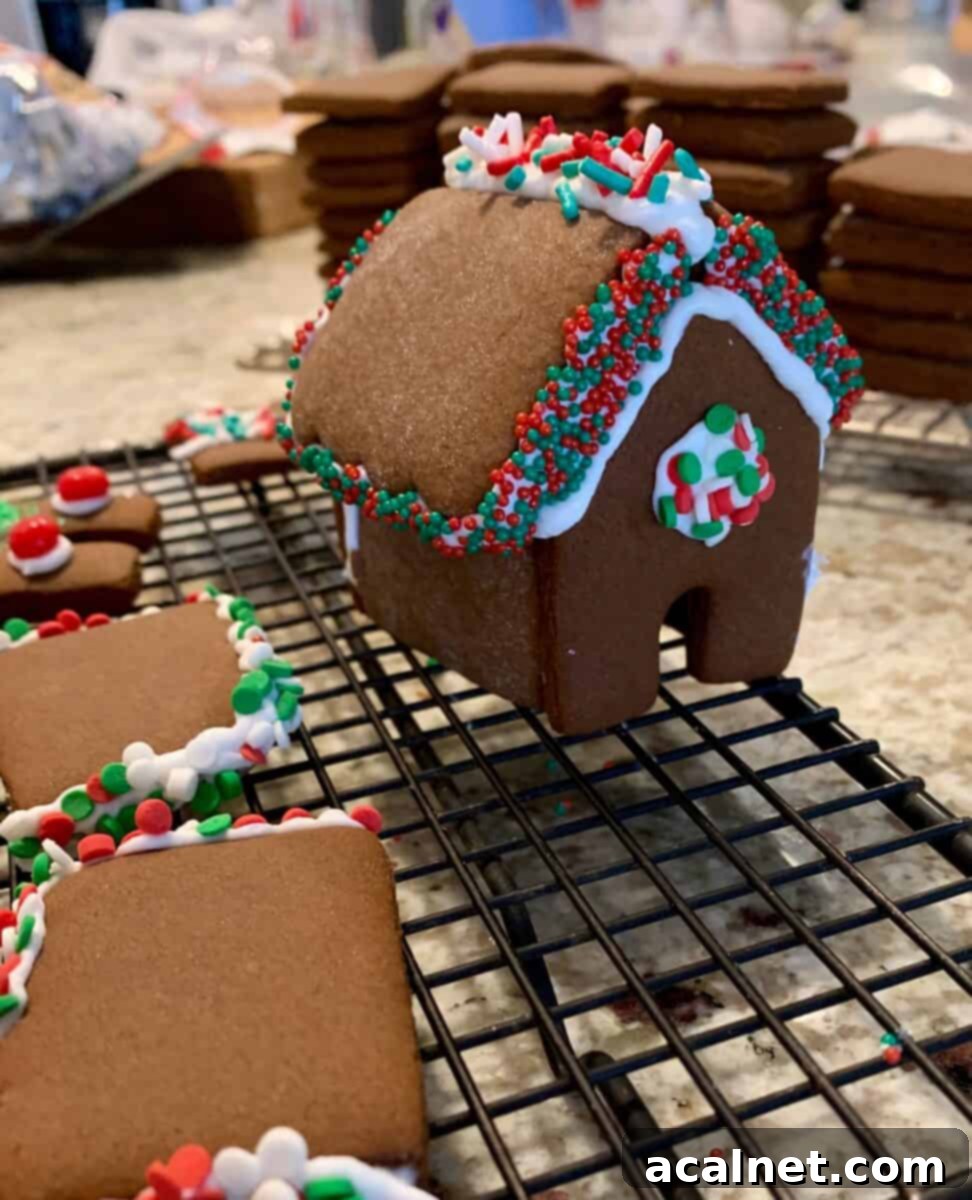
Mini-Gingerbread Houses are a truly enchanting and delightful holiday tradition, offering a perfect, bite-sized canvas for creativity and festive cheer. Each little house is just the right size for everyone to have their own individual project to build, decorate, and best of all, enjoy eating! This recipe is specifically tailored for crafting these charming, kid-friendly gingerbread treats, making the decorating process an incredibly fun activity for the whole family, a festive gathering, or even a cozy afternoon with friends. As an added bonus, this delicious gingerbread cookie recipe is versatile enough to be used with any shape cookie cutter, so you can easily adapt it for gingerbread men, stars, or trees! Serve these adorable creations at your next holiday party alongside other festive favorites like Easy No-Bake Peanut Butter Pies and Classic Sugar Cookies with a luscious swirl of Homemade Buttercream Frosting.
[feast_advanced_jump_to]
Why Mini Gingerbread Houses Are a Must-Make This Holiday Season
There’s something uniquely magical about mini gingerbread houses that captures the spirit of the holidays. They’re not just a dessert; they’re an experience, a craft, and a memory in the making. Here’s why you’ll absolutely adore making them:
Unleash Your Inner Architect and Artist
Enjoy the Creativity: Building mini gingerbread houses offers a wonderful opportunity for you, your children, or your guests to unleash their creativity. Each house is a blank canvas waiting for a unique design. You can experiment with different icing colors and consistencies, a variety of small candies, edible glitter, and even miniature edible decorations. Imagine tiny gumdrop pathways, candy cane fences, or sparkling sugar snow on the roofs! They are the perfect holiday treat to share alongside homemade Candy Cane Cookies, making your festive spread truly memorable.
A Heartwarming Family Tradition
Family Fun: Creating mini gingerbread houses is a fantastic family activity that brings generations together. It’s a delightful way for young and old alike to spend quality time, collaborate, and make lasting memories during the festive season. From rolling out the dough to carefully placing the final sprinkle, every step can be a shared moment of joy and laughter. These small projects are less intimidating for little hands than full-sized houses, encouraging participation from even the youngest family members.
Delicious Decorations You Can Actually Eat!
Tasty Holiday Decor: Unlike their larger counterparts, which often end up as dusty centerpieces rather than edible treats, mini gingerbread houses are perfectly designed to be enjoyed! Their small size makes them ideal for individual servings, ensuring that every effort put into decorating is rewarded with a delicious bite. You can also discreetly nibble on the gingerbread pieces, icing, and candies as you construct your custom creations, adding to the fun of the process.
Perfect for Parties and Personalized Gifts
Mini gingerbread houses are also a phenomenal option for holiday parties or as thoughtful, personalized gifts. Set up a “decorate your own gingerbread house” station, and watch your guests delight in creating their edible masterpieces. Each guest leaves with a unique, delicious party favor. They are also fantastic for school events, office holiday potlucks, or simply as a special treat to share with neighbors.
Essential Ingredients for Your Perfect Gingerbread Houses
Crafting the perfect gingerbread dough is the foundation of these delightful mini houses. Here are the key ingredients you’ll need and why they’re so important:
- Light Brown Sugar: This gives your gingerbread a lovely depth of flavor and a tender crumb. While light brown sugar is preferred for its milder molasses notes, you can absolutely use dark brown sugar if that’s what’s currently in your pantry. Dark brown sugar will result in a richer, slightly more intense molasses flavor, which some people adore!
- Molasses: This distinctive, dark syrup is a non-negotiable, ‘must-have’ ingredient for authentic gingerbread. Molasses is the very base for that wonderful, classic gingerbread flavor and contributes significantly to the cookie’s characteristic dark color and chewy texture. Don’t skip it!
- Unsalted Butter: Used at room temperature, butter is crucial for the tender texture and rich flavor of the gingerbread. Ensure it’s softened properly for easy creaming.
- Egg: A single beaten egg helps bind the dough ingredients together, adding moisture and structure to your gingerbread panels.
- Vanilla Extract: A touch of vanilla enhances all the other flavors, adding a warm, aromatic note to the gingerbread.
- Ground Spices (Cinnamon and Ginger): These are the stars of gingerbread! Two teaspoons each of cinnamon and ground ginger provide that quintessential warming, festive spice blend. You can adjust these to your taste, adding a pinch of nutmeg or cloves for extra complexity.
- Baking Soda: This leavening agent reacts with the molasses (an acid) to give the cookies a slight lift and contributes to their tender texture.
- Salt: Just a half teaspoon of salt balances the sweetness and enhances all the spice flavors, making the gingerbread truly pop.
- All-Purpose Flour: The main structural component of your dough. You’ll need about 4 cups, plus extra for dusting your work surface when rolling out the dough. This prevents sticking and ensures clean cuts.
For precise measurements and full ingredient details, please scroll down to the complete recipe card below.
Choosing Your Gingerbread House Cookie Cutter & Alternatives
This recipe yields approximately 12 delightful mini-gingerbread houses, and they are always an absolute hit! If you’re looking for a fun, interactive holiday party activity, your guests will undoubtedly love the challenge and joy of building their own edible creations.
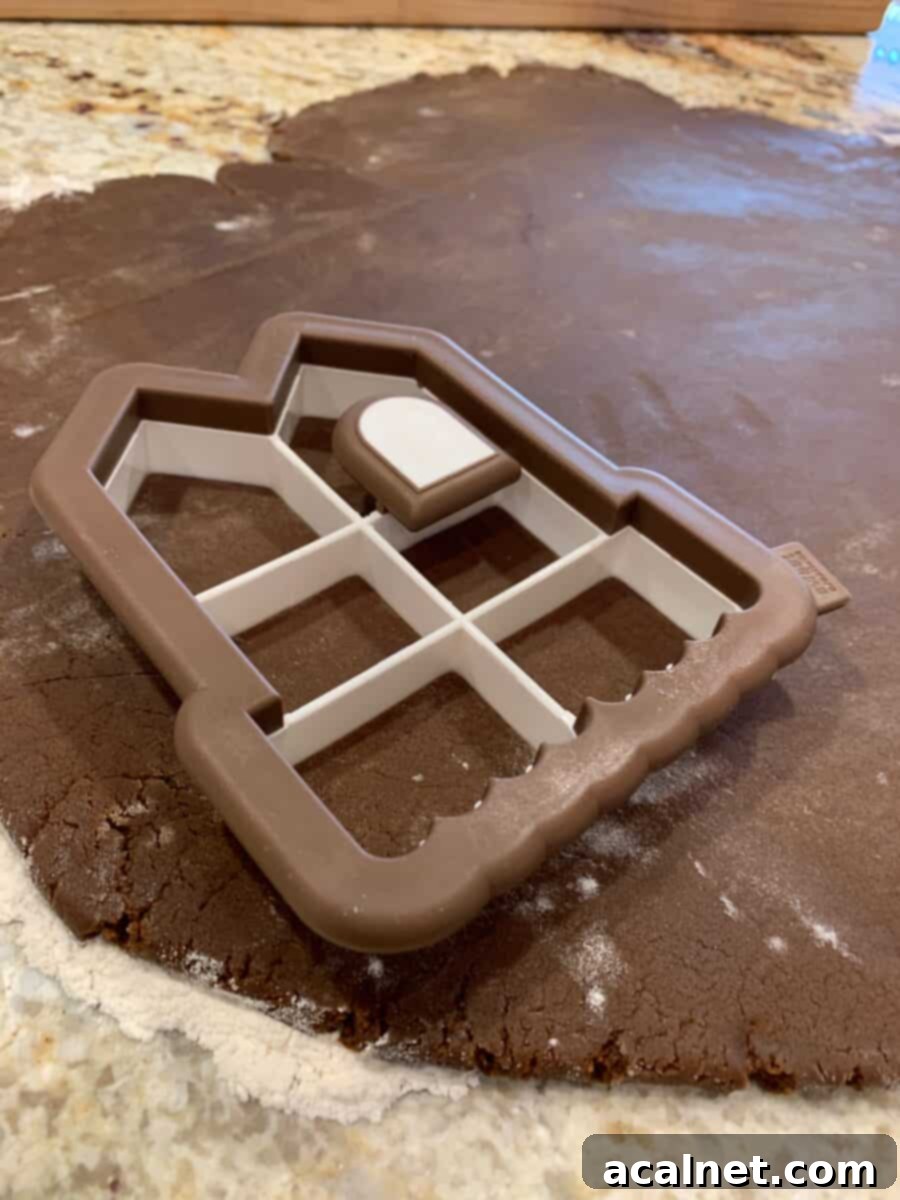
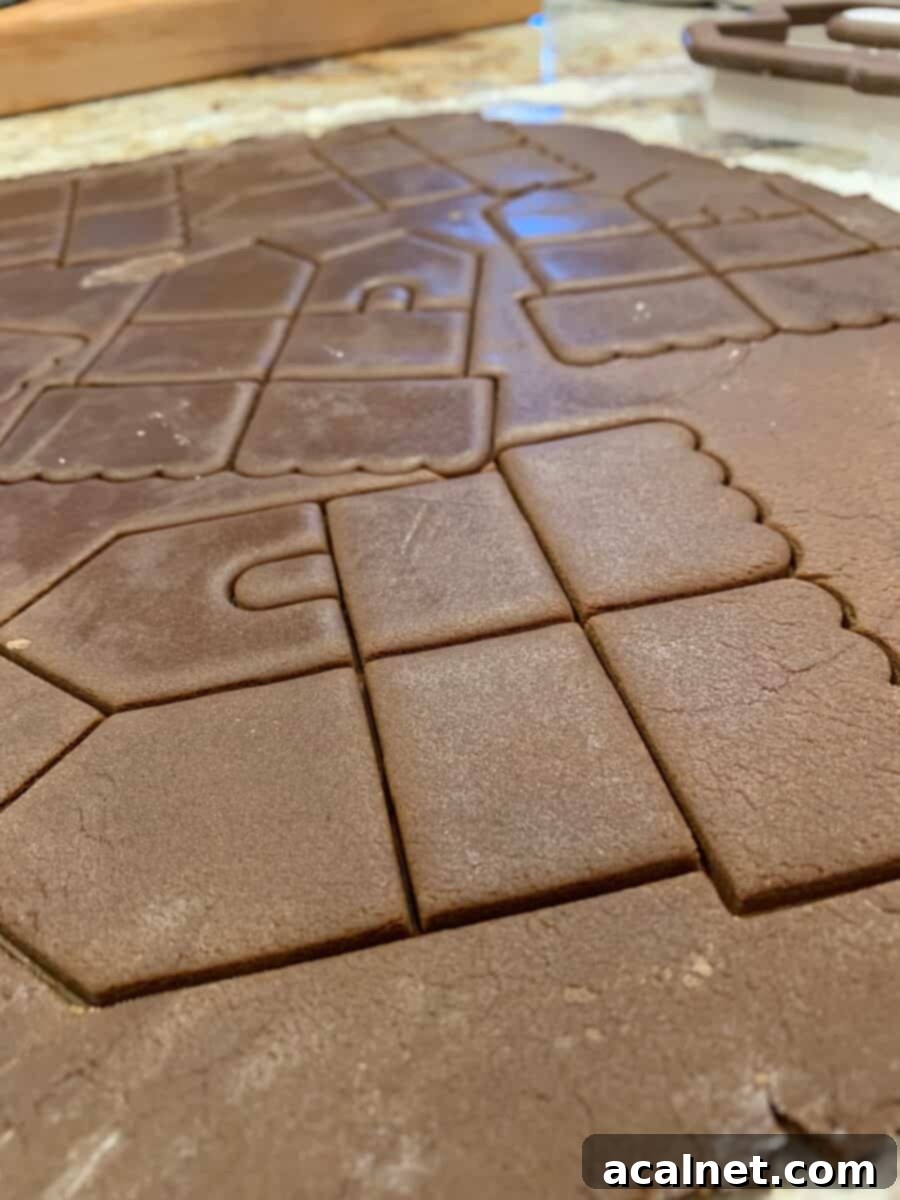
Pro-Tip: For the easiest and most consistent results, I highly recommend using a specialized mini gingerbread house cookie cutter. These ingenious cutters typically create all the panels (walls and roof pieces) for each house in one press. This special cookie cutter is an excellent choice, ensuring perfectly sized and shaped components every time. As an option, here is another similar cookie cutter to make gingerbread houses.
However, don’t let the lack of a special cutter deter you! By all means, feel free to use whatever cookie cutters you have on hand. This gingerbread dough is incredibly versatile and delicious, no matter the shape. Classic gingerbread men are always a big hit, and any festive shape—from stars and trees to snowflakes—works beautifully with this robust and flavorful dough. If you don’t have a specific house cutter, you can:
- Use a Knife and Template: Print out small templates for walls and roof panels, place them on rolled-out dough, and carefully cut around them with a sharp knife.
- Simple Square/Rectangle Cutters: Use small square or rectangular cutters for walls, and cut triangles for roofs freehand.
- Combine Shapes: Get creative! Small circles can become windows, and tiny rectangles can form doors.
The most important thing is to enjoy sharing this delicious recipe and the creative process with your family and friends. The taste will be amazing regardless of the exact architecture!
Frequently Asked Questions About Mini Gingerbread Houses
For best results and to maintain a tender cookie texture, try to only re-roll the gingerbread dough about three times at most. Beyond that, the dough can become stiff and hard to handle, and the resulting cookies might be tough.
Yes, absolutely! This is an excellent option for preparing the gingerbread house components well in advance of your assembly and decorating session. Simply cut the dough into the desired house portions, bake them as directed, and allow the cookies to cool completely on a wire rack. Once cooled, place them in a freezer-safe zipped-top bag or an airtight container, layered with parchment paper if needed, and freeze for up to 2-3 months. Thaw them at room temperature before you are ready to assemble.
For structural integrity, royal icing is highly recommended. It dries hard and strong, acting like edible cement to hold your houses together. For decorative details, royal icing is also excellent for piping, but a simple homemade buttercream frosting can be used for colorful accents or “snow” if the houses won’t be handled too much after decorating.
Once assembled and decorated, mini gingerbread houses can be stored at room temperature in an airtight container for up to 1-2 weeks. If using ingredients that require refrigeration (like certain buttercreams or fresh candies), adjust storage accordingly. Avoid direct sunlight or very warm places, which can cause icing to melt.
If the dough is too sticky to handle, add flour one tablespoon at a time, kneading gently until it reaches a manageable consistency. If it’s too dry and crumbly, add a tiny bit more molasses or even a teaspoon of water, mixing until it comes together. Always aim for a dough that is soft but not sticky.
Assembling Your Adorable Mini Gingerbread Houses: A Step-by-Step Guide
In my many years of making these adorable, kid-sized gingerbread houses, we’ve consistently achieved the best results by approaching the project in stages. This method breaks down the process into manageable steps, making it more enjoyable and less stressful, especially when making multiple houses.
Pro Tip: I highly recommend spreading the process over two days. Dedicate the first day to preparing the dough, rolling it out, and baking all the gingerbread house pieces. Then, on the following day, you can focus entirely on the fun parts: assembling and decorating the houses. This allows ample time for each step to be completed without rush, ensuring the gingerbread cools completely and is firm enough for construction.
Day One: Baking the Foundation
- Prepare the Dough: Follow the recipe to mix your gingerbread dough.
- Chill (Optional but Recommended): If time allows, chill the dough for at least 30 minutes. This makes it easier to roll and cut, preventing sticky messes.
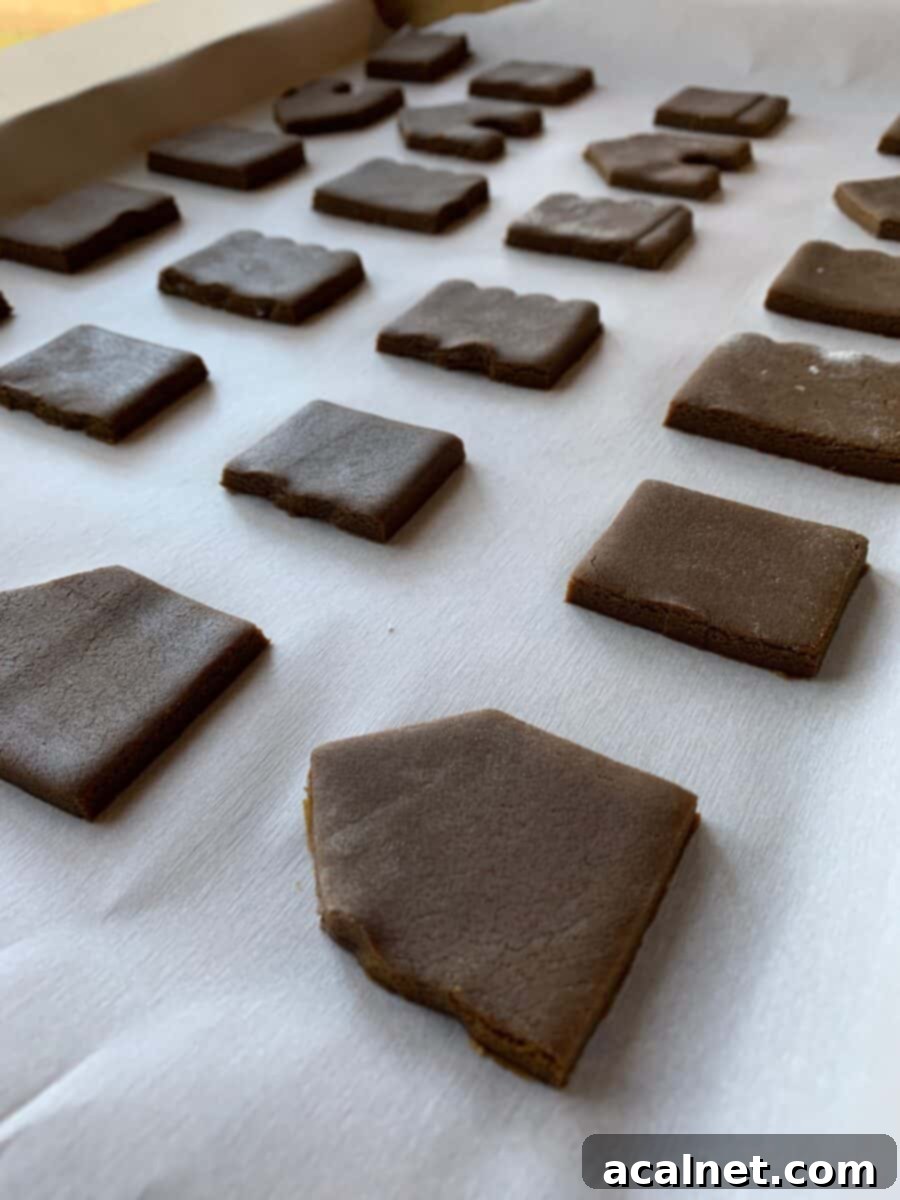
- Roll and Cut: Roll out the dough to an even thickness (around ⅛ inch) on a lightly floured surface. Use your special cookie cutter (or templates) to cut out all the wall and roof panels for your houses.
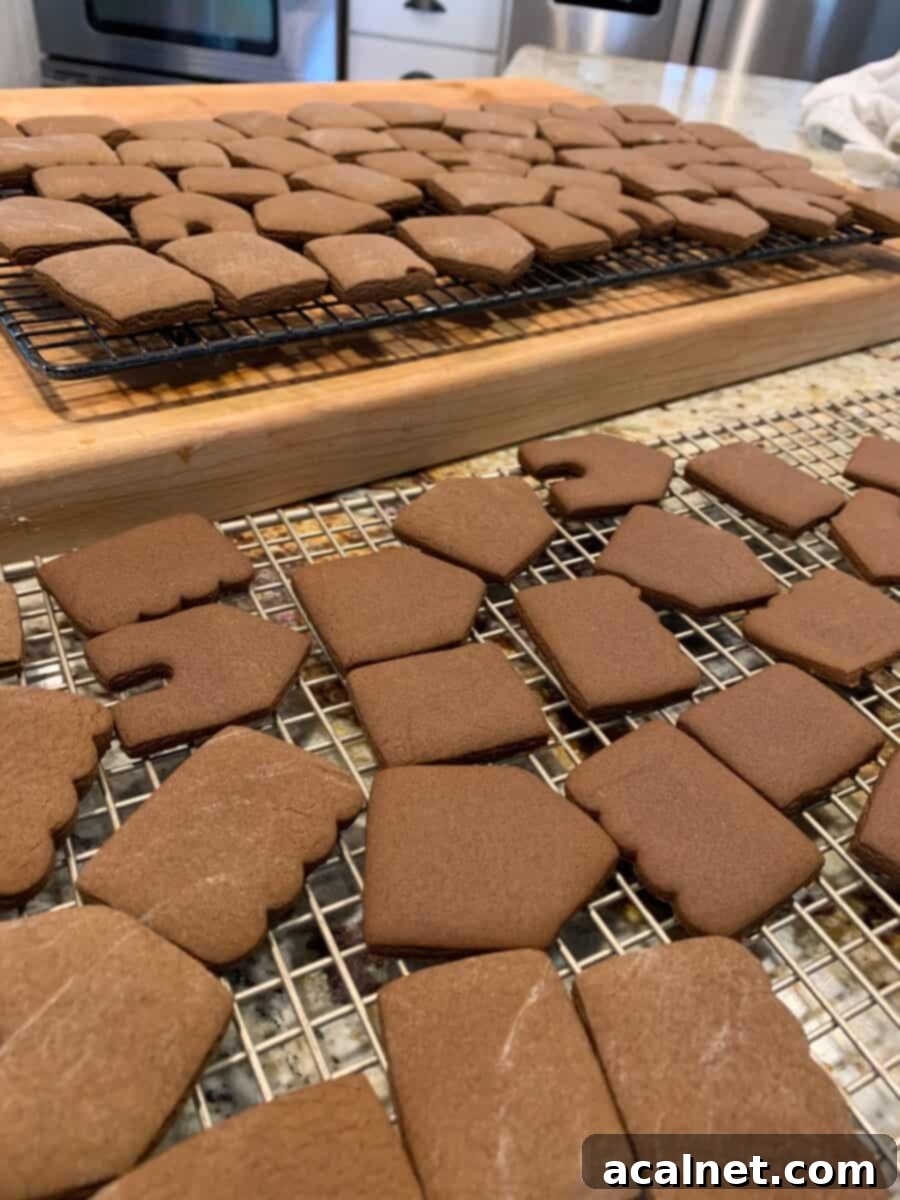
- Bake: Bake the pieces until lightly browned at the edges. Allow them to cool completely on a wire rack. Cooling is crucial for strong, stable house parts.
- Store: Once fully cooled, store the gingerbread pieces in an airtight container at room temperature until you’re ready for assembly.
Day Two: Building and Decorating
- Prepare Icing: Make your royal icing. It should be thick enough to hold pieces together but still pipeable.
- Set Up Your Station: Gather all your gingerbread pieces, various candies, sprinkles, and icing bags with different tips.
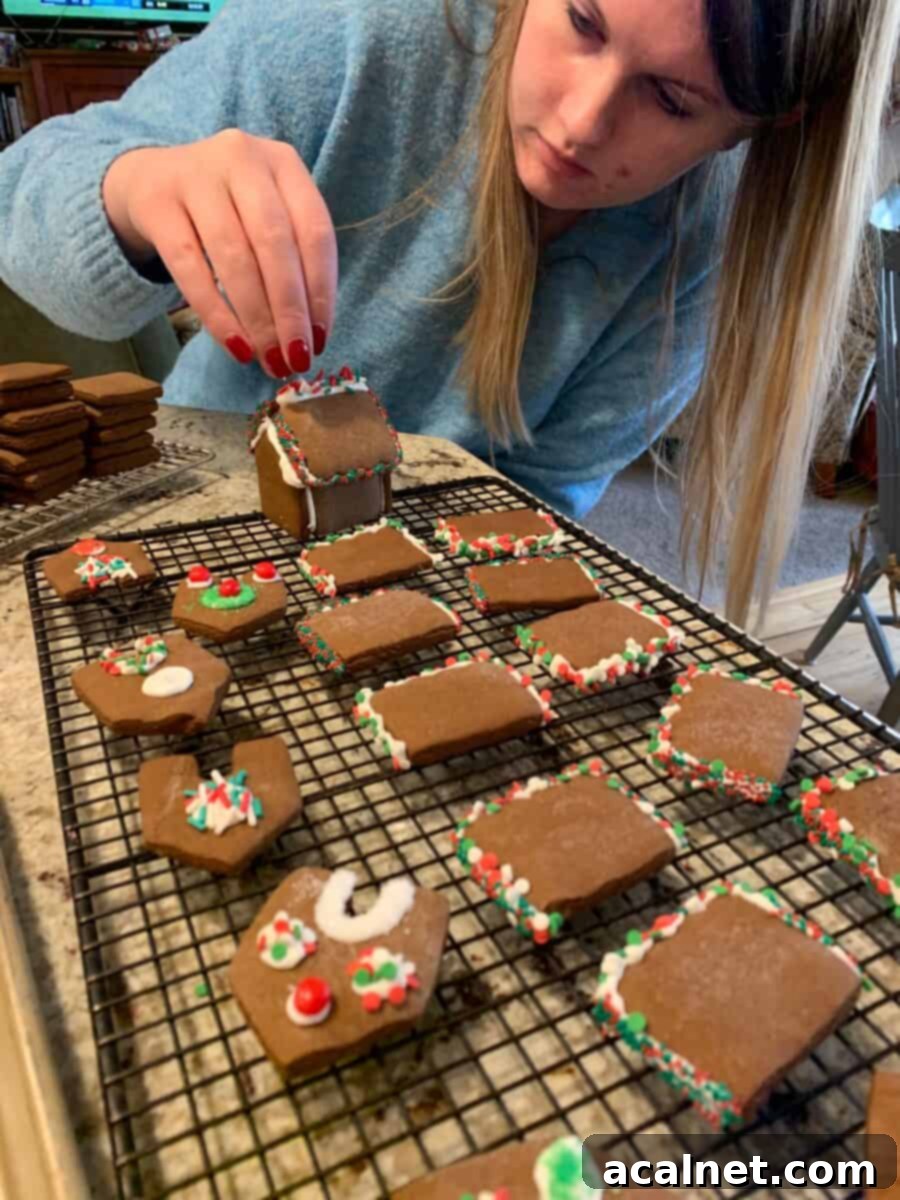
- Assemble the Walls: Using the royal icing as “glue,” pipe a line of icing along the edges of the gingerbread walls. Gently press two walls together at a 90-degree angle, holding them for a few seconds until the icing starts to set. Continue with the remaining walls to form a square or rectangular base.
- Let Set: Allow the wall structure to dry and set for at least 30 minutes, or even an hour, before adding the roof. This prevents collapses.
- Add the Roof: Once the walls are stable, pipe icing along the top edges of the walls and the gable ends. Carefully place the two roof pieces onto the structure, pressing gently. Pipe a line of icing along the peak of the roof to seal it.
- Decorate! This is where the real fun begins! Once the house structure is stable, decorate to your heart’s content. See the “How to Decorate” section below for ideas.
This staged approach allows for plenty of time for each step and, if you’re using this as a party activity, it also provides ample opportunity to create a few inspiring examples for your guests. Make no mistake, this is an incredibly fun process, and the end result is always an adorable and delicious treat or party favor that everyone loves and remembers.
The Sweet Story Behind Our Mini Gingerbread Houses
Our family absolutely LOVES gingerbread houses, and it’s a tradition that has brought us so much joy over the years. A special thank you goes to Auntie Maureen, who always sends the kids the most beautiful and elaborate gingerbread house every Christmas. Her thoughtful gifts inspired us to create our own, more manageable, and equally delightful versions!
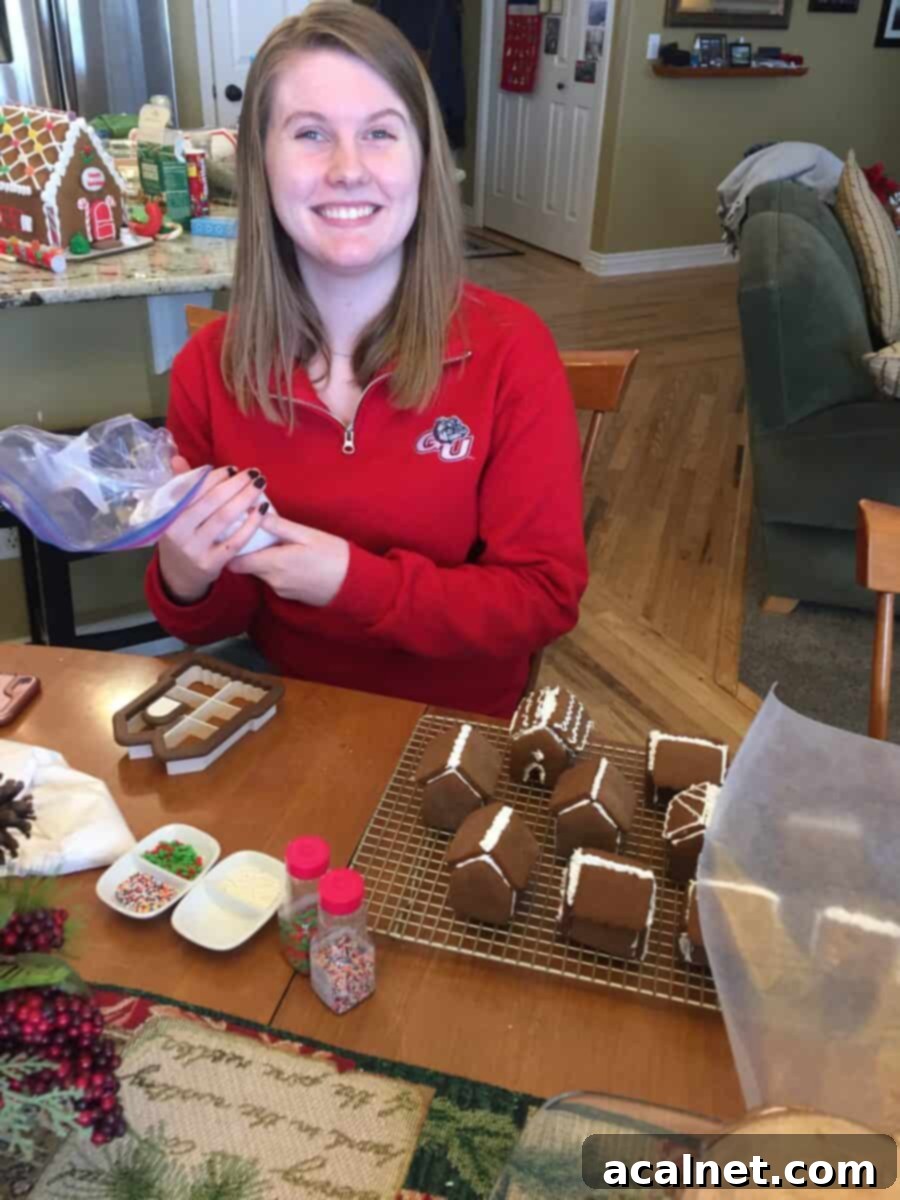
This particular gingerbread recipe is actually found on the back of the packaging for the mini-gingerbread cookie cutter we recommend. It’s tried and true, and my daughter Madeline has been making these charming mini houses for years, perfecting her technique and creating beautiful edible art.
Creative Decorating Ideas for Your Mini Gingerbread Masterpieces
Here’s where the fun truly takes off! Decorating mini gingerbread houses is an opportunity to let your imagination run wild. I always recommend having a good base of white royal icing (which acts as both glue and snow), along with a wide selection of various holiday sprinkles. The more options you have on hand, the more creativity and unique designs each house will showcase!
Essential Decorating Tools & Supplies:
- Piping Bags & Tips: Small round tips for fine lines and writing, and a larger star tip for creating borders or textured snow.
- Offset Spatula or Knife: For spreading icing smoothly.
- Small Bowls: For different colored icings and various candies.
- Tweezers: Handy for placing tiny sprinkles or candies precisely.
Creative Decoration Ideas:
- Snowy Roofs: Use white royal icing to create a fluffy snow effect. You can pipe simple lines, spread it smoothly, or create icicles dripping from the eaves. Dust with edible glitter for a shimmering finish.
- Candy Roof Tiles: Use small candies like M&M’s, Skittles, or even mini Nilla wafers as roof tiles. Overlap them slightly for a realistic look.
- Window Panes: Pipe square or rectangular outlines for windows and fill them with crushed hard candies (baked into the dough beforehand for a stained-glass effect) or use flat sprinkles.
- Doors & Pathways: Create a door with a rectangle of icing or a small wafer cookie. Add a pathway with mini gumdrops, chocolate chips, or colorful nonpareils.
- Holiday Foliage: Use green icing with a star tip to pipe tiny wreaths or evergreen branches. Red sprinkles or mini candies can be berries.
- Candy Cane Accents: Break candy canes into small pieces to create decorative borders, fences, or tiny poles for lights.
- Pretzel Log Walls: For a rustic cabin look, use small pretzel sticks glued to the sides with icing.
- Sugar & Sprinkles: Don’t underestimate the power of simple sugar! Coarse sanding sugar or edible glitter can add sparkle and texture to any part of your house.
- Themed Houses: Encourage different themes! A “candyland” house with colorful candies, a “winter wonderland” house with white and silver, or a “gingerbread man’s home” with mini gingerbread men cutouts.
Remember, there’s no right or wrong way to decorate. Encourage experimentation and embrace the unique charm of each handmade house. The goal is to have fun and create something beautiful and delicious!
Delightful Holiday Recipes to Complete Your Festive Spread
Looking for more delicious recipes to serve and enjoy during the festive season? We’ve got you covered! As a perfect appetizer to kick off any gathering, our Cranberry Brie Bites offer the ideal blend of tart cranberry, creamy brie, and savory pastry. And for all your favorite dessert recipes, you’ll love mastering our Perfect Pie Crust, a versatile base for sweet and savory pies alike. Explore these and other holiday favorites below:
- Dutch Oven Pot Roast
- 10 Easy, Edible Gift Recipes
- Candy Cane Cookies
- Delicious Crab and Shrimp Dip
If you made Mini-Gingerbread Houses or any other delightful recipe from my website, please take a moment to leave a 🌟 star rating and let me know how it went in the 📝 comments below. Your feedback is greatly appreciated!
Mini Gingerbread Houses Recipe
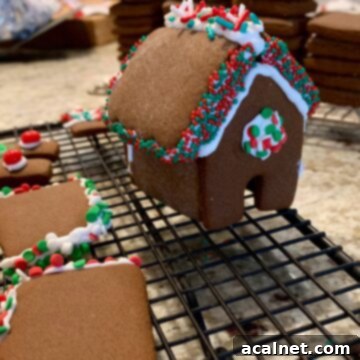
Mini-Gingerbread Houses
Print
Rate
Pin Recipe
Ingredients
- ⅔ cup light brown sugar – packed
- ⅔ cup molasses
- 2 teaspoons cinnamon
- 2 teaspoons ground ginger
- 2 teaspoons baking soda
- 1 cup unsalted butter – at room temperature
- 1 egg – beaten
- 2 teaspoons vanilla extract
- ½ teaspoon salt
- 4 cups flour – plus extra for dusting while rolling out the dough
Instructions
Combine Ingredients
- Place brown sugar, molasses, cinnamon and ginger in a large pan over medium-low heat. Bring to a boil, stirring as it cooks. Remove pan from the heat and stir in baking soda.
- Add butter gradually, about ¼ cup at a time, stirring well between additions to combine.
- Next add the egg, vanilla and salt and stir to combine.
- Pour into a large bowl and add flour gradually, stir to combine.
Roll Out
- Turn dough out onto a lightly floured kitchen counter, cutting board or on a pastry cloth and knead until dough comes together and is no longer sticky, adding flour by the tablespoon if needed.
- Roll out half the dough on the floured work surface to about ⅛” thick. Place gingerbread house cookie cutter on the dough and press to cut through the dough and create the outlines for the gingerbread houses.
Bake
- Preheat oven to 325°
- Place the sectioned pieces of dough on the parchment paper and bake until edges are slighted browned, about 10 minutes.
- Remove from the oven and let the cookies cool on the baking sheet for about 5 minutes. Transfer to a wire rack to cool completely before assembling and decorating.
Notes
Please note, the nutrition details provided are estimated using a food database and are intended as a rough guide, not an exact scientific calculation. Individual results may vary based on exact ingredients and preparation methods.
