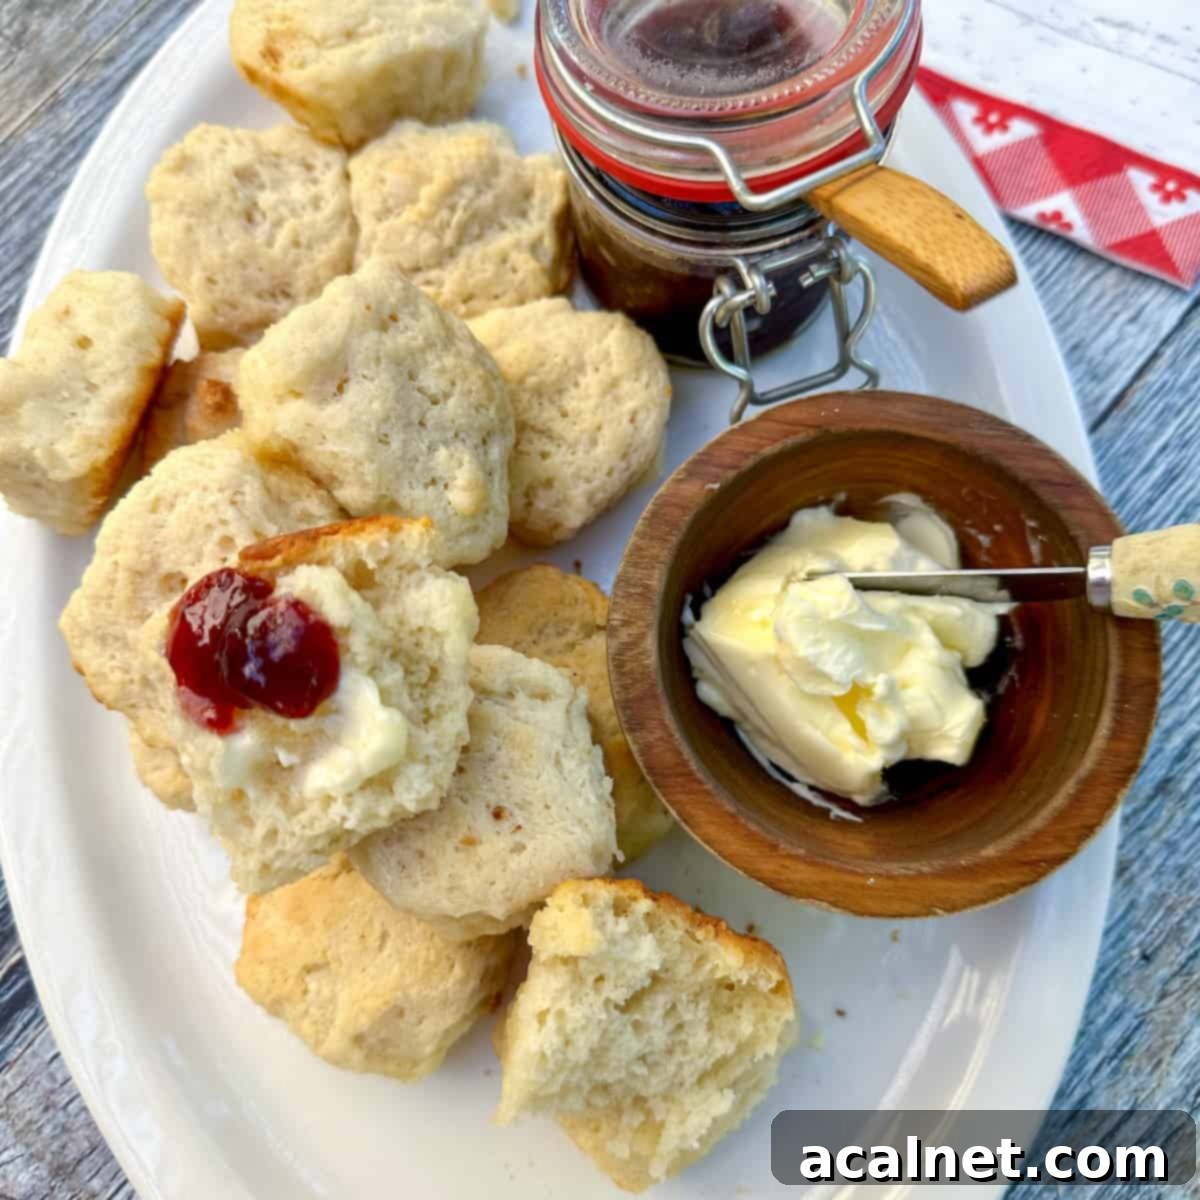
The Best Fluffy Buttermilk Butter Biscuits: Easy 4-Ingredient Recipe
Prepare to fall in love with these incredibly **tender and buttery buttermilk biscuits**! Made with just four simple ingredients, this homemade biscuit recipe delivers a truly exceptional texture: soft and fluffy on the inside with a perfectly light and crispy exterior. Best of all, these delightful biscuits are remarkably easy to make and can be ready to enjoy in under 30 minutes, making them a perfect addition to any meal.
Their versatility makes them suitable for any occasion. Serve these savory delights for a hearty breakfast alongside a Cougar Gold Cheese Quiche or as a comforting side at dinner with a robust Pinto Bean Chili, a classic No-Ketchup Meatloaf, or an elegant Crusted Chicken Romano. However you choose to enjoy them, these fluffy biscuits are sure to become a family favorite.
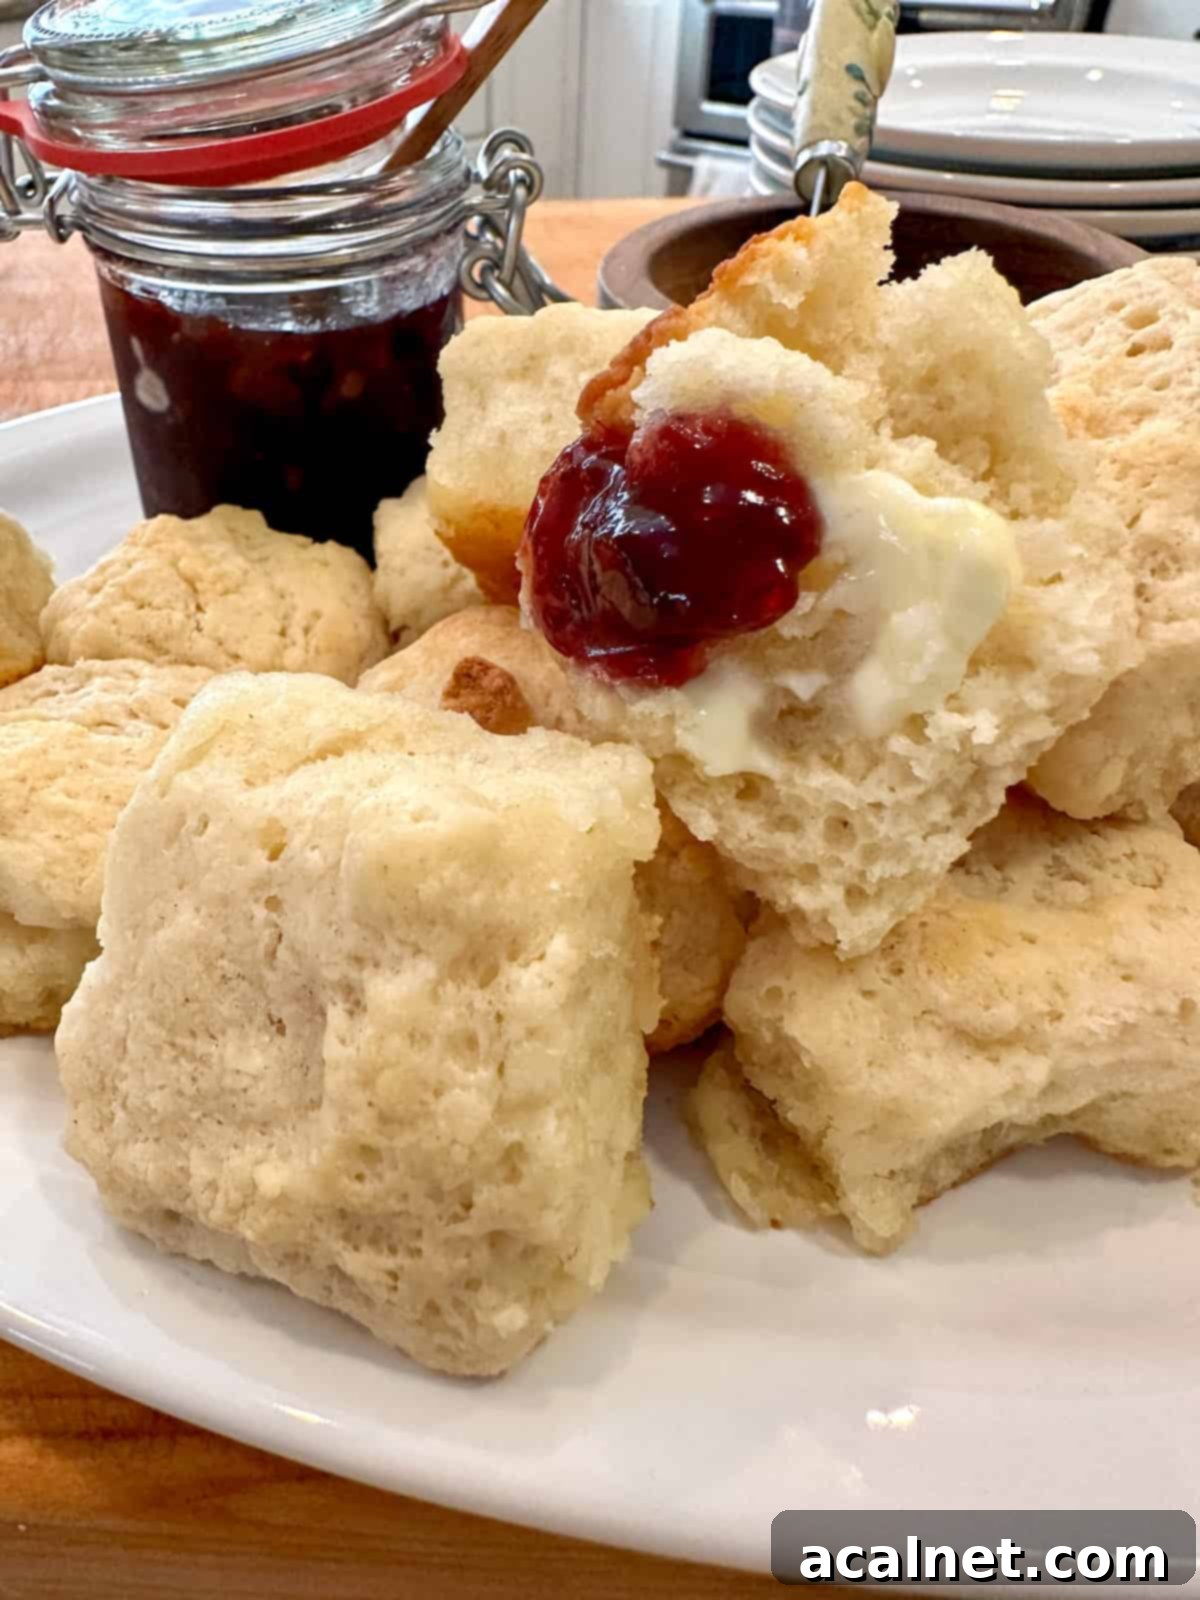
⭐ Why You’ll Love This Easy Biscuit Recipe
This recipe for **Buttermilk Butter Biscuits** is a true gem, especially for those seeking a quick and satisfying homemade treat. These aren’t just any biscuits; they’re a classic buttermilk biscuit recipe simplified for modern convenience. Thanks to the clever use of a pre-mixed baking product like Bisquick, these biscuits come together incredibly fast, perfect for busy mornings or last-minute dinner sides.
**Major Time Saver:** Forget the tedious task of cutting cold butter into flour or meticulously measuring shortening. The baking mix already has these essential dry ingredients perfectly proportioned, significantly speeding up your prep time and ensuring consistent results every time.
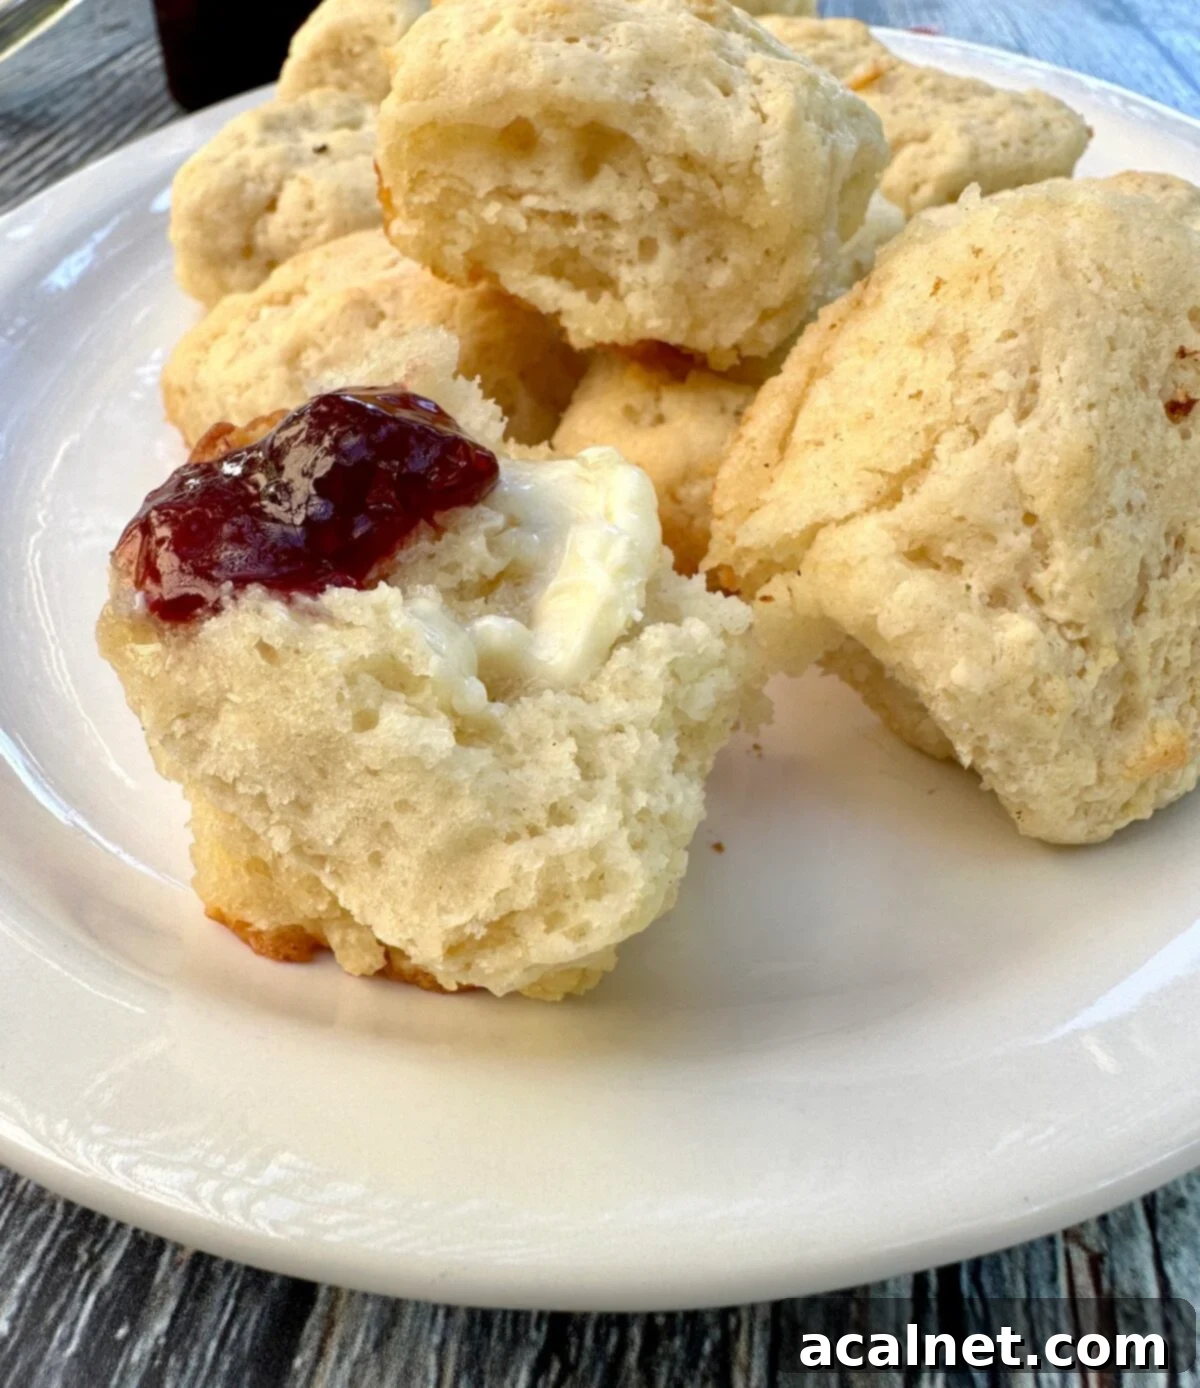
Imagine serving these warm, fluffy biscuits straight from the oven, slathered with Homemade Honey Butter and your favorite Easy Homemade Raspberry Jam. It’s the ultimate cozy comfort food experience. Their light, airy texture and rich, buttery flavor make them irresistible. Plus, you have the freedom to cut the biscuits into any shape that best suits your meal – traditional rounds, practical squares, or even smaller bite-sized pieces. With just **four simple ingredients**, these truly homemade biscuits are ready for the oven in mere minutes, making fresh-baked goodness more accessible than ever!
🥘 Simple Ingredients for Homemade Biscuits

These are truly classic, basic buttermilk biscuits, yet they are incredibly foolproof thanks to a minimal list of readily available ingredients. The simplicity of this recipe makes it perfect for novice bakers and seasoned pros alike, guaranteeing delicious results every time.
Pre-Mixed Baking Mix: The star of this shortcut biscuit recipe! Brands like Bisquick, Jiffy, or Krusteaz are fantastic for this purpose. This convenient mix already contains all the dry ingredients you need, including flour, shortening, salt, and crucial leavening agents like baking powder. It’s what gives these basic biscuits their impressive rise and tender crumb without extra effort. Using a pre-mixed baking mix eliminates the need for precision measurements of multiple dry ingredients, making the process incredibly fast and straightforward.
Buttermilk: Essential for both flavor and texture. Buttermilk reacts with the baking powder in the mix, helping the biscuits rise nice and tall, resulting in that desired fluffy interior. Beyond its leavening power, buttermilk imparts a distinct, slightly tangy flavor that is characteristic of traditional Southern biscuits, adding depth and complexity to each bite.
Sour Cream: This ingredient is the secret to extra tender and moist biscuits. Sour cream adds a significant amount of fat and moisture to the dough, which prevents the biscuits from drying out and contributes to their incredibly soft inside. It works in harmony with the buttermilk to create a richer, more decadent biscuit experience.
Melted Butter: While not listed separately in the initial ingredient summary, the recipe card includes it, and it’s crucial! Melted butter isn’t just for greasing the pan; soaking the biscuit bottoms in it before baking infuses them with a rich, golden flavor and ensures a perfectly crispy, irresistible bottom crust. It’s a game-changer for overall buttery goodness.
Scroll to the recipe card below for a full list of ingredients and precise measurements.
📋 Step-by-Step Instructions: Making Buttermilk Biscuits
Follow these simple steps to create perfectly buttery and tender **Buttermilk Butter Biscuits** that will impress everyone.

Step 1: Combine Ingredients. In a large mixing bowl, combine the Bisquick baking mix (or your preferred baking mix) with the sour cream and buttermilk. Use a sturdy spoon to mix these ingredients until just combined. (Photo #1)
Step 2: Avoid Overmixing. The dough will be quite thick. It’s crucial not to overmix it. Overmixing develops the gluten in the flour too much, which can lead to tough and chewy biscuits. Stir just until the ingredients are blended and no dry streaks remain. A slightly lumpy dough is perfectly fine. (Photo #2)

Step 3: Prepare Your Surface. Lightly dust a clean cutting board or countertop with one or two tablespoons of additional baking mix. This will prevent the dough from sticking. (Photo #3)
Step 4: Transfer Dough. Carefully transfer the thick biscuit dough from the mixing bowl onto your prepared, floured cutting board or counter. (Photo #4)

Step 5: Gentle Kneading. Fold the dough in half, then gently knead it 4 or 5 times. The goal is to incorporate most of the dry baking mix from the surface and achieve a firm, workable dough without overworking it. If you’re adding optional ingredients like grated cheese or chives, sprinkle them in during this kneading step to distribute them evenly. (Photo #5)
Step 6: Shape the Dough. Using your fingers, gently pat the dough into a rectangle approximately 10 inches by 7 inches in size and about **one inch thick**. Remember, minimal handling is key to tender biscuits; the less you manipulate the dough, the softer your final product will be. (Photo #6)
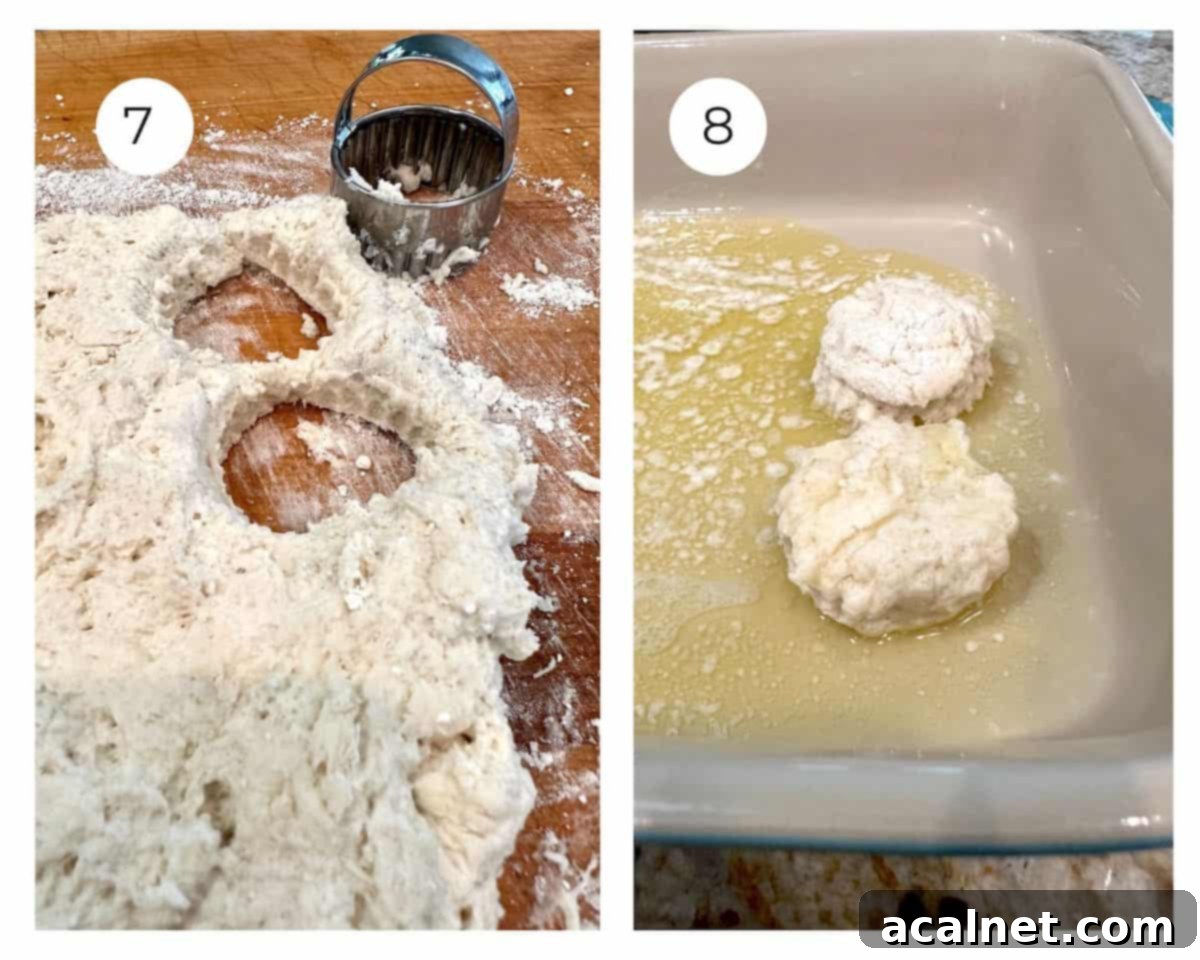
Step 7: Cut Biscuits. Now it’s time to shape your biscuits! Use a round cookie cutter of your desired size, or even the rim of a large glass, to cut out individual biscuits. (Photo #7) Alternatively, for a more efficient approach that minimizes waste, simply use a knife to cut the dough into squares, especially if you plan to serve them for a casual meal.
⭐ Pro Tip: Maximizing Dough
For zero waste and maximum biscuit yield, consider cutting your dough into squares with a knife instead of rounds. This method ensures you use every bit of the dough, leaving no scraps behind.
Step 8: The Butter Bath. Pour your melted butter into the bottom of your baking dish. Place each cut biscuit into the melted butter, then flip it over. This ensures both the top and bottom surfaces of each biscuit are thoroughly coated in butter, promising a rich flavor and a beautiful golden crust. (Photo #8)
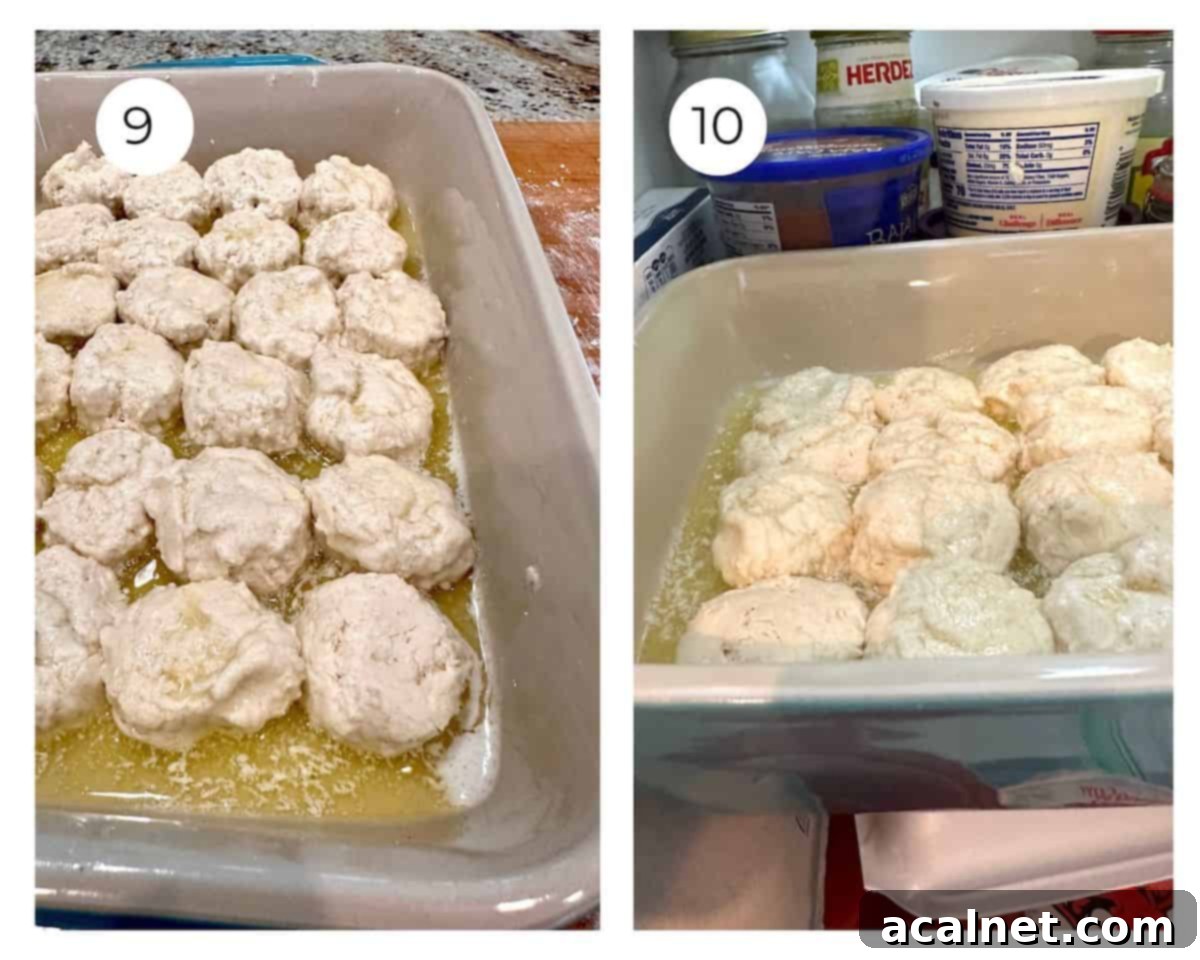
Step 9: Arrange Biscuits. Arrange the biscuits side by side in the baking dish, making sure their edges are touching. This close placement encourages them to rise upwards rather than spreading outwards, resulting in taller, fluffier biscuits. (Photo #9)
Step 10: Chill Before Baking. Place the baking dish containing the biscuits in the refrigerator for at least 10 minutes before baking. For even better results, chill them for up to 30 minutes. This crucial step allows the gluten in the dough to relax, contributing to a more tender biscuit. It also gives the melted butter a chance to reharden slightly, which will then create steam as it melts in the oven, ensuring high-rising, crispy-bottomed biscuits. (Photo #10)
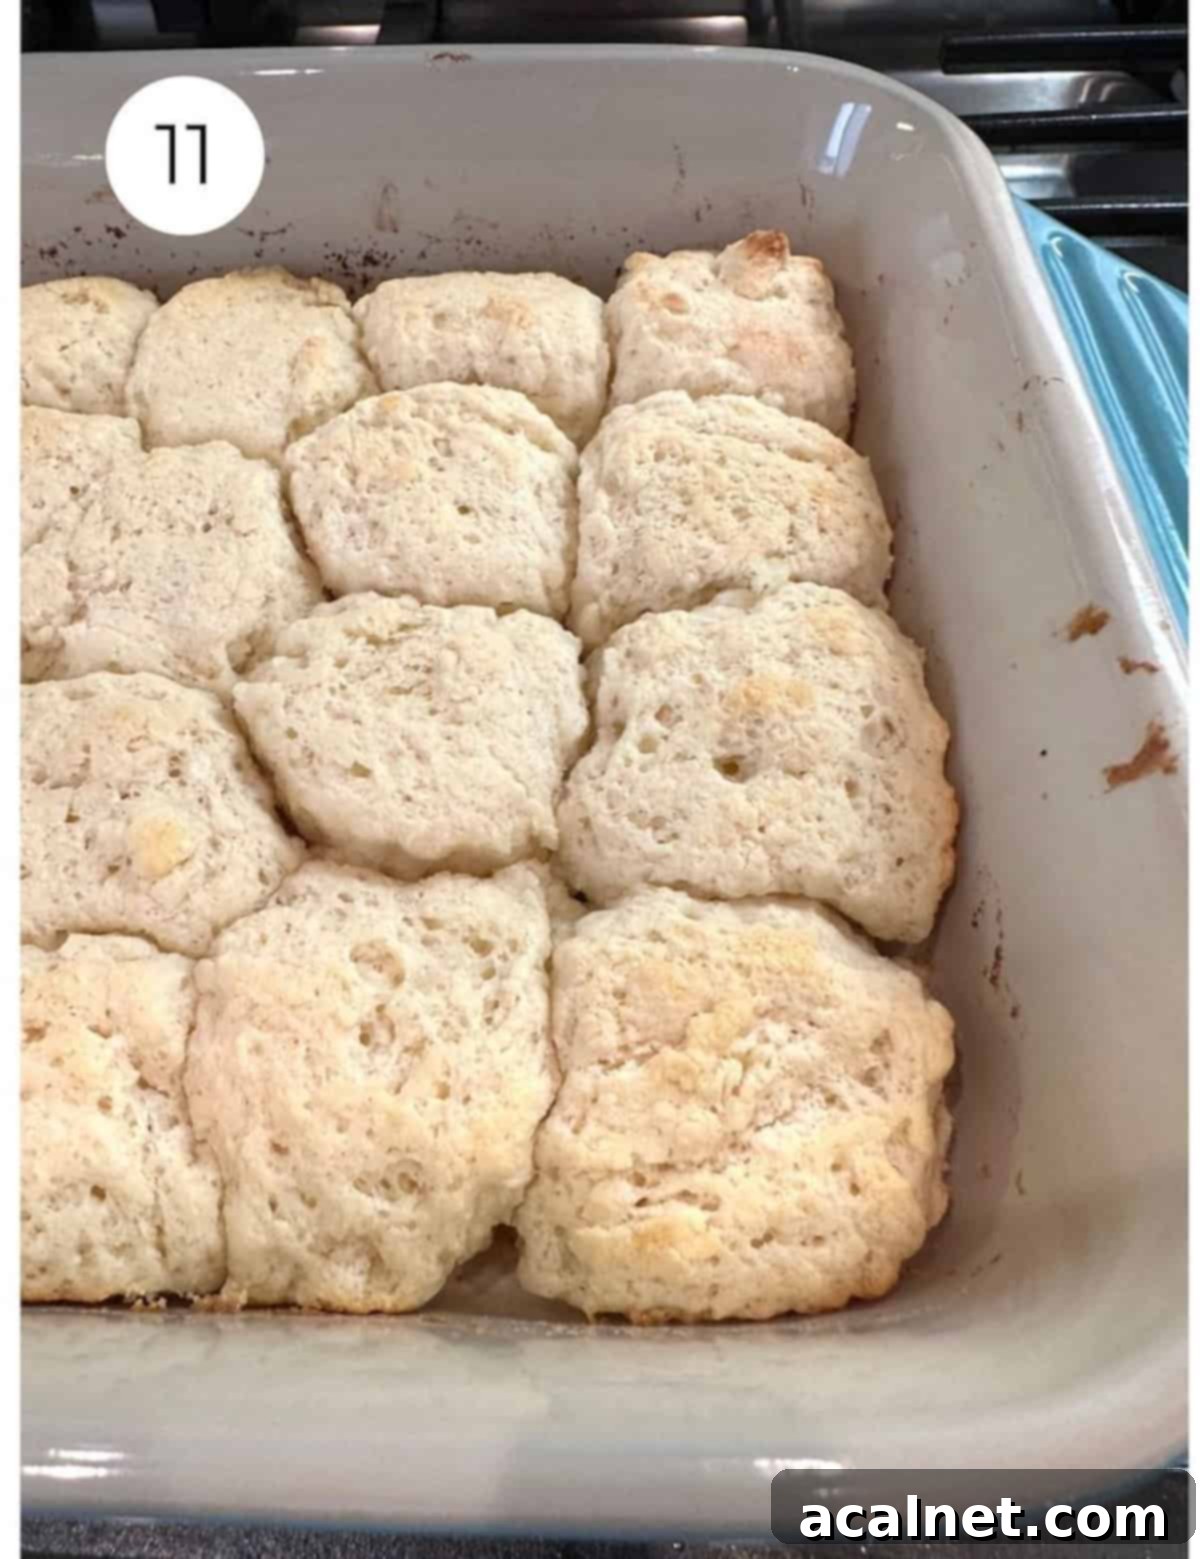
Step 11: Bake to Golden Perfection. Place the baking dish in a preheated 425°F (220°C) oven and bake for 15 to 20 minutes. The biscuits are fully baked when their tops are lightly golden brown and they appear puffed and risen. Keep in mind that baking time may vary slightly depending on how long the biscuits were chilled and their size. (Photo #11)
📖 Easy Ingredient Substitutions for Biscuits
Don’t have an ingredient on hand? No problem! Here are some simple substitutions to help you make these delicious biscuits.
Bisquick: While Bisquick is a fantastic shortcut, any brand of pre-mixed baking mix, such as Jiffy or Krusteaz, will work beautifully in this recipe. They all provide the necessary leavening and dry ingredients for fluffy biscuits. You can also use a good quality pancake mix, but be aware that it will result in a slightly sweeter biscuit, which can be delightful for breakfast!
Buttermilk: If you find yourself without buttermilk, creating a homemade substitute is incredibly easy. Simply pour one tablespoon of either white vinegar or lemon juice into a liquid measuring cup. Then, add enough regular milk (dairy or non-dairy) to reach the one-cup line. Let this mixture sit for 5-10 minutes until it slightly curdles. This DIY buttermilk will work just as well as store-bought to activate the leavening and add a tangy flavor.
Lemon-Lime Soda Pop: This might sound like an unconventional choice, but biscuits made with lemon-lime soda (like 7UP or Sprite) are surprisingly delicious! Swap the buttermilk for the same amount (1 cup) of lemon-lime soda. The carbonation acts as an additional leavening agent, and the soda imparts a subtle sweetness and light citrus note, creating a wonderfully unique biscuit.
Sour Cream: Not a fan of sour cream, or simply don’t have any? A full-fat, plain yogurt makes an excellent substitute. Its creamy texture and acidity will provide similar moisture and tenderness to the biscuits. Full-fat cream cheese, softened, can also be used for an even richer biscuit, though the texture might be slightly denser.
⭐ Pro Tip: Best Buttermilk Substitute
When making your homemade buttermilk substitute with milk and vinegar/lemon juice, always allow the mixture to sit for at least 10 minutes before incorporating it with the other biscuit ingredients. This gives the acid time to react with the milk, ensuring optimal activation of the leavening agents and a perfectly tangy flavor.

💭 Recipe FAQs: Common Questions About Buttermilk Biscuits
Yes, absolutely! It’s best to place the biscuits side by side and close together in the baking pan. This arrangement encourages them to rise tall rather than spreading out too much. As they bake, they’ll support each other, resulting in higher, fluffier biscuits with beautifully soft sides.
A pre-mixed baking mix, like Bisquick, is a convenient blend of all-purpose flour that already includes essential baking ingredients such as shortening (or other fats), salt, a touch of sugar, and leavening agents like baking powder. It’s pre-packaged for ease of use and typically found in the baking aisle of most grocery stores. It’s designed to simplify recipes and ensure consistent results.
Yes, you can certainly use margarine as a substitute for butter in this biscuit recipe. Margarine is a good alternative in most baking applications, and these buttermilk biscuits are no exception. For the best results in terms of texture and richness, be sure to use stick margarine rather than the spreadable kind typically found in tubs, as stick margarine has a higher fat content suitable for baking.
Chilling the biscuits before baking is a crucial step for achieving the most tender, high-rising, and crispy-bottomed results. The cool temperature in the refrigerator allows the gluten in the dough a chance to “relax,” preventing a tough texture. Additionally, the melted butter that the biscuits are coated in will cool and re-harden slightly. Once placed in the hot oven, this chilled butter creates steam as it rapidly melts, which helps the biscuits rise significantly, maintain their shape, and develop that deliciously crispy, buttery bottom crust we all love.
Absolutely! These basic buttermilk biscuits are a fantastic canvas for additional flavors. You can sprinkle in shredded cheddar cheese, chopped fresh chives, a pinch of garlic powder, or even a touch of black pepper when you’re doing the gentle kneading step (Step 5). For a sweeter biscuit, consider adding a tablespoon of sugar or some dried cranberries to the dough.
While this recipe uses baking mix for ease, the chilling step (Step 10) helps enhance flakiness. For maximum layers, handle the dough as little as possible. When patting the dough, try to create clear layers by folding it a few times (as in Step 5) and gently patting it back down before cutting. The cold butter melting and steaming in the oven is key to creating those desirable layers.

🍽 What to Serve With Your Buttermilk Butter Biscuits
These homemade buttermilk biscuits are incredibly versatile and can elevate almost any meal. Here are some fantastic ways to enjoy your warm, freshly baked buttermilk butter biscuits:
Jam and Butter: The quintessential pairing! Slather warm biscuits with softened butter and your favorite fruit jam or jelly. Strawberry, raspberry, peach, or even a spicy pepper jam are all delicious choices.
Honey Butter or Syrup: For a sweet and comforting treat, spread a generous teaspoon of Homemade Honey Butter on a warm biscuit, allowing it to melt into the fluffy interior. Maple syrup is another delightful option for breakfast or brunch.
Classic Southern Fried Chicken: Take your meal to the next level by cutting your biscuits into large rounds, similar in size to hamburger buns. Serve these warm, fluffy biscuits fresh from the oven with a batch of crispy oven-fried chicken, perhaps these Buttermilk Crispy Chicken Strips. Don’t forget to top them with a rich, savory homemade gravy for an authentic Southern feast!
Hearty Breakfast Sandwiches: Biscuits make an absolutely fantastic base for breakfast sandwiches. Slice them in half and fill them with fluffy scrambled eggs, perfectly cooked crispy bacon or savory sausage patties, and a slice of melty cheese. A dash of hot sauce or a dollop of ketchup can complete this portable and satisfying meal.
Chili and Stew: Move beyond traditional bread or dinner rolls! These tender biscuits are a terrific side dish for a variety of soups, chilis, and stews. Their absorbent texture is ideal for sopping up every last drop of flavorful sauce from a hearty bowl of Idaho Chili or a comforting beef stew. They add a wonderful richness and substance to these warming dishes.
Whipped Cream and Berries: Transform your basic buttermilk biscuits into a stunning and easy dessert! Split them open and top with a generous dollop of homemade whipped cream and a medley of fresh strawberries, raspberries, or blueberries. **Buttermilk Butter Biscuits are a wonderful, slightly more rustic alternative to angel food cake or shortcake for berry desserts!**
💭 Leftovers and Storage for Buttermilk Biscuits
Leftovers: To maintain freshness, any leftover baked biscuits should be stored at room temperature in an airtight container or a zip-top bag for up to 2 days. This helps keep them soft and prevents them from drying out.
For slightly longer storage, you can place the airtight container of leftover biscuits in the refrigerator, where they will keep well for up to 7 days.
Reheating Leftovers: Basic biscuits reheat beautifully, allowing you to enjoy their comforting warmth anytime. For a quick reheat, warm them in the microwave on low power for about one minute, or until heated through. For a crispier exterior, wrap them loosely in aluminum foil and place them in a 325°F (160°C) oven for about 10-15 minutes, or until warm and fragrant.
Freezer Storage: Baked buttermilk biscuits freeze exceptionally well. Allow the baked biscuits to cool completely before preparing them for the freezer. Once cooled, wrap and seal them tightly in aluminum foil, or place them in heavy-duty zip-top freezer bags. For the best flavor and texture, plan to reheat and enjoy your frozen biscuits within three months of freezing.
To reheat *previously baked* biscuits from frozen, simply place the frozen biscuits on a baking sheet lined with parchment paper. Bake them in a preheated 350°F (175°C) oven for 15-20 minutes. They’re ready when they are warm to the touch, puffy, and soft in the center.
⭐ Pro Tip: Reheating Frozen Biscuits
When reheating frozen biscuits in the oven, place a sheet of aluminum foil loosely over the top of them. This simple trick helps to prevent the tops from browning too much while ensuring the biscuits warm through evenly and remain tender.
🥘 More Delicious Recipes to Enjoy
These **Buttermilk Butter Biscuits** are a wonderful, versatile addition to countless main dishes and entrees, making any meal feel more special and complete. Here are some fantastic family-friendly dinner recipes that pair exceptionally well with a side of freshly baked, tender biscuits. From hearty roasts to comforting casseroles, these pairings promise a satisfying meal.
- 10 Dutch Oven Chicken Recipes
- Dutch Oven Pot Roast
- Easy Pork Tenderloin with Orange Sauce
- Lazy Lasagna
If you tried **Buttermilk Butter Biscuits** or any other recipe on my website, please leave a 🌟🌟🌟🌟🌟 **star rating** and let me know how it goes in the **comments** below. I’m looking forward to hearing from you!
Recipe Card

Buttermilk Butter Biscuits
Ingredients
- 4 cups Bisquick baking mix – plus two or three additional tablespoons for light kneading
- ⅔ cup sour cream
- 1 cup buttermilk
- ½ cup butter – melted
Instructions
Preheat Oven and Blend Ingredients
- Preheat your oven to 425°F (220°C).
- In a large mixing bowl, using a sturdy spoon or spatula, gently combine the Bisquick baking mix (or your preferred baking mix) with the sour cream and buttermilk. Mix just until the ingredients are blended and no dry pockets of mix remain. Avoid overmixing, as this can lead to tough biscuits.
Prepare and Cut Biscuit Shapes
- Lightly dust a clean cutting board or countertop with one or two tablespoons of additional baking mix to create a non-stick surface.
- Carefully transfer the thick biscuit dough from the mixing bowl onto your prepared, lightly floured surface.
- Fold the dough in half gently, then lightly knead it 4 or 5 times. The goal is to absorb most of the dry baking mix from the surface, resulting in a firm, yet still tender dough. Afterward, pat the dough evenly into a rectangle that is about one inch thick.
- For traditional round biscuits, use a large round cookie cutter (or the rim of a large drinking glass) to cut out shapes. Alternatively, for less waste, use a knife to cut the dough into uniform squares.
Assemble the Biscuits in the Baking Dish
- Melt the butter in a microwave-safe dish or in a small saucepan over low heat on the stovetop. Pour the entire ½ cup of melted butter evenly into the bottom of a 13″ x 9″ baking dish.
- Place each cut biscuit into the melted butter in the baking dish, then immediately flip each biscuit over. This ensures both the top and bottom of the biscuit are thoroughly coated in butter, preparing them for a delicious buttery crust. Arrange the biscuits side by side, with their edges touching.
Chilling Time
- Crucially, let the biscuits sit in the baking dish and place them in the refrigerator for at least 10 minutes before baking. (Chilling for up to 30 minutes is even better!) This resting period allows the gluten to relax, resulting in a more tender biscuit, and helps the butter harden slightly, contributing to a superior rise and crispy texture during baking.
Bake to Golden Perfection
- Place the baking dish with the chilled biscuits into your preheated oven. Bake for 15-20 minutes, or until the tops of the biscuits are lightly golden brown and they are visibly puffy and risen. Baking time may vary depending on your oven and the size of your biscuits.Once baked, use a spatula to carefully remove the warm biscuits from the dish. Serve them immediately while they’re still hot and enjoy their tender, buttery goodness!
Notes
Please note, the nutrition details are estimated using a food database, so they’re just a rough estimate not an exact science.
