The Best Old-Fashioned Sour Cream Cookies: Soft, Pillowy & Nostalgic Recipe
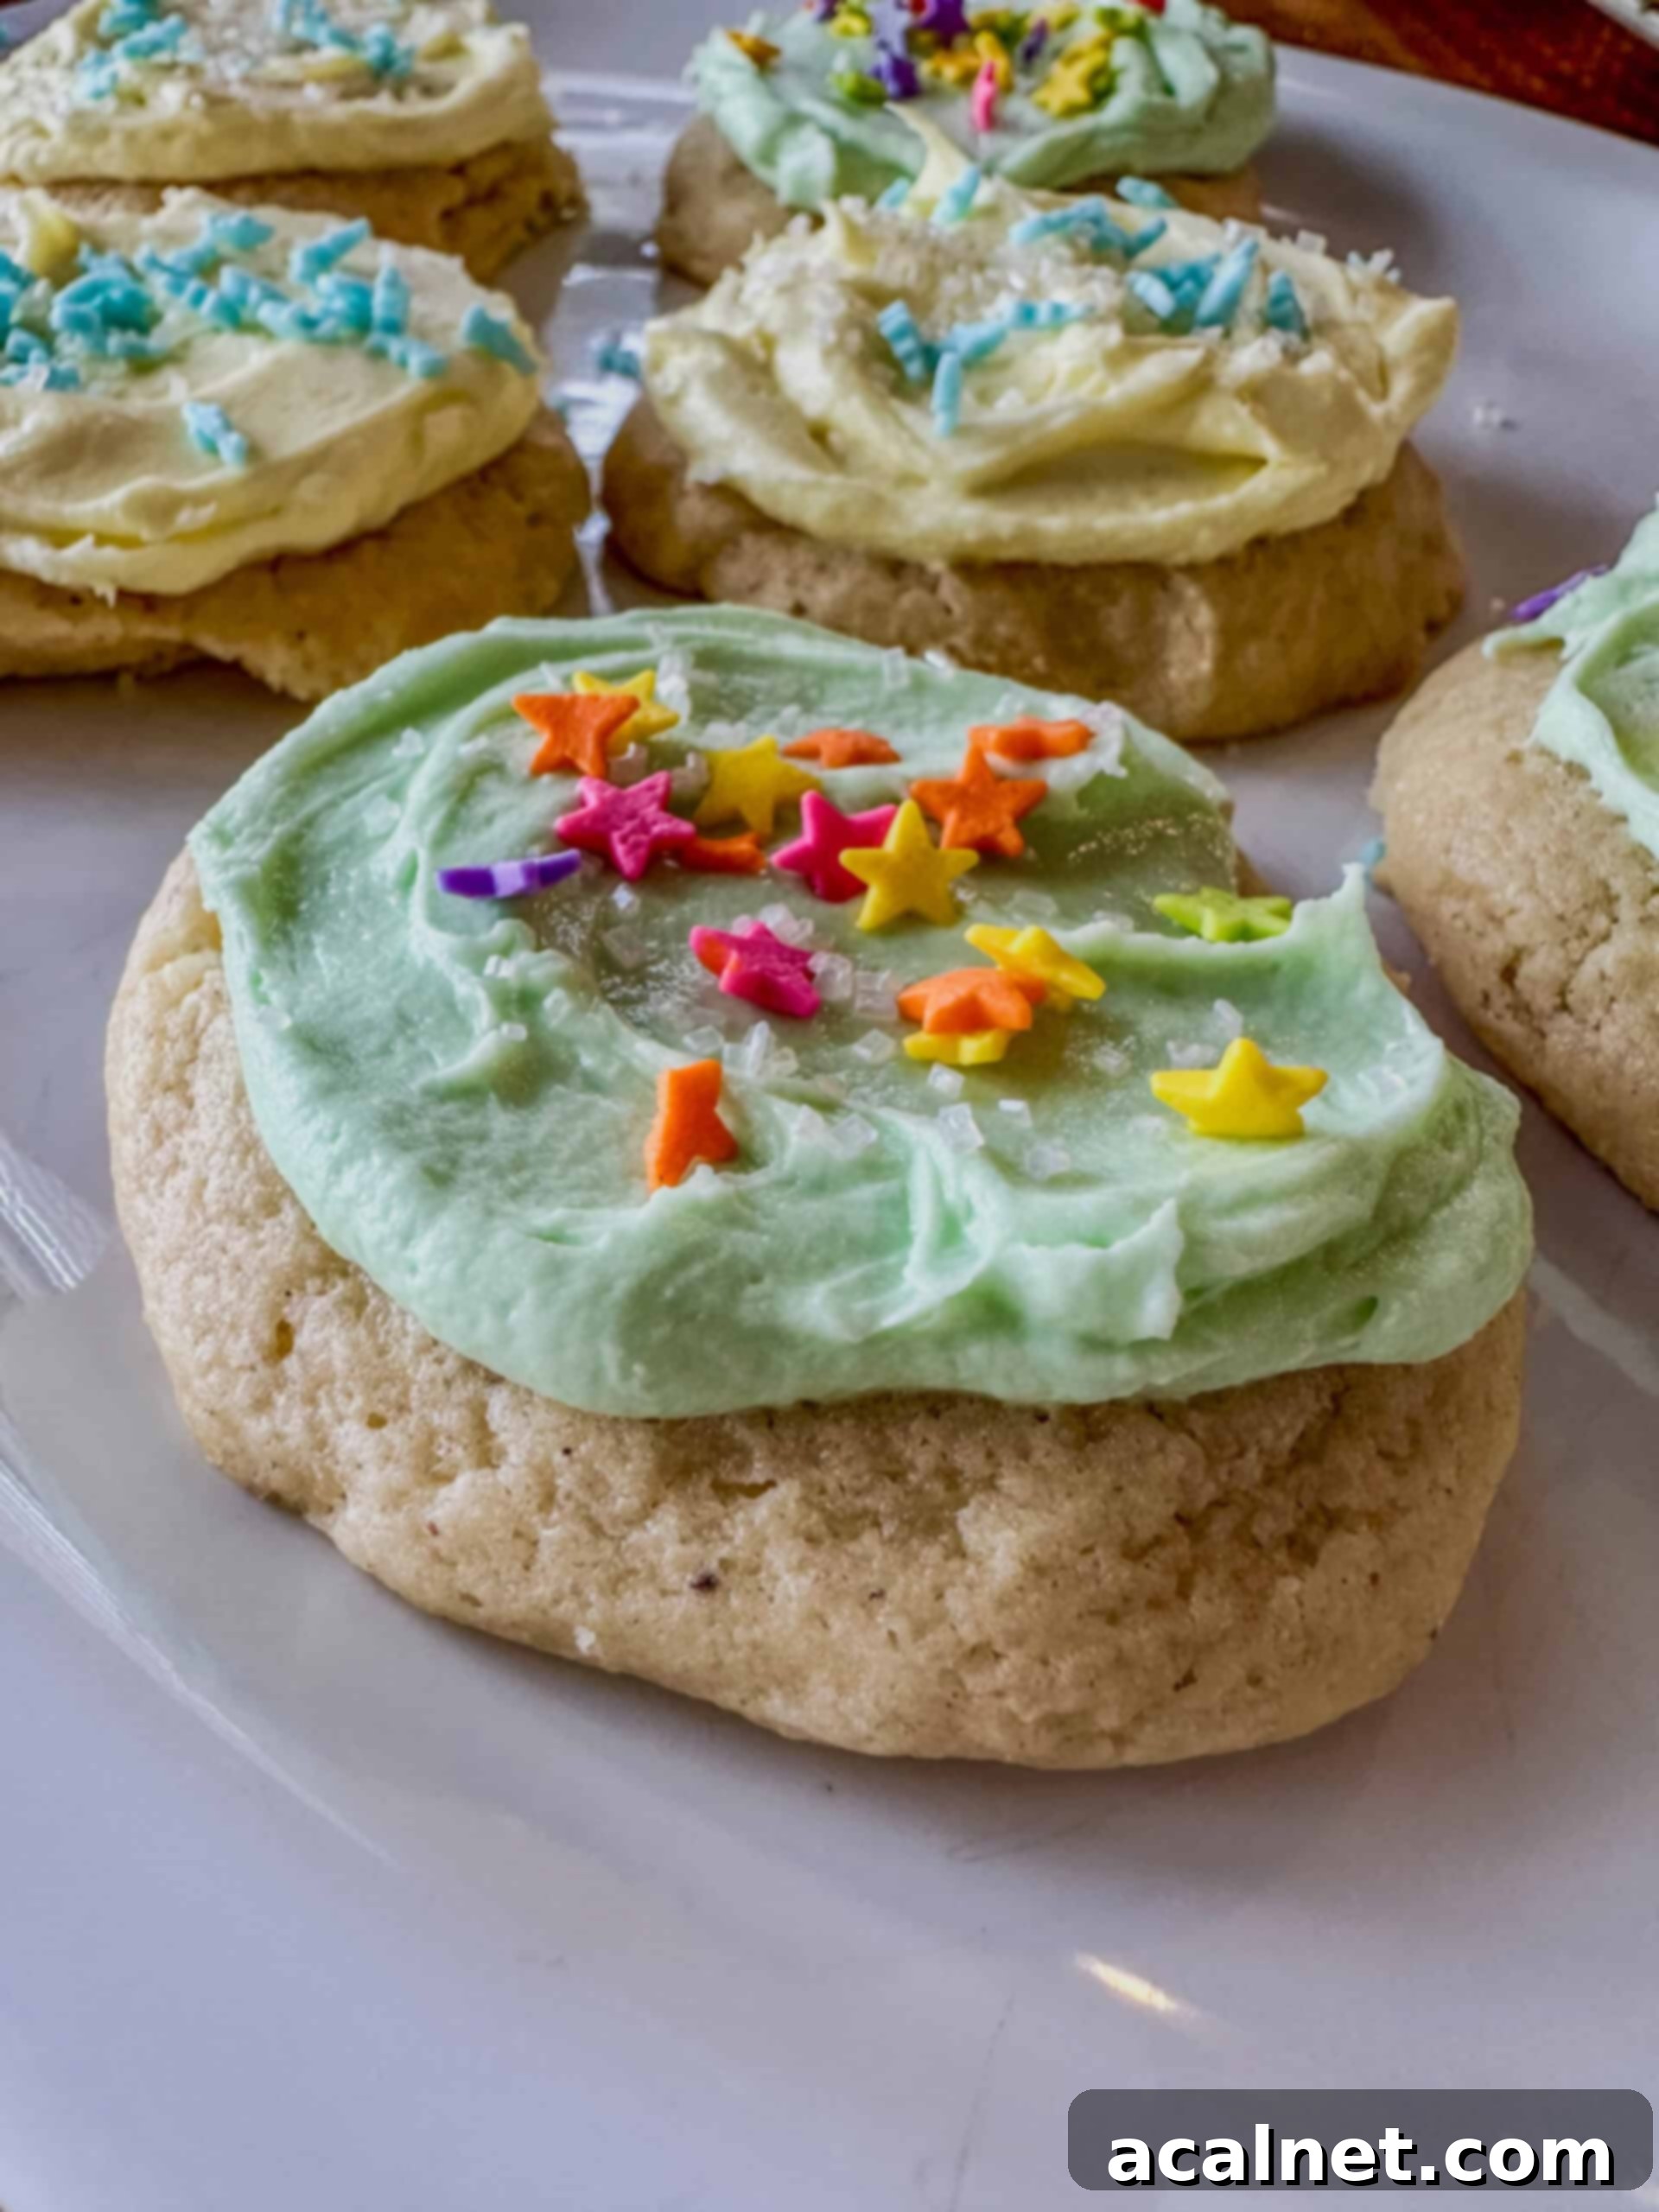
Step back in time with a delightful bite of these incredible Old-Fashioned Sour Cream Cookies. These treats are the epitome of comfort, delivering an irresistibly soft, pillowy texture and a delicately sweet flavor that will instantly transport you back to mom or grandma’s kitchen. Far from your average sugar cookie, these timeless classics boast a unique, tender crumb, thanks to the magic of sour cream, leaving a hint of pure nostalgia in every single bite. Whether you’re preparing for a special celebration, hosting a holiday gathering, or simply craving a taste of home, this incredibly easy, no-roll cookie recipe is destined to become your most cherished culinary secret and a go-to favorite.
These versatile sour cream cookies are absolutely delicious on their own, but they truly shine when adorned with a luscious homemade buttercream frosting. For a festive holiday spread or a diverse dessert platter, arrange them alongside decadent brownies made from a homemade mix or whimsical Candy Cane Cookies. This creates a visually stunning and deliciously varied assortment that will impress everyone at your table!
[feast_advanced_jump_to]
⭐ Why These Sour Cream Cookies are a Must-Make

There are countless reasons to fall in love with these delightful sour cream cookies, and for me, Melinda, they hold a truly special place in my heart and my recipe collection. I believe they embody everything a homemade cookie should be—comforting, easy, and utterly delicious. Here’s why I’m convinced they’ll quickly become your new favorite:
- Unbelievably Quick to Make: We all lead busy lives, and sometimes you just need a batch of fresh, homemade cookies in a flash. This recipe is your answer! From the moment you start mixing to the minute they come out of the oven, these cookies are ready in about 30 minutes. That’s significantly faster than ordering a cookie delivery and means you can satisfy those sudden sweet cravings or whip up an impromptu dessert without any stress or delay. Just a few simple steps—mix, drop, and bake—and you’ll have warm, fragrant cookies in no time.
- A Cherished Old-Fashioned Recipe: As a passionate advocate for classic, tried-and-true recipes, these sour cream cookies come directly from my mom’s treasured collection. There’s an undeniable charm, depth of flavor, and comforting familiarity in recipes that have been passed down through generations. Much like my beloved Old Fashioned Salmon Patties and my comforting Old Fashioned Strawberry Rhubarb Pie, this cookie recipe is a true testament to the enduring appeal of traditional baking. It’s a delicious piece of history, simplified for modern kitchens, bringing a taste of the past into the present.
- Melt-in-Your-Mouth, Cake-Like Texture: The real secret weapon in this recipe is, of course, the sour cream. This humble ingredient works wonders, infusing the dough with incredible moisture and richness. The result? Cookies with a uniquely tender, almost cake-like consistency that literally melts in your mouth with every bite. The subtle tang from the sour cream perfectly balances the sweetness of the sugar, creating a sophisticated flavor profile that keeps you reaching for just one more, making them truly irresistible.
- No-Roll, Drop Cookie Simplicity: Forget the fuss of chilling dough for hours, flouring your entire countertop, and dealing with intricate cookie cutters. This recipe is specifically designed for maximum ease and minimal cleanup! It’s a simple drop cookie, meaning you just spoon portions of the prepared dough onto your baking sheet, lightly flatten them, and pop them into the oven. This makes it perfect for beginner bakers, busy parents, or anyone looking for a stress-free baking experience without ever sacrificing incredible flavor and that coveted soft, pillowy texture.
🍰 Essential Ingredients for Perfect Old-Fashioned Sour Cream Cookies
Crafting these delectable sour cream cookies requires a few basic pantry staples, each playing a crucial role in achieving that signature soft, pillowy, and tender texture. Using fresh, quality ingredients will always yield the best results. Here’s a closer look at what you’ll need and why each ingredient is important for your homemade masterpieces:
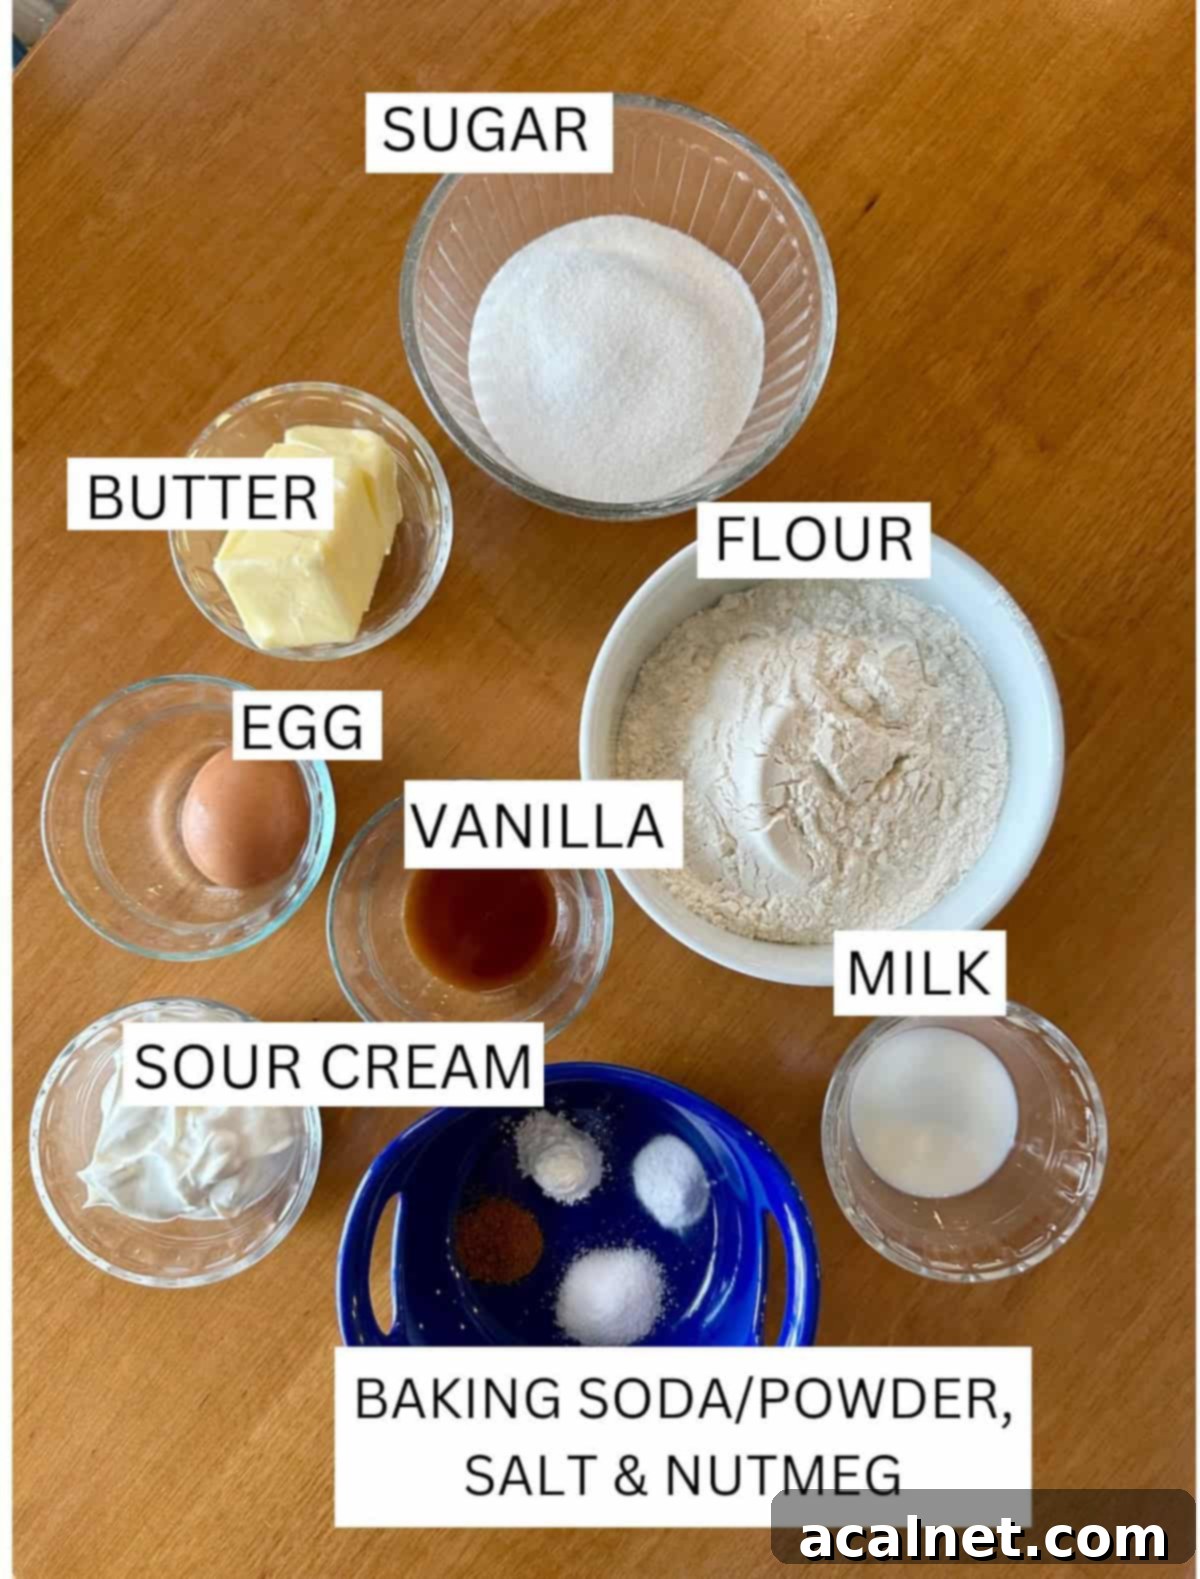
- All-Purpose Flour: This is the structural foundation of our cookies. Standard all-purpose flour provides the right balance for a tender crumb. For these drop cookies, the specified amount in the recipe card is crucial for achieving that desired pillowy softness. If you ever want to make cutout cookies from this recipe (see FAQs for details!), you’ll need to add a bit more flour to achieve a firmer, more manageable dough.
- Granulated Sugar: Beyond providing essential sweetness, sugar plays a vital role in the cookie’s texture. When creamed with butter, it creates countless tiny air pockets that contribute significantly to the cookie’s overall lightness and spread, ensuring they don’t turn out dense.
- Baking Powder & Baking Soda: These two powerful leavening agents work in harmony to give the cookies their delightful puffiness and characteristic cake-like rise. Baking soda specifically reacts with the natural acidity of the sour cream, while baking powder provides an additional boost of lift, ensuring a wonderfully light and airy crumb that defines these cookies.
- Salt: A small but mighty pinch of salt is absolutely vital in almost any baking recipe. It doesn’t just add flavor; it balances the sweetness, enhances all the other ingredients, and brings out the deeper notes in the dough. Do not skip this!
- Nutmeg: Just a mere ¼ teaspoon of ground nutmeg adds a subtle, warm, and incredibly comforting spice that truly elevates the classic flavor of these cookies. It’s that secret ingredient that gives them an authentic “old-fashioned” touch without ever being overpowering. For the most aromatic and delicious results, consider using freshly grated nutmeg if you have it.
- Unsalted Butter (Softened): Butter contributes unparalleled richness, flavor, and tenderness to the cookies. It’s crucial that it’s properly softened to room temperature, not melted. Softened butter creams beautifully with sugar, creating a light and airy base for the dough structure. If you only have salted butter, reduce the amount of added salt in the recipe by half a teaspoon.
- Large Egg: The egg acts as a powerful binder, holding all the ingredients together, while also adding essential moisture and a boost of richness to the cookies. It contributes to the overall structure and a tender chewiness. Always use a large egg unless otherwise specified in the recipe.
- Vanilla Extract: Pure vanilla extract is an essential flavor enhancer, crucial for boosting the overall taste profile of these cookies. It complements the sweetness and the subtle tang of the sour cream perfectly, adding a layer of warmth and complexity. Always opt for good quality pure vanilla for the best results.
- Sour Cream: This is unequivocally the star ingredient and the hero of this recipe! Sour cream adds incredible moisture, richness, and a unique tenderizing quality to the cookie dough, resulting in that wonderfully soft, pillowy, and distinctly cake-like texture that makes these cookies so special. Its slight tangy flavor also beautifully cuts through and balances the sweetness of the sugar, preventing the cookies from being overly cloying. For the ultimate texture and flavor, always use full-fat sour cream.
- Milk: A small amount of milk helps to achieve the perfect dough consistency, ensuring it’s just right for dropping onto baking sheets. It contributes to the overall moisture of the cookies and helps all the ingredients come together smoothly into a cohesive dough. Any type of milk (dairy or non-dairy, like almond or oat milk) will work, but whole milk is generally recommended for its added richness.
For a complete list of precise ingredients and measurements, please refer to the detailed recipe card located below.
📖 Delicious Sour Cream Cookie Variations & Topping Ideas
One of the most wonderful aspects of these Old Fashioned Sour Cream Cookies is their incredible versatility. While they are absolutely divine and comforting on their own, much like my simple yet satisfying Old Fashioned Peanut Butter Cookies, they also serve as a perfect canvas for a variety of delightful toppings and flavor twists. Don’t be afraid to experiment and make them your own! Here are some popular and creative variations to inspire your next baking adventure:
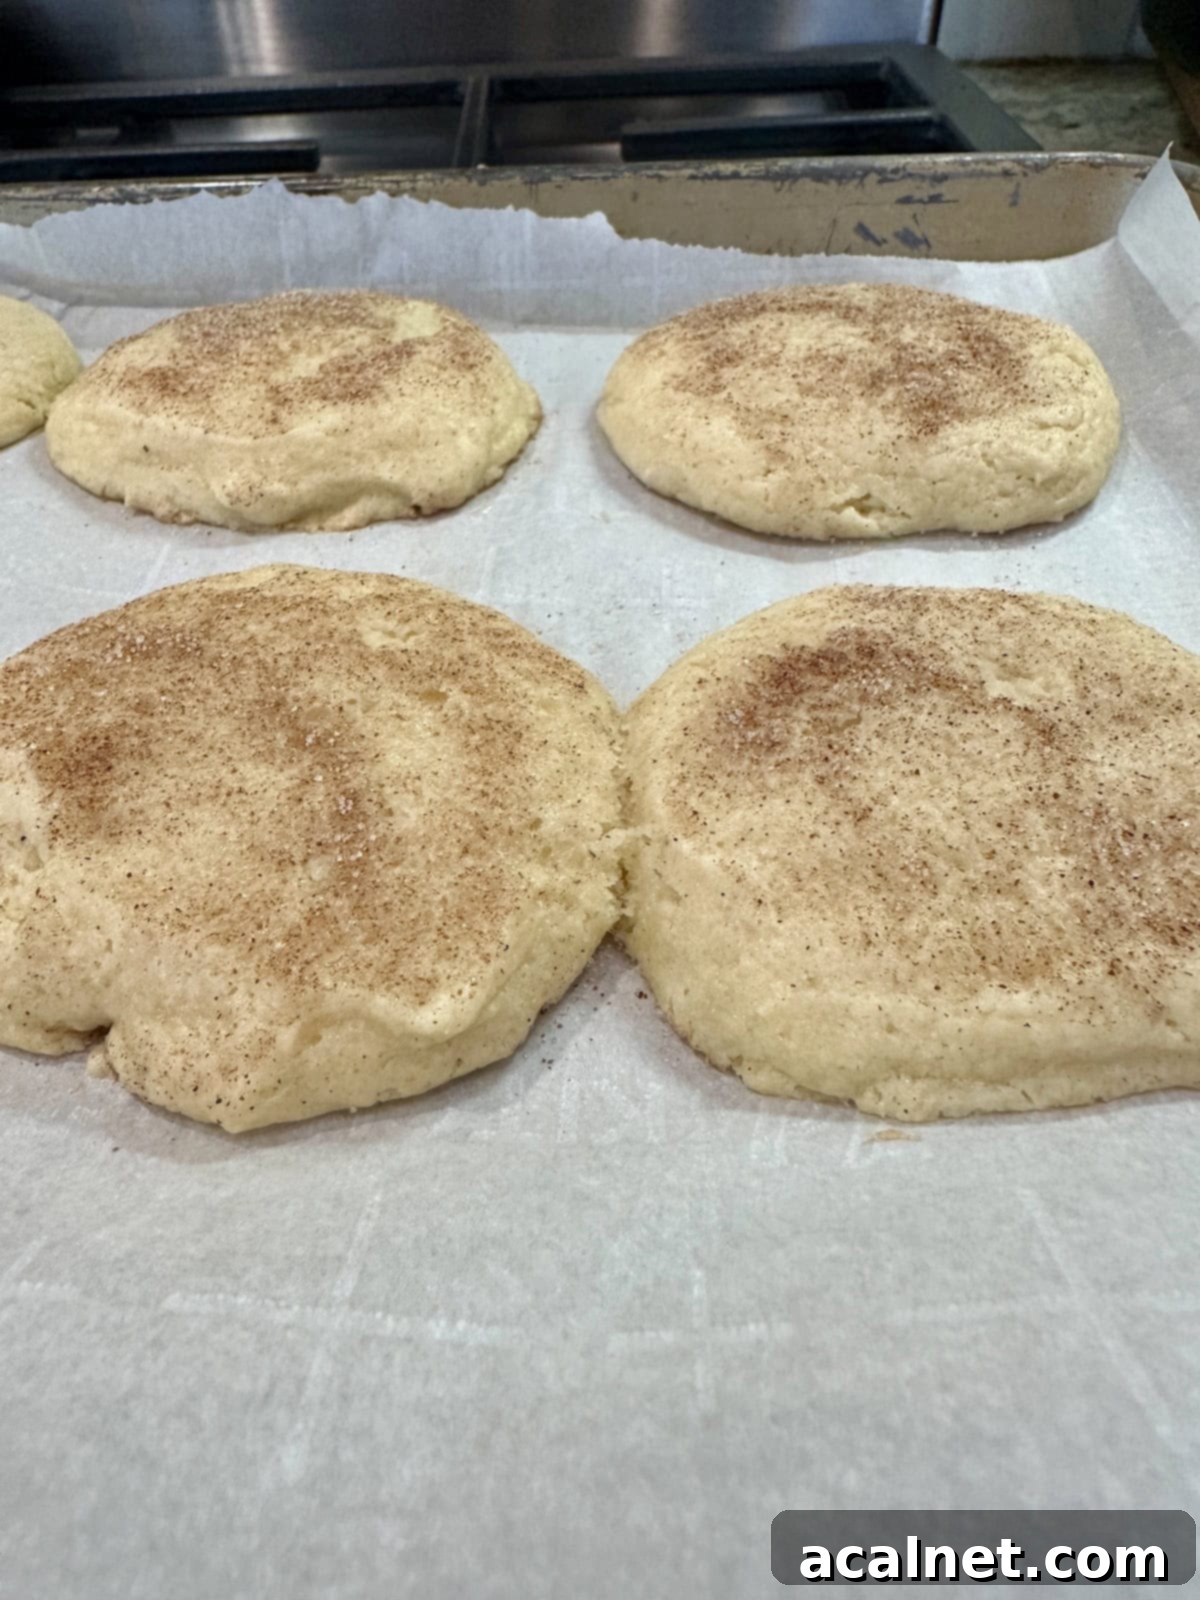
Cinnamon Sugar Topping: For a delightful and aromatic twist reminiscent of a classic snickerdoodle, prepare a simple cinnamon sugar blend. Before baking, generously sprinkle each cookie mound with this mixture. This creates a slightly crisp, spiced crust on top that adds another wonderful layer of flavor and texture. Simply combine 2 tablespoons of granulated sugar with 1 tablespoon of ground cinnamon in a small bowl and sprinkle away for a quick and flavorful finish.
Powdered Sugar Dusting: For a simple yet incredibly elegant finish, dust the cooled cookies with a delicate coating of powdered sugar. This is a quick and easy way to add a touch of sweetness and a beautiful, classic presentation. It’s a method I often use for understated elegance, similar to how I finish my beloved Old Fashioned Chocolate Pound Cake. Use a small sieve or strainer to ensure you get an even, delicate layer without clumps.
Luscious Frosting: This is, hands down, my absolute favorite way to enjoy these cookies! Once the cookies have completely cooled on a wire rack, generously spread each one with a smooth layer of your favorite frosting. A classic homemade buttercream frosting (you’ll find my recipe notes below!) is perfectly suited, but a tangy cream cheese frosting also pairs wonderfully with the subtle sour cream notes in the cookie. For an extra touch of festivity and visual appeal, don’t forget to add a few colorful sprinkles, especially for holidays, birthday parties, or just a touch of everyday cheer!
- Citrus Zest Infusion: For a bright, zesty, and incredibly fresh flavor, add 1 to 2 teaspoons of finely grated lemon or orange zest to the wet ingredients when you’re mixing the dough. The citrus aroma and taste complement the sour cream beautifully, adding a lovely aromatic note that brightens the entire cookie.
- Almond Extract Boost: While vanilla is a timeless classic, a ¼ to ½ teaspoon of almond extract can be used in place of, or even in addition to, the vanilla extract for a distinct, slightly nutty, and more intense flavor profile. Almond extract pairs exceptionally well with the subtle tang of sour cream. See our Frequently Asked Questions section for more detailed guidance on this substitution!
- Chocolate Chips or Sprinkles (Mixed In): For an extra burst of sweetness, texture, and fun, fold in about ½ cup of mini chocolate chips, colorful sprinkles, or even white chocolate chunks into the dough during the final mixing step. This is especially great for making them kid-friendly or adding a festive touch for parties.
- Holiday Decorating Canvas: These cookies are ideal for holiday decorating! Their flat surface and tender texture make them perfect for applying festive colored frostings, intricate royal icing designs, or themed sprinkles. They’re a wonderful base for Christmas, Easter, Halloween, or any seasonal celebration.
- Spiced Variations: Beyond nutmeg, consider adding a pinch of cinnamon, allspice, or even a tiny bit of cardamom for a more complex spiced cookie flavor, especially during the fall and winter months.
🧁 Easy Step-by-Step Instructions for Making Sour Cream Cookies
Making these old-fashioned sour cream cookies is a wonderfully straightforward process, perfect for bakers of all skill levels, from beginners to seasoned pros. Follow these simple, detailed steps for perfectly soft, tender, and consistently delicious results every single time:
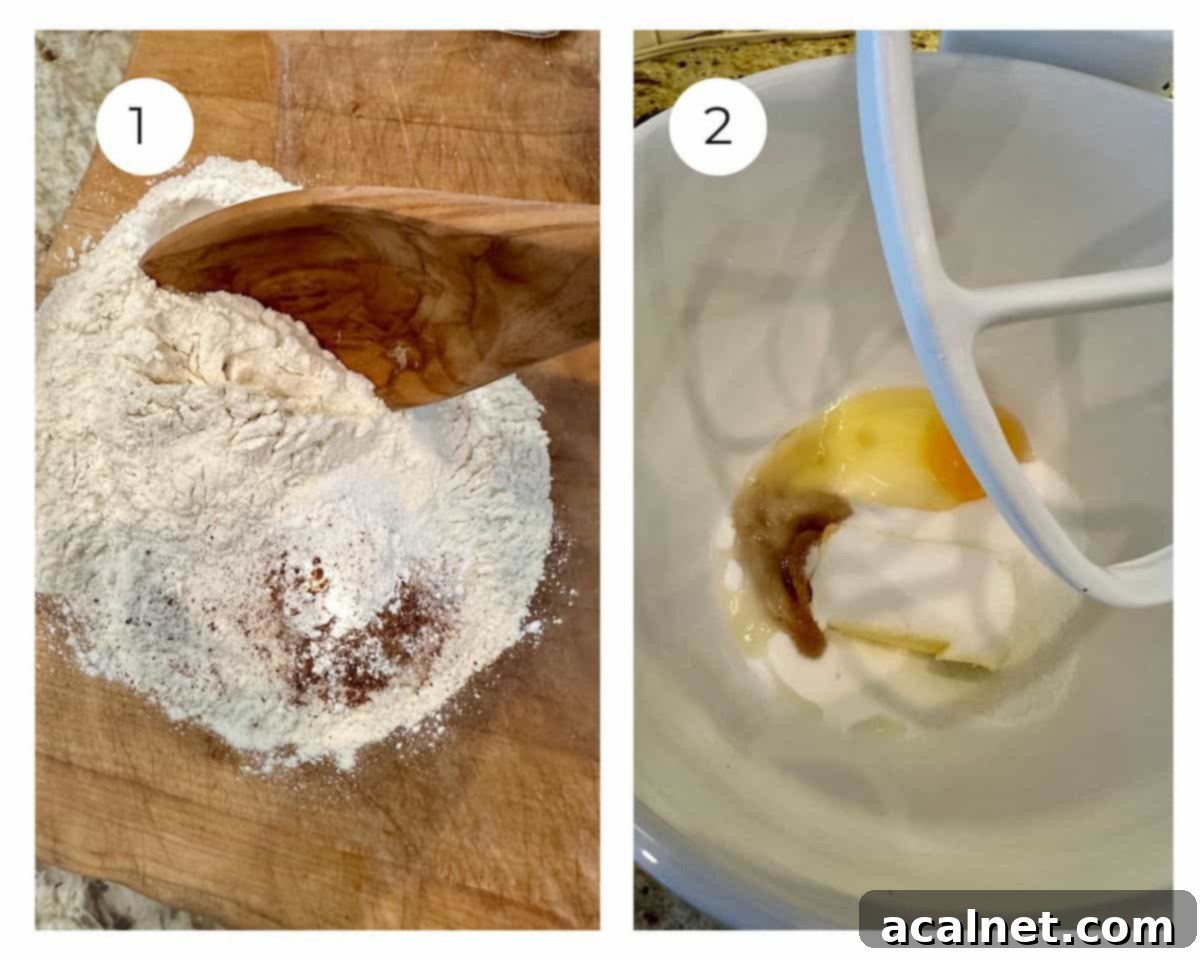
Step 1: Prepare Dry Ingredients & Oven. First things first, preheat your oven to 350°F (175°C) to ensure it reaches and maintains the correct temperature by the time your dough is ready. This is crucial for even baking. Next, prepare your baking sheets: line two standard baking sheets with parchment paper. This step is a game-changer as it not only prevents the cookies from sticking but also makes cleanup an absolute breeze. In a medium-sized bowl, whisk together all your dry ingredients: the all-purpose flour, baking powder, baking soda, salt, and that subtle hint of nutmeg. Make sure these dry ingredients are thoroughly combined and evenly distributed, as this ensures proper leavening throughout your cookies. Set this bowl aside for later. (Just a quick note: my mixing bowl in Photo #1 was made of clear glass, which can make it a bit tricky to see the contents. But please be assured that all ingredients were mixed properly in the bowl, not on a cutting board, for hygienic and practical reasons!)
Step 2: Cream Wet Ingredients. Now, move on to your wet ingredients. In a large mixing bowl, preferably using an electric mixer (either stand or hand-held) or a sturdy whisk for a good arm workout, cream together the properly softened unsalted butter and granulated sugar. Beat them together until the mixture is light, fluffy, and noticeably pale in color. This creaming process is vital as it incorporates air into the mixture, which directly contributes to the cookies’ wonderfully soft and airy texture. Once light and fluffy, beat in the egg and vanilla extract until they are fully incorporated and the mixture appears smooth and cohesive. (Photo #2)
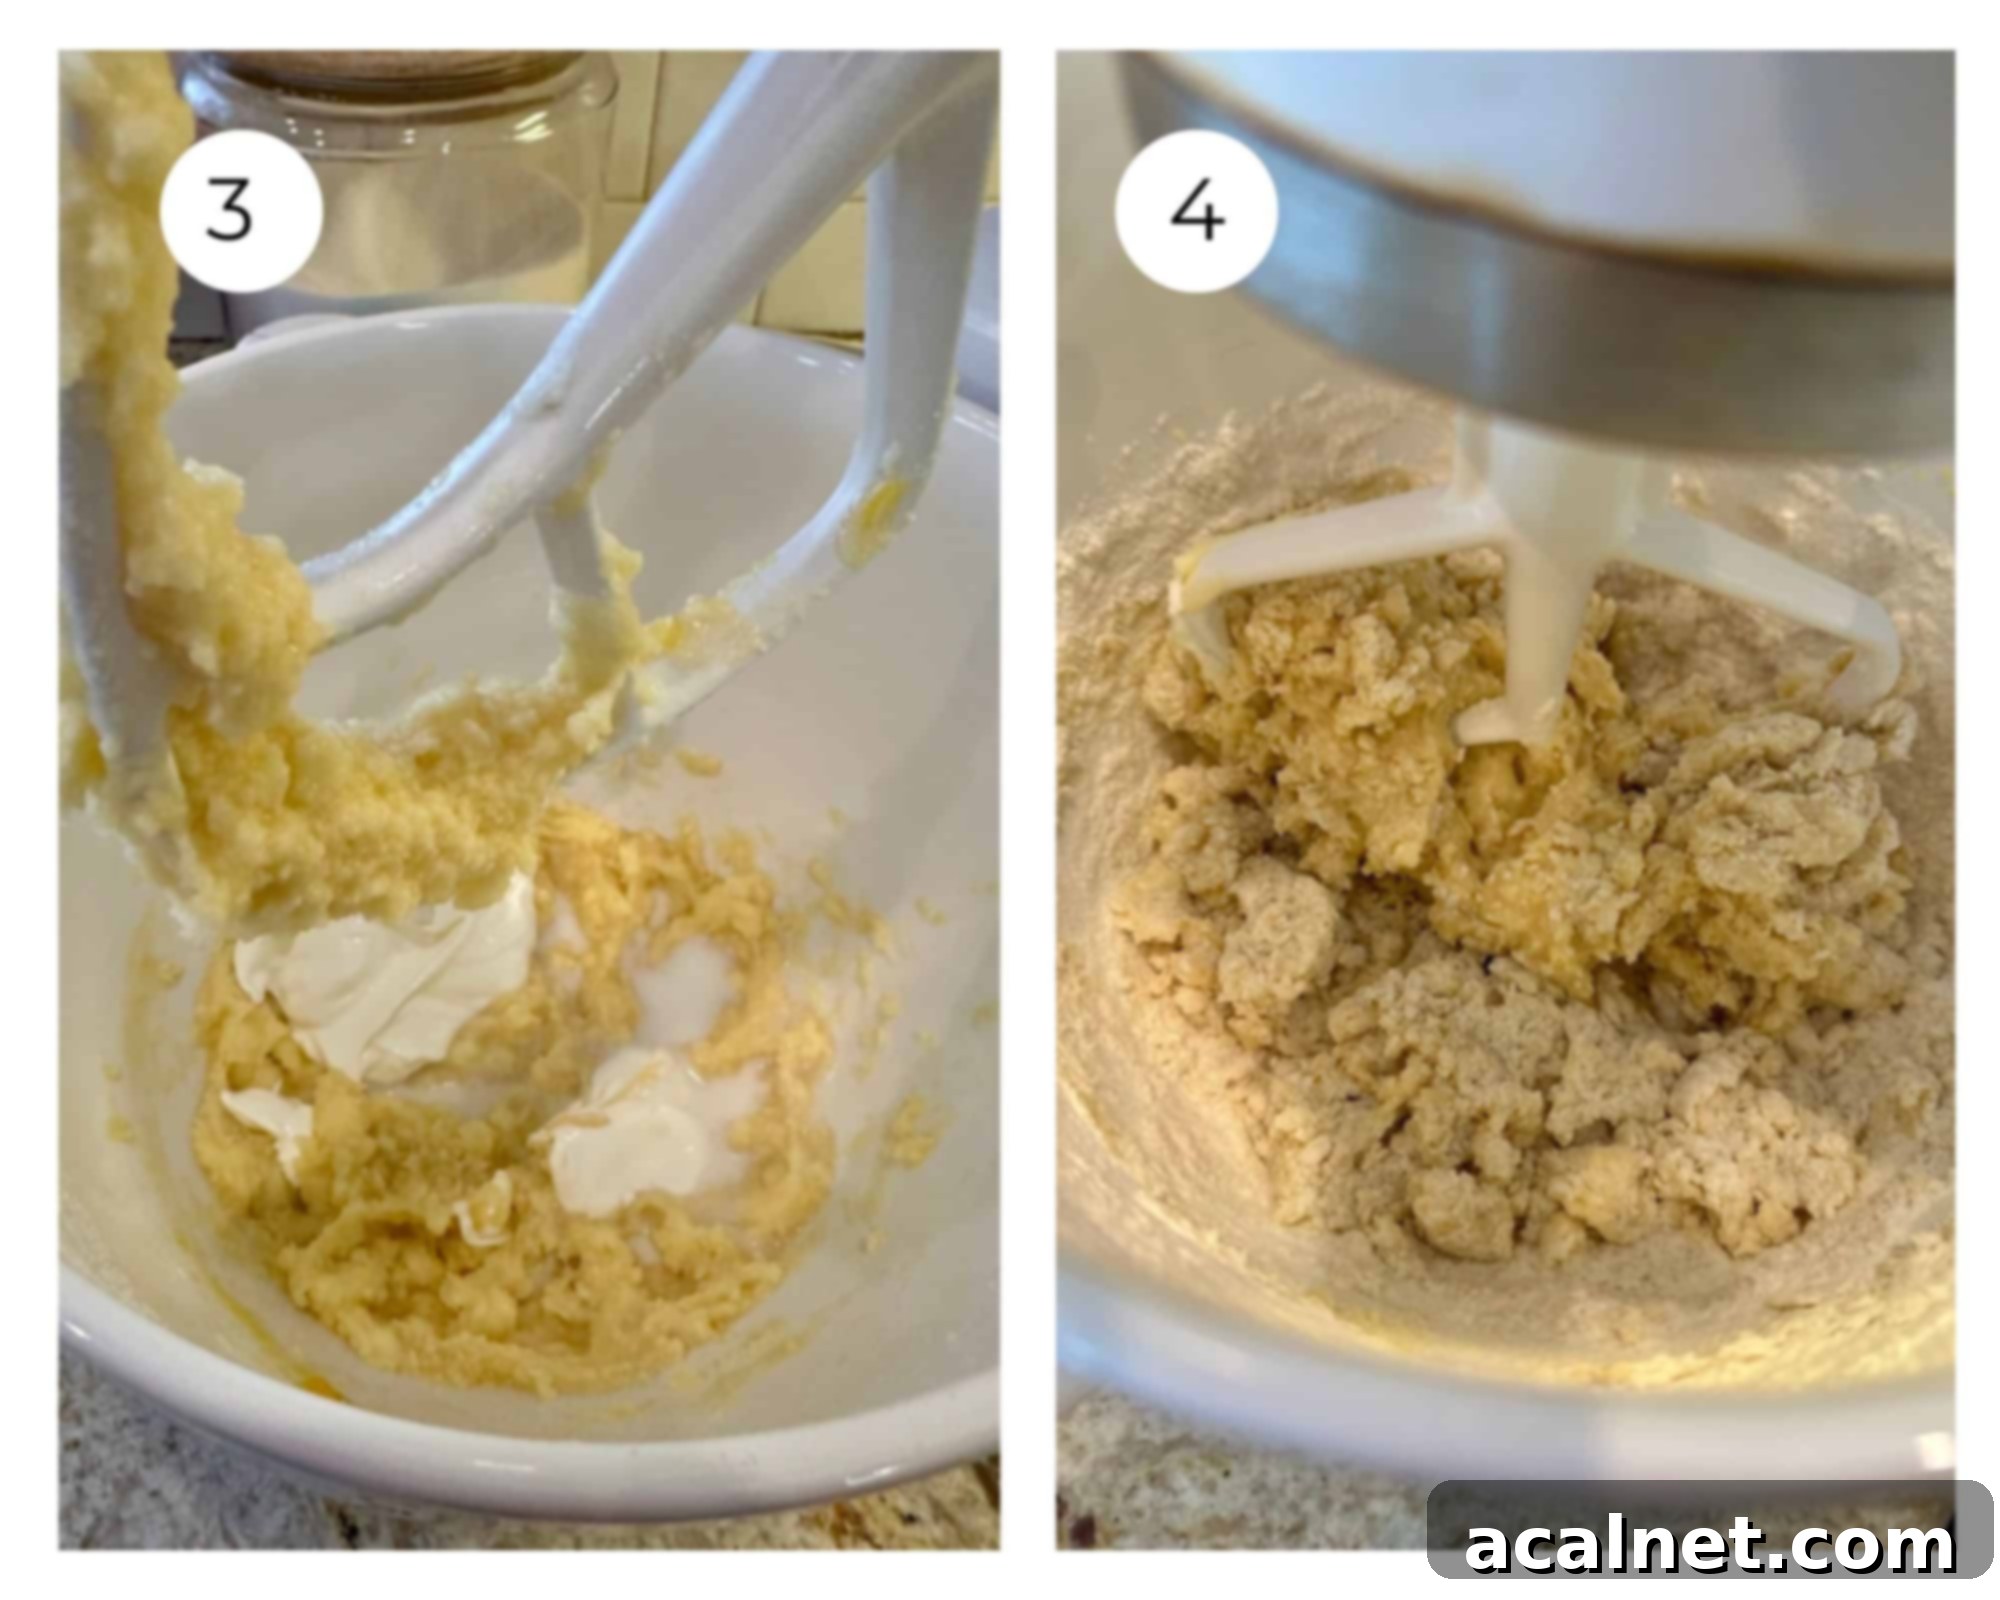
Step 3: Stir in Sour Cream & Milk. Once your butter, sugar, egg, and vanilla mixture is beautifully blended and creamy, it’s time to add the star ingredients. Gently stir in the full-fat sour cream and milk. Mix just until these liquids are combined and evenly distributed throughout the mixture. It’s important to be careful not to overmix at this stage. The sour cream will instantly make the mixture richer, slightly tangier, and more voluminous, setting the stage for that amazing soft and tender cookie texture. (Photo #3)
Step 4: Combine Wet and Dry. Gradually add the reserved dry ingredients from the medium bowl into your large mixing bowl containing the wet ingredients. Start by mixing on the lowest speed setting of your electric mixer, or if mixing by hand, stir gently with a wooden spoon or a sturdy rubber spatula. Mix only until the ingredients are just combined and no visible streaks of dry flour remain. The key here is to stop mixing as soon as everything comes together. Overmixing will develop the gluten in the flour too much, which can lead to tough, dense, and less tender cookies, rather than the light and airy texture we are aiming for. (Photo #4)
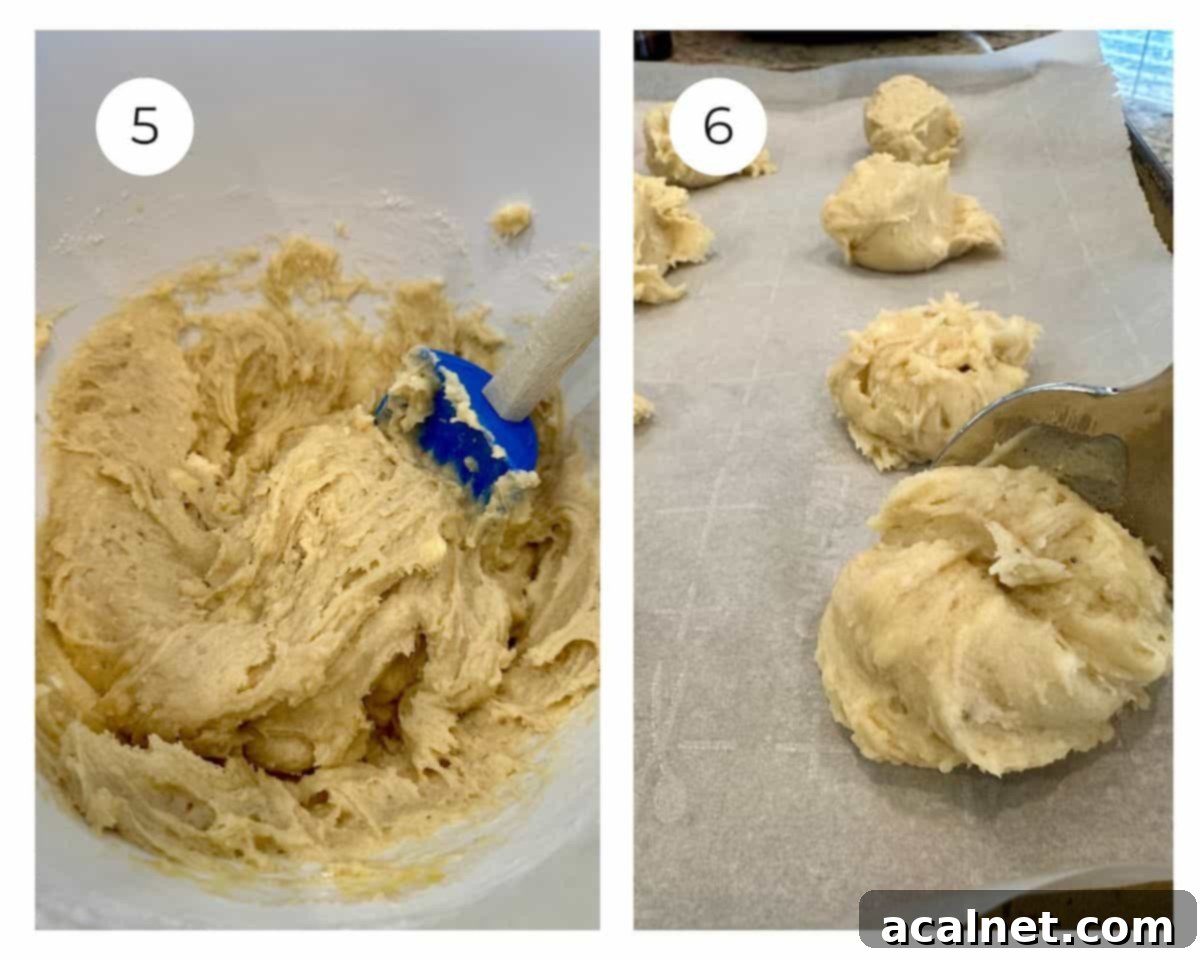
Step 5: Check Dough Consistency & Final Blend. The dough for these sour cream cookies will naturally be quite sticky; this is perfectly normal and actually desired! It’s precisely this stickiness that contributes significantly to their wonderfully soft and pillowy texture. Before proceeding, take a rubber spatula or a sturdy spoon to scrape down the sides of the bowl. Gently fold the dough a few times to ensure all ingredients, especially any bits clinging to the edges of the bowl, are thoroughly blended into the main dough mass. (Photo #5)
Step 6: Drop Dough onto Baking Sheets. Using a large, rounded tablespoon or a standard cookie scoop, drop uniform portions of the sticky dough onto your prepared baking sheets. Make sure to leave ample space, approximately 2 inches, between each cookie to allow for proper spreading during baking. Consistency in size is important here to ensure all your cookies bake evenly at the same rate. (Photo #6)
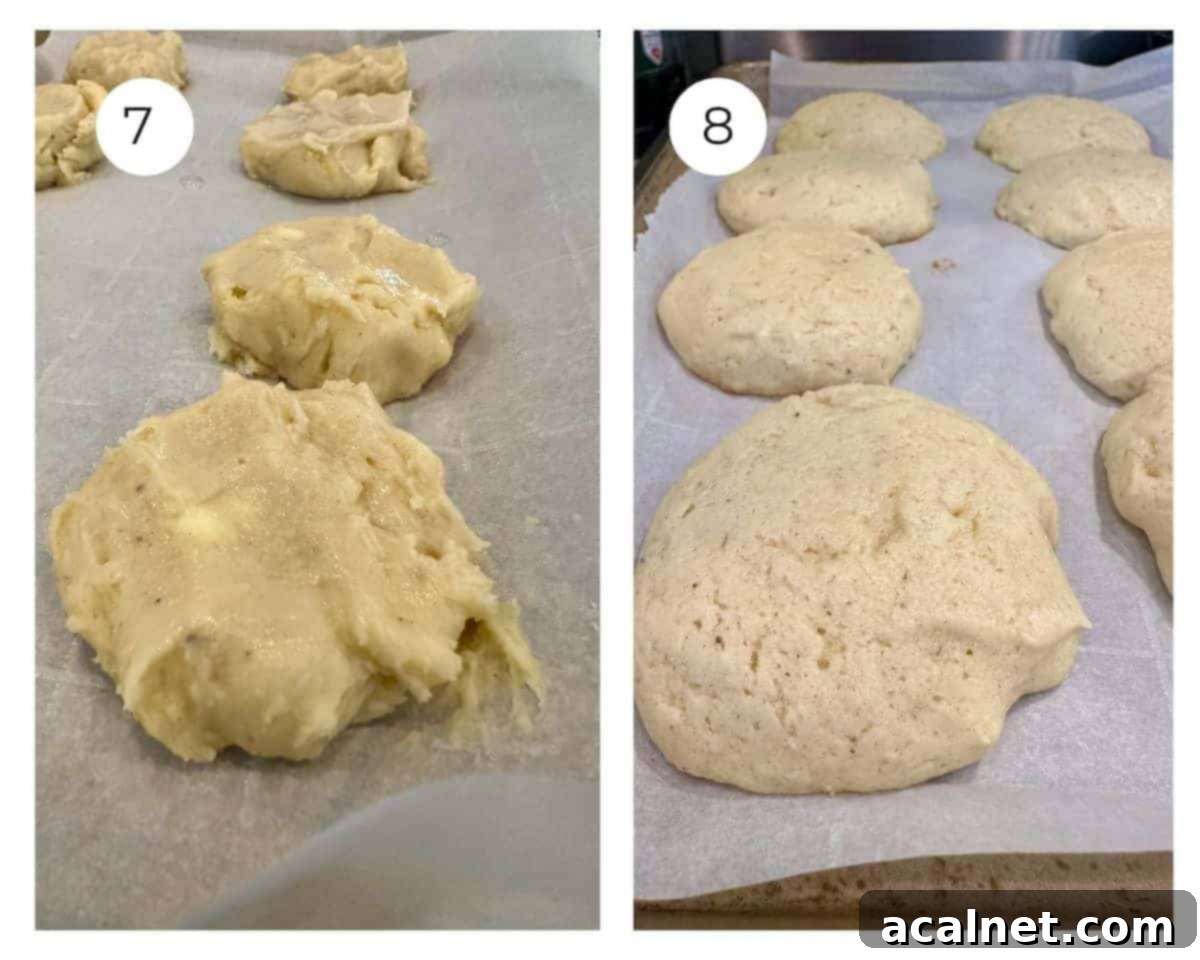
Step 7: Flatten the Cookies. To help the cookies bake more evenly and achieve that classic disc shape, lightly dampen your fingertips with a little water. Then, gently press down on each cookie dough mound to flatten it slightly and give it a somewhat rounder, disc-like shape, aiming for about 1-inch thick. The water on your fingers is key here, as it prevents the sticky dough from adhering to your skin. Don’t worry if they’re not perfectly symmetrical; just aim for an even thickness. A tiny bit of water remaining on top of the cookies is completely fine and will simply evaporate during the baking process! (Photo #7)
Step 8: Bake to Perfection & Cool. Carefully place the baking sheets into your preheated 350°F (175°C) oven. Bake for approximately 10-11 minutes, or until the edges are very lightly golden and the centers appear set, puffy, and are no longer shiny or wet-looking. They will still feel very soft to the touch if you gently press them, and this is exactly what you want for that signature tender, pillowy texture. It’s crucial to avoid overbaking, as this will dry them out and make them less tender. As soon as they’re done, remove the baking sheets from the oven and let the cookies cool on the hot baking sheet for about 10 minutes. This crucial cooling step allows the cookies to continue setting and firming up slightly without overcooking, creating the perfect consistency. (Photo #8) After 10 minutes, use a thin, wide spatula to carefully lift them off the parchment paper and transfer them to a wire cooling rack to cool completely. Once fully cooled, they are ready to be frosted or dusted with powdered sugar. Don’t forget to add colorful sprinkles if you’re frosting them for that extra festive touch!

⭐ Pro Tips for the Best Old-Fashioned Sour Cream Cookies
Achieving bakery-quality sour cream cookies at home is easier than you think, especially with a few insider tricks. Here are some pro tips to ensure your batch is absolutely perfect, consistently soft, and utterly delicious:
- The Secret to Perfect Buttercream Frosting: These Old Fashioned Sour Cream Cookies are truly elevated to a new level by a creamy, homemade buttercream frosting. I highly recommend making a half batch of my signature best buttercream frosting to pair with them. For a half batch, you’ll need: ½ cup softened unsalted butter, 2 cups powdered sugar, ½ teaspoon lemon juice (this adds a lovely, subtle brightness and beautifully cuts through the sweetness), ¼ teaspoon vanilla extract, 1-2 teaspoons half and half (or milk, which you can adjust to reach your desired consistency), and a dash of salt to perfectly balance all the flavors. Combine all these ingredients in a medium-sized bowl, using either a sturdy spoon or a hand-held mixer. Blend until you achieve your desired consistency – smooth, fluffy, and easily spreadable. Remember to add the liquid (half and half/milk) gradually to get it just right.
- Room Temperature Ingredients are Non-Negotiable: This might seem like a small detail, but it’s incredibly important. Ensure your butter, egg, and especially the sour cream are all at true room temperature before you begin mixing. This allows them to cream together smoothly and evenly, creating a uniform dough that bakes consistently and results in that perfect tender texture. Cold ingredients don’t emulsify properly, which can lead to a lumpy dough and a dense or inconsistent cookie texture. Plan ahead and take them out of the fridge at least 30-60 minutes before you start.
- Do Not Overmix the Dough: This is a golden rule in baking, especially for tender cookies. Once you add the dry ingredients to the wet mixture, mix only until they are just combined. Stop as soon as no streaks of flour are visible. Overmixing develops the gluten in the flour too much, which will result in tough, chewy cookies rather than the desired soft, pillowy ones. A few unmixed flecks of flour are far better than an overmixed, tough dough.
- Parchment Paper or Silicone Mats are Your Best Friends: Always, always line your baking sheets with parchment paper or use silicone baking mats. Not only do they provide a non-stick surface that prevents your precious cookies from sticking, but they also promote more even baking by creating a buffer between the hot metal and the cookie dough. Plus, they make cleanup incredibly easy, saving you time and effort.
- Invest in an Oven Thermometer: Oven temperatures can vary significantly from what the dial indicates. If you find your cookies are consistently browning too quickly, baking unevenly, or not setting properly, consider investing in an inexpensive oven thermometer. This simple tool will ensure your oven is truly at 350°F (175°C), which is critical for consistent baking results.
💭 Frequently Asked Questions About Old-Fashioned Sour Cream Cookies
Yes, you absolutely can adapt this recipe to make cutout cookies! This is actually how my mom often prefers to prepare them, especially for holidays. To transform this wonderfully soft drop cookie dough into a roll-and-cut dough, you’ll need to add an additional ⅔ cup of all-purpose flour to the recipe. After mixing all the ingredients, cover the dough tightly with plastic wrap and chill it in the refrigerator overnight, or for a minimum of 4-6 hours. This chilling process is crucial: it allows the flour to fully hydrate and the butter to firm up, which makes the dough much less sticky and significantly easier to handle and roll out. When ready, roll the chilled dough out on a lightly floured surface to about ¼-inch thickness and cut into your desired shapes using cookie cutters. The baking time remains similar to the drop cookies, typically 10-12 minutes, but keep a close eye on them as thinner cookies might bake slightly faster.
Yes, almond extract makes a delicious and intriguing substitution or even an excellent addition to vanilla in this recipe! While pure vanilla extract offers a classic, warm, and sweet background flavor that many love, almond extract provides a distinct, slightly nutty, and often more intense aromatic note that pairs wonderfully with baked goods, especially those featuring dairy like sour cream. If you choose to substitute completely, use the same amount (2 teaspoons) as you would vanilla. If you’re looking to add an extra layer of flavor without overpowering, start with ¼ to ½ teaspoon of almond extract alongside the vanilla, as almond extract can be quite potent. Feel free to experiment to discover your preferred flavor combination!
While you technically can use low-fat or fat-free sour cream, I highly recommend sticking to full-fat sour cream for the best and most authentic results in these old-fashioned cookies. The higher fat content in full-fat sour cream is absolutely crucial for achieving that incredibly rich, tender, moist, and signature melt-in-your-mouth texture that these cookies are known for. Low-fat or fat-free versions often contain more water and less fat, which can result in cookies that are less tender, potentially drier, or may have a slightly different spread and overall texture. For an experience that truly replicates a cherished “old-fashioned” recipe, full-fat is definitely the superior choice.
These cookies bake relatively quickly, typically in about 10-11 minutes, so it’s important to keep a close watch. You’ll know they’re perfectly done when the edges are lightly golden, and the centers appear set and puffy. Crucially, they should no longer look shiny or wet in the middle. If you gently touch the center, they will still feel very soft, which is exactly what you want for that signature pillowy and tender texture. Avoid letting them brown too much, as overbaking will quickly dry them out and make them less tender and soft. Remember, they continue to cook slightly on the hot baking sheet after being removed from the oven, so trust that soft touch!
Properly softened butter is absolutely crucial for creaming with sugar and achieving a light, airy cookie dough, which contributes to the final texture. The ideal temperature for softened butter is around 68-70°F (20-21°C). It should be pliable enough to leave a slight indentation when pressed gently with your finger, but it should never be melted or greasy. You can achieve this by simply leaving it on your kitchen counter for 30-60 minutes, depending on your room’s temperature. If you’re short on time, you can cut the butter into smaller, 1-inch pieces, or carefully microwave it on 10% power for very short bursts (5-10 seconds), flipping it between each burst, until it reaches the desired softness. Be extremely careful not to melt it, as melted butter will change the texture of your cookies significantly.
Absolutely! These sour cream cookies are fantastic with additions. For chocolate lovers, fold in about ½ cup of mini chocolate chips, white chocolate chips, or even chopped dark chocolate during the final mixing step (Step 4). If you enjoy a nutty crunch, feel free to add ½ cup of finely chopped pecans or walnuts to the dry ingredients before combining them with the wet. These additions can add a delightful textural contrast and extra flavor dimension to your already delicious cookies.

👩🏻🍳 Storing Your Homemade Old-Fashioned Sour Cream Cookies
To keep your delicious sour cream cookies fresh, soft, and tasting their best for as long as possible, proper storage is absolutely key. Whether you’re planning to enjoy them within a few days or save some for a future treat, here’s how to store them effectively:
- Room Temperature Storage: After the cookies have completely cooled (and you’ve frosted them, if desired), store them in an airtight container at room temperature. If you are stacking multiple layers of cookies, especially frosted ones, I recommend placing a sheet of parchment paper or wax paper between each layer to prevent sticking and preserve their delicate decoration. These cookies are at their absolute best when enjoyed within 3 days of baking, maintaining their wonderful soft texture and fresh, comforting flavor.
- Refrigeration: Generally, plain or buttercream-frosted cookies do not require refrigeration and are often best kept at room temperature to maintain their soft texture. However, if your chosen frosting contains perishable ingredients (like a cream cheese frosting with fresh dairy), or if your kitchen is particularly warm, you might want to refrigerate them. Always ensure they are in an airtight container to prevent them from drying out or absorbing odors from the refrigerator. For the best taste and texture, allow them to come to room temperature for about 15-30 minutes before serving.
⭐ Pro Tip: Freezing Frosted Sour Cream Cookies for Later
Freezing these old-fashioned sour cream cookies is a fantastic way to ensure you always have a delicious homemade treat on hand whenever a craving strikes or unexpected guests arrive! Here’s the best method to freeze them, even when frosted, ensuring they taste as good as freshly baked:
First, arrange your freshly frosted (and fully set) cookies in a single layer on a baking sheet or a large plate. Make sure there’s enough space between each cookie so they don’t touch. Lightly cover the baking sheet with plastic wrap to protect the cookies from freezer burn and any condensation. Place this sheet in the freezer for approximately one hour, or until the cookies are completely solid and the frosting is firm to the touch. This crucial step, known as “flash freezing,” prevents the frosting from smearing or sticking to other cookies when they are eventually stacked.
Once the cookies are thoroughly frozen, you can remove them from the freezer. At this point, they are ready to be stacked and placed into a larger freezer-safe container or a heavy-duty freezer bag. Be sure to remove as much air as possible from the bag to prevent freezer burn. For the absolute best flavor and texture, defrost the cookies at room temperature for a few hours before serving. They will be delicious for up to 3-4 months when stored this way. This method ensures they retain their beautiful shape and incredibly deliciousness, ready to be enjoyed any time!

🥧 Other Tasty Sweets and Desserts to Explore
Beyond these delightful Old Fashioned Sour Cream Cookies, which are a tried and true recipe for comforting treats that everyone loves, there’s a whole world of other fantastic sweets and desserts waiting to be discovered. If you have a sweet tooth that needs satisfying, or you’re simply looking to expand your baking repertoire, check out these additional recipes from my kitchen. Each one is designed to bring joy and deliciousness to your table:
- Chocolate Zucchini Cake
- Tiramisu Cake for Dessert
- Old Fashioned Sour Cream Cookies
- 15 Best Apple & Pumpkin Desserts
💬 Did You Make These Old-Fashioned Sour Cream Cookies?
If you’ve had the joy of baking these delightful Old Fashioned Sour Cream Cookies, I would absolutely love to hear about your experience and how your soft, pillowy sugar cookies turned out! Your feedback is incredibly valuable to me and other home bakers who are looking for tried-and-true recipes. Please take a moment to scroll down to the comments section and leave a 🌟 star rating along with your thoughts, any helpful tips you discovered, or any delicious variations you tried. You can also share your creation on Instagram by tagging @crinkledcookbook and using the hashtag #crinkledcookbook. I’m eagerly looking forward to hearing from you!
Recipe

Old Fashioned Sour Cream Cookies
Print
Rate
Pin Recipe
Ingredients
- 2 cups flour
- ½ teaspoon baking powder
- ¼ teaspoon baking soda
- ½ teaspoon salt
- ¼ teaspoon nutmeg
- ½ cup butter – softened
- 1 cup sugar
- 1 egg
- 2 teaspoons vanilla extract
- ½ cup sour cream
- 1 tablespoon milk
Instructions
- Preheat oven to 350°F and line two baking sheets with parchment paper. You can use any size baking sheet, mine are 10″ x 13.”
- In a medium-sized bowl, combine the flour, baking powder, baking soda, salt and nutmeg and set aside.
- In a mixing bowl combine the butter, sugar, egg and vanilla extract. Once blended, stir in the sour cream and milk.
- Add the dry ingredients from the bowl. Stir to blend thoroughly.
- Drop by large, rounded tablespoons full onto the parchment paper. The dough will be sticky. Lightly dampen your fingers with water and gently press the cookies into a 1-inch thick circle. The water keeps your fingers from sticking to the dough. A little water on top of the cookies is perfectly fine! Don’t worry about making the cookies perfect circles. Just flatten them a little.
- Optional: Combine 2 tablespoons of sugar with 1 tablespoon of cinnamon and sprinkle the top of each cookie with cinnamon and sugar blend. This is a great topping option if you don’t want to frost the cookies.
- Bake for 10-11 minutes or until the center and edges of the cookies are set and no longer shiny. Check them at 9 minutes of baking.
- Remove the baking sheet from the oven and cool the cookies on the hot baking sheet for about 10 minutes, then use a spatula to lift them onto a cooling rack.
- Frost the cookies using your favorite frosting (scroll down for buttercream frosting ingredients in the recipe notes) or dust each cookie with powdered sugar and enjoy!
Notes
Here’s how to make a half batch of my buttercream frosting: blend ½ cup softened butter with 2 cups powdered sugar, ½ teaspoon lemon juice, ¼ teaspoon vanilla extract, 1-2 teaspoons half and half and a dash of salt. Combine the ingredients in a medium-sized bowl using a sturdy spoon or hand-held mixer. Blend the ingredients until you get the frosting consistency you’d like.
Please note, the nutrition details are estimated using a food database, so they’re just a rough estimate not an exact science.
