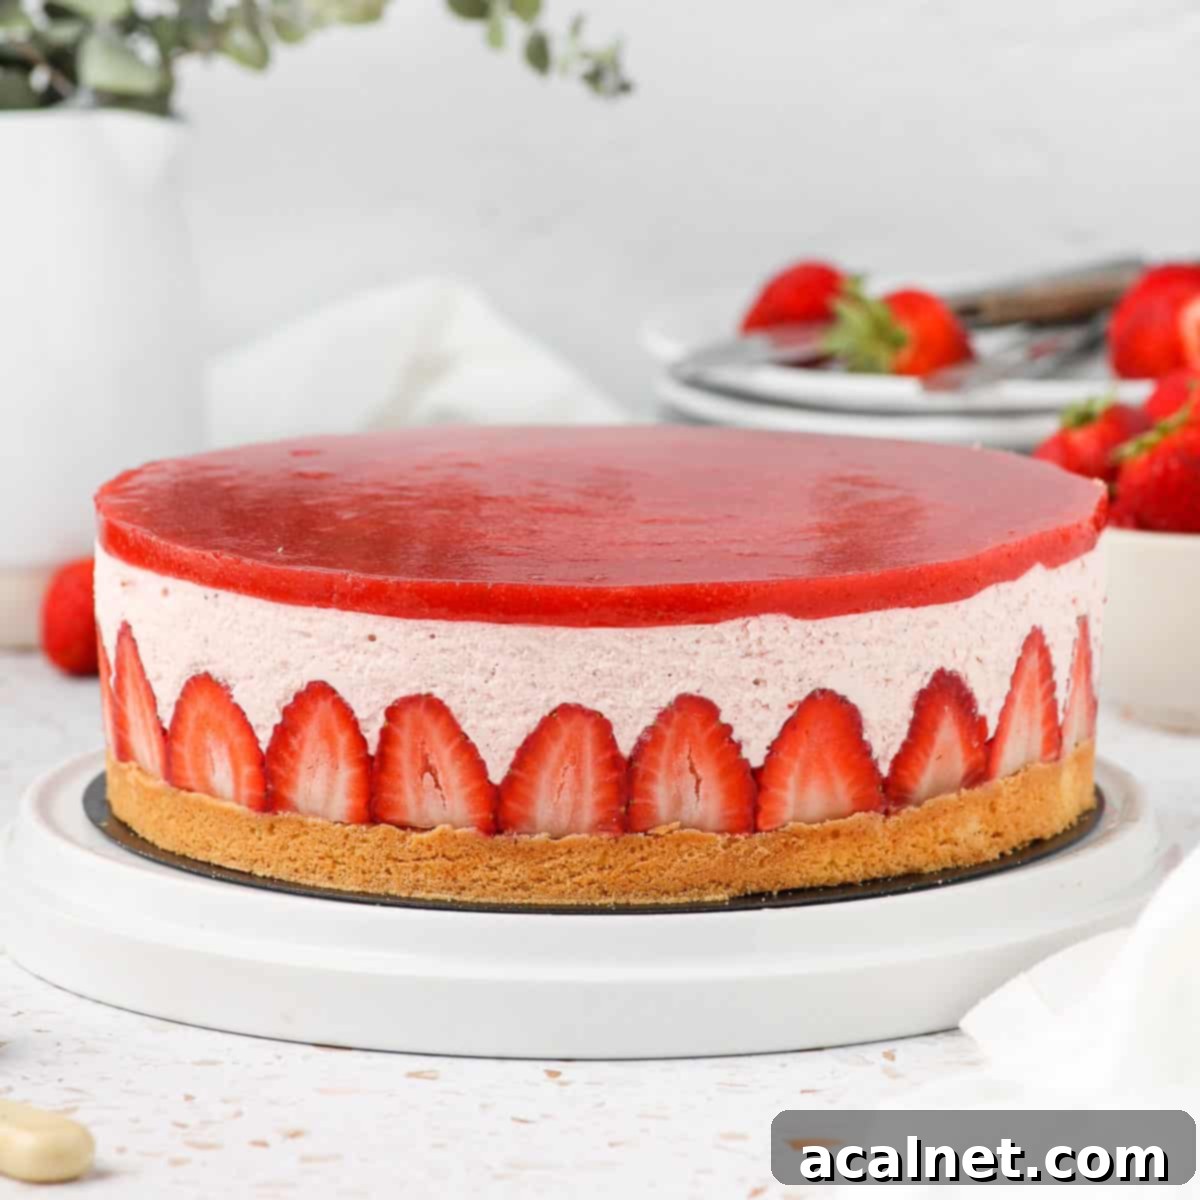
Indulge in the Perfect Strawberry Mousse Cake: Your Ultimate Summer Dessert
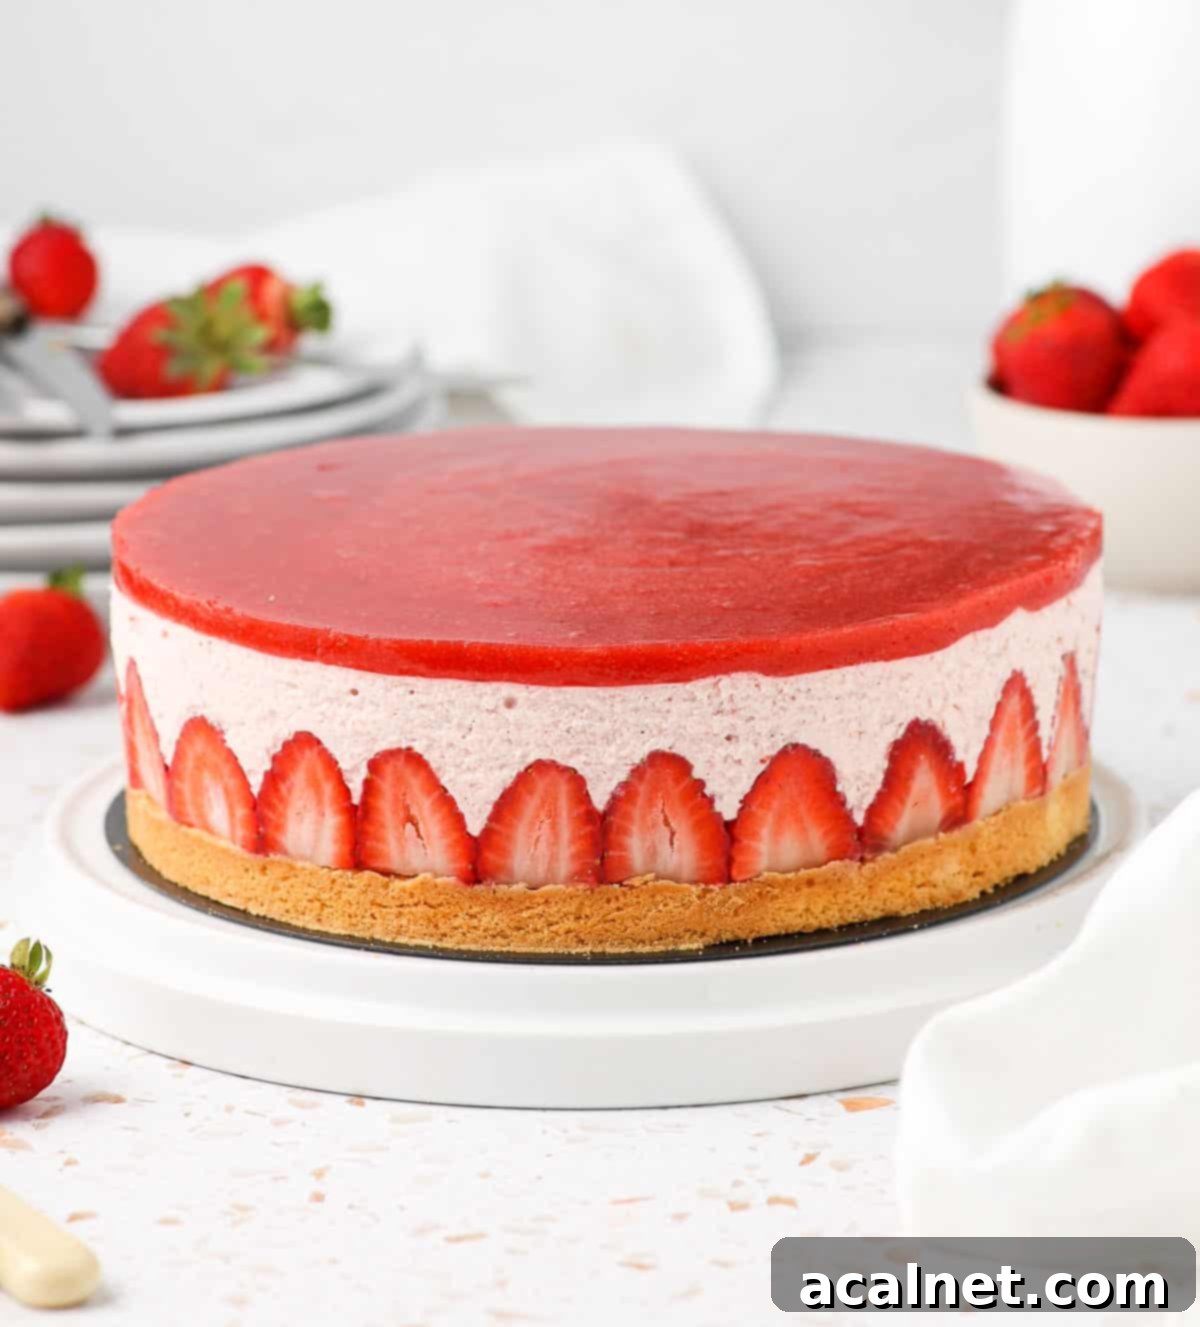
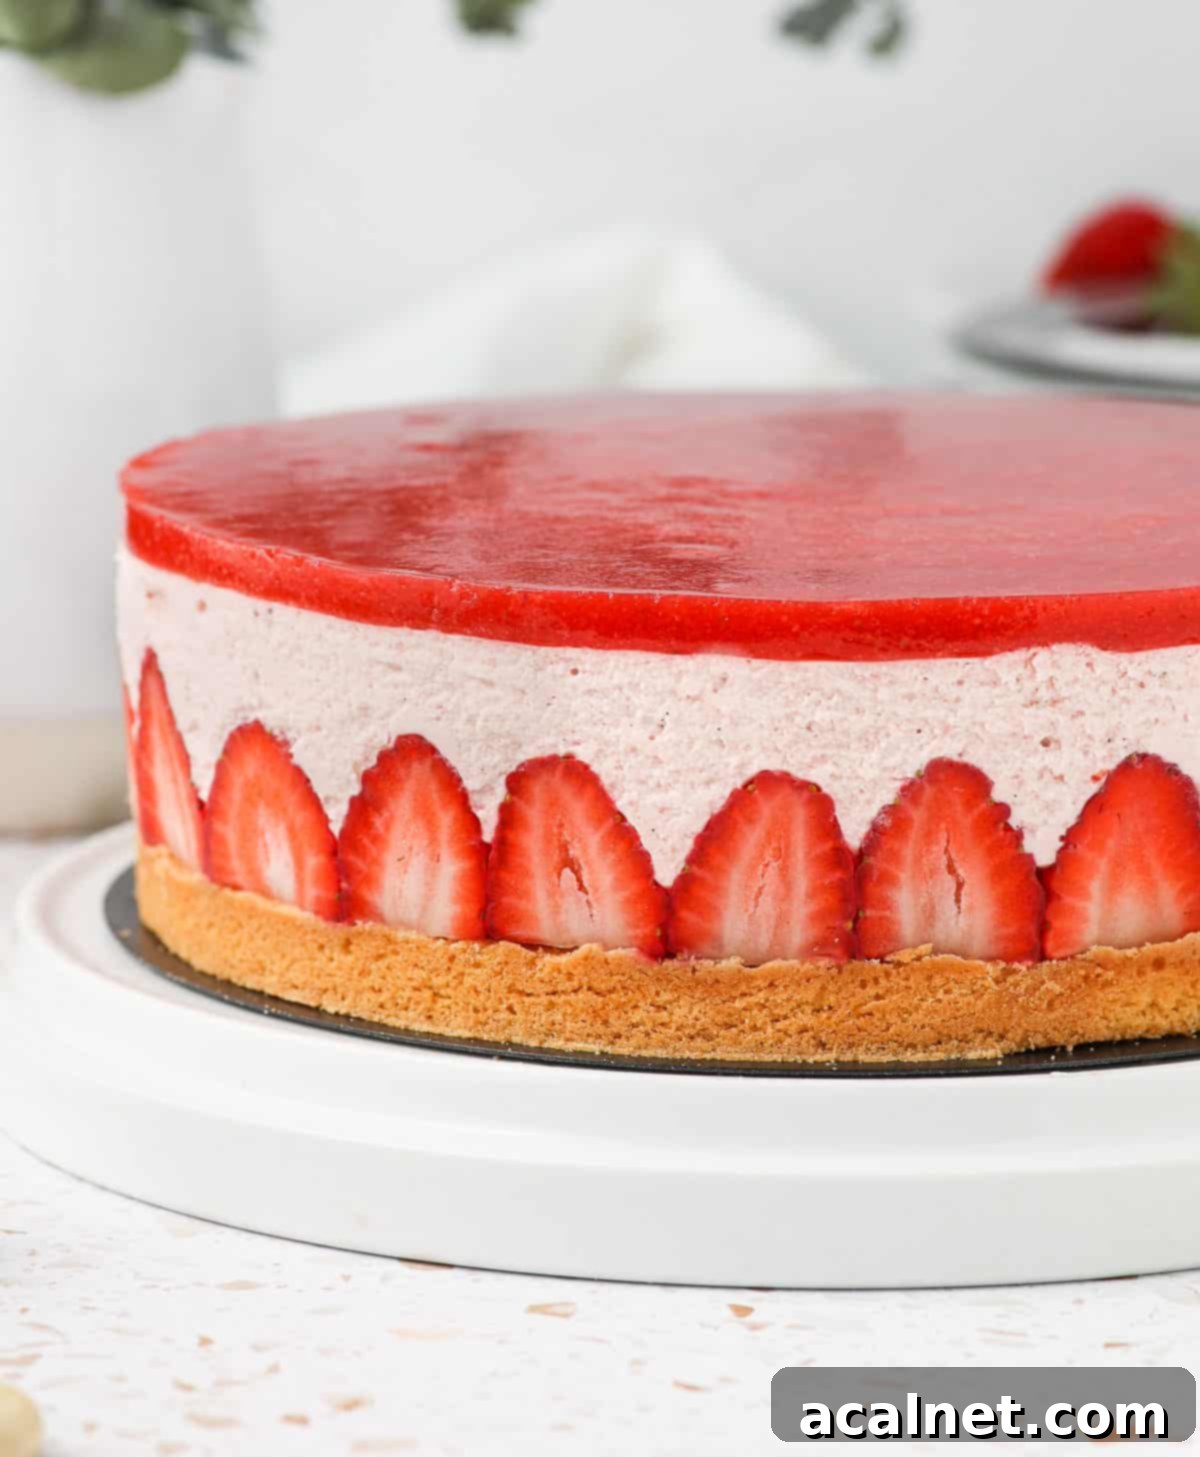
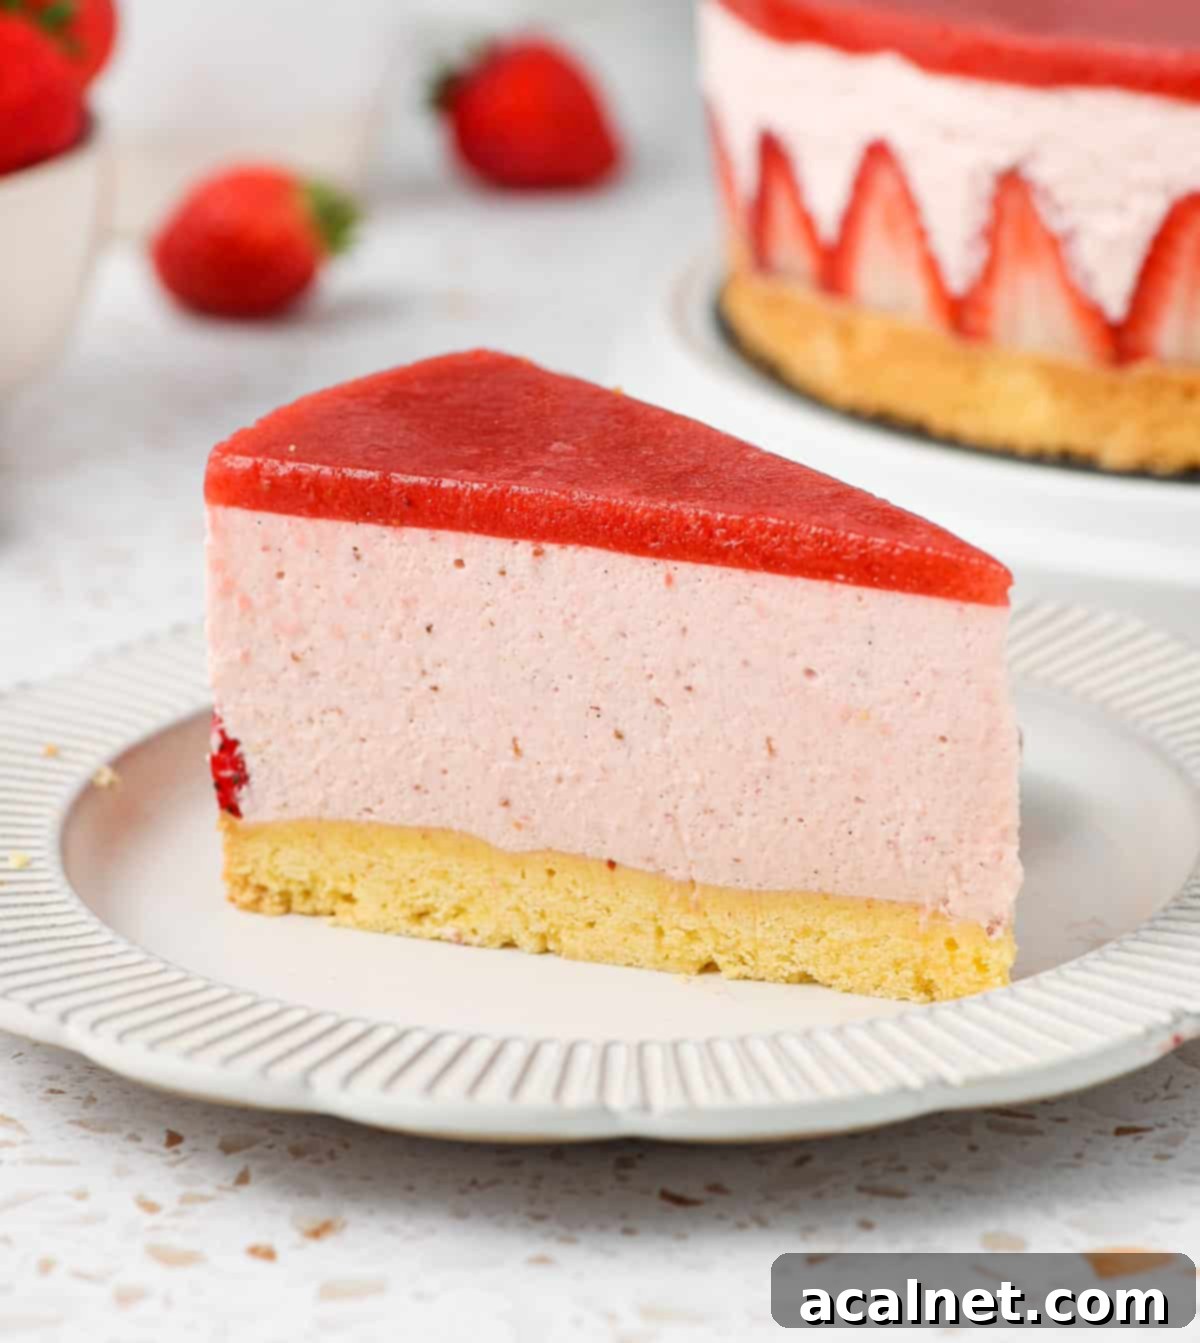
Prepare to be enchanted by this exquisite Strawberry Mousse Cake, a true masterpiece of lightness, freshness, and creamy delight. This show-stopping dessert is the epitome of a perfect summer treat, artfully combining a buttery French Sablé base, a cloud-like Strawberry Mousse Filling bursting with ripe strawberries, and a vibrant, glistening Strawberry Jelly topping. Each layer is meticulously crafted to deliver a harmonious balance of texture and flavor, making it an unforgettable experience for any palate. Whether you’re celebrating a special occasion or simply craving a refreshing indulgence, this cake promises to impress with its elegant appearance and irresistible taste.
[feast_advanced_jump_to]
Why This Strawberry Mousse Cake Will Be Your New Favorite Dessert
If you’re searching for a dessert that’s not only incredibly flavorful but also remarkably light and guaranteed to impress, then your quest ends here. This Strawberry Mousse Cake is truly exceptional, offering a delicate balance of textures and intense strawberry flavor that makes it a standout choice for any gathering.
What makes this cake so special is its thoughtful construction. It starts with a classic Sablé Breton base, a traditional French salted butter biscuit known for its rich, crumbly texture and delightful hint of salt. This provides the perfect counterpoint to the star of the show: a remarkably light and airy strawberry mousse layer, generously studded with fresh, juicy strawberries. Finally, it’s crowned with a glistening, intensely fruity Strawberry Jelly topping, adding both a beautiful visual appeal and an extra burst of flavor. This combination makes it ideal for summer celebrations, garden parties, or any moment you want to share something truly special.
This mousse cake offers a more accessible take on a classic French dessert, similar in elegance but simpler in execution than a traditional Fraisier Cake. Instead of the rich Diplomat Cream, we opt for a super light and refreshing strawberry mousse, akin to the delightful texture found in my Strawberry Mousse Cups. This ensures a dessert that feels indulgent yet remains wonderfully light on the palate.
Explore More Mousse Cake Recipes:
- Mango Mousse Cake
- Chocolate Mousse Cake (coming soon!)
Essential Ingredients for Your Strawberry Mousse Cake
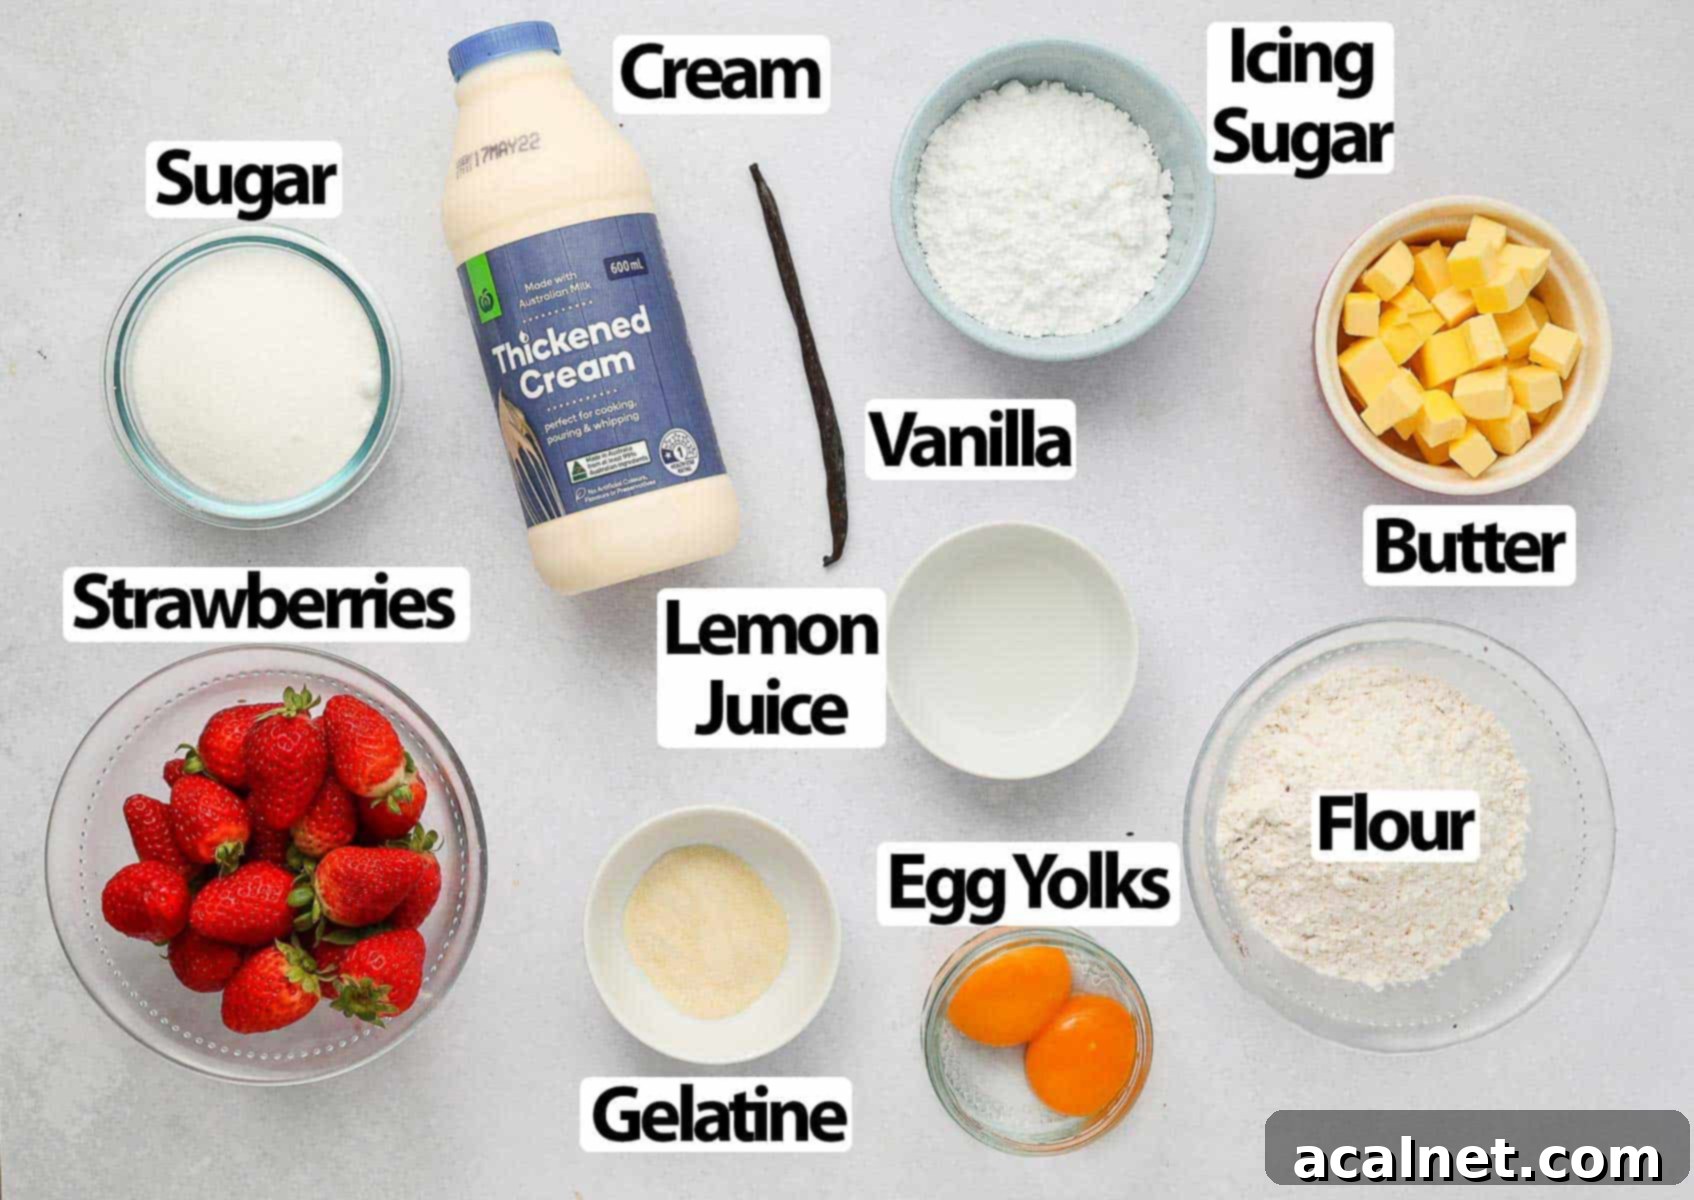
Crafting this elegant Strawberry Mousse Cake requires a selection of quality ingredients for each distinct layer. Here’s a detailed look at what you’ll need and why:
Sablé Breton Base:
- Egg Yolks: The unique richness and tender crumb of Sablé Breton biscuits come from using only egg yolks. This makes the cookie incredibly delicate and flavorful. Save your egg whites for other delicious recipes like meringues or financiers!
- Icing Sugar: Also known as powdered sugar, it contributes to the fine, smooth texture of the biscuit. Sifting it ensures there are no lumps, resulting in a perfectly uniform dough.
- Salted Butter: A defining characteristic of this Breton biscuit is the use of high-quality salted butter. This gives the base an exquisite depth of flavor and a distinct savory note that beautifully complements the sweet strawberry layers. If you prefer to use unsalted butter, simply add a small amount of fine salt to the dough for that authentic taste. Ensure your butter is very soft, at true room temperature, for easy incorporation.
- Plain / All-Purpose Flour: The foundational dry ingredient, providing structure to the crumbly cookie.
Strawberry Mousse Filling:
- Strawberries: The star ingredient! You can use either fresh or frozen strawberries for the mousse itself. Frozen berries are convenient and often more affordable, but make sure they are thawed and drained well. For the decorative ring around the edge of the cake, fresh, vibrant strawberries are highly recommended for their appearance and firm texture.
- Caster Sugar: Fine-grain sugar that dissolves easily, ensuring a smooth mousse and jelly without a grainy texture.
- Vanilla Bean: For the most exquisite flavor, a fresh vanilla pod is unmatched. Scrape out the tiny seeds to infuse the mousse with a deep, aromatic vanilla essence. Vanilla paste is an excellent alternative, offering similar intensity. While vanilla extract can be used, it may not provide the same depth of flavor.
- Gelatine: This is crucial for setting the mousse and giving it its signature light, airy structure. I used gelatine powder, rehydrated in a small amount of cold water. Gelatine leaves (sheets) can also be used; simply bloom them in very cold water for a few minutes until soft, then squeeze out excess water before incorporating. A good rule of thumb is 1 tablespoon (or 3 teaspoons) of gelatine powder is equivalent to about 4 sheets of gelatine, though this can vary slightly based on the brand and strength.
- Heavy / Thickened Cream: Also known as whipping cream, it must have at least 30% fat content to whip properly into stiff peaks, which is essential for the mousse’s light consistency.
- Fresh Strawberries (optional): Sliced in half, these are used to line the cake ring, adding a beautiful visual element and an extra layer of fresh fruit goodness.
Strawberry Jelly Topping:
This simple yet impactful topping is a blend of smooth strawberry puree (made from fresh or frozen strawberries), caster sugar for sweetness, a touch of lemon juice to brighten the flavors, and gelatine powder to set it into a glossy, clear layer. A hint of vanilla can also be added here for extra aroma if desired.
Crafting Your Elegant Strawberry Mousse Cake: A Step-by-Step Guide
Creating this layered strawberry mousse cake is a delightful process, broken down into three main stages. Follow these detailed steps for a flawless finish and an incredibly delicious result.
The Perfect Sablé Breton Crust
Our journey begins with the Sablé Breton crust, a rich, crumbly base that offers a delightful contrast to the light mousse. This step is similar to making a high-quality shortbread, but with its own unique characteristics.
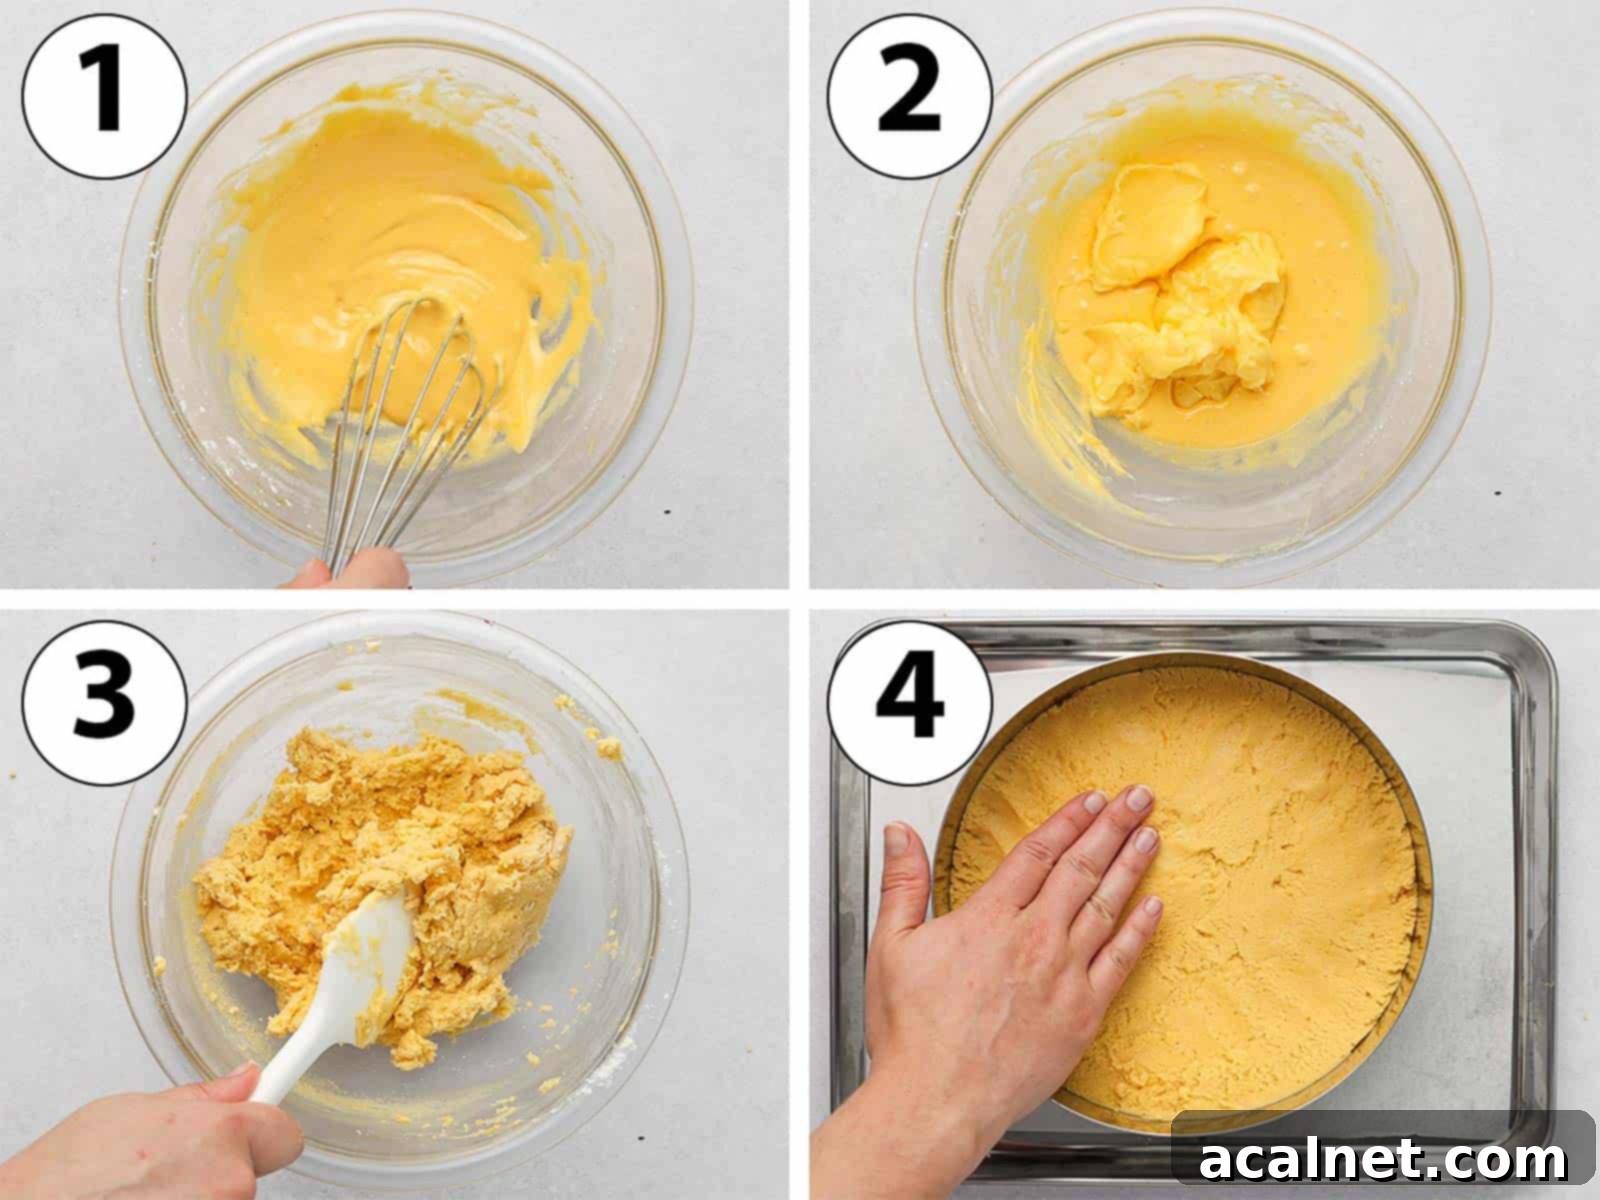
- Begin by preparing your workspace. Position a 9-inch (23 cm) cake ring over a small baking tray that’s been lined with baking paper or a silicone mat. This ensures easy transfer and prevents sticking.
- Photo 1: In a small mixing bowl, combine the egg yolks and icing sugar. Whisk them vigorously for one to two minutes until the mixture becomes pale, thick, and creamy. This aeration is key to the sablé’s texture.
- Photo 2: Next, add the very soft, room-temperature salted butter. Stir it in thoroughly until it’s completely incorporated and the mixture is smooth.
Pro Tip: If your butter isn’t soft enough, it will be difficult to mix, leading to a lumpy dough. Always ensure it’s at true room temperature for optimal results.
- Photo 3: Incorporate the plain (all-purpose) flour. If you’re using unsalted butter, this is the stage to add your extra pinch of salt. Mix with a spatula until the ingredients come together to form a thick, cohesive paste-like dough. Avoid overmixing to keep the crust tender.
- Photo 4: Transfer the dough to the prepared cake ring. Press it firmly and evenly across the bottom of the ring. You can use the back of a measuring cup or a small offset spatula to achieve a perfectly flat and well-packed base.
- Place the ring with the dough into the fridge to chill for a minimum of 30 minutes. Meanwhile, preheat your oven to 160°C (325°F).
- Bake the crust for about 30 minutes, or until it turns a beautiful light golden brown and smells fragrant. Once baked, carefully remove the tray from the oven and place it on a cooling rack to cool down completely. A fully cooled crust is essential before adding the mousse.
Creating the Light & Creamy Strawberry Mousse Filling
The second major step involves preparing the star of the show: the incredibly light and fresh strawberry mousse filling. This layer is designed to be airy and bursting with natural strawberry flavor.
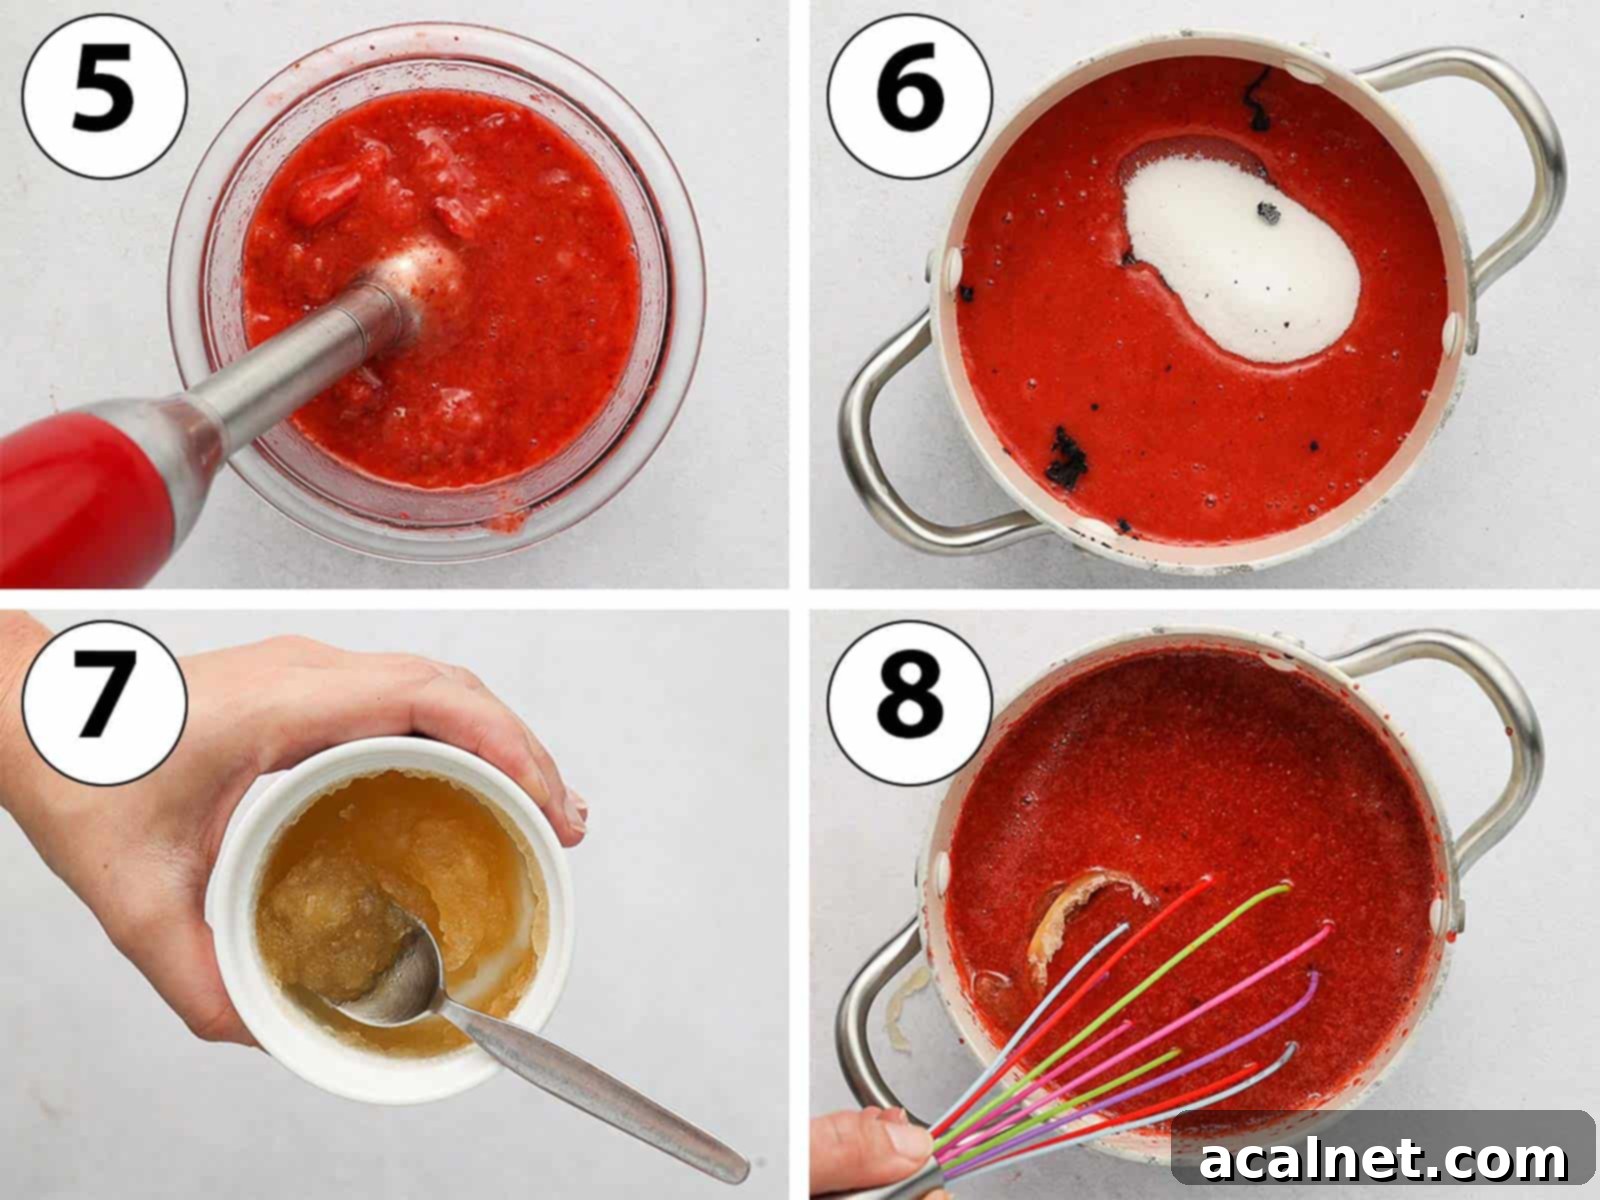
- Photo 5: Start by preparing your strawberries. Place them in a bowl and blend until completely smooth using an immersion blender, or transfer them to a regular blender.
Optional Step: For an extra refined mousse, pour the blended strawberry puree through a fine-mesh sieve to remove any seeds. This results in an incredibly smooth and silky texture.
- Photo 6: Transfer the smooth strawberry puree to a small saucepan. Add the caster sugar and the fragrant seeds from your vanilla bean. Whisk these ingredients together and gently heat the mixture over low heat until it begins to simmer gently. There’s no need for a rolling boil; a gentle simmer is sufficient to dissolve the sugar and warm the mixture. Turn off the heat once simmering.
- Photo 7: While the strawberry mixture is warming, prepare your gelatine. In a small separate bowl, combine the gelatine powder with a small amount of very cold water (as specified in the recipe card). Mix well and set it aside for a few minutes. It will “bloom” and thicken into a paste.
- Photo 8: Once the gelatine has bloomed, add it directly into the hot strawberry puree. Whisk thoroughly until the gelatine is completely dissolved and no lumps remain.
- Pour the gelatine-infused strawberry mixture into a clean bowl or, ideally, a shallow pan (like a brownie or loaf pan) to help it cool faster. Cover the surface directly with plastic wrap to prevent a skin from forming. Chill this mixture in the fridge for at least 1 hour, or until it has completely cooled down and is no longer warm to the touch.
Important Note: If the gelatine mixture has started to set too much, simply whisk it well again until it returns to a smooth, loose consistency before proceeding.
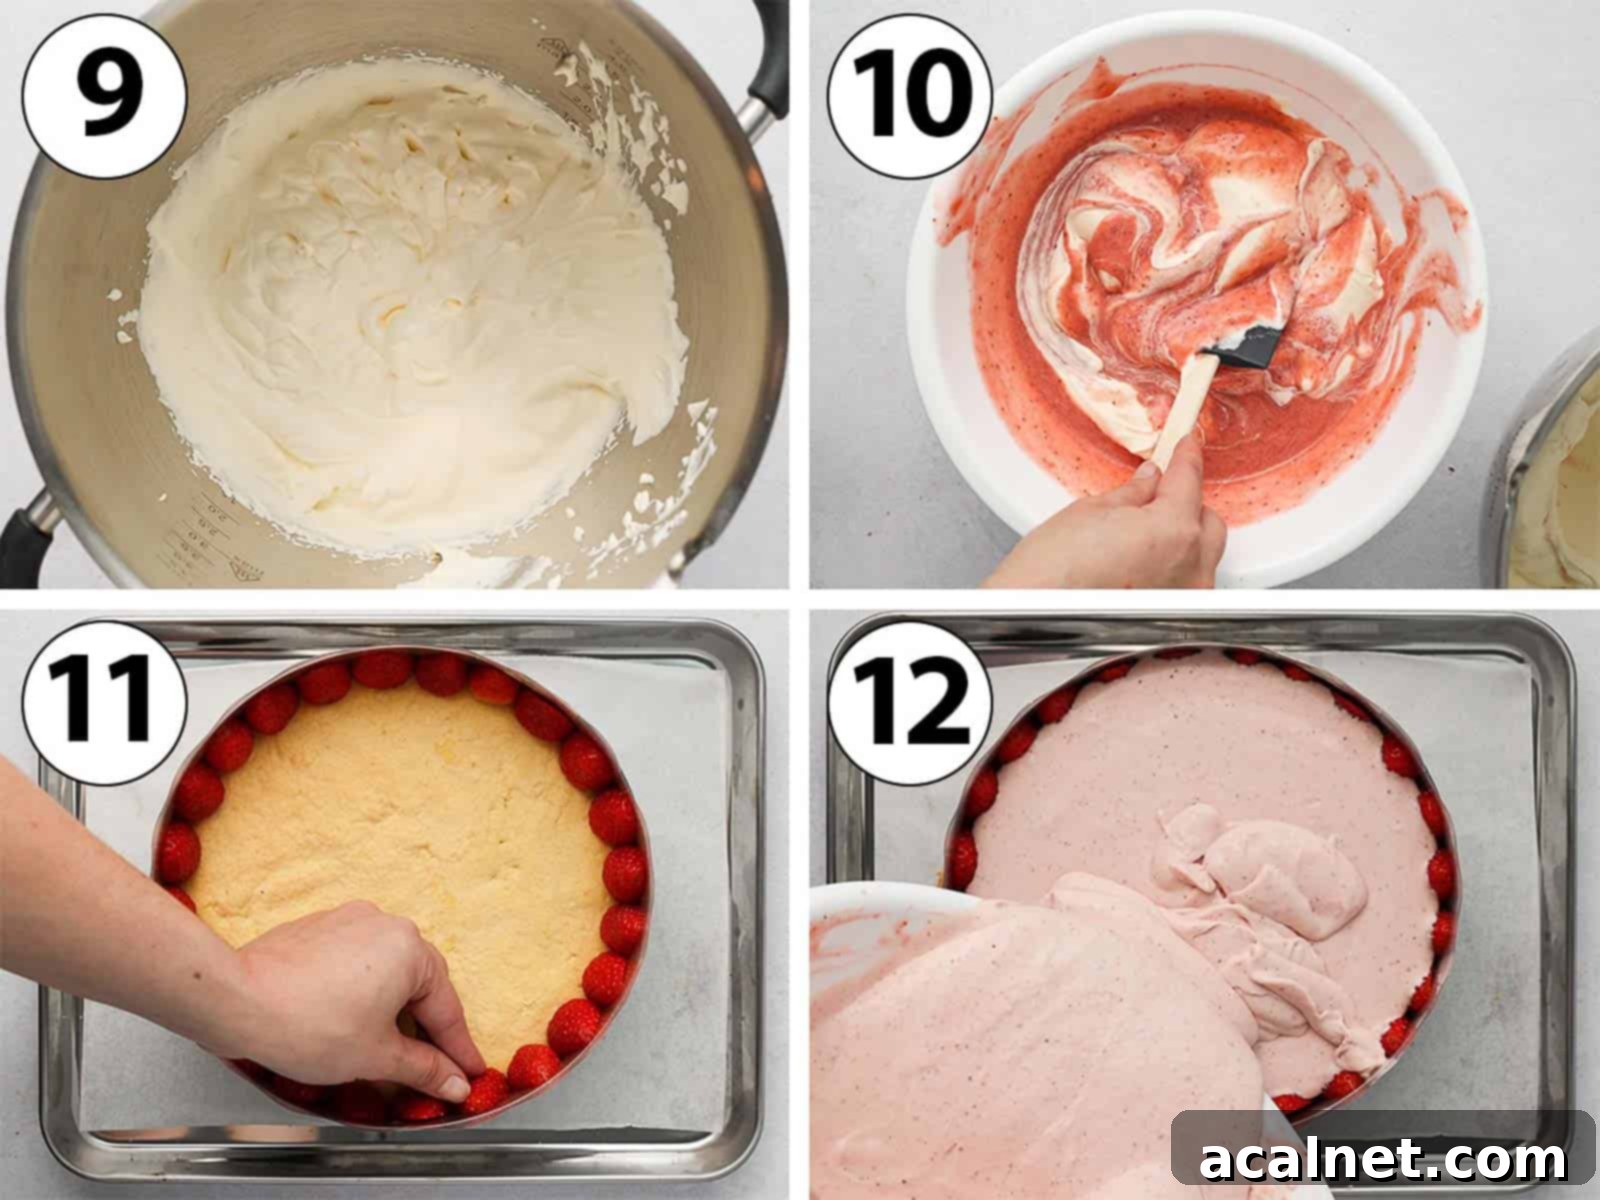
- Photo 9: Once your strawberry mixture is thoroughly chilled, it’s time to prepare the cream. Pour the heavy cream into the bowl of your stand mixer (or a large bowl if using a hand-held electric mixer). Whip the cream until it forms stiff peaks. Be careful not to over-whip, which can result in grainy cream.
- Photo 10: Transfer the chilled strawberry mixture to a large bowl. Gently fold in the whipped cream in 3 or 4 additions. The key here is to be very gentle to maintain the airiness of the whipped cream, which contributes to the mousse’s light texture. Use a spatula to delicately combine the two mixtures until no streaks of cream remain.
- Prepare your cake ring for assembly. Line the inside of the cake ring with a 5 cm (2-inch) high acetate strip (often called a cake collar). This critical step ensures a perfectly clean and smooth edge when you eventually unmold your cake.
- Photo 11: For an optional yet stunning presentation, slice fresh strawberries in half. Carefully arrange these strawberry halves along the inside edge of the cake ring, with the sliced side touching the acetate strip. Ensure they are packed snugly together to prevent the mousse from seeping through.
- Photo 12: Gently pour the prepared strawberry mousse filling into the cake ring, over the cooled Sablé base and around any fresh strawberries you’ve placed. Ensure the mousse is evenly distributed. Use the back of your spatula to lightly spread the top for a smooth finish.
Don’t worry if the mousse seems quite runny at this stage; it’s completely normal before chilling!
- Carefully transfer the cake ring to the fridge. Allow it to chill and set for at least 4 hours, or ideally, overnight. The mousse should feel firm to the touch before proceeding.
Finishing with a Vibrant Strawberry Jelly Topping
The final layer is a bright and beautiful strawberry jelly topping. While optional, this step significantly enhances the cake’s visual appeal and adds an intense, sweet-tart strawberry flavor that beautifully balances the light mousse.
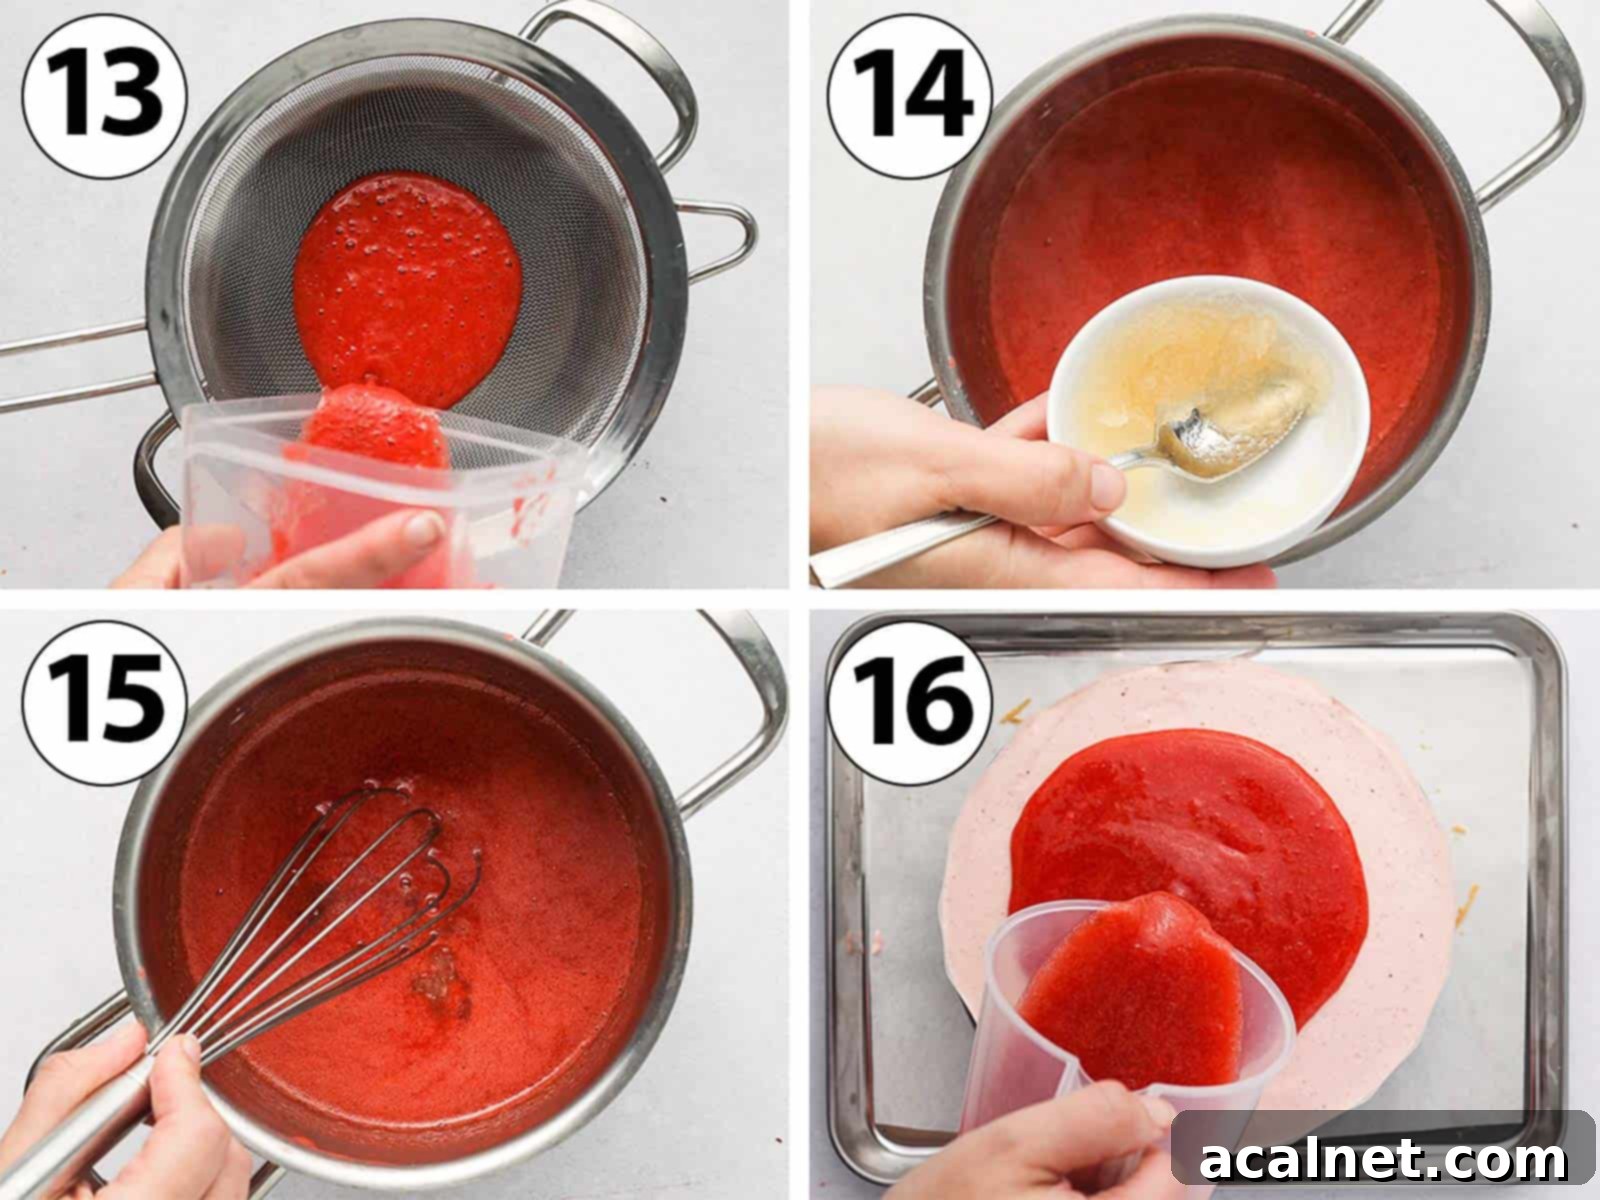
- Photo 13: Begin by blending the strawberries until you achieve a perfectly smooth puree. You can use a blender or an immersion blender for this. For a crystal-clear jelly, pass the puree through a thin-mesh sieve into a small saucepan to remove all the seeds. Whisk in the caster sugar and fresh lemon juice, which will brighten the berry flavor.
- Place the saucepan over low to medium heat and bring the mixture to a gentle simmer, just enough to dissolve the sugar completely.
- Photo 14: While the strawberry puree is heating, bloom the gelatine powder in a small bowl with a tiny amount of very cold water until it forms a thick paste. Remove the saucepan from the heat and stir in the bloomed gelatine paste.
- Photo 15: Whisk continuously until the gelatine is completely dissolved and the jelly mixture is smooth. Set it aside for about 30 minutes to cool down slightly. It should still be liquid but not warm.
- Photo 16: Once the jelly mixture has cooled to lukewarm, carefully pour it over the set strawberry mousse layer. Gently spread it to create a flat, even top. Return the cake to the fridge to set for a minimum of another 3 hours, or preferably overnight, to ensure all layers are perfectly firm.
Frequently Asked Questions About Strawberry Mousse Cake
Absolutely! While the Sablé Breton crust offers a unique and delicious flavor, you have several options. You can use any type of biscuit or cookie crust that you prefer, such as a classic shortbread crust or a graham cracker crust (often used for cheesecakes). For a quicker approach, a no-bake cookie crust, similar to what you’d use for a cheesecake or pie, works wonderfully. If you have dietary restrictions, you can adapt your favorite gluten-free cookie base recipe to make this dessert gluten-free. For an eggless option, simply choose an eggless shortbread cookie base.
Unfortunately, no, gelatine is a critical component for this particular mousse cake. The mousse relies on gelatine to set properly and maintain its light, airy structure. Without it, the mousse would remain quite liquid and would not set fully, leading to a much different and less stable texture. For a mousse cake, gelatine is essential for achieving the desired consistency.
No worries at all! A large springform pan is an excellent substitute and works just as well. You can use it with or without its bottom plate, depending on your preference and if you plan to transfer the cake. The most important thing is to use a pan of the same size (9 inches / 23 cm) to ensure the ingredient measurements remain accurate for the height and layers of the cake. If you choose a different size pan, you will need to adjust your ingredients accordingly.
Yes, you absolutely can! The strawberry mousse, while soft and creamy, is stable enough to be used as a delicious filling for other cakes, provided the cake layers above it aren’t excessively heavy. For best results, chill the mousse for a few hours after folding in the whipped cream, allowing it to firm up slightly. You can then pipe or spread it as a cake filling, use it as a light cake topping, incorporate it into a pie, or even enjoy it as a refreshing substitute for buttercream. Just remember that, like the complete mousse cake, any dessert using this mousse should remain refrigerated to maintain its texture and freshness.
Pro Tips & Troubleshooting for Your Strawberry Mousse Cake
Achieving a perfect strawberry mousse cake is straightforward with a few key considerations. Here are some essential tips to ensure your baking journey is smooth and successful:
- Mastering the Timing: Success with this layered cake hinges on proper chilling. Ensure each layer has ample time to chill and set thoroughly. This precision guarantees clean, distinct layers and a stable structure for your cake. Because of the extended chilling periods, this cake is an ideal make-ahead dessert; prepare it 24 to 48 hours before serving to allow flavors to fully develop and layers to firm perfectly.
- Temperature Precision is Key: The temperature of your ingredients is crucial. The strawberry puree must be warm enough to completely dissolve and activate the gelatine. However, it is equally important that this mixture is sufficiently cooled before you fold in the whipped cream. Incorporating a warm strawberry mixture into cold whipped cream will cause the cream to melt, resulting in a dense, less airy mousse. Patience during the cooling phase is highly rewarded.
- Adjusting for Different Sizes: This recipe is designed for a 9-inch (23 cm) cake ring. If you wish to make a smaller cake, feel free to use smaller cake pans or rings. While the chilling and setting times will remain approximately the same, you must carefully adjust all ingredient quantities proportionally to ensure the correct balance of flavors and textures in your smaller cake.
- Strawberry Placement Flexibility: The fresh strawberries used to line the mousse layer are primarily for decorative appeal and an extra textural element. If you prefer, you can omit placing them inside the mousse and instead use them to garnish the top of the jelly layer just before serving. This offers a different visual aesthetic without compromising flavor.
- Flavor Variations & Additions: Love the classic combination of chocolate and strawberry? Consider replacing the strawberry jelly topping with a rich layer of homemade Chocolate Ganache for an indulgent twist. This recipe is also incredibly versatile with other fruits; raspberries make a fantastic alternative to strawberries, yielding a beautiful and equally delicious mousse cake. Feel free to experiment with your favorite berries!
Storing & Freezing Your Strawberry Mousse Cake
To keep your Strawberry Mousse Cake at its best, proper storage is essential. This cake should always be stored in the fridge. For optimal texture and the most vibrant strawberry flavor, it is best enjoyed within 3 days of preparation. In fact, many find the flavors deepen and meld beautifully after 24 hours in the fridge, making it a perfect dessert to prepare in advance for dinner parties or special occasions.
I generally do not recommend freezing this cake. Freezing can alter the delicate texture of the mousse and jelly, potentially making them less creamy and smooth upon thawing, which can detract from the overall enjoyment of this exquisite dessert.
Discover More Delightful Strawberry Cake Recipes
If you’ve fallen in love with this strawberry creation, you’ll be thrilled to explore our other fantastic strawberry-inspired desserts:
- Fraisier Cake (Classic French Strawberry Cake)
- Almond Strawberry Cake
- Elegant Strawberry Charlotte Cake
- Delectable Upside Down Strawberry Cake
- Comforting Strawberry Crumble Cake
- Adorable Mini Strawberry Cheesecakes
Made this recipe?
We’d love to hear from you! Please let us know if you liked it by leaving a comment below, and don’t forget to tag us on Instagram @a.baking.journey with a photo of your beautiful creation!
Recipe Card

Strawberry Mousse Cake
Servings:
12
Author:
Sylvie
1 hour
30 minutes
9 hours
10 hours 30 minutes
Print Recipe
Prevent your screen from going dark
Equipment
- 23 cm (9 inch) Cake Ring (or pastry ring / mousse ring)
- 5 cm (2 inch) high Acetate Strip (or soft plastic cake collar)
Ingredients
Sablé Cookie Crust
- 2 Egg Yolk, at room temperature
- 50 gr Icing Sugar, sifted
- 75 gr Salted Butter, very soft
- 120 gr Plain / All-Purpose Flour
- 1/4 teaspoon Salt, if using unsalted butter
Strawberry Mousse Filling
- 375 gr Strawberries, fresh or frozen & thawed
- 90 gr Caster Sugar
- 1 Vanilla Bean, or 1 1/2 teaspoon Vanilla Paste
- 7 gr (2 1/4 teaspoon) Gelatine Powder, with 2 tablespoon cold water
- 400 ml Heavy / Thickened Cream, 30% fat content min.
- 200 gr Fresh Strawberries (optional), for decorating the edges
Strawberry Jelly Topping
- 200 gr Strawberries, fresh or frozen
- 50 gr Caster Sugar
- 15 ml Lemon Juice
- 3 gr (1 teaspoon) Gelatine Powder
Instructions
Sablé Cookie Crust
- Place a large 9 inch / 23 cm cake ring over a small baking tray lined with baking paper or mat.
- In a small bowl, whisk together the Egg Yolks and Icing Sugar until smooth and thick (about 1 to 2 minutes). Add the very soft Butter and stir it in (see note 1).
- Add the Flour (and salt if using unsalted butter) and mix with a spatula until combined. It should have the consistency of a thick paste.
- Press the dough at the bottom of the Cake Ring until well packed and flat. Chill for 30 minutes, then bake for 30 minutes in an oven preheat on 160’c / 325’f. Set aside to cool down completely.
Strawberry Mousse Filling
- Blend the Strawberries (fresh or frozen, thawed and drained) until smooth. Optionally, pour through a thin mesh sieve to remove the seeds.
- Place the blended Strawberries in a small saucepan with the Sugar and the seeds of the Vanilla Bean (see note 2). Whisk to combine them bring to a simmer on medium low heat. Remove from the heat.
- In the meantime, mix the Gelatine Powder with a little bit of very cold water (about 2 tablespoons) in a small bowl. Set aside for a couple of minutes or until it resembles a thick paste.
- Add the Gelatine paste into the warm Strawberry mixture and whisk well until fully dissolved. Transfer into a clean bowl or shallow pan and cover with plastic wrap touching the surface. Chill in the fridge for about 1 hour or until it doesn’t feel warm to the touch anymore (see note 3)
- Whip the Cream in your mixer (or with a hand mixer) until you reach stiff peaks. Place the chilled strawberry mixture in a large bowl and gently fold in the whipped cream in 3 or 4 times.
- Place a 5 cm / 2 inch high Acetate Strip on the inside of the Cake Ring (see note 4). Optionally, slice the fresh Strawberries in half and place them on the inside of the ring – sliced side touching the ring (see note 5).
- Pour the Strawberry Mousse into the Cake Ring and spread it around until smooth on top. Chill for at least 4 hours or overnight / until the top of the mousse appears to be set.
Strawberry Jelly Topping
- Blend the Strawberries until smooth. Pour it through a thin mesh sieve place over a small saucepan to remove the seeds. Whisk in the Sugar and Lemon Juice, and bring to a simmer on medium low heat. Turn off the heat.
- In the meantime, bloom the gelatine powder with a little bit of cold water (about 1 tablespoon) in a small bowl. When it resembles a thick paste, whisk it in the warm strawberry mixture until fully dissolved.
- Set aside for 30 minutes to slightly cool down, then pour it over the mousse Mousse layer. Spread it around gently, then place back the cake in the fridge to set again for another 3 hours minimum, preferably overnight.
Would you like to save this recipe?
We’ll email this post to you, so you can come back to it later!
Notes
- Gelatine Powder: For convenience, this recipe uses gelatine powder. However, it can be easily replaced with gelatine sheets. If using sheets, bloom them first in a bowl of very cold water until softened, then squeeze out any excess water thoroughly before incorporating into your warm mixture. A general guideline is that 1 tablespoon (or 3 teaspoons) of gelatine powder is roughly equivalent to 4 sheets of gelatine, though it’s always wise to check the specific strength recommendations on your gelatine packaging.
Instructions Notes:
- If the butter you’re using for the Sablé crust is too cold, you will encounter difficulty mixing it smoothly into the other ingredients. It’s crucial that the butter is at true room temperature and very soft to achieve the desired paste-like consistency.
- To extract the flavorful seeds from a vanilla bean, carefully slice the bean in half lengthwise with a small, sharp knife. Then, use the dull side of the knife to gently scrape the tiny black seeds from the inside of each half and add them directly to your saucepan. If you are using vanilla paste, simply measure and add it to the saucepan as indicated.
- It is critically important that the strawberry-gelatine mixture cools sufficiently before you incorporate the whipped cream. If the mixture is still warm, it will melt the delicate whipped cream, resulting in a mousse that is less airy and fluffy. If you notice the gelatine starting to set too much during the cooling process, simply give the mixture a good whisk until it becomes smooth and fluid again before folding in the cream.
- The acetate strip, or cake collar, is an optional but highly recommended tool. It helps create a perfectly clean and professional finish when it’s time to remove the cake from its mold, ensuring smooth and sharp edges.
- When arranging the fresh strawberry halves along the inside of the cake ring, make sure to pack them quite tightly. This firm arrangement is essential to create a barrier that prevents the liquid mousse from seeping through the gaps and ensures a visually stunning edge.
Nutrition (per serving)
