Mastering Mini Chocolate Eclairs: A Step-by-Step Guide to French Perfection
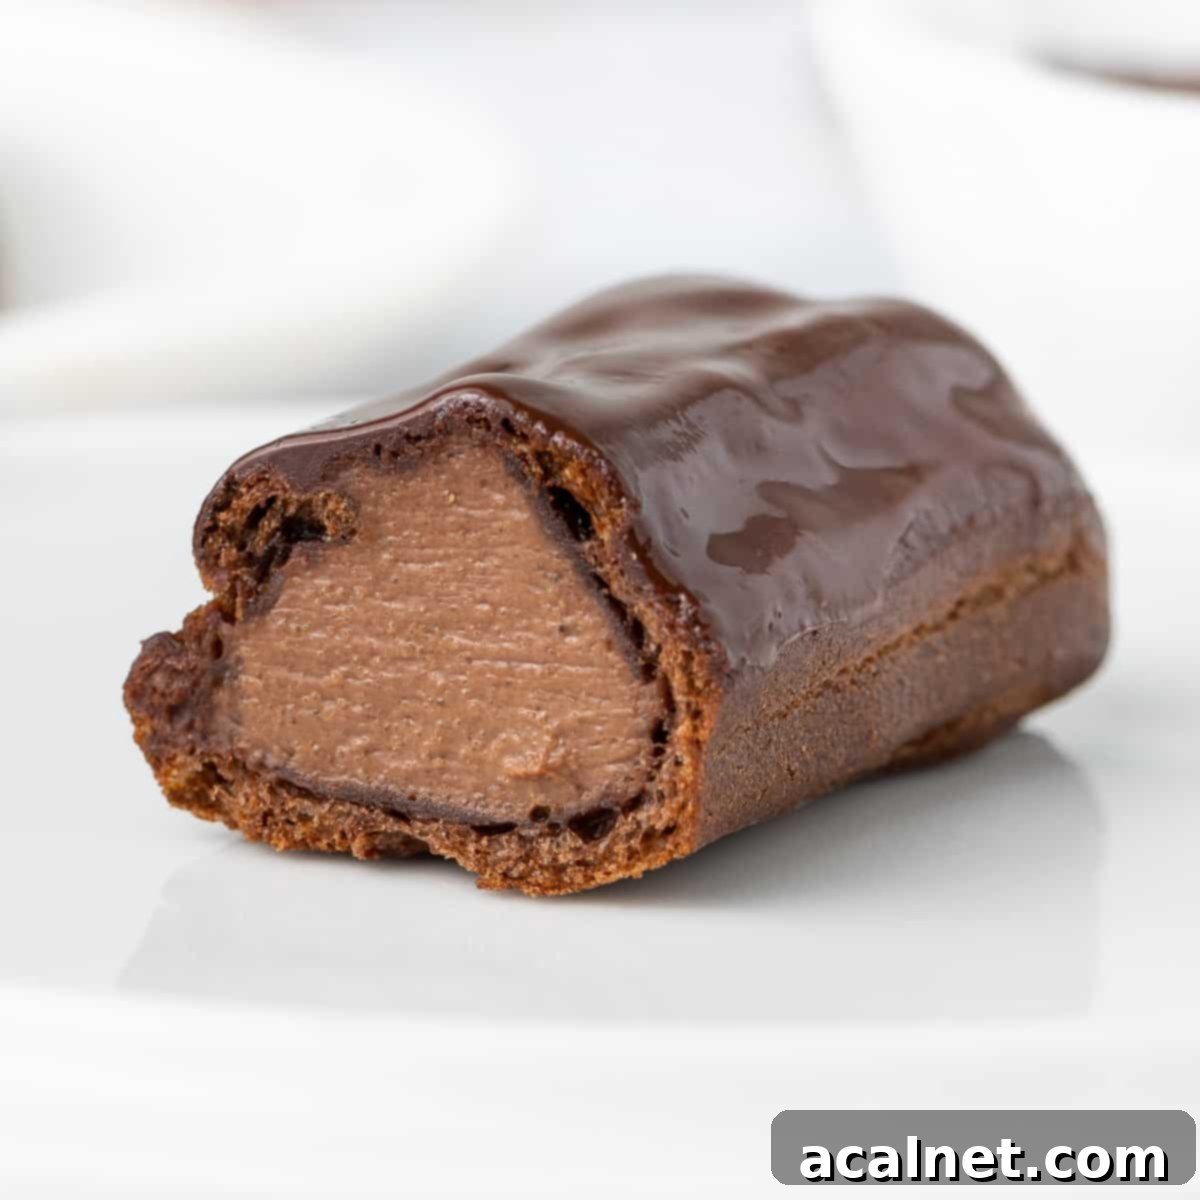
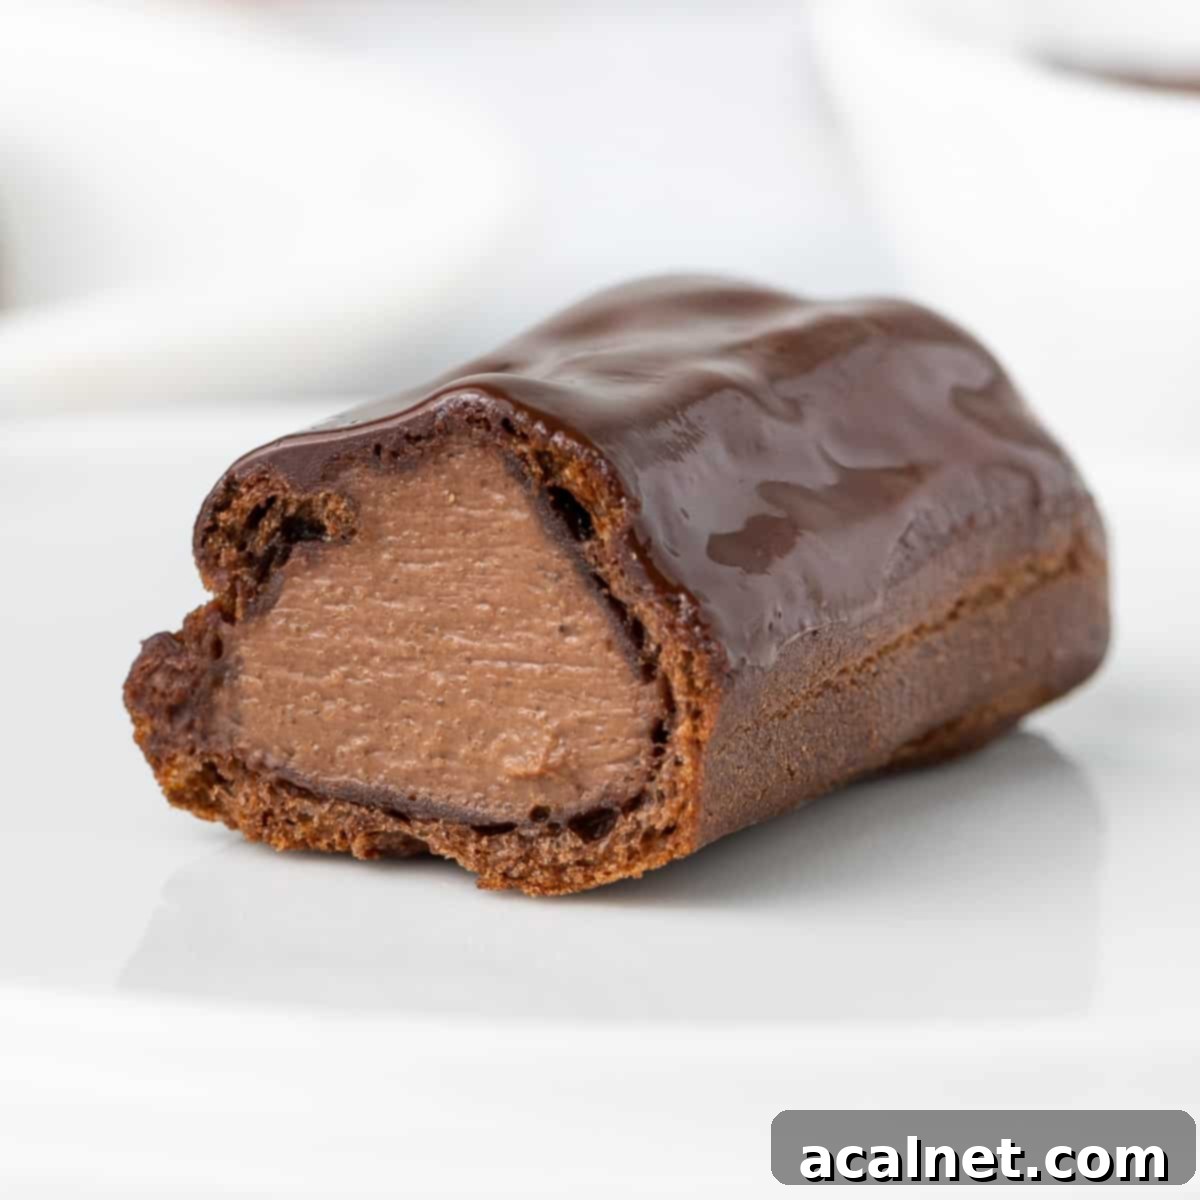
These exquisite mini chocolate éclairs are a true celebration of French patisserie, featuring delicate cocoa choux pastry shells, a rich dark chocolate pastry cream filling, and a glossy chocolate glaze. Perfectly sized for a dessert buffet, a special occasion, or a sophisticated afternoon tea, these treats promise to impress with their intense chocolate flavor and elegant presentation. Forget store-bought; creating these homemade delights is a rewarding baking journey that culminates in pure indulgence.
Why You’ll Adore This Mini Chocolate Eclair Recipe
Éclairs hold a distinguished place as one of the most iconic French pastries. It’s virtually impossible to step into a traditional French bakery, or pâtisserie, and not find these elegant treats beautifully displayed. While classic éclairs often feature a plain choux pastry (pâte à choux) shell, a luscious vanilla pastry cream (crème pâtissière) filling, and a simple chocolate glaze, our recipe takes the chocolate experience to an entirely new level.
We’ve crafted this recipe for the ultimate chocolate lover, going all-in with a symphony of cocoa flavors. From the deep, rich chocolate pâte à choux that forms the crisp shell, to the velvety dark chocolate pastry cream that bursts with flavor, every component is infused with decadent cocoa. The grand finale is a sophisticated dark chocolate glaze, creating a truly irresistible dessert.
These particular éclairs are designed in a charming mini log shape, deliberately smaller than their traditional counterparts. This makes them absolutely perfect for a variety of occasions, whether you’re hosting an elaborate dessert buffet, celebrating a special event, or simply elevating your afternoon tea party. Much like our beloved Chocolate Choux Buns, these mini chocolate éclairs are a pure taste of chocolate heaven, offering both elegance and intense flavor in every bite.
What are Éclairs? Understanding this Classic French Pastry
Éclairs are a celebrated type of French pastry, instantly recognizable by their distinct long, thin log shape. They are created from choux pastry, a light and airy dough that puffs up when baked, creating a hollow interior. Once baked to golden perfection, these shells are generously filled with a creamy, rich custard, most commonly pastry cream (crème pâtissière), and then artfully topped with a sweet glaze. A traditional éclair typically measures between 12 and 16 centimeters, making these mini versions a delightful, more manageable treat.
What’s the difference between a cream puff and an éclair?
Both éclairs and cream puffs (known simply as “choux” in French) are fundamentally made from the same versatile dough: pâte à choux (choux pastry). After being baked, both are filled with a creamy delight. However, their primary distinctions lie in their shape and finishing.
An éclair is characterized by its elongated, oblong form, carefully piped to achieve its signature log shape. In contrast, a cream puff, such as these delightful Choux à la Crème, is typically smaller and sports a charming round, dome shape. Furthermore, éclairs are almost always finished with a decorative glaze or icing, adding an extra layer of flavor and visual appeal. Cream puffs, while equally delicious, are often left plain or simply dusted with powdered sugar, highlighting the pure essence of the pastry and its creamy filling.
Essential Ingredients for Your Mini Chocolate Éclairs
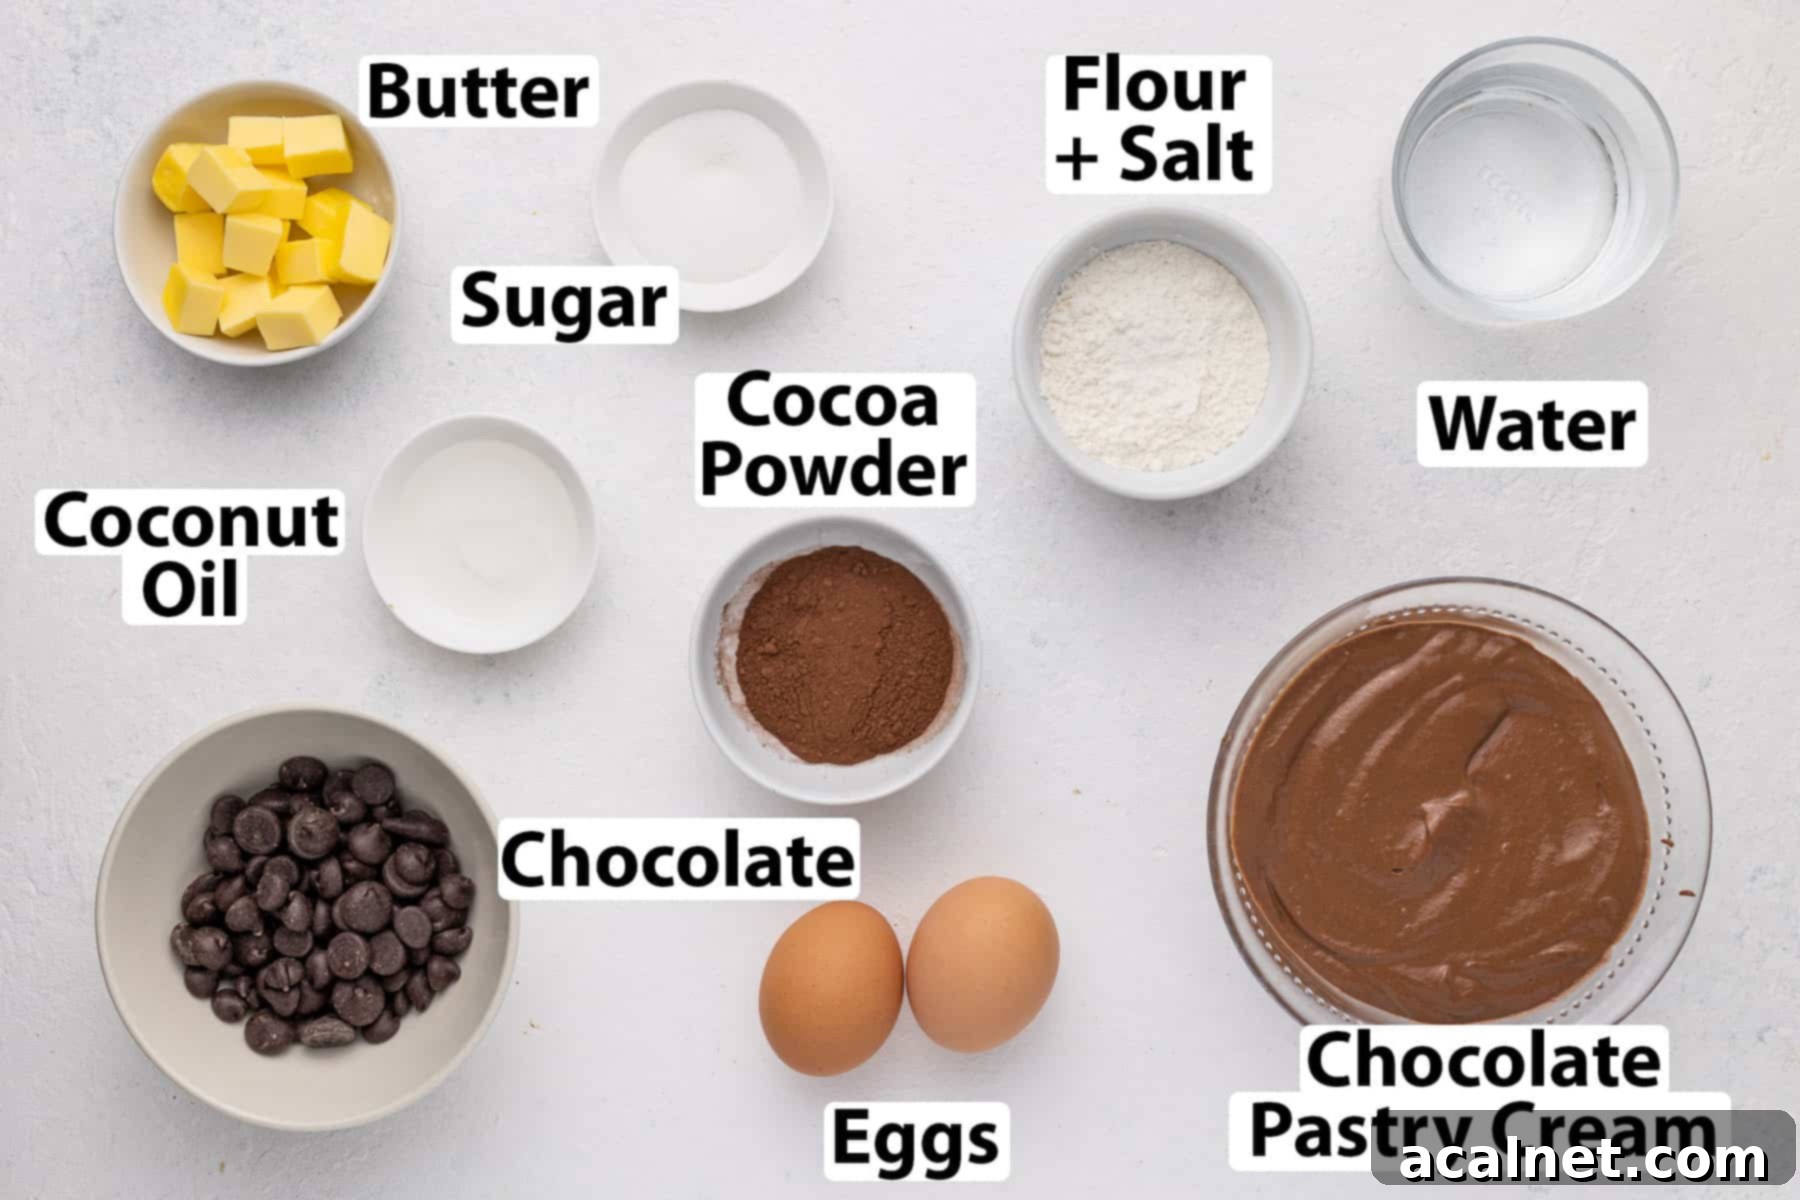
Creating perfect mini chocolate éclairs relies on a few key, high-quality ingredients. Here’s what you’ll need, along with some important tips:
Scroll down to the recipe card below for all exact quantities!
For the Cocoa Choux Pastry:
- Water: For my choux pastry, I exclusively use water rather than milk or a milk-water blend. This choice is deliberate, as water helps create an exceptionally crisp and light choux shell. If you prefer a slightly softer pastry, you can certainly substitute part or all of the water with milk (or use a 50/50 ratio).
- Dry Ingredients: This blend consists of plain (all-purpose) flour and unsweetened cocoa powder. It’s crucial to thoroughly mix and sift these dry ingredients together before adding them to your liquid base. This prevents the formation of lumps, ensuring a smooth, uniform pastry dough.
- Eggs: Always use large eggs, and ensure they are at room temperature. The precise amount of egg can vary slightly, influenced by factors such as your brand of flour and how thoroughly you’ve cooked the “panade” (the initial dough mixture) on the stovetop. It’s often best to add eggs gradually until the perfect consistency is achieved.
For the Rich Chocolate Crème Pâtissière (Pastry Cream):
- Milk: Opt for Whole Milk or Full Cream Milk. This is vital for achieving the rich flavor and luxuriously creamy texture characteristic of a classic pastry cream. Lighter milk varieties simply won’t yield the same delightful results.
- Eggs: This recipe calls for egg yolks only, again at room temperature. The yolks provide the essential richness and thickening power. Don’t discard those leftover egg whites! They can be beautifully repurposed for other delicious creations like Financiers or light meringues.
- Cornstarch: Cornstarch acts as our primary thickening agent. While plain (all-purpose) flour or another type of starch can be substituted, I personally favor cornstarch for its ability to create a lighter, silkier texture in the finished custard.
- Dark Chocolate: I recommend using 70% cocoa dark chocolate for a robust and sophisticated chocolate flavor. However, feel free to use a less intense dark chocolate if that’s your preference. The quality of your chocolate matters significantly here; always choose proper baking chocolate or high-quality chocolate couverture. Avoid chocolate chips, as they often contain stabilizers that prevent proper melting and can result in a grainy pastry cream.
For the Brilliant Chocolate Glaze:
A beautifully simple yet effective glaze, this is a blend of high-quality Dark Cooking Chocolate or Couverture Chocolate (I typically use 70% cocoa couverture chocolate for its depth of flavor and smooth melt) combined with a small amount of Coconut Oil or a Neutral Oil, such as canola oil. The oil helps to thin the chocolate slightly, making it easier to dip, and contributes to that desirable glossy finish.
How to Make Homemade Chocolate Éclairs: A Step-by-Step Guide
1. Crafting the Velvety Chocolate Pastry Cream
The journey to perfect éclairs begins with a smooth, rich chocolate pastry cream. This component can be made ahead of time, allowing flavors to deepen and making your baking day easier.
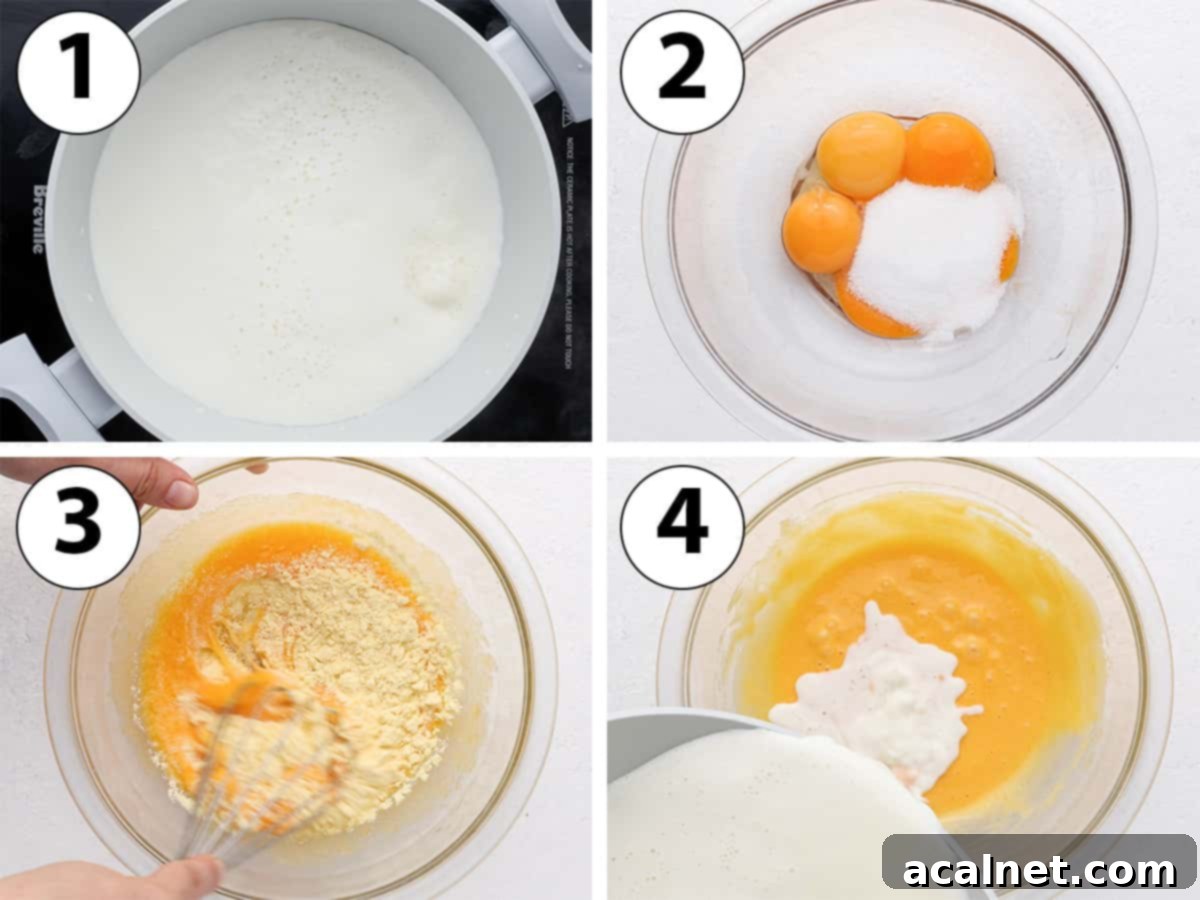
- Heat the Milk: In a saucepan of appropriate size (small to medium), gently bring your milk to a simmer over low heat. If you wish to add a touch of vanilla, this is the perfect moment to stir in some vanilla extract or paste.
- Prepare Egg Mixture: While the milk warms, combine the large egg yolks and sugar in a medium, heat-proof bowl. Whisk vigorously for about one minute until the mixture lightens in color and becomes slightly fluffy.
- Add Cornstarch: Incorporate the cornstarch into the egg and sugar mixture. Whisk until it is just smooth and fully combined, ensuring no lumps remain.
- Temper the Eggs: Once the milk begins to simmer, carefully and slowly pour a thin stream of the hot milk into the egg mixture. Continuously whisk the egg mixture as you pour. After all the milk has been added, mix thoroughly until you achieve a smooth, homogeneous blend. This critical “tempering” step gradually raises the temperature of the egg yolks, preventing them from scrambling when they are cooked directly on the stove.
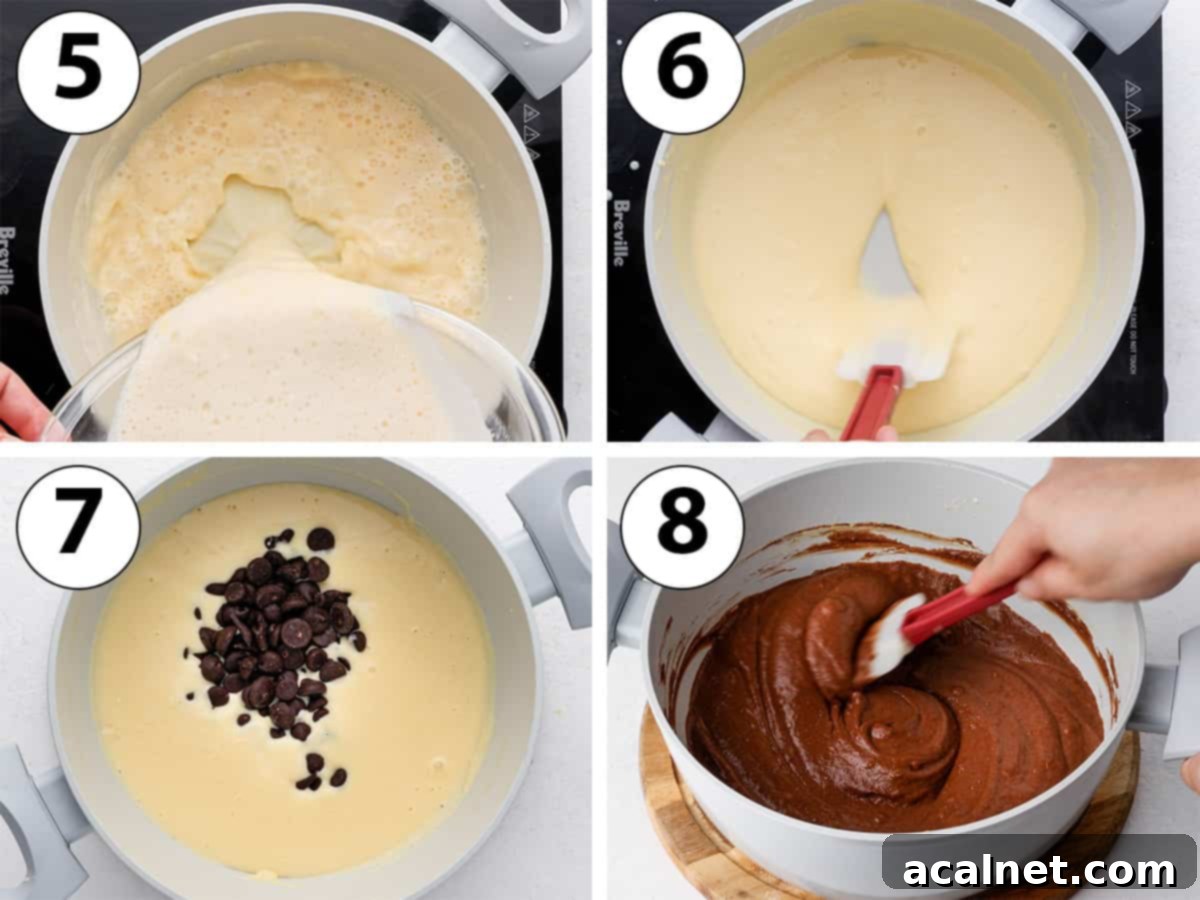
- Cook the Custard: Pour the entire tempered mixture back into the saucepan. Place it over low heat and cook for approximately 5 minutes, or until the custard has visibly thickened. It’s crucial to ensure the cream never boils; it should only ever maintain a gentle simmer. The exact cooking time will vary depending on your stove’s heat, but aim for the pastry cream to reach between 82 and 84 degrees Celsius (around 180 degrees Fahrenheit) for proper cooking. Cooking on low heat is vital to prevent the eggs from overcooking and creating a lumpy texture.
- Melt in the Chocolate: Remove the saucepan from the heat. Add the finely chopped dark chocolate (or chocolate callets/pistols if using couverture chocolate). Stir continuously with a spatula until the chocolate has completely melted and is fully incorporated into the cream, creating a smooth and luscious consistency. For an extra-silky emulsion, you can optionally use an immersion blender, but blend briefly to avoid making the custard too thin.
- Chill Thoroughly: Transfer the finished chocolate pastry cream into a clean bowl or a shallow pan (a brownie pan works well). Cover the surface directly with plastic wrap to prevent a skin from forming. Chill in the refrigerator for a minimum of 2 hours, or ideally, prepare it up to 24 hours in advance for optimal setting and flavor development.
2. Preparing the Light and Airy Cocoa Choux Pastry
Choux pastry, while seeming intimidating, is a magical dough that puffs dramatically in the oven to create hollow shells perfect for filling. The initial step, known as creating the “panade,” is key.
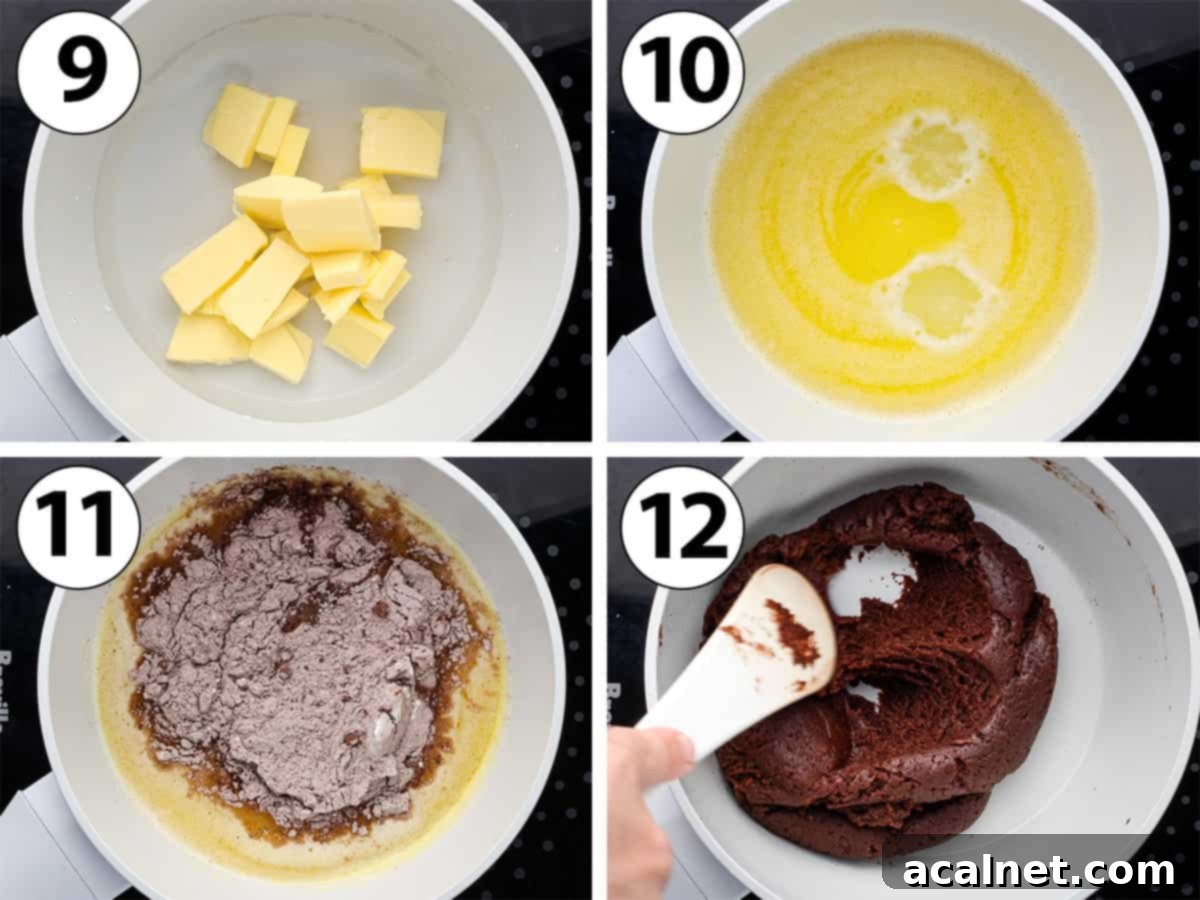
- Combine Liquids and Fats: In a medium-sized saucepan, combine the water, sugar, a pinch of fine table salt, and butter.
- Prepare Dry Ingredients: Over medium-low heat, bring the liquid mixture to a gentle simmer, ensuring the butter completely melts. While this is happening, thoroughly sift together your plain (all-purpose) flour and unsweetened cocoa powder in a separate bowl.
- Form the Panade: Once the butter has melted and the liquid is simmering, remove the saucepan from the heat. Immediately add all the sifted flour and cocoa powder at once. Using a stiff, heat-proof spatula or a wooden spoon, vigorously stir the mixture until it quickly comes together to form a thick, cohesive paste, known as the “panade.”
- Dry Out the Panade: Return the saucepan to medium heat. Continue to cook the panade for about 2 minutes, constantly mixing and pressing the dough against the bottom and sides of the saucepan. This crucial step dries out the dough, allowing the starch in the flour to gelatinize, which is essential for the choux pastry to puff correctly and create a crisp shell. You’ll know it’s ready when a thin skin forms on the bottom of the pan.
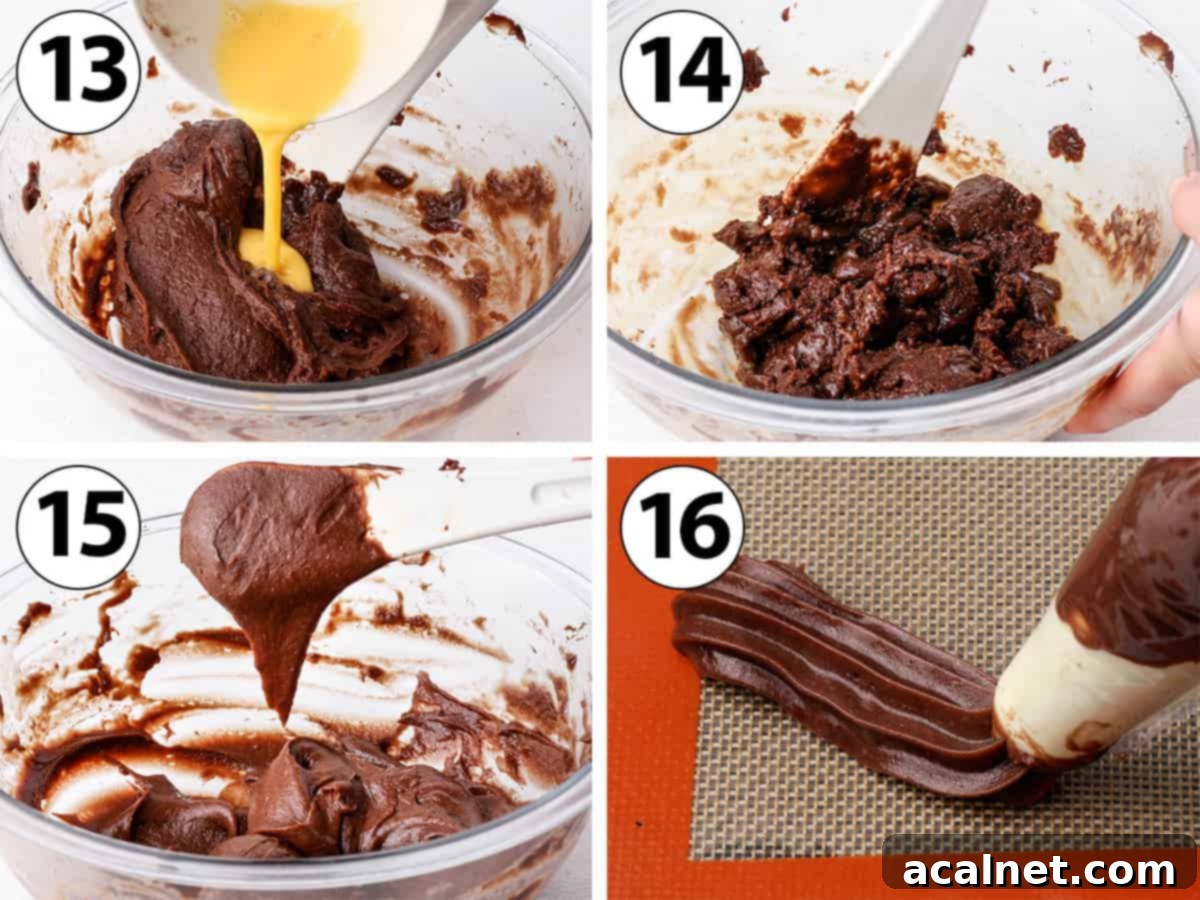
- Cool the Panade: Transfer the panade into a large, clean bowl (or the bowl of a stand mixer fitted with the paddle attachment). Let it cool for 10 to 15 minutes; it should no longer feel hot to the touch. This step prevents the eggs from cooking when added.
- Gradually Add Eggs: In a small separate bowl, whisk the eggs until the whites and yolks are fully combined. Begin adding the whisked egg to the cooled panade, a small amount (about 1 to 2 tablespoons) at a time. Mix vigorously with a stiff spatula (or on medium speed with a hand mixer or stand mixer) until each addition of egg is fully incorporated into the dough. Initially, the mixture may appear to separate, but it will come together with strong mixing. Continue adding eggs gradually, mixing thoroughly after each addition, until the choux pastry reaches the perfect consistency. It’s crucial to stop adding egg as soon as the desired consistency is met, even if you have some egg mixture leftover.
- Check Consistency: To test for the right consistency, scoop some choux pastry with your spatula and lift it. When the mixture slowly falls back into the bowl, it should form a distinct “V” shape hanging from the spatula. The dough itself should be smooth, glossy, and slightly fluid.
- Prepare for Baking: Preheat your oven to 180 degrees Celsius (350 degrees Fahrenheit). Line a large baking sheet with baking paper (parchment paper) or a silicone baking mat, such as a Silpat. The oven temperature is paramount here; a too-low temperature will prevent the éclairs from fully expanding and can cause them to become soft or collapse after baking. If your oven tends to run cool, consider increasing the temperature to 200 degrees Celsius initially.
- Pipe the Éclairs: Transfer the chocolate choux pastry into a large pastry bag fitted with a 1.2 cm (approximately 1/2 inch) open star tip or French star tip. Holding the pastry bag at a 45-degree angle, pipe small, even logs of pastry, each about 8 cm (3 inches) in length. Ensure you leave ample space between each éclair on the baking sheet, as they will expand significantly during baking. For uniform éclairs, try to pipe with a steady, confident motion. To finish piping a log, gently push the piping tip down towards the baking sheet to “cut off” the pastry, then lift the bag upwards.
- Bake to Perfection: Bake the éclairs for 25 minutes, or until they have beautifully puffed up and their shells feel completely dry to the touch. It is absolutely critical NOT to open the oven door at all during the baking process, as this can cause them to collapse. Once baked, turn off the oven, prop the oven door slightly ajar using a wooden spoon, and leave the éclairs inside for another 15 minutes. This allows them to dry out further and prevents deflation. Finally, remove them from the oven, transfer them to a wire rack, and allow them to cool down completely before filling.
3. Filling and Glazing Your Elegant Éclairs
The final steps transform your baked choux shells into dazzling mini chocolate éclairs.

- Prepare Pastry Cream for Filling: Remove the chocolate pastry cream from the fridge. It will have stiffened, so stir it vigorously with a spatula to loosen and smooth it out. Transfer the cream into a pastry bag fitted with a bismarck piping tip. A small round tip can also work as an alternative.
- Fill the Éclairs: Using either the bismarck tip or a small, sharp knife, make two or three small holes on the bottom of each cooled éclair shell. Carefully insert the piping tip into one of the holes and gently pipe the chocolate cream into the éclair. You’ll know the éclair is fully filled when you feel it become heavy and some of the cream begins to gently escape from one of the other holes. Place the filled éclairs on a flat tray and set aside.
- Make the Glaze: Finely chop your dark cooking chocolate. Place it in a small to medium heatproof bowl. Melt the chocolate either in a microwave (using 30-second intervals, stirring thoroughly after each to prevent burning) or over a double-boiler. Once the chocolate is completely melted and smooth, stir in the melted coconut oil or neutral oil until you achieve a very shiny and fluid chocolate glaze.
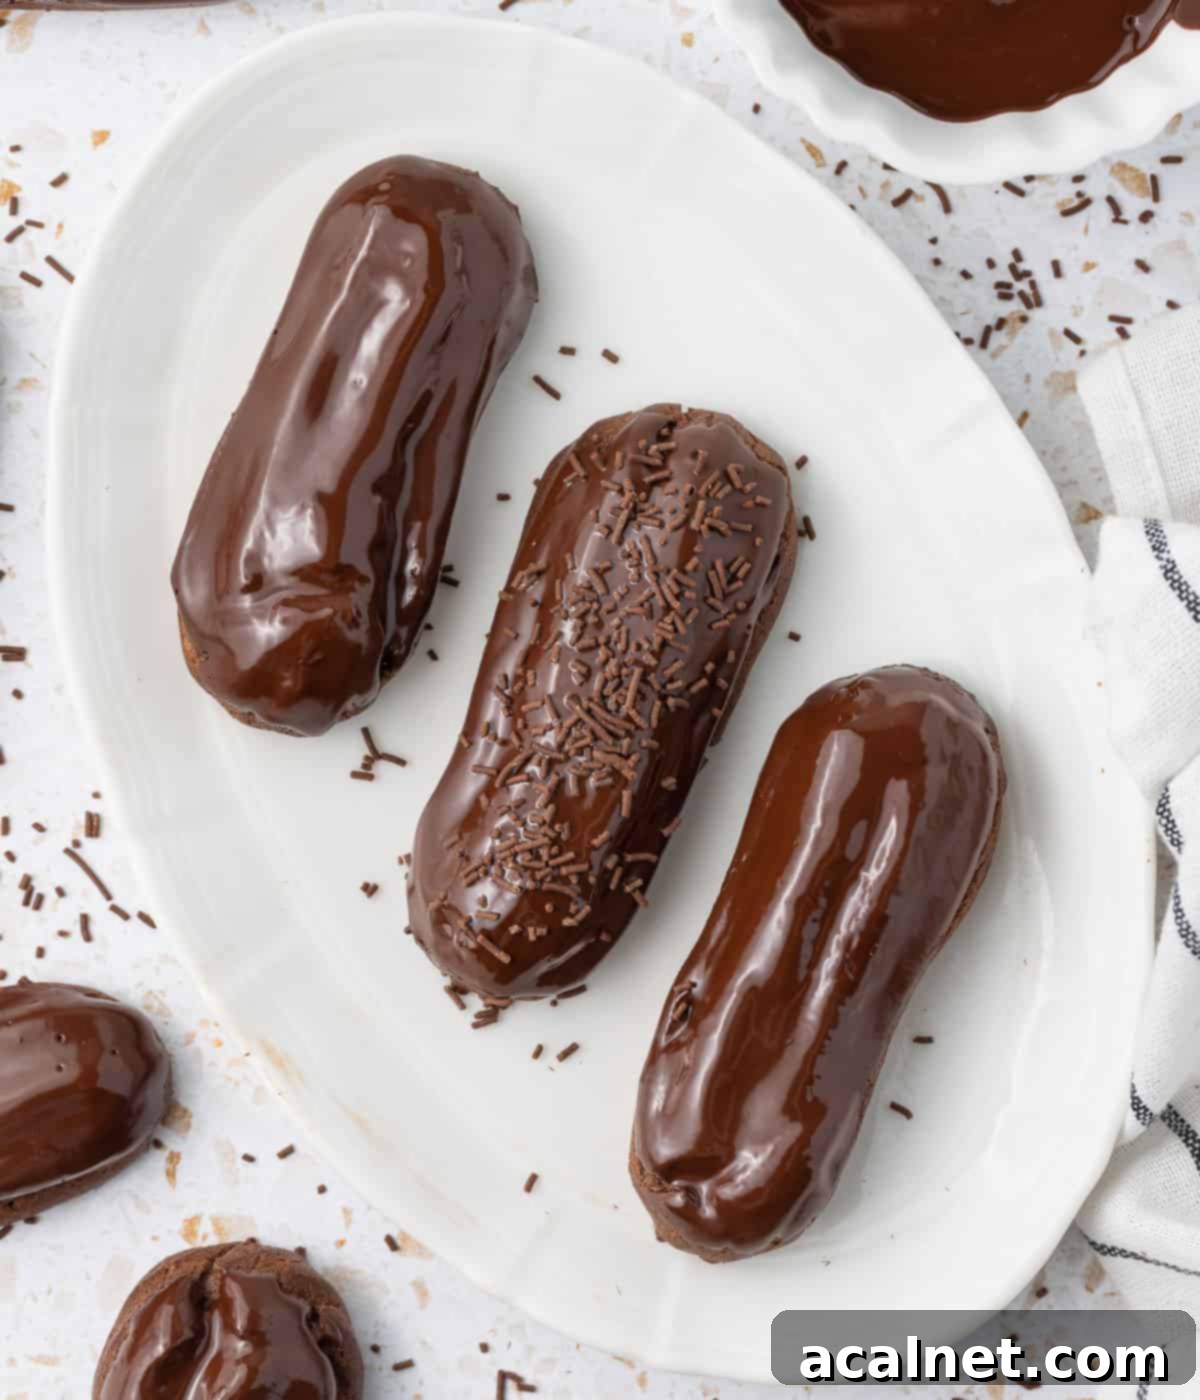
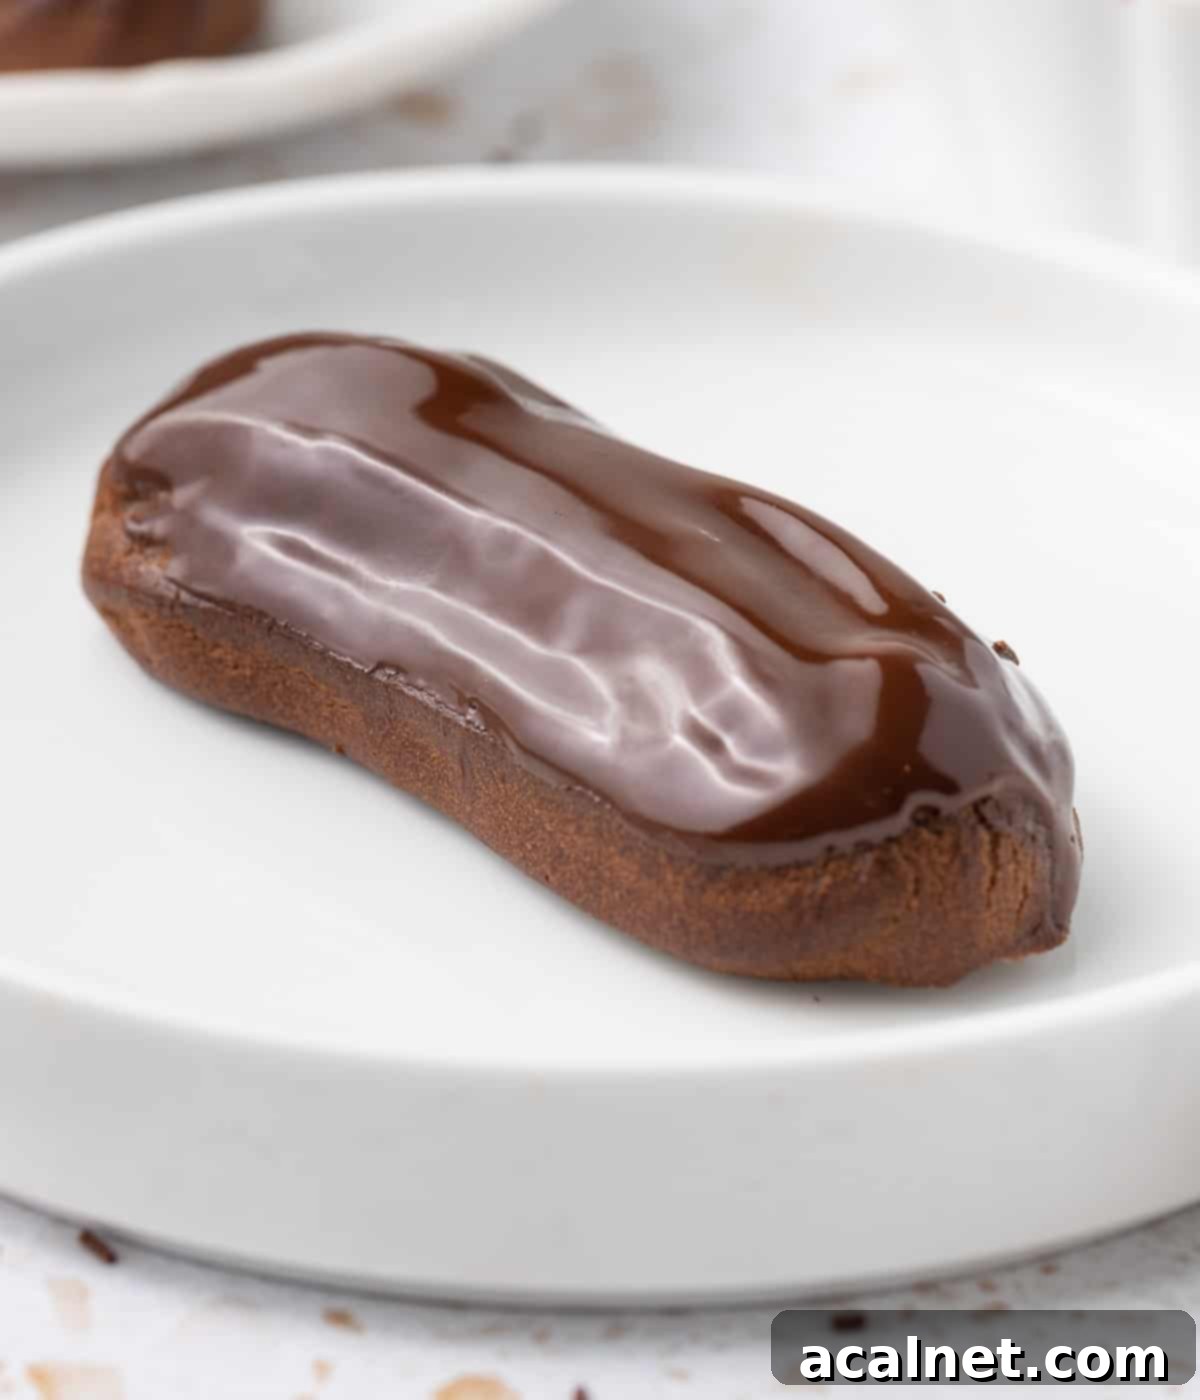
- Glaze the Éclairs: Dip the top surface of each filled éclair shell into the warm chocolate glaze. Gently shake the éclair over the bowl to allow any excess chocolate to drip off, ensuring an even coating. Flip the chocolate éclair back over and place it on a flat tray to allow the glaze to set.
At this point, your mini chocolate éclairs are beautiful as is. However, feel free to get creative with decorations! You can adorn them with delicate chocolate curls, festive chocolate sprinkles, a scattering of fresh fruits like vibrant raspberries, or any other embellishments that spark your imagination.
For the best texture and taste, éclairs are ideally served immediately after the glaze has set. If you need to store them, transfer them to the fridge. Be aware, though, that the delicate choux pastry shells will gradually start to soften and turn soggy after a few hours in the refrigerator.
Mini Chocolate Eclairs: Frequently Asked Questions
The initial cooking step for choux pastry, where we create and dry out the “panade” on the stovetop, is absolutely crucial. During this process, the starch present in the flour gelatinizes. This gelatinization is what makes the pastry dough pliable and flexible, allowing it to dramatically puff up in the oven without tearing or bursting. It’s this unique characteristic that creates the signature hollow interior of choux pastry, making it perfect for filling.
Because this recipe uses cocoa powder in the choux pastry, you cannot rely on the typical golden-brown color as an indicator of doneness. Instead, look for these signs: the éclairs should have puffed up beautifully and significantly in the oven, and the crust should appear completely dry to the touch. If the shell feels at all soft, it generally indicates that the éclairs are underbaked, making them highly susceptible to collapsing once they are removed from the oven.
While many éclair recipes outside of France might suggest slicing the éclairs in half lengthwise and piping in cream (often whipped cream), traditional French pastry techniques favour a more elegant approach. Éclairs are most commonly filled from the bottom (or sometimes the sides in a professional setting) using a small piping nozzle. A bismarck tip or a small round tip is ideal for this. Small holes are carefully made on the bottom of each éclair, and the piping tip is inserted into these openings. You’ll know the éclair is sufficiently filled when it feels noticeably heavy with cream, and a small amount of the filling begins to gently emerge from one of the other holes.
Although a simple round piping tip (approximately 1.2 cm or 1/2-inch) can be used to pipe éclairs, this often leads to the pastry cracking in irregular patterns during baking. For beautifully shaped, perfectly puffed chocolate éclairs, the secret lies in using an open star piping tip or a French star tip. The distinctive grooves created by these star-shaped tips guide the expansion of the choux pastry in the oven, ensuring a more even rise and a consistently elegant shape.
Several factors can contribute to choux pastry not rising. The “panade” might not have been dried out enough on the stove, or conversely, it might have been dried too much. Incorrect egg quantity is a common culprit; too little egg results in a stiff dough that won’t expand, while too much egg can make the dough too loose. Finally, an oven that isn’t hot enough is a major cause, as choux pastry relies on intense initial heat to create steam and puff up.
To get that professional, mirror-like sheen on your chocolate glaze, ensure you are using high-quality baking chocolate or couverture chocolate. Melting it gently (either carefully in the microwave or over a double-boiler) without overheating is key. The addition of a small amount of neutral oil (like coconut or canola) helps to thin the chocolate slightly, making it smoother to dip and giving it that beautiful, lasting shine as it sets.
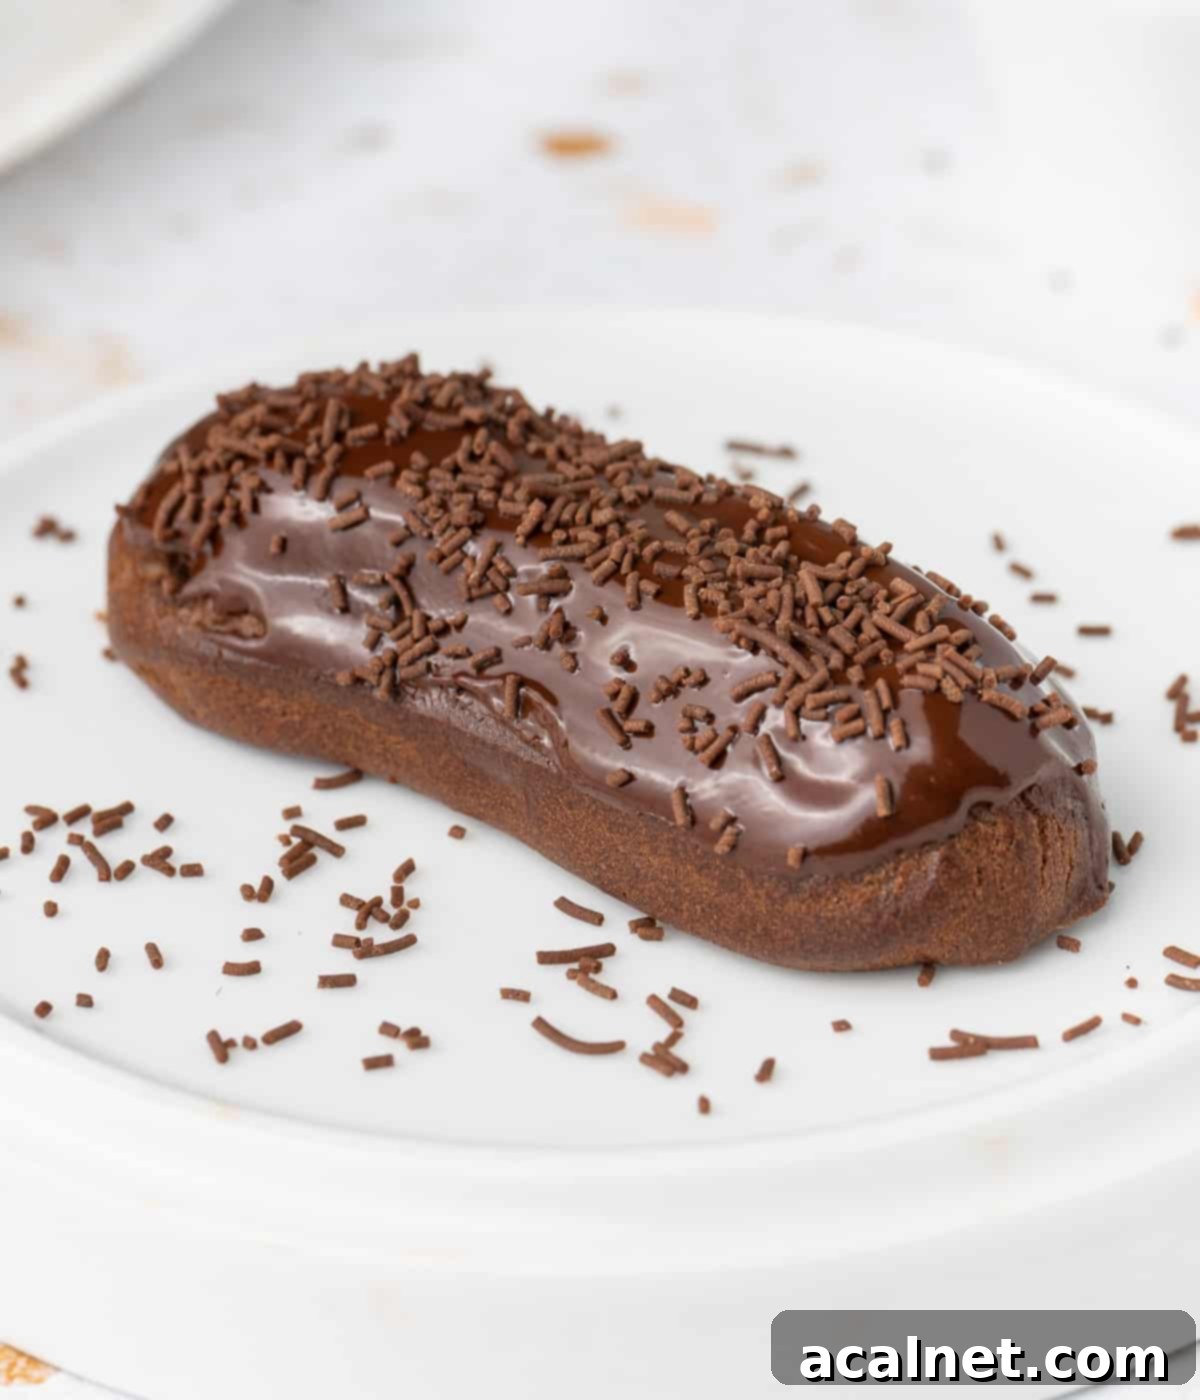
Expert Tips & Troubleshooting for Perfect Éclairs
- My chocolate pastry cream is lumpy: Lumps in pastry cream are typically caused by the eggs scrambling, which happens if the temperature on the stove was too high or the tempering step was rushed. To fix this, you can try passing the warm cream through a fine mesh sieve to remove most of the lumps. Alternatively, a quick pulse with an immersion blender on a very low speed can help break down smaller lumps and create a smoother consistency, but be careful not to over-blend, which can thin the cream.
- The éclairs are not puffy or hollow: This usually points to issues with your choux pastry preparation. Either the “panade” (the cooked dough base) was not adequately dried on the stove, or, conversely, it was over-dried. Another frequent cause is adding the incorrect amount of egg; too little egg results in a dense dough that won’t expand, while too much can make it too wet. Lastly, ensure your oven temperature is accurate and hot enough, as choux relies on a strong initial burst of heat.
- The éclairs deflated after baking: Éclairs commonly collapse if they are underbaked or if they were baked at an insufficient temperature. To prevent this, it’s essential that the choux shells are thoroughly dry and firm. My preferred method is to turn off the oven once they are baked, then slightly open the door with a wooden spoon and leave the éclairs inside for an additional 15 minutes. This allows them to gradually cool and dry out completely, ensuring a stable, crisp shell.
- There are big cracks in my éclairs: Cracks usually occur when a round piping tip is used instead of a star-shaped one. Star tips create grooves that guide the expansion of the pastry, leading to a more even rise. Large air bubbles trapped in your choux pastry when piping can also cause cracking. Finally, éclairs with too many cracks can indicate that the pastry was too dry, suggesting that slightly more egg was needed to achieve the correct consistency.
- My éclairs taste eggy: An eggy flavor often indicates that the pastry was underbaked and/or did not rise sufficiently in the oven. This can happen if too much egg was incorporated into the choux mixture, leading to excess moisture that prevents proper cooking and drying out of the shell. Ensuring the correct “V” consistency for your choux pastry and thorough baking is key to avoiding this.
Storing Your Delicious Mini Chocolate Eclairs
Choux pastry is notoriously delicate when exposed to moisture, which means éclairs are always best enjoyed fresh. However, if you need to plan ahead, here are some storage tips:
Making ahead: While the assembled éclairs have a short peak freshness, the chocolate pastry cream is quite stable. You can prepare the pastry cream up to 3 days in advance and store it, covered tightly with plastic wrap directly on its surface, in the refrigerator.
Storing filled éclairs: Once filled with cream, mini chocolate éclairs are truly at their best when served within a couple of hours. If you anticipate serving them later, transfer them to an airtight container and refrigerate for up to 3 days. Be mindful that the crisp choux pastry shells will gradually soften and become soggy after approximately 24 hours in the fridge.
Freezing Eclairs: How to Prepare for Later
While I don’t recommend freezing already filled and glazed éclairs (as the texture of both the cream and the choux pastry will suffer), you can successfully freeze the choux pastry shells, either baked or unbaked, to enjoy fresh éclairs another day.
To freeze unbaked éclairs: After preparing and piping your choux pastry logs onto a lined baking sheet, place the entire sheet directly into the freezer. Once the piped éclairs are completely frozen solid, transfer them to an airtight freezer-safe container or bag. They can be stored for up to 3 months. When you’re ready to bake, simply arrange the frozen éclairs on a lined baking sheet. Allow them to thaw for a few hours at room temperature, then bake as directed. You might find they need a minute or two longer in the oven if they are still slightly frozen.
To freeze baked choux shells: Bake the éclairs as per the recipe, then allow them to cool completely. Once cool, store them in an airtight freezer bag or container for up to 1 month. While this is an option, be aware that baked and frozen shells, once thawed, will be noticeably softer and potentially a bit soggy compared to freshly baked ones. For best results, it’s always preferable to freeze unbaked shells.
More Choux Pastry Recipes to Explore
If you’ve fallen in love with making choux pastry, there’s a whole world of delightful creations waiting for you. Here are some other fantastic choux-based recipes from our collection:
- Chocolate Choux Buns – Another chocolatey choux delight, perfect for individual servings.
- Gougères – Savory cheese puffs that are irresistible as an appetizer.
- Choux au Craquelin – Crispy cream puffs featuring a sweet, crunchy topping.
- French Profiteroles – Classic cream puffs often served with ice cream and chocolate sauce.
- Coffee Choux Buns – Aromatic choux buns infused with rich coffee flavor.
- Chouquettes – Simple, delightful French sugar puffs, often enjoyed for breakfast or a snack.
- Choux à la Crème – The quintessential cream puff, light and airy with a creamy filling.
Made this recipe?
Let us know if you liked it by leaving a comment below, and tag us on Instagram @a.baking.journey with a photo of your creation!
Recipe
Mini Chocolate Eclairs
Print Recipe
Ingredients
Chocolate Pastry Cream
- 500 ml full cream / whole milk
- 4 egg yolks, about 80 grams, at room temperature
- 30 gr caster sugar
- 30 gr cornstarch
- 120 gr 70 % dark cooking chocolate, finely chopped
Chocolate Choux Pastry
- 125 ml water
- 50 gr unsalted butter
- 20 gr caster sugar
- 1 pinch fine table salt
- 60 gr plain / all-purpose flour
- 10 gr unsweetened cocoa powder
- 2 large eggs, about 100 grams, at room temperature
Chocolate Glaze
- 75 gr 70 % dark cooking chocolate, finely chopped
- 10 ml neutral oil or coconut oil
Instructions
Chocolate Pastry Cream
- Pour the milk into a medium saucepan, turn on low heat and bring to a simmer. In the meantime, whisk together the egg yolks and sugar in a large heat-proof bowl for about a minute. Add the cornstarch and whisk well until smooth.
- Once it starts to simmer, slowly pour the hot milk over the egg mixture while constantly whisking (see note 1). Pour the whole mixture back into the saucepan and place back on the stove over low heat. Cook for about 5 minutes or until the custard has thickened. Make sure the cream doesn’t boil – it should only ever just simmer (see note 2).
- Remove from the heat and add the finely chopped chocolate. Stir with a spatula until the chocolate has completely melted and you get a smooth, shiny mixture (see note 3).
- Pour the chocolate pastry cream into a clean bowl or shallow pan, cover with plastic wrap touching the surface of the cream and refrigerate for at least 2 hours.
Chocolate Choux Pastry
- Place the water, sugar, pinch of salt and butter in a medium size saucepan on medium low heat. In the meantime, sift together the flour and cocoa powder.
- When the butter has completely melted and the liquid is simmering, take away from the stove and drop in the sifted flour and cocoa powder at once. Using a stiff heat-proof spatula or wooden spoon, vigorously stir until the mixture turns into a thick paste (called a “panade”).
- Place back on the stove under medium heat and cook for 2 minutes while constantly mixing and pressing the dough against the side and bottom of the saucepan to dry it out. You should see a thin skin form at the bottom of the pan.
- Transfer into a large clean bowl (or bowl of a stand-mixer fitted with the paddle attachment). Set aside to cool for 10 to 15 minutes (see note 4).
- In a small bowl, whisk together the eggs until the whites and yolks are well combined. Pour a little bit of the eggs (1 to 2 tablespoons at a time) into the panade and mix well using a stiff spatula (or your mixer) until the eggs get fully incorporated (see note 5). Continue to add a little bit of egg at a time and mix well until you reach the desired consistency, even if you still have a bit of egg left.
- To know you have reached the right consistency, pick up some of the mixture with the spatula and lift it up. When the mixture falls back down into the bowl, it should leave some of the mixture hanging from the spatula a “V” shape. The mixture should be smooth, shiny and slightly fluid.
- Preheat your oven on 180 degrees Celsius / 350 degrees Fahrenheit. Prepare a large baking sheet with baking paper or with a silicone baking mat.
- Transfer the chocolate choux pastry into a large pastry bag fitted with a 1,2 cm (about 1/2 inch) open star tip or french start tip. Holding the pastry bag at on a 45 degrees angle, pipe small logs of pastry that measure about 8 cm (3-inch) in length onto the prepared sheet (see note 6). Leave some room between each éclair as they will expand in the oven.
- Bake for 25 minutes or until the éclairs have nicely puffed and are completely dry, making sure not to open the oven door at all. Turn off the oven, slightly open the door using a wooden spoon to keep it open and leave for 15 minutes. Remove from the oven, place on a wire rack and allow to cool down completely.
- Take the chocolate pastry cream out of the fridge and stir it with a spatula to loosen it. Transfer it into a pastry bag fitted with a bismarck piping tip or small round tip. Make two or three small holes on the bottom of each éclair using either the bismarck tip or a small knife. Pipe the chocolate custard into the éclairs, place them on a flat tray and set aside (see note 7).
Chocolate Glaze
- Finely chop the chocolate, place it in a medium heatproof bowl and melt it either in the microwave in 30 seconds increments or over a double-boiler. When fully melted, mix in the melted coconut oil or neutral oil. Stir until you get a very shiny and smooth glaze.
- Dip the top of each eclair shell in the warm chocolate glaze. Gently shake the eclair over the bowl to remove any excess chocolate. Tip back over and place back on the flat tray. Serve straight away or within a few hours. If making in advance, you can keep them in the fridge but the shells will start to turn soft and soggy.
Video
Would you like to save this recipe?
We’ll email this post to you, so you can come back to it later!
Notes
- This step allows to temper (or slowly rise the temperature of) the egg yolks. This will help avoid overcooking and scrambling the eggs on the stove later.
- The time it will take to reach the right temperature will depend on the exact heat of your stove. Ideally, the pastry cream needs to reach 82 to 84 degrees celsius (around 180 degrees Fahrenheit) to be properly cooked.
- Optionally, use an immersion blender to create a super smooth emulsion (but be careful not to blend for too long or your custard will turn liquid).
- Make sure the mixture doesn’t feel hot to the touch before you start adding the eggs or your risk cooking the eggs with the residual heat.
- The mixture will seem to split at first but will come together after some strong mixing. It is not the easiest thing to do by hands so if you have a hand or stand mixer, you will find the process much easier.
- Try to pipe in a fast, confident way to insure the thickness of the éclair is even all along its length. To finish piping, gently push down the piping tip towards the baking sheet to “cut off” the pastry and lift the bag up.
- You know the éclair is fully filled when some of the cream tries to escape from one of the holes while you pipe it in. The eclairs should feel heavy too.
Nutrition (per serving)
