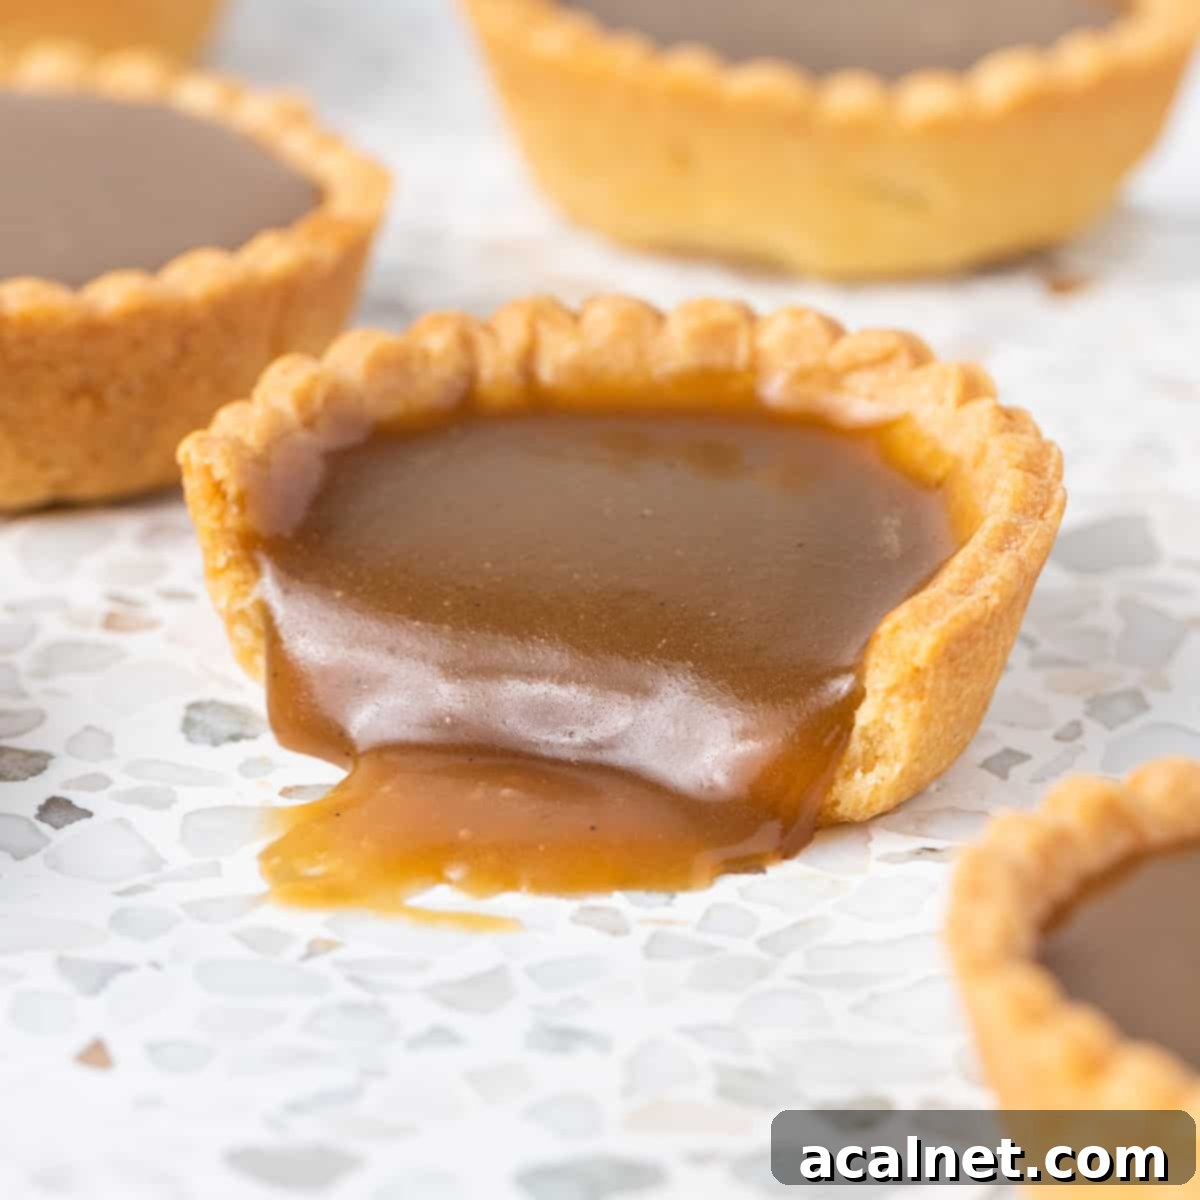
Irresistible Mini Butterscotch Tartlets: A Decadent Homemade Dessert Recipe
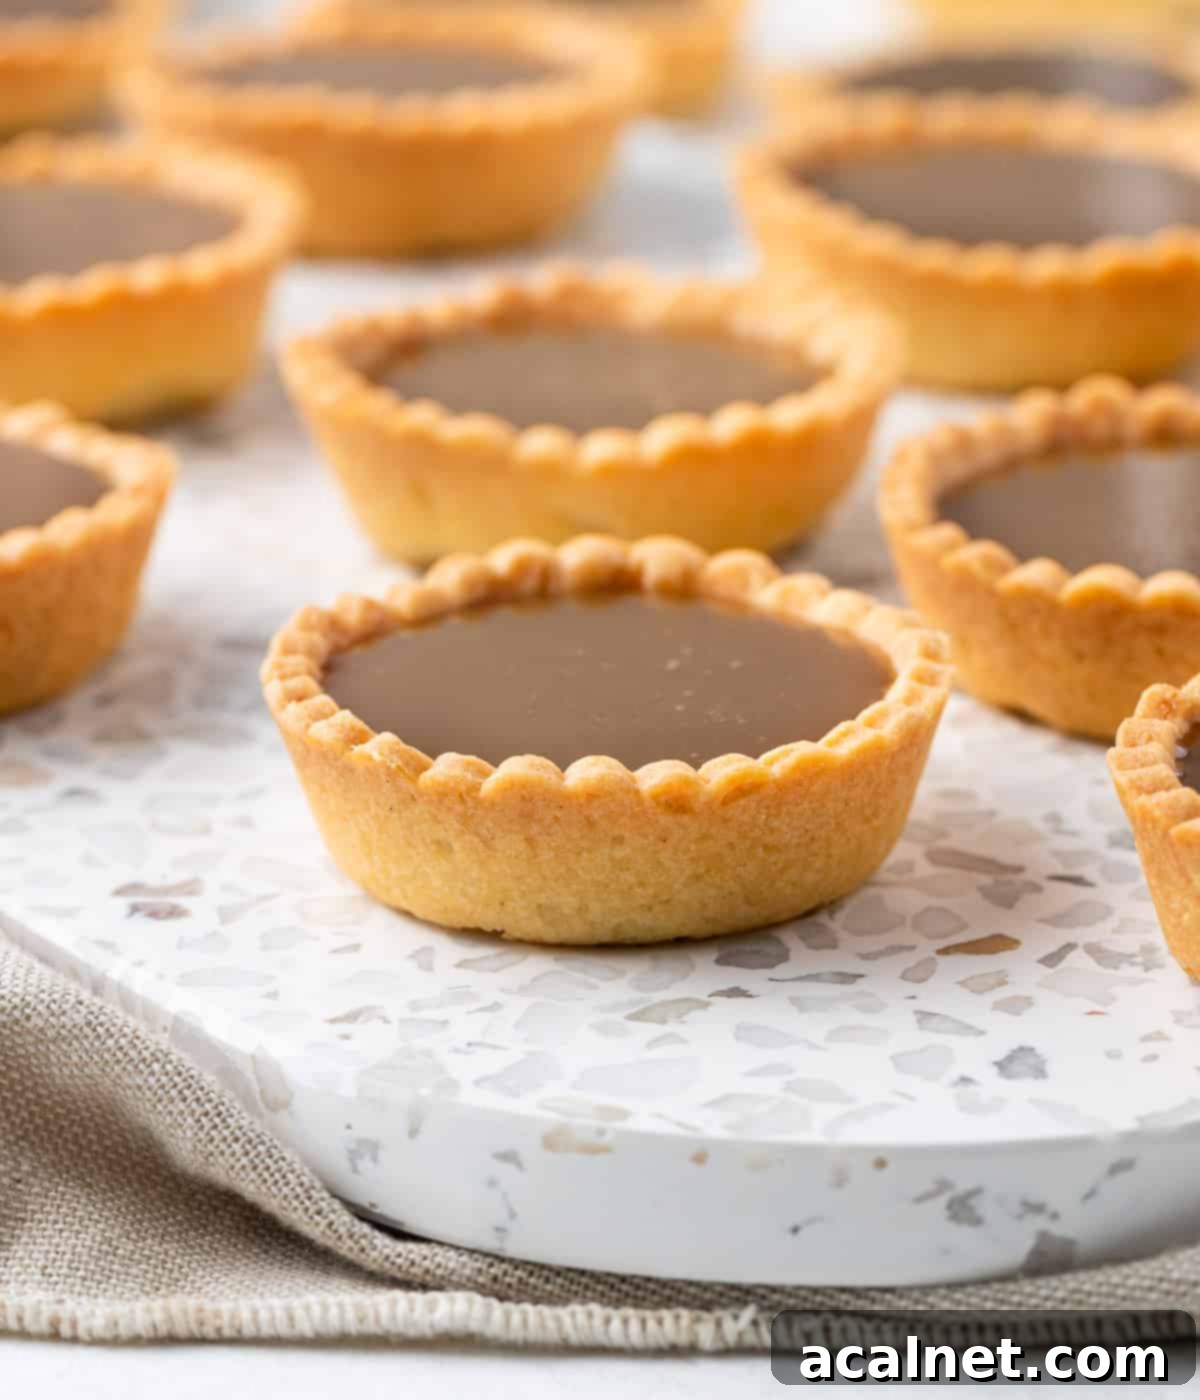
These Mini Butterscotch Tartlets are more than just a sweet treat; they are a bite-sized indulgence, perfect for elevating any occasion. Imagine crisp, buttery tartlet shells cradling a luscious, gooey homemade Salted Butterscotch Sauce filling. Whether it’s an elegant afternoon tea party, a festive holiday gathering, or just a special moment you want to make sweeter, these irresistible little tarts are guaranteed to impress. The best part? You can easily create these delightful desserts right in your own kitchen, using a simple muffin pan for the shells – no special equipment required!
[feast_advanced_jump_to]
Why You’ll Adore These Mini Butterscotch Tartlets
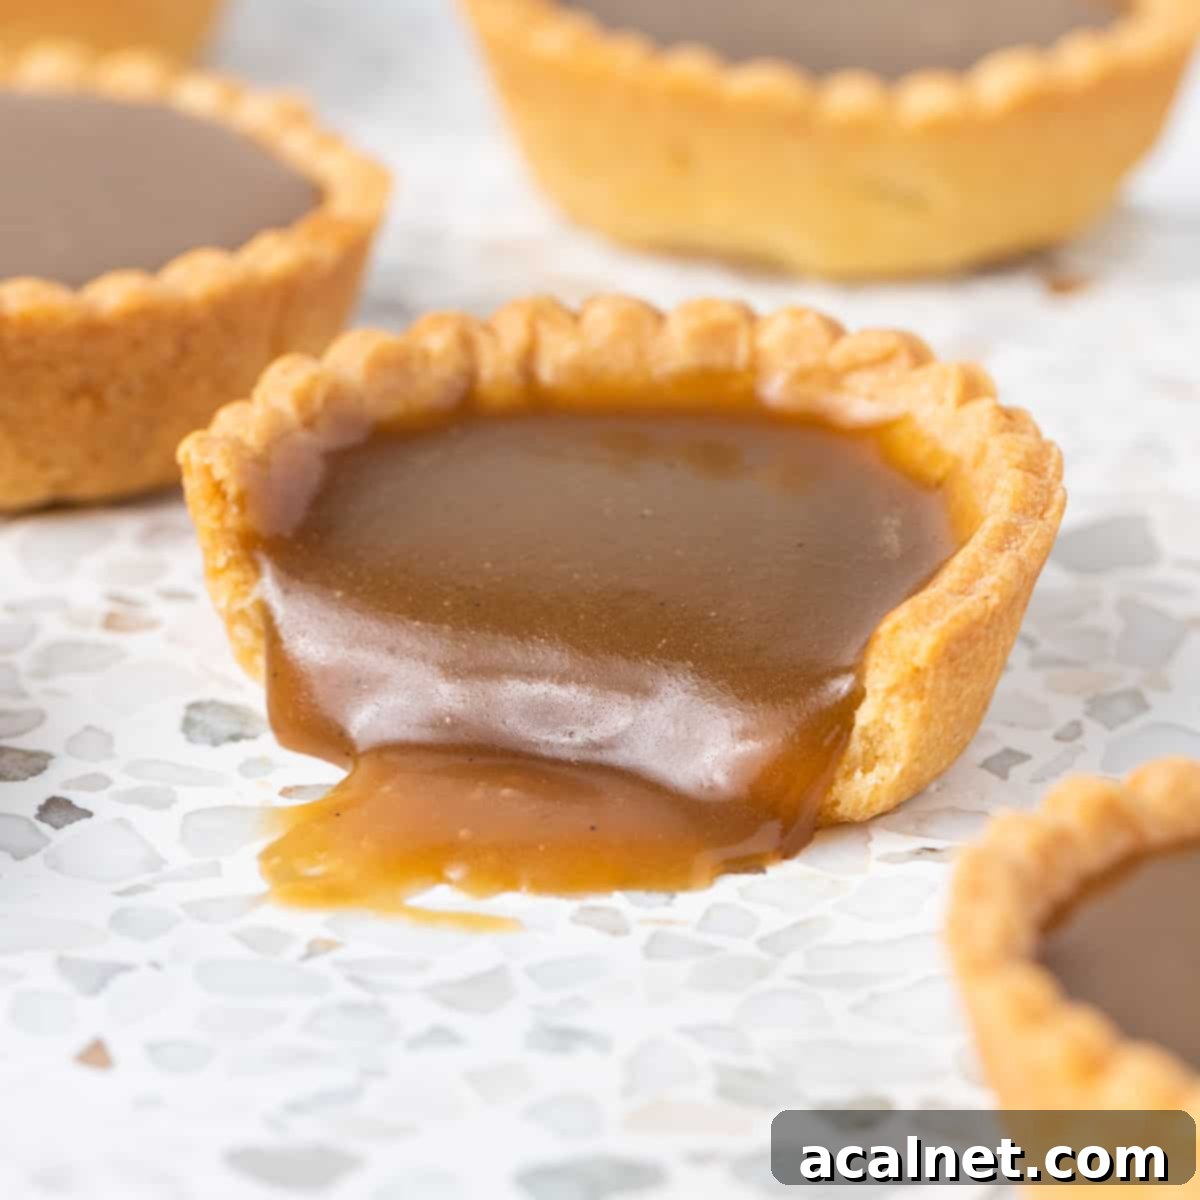
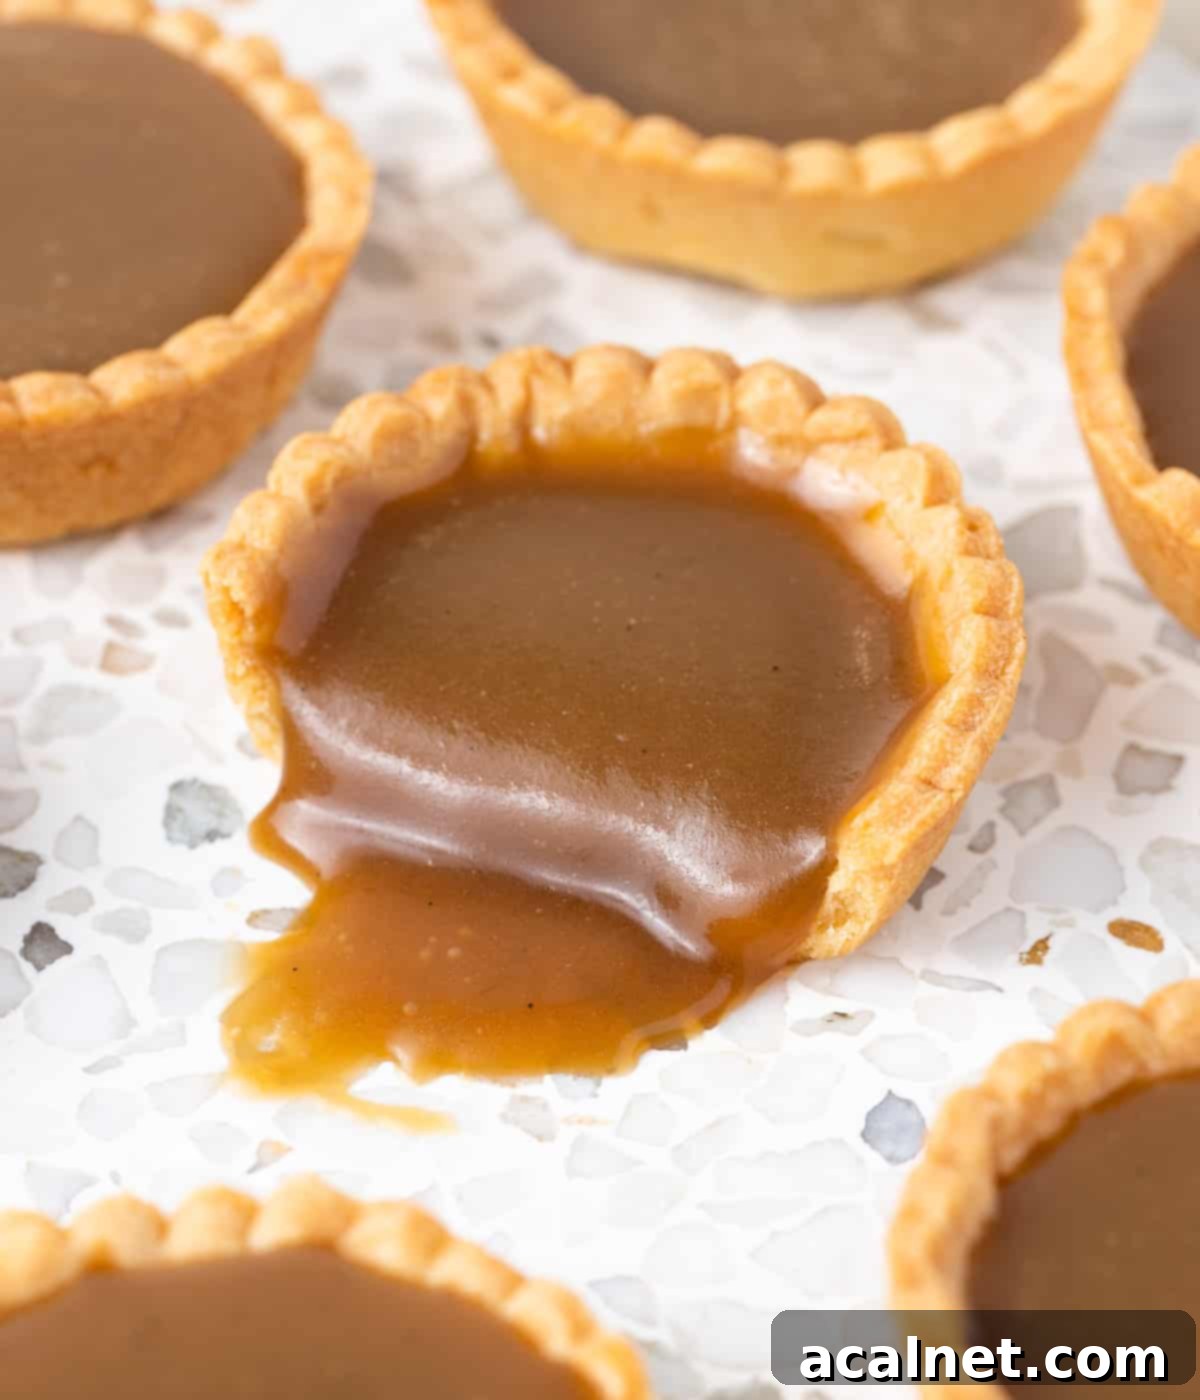
These Mini Butterscotch Tartlets are truly irresistible for so many reasons. The delicate shortcrust pastry, a perfect Pâte Sablée, offers a delightfully buttery and crunchy base that melts in your mouth. But the real star is the butterscotch filling – an incredibly decadent concoction with a rich, gooey, and sticky texture, boasting deep, sweet molasses flavors that are utterly captivating.
One of the best features of this recipe is the simplicity of making the tartlet shells. There’s no need for specialized tartlet pans; these charming little cases are simply baked in a standard muffin pan. This makes the recipe accessible to home bakers of all skill levels, ensuring perfectly formed shells every time.
Just like our popular Salted Caramel Tarts, these classic Butterscotch Tartlets are ideal for any dessert spread. Their elegant appearance and exquisite taste make them a showstopper. Plus, they offer fantastic convenience: these tartlets will last for days in the fridge, meaning you can easily prepare them in advance, taking the stress out of entertaining and allowing you to enjoy your special occasions without last-minute rush.
Essential Ingredients for Perfect Butterscotch Tartlets
Crafting these delectable mini butterscotch tartlets requires a few key ingredients, each playing a crucial role in achieving that perfect balance of texture and flavor. Quality ingredients make all the difference, so let’s dive into what you’ll need.
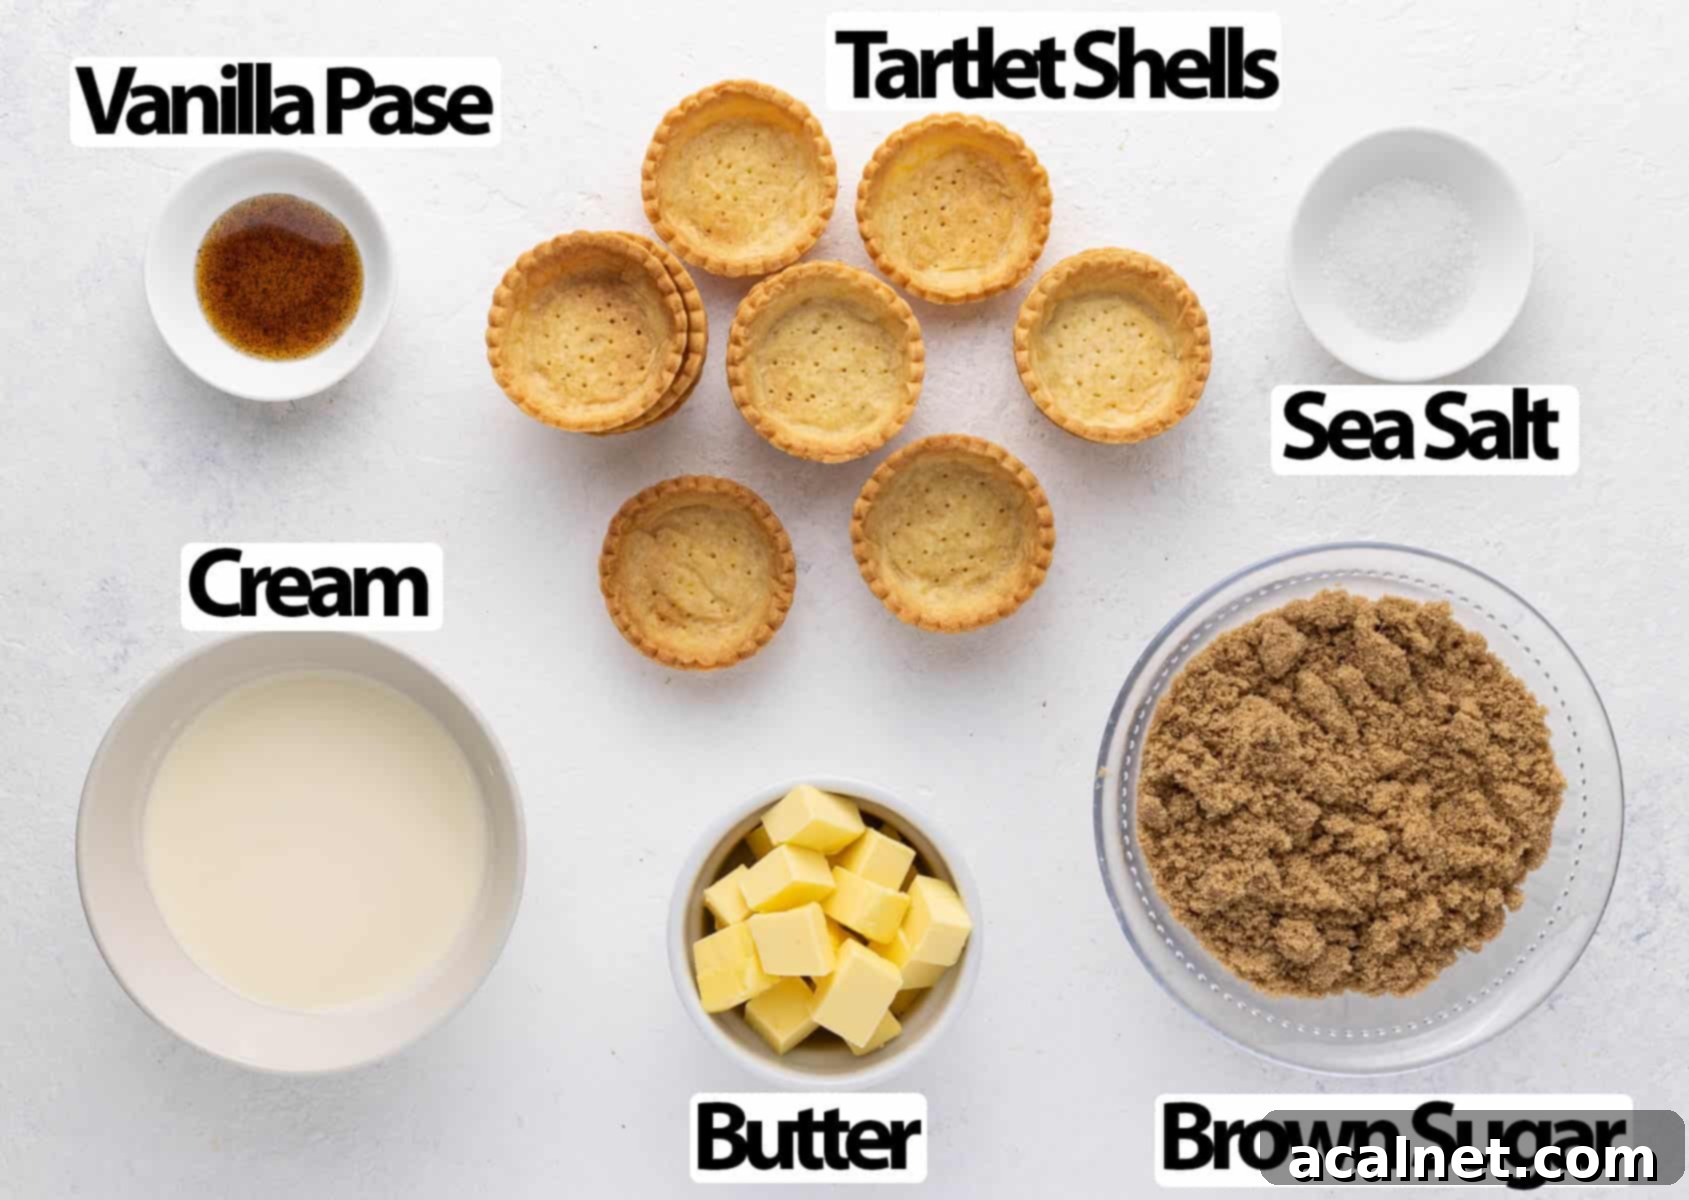
Scroll down to recipe card below for all quantities
For the Shortcrust Pastry Crusts:
- Dry Ingredients: You’ll need a precise mix of Plain / All-Purpose Flour, fine Icing Sugar (also known as powdered sugar), and a small pinch of Salt. The flour provides the structure, the icing sugar adds a delicate sweetness and contributes to the tenderness of the crust, while salt enhances all the other flavors.
- Butter: Opt for very cold unsalted butter. It’s absolutely crucial that the butter comes straight from the fridge and is cut into cubes. Cold butter creates pockets of steam during baking, resulting in that wonderfully tender and flaky texture we’re aiming for.
- Egg: A medium to large size egg acts as a binder, helping the pastry come together and adding richness. For easier incorporation into the dough, you can whisk it separately in a small bowl before adding.
For the Butterscotch Filling:
- Brown Sugar: This is the defining ingredient of butterscotch. Brown sugar contains molasses, which is what gives the sauce its distinctive deep, sweet, and slightly smoky flavor. You can use light brown sugar for a milder taste or dark brown sugar for a more intense molasses profile.
- Butter: You can use either salted or unsalted butter for the filling. If you opt for salted butter, you might want to reduce or discard the extra salt added to the sauce, depending on your preference. Since it will be melted immediately, the butter can be at room temperature or even cold.
- Cream: Use Thickened / Heavy Cream (also known as Double Cream in some regions), ensuring it contains at least 30% fat. The high-fat content is essential for a rich, creamy butterscotch. A critical step is to gently heat up the cream before adding it to the melted brown sugar. This prevents the sugar from crystallizing and also minimizes splashing, making the process safer.
- Vanilla Paste + Salt: These are optional but highly recommended additions that significantly boost the flavors of the filling. Vanilla paste offers a more intense vanilla flavor and speckled appearance, but vanilla extract works perfectly if preferred. A touch of salt balances the sweetness, enhancing the overall butterscotch experience.
Optional Addition: A squeeze of Lemon Juice and/or a sprinkle of Lemon Zest can do wonders. Adding a small amount of acidity to the butterscotch sauce is an excellent way to balance its intense sweetness, adding a subtle bright note. It is also a well-known trick believed to help prevent crystallisation issues, ensuring a silky-smooth sauce.
Crafting Your Homemade Butterscotch Tarts: Step-by-Step Guide
Making the Perfect Shortcrust Pastry
The foundation of these exquisite tartlets is a perfectly crisp shortcrust pastry. While I prefer to make mine in a food processor for speed and ease, you can certainly prepare it by hand or with a pastry blender. For detailed instructions on making pastry by hand, refer to my comprehensive Pâte Sablée recipe.
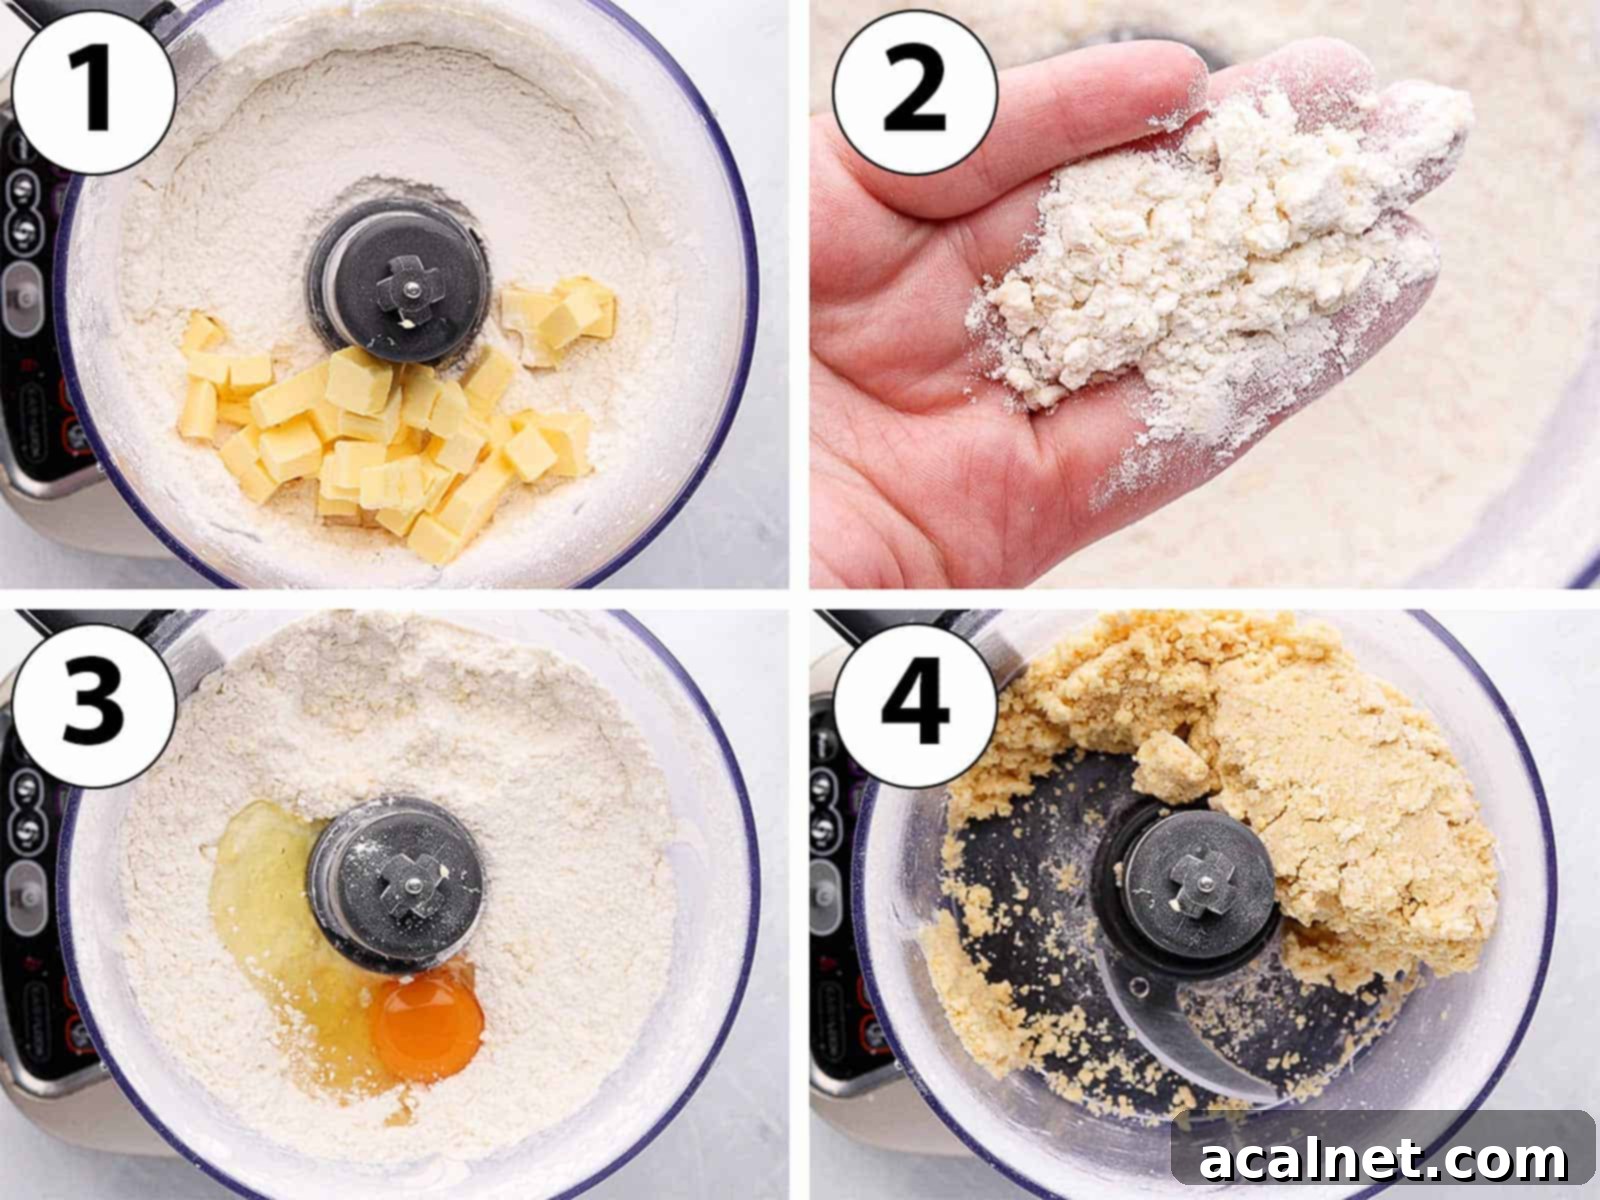
- Photo 1: Begin by combining the Plain Flour, Icing Sugar, and Salt in the bowl of your food processor. Give it a few quick pulses to ensure they are well mixed. Next, add the very cold unsalted butter, which you should have cut into small cubes straight from the fridge.
- Photo 2: Continue to pulse the mixture until the butter is thoroughly incorporated and you achieve fine, sand-like crumbs. For this recipe, we want smaller crumbs rather than large, flaky pieces, as this helps prevent the tart cases from puffing up too much during baking, ensuring a smoother interior for the filling.
- Photo 3: Introduce the Egg to the flour and butter mixture. To ensure a more even distribution and easier incorporation into the dough, you can whisk the egg yolk and white together in a separate small bowl before adding it to the food processor.
- Photo 4: Pulse again until the dough just begins to come together into a rough, shaggy mass. To check if the pastry is ready, take a small pinch of the dough and press it between your fingers. If it sticks together and holds its shape, you’ve reached the perfect consistency. If it appears too dry or crumbly and doesn’t hold, add a few drops of very cold water, one at a time, and pulse briefly until the desired texture is achieved. Be careful not to overmix!
- Once the dough is ready, gather it into a cohesive ball. Place this ball between two large sheets of baking paper or parchment paper. Lightly flatten the ball with your hand, then use a rolling pin to roll it out into a large, even disk, approximately 4mm (1/8 inch) thick. Using a rolling pin with thickness rings can be incredibly helpful here to ensure uniform thickness across the entire sheet of pastry.
- Transfer the pastry, still sandwiched between the baking paper, onto a flat tray. This is a crucial step: refrigerate the dough for at least 1 hour, or ideally, overnight. This chilling period allows the gluten to relax, preventing shrinkage during baking, and firms up the butter, which contributes to a crisp crust.
Shaping & Blind-Baking Your Mini Tartlet Shells
Now that your pastry is perfectly chilled and rested, it’s time to transform it into those beautiful mini tartlet shells.
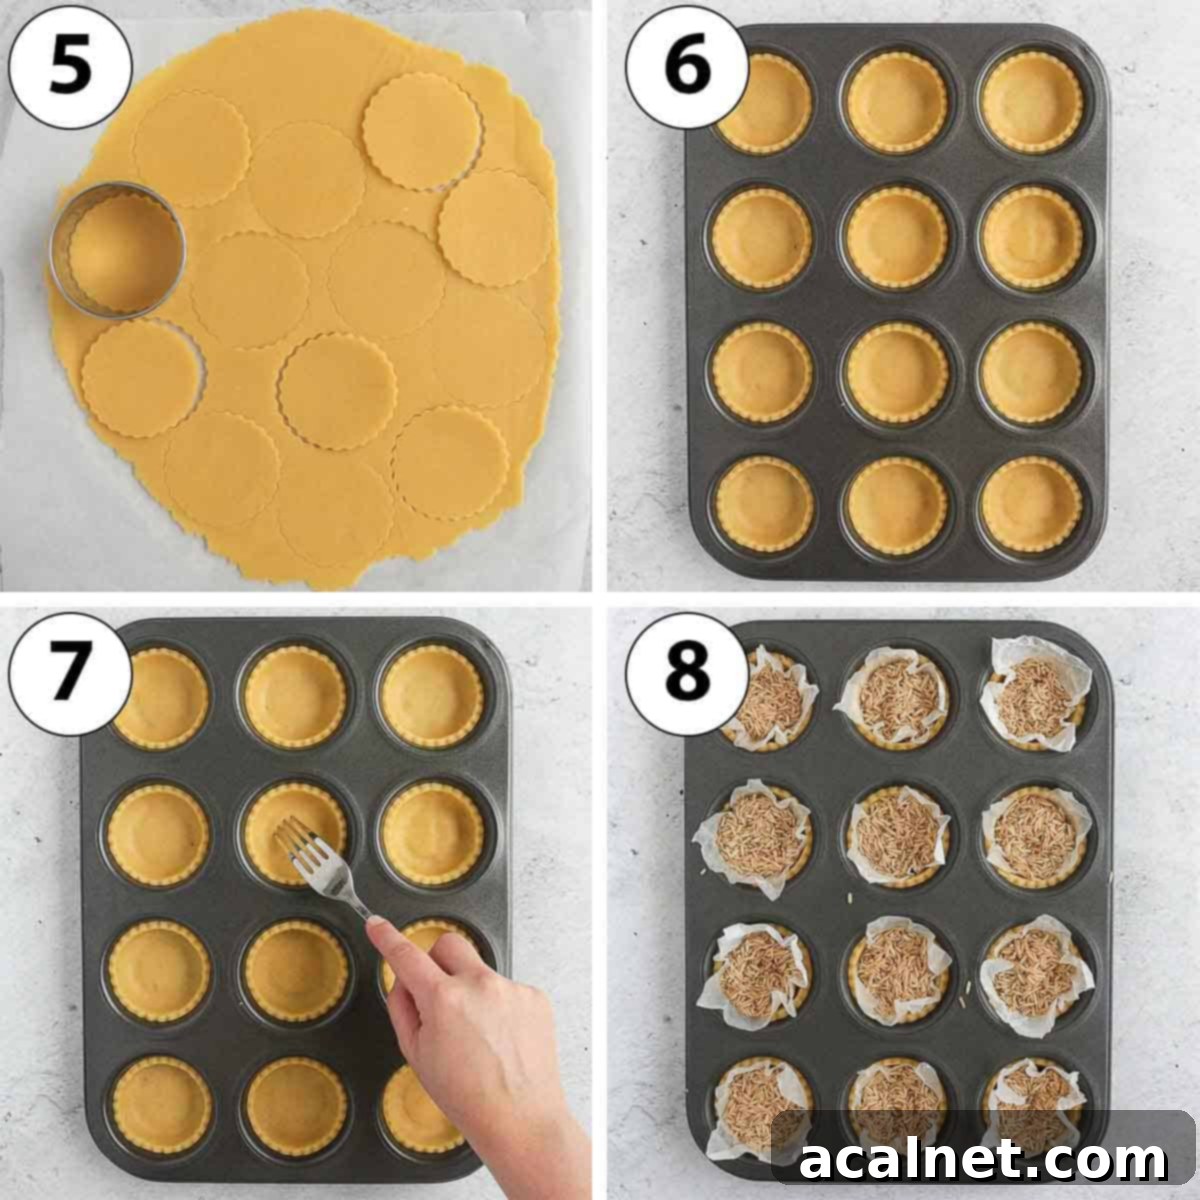
- Photo 5: Carefully remove the baking paper from your well-chilled dough. Using a round or fluted cookie cutter that is at least as wide as the opening of your muffin cups, cut out individual disks of pastry. The wider your cutter, the deeper your tartlets will be, so I recommend cutting one disk and gently fitting it into a muffin cup to assess if the size is right for your desired tartlet depth. Any excess dough can be gently re-rolled, chilled for a couple of hours to re-firm the butter, and then cut out to make additional tart shells. If the pastry seems a bit too stiff after chilling, let it sit at room temperature for a few minutes to soften slightly, making it easier to handle. Conversely, if it becomes too soft and starts to tear, pop it back into the fridge for 5-10 minutes.
- Photo 6: Carefully slide each pastry disk into the individual cups of your muffin pan. Gently press the pastry into the corners and along the sides to ensure it completely touches the pan on all surfaces. This helps prevent air bubbles and ensures a beautifully shaped tartlet. Pressing the sides firmly against the pan also helps the pastry hold its shape during baking.
- Photo 7: Once all cups are lined, return the muffin pan to the fridge to chill and rest for at least one hour – preferably overnight for the best possible results. This second chilling step is crucial for minimizing shrinkage during baking. When ready to bake, lightly dock the bottom of each pastry shell (prick several times with a fork) to allow steam to escape and prevent puffing. Place the entire muffin pan in the freezer while your oven preheats to 160 degrees Celsius / 325 degrees Fahrenheit. Freezing helps the pastry hold its shape even better.
- Photo 8: To blind bake, place a crunched-up piece of baking paper or foil over the bottom of each crust, then fill with pie weights (baking beads, dried beans, or rice). These weights help to keep the pastry flat and prevent it from bubbling up.
- Bake for 15 minutes with the weights. Then, carefully remove the baking paper and weights. Return the tartlet shells to the oven for another 12 to 15 minutes, or until the crusts are fully baked, lightly golden brown, and feel dry to the touch. Once baked, remove them from the oven and transfer to a wire rack to cool down completely. A fully cooled crust is essential before adding the butterscotch filling.
Preparing the Luscious Butterscotch Filling
With your tartlet shells cooling, it’s time to create the star of the show: the rich and gooey butterscotch filling.
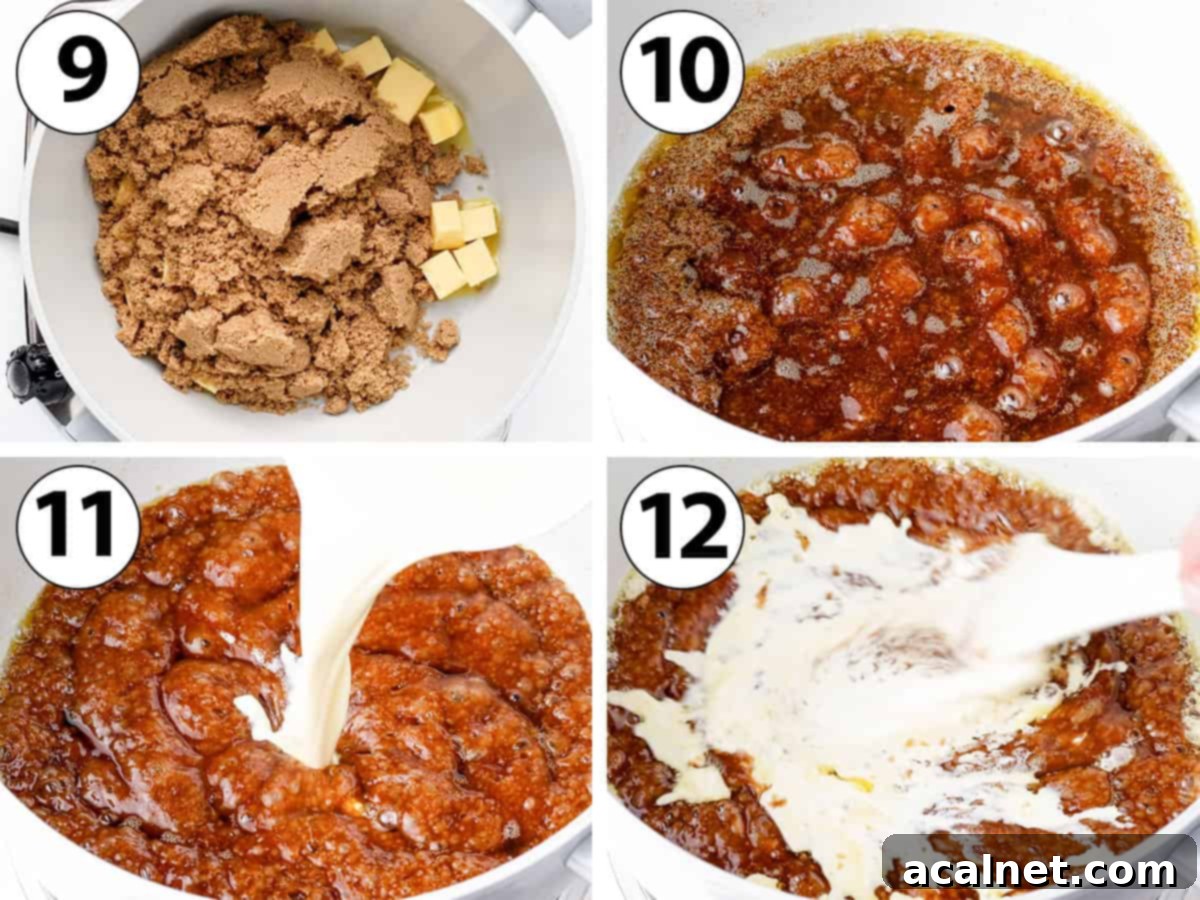
- Place the Heavy Cream in a small microwave-safe bowl and heat it in the microwave for 30 seconds to 1 minute, or until it’s pleasantly warm to the touch. Set this aside; warm cream is vital for a smooth butterscotch.
- Photo 9: In a small, heavy-bottomed saucepan, combine the Brown Sugar and your cubed Butter.
- Photo 10: Turn the heat to low to medium and allow the butter and sugar to slowly melt together, stirring occasionally to prevent sticking. Once completely melted, let the mixture gently simmer for a couple of minutes. Don’t be alarmed if it looks like the mixture has separated, with the butterfat seemingly splitting from the melted sugar. This is entirely normal at this stage and will resolve in the next step!
- Photo 11: This is a crucial step that requires care. Slowly and carefully pour the warm cream into the melted brown sugar mixture. If your cream has cooled down, quickly re-heat it slightly before adding.
- Photo 12: Immediately and vigorously stir the mixture with a heat-proof spatula or whisk until everything is smoothly combined and any separation has disappeared.
Using warm cream is a key trick to prevent the sugar from crystallizing, which can lead to a grainy sauce. It also significantly reduces the risk of the hot sugar mixture splattering, protecting you from potential burns.
Exercise extreme caution during this step, as the mixture will be very hot and can bubble up. Wear oven mitts if you prefer, and stir away from your face.
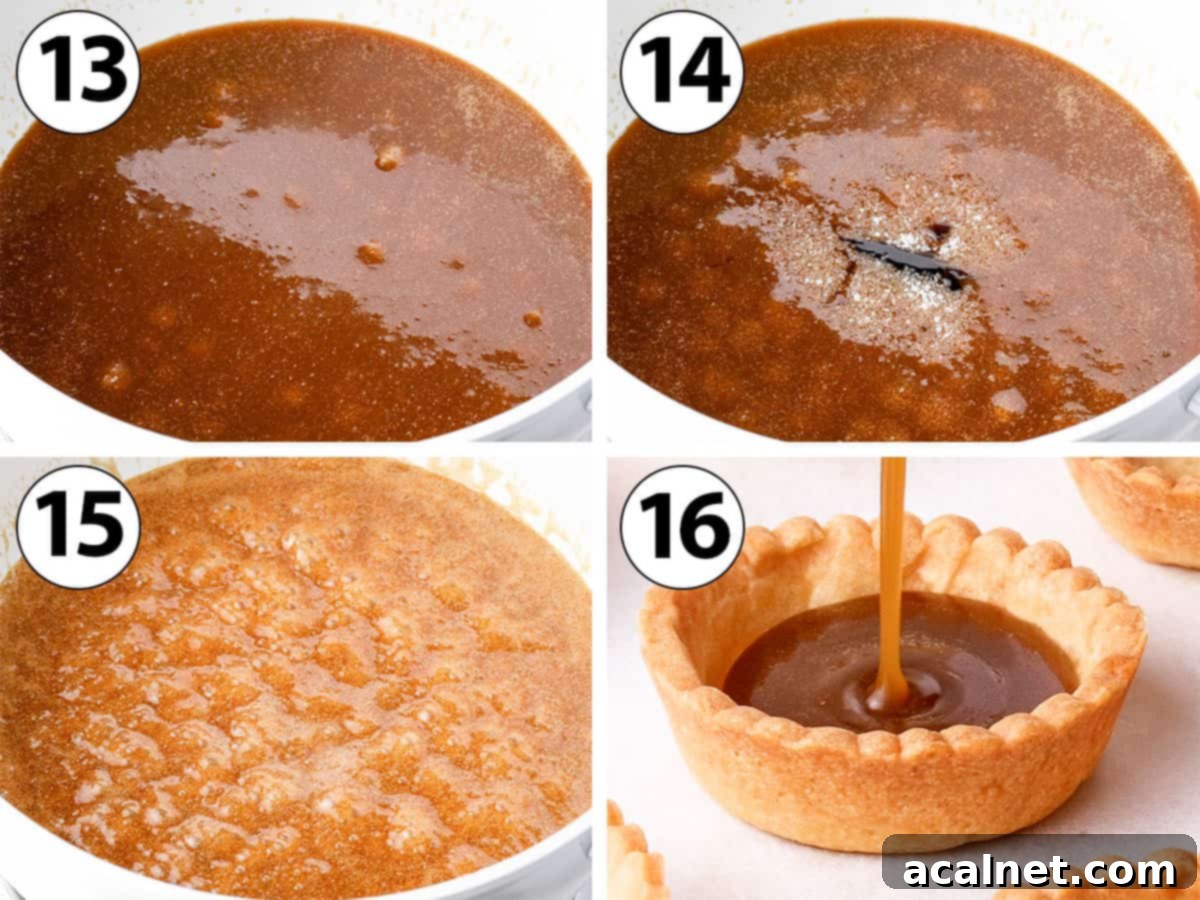
- Photo 13: Continue to cook the sauce for another minute or two, stirring consistently, until you achieve a perfectly smooth consistency with no lumps.
- Photo 14: Remove the saucepan from the heat and stir in the teaspoon of salt and the vanilla paste (or extract). Mix well to ensure these flavor enhancers are fully combined throughout the rich sauce.
- Photo 15: Return the saucepan to low to medium heat and continue to cook, stirring occasionally, for another 3 to 5 minutes. During this time, the sauce will gradually start to thicken. You’re looking for a consistency that coats the back of a spoon, but it will still appear quite liquid and thin at this point.
- Photo 16: Carefully transfer the extremely hot butterscotch sauce into a clean pouring jug – a jug with a spout will make filling the tartlets much easier and safer. Immediately pour the warm sauce into your cooled, baked tart crusts. Once filled, gently tap the bottom of the tarts against a hard surface a few times. This helps to release any trapped air bubbles and ensures a beautifully smooth, glossy top surface for your butterscotch filling.
- Finally, place your mini butterscotch tarts in the fridge to chill for at least 2 hours, or until the filling is completely set and ready to serve. The longer they chill, the firmer and more perfectly set the butterscotch will become.
The butterscotch filling will indeed seem quite liquid and thin when hot, but this is perfectly normal. It will thicken significantly and set as it cools, transforming into that delightful gooey texture. If you desire an even thicker filling, a tiny amount of cornstarch (dissolved in a tablespoon of cold water) can be whisked in during the last minute of cooking.
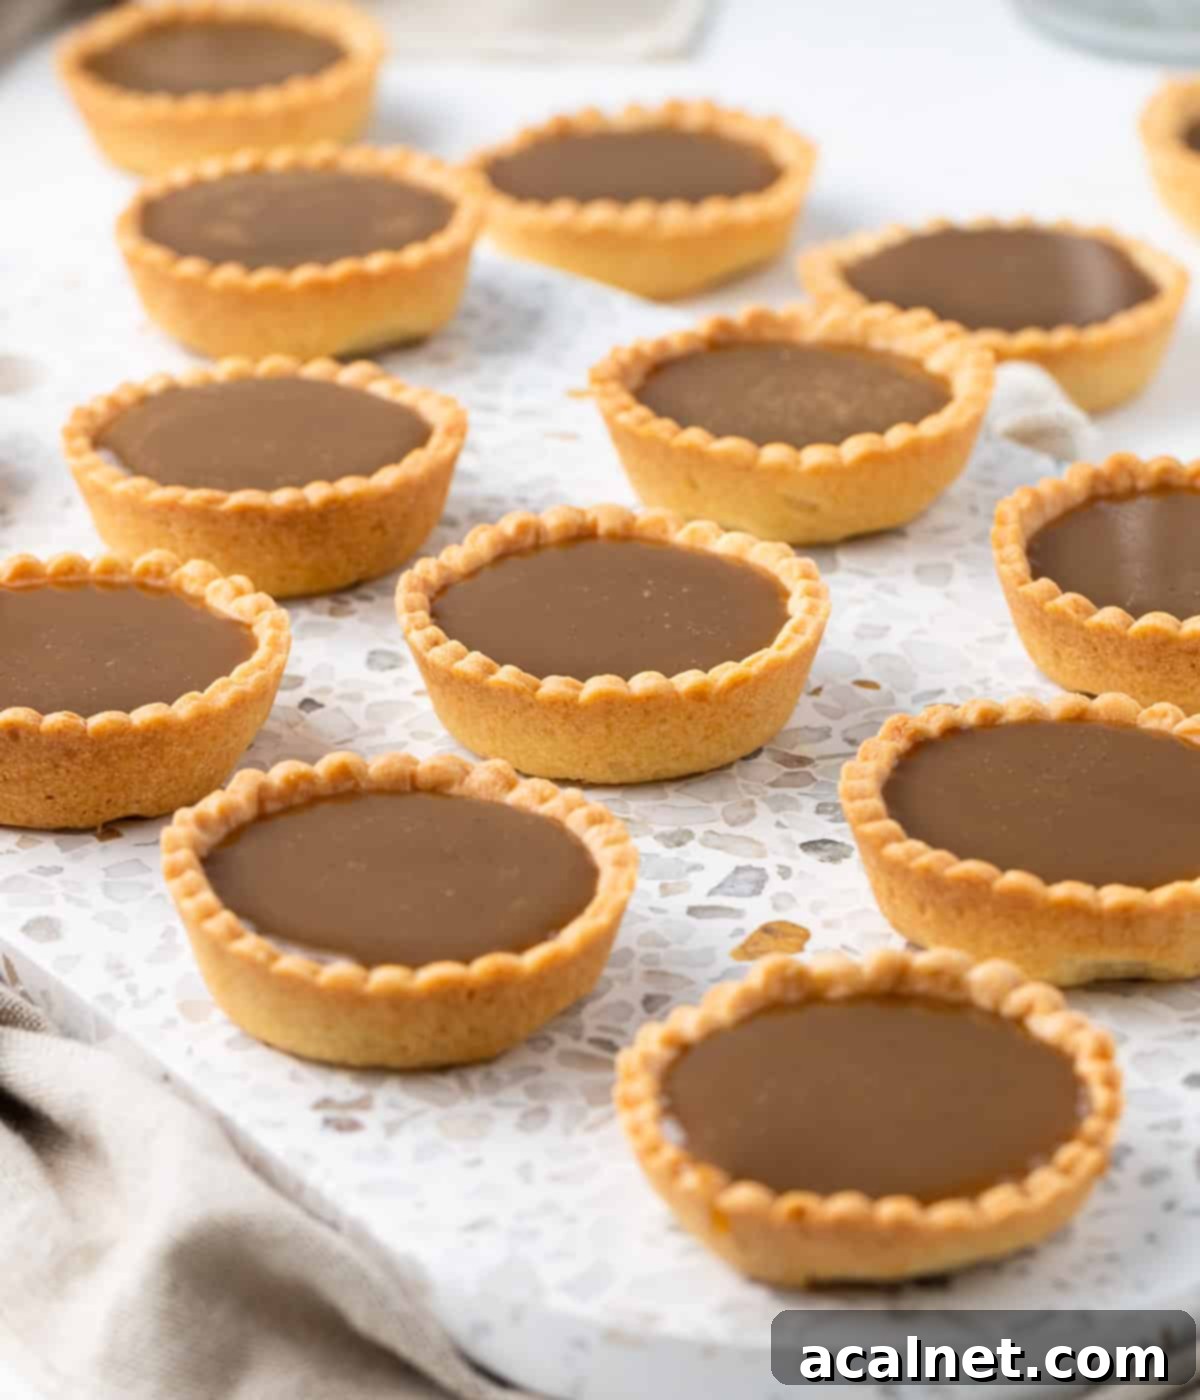
Frequently Asked Questions About Butterscotch Tartlets
Butterscotch is a symphony of rich, deep, and complex flavors. It boasts a distinctly buttery and caramel-like taste, thanks to the brown sugar and the way the butter is cooked into the sauce. Unlike traditional caramel which relies on granulated white sugar, butterscotch’s brown sugar base provides a more profound, slightly molasses-forward sweetness with subtle smoky undertones. When you add a touch of salt and vanilla, these flavors are amplified, creating a balanced, highly addictive sweet and salty profile that is incredibly satisfying.
While often confused due to their similar appearances and sweet profiles, caramel and butterscotch have distinct differences, primarily in their ingredients and preparation methods. Caramel is traditionally made with white granulated sugar, which is melted and caramelized to a deep amber color before butter and cream are incorporated. Butterscotch, on the other hand, is uniquely defined by its use of brown sugar. To make butterscotch, brown sugar is typically melted directly with butter, and then cream is added. The molasses in brown sugar gives butterscotch its characteristic richer, darker flavor profile compared to caramel.
Absolutely! While this recipe is cleverly designed for a standard muffin pan for ease, you can certainly use traditional mini tart pans if you have them. This recipe yields approximately 15 butterscotch tarts when using 7 cm (about 2.75 inches) wide mini tart pans, similar to those I’ve used for my Caramel Chocolate Tarts. Just ensure your tart pans are greased if they aren’t non-stick, and follow the same blind-baking instructions.
These butterscotch tartlets are so perfectly balanced and delicious on their own that they truly don’t need much in the way of embellishment. Their rich flavor speaks for itself! However, if you’re looking to add an extra touch of elegance or another layer of flavor, there are several wonderful options. You could drizzle them with a bit of melted dark or white chocolate for a beautiful contrast. A sprinkle of flaky sea salt just before serving will enhance the “salted butterscotch” aspect even further. Toasted coconut flakes add a lovely texture and tropical hint, while a dollop of freshly whipped cream or a dusting of cocoa powder can also make for a stunning presentation. They are perfect served alongside a hot cup of tea or coffee, or as part of a grand dessert table spread.
Expert Tips for Butterscotch Tartlet Perfection
Achieving bakery-quality mini butterscotch tartlets at home is easier than you think, especially with these tried-and-true tips:
- For the absolute best tartlet crusts, consider investing in or using a muffin pan with perforated bottoms. The perforations allow for superior air circulation around the pastry, leading to an incredibly even bake, maximum crispiness, and minimal shrinkage. This ensures your shells are perfectly golden and hold their shape beautifully.
- The secret to a silky-smooth butterscotch filling that doesn’t crystallize lies in using warm cream. Adding warm cream to the melted sugar and butter mixture helps to stabilize the temperature, preventing the sugar from shocking and forming gritty crystals. It also significantly reduces the chances of the hot sugar mixture splashing or bubbling violently, making the cooking process much safer and more manageable.
- Chill, chill, and chill again! Pastry dough loves to be cold. Ensure your butter is ice-cold when making the dough, and don’t skip the two chilling periods for the dough (after mixing and after shaping). This prevents the butter from melting too quickly in the oven, leading to a much more tender and less prone-to-shrinkage crust.
- Measure precisely. Baking is a science, and exact measurements, especially for sugar and fat, are crucial for the butterscotch consistency. Use a kitchen scale for best accuracy when weighing ingredients.
Common Issues & How to Fix Them
Even experienced bakers can encounter a snag or two. Here’s a guide to common butterscotch tartlet issues and how to troubleshoot them:
- The pastry is too hard or too soft to handle: If your pastry dough feels excessively hard straight out of the fridge, simply allow it to sit at room temperature for a few minutes. This will soften the butter just enough to make it pliable and easy to line your tartlet pans without cracking. Conversely, if the pastry becomes too soft and starts to rip or stick, place it back into the fridge for 5 to 10 minutes to firm up. Working quickly with chilled dough is always best.
- The crust shrank or collapsed when baked: This is a very common pastry issue, usually indicating that the dough was not adequately rested or chilled for long enough. The gluten in the dough needs time to relax, and the butter needs to be very cold to hold its structure. The best tip I can offer for perfect, non-shrinking crusts is to chill the pastry twice: once after making the dough, and then again after shaping the shells in the muffin pan. I personally find that allowing the shaped pastry in the muffin pans to rest overnight in the fridge, then baking them in the morning, yields outstanding results with minimal shrinkage.
- The butterscotch is grainy or lumpy: A grainy butterscotch usually happens when the brown sugar doesn’t melt completely or if it crystallizes during the cooking process. This can occur if the sugar isn’t fully dissolved before adding other ingredients or if cold cream is added too quickly. To remedy this, try adding a few drops of very hot water or even lemon juice (the acidity helps break down sugar crystals) to the sauce, return it to very low heat, and stir gently until the sugar dissolves again. Patience is key here.
- The filling is too soft / is not setting: If your butterscotch filling remains too liquid even after chilling, it likely means it wasn’t cooked for long enough. The sauce needs sufficient time on the heat to evaporate enough moisture and develop its thickening properties. Ensure you cook it for at least 3 to 5 minutes after all the ingredients have been added and combined, stirring often. Unlike granulated sugar caramel, butterscotch made with brown sugar is much less prone to burning, so you have a bit more leeway to cook it until it reaches the correct consistency. It should coat the back of a spoon and feel slightly thickened even when hot.
Storing & Freezing Your Butterscotch Tartlets
These mini butterscotch tartlets are wonderfully versatile when it comes to preparation and storage, making them an ideal make-ahead dessert:
Tartlet Shells: The unbaked tartlet shells can be prepared in advance and kept in the fridge, tightly covered, for up to 24 hours. Once baked and completely cooled, they can be stored at room temperature in an air-tight container for up to 24 hours before filling. For longer storage, both baked and unbaked shells can be frozen. Wrap them well in plastic wrap and then foil, and they’ll keep for up to 1 month. Thaw unbaked shells in the fridge overnight before baking, and thaw baked shells at room temperature.
Filled Butterscotch Tartlets: The butterscotch filling needs to be poured into the baked shells while it is still warm; otherwise, it will begin to thicken and become too sticky to work with. Once filled and completely cooled to room temperature, these delightful butterscotch tartlets should be stored in the fridge in an airtight container. They will maintain their deliciousness and perfect texture for up to 3 days. While you can technically freeze filled tartlets, the texture of the butterscotch might change slightly upon thawing (it may become a bit softer), so it’s generally best to enjoy them fresh from the fridge.
Explore More Delicious Tartlet Recipes
If you’ve fallen in love with making mini tartlets, there’s a whole world of delightful flavors to explore. Here are some other fantastic tartlet recipes that you might enjoy:
- Mini Fruit Tarts
- Bright Lemon Curd Tartlets
- Zesty Orange Tartlets
- Decadent Chocolate Orange Tartlets
- Easy Cherry Tartlets (with Puff Pastry)
- Mini Chocolate Caramel Tarts
- Classic Mini Chocolate Tarts
- Elegant Pear Frangipane Tartlets
Made this recipe?
We absolutely love seeing your creations! Let us know if you liked it by leaving a comment below, and don’t forget to tag us on Instagram @a.baking.journey with a photo of your delicious mini butterscotch tartlets!
Recipe Card: Mini Butterscotch Tartlets

Mini Butterscotch Tartlets
Print Recipe
Ingredients
Shortcrust Pastry
- 250 gr Plain / All-Purpose Flour
- 50 gr Icing Sugar
- 1 pinch Salt
- 120 gr Unsalted Butter, very cold, cubed
- 1 large Egg
Butterscotch Filling
- 250 gr Brown Sugar
- 90 gr Unsalted Butter
- 120 ml Thickened / Heavy Cream, warm
- 1 teaspoon Vanilla Paste, or vanilla extract
- 1 teaspoon Sea Salt
Instructions
Shortcrust Pastry
- Place the Plain Flour, Icing Sugar, and Salt in the bowl of your food processor (see note 1). Pulse for a few seconds to mix thoroughly. Then, add the very cold, cubed Butter and blend until the mixture resembles very small crumbs (see note 2).
- Add the large Egg and mix again until a rough dough just begins to come together. To check consistency, press a small amount of dough in your hand; if it sticks, it’s ready. If it feels too dry or crumbly, add a few drops of very cold water and mix until the desired consistency is achieved.
- Gather the mixture into a ball and place it between two large sheets of baking paper. Roll it into a large, even disk about 4mm (1/8 inch) thick using a rolling pin (see note 3). Transfer the wrapped dough to a flat tray and refrigerate for at least 1 hour, or up to 24 hours.
- Once chilled, remove the baking paper from the dough. Use a round or fluted cookie cutter, at least as wide as your muffin cups, to cut out pastry disks (see note 4). Any excess dough can be re-rolled and chilled for 2 hours to make more shells.
- Gently slide each pastry disk into the muffin pan. Lightly press the pastry into the corners and sides to remove any air bubbles and ensure it adheres completely to the pan.
- Return the lined muffin pan to the fridge to chill and rest for at least one hour, or preferably overnight, for the best baking results and to prevent shrinkage.
- Preheat your oven to 160 degrees Celsius / 325 degrees Fahrenheit. Dock the bottom of each chilled pastry shell (prick with a fork) and place the muffin pan in the freezer while the oven preheats. Place a crunched-up piece of baking paper over the bottom of each crust and fill with pie weights, dried beans, or rice for blind baking.
- Bake for 15 minutes, then carefully remove the baking paper and weights. Return the shells to the oven for an additional 12 to 15 minutes, or until the crusts are fully baked, lightly golden, and dry to the touch. Transfer to a wire rack to cool completely.
Butterscotch Filling
- Place the Heavy Cream in a small bowl and warm it in the microwave for 30 seconds to 1 minute until warm. Set aside.
- Combine the Brown Sugar and cubed Butter in a small saucepan. Cook over low to medium heat, stirring occasionally, until completely melted. Let it simmer for a couple of minutes (See note 5).
- Carefully pour the warm cream into the melted brown sugar (ensure cream is still warm to avoid splashing and crystallization – see note 6). Stir vigorously with a heat-proof spatula until completely smooth. Continue to cook for about 2 minutes over low to medium heat, stirring occasionally.
- Add the Salt and Vanilla Paste (or extract). Mix to combine thoroughly. Continue to simmer for 3 to 5 minutes over low to medium heat, stirring occasionally, until the sauce has slightly thickened (see note 7).
- Carefully transfer the very hot butterscotch sauce into a clean pouring jug. Immediately pour the warm sauce into the cooled, baked tartlet crusts. Gently tap the bottom of the filled tarts against a hard surface to release air bubbles and ensure a smooth top.
- Place the mini butterscotch tarts in the fridge to chill for at least 2 hours, or until the filling is completely set and ready to serve. The longer they chill, the thicker and more perfectly set the filling will be.
Video
Would you like to save this recipe?
We’ll email this post to you, so you can come back to it later!
Notes
- If you don’t have a food processor, you can easily make the pastry by hand. You’ll find detailed instructions for this method in my comprehensive Pâte Sablée recipe.
- The size of your butter crumbs directly influences the pastry’s texture. For this specific recipe, we aim for very fine crumbs rather than large ones. This is important to avoid excessive flakiness, which can cause the tart cases to puff up too much during baking, ensuring a smoother and more stable base for your filling.
- Achieving an even thickness is key for consistent baking. For the best and most reliable results when rolling out your pastry, I highly recommend using a rolling pin equipped with thickness rings. These rings will help you maintain a uniform thickness of about 4mm (1/8 inch) across the entire dough disk.
- When cutting your pastry disks, I suggest cutting just one first and fitting it into a muffin pan cup. This allows you to assess if you need a wider or narrower cookie cutter to achieve your desired tartlet depth. If your pastry dough feels a bit hard and resistant when it comes out of the fridge, let it sit at room temperature for a few minutes to soften slightly. If it becomes too soft and starts to tear easily, pop it back into the fridge for 5 to 10 minutes to firm up again before continuing.
- It’s common for the mixture to appear split at this stage, with the butterfat separating from the melted sugar. Please don’t worry about this; it’s a normal part of the process and will fully come together and emulsify in the very next step once the cream is added.
- Using warm cream is a crucial technique in butterscotch making. It dramatically helps to prevent the sugar from crystallizing, which would result in a grainy sauce. Furthermore, adding warm cream minimizes the risk of the hot sugar mixture splashing around, significantly reducing the chances of burns and making the process much safer.
- At this stage, the butterscotch filling will naturally appear quite liquid and thin. This is the correct consistency while it’s hot. The sauce will gradually thicken and set beautifully as it cools down in the tartlet shells, developing that signature gooey, luscious texture you’re looking for.
Nutrition (per serving)
