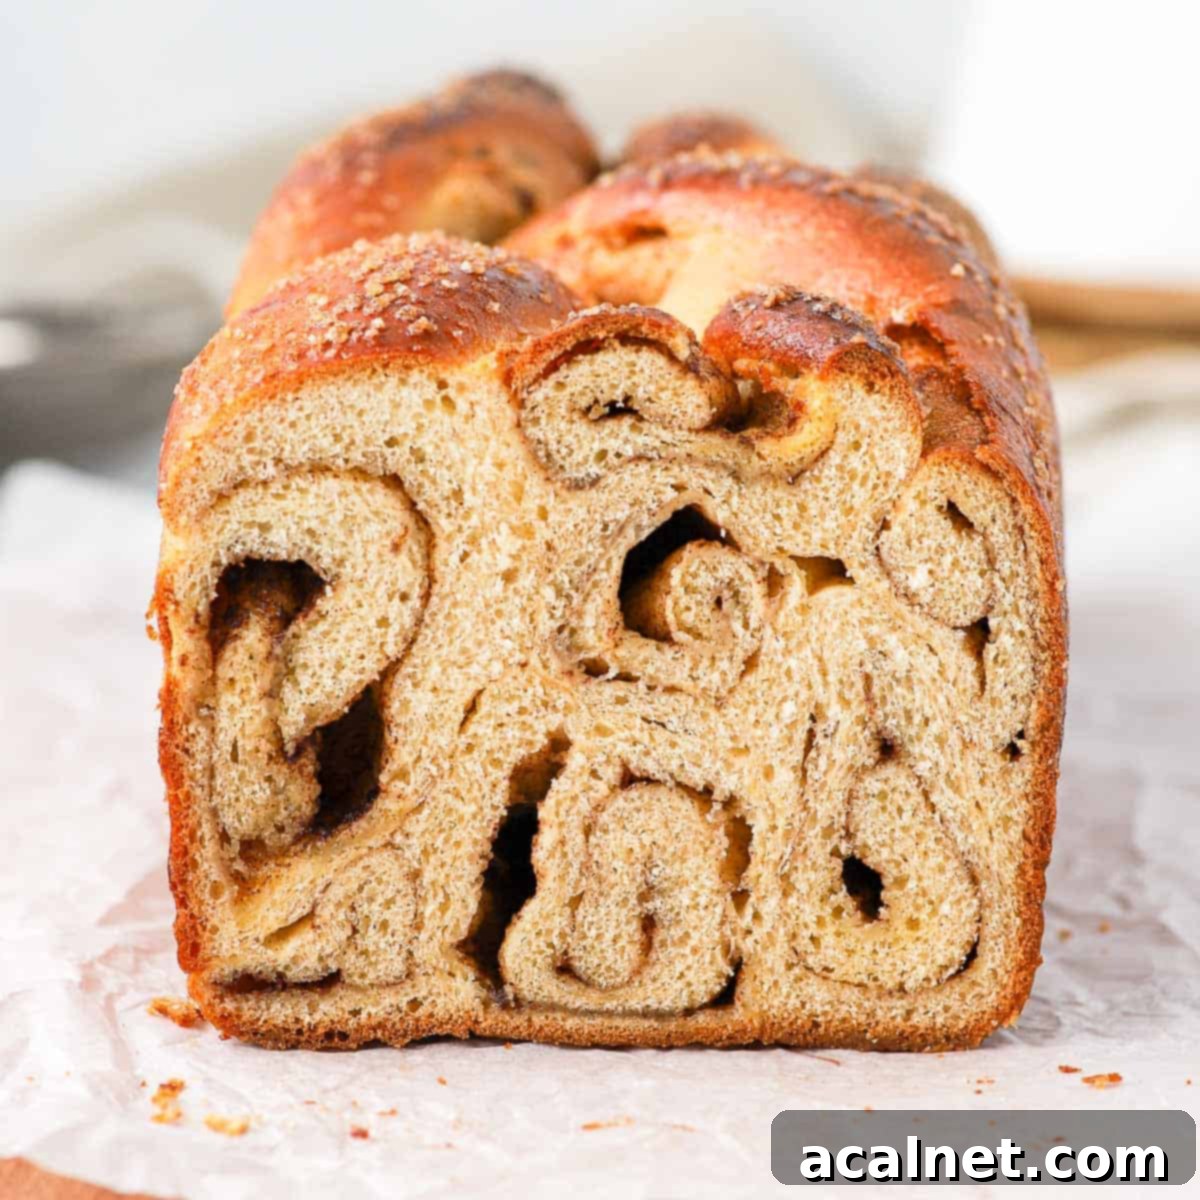
Deliciously Easy Cinnamon Roll Bread Loaf: Your New Favorite Swirl Bread Recipe
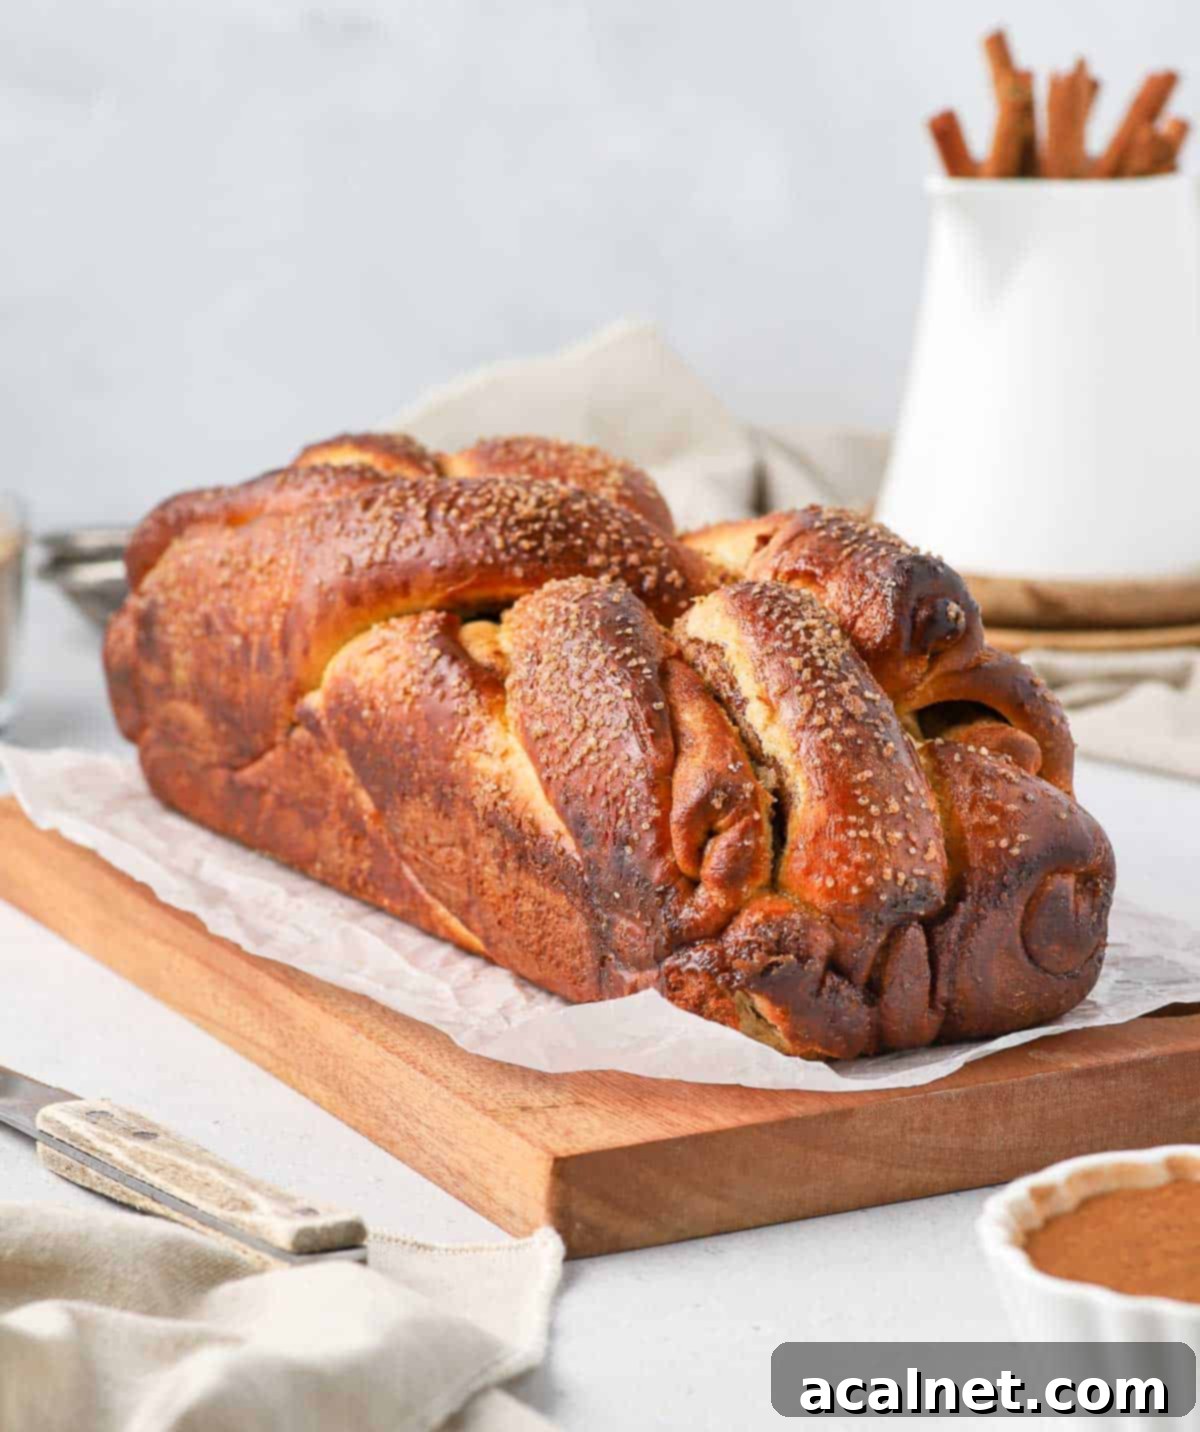
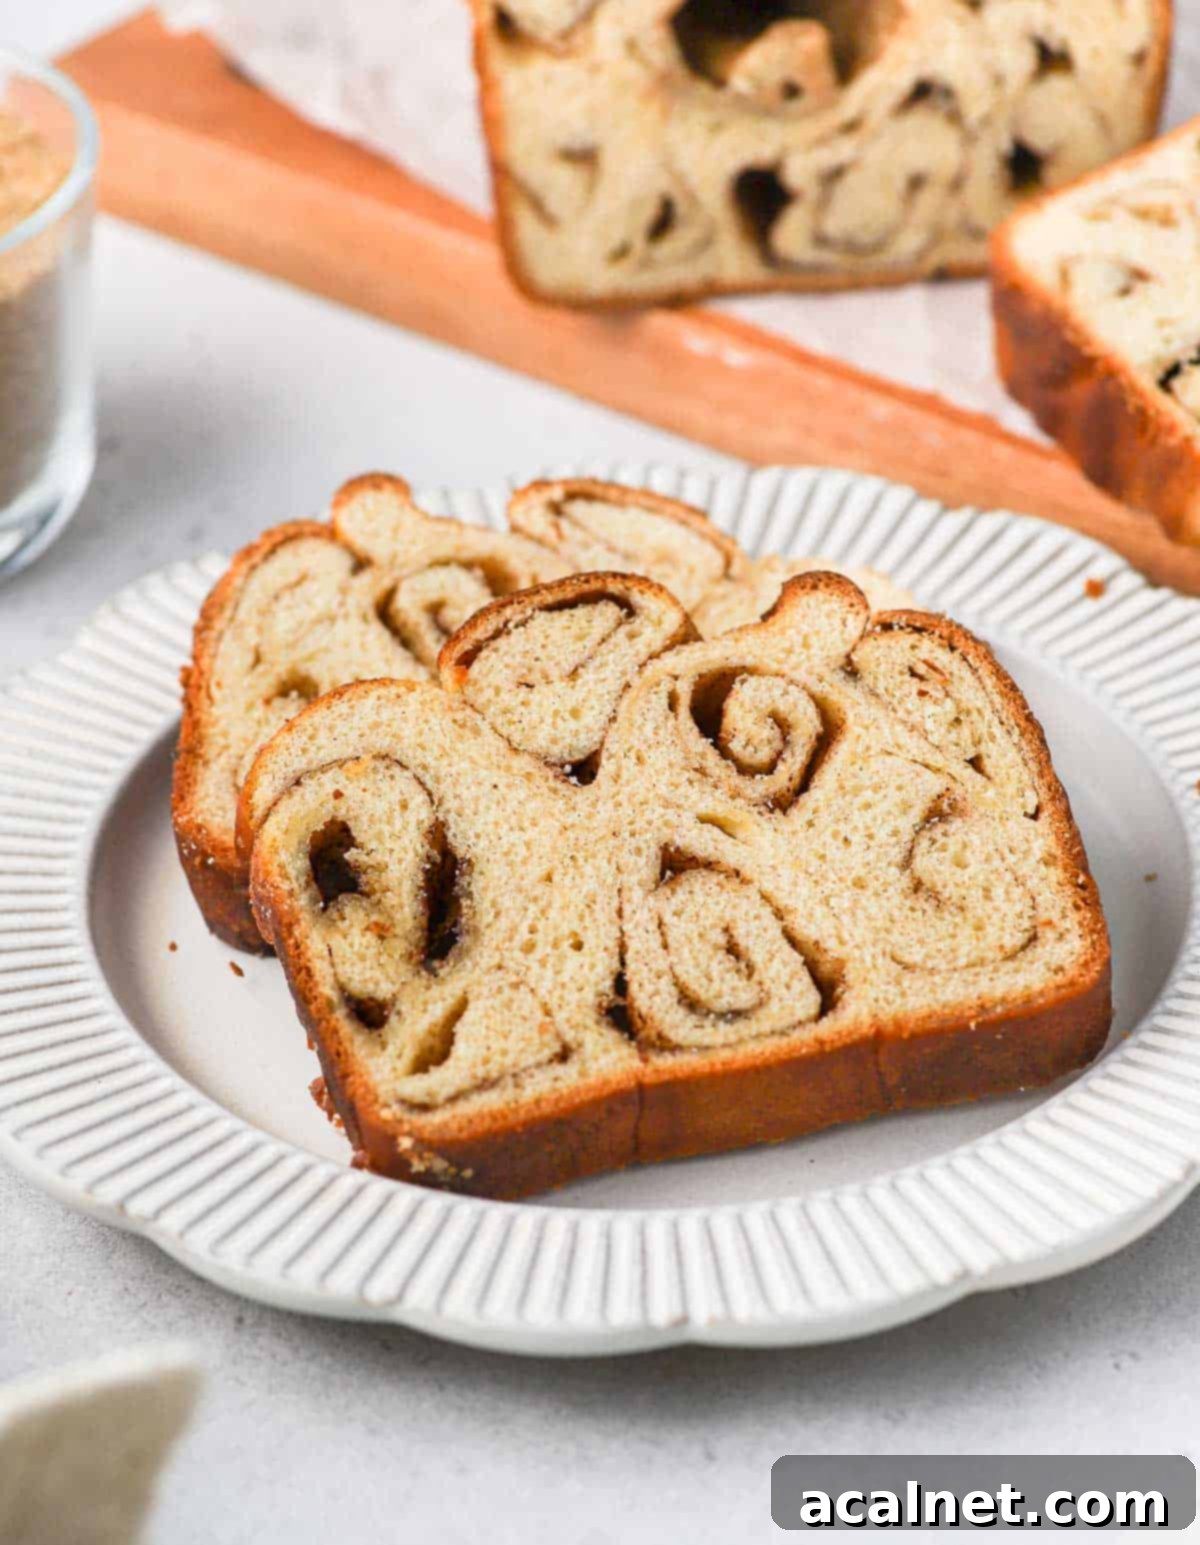
Prepare to fall in love with this **Cinnamon Roll Bread Loaf**, a truly exceptional treat that combines the best qualities of fluffy brioche and aromatic cinnamon rolls into one stunning loaf. Each slice reveals beautiful swirls of rich cinnamon sugar, promising a bite that is both deliciously buttery and incredibly tender. Whether you’re looking for an indulgent breakfast, a delightful accompaniment to your afternoon tea, or a festive centerpiece for Christmas and other holidays, this cinnamon swirl bread is an absolute must-bake. Its inviting aroma and comforting flavor make it perfect for any special occasion, or simply to elevate an ordinary day into something extraordinary.
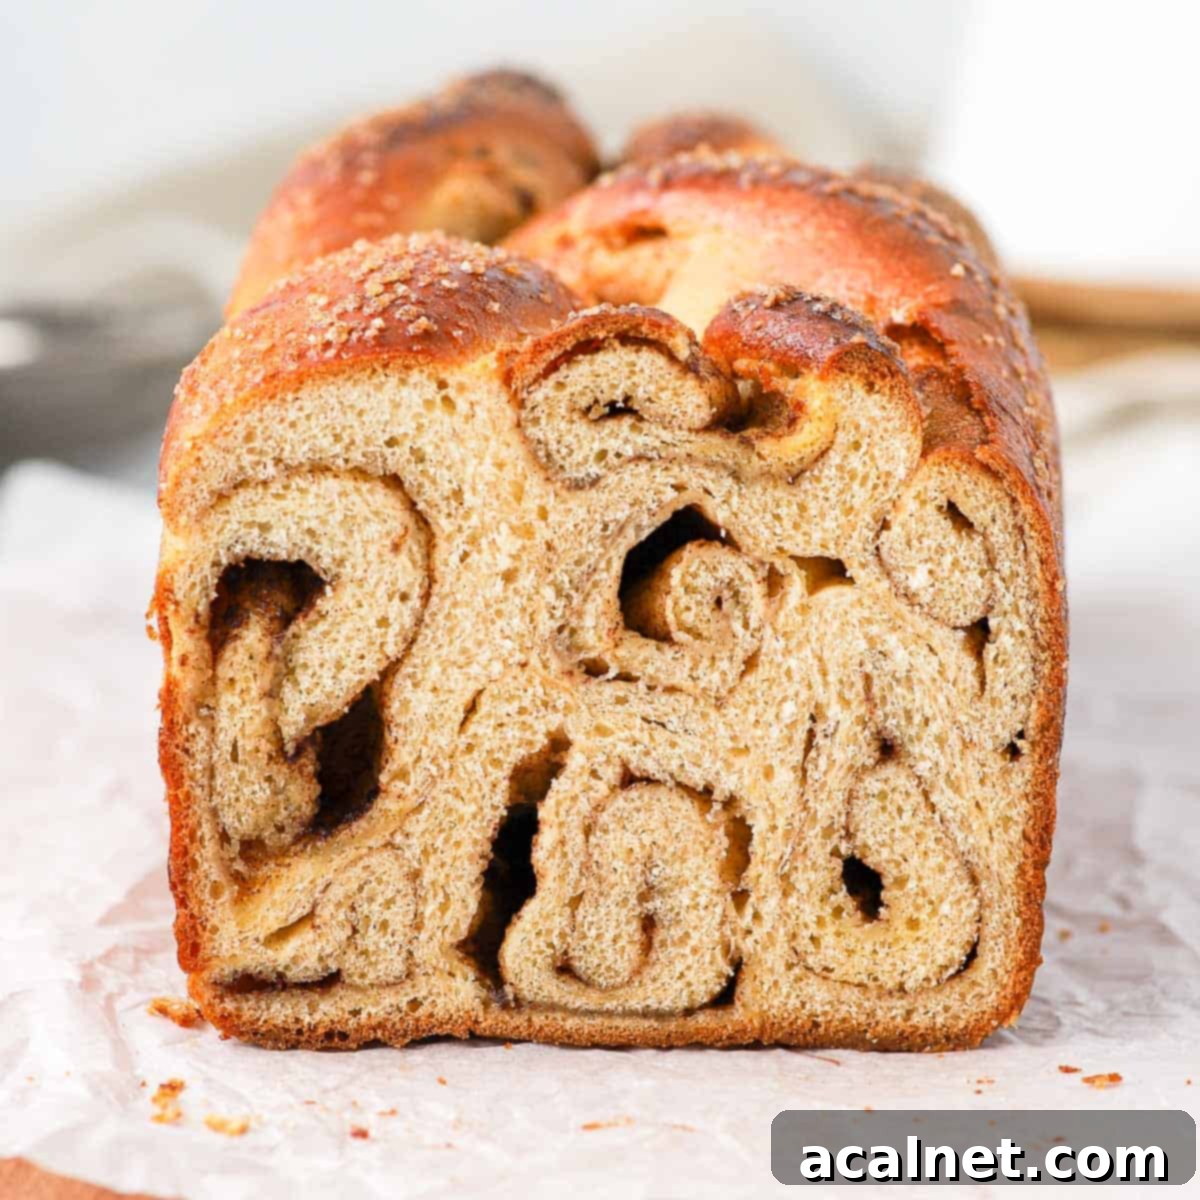
Why You’ll Adore This Cinnamon Roll Bread Recipe
If the mere mention of classic Cinnamon Rolls sends your taste buds tingling, but you’re eager to try a fun, innovative twist, then this Cinnamon Roll Bread is precisely what you need! It takes the familiar, comforting flavors of your favorite cinnamon rolls and presents them in an exciting new format. Instead of individual rolls, this recipe ingeniously combines eight logs of rich, brioche-style cinnamon dough, artfully arranged and baked together in a standard loaf pan. The result is a pull-apart bread that offers all the incredible taste and texture of a cinnamon roll, but in a unique, shareable, and visually appealing form.
Much like our popular Cinnamon Babka, this sweet, fragrant bread makes an absolutely indulgent breakfast or a luxurious sweet treat, perfectly suited for the festive holiday season. Its warm, spiced notes are especially welcoming during colder months, making it a fantastic addition to your Christmas morning spread or any holiday brunch. However, its irresistible charm isn’t limited to specific times of the year – you’ll find yourself craving and baking this delightful loaf all year round.
Beyond its delicious taste, this recipe offers a wonderfully engaging baking experience. It’s a super fun activity to share with kids, allowing them to help with the rolling and shaping, fostering a love for baking. Furthermore, a freshly baked loaf makes for a thoughtful and delicious edible gift, sure to impress friends, family, and neighbors alike. This recipe truly offers versatility, enjoyment, and incredible flavor in every single bite.
Essential Ingredients for Your Cinnamon Swirl Bread
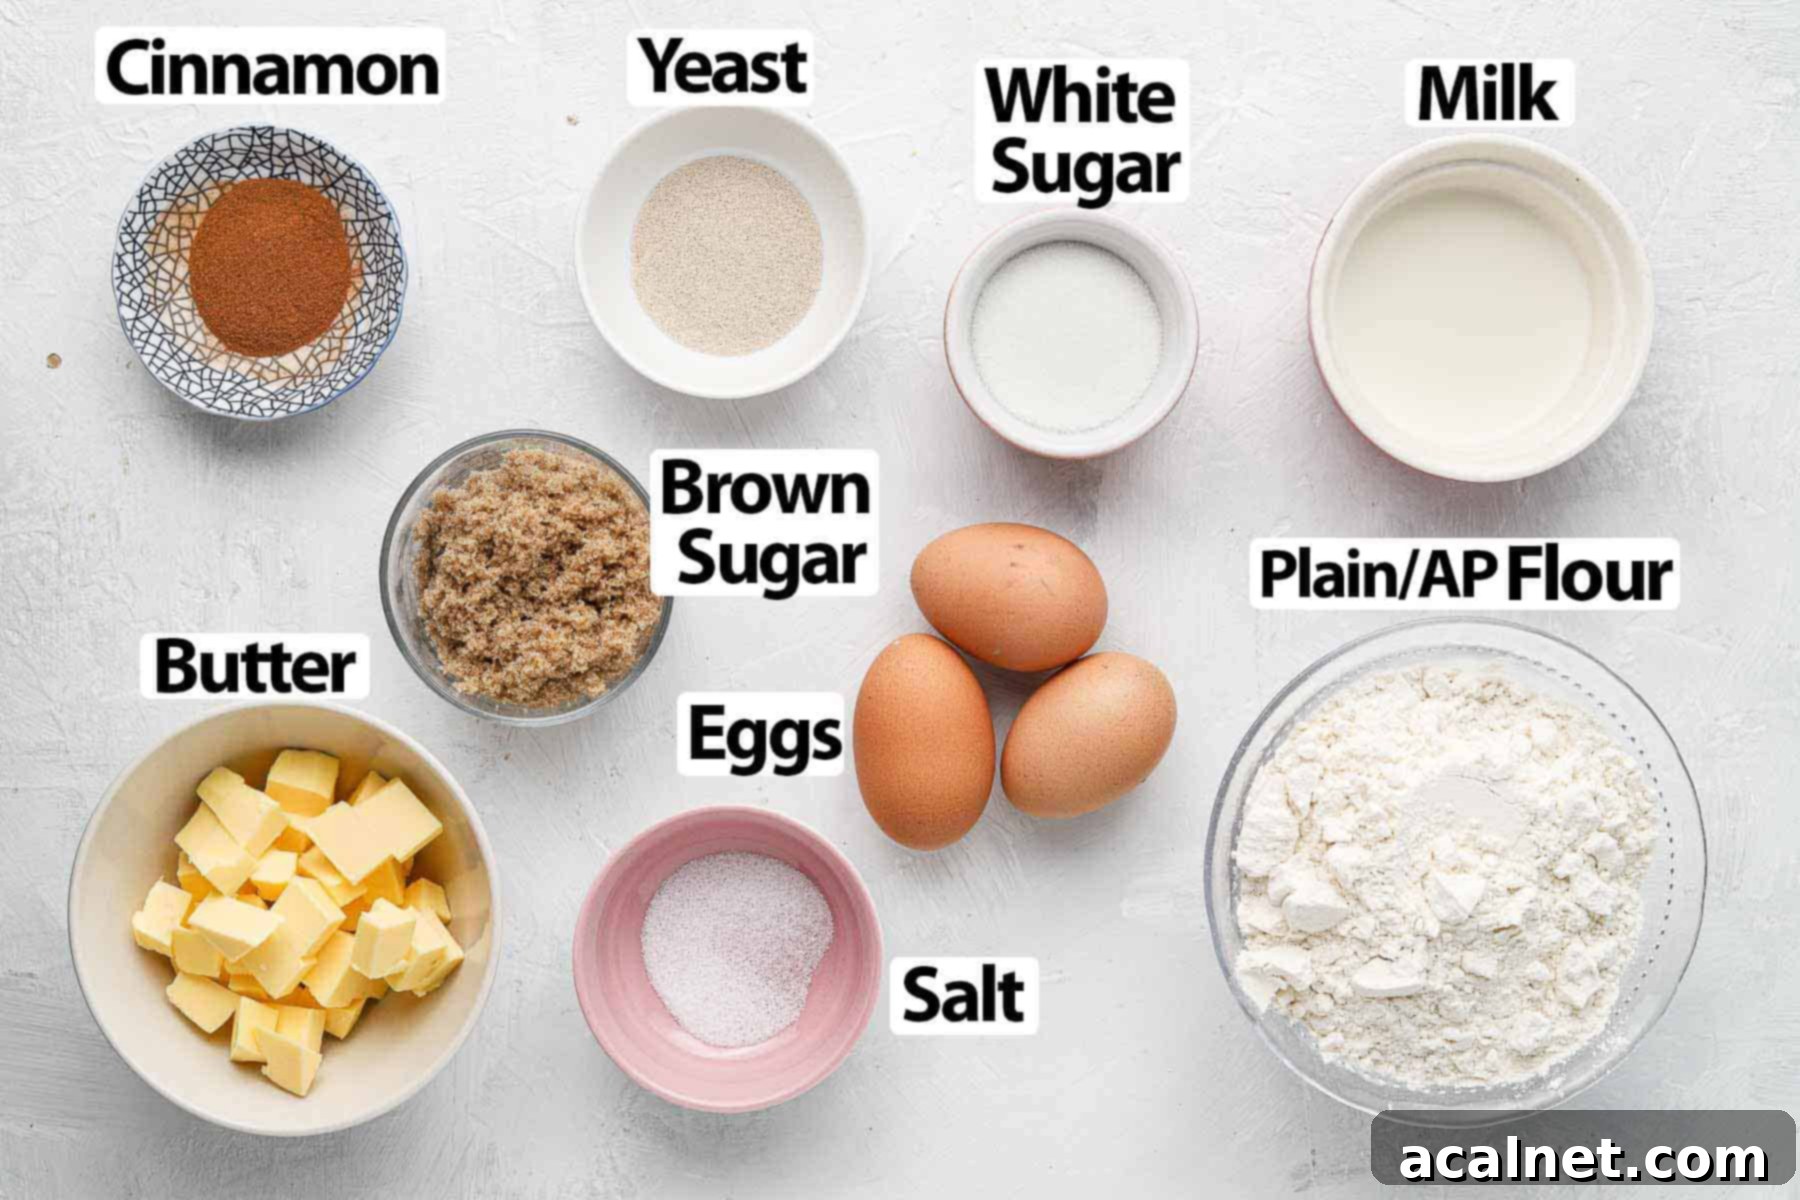
The beauty of this cinnamon roll bread lies in its simplicity. The ingredients required are largely the same as those you would use for classic brioche-style cinnamon rolls, ensuring a familiar yet elevated flavor profile. (For precise quantities, please refer to the detailed recipe card below.)
For the Rich Brioche-style Dough:
- Milk: We highly recommend using Full-Cream or Whole Milk. Its higher fat content contributes significantly to the bread’s incredibly rich flavor and tender texture. Ensure the milk is lukewarm – warm enough to activate the yeast, but not hot, as excessive heat can kill the yeast and prevent your dough from rising.
- Sugar: Caster Sugar or a fine white granulated sugar works best here. Sugar not only sweetens the dough but also feeds the yeast, aiding in the fermentation process and contributing to a soft crumb.
- Yeast: Instant (dried) Yeast is convenient and doesn’t strictly require “blooming” (pre-hydrating). However, I personally prefer to bloom it first as a quick test to confirm it’s active and alive. If you opt for Active Dry Yeast, blooming this step is essential to ensure your dough rises properly.
- Plain / All-Purpose Flour: While bread flour can be used, plain or all-purpose flour is specified for this recipe to achieve a lighter, fluffier crumb. Bread flour, with its higher protein content, tends to produce a chewier texture.
- Ground Cinnamon & Salt: A touch of ground cinnamon added directly into the dough amplifies the overall warm, spiced flavor. Fine table salt is crucial for balancing the sweetness and enhancing the other flavors. Remember to add salt last to avoid direct contact with the yeast, which can inhibit its activity.
- Eggs: Medium-sized eggs are ideal. It is vitally important that they are at room temperature. Cold eggs can stiffen the butter in the dough, making it harder to incorporate and affecting the dough’s texture and rise. An optional extra egg is used for the egg wash, which gives the baked bread a beautiful golden sheen.
- Butter: Unsalted butter is preferred, allowing you to control the overall saltiness of the bread. It must be very soft, almost at room temperature, but not melted. This ensures it incorporates smoothly into the dough, creating that signature brioche richness.
- Optional: For an appealing textural contrast and a hint of extra sweetness, consider sprinkling Raw Sugar or Demerara Sugar on top of the cinnamon rolls bread before baking. It adds a delightful crunch to the crust.
For the Aromatic Cinnamon Roll Filling:
The heart of our cinnamon swirl lies in a wonderfully simple yet potent mixture: creamy soft unsalted Butter, rich Brown Sugar, and fragrant Ground Cinnamon. This classic combination melts into the dough during baking, creating those iconic, gooey cinnamon swirls. Feel free to get creative with your filling! You could add a pinch of other warm spices like nutmeg or cardamom, stir in some decadent chocolate chunks or mini chips for a hint of cocoa, or even incorporate finely chopped nuts such as pecans or walnuts for an extra layer of flavor and crunch.
Step-by-Step Guide: Crafting Your Cinnamon Roll Bread
Creating this delightful Cinnamon Roll Bread is a rewarding process. It begins with preparing a rich, slightly spiced brioche-style dough, which forms the tender base of our loaf.
Making the Perfect Brioche Dough
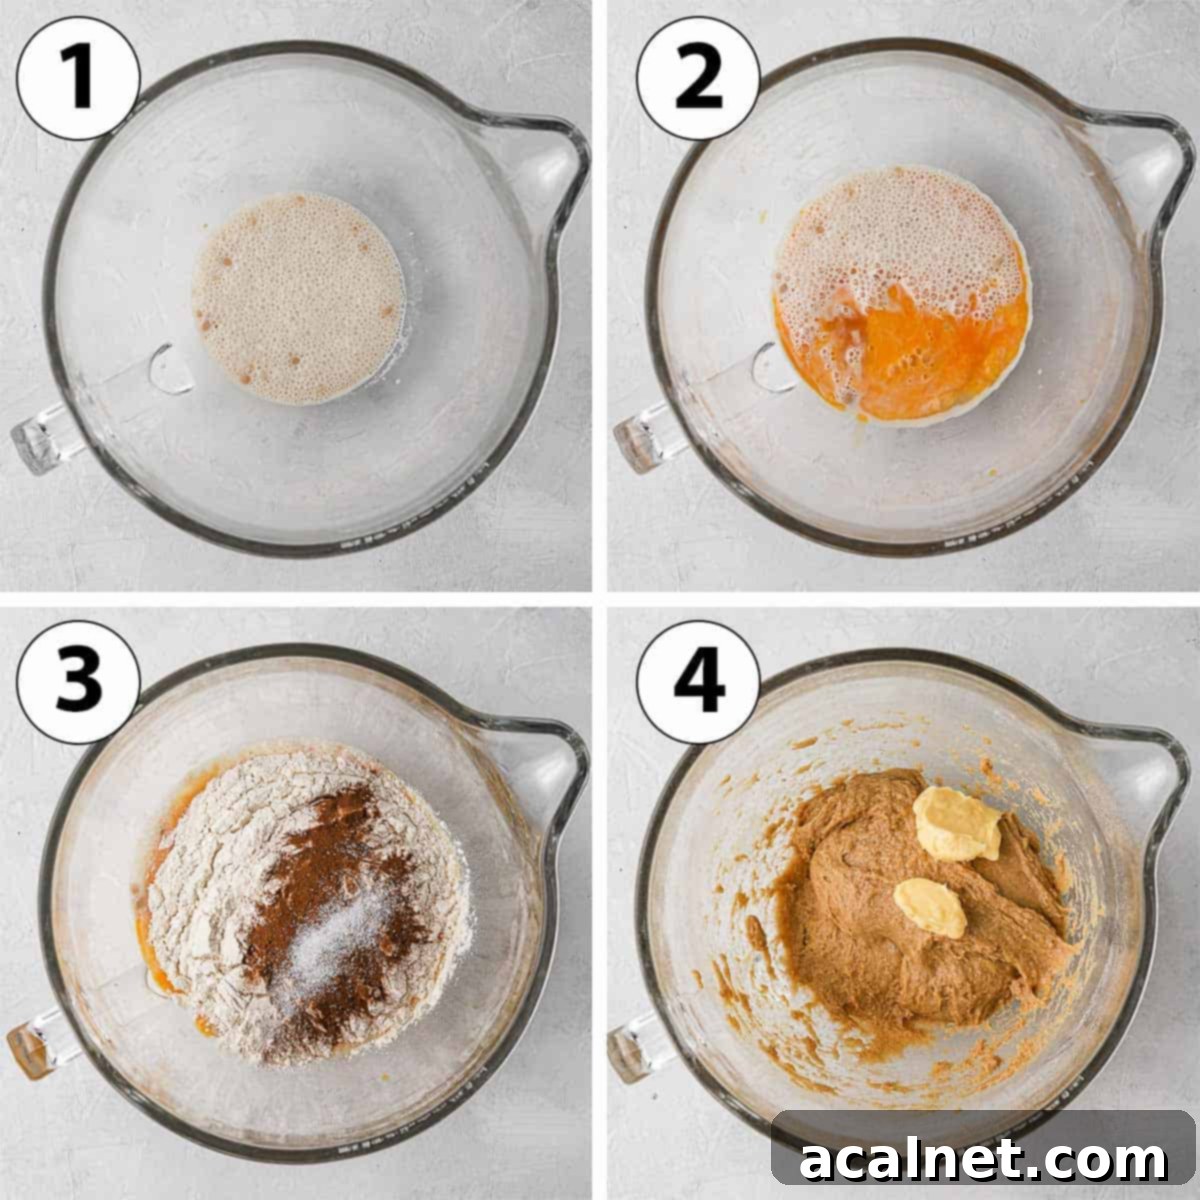
- Photo 1: Activating the Yeast. Begin by placing the lukewarm milk (remember, not too hot!) and one tablespoon of the caster sugar into the bowl of your stand mixer. Stir gently, then sprinkle in the yeast. Let this mixture sit for approximately 10 minutes. During this time, you should observe small bubbles forming on the surface, which is a clear indication that your yeast is active and ready to work its magic.
While “blooming” or rehydrating instant yeast is technically optional, as it doesn’t strictly require it, I always recommend this step. It serves as a simple “proof” that your yeast is alive and active, preventing wasted effort on dough that won’t rise. If you’re using Active Dry Yeast, this step is absolutely mandatory for successful results.
- Photo 2: Incorporating Eggs. Once your yeast mixture is frothy, add the room temperature eggs to the bowl. Ensure eggs are at room temperature to blend seamlessly with the other ingredients.
- Photo 3: Mixing Dry Ingredients. Next, add the plain/all-purpose flour, the remaining caster sugar, ground cinnamon, and finally, the salt. Using the dough hook attachment of your stand mixer, knead on medium speed. Continue kneading until a cohesive, sticky dough forms and all the ingredients appear well-incorporated.
It’s crucial to add the salt last, ensuring it does not come into direct contact with the yeast, as salt can inhibit yeast activity. If the mixer struggles to start, a spatula can be used to help combine the initial ingredients.
- Photo 4: Adding the Butter. Gradually add the very soft unsalted butter, a small piece at a time, while the mixer continues to knead. Wait for each addition to be fully incorporated before adding the next. As the butter goes in, the dough will become quite greasy initially and may stick to the sides of the bowl. Don’t hesitate to stop the mixer and scrape down the sides with a spatula as needed to help the dough come together.
- Continue kneading on medium-high to high speed for a substantial 10 to 12 minutes. The dough is properly kneaded when it passes the “windowpane test” (check the FAQs section below for a detailed explanation of this technique). Even after thorough kneading, the dough will remain somewhat sticky and quite soft, which is perfectly normal for a brioche-style dough.
- Once kneaded, cover the bowl tightly with a tea towel or plastic wrap. Allow the dough to proof in a warm, draft-free spot for approximately 1.5 hours, or until it has visibly doubled in size. For enhanced flavor and easier handling, you have the excellent option of proofing the dough overnight in the refrigerator for 8 to 12 hours (more details on this beneficial method can be found in the FAQs section).
Shaping and Filling Your Cinnamon Swirls
- While the dough is proofing (or before you start shaping if doing an overnight proof), prepare the luscious Cinnamon Roll Filling. In a small bowl, simply mix together the very soft unsalted butter, brown sugar, and ground cinnamon until well combined and spreadable.
If your filling seems too soft or runny (perhaps your butter was too warm), pop it into the fridge for a few minutes to allow it to firm up slightly. This will make it much easier to spread.
Scroll down to the recipe card below for a video showing how I shaped the cinnamon roll bread!
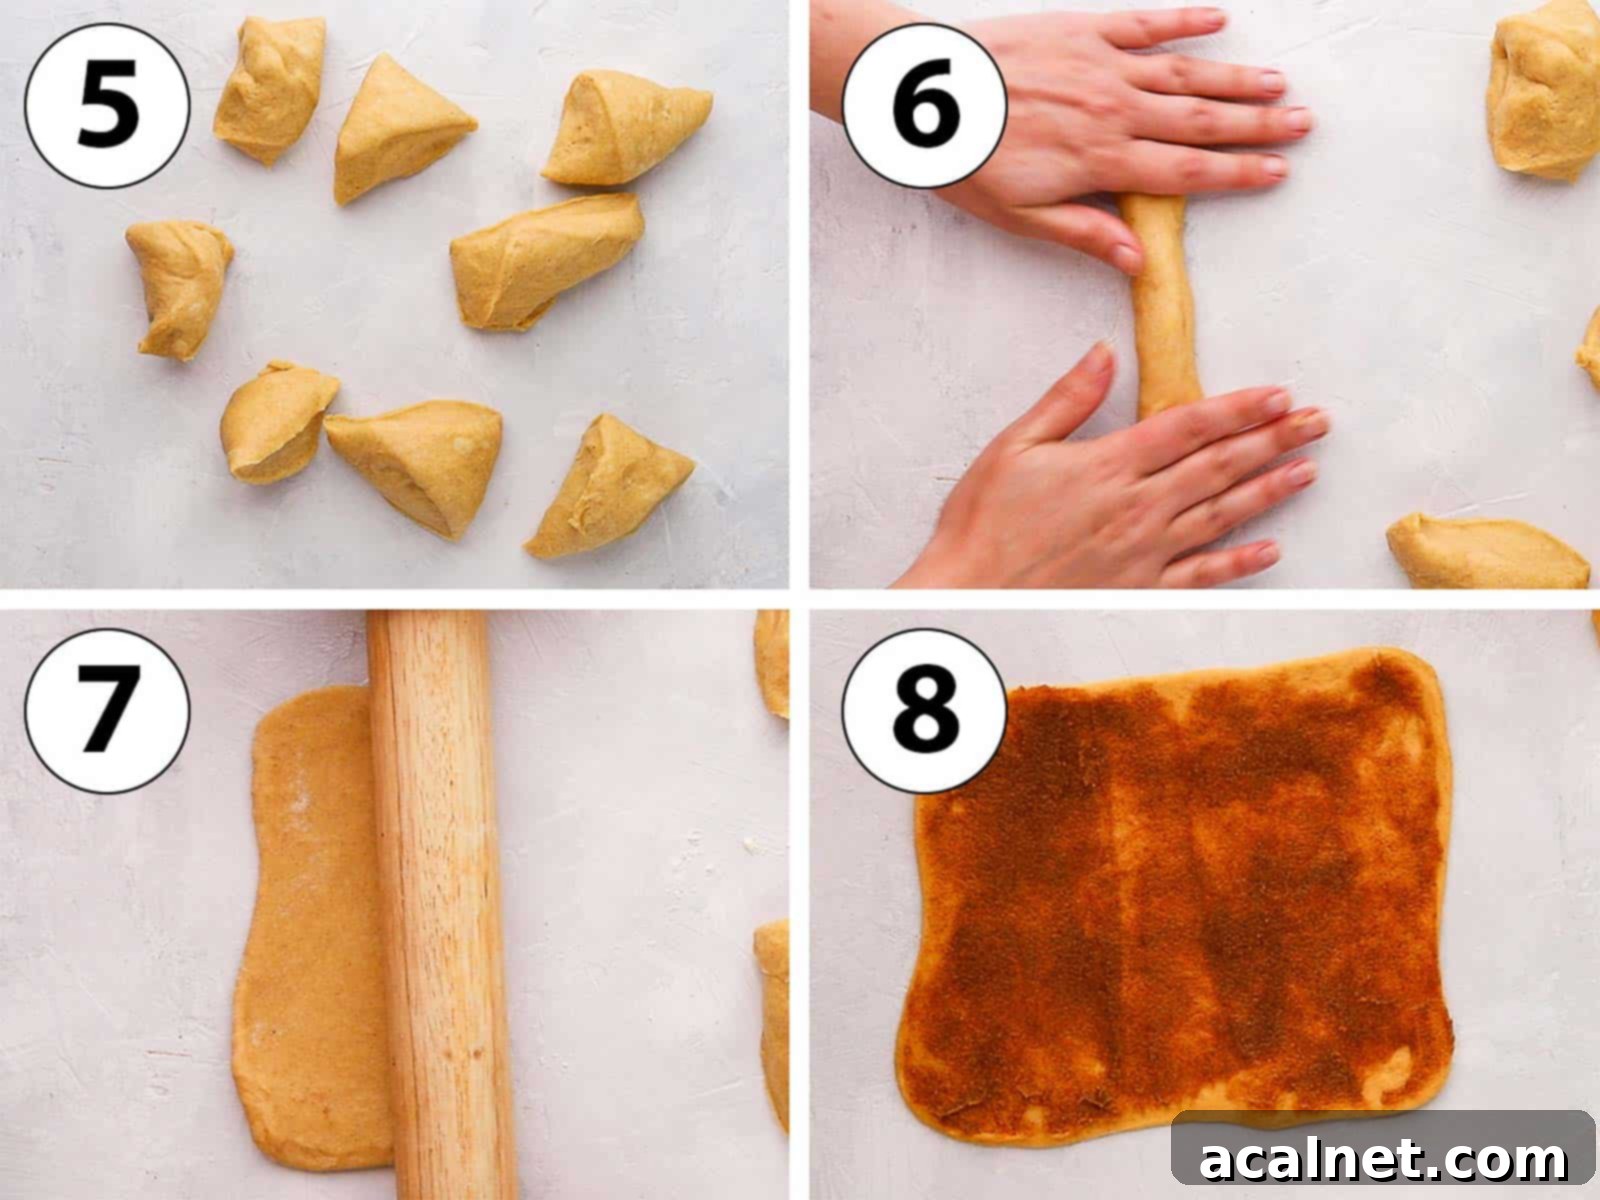
- Photo 5: Dividing the Dough. Once your dough has risen beautifully, gently punch it down to deflate it and transfer it onto a lightly floured work surface. Using a sharp knife or a dough scraper, divide the dough into 8 equal pieces.
For maximum precision and uniformity in your bread, I highly recommend using a kitchen scale to weigh the entire dough and then divide it into 8 perfectly equal portions.
- Photo 6: Shaping Logs. Take each individual piece of dough and gently roll it between your palms or on the work surface to form a neat log shape.
- Photo 7: Rolling Rectangles. With a rolling pin, carefully roll each dough log into a small, thin rectangle. The goal is for the longest side of your rectangle to be at least as long as the loaf pan you intend to use for baking. This ensures the logs fit well inside the pan.
- Photo 8: Spreading the Filling. Generously spread a thin, even layer of your prepared cinnamon sugar mixture over each rolled-out dough rectangle. Use a small offset spatula or the back of a spoon for easy, even distribution, making sure to go almost to the edges.
Assembling & Baking Your Beautiful Loaf
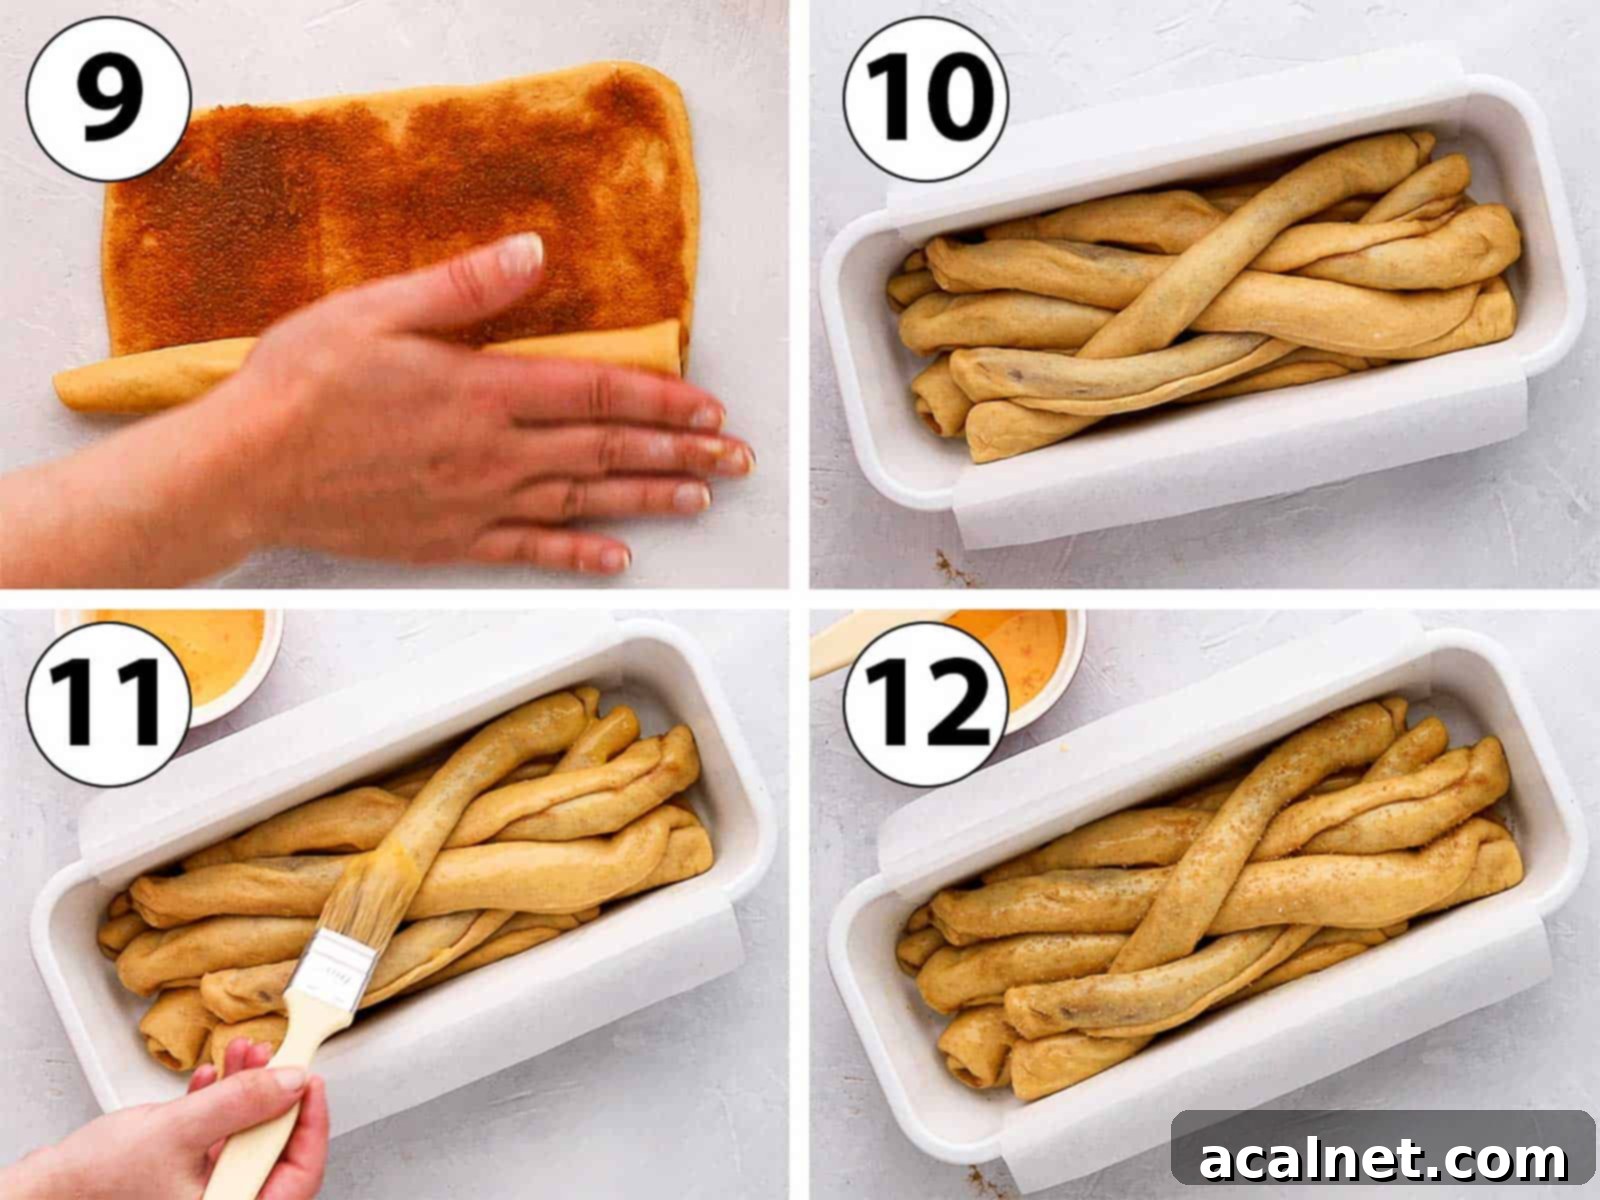
- Photo 9: Rolling the Logs. Carefully roll each piece of dough, starting from one of the longer sides, tightly onto itself to create a long, slender log shape. This is just like how you would form classic cinnamon rolls. Once rolled, gently roll each log under your fingers on the work surface to seal the seam securely. Repeat this process for all 8 pieces of dough, ensuring you have 8 perfectly formed cinnamon logs.
As an alternative shaping method, you could roll out the entire dough into one large rectangle after the first proof. Then, spread the cinnamon filling evenly over the large rectangle, and finally, cut it into 8 equal strips before rolling each strip individually to achieve the log shape. This can be quicker for some bakers.
- Photo 10: Arranging in the Pan. Prepare your loaf pan (I used a 11.5x30cm / 4.5×12 inch loaf pan) by lightly greasing it and lining it with baking paper or parchment paper, allowing some overhang for easy removal later. Now, artfully arrange the 8 dough logs inside the prepared loaf pan. You can place them next to each other, slightly on top of one another, or even twist some together to create an interesting, textured, and visually appealing pattern. Don’t worry about perfection; an “uneven” arrangement often creates the most charming final look.
- Photo 11: The Egg Wash. For a beautiful golden-brown crust and a slight sheen, gently brush the top of the assembled bread with an egg wash. This helps in browning and adds a professional finish.
- Photo 12: Optional Sugar Sprinkle. If desired, sprinkle some raw sugar or demerara sugar generously over the top of the cinnamon roll bread. This optional step adds a lovely textural crunch and a hint of extra sweetness to the crust.
- Once assembled and prepared, cover the loaf pan with a clean tea towel and allow it to rise for a second proof. This should take about 30 to 45 minutes, or until the bread has visibly puffed up and increased in size again. While it’s proofing, preheat your oven to 180°C (350°F).
- Bake the bread for 25 to 30 minutes. Keep an eye on it; it should be beautifully risen, golden brown on top, and fragrant. To ensure it’s cooked through, an internal temperature of around 90-95°C (195-205°F) is ideal.
- Allow the cinnamon roll bread to cool down completely in the loaf pan before attempting to remove it. This prevents it from collapsing and ensures a stable structure.
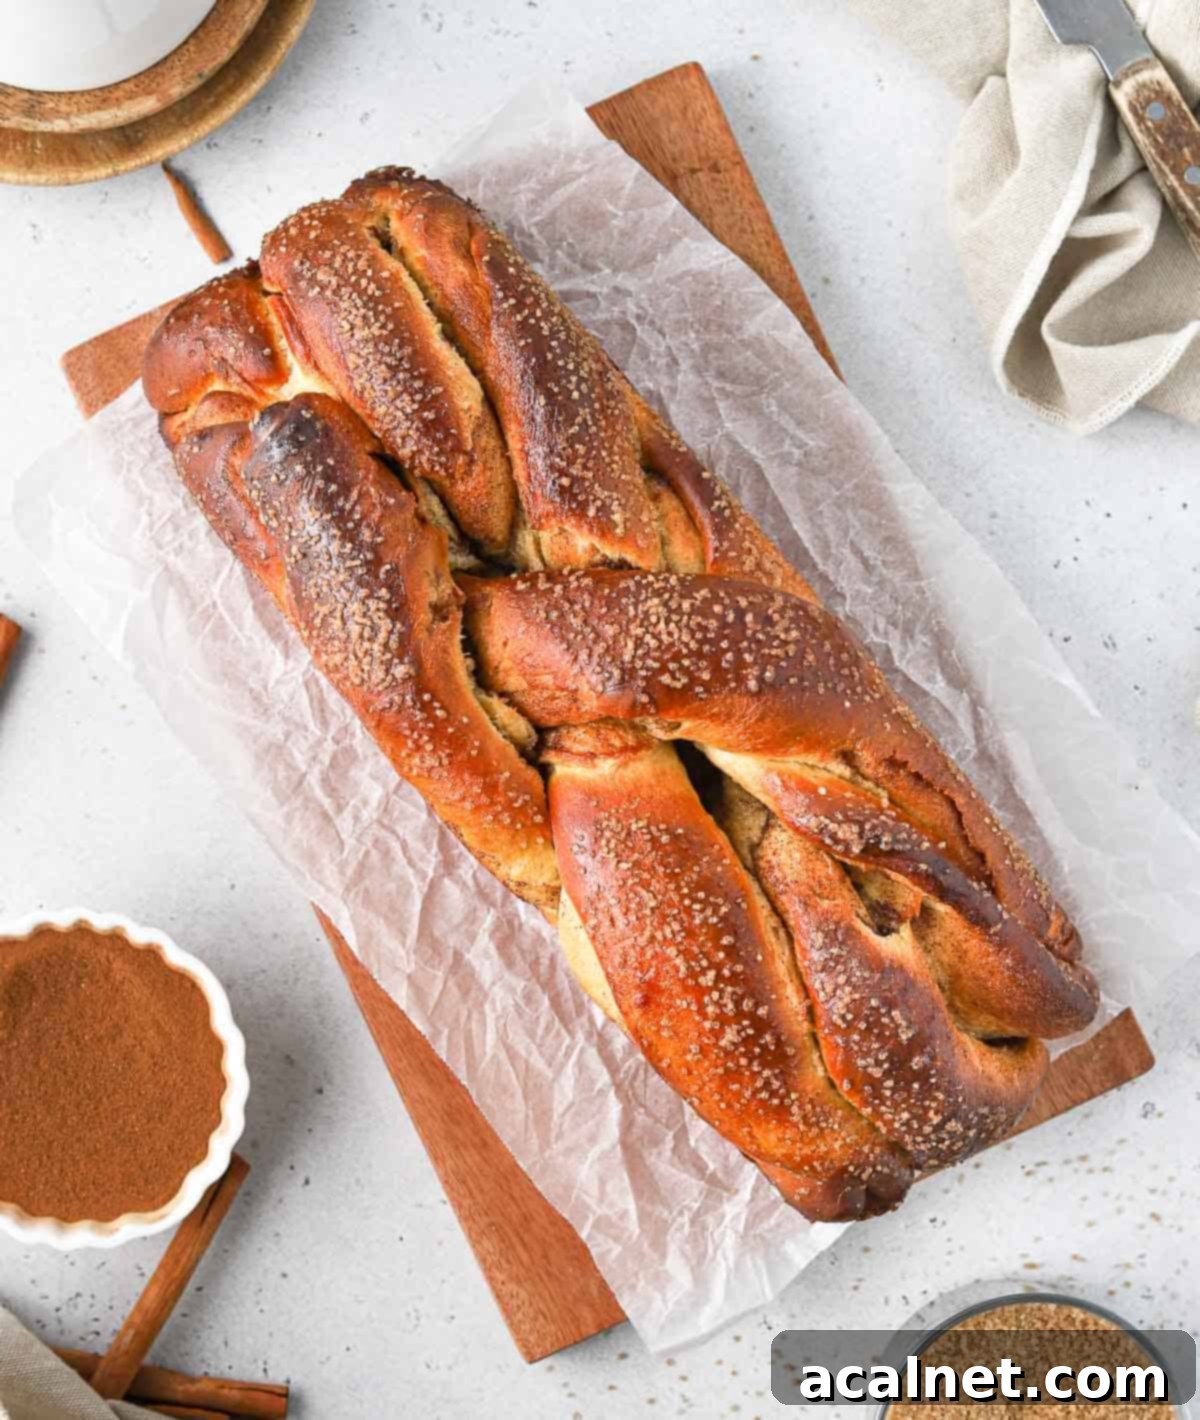
I personally find this bread delightful served simply as is, allowing its buttery cinnamon flavor to shine. However, if you crave an extra layer of sweetness, you can drizzle it with a simple icing glaze, sprinkle powdered sugar for a delicate finish, or even top it with a luscious cream cheese glaze, mimicking the classic cinnamon roll experience.
Frequently Asked Questions About Cinnamon Roll Bread
You can certainly substitute the All-Purpose Flour with the same quantities of Bread Flour. However, it’s important to note that Plain/AP Flour is specifically used in this recipe to give the dough a lighter, more tender, and softer crumb. Bread flour, with its higher protein content, tends to develop more gluten, resulting in a chewier texture. If you prefer a slightly chewier bread, bread flour is a good option, but for that signature soft brioche feel, stick to AP flour.
The windowpane test is a fundamental technique used by bakers to determine if yeast dough has been kneaded sufficiently. To perform the test, simply pull a small piece of dough (about the size of a golf ball) and gently stretch it between your fingers. If the dough tears or breaks quickly, it indicates that it needs more kneading time to develop its gluten. If, however, the dough stretches easily without tearing and becomes thin enough for light to pass through it, resembling a translucent “windowpane,” then your dough has passed the test and is perfectly kneaded.
Absolutely, proofing the dough in the refrigerator overnight is an excellent technique that offers several benefits. Firstly, the extended, slow fermentation in a cold environment allows deeper, more complex flavors to develop in the dough, enhancing the overall taste of your bread. Secondly, a cold dough is significantly easier to handle – it will be less soft and sticky, making it much simpler to cut, roll, and shape into your desired logs. To do this, prepare the cinnamon roll bread dough in the evening, cover the bowl tightly with plastic wrap, and place it in the fridge to proof overnight (typically 8 to 12 hours). In the morning, take the dough out of the fridge and let it come back to room temperature for about 30 minutes before proceeding with cutting it into pieces and filling/shaping the bread.
Unfortunately, no; this particular recipe is specifically designed for a classic cinnamon roll bread that relies on yeast for its characteristic rise, fluffy texture, and fermented flavor. It is not a “quick bread” recipe that uses baking powder or baking soda. If you’re looking for a cinnamon-flavored bread without yeast, you would need to find a completely different recipe that specifically calls for chemical leaveners.
Expert Tips for a Flawless Cinnamon Roll Bread Loaf
- Ensure Yeast Activity: There’s nothing more disheartening than investing time and effort into baking only to discover your yeast was inactive, preventing your dough from rising. To avoid this disappointment, always “bloom” your yeast, especially if using active dry yeast, or as a precautionary measure with instant yeast. This involves re-hydrating it in a warm liquid (like milk) and waiting for a reaction – observe small bubbles, froth, or a distinct yeasty aroma. This confirms your yeast is alive and well, ready to make your bread beautifully fluffy.
- Overnight Proofing for Enhanced Flavor: For an exceptionally rich flavor profile and an even more delightful texture, consider proofing your cinnamon roll bread dough overnight in the refrigerator. The slow, cold fermentation not only deepens the taste but also makes the dough much easier to handle. A chilled dough is firmer and less sticky, simplifying the rolling and shaping process, leading to more uniform logs and swirls.
- Creative Shaping is Encouraged: Don’t feel restricted by a rigid arrangement of the cinnamon roll logs in the loaf pan. This is your chance to get creative! You can place them neatly side-by-side, overlap them slightly, or even twist and braid some of the logs together to form unique and beautiful patterns. The beauty of this bread often lies in its rustic, pull-apart charm, so experiment and have fun with the arrangement to make it truly your own.
- Customize Your Cinnamon Filling: While the classic butter, brown sugar, and cinnamon filling is undeniably delicious, feel free to personalize it! Elevate the flavor by adding finely chopped nuts like pecans or walnuts for crunch, dried fruits such as raisins or cranberries for a chewy sweetness, or even a touch of citrus zest (orange or lemon) for a bright, aromatic lift. Small chocolate chunks or mini chocolate chips can also be a delightful addition, adding a rich, melty surprise to your swirls.
- Room Temperature Ingredients are Key: Especially for the brioche dough, ensuring your eggs and butter are at room temperature is crucial. Cold ingredients can shock the yeast and prevent proper gluten development, leading to a denser bread. Room temperature ingredients integrate smoothly, creating a homogeneous, pliable dough that rises beautifully.
Storing & Freezing Your Cinnamon Roll Bread
This delectable cinnamon rolls bread is at its absolute best when enjoyed fresh, ideally within a day of baking, for the most tender and buttery crumb. However, it will happily remain fresh and delicious for 2 to 3 days when stored properly at room temperature in an airtight container or tightly wrapped in plastic wrap. If you wish to enjoy a warm treat later, individual slices can be easily reheated in the microwave for a few seconds or gently toasted for a slightly crispy exterior.
The good news is that this cinnamon bread freezes exceptionally well, making it perfect for meal prep or enjoying a homemade treat whenever a craving strikes. You can freeze the entire loaf by first placing it on a tray in the freezer until it’s completely solid. Once frozen, wrap it securely in one layer of plastic wrap, followed by a layer of aluminum foil, to protect it from freezer burn. Alternatively, you can pre-slice the bread and freeze individual slices, separating them with small pieces of baking or parchment paper before wrapping. When you’re ready to enjoy, simply remove the desired amount from the freezer and allow it to thaw at room temperature. For an extra touch of warmth, you can gently reheat thawed slices.
Explore More Irresistible Bread Recipes
If you’ve enjoyed crafting this Cinnamon Roll Bread Loaf, you’re in for a treat! Our collection of bread recipes offers a variety of delightful options, from rich brioches to other spiced and savory loaves. Dive in and discover your next baking adventure:
- Decadent Chocolate Chip Brioche Bread
- Luxurious Chocolate Brioche Bread
- Speedy No Yeast Cinnamon Rolls (for when you’re short on time!)
- Warm Apple Cinnamon Pull Apart Bread
- Indulgent Triple Chocolate Cinnamon Rolls
- Classic French Brioche Loaf Bread
- Perfect Homemade Sesame Bagels
- Versatile Challah Rolls (4 Delicious Ways)
- Aromatic Coffee Cinnamon Rolls
Did you make this recipe?
We’d love to hear from you! Let us know if you liked it by leaving a comment below, and be sure to tag us on Instagram @a.baking.journey with a photo of your delightful creation!
Recipe Card
Cinnamon Roll Bread Loaf
Print Recipe
Ingredients
Cinnamon Roll Dough
- 75 ml (5 tablespoons) Full Cream / Whole Milk, lukewarm
- 60 gr (1/4 cup) Caster Sugar, or fine white granulated sugar
- 9 gr (2 teaspoons) Instant Yeast
- 3 Eggs, at room temperature
- 350 gr (2 1/3 cup) Plain / All-Purpose Flour
- 1 teaspoon Ground Cinnamon
- 1/3 teaspoon Fine Table Salt
- 90 gr (6 tablespoons) Unsalted Butter, very soft
- 1 Egg for Egg Wash, optional
Cinnamon Filling
- 120 gr (1/2 cup) Unsalted Butter, very soft
- 100 gr (1/2 cup) Brown Sugar
- 2 teaspoon Ground Cinnamon
- Raw Sugar / Demerara Sugar to taste, optional
Instructions
Cinnamon Roll Dough
- Place the lukewarm Milk in the bowl of your stand mixer and mix it with one tablespoon of the Caster Sugar. Add the Yeast, stir then let it bloom for about 10 minutes – or until the mixture looks bubbly / frothy.75 ml (5 tablespoons) Full Cream / Whole Milk, 9 gr (2 teaspoons) Instant Yeast
- Add the Eggs then the Plain/AP Flour, rest of the Caster Sugar, Ground Cinnamon and finish with the salt (see note 1). Knead on medium speed with the dough hook until a sticky dough comes together.60 gr (1/4 cup) Caster Sugar, 3 Eggs, 350 gr (2 1/3 cup) Plain / All-Purpose Flour, 1 teaspoon Ground Cinnamon, 1/3 teaspoon Fine Table Salt
- Add the soft Butter a little bit at the time, kneading until incorporated before adding more (see 2). Keep kneading on medium high to high speed for about 10 to 12 minutes, or until the dough passes the “windowpane test”. The cinnamon roll dough will be very soft and still slightly sticky – that’s normal!90 gr (6 tablespoons) Unsalted Butter
- Cover the bowl with a tea towel and leave it to proof in a warm spot for about 1,5 hours, or until it has doubled in size – or overnight in the fridge for 8 to 12 hours.
Cinnamon Filling
- Mix together the soft Butter, Cinnamon and Brown Sugar in a small bowl. Set aside (see note 3).120 gr (1/2 cup) Unsalted Butter, 100 gr (1/2 cup) Brown Sugar, 2 teaspoon Ground Cinnamon
- Punch the dough to deflate it and transfer it over a lightly floured surface. Cut the dough into 8 equal pieces (see note 4).
- Shape each piece of dough into a log shape then roll it into a thin rectangle with a rolling pin. The longest side of the rectangle should be at least as long as the Loaf Pan you are using.
- Spread a little bit of the cinnamon filling over the dough, then roll the dough on itself to create a long log shape. Repeat the process with the 8 pieces of dough (see note 5).
- Lightly grease and line a Loaf Pan with baking paper (used a 11,5x30cm / 4,5×12 inch loaf pan). Place the rolls of dough inside the loaf pan next to and on top of each other to create an un-even pattern. You can twist some of the logs together to create a pretty pattern or just place them on top of each other.
- Brush the bread with an Egg Wash then sprinkle with the Raw / Demerara Sugar.1 Egg for Egg Wash, Raw Sugar / Demerara Sugar to taste
- Cover with a tea towel and leave to proof again for 30 to 45 minutes or until it has risen again.
- Preheat your oven on 180’C/350’F, then bake the bread for 25 to 30 minutes or until puffed and golden brown. Let the cinnamon roll bread cool down completely before taking it out of the loaf pan.
Video
Would you like to save this recipe?
We’ll email this post to you, so you can come back to it later!
Notes
- Make sure to add the salt last as you don’t want it to be in direct contact with the yeast, which might kill it. I personally like to mix all the ingredients with a spatula first until just combined before using the stand mixer hook attachment.
- The dough can get quite greasy when you add the butter so feel free to stop and scrap the edges of the bowl to help the machine when required.
- If the filling seems quite soft or too liquid (if the butter was too warm), place it in the fridge to set again for a few minutes.
- To be precise, use a kitchen scale to weight out the dough and make sure all pieces are equal.
- Alternatively, you could also roll the dough into a large rectangle, spread the cinnamon filling over it then cut it into 8 equal pieces before rolling each piece on its own to get the log shape.
Nutrition (per serving)
