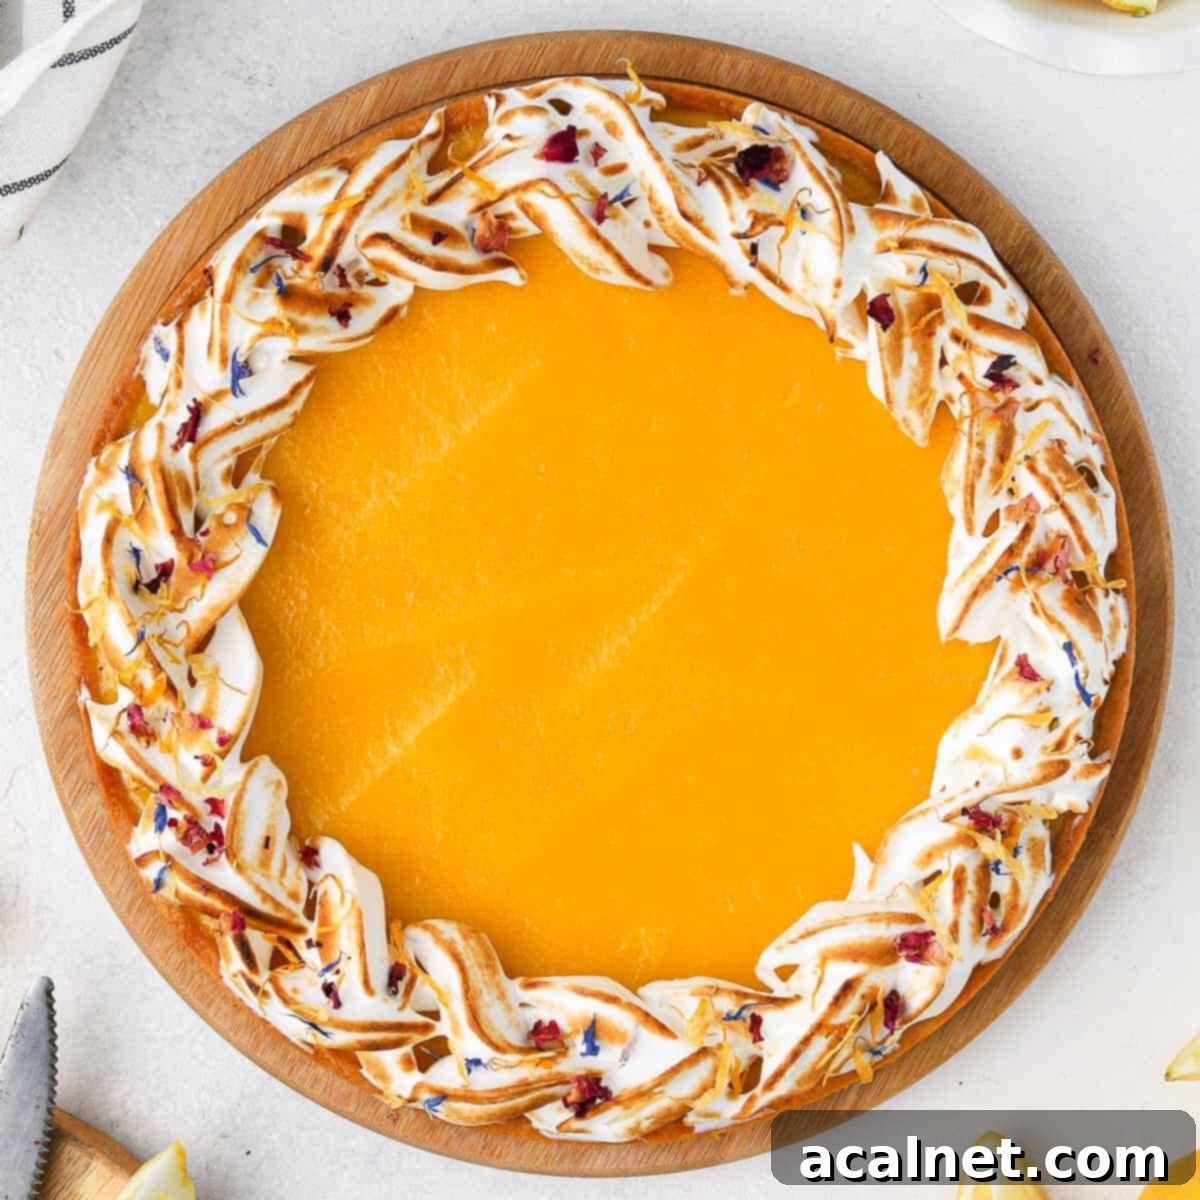
Classic Lemon Curd Tart with Meringue: Your Ultimate Homemade Recipe Guide
Indulge in the bright, tangy flavors of this exquisite Classic Lemon Curd Tart, an impeccable dessert designed to impress at any dinner party or elevate a special occasion. This recipe guides you through creating a delicate, buttery homemade shortcrust pastry, which cradles a luscious, simple yet vibrantly tangy lemon curd filling. For an added touch of elegance and a perfect balance of flavors, it’s crowned with an optional, beautifully toasted Swiss Meringue topping. Prepare to delight your senses and those of your guests with this timeless dessert that perfectly marries crunch, creaminess, and a delightful zesty kick.
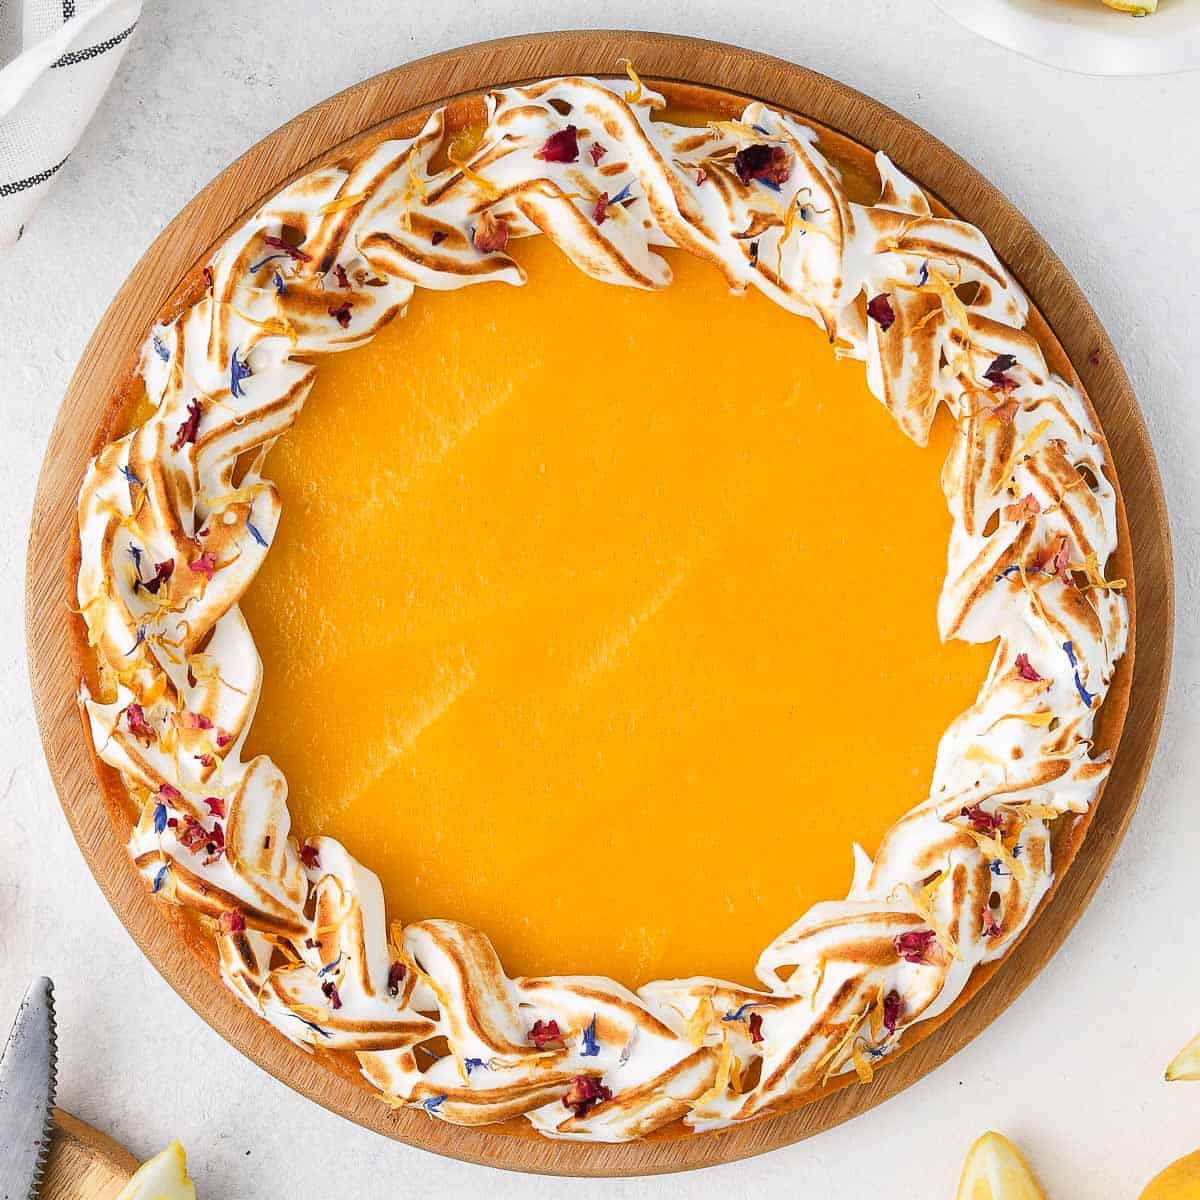
Why You’ll Adore This Classic Lemon Curd Tart Recipe
There’s an undeniable charm to a perfectly executed tangy Lemon Tart, and this recipe delivers just that. It’s more than just a dessert; it’s a culinary experience that consistently earns rave reviews, whether served at an elegant gathering, a casual dinner party, or simply as a treat because you deserve it! This particular Lemon Curd Tart is a grander, more substantial iteration of beloved smaller bakes like my Lemon Curd Tartlets and Mini Lemon Meringue Tarts, designed to be the showstopper of your dessert table.
The foundation of this exquisite tart is a traditional French Shortcrust Pastry, known as Pâte Sablée. This rich, crumbly pastry can be expertly prepared in advance, allowing you to focus on the luscious homemade Lemon Curd filling just a few hours before serving. The convenience of staggered preparation makes this elegant dessert surprisingly accessible for home bakers.
While the airy Swiss Meringue topping is entirely optional, it’s a brilliant addition that elevates the tart from simply delicious to truly unforgettable. Its subtle sweetness provides a beautiful counterpoint to the vibrant tanginess of the Lemon Curd, creating a harmonious balance. With every bite, you’ll experience a symphony of textures and flavors: the satisfying crunch of the buttery crust, the smooth creaminess of the zesty curd, and the light, sweet cloud of toasted meringue. It’s a dessert that never fails to please, leaving a lasting impression on everyone who tries it.
Essential Ingredients for Your Perfect Lemon Tart

Crafting this delightful Lemon Tart requires a handful of quality ingredients. While I wholeheartedly recommend making your own tart crust for superior flavor and texture, a store-bought option can be a convenient shortcut if time is a concern.
For precise quantities, please refer to the detailed recipe card below.
Pâte Sablée / French Shortcrust Pastry
This classic French tart dough is renowned for its tender, crumbly texture. It’s a simple yet elegant blend of:
- Plain / All-purpose Flour: Provides the structure for our delicate crust.
- Fine Salt: Enhances all the other flavors, balancing the sweetness.
- Icing Sugar (Powdered Sugar): Contributes to the pastry’s tender texture and slight sweetness, making it less brittle than granulated sugar.
- Cold Unsalted Butter: Essential for a flaky and rich crust. Keeping it very cold ensures it creates pockets of steam during baking, leading to a perfectly tender result.
- An Egg: Acts as a binding agent, bringing the dough together and adding richness.
Alternatively, you could opt for a Sweet Shortcrust Pastry (Pâte Sucrée), which is generally a bit sturdier and less prone to crumbling than the Pâte Sablée, offering a slightly different texture profile.
Lemon Curd Filling
The heart of this tart, this tangy and smooth filling is made with:
- Lemons: You’ll need both the aromatic Lemon Zest and freshly squeezed Lemon Juice. The zest provides intense lemon flavor, while the juice delivers the signature tang. Depending on the size and juiciness of your lemons, you might require more than two.
- Egg Yolks: Medium-sized and at room temperature for optimal emulsification and a creamy texture. Don’t discard the egg whites – save them for the meringue topping, or use them to make delicious Financiers!
- Sugar: Caster Sugar or fine White Granulated Sugar. This recipe leans towards a wonderfully tangy curd with a relatively low sugar content. Feel free to adjust and increase the sugar if you prefer a sweeter dessert.
- Cornstarch: A crucial thickening agent that ensures the curd sets beautifully, allowing for clean slices without the filling spreading out. It contributes to a wonderfully creamy, yet stable, texture.
- Butter: Unsalted and at room temperature. Butter is folded in at the end to provide richness, gloss, and a silky smooth finish to the curd.
Swiss Meringue Topping
This elegant, stable meringue is crafted from just two ingredients:
- Egg Whites: Preferably from the same eggs used for the curd, at room temperature for best whipping results.
- Caster Sugar: Fine white granulated sugar dissolves quickly and creates a smooth, stable meringue.
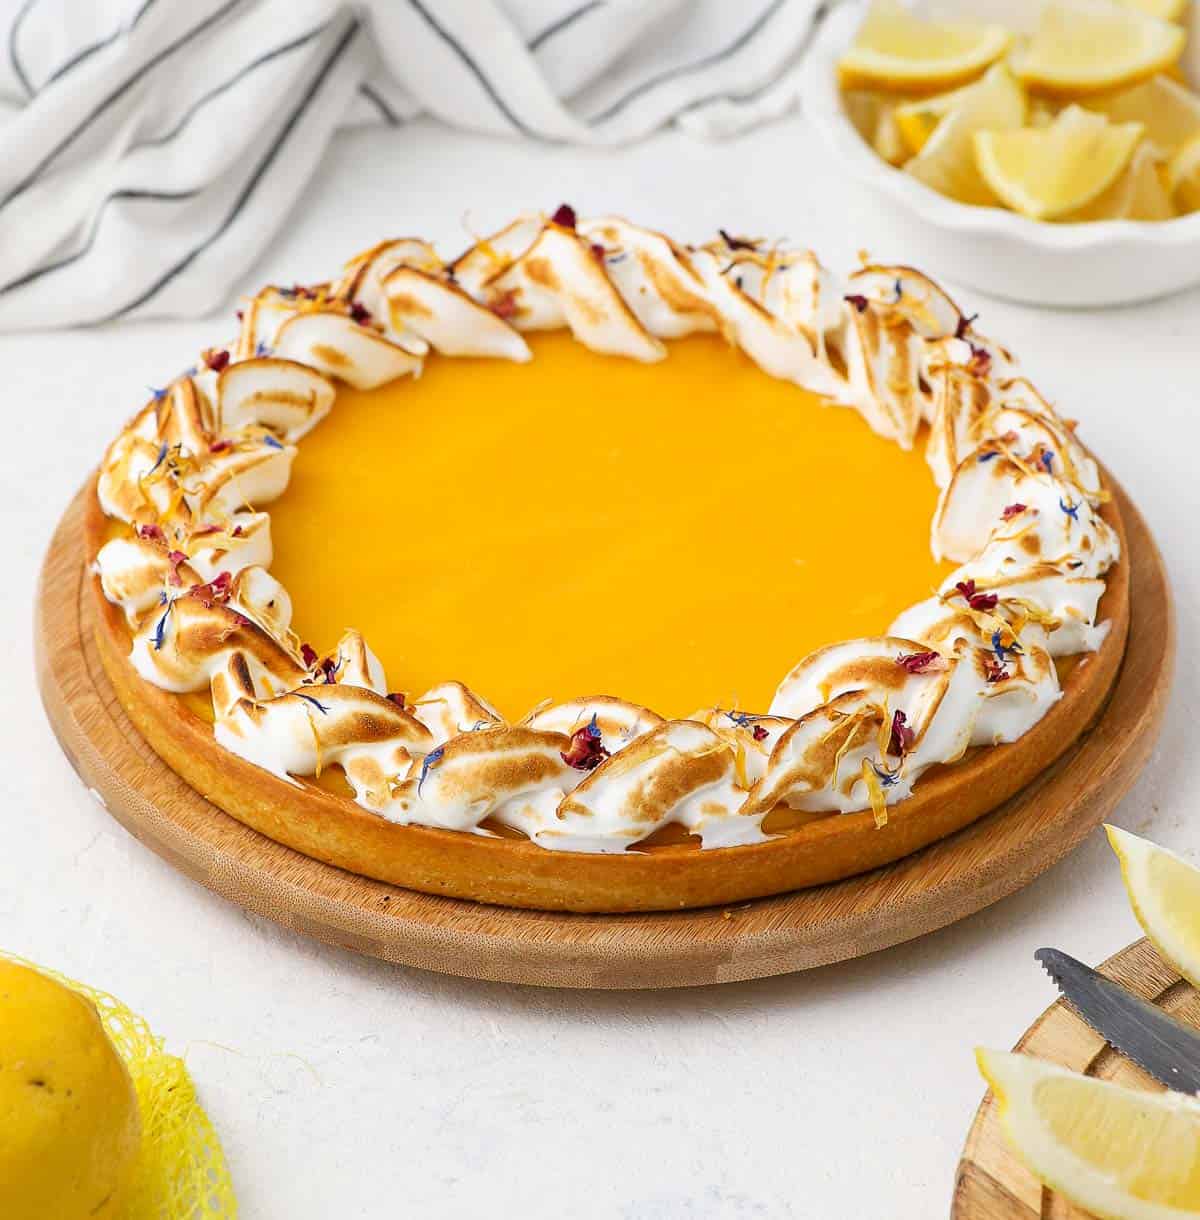
Step-by-Step Guide: Crafting Your Lemon Curd Tart
Creating this stunning lemon curd tart is a rewarding process broken down into three main stages: preparing and baking the shortcrust pastry, crafting the vibrant homemade lemon curd filling, and finally, for those who desire, elegantly topping it with a Swiss meringue once the curd has perfectly set.
1. Preparing the Shortcrust Pastry (Pâte Sablée)
This tender, crumbly tart pastry dough can be efficiently made in a food processor, though it’s also perfectly achievable by hand if you prefer a more traditional approach (detailed hand-mixing instructions can be found in my Pâte Sablée recipe). The key here is to keep ingredients cold for optimal texture.
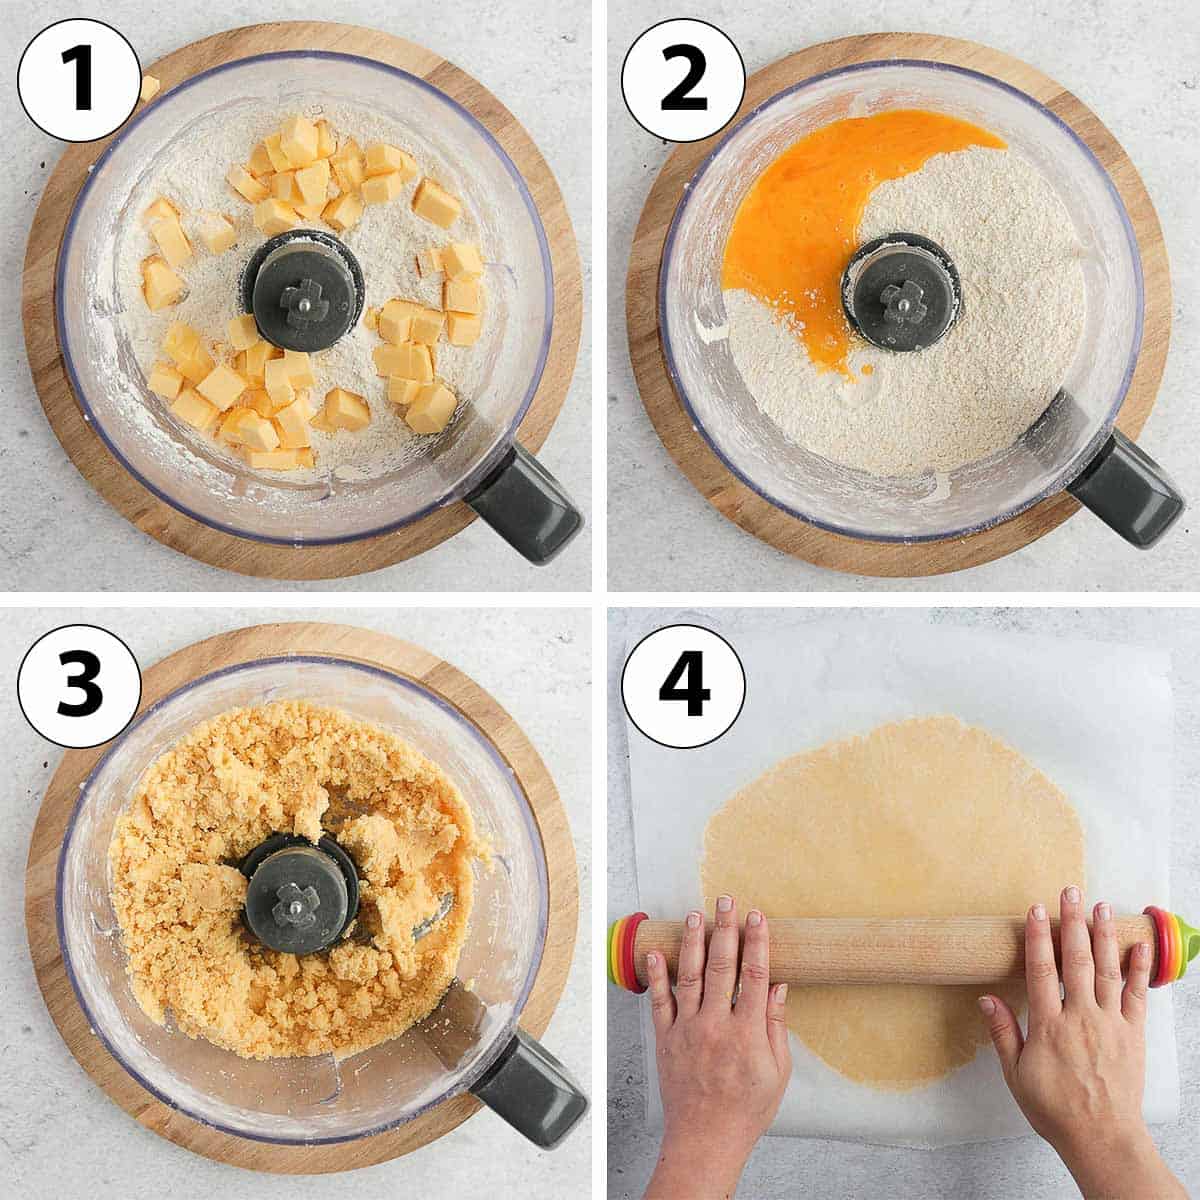
- Photo 1: Begin by combining the flour, a pinch of fine salt, and the icing sugar in the bowl of your food processor. Pulse a few times to ensure these dry ingredients are well mixed. Next, add the very cold unsalted butter, cut into small cubes. Pulse repeatedly until the butter is fully incorporated into the flour mixture, resembling very fine crumbs or coarse sand. Avoid over-processing at this stage.
- Photo 2: Carefully add the single egg to the crumb mixture. The egg provides the necessary moisture to bind the dough.
- Photo 3: Continue to pulse the mixture in the food processor until a rough dough just begins to come together. It might still look a bit crumbly, but if you pinch a small amount between your fingers, it should hold its shape and stick together. This indicates the dough is ready and not overmixed, which can lead to a tough crust.
- Photo 4: Transfer the freshly formed dough onto a large sheet of baking paper (parchment paper). Gently gather and press it into a cohesive, large ball. Place a second sheet of baking paper over the dough and, using a rolling pin, roll it out into an even circle, approximately 4mm (1/8 inch) thick. Rolling between two sheets of paper prevents sticking and ensures a smooth finish. Transfer the rolled dough, still between the paper, onto a flat tray and refrigerate for at least one hour, or ideally up to 24 hours. This chilling period is crucial for relaxing the gluten and ensuring the pastry holds its shape beautifully during baking.
For achieving a consistently even pastry thickness, I highly recommend using a rolling pin with thickness rings. This simple tool makes a significant difference in the final baked texture of your tart.
- Once thoroughly chilled, carefully remove the dough from the fridge. Gently line the pastry inside a 25 cm / 10 inch perforated tart ring or your preferred tart pan with a removable bottom. Perforated rings are excellent for ensuring a crispy bottom crust. Press the dough gently into the corners and up the sides. Prick the bottom of the pastry all over with a fork (known as “docking”) to prevent it from puffing up during blind baking. Return the lined tart pan to the fridge for another hour, or up to 24 hours, for a second critical chill.
This recipe provides a generous amount of pastry, suitable even for a slightly deeper yet smaller tart pan, such as a standard 22 cm / 9 inch tart pan, allowing for a thicker crust or decorative edges.
- Preheat your oven to 160°C (325°F). While the oven heats, place the pastry-lined tart pan in the freezer for about 15-20 minutes. This quick freeze helps to further solidify the butter and prevent shrinkage. Blind bake the pastry for 30 to 40 minutes, or until it’s beautifully golden brown and fully baked through. Once baked, remove from the oven and set aside to cool down completely on a wire rack before filling. A fully cooled crust is essential to prevent the lemon curd from becoming soggy.
2. Crafting the Tangy Lemon Curd Filling
Once your tart crust has completely cooled – patience is key here! – it’s time to prepare the star of the show: the silky, intensely flavorful Lemon Curd Filling. This process is straightforward but requires consistent stirring.
- Begin by zesting your lemons, being careful to only get the bright yellow part, avoiding the bitter white pith. Then, juice the lemons. Place the fresh lemon juice in a small saucepan and set the zest aside for later. Gently heat the lemon juice over low to medium heat until it begins to steam and is warm, but not boiling. Simultaneously, in a small heat-proof bowl, vigorously whisk together the egg yolks, sugar, and cornstarch until smooth and pale.
- Once the lemon juice is warm, gradually pour it in a thin, steady stream over the egg and sugar mixture while continuously whisking. This crucial step, known as tempering the eggs, prevents them from cooking too quickly and curdling, ensuring a perfectly smooth curd. After tempering, transfer the entire mixture back into the same saucepan.
Tempering the eggs carefully prevents them from scrambling or forming lumps, leading to a perfectly smooth and creamy lemon curd.
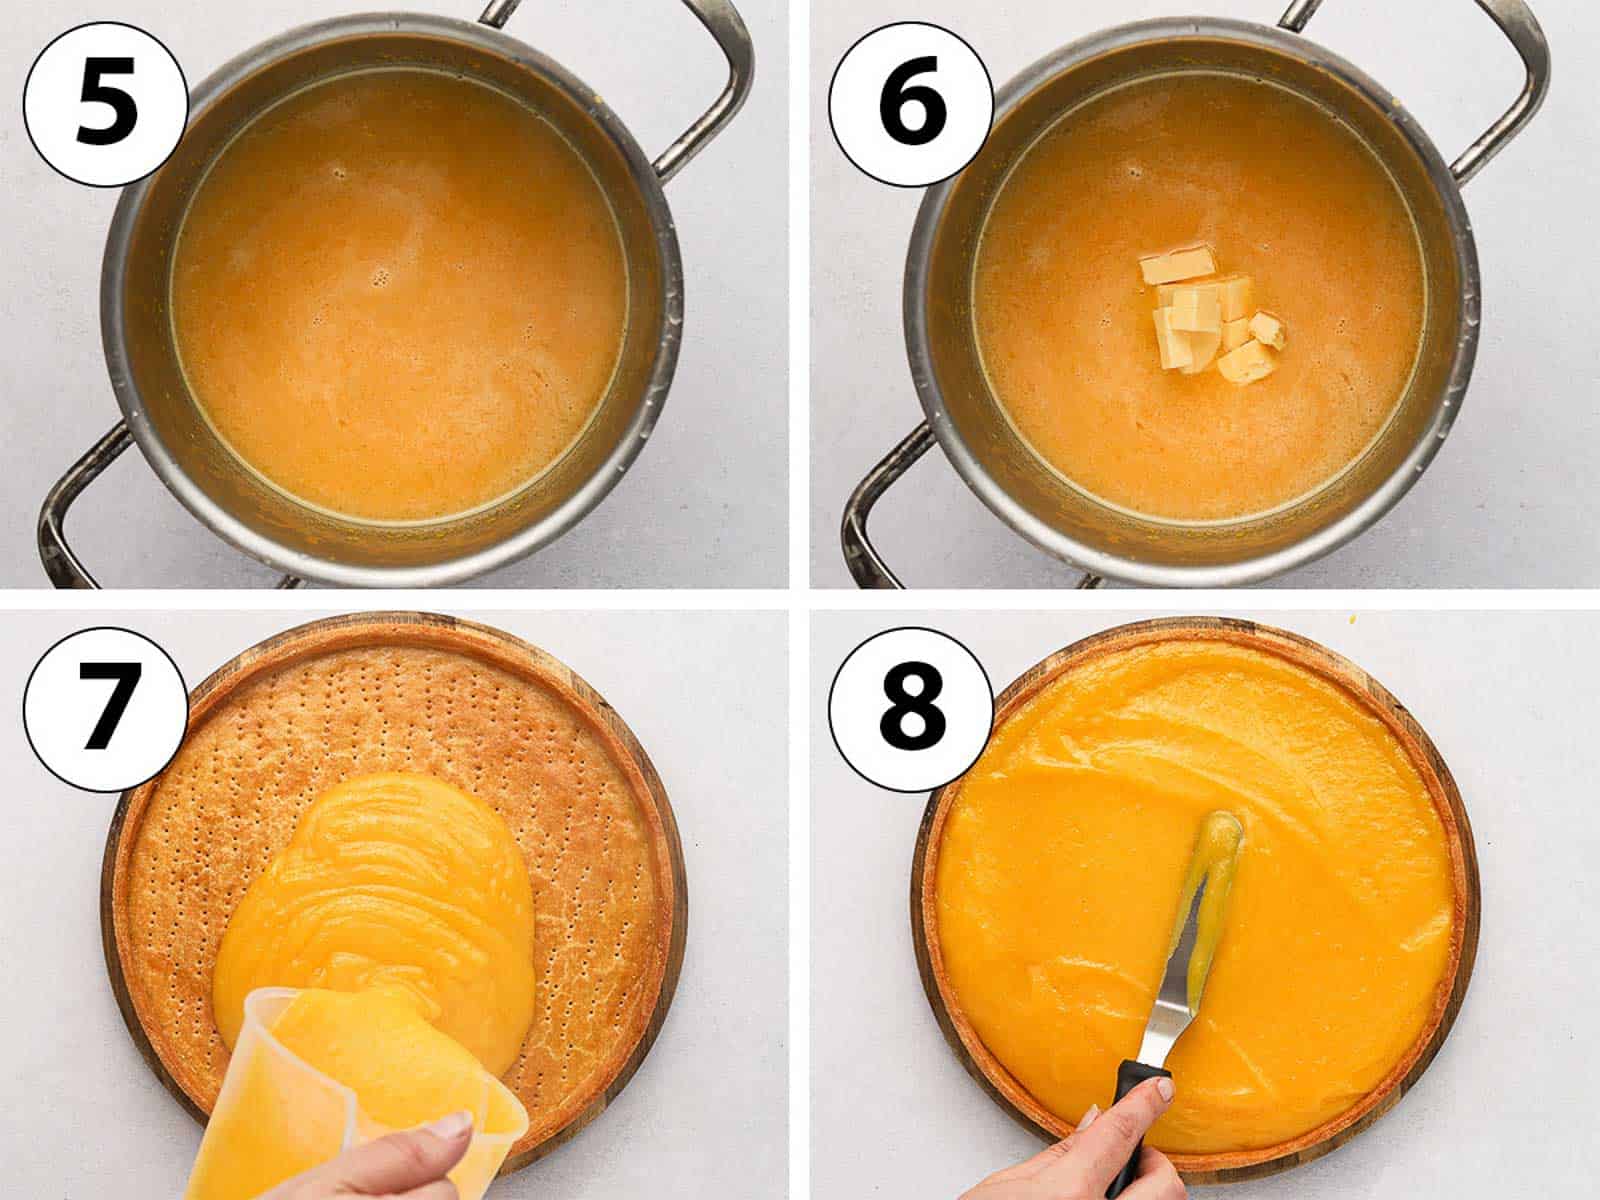
- Photo 5: Cook the mixture over low to medium-low heat, stirring continuously with a heat-proof spatula or wooden spoon. The curd will gradually thicken to a custard-like consistency. It’s important not to let it boil vigorously. Continue stirring until it coats the back of your spoon, and a line drawn with your finger stays clear.
At this stage, take a moment to taste the curd and adjust the sweetness level to your preference. If you prefer a less tangy, sweeter dessert, add a little more sugar, whisking until dissolved.
- Photo 6: Remove the saucepan from the heat. Gradually add the cold unsalted butter, one cube at a time, whisking constantly until each piece is fully melted and incorporated before adding the next. This enriches the curd and gives it a beautiful sheen. Once all the butter is in, stir in the reserved lemon zest. Cook for another 2 to 3 minutes over very low heat, ensuring it doesn’t come to a boil. If, despite your best efforts, the curd appears clumpy or you notice any small bits of cooked egg, immediately pour the lemon curd through a fine-mesh sieve to strain it, ensuring a silky-smooth finish.
- Photo 7: While the lemon curd is still warm and pourable, carefully pour it into your completely cooled, blind-baked tart shell.
- Photo 8: Using a small offset spatula or the back of a spoon, gently spread the curd filling evenly across the bottom of the tart crust, ensuring a smooth, level surface.
- Place the filled lemon curd tart in the refrigerator to chill for at least 2 to 3 hours, or preferably overnight. This chilling period is essential for the curd filling to fully set and achieve its perfect sliceable consistency.
3. Optional: Adding a Beautiful Swiss Meringue Topping
The final, show-stopping step is to adorn your lemon tart with a cloud of glossy, perfectly toasted meringue. This step is entirely optional, but it offers an elegant finish and introduces a delightful sweetness that perfectly complements the tartness of the lemon curd. For best results, prepare and add the meringue just before serving, or as close to serving time as possible.
For this recipe, we use a Swiss Meringue, which is created by gently cooking egg whites and sugar over a double boiler before whipping. This technique results in a more stable, silky, and less temperamental meringue compared to its French counterpart.
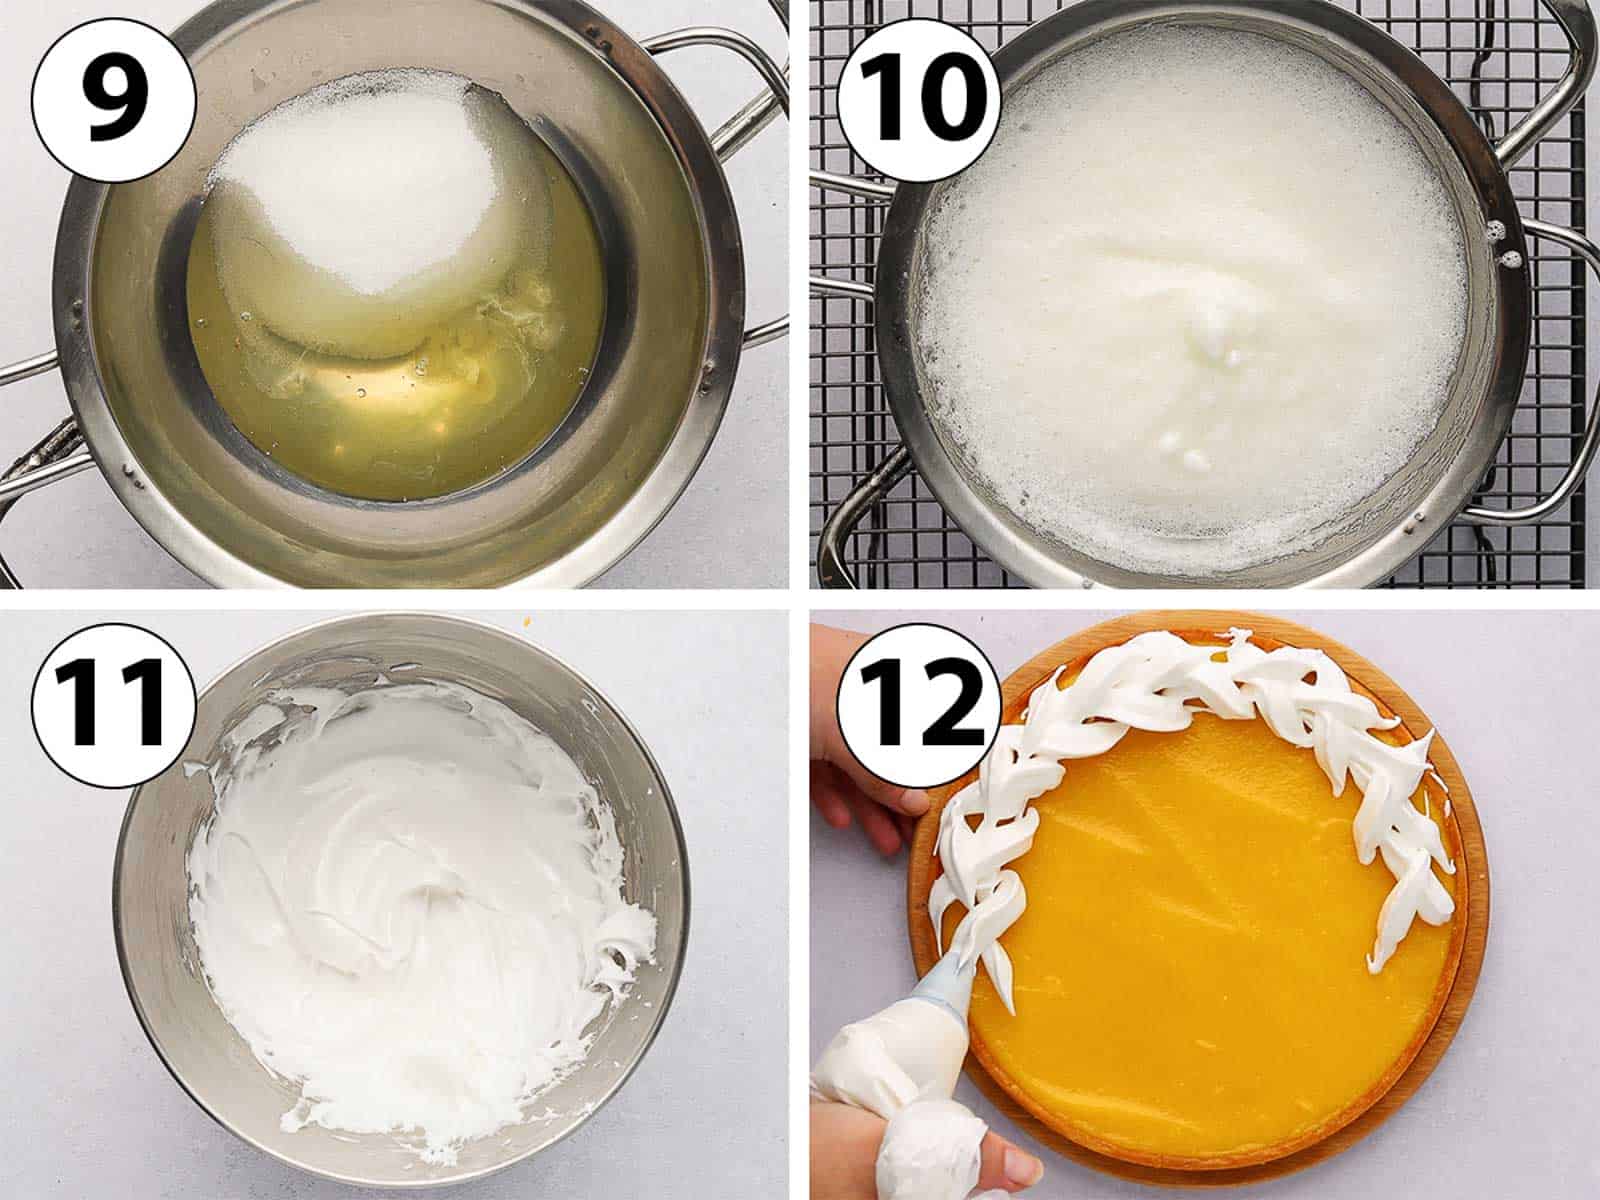
- Photo 9: Set up a double boiler by preparing a saucepan with a small amount of simmering water (ensure the water does not touch the bottom of the bowl placed over it). In a separate, small heat-proof bowl, combine your egg whites and caster sugar. Place this bowl directly over the saucepan, turning the stove to low to medium-low heat.
- Photo 10: Continuously whisk the egg white and sugar mixture for several minutes over the simmering water. As you whisk, the mixture will gradually double in volume and become frothy. The crucial indicator that it’s ready is when the sugar has completely dissolved; you should not feel any sugar grains if you rub a small amount of the mixture between your fingers. The temperature should reach around 70°C (160°F) for safety and stability.
- Photo 11: Carefully transfer the warm egg white and sugar mixture into the clean bowl of your stand mixer (or a large mixing bowl if using a hand mixer). Whisk on medium to high speed until the meringue reaches almost stiff peaks. You want it to be firm but still slightly soft and pliable, which makes it easier to pipe beautifully over the lemon tart. Stop just short of very firm, unmoving stiff peaks.
- Once your meringue is ready, transfer it to a piping bag fitted with your desired tip. For a particularly elegant finish, I often use a “St Honoré Piping Tip” to create a decorative crown shape, piping a criss-cross pattern around the edges of the tart. You can find a visual demonstration of this technique in the recipe video provided in the recipe card below.
Feel free to get creative with your decoration! You can simply spread the meringue over the tart with an offset spatula for a rustic look, or use a round or star-shaped piping tip to create small dots or swirls. If you wish to fully cover the entire tart with meringue, remember to double the quantities of egg whites and sugar for the Swiss meringue recipe.
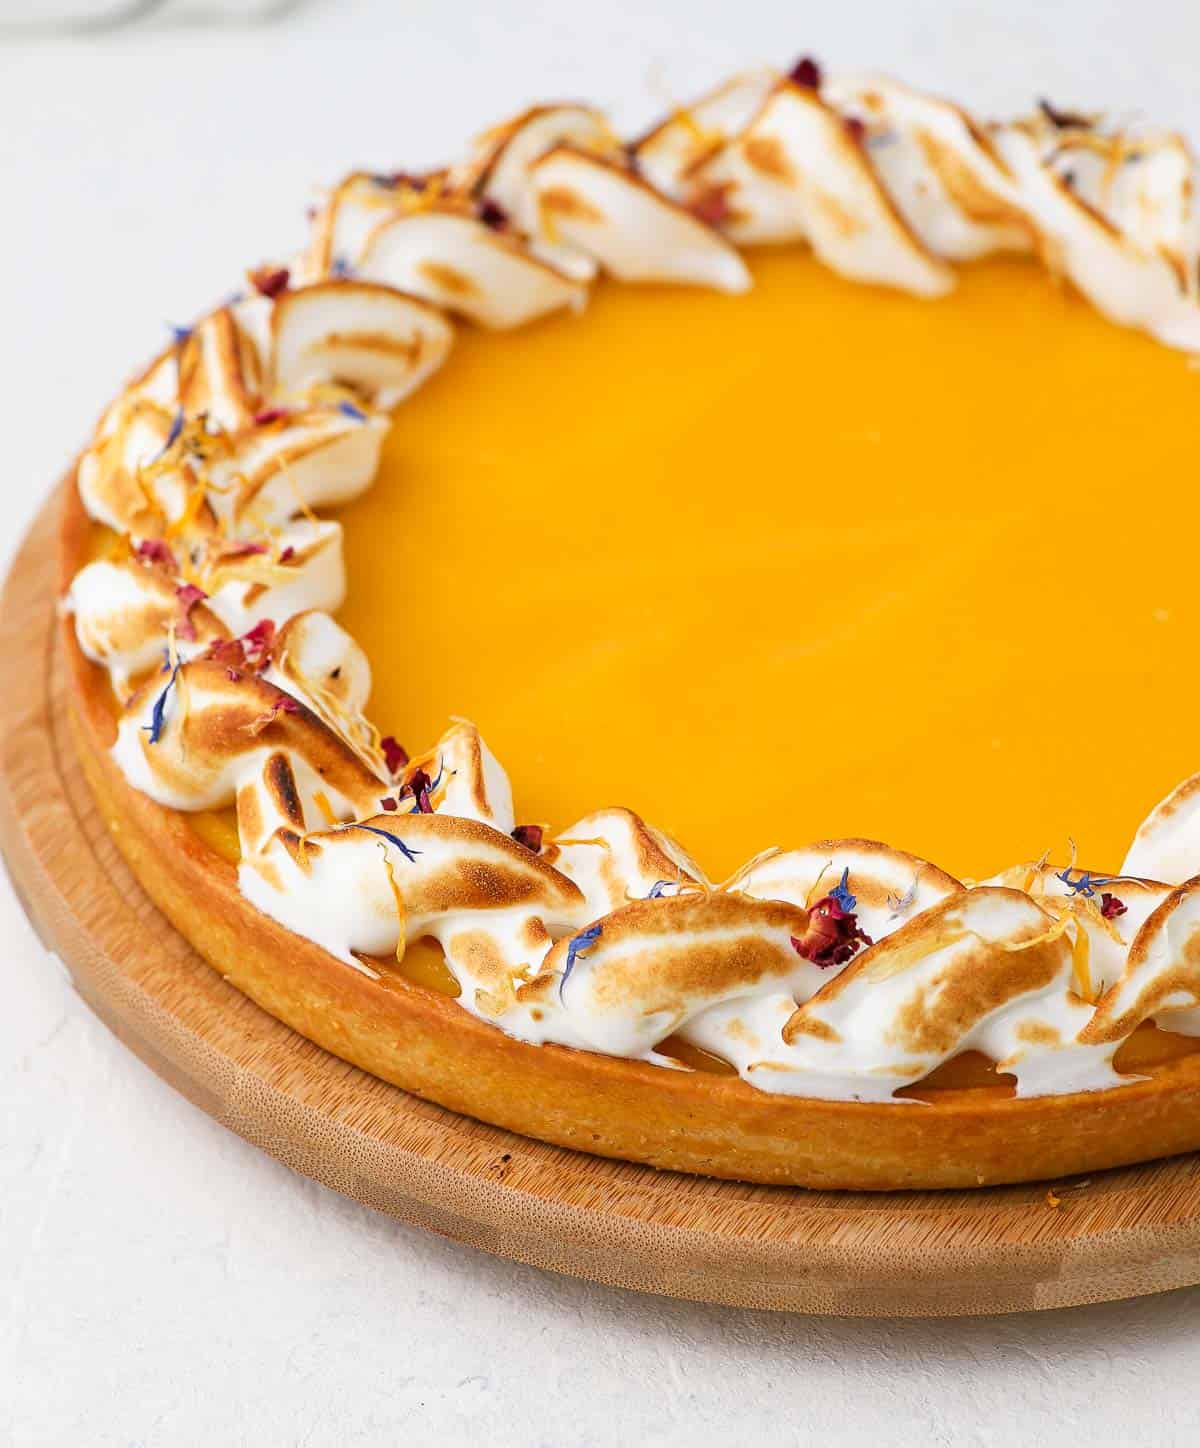
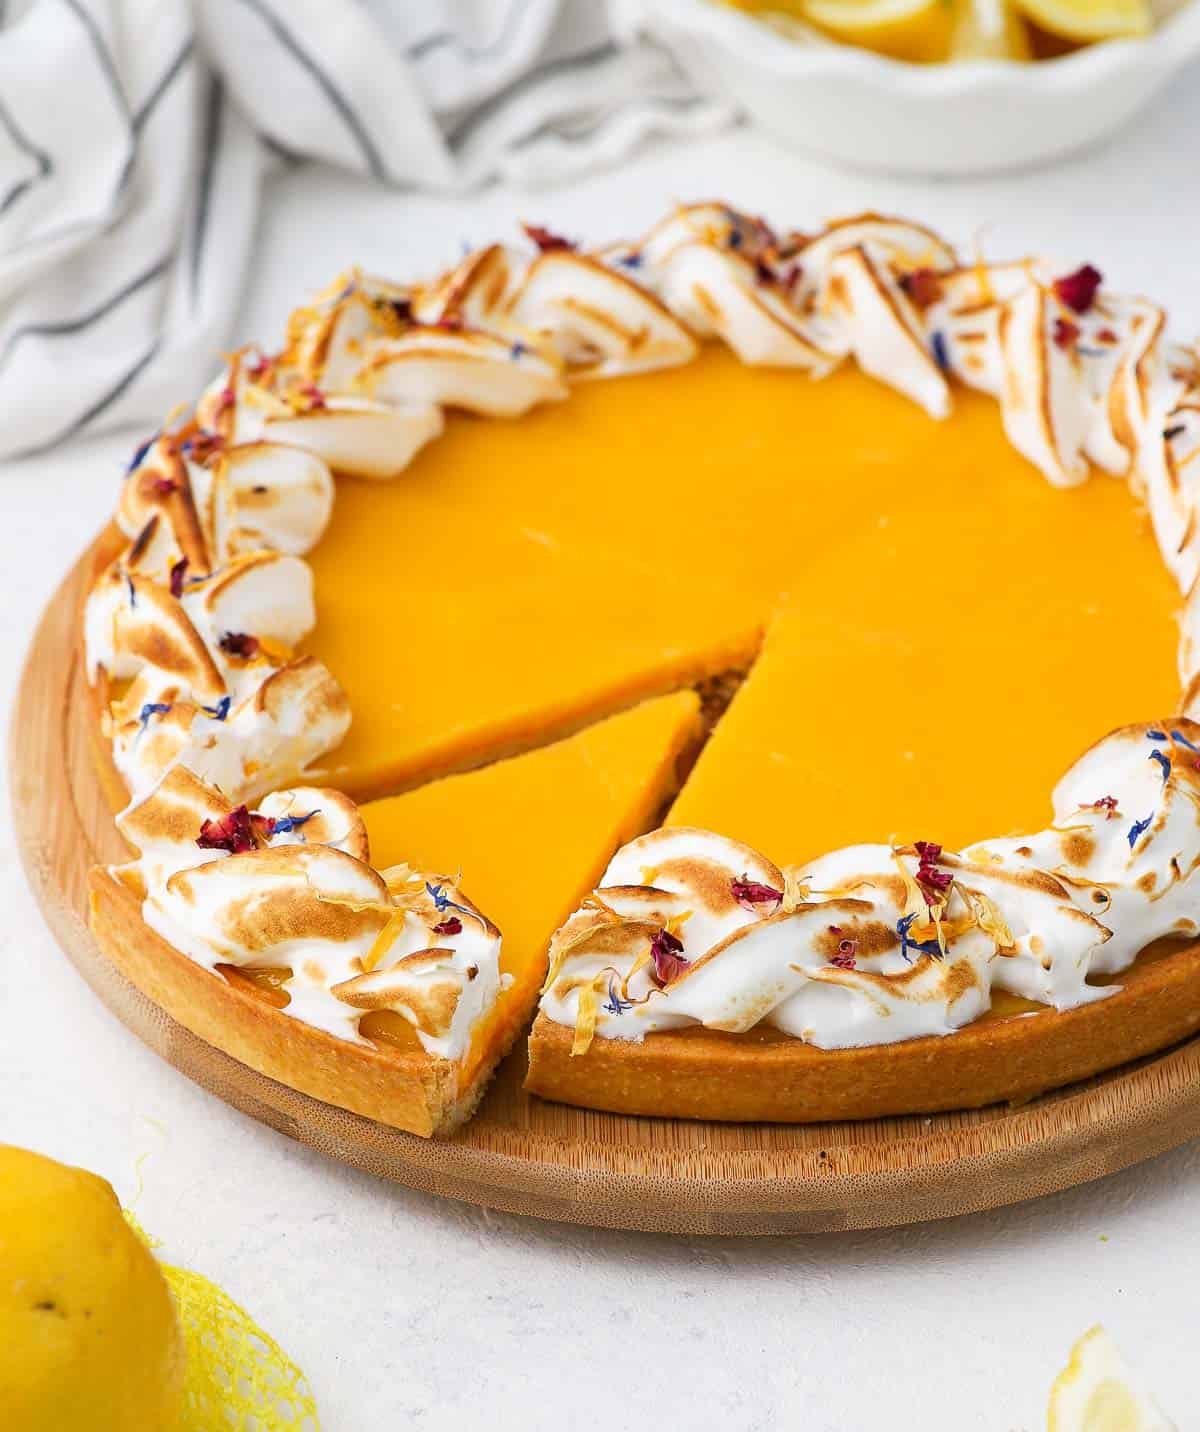
- To achieve that signature toasted look and flavor, use a kitchen torch to gently toast the meringue until the peaks are beautifully golden brown. Serve immediately for the best experience.
To further enhance the visual appeal of your finished lemon curd tart, consider garnishing it with delicate dried edible flowers, a dusting of icing sugar, a dollop of fresh whipped cream, or some vibrant fresh berries. Candied lemon slices also make a sophisticated and complementary topping.
Lemon Curd Tart: Frequently Asked Questions
While a store-bought lemon curd can be a time-saver, you will undoubtedly achieve the best, most authentic, and intensely flavorful results by making the lemon curd yourself from scratch. This method also grants you the flexibility to precisely adjust the sweetness and tanginess of the curd to your exact liking. Furthermore, this specific homemade curd recipe is slightly thickened with cornstarch, which helps it set perfectly firm and sliceable. A store-bought curd, while functional, typically won’t offer the same level of depth in flavor or ideal set texture.
Absolutely! If you’re short on time or simply prefer to streamline the process, a good quality store-bought shortcrust pastry will work perfectly well. Just be sure to blind bake it according to the package instructions or the general guidelines for blind baking a tart shell before filling it with the lemon curd. This allows you to enjoy a delicious homemade lemon tart with less effort.
In this recipe, the lemon curd is expertly thickened with cornstarch. This ingredient is key to achieving a curd filling that is firm enough to easily slice the tart into neat portions, yet still retains a wonderfully creamy and smooth texture that melts in your mouth. If you were aiming for an exceptionally firm, almost gelatinous texture (though not typical for this classic tart), you could potentially add a small amount of gelatin to the curd mixture, but for a classic, creamy curd, cornstarch is ideal.
There are two reliable methods to determine if your lemon curd has cooked sufficiently and reached the perfect consistency. The first, and most traditional, is the “spoon test”: dip the back of a spoon into the curd, then draw a line across it with your finger. If the line remains clear and the curd doesn’t immediately run back together, your curd is fully cooked and has thickened adequately. The second, more precise option, is to use a food thermometer. The curd is done when it registers a temperature of approximately 82°C (180°F).
Generally, not all lemon curds are suitable for direct use as a pie filling because some are too thin to set properly in a larger pie format. However, in this specific case, our homemade lemon curd recipe, fortified with cornstarch, is indeed thick enough to function as an excellent pie filling. A significant advantage is that this particular curd does not require any further baking once it’s poured into your pre-baked crust, making it a convenient and delicious option for a no-bake lemon pie.
Pro Tips for a Flawless Lemon Curd Tart
- Embrace the Chill: Do not underestimate or skip the crucial chilling and resting times for your pastry dough. These periods are absolutely essential to ensure the butter remains firm and the gluten has sufficient time to relax. This meticulous chilling prevents the dough from shrinking excessively during baking, resulting in a beautifully crisp, tender, and perfectly shaped tart crust that doesn’t slump.
- Patience is Key for Setting Curd: After you’ve lovingly filled your baked tart crust with the warm lemon curd, the chilling and setting time can vary. Factors such as the precise temperature of your refrigerator and the depth of your tart pan will influence how long it takes. For the very best, firm, and sliceable results, I highly recommend preparing the tart the evening before you plan to serve it and allowing it to chill thoroughly in the fridge overnight.
- Meringue Timing for Perfection: If you’re opting for the Swiss meringue topping, it’s best to decorate the tart just before serving. While Swiss meringue is significantly more stable than a French meringue, it can eventually start to “weep” or release moisture over time, affecting the curd below. For an extra flourish and to truly impress your guests, consider toasting the meringue with a kitchen torch right at the table!
Common Lemon Curd Tart Issues & How to Fix Them
- The shortcrust pastry is too dry or too wet to properly roll: If your pastry dough feels too dry and crumbly to form a cohesive ball or roll out smoothly, add a very small amount of very cold water, one teaspoon at a time, mixing gently until it just comes together. Conversely, if the dough is too sticky or wet, incorporate a little more flour, one teaspoon at a time, until it reaches a manageable consistency.
- The lemon curd is clumpy or grainy: This usually happens if the curd was cooked too quickly, over too high heat, or stirred insufficiently, causing the egg to partially scramble. Don’t despair! You can often salvage it by immediately pouring the warm curd through a very thin mesh sieve or a fine-mesh strainer to remove any small lumps or cooked egg bits, leaving you with a much smoother consistency. For persistent small lumps, a quick pulse with an immersion blender for just a few seconds can help, but be cautious not to over-blend, which can thin the curd too much.
- The lemon filling is runny and won’t set: It’s perfectly normal for the lemon filling to appear quite liquid when you first pour it into the crust. It will firm up considerably as it chills in the refrigerator. However, if after several hours of chilling (or even overnight) the filling still hasn’t set, it most likely means the lemon curd was not cooked enough initially. Ensure you’re reaching the correct temperature (82°C / 180°F) or passing the “spoon test” during the cooking stage to ensure proper thickening.
Storage and Freezing Guidelines
This exquisite lemon curd tart should always be stored in the refrigerator. For the best taste and texture, it is ideally consumed within two days of preparation. The individual components offer some flexibility: the tart dough (Pâte Sablée) can be prepared in advance and stored unbaked in the fridge for up to 24 hours, or fully baked at room temperature for one day before assembly. However, for the freshest and most visually appealing presentation, I strongly recommend adding the optional Swiss meringue topping just before you plan to serve the tart.
While the unbaked or blind-baked tart crust can be successfully frozen for longer storage (wrapped tightly), I do not recommend freezing the entire assembled lemon tart. Freezing the lemon curd filling can alter its creamy texture upon thawing, potentially making it grainy or watery.
Explore More Delicious Tart Recipes
- Decadent Chocolate Ganache Tart
- Fresh Strawberry Custard Tart
- Tangy Rhubarb Custard Tart
- Classic French Orange Tart
- Elegant Pistachio Tart
- Simple French Apple Tart
- Rich Chocolate Raspberry Tart
- Comforting Pear Frangipane Tart (Tarte Bourdaloue)
- Sweet Apple Frangipane Tart
- Exotic Passion Fruit Tart
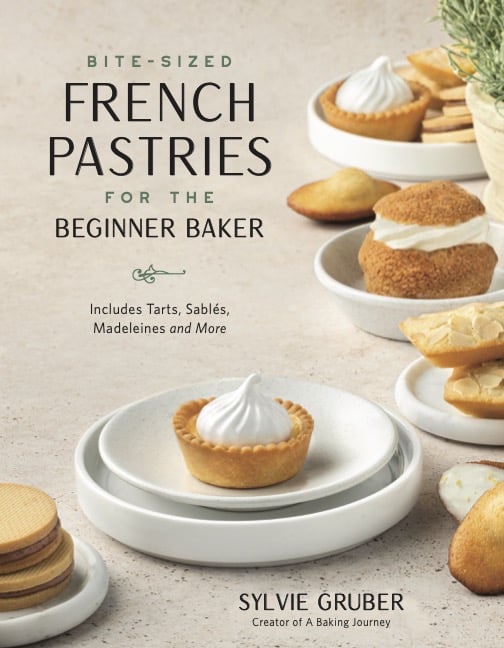
I am so excited to share that my debut cookbook
“Bite-Sized French Pastries for the Beginner Baker”
is now available for purchase!
Recipe Card
Classic Lemon Curd Tart with Meringue
Print Recipe
Ingredients
Pâte Sablée (French Shortcrust Pastry)
- 250 gr (1 2/3 cup) Plain / All-Purpose Flour
- 50 gr (1/2 cup) Icing Sugar
- 1 pinch Fine Table Salt
- 120 gr (1/2 cup) Unsalted Butter, very cold, cut into small cubes
- 1 Egg
Lemon Curd Filling
- 150 ml (1/2 cup + 2 tablespoons) Fresh Lemon Juice
- 1 Lemon Zest, from about 2 large lemons
- 5 Egg Yolks, from medium-sized eggs, at room temperature
- 120 gr (1/2 cup) Caster Sugar, or fine white granulated sugar, adjust to taste
- 20 gr (2 tablespoons) Cornstarch
- 90 gr (6 tablespoons) Unsalted Butter, at room temperature, cut into small cubes
Swiss Meringue Topping (optional)
- 2 Egg Whites
- 75 gr (1/3 cup) Caster Sugar, fine white granulated sugar
Instructions
Pâte Sablée (French Shortcrust Pastry)
- Combine the Flour, Icing Sugar, and Salt in the bowl of your food processor. Add the very cold Butter, cut into small cubes, and pulse until the mixture resembles very fine crumbs.
- Add the Egg to the mixture. Blend again until a rough dough starts to form. It should just come together when pressed (see note 1 for troubleshooting).
- Transfer the dough onto a sheet of baking paper and form it into a ball. Cover with a second sheet of baking paper and roll into a large, thin circle, approximately 4 mm (1/8 inch) thick. Place on a flat tray and refrigerate for at least one hour (or up to 24 hours).
- Remove from the fridge and gently line the pastry inside a 25 cm / 10 inch perforated tart ring or a tart pan with a removable bottom (see note 2 for pan size versatility). Dock the pastry evenly with a fork, then return it to the fridge for another hour (or up to 24 hours).
- Preheat your oven to 160°C (325°F). Place the tart shell in the freezer for 15-20 minutes while the oven heats. Blind bake for 30 to 40 minutes, or until the crust is golden and fully baked. Allow it to cool down completely on a wire rack before filling.
Lemon Curd Filling
- Zest and juice the lemons. Place the fresh lemon juice in a small saucepan and set the zest aside. Gently heat the lemon juice until it begins to steam. Meanwhile, whisk together the Egg Yolks, Sugar, and Cornstarch in a small heat-proof bowl until smooth.
- Slowly pour the warm lemon juice over the egg/sugar mixture while whisking continuously (this tempers the eggs). Then, transfer the entire mixture back into the saucepan. Cook over low to medium-low heat, stirring constantly with a heat-proof spatula, until the curd visibly thickens to a custard-like consistency. (See note 3 to adjust sweetness).
- Remove the saucepan from the heat. Add the Butter, one piece at a time, whisking until fully incorporated. Stir in the Lemon Zest, then cook for another 2 to 3 minutes over very low heat, ensuring it doesn’t boil. If necessary, pour the cooked curd through a fine-mesh sieve to ensure it’s perfectly smooth (see note 4 for doneness test).
- Pour the warm lemon curd immediately into the cooled, baked tart crust. Spread it evenly with a small offset spatula. Place the tart in the refrigerator to chill and set for at least 2 to 3 hours, or preferably overnight, until the curd is completely firm.
Swiss Meringue Topping (Optional)
- For the freshest results, prepare and add the meringue topping as close to serving time as possible.
- In a small heat-proof bowl, combine the Egg Whites and Caster Sugar. Set this bowl over a small saucepan containing a few inches of simmering water (ensure the bowl does not touch the water). Turn the stove to low to medium-low heat.
- Continuously whisk the mixture for several minutes. It should double in volume, become very frothy, and the sugar should be completely dissolved. Test by rubbing a small amount between your fingers (see note 5 for sugar test and temperature).
- Transfer the warm mixture into the bowl of your stand mixer (or use a hand mixer) and whisk on medium to high speed until the meringue almost reaches stiff peaks. It should still be soft enough to pipe easily (see note 6 for meringue consistency). Transfer to a piping bag and pipe your desired pattern over the chilled lemon tart (see note 7 for piping ideas).
- Using a kitchen torch, carefully toast the meringue until the peaks are beautifully golden brown. Serve immediately for optimal enjoyment.
Video Tutorial
Would you like to save this recipe?
We’ll email this post to you, so you can come back to it later!
Notes
- Pastry Dough Consistency: If the dough appears too dry and crumbly (it doesn’t hold together when pressed), add a tiny amount of very cold water, one teaspoon at a time, until it just comes together. If it’s too sticky or wet, add a little more flour, one teaspoon at a time, until manageable. Avoid overworking the dough to maintain tenderness.
- Tart Pan Versatility: This Pâte Sablée recipe provides sufficient dough for various tart pans. While it’s perfect for a 25 cm / 10 inch perforated tart ring, it also yields enough pastry for a slightly deeper, yet smaller, tart pan, such as a regular 22 cm / 9 inch tart pan, allowing for versatile baking.
- Adjusting Sweetness: At the point where the lemon curd has thickened (before adding butter), taste it carefully. The recipe is designed for a wonderfully tangy curd, but you are absolutely encouraged to adjust the sugar content to your personal preference for a sweeter dessert. Whisk in additional caster sugar, one tablespoon at a time, until dissolved and the desired sweetness is achieved.
- Lemon Curd Doneness Test: To confirm your lemon curd is perfectly cooked, dip the back of a spoon into the curd and then draw a clear line across it with your finger. If the line holds and the curd does not immediately run back into the gap, it has thickened sufficiently. Alternatively, use a food thermometer: the curd is done when it reaches approximately 82°C (180°F). This ensures both proper thickening and food safety.
- Swiss Meringue Sugar Dissolution: When making the Swiss meringue over a double boiler, it’s crucial that all the sugar completely dissolves into the egg whites. You can test this by carefully rubbing a tiny amount of the mixture between your thumb and forefinger; there should be no discernible sugar grains. The mixture should also feel warm to the touch (around 70°C / 160°F), indicating pasteurization and stability.
- Meringue Whipping Consistency: For piping, the meringue should be whipped until it almost reaches stiff peaks. This means it should be firm and glossy but still have a slight softness and pliability. If it’s too stiff, it can be difficult to pipe smoothly. Stop whipping just before you achieve very rigid, unmoving peaks.
- Meringue Decoration Options: For the meringue topping, you have full creative freedom! I personally enjoy using a “St Honoré Piping Tip” to create a decorative crown with a criss-cross pattern around the edges, as demonstrated in the video. However, feel free to use any piping tip you prefer (e.g., a round tip for dots, a star tip for rosettes) or simply spread the meringue artfully with an offset spatula. If you wish to cover the entire surface of the tart with meringue, remember to double the quantities of egg whites and sugar for the meringue recipe to ensure you have enough.
Nutrition (per serving)
Made this irresistible recipe?
We’d be thrilled to hear your thoughts! Please let us know if you liked it by leaving a comment below. Don’t forget to tag us on Instagram @a.baking.journey with a photo of your beautiful creation!
