Deliciously Flaky Spanakopita Triangles: An Authentic Greek Spinach and Feta Pastry Recipe
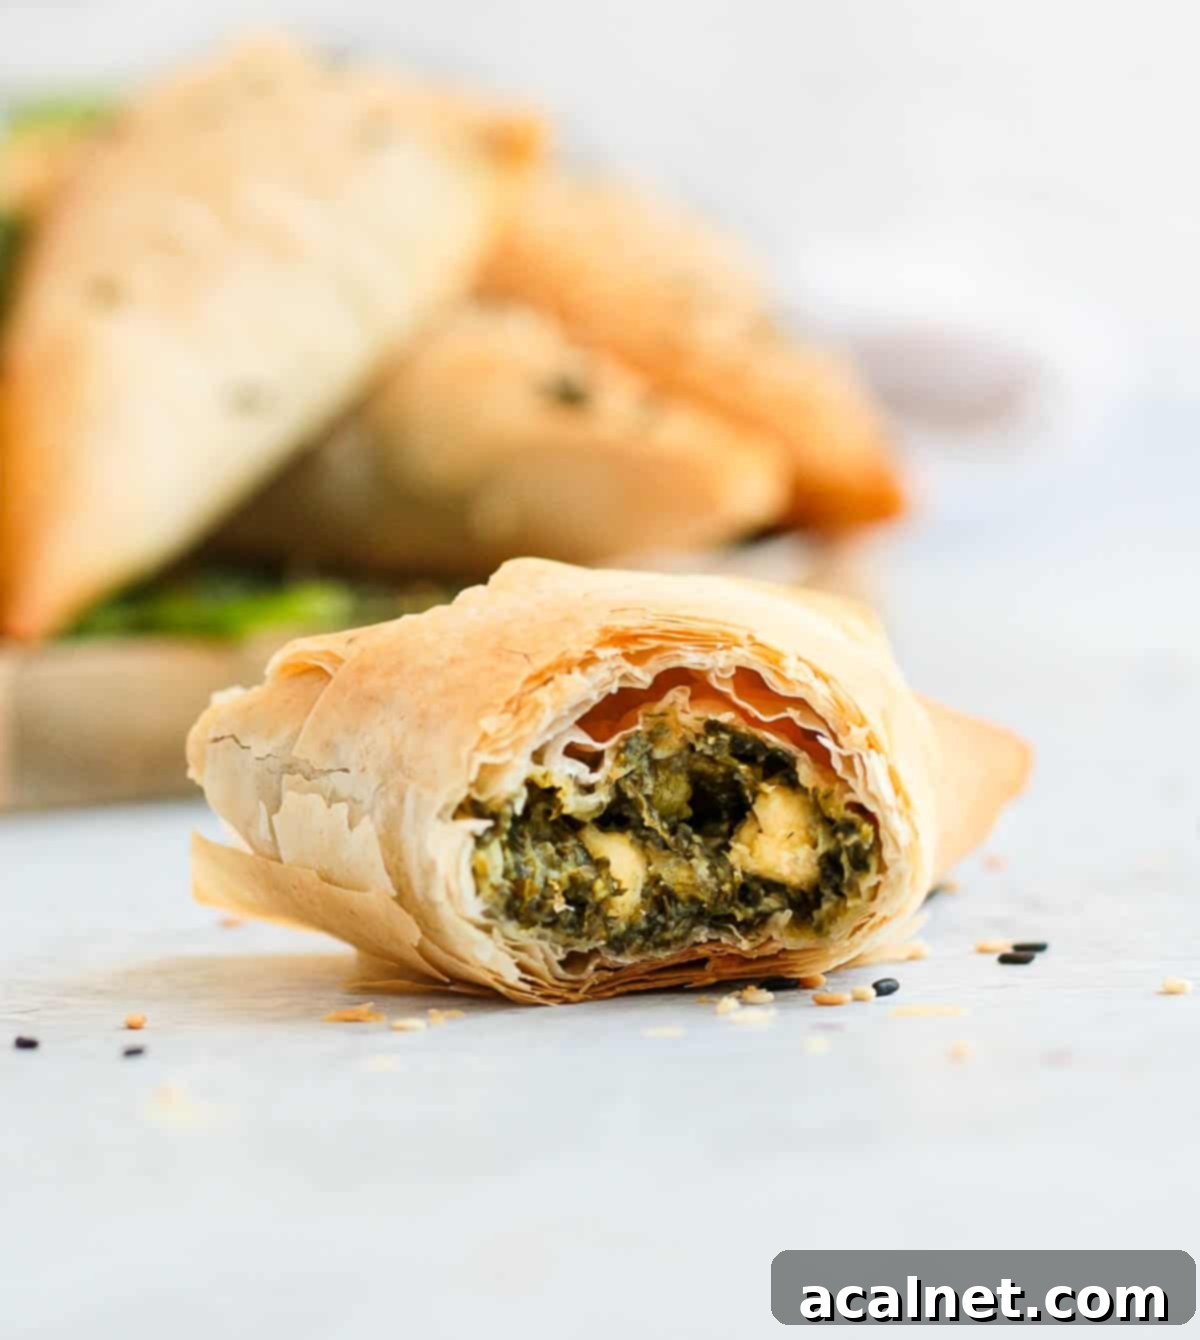
Prepare to delight your senses with these incredible Greek Spanakopita Triangles, a quintessential vegetarian appetizer that also shines as a finger food, a satisfying savory snack, or even a light lunch. Each bite offers a harmonious symphony of textures and flavors: the impossibly flaky and wonderfully crunchy layers of delicate Phyllo Pastry encasing a rich, savory filling of earthy spinach and salty, tangy feta cheese, all folded into a perfectly portable, bite-sized triangle.

Why You’ll Adore This Spanakopita Triangles Recipe
The combination of fresh spinach and creamy, salty feta cheese is a culinary match made in heaven. It’s a classic flavor duo that delivers every single time, much like in my beloved Spinach and Feta Quiche. The earthy bitterness of the spinach perfectly balances the piquant, tangy notes of the feta, creating a deeply satisfying and surprisingly light filling.
Now, imagine adding the glorious texture of buttery, flaky, and ultra-crisp Phyllo Pastry (also known as Filo or Fillo Pastry) to that equation. The contrast is simply irresistible! Each triangle boasts a multitude of delicate, golden-brown layers that shatter delightfully with every bite, leading to the warm, herby, and cheesy interior. It’s an incredible dance of flavor and texture that truly elevates these pastries.
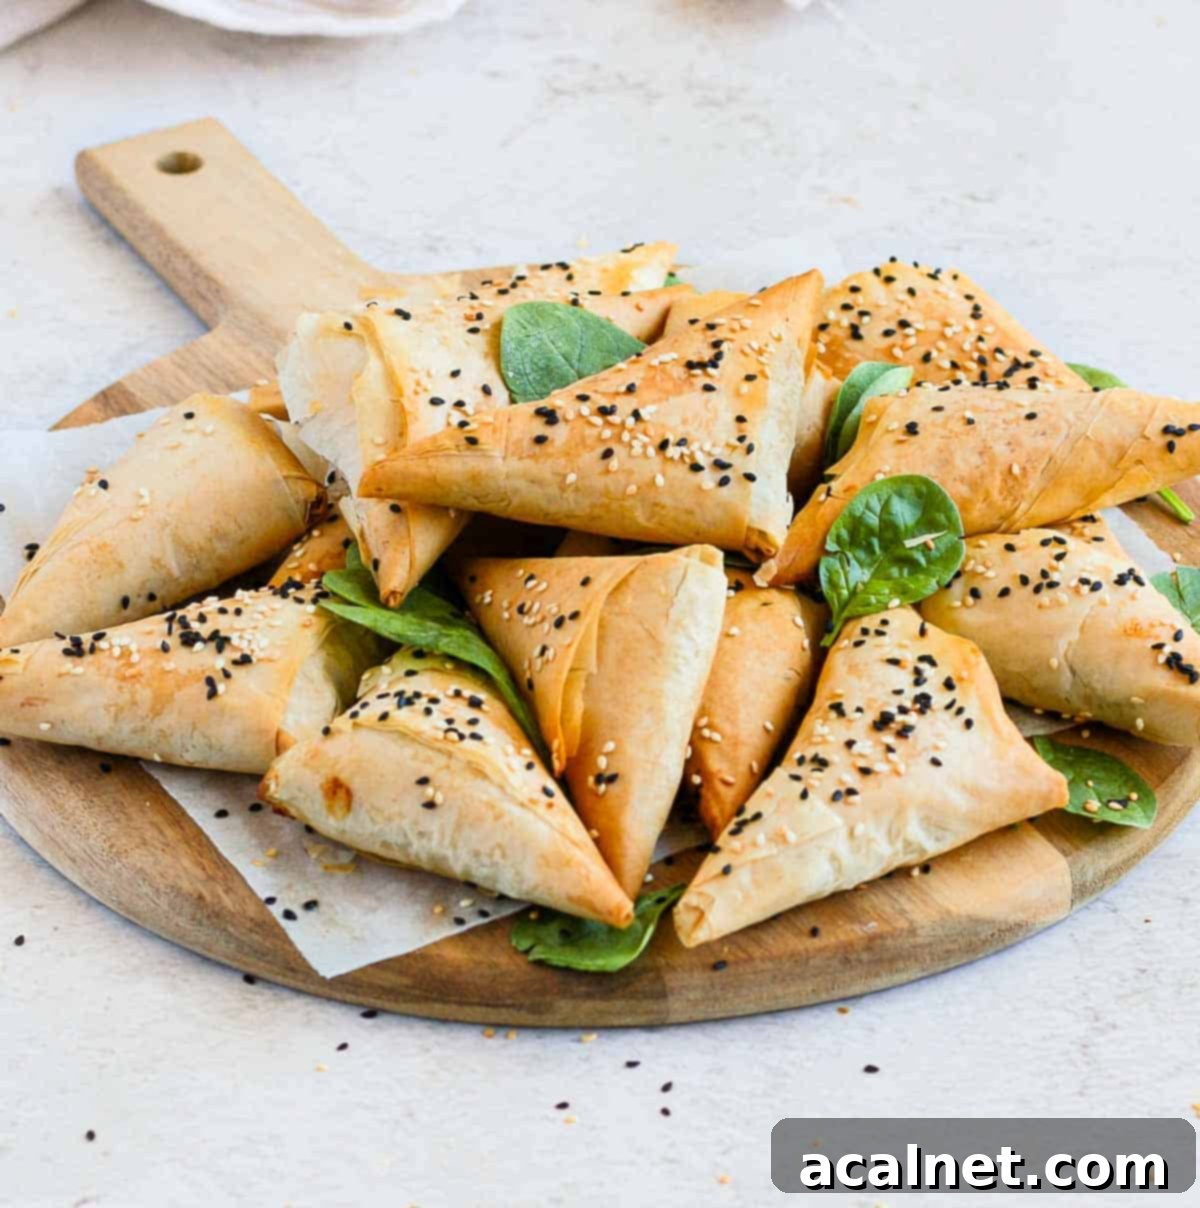
These individual Greek Spanakopita Triangles are not only a treat for the taste buds but also incredibly versatile. They are absolutely fantastic as an elegant appetizer for your next dinner party, a festive addition to holiday gatherings, or a casual snack anytime. Personally, I find them perfect for a quick and satisfying lunch. Best of all, they can be prepared in advance and even frozen, making them an ideal option for meal prep or entertaining without stress.
Understanding Spanakopita: A Greek Culinary Staple
Spanakopita is a beloved traditional Greek vegetarian pie. Its name literally translates to “spinach pie” (spanaki meaning spinach, and pita meaning pie). The authentic version typically features a rich filling made primarily from spinach and cheese, most commonly Feta, though sometimes Ricotta or a blend of cheeses is used, all encased within crispy layers of phyllo pastry.
While often enjoyed as individual triangles, spanakopita can take several forms. It’s commonly baked as a large pie in a round or rectangular baking dish, then cut into wedges or squares for serving. This recipe, however, focuses on the charming and convenient individual triangle format, perfect for grab-and-go enjoyment or elegant presentation.
This particular recipe draws inspiration from the delicious Spanakopita recipe found in the acclaimed cookbook “Food from Many Greek Kitchens” by Tessa Kiros, a true celebration of Greek culinary traditions.
Essential Ingredients for Your Spanakopita Triangles
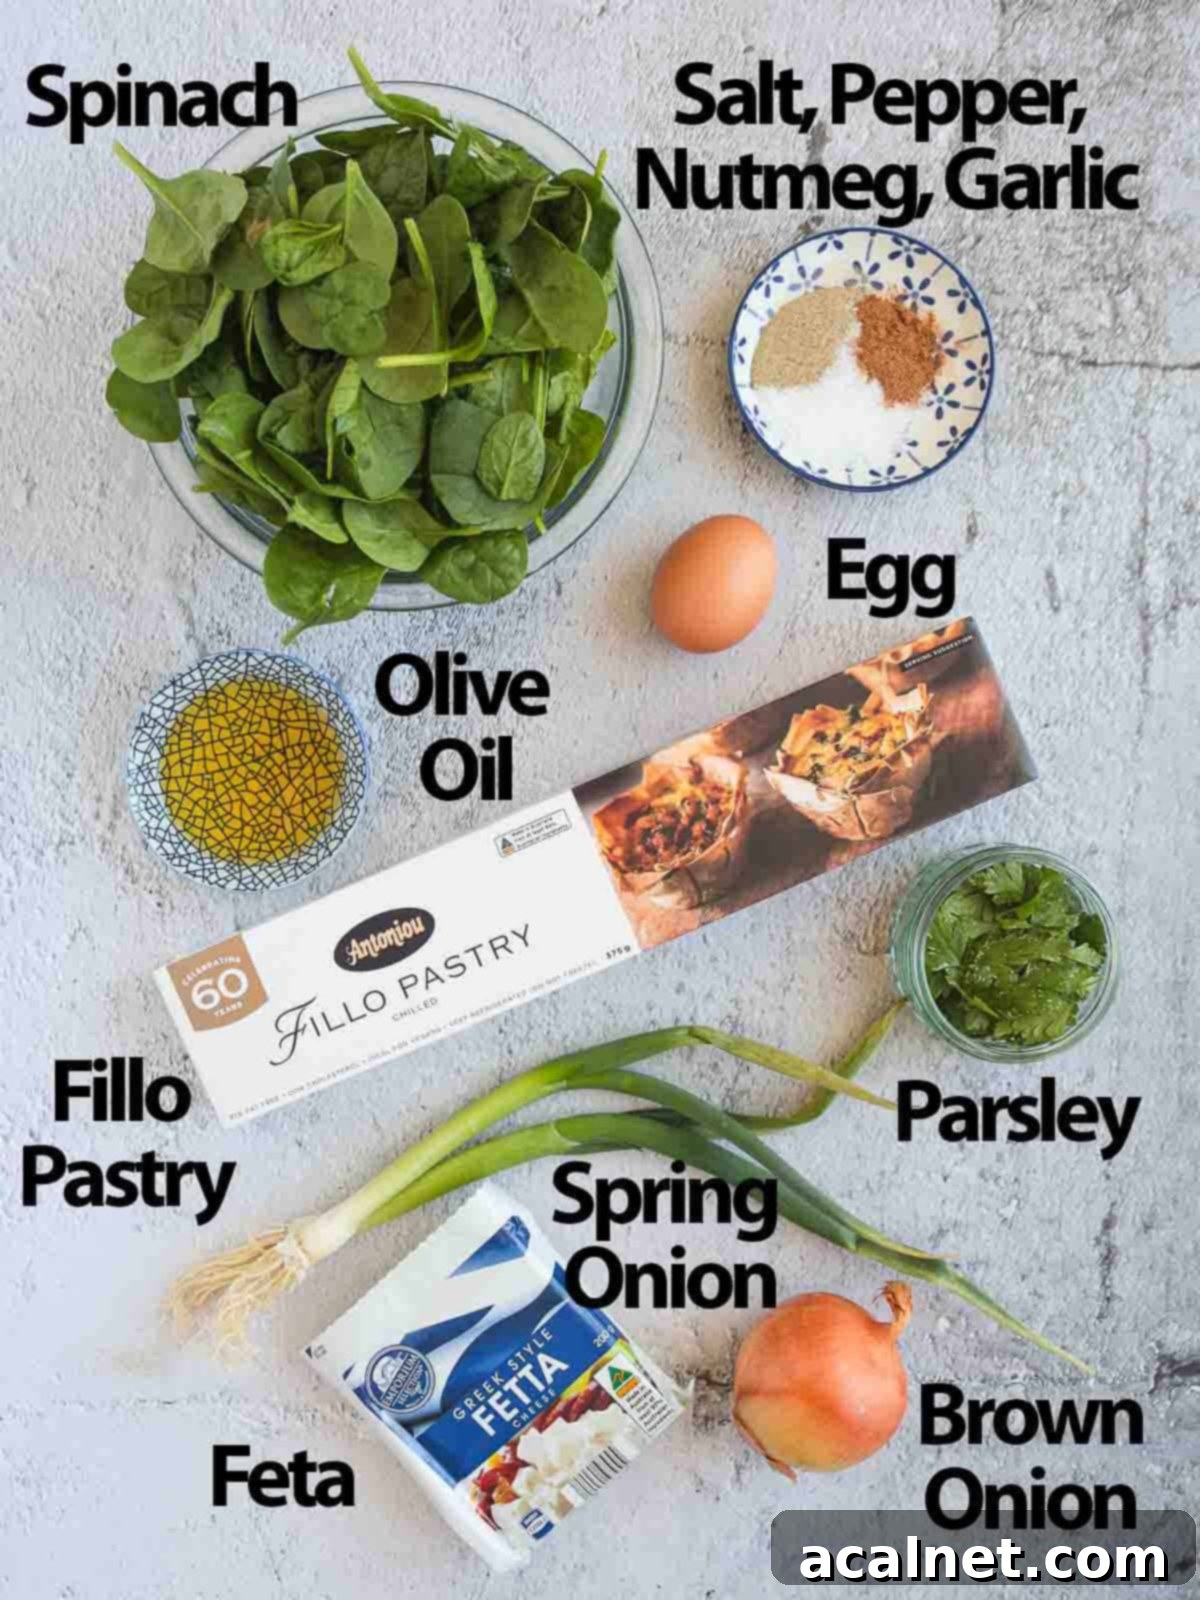
While the ingredient list may appear a bit long at first glance, the beauty of this recipe lies in its adaptability. At its core, all you truly need for these delicious Spinach and Feta Filo Pastries are the stars of the show: quality Feta cheese, fresh spinach, and delicate phyllo pastry. Many other ingredients can be easily adjusted or substituted to suit your preferences or what you have on hand.
- Spinach: I highly recommend using fresh spinach leaves for their superior taste and vibrant texture. Baby spinach is particularly tender and requires less chopping. If fresh isn’t available, frozen spinach is a perfectly acceptable alternative. Just be sure to thaw it completely and squeeze out as much excess water as possible to prevent a soggy filling.
- Feta Cheese: For an authentic Greek flavor, opt for a high-quality Greek-style Feta cheese made from sheep’s or goat’s milk (or a combination). Its salty, briny, and slightly tangy profile is crucial. You can either crumble the feta directly into the mix or cut it into small cubes for pockets of melt-in-your-mouth cheese.
- Phyllo Pastry (Fillo Pastry): This paper-thin pastry is the secret to spanakopita’s signature crispiness. It’s quite fragile and dries out rapidly, so handle it gently and keep unused sheets covered (more on this in the tips). Fresh phyllo, often found in the refrigerated section of supermarkets, is ideal. Frozen phyllo works too, but remember to thaw it properly overnight in the refrigerator before use.
- Brown Onion & Spring Onion (Green Onion/Scallion): The combination of both types of onions adds layers of aromatic depth. Brown onion provides a foundational sweetness and savory base when sautéed, while spring onions contribute a milder, fresher onion flavor, especially when both their white and green parts are used. You could use only spring onion if preferred for a lighter taste.
- Parsley: Fresh herbs are key to spanakopita’s vibrant taste. Fresh parsley offers a clean, herbaceous note. For a traditional Greek touch, consider substituting or adding fresh dill. Other fresh herbs like oregano or mint could also work. If using dried herbs, remember they are more potent, so use about one-third of the amount of fresh.
- Olive Oil: Generous brushing of olive oil between phyllo layers is essential for achieving that golden, crispy, and flaky texture. A good quality extra virgin olive oil also adds a lovely Mediterranean flavor to the filling. If you prefer a richer, buttery taste, you can substitute olive oil with melted unsalted butter.
- Seasoning: Beyond the essential salt and pepper, garlic paste (or minced garlic) provides a pungent depth, and a touch of ground nutmeg adds a subtle, warm, and often unexpected, earthy aroma that beautifully complements the spinach. Feel free to experiment with your favorite seasoning blends or a pinch of dried Greek oregano for an extra layer of flavor.
- Egg: While technically optional, incorporating an egg into the filling is highly recommended. It acts as a binder, helping all the ingredients coalesce into a smoother, richer, and more cohesive mixture. It also contributes to the overall moisture and creaminess of the filling. Ensure the filling has cooled sufficiently before adding the egg to prevent it from scrambling.
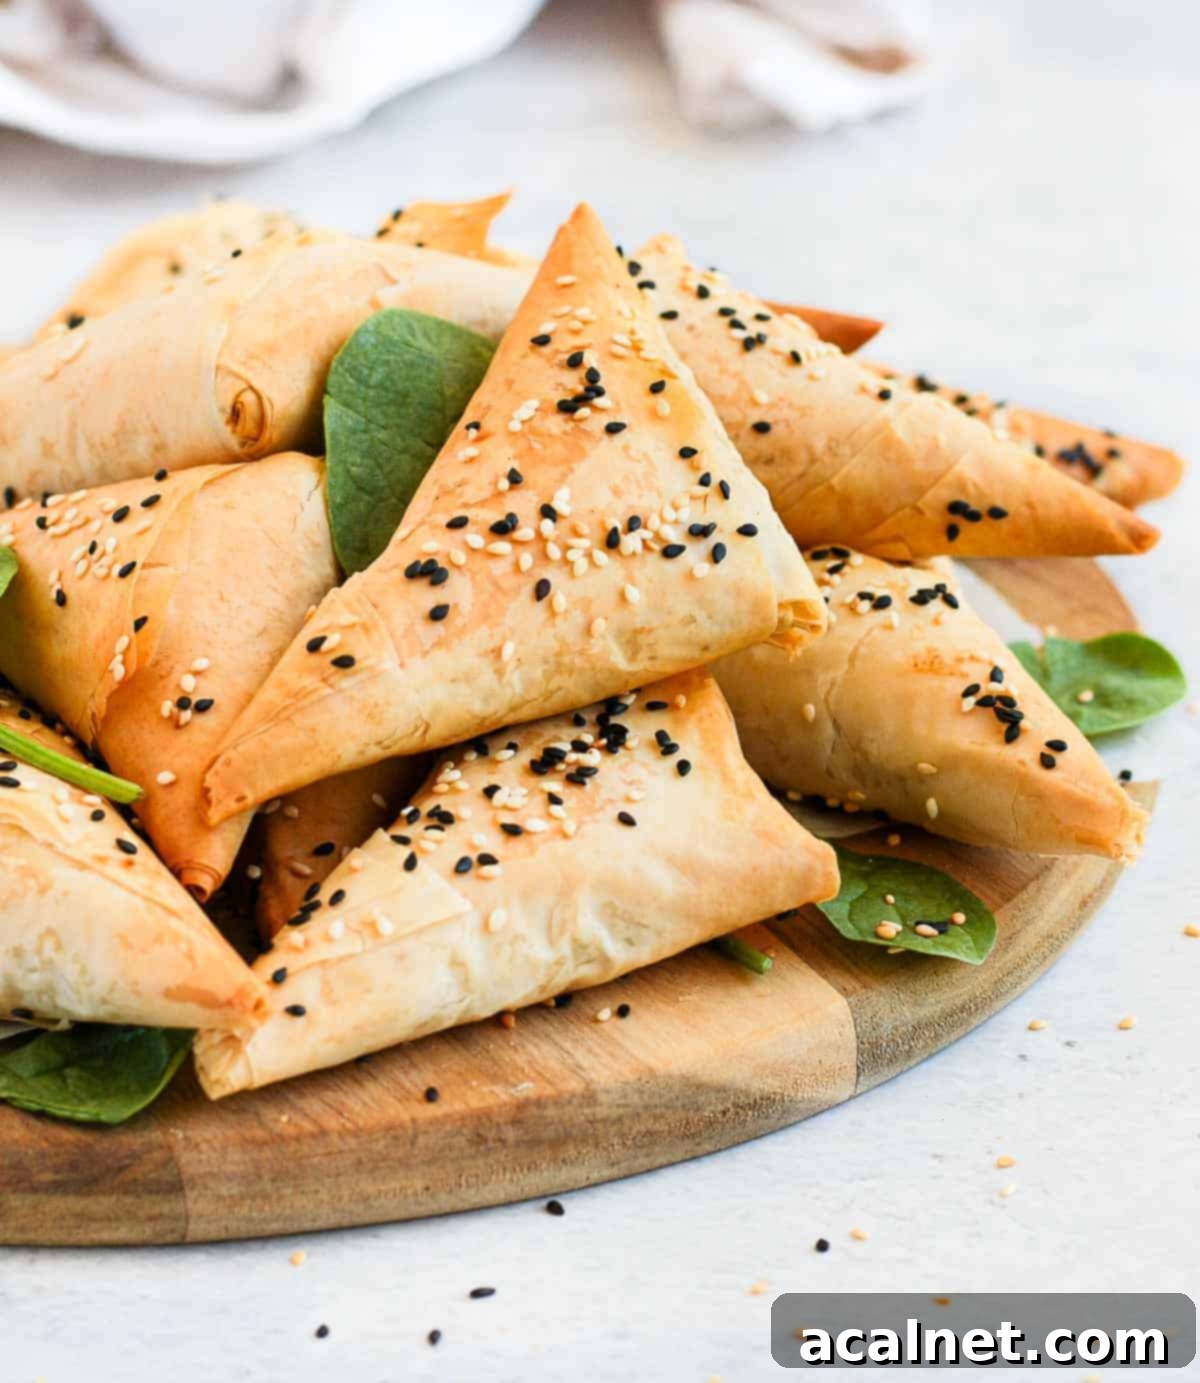
Crafting Your Own Spinach and Feta Triangles: A Step-by-Step Guide
Making these delicious Spanakopita Triangles can be broken down into three manageable stages: preparing the flavorful filling, carefully preparing the delicate phyllo pastry, and finally, folding them into their characteristic triangular shape. Let’s walk through each step to ensure perfect results.
Crafting the Irresistible Cheese and Spinach Filling
Before you even begin cooking, I highly recommend adopting the “mise en place” approach – get all your ingredients prepped and ready. This means finely dicing your brown onion, roughly chopping the fresh spinach leaves, thinly slicing both the white and green parts of your spring onions and parsley, and either crumbling or cutting your feta cheese into small, even cubes.
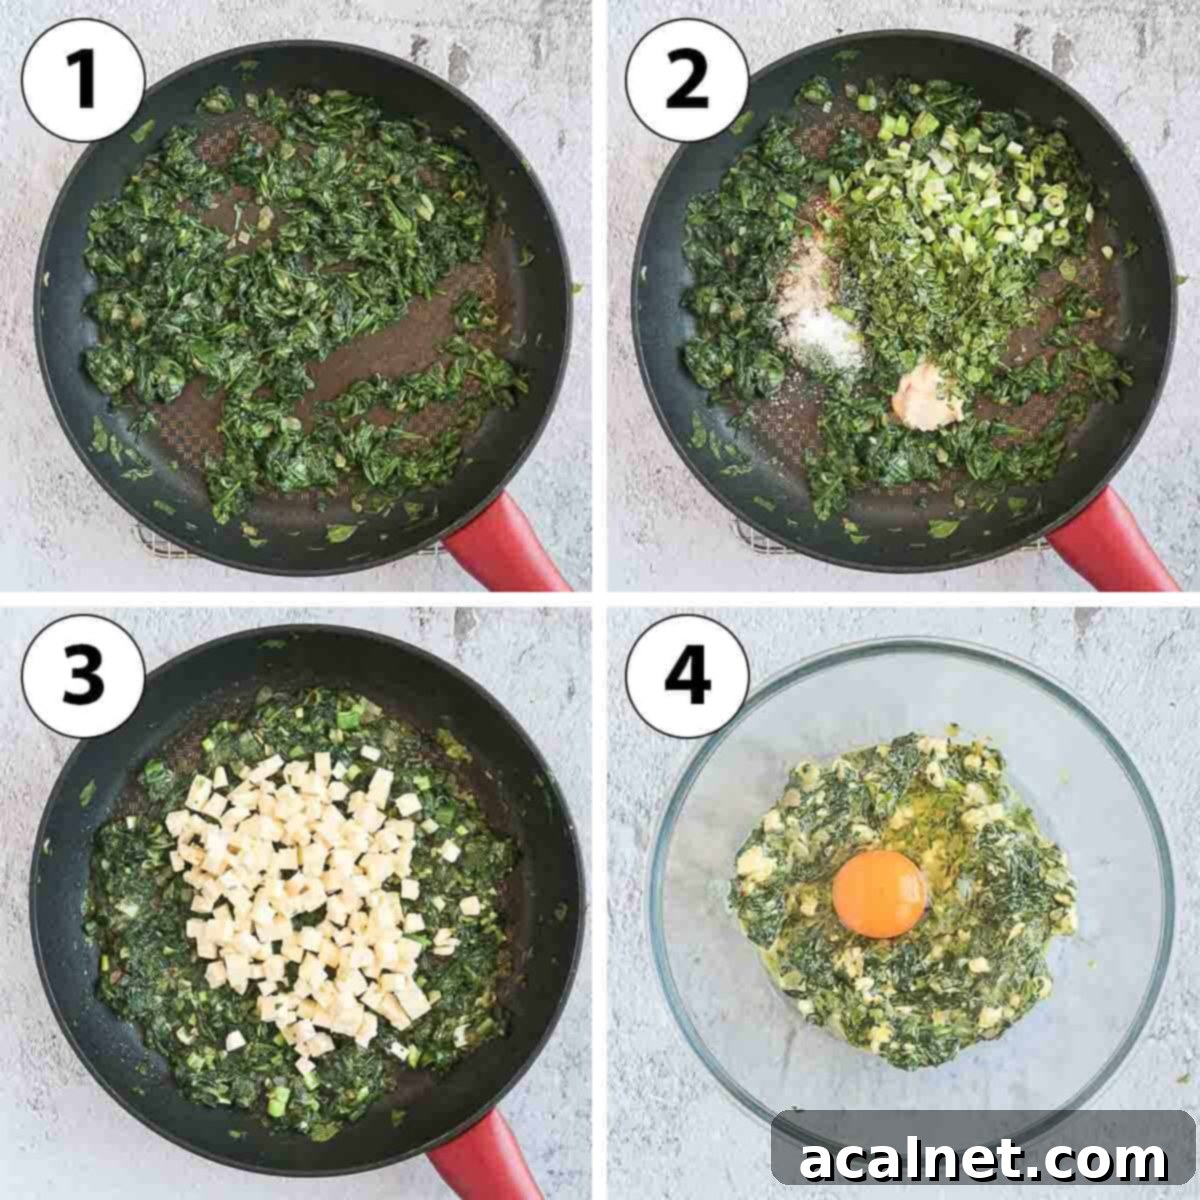
- Photo 1: Start by heating the olive oil in a large saucepan over medium heat. Add the diced brown onion and sauté it gently until it becomes soft and translucent, usually about 5-7 minutes. Then, add the roughly chopped spinach. Cook for another 3 to 5 minutes, stirring occasionally, until the spinach has fully wilted and significantly reduced in volume. If using frozen spinach, cook it for longer to ensure any excess moisture has evaporated.
- Photo 2: Next, stir in the thinly sliced spring onion, fresh parsley, salt, pepper, garlic paste (or minced garlic), and a hint of nutmeg. Continue to cook and stir for a couple of minutes, allowing the flavors to meld and the herbs to become fragrant.
- Photo 3: Add the cubed or crumbled feta cheese to the pan. Mix it gently with the spinach and onion mixture. Cook for just a minute or two, enough for the feta to slightly soften and become warm throughout, but not completely melt.
- Photo 4: Carefully transfer the hot filling mixture into a large mixing bowl. It’s crucial to set it aside and allow it to cool down to at least lukewarm temperature before proceeding. Once cooled, add the egg and mix it thoroughly until well combined. This step is vital because adding the egg to a hot filling would cause it to scramble, resulting in an undesirable texture. The egg helps bind all the delicious ingredients together, creating a smoother and richer filling.
Mastering the Delicate Art of Preparing Phyllo Pastry
Phyllo pastry is incredibly delicate and has a tendency to dry out very quickly, becoming brittle and difficult to work with. To keep it pliable, always keep any unused sheets covered with a slightly damp (but not wet!) clean kitchen towel while you work. This is a golden rule for successful phyllo handling.
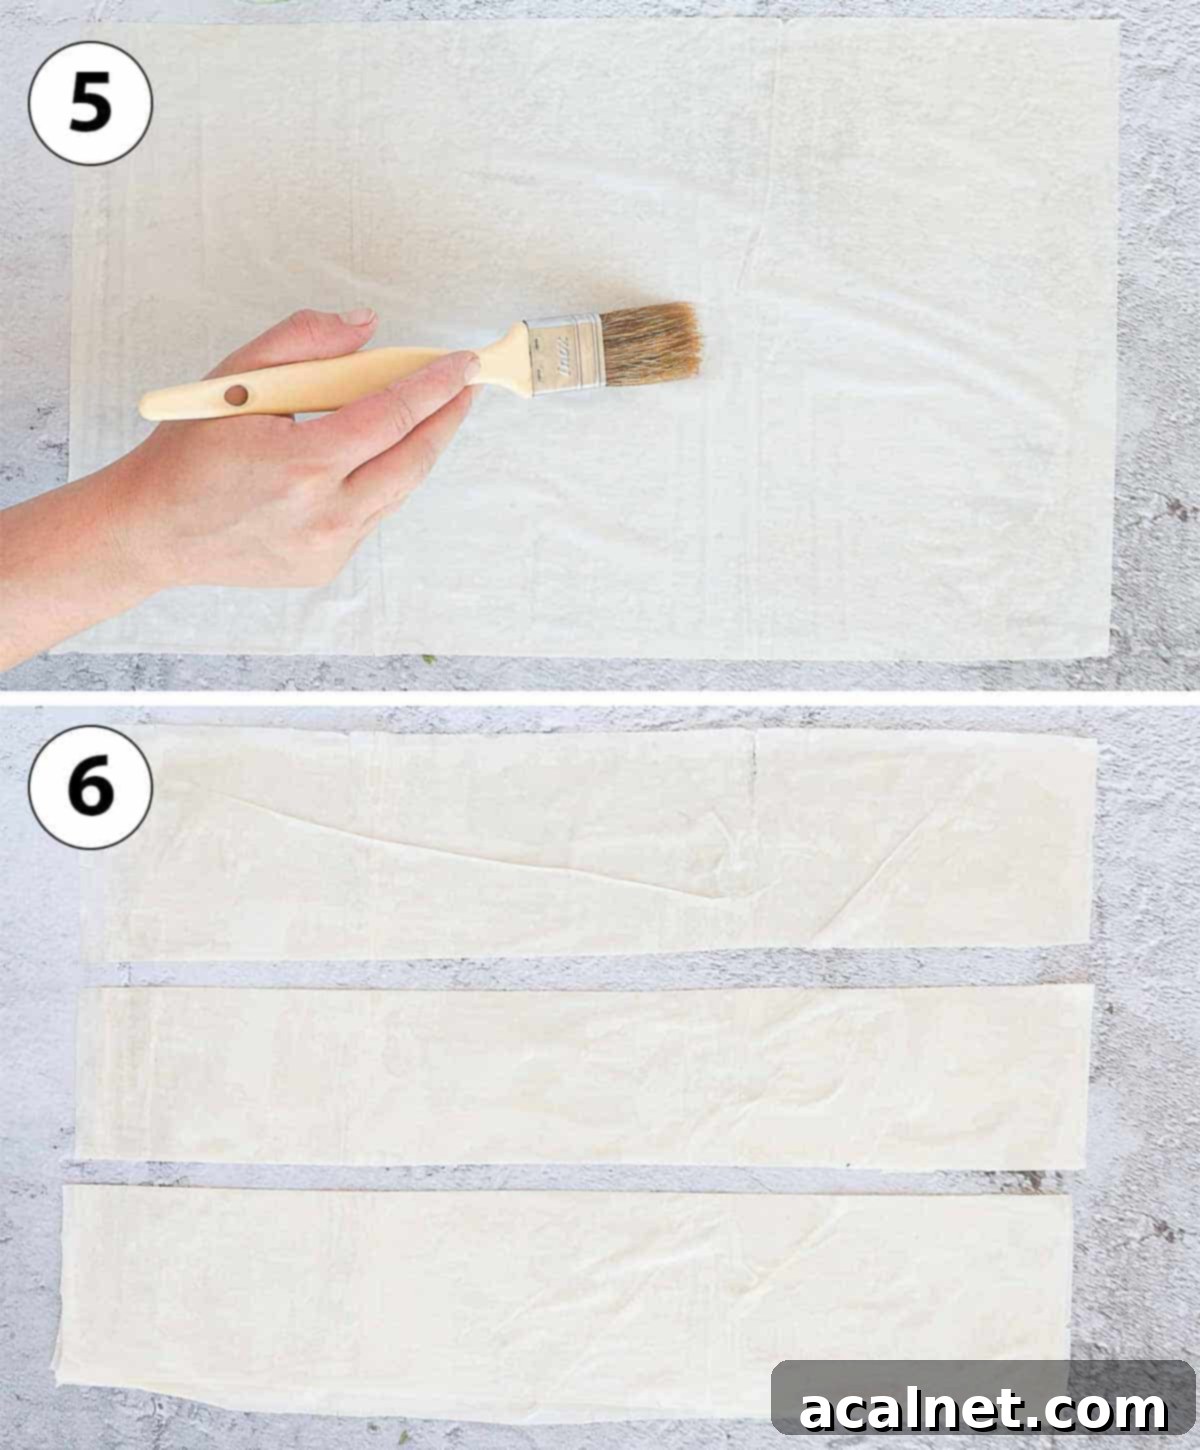
- Photo 5: Lay one sheet of phyllo pastry flat on a clean, dry work surface. Lightly brush the entire surface with a thin layer of olive oil (or melted butter). This oil is crucial for creating those distinct, crispy layers. Carefully place a second sheet of phyllo directly on top, align it perfectly, and brush it with more oil. Repeat this process with a third sheet of phyllo. Using three layers provides a good balance of crispiness and structural integrity for the triangles. You can adjust this—fewer layers for a more delicate pastry, more layers for extra crunch.
- Photo 6: Once you have your stack of three oiled phyllo sheets, use a sharp knife or a pizza cutter to cut the entire stack into three equally long strips. The standard phyllo sheets I use are approximately 30x45cm (12×18 inches), which yield perfectly sized strips when cut into three. However, you can adjust the number of strips (e.g., two for larger triangles, four for smaller ones) to achieve your desired final size.
Pro Tip: Work quickly with the phyllo, or as mentioned, keep any sheets you’re not immediately using covered with a lightly humid towel to prevent them from drying and cracking. The longer your phyllo strips, the more turns you’ll get in your folding, resulting in more crispy layers within each triangle. If you prefer a less crispy pastry with a higher filling-to-pastry ratio, you could cut each strip in half, making them shorter.
The Art of Folding Perfect Spanakopita Triangles
Folding the spanakopita triangles might seem intimidating at first, but it’s a simple, repetitive process once you get the hang of it. Think of it like folding a flag! Precision isn’t as important as maintaining a tight fold to keep the filling secure.
- First, preheat your oven to 180°C/350°F. Line a large baking tray with baking paper or a silicone baking mat to prevent sticking.
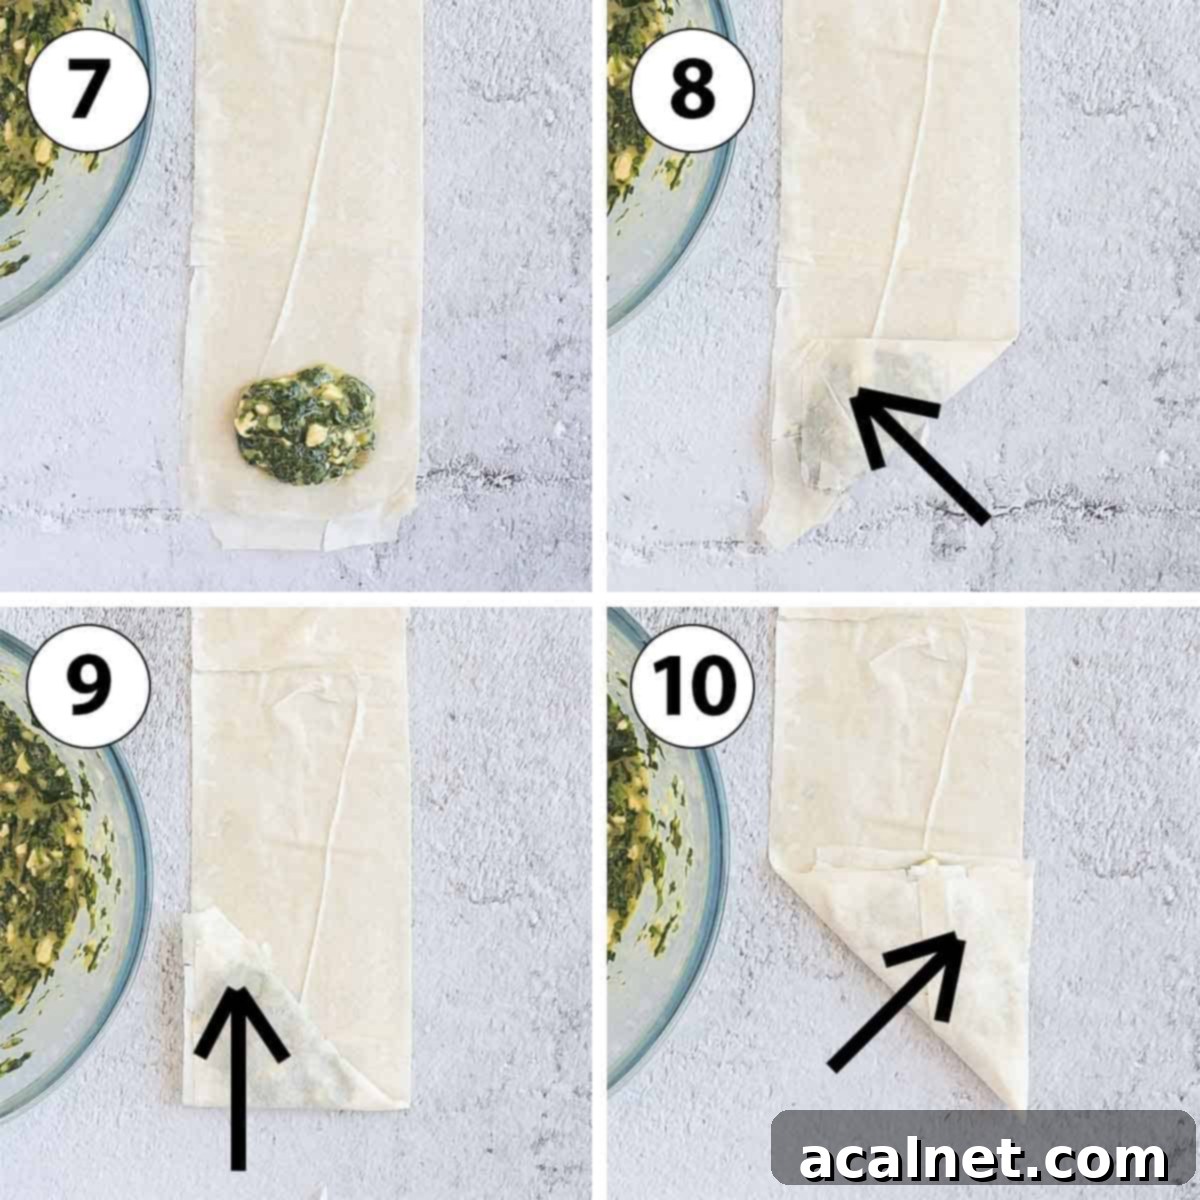
- Photo 7: Take one of your three-layered phyllo strips. Place a small tablespoon (or slightly more, depending on the strip size) of the cooled spinach and feta filling at the very bottom right corner of the strip. Don’t overfill, as this will make folding difficult and prone to tearing. You can also lightly brush the remaining length of the phyllo strip with a little olive oil; this helps the layers stick together as you fold.
- Photo 8: Now, take the bottom right corner of the pastry strip and fold it diagonally upwards and to the left, so that the bottom edge meets the left side of the strip. This will create your first triangular shape at the base of the strip, enclosing the filling. Make sure the edges are aligned.
- Photo 9: Take the bottom left corner of this newly formed triangle and fold it straight up over the strip of pastry, aligning the edge with the top of the existing triangle. You’re essentially flipping the triangle upwards along the strip.
- Photo 10: Next, take the bottom left corner (which is now at the top left of your current fold) and fold it diagonally downwards and to the right, aligning the edge with the right side of the strip.
- Continue this “up, over, diagonal” folding pattern, always maintaining a snug, triangular shape, until you reach the end of the phyllo strip. If the end doesn’t seal perfectly, a tiny dab of olive oil can help it adhere. The goal is to create a neat, compact triangle with the filling fully enclosed.
- Carefully transfer each neatly folded spanakopita triangle onto your prepared baking tray, leaving a little space between them.
- Before baking, brush the tops of each triangle with a bit more olive oil. This is what gives them that beautiful golden color and extra crispiness in the oven. For an even deeper golden hue and a slight sheen, you can brush them with a whisked egg wash. Optionally, sprinkle a few sesame seeds over the top for an authentic touch and added texture.
- Bake for 25 to 30 minutes, or until the pastries are beautifully golden brown and wonderfully crispy. There’s no need to flip them during baking. For the absolute best texture, serve these delightful triangles straight out of the oven while they are warm and at their peak crispiness.
Common Questions About Spanakopita Triangles
Absolutely! While Feta is traditional and offers that iconic Greek flavor, you can certainly experiment with other cheeses. Ricotta cheese is a popular alternative, often used in combination with spinach, much like in these delicious Spinach and Ricotta Rolls. You could do a half-feta, half-ricotta blend for a creamier, milder flavor with a hint of tang. Some recipes even incorporate small amounts of hard cheeses like grated Parmesan or Pecorino Romano for added umami, or a touch of goat cheese for extra creaminess and a different flavor profile.
Yes, frozen spinach works wonderfully in this recipe, provided it is prepared correctly. The key is to ensure it is thoroughly thawed and very well drained to remove all excess moisture. Spinach holds a lot of water, and if not drained properly, it will make your filling watery and can make the phyllo soggy. After thawing, place the spinach in a clean kitchen towel or cheesecloth and squeeze out as much liquid as possible. Alternatively, you can cook the thawed spinach in the pan for a bit longer, allowing the moisture to evaporate, before proceeding with the rest of the filling ingredients.
While the result will be different in texture, you can definitely use puff pastry with this spinach and feta filling, and it will be delicious – just less traditional than the Greek phyllo version. Puff pastry yields a “puffier” and softer crust compared to the delicate crispiness of phyllo. To adapt the recipe for puff pastry, simply cut squares or rectangles from your puff pastry sheet, place a spoonful of the filling in the center of each, and fold it in half to create a triangle or rectangle. Seal the edges by pressing them firmly with a fork to crimp them closed. Bake according to puff pastry instructions until golden brown.
These spanakopita triangles are incredibly flavorful and satisfying on their own, making them a perfect standalone snack or appetizer. However, they are also wonderfully complemented by various dips and accompaniments. A traditional Greek Tzatziki sauce (cucumber and yogurt dip) offers a refreshing contrast. Creamy Hummus, a spicy feta dip, or a simple Greek Yogurt Dip with herbs are also excellent choices. For a light meal, serve them alongside a crisp Greek salad or a squeeze of fresh lemon juice to brighten the flavors.
Expert Tips for Perfect Spanakopita Triangles
- Thaw Frozen Phyllo Properly: If you’re using frozen phyllo pastry, plan ahead! It’s best to let it thaw slowly overnight in the refrigerator. Keep it in its original sealed packaging to prevent it from drying out, which can make it brittle and hard to work with. Once thawed, bring it to room temperature for about an hour before using, as cold phyllo can crack easily.
- Drain Spinach Thoroughly: This is arguably the most crucial tip for a perfectly textured filling. Whether using fresh (after cooking) or thawed frozen spinach, squeeze out as much liquid as humanly possible. Excess moisture will make the filling watery and can seep into the phyllo, making it soggy instead of crispy. A clean kitchen towel or cheesecloth works wonders here.
- Customize Phyllo Layers and Size: The number of phyllo sheets and the dimensions of your strips will directly impact the final texture and size of your spanakopita triangles. For an extra crispy, super flaky triangle with many layers, use the full length of the phyllo sheet and 3-4 layers. If you prefer a slightly less crunchy pastry with a higher filling-to-pastry ratio, you can cut the strips shorter or use only 1-2 layers of phyllo per triangle. Experiment to find your perfect balance!
- Be Generous with Oil (or Butter): Don’t skimp on the olive oil (or melted butter) when brushing between the phyllo layers and on top of the finished triangles. This fat is what creates the distinct separation of layers, allowing them to puff up and become wonderfully crispy and golden. For an even richer flavor, melted unsalted butter is a fantastic alternative to olive oil.
- Don’t Overfill: While tempting to pack in as much filling as possible, overfilling can lead to bursting triangles and make the folding process messy and difficult. Use a moderate amount of filling that allows you to easily seal the edges.
- Keep Phyllo Covered: As mentioned, phyllo dries out incredibly fast. Always keep the stack of phyllo sheets you’re not actively working with covered with a lightly damp kitchen towel. This will keep them pliable and prevent them from cracking.
- Bake Until Golden and Crispy: Keep an eye on your spanakopita in the oven. You want them to achieve a beautiful deep golden brown color, which indicates maximum crispiness. Undercooked phyllo will be soft and chewy.
Storing & Freezing Your Spanakopita Triangles
For the ultimate culinary experience, I wholeheartedly recommend serving these Spanakopita Triangles straight out of the oven. At this moment, they are at their peak: gloriously crispy, wonderfully flaky, and the filling is perfectly warm and flavorful.
However, if you need to make them ahead or have leftovers, they can be stored. If made in advance and kept in an airtight container in the refrigerator, they will remain delicious for a couple of days. Be aware that the phyllo pastry may soften slightly. To restore their crispiness, reheat them in the oven (at around 160°C/325°F) for 10-15 minutes until warmed through and re-crisped. Avoid reheating in the microwave, as this will unfortunately make the pastry soggy.
These spinach and feta triangles are also excellent candidates for freezing, making them perfect for batch cooking or unexpected guests! The best method for preserving their crispy texture after freezing is to freeze them unbaked. Here’s how:
- To Freeze Unbaked: Prepare the triangles as per the recipe, but do not bake them. Place the unbaked triangles in a single layer on a baking sheet lined with parchment paper. Ensure they are not touching each other, as they will freeze together. Transfer the baking sheet to the freezer and freeze until the triangles are completely solid (this usually takes 1-2 hours). Once frozen solid, transfer them to a freezer-friendly airtight container or a freezer bag. They can be stored in the freezer for up to 2 months.
- Baking from Frozen: When you’re ready to enjoy them, simply take the frozen triangles directly from the freezer and place them on a prepared baking sheet. You can brush them with a little extra olive oil or egg wash if desired. Bake them in a preheated oven as recommended in the recipe, but add an additional 5 to 10 minutes to the baking time, or until they are golden brown and cooked through.
Explore More Delicious Appetizer Ideas
- Cheese Gougères
- Puff Pastry Mushroom Tart
- Cheddar Spinach Muffins
- Pumpkin Tart with Puff Pastry
- Goat’s Cheese Zucchini Muffins
- Mini Tomato Galettes
- Focaccia Bread
Made this recipe?
Let us know if you liked it by leaving a comment below, and tag us on Instagram @a.baking.journey with a photo of your creation!
Recipe Card: Spanakopita Triangles (Spinach & Feta)

Spanakopita Triangles (Spinach & Feta Triangles)
Print Recipe
Ingredients
- 1/2 small Brown Onion, finely diced
- 1 tablesp. Olive Oil, plus extra for brushing phyllo
- 250 gr (1/2 lbs) Fresh Spinach, roughly chopped, or frozen (thawed and very well drained)
- 2 Spring Onions (Scallions), thinly sliced (white and green parts)
- 3 tablesp. Fresh Parsley, finely chopped (or fresh dill)
- 1 teasp. Salt
- 1/2 teasp. Pepper
- 1/4 teasp. Nutmeg, ground
- 1 teasp. Garlic Paste, or 2 cloves minced garlic
- 150 gr (1/3 lbs) Feta Cheese, crumbled or cubed
- 1 Large Egg, optional but recommended for binding
- 15 sheets Fillo Pastry, approx. 30×45 cm (12x18inch) each
- Sesame Seeds to taste, optional, for sprinkling
Instructions
Spinach & Feta Filling
- Begin by preparing all your ingredients (mise en place): finely dice the Brown Onion. Roughly chop the Fresh Spinach (if using frozen, thaw and squeeze out all excess water). Thinly slice the Spring Onion and Parsley. Crumble or cut the Feta into small cubes.
- In a large saucepan, heat the Olive Oil over medium heat. Add the diced Brown Onion and cook for 5-7 minutes until soft and translucent.
- Add the chopped Spinach, sliced Spring Onion, Parsley, Salt, Pepper, Garlic Paste, and Nutmeg. Stir thoroughly to combine and cook for 3-5 minutes, or until the spinach has wilted and all ingredients are tender. Ensure any remaining moisture evaporates.
- Stir in the Feta cheese and cook for just 1-2 minutes, until the cheese has slightly softened and warmed through. Do not let it fully melt.
- Transfer the filling into a large mixing bowl and set aside to cool down completely (see note 1 regarding temperature). Once cooled, mix in the Egg until well incorporated.
Folding the Spanakopita Triangles
- Preheat your oven to 180°C/350°F. Line a large baking tray with baking paper or a silicone baking mat.
- Place one sheet of Phyllo Pastry on a clean, dry surface. Lightly brush it evenly with Olive Oil. Cover with a second sheet, brush again with oil, and then top with a third sheet of phyllo (see note 2). Cut the layered phyllo into three equal long strips (see note 3). Keep unused phyllo covered with a damp towel.
- Place a small spoonful of the cooled filling at the bottom right corner of one phyllo strip. Lightly brush the rest of the strip with a tiny bit more olive oil; this will help the layers stick during folding.
- Take the bottom right corner of the strip and fold it diagonally upwards to the left, forming a triangle that encloses the filling. Then, take the bottom left corner of this triangle and fold it straight up over the strip. Next, fold the bottom left corner (now at the top left of your current fold) diagonally downwards and to the right. Continue this folding pattern (refer to step-by-step photos in the post above, note 4) until you reach the end of the strip, maintaining a tight triangle. Use a dab of olive oil to seal the final flap if needed. Place the completed triangle on the prepared baking tray.
- Repeat the phyllo layering and folding process with the remaining strips and filling until all are used.
- Brush each finished triangle with a little more Olive Oil (or an egg wash for a richer color) and optionally sprinkle with Sesame Seeds.
- Bake for 25 to 30 minutes, or until the phyllo is golden brown and deliciously crispy. Serve immediately for the best texture.
Would you like to save this recipe?
We’ll email this post to you, so you can come back to it later!
Notes
Ingredients Notes:
- Phyllo Pastry / Filo Pastry: I used standard sheets measuring approximately 30x45cm (12×18 inches). Ensure phyllo is thawed properly if frozen and kept covered while working.
- Spinach: If opting for frozen spinach, it is absolutely essential to thaw it completely and then squeeze out as much water as possible. This step prevents the filling from becoming watery and ultimately leading to soggy phyllo.
Instructions Notes:
- It is crucial that the spinach and feta filling cools down to at least lukewarm temperature before you mix in the egg. Adding the egg to a hot mixture will cause it to cook and scramble, which you want to avoid for a smooth filling.
- While I recommend three layers for optimal crispiness and structure, you can certainly use only 1 or 2 sheets of phyllo pastry per triangle if you prefer a lighter, more delicate crust.
- The size of your triangles can be customized by how you cut the phyllo sheets. You can cut them into wider or thinner strips to make larger or smaller triangles, respectively. Remember to add the filling and fold the pastry into triangles immediately after preparing each batch of phyllo strips, as phyllo tends to dry out very quickly when exposed to air. Keeping unused strips covered with a lightly damp towel is highly recommended.
- Please refer to the detailed step-by-step photos in the blog post above for a clear visual guide on how to fold the triangles. This visual aid can be very helpful for beginners.
Nutrition (per serving)
