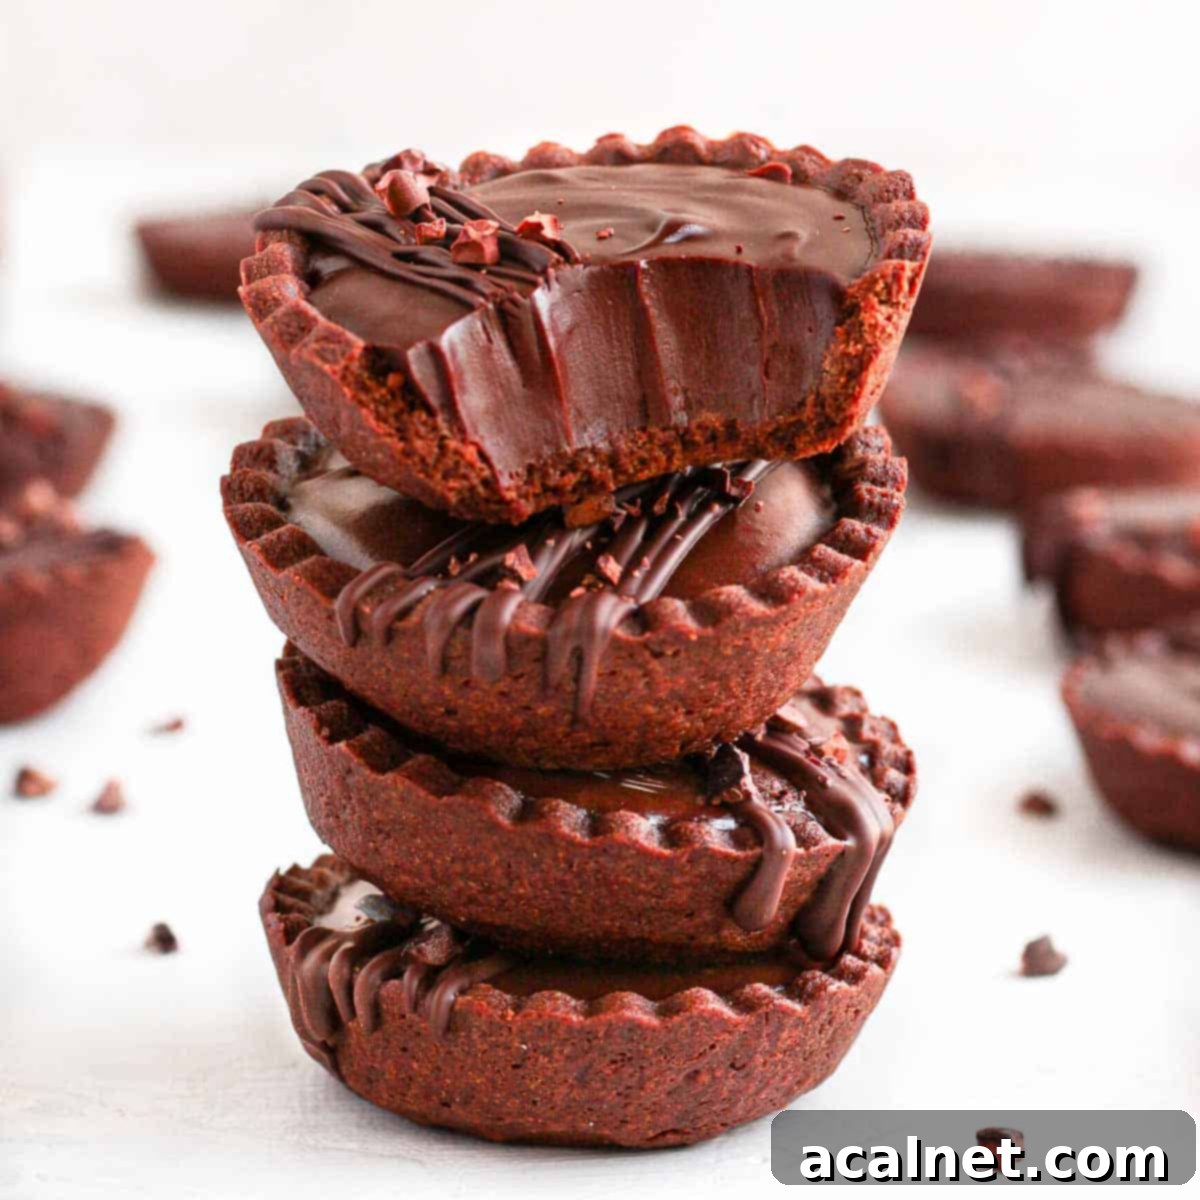
Decadent Mini Chocolate Ganache Tartlets: Your Ultimate Guide to Perfect Bite-Sized Treats
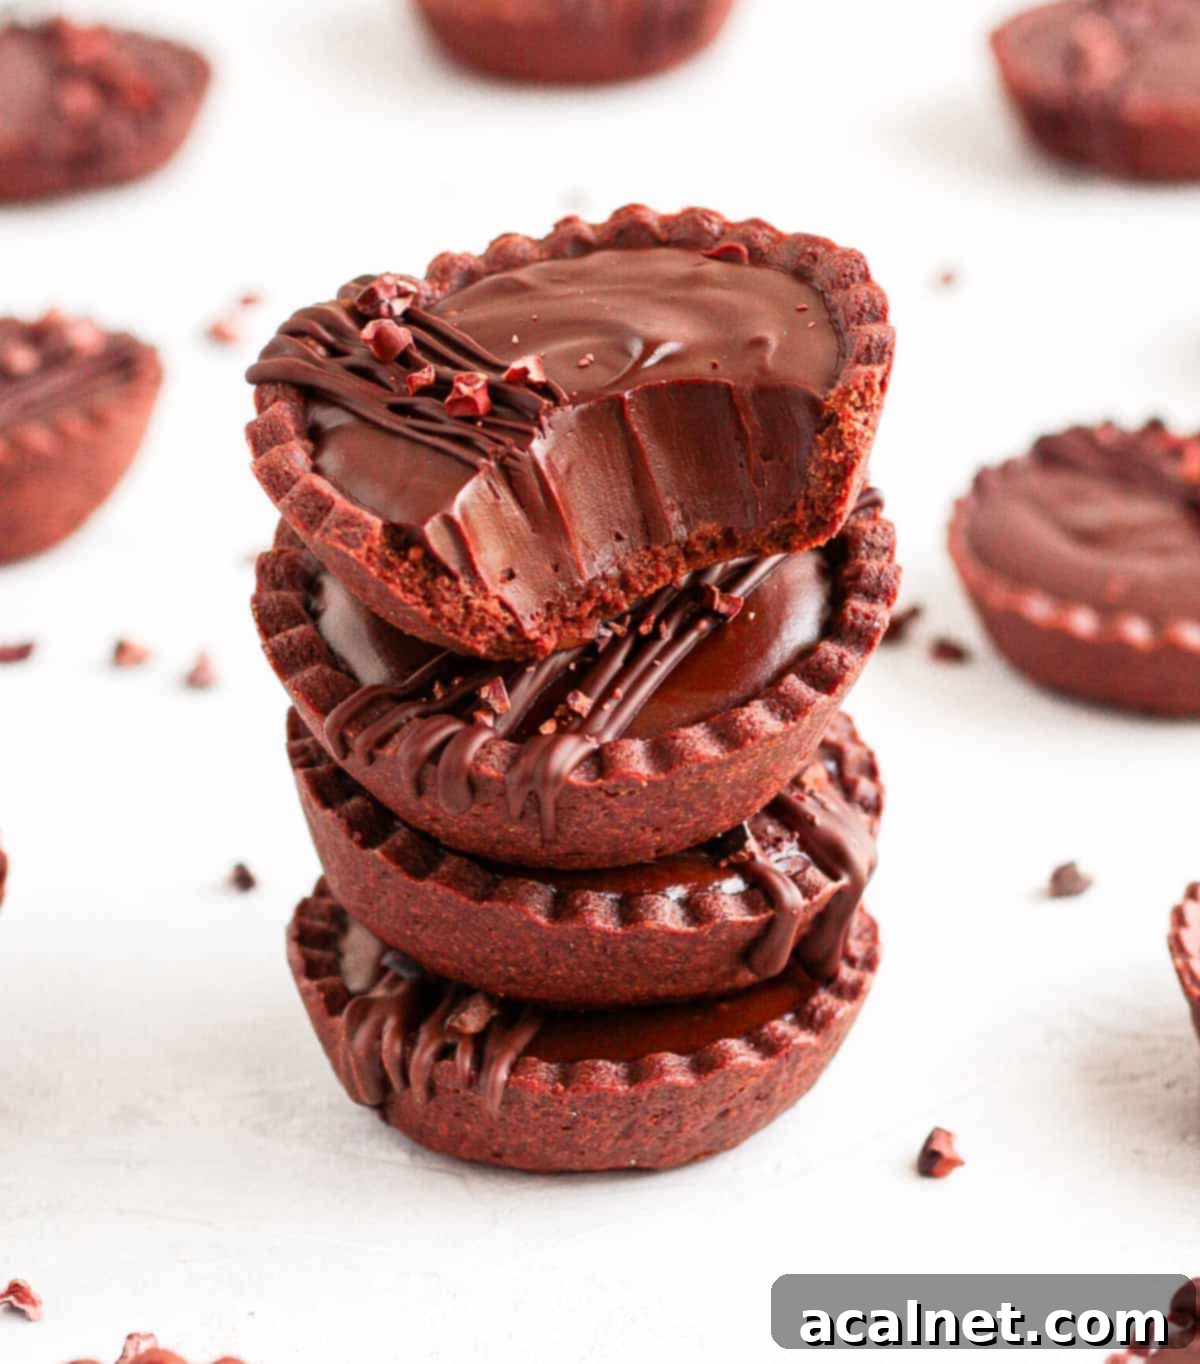
These decadent Chocolate Ganache Tartlets are the perfect sweet treat for any occasion. Whether you’re planning a party, celebrating a birthday, curating a stunning Holiday dessert table, or simply indulging in an afternoon tea, these delightful mini tarts are sure to impress. They beautifully combine a buttery, rich Cacao Shortcrust Pastry with an intense, silky-smooth Dark Chocolate Ganache Filling, creating a simple yet incredibly delicious bite-size dessert that’s both elegant and satisfying.
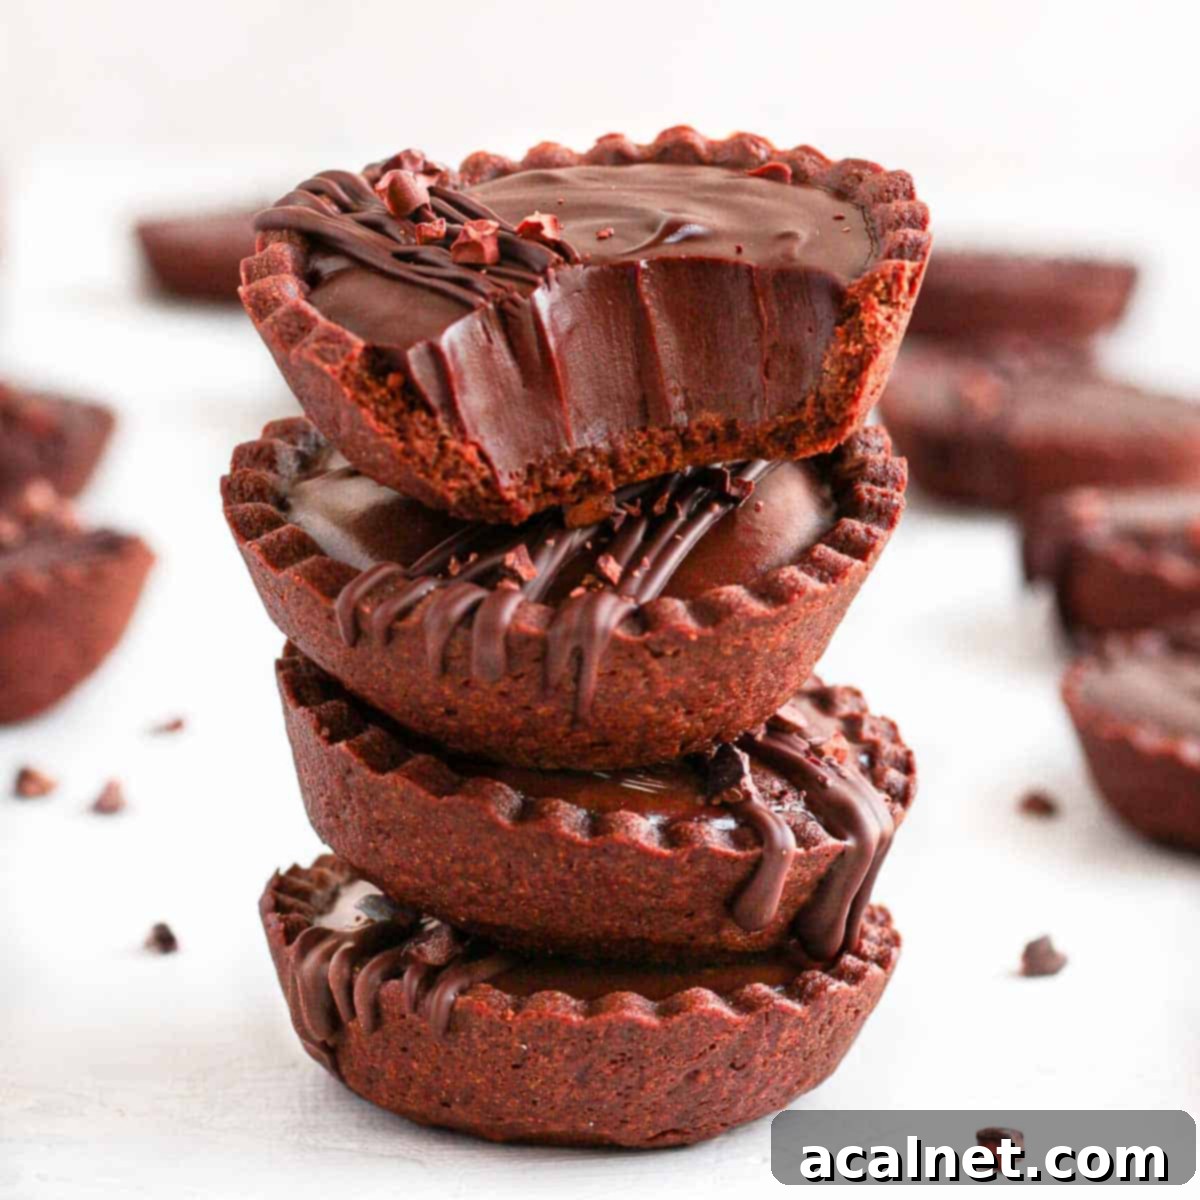
Why You’ll Adore These Mini Chocolate Ganache Tartlets
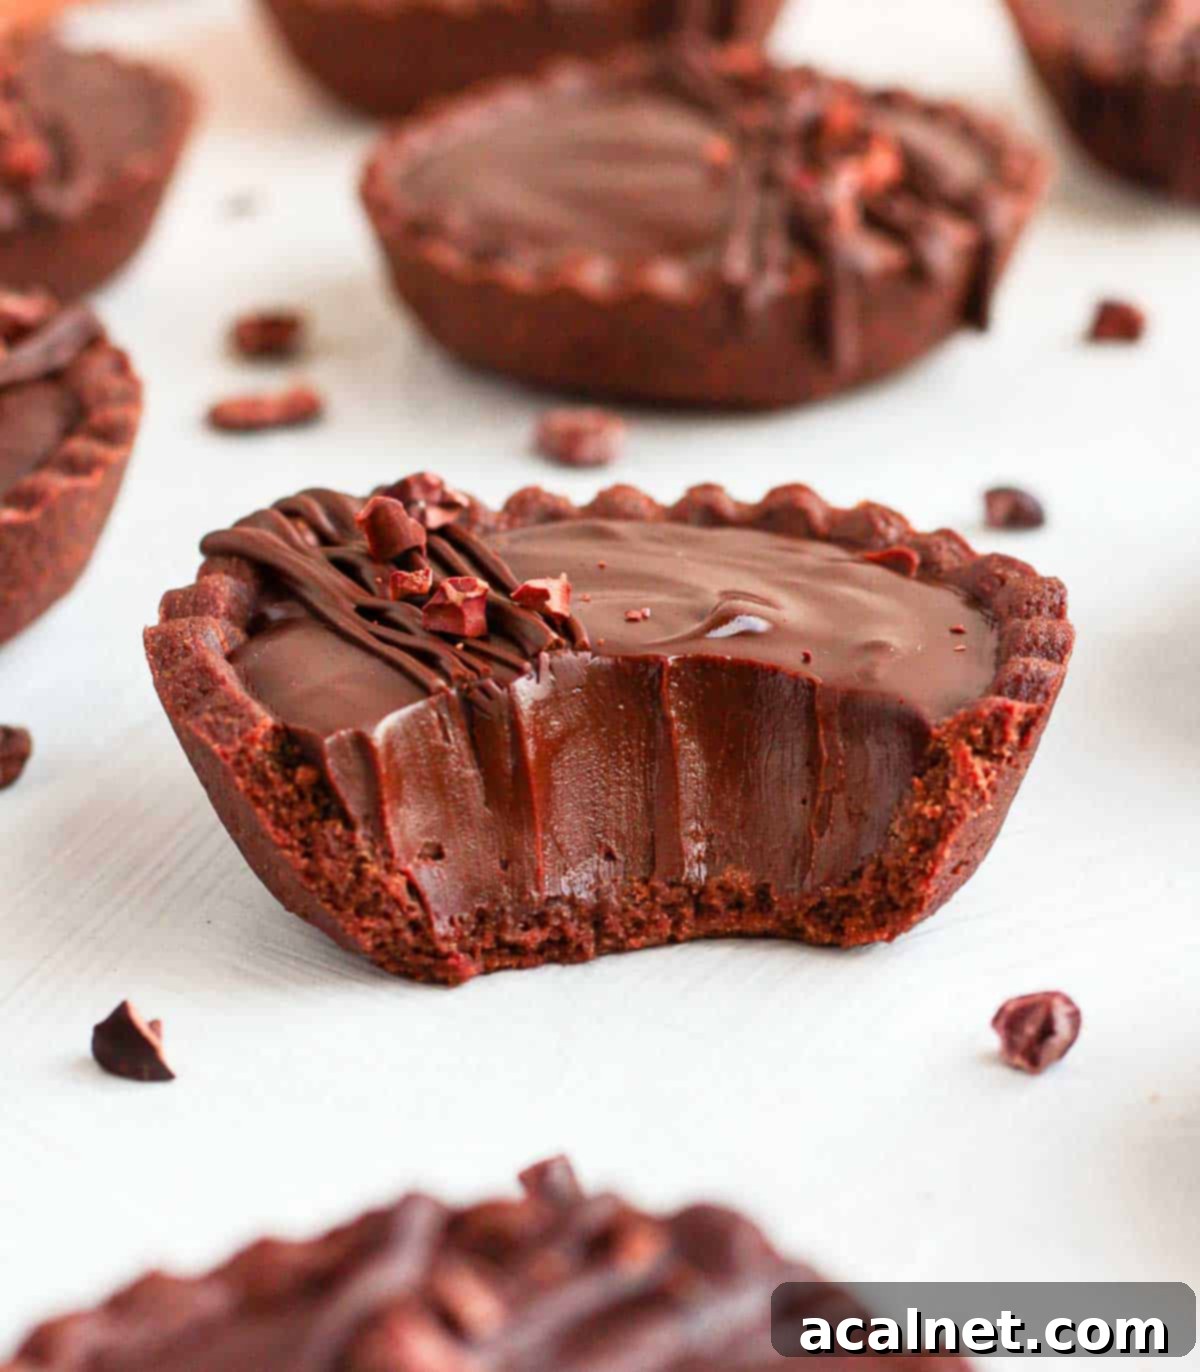
These decadent mini chocolate tarts truly stand out as the ultimate treat to serve at any gathering, party, or simply to enjoy as a sweet snack. They are not just incredibly delicious, but also surprisingly easy to prepare and, best of all, can be made in advance, making them perfect for stress-free entertaining. You’ll love their elegant appearance and rich flavor profile.
Much like their larger counterpart, the French Chocolate Ganache Tart, these tartlets feature a crisp Chocolate Tart Crust paired with a quick and effortlessly simple two-ingredient Chocolate Ganache Filling. The contrast between the flaky crust and the smooth, intense ganache is simply divine.
Forget about needing specialized tartlet tins or fancy equipment; the charming tartlet crusts are easily formed using a standard muffin tin, a method similar to how we create these versatile Tartlet Shells. This simplicity ensures that anyone can achieve bakery-quality results right in their own kitchen.
Beyond their classic appeal, these chocolate tartlets offer endless possibilities for customization, allowing you to create an even more unique and fun treat. Elevate their presentation and flavor by garnishing them with fresh fruits like vibrant berries or zesty citrus (explore inspiration from these Chocolate Orange Tartlets or Raspberry Chocolate Tartlets!). For a sophisticated twist, sprinkle a little sea salt over the filling, or infuse it with a hint of coffee to deepen the chocolate notes. Craving something extra indulgent? Add a luxurious caramel layer, just like in my popular Mini Chocolate Caramel Tarts!
How to Craft Perfect Chocolate Ganache Tartlets
Creating these delightful mini chocolate ganache tartlets involves two main components: the rich chocolate pastry shells and the luscious ganache filling. Follow these detailed steps for a flawless outcome.
Crafting the Chocolate Tartlet Crusts
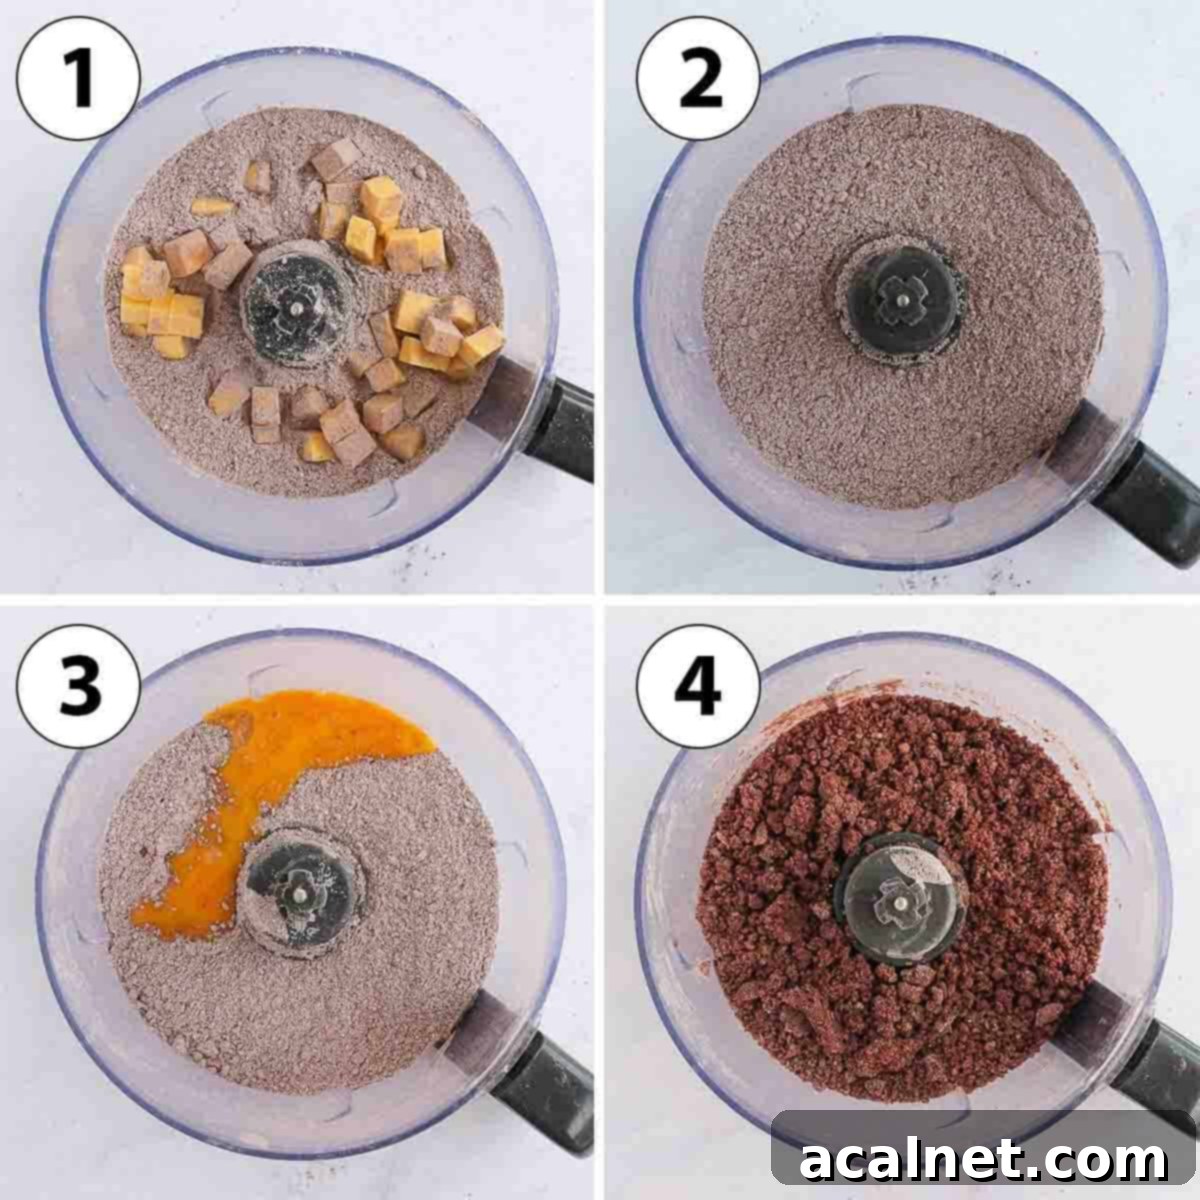
The foundation of these exquisite Chocolate Ganache Tartlets is a perfect chocolate shortcrust pastry. While I personally find a food processor incredibly efficient for pastry making, you can certainly achieve excellent results by hand if you prefer, or if a food processor isn’t available. For a full step-by-step guide on the by-hand method, refer to my comprehensive chocolate pie crust recipe.
This particular pastry is a variation of a classic Pâte Sablée, a traditional French shortcrust pastry known for its delicate, crumbly texture. It’s typically made with Flour, Icing Sugar, a pinch of Salt, unsalted Butter, and an Egg. For our chocolate version, we incorporate a touch of premium Cacao Powder, which not only adds a beautiful dark hue but also deepens the flavor profile, making it a perfect complement to the rich ganache.
- Step 1 (Photo 1): Combining Dry Ingredients and Cold Butter. Begin by placing the all-purpose Flour, unsweetened Cacao Powder, and Icing Sugar into the bowl of your food processor. Pulse a few times to thoroughly combine these dry ingredients and ensure there are no lumps, especially important for the cacao powder. Next, add the very cold, unsalted Butter, cut into small cubes. The colder the butter, the flakier your pastry will be.
- Step 2 (Photo 2): Achieving a Crumbly Texture. Continue to pulse the mixture. Your goal here is to ‘cut’ the butter into the dry ingredients until it resembles small, uniform crumbs. You should no longer see large chunks of butter or distinct pockets of dry flour. This process coats the flour particles with butter, which inhibits gluten development and results in a tender crust.
- Step 3 (Photo 3): Incorporating the Egg. In a separate small bowl, whisk the egg until just combined. Then, add this whisked egg to the food processor bowl. The egg acts as a binding agent, bringing the dough together.
- Step 4 (Photo 4): Forming the Dough. Slowly blend the mixture. The dough will gradually darken and start to come together. Be careful not to over-mix at this stage; overworking the dough can lead to a tough crust. The process is complete when the crumbs, if pressed together with your fingers, stick and begin to form a cohesive ball.
Troubleshooting Pastry Consistency: If your pastry seems too dry and isn’t coming together, add a very small amount of very cold water, about 1 tablespoon at a time, pulsing briefly after each addition until it reaches the right consistency. Conversely, if the dough feels too wet and sticky, incorporate a little more flour, again 1 tablespoon at a time, until it’s workable.
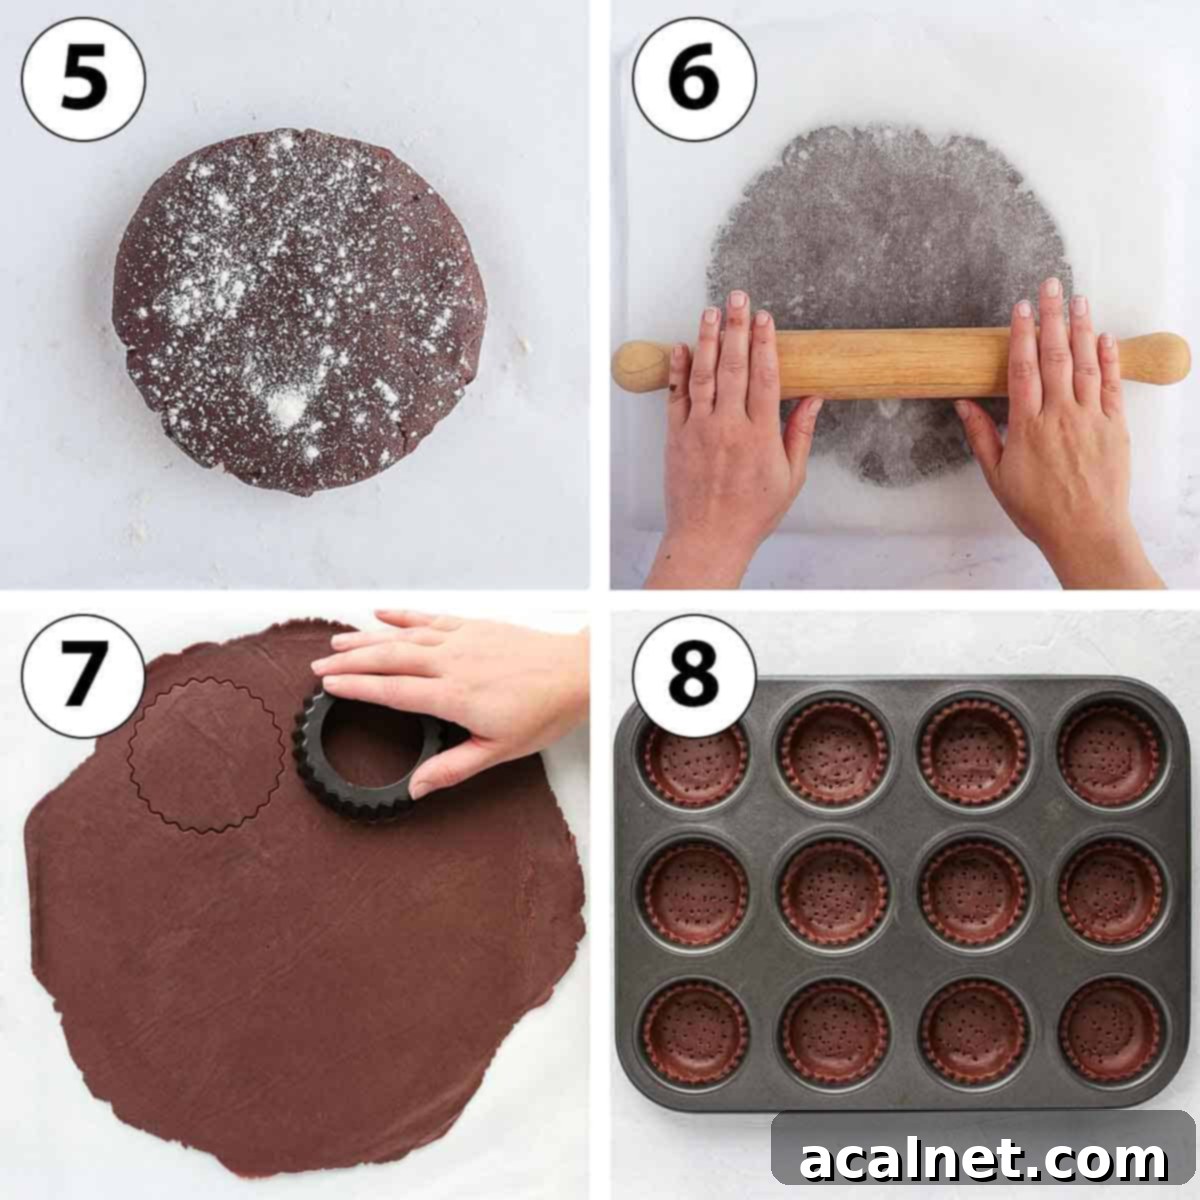
- Step 5 (Photo 5): Forming and Flattening the Dough. Once the dough comes together, gently gather it into a large ball. Then, flatten it into a disk shape. If the dough feels a bit sticky, lightly dust your work surface and rolling pin with a small amount of flour.
- Step 6 (Photo 6): Rolling the Pastry. Place the dough disk between two sheets of baking paper (parchment paper). Using a rolling pin, roll the dough evenly into a large circle. Aim for a thickness of about 3mm (1/8 inch). Rolling too thin might cause the crusts to break during baking or handling, while too thick can make them difficult to shape and result in a heavy crust.
- Chilling the Dough: Transfer the rolled tart crust (still between the baking paper) onto a large flat tray and place it in the fridge. Allow it to rest and chill for at least 1 hour, or ideally, up to 24 hours. This crucial step helps the gluten relax and the butter firm up, preventing the pastry from shrinking excessively during baking.
- Step 7 (Photo 7): Cutting Out Pastry Rounds. Once thoroughly chilled, remove the top sheet of baking paper. Using a round or fluted cookie cutter, carefully cut out small rounds of pastry. The size of your cutter will determine the depth of your finished tartlets. I recommend choosing a cutter that is at least the same width as the openings of your muffin pan to ensure sufficient pastry to line the sides.
- Step 8 (Photo 8): Lining the Muffin Pan. Gently place each pastry round inside the openings of your muffin pan. Carefully slide it in, then use your finger to lightly press along the corners where the bottom meets the sides. This helps to eliminate any trapped air bubbles and creates a crisp, well-defined 45-degree angle in your tartlet shell. Finally, lightly dock the bottom of each pastry with a small fork to prevent it from puffing up during baking.
- Second Chill: Place the lined muffin pan back in the fridge (or even the freezer for a quicker chill) for at least another hour, or up to 24 hours. This second chilling period is vital for maintaining the shape of your tartlet shells during baking. While the pastry rests, preheat your oven to 160°C/325°F. Place the muffin pan in the freezer just as the oven is preheating – the extreme cold will help the pastry hold its shape even better.
- Blind Baking: To ensure a perfectly crisp crust, cover each pastry shell with a small piece of crumpled baking paper and fill it with baking beads, dried beans, or rice. Bake for 15 minutes. This ‘blind baking’ step prevents the crust from rising too much. After 15 minutes, carefully remove the baking weights and baking paper, then return the tartlets to the oven for an additional 15 minutes, or until the pastry is fully baked and golden. Allow them to cool down completely in the muffin pan before attempting to remove them.
For more detailed step-by-step photos and guidance on shaping the shells, please refer to my Tartlet Shells recipe.
Preparing the Rich Dark Chocolate Ganache Filling
Once your mini chocolate tart crusts are perfectly baked and cooled, it’s time to prepare the star of the show: the incredibly easy chocolate ganache filling. This luxurious filling requires just two simple ingredients, showcasing that simplicity often yields the most profound flavors.
- Chocolate: The quality of your chocolate directly impacts the final taste of your ganache. Always opt for high-quality Cooking or Baking Chocolate, especially when melting chocolate as we are here. Eating chocolate often contains additives that prevent it from melting and re-solidifying properly, leading to a grainy or split ganache. I personally used a 70% Dark Chocolate to achieve an intensely rich and sophisticated chocolate filling, but you have the flexibility to choose any type of cooking chocolate you prefer, from a less intense dark chocolate to a sweeter milk chocolate.
- Cream: You’ll need heavy or thickened cream (often labeled whipping cream in some regions). The high fat content in heavy cream is essential for creating a stable, smooth, and wonderfully fudgy ganache.
We’re using a fundamental 1:1 ratio of chocolate to cream (by weight), which is ideal for creating a ganache with a delightful, fudgy texture that sets beautifully. This ratio ensures a firm yet melt-in-your-mouth consistency once chilled.
Beyond these two basic ingredients, you can easily customize your ganache filling to suit your palate. Consider adding a splash of vanilla extract for warmth, a pinch of espresso powder to enhance the chocolate flavor, a touch of flaky sea salt for a balanced sweet-and-salty contrast, or even some finely grated orange zest for a bright, aromatic twist! For those seeking a creamier, softer filling, you could alternatively prepare a Chocolate Crèmeux or a rich Chocolate Pastry Cream.
Here’s how to make the tartlets ganache filling step-by-step:
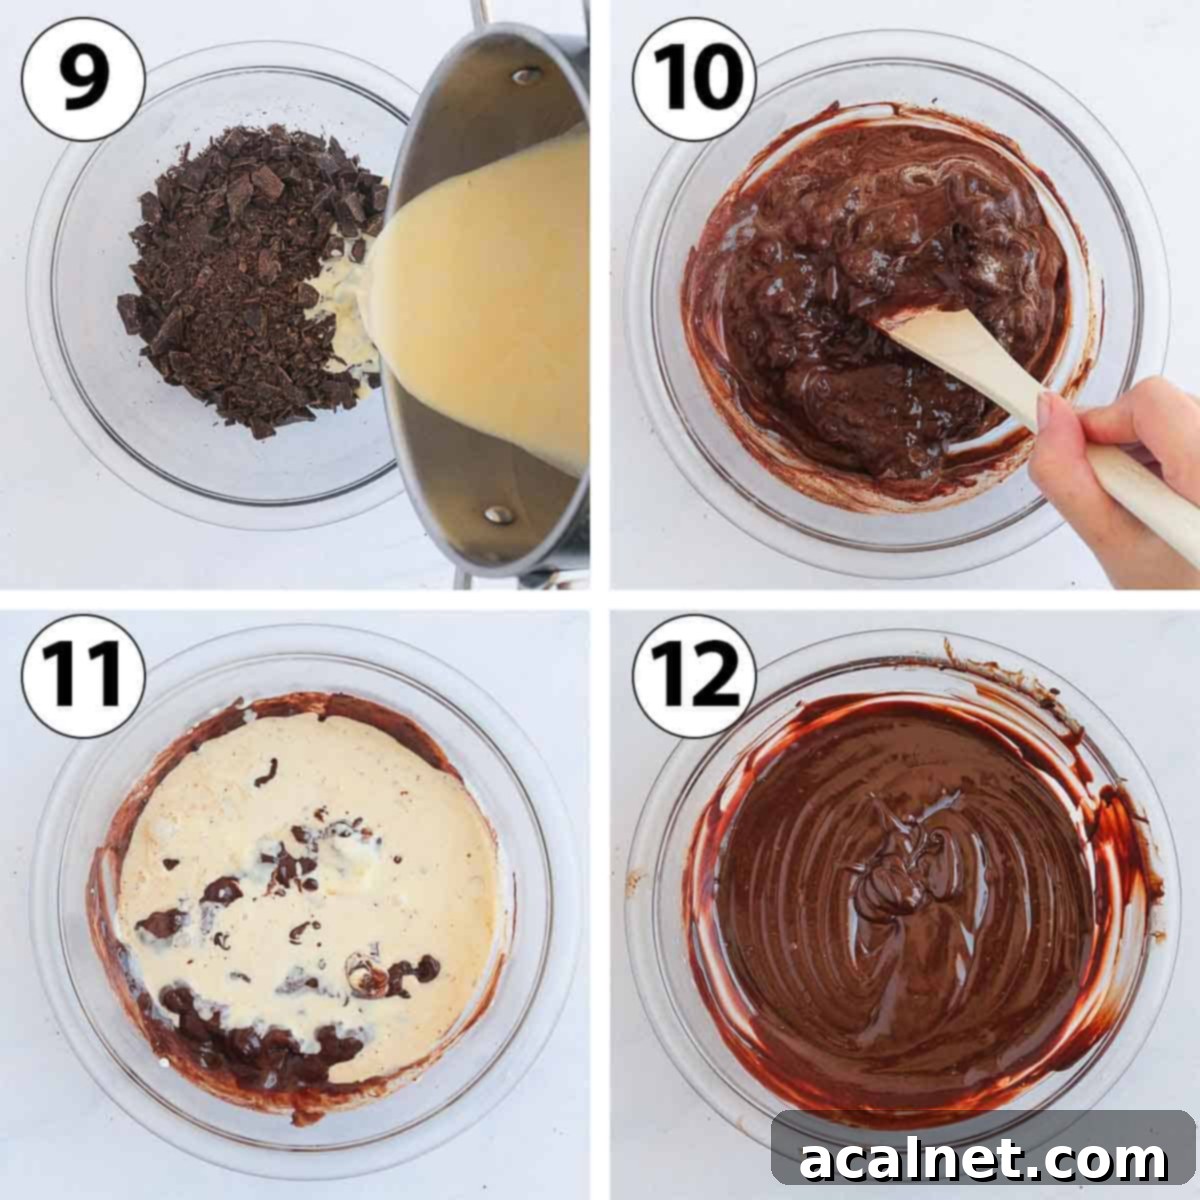
- Step 9 (Photo 9): Prepare Chocolate and Cream. Start by finely chopping your cooking chocolate. The smaller the pieces, the faster and more evenly the chocolate will melt, preventing any scorching. Place the finely chopped chocolate in a large, heat-proof mixing bowl. In a small saucepan, gently heat the heavy cream until it just begins to simmer, showing small bubbles around the edges. Do not let it boil vigorously. Pour approximately half of the hot cream directly over the chopped chocolate and let it sit undisturbed for 2 to 3 minutes. This allows the heat from the cream to begin melting the chocolate without overworking it.
- Step 10 (Photo 10): Initial Emulsification. After the resting period, use a stiff spatula and begin to gently mix the chocolate and cream. Start in the very center of the bowl and make small, slow circular movements, gradually expanding outwards. This technique, known as emulsification, helps to create a smooth, homogenous mixture. At this point, you should observe a mix of beautifully melted chocolate with perhaps a few stubborn chunks of still-solid chocolate remaining.
- Step 11 (Photo 11): Complete Melting. Now, pour the remaining hot cream over the ganache. If your cream has cooled down significantly, you might want to briefly reheat it until it’s just simmering again to ensure enough heat for the remaining chocolate.
- Step 12 (Photo 12): Achieving a Smooth Ganache. Continue to stir the mixture using the same circular movements. Keep stirring until all the chocolate has completely melted and is fully incorporated into the cream. The result should be a very shiny, perfectly smooth, and fluid ganache. The glossiness indicates a well-emulsified mixture.
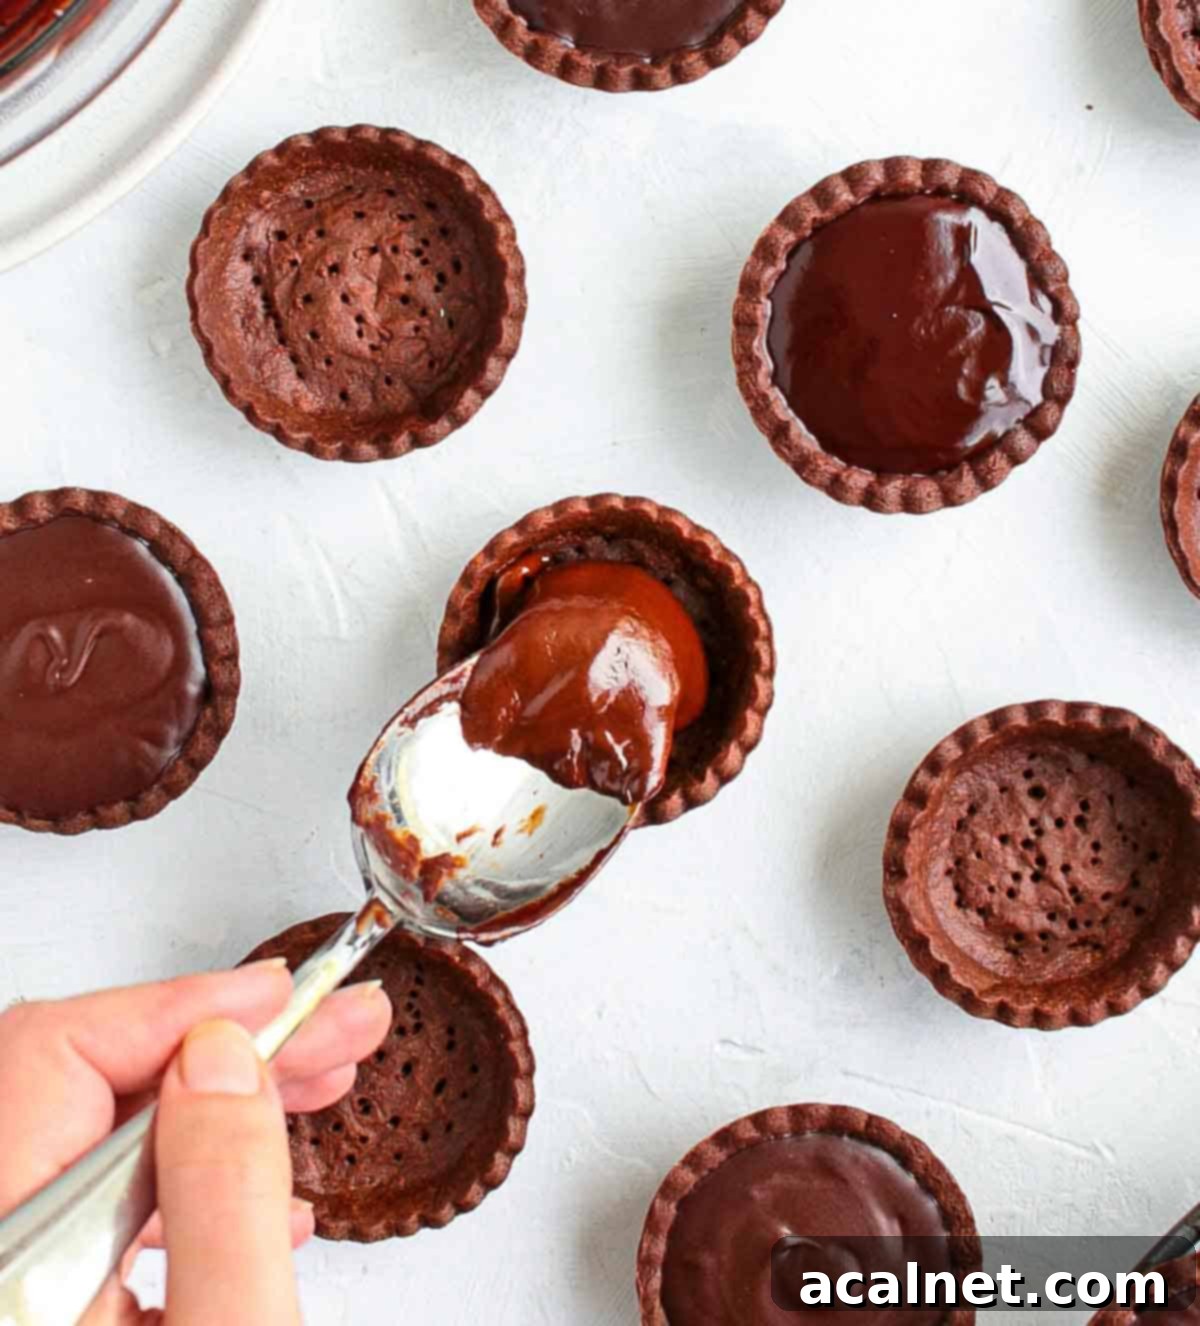
- Filling the Tartlets & Setting: As soon as the ganache is ready, directly pour it into your cooled, baked tartlet shells while it is still warm and fluid. This ensures it spreads out easily and creates a perfectly even surface. Gently tap each filled tartlet on a hard surface a few times to release any trapped air bubbles, which will result in a flawlessly smooth top. Finally, transfer the tartlets to the fridge and allow them to set for at least 2 hours, or until the ganache is firm.
Expert Tips & Troubleshooting for Perfect Tartlets
- Embrace the Chill: Pastry Resting is Key. Resting your chocolate pastry for at least 1 hour after each significant handling (e.g., after mixing, after rolling and lining) is paramount. The longer you can let it rest and chill, the better the final result. This rest period is crucial for two reasons: it allows the gluten, which develops during mixing and handling, to relax, preventing the pastry from shrinking excessively in the oven. Secondly, it ensures the butter remains very cold and firm, which is essential for creating a tender, flaky, and stable crust that holds its shape beautifully. Don’t rush this step!
- The Power of Blind Baking Weights. Using baking weights, beads, or even dried beans/rice during the first half of the pastry baking process is incredibly important, especially for mini tarts. Due to their small size, mini tart shells are particularly prone to puffing up and losing their delicate shape in the oven. I’ve experimented without weights and consistently found that the pastry shrunk and puffed up significantly more. Remember to remove these weights and the baking paper midway through baking. This allows the bottom of the pastry to fully dry out and become wonderfully crisp, preventing a soggy bottom.
- Chocolate Choice: Your Flavor Canvas. Since no extra sugar is added to the ganache filling, the type and percentage of chocolate you choose will dictate the overall sweetness and intensity of your tartlets. If you adore a deeply dark, intense chocolate flavor, stick with a 70% dark chocolate, as I did. For a balance that’s still rich but slightly sweeter, a 50-60% dark chocolate works wonderfully. If you prefer a much sweeter dessert, opt for a good quality milk chocolate. Always prioritize good quality cooking chocolate; it makes a huge difference, as most of the filling’s flavor comes directly from it.
- Dealing with Unmelted Chocolate Chunks. If, after thoroughly incorporating all the cream, you still find a few stubborn chunks of unmelted chocolate in your ganache, don’t fret! You can gently finish melting them using a double-boiler method. Alternatively, you can use a microwave, but proceed with extreme caution: microwave for very short bursts (no longer than 10-15 seconds at a time), stirring vigorously after each interval. Overheating chocolate in the microwave can quickly scorch it, leading to a grainy, unpalatable ganache.
Recipe FAQs: Your Questions Answered
Absolutely! If you’re short on time or prefer not to make your own pastry from scratch, using pre-made tartlet shells is a perfectly acceptable shortcut. While you might find it challenging to locate pre-made chocolate ones, plain shortcrust pastry shells will work beautifully and still provide a delicious contrast to the rich chocolate ganache. Just ensure they are fully baked and cooled before filling.
The choice of chocolate is entirely up to your personal preference, but the most crucial rule is to always use proper cooking or baking chocolate. Never use eating chocolate (like a regular chocolate bar) to make ganache or for baking in general. Eating chocolate contains emulsifiers and other additives that can prevent it from melting smoothly and re-solidifying correctly, often resulting in a grainy or split ganache. I recommend a 70% dark chocolate for a truly intense chocolate flavor, but you can certainly opt for a less strong dark chocolate (e.g., 50-60%) or even milk chocolate if you prefer a sweeter profile. Remember, there’s no added sugar in the ganache filling, so the sweetness of the finished dessert will predominantly come from the type of chocolate you select (its cacao percentage, whether it’s milk or dark, etc.).
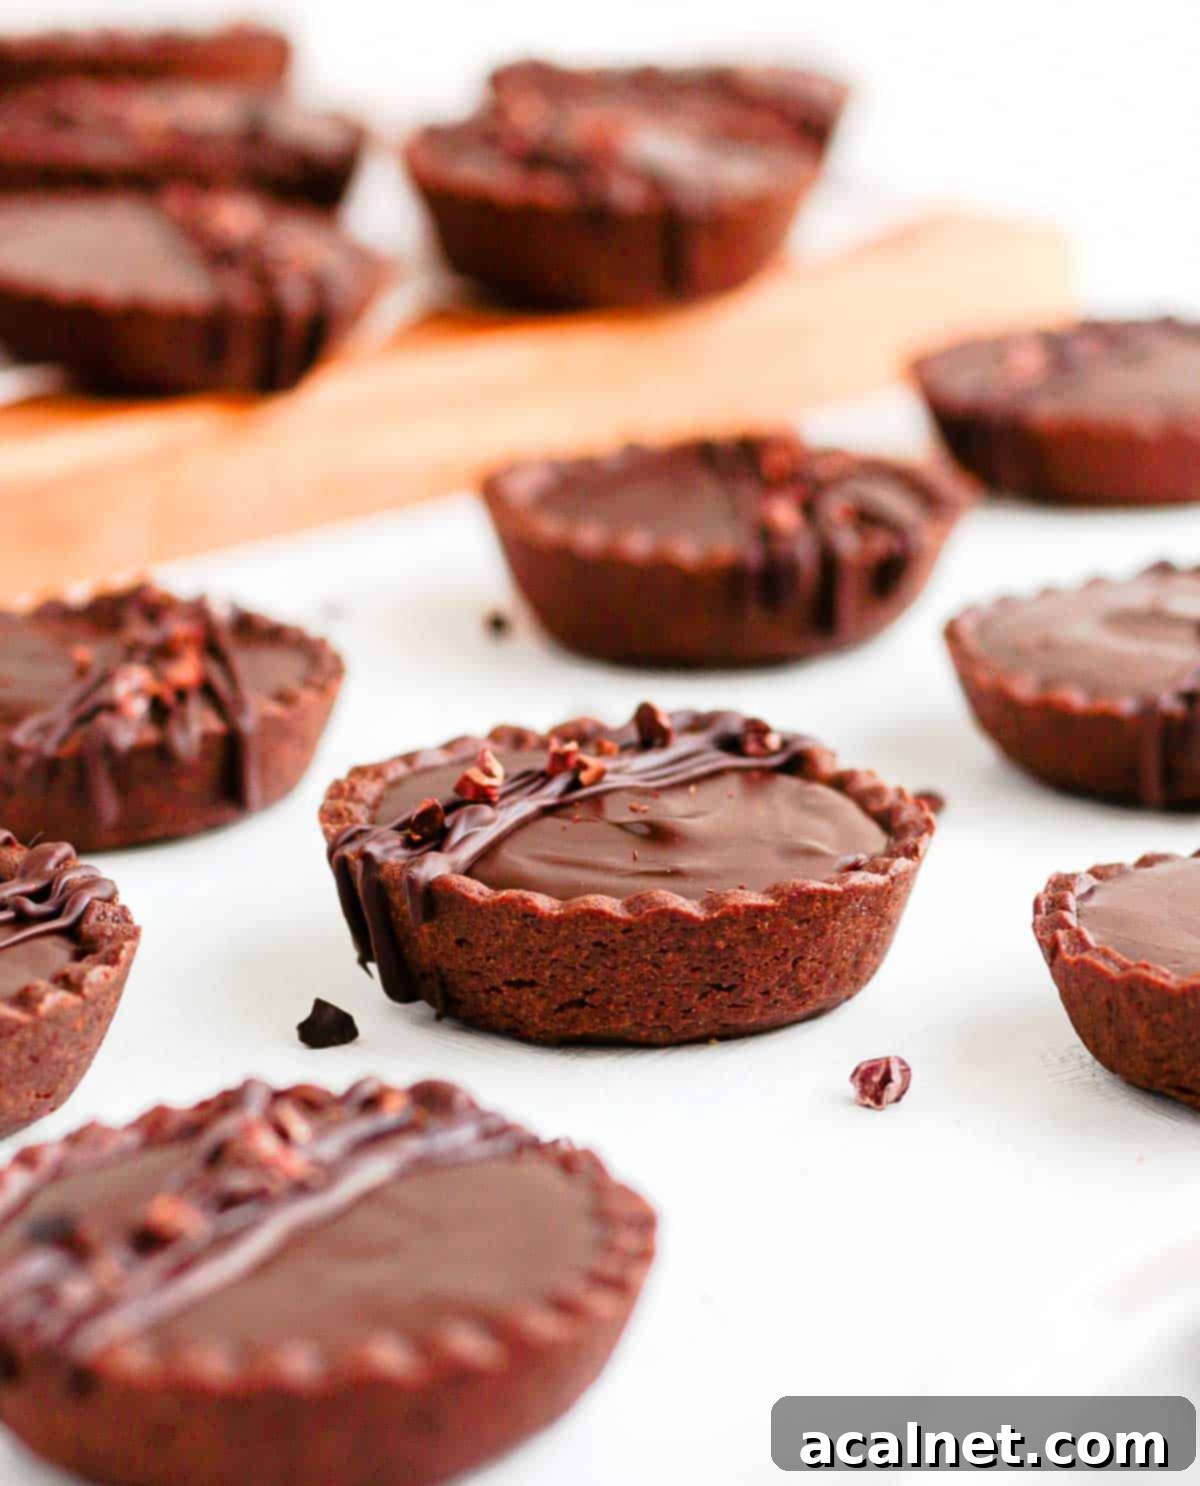
For these particular chocolate tartlets, I kept it simple by adding a delicate drizzle of melted chocolate and a sprinkle of crunchy cacao nibs. However, the possibilities for finishing are endless! You could add a burst of freshness with colorful fresh fruits like raspberries, strawberries, or orange segments. A sprinkle of chocolate shavings (dark, milk, or white for contrast) always looks elegant. For a popular flavor combination, a tiny pinch of flaky sea salt on top of the ganache before it sets truly enhances the chocolate’s depth. Other ideas include a dollop of whipped cream, a dusting of cocoa powder, edible glitter, or even a candied violet for a touch of sophistication!
Storing & Freezing Your Chocolate Ganache Tartlets
To maintain their optimal freshness and texture, these delightful mini chocolate tarts should always be stored in the fridge. However, for the very best tasting experience, I highly recommend taking them out of the refrigerator approximately an hour before you plan to serve them. This allows the rich ganache filling to gradually return to room temperature, which is when it truly showcases its ideal fudgy, melt-in-your-mouth texture.
This dessert will remain delicious for up to 3 days when properly stored in an airtight container in the fridge. That said, they are undoubtedly at their peak and best enjoyed as soon as the ganache has fully set, or within 24 hours of preparation. This timeframe ensures the buttery pastry crust remains wonderfully crunchy and doesn’t soften from the moisture of the ganache.
While I generally do not recommend freezing the fully assembled chocolate tartlets (as the pastry can lose some of its crispness upon thawing), you can absolutely get a head start by preparing and freezing the tart shells themselves in advance. This is a fantastic time-saver!
For the best results, you’ll achieve a much nicer texture by freezing the tart shells raw and then baking them only when you need them. Simply arrange the raw, pre-shaped shells on a baking sheet and freeze until solid, then transfer them to an airtight container or freezer bag. When you’re ready to bake, there’s no need to thaw them; just bake them directly from frozen, adding an extra 5 minutes to the recommended baking time to allow for the initial thawing in the oven. If you must freeze baked shells, ensure they are completely cooled before freezing, and thaw them gently at room temperature before filling and serving.
Explore More Delightful Tartlet Recipes
- Mini Lemon Curd Tartlets
- Strawberry Custard Tartlets
- Pear Frangipane Tartlets
- Orange Tartlets
- Easy Cherry Tartlets with Puff Pastry
- Puff Pastry Apple Tartlets
- Mini Lemon Meringue Tarts
- Mini Fruit Tarts
- Salted Caramel Tartlets
- Mini Butterscotch Tartlets
Made this recipe?
Let us know if you liked it by leaving a comment below, and tag us on Instagram @a.baking.journey with a photo of your creation!
Recipe Card

Mini Chocolate Tarts
Print Recipe
Ingredients
Chocolate Tart Pastry
- 225 gr (1 1/2 cup) Plain / AP Flour
- 20 gr (2 tables.) Unsweetened Cacao Powder, sifted
- 50 gr (1/3 cup + 2 tablesp.) Icing Sugar, or powdered sugar
- 1 pinch Fine Salt
- 120 gr (1/2 cup) Unsalted Butter, very cold
- 1 Egg, at room temperature
Chocolate Ganache Filling
- 200 gr (7 oz) Dark Cooking Chocolate, (*see notes below)
- 200 ml (3/4 cup + 1 tablesp.) Heavy / Thickened Cream
Instructions
Chocolate Tart Pastry
- Place the Flour, Cacao Powder and Icing Sugar in the bowl of your food processor and pulse to combine and remove any lumps (see note 1 if making by hands).
- Add the very cold Butter, cut into small cubes and pulse until you get a fine crumbs consistency. Add the whisked Egg and pulse to combine until a sticky dough starts to come together. If you press the crumbs together, they should stick.
- Bring the pastry together into a disk and place between two sheets of baking paper (see note 2) and roll into a large circle about 3mm (1/8 inch) thick. Place in the fridge to rest for at least 1 hour, or up to 24 hours.
- Remove the baking paper and cut out rounds of pastry using a round or fluted cookie cutter (see note 3). Gently slide the pastries into the muffin pan openings, lightly pressing the edge between the bottom and the sides to remove any air bubbles. Prick the bottom with a fork and place back in the fridge to rest for at least 1 hour, or up to 24 hours.
- Preheat your oven on 160’C/325’F and place the muffin pan in the freezer in the meantime.
- Line each tartlet shell with a small piece of crunched up baking paper and cover with baking beads, dry beans or rice. Bake for 15 minutes, remove the baking weights and baking paper, then bake for an additional 15 minutes or until fully baked. Leave to cool down completely
Chocolate Ganache Filling
- Finely chop the Cooking Chocolate and place it in a large heat-proof mixing bowl.
- Heat up the Cream in a small pot until it starts to simmer. Pour half of the hot cream over the chopped Chocolate and leave for 2 to 3 minutes without touching it. Using a stiff spatula, stir in small circular movements, starting from the centre of the bowl then making your way towards the edges until combined (see note 4).
- Pour the rest of the hot cream over the ganache (reheat it first if needed) and stir again in circular movement until all the chocolate has melted. You should get a smooth, fluid and shiny ganache (see note 5).
- Pour straight away into the baked tartlet shells while still warm. Gently tap each tartlet on a hard surface to remove any air bubbles, then place in the fridge to set for at least 2 hours (see note 6).
Would you like to save this recipe?
We’ll email this post to you, so you can come back to it later!
Notes
Yield: this recipe made 18 tartlets, but depending on the size of your muffin pan and how wide you cut out the pastry, you could be making a few less or more.
Ingredients Notes:
- Chocolate: always use Cooking Chocolate (and not eating chocolate) to bake with or make a ganache. Using eating chocolate would likely result in a grainy and/or split ganache as it will not melt and reset properly.
I used 70% dark chocolate but you could use any of your preferred dark chocolate or even milk chocolate if preferred! There is no sugar added to the filling so play with the type of chocolate to bring a sweetness that is to your liking.
Instruction Notes:
- The pastry can be made by hands and/or with a pastry blender if you do not have a food processor. You can find the detailed step by step instructions in my Chocolate Pie Curst recipe.
- If the pastry seem to be a bit sticky, dust with a little bit of flour.
- The wider you cut out the circles of pastry, the deeper the tartlet shells will be. It is up to you how wide you cut them out, but I recommend having the width of the muffin pan openings as a minimum. Otherwise, the crusts will be quite flat and not deep enough for a filling.
- The chocolate won’t be fully melted at this point – it is normal. Gently mix until all the cream has been incorporated into the chocolate.
- If you still have some unmelted chunks of chocolate after adding the second half of the cream, either place the ganache in the microwave (for no longer than 30 seconds at the time, stirring well each time until fully melted) or preferably over a double boiler.
- I recommend taking them out of the fridge for about 1 hour before serving them so that the ganache can come back to room temperature, which will give it the best, fudgy texture.
Nutrition (per serving)
