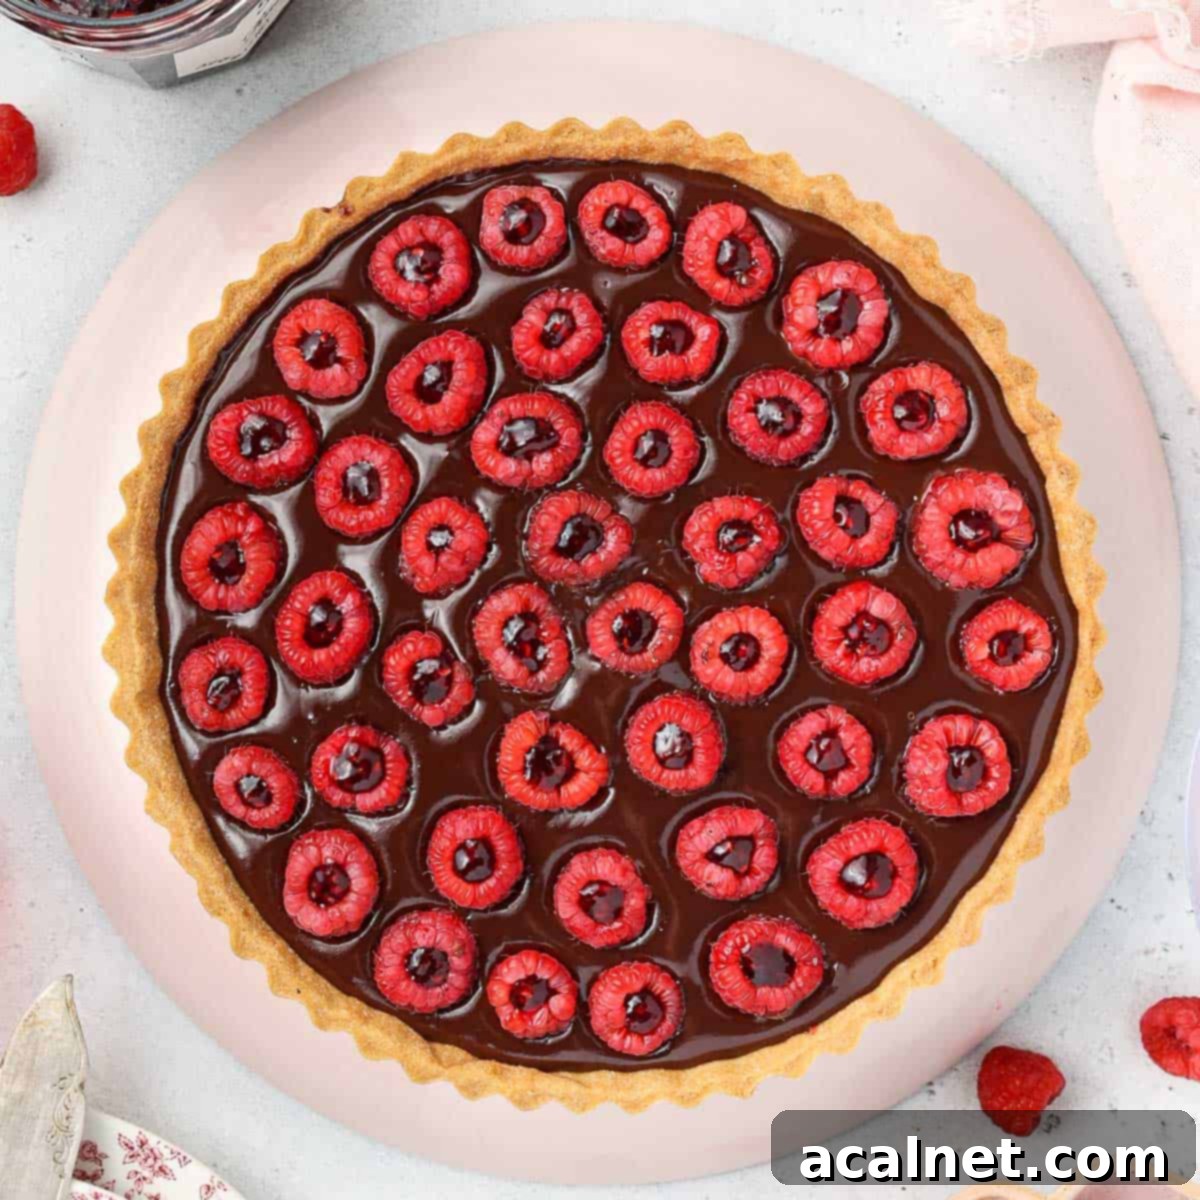
Decadent French Chocolate Raspberry Tart: The Ultimate Homemade Recipe
Indulge in a truly exquisite dessert with this French Chocolate Raspberry Tart. Combining a rich, buttery homemade shortcrust pastry, vibrant raspberry jam, a luxurious dark chocolate ganache filling, and a crowning of fresh, plump raspberries, this tart is a symphony of flavors and textures. It offers a perfect balance of intense sweetness and tart freshness, making it a show-stopping dessert for any occasion.
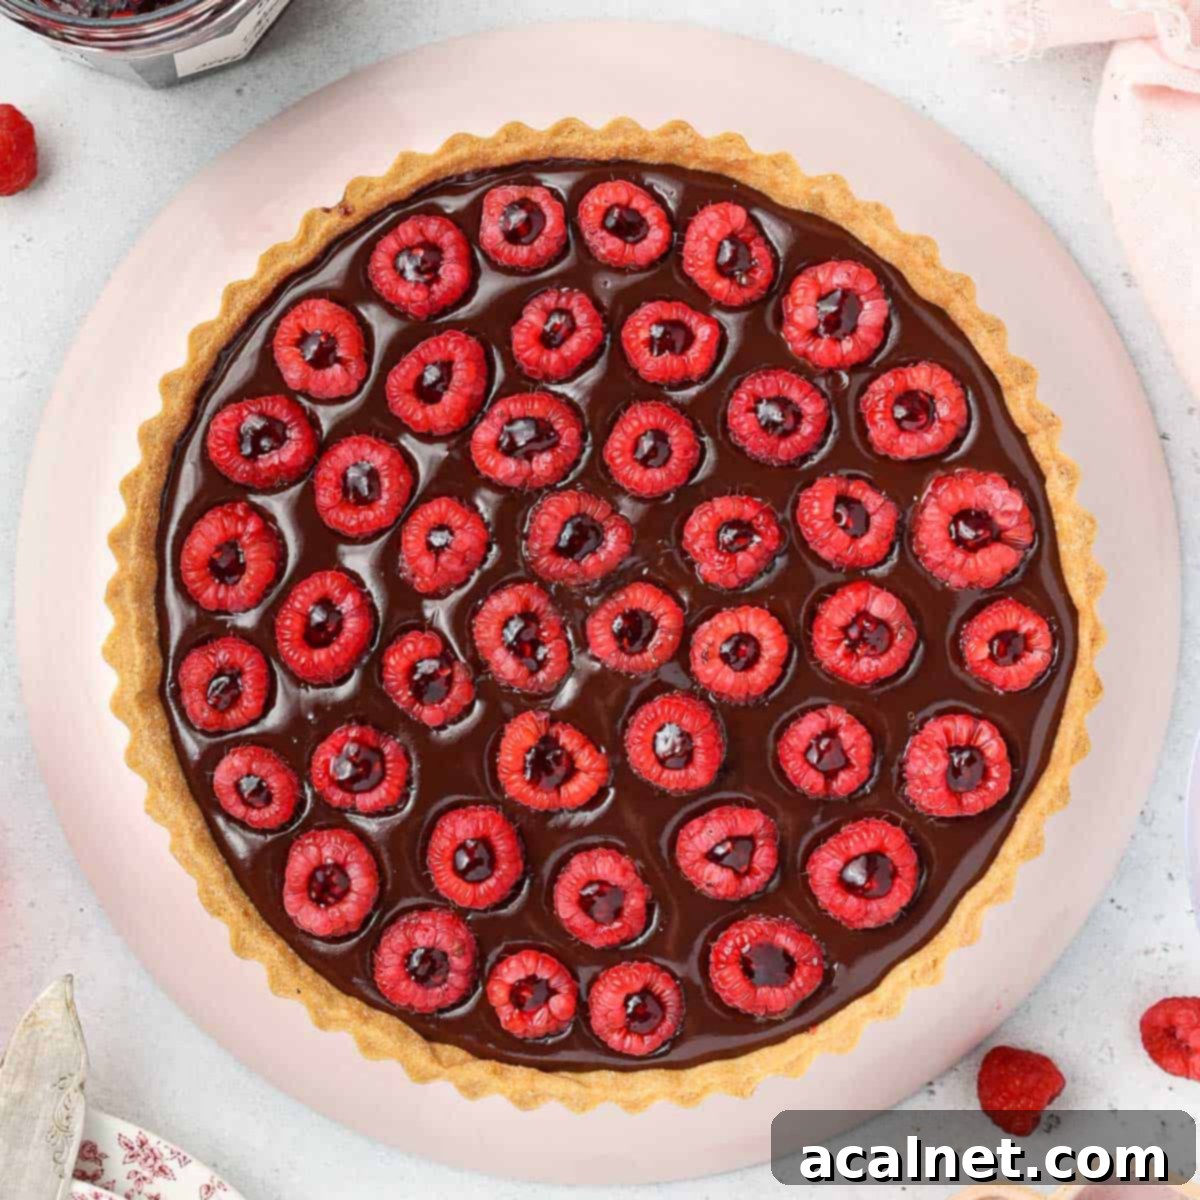
Why You’ll Adore This Chocolate Raspberry Tart Recipe
The combination of rich chocolate and vibrant raspberries is a classic for a reason – it’s pure culinary magic. This chocolate raspberry tart takes that timeless pairing to a new level, offering a dessert that is both sophisticated and incredibly satisfying. The intense depth of dark chocolate perfectly complements the bright, tart freshness of raspberries, creating an unforgettable sensory experience with every bite. Encased within a wonderfully buttery and crisp Pâte Sablée (French shortcrust pastry), this tart truly is a winning dessert that will impress both your guests and your taste buds.
Beyond its irresistible flavor, this French chocolate raspberry tart is surprisingly straightforward to prepare. The indulgent ganache filling requires just four simple ingredients (with one optional addition), making the process much less intimidating than you might imagine. And for those short on time, using a high-quality store-bought pastry crust is a perfectly acceptable shortcut that won’t compromise the delicious outcome. This versatility makes it an ideal baking project for both seasoned home bakers and enthusiastic beginners.
Whether you’re celebrating a special occasion, hosting a sophisticated dinner party, or simply treating yourself to a gourmet delight, this homemade chocolate raspberry tart fits the bill. It’s an elevated dessert that looks as impressive as it tastes, promising to be the highlight of any dessert table. For those who can’t get enough of this glorious flavor duo, be sure to also try my Raspberry Brownies and luscious Raspberry Truffles!
Looking for more berry deliciousness? Also explore our classic Raspberry Tart filled with creamy Raspberry Curd, or delightful Raspberry Frangipane Tartlets for individual servings.
Essential Ingredients for Your Tart
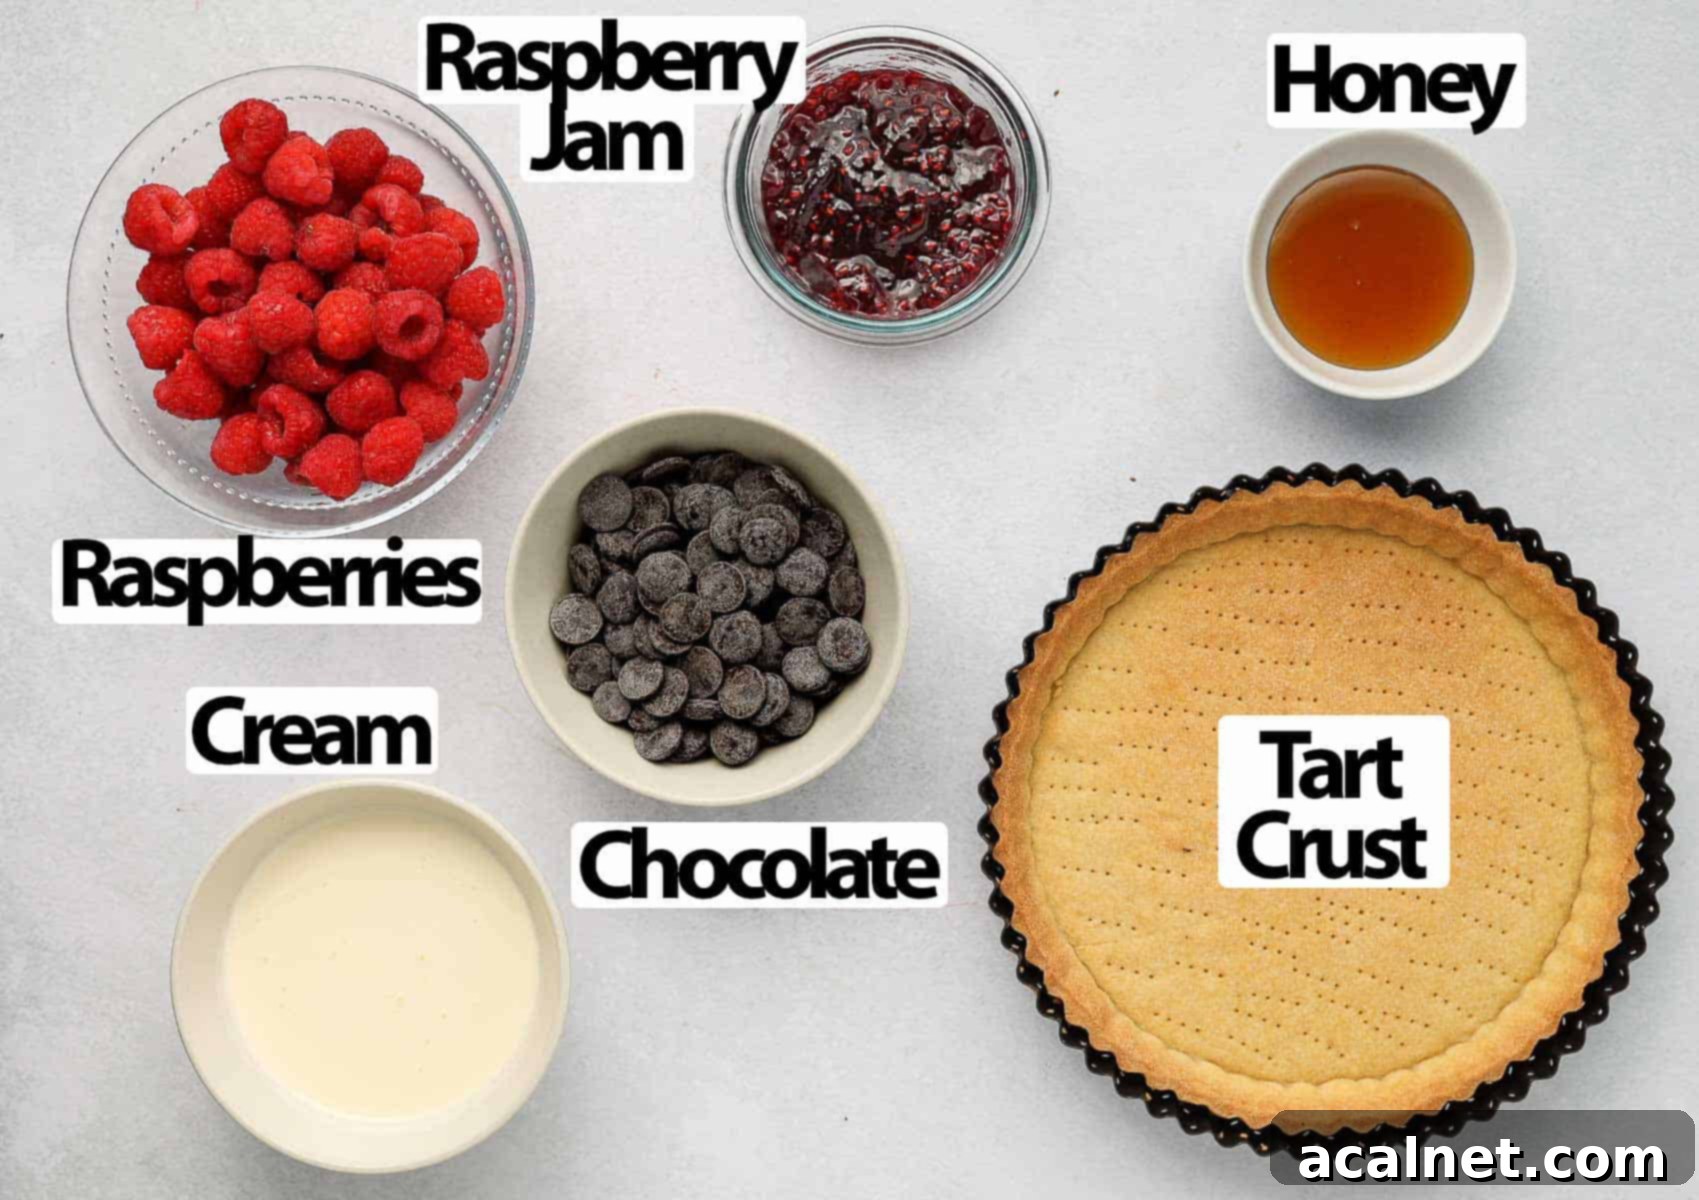
Crafting a truly exceptional French Chocolate Raspberry Tart begins with selecting high-quality ingredients. Each component plays a vital role in achieving the perfect balance of flavor and texture. Here’s a closer look at what you’ll need:
For the Pâte Sablée (French Shortcrust Pastry)
This classic French pastry forms the ideal crisp and tender base for our tart. It’s a simple yet elegant dough, requiring just four key ingredients:
- Plain / All-Purpose Flour: The structural foundation of the pastry. Ensure it’s fresh and unbleached for the best results.
- Icing Sugar (Powdered Sugar): Contributes to the tender, melt-in-your-mouth texture of Pâte Sablée, distinguishing it from regular pie crusts that often use granulated sugar. It also adds a delicate sweetness.
- Unsalted Butter: Must be very cold and cut into small cubes. Cold butter is crucial for creating pockets of steam during baking, which results in a tender, crumbly crust rather than a tough one. Using unsalted butter allows you to control the salt content precisely.
- Egg: Acts as a binding agent, bringing the dough together and adding richness. A medium-sized egg is typically sufficient.
For an intriguing variation, consider making a full chocolate dessert by using my Chocolate Pie Crust recipe instead. This will intensify the chocolate experience, perfect for true chocoholics.
For the Tart Filling
The heart of this tart lies in its luscious ganache, complemented by a burst of fruity jam and fresh raspberries.
- Raspberry Jam: This optional layer adds a vibrant burst of fruitiness and a lovely tart contrast to the rich chocolate. While a good quality store-bought raspberry jam or preserves is convenient and perfectly acceptable, making your own from scratch will certainly elevate the flavor even further.
- Dark Cooking Chocolate: The quality of your chocolate will significantly impact the flavor of your ganache. Opt for a high-quality dark cooking chocolate, ideally in the form of callets, pistols, or a solid bar (which you’ll chop finely). I highly recommend using a 70% Couverture Chocolate for its superior melting properties and rich, complex flavor. Avoid using eating chocolate bars or chocolate chips, as they often contain stabilizers that prevent proper melting, potentially leading to a grainy or greasy ganache.
- Heavy / Thickened Cream (Whipping Cream): Essential for creating a smooth, luxurious ganache. Look for a cream with at least 30% fat content. The fat in the cream emulsifies with the cocoa butter in the chocolate, creating that signature silky texture.
- Honey (Optional): A small amount of honey can add a subtle sweetness and a beautiful sheen to the ganache, balancing the intensity of dark chocolate. You can substitute with another liquid sweetener of your choice or omit it entirely, especially if you’re using a chocolate with a lower cocoa percentage (which tends to be sweeter) or if you prefer a less sweet, more intense chocolate flavor.
- Fresh Raspberries: For the ultimate presentation and flavor, I strongly recommend using only fresh raspberries to top this chocolate tart. Frozen raspberries tend to release too much water as they thaw, which can affect the texture and appearance of the tart.
Step-by-Step Guide: How to Make This Exquisite Raspberry Chocolate Tart
Creating this stunning chocolate raspberry tart is a rewarding process. Follow these detailed steps to ensure a perfect result, from the crisp pastry crust to the decadent ganache and fresh fruit topping.
Mastering the Pastry Crust: Pâte Sablée
The foundation of any great tart is its crust. We’ll be making a Pâte Sablée, a tender and buttery French shortcrust pastry. While a food processor offers convenience, it can also be made by hand.
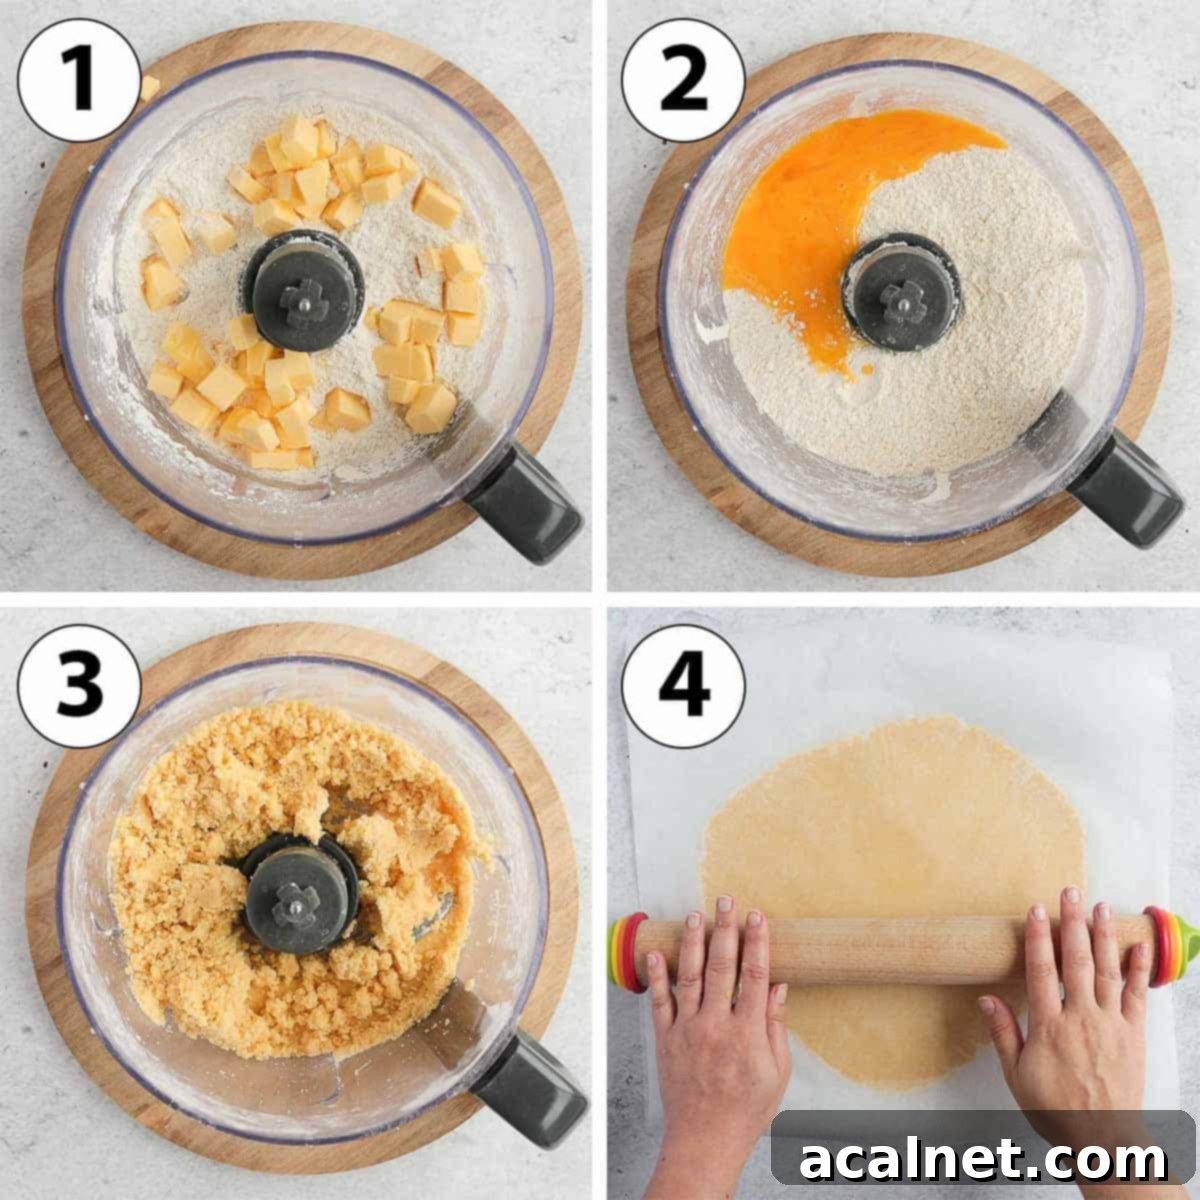
- Begin by combining the Plain / All-Purpose Flour and Icing Sugar in the bowl of your food processor. Give it a few quick pulses to ensure they are well mixed. For an enhanced flavor, you may also add a tiny pinch of salt to the dry ingredients at this stage.
- Photo 1: Next, add the very cold unsalted butter, cut into small, even cubes. Pulse the mixture for several seconds. You’re aiming for very small, sand-like crumbs of butter distributed throughout the flour. Remember, the smaller the butter pieces, the more uniform and tender your pastry will be. For Pâte Sablée, we’re seeking a delicate crunch, so avoid large butter chunks typical of flaky pie crusts.
- Photo 2: Introduce the medium-sized egg. You can lightly whisk the egg in a separate bowl before adding it to ensure even incorporation, though it’s not strictly necessary if your food processor is efficient.
- Photo 3: Continue mixing for about 30 seconds to 1 minute. The mixture will transform from crumbs into a rough, shaggy dough that just begins to cling together. Stop mixing as soon as it starts to come together to avoid overworking the gluten.
To test if your dough is ready, press a small amount between your fingers. It should stick together easily and form a smooth, cohesive mass, rather than crumbling apart.
- Photo 4: Gently gather the dough into a large ball. Place it between two sheets of baking paper (parchment paper). Lightly flatten the dough with your hands, then use a rolling pin to roll it into a large, even circle. Aim for a consistent thickness of approximately 4 mm (about 1/6 inch). This parchment paper method prevents sticking and makes transfer easier.

- Crucially, place the rolled-out, flat pastry dough in the fridge to chill for at least 1 hour. Chilling allows the gluten to relax, preventing shrinkage during baking, and ensures the butter remains very cold, contributing to a crisp crust. You can even chill it for up to 24 hours.
- Before lining the pan, take the pastry out of the fridge and let it sit at room temperature for about 5 minutes. It should still feel very cold but pliable enough to handle without cracking.
- Photo 5: Carefully unroll the pastry into a 22cm / 9-inch tart pan (preferably one with a removable bottom). Gently ease the pastry into the contours of the pan, making sure it forms a crisp 90-degree angle with the bottom. Press it lightly against the sides. Use a small, sharp knife to trim off any excess dough along the top edge of the pan.
- Return the tart pan, now lined with pastry, to the fridge for another chilling period of at least 1 hour, or up to 24 hours. This second chill is vital for maintaining the tart’s shape during baking. At this point, you could also carefully freeze the unbaked pastry shell for later use.
- Photo 6: Preheat your oven to 160°C (325°F). While the oven preheats, use a fork to “dock” (poke small holes) all over the bottom of the pastry crust. This prevents steam from building up and causing the crust to puff or bubble. Immediately place the tart crust in the freezer for 10-15 minutes while your oven comes to temperature. This ensures it’s as cold as possible before baking.
- Bake the crust for 30 to 40 minutes, or until it achieves a beautiful light golden color and feels dry to the touch. Once baked, remove it from the oven and set it aside to cool down completely on a wire rack. Cooling is important before adding the filling to prevent the ganache from melting into the crust.
A properly chilled and rested Pâte Sablée often eliminates the need for blind baking with pie weights. The cold butter and relaxed gluten help the crust hold its shape. However, if you prefer the extra security, you can certainly use pie weights (placed over baking paper) for the first 15-20 minutes of baking, then remove them to allow the crust to fully brown and dry out.
Crafting the Raspberry and Chocolate Ganache Filling
Once your exquisite pastry crust is perfectly baked and has cooled to room temperature, it’s time to create the luxurious raspberry and chocolate ganache filling – the star of our tart!
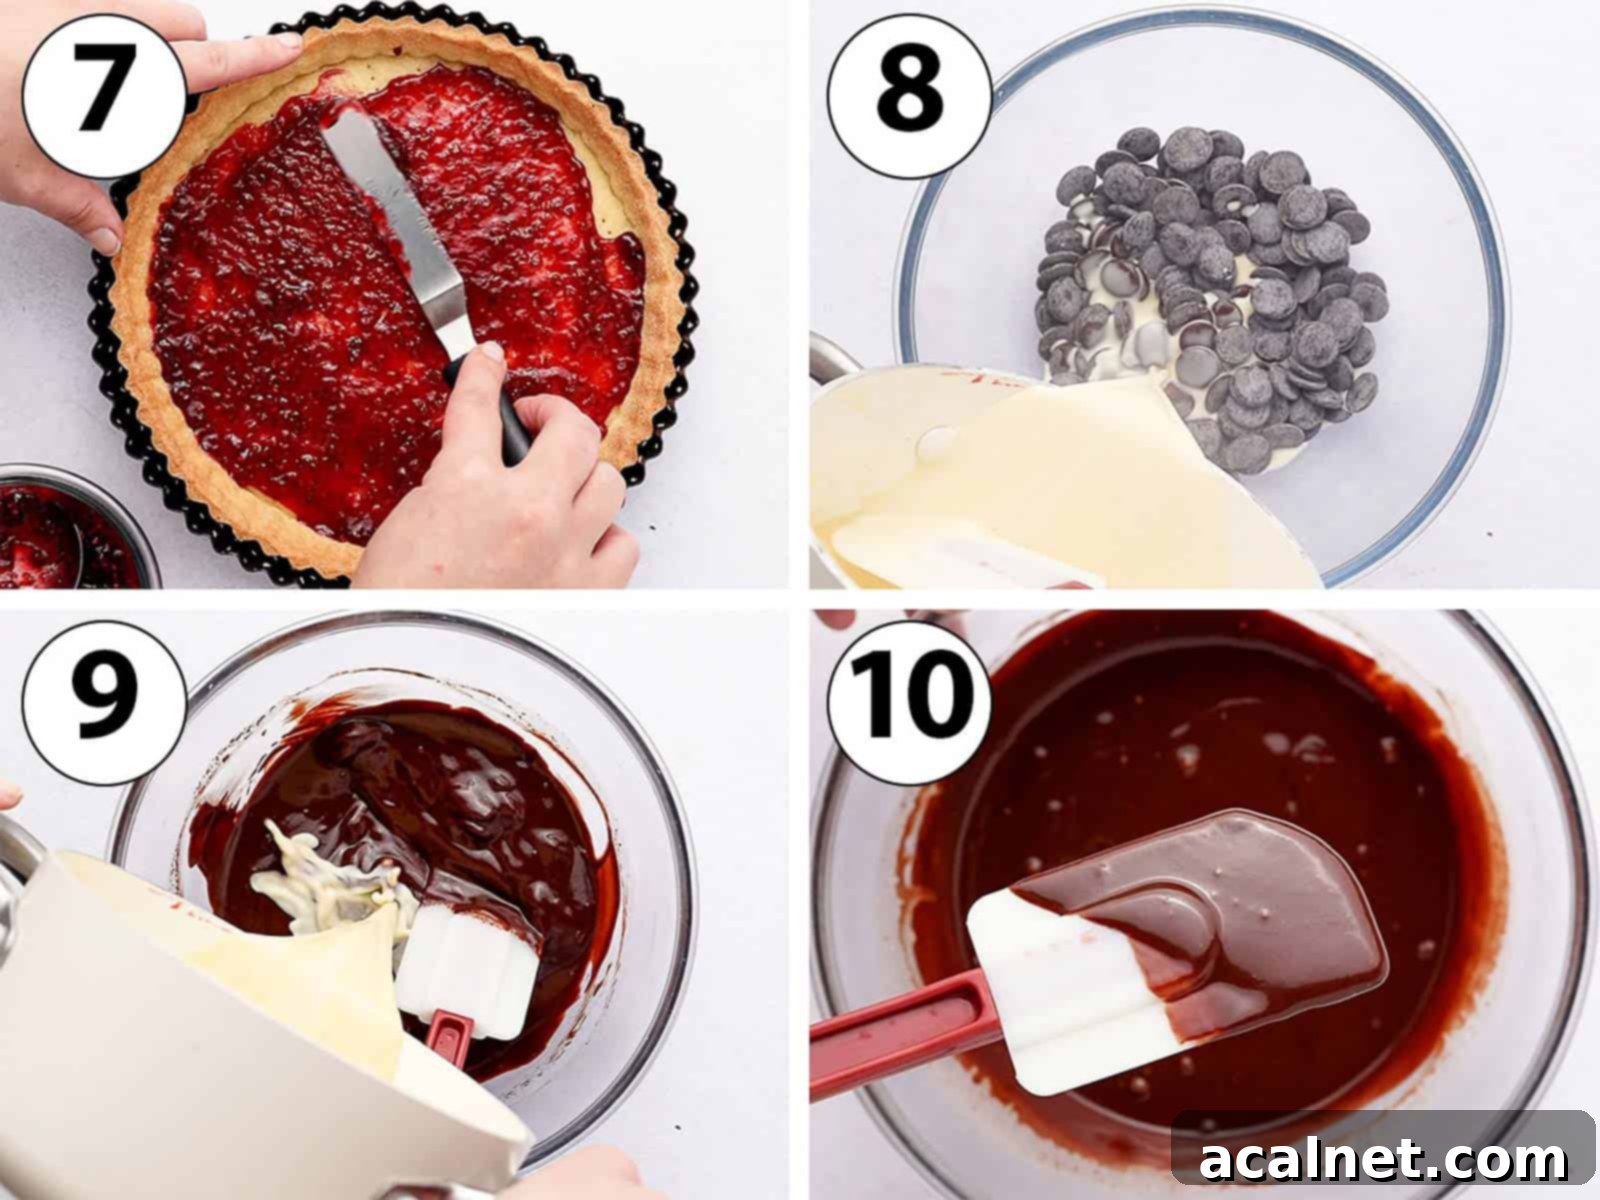
- Photo 7: Once the tart crust is completely cool, spread a generous layer of raspberry jam evenly across the bottom. A small offset spatula is ideal for this task, ensuring a smooth and consistent layer. This jam layer provides a delightful fruity surprise and a beautiful visual contrast. Set the crust aside.
- Prepare your chocolate: If you are using a cooking chocolate bar, finely chop it into small, uniform pieces. This ensures even and quick melting. Place the chopped chocolate (or callets/pistols) in a heat-proof bowl.
- Photo 8: In a small saucepan, gently heat the heavy cream (and the optional honey, if using) over low to medium heat. Watch it carefully; as soon as small bubbles begin to appear around the edges and it just starts to simmer, remove it from the heat. Immediately pour approximately half of the hot cream over the prepared chocolate in the heat-proof bowl.
- Resist the urge to stir immediately! Let the hot cream sit undisturbed over the chocolate for 2 to 3 minutes. This allows the residual heat from the cream to partially melt the chocolate. After this resting period, use a spatula and gently stir in slow, circular movements, starting from the center and gradually moving outwards, to combine the chocolate and cream. You’ll notice it starting to come together into a rich, thick mixture.
- Photo 9: Now, pour the remaining hot cream over the chocolate mixture. If the cream has cooled significantly, give it a quick reheat until it’s simmering again.
- Photo 10: Continue to stir gently and consistently until all the chocolate has completely melted and incorporated with the cream. You should achieve a perfectly smooth, glossy, and fluid ganache. The key is slow, steady stirring to create a stable emulsion. If you find small bits of unmelted chocolate, you can gently place the bowl over a double boiler (bain-marie) on very low heat, stirring continuously until smooth, being careful not to overheat.
Assembling Your Masterpiece: The Final Touches
With the crust baked and the ganache perfected, it’s time for the exciting final assembly that brings this delicious chocolate raspberry tart to life.
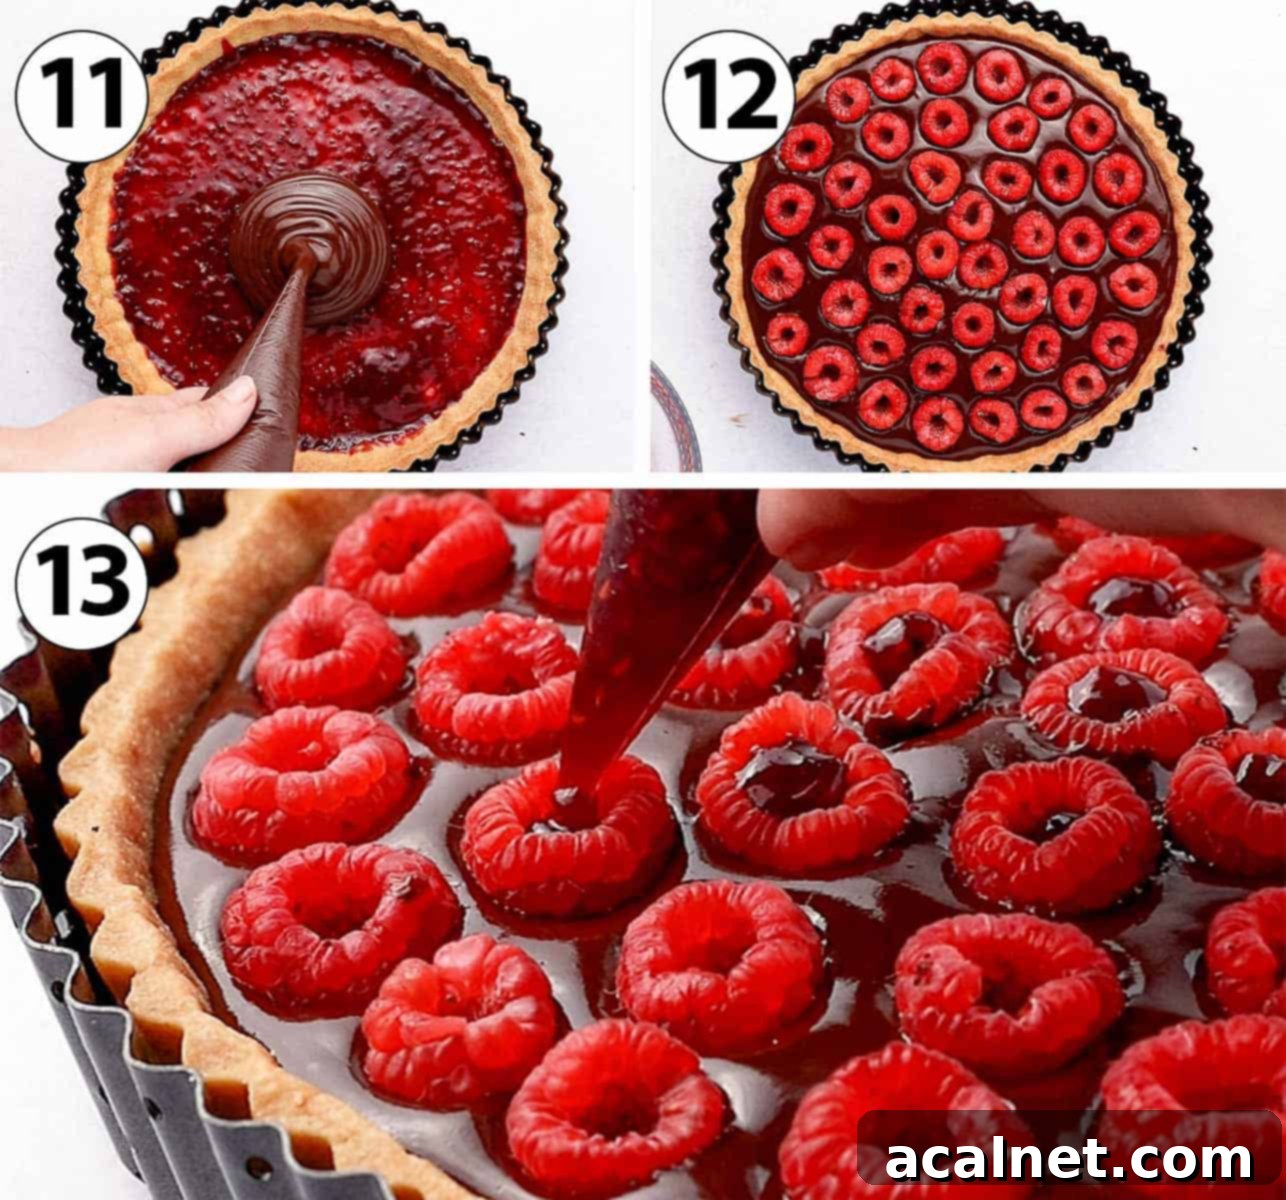
- Photo 11: Carefully pour the warm, fluid Chocolate Ganache over the raspberry jam layer in the cooled tart crust. You can pour it directly from the mixing bowl, or for more precision, transfer it to a pouring jug or even a pastry bag with a wide opening.
It is crucial that the ganache is still warm and very fluid at this stage. As ganache cools, it begins to set, becoming thicker and much harder to pour and spread smoothly. If it has thickened too much, gently warm it over a double boiler for a few moments until it regains its fluidity.
- Once poured, gently tap the tart pan a few times against a hard surface. This action helps the ganache self-level into a perfectly smooth surface and encourages any trapped air bubbles to rise and pop, resulting in a flawless finish.
- Photo 12: While the chocolate ganache is still slightly warm and hasn’t fully set, arrange the fresh raspberries over the surface. Gently press each raspberry into the ganache. This helps them adhere securely as the ganache chills.
Consider the aesthetic: If you plan to fill the raspberries with additional jam, place them with their hollow side facing upwards. If you’re opting for a simpler presentation without extra filling, you can arrange them with the tips facing upwards for a natural look.
- Photo 13: For an extra touch of elegance and flavor, optionally place some raspberry jam (or a Raspberry Compote or Raspberry Coulis) into a pastry bag. Snip a very small hole at the bottom and pipe a tiny amount of jam into the hollow center of each raspberry. This adds another layer of fruitiness and makes for a stunning visual effect.
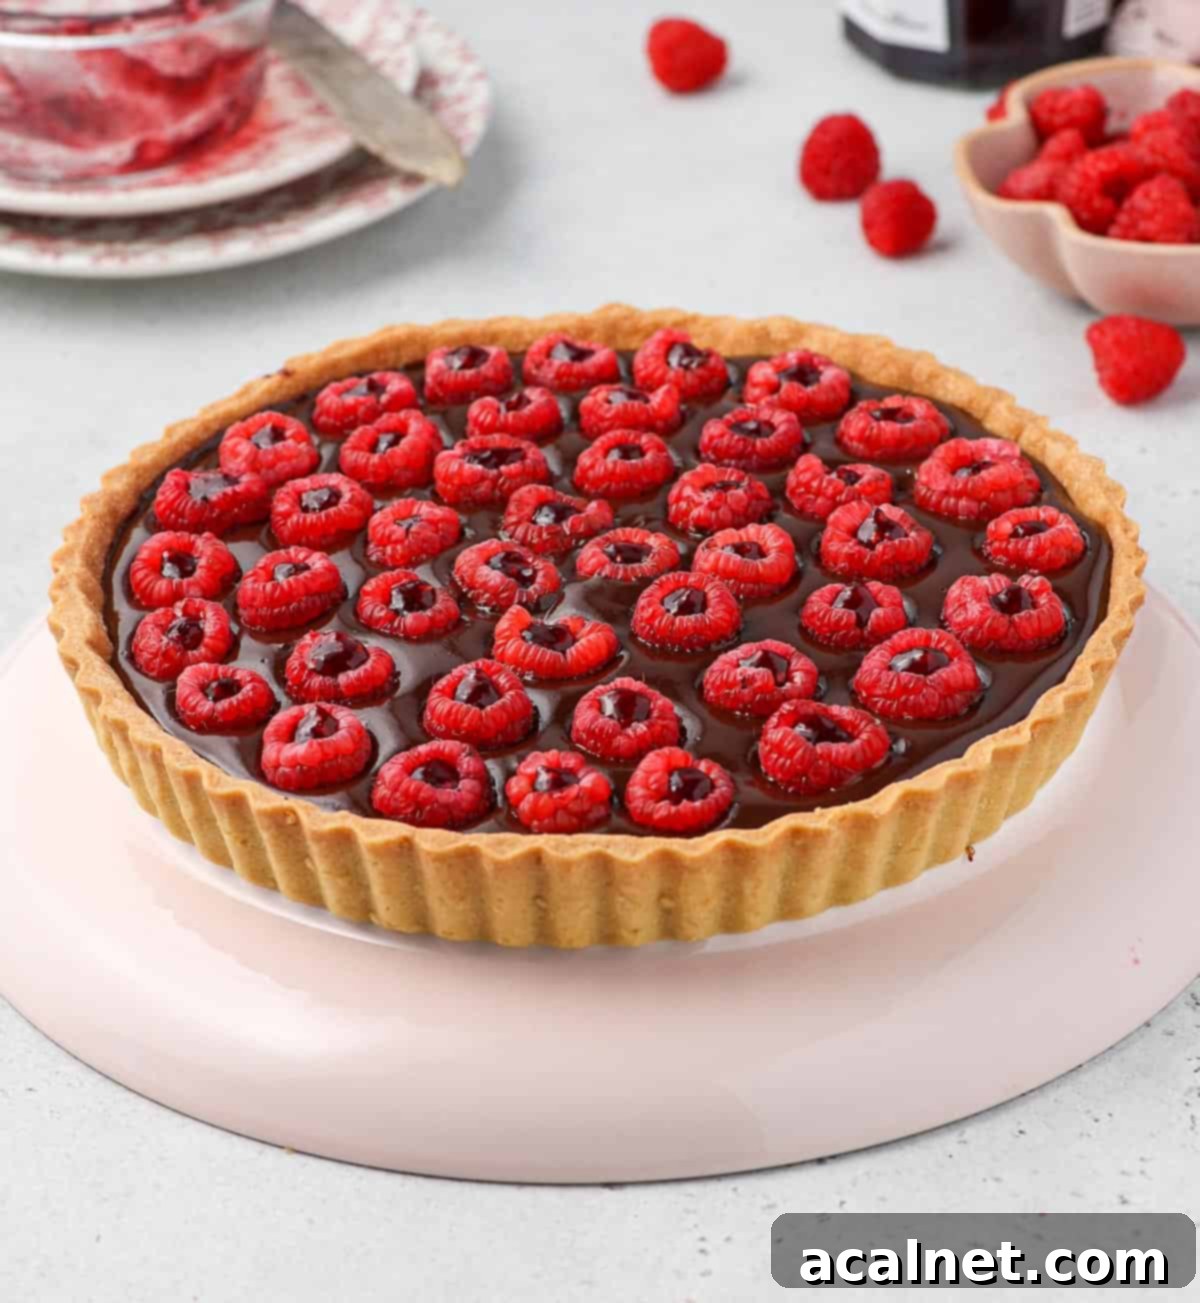
- Finally, place the assembled tart in the refrigerator to chill and set for at least 2 hours. The longer the tart chills, the firmer the ganache will become. For a delightfully fudgier texture, you might want to remove it from the fridge about 30 minutes to an hour before serving to allow it to come slightly back to room temperature.
Frequently Asked Questions About This Tart
Absolutely! While I always encourage making your own Pâte Sablée for its superior flavor and texture, a high-quality store-bought pastry crust is a fantastic time-saver. Just ensure you fully bake it according to package directions and allow it to cool completely before you add the delicious chocolate ganache filling and fresh raspberry topping. This ensures a crisp base that won’t become soggy.
For a truly exceptional ganache, akin to my French Chocolate Ganache Tart, the quality of your chocolate is paramount. Always use a good quality dark cooking chocolate with a high percentage of cocoa. Couverture chocolate, typically found in callet or pistol form, is ideal due to its high cocoa butter content and smooth melting properties, resulting in a perfectly silky and shiny ganache. If using a bar, finely chop it. Try to avoid standard eating chocolate bars or, more importantly, chocolate chips. Chocolate chips often contain stabilizers that prevent them from melting smoothly, potentially leading to a grainy or separated ganache. I personally prefer a 70% dark chocolate for its intense, rich flavor, which perfectly balances the tartness of the raspberries. If you opt for a dark chocolate with a lower cocoa percentage (which will be sweeter), I recommend omitting the honey from the recipe. This recipe has not been tested with white or milk chocolate (semi-sweet chocolate), as the fat content and sugar levels are quite different and would require adjustments to the cream ratio.
Definitely! Making your own raspberry jam will infuse your tart with an even fresher, more vibrant fruit flavor. If you’re feeling ambitious and want to take your tart to the next level, I highly recommend giving it a try. Homemade jam often has a more intense fruit flavor and a less processed taste than many store-bought varieties, making it a wonderful addition to this chocolate raspberry tart.
For consistent baking and easy removal, I consistently use a metal tart pan that features perforated edges and/or a perforated bottom, along with a removable bottom plate, like this one. The perforations allow for better air circulation, promoting a crispier crust. However, if you don’t have a perforated pan, any standard metal tart pan with a removable bottom plate will work beautifully – the pastry should still slide out without any issues once baked and cooled. If your pan doesn’t have a removable bottom, ensure you grease and flour it thoroughly or line it with parchment paper for easier serving.
Pastry shrinkage is a common issue often caused by overworking the dough or insufficient chilling. Overworking the dough develops gluten, making it elastic and prone to shrinking. Not chilling the dough long enough (both after mixing and after lining the pan) means the butter isn’t firm enough, and the gluten hasn’t relaxed, leading to contraction in the oven. Always ensure your butter is very cold, mix just until combined, and follow the recommended chilling times for a stable crust.
A greasy or separated ganache, often called “broken” ganache, typically occurs if the chocolate is overheated, the cream is not hot enough, or if the mixture is stirred too vigorously or too quickly at the initial stages of emulsification. The key is to melt the chocolate gently with hot (but not boiling) cream and stir slowly from the center outwards. If your ganache breaks, try adding a tablespoon of lukewarm water or warm cream and stirring gently until it comes back together. Patience is key for a silky smooth ganache!
Expert Tips for a Flawless Chocolate Raspberry Tart
Achieving a bakery-quality chocolate raspberry tart is easier than you think with these expert tips:
- Proper Pastry Chilling is Non-Negotiable: The single most critical step for a perfect Pâte Sablée is adequate resting and chilling. Ensure your pastry dough is as cold as possible (and well-rested to prevent gluten development) before it enters the oven. This prevents shrinkage, ensures a crisp texture, and helps the crust maintain its elegant shape. Don’t rush this step!
- Troubleshooting Unmelted Chocolate in Ganache: If, after diligently stirring, you still find small bits of unmelted chocolate in your ganache, don’t fret. Gently place your bowl over a double-boiler (a saucepan with simmering water, ensuring the bowl doesn’t touch the water) on very low heat. Continue to stir slowly until the ganache becomes perfectly smooth and shiny. Be cautious not to overheat the chocolate, as this can cause it to seize or burn.
- Control Ganache Texture with Chilling Time: The final texture of your chocolate ganache can be customized by adjusting the chilling time. The longer the tart remains in the fridge, the firmer the ganache will become, offering a snappy, firm bite. For a softer, more fudgy, and melt-in-your-mouth experience, remove the tart from the refrigerator about 30 minutes to 1 hour before serving, allowing it to slightly come back to room temperature.
- Experiment with Fruit Flavors: While the chocolate raspberry combination is iconic, don’t hesitate to experiment! For a different yet equally delicious twist, replace the raspberry jam and fresh raspberries with high-quality strawberry jam and fresh strawberries. Blackberries or cherries could also offer a delightful alternative.
- Precision in Ingredients: Baking is a science, and precise measurements are key, especially for pastry and ganache. Use a kitchen scale for flour and sugar for the most accurate results.
- Quality Over Quantity: As mentioned in the ingredients section, the quality of your dark chocolate is paramount for the ganache. Investing in good couverture chocolate will yield significantly better flavor and texture.
- Serving Temperature Matters: For the best flavor experience, let your tart sit at room temperature for 15-30 minutes before serving. This allows the ganache to soften slightly and the flavors to fully bloom.
Storing & Freezing Your Chocolate Raspberry Tart
Proper storage ensures your beautiful chocolate raspberry tart remains fresh and delicious for as long as possible:
This exquisite chocolate raspberry tart should always be stored in an airtight container in the refrigerator. It will maintain its best quality for up to 3 days. However, for peak freshness, vibrant fruit flavor, and optimal ganache texture, it is best enjoyed within 24 hours of assembly. As mentioned, for a slightly fudgier ganache, you may wish to let it sit at room temperature for about 30 minutes to 1 hour before serving.
If you’re planning ahead, the tart crust offers more flexibility. The unbaked crust can be prepared up to 24 hours in advance and stored well-covered in the fridge. Alternatively, a fully baked and cooled crust can be stored at room temperature (covered to prevent it from drying out) for up to 24 hours before you add the filling.
While the assembled tart with its ganache and fresh raspberries is not recommended for freezing (the ganache texture and fresh fruit will suffer upon thawing), the tart crust itself is freezer-friendly. You can freeze the unbaked crust (this is generally recommended for the best texture post-thaw and bake) or the fully baked crust. Wrap it tightly in plastic wrap and then foil to prevent freezer burn. Thaw in the refrigerator before proceeding with baking or filling.

Explore More Delicious Tart Recipes
If you’ve enjoyed making this chocolate raspberry tart, you’ll love diving into our other classic and innovative tart recipes. Expand your baking repertoire with these irresistible options:
- Bright & Zesty Lemon Curd Tart
- Elegant Pistachio Tart
- Easy & Classic French Apple Tart
- Delicate French Strawberry Custard Tart
- Rich Baked Chocolate Tart (Triple French Chocolate)
- Aromatic French Orange Tart
- Comforting Pear Frangipane Tart (Tarte Bourdaloue)
- Sweet Apple Frangipane Tart
- Simple & Fresh Raspberry Tart
- Seasonal Apricot Frangipane Tart
- Exotic Passion Fruit Tart
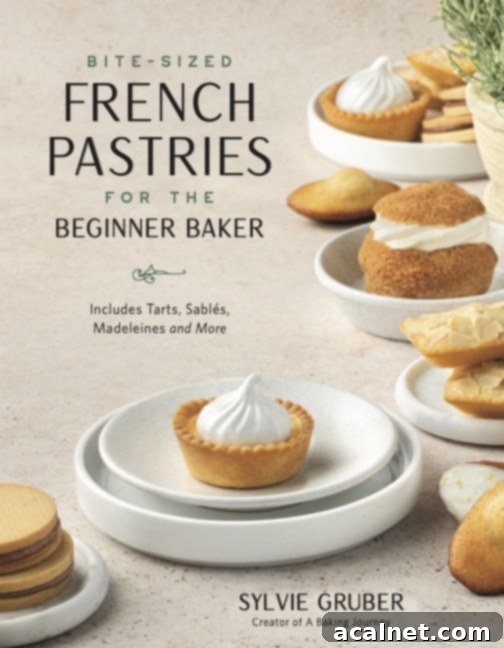
I am so excited to share that my debut cookbook
“Bite-Sized French Pastries for the Beginner Baker”
is now available for purchase!
Full Recipe: French Chocolate Raspberry Tart

Chocolate Raspberry Tart
Servings:
10
Author:
Sylvie
45 minutes
35 minutes
4 hours
5 hours 20 minutes
Print Recipe
Ingredients
Shortcrust Pastry (Pâte Sablée)
- 250 gr Plain / All-Purpose Flour
- 50 gr Icing Sugar
- 120 gr Unsalted Butter, very cold, cut into cubes
- 1 Egg, medium size
Ganache Filling
- 80 gr Raspberry Jam, homemade or good quality store-bought
- 200 gr Dark Cooking Chocolate, 70% couverture recommended, finely chopped if bar
- 200 ml Heavy / Thickened Cream, at least 30% fat content
- 15 gr Honey, optional, for balancing bitterness
Raspberry Topping
- 250 gr Fresh Raspberries
- 80 gr Raspberry Jam, optional, for filling raspberries
Instructions
Shortcrust Pastry (Pâte Sablée)
- In a food processor, combine flour and icing sugar; pulse to mix. Add very cold cubed butter and pulse until small, sand-like crumbs form (see note 1).
- Add the egg and mix until a rough dough just begins to come together (see note 2).
- Gather dough into a flat ball, place between two sheets of baking paper, and roll into a 4 mm (1/6 inch) thick circle.
- Chill for at least 1 hour. Line a 22 cm / 9-inch tart pan with the pastry, trim excess, and chill again for at least 1 hour (see note 3).
- Dock the pastry with a fork. Preheat oven to 160°C/325°F. Place tart crust in the freezer while oven preheats.
- Bake for 30-40 minutes, until lightly golden and dry. Cool completely (see note 4).
Ganache Filling
- Spread raspberry jam evenly on the bottom of the cooled crust. Set aside.
- Finely chop cooking chocolate (if using a bar) and place in a heat-proof bowl.
- Heat cream (and optional honey, see note 5) in a saucepan until simmering. Pour half over chocolate, let sit 2-3 minutes, then gently stir to melt.
- Pour remaining hot cream over mixture (reheat if necessary). Continue stirring until smooth, shiny, and fluid ganache forms (see note 6).
- Pour warm ganache over the jam layer. Gently tap the tart pan to spread smoothly and remove air bubbles (see note 7).
Raspberry Topping
- While ganache is still slightly warm, gently press fresh raspberries into the surface.
- If filling raspberries with jam, place hollow side up. Otherwise, place tip up.
- Optionally, pipe a small amount of raspberry jam into each hollow raspberry.
- Chill in the fridge for at least 2 hours to set. For a fudgier texture, let it come to room temperature for 30 minutes before serving.
Video
Would you like to save this recipe?
We’ll email this post to you, so you can come back to it later!
Notes
- Butter Size for Pastry: For Pâte Sablée, we aim for a crunchy rather than flaky pastry. Ensure your butter chunks are no larger than a small pea (preferably smaller). This helps create a uniform, tender crumb.
- Dough Consistency Check: After mixing the dough, gently press a small amount between your fingers. It should hold together smoothly without crumbling. If it’s too dry, add a tiny bit of cold water, a teaspoon at a time.
- Lining the Tart Pan: I recommend a perforated metal tart pan with a removable bottom for best results. When lining, carefully press the pastry into the edges to form a sharp 90-degree angle, which helps achieve crisp, straight sides.
- Blind Baking (Optional): If the pastry is adequately chilled and rested, you may not need pie weights. However, if you prefer, blind bake with weights for the first 15-20 minutes, then remove them and continue baking until golden.
- Honey in Ganache: Honey is optional and best used with a 70% dark chocolate to add a touch of sweetness and shine. For chocolates with lower cocoa percentages (which are sweeter), you can omit the honey entirely unless you prefer a very sweet ganache.
- Achieving Smooth Ganache: If you find any unmelted chocolate chunks after combining with cream, gently warm the mixture over a double boiler on low heat, stirring continuously until smooth. Avoid high heat to prevent burning.
- Ganache Fluidity: Pour the ganache into the tart crust while it is still warm and very fluid. As it cools, it will thicken and become harder to spread evenly. If it thickens too much, a gentle re-warm over a double boiler can help restore its fluidity.
Nutrition (per serving)
Carbohydrates: 48g |
Protein: 5g |
Fat: 26g |
Saturated Fat: 16g |
Polyunsaturated Fat: 1g |
Monounsaturated Fat: 7g |
Trans Fat: 0.4g |
Cholesterol: 65mg |
Sodium: 20mg |
Potassium: 105mg |
Fiber: 4g |
Sugar: 21g |
Vitamin A: 628IU |
Vitamin C: 8mg |
Calcium: 32mg |
Iron: 2mg
Made this recipe?
Let us know if you liked it by leaving a comment below, and tag us on Instagram @a.baking.journey with a photo of your creation!
