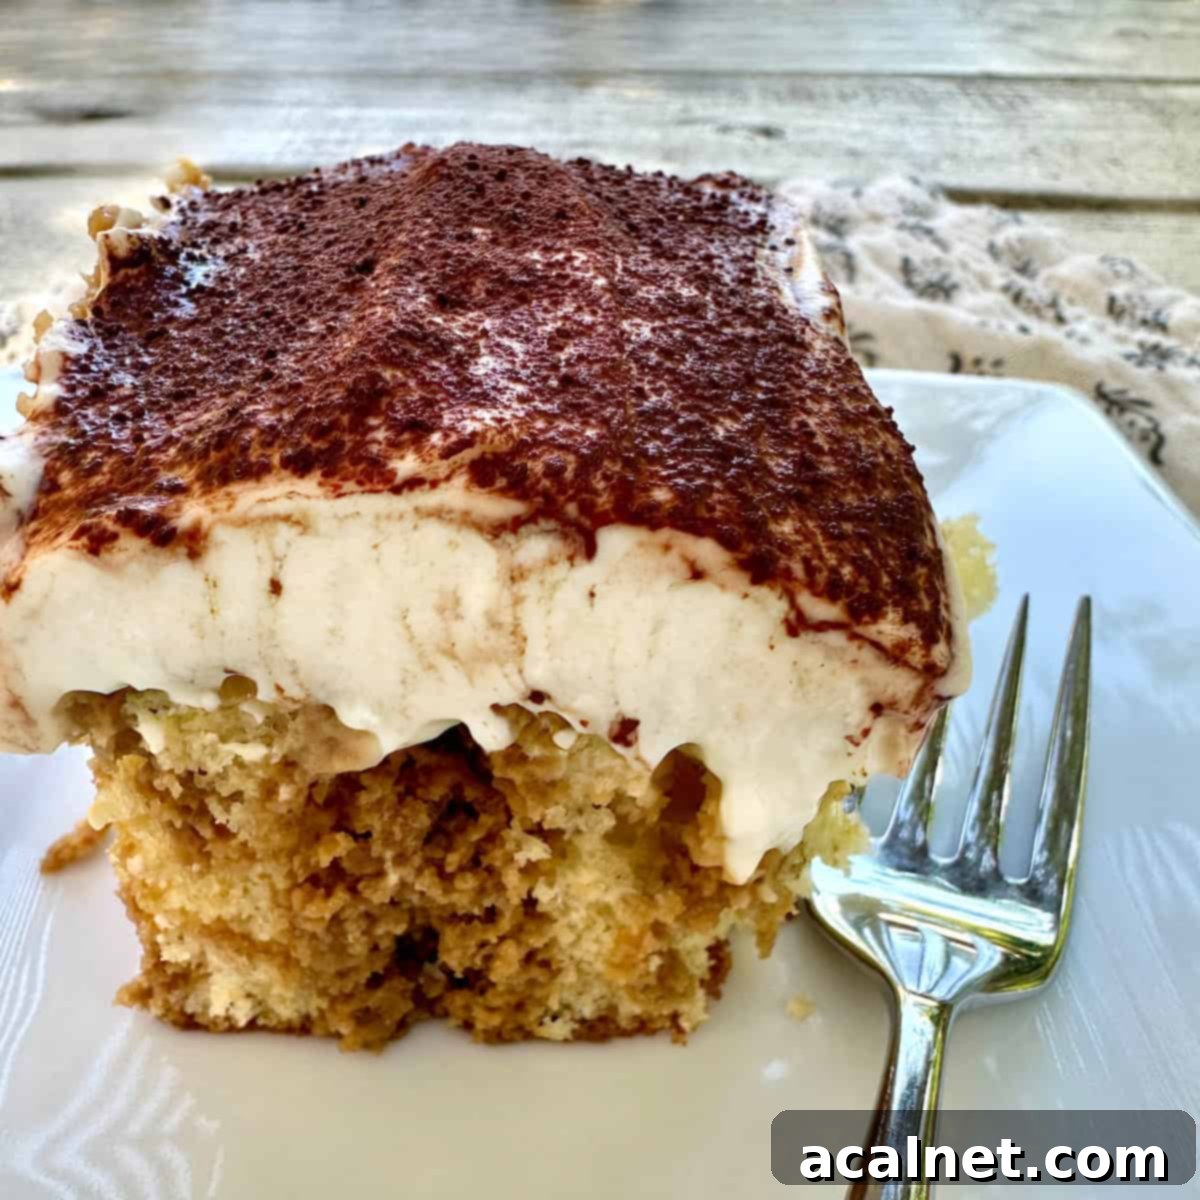
Easy No-Alcohol Tiramisu Cake: Simple & Crowd-Pleasing Recipe
Indulge in the rich, coffee-infused flavors of classic Italian Tiramisu without the traditional fuss or alcohol! This incredibly easy Tiramisu Cake recipe transforms a simple vanilla cake mix into a show-stopping dessert that’s perfect for any occasion. Whether you’re hosting a dinner party, preparing for a potluck, or simply craving a delightful coffee-flavored treat, this homemade twist on a beloved classic promises all the luxurious taste of tiramisu in an approachable cake form. It features a moist vanilla cake soaked in a homemade espresso filling and topped with a creamy, dreamy mascarpone frosting, all dusted with cocoa powder for that authentic finish. Prepare to impress everyone with minimal effort!

⭐ Why This Easy No-Alcohol Tiramisu Cake Will Be Your New Favorite

This Tiramisu Cake truly captures all the indulgent flavor of traditional tiramisu but with a delightful twist – it’s incredibly easy to make and contains no alcohol. This makes it a fantastic option for family gatherings, school events, or for anyone who prefers to avoid alcohol in their desserts. You get the rich, sophisticated taste without any of the complications, making it a universally loved treat.
One of the biggest advantages of this recipe is its ability to serve a crowd effortlessly. Baked in a classic 9×13 inch pan, it yields plenty of generous slices, making it the perfect cake for a potluck, office party, or any large get-together where you want to impress without spending hours in the kitchen. Its stunning appearance and irresistible taste ensure it’s always a highlight on any dessert table, disappearing quickly!
If you’re a devoted fan of coffee-flavored desserts, you’ll absolutely adore this cake. It delivers a rich, robust coffee essence without being overly sweet, striking a perfect balance that appeals to many palates. The espresso-soaked cake layers combined with the creamy mascarpone frosting create a harmonious blend of textures and tastes that is both comforting and sophisticated. It’s a delightful treat that satisfies your sweet tooth while offering that distinct coffeehouse vibe in every single bite, truly a coffee lover’s dream dessert.
Note: Some of the links in this recipe post are Amazon affiliate links, which means I make a small commission from Amazon if you link to and purchase the item. The affiliate process never affects your cost and I only link to products that I use and highly recommend, ensuring quality and value for you.
👩🏻🍳 Essential Ingredients for Your Easy Tiramisu Cake
This boxed cake mix tiramisu cake is designed for simplicity and incredible flavor, making it an easy, family-friendly dessert with no alcohol. You’ll be amazed at how quickly these simple ingredients come together to create such a sophisticated dessert. Here’s everything you’ll need to gather to create this delightful treat:
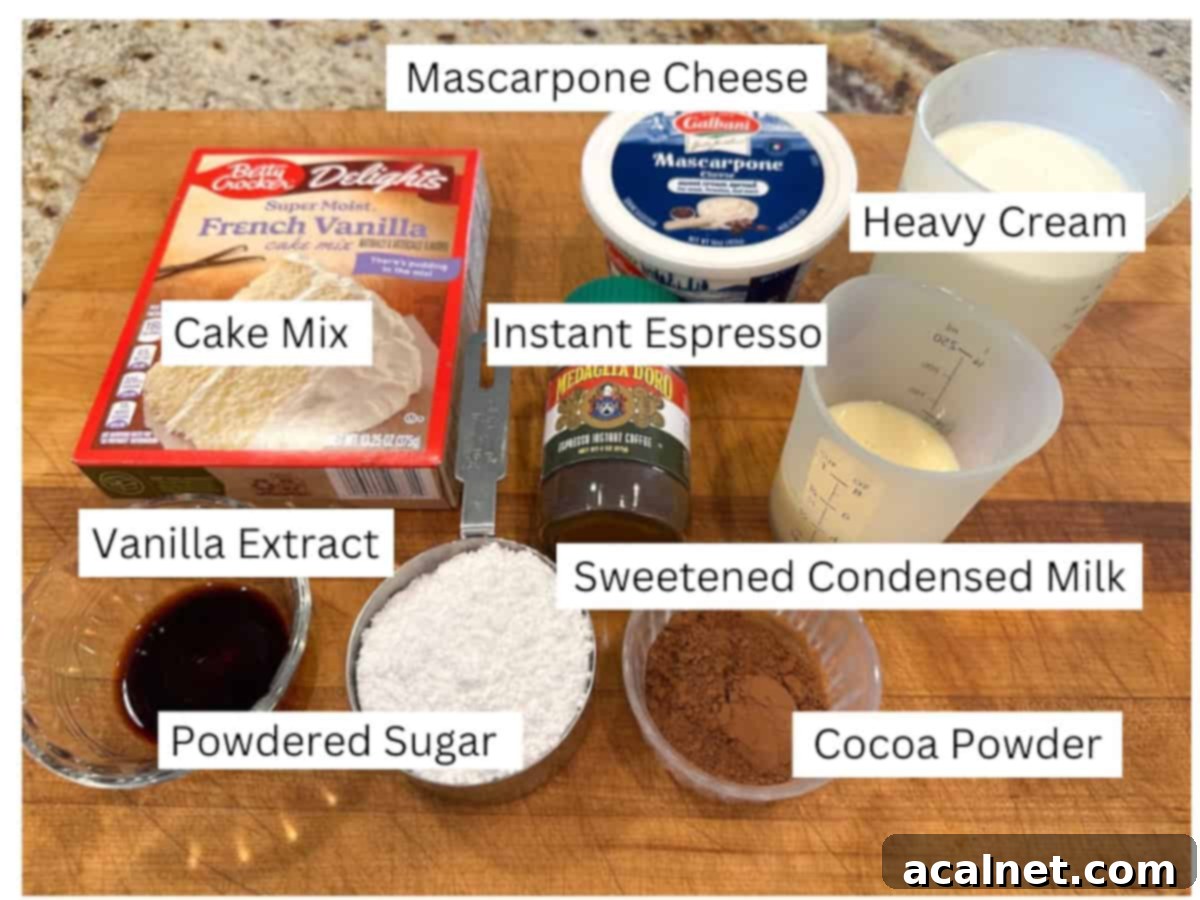
Vanilla Cake Mix: To achieve the best flavor and texture that closely mimics traditional ladyfingers, a key component of authentic tiramisu, I highly recommend a quality vanilla cake mix. My absolute favorite and go-to choice for this recipe is (affiliate link) Betty Crocker’s French Vanilla Cake Mix. It offers a light, incredibly moist crumb and a rich vanilla flavor that provides the perfect foundation, making this easy tiramisu cake utterly irresistible. French vanilla has a slightly deeper and more complex vanilla profile compared to regular vanilla, which truly elevates the dessert. However, feel free to use any white or vanilla cake mix you prefer; just ensure it bakes into a moist and tender cake.
Instant Espresso Powder: While you can certainly use any type of instant coffee you have on hand, for the most authentic, richest, and most robust coffee flavor that tiramisu demands, I strongly recommend using (affiliate link) instant espresso powder. Espresso powder is much more concentrated than instant coffee, meaning it delivers a deeper, less diluted coffee flavor that stands up beautifully to the sweet elements of the cake and cream. This concentrated coffee will infuse your cake with a deep, aromatic essence that perfectly balances the sweetness, ensuring that signature tiramisu taste shines through. The quality of your espresso powder will significantly impact the overall flavor profile of your dessert, so choose a good one!
Mascarpone Cheese: This is a non-negotiable star ingredient in traditional tiramisu, and it’s absolutely essential for achieving that characteristic creamy, luxurious frosting. Mascarpone is a soft, Italian acid-set cream cheese, often compared to American cream cheese but with significant differences. It boasts a much higher fat content, resulting in an exceptionally smoother, richer texture, and a subtly sweet taste that is less tangy than regular cream cheese. It’s crucial for the velvety texture and decadent flavor of our frosting, providing an authentic Italian touch to this easy cake adaptation. Ensure it’s softened to room temperature for easier, lump-free blending; cold mascarpone can be difficult to incorporate smoothly and may result in a lumpy frosting.
Heavy Whipping Cream & Sweetened Condensed Milk: These two ingredients are vital for creating both the rich coffee soak and the luscious mascarpone frosting. The heavy whipping cream adds volume, lightness, and richness to the frosting, ensuring it’s airy yet decadent. In the coffee soak, it provides a creamy mouthfeel. The sweetened condensed milk contributes to the sweetness and provides a smooth, condensed texture to the coffee liquid that soaks into the cake, enhancing its moisture, sweetness, and depth of flavor. Together, they create a perfect balance that enriches both the cake and its topping.
Powdered Sugar: Used exclusively in the mascarpone frosting, powdered sugar (also widely known as confectioners’ sugar or icing sugar) is key for a smooth, lump-free frosting with a delightful sweetness. Unlike granulated sugar, powdered sugar dissolves instantly and contributes to the light and airy texture of the frosting, perfectly complementing the rich cheese and espresso flavors without creating any grittiness. It’s the ideal sweetener for a delicate and soft frosting.
Vanilla Extract: A touch of pure vanilla extract enhances the overall flavor profile of the frosting, adding a warm, aromatic note that ties all the elements together beautifully. Vanilla is a versatile flavor enhancer that brightens and rounds out the richness of the mascarpone and sweetness of the sugar, creating a harmonious and inviting aroma and taste in your dessert.
Unsweetened Cocoa Powder: The final flourish and an iconic component of tiramisu! A generous dusting of unsweetened cocoa powder over the finished cake provides a beautiful visual contrast and a crucial hint of bittersweet chocolate flavor. This bitterness cuts through the sweetness of the cake and frosting, creating a perfectly balanced flavor profile that is characteristic of authentic tiramisu. It’s the perfect way to complete your masterpiece, adding both elegance and depth of flavor.
For a complete list of ingredients with precise measurements, along with detailed nutritional information, please scroll down to the full recipe card below.
🍰 Step-by-Step Guide to Making Your Tiramisu Cake
Whether you’re baking for a special occasion or just craving a dessert with sophisticated coffeehouse vibes, this No-Alcohol Tiramisu Cake is light, creamy, and best of all, incredibly easy to make right in your home kitchen. Follow these simple steps for a truly delightful experience that yields impressive results with minimal effort.
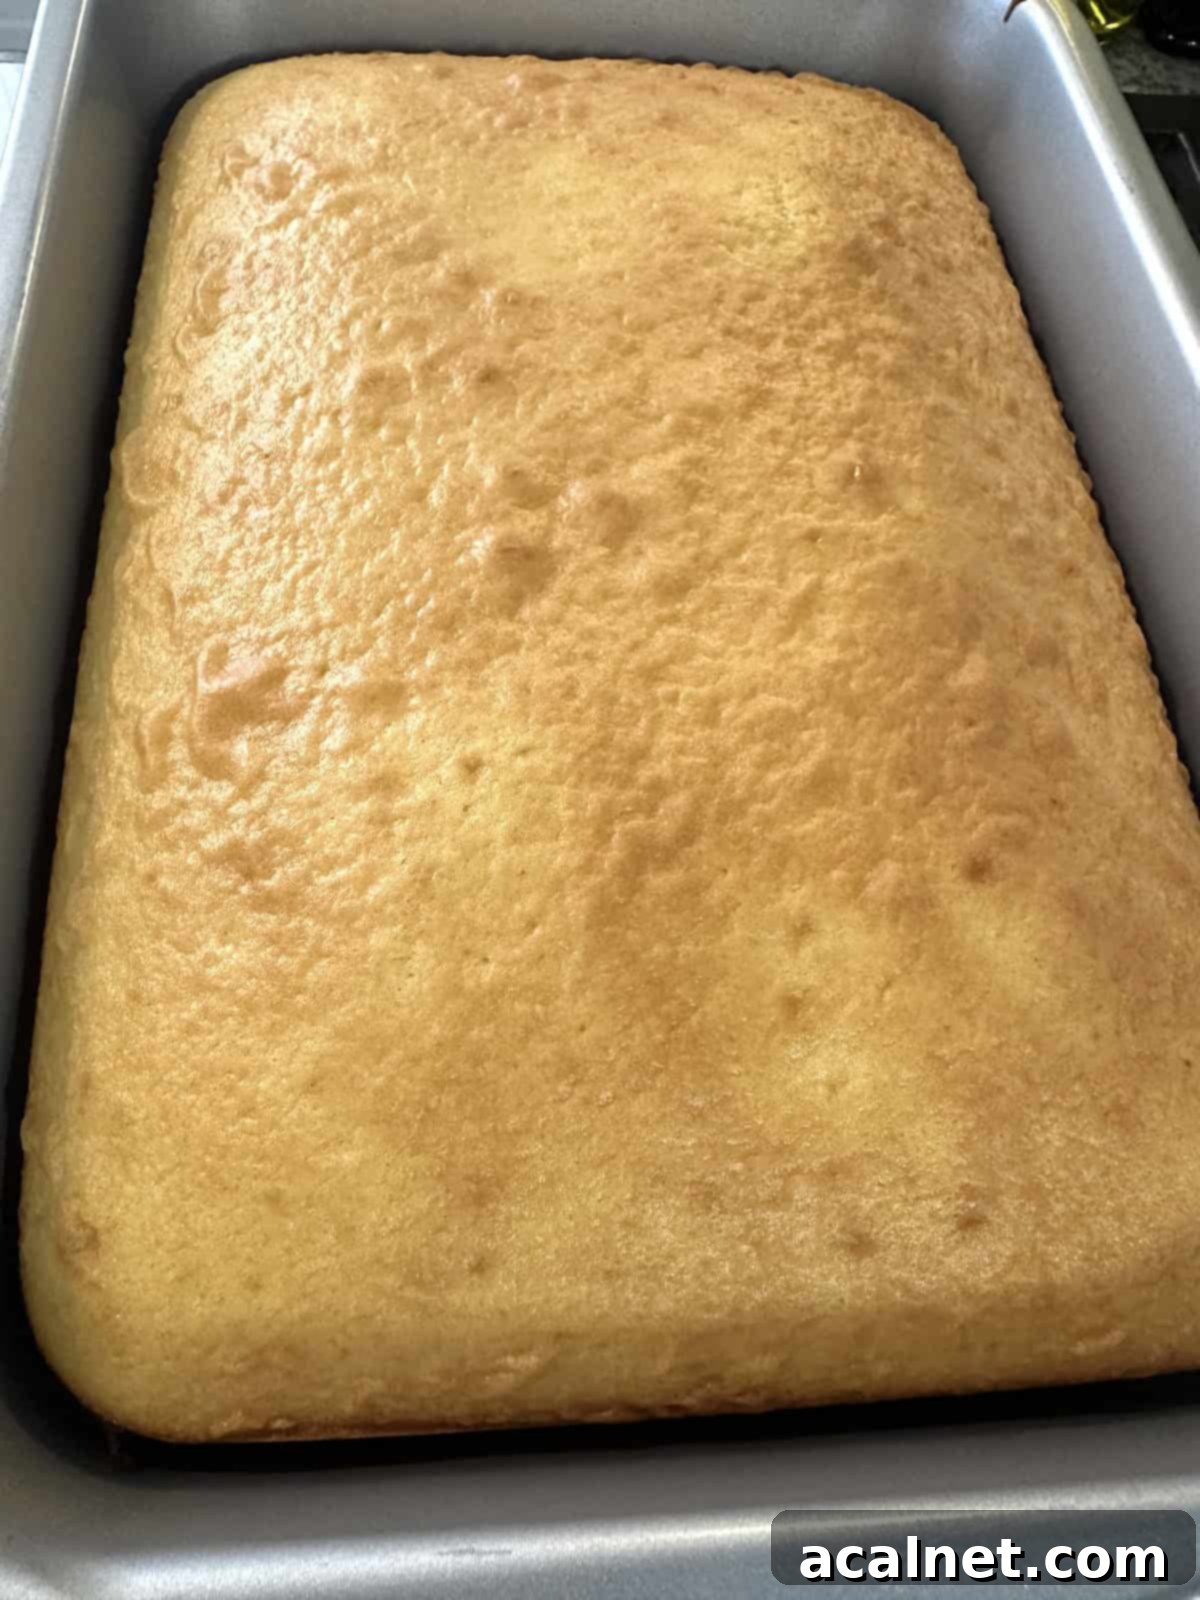
Step 1: Prepare and Bake the Cake. Begin by preparing and baking your chosen boxed vanilla cake mix precisely according to the package directions. It is crucial to use a standard 13″ x 9″ baking pan for this recipe, as this size is ideal for creating the perfect cake-to-filling ratio and ensures easy serving for a crowd. Once baked to golden perfection, carefully remove the cake from the oven and set it aside on a wire rack to cool completely. A fully cooled cake is absolutely crucial before moving to the next steps to prevent the liquid from making the cake soggy or causing the frosting to melt.
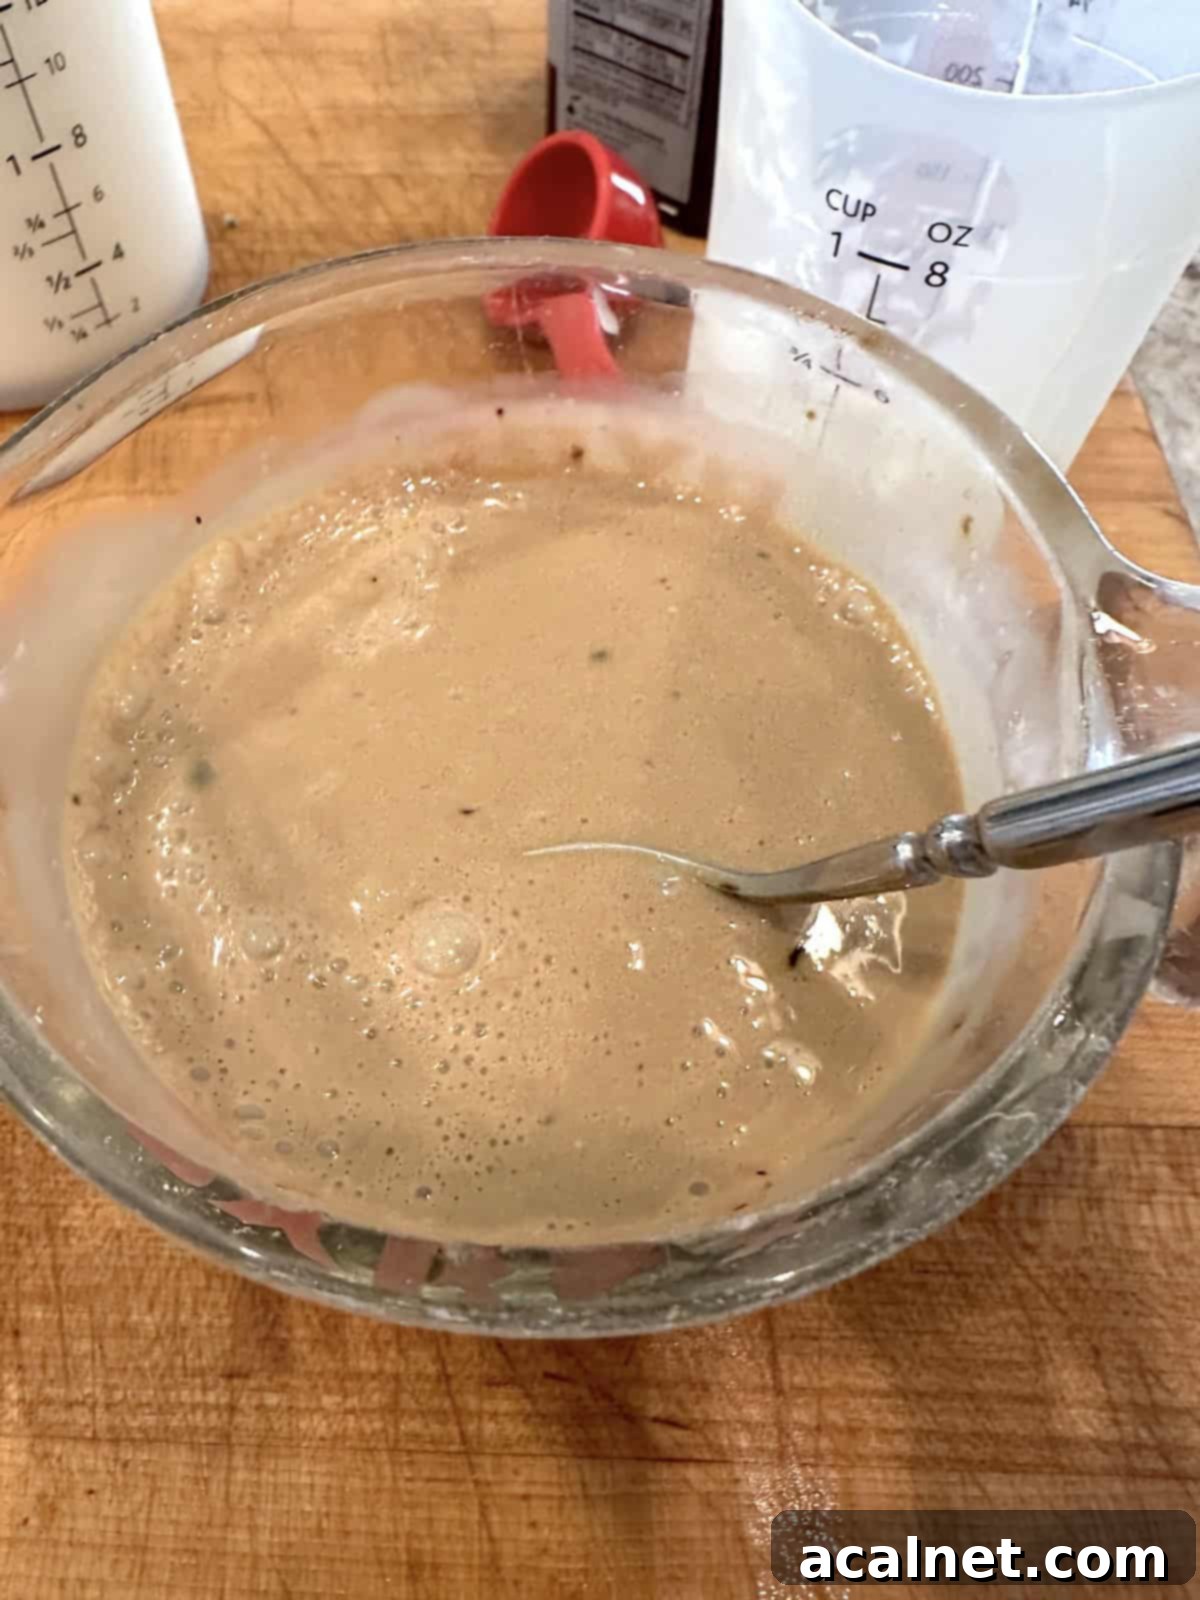
Step 2: Create the Espresso Infusion. While your cake is baking and beginning to cool, it’s the perfect time to prepare the flavorful espresso infusion that gives this cake its signature tiramisu taste. In a glass measuring cup or a small bowl, combine the hot water with the instant espresso powder. Stir vigorously and thoroughly until the espresso powder is completely dissolved, ensuring no granules remain. Then, seamlessly blend in the ½ cup of heavy whipping cream and the sweetened condensed milk, stirring until the entire mixture is smooth and well combined. This creates a rich, sweet, and aromatic liquid that will penetrate and moisten the cake, infusing it with deep coffee flavor.
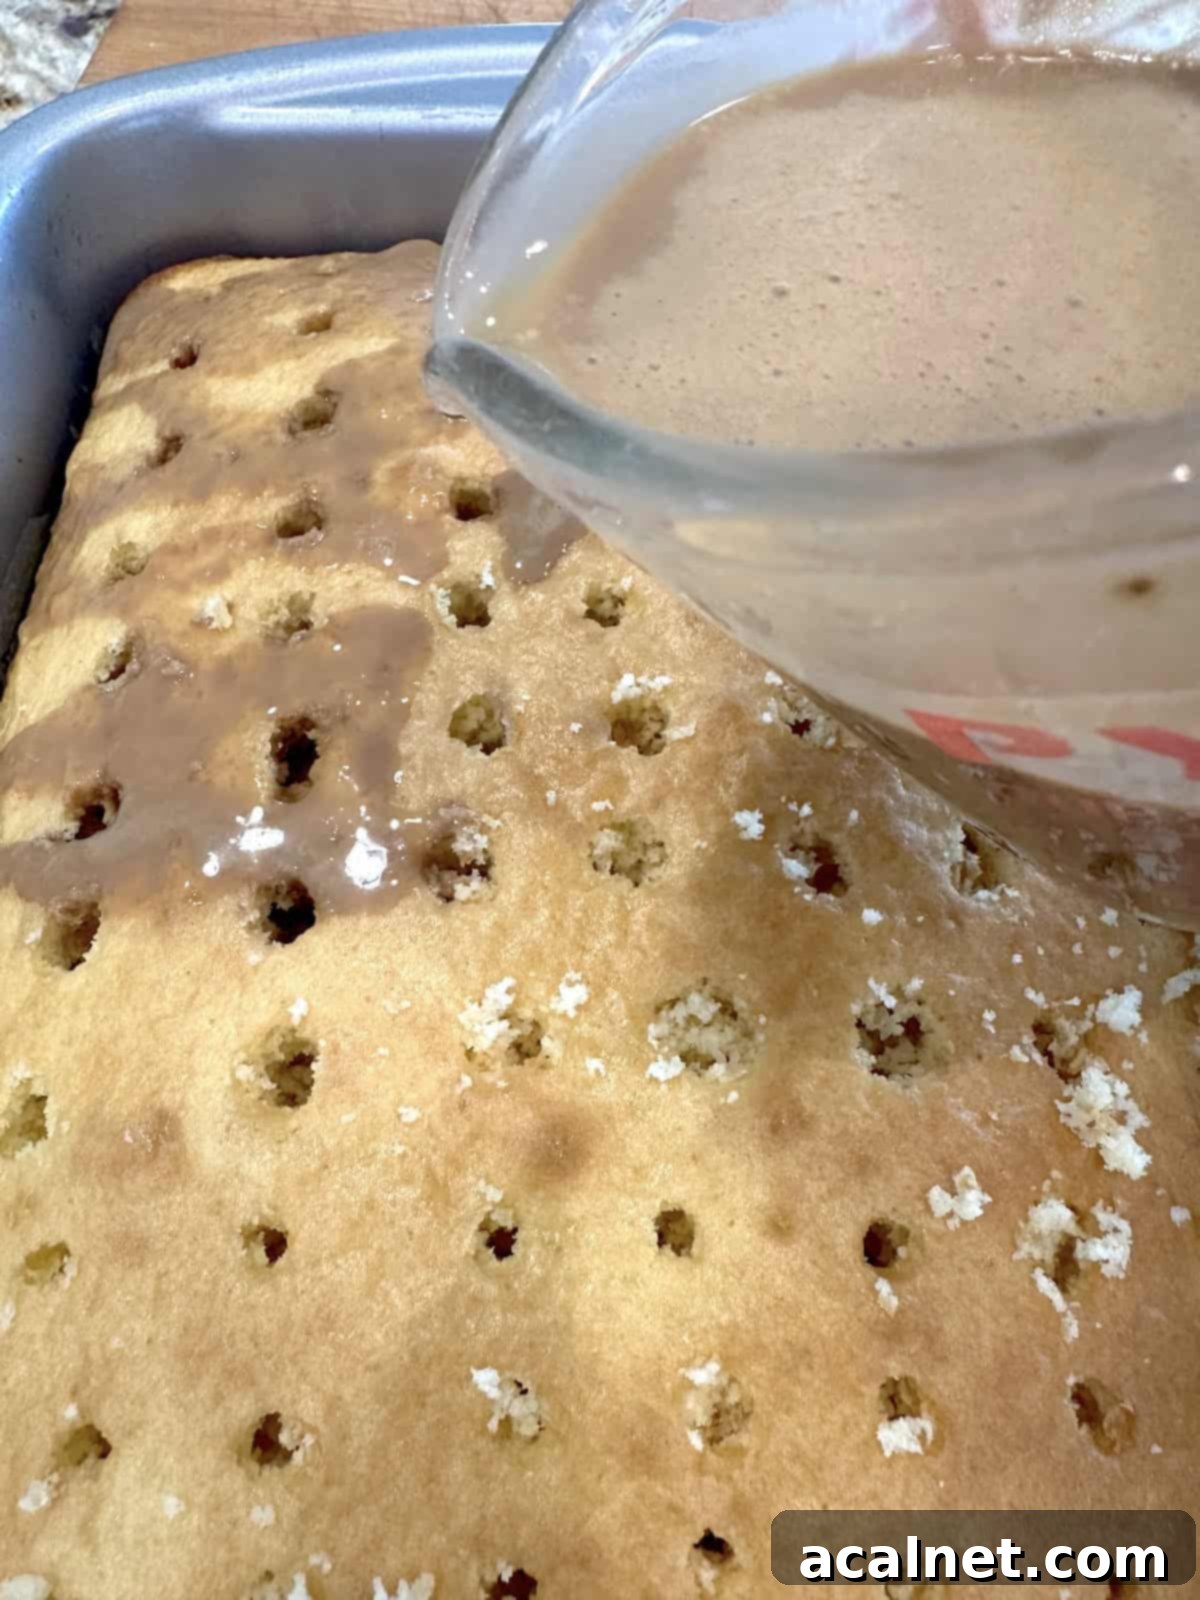
Step 3: Soak the Cake and Chill. Once the cake has cooled completely to room temperature, use a chopstick, a thin skewer, or the blunt end of a wooden spoon (if you prefer slightly larger holes) to poke small, evenly spaced holes across the entire top surface of the cake. Ensure these holes go all the way to the bottom of the pan to allow for maximum liquid absorption. Then, carefully and slowly pour the prepared coffee and cream liquid over the top of the cake, allowing it to seep into each hole and moisten the cake thoroughly. Distribute the liquid as evenly as possible. Once soaked, cover the cake tightly with plastic wrap and place it in the refrigerator to chill for at least 30 minutes. This chilling time is essential for the liquid to fully absorb and for the cake to firm up before frosting, preventing a crumbly mess.
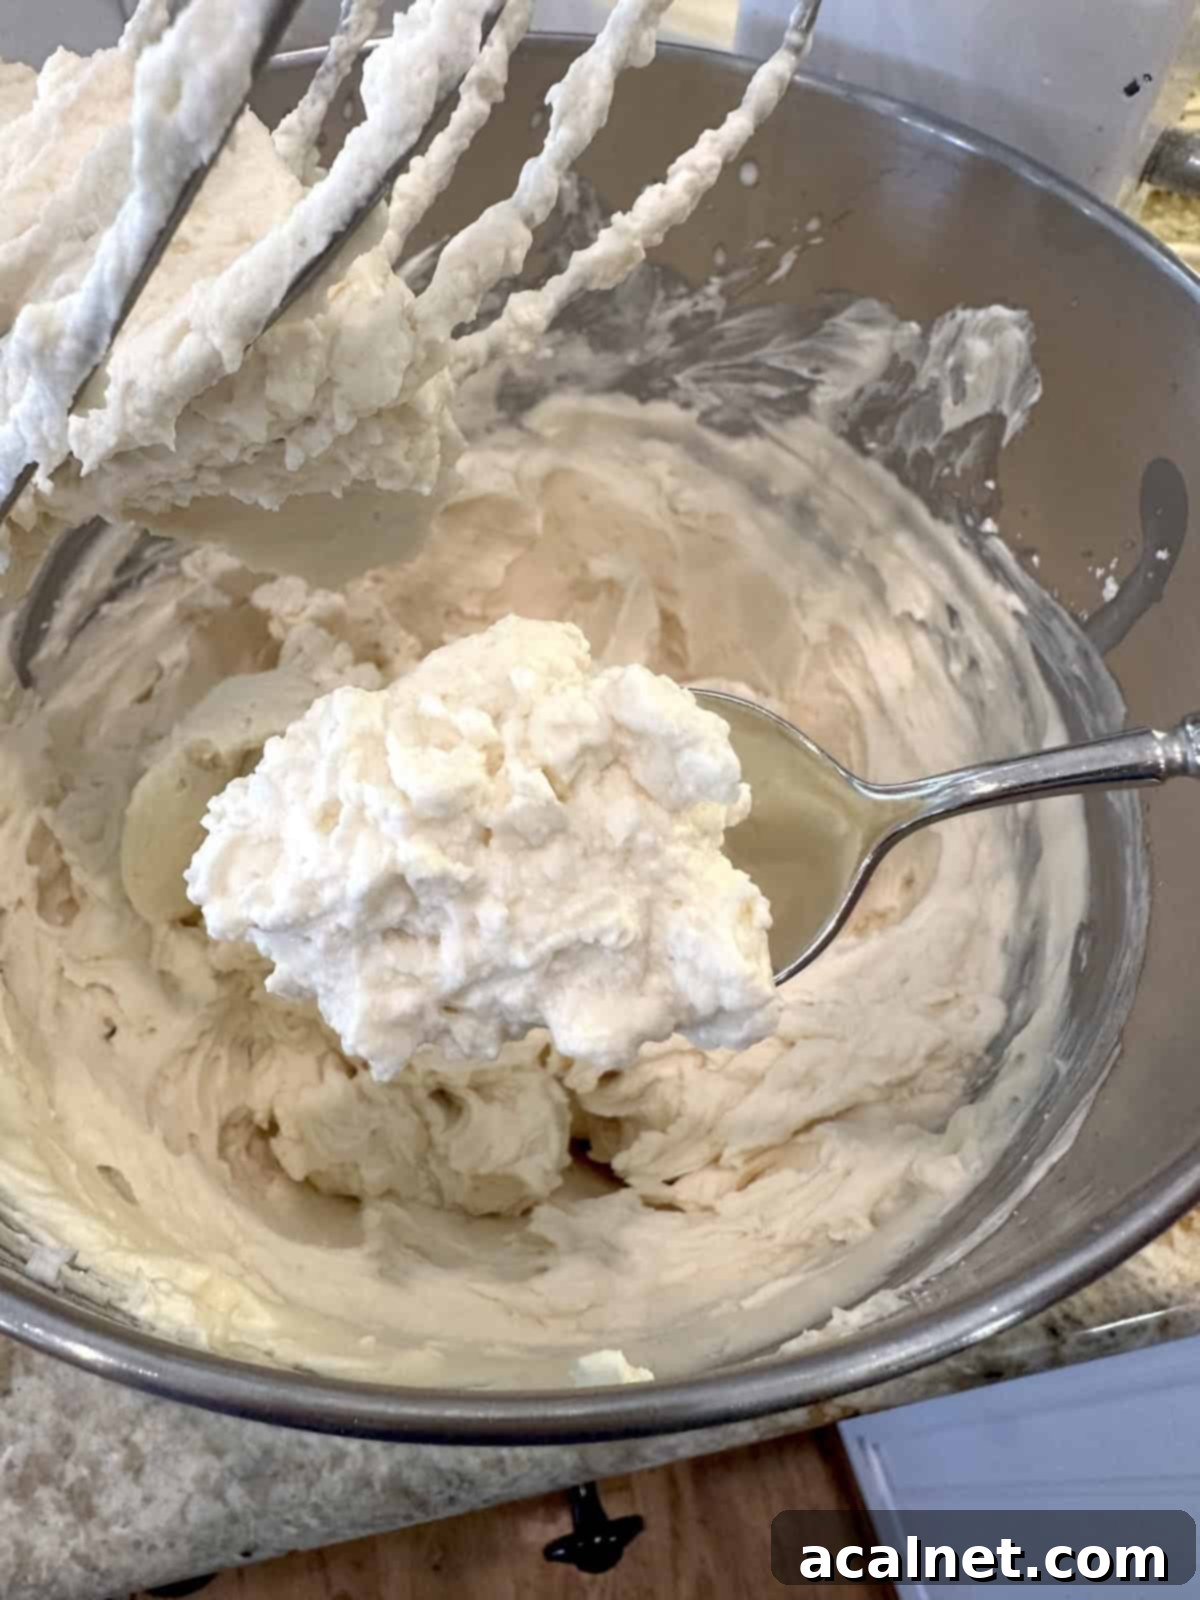
Step 4: Prepare the Mascarpone Frosting. While your cake is chilling and soaking up all that delicious espresso flavor, it’s time to whip up the luxurious mascarpone frosting. In a medium-sized mixing bowl, combine the softened mascarpone cheese with one cup of heavy whipping cream. Use an electric hand mixer to beat these ingredients together until they are perfectly smooth and creamy, ensuring there are absolutely no lumps of mascarpone remaining. Next, add the remaining 1 cup of heavy cream, the powdered sugar, and the vanilla extract. Continue beating on medium-high speed until the mixture becomes wonderfully light, fluffy, and forms soft peaks. Be careful not to overmix, as mascarpone can curdle if beaten too vigorously for too long. This will create a thick, yet airy, frosting that is simply divine and perfect for your tiramisu cake!
⭐ Pro Tip: For Even Espresso Distribution
To ensure the espresso-flavored, sweet liquid is absorbed evenly into every part of your cake, resulting in consistently moist and flavorful slices, pour it very slowly over the top. Take your time with this step, allowing the liquid to gradually seep into all the small holes you’ve meticulously poked. Using a glass measuring cup with a convenient pour spout will make this step much easier and more controlled, preventing any spills and ensuring a perfectly moist cake every single time. Patience here truly pays off for the best results.

Step 5: Apply the Frosting. Once the cake is sufficiently chilled and the espresso liquid has been fully absorbed, remove it from the refrigerator and uncover it. Using a large spoon or a sturdy offset spatula, gently place generous spoonfuls of the freshly prepared, fluffy mascarpone frosting all over the top of the cake. At this stage, don’t worry about achieving a perfect spread; simply distribute the frosting in even, large mounds across the entire surface of the cake. This initial dolloping helps in achieving an even layer later on.
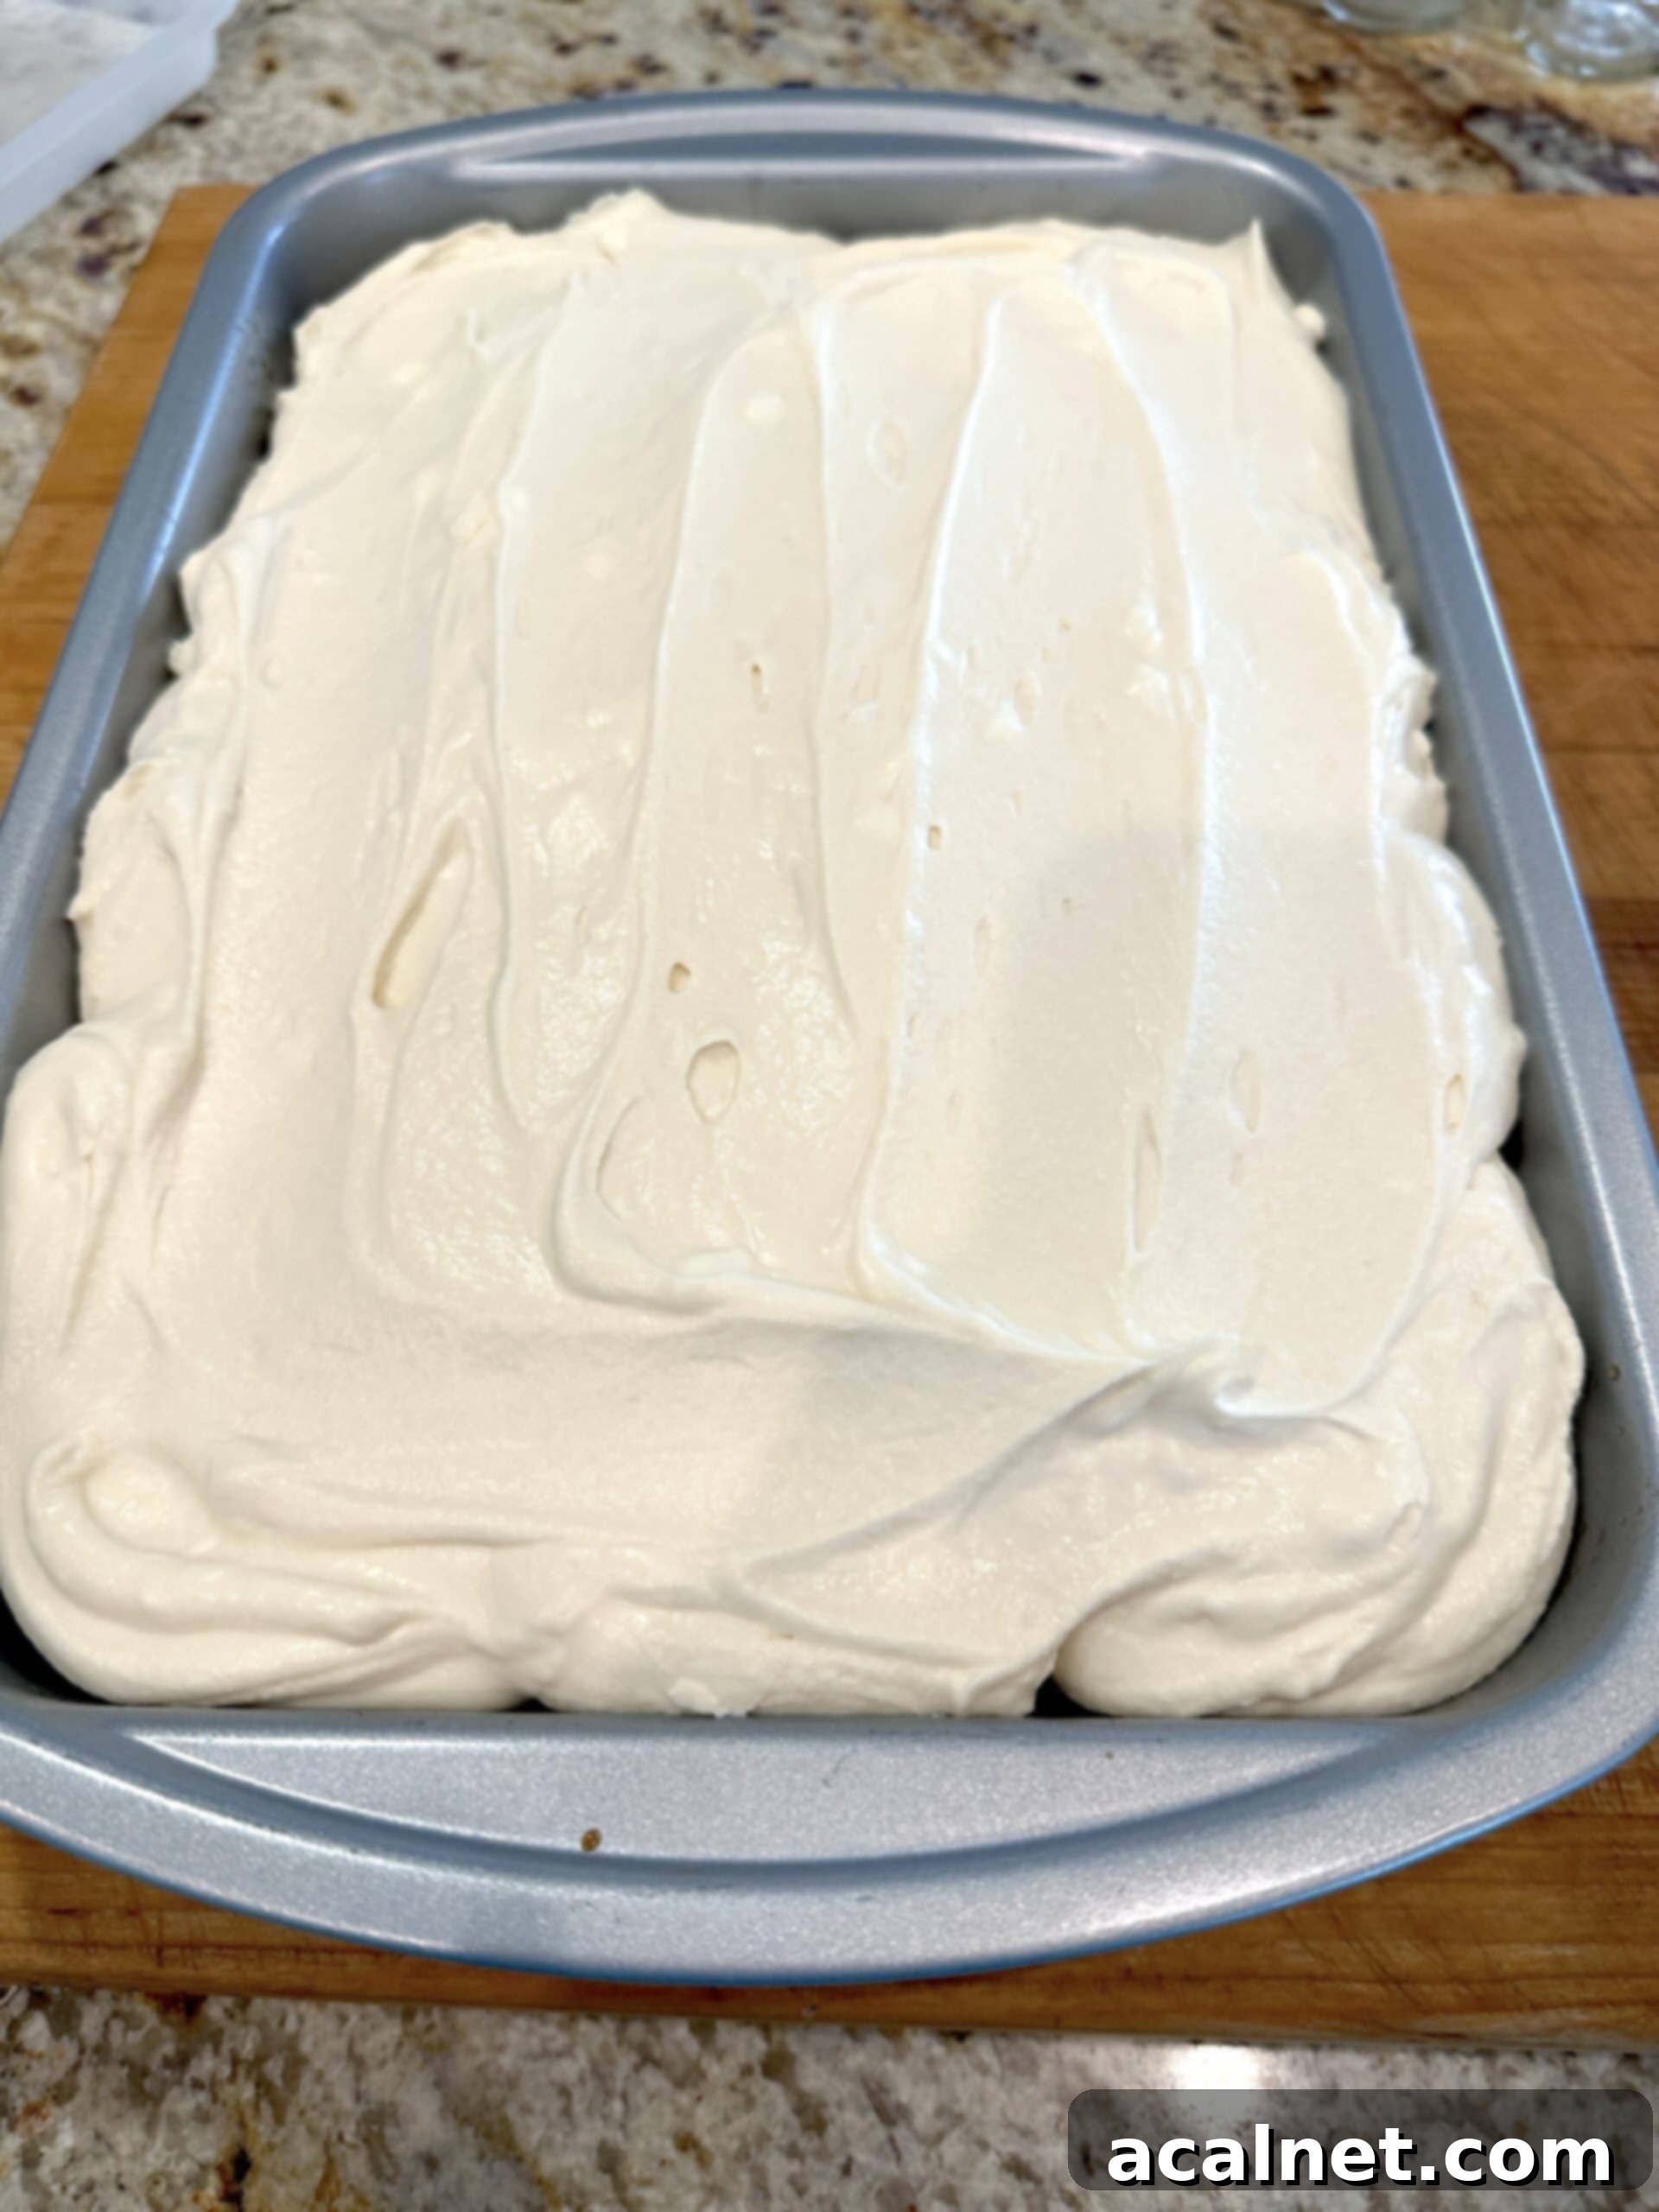
Step 6: Smooth the Frosting. Now, using the back of your spoon or an offset spatula, carefully and gently spread the mascarpone frosting out towards the edges of the pan, ensuring the entire top surface of the cake is covered with an even, luscious layer. Aim for a smooth and inviting finish, creating an appealing canvas for the final dusting. The cooler temperature of the cake will significantly help the frosting set beautifully and make it easier to spread without pulling up crumbs from the cake, ensuring a professional-looking dessert.
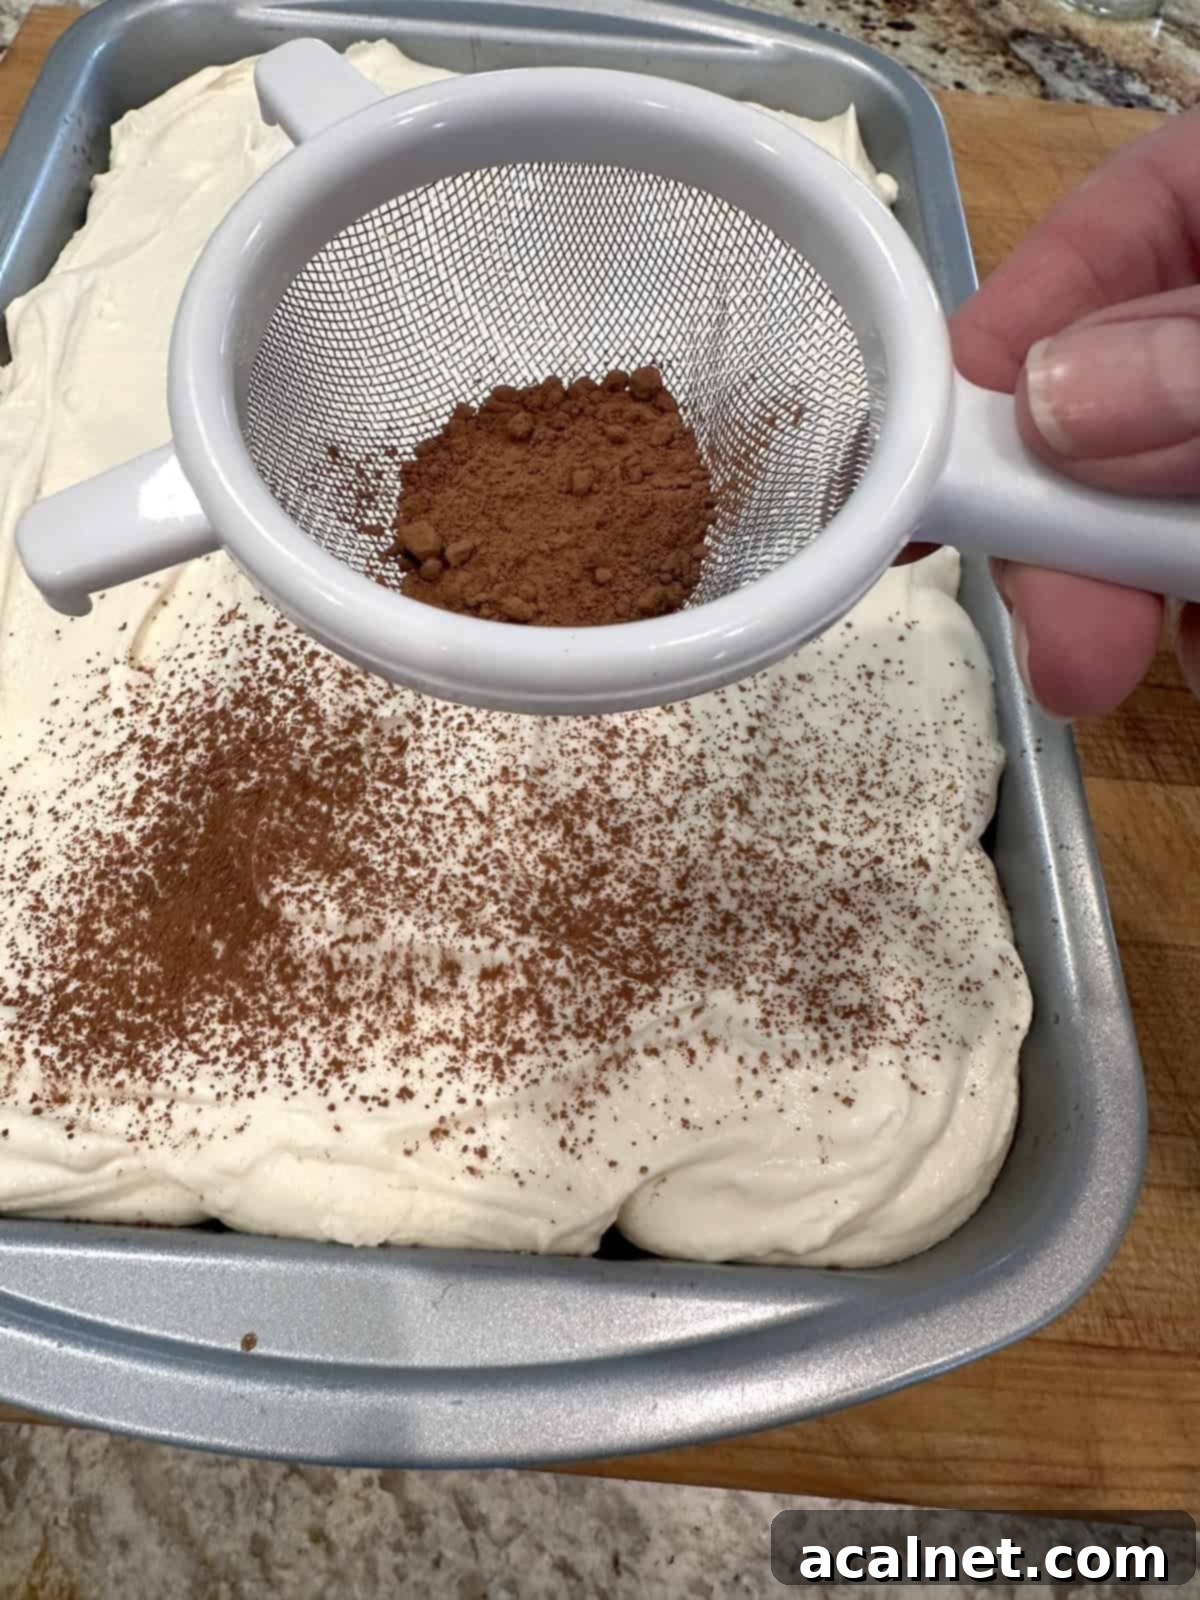
Step 7: Dust with Cocoa Powder. For the classic tiramisu presentation and a delightful hint of bittersweetness that contrasts beautifully with the sweet, creamy layers, it’s time to dust your cake with cocoa powder. Use a small fine-mesh strainer or a sifter to lightly and evenly dust the entire top surface of the cake with unsweetened cocoa powder. This step not only adds to the aesthetic appeal, giving it that iconic look, but also provides a crucial flavor component that enhances the overall tiramisu experience. Don’t be shy with the dusting, but aim for an even, delicate layer.
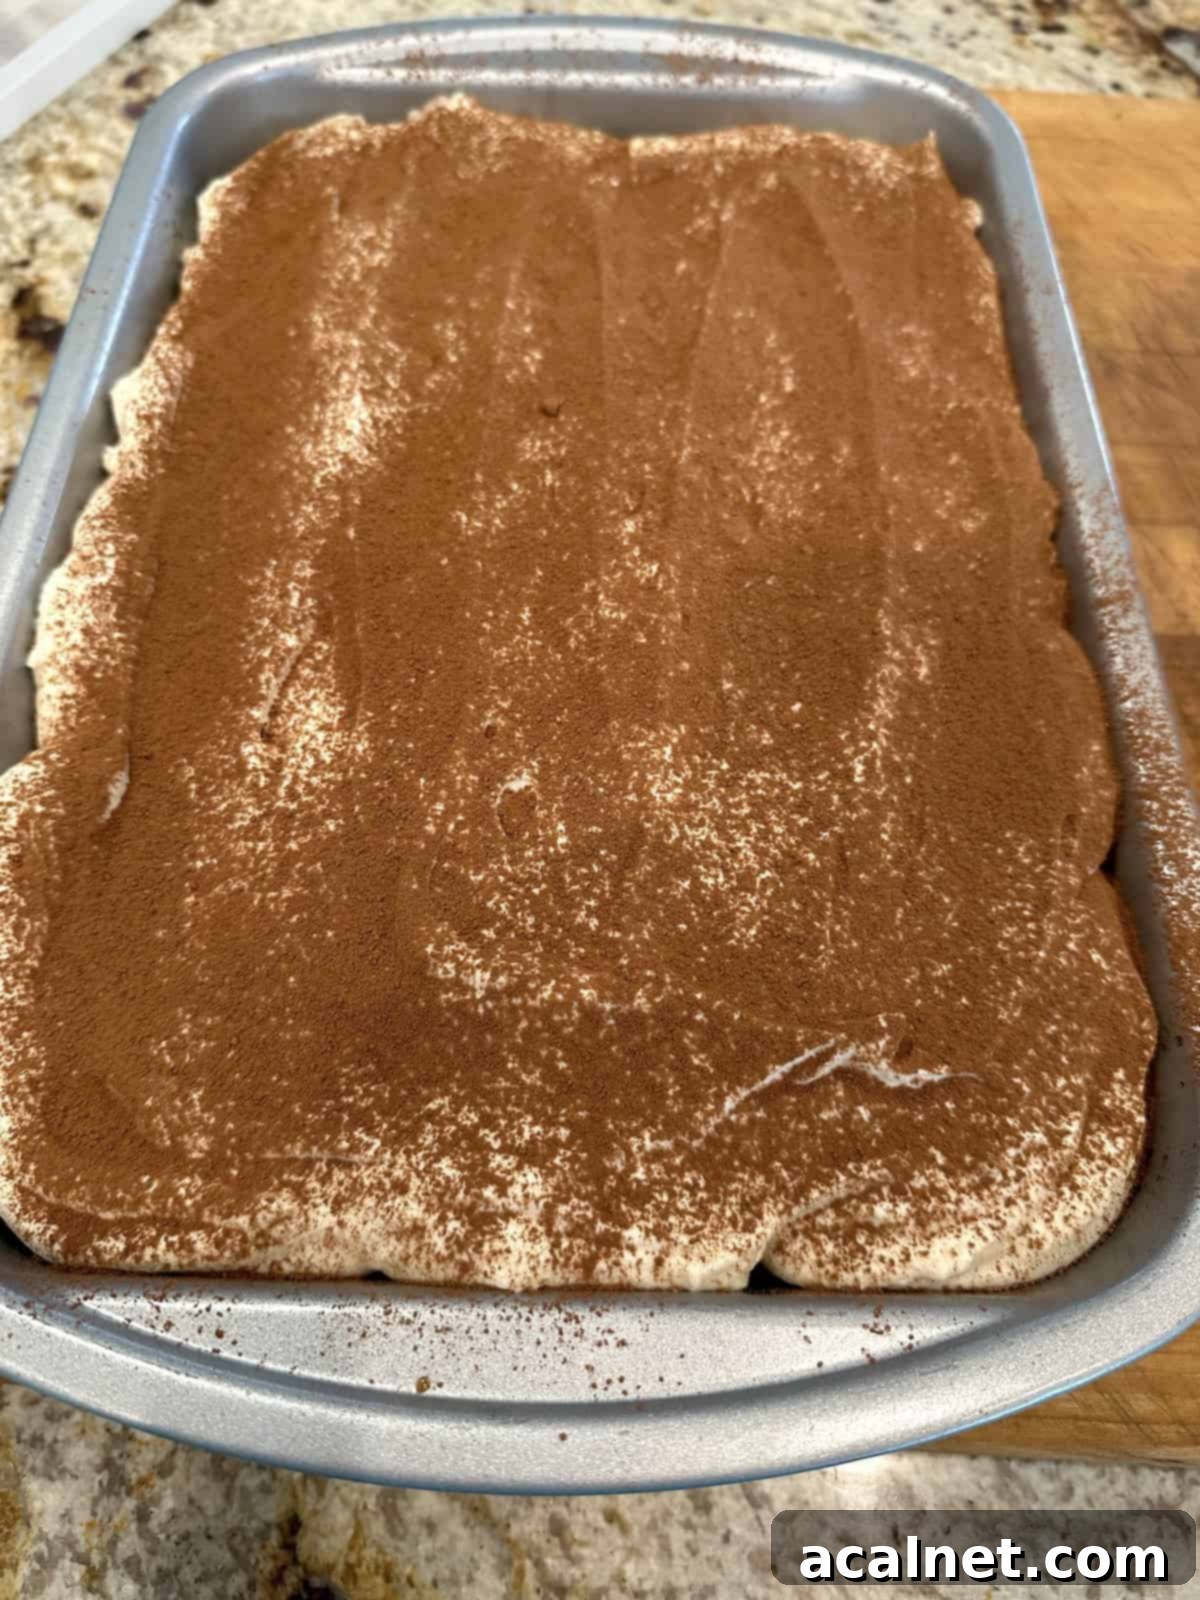
Step 8: Final Touches and Chill. Ensure the cocoa powder is sprinkled evenly over the entire cake for a consistent look and taste across all slices. Once dusted and looking picture-perfect, cover the cake loosely but securely with plastic wrap and return it to the refrigerator. Allow it to chill for at least 1 hour, or ideally longer (2-4 hours, or even overnight, is highly recommended), before serving. Chilling not only helps the flavors meld together beautifully and intensely but also sets the frosting perfectly and ensures a clean, delightful slice every time. This cake is truly best enjoyed when thoroughly cold.
💭 Recipe FAQs: Your Questions Answered About This No-Alcohol Tiramisu Cake
You certainly can, and many “poke cake” recipes often suggest using the handle of a wooden spoon for this purpose. However, the handle of a wooden spoon typically creates fairly large holes, which can sometimes lead to an uneven distribution of the liquid or even tear the cake, making it less aesthetically pleasing. Through my experience, I’ve found that smaller, more delicate holes made with the tip of a chopstick or a similar sized item (like a thin skewer or the end of a disposable coffee stirrer) work best. These smaller holes allow the coffee-flavored liquid to penetrate more evenly and thoroughly throughout the cake, resulting in a perfectly moist crumb without any excessive sogginess or structural damage.
That’s right, this recipe is completely alcohol-free! While traditional Italian tiramisu typically features ladyfingers dipped in a mixture of coffee and alcohol, often including Marsala wine, rum, or amaretto liqueur, this version offers all the classic flavors without the spirits. The rich espresso infusion combined with the creamy mascarpone creates a truly delicious dessert that captures the essence of tiramisu, making it accessible and enjoyable for everyone, including children and those who prefer non-alcoholic options. It retains the signature coffee and cream profile that defines tiramisu, making it a “tiramisu-inspired” cake that’s incredibly satisfying and widely appealing.
Absolutely, you can! While French vanilla cake mix is recommended for its richer, more pronounced vanilla flavor that beautifully complements the robust coffee and creamy mascarpone, any standard white or vanilla cake mix will work perfectly fine. The key is to choose a mix that you genuinely enjoy and that bakes into a moist, tender cake. The potent espresso soak and rich mascarpone frosting are robust enough to carry the signature tiramisu flavor, regardless of the subtle differences in the specific vanilla notes of the cake base. Just be sure to follow the package directions for baking your chosen mix.
Yes, this Tiramisu Cake is actually fantastic for making ahead of time! In fact, the flavors tend to meld and deepen over time as the cake chills, often making it even more delicious on the second day. You can confidently bake the cake, soak it with the espresso liquid, frost it with the mascarpone cream, and dust it with cocoa powder up to 24-48 hours in advance of serving. Just ensure it’s tightly covered with plastic wrap or stored in an airtight container in the refrigerator to maintain its freshness and prevent it from drying out or absorbing other odors. This makes it an ideal dessert for entertaining, as you can do most of the work beforehand and simply pull it out of the fridge when ready to serve.
Tiramisu is a classic Italian dessert that originated in the Veneto region of Italy in the 1960s, though its exact origins are often debated with several cities claiming its invention. The name “tiramisu” literally translates to “pick me up” or “cheer me up,” referring to the invigorating effect of the coffee and sometimes alcohol it traditionally contains. Traditionally, it’s made with layers of coffee-soaked ladyfingers, a creamy mixture of mascarpone cheese, eggs (often raw or lightly cooked yolks), sugar, and is usually finished with a dusting of cocoa powder. This cake version offers a simplified yet equally delightful experience inspired by this beloved Italian classic, making it approachable for home bakers.
While instant espresso powder is highly recommended for its concentrated flavor, you can use very strong brewed coffee as a substitute if needed. If using brewed coffee, make sure it’s cooled to room temperature. You might need to use a slightly smaller amount (e.g., ¼ cup strong brewed coffee instead of ¼ cup hot water + 2 tbsp instant espresso) or concentrate it further to achieve a robust coffee flavor, as regular coffee tends to be less intense. The goal is to get a pronounced coffee taste that doesn’t get lost among the other rich flavors of the cake and frosting.
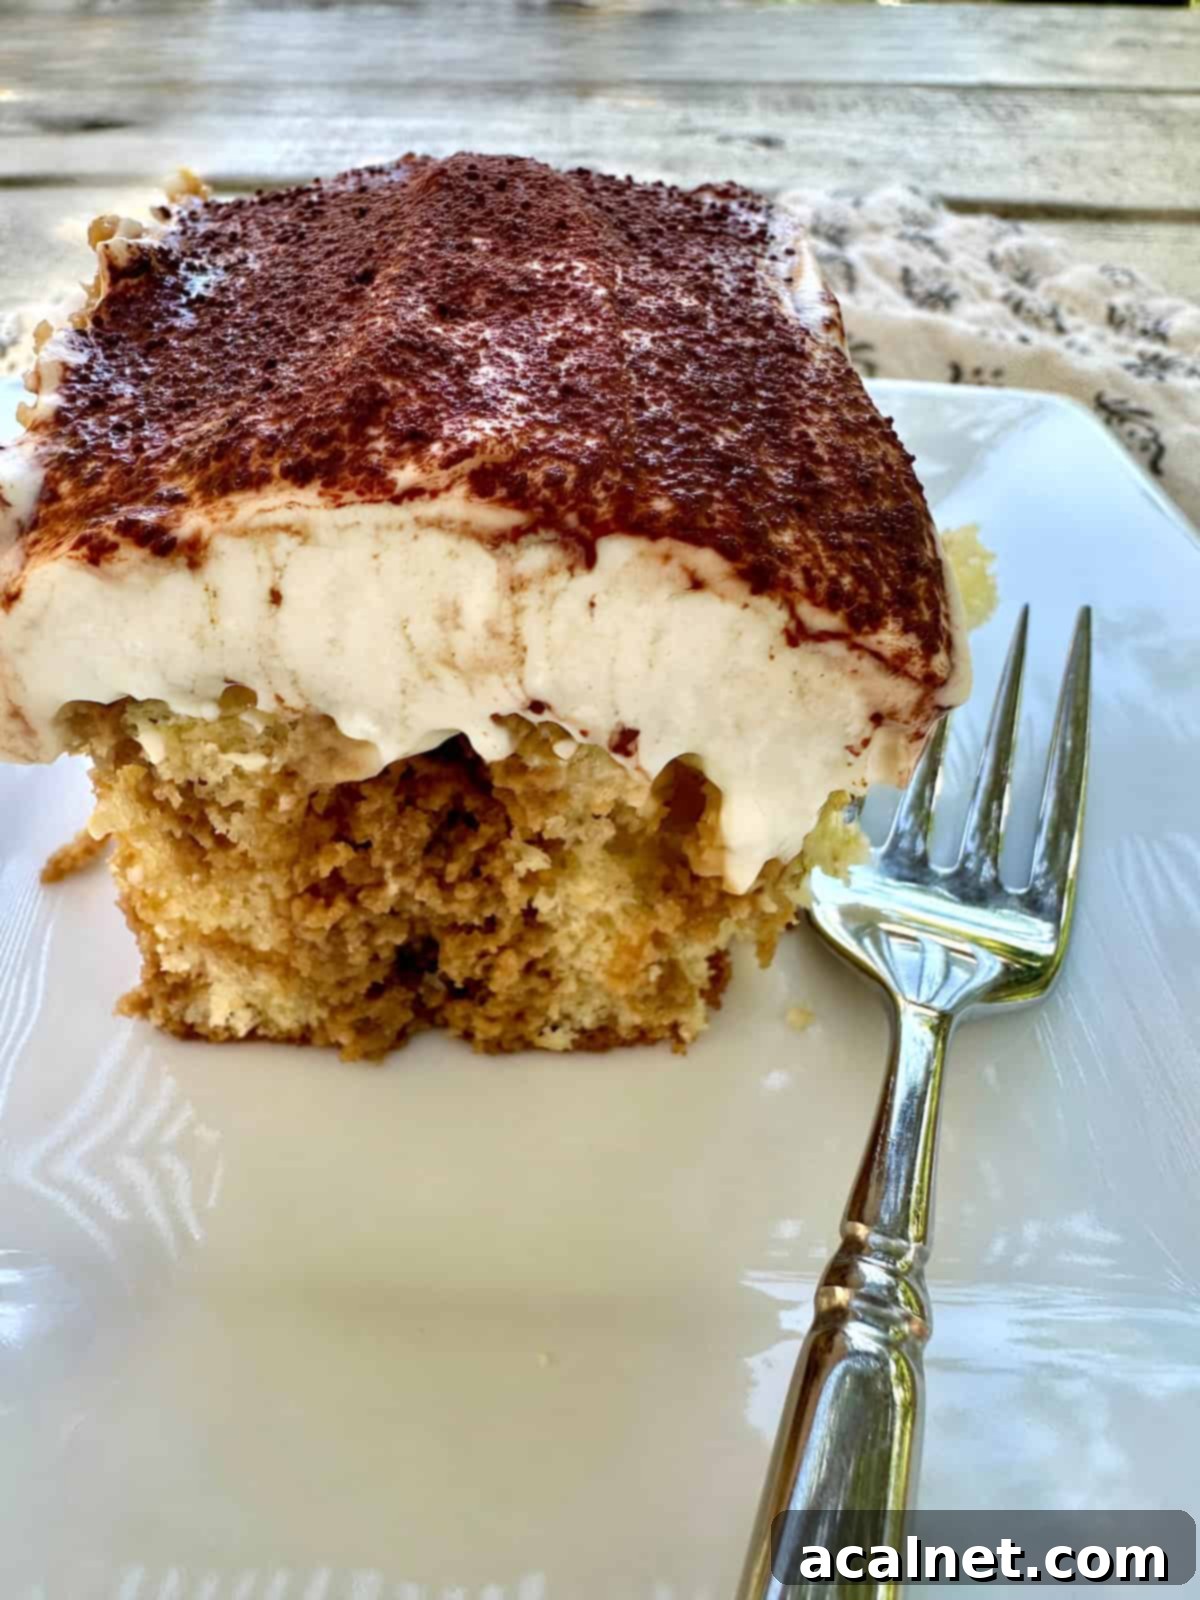
⭐ Pro Tip: For Serving the Best Tiramisu Cake
For an unparalleled taste and texture experience, your Tiramisu Cake is best served well-chilled. The time spent in the refrigerator allows the robust coffee flavors to fully meld into the cake layers and the rich mascarpone frosting to firm up to a delightful, luscious consistency. I highly recommend making this cake in the morning or even the day before, letting the frosted cake chill all day (or overnight) before serving it for dessert. This extended chilling period is truly transformative. Always store it in the refrigerator until right before you plan to cut and serve, ensuring every single bite is cool, creamy, and utterly refreshing.
🌡️ Leftovers and Storage Tips for Tiramisu Cake
To keep your delicious No-Alcohol Tiramisu Cake fresh and flavorful, proper storage is paramount. Always ensure the cake is covered tightly with plastic wrap or stored in an airtight container in the refrigerator. This crucial step prevents it from drying out, absorbing any unwanted odors from other foods in your fridge, and keeps the mascarpone frosting at its best. For the best texture and taste, I recommend enjoying any leftovers within 3 days. While the idea of saving it for longer might be tempting, freezing is generally not recommended for this particular cake. The delicate texture of the mascarpone frosting and the moistness of the cake layers can be negatively affected by the freezing and thawing process, potentially leading to a grainy texture in the cream or a soggy cake. Always serve chilled for the optimal experience and maximum enjoyment.
🍽 Other Tasty Dessert Recipes to Try
If you loved this easy no-alcohol tiramisu cake and are looking for more delightful treats, you’re in for a treat with these other tried-and-true dessert recipes! They’re perfect for any time of year and are sure to become new family favorites. From comforting cookies to decadent pies and creamy cheesecakes, these recipes are all winners that will satisfy any sweet craving and make your baking adventures even more exciting.
- Chocolate Zucchini Cake
- Tiramisu Cake for Dessert
- Old Fashioned Sour Cream Cookies
- 15 Best Apple & Pumpkin Desserts
If you make this wonderful No-Alcohol Tiramisu Cake, I’d absolutely love to hear how it turned out for you and if you enjoyed it as much as we do! Please take a moment to leave a 🌟🌟🌟🌟🌟 star rating and a comment below. Your feedback truly brightens my day, helps other aspiring bakers in our community, and allows me to create more recipes you’ll love. I’m eagerly looking forward to hearing from you and seeing your creations!
Recipe Card: Easy Tiramisu Cake (No Alcohol)
Tiramisu Cake for Dessert (No Alcohol)
Print
Rate
Pin Recipe
Ingredients
- 1 13.25 ounce box of vanilla cake mix – plus the ingredients required on the box to make the cake (e.g., eggs, oil, milk/water)
- ¼ cup hot water – to dissolve instant espresso powder
- 2 tablespoons instant espresso powder – for rich coffee flavor
- ½ cup heavy whipping cream – for the espresso soak
- ½ cup sweetened condensed milk – adds sweetness and body to the soak
- 16 ounces mascarpone cheese – softened to room temperature for smooth frosting
- 2 cups heavy whipping cream – for the creamy frosting
- 1 cup powdered sugar – for a smooth, sweet frosting
- 1 tablespoon vanilla extract – enhances overall flavor
- 1 tablespoon unsweetened cocoa powder – for dusting on top, adds visual appeal and a bitter counterpoint
Instructions
- 1. Bake the Cake: Prepare and bake your chosen vanilla cake mix exactly according to the package directions. Ensure you are using a 9″ x 13″ baking dish. Once baked, carefully remove the cake from the oven and set it aside on a cooling rack to cool completely. This step is crucial to prevent the cake from becoming soggy when you add the liquid, ensuring a perfect texture.1 13.25 ounce box of vanilla cake mix
- 2. Prepare Espresso Soak: While the cake is cooling, in a glass measuring cup or a small bowl, combine the hot water with the instant espresso powder. Stir vigorously until the espresso is fully dissolved. Next, stir in the ½ cup of heavy whipping cream and the sweetened condensed milk until the mixture is uniform and smooth. Set this aromatic liquid aside, ready to infuse your cake.¼ cup water, 2 tablespoons instant espresso, ½ cup heavy whipping cream, ½ cup sweetened condensed milk
- 3. Poke and Soak the Cake: After the cake has completely cooled, use a chopstick (or a similar thin, blunt object) to poke small, evenly spaced holes all across the surface of the cake. Make sure to insert the chopstick all the way to the bottom of the pan to allow for maximum liquid penetration. Now, slowly pour the prepared espresso liquid mixture across the top of the cake, carefully allowing the liquid to seep into each small hole. Take your time to ensure even absorption. Once all the liquid is poured, cover the cake tightly with plastic wrap and refrigerate for at least 30 minutes to allow the cake to fully absorb the flavors and firm up.
- 4. Make the Mascarpone Frosting: While the cake is chilling, begin preparing your creamy frosting. In a medium-sized mixing bowl, place the softened mascarpone cheese and one cup of heavy cream. Using an electric hand mixer, beat these ingredients together until the mixture is completely smooth and creamy. Ensure there are no lumps of mascarpone. Then, add the remaining 1 cup of heavy cream, the powdered sugar, and the vanilla extract. Continue to beat on medium-high speed until the frosting becomes light, fluffy, and holds soft peaks. Be careful not to overmix, as mascarpone can curdle if beaten too vigorously for too long.16 ounces mascarpone cheese, 2 cups heavy whipping cream, 1 cup powdered sugar, 1 tablespoon vanilla extract
- 5. Frost the Cake: Remove the chilled cake from the refrigerator and uncover it. Using a large spoon or an offset spatula, place generous spoonfuls of the fluffy mascarpone frosting evenly across the top of the cake. Then, use the back of the spoon or the spatula to carefully spread the frosting out towards the edges of the pan, ensuring the entire top surface of the cake is covered with an even layer. Aim for a smooth and inviting finish.
- 6. Dust with Cocoa: For the iconic tiramisu finish, use a small fine-mesh strainer or sifter to lightly and evenly dust the entire top of the frosted cake with unsweetened cocoa powder. This adds a beautiful visual appeal and a delicious, slightly bitter counterpoint to the sweet frosting.1 tablespoon cocoa powder
- 7. Chill and Serve: Once decorated, cover the cake lightly with plastic wrap and return it to the refrigerator. Allow it to chill for at least 1 hour, or ideally longer (2-4 hours is excellent, overnight is even better), before serving. This chilling time is essential for the flavors to fully develop and for the frosting to set perfectly. For the absolute best flavor and peak texture, serve the cake and any leftovers within 3 days, always keeping it refrigerated.
Notes
For an optimal tasting experience, Tiramisu Cake is always best served well-chilled. This means storing it in the refrigerator until literally just before you plan to cut and serve. Keeping it thoroughly cold ensures that the rich mascarpone cheese frosting maintains its delightful firmness and luscious texture, while the coffee-infused cake remains moist and flavorful.
While this recipe is delicious enjoyed immediately after its initial chill, the flavors truly deepen and meld together wonderfully if allowed to chill for several hours or even overnight. This makes it an ideal make-ahead dessert for entertaining, allowing you to prepare it in advance and enjoy stress-free hosting.
Please note, the nutrition details provided are estimated using a food database. They are intended as a rough estimate and should not be considered an exact science. Individual results may vary based on specific brands, ingredient variations, and preparation methods. This information is for guidance only.
This delightful recipe was thoughtfully adapted from the Pioneer Woman’s Espresso Cream Poke Cake. My adjustments primarily focused on enhancing the coffee and cream balance by modifying the amount of liquid and powdered sugar, and opting for the pure simplicity of vanilla extract instead of vanilla paste to achieve a familiar, comforting flavor. Her original recipe is undoubtedly delicious, and this adaptation aims to offer an equally wonderful, alcohol-free alternative that’s just as satisfying and easy to prepare, bringing a taste of Italy right to your kitchen without any fuss.
