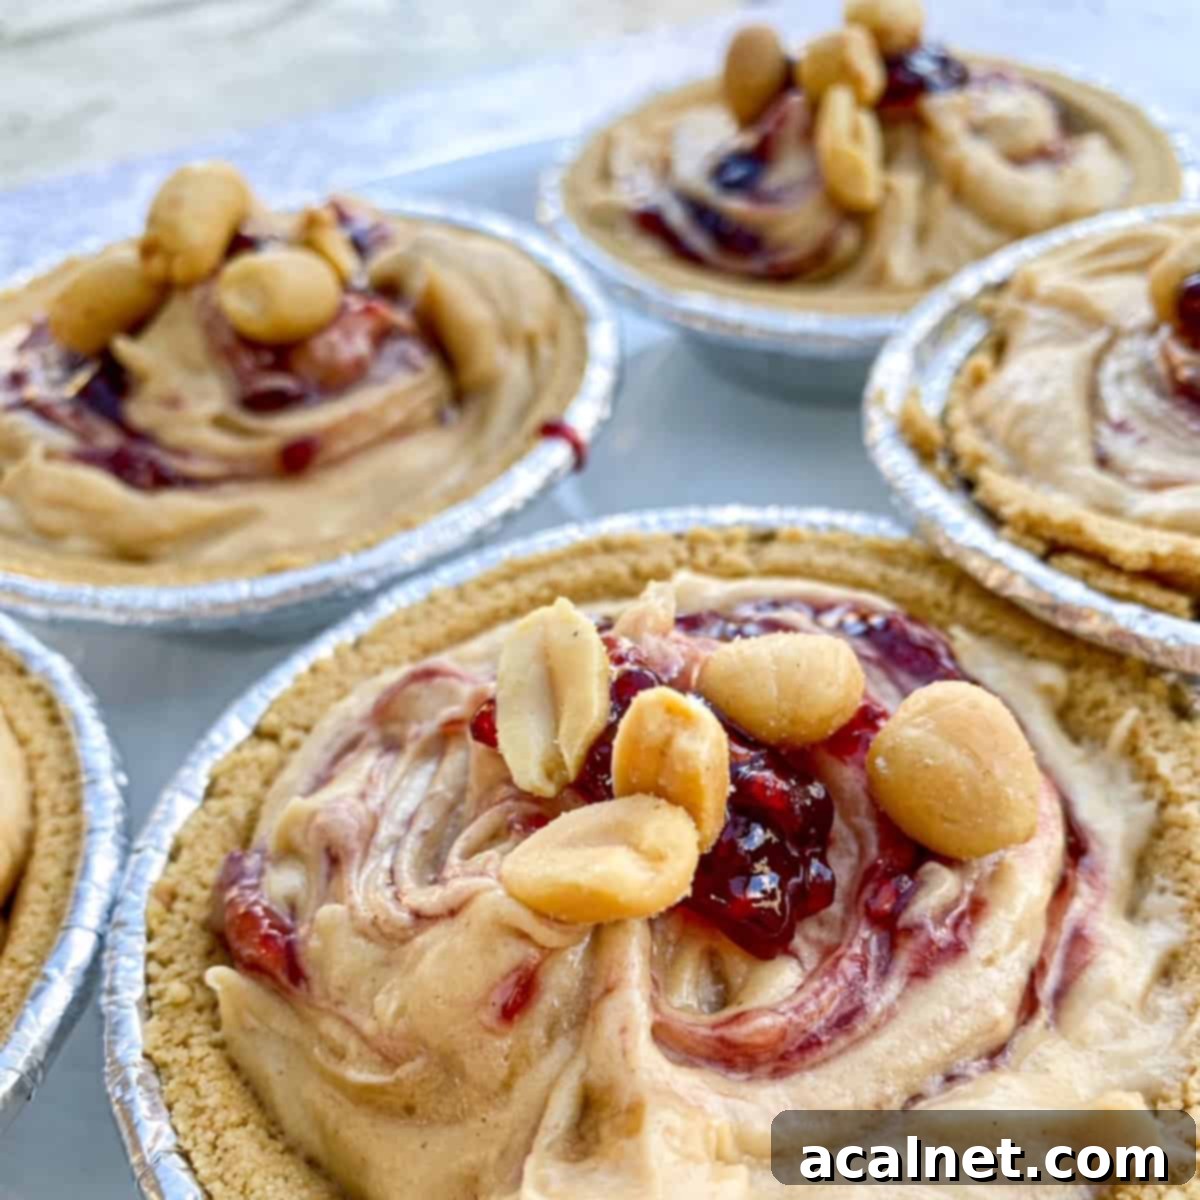
Easy No Bake Peanut Butter Pie: The Ultimate Creamy, Dreamy Dessert Recipe
Prepare to fall in love with the **Easy No Bake Peanut Butter Pie**, a dessert that effortlessly combines a rich, smooth peanut butter filling with your choice of delightful mix-ins. Whether you prefer the fruity tang of your favorite jam or the classic chocolate-peanut butter bliss of Reese’s candies, this no-bake wonder is guaranteed to be a crowd-pleaser. It’s the perfect sweet treat for any occasion, from casual family gatherings to elegant holiday feasts, requiring minimal effort but delivering maximum flavor.
This recipe is designed for simplicity without compromising on taste or texture. Imagine a velvety smooth peanut butter filling, lightened with whipped cream and cream cheese, all nestled in a perfectly crisp graham cracker crust. The beauty of a no-bake pie lies in its convenience – no oven required, making it ideal for hot summer days or when your oven is already occupied. Get ready to create a truly memorable dessert that will have everyone asking for seconds!
Note: Links in this recipe are paid links (Amazon Associates). This means I make a small commission when you click and shop. Your cost is always the same, and I only link to and recommend ingredients and products that I personally use and trust.
Ingredients You’ll Need for This Creamy Masterpiece
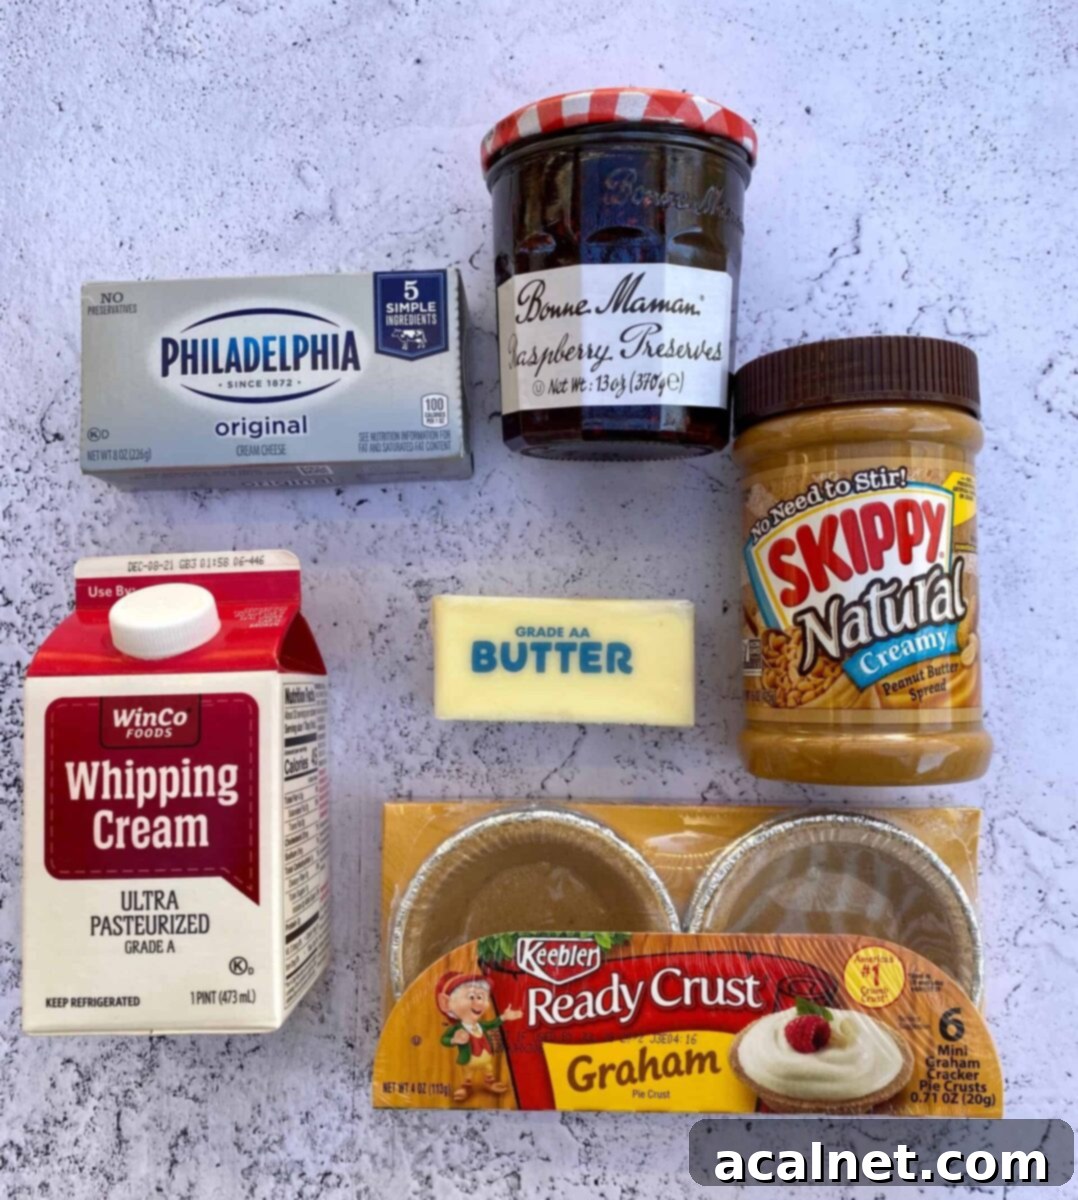
One of the best aspects of this Easy No Bake Peanut Butter Pie is its straightforward ingredient list. You likely have many of these staples in your pantry already, making this a go-to recipe whenever a peanut butter craving strikes. For the best results, we recommend using high-quality ingredients that will truly shine in this creamy dessert.
- Creamy Peanut Butter: We opt for creamy peanut butter to ensure a silky-smooth filling, but feel free to experiment with chunky if you prefer a bit of texture.
- Cream Cheese: Full-fat cream cheese is key for that rich, tangy counterpoint to the sweet peanut butter. Ensure it’s softened to room temperature for a lump-free mixture.
- Heavy Whipping Cream: Freshly whipped cream adds incredible lightness and airiness to the pie filling, giving it that melt-in-your-mouth quality.
- Unsalted Butter: Melted butter helps bind the peanut butter mixture and adds a touch of richness.
- Granulated Sugar: For just the right amount of sweetness to balance the other flavors.
- Your Favorite Jam, Chocolate Chips, or Reese’s Minis: These are your flavor accelerators, allowing you to customize each pie to perfection.
- Pre-Made Graham Cracker Mini Pie Crusts: The ultimate convenience factor! Using pre-made crusts saves time and ensures a consistently crisp base. You can also use one standard 9-inch crust.
Gathering these simple ingredients is the first step towards creating an unforgettable dessert experience. Each component plays a vital role in achieving the signature taste and texture of this incredible no-bake pie.
Endless Pie Filling Variations: Customize Your Creamy Dream
This peanut butter pie is celebrated for its rich, decadent texture and intense peanut butter flavor, making it an absolute favorite among peanut butter enthusiasts of all ages. But what truly sets it apart is its incredible versatility. While delicious on its own, the ability to blend in additional sweet ingredients opens up a world of flavor possibilities, ensuring these peanut butter pies are winners every single time!
Imagine serving a variety of mini peanut butter pies, each with a unique twist, at your next gathering. This simple customization elevates the dessert from delightful to truly spectacular, catering to different tastes and preferences. You can create a dessert bar experience that’s both fun and impressive, all without the hassle of baking.
We have so many delightful variations to choose from when crafting these peanut butter pies. Here are some ideas to spark your creativity:
- Fruity Jam Swirls: Recreate the nostalgic flavor of a peanut butter and jelly sandwich by swirling in your favorite fruit jam. Raspberry, strawberry, grape, or even apricot jam would be fantastic choices.
- Rich Chocolate Chips: For the ultimate chocolate-peanut butter combination, blend in milk chocolate, semi-sweet, or even white chocolate chips. They add a delightful texture and a burst of chocolatey goodness.
- Diced Mini Reese’s Peanut Butter Cups: Elevate the classic with miniature Reese’s cups, chopped and folded into the filling. This creates an irresistible candy-like experience that’s truly indulgent.
The beauty is in the choice – whether you stick to one variation or mix and match, your homemade no-bake peanut butter pies are destined for rave reviews!
Choose Your Filling and Garnish Options
The Easy No Bake Peanut Butter Pie is always best served chilled, offering a refreshing contrast to its rich flavor. As mentioned, the true fun begins with customizing your filling and garnishes. There’s no need for an oven, as a store-bought graham cracker crust provides the perfect crunchy foundation, leaving you more time for creative embellishments.
Blend into the pie filling whichever of these delightful options sounds most appealing for your family and guests:
- Chopped Peanuts: For an extra crunch and intensified peanut flavor.
- Jam (Raspberry, Strawberry, Grape): Adds a sweet and tart fruitiness, creating a classic PB&J experience.
- Jelly: Similar to jam, but with a smoother texture, offering a pure fruity essence.
- Chocolate Chips (Milk, Semi-Sweet, Dark): A timeless pairing with peanut butter, adding rich, melty pockets of chocolate.
- White Chocolate Chips: For a sweeter, creamier chocolate note that complements the peanut butter beautifully.
- Reese’s Peanut Butter Cups, Chopped: The ultimate indulgence for fans of the iconic candy. Chop them finely for even distribution.
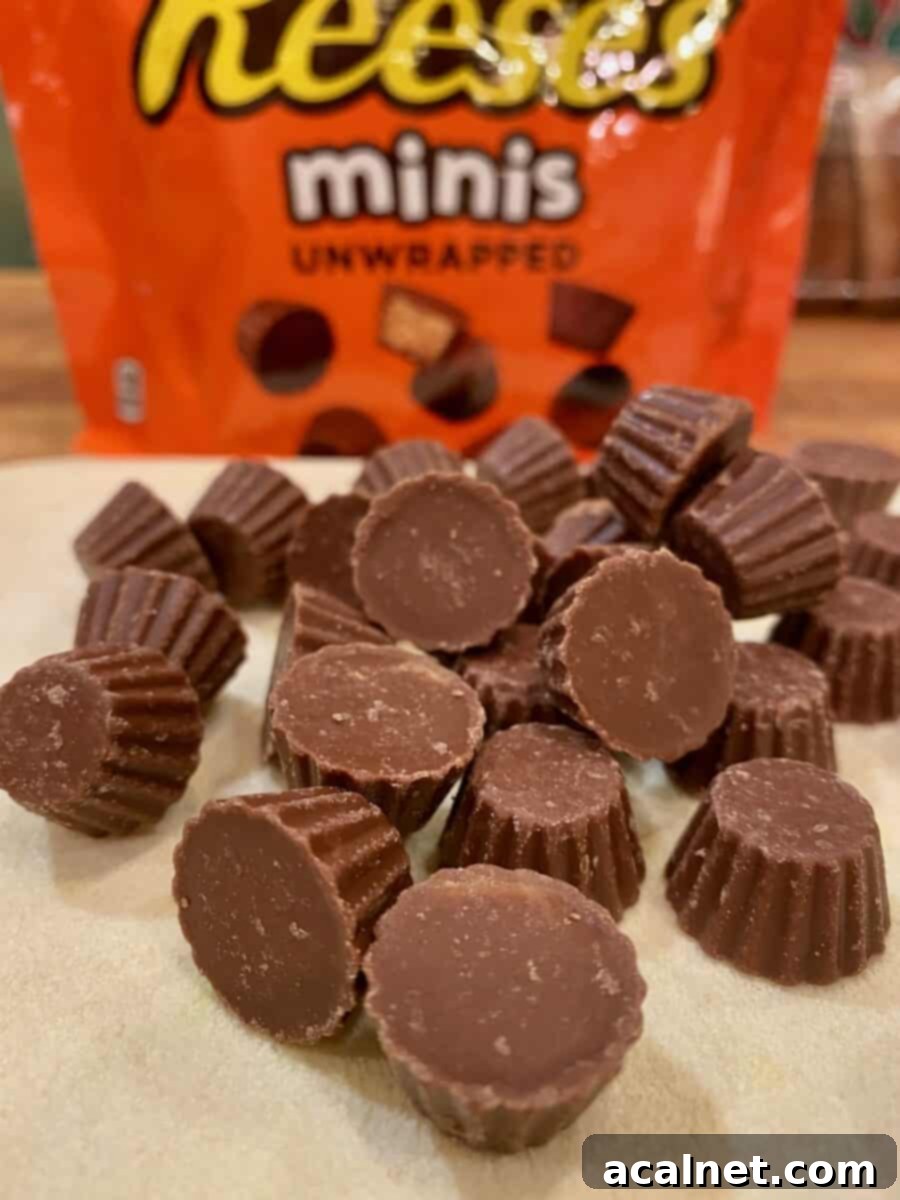
Garnishes on top of the pies add an extra touch of flair and visual appeal when served. Here are some topping options for your peanut butter pies, which you can mix and match depending on your chosen filling blend:
- Fresh Whipped Cream: A dollop of airy, homemade whipped cream is always a fantastic, light addition.
- Chopped Peanuts: A sprinkle of chopped peanuts provides a pleasant crunch and reinforces the peanut butter theme.
- A Drizzle of Chocolate Sauce: For a luxurious finish, especially if you’ve opted for chocolate chips or Reese’s in your filling.
- Extra Jam Swirl: For the jam-infused pies, an extra swirl on top adds color and a visual cue to the flavor.
- Mini Reese’s Cups: Place a whole or halved mini Reese’s cup on top for a clear indication of that delicious variation.
How to Make the Velvety Smooth Pie Filling
Regardless of which delicious ingredients you plan to blend into your pie, the foundation of this dessert is its incredibly creamy and flavorful peanut butter filling. Our first crucial step is to prepare the whipping cream, which gives the pie its light, airy texture.
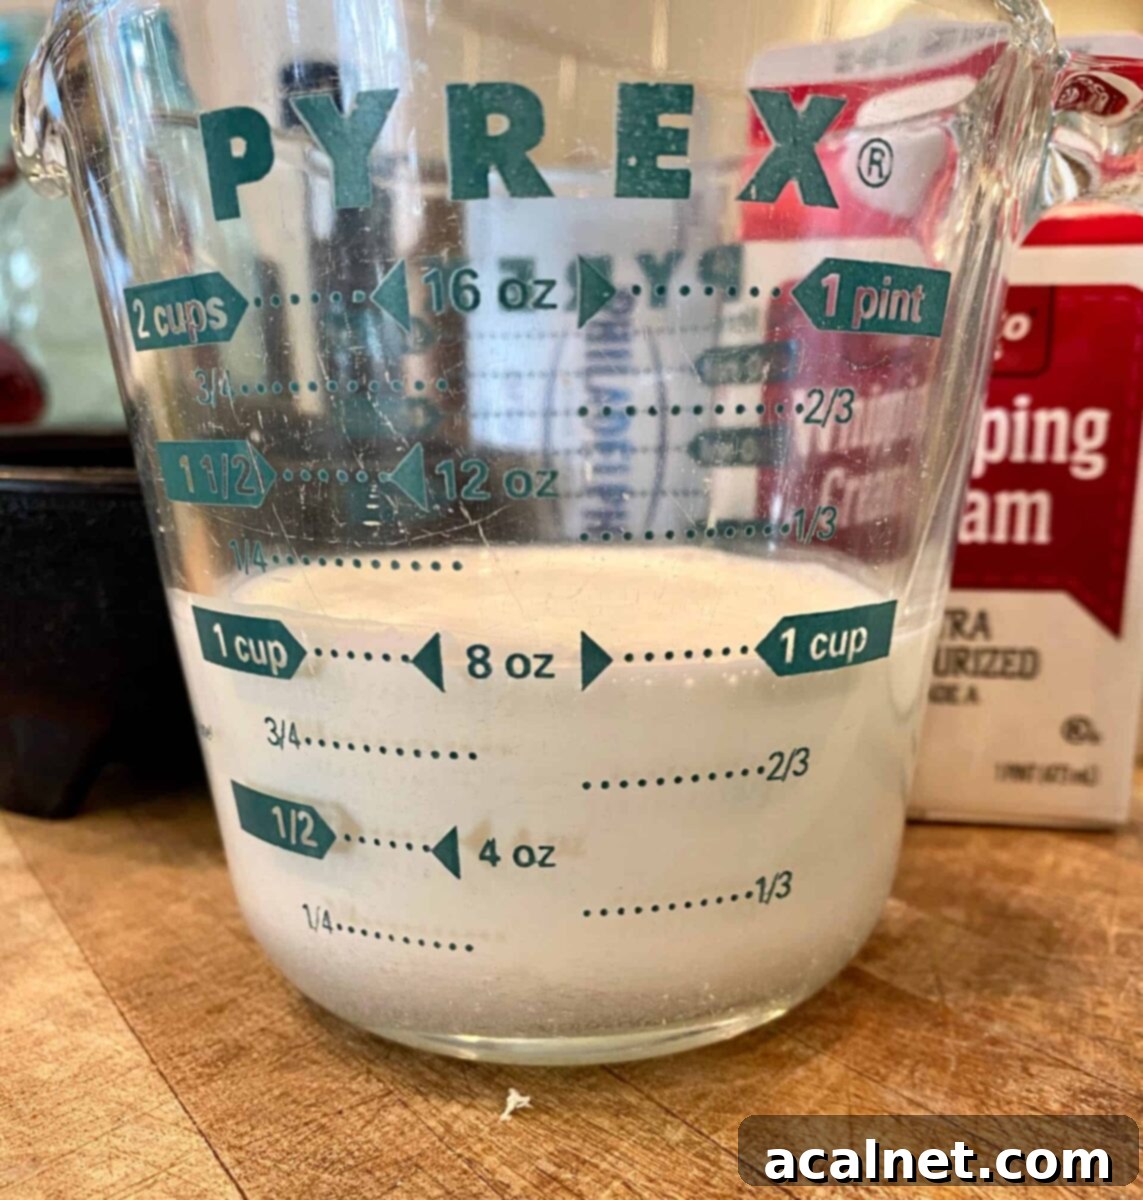
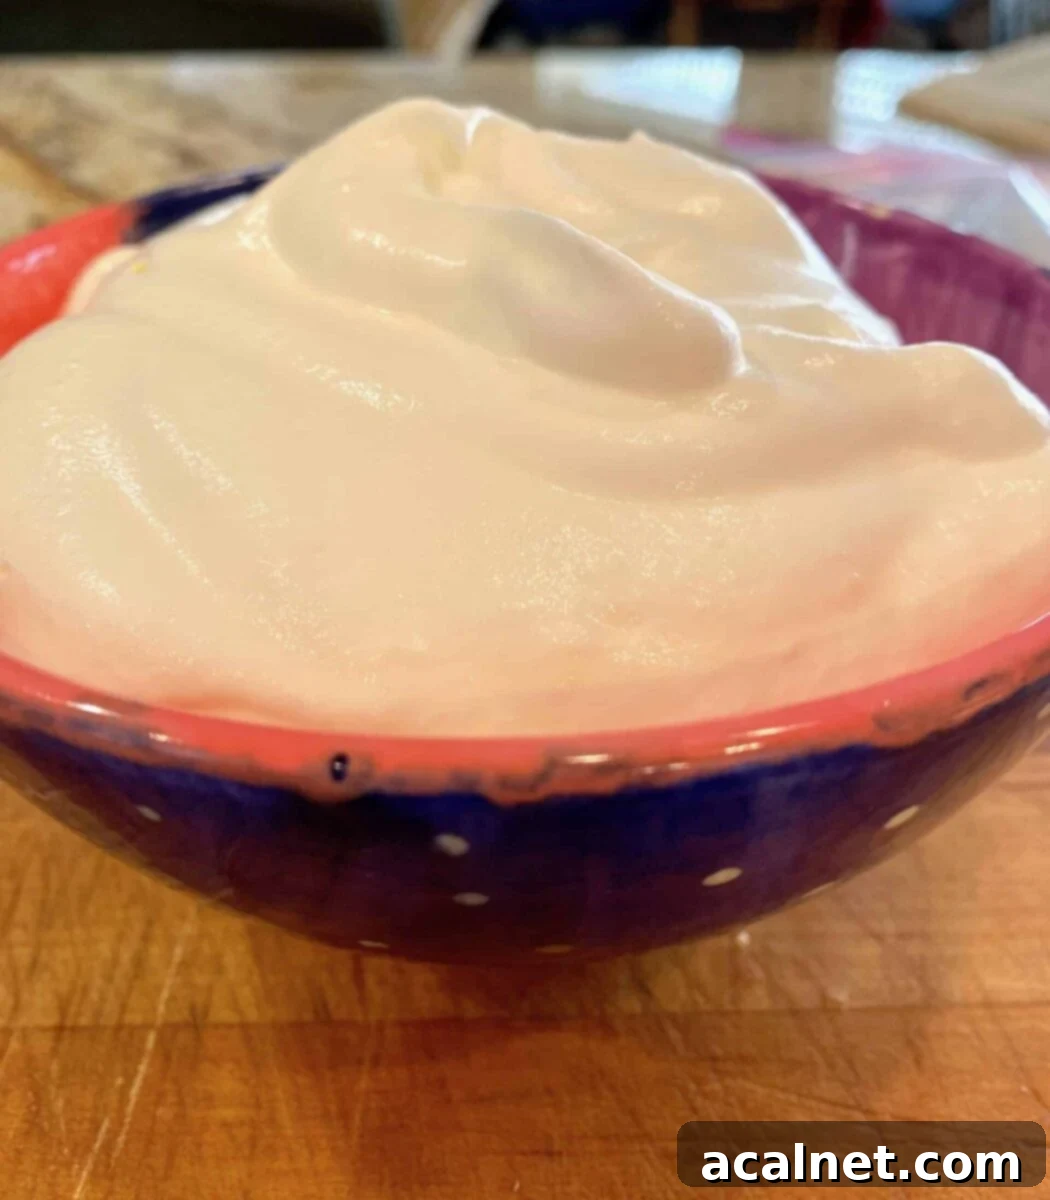
Making fresh whipped cream is surprisingly easy, and there’s truly nothing better for this peanut butter pie filling. It lends an unparalleled silky and creamy texture that store-bought alternatives simply can’t match. The difference is noticeable and well worth the extra few minutes.
Pro Tip: For the fluffiest, most stable whipped cream, it really helps to chill both your mixing bowl and your beaters or whisk in the freezer for about 10-15 minutes before you start whipping. This time-honored tip ensures the cream stays cold, making it easier to incorporate air and achieve that perfect fluffy, voluminous consistency.
Here’s how to create the luscious peanut butter pie filling:
Step One: Prepare the Whipped Cream. Pour the cold heavy whipping cream into your chilled mixing bowl. Using either an electric mixer with a whisk attachment or a hand whisk, whip the liquid until it forms soft peaks. This usually takes about 3-4 minutes. The cream should be puffy and hold a gentle shape when the whisk is lifted. Be careful not to over-whip, or it will become grainy. Set the whipped cream aside.
Step Two: Combine the Base Ingredients. In a separate large mixing bowl, combine the softened cream cheese, creamy peanut butter, granulated sugar, and melted butter. Beat these ingredients together with your electric mixer (or vigorously with a sturdy whisk) until the mixture is completely smooth, creamy, and well combined. Ensure there are no lumps of cream cheese remaining.
Step Three: Gently Fold in Whipped Cream. Carefully add the prepared whipped cream to the peanut butter mixture. This step requires a light hand to maintain the airiness of the whipped cream.
Step Four: Blend Until Combined. Using a spatula or a large spoon, gently fold the whipped cream into the peanut butter mixture until everything is just combined and no streaks of white remain. Avoid overmixing, as this can deflate the whipped cream. The result should be a light, fluffy, and uniformly colored filling.
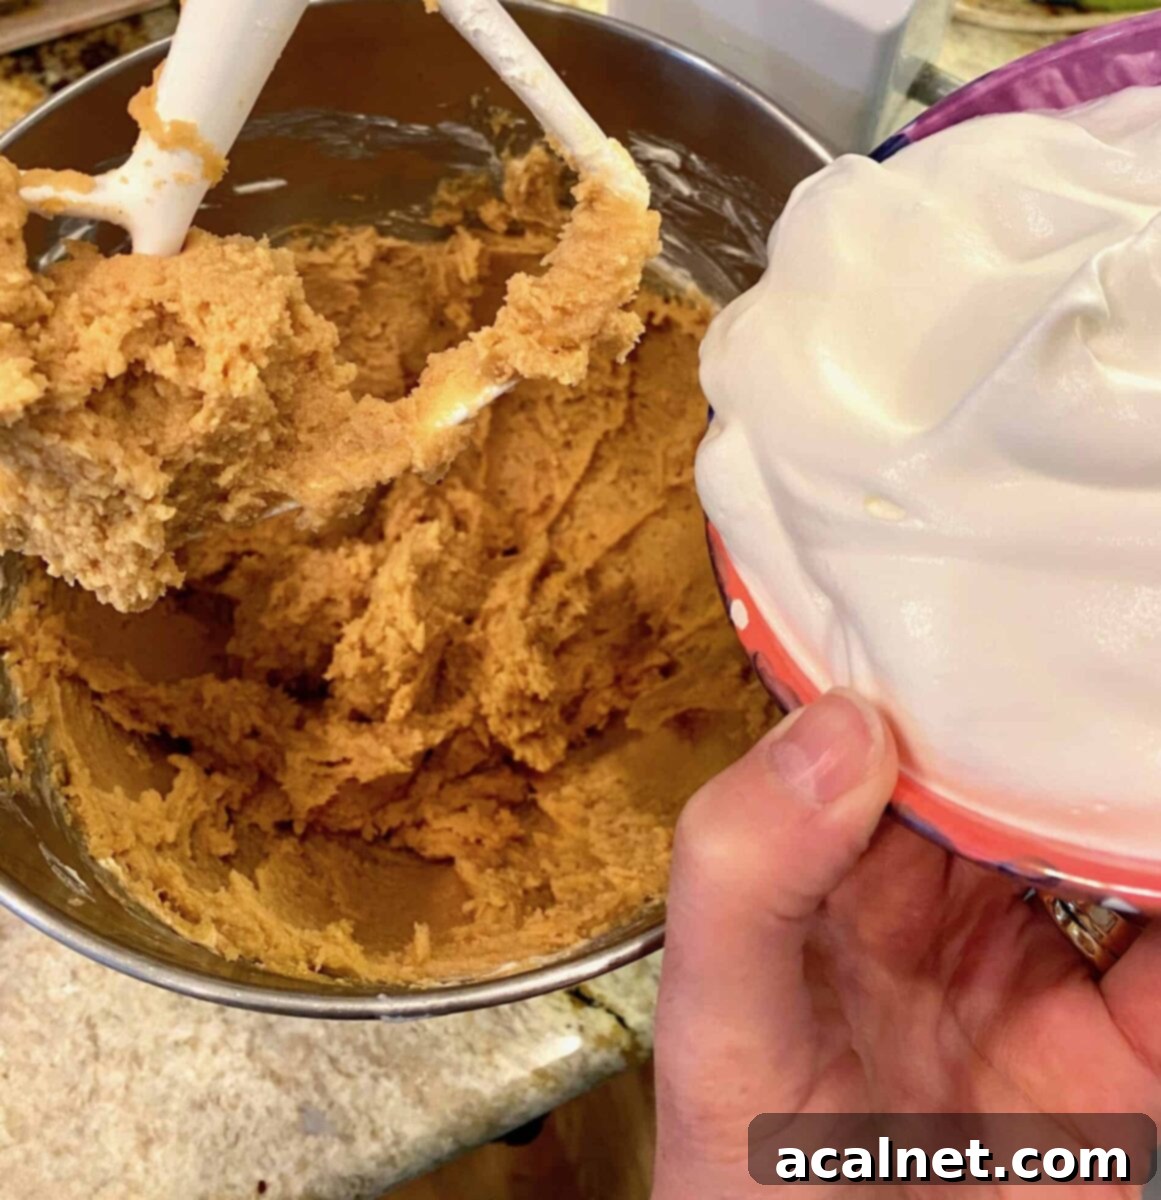
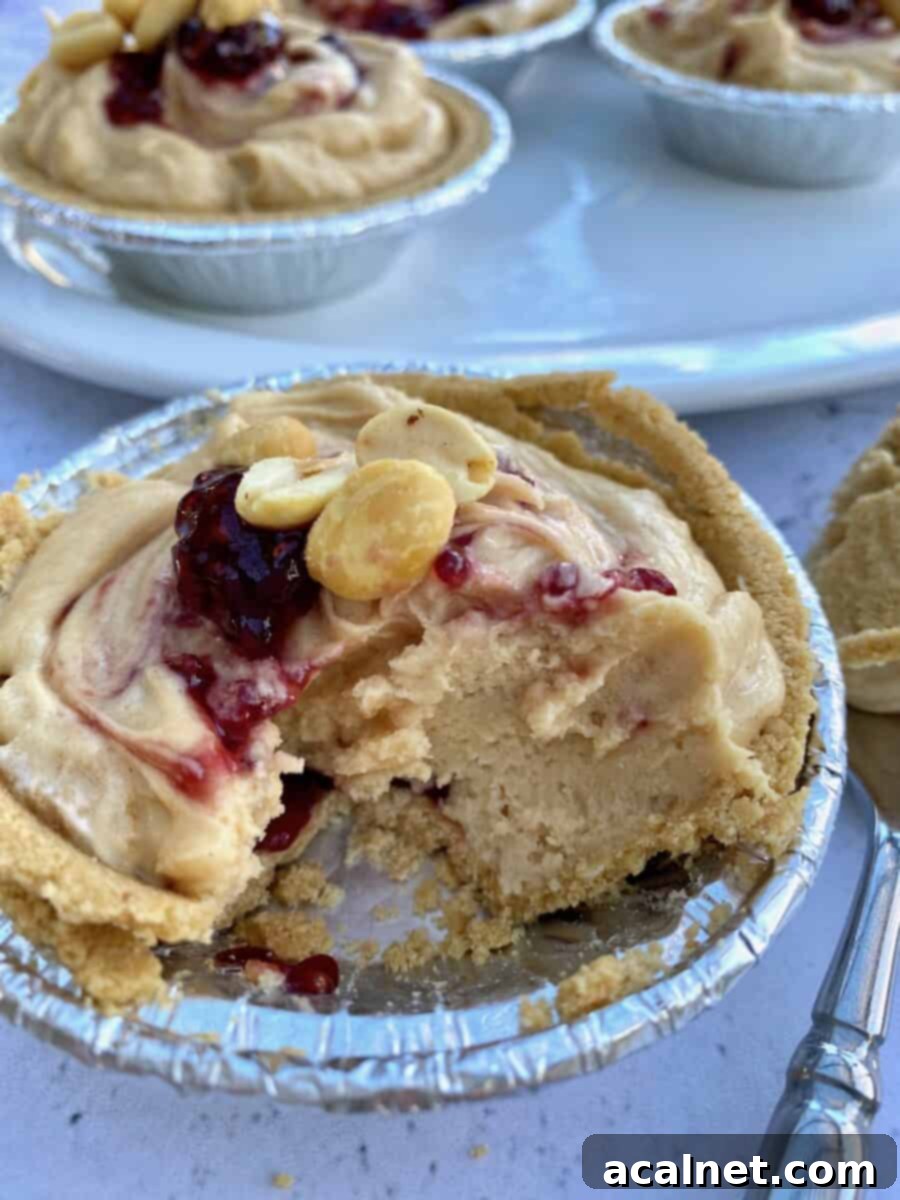
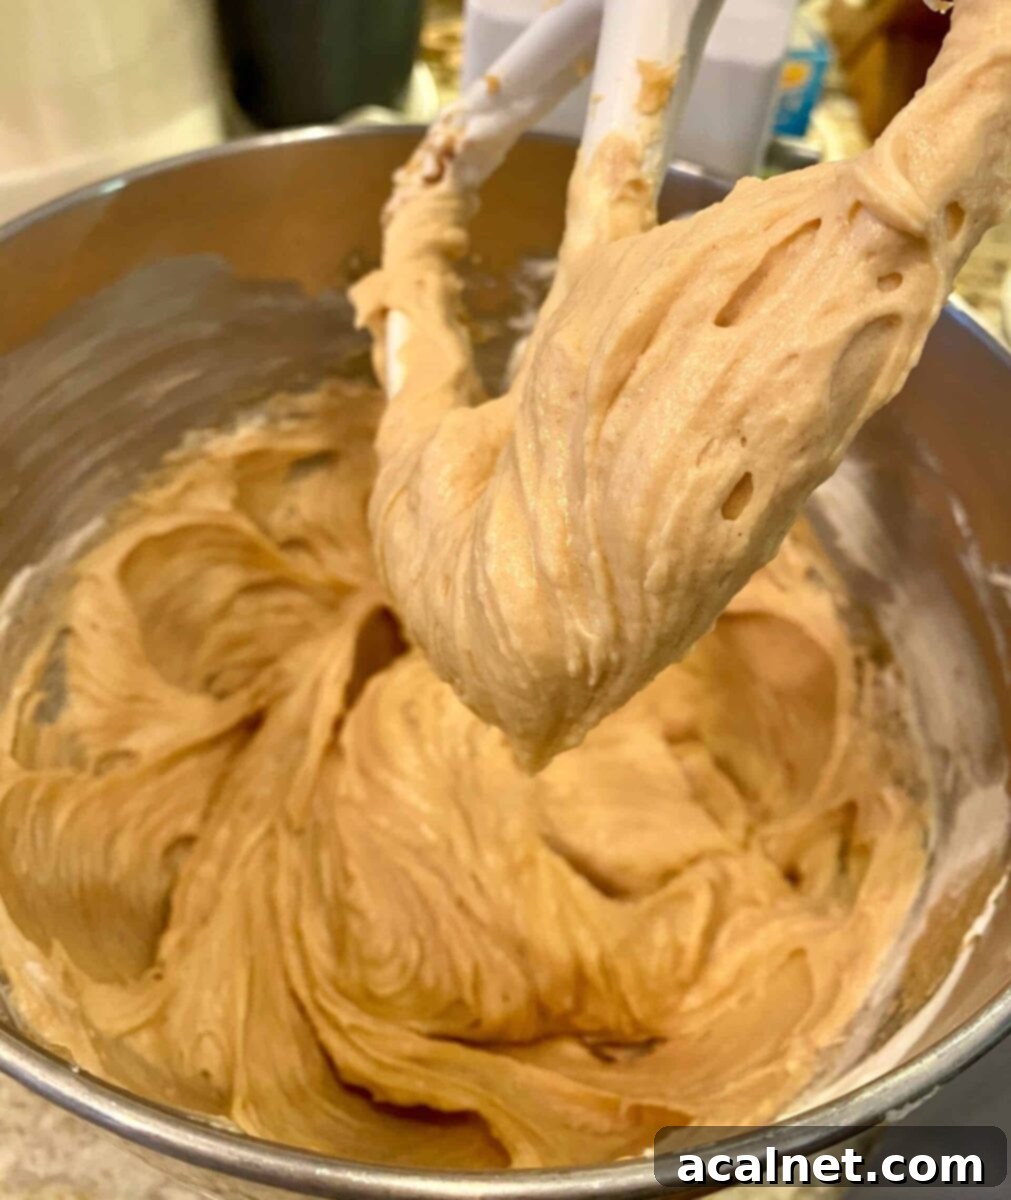
Once fully combined, you’ll immediately notice that the color and texture of your homemade peanut butter pie filling are much lighter and airier than peanut butter straight from the jar. This transformation is thanks to the harmonious blend of the tangy cream cheese and the delightful lightness of the whipping cream, creating a truly irresistible base for your pies.
How to Make a Nostalgic Peanut Butter and Jam Pie
One of the most appealing aspects of this no-bake peanut butter pie is its incredible versatility and adaptability. You can keep it delightfully simple, enjoying the pure, unadulterated flavor of the creamy peanut butter filling, or you can take a delightful stroll down memory lane by adding jam. This comforting combination perfectly mimics the beloved flavors of a classic peanut butter and jelly sandwich, transformed into an elegant dessert.
Here’s how to create a delicious No Bake Peanut Butter Pie with Jam, step by step, ensuring a beautiful swirl of fruity goodness in every bite:
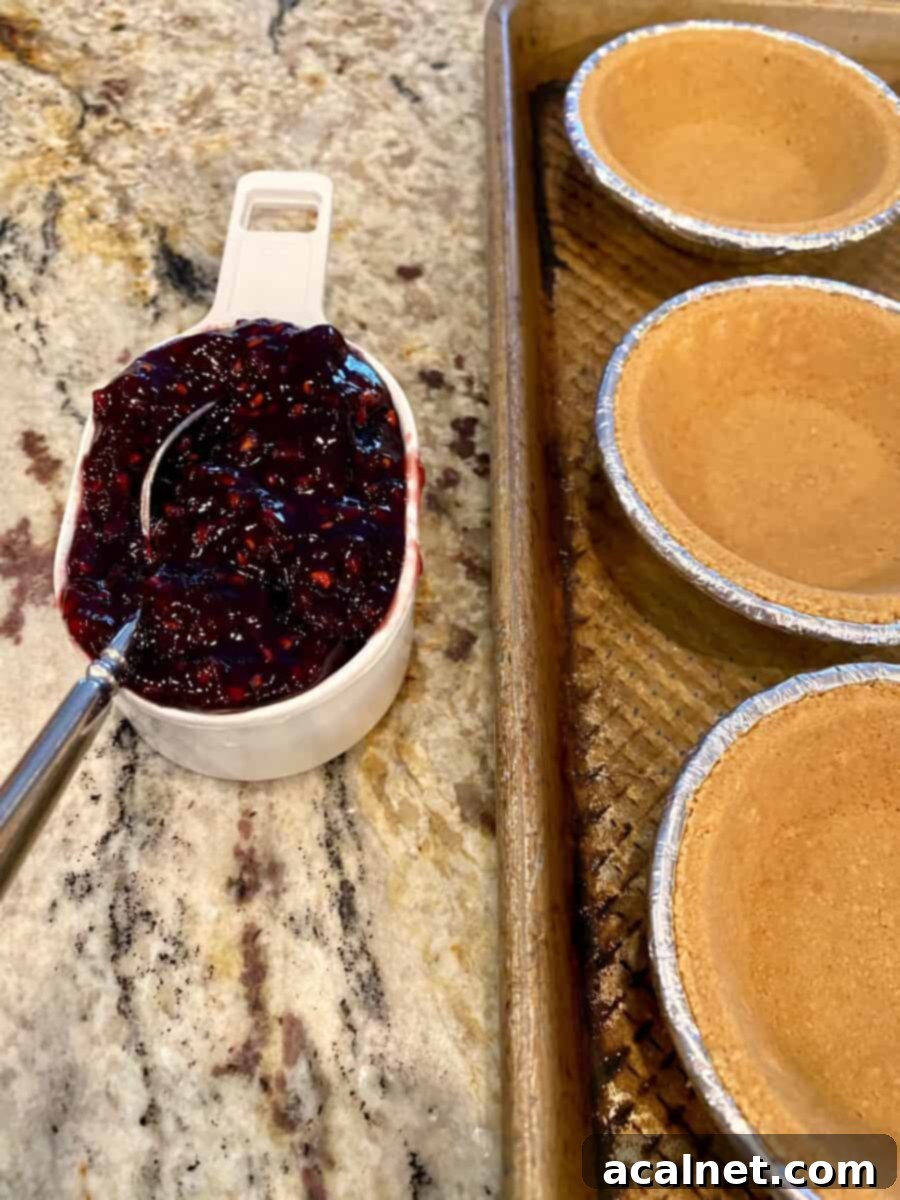
Step One: Prepare the Crusts with Jam. Place your pre-baked or store-bought graham cracker mini pie crusts on a large baking sheet for easy handling. Drop approximately one generous teaspoon of your chosen jam onto the bottom of each crust. This creates a sweet, fruity base for the peanut butter filling.
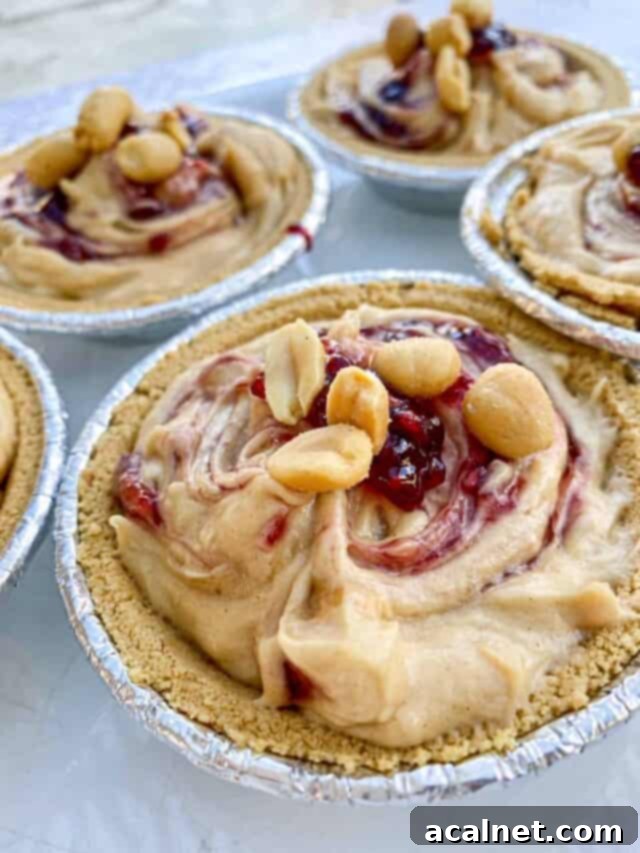
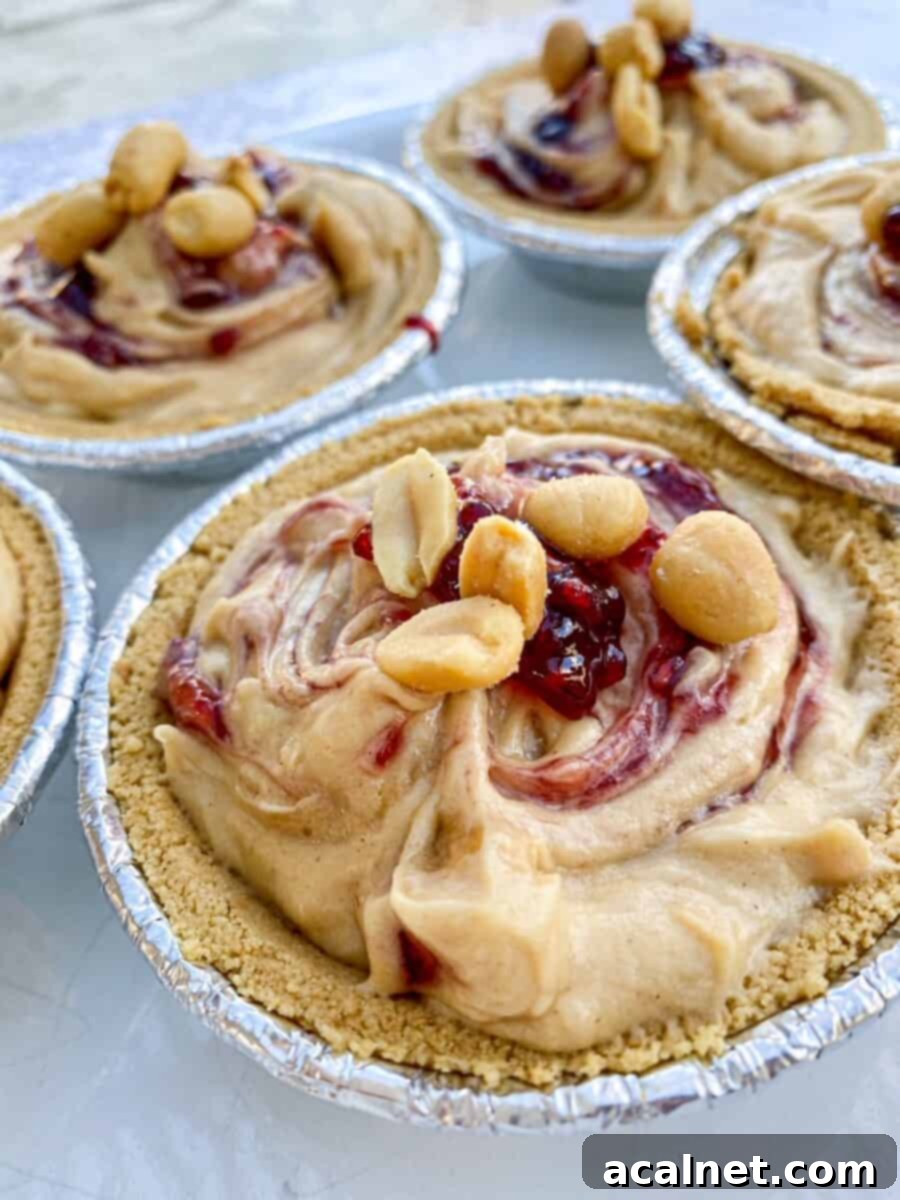
Step Two: Add Peanut Butter Filling and Swirl. Carefully spoon about three tablespoons of the prepared peanut butter pie filling mixture directly on top of the jam layer in each crust. Then, dollop another small teaspoon of jam on top of the peanut butter filling. Using a thin, sharp knife or a skewer, gently swirl the jam and peanut butter together. Be delicate to create beautiful marbling without fully mixing the two layers.
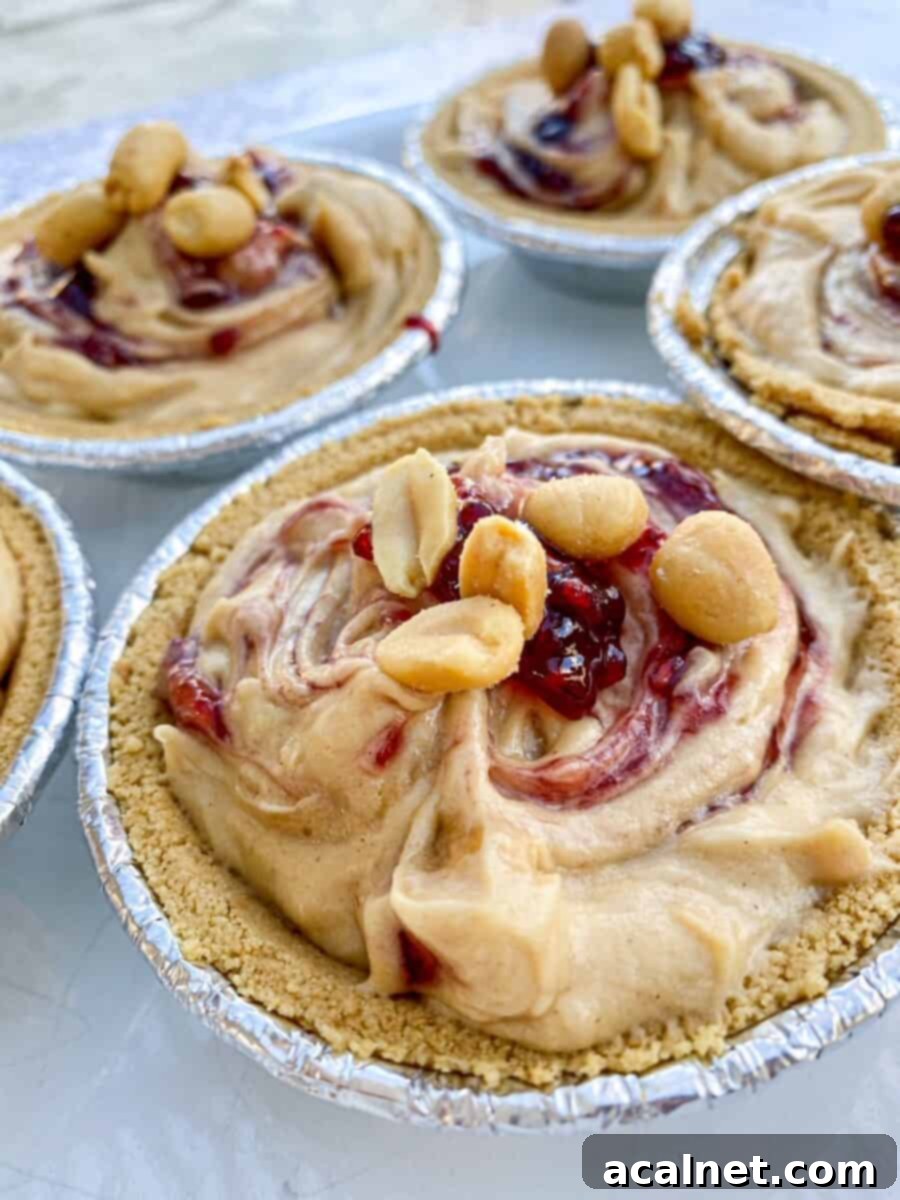
Step Three: Garnish and Chill. For an extra touch and a hint of crunch, top each pie with a few chopped peanuts. This enhances the classic peanut butter flavor and adds textural contrast. Once assembled, place the baking sheet with the mini pies into the refrigerator, uncovered. Chill them until they are firm, which typically takes about an hour. Chilling allows the filling to set perfectly, making for neat slices and a refreshing treat.
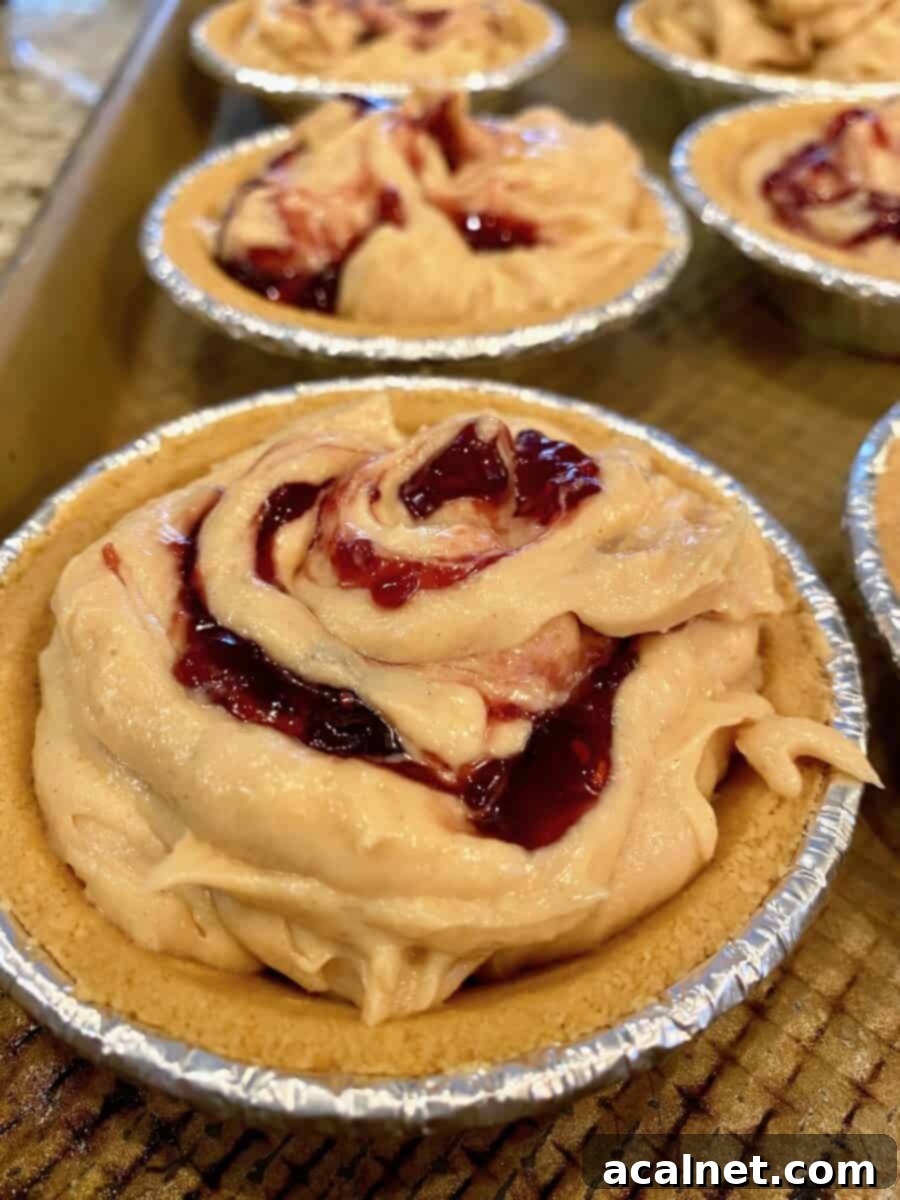
Once firm, these delightful mini pies are ready to be served. The combination of sweet, creamy peanut butter and tangy fruit jam is a timeless classic that brings comfort and joy in every bite. They are not only delicious but also visually appealing, perfect for individual servings at any gathering.
How to Make an Indulgent Peanut Butter and Reese’s Pie
For those who adore the iconic combination of chocolate and peanut butter, transforming this no-bake pie into a Reese’s-inspired delight is a must-try. These pies taste uncannily like a giant Reese’s Peanut Butter Cup, but in a charming mini pie dish, making them impressive enough to serve even after a formal holiday meal. They offer a delightful blend of rich flavors and varied textures, creating an unforgettable dessert experience.
Begin by preparing the velvety peanut butter filling as directed in the previous section. Once your filling is ready, you’re all set to infuse it with the irresistible taste of Reese’s.
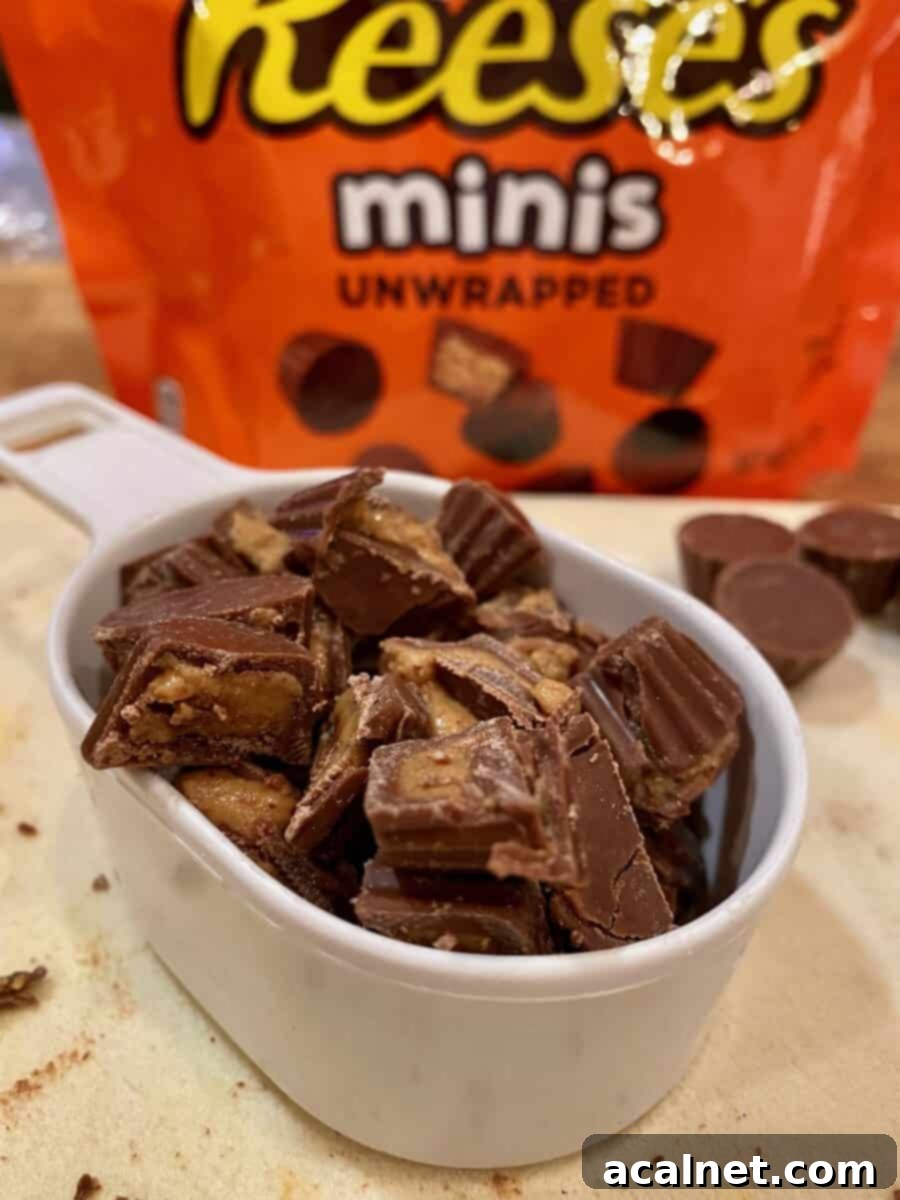
Step One: Prepare and Layer the Reese’s. Take your Reese’s Minis and slice each one into two or three smaller, bite-sized pieces. This ensures that every forkful of pie will have delightful chunks of candy. Distribute a few portions of these sliced Reese’s minis onto the bottom of each graham cracker pie crust, creating an initial layer of chocolate-peanut butter goodness.
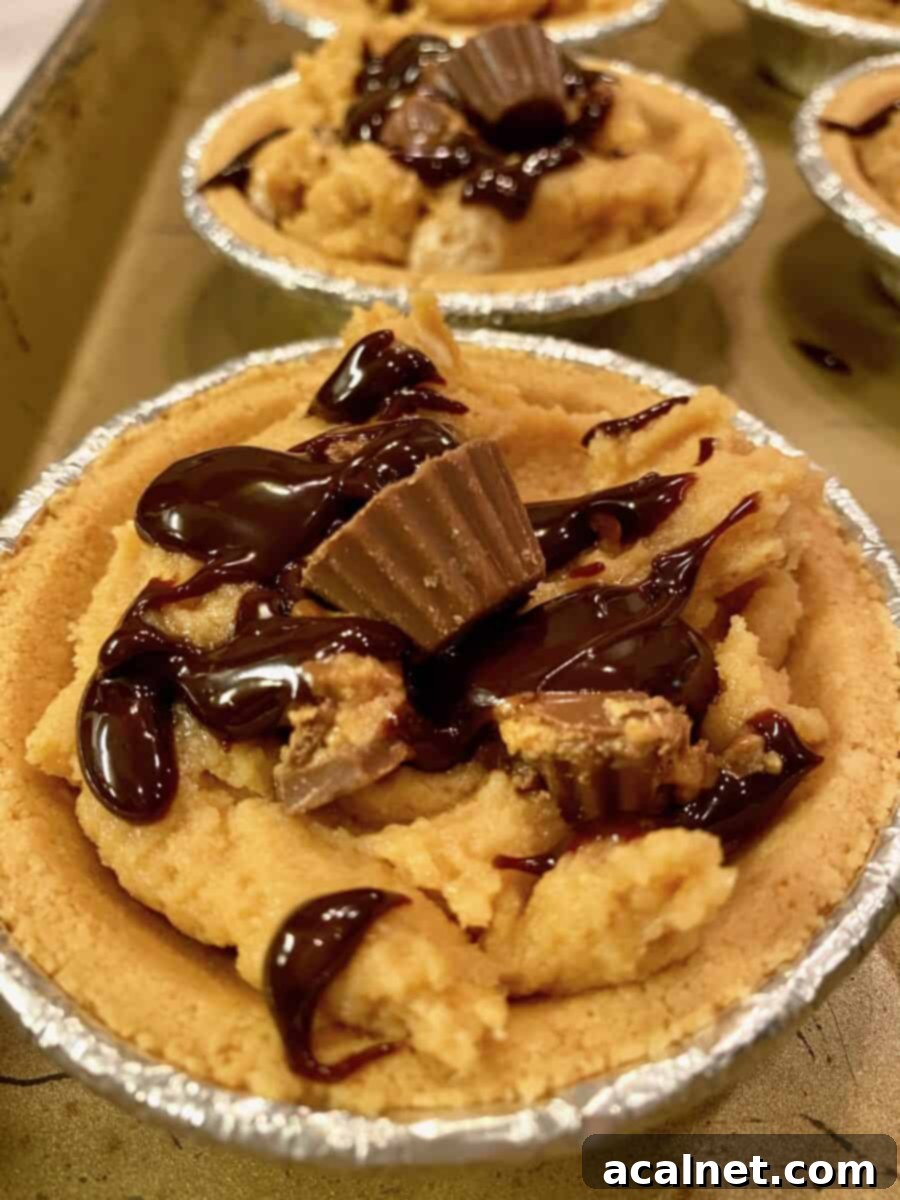
Step Two: Fill and Top with More Reese’s. Spoon about three generous tablespoons of your creamy peanut butter mixture on top of the candy layer in each crust. Once the filling is in place, artfully arrange a few additional sections of the sliced Reese’s Minis on top of the peanut butter layer. These will be visible and provide another layer of flavor and texture.
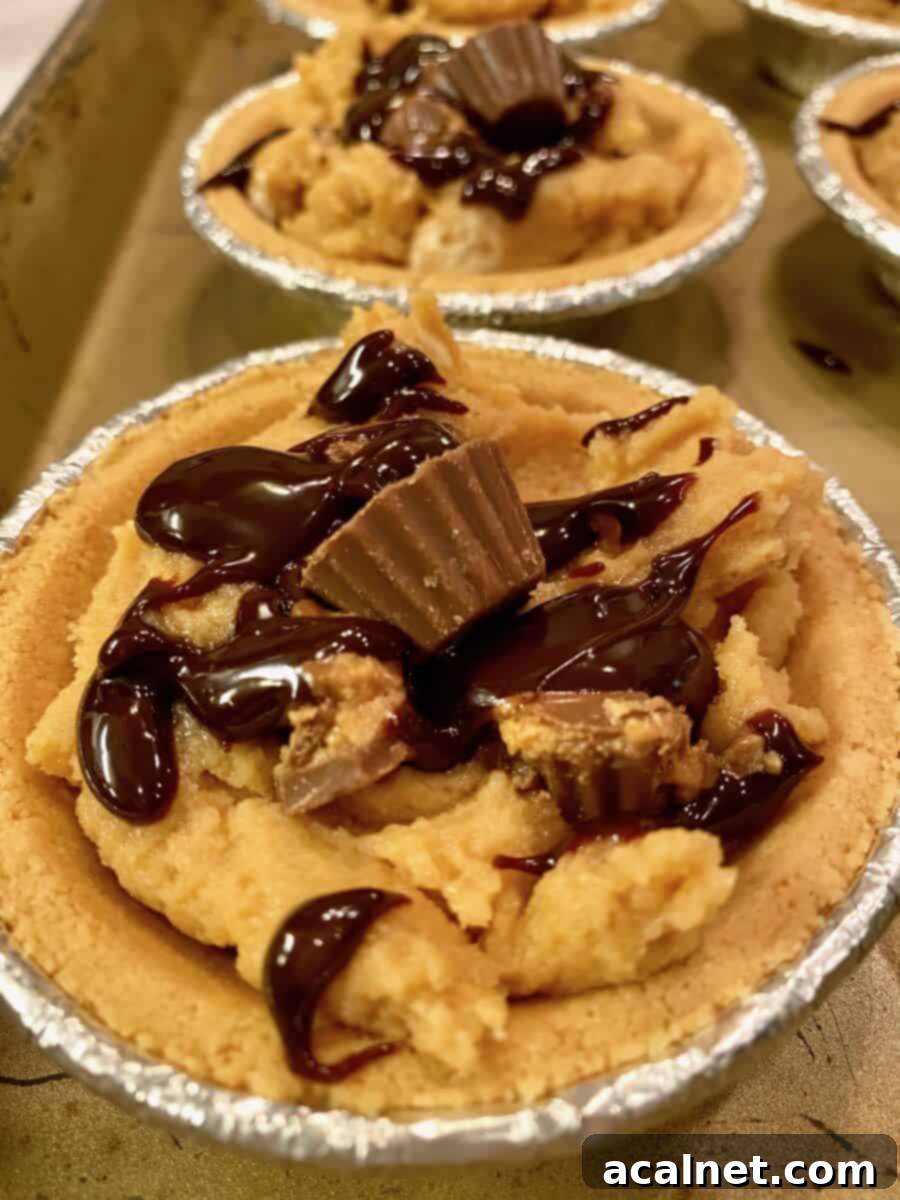
Step Three: Optional Fudge Drizzle and Garnish. For an even more decadent experience, drizzle about a teaspoon (or more, if you’re feeling indulgent!) of hot fudge topping over each pie. This optional garnish truly brings out the “Reese’s Peanut Butter Cup” flavor. Finally, for a finishing touch and a clear indication of the deliciousness within, place one whole Reese’s Mini on top of each pie.
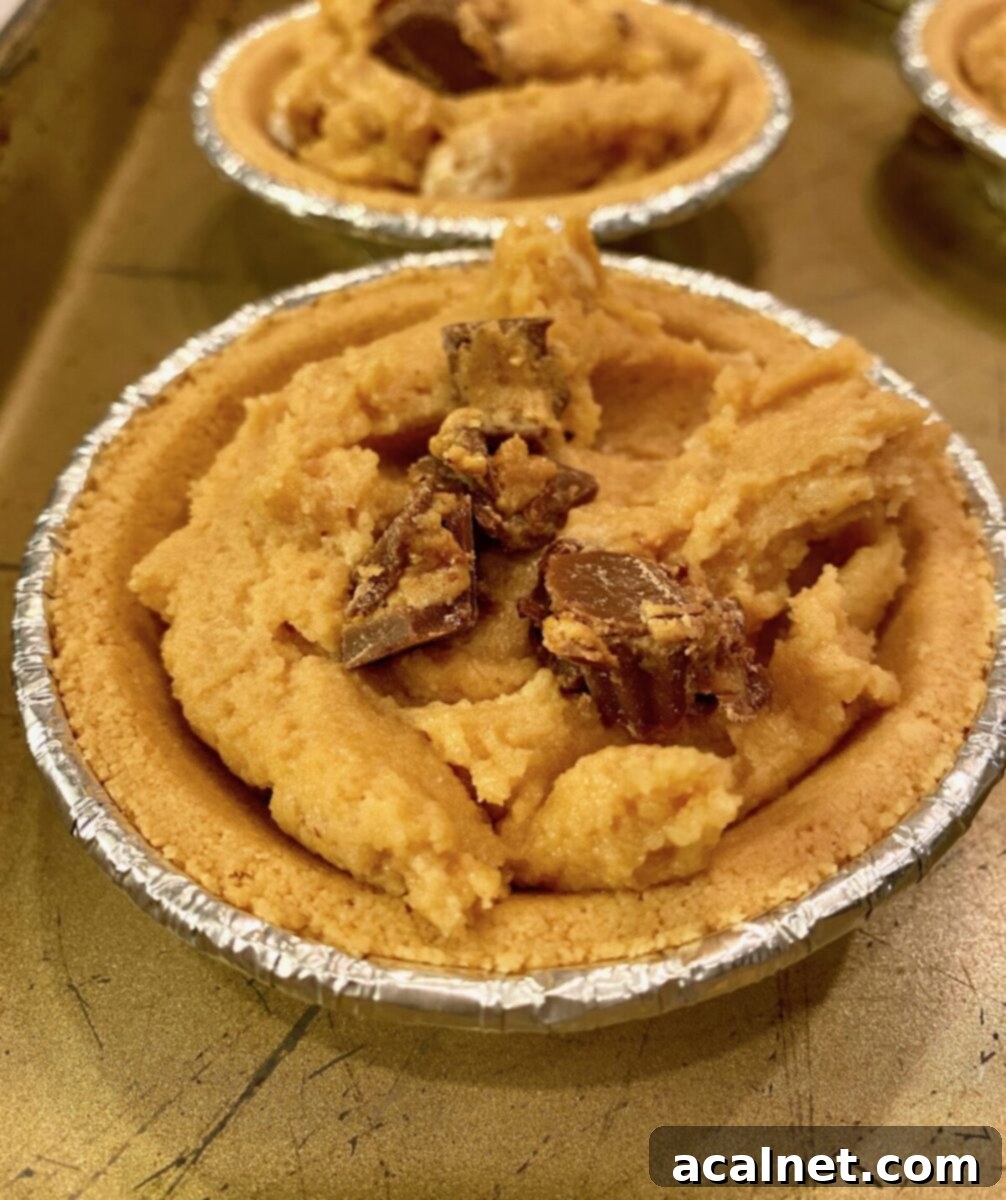
The addition of a teaspoon or so of hot fudge sauce creates a luxurious and utterly delicious topping, helping each little peanut butter pie taste almost exactly like a beloved Reese’s peanut butter cup. The combination of textures and flavors is simply irresistible, making this variation a true showstopper.
Top Tips and Frequently Asked Questions
To ensure your Easy No Bake Peanut Butter Pie turns out perfectly every time, here are some helpful tips and answers to common questions:
Tip: Chill Your Whipping Cream Equipment
For the best whipped cream, always use very cold heavy whipping cream. For an even fluffier result, chill your mixing bowl and whisk attachment in the freezer for 10-15 minutes before whipping. This helps the cream maintain its temperature and incorporate more air, leading to perfectly soft peaks.
Tip: Soften Cream Cheese Properly
Ensure your cream cheese is truly at room temperature and softened. This prevents lumps in your filling and ensures a smooth, uniform consistency when blended with the peanut butter and other ingredients. You can speed up the softening process by cutting the cream cheese into smaller cubes and letting it sit on the counter for about 30 minutes, or gently warming it in the microwave for 10-15 seconds.
FAQ: Can I use Cool Whip topping instead of whipping cream?
Yes, you certainly can use a thawed store-bought whipped topping like Cool Whip as a substitute for freshly whipped cream. However, be aware that the pie filling will have a slightly different texture. In my experience with this recipe, pies made with fresh whipping cream have a notably creamier, richer, and more luxurious texture compared to those made with imitation whipped topping. If you do use Cool Whip, gently combine the softened cream cheese, peanut butter, and butter with the non-dairy whipped topping.
FAQ: Will this work with a traditional, flaky pie crust?
It absolutely will! This recipe is incredibly adaptable to different crust types. If you opt for a traditional, flaky pie crust, just be sure to bake and cool the pie crust completely before adding the no-bake peanut butter pie filling. A warm crust would melt the delicate filling, ruining the texture.
FAQ: Do I have to use raspberry jam?
Not at all! There are lots of delicious options here. While I’m a big fan of raspberry jam for its sweet-tart balance, you should definitely use your favorite fruit jam. Strawberry, grape, apricot, or even a mixed berry jam would work wonderfully. Feel free to experiment with what you love best!
FAQ: Can I use chunky peanut butter for the filling instead of creamy?
Yes, absolutely! No Bake Peanut Butter Pie is also delicious with chunky peanut butter. It adds an extra layer of texture and intensified peanut crunch, which many people adore. My family just prefers the smooth, uniform texture that creamy peanut butter provides in the filling, which is why I list it as the primary ingredient. Feel free to choose according to your preference!
Pie Crust Options: The Perfect Base for Your Dessert
While the mini pies are undeniably fun to serve and perfectly portioned, this recipe is incredibly versatile and can easily fill a standard 9-inch pie dish. This flexibility allows you to choose the presentation that best suits your occasion and preference. Whether you’re making individual treats or a grand centerpiece, the filling quantity remains ideal.
As this is a no-bake peanut butter dessert, convenience is key! You have several excellent choices for your crust:
- Store-Bought Graham Cracker Crust: This is the ultimate time-saver and a classic choice for no-bake pies. Its slightly sweet, crumbly texture perfectly complements the creamy peanut butter filling.
- Homemade Graham Cracker Crust: If you have a few extra minutes, a homemade graham cracker crust can add an extra layer of freshness. Simply crush graham crackers, mix with melted butter and a touch of sugar, press into your pie dish, and chill.
- Oreo Cookie Crust: For chocolate lovers, an Oreo crust is a fantastic alternative. Crush whole Oreos (filling included!), mix with melted butter, and press into your pan. This creates a rich, dark base that pairs beautifully with peanut butter.
- Homemade Flaky Pastry Crust: If you prefer a more traditional pie experience and don’t mind a bit of baking, a scratch-made flaky pastry crust can also be used. Just ensure that the pastry crust is fully baked and completely cooled before you add the creamy peanut butter filling. A warm crust would cause the filling to melt and not set properly.
No matter which crust you choose, the goal is to have a sturdy, delicious base that can hold the rich, creamy filling once it’s chilled. This adaptability ensures that everyone can enjoy this fantastic dessert, regardless of their baking preferences or time constraints.
The convenience of a no-bake crust, whether store-bought or quickly homemade, is one of the many reasons this peanut butter pie is such a beloved recipe. It frees up your oven and your time, letting you focus on the delicious, creamy filling and fun embellishments.
Storage Tips for Your No-Bake Peanut Butter Pies
Proper storage is essential to keep your Easy No Bake Peanut Butter Pies fresh and delicious for as long as possible. Since they are a dairy-based dessert, refrigeration is key.
Refrigeration: Store the peanut butter pies lightly covered with plastic wrap in the refrigerator. They will maintain their creamy texture and delightful flavor for 5-7 days. Be sure to cover them gently to prevent the top from drying out or absorbing other odors from the fridge.
Freezing for Later: These pies are also excellent for making ahead of time and freezing! This is particularly useful if you’re preparing for a party or simply want to have a sweet treat on hand. To freeze, place the pies (mini or a full-size pie) uncovered in the freezer for about 1-2 hours until they are firm. Once firm, wrap them tightly in plastic wrap, then place them in a zip-top freezer bag or an airtight container. They can be stored in the freezer for up to 1 month. To serve, simply defrost them in the refrigerator for one day before enjoying. This ensures they return to their perfect creamy consistency.
More Delicious Recipes to Satisfy Your Sweet Tooth
Whether baked or no-bake, pies and other desserts are a delicious indulgence any time of year and perfect for any holiday celebration. If you enjoyed creating this Easy No Bake Peanut Butter Pie, I think you’ll absolutely love these other fantastic recipes from my kitchen:
- Chocolate Strawberry Pie: A divine combination of rich chocolate and fresh, juicy strawberries in a beautiful pie.
- Strawberry Rhubarb Pie: This is my Mom’s cherished recipe, a true family favorite that captures the essence of spring and summer.
- Perfect Pie Crust: Master the art of homemade pie with this reliable, flaky pastry crust recipe, perfect for all your baked pie creations.
- No Peel Apple Cake: So incredibly easy to make! This delightful apple cake bakes beautifully in a pie plate and requires no peeling of apples.
And beyond pies, from classic cookies to fudgy brownies and fluffy muffins, these are several of my all-time favorite baking recipes that are sure to inspire your next kitchen adventure:
- Homemade Biscuits (Easy, No Yeast Recipe)
- Chocolate Zucchini Cake
- Candy Cane Cookies
- Tiramisu Cake for Dessert
Recipe: Easy No Bake Peanut Butter Pie
This creamy combination of smooth peanut butter filling along with your choice of a blend-in sweet ingredient is easy, no-bake, and utterly delicious! Perfect for any gathering, it’s a dessert that consistently wows with minimal effort. While you have peanut butter on hand, don’t miss my Spicy Peanut Butter Noodle recipe for a flavorful dinner idea. For another delightful dessert, be sure to try Tiramisu Cake for Dessert!
Recipe Summary
- Prep Time: 15 minutes
- Chilling Time: 1 hour
- Total Time: 1 hour 15 minutes
- Servings: 12 mini pies (or one 9″ pie)
- Author: Melinda O’Malley Keckler
Ingredients
Peanut Butter Pie Filling Ingredients
- 1 cup whipping cream, whipped
- 1 (8-ounce) package cream cheese, softened
- 1 cup creamy peanut butter
- 1 cup granulated sugar
- 2 tablespoons unsalted butter, melted
Optional Ingredients to Blend with Filling (Choose either jam or chocolate)
- ½ cup raspberry jam, divided (or your favorite jam)
- 1 ¼ cup Reese’s minis unwrapped, divided, or your choice of chocolate chips
- ¼ cup peanuts, optional topping garnish
- ¼ cup hot fudge topping, optional topping garnish if using Reese’s minis
Pie Crust
- 12 graham cracker mini-pie crusts, or one 9″ pre-baked pie crust (graham cracker or traditional)
Instructions
Blend Ingredients for the Filling
- Whisk the whipping cream in a chilled bowl until very soft peaks form (about 3-4 minutes). Set aside.
- In a separate mixing bowl, blend the softened cream cheese, creamy peanut butter, granulated sugar, and melted butter until the mixture is completely smooth and uniform.
- Gently stir the whipped cream into the peanut butter mixture until just combined. Be careful not to overmix to maintain the airy texture.
- Place the 12 graham cracker mini-pies on a large baking sheet, ready for assembly.
1. Assembly Directions If Using Jam:
- Add about a teaspoon of your chosen jam onto the bottom of each mini pie crust.
- Spoon approximately three tablespoons of the creamy peanut butter mixture on top of the jam. Then, dollop another small teaspoon of jam on top of the peanut butter filling.
- Use a sharp knife or skewer to gently swirl the jam and peanut butter mixture, creating an appealing marbled effect.
- Top with a few chopped peanuts for garnish, if desired.
2. Assembly Directions If Using Reese’s Minis:
- Slice the Reese’s minis into two or three small pieces.
- Add a few portions of sliced Reese’s minis onto the bottom of each pie crust.
- Spoon about three tablespoons of the peanut butter mixture on top of the candy. Then, top with a few additional sections of the sliced candy.
- For an optional but highly recommended garnish, top with about a teaspoon of hot fudge topping and place a whole Reese’s mini on top.
Chill Time
- Place the baking sheet with the assembled mini pies in the refrigerator, uncovered.
- Chill until the pies are firm and set, which typically takes about an hour. This step is crucial for the perfect texture.
9″ Pie Crust Option
- One 9″ baked pie crust (either graham cracker or a traditional flaky pastry) can be substituted for the 12 mini pie crusts.
- If using jam or Reese’s minis for the 9″ pie: use half of your chosen blend-in (jam or chopped Reese’s) as a bottom layer in the crust.
- Fill the pie crust with the entire batch of peanut butter mixture.
- Dollop the remaining jam or Reese’s minis across the top of the filling.
- If using jam, use the tip of a sharp knife to gently swirl the ingredients together on the surface.
- Chill the 9″ pie in the refrigerator for at least 2-3 hours, or until completely firm, before slicing and serving.
Notes
- Nutritional facts were calculated using raspberry jam. If you are using a different type of jam or the Reese’s minis, please review the nutritional facts listed on their packaging for accurate information.
- If using Cool Whip in place of whipped cream, gently combine the softened cream cheese, peanut butter, and melted butter with the thawed non-dairy whipped topping until smooth.
Estimated Nutritional Information (per mini pie, with raspberry jam)
Please note: The nutrition details provided below are estimated using a food database, so they are a rough estimate and not an exact scientific measurement. Values may vary based on specific brands and exact quantities used.
- Calories: 468 kcal
- Carbohydrates: 42g
- Protein: 9g
- Fat: 32g
- Saturated Fat: 13g
- Polyunsaturated Fat: 4g
- Monounsaturated Fat: 13g
- Trans Fat: 1g
- Cholesterol: 53mg
- Sodium: 239mg
- Potassium: 231mg
- Fiber: 2g
- Sugar: 29g
- Vitamin A: 604 IU
- Vitamin C: 1mg
- Calcium: 52mg
- Iron: 1mg
Did you try this recipe?
Leave a comment below or tag @crinkledcookbook on Instagram, snap a photo and tag it #crinkledcookbook
