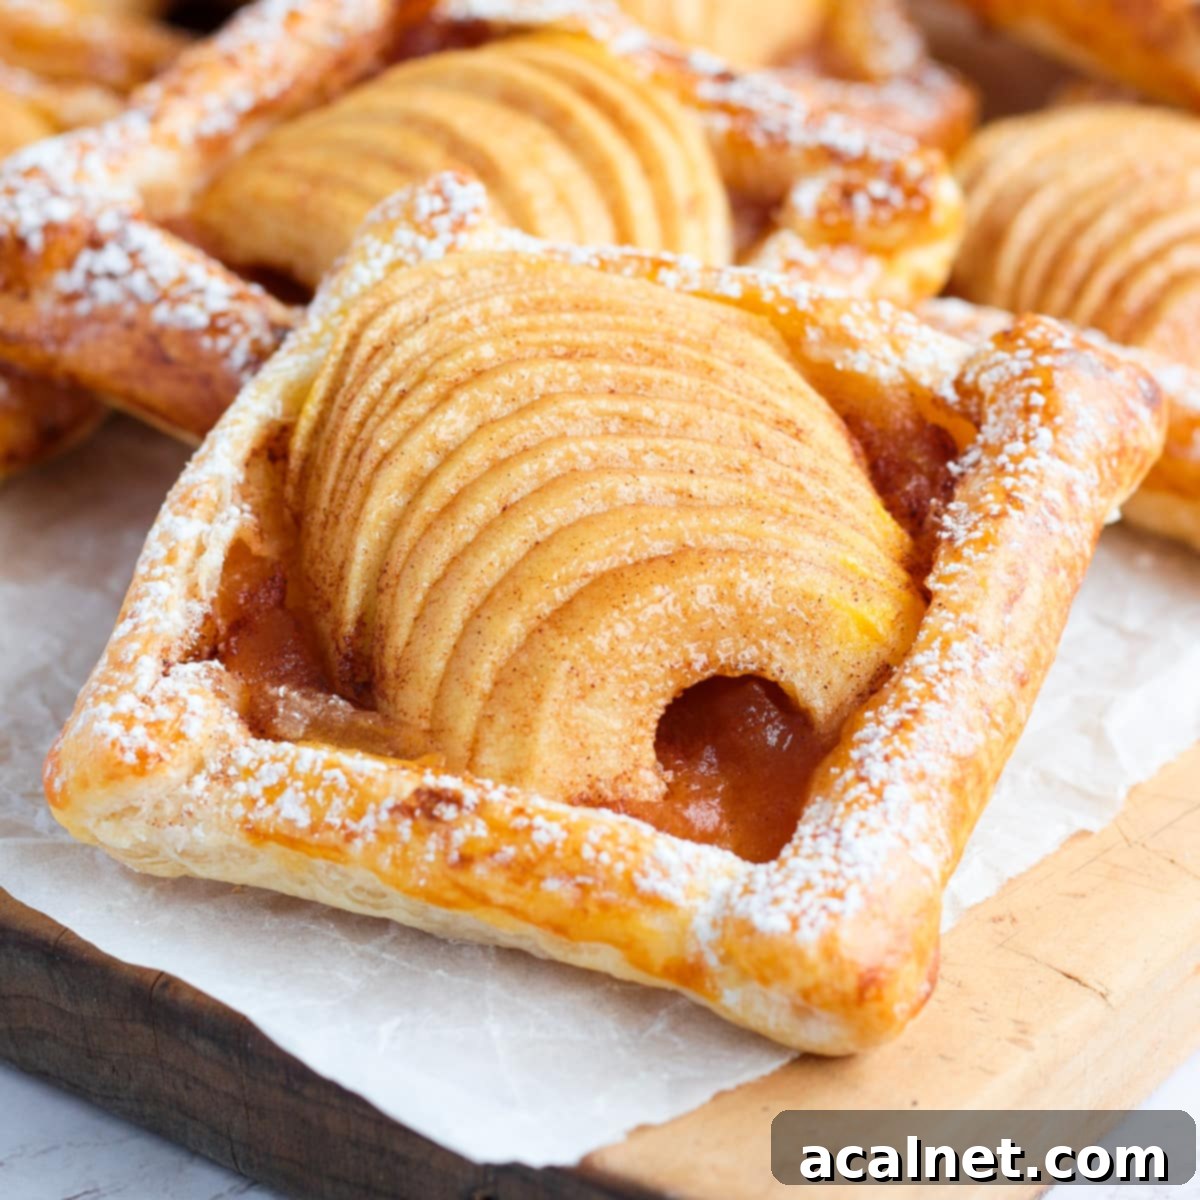
Easy & Flaky Puff Pastry Apple Tartlets: Your Quick Guide to Delicious Homemade Apple Tarts
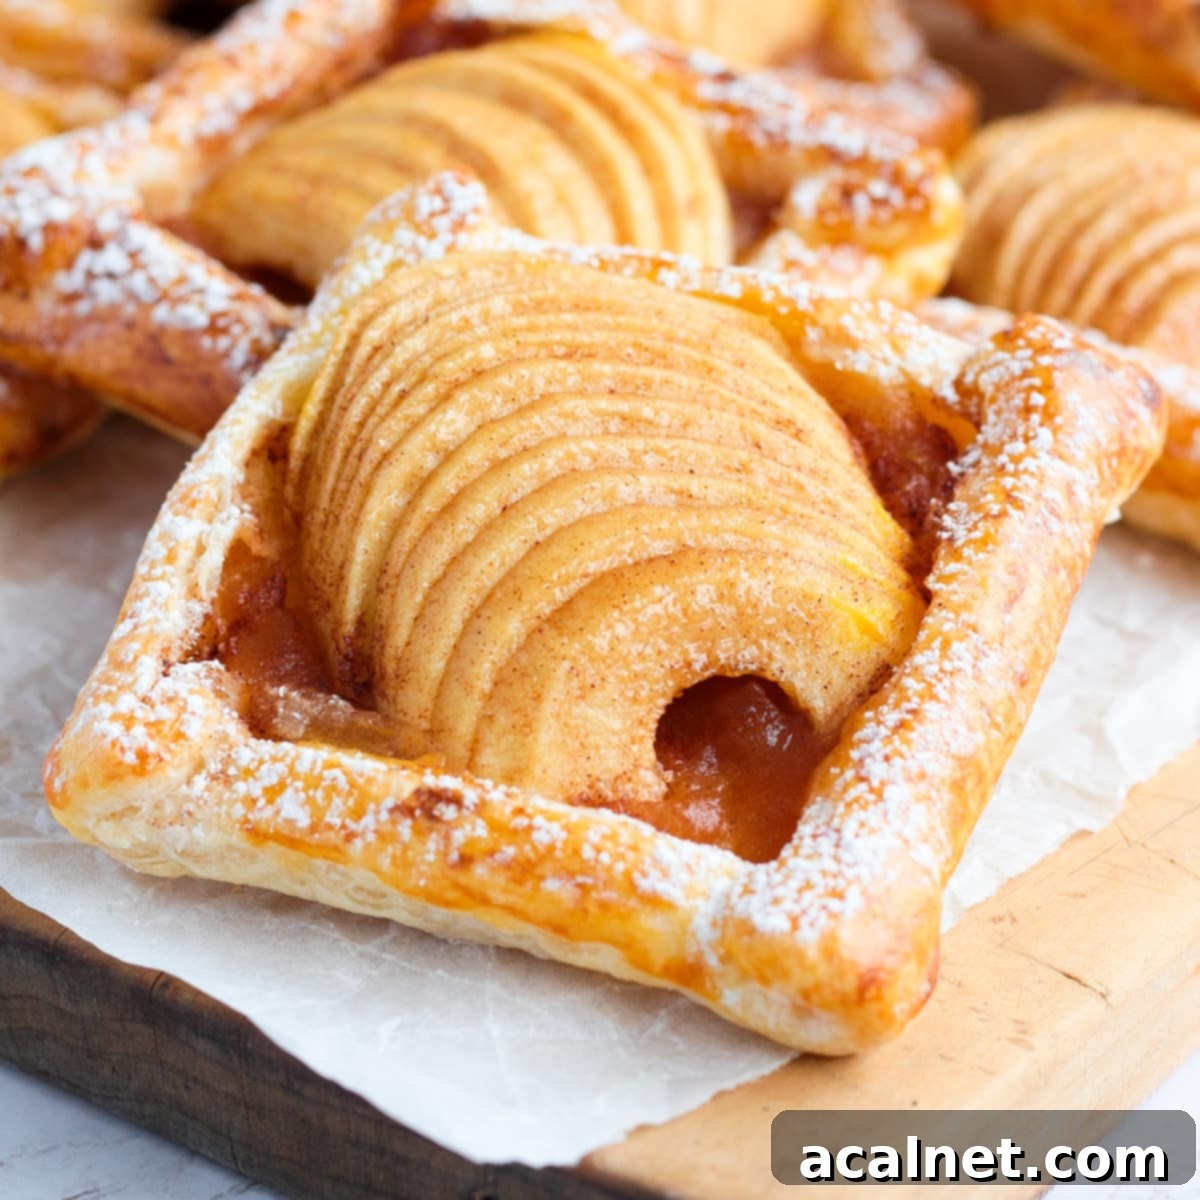
Unleash your inner baker with these incredibly simple yet utterly delicious puff pastry apple tartlets! Requiring just 6 core ingredients, these delightful treats are perfect for any season, particularly comforting during autumn and winter. Each tartlet features a heavenly combination of rich homemade (or quality store-bought) applesauce, thinly sliced fresh apples, and a warming hint of cinnamon, all nestled within a beautifully golden, flaky pastry crust. This recipe offers a swift and satisfying way to create elegant individual desserts that taste like they came straight from a French patisserie, without the fuss.
[feast_advanced_jump_to]
Why These Puff Pastry Apple Tartlets Are a Must-Try
There’s an undeniable charm and comfort in a freshly baked apple tart, and these individual puff pastry apple tartlets take that experience to a new level of ease and delight. What makes them truly special, and why we can’t stop making them, boils down to their perfect blend of classic flavors and incredible convenience. The timeless pairing of sweet and slightly tart apples, aromatic cinnamon, and a hint of brown sugar creates a truly heartwarming experience, all encapsulated in a wonderfully flaky pastry crust that simply melts in your mouth.
This recipe cleverly leverages readily available ingredients and smart shortcuts without compromising on taste or quality. By using readily available frozen Puff Pastry, we brilliantly eliminate the most time-consuming and often intimidating step of tart making – preparing the dough from scratch. Couple this with an applesauce filling that can either be whipped up homemade in advance for superior, customizable flavor or simply purchased from the store for ultimate speed, and you have a dessert that’s not just easy but exceptionally quick to prepare. This makes it perfect for last-minute guests, a weekend baking project, or a comforting treat on a busy weeknight.
These mini apple tarts are a brilliant solution for when you crave a sophisticated, homemade dessert but are short on time. They offer all the rustic charm and deliciousness of larger tarts, but in perfectly portioned individual servings, making them ideal for entertaining, afternoon tea, a delightful breakfast, or simply a personal treat. They are a beloved choice during the colder months of Fall and Winter, bringing warmth and coziness to any table. Think of them as a delightful, quicker alternative to a traditional French Apple Tart, a more manageable mini version of a large Puff Pastry Apple Tart, and an even flakier, more delicate take on an Apple Galette. Their simplicity makes them approachable for bakers of all skill levels, delivering impressive, praise-worthy results every time.
Discover More Flaky & Fruity Puff Pastry Tart Recipes:
- Irresistible Puff Pastry Pear Tartlets
- Easy Cherry Tartlets with Puff Pastry
- Simple Large Puff Pastry Apple Tart
Essential Ingredients for Perfect Apple Tartlets
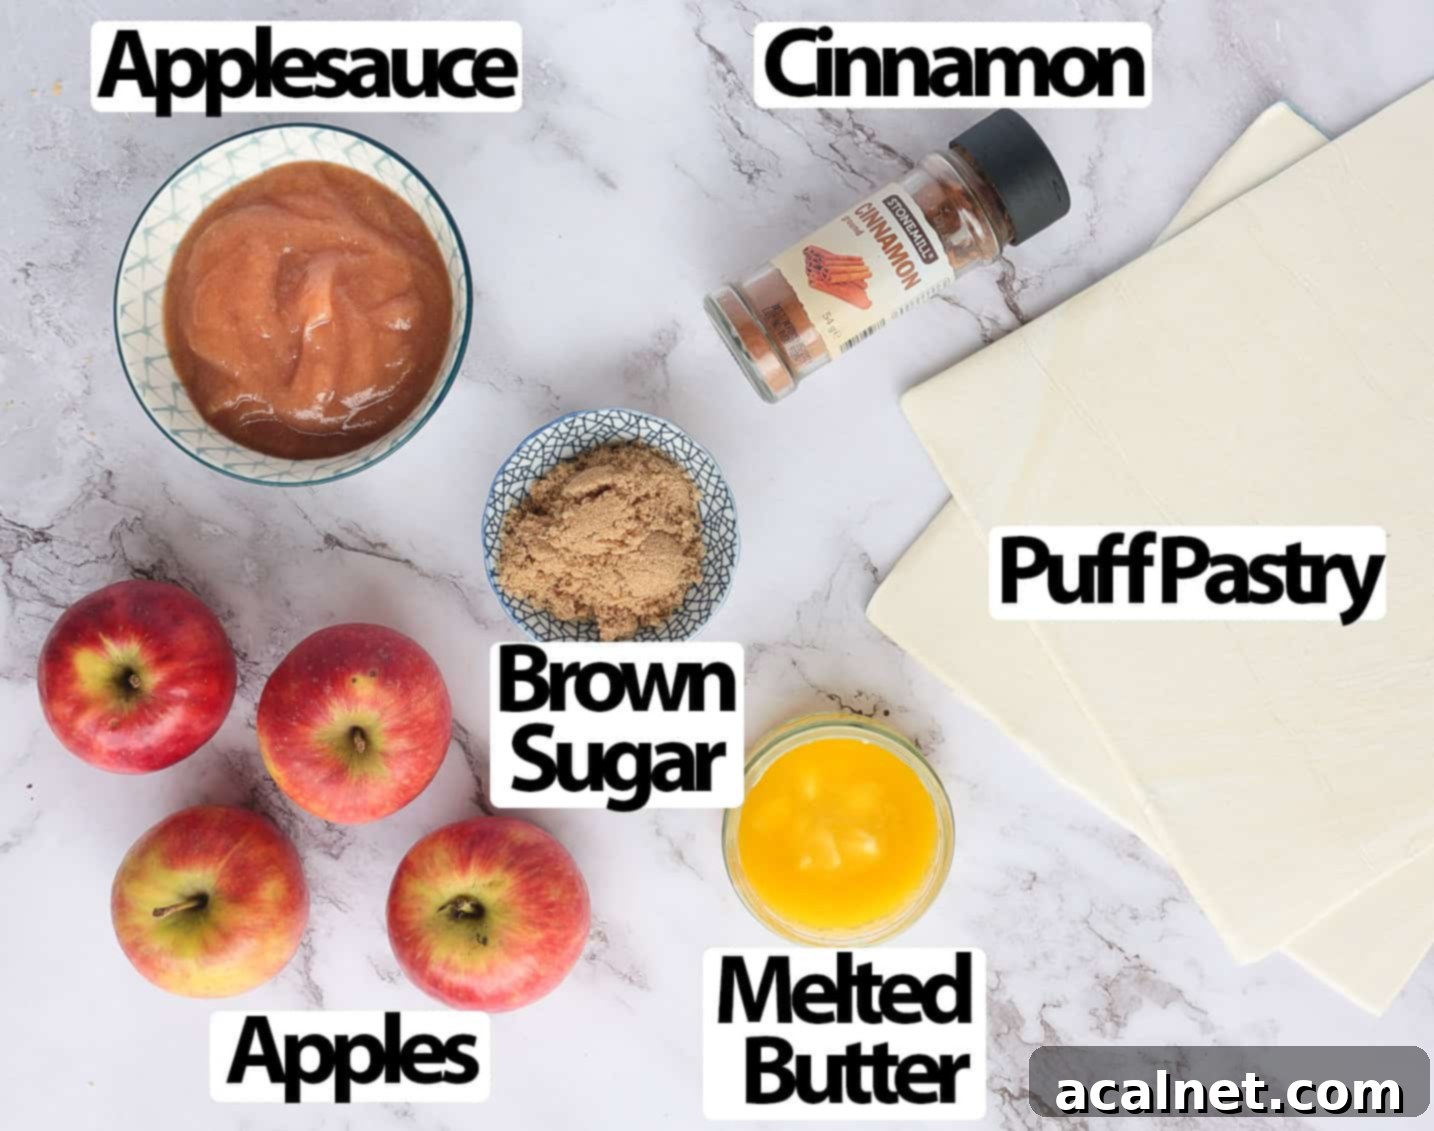
For precise measurements and full instructions, please refer to the recipe card below.
Crafting these delectable apple tartlets requires just a handful of quality ingredients, each playing a crucial role in the final flavor and texture. Here’s a detailed look at what you’ll need to create these rustic yet elegant desserts:
- Puff Pastry: The foundation of our incredibly flaky crust! I highly recommend using high-quality Frozen Puff Pastry Sheets, typically sold in packs of two, each around 25x25cm (10×10 inches). For the absolute best flavor and a rich, buttery flakiness, try to find an all-butter puff pastry. Many conventional frozen puff pastries use shortening or oil, which will still work, but an all-butter version truly elevates the taste and texture. Remember to let it thaw sufficiently but keep it cold for optimal handling – a cold pastry is a happy pastry!
- Butter: An indispensable ingredient for our irresistible glaze. Melted Unsalted Butter is my go-to choice, as it allows you to precisely control the overall saltiness of your dessert. However, if you’re a fan of a sweet-and-savory profile, using Salted Butter will introduce a wonderful depth, reminiscent of a delicious salted caramel flavor that pairs exquisitely with apples and cinnamon.
- Applesauce: This component provides a moist, flavorful, and slightly tangy base for our thinly sliced fresh apple slices. While store-bought applesauce offers a fantastic shortcut for those busy days, making your own homemade applesauce allows you to control the sugar content and avoid unwanted additives, delivering a purer, more intense apple flavor. If using store-bought, opt for an unsweetened or lightly sweetened variety to best balance the tartlet’s overall sweetness. You can even infuse your homemade applesauce with extra spices or a touch of lemon zest for added complexity.
- Apples: The choice of apple variety greatly influences the tartlet’s final texture and taste. You want apples that will soften beautifully when baked but still hold their shape, preventing a mushy filling. Pink Lady Apples are excellent for their balanced sweet-tart flavor and firm texture, which is why I often use them. If you prefer a more pronounced tartness to cut through the sweetness, Granny Smith Apples are an ideal choice, renowned for their ability to hold up well to baking. For inherently sweeter apples, a small squeeze of lemon juice can be added to the applesauce or brushed over the slices to brighten the flavors and prevent any premature browning. Other great baking apple choices include Honeycrisp (crisp and sweet), Fuji (sweet and crunchy), Gala (mildly sweet), and Braeburn (firm and flavorful).
- Brown Sugar & Ground Cinnamon: These two come together with the butter to create a magic glaze that not only caramelizes the apples beautifully but also infuses the entire tartlet with warm, inviting, and utterly comforting spices. Brown sugar adds a lovely molasses note and helps in achieving that desirable golden-brown finish and sticky texture, while cinnamon is the quintessential partner to apples, enhancing their natural sweetness.
To finish these exquisite pastries, a simple dusting of Icing Sugar adds a touch of understated elegance and extra sweetness. But for those looking to truly indulge and elevate their creation, a drizzle of classic vanilla icing or a decadent Salted Caramel Sauce would take these individual apple tartlets to an extraordinary level of deliciousness, making them an unforgettable dessert experience.
Creative Flavor Variations for Your Apple Tartlets
While the classic apple and cinnamon combination is undeniably perfect and always a crowd-pleaser, these puff pastry tartlets are incredibly versatile. They invite you to experiment and unleash your culinary creativity with different fruits, spices, and toppings. Here are some inspiring ideas to customize your mini apple tarts:
- Different Fruit Fillings: Don’t limit yourself to apples! These tartlets are equally delicious with a variety of other fruits. I’ve personally had great success making a similar version with Pears, which offer a slightly different sweetness and a softer texture. Consider seasonal stone fruits like peaches, nectarines, or plums in the summer, or a medley of berries such as blueberries and raspberries for a burst of color and tangy contrast. The key is to adapt the underlying fruit purée (e.g., pear sauce, berry compote) to match your chosen fruit’s flavor profile.
- Spice It Up Even More: Cinnamon is a wonderful start, but a blend of warm spices can add even more depth and complexity to your apple tartlets. Expand your spice cabinet with additions like Allspice, freshly grated Nutmeg, a hint of ground Ginger, a subtle note of Star Anise, or fragrant Cardamom. A pinch of ground cloves can also bring a rich, autumnal aroma that complements apples beautifully. For ultimate convenience, you can even use a pre-mixed apple pie spice blend.
- Luscious Toppings for Texture and Flavor: Elevate both the texture and flavor of your tartlets with additional toppings. A sprinkle of chopped Nuts, such as toasted almonds, walnuts, or pecans, will add a delightful crunch and nutty richness once baked. A small handful of streusel (a crumbly mixture of oats, flour, butter, and sugar) can also create a lovely crumbly texture and extra sweetness. For a richer, creamier element reminiscent of a Danish pastry, consider adding a thin layer of sweetened cream cheese mixture under the applesauce.
- Brighten with Citrus Zest: A little finely grated orange or lemon zest can work wonders to brighten the overall flavors, especially if you’re using sweeter apple varieties. Incorporate the zest directly into the applesauce or sprinkle it delicately over the apples before baking.
- Sweet & Savory Twist: For an unexpected and sophisticated touch, try adding a thin slice of Brie or goat cheese under the applesauce before baking. The creamy, slightly savory cheese pairs surprisingly well with the sweet apples and flaky pastry.
Step-by-Step Guide: Crafting Your Own Puff Pastry Apple Tartlets
Creating these beautiful and delicious puff pastry apple tartlets is simpler than you might imagine. The process is divided into two main stages: first, preparing your ingredients and giving the puff pastry a crucial par-bake, then, assembling and finishing the tarts with their delightful apple topping. Follow these detailed steps for consistently perfect results:
- **Prepare Your Applesauce (if homemade):** If you’re opting for a homemade applesauce, begin by peeling, coring, and chopping your chosen apples into small pieces. Place them in a saucepan with a splash of water (about 1/4 cup) over medium heat and cook until they are wonderfully soft and easily mashed with a fork. Then, blend them using an immersion blender or food processor to achieve a smooth, lump-free applesauce. Allow it to cool completely to room temperature before using, as warm applesauce can make the pastry soggy.
- **Thaw the Puff Pastry Correctly:** Carefully remove your Frozen Puff Pastry Sheets from the freezer. It’s crucial to let them sit at room temperature for just about 5 to 10 minutes, or until they are pliable enough to unfold without cracking, but still noticeably cold. Over-thawing will make the pastry soft and difficult to handle, affecting its flakiness. If your puff pastry isn’t pre-rolled into sheets, gently roll it out on a lightly floured surface to a 25x25cm (10×10 inch) square, maintaining an even thickness.
- **Preheat Your Oven and Prepare Baking Trays:** Preheat your oven to a precise 180°C (350°F). Line one or two flat baking trays with baking paper (parchment paper) or a reusable silicone baking mat. This essential step prevents sticking and helps ensure the bottom of your tartlets cook evenly and become crisp.
- **Cut and Form Pastry Squares:** Carefully cut each rolled puff pastry sheet into four equal squares, each measuring approximately 12×12 cm (4.5×4.5 inches). This will yield eight perfectly portioned individual tartlets.
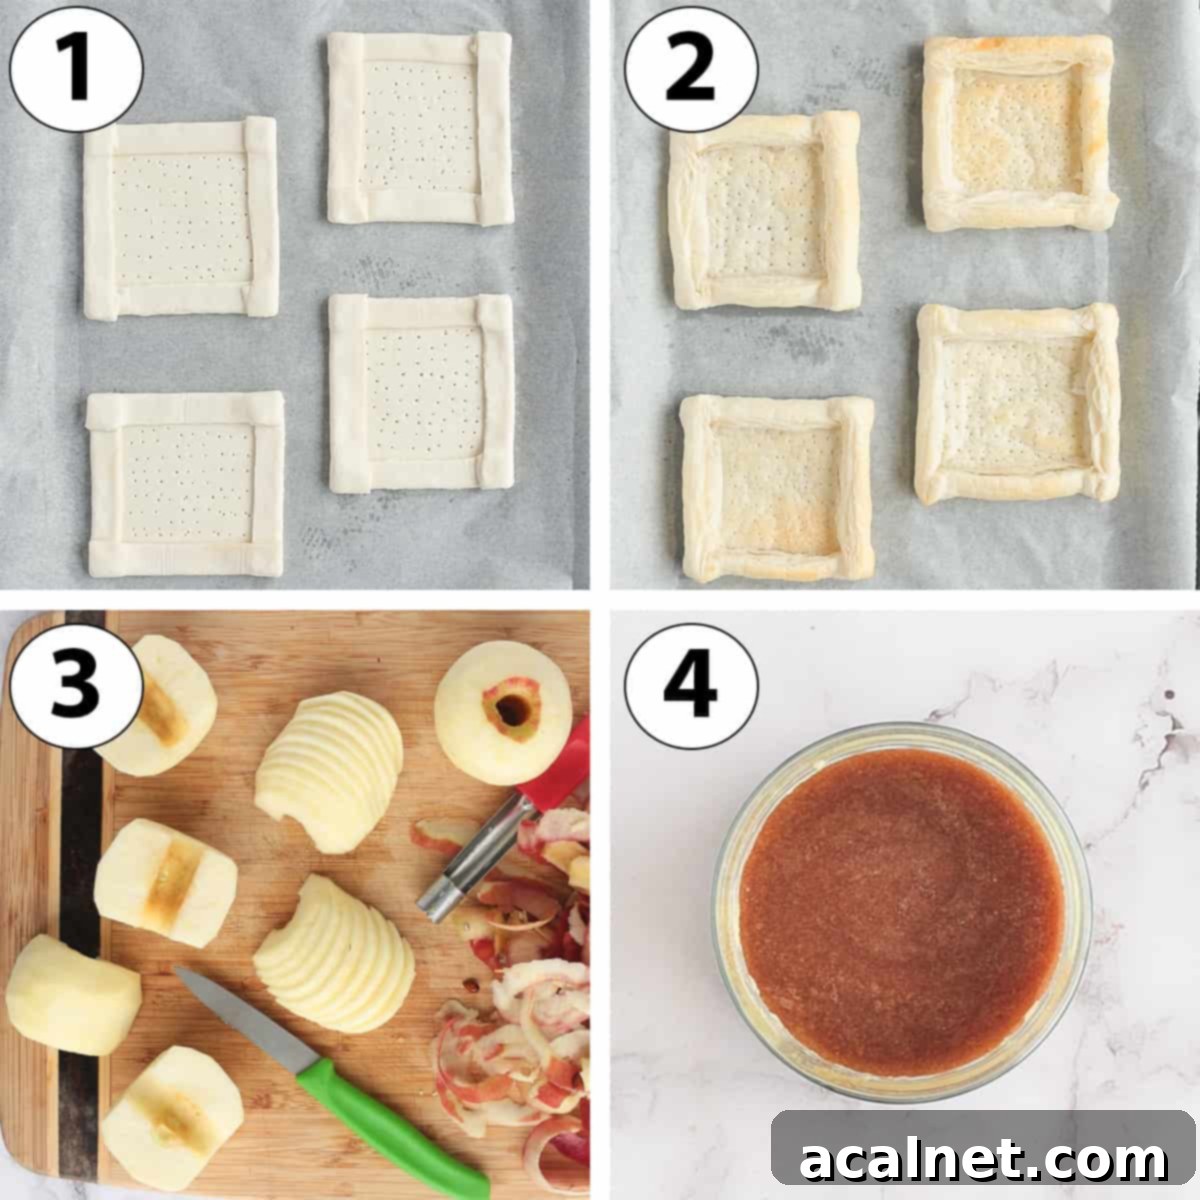
- **Photo 1: Create the Edges and Prick the Base:** Gently fold about 1 cm (0.4 inch) of each of the pastry edges inwards on all four sides of each square. Lightly press down on these folded edges to help them adhere to the main pastry base. This creates a beautifully raised border that will puff up dramatically, forming a protective barrier for your filling. Next, prick the center of each pastry square multiple times with a fork (within the folded border); this crucial step prevents the center from puffing up too much during the initial bake, ensuring a flat, stable base for your delicious apple filling. Place the prepared pastry squares on your lined baking trays.
- **Photo 2: Par-bake the Puff Pastry:** Transfer the baking trays to the preheated oven and par-bake for approximately 10 minutes. During this time, the pastry edges should slightly puff up, and the pastry base will begin to cook, achieving a light golden hue. This crucial initial bake helps create a crisp base and prevents a soggy bottom once the moist apple filling is added. Remove from the oven and let them cool slightly on the trays while you prepare the remaining elements.
- **Photo 3: Prepare Your Fresh Apples:** While the pastry is par-baking, focus on preparing your fresh apples. Peel each apple meticulously, then core it thoroughly to remove seeds and the fibrous center. Once cored, slice each apple in half. Using a small, sharp paring knife or, for best consistency, a mandoline, thinly slice each halved apple. Aim for slices that are uniformly thin, ideally about 2-3mm (around 1/8 inch) thick, as this ensures they cook evenly and become wonderfully tender without being mushy.
- **Photo 4: Make the Flavorful Glaze:** In a small bowl, combine the cooled down melted Butter with the Brown Sugar and Ground Cinnamon. Stir these ingredients together until they form a smooth, light, paste-like glaze. The cooling of the butter is particularly important here; if it’s too hot and liquid, it will simply run off the apple slices during application. A slightly thickened, cooled glaze will adhere much better, ensuring a rich, caramelized finish.
With all your components prepped and the puff pastry perfectly par-baked, it’s now time for the exciting part: assembling your mini apple pies for their final bake! This is where the visual appeal truly comes to life.
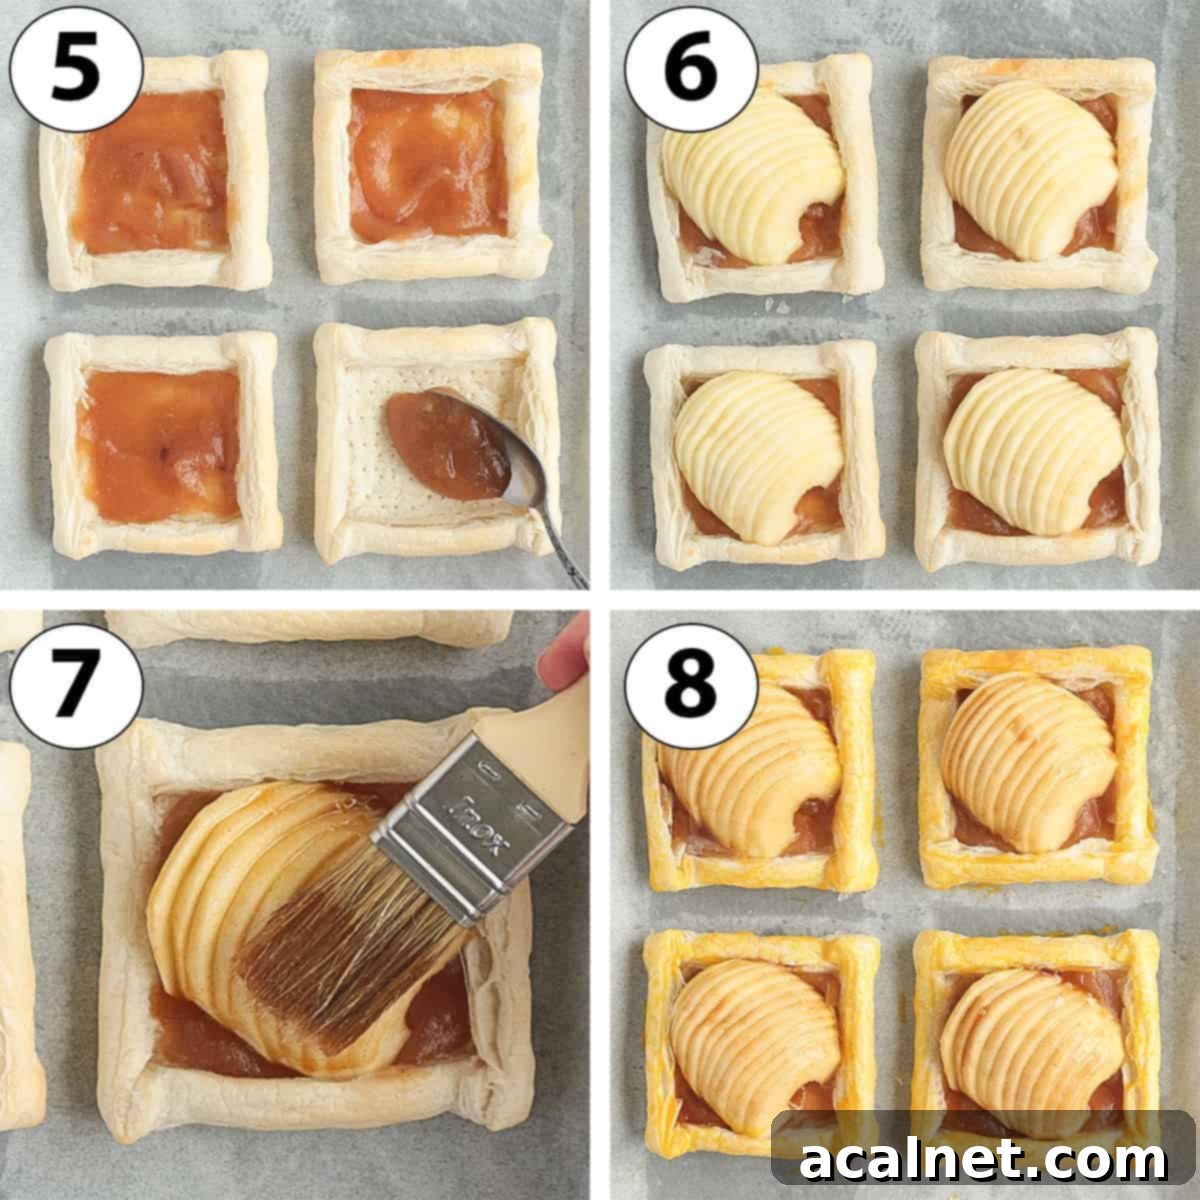
- **Photo 5: Add the Applesauce Base:** Take your par-baked puff pastry squares. Using a spoon or a small spatula, spread a generous layer of applesauce evenly over the center of each square, making sure to stay within the pricked area and leaving the raised edges clear. This creates a flavorful, moist bed for your fresh apples.
- **Photo 6: Artfully Arrange the Apple Slices:** Begin to arrange your thinly sliced apples over the applesauce. You can layer them slightly overlapping, creating a beautiful fanned or spiral pattern. For the most visually appealing result, orient them on a slight angle, stacking them to form an attractive mound.
Pro Tip: Depending on the precise size of your chosen apples and puff pastry squares, you might find you have a few extra slices, or need to adjust the number of slices per tartlet to fit neatly within the pastry border without overcrowding. Aim for a balanced look without overfilling, which could lead to soggy pastry.
- **Photo 7: Glaze for Golden Perfection:** Using a clean pastry brush, generously apply the prepared Butter, Cinnamon, and Brown Sugar Glaze over the arranged apple slices. Ensure every slice is coated evenly. This glaze will caramelize in the oven, imparting a beautiful shine and rich flavor.
Baker’s Note: It’s easier to brush the glaze when the butter has cooled sufficiently and begun to firm up; this allows it to stick better to the apples rather than simply dripping off. For an extra rich, deeply caramelized finish, you can apply half the glaze now, then brush the remaining half onto the apples halfway through the final baking time (around the 8-10 minute mark). This dual application helps to build layers of flavor and shine.
- **Photo 8: Optional Egg Wash for Shine:** For an extra golden and wonderfully shiny finish on your pastry edges, whisk a small Egg Yolk in a separate bowl with about a teaspoon of water to create an egg wash. Lightly brush this mixture over the exposed puff pastry edges. This step is purely aesthetic but adds a professional touch.
- **Final Bake:** Carefully return the assembled tartlets to the oven and bake for an additional 15 to 20 minutes. Keep an eye on them! You’ll know they’re ready when the pastry edges are beautifully golden brown and significantly puffed, and the apple slices are tender, slightly softened, and the glaze is bubbling and perfectly caramelized.
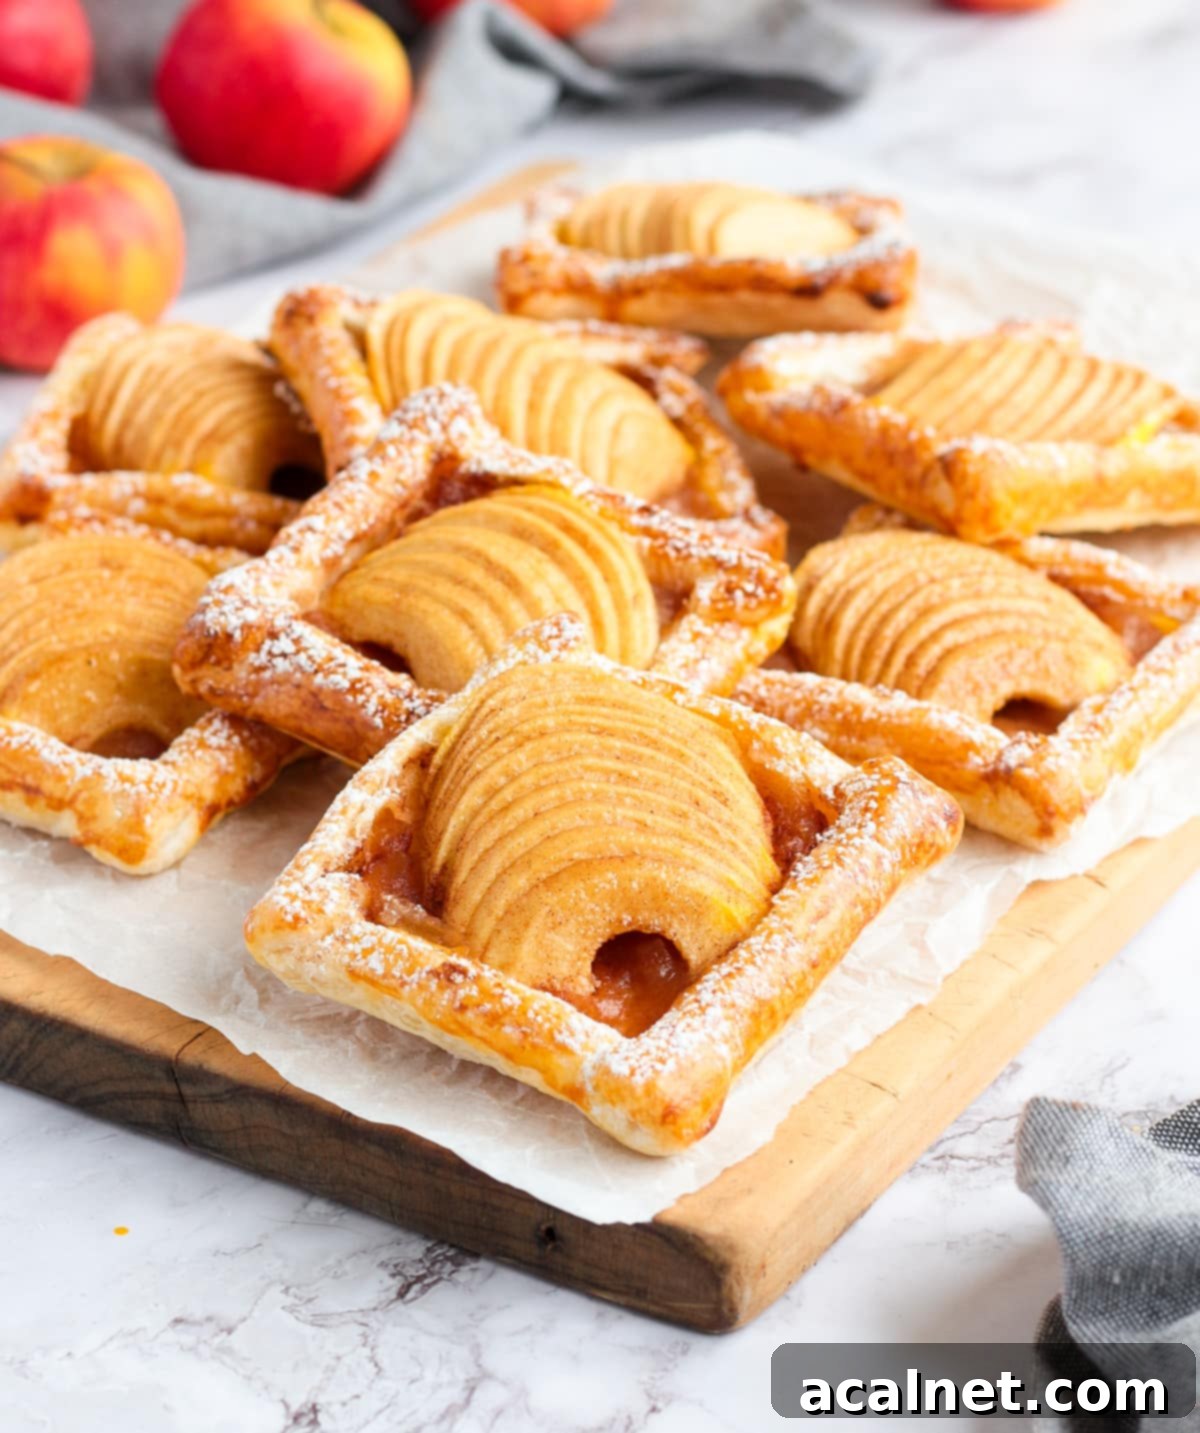
Once baked to perfection, carefully remove the tartlets from the oven and allow them to cool completely on the baking tray. This cooling period is important as it helps the pastry set, ensures the filling firms up slightly, and makes for easier handling. Optionally, once fully cool, dust the edges with a delicate sprinkle of Icing Sugar for a final elegant touch that also adds a subtle sweetness. Serve these mini apple tartlets immediately for the best warm, flaky experience, or elevate them further with a scoop of premium vanilla ice cream, a dollop of fresh whipped cream, or even a drizzle of custard for a truly decadent dessert experience!
Frequently Asked Questions About Apple Tartlets
Selecting the right apple variety is paramount for a successful apple tart. You need apples that will soften beautifully when baked, releasing their delicious juices and becoming tender, yet still maintain some structural integrity so they don’t turn into a shapeless mush. Excellent choices for baking in tarts include:
- **Pink Lady Apples:** (as used in this recipe) Offer a delightful balance of sweet and tart flavors, combined with a firm flesh that bakes wonderfully without losing its shape.
- **Granny Smith:** Known for its pronounced tartness, this variety holds its shape perfectly through baking and provides a lovely acidic counterpoint to the sweet pastry and glaze.
- **Honeycrisp:** A highly popular choice for its exceptionally crisp texture and balanced sweetness, it remains flavorful after baking.
- **Gala & Fuji:** These are sweeter options that still hold up relatively well to baking, though you might consider adding a touch of lemon juice to balance their sweetness and add brightness.
- **Jonagold & Braeburn:** Both are great all-purpose apples that perform admirably in baking, offering a good balance of flavor and texture.
For a deeper dive into choosing the ideal apples for your baking adventures, including tips on flavor profiles and textures, you can explore more about best apples for baking here.
When preparing the apples for these tartlets, thinness is absolutely key to achieving the desired tender texture. To ensure your apple slices become wonderfully soft and yielding in the oven, it is crucial to slice them very thinly, ideally about 2-3mm (around 1/8 inch) thick. Thicker slices will inevitably result in crunchier, less cooked fruit, which might not be the desired delicate texture for a small tartlet. Using a mandoline slicer can be incredibly helpful in achieving consistent, paper-thin slices quickly and safely, ensuring even cooking throughout all your tartlets. If slicing by hand, take your time to make them as uniform as possible – consistency is important for uniform baking!
While both applesauce and apple butter are delicious apple-based spreads, they differ significantly in their preparation, consistency, and flavor intensity. Applesauce is made by cooking apples until soft and then puréeing them, resulting in a lighter, looser consistency and a fresh apple flavor. Apple butter, on the other hand, is cooked for a significantly longer period, often for several hours, until it becomes much thicker, darker, and more intensely flavored due to a deeper caramelization of the natural sugars. You absolutely can substitute applesauce with apple butter in this recipe if you prefer a richer, more concentrated apple flavor and a denser filling. The darker color and robust taste of apple butter would add another dimension and a deeper, more autumnal note to your tartlets, creating a slightly different but equally delightful experience.
Yes, you can certainly use a traditional pie crust as an alternative to puff pastry for these individual tarts, but it’s important to note that the final texture will be quite different. Puff pastry is renowned for its light, airy, and incredibly flaky layers, which are a signature characteristic and contribute significantly to the appeal of these tartlets. A standard pie crust will result in a more crumbly, tender, or crisp texture, rather than the delicate, multi-layered flakiness of puff pastry. If you opt for pie crust, try to choose an ‘extra flaky’ or ‘all-butter’ variety to get as close as possible to the desired light texture. You might also consider par-baking the pie crust slightly longer (or with pie weights) to ensure it’s fully cooked through and firm once the moist apple filling is added, preventing a soggy bottom.
While these apple tartlets are undeniably best enjoyed fresh from the oven for optimal warmth and flakiness, you can prepare certain components ahead to streamline your baking process. The applesauce can be made a day or two in advance and stored in an airtight container in the refrigerator. You can also slice the apples a few hours prior to assembly and keep them submerged in a bowl of lightly salted water or water with a squeeze of lemon juice to prevent browning; just be sure to pat them thoroughly dry before use. The full assembled and baked tartlets are best consumed within a day, as puff pastry tends to gradually lose its crispness and become softer over time due to moisture from the filling. Reheating them in a toaster oven or regular oven can help restore some crispness.

Expert Tips & Tricks for the Best Apple Tartlets
Achieving bakery-quality puff pastry apple tartlets at home is entirely possible and surprisingly easy with a few insider tips and tricks. These pointers will help you fine-tune your technique, enhance the flavors, and ensure your tartlets turn out perfectly golden, flaky, and delicious every single time:
- **Customize Sweetness to Your Liking:** This mini apple pie tart recipe is thoughtfully designed with a moderate level of sweetness, allowing the natural, fresh flavor of the apples and the subtle spice of cinnamon to truly shine. However, taste preferences vary greatly! Feel free to adjust the quantity of Brown Sugar in the glaze to suit your personal palate. If you prefer a sweeter dessert, you can absolutely increase the amount of sugar without any issues. For an extra textural and flavor boost, consider sprinkling a little extra granulated sugar or demerara sugar over the apples before baking for a crunchier, more caramelized topping.
- **Perfect Glaze Consistency is Key:** The temperature of your melted butter is a critical factor for the glaze. It’s crucial to ensure the melted Butter has cooled down significantly before you mix it with the Brown Sugar and Cinnamon. Ideally, it should be cool enough that it starts to thicken slightly, or resemble a soft, spreadable paste. If the butter is too hot and liquid, the glaze will simply run off the apple slices during application, instead of adhering beautifully. A slightly hardened, cooled glaze will stick much better to the apples and caramelize more effectively, creating that desirable sticky-sweet coating.
- **For Dairy-Free and Vegan Options:** Making these Mini Apple Tarts suitable for dairy-free and/or Vegan diets is straightforward and requires just a couple of simple substitutions. Simply choose a Puff Pastry that is explicitly labeled as dairy-free or made with oil or shortening (many conventional frozen brands are, but always double-check the ingredients list). Then, replace the Melted Butter in the glaze with an equal amount of refined Coconut Oil (refined coconut oil has a neutral flavor, avoiding a tropical taste) or a good quality plant-based margarine. The results will be just as delicious and flaky!
- **Avoid Overfilling Your Tartlets:** While it might be tempting to pile on a generous amount of applesauce and apple slices, it’s important to avoid overfilling your tartlets. Overfilling can cause the pastry to become soggy in the center, prevent the edges from puffing up correctly, and potentially lead to leakage during baking. A moderate amount of filling ensures even baking, a perfectly balanced flavor, and a structurally sound tartlet.
- **Maintain Cold Puff Pastry:** Always remember to work quickly with puff pastry. It performs best when kept cold, as this is what helps to create those distinct, beautiful, flaky layers. If your kitchen is warm, or if you find the pastry becoming too soft and sticky, don’t hesitate to pop the cut pastry squares back into the refrigerator for 10-15 minutes before par-baking, and again after assembly if needed. A brief chill can make all the difference.
- **Achieve Even Apple Slices:** As emphasized in the FAQ section, consistent, thin apple slices are absolutely vital for uniform cooking and a perfectly tender texture in your baked tartlets. A mandoline slicer is a fantastic tool for achieving this precision quickly, but a sharp chef’s knife and a steady hand work just as well. The goal is to have all slices cook at roughly the same rate.
- **Serve Warm for Best Experience:** While delicious at room temperature, these apple tartlets are truly heavenly when served slightly warm. The warmth enhances the aroma of the cinnamon, softens the apples further, and makes the puff pastry incredibly delicate and melt-in-your-mouth flaky. Consider a quick warm-up in a low oven if serving later.
Storage Recommendations for Your Apple Tartlets
For the ultimate experience of crispness and flavor, these individual puff pastry apple tartlets are truly at their best when served warm, straight from the oven. The layers of puff pastry are most delicate and flaky, and the apples are tender and aromatic.
If you happen to have any leftovers or are preparing them for a gathering later in the day, here’s how to store them to maintain their quality:
- Room Temperature: Once completely cooled to room temperature, store the mini apple tarts in an airtight container for up to 1 day. While they will still be delicious, the pastry will gradually lose some of its initial crispiness and become a little softer due to moisture absorption from the filling.
- Refrigerator: For slightly longer storage, they can be kept in an airtight container in the fridge for up to 2 days. Be aware that refrigeration tends to soften the puff pastry more quickly due to the cold, moist environment, so they won’t retain their freshly baked flaky texture as much. Before serving, you can gently rewarm them in a preheated oven (around 150°C/300°F) for 5-10 minutes. This will help to crisp up the pastry again and warm the filling through.
- Freezing: I generally do not recommend freezing these baked apple tartlets. The delicate nature of puff pastry means it often loses its signature flaky texture and can become somewhat soggy or tough after thawing and reheating. The moisture from the apple filling also doesn’t fare well with freezing and thawing. For the best quality and enjoyment, it’s ideal to prepare and consume them fresh or within the short storage periods mentioned above. If you really must freeze, bake them fully, cool completely, then freeze individually on a tray before transferring to an airtight container. Reheat directly from frozen in a hot oven.

Explore More Delicious Apple Desserts
If you’re an apple enthusiast, you know there’s a whole world of delightful apple-based recipes waiting to be explored! From comforting cakes to hearty oat bakes, and everything in between, apples are incredibly versatile in baking. If you loved these Puff Pastry Apple Tartlets, here are some more of my favorite ways to enjoy this wonderful fruit:
- Moist Apple Loaf Cake with Applesauce: A tender, flavorful cake, perfect for breakfast or a snack.
- Hearty Apple Cinnamon Streusel Muffins: Ideal for a grab-and-go treat with a delightful crumb topping.
- Comforting Pear and Apple Crumble: A classic dessert, warm and bubbly, topped with a buttery crumble.
- Classic Easy French Apple Cake: Simple, elegant, and bursting with tender apple pieces.
- Delectable Upside Down Apple Cake: A stunning dessert with caramelized apples at the top.
- Sweet Apple Cinnamon Pull Apart Bread: A fun, shareable bread, great for brunches.
- Wholesome Apple Cinnamon Oatmeal Bake: A healthy and satisfying breakfast or brunch option.
- Gluten-Free Apple and Almond Cake: A light and moist option for those with dietary preferences.
- Tangy Apple and Blueberry Crumble: A fantastic combination of sweet and tart fruits under a crisp topping.
Each of these recipes celebrates the unique flavors and versatility of apples, offering something for every craving and occasion. Whether you’re looking for a quick breakfast, a cozy dessert, or a gluten-free option, these apple recipes are sure to inspire your next baking adventure. Happy baking!
Loved This Recipe?
We’d love to hear from you and see your beautiful creations! Let us know how your Puff Pastry Apple Tartlets turned out by leaving a comment and a rating below. Don’t forget to tag us on Instagram @a.baking.journey with a photo of your delicious homemade apple tarts!
Recipe Card: Puff Pastry Apple Tartlets

Puff Pastry Apple Tartlets
Print Recipe
Ingredients
For the Apple Tartlets
- 2 sheets Frozen Puff Pastry, (approx. 25×25 cm / 10×10 inch each)
- 4 small Apples, (e.g., Pink Lady, Granny Smith, or Fuji)
- 45 gr (3 tablespoons) Unsalted Butter, (melted and slightly cooled)
- 50 gr (1/4 cup) Brown Sugar
- 1/2 teaspoon Ground Cinnamon
- 180 ml (3/4 cup) Smooth Applesauce, (homemade or quality store-bought)
Optional Additions
- 1 Egg Yolk, (for an egg wash to brush edges)
- 1/2 tablespoon Icing Sugar, (for dusting after baking)
Instructions
- Remove the Puff Pastry Sheets from the freezer and let them thaw at room temperature for 5 to 10 minutes, until they are pliable but still cold. If using non-rolled puff pastry, roll it into two squares approximately 25cm (10-inch) wide.
- Preheat your oven to 180°C (350°F). Line two baking trays with baking paper or a silicone baking mat.
- Cut each Puff Pastry Sheet into 4 equal Squares, resulting in 8 squares total (refer to Note 1 for ideal size). Fold about 1 cm / 0.4 inch of each side inwards to create a raised edge. Gently press these folded edges down to adhere them to the base pastry. Prick the center of each pastry square several times with a fork.
- Place the prepared pastry squares on the lined baking trays and par-bake for 10 to 15 minutes, or until they are slightly puffed and lightly golden. Remove from the oven and set aside to cool slightly.
- While the pastries are par-baking, prepare the remaining ingredients. Peel, core, and cut each Apple in half. Then, thinly slice each halved Apple (aim for about 2-3mm thick). Set these aside.
- In a small bowl, mix the cooled melted Butter (see Note 2 for glaze consistency) with the Brown Sugar and Ground Cinnamon until it forms a paste. Set this glaze aside.
- Spread a layer of Smooth Applesauce over the pricked center of each par-baked pastry square. Then, artfully arrange the thinly sliced Apples over the applesauce (see Note 3 regarding apple arrangement). Using a pastry brush, generously apply the Butter, Sugar, and Cinnamon glaze over each apple arrangement (see Note 4 for an optional caramelization technique).
- Optional step: For a beautiful golden sheen on the pastry edges, whisk the Egg Yolk in a separate small bowl (with a teaspoon of water) and lightly brush it over the exposed puff pastry borders.
- Bake for an additional 15 to 20 minutes, or until the pastry edges are golden brown and well-puffed, and the apples are tender and slightly caramelized.
- Optional step: Allow the tartlets to cool completely on the baking tray. Once cooled, dust lightly with Icing Sugar for a decorative finish. Serve warm or at room temperature.
Would you like to save this recipe?
We’ll email this post to you, so you can come back to it later!
Notes
- Each individual Pastry square should be approximately 12×12 cm (4.5×4.5 inches) for ideal individual portions. This size allows for good filling-to-pastry ratio and easy handling.
- For the best application, ensure your melted butter for the glaze has cooled and started to slightly thicken or harden. This prevents it from dripping off the apples and helps it adhere for better caramelization and a more even coating.
- When arranging the apple slices, you may need to adjust the quantity based on the size of your apples to ensure they fit neatly within the pastry squares without overflowing. Aim for an attractive, slightly fanned or overlapping pattern.
- To achieve a more intensely caramelized and glossy apple topping, apply only half of the butter-sugar-cinnamon glaze to the raw apples before the final bake. Halfway through the baking time (around 8-10 minutes in), remove the pastries from the oven and brush them with the remaining glaze before returning them to finish baking. This second application helps build a deeper caramel flavor and a more irresistible shine.
Nutrition (per serving)
