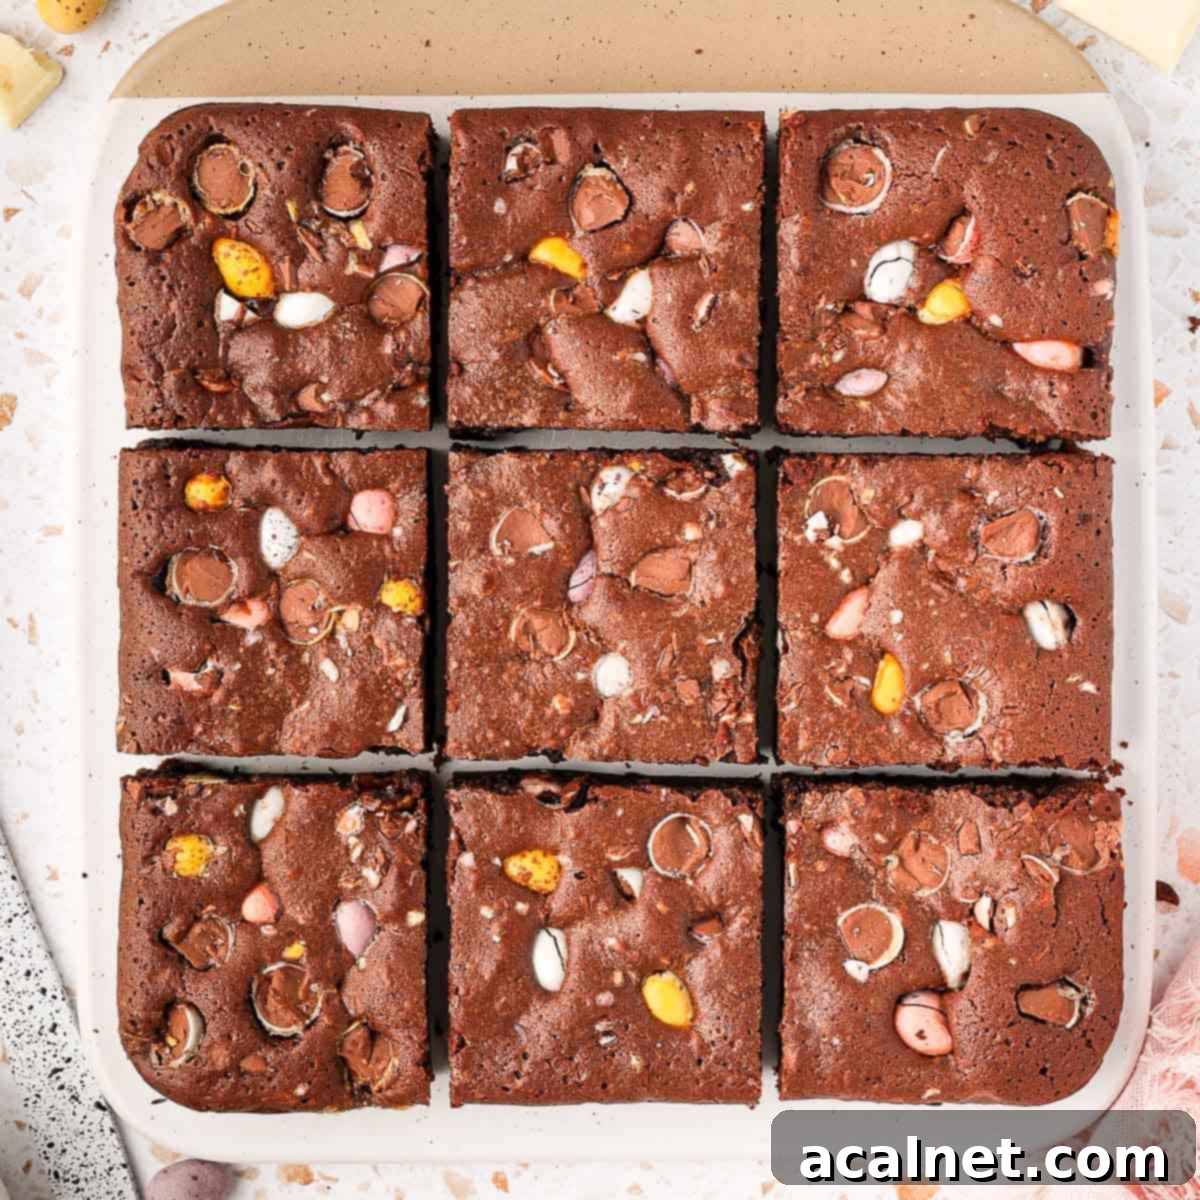
Ultimate Fudgy Easter Mini Egg Brownies Recipe: A Decadent Chocolate Treat
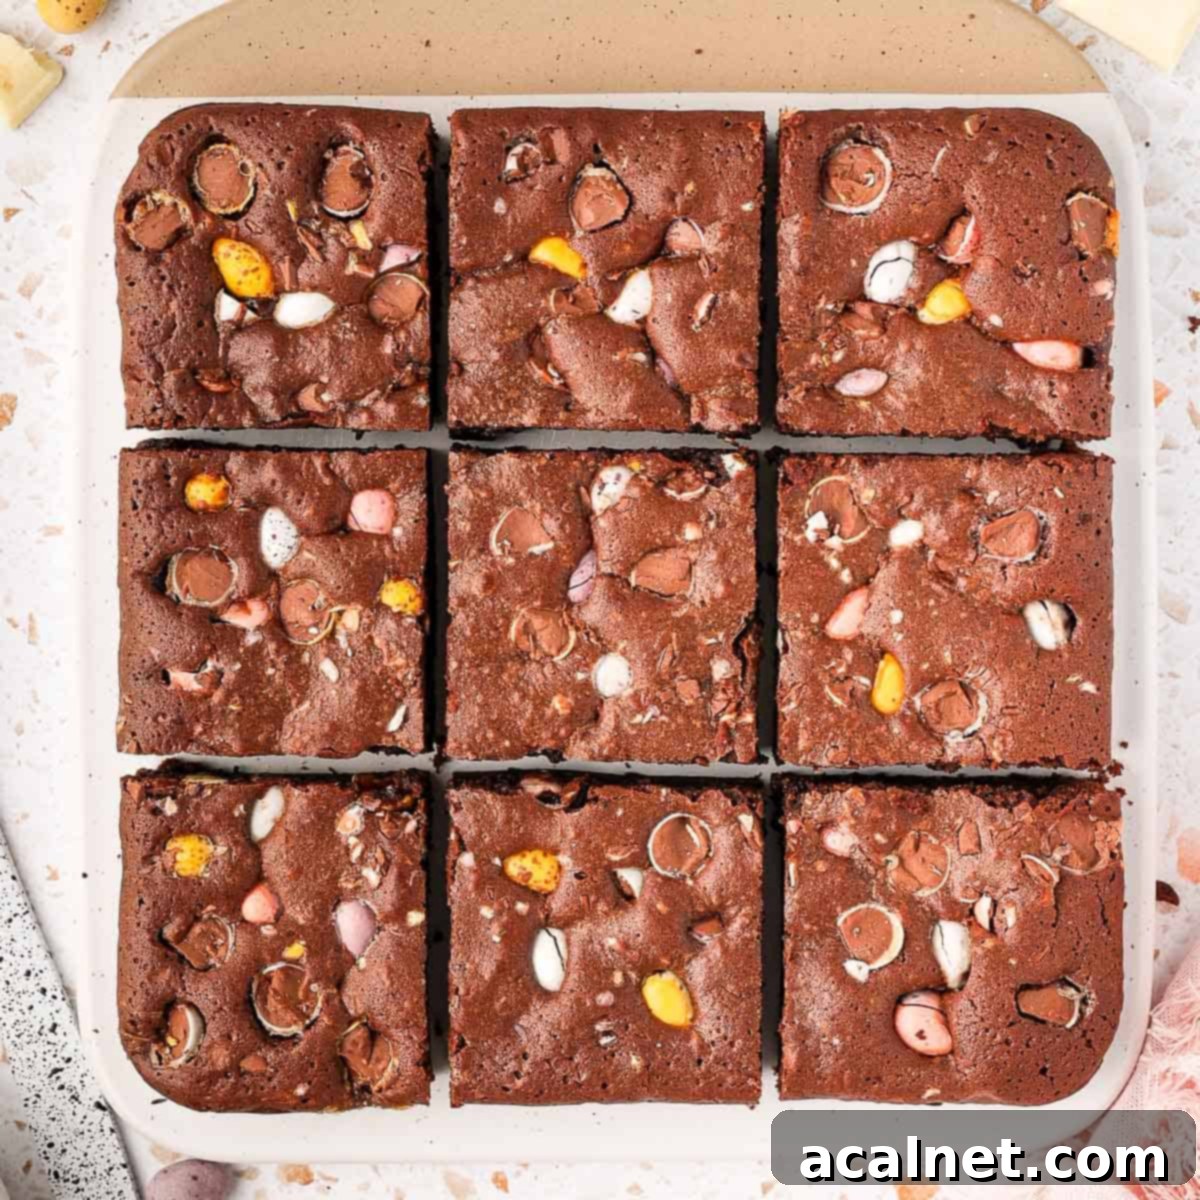
Get ready to elevate your Easter celebration with these truly decadent Mini Egg Brownies! This recipe delivers the perfect sweet treat, combining intensely rich dark chocolate with playful pops of colour and crunch. Our fudgy dark chocolate brownies are generously packed with both dark and white chocolate chunks, then crowned with a vibrant scattering of Mini Eggs, making them an irresistible centerpiece for any Easter gathering.
[feast_advanced_jump_to]
Why You’ll Adore This Mini Egg Brownie Recipe
Easter is synonymous with indulgence, especially when it comes to chocolate. These Easter Mini Egg Brownies are no exception – they are the epitome of chocolatey decadence! Imagine a gloriously fudgy brownie base, enriched with a luxurious blend of dark and white chocolate chunks, all topped off with vibrant, crunchy Mini Eggs. It’s a symphony of textures and flavors that truly embodies the spirit of Easter.
What makes these Easter Egg Brownies so special? It’s the delightful contrast! The rich, deep flavour of the dark chocolate brownie pairs perfectly with the creamy sweetness of white chocolate, while the crisp candy shell of the Mini Eggs adds an irresistible crunch and a burst of festive colour. They’re not just a dessert; they’re a fun baking project that brings joy to the kitchen and smiles to everyone who tries them. Whether you’re making them for a family gathering, a potluck, or simply to treat yourself, these brownies are guaranteed to be a hit. The recipe is straightforward, yielding beautifully fudgy results every time, making it a staple for your holiday baking repertoire.
Looking for more Easter sweet treats? Don’t miss these delightful Chocolate Cornflake Cakes – they’re perfect for topping with even more Mini Eggs for an extra festive touch!
Essential Ingredients for Perfect Fudgy Brownies
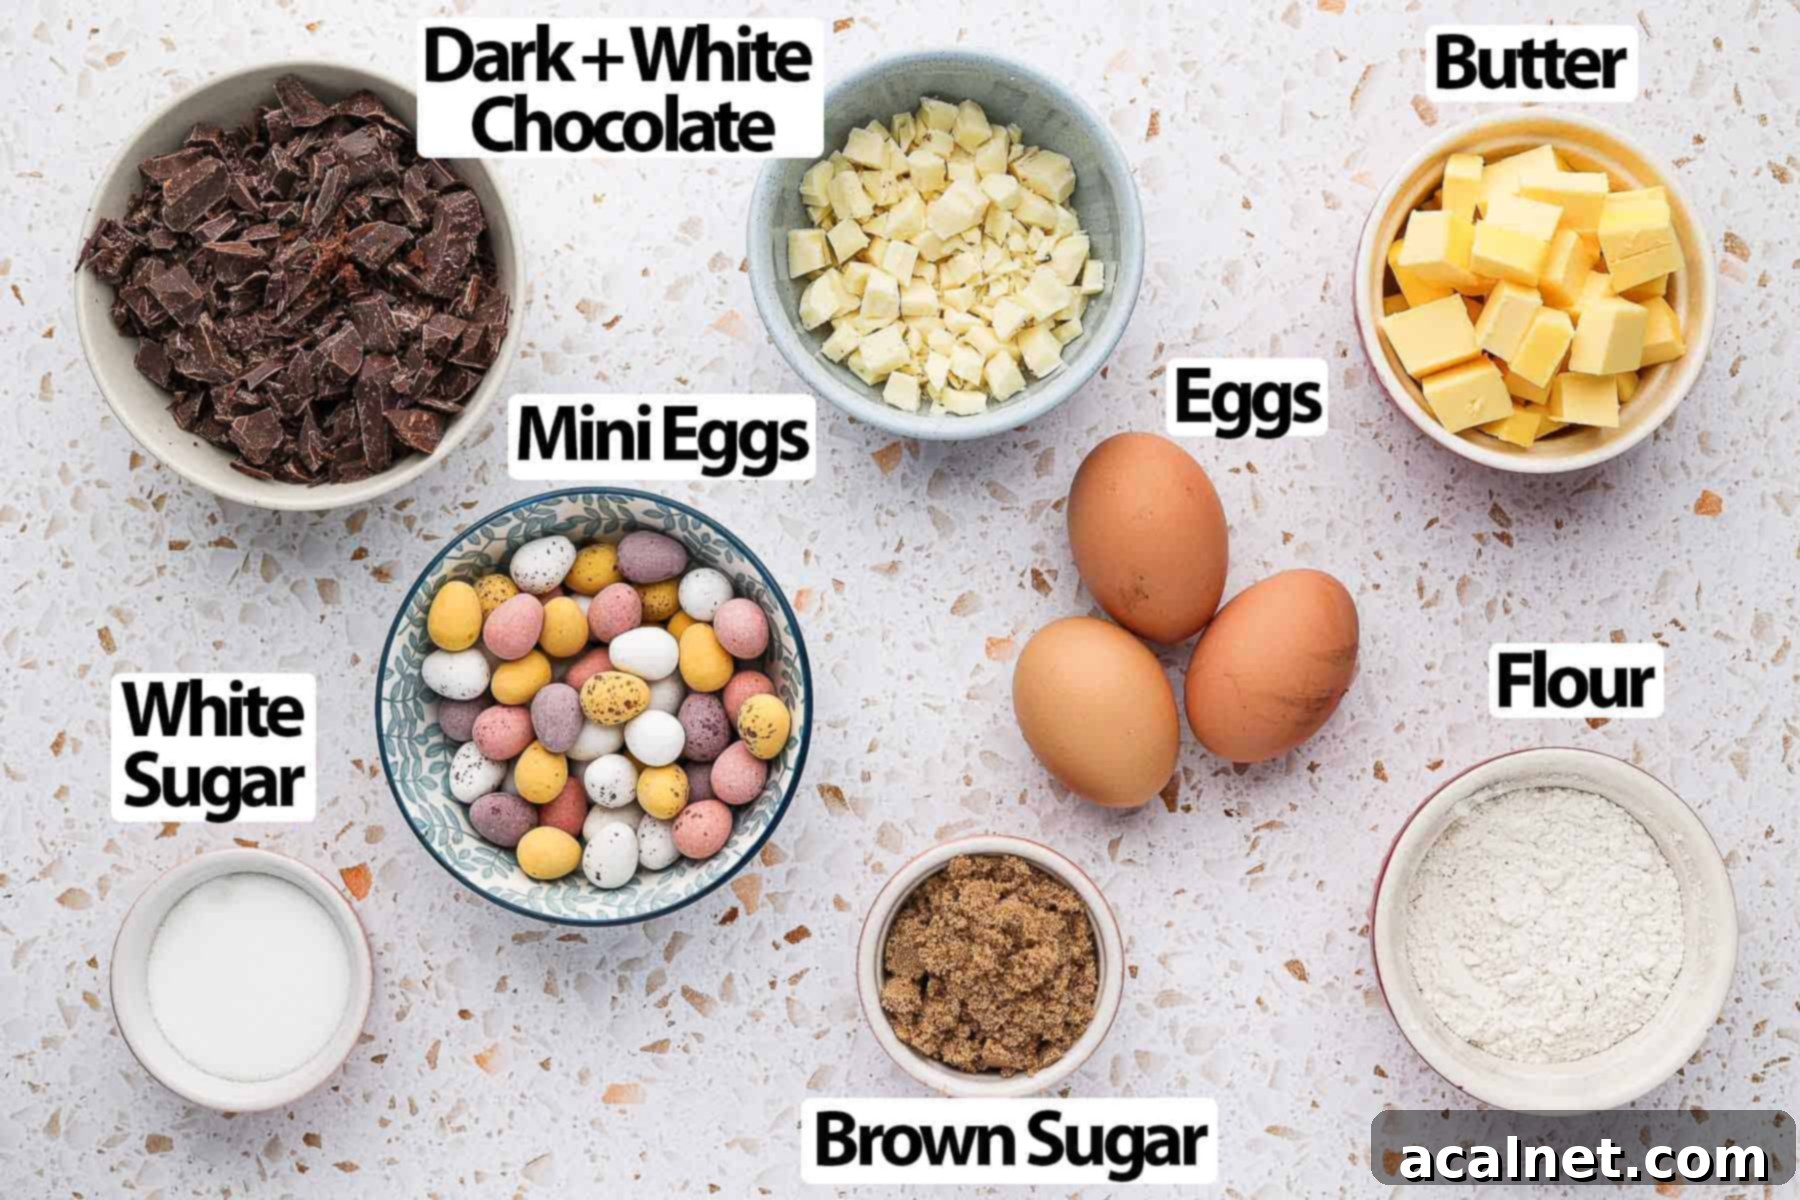
For the unbelievably fudgy dark chocolate brownie base:
- Dark Chocolate: For an intensely rich chocolate flavour, I highly recommend using a good quality 70% dark cooking chocolate, preferably in bar form. Avoid using chocolate chips or eating chocolate for melting, as they contain stabilizers that can prevent smooth melting, leading to a grainy texture in your brownies. The cocoa butter content in cooking chocolate is crucial for that desirable fudgy consistency.
- Butter: Unsalted is always preferred in baking to control the salt content. Since it will be melted, it’s perfectly fine to use it straight from the fridge.
- Eggs: Medium-sized eggs are ideal for this recipe. Ensure they are at room temperature, as this helps them emulsify better with the other ingredients, contributing to a smoother batter and a more uniform bake.
- Sugar: This recipe calls for a carefully balanced mix of Brown Sugar and White Caster Sugar. While you could technically use all brown or all white sugar, the combination is key to achieving that signature fudgy texture with just the right amount of sweetness and a beautiful shiny, crackly top. Brown sugar adds moisture and a subtle caramel note, while caster sugar contributes to the crust.
- Flour: Standard All-Purpose or Plain Flour is perfect. Always remember to sift your flour! This simple step prevents lumps in the batter and ensures an even distribution, leading to a smoother, more uniform brownie.
- Salt: A small amount of Fine Table Salt is essential. It doesn’t make the brownies salty, but rather enhances and balances the sweet chocolate flavours, making them truly pop. Don’t skip it!
A note on cocoa powder: Many brownie recipes use cocoa powder, but this one relies solely on melted dark chocolate for its intense flavour and fudginess. I’ve tested this recipe with cocoa powder, and found it tends to result in a drier, more cake-like brownie, which isn’t what we’re aiming for with these rich, fudgy treats.
For the delightful filling and festive topping:
- Filling: We’re going for a luxurious blend of Dark Chocolate Chunks and White Chocolate Chunks. This mix provides a wonderful contrast, offering both intense and sweet notes within each bite. Of course, you can customize this – use all dark or all white if you prefer a more singular flavour profile. For a truly fun and unique alternative, I’ve even tried this recipe with Cadbury Caramilk instead of white chocolate, and it’s absolutely delicious!
- Mini Eggs: The star of our Easter theme! I used Cadbury Mini Eggs for their classic taste and vibrant colours. To maximize both crunch and visual appeal, I recommend chopping about half of the Mini Eggs to mix into the batter (or just for topping) and keeping the other half whole for the ultimate colourful topping. Feel free to substitute some of the chocolate chunks with more chopped Mini Eggs if you crave an even more eggy crunch!
Optional Additions to Enhance Flavour
- Vanilla Extract: A touch of Vanilla Extract or Essence can significantly boost the overall flavour profile of your brownies, adding a warm, aromatic depth that complements the chocolate beautifully.
- Coffee: For an adult-friendly version of these Mini Eggs Brownies, consider adding coffee! Coffee doesn’t make the brownies taste like coffee; instead, it deepens and intensifies the dark chocolate flavour. Simply add about 1 teaspoon of instant coffee granules to the hot melted chocolate mixture – it will dissolve seamlessly and create an even richer brownie experience.
Step-by-Step Guide: How to Make Unforgettable Fudgy Easter Egg Brownies
Follow these detailed instructions to create the most incredible fudgy Mini Egg Brownies you’ve ever tasted!
- Preheat your oven to 180°C/350°F (160°C/325°F fan-forced). Prepare a 21×21 cm (8×8 inch) square baking pan by lining it with baking paper or parchment paper. To ensure the paper stays in place and makes removal easier, I find it helpful to lightly grease the pan first before fitting the baking paper.
- Chop all your chocolates and Mini Eggs as specified in the ingredients list (refer to note 4 for Mini Egg chopping tips). Set these aside; having everything prepped beforehand makes the baking process much smoother.
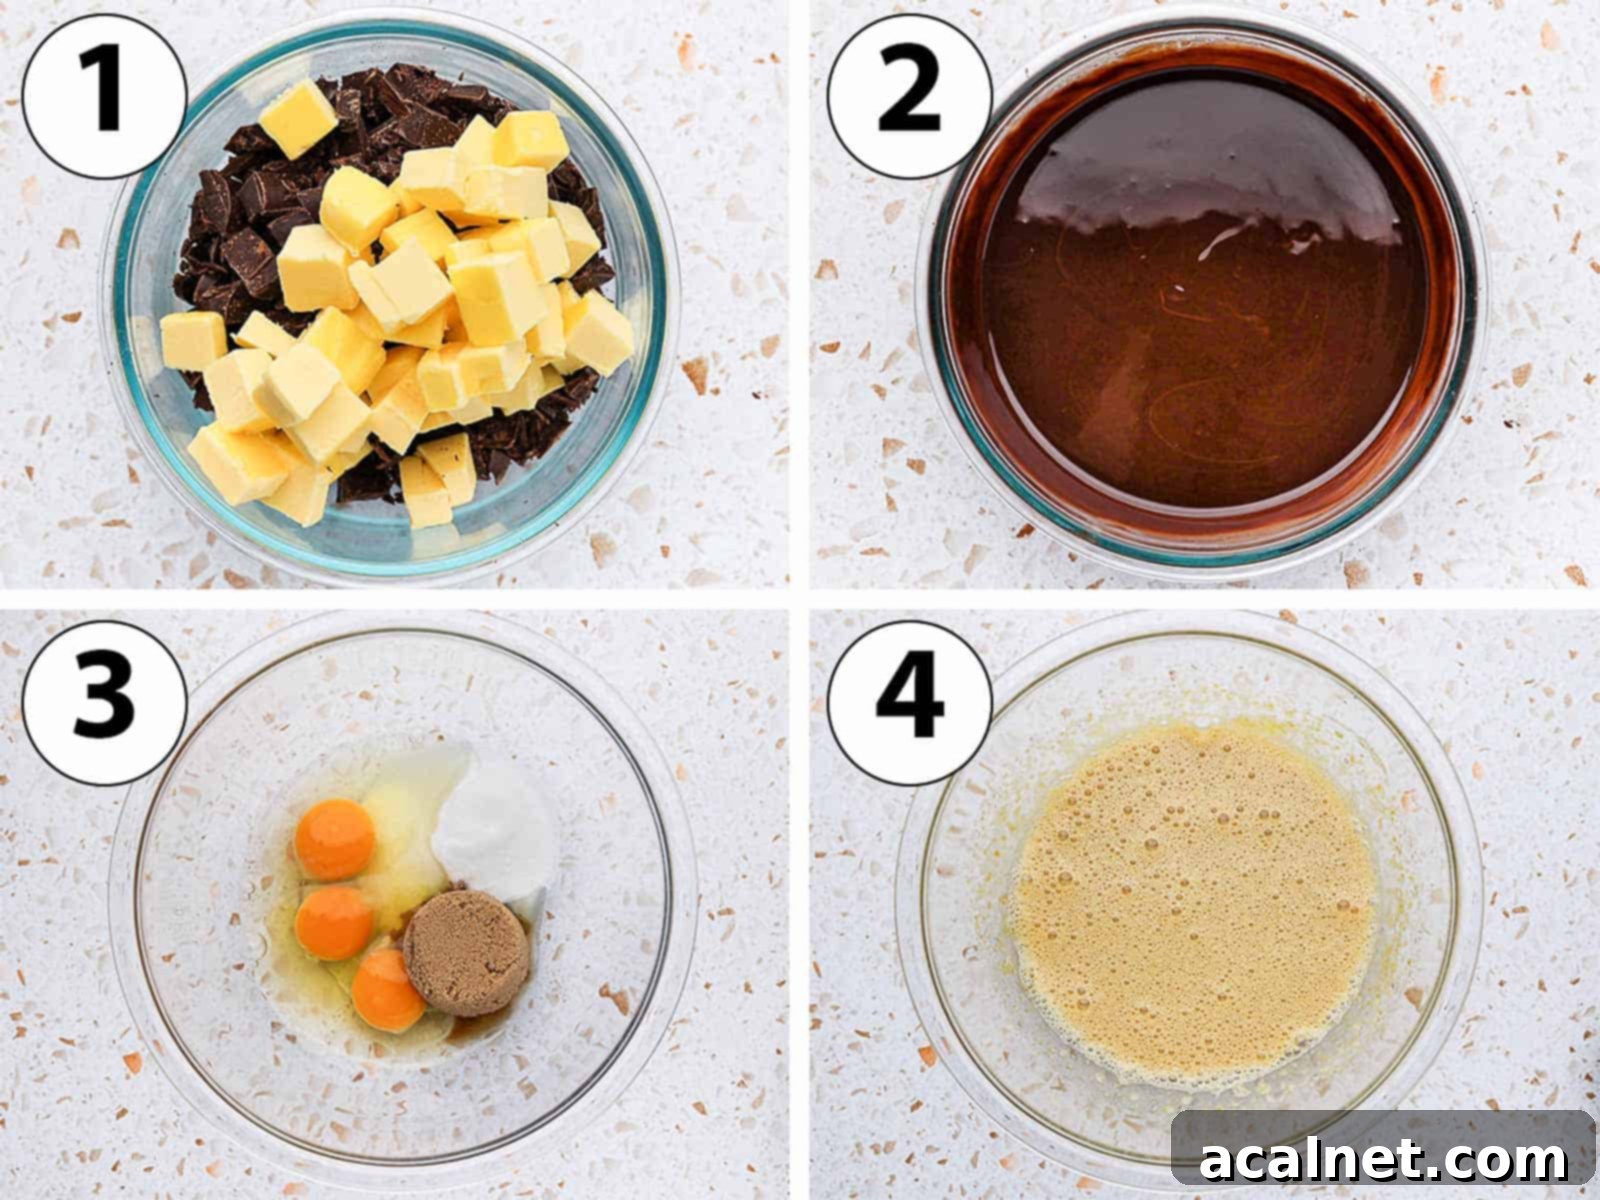
- Photo 1: In a heat-proof bowl, combine the finely chopped Dark Chocolate (the portion specified for the brownie base) with the Unsalted Butter. Finely chopping the chocolate is crucial here, as it allows it to melt more quickly and evenly, significantly reducing the risk of scorching.
- Photo 2: Gently melt the chocolate and butter mixture until it’s completely smooth and glossy. You can do this either by placing the bowl over a double-boiler (a saucepan with a small amount of simmering water, ensuring the bowl does not touch the water) or in the microwave. If using a microwave, melt in short 30-second bursts, stirring thoroughly after each interval, until fully melted and smooth. This constant stirring prevents the chocolate from burning or seizing, which can lead to a grainy texture. Once melted, set it aside to cool slightly.
- Photo 3: In a separate large mixing bowl, combine the Eggs, Brown Sugar, and White Caster Sugar.
- Photo 4: Using a hand mixer or stand mixer, whisk this mixture on medium speed for 3 to 5 minutes. You’ll know it’s ready when the mixture lightens in colour, significantly increases in volume, and becomes wonderfully foamy and bubbly. This aeration step is key to developing that desirable shiny, crackly top on your brownies. If you’re whisking by hand, just ensure it’s well combined and lighter; while the shiny top might be less pronounced, the flavour and fudginess will still be fantastic.
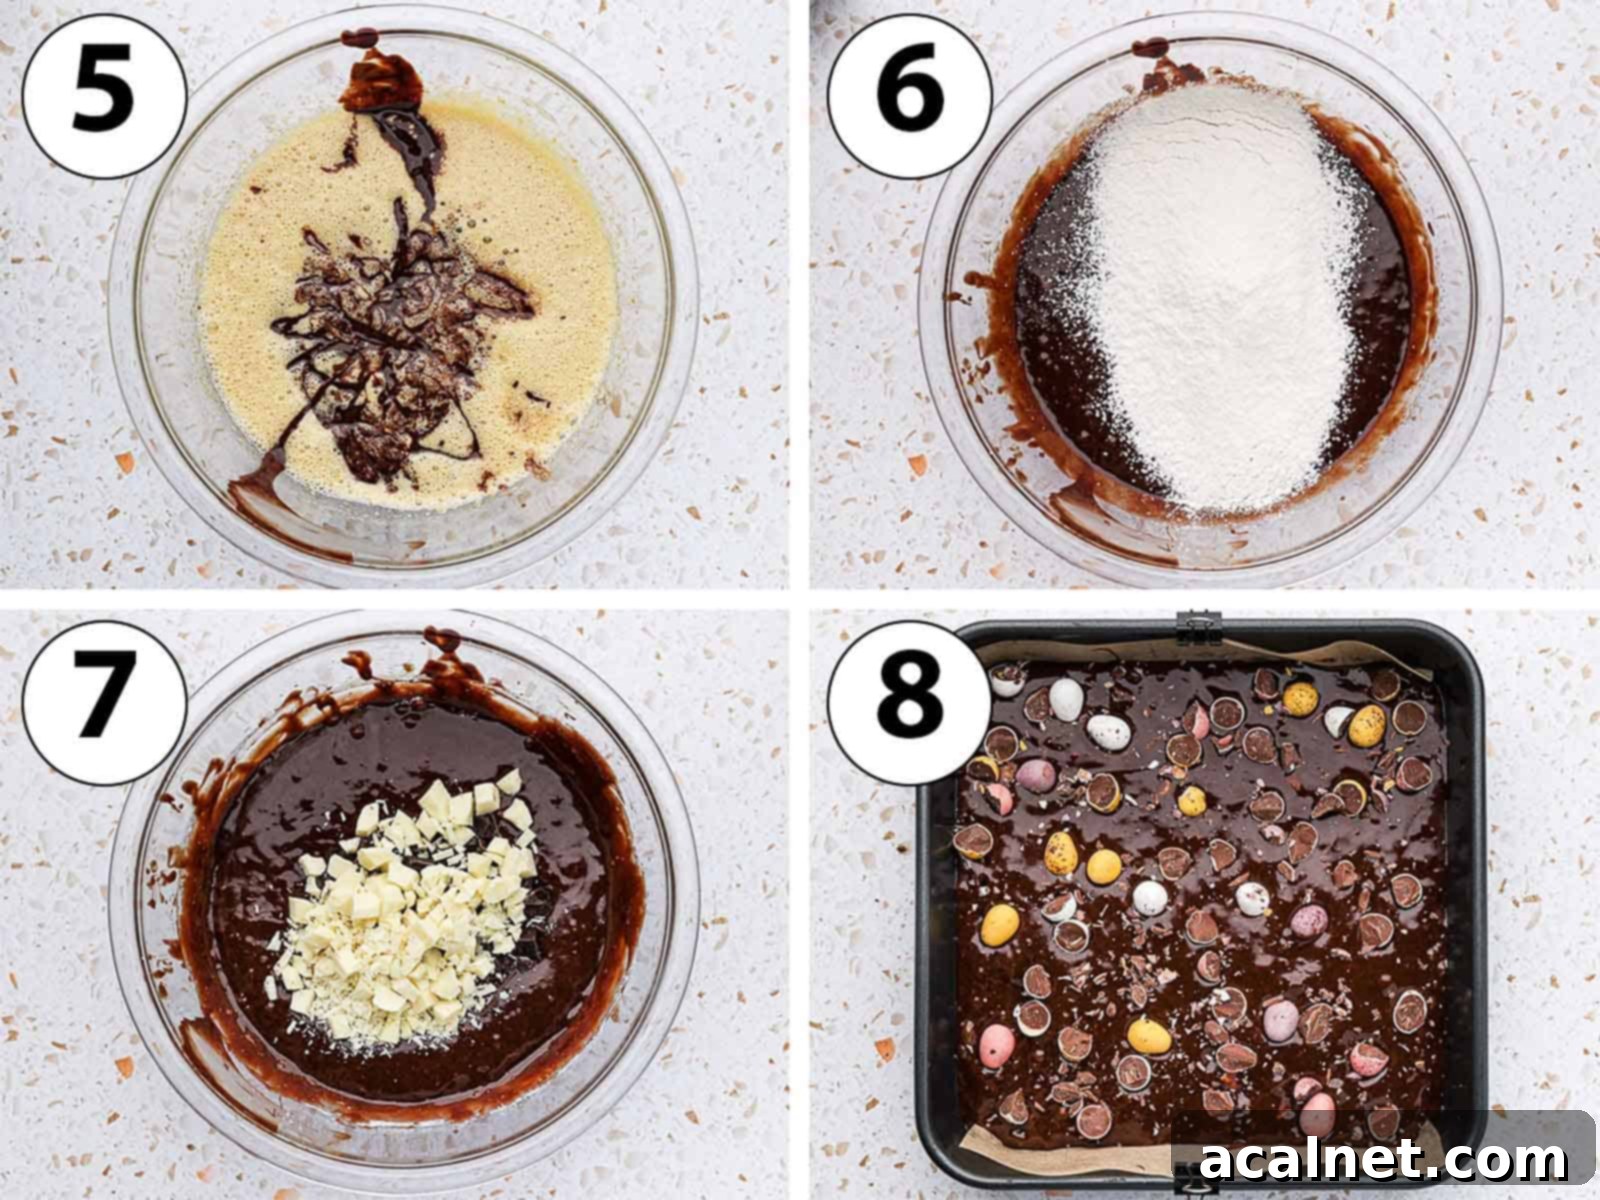
- Photo 5: Carefully pour the slightly cooled melted butter and chocolate mixture over the whisked egg and sugar mixture. Mix slowly until just combined. It’s crucial that the chocolate isn’t too hot at this stage, as excessive heat can “cook” the eggs, resulting in tiny bits of scrambled egg in your batter and affecting the final texture.
- Photo 6: Sift in the All-Purpose Flour and Salt. Using a spatula or your mixer on the lowest speed, gently fold or mix until the flour is *just* incorporated and no dry streaks remain. Be very careful not to overmix the batter at this point; overmixing develops gluten in the flour, which will lead to a tougher, more cake-like brownie rather than the desired fudgy texture.
- Photo 7: Now, it’s time for the delicious add-ins! Gently fold in the chopped Dark Chocolate Chunks and White Chocolate Chunks (the filling portion). Use a spatula to ensure the chunks are evenly distributed throughout the rich brownie batter, guaranteeing chocolate in every bite.
- Photo 8: Pour the luscious brownie batter into your prepared baking tin. Then, artfully arrange the Mini Eggs on top. You can scatter them entirely whole, or use a mix of chopped and whole eggs for varied texture and visual appeal, as discussed earlier.
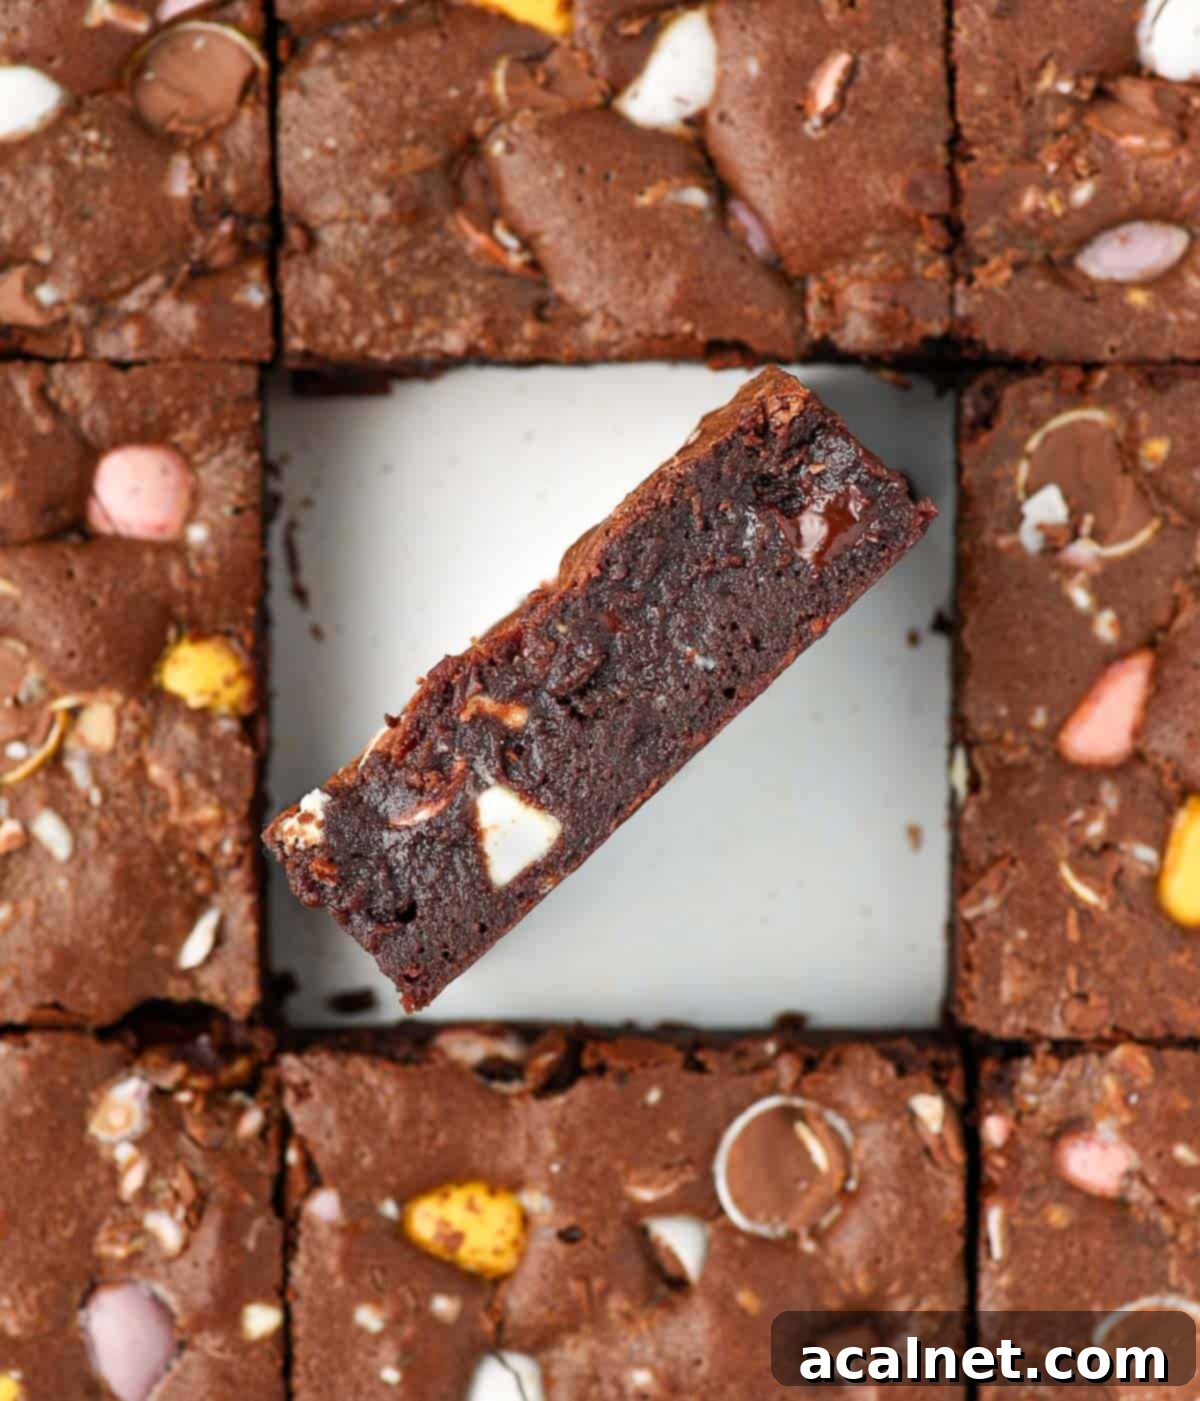
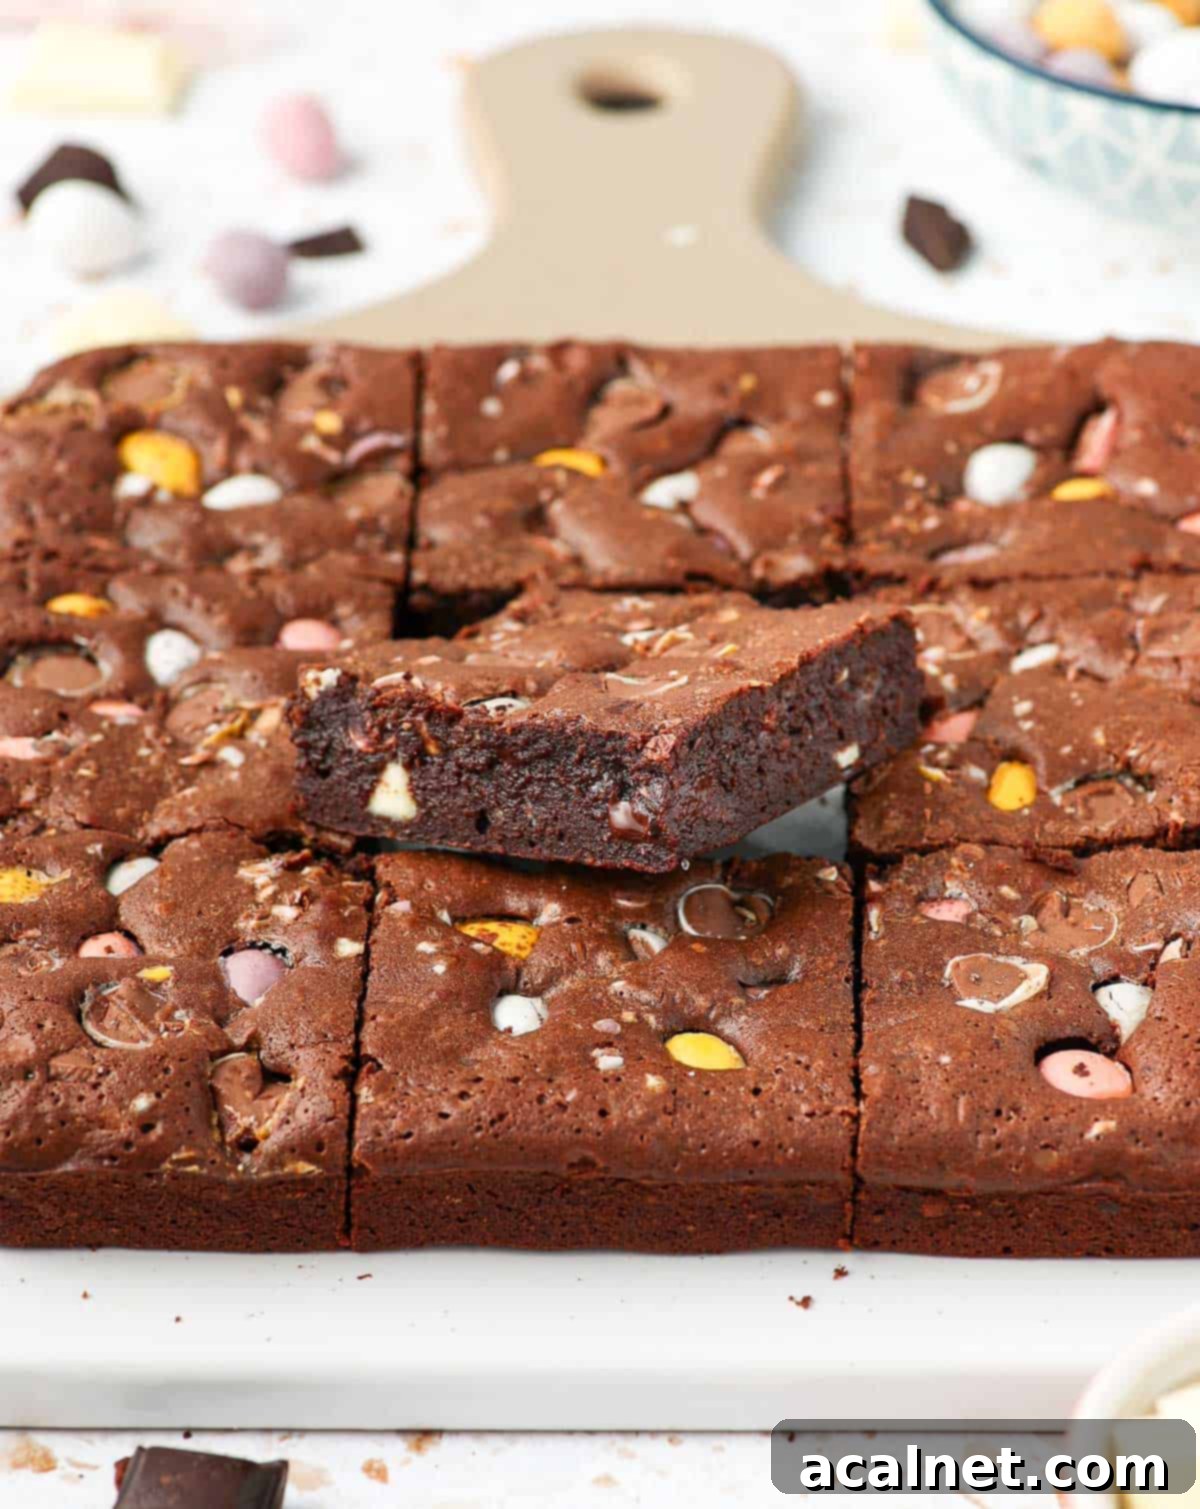
- Bake for 16 to 18 minutes. The brownies are ready when the centre looks mostly set but still slightly wobbly, and the top has formed a beautiful, shiny crust. This Easter brownies recipe is designed for a quick bake to maintain fudginess. Overbaking is the enemy of a fudgy brownie, so err on the side of underbaking rather than overbaking. A toothpick or knife inserted into the center should come out with moist crumbs, not completely clean.
- Once baked, resist the urge to cut into them immediately! Leave the brownies to cool in the pan for at least 20 to 30 minutes. For the best, cleanest slices and fudgiest texture, ideally let them cool completely, especially if you’re serving them later. Brownies are quite delicate when warm and can break easily if moved too soon.
Common Questions About Mini Egg Brownies
While you can certainly adjust the chocolate chunks for the filling to be milk or all white chocolate for a sweeter profile, I strongly recommend sticking with dark cooking chocolate (around 70% cocoa) for the brownie batter itself. Dark chocolate provides the ideal richness and structural integrity for a fudgy brownie. Using milk or white chocolate in the base might result in an overly sweet and less intense flavour, and potentially a different texture. However, feel free to use milk chocolate chunks in place of dark chunks for the filling for a sweeter Easter treat!
For truly decadent and fudgy brownies, your choice of chocolate is paramount. I always use a high-quality 70% dark cooking chocolate in bar form. This percentage delivers an intense chocolate flavour without being overly bitter and contributes to a rich, luscious texture. It’s crucial to use proper cooking chocolate, not eating chocolate or chocolate chips. Cooking chocolate has a higher cocoa butter content and fewer stabilizers, allowing it to melt smoothly and integrate perfectly into the batter, preventing a grainy texture.
Absolutely, this recipe is quite flexible with sugar. Using only brown sugar will yield an even more extra fudgy brownie with a deeper, more pronounced caramelised flavour. Conversely, opting for all white sugar will result in a slightly chewier texture and a more intensely sweet flavour. The combination I’ve provided offers a balanced fudgy-chewy texture with a perfect level of sweetness and that desirable shiny top.
Don’t worry if you can’t find Cadbury Mini Eggs! You can easily substitute them with any other brand of mini chocolate eggs that have a crispy sugar candy shell – many brands offer similar festive options during Easter. Malted Robin Eggs are another fantastic alternative for a similar look and satisfying crunch. For a different but equally festive twist, you could use colorful M&Ms, chopped up larger Easter chocolate eggs, or even other small, candy-coated chocolates to maintain that fun, colourful topping.
Yes, you can easily double this recipe! If you do, I recommend using a larger baking pan, such as a 9×13 inch (23×33 cm) rectangular pan. Keep in mind that baking times may vary slightly, so keep an eye on the brownies and perform the toothpick test towards the end of the suggested baking time to ensure they don’t overbake.
Expert Tips for Baking Perfect Mini Egg Brownies
- Customize Your Texture with Sugar: For an exceptionally fudgy brownie, replace all the white sugar with brown sugar. The molasses in brown sugar adds extra moisture and chewiness. If you prefer a brownie with a slightly chewier bite and a more prominent shiny top, use all white sugar. The combination in this recipe offers a delightful balance of both!
- Avoid Overmixing the Batter: This is arguably the most crucial tip for fudgy brownies. Once you add the flour, mix only until it’s *just* incorporated. Overmixing develops the gluten in the flour, leading to a denser, more cake-like texture, which is the opposite of what we want for these decadent treats. Gently fold the dry ingredients until no streaks of flour remain.
- Strategic Mini Egg Topping: To achieve a balance of textures and visual appeal, consider chopping about half of your Mini Eggs to sprinkle into the batter or for a finer crunch on top, while keeping the other half whole for vibrant pops of colour. If you plan to cut your brownies into neat squares, try to strategically place the whole Mini Eggs to avoid your knife lines for easier slicing. You can also reserve some dark and white chocolate chunks to sprinkle on top alongside the Mini Eggs for even more chocolatey goodness!
- Patience is a Virtue: Cool Completely: As tempting as it is to dive in, allowing the brownies to cool for at least 20 to 30 minutes in the pan is essential before attempting to remove or slice them. Brownies are very delicate and soft straight out of the oven, and moving them too quickly can cause them to break apart. For the cleanest cuts and ultimate fudginess, let them cool completely to room temperature.
- Don’t Overbake: Brownies are meant to be slightly underbaked to maintain their fudgy, moist texture. A toothpick inserted into the center should come out with moist crumbs, not completely clean. The top should look set and shiny, but the center should still have a slight wobble. This short baking time is key to their gooey perfection!
Storing Your Decadent Mini Egg Brownies
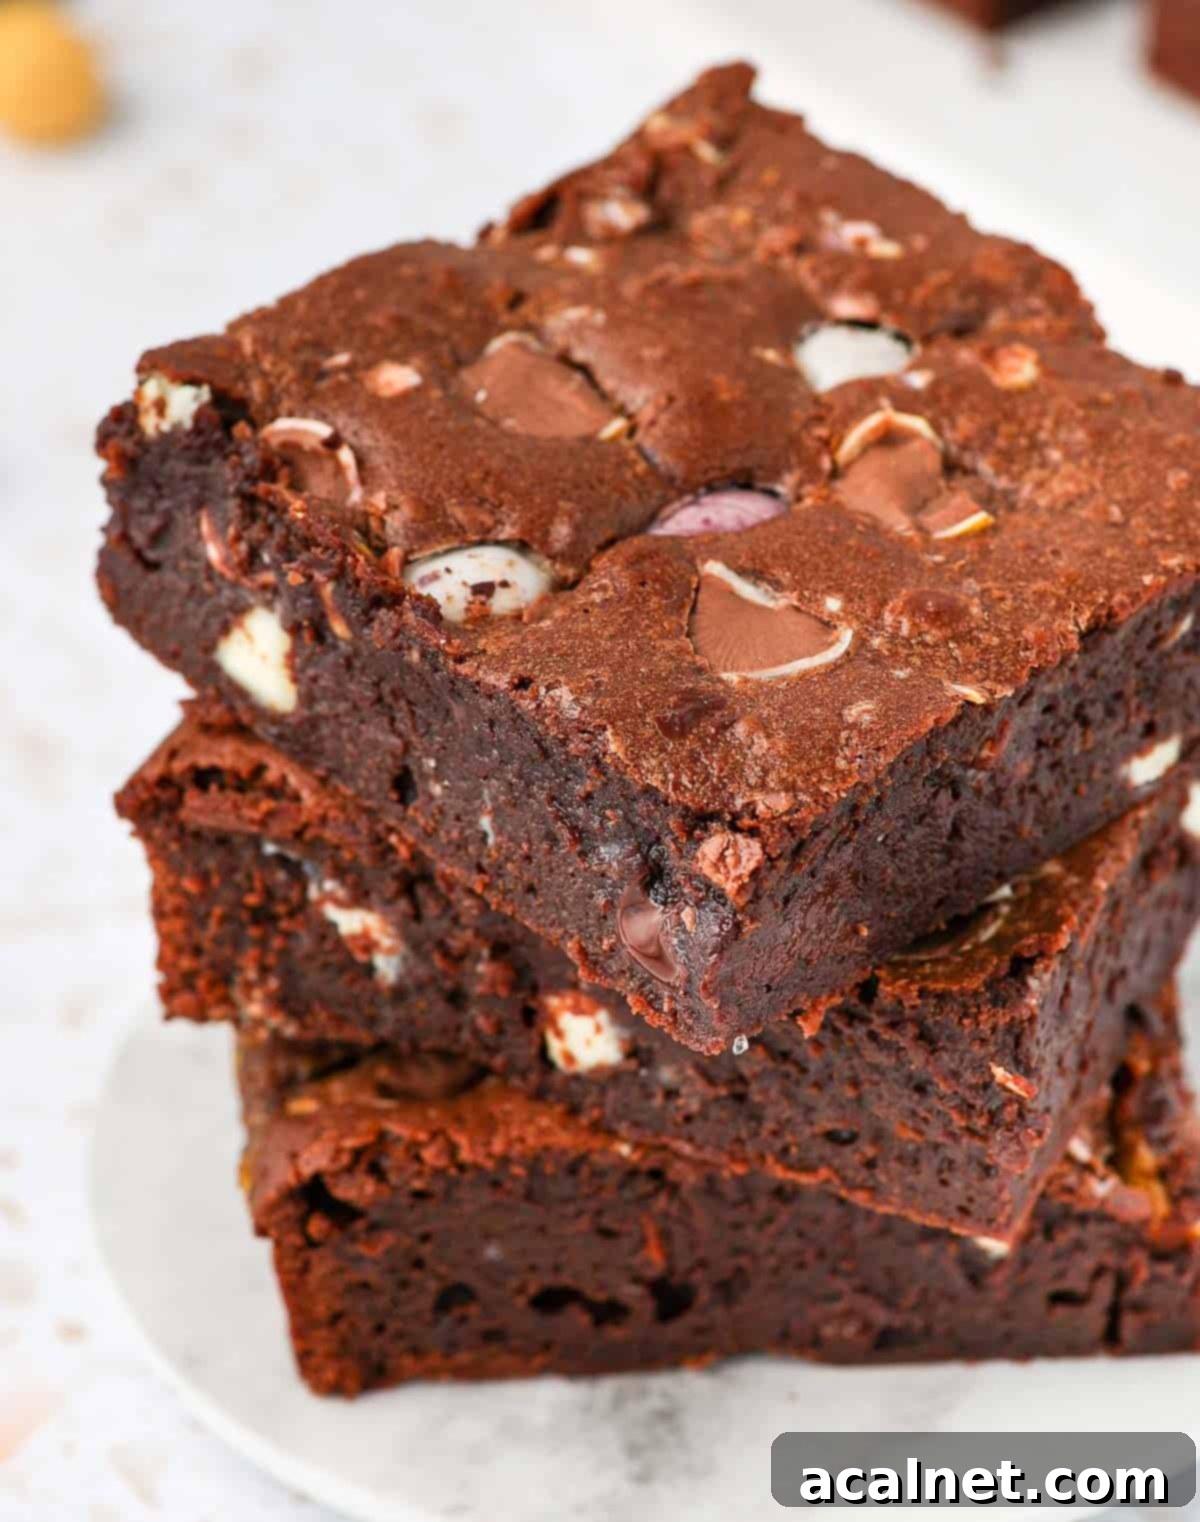
These Easter brownies, made with real butter, tend to dry out a little faster than those made with oil. For the absolute best flavour and texture, they are most delicious when eaten on the day they are baked or within two to three days. To keep them fresh, store them in an airtight container at room temperature. This will help maintain their fudginess and prevent them from going stale too quickly.
While some brownies freeze well, I generally don’t recommend freezing these particular Easter Mini Egg Brownies. The texture of the Mini Eggs and the overall fudginess can be slightly compromised after freezing and thawing, becoming a bit softer or grainier. They are truly best enjoyed fresh!
Explore More Decadent Chocolate Recipes
- Mini Chocolate Tarts: Perfect bite-sized chocolate delights.
- Raspberry Brownies: A fruity twist on classic fudgy brownies.
- Chocolate Cornflake Cakes: A nostalgic no-bake favourite.
- French Chocolate Fondant Cake: For lovers of molten chocolate centers.
- Orange Brownies: A zesty, citrus-infused chocolate experience.
- Easy Chocolate Brownie Bites: Small, delicious, and perfect for sharing.
- Biscoff Brownies: A unique and incredibly flavourful brownie variation.
Made this recipe?
We’d love to hear how your Easter Mini Egg Brownies turned out! Please let us know if you liked them by leaving a comment below, and don’t forget to tag us on Instagram @a.baking.journey with a photo of your delicious creation!
Recipe Card: Easter Mini Egg Brownies

Easter Mini Egg Brownies
Print Recipe
Ingredients
Brownies
- 150 gr Unsalted Butter
- 200 gr Dark Cooking Chocolate
- 3 Eggs, medium, at room temperature
- 60 gr Brown Sugar
- 60 gr Caster Sugar, or fine white granulated sugar
- 60 gr Plain / All-Purpose Flour
- 1/3 teaspoon Fine Salt
Filling & Topping
- 75 gr White Chocolate, chopped into chunks
- 50 gr Dark Chocolate, chopped into chunks
- 125 gr Cadbury Mini Eggs, or similar mini chocolate eggs
Instructions
- Preheat your oven on 180’C/350’F. Line a 21×21 cm (8×8 inch) square baking pan with baking paper.
- Finely chop the Dark Chocolate required for the brownies and set aside. Roughly chop the Dark Chocolate and White Chocolate required for the filling. Optionally, chop half of the Mini Eggs. Set all aside.
- Place the chopped Dark Chocolate (200 grams) it in a heat-proof bowl with the Butter. Melt over a double-boiler or in the microwave in 30 seconds increments until smooth (see note 1). Set aside to cool down.
- In the bowl of your mixer or a large mixing bowl if using a hand mixer, whisk together the Eggs, Brown Sugar and White Sugar for 3 to 5 minutes on medium speed or until it has increased in size and looks very bubbly.
- Pour the melted Chocolate / Butter into the bowl with the Eggs and Sugar (see note 2). Gently whisk until combined.
- Sift in the Flour and Salt. Using a spatula or with the mixer on low speed, mix it in until just incorporated (see note 3).
- For the filling, gently mix in the second batch of Dark Chocolate Chunks and the White Chocolate Chunks. Fold with a spatula until the chunks are evenly spread throughout the brownie batter.
- Pour the batter in the prepared pan and top with the Mini Eggs (see note 4).
- Bake for 16 to 18 minutes, or until the centre looks set and the top is shiny. A toothpick or knife should still come out slightly wet (see note 5).
- Leave to cool down for 20 to 30 minutes (or until fully cooled down if serving later) before removing from the pan and slicing it.
Video
Would you like to save this recipe?
We’ll email this post to you, so you can come back to it later!
Notes
- If melting in the microwave, it is very important to stop and stir every 30 seconds to avoid burning the chocolate. That would result in a very grainy chocolate that looks like it has split. For a double-boiler, ensure the bowl doesn’t touch the simmering water to prevent overheating.
- Make sure the chocolate isn’t too hot when combining it with the egg and sugar mixture, or it will cook the eggs and you will get small bits of cooked eggs in your batter. Let it cool for a few minutes after melting.
- It is important not to overmix the batter at this point, especially after adding the flour, or you won’t get a nice fudgy texture. Overmixing creates too much gluten, leading to a cakey rather than fudgy brownie.
- I chopped half of the mini eggs and kept the other half whole to create a crunchy texture with nice pops of colours and a visually appealing topping. You could use all chopped or all whole if preferred. To easily be able to cut the brownies later, try not to place whole mini eggs directly where you anticipate slicing them.
- It is a quick bake here because this Easter brownies recipe does not require that long in the oven. Unless absolutely necessary, avoid baking the brownies for longer than the recommended time or they will be dry! A toothpick or knife inserted into the center should come out with moist crumbs, not completely clean, indicating a perfect fudgy center.
Nutrition (per serving)
View the Easter Mini Egg Brownies Web Story
