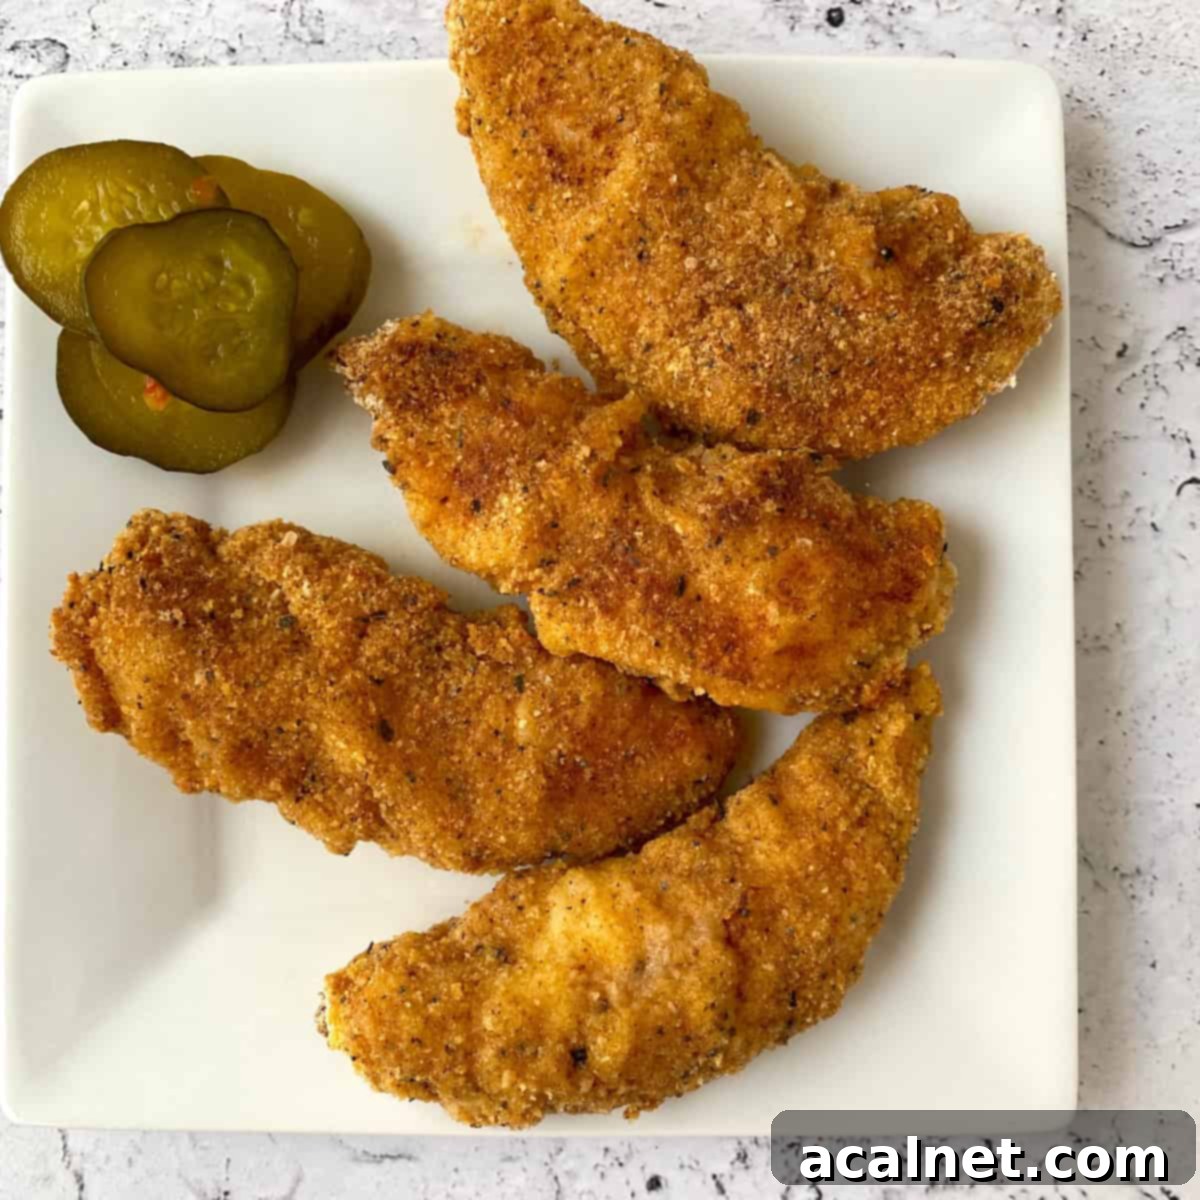
Crispy Oven-Baked Buttermilk Chicken Tenders: Your New Favorite Homemade Recipe
Imagine sinking your teeth into incredibly crispy, perfectly seasoned chicken tenders that are juicy on the inside and golden-brown on the outside. Our **Crispy Oven-Baked Buttermilk Chicken Tenders** recipe brings that dream to life, offering a healthier twist on classic fried chicken without sacrificing any of the delicious flavor or satisfying texture. Forget the deep fryer – these tenders achieve their irresistible crunch right in your oven, making them an ideal choice for a quick weeknight family meal or a crowd-pleasing appetizer.
Inspired by the beloved flavors of iconic takeout chicken, this recipe features a unique blend of spices and a crucial buttermilk soak that guarantees tender, succulent results every time. Prepare to say goodbye to greasy fried chicken and hello to a homemade version that truly rivals your favorite fast-food joints like KFC and Chick-fil-A. Served alongside a refreshing Cold Green Bean Salad, this meal is a guaranteed hit that will have everyone asking for seconds!
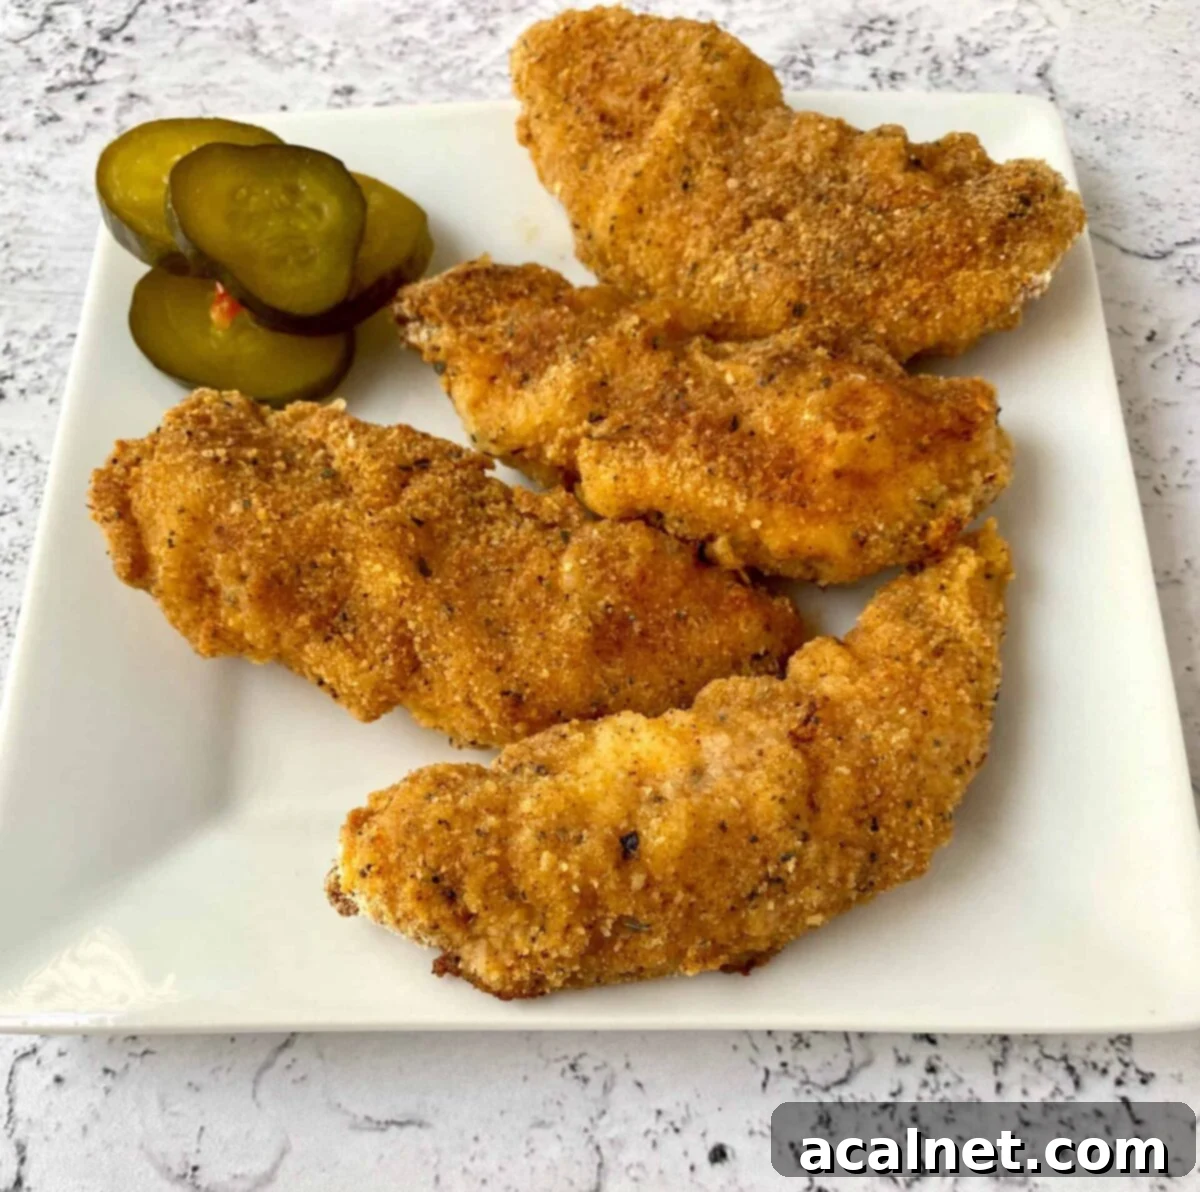
Why You’ll Adore This Oven-Baked Chicken Tender Recipe
If you’re a fan of tender, savory chicken, similar to what you find in comforting dishes like Chicken Spaghetti with Rotel and Velveeta, a creamy Easy Creamy Chicken Stroganoff, or my simple yet delicious Dutch Oven Chicken recipe, then you are absolutely going to fall in love with these **Buttermilk Chicken Tenders**. This recipe isn’t just another way to cook chicken; it’s an experience that delivers maximum flavor with minimal fuss.
Here’s why these crispy oven-baked tenders will become a staple in your kitchen:
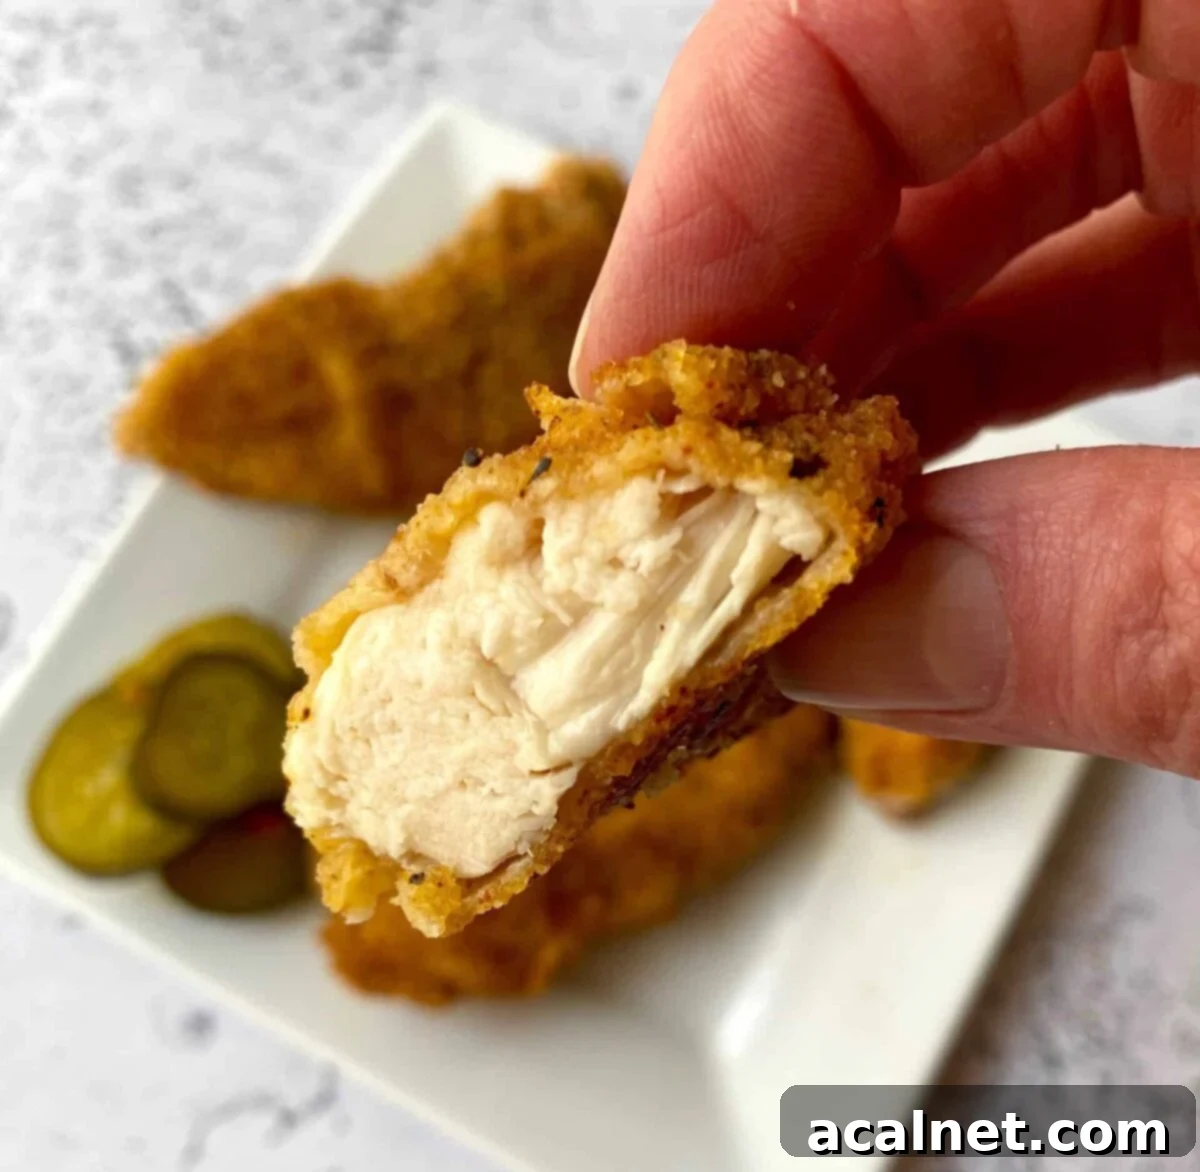
- Unmatched Tenderness: The secret lies in the buttermilk marinade, which gently breaks down the chicken fibers, ensuring every bite is incredibly juicy and tender.
- Crispy, Not Greasy: Unlike traditional fried chicken, these tenders are oven-baked, offering that satisfying crunch you crave without the excess oil and mess of deep-frying. It’s a healthier alternative that doesn’t compromise on texture or taste.
- Flavor That Rivals Takeout: Our carefully crafted blend of spices creates a depth of flavor that competes with, and often surpasses, popular fast-food chicken. You’ll be amazed at how much deliciousness comes from your own kitchen!
- Pantry-Friendly Ingredients: Most of the spices and ingredients needed for this recipe are likely already in your kitchen cabinet. No need for a special trip to an exotic grocery store!
- Highly Adaptable: Don’t have every single spice on hand? No problem! This recipe is incredibly forgiving, allowing for easy substitutions without losing its delicious essence. We’ll share some fantastic alternatives further down.
- Family-Friendly: Kids and adults alike will devour these chicken tenders. They’re perfect for picky eaters and make a great addition to lunchboxes or as a party appetizer.
Prepare for a delightful meal that brings the joy of crispy, flavorful chicken right to your dining table!
Key Ingredients for Flavorful Buttermilk Chicken Tenders
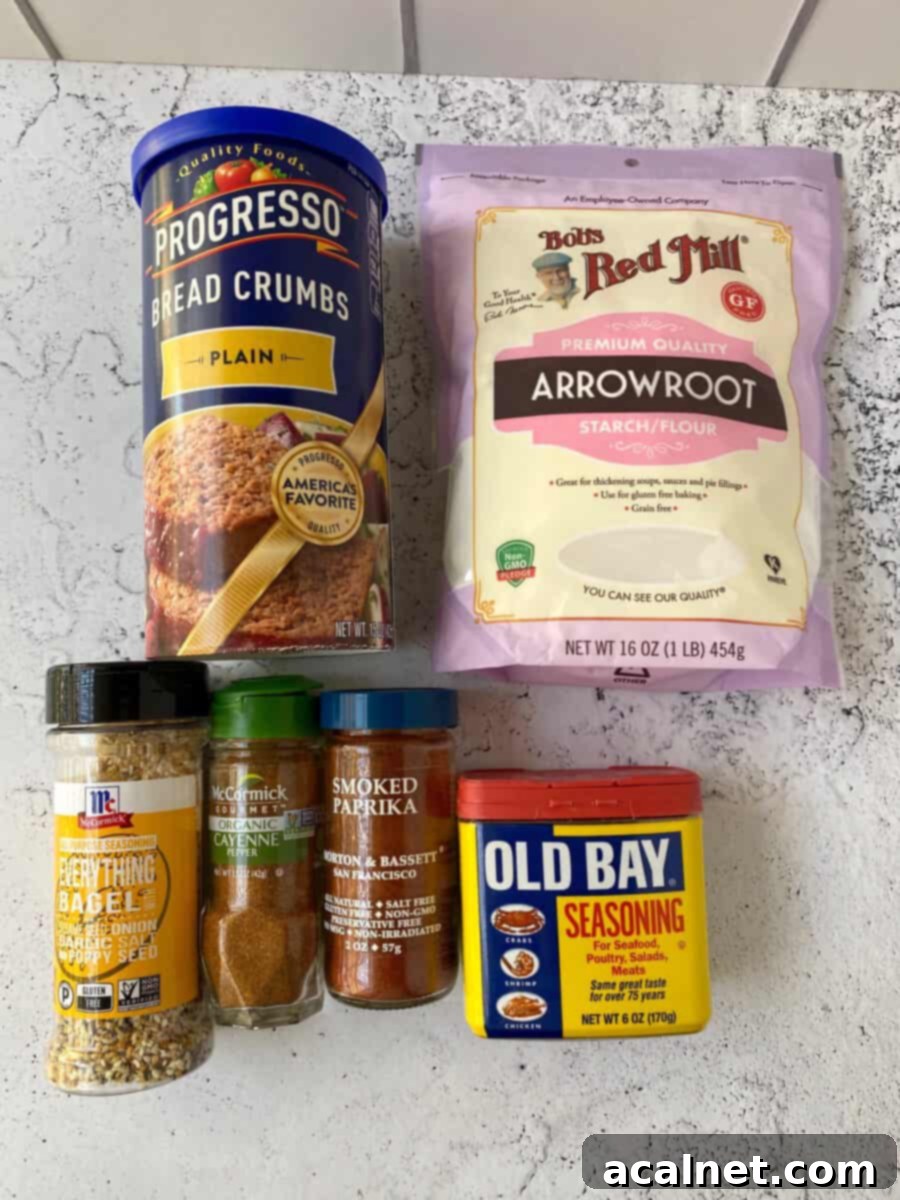
Crafting these perfectly seasoned chicken tenders requires a thoughtful selection of ingredients, many of which you likely already have. Here’s a closer look at what you’ll need to create this culinary masterpiece:
- Chicken: Opt for high-quality chicken tenders (also known as chicken tenderloins). If you can’t find tenders, boneless, skinless chicken breasts can be sliced into strips.
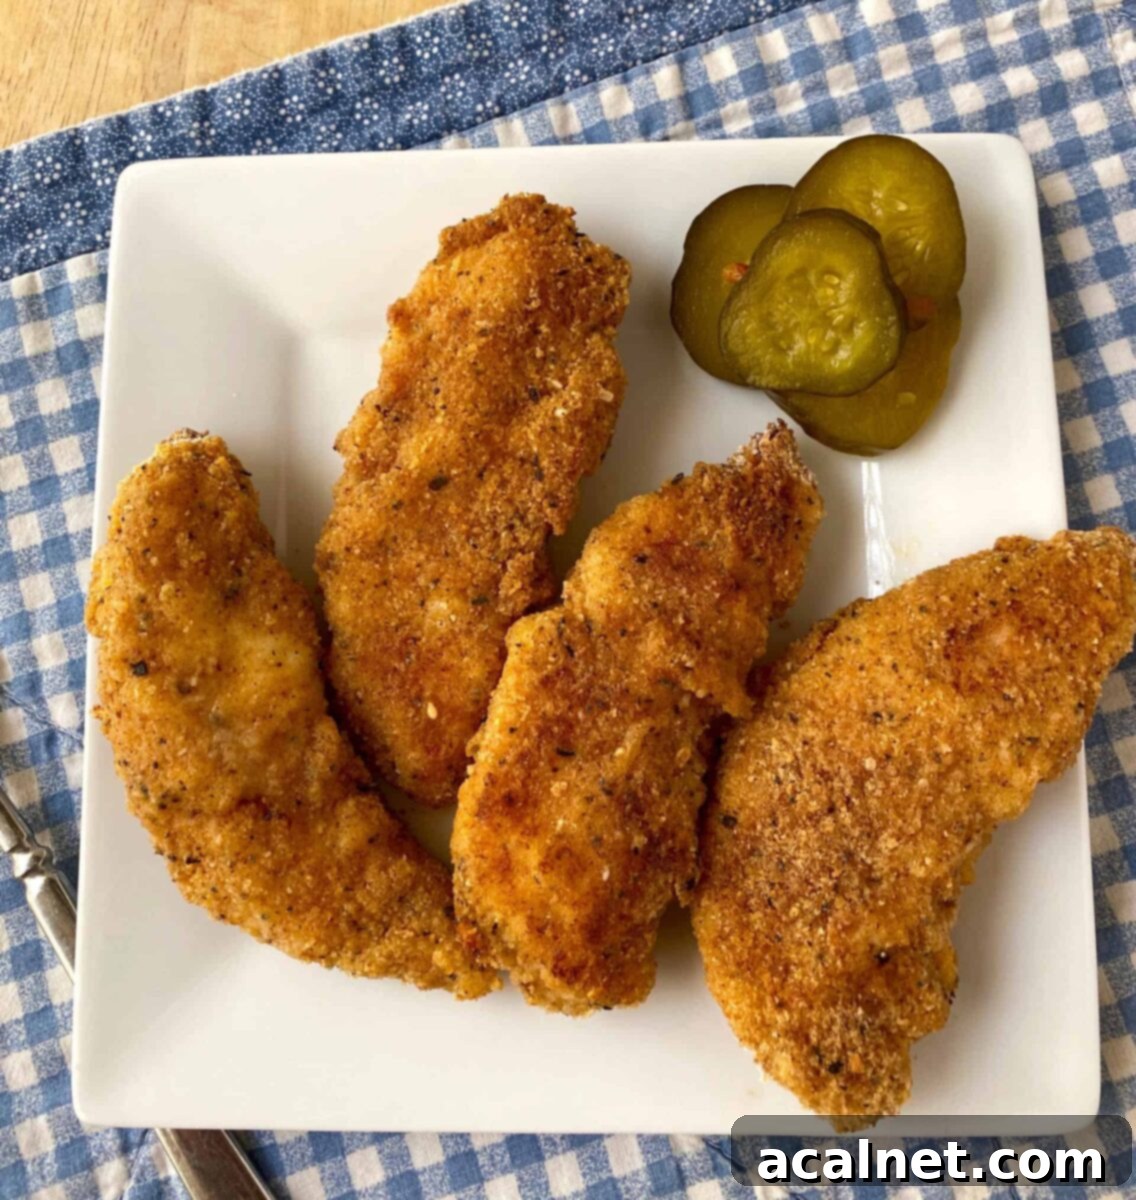
- Buttermilk: The star of our marinade! Buttermilk is essential for tenderizing the chicken and creating a slightly tangy flavor.
- Arrowroot Flour: This is our secret weapon for achieving an extra-crispy, gluten-free coating. It creates a lighter, crunchier crust than traditional all-purpose flour.
- Plain Bread Crumbs: Providing the foundational texture for our breading, plain bread crumbs brown beautifully in the oven.
- Old Bay Seasoning: A distinct and complex blend that adds a savory, slightly spicy, and herbaceous note. It’s a fantastic secret ingredient for chicken.
- Everything Bagel Seasoning: This trendy seasoning isn’t just for bagels! Its blend of sesame seeds, poppy seeds, garlic, onion, and salt adds incredible texture and a burst of umami flavor to the breading.
- Smoked Paprika and Dried Basil: Smoked paprika contributes a deep, smoky undertone and beautiful color, while dried basil adds a subtle, aromatic sweetness.
- Accent Flavor Enhancer (MSG), optional: For an extra boost of savory flavor, Accent can truly elevate the seasoning blend, creating that irresistible “can’t quite place it” deliciousness.
- Eggs and Butter: Egg whites help the breading adhere, and melted butter brushed on top ensures a golden, crispy finish in the oven.
- Salt, Black Pepper, and Cayenne Pepper: Essential flavor foundations, with cayenne adding a gentle kick.
Scroll down to the recipe card for the precise quantities for each ingredient. Having these on hand will set you up for success!
The Secret to Irresistible Flavor: Our Special Seasoning Blend
Any connoisseur of truly great chicken will tell you that the magic isn’t just in the cooking method, but in the meticulous preparation and the secret seasoning blend. Just as KFC famously built its empire on the “11 herbs and spices” that give their chicken its distinctive, delicious taste, and Chick-fil-A is rumored (perhaps incorrectly, but persistently!) to brine their chicken in pickle juice for an extra layer of flavor, we too have crafted a unique blend that elevates these buttermilk chicken tenders to extraordinary heights.
While the internet abounds with copycat recipes claiming to perfectly replicate those iconic flavors, our approach is different. This recipe for Buttermilk Chicken Tenders is thoughtfully inspired by the best qualities of both KFC’s seasoned crunch and Chick-fil-A’s tender juiciness. We don’t claim to be an exact replica, but we are confident that you’ll recognize and appreciate the echoes of those beloved brands in every bite of our homemade version. Our special seasoning mix is designed to create a complex, savory, and slightly spicy profile that will become a new favorite in your household.
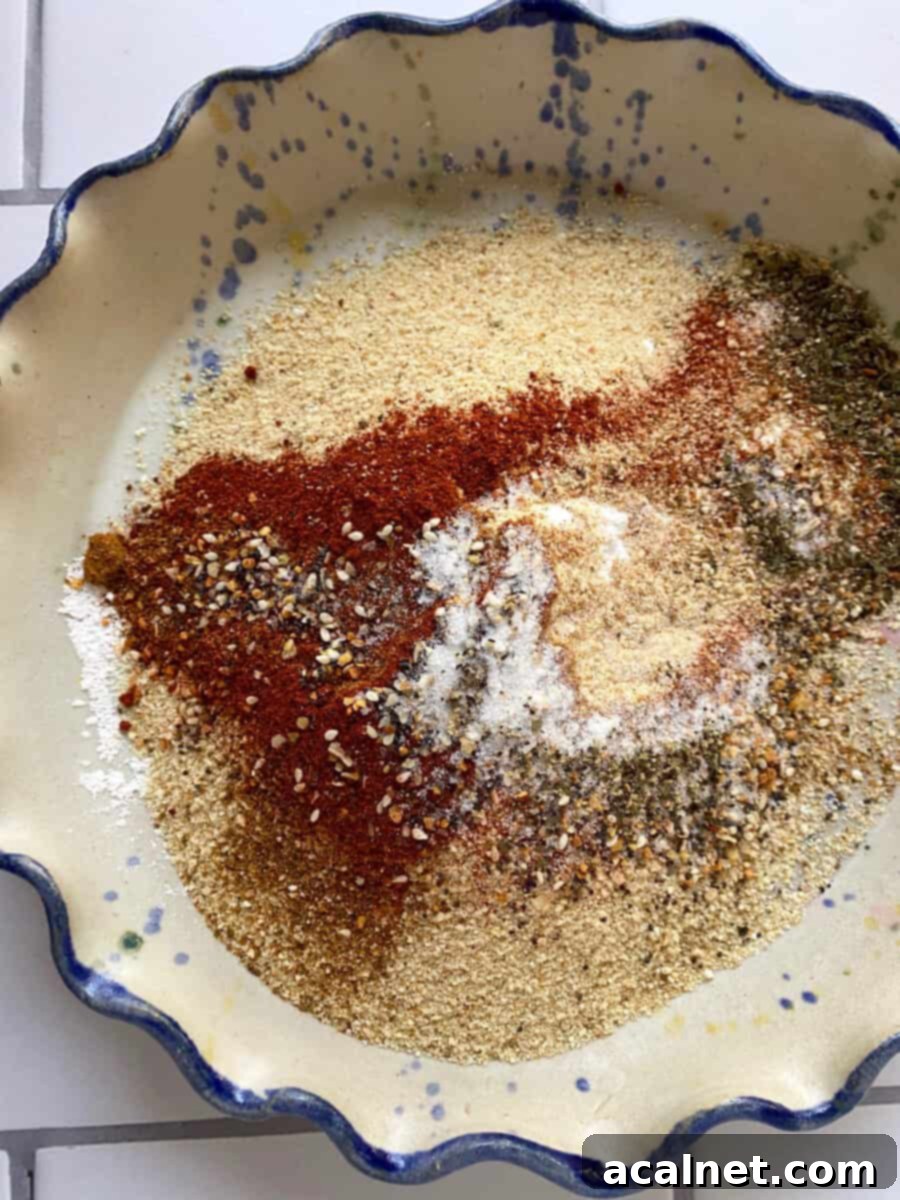
It’s this deliberate combination of spices – from the umami of Everything Bagel Seasoning to the smoky depth of paprika and the savory notes of Old Bay – that truly sets these tenders apart. It’s a flavor profile designed not just to coat the chicken, but to deeply infuse it, ensuring a memorable taste experience that will make you rethink your next takeout order.
The Magic of Buttermilk: Tenderizing for Perfection
The name “chicken tenders” truly lives up to its promise when the chicken is given the chance to marinate in buttermilk. This isn’t just an optional step; it’s a fundamental part of achieving the incredibly juicy and tender results that make this recipe so special. While it does require a bit of planning ahead – allowing the raw chicken strips to soak in buttermilk in the refrigerator for at least an hour, or even better, several hours – the payoff in flavor and texture is absolutely worth the extra time.
So, why is buttermilk so effective? It’s all about science!
- Acidity: Buttermilk is mildly acidic. This acidity works gently to break down the tough protein fibers in the chicken meat, leading to a much more tender final product. Unlike stronger acids like lemon juice or vinegar, buttermilk’s acidity is mild enough to tenderize without making the chicken tough or rubbery.
- Enzymes: Buttermilk contains enzymes that further assist in breaking down muscle fibers, contributing to the chicken’s tenderness.
- Flavor Infusion: Beyond tenderizing, buttermilk imparts a subtle tangy flavor that complements the robust spice blend beautifully. It also helps the breading adhere more effectively, creating a better crust.
- Moisture Retention: The buttermilk soak helps the chicken retain moisture during cooking, ensuring that even when baked at a high temperature, the chicken remains wonderfully juicy, not dry.
This trick has been cherished and utilized for generations by home cooks and chefs alike, a testament to its effectiveness. It’s the secret weapon for guaranteeing that every bite of your chicken tenders is as succulent and flavorful as possible. Don’t skip this crucial step!
Crafting the Perfect Crispy Breading: The Role of Arrowroot Flour
The breading is arguably just as important as the chicken itself when it comes to achieving that irresistible crispy texture. For these chicken strips, I highly recommend using arrowroot flour. You might also see it labeled as arrowroot starch or arrowroot powder, and it’s becoming increasingly common in most well-stocked grocery stores.
You’ll typically find it in the baking aisle, often alongside other specialty flours like almond or coconut flour, or sometimes near the spices. In some larger stores, I’ve even discovered it in the bulk food section, which can be a great economical option.
So, why arrowroot flour instead of the more common all-purpose flour? While all-purpose flour certainly works, arrowroot offers distinct advantages that contribute to a superior crispy coating:
- Unrivaled Crispiness: Arrowroot flour, when baked or fried, creates an exceptionally light and crispy texture that’s hard to achieve with wheat flours. It helps form a delicate, crunchy shell around the chicken.
- Flavorless: It’s completely flavorless, allowing the carefully selected spices in our blend to shine through without any starchy undertones.
- Gluten-Free: For those with gluten sensitivities or simply looking for a gluten-free option, arrowroot flour is a fantastic natural choice.
- Excellent Binder: It’s highly effective at binding the breading ingredients together, ensuring an even and consistent coating on each tender.
Combining arrowroot flour with plain bread crumbs and our special spice blend creates a dynamic coating that adheres perfectly after the buttermilk soak and egg wash. This multi-layered breading is key to the golden, crispy exterior of these oven-baked chicken tenders, giving them that satisfying crunch in every bite.
Flexible Flavor: Seasoning Substitutions and Variations
Don’t worry if your spice rack isn’t fully stocked with every single ingredient listed in this recipe. This Buttermilk Chicken Tenders recipe is incredibly forgiving, and there are plenty of excellent substitutions that will still allow you to achieve a remarkably tasty and well-seasoned breading. Here are some fantastic alternatives:
Smoked Paprika: Smoked paprika offers a rich, deep, and slightly smoky flavor that truly enhances the chicken. If you don’t have it:
- Regular Paprika: You can absolutely use regular (sweet) paprika in its place. The flavor will be slightly milder and less smoky, but it will still contribute a lovely color and a foundational pepper note to the blend.
- Chili Powder: For a slightly spicier and more complex flavor, a pinch of chili powder can be a good substitute, but be mindful of the quantity as it can be stronger.
Everything Bagel Seasoning: This seasoning provides a unique blend of texture and umami from its mixture of seeds and dried aromatics. If you’re out:
- DIY Blend: To get fairly close to the texture and taste, combine 1 teaspoon of poppy seeds, 2 teaspoons of sesame seeds (white or black), and 1 teaspoon of onion flakes (or finely minced dried onion). You can also add a pinch of garlic powder.
- Simply Omit: If you prefer to keep it simple, you can simply leave out the Everything Bagel Seasoning. The chicken will still be wonderfully flavorful thanks to the other spices.
Old Bay Seasoning: Old Bay is known for its distinctive, complex, and savory flavor, a true seafood boil classic that works wonders on chicken. It’s hard to perfectly replicate, but here are some options:
- Favorite Seasoning Salt: Your preferred seasoning salt (like Lawry’s or similar all-purpose blends) can be used as a direct substitute.
- Cajun Seasoning: For a spicier, more robust flavor profile, Cajun seasoning is an excellent choice. Adjust to your heat preference.
- Homemade Blend: Combine 1 ½ teaspoons of regular paprika with 1 ½ teaspoons of celery salt. You can also add a pinch of dried mustard, black pepper, and a tiny bit of ground cloves or allspice for a closer match.
Feel free to experiment with other spices you love, such as garlic powder, onion powder, or a touch of dried oregano, to customize the flavor to your personal preference. The goal is a rich, balanced seasoning that makes your chicken tenders truly shine!

Top Tips and Frequently Asked Questions
No need to rinse the chicken after its buttermilk soak, and definitely no need to pat them completely dry! The goal is for each chicken strip to be lightly coated with buttermilk when you remove it. This residual buttermilk helps the breading adhere perfectly. Simply drain off any excess liquid; a colander or strainer works great for this. Each piece should still feel slightly damp, ready for the flour and egg dredge.
Yes, you can substitute all-purpose flour for arrowroot flour if it’s what you have on hand. However, based on extensive testing, I’ve found that arrowroot flour excels at binding the breading ingredients together more effectively and contributes to a noticeably crispier final texture compared to all-purpose flour. While your chicken tenders will still be delicious with all-purpose flour, they might not achieve quite the same level of delicate crispiness.
Accent (Monosodium Glutamate, MSG) is a powerful flavor enhancer that provides a significant boost of savory “umami” to the seasoning, making it truly pop. I highly recommend using it if you can, as MSG has been safely used for decades and is a common “secret ingredient” among chefs and famous food brands. However, if you’re sensitive to MSG or prefer not to use it, rest assured the chicken will still be absolutely delicious! The other robust spices ensure a fantastic flavor profile even without the Accent.
Several tricks will help you achieve maximum crispiness: 1) Don’t overcrowd the baking sheet. Give each tender space for air to circulate. 2) Use parchment paper and lightly spray it or brush with butter. 3) Flip the tenders halfway through baking to ensure even browning on both sides. 4) Ensure your oven is fully preheated to 425°F (220°C). A hot oven helps the breading crisp quickly.
These versatile chicken tenders pair wonderfully with a variety of sides! Classic choices include Classic Potato Salad, Crunchy Cole Slaw, French fries, or a side of steamed vegetables. For dipping, consider homemade Fry Sauce, honey mustard, BBQ sauce, or ranch dressing. They’re also fantastic sliced and added to salads or used in wraps!

Achieving Crispy Perfection: Oven-Baked Chicken Tenders
While I adore the nostalgic taste of old-fashioned fried chicken, and store-bought fried chicken strips are certainly a guilty pleasure, these homemade chicken tenders offer a fantastic, healthier alternative without sacrificing an ounce of flavor or that coveted crispy texture. The beauty of this recipe lies in its simplicity and the minimal mess it creates.
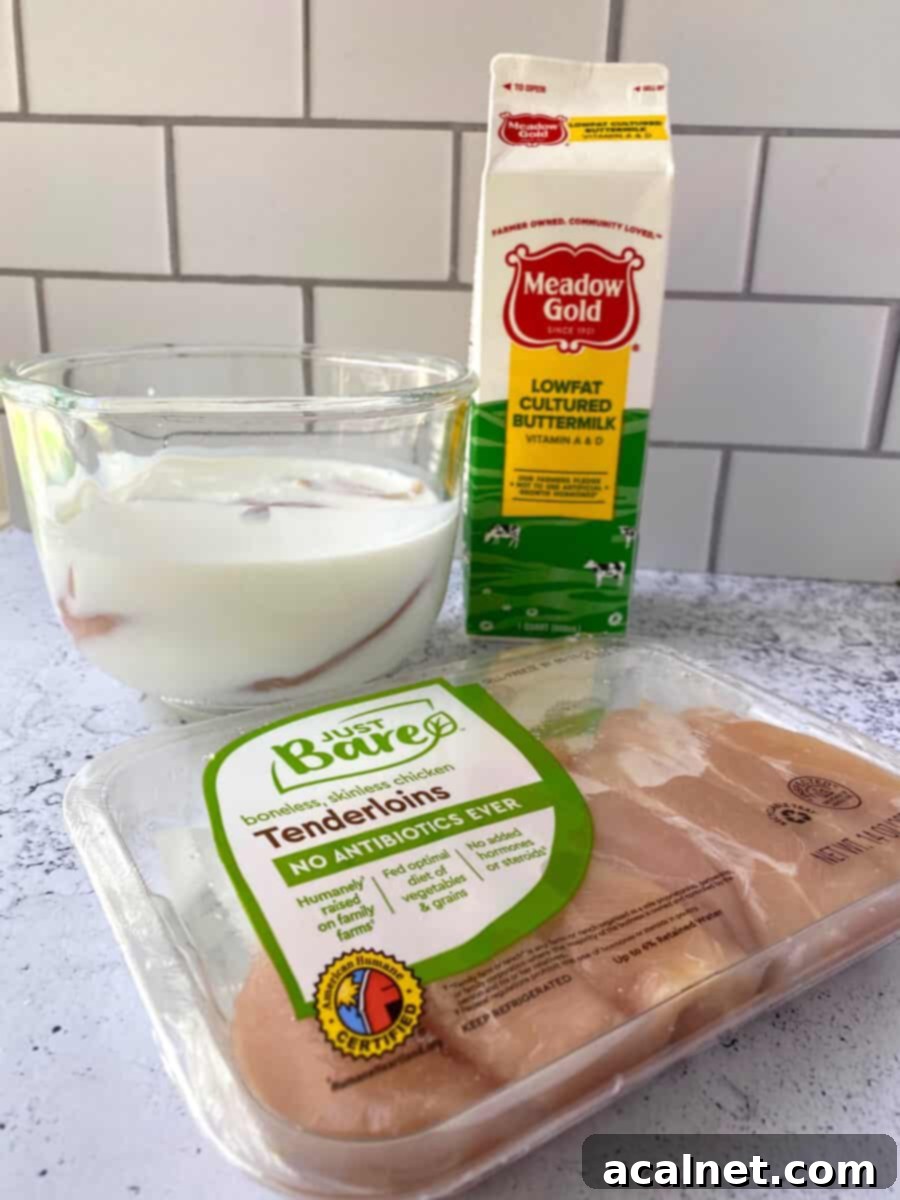
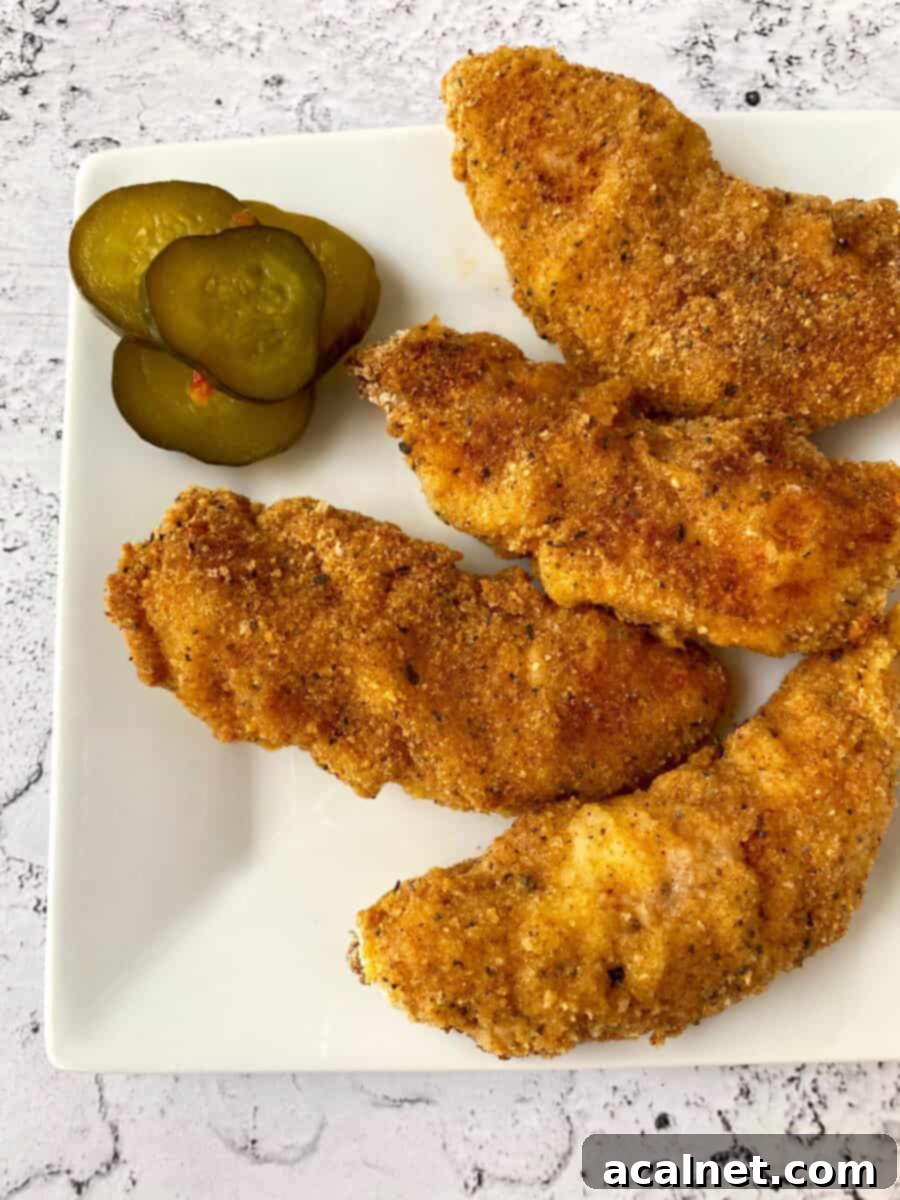
These chicken strips bake quickly and efficiently in a hot oven, placed on a baking sheet lined with parchment paper. This method means no hot oil splatters to clean up and a much lighter, less greasy result. You’ll be amazed at how the oven transforms the seasoned breading into a golden, crunchy crust that truly rivals your favorite fried chicken, perhaps even reminding you of those beloved KFC chicken strips, but with the satisfaction of knowing they’re homemade.
The oven-baked approach offers several advantages:
- Healthier Option: Significantly less fat and calories compared to deep-frying.
- Easier Cleanup: No messy oil to dispose of or grease to scrub from your stovetop.
- Even Cooking: The oven provides consistent heat, ensuring the chicken cooks thoroughly and evenly.
- Hands-Off Time: Once in the oven, you’re free to prepare your side dishes or relax while they bake.
However, we understand that sometimes you just crave that classic fried taste! That’s why we also offer an alternative. Scroll down for details on how you can achieve beautifully fried chicken tenders in a skillet on your stovetop! Whether baked or pan-fried, these buttermilk chicken tenders are designed for maximum deliciousness.

Before sending your chicken tenders into the oven, there’s a small but significant step to ensure a perfect golden-brown crisp: brush each tender generously with melted butter. This not only aids in browning but also adds a rich, delectable flavor that enhances the overall taste. As an alternative, you can also spray them lightly with cooking spray (like Pam), but the butter truly makes a difference in both crispiness and flavor depth. Don’t skip this easy step for the best results!

It’s always a good practice to keep an eye on your chicken tenders as they bake. Around the halfway point of the cooking time, check their progress. This is an opportune moment to either flip them over to ensure even crisping on both sides or to assess if they might require slightly more or less time than initially set on your timer. Ovens can vary, and chicken tender sizes differ, so a quick check ensures perfect results every time.

Step-by-Step Guide: How to Oven Bake for Optimal Crispiness
Achieving perfectly cooked, crispy oven-baked chicken tenders is simple with these clear steps:
- Preheat your oven: Set your oven to a high temperature of 425°F (220°C). A hot oven is crucial for achieving that initial crisp on the breading.
- Arrange the tenders: Place your breaded and butter-brushed chicken tenders in a single layer on the prepared parchment-lined baking sheet, ensuring they are not overcrowded. Give each piece a little space to allow for proper air circulation and even browning.
- Initial Bake: Bake the chicken tenders for 15 minutes. As an option, you can carefully flip them over halfway through this time (around the 7-8 minute mark) to ensure both sides achieve a beautiful golden crust.
- Check for Doneness: After 15 minutes, it’s time to check if they are done. Look for a breaded coating that is dark, golden brown and crispy. To confirm the chicken is fully cooked, pierce the thickest part of a chicken strip with a fork; the juices should run clear. If you see any signs of pink meat, it means the chicken needs more time.
- Additional Baking (if needed): If your chicken tenders aren’t quite done, return the baking sheet to the oven and bake for an additional 5-8 minutes, or until the internal temperature reaches 165°F (74°C) with a meat thermometer.
Remember that cooking times can vary depending on the thickness of your chicken tenders and your specific oven. Always prioritize food safety by ensuring the chicken is cooked through.
Classic Crunch: The Fried Chicken Option
While our oven-baked method delivers fantastic crispy results, sometimes you simply crave the unmistakable texture and flavor of traditionally fried chicken. If you’re feeling nostalgic or just prefer the classic way, you can absolutely opt for the old-fashioned method – just like grandma used to do – and fry these breaded chicken tenders in hot oil in a sturdy skillet. Here’s how to get that perfect golden-brown, deep-fried crunch:
- Prepare the Oil: Heat about ¾ cup of vegetable oil (or another neutral high-smoke-point oil like canola or peanut oil) in a large, heavy-bottomed skillet over medium-high heat. A cast iron skillet is highly recommended as it distributes and retains heat exceptionally well, leading to more even cooking and browning. Wait until the oil starts to shimmer and a drop of water sizzles vigorously when flicked into it – this indicates it’s hot enough (around 350-375°F or 175-190°C).
- Fry the Tenders: Carefully place each breaded chicken tender into the hot oil, ensuring not to overcrowd the pan. Cook in batches if necessary to maintain oil temperature. Fry for about 4 minutes on each side, or until the chicken is deeply golden brown, crispy, and fully cooked through. To verify doneness, pierce the chicken with a fork, and the juices should run clear.
- Drain and Serve: Once cooked, use tongs to remove the chicken tenders from the skillet and place them on a plate lined with paper towels. This will help drain any excess oil, ensuring maximum crispiness. Serve immediately and enjoy the classic fried chicken experience!

Whether you choose the convenience and health benefits of oven-baking or the rich, deep flavor of skillet-frying, each chicken tender will be fully coated in our flavorful, spicy seasoned breading. This coating effectively replaces the chicken skin typically found on traditional fried chicken, delivering a satisfying crunch and taste that just might remind you of those famous KFC chicken strips, all from your own kitchen!
I personally love to serve these versatile tenders with classic comfort sides. My homemade Classic Potato Salad and a refreshing Crunchy Cole Slaw make for an absolutely perfect meal combination that’s sure to please everyone at the table.
Storing and Reheating Buttermilk Chicken Tenders
These delicious buttermilk chicken tenders are so good, you might not have any leftovers! But if you do, they store and reheat wonderfully, making for quick and easy meals later in the week.
How to Store Leftovers:
- Refrigerator: Place any cooled leftover Buttermilk Chicken Tenders in an airtight container and store them in the refrigerator. They will remain fresh and delicious for 3-4 days.
- Freezer: For longer storage, allow the chicken tenders to cool completely. Then, arrange them in a single layer on a baking sheet and freeze until solid (this prevents them from sticking together). Once frozen, transfer them to a sealed freezer-safe container or a zip-top freezer bag. They can be stored in the freezer for up to 6 months. Label with the date for best quality.
Creative Ways to Enjoy Leftovers:
- Enjoy them cold for a quick snack or a packed lunch.
- Slice the chicken tenders and toss them into crunchy salad greens for a tasty and satisfying chicken salad.
- Chop them up and use them in wraps or sandwiches.
- Reheat and serve with different dipping sauces for a varied meal.
How to Reheat for Best Results:
The key to reheating is to bring back that delicious crispiness!
- Oven (Recommended for Crispiness): To replicate the crispy breading, preheat your oven to 300°F (150°C). Place the chicken tenders on a baking sheet (lined with parchment paper for easy cleanup) and bake uncovered for about 20 minutes, or until they are heated through and the breading has crisped up again. If reheating from frozen, increase baking time to 425°F (220°C) for 15-20 minutes, or until hot.
- Air Fryer: For an even faster and crispier reheat, place the tenders in a single layer in your air fryer basket. Air fry at 350°F (175°C) for 5-8 minutes, flipping halfway, until hot and crispy.
- Microwave: While convenient, the microwave will soften the breading. Heat on low power until hot, typically 1-2 minutes, checking at 30-second intervals. This method is best if you plan to use the chicken in a salad or a dish where crispiness isn’t the primary goal.
No matter how you choose to store or reheat them, these buttermilk chicken tenders are designed to be a delightful addition to your meal rotation!
More Delicious Dinner Recipes to Explore
Looking for more inspiration to round out your dinner menu? Here are some other fantastic recipes from our collection that are sure to become family favorites:
- 10 Dutch Oven Chicken Recipes
- Dutch Oven Pot Roast
- Easy Pork Tenderloin with Orange Sauce
- Lazy Lasagna
Important Food Safety Guidelines
When cooking any meal, especially with poultry, keeping food safety in mind is paramount to ensure a healthy and enjoyable experience for everyone. Here are a few essential tips to maintain a safe kitchen and serve safe food:
- Cook to a Minimum Safe Temperature: Always ensure chicken is cooked to an internal temperature of at least 165°F (74°C). Use a meat thermometer to check the thickest part of the chicken.
- Prevent Cross-Contamination: Never use the same cutting boards, utensils, or plates on cooked food that previously touched raw meat without thorough washing and sanitizing.
- Refrigerate Promptly: Do not leave cooked food sitting out at room temperature for extended periods (no more than two hours). Promptly refrigerate leftovers to prevent bacterial growth.
- Ensure Good Ventilation: Always have good ventilation when using a gas stove to dissipate any fumes.
For more comprehensive guidelines on safe food handling and preparation, please refer to USDA.gov.
If you tried this Buttermilk Chicken Tenders Recipe or any other recipe on my website, please leave a 🌟 star rating and let me know how it goes in the 📝 comments below. Your feedback is greatly appreciated!
Recipe Card
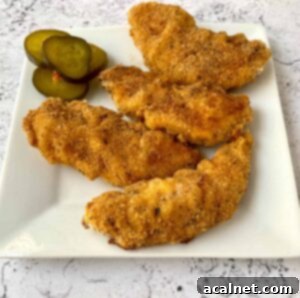
Buttermilk Chicken Tenders
Ingredients
- 2 cups buttermilk
- 2 pounds chicken tenders
- 1 cup plain bread crumbs
- 1 cup arrowroot flour – divided
- ½ teaspoon cayenne pepper
- 2 teaspoons Old Bay Seasoning
- 1 teaspoon smoked paprika
- 1 teaspoon Everything Bagel Seasoning
- ½ teaspoon dried basil
- ½ teaspoon black pepper
- 1 teaspoon salt
- 1 ½ teaspoon Accent, flavor enhancer – optional
- 3 egg whites
- ⅓ cup butter – melted
Instructions
Prep Chicken
- Place chicken tenders in a bowl and add buttermilk. Combine so that each chicken strip is covered completely and soaking in the buttermilk. Cover and refrigerate for at least one hour (or up to 4 hours for maximum tenderness). This crucial step helps to tenderize the chicken and infuse it with flavor.
Preheat Oven and Prepare Baking Sheet
- Preheat your oven to 425°F (220°C). This high temperature is key for a crispy coating.
- Line a large baking sheet with parchment paper for easy cleanup and to prevent sticking. Lightly spray the parchment paper with cooking spray (such as Pam).
Prepare Breading Stations
- In a shallow pan (a pie dish or wide bowl works great), combine the bread crumbs, ⅓ cup of arrowroot flour, Old Bay Seasoning, smoked paprika, black pepper, salt, Everything Bagel Seasoning, dried basil, and Accent flavor enhancer (if using).Use a fork or whisk to thoroughly combine all the dry ingredients. Set this breading mixture aside.
- In a separate shallow bowl, whisk the egg whites until slightly frothy. Set aside.On a third plate, combine the remaining ⅔ cup of arrowroot powder and cayenne pepper. Stir well to combine, and place this plate next to the bowl with the egg whites. You should now have three distinct breading stations.
- Remove the chicken tenders from the refrigerator and drain off the excess buttermilk. Do not rinse or pat dry; a light coating of buttermilk is desired.
Bread the Chicken Strips
- Working one by one, place each chicken strip into the arrowroot flour/cayenne mixture on the plate, ensuring it’s lightly coated. Next, dunk it into the whisked egg whites, letting any excess drip off. Finally, place the chicken strip into the bread crumb mixture and turn it a few times, pressing gently, so the breading completely coats each piece of chicken.
- Arrange the breaded chicken strips in a single layer on the prepared parchment paper on the baking sheet, ensuring they are not touching. Brush the top of each piece of chicken generously with the melted butter. While you can use cooking spray instead of butter, the butter significantly enhances the flavor and promotes a richer golden crust.
Bake to Perfection
- Bake for 15 minutes. At the 15-minute mark, check the chicken strips for doneness. They are ready if the breaded coating is dark, golden brown and crispy, and the juices run clear when you pierce the chicken strip with a fork. Sometimes, depending on the size and thickness of the chicken strips, you might need to bake them for an additional 5-8 minutes. Ensure an internal temperature of 165°F (74°C) is reached for food safety. Serve hot and enjoy!
Notes
Please note, the nutrition details are estimated using a food database, so they’re just a rough estimate not an exact science.
