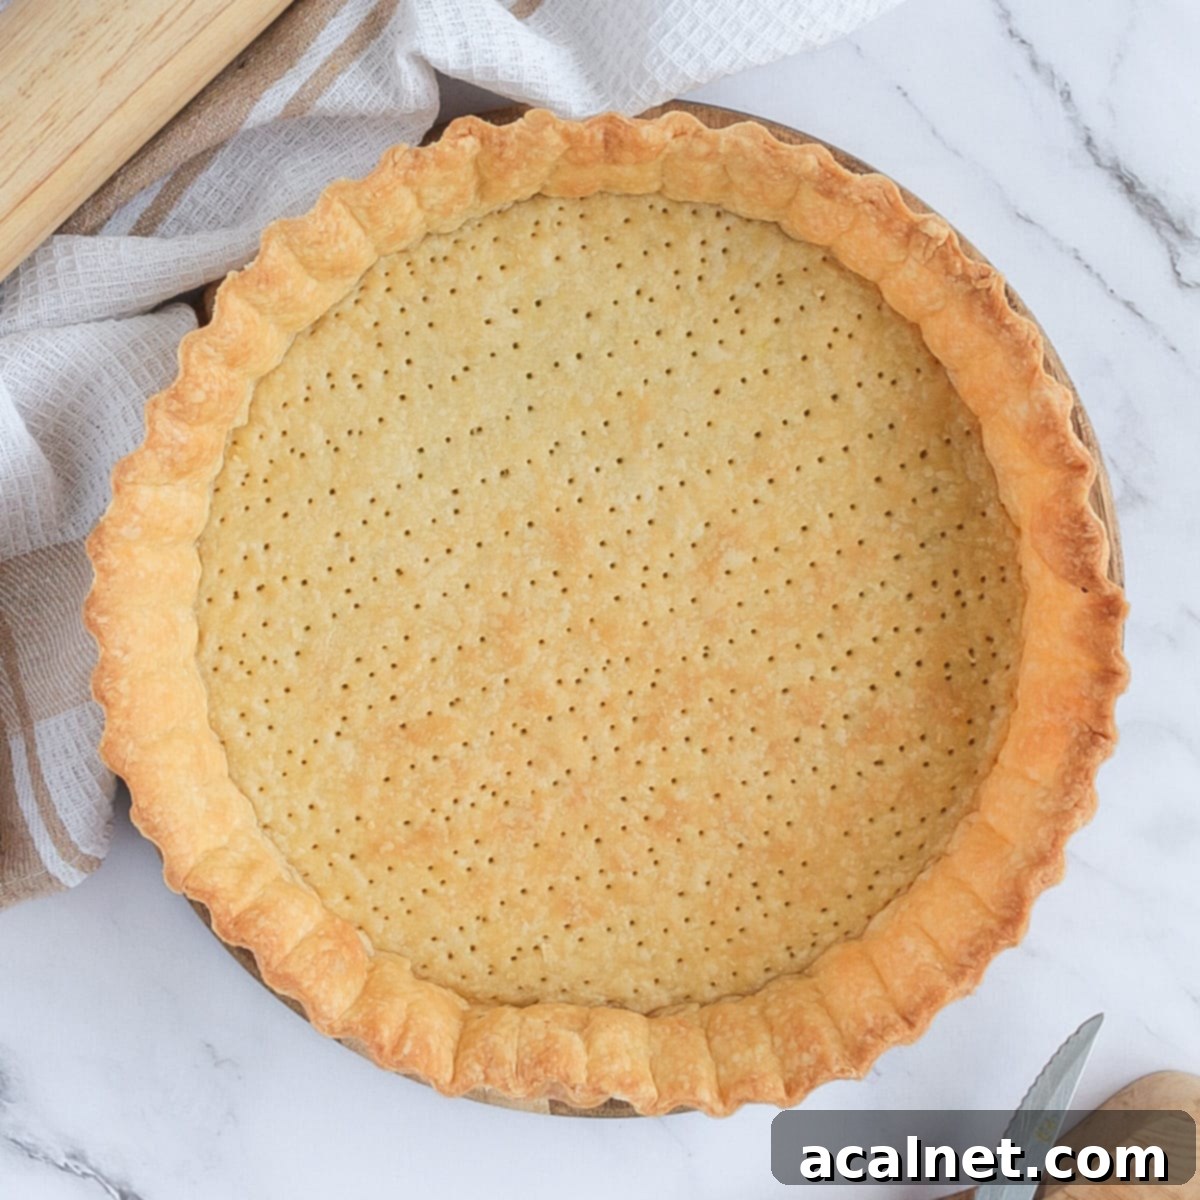
The Ultimate 4-Ingredient Savoury Shortcrust Pastry: Perfect for Quiches, Tarts & Pies (Food Processor Method)
Unleash your inner baker with this incredibly simple and quick 4-ingredient savoury shortcrust pastry recipe, ideal for crafting delicious quiches, tarts, and pies. Designed for convenience, this buttery, flaky, and impossibly light pie crust comes together effortlessly in your food processor. Say goodbye to mediocre store-bought options; once you taste the homemade difference, you’ll never look back. This recipe is not just easy; it’s a game-changer for anyone who loves savoury baked goods, providing a perfect foundation for all your culinary creations.
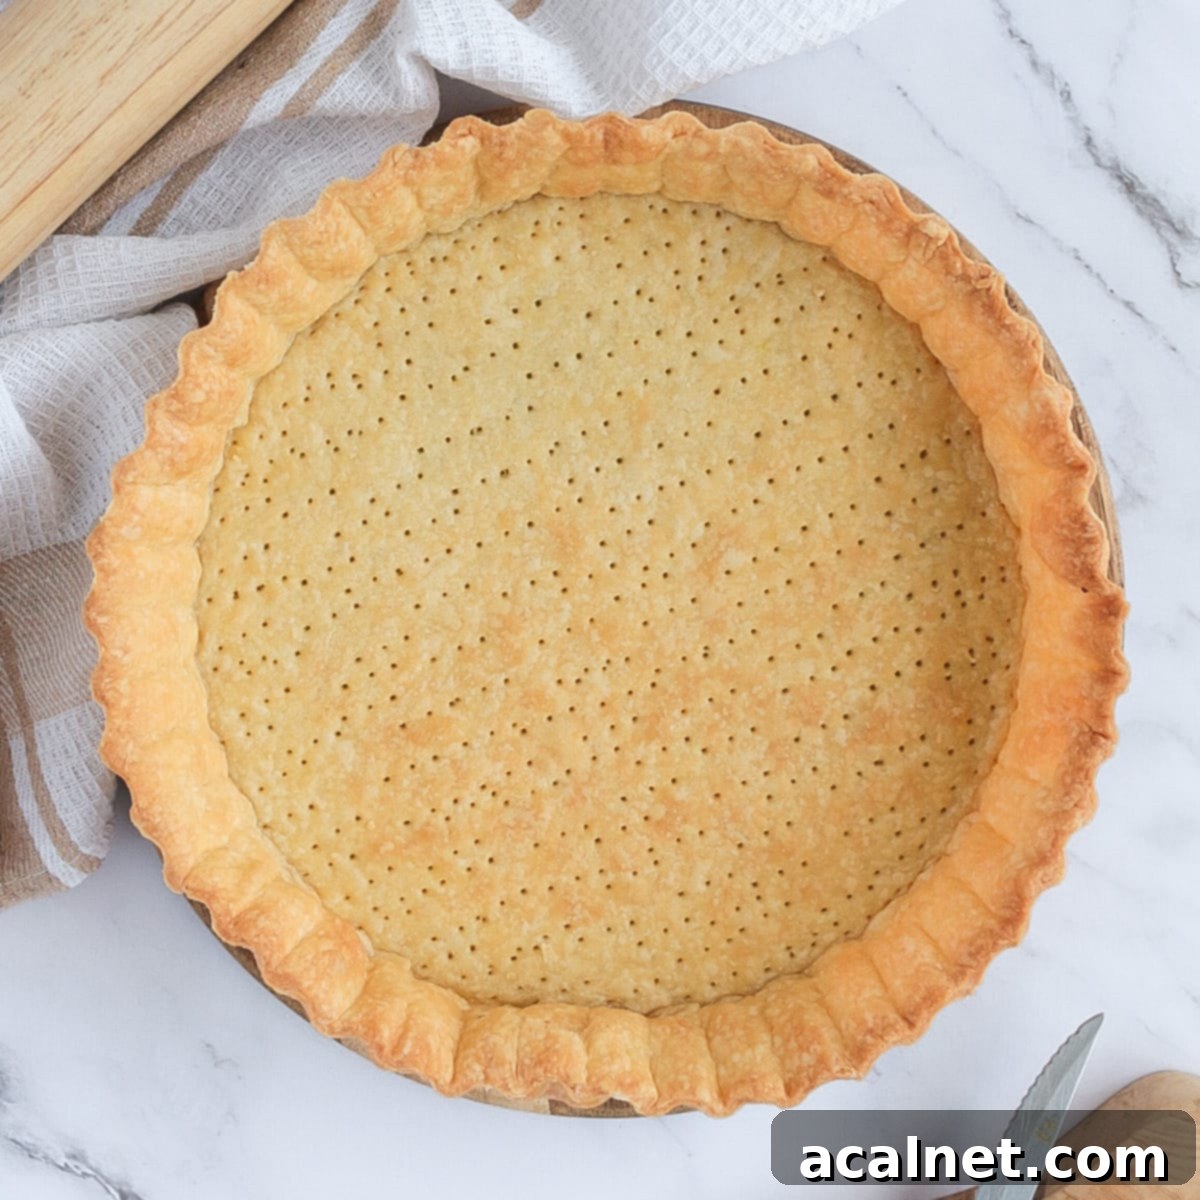
Why You’ll Adore This Easy Savoury Shortcrust Pastry Recipe
This savoury tart crust recipe holds a special place in my kitchen, a true workhorse that sees constant use! While I confess a deep affection for sweet tarts made with a variety of Sweet Shortcrust Pastry, Pâte Sablée, or even a decadent Chocolate Pie Crust, my heart also beats for a hearty main meal. That’s where savoury delights like quiches and tarts come into play, each demanding a perfectly crafted, robust pastry base.
Having a straightforward, reliable savoury pastry recipe that’s both incredibly easy and lightning-fast to prepare is an absolute kitchen essential. This particular recipe is a true testament to versatility. It serves as the ideal foundation for classic quiches, such as a delightful Spinach and Feta Quiche, or elegant savoury tarts like my beloved Leek Tart with Gruyere and Onions. Imagine it also as the perfect top crust for a comforting savoury pot pie, adding that irresistible crunch and flavour!
Crafting your own quiche pastry with real butter is, in my opinion, the only way to achieve that quintessential flaky texture and rich, deep flavour that elevates any dish. This is a quality simply unattainable with pre-made, store-bought shortcrust pastry. While the idea of making pastry from scratch might feel a little daunting to some, rest assured – by diligently following the crucial resting and chilling times outlined in this recipe, you’ll achieve a flawless pie crust, every single time. It’s truly worth the small effort for such exceptional results.
Essential Ingredients for Your Flaky Pie Crust
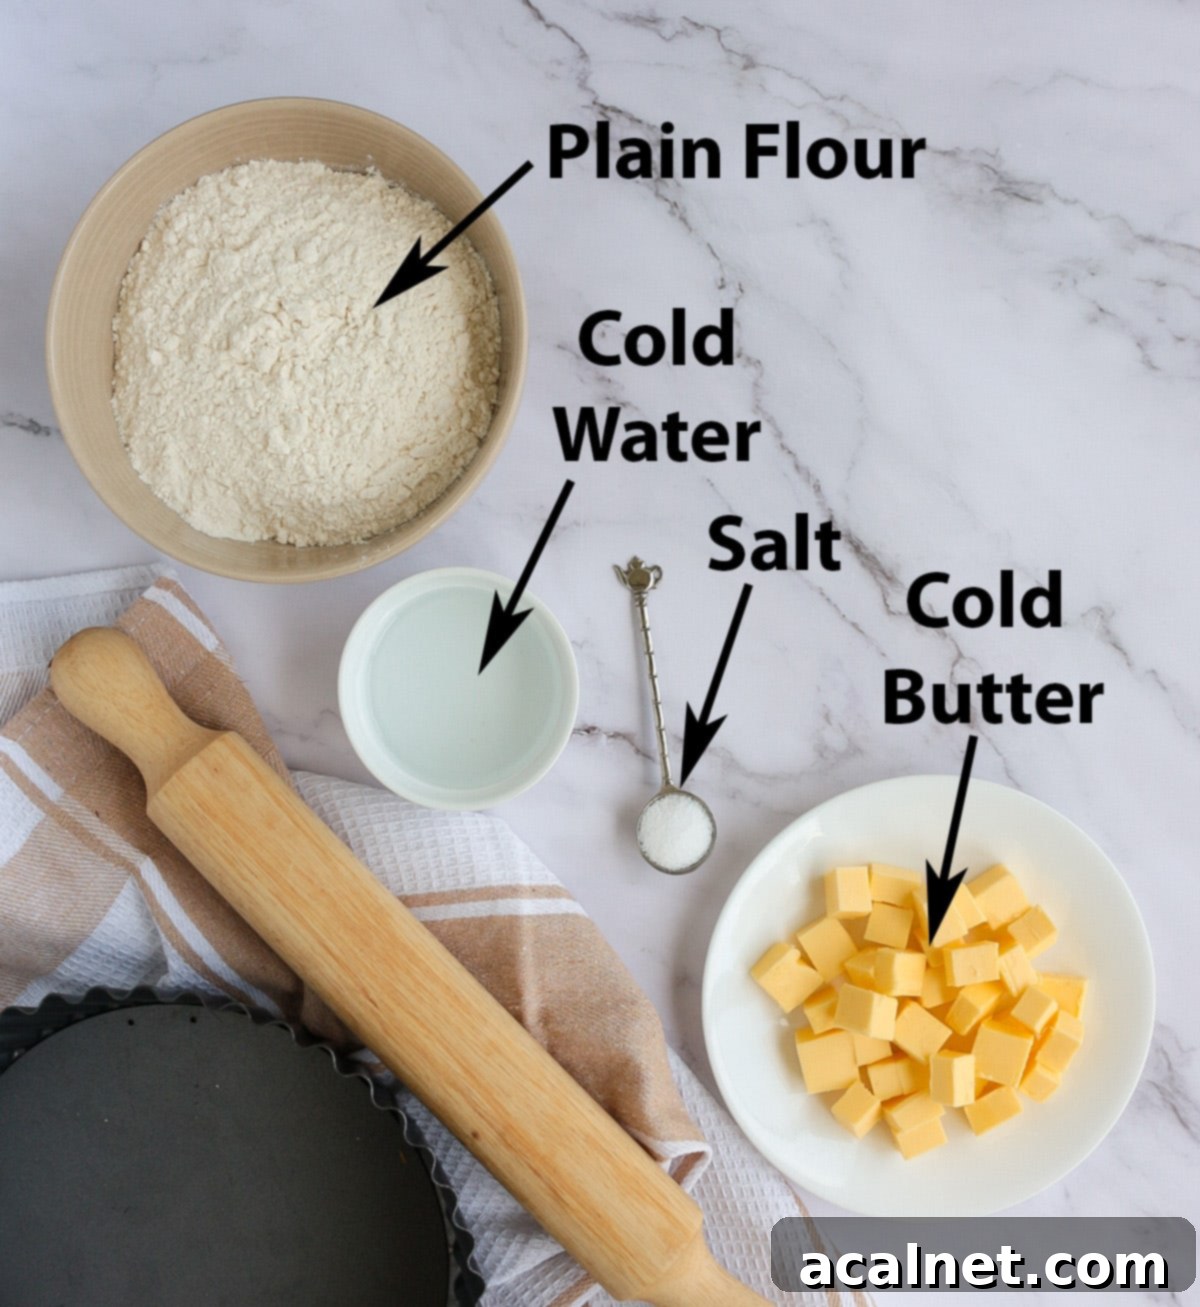
One of the best features of this savoury pastry recipe is its reliance on just four incredibly simple and widely available ingredients. Chances are, you already have them stocked in your pantry and fridge! Here’s what you’ll need to create your perfect homemade pie crust:
- Flour: Use good quality Plain or All-Purpose Flour. For optimal results and a smoother dough, it’s always a good idea to sift your flour before adding it to the food processor. This helps to prevent lumps and ensures an even distribution.
- Salt: A crucial ingredient for savoury pastry, fine table salt enhances the overall flavour of your crust. It balances the richness of the butter and provides a subtle seasoning that complements any filling.
- Butter: Unsalted butter is preferred, allowing you to control the salt content precisely. The key here is for the butter to be very cold, cut into small cubes. Cold butter is essential for achieving that desired flaky texture, as it creates pockets of steam during baking, separating the layers of dough.
- Water: Just like the butter, your water needs to be very cold. This helps to keep the butter firm and prevents the gluten in the flour from developing too much, which would result in a tough pastry. For an even richer taste, you can experiment with using very cold milk instead of water.
Optional Additions to Elevate Your Pastry
While delicious on its own, this versatile savoury shortcrust pastry recipe welcomes customization. Feel free to infuse it with additional flavours by incorporating your favourite Spices or Dried Herbs. This is a fantastic way to tailor the crust to complement the specific filling you’re preparing.
For a warm, earthy note, I particularly enjoy adding Ground Cumin or whole Cumin Seeds to the mix. But the possibilities are truly endless! Consider a pinch of Chilli Powder or Flakes for a subtle kick, Dried Basil, Parsley, or Oregano for an aromatic Mediterranean touch, a dash of Curry Powder for an exotic twist, or a sprinkle of Paprika for colour and a mild, peppery flavour. Don’t be afraid to experiment and discover your own signature savoury crust!
Mastering the Basic Shortcrust Pastry Ratio (The 3:2:1 Rule)
One of the most remarkable aspects of this recipe, and what makes it so beginner-friendly and adaptable, is its adherence to a classic, easy-to-remember 3:2:1 weight ratio. This simple principle means you can effortlessly scale the recipe up or down to produce larger or smaller quantities of dough as needed, without compromising on texture or flavour.
The ratio breaks down as follows:
- 3 parts Flour
- 2 parts Butter
- 1 part Water
To put this into practice, if you start with 300 grams of Flour, you would then incorporate 200 grams of very cold Butter and approximately 100 grams (or ml) of very cold Water. It’s that intuitive and straightforward! This ratio provides a reliable framework for consistent results every time you make your savoury pie crust.
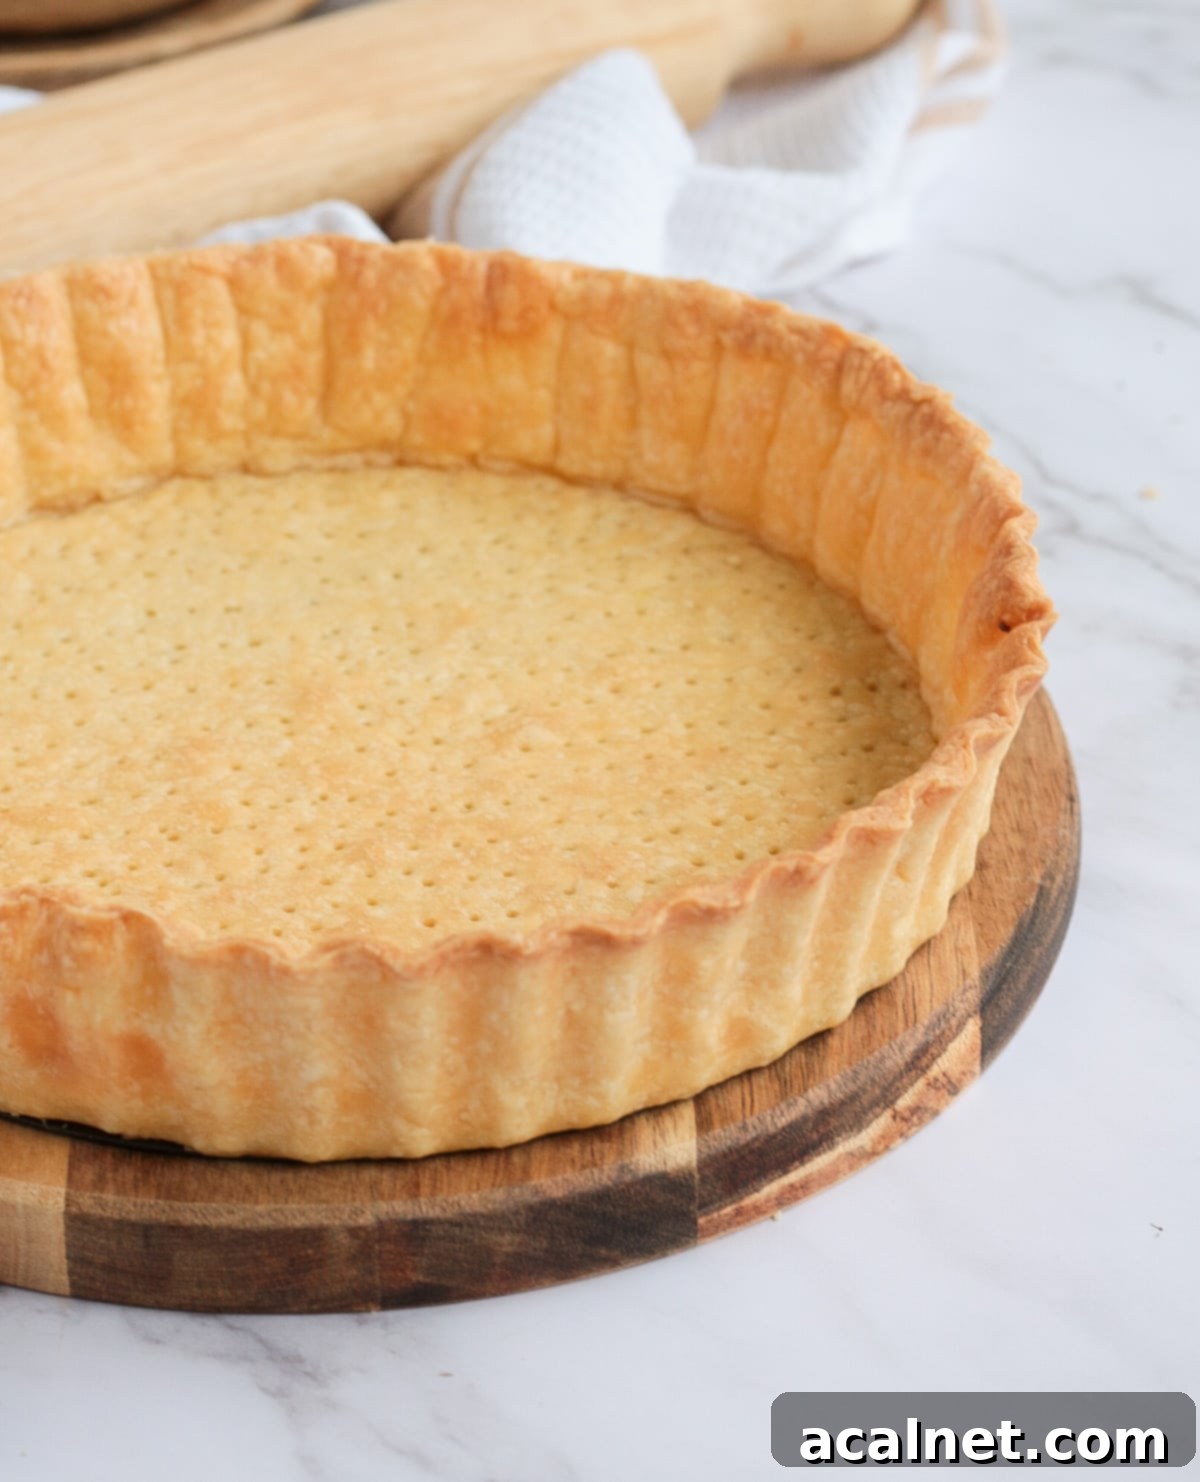
Step-by-Step Guide: Making Savoury Shortcrust Pastry in Your Food Processor
Creating this delicious savoury pie pastry is remarkably straightforward, especially when you harness the efficiency of a food processor. For consistently perfect results – a quiche crust that holds its shape beautifully and never shrinks or collapses in the oven – adhering to the recommended resting and chilling times is absolutely paramount. These steps are crucial for developing a tender, flaky texture. Here’s a detailed breakdown of how to prepare your savoury pastry crust:
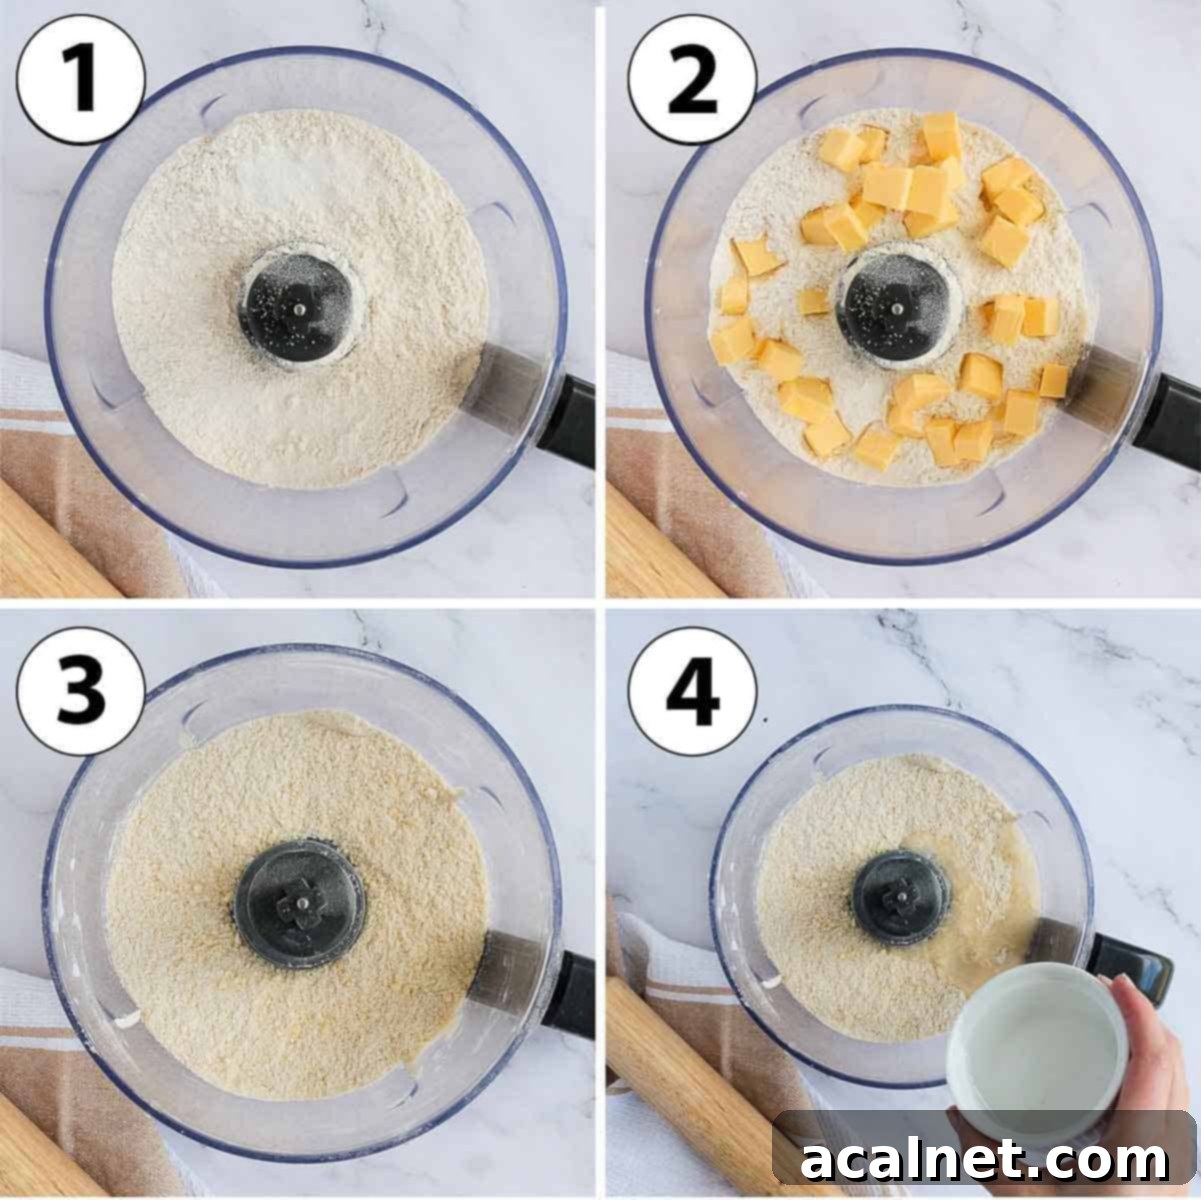
- Step 1: Combine Dry Ingredients.
Place your sifted Plain/All-Purpose Flour and the fine Table Salt into the bowl of your food processor. Give it a few quick pulses to ensure these dry ingredients are thoroughly combined. This initial step helps distribute the salt evenly throughout the flour.
- Step 2: Incorporate Cold Butter.
Next, add your very cold butter, which should already be cut into small, uniform cubes. Cold butter is key here – it prevents the pastry from becoming tough and promotes flakiness. - Step 3: Pulse Butter into Flour.
Pulse the mixture slowly and incrementally. The goal is to cut the butter into the flour until it resembles a fine crumb or wet sand consistency. While some bakers prefer larger butter chunks for an extra-flaky pastry, this can sometimes lead to the pastry collapsing in the oven. For a more consistent and reliable crust, I recommend blending the butter into very small, pea-sized crumbs. This ensures a delicate, tender texture that still retains its flakiness. - Step 4: Gradually Add Cold Water.
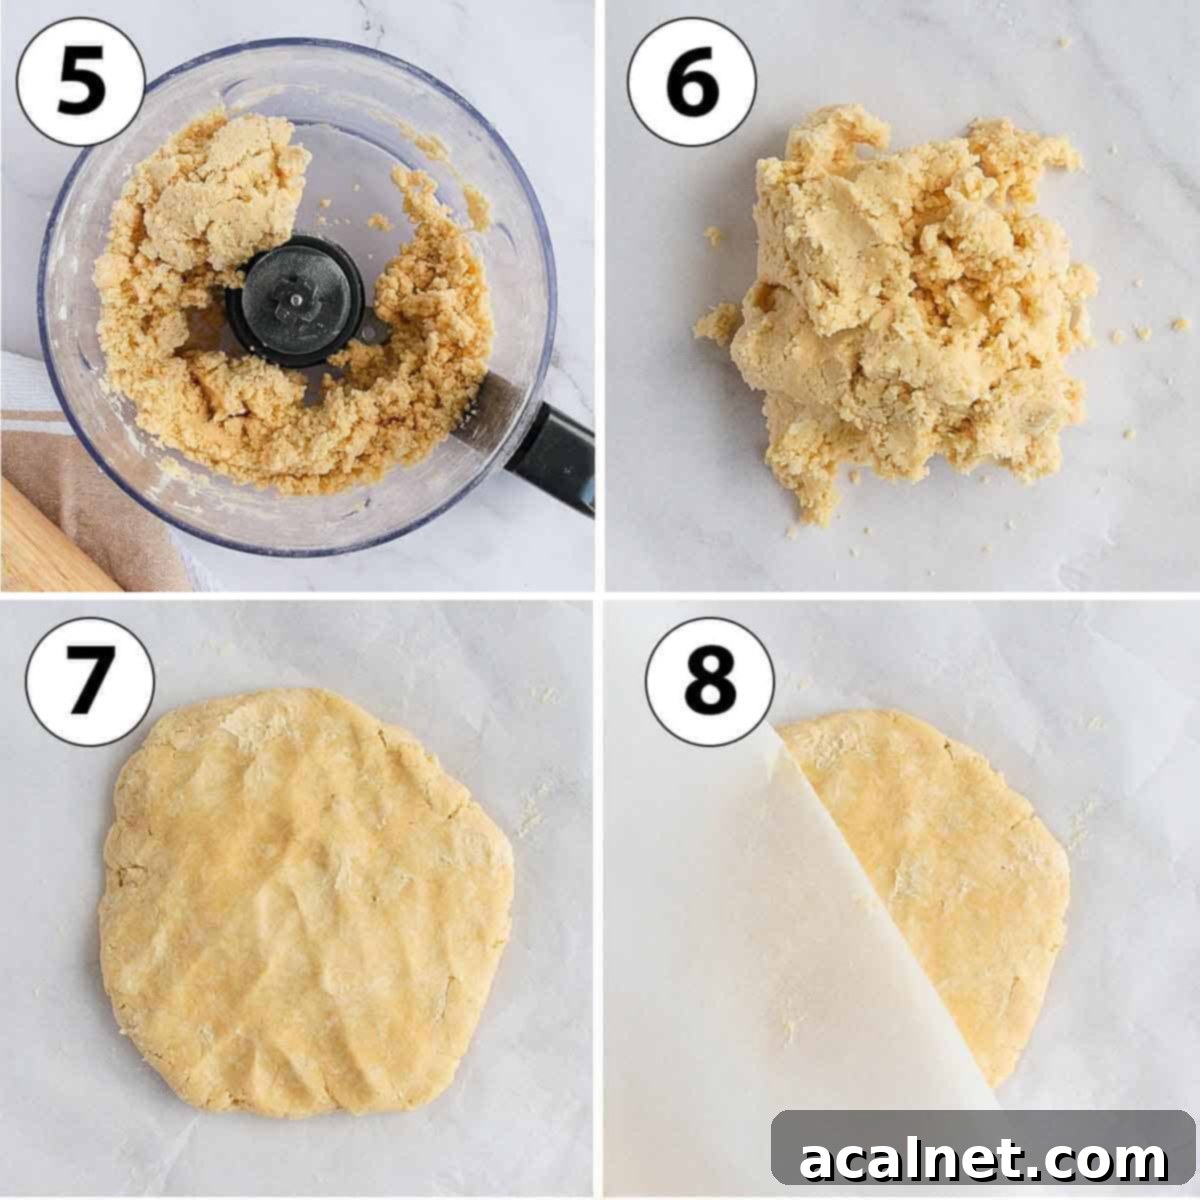
Begin adding the very cold water, a tablespoon at a time, while continuing to pulse the food processor. It’s crucial not to add all the water at once. The exact amount of water needed can vary slightly depending on your specific brand of flour and ambient humidity. Add a little, pulse, and observe. Stop as soon as the dough begins to clump together. The mixture should appear shaggy but when you pinch a piece between your fingers, it should stick together. This indicates sufficient moisture without over-hydrating the dough. - Step 5: Form the Dough.
Once the dough starts to come together into larger crumbs that stick, immediately stop pulsing. Avoid overworking the pastry at this stage, as excessive processing can develop the gluten, resulting in a tough crust. Carefully transfer the mixture onto a clean sheet of baking paper laid out on your kitchen bench. - Step 6: Gently Flatten and Rest.
Bring the dough together into a cohesive ball using your hands, then gently flatten it into a disk. If the dough feels a bit sticky, lightly dust both sides with a touch of flour. Cover this disk with a second sheet of baking paper and allow it to rest for approximately 10 minutes. This brief resting period is vital, as it allows the gluten to relax, making the dough much easier to roll out without resistance.
- Step 7: Roll Out the Dough.
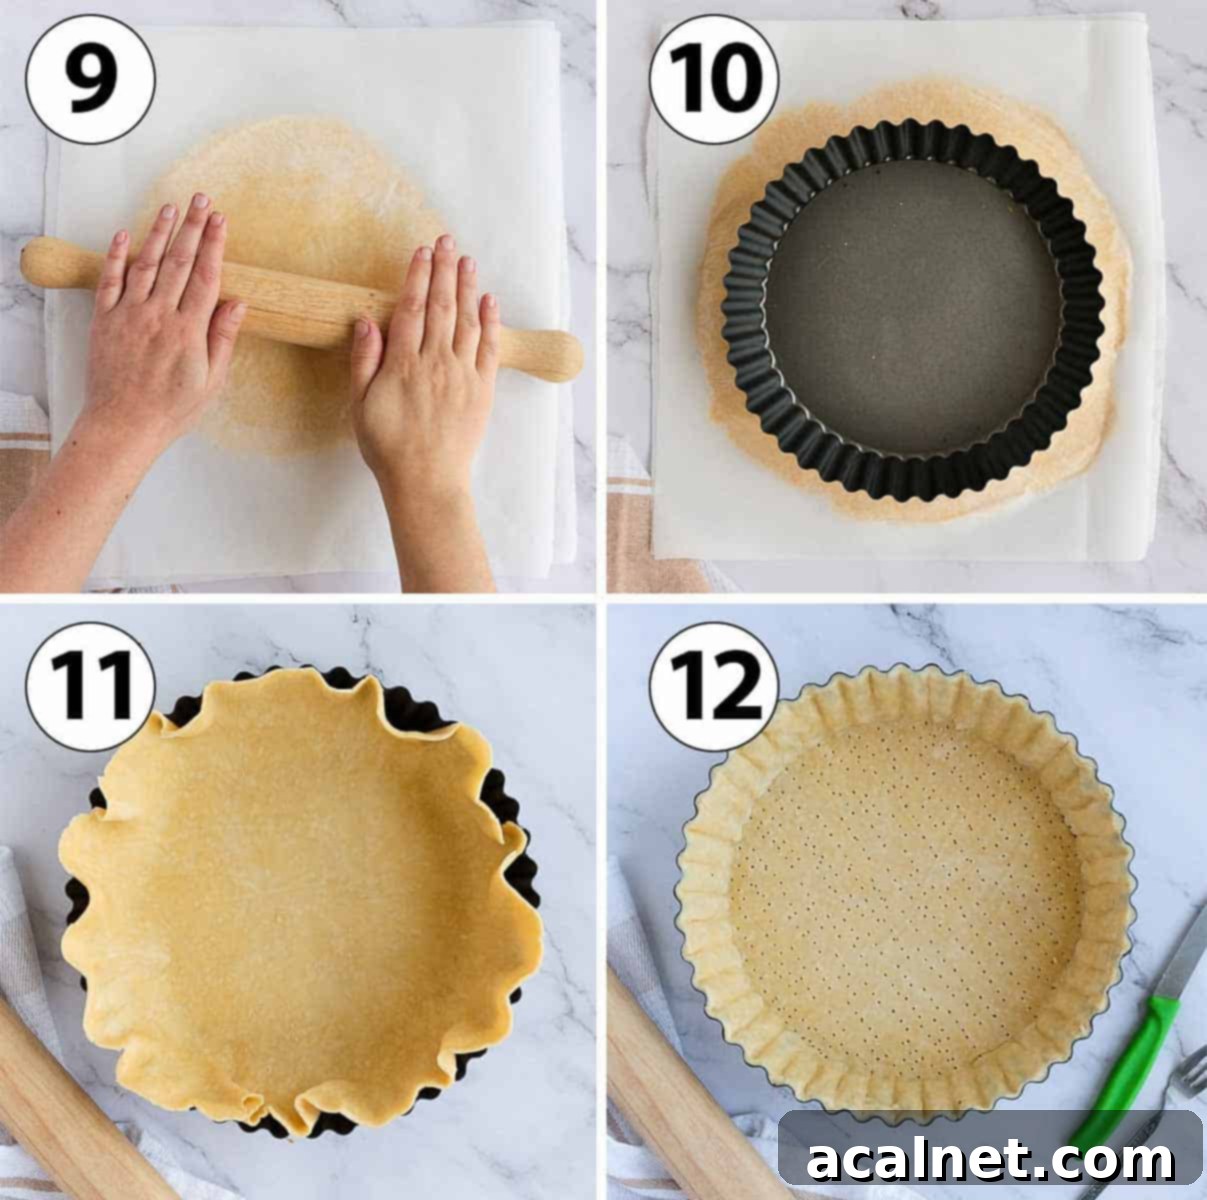
Using a rolling pin, carefully roll the dough into a large circle. For an impeccably even thickness, consider using a rolling pin with thickness rings. A useful technique for rolling pastry is to always roll in one direction, then rotate the pastry itself, rather than trying to turn the rolling pin around. Aim for an ideal pastry thickness of about 3 to 4 mm (approximately 1/6 to 1/8 inch) for a robust yet tender crust. - Step 8: Check Size and Chill.
Before transferring, place your tart or quiche pan over the rolled pastry to confirm it’s large enough to comfortably line the pan with a slight overhang. Once confirmed, place the entire rolled pastry (still between the baking paper sheets) onto a flat tray. Transfer it to the refrigerator and let it chill and rest for at least 1 hour, or even better, up to 24 hours. This chilling period is critical for the butter to firm up and the gluten to fully relax, preventing shrinkage during baking. - Step 9: Line Your Pan.
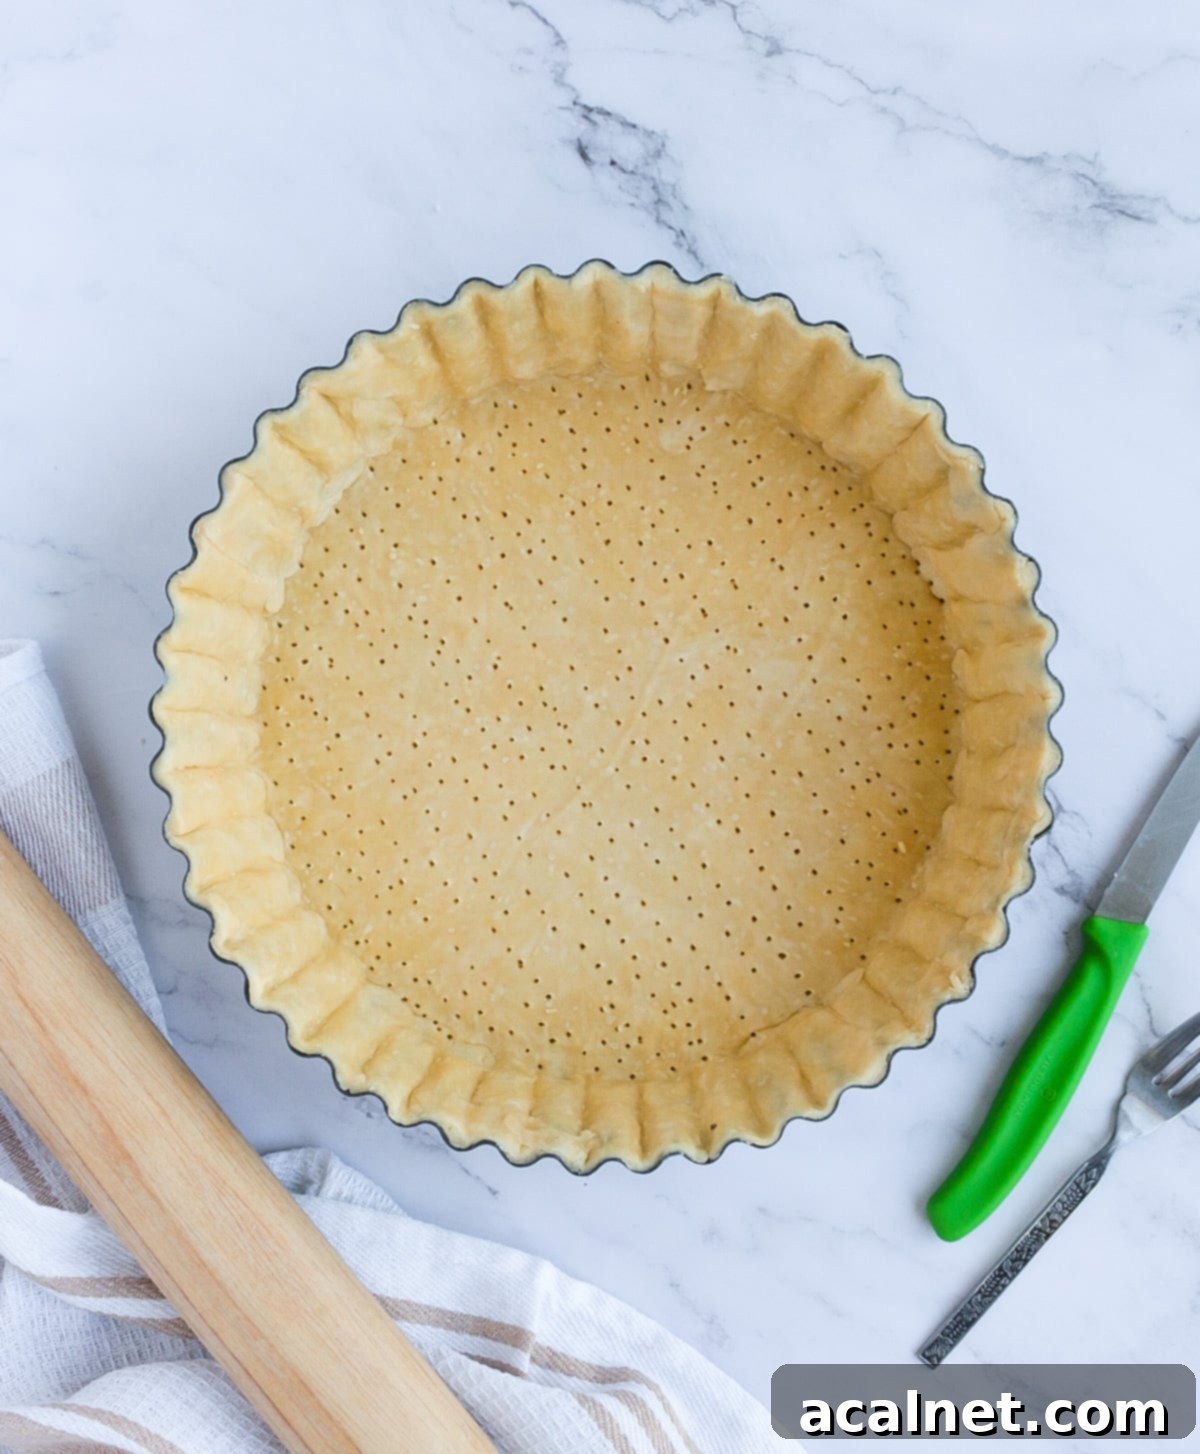
Carefully remove the top sheet of baking paper and then gently transfer the rolled pastry into your tart or quiche pan. Allow it to slump into the pan, then gently slide and press the pastry along the sides, ensuring it creates a snug 90-degree angle with the bottom. Press the pastry firmly against the edges of the pan so it adheres. Use a small paring knife or roll your rolling pin over the top edge of the pan to trim off any excess pastry, creating a neat finish.Don’t fret if the pastry cracks a little or if some areas seem too short to fully cover the pan. Shortcrust pastry is very forgiving! You can easily patch up any imperfections with your fingers, using any leftover pastry trimmings. For a visual guide, you can watch this helpful video on how to line a tart tin.

- Step 10: Dock and Final Chill.
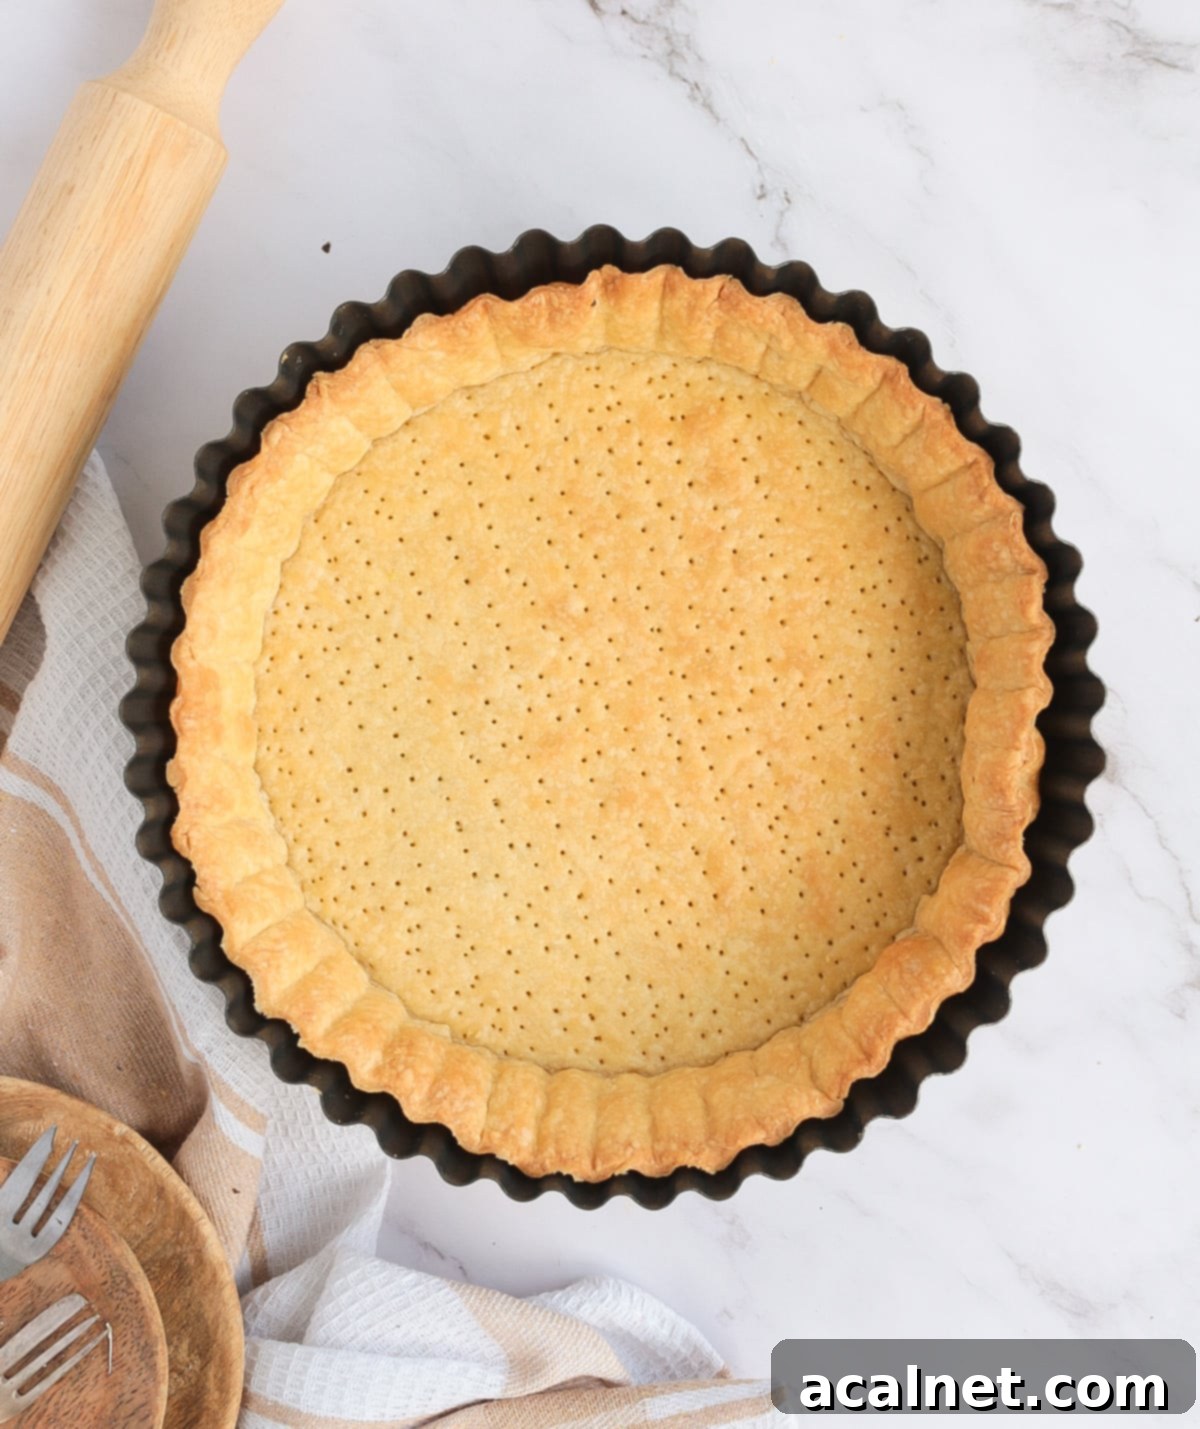
Using a fork, gently dock the pastry by poking small holes all over the bottom surface of the crust. This crucial step allows steam to escape during baking, preventing the bottom from puffing up excessively and ensuring an even bake. Once docked, return the lined pan to the refrigerator for another rest, chilling for at least 1 hour, or again, up to 24 hours. Just before you’re ready to bake, place the pastry in the freezer for about 15 minutes. This ensures the butter is incredibly cold, almost frozen, which helps create that perfectly flaky texture when it hits the hot oven. - Step 11: Preheat and Bake.
Preheat your oven to 180°C / 350°F. Once the oven is preheated, remove your super-chilled pastry from the freezer and proceed with blind-baking or full baking according to the specific instructions of your quiche or tart recipe. Remember, cold pastry going into a hot oven is the secret to success!If you’re preparing the pastry in advance and plan to keep it unbaked in the fridge for an extended period (more than an hour or two), ensure you cover the pastry tightly with plastic wrap or baking paper to prevent it from drying out.
Expert Tips for the Perfect Homemade Quiche Pastry
Achieving a flawless quiche or tart pastry at home is entirely within reach with a few key techniques. These tips are designed to guide you toward a wonderfully flaky, tender, and perfectly structured crust every single time. Pay close attention to these details, and you’ll soon be a pastry pro!
- Keep Ingredients Ice Cold: This is arguably the most critical rule for any shortcrust pastry. Ensure your butter and water are truly ice-cold. Cold butter creates steam pockets during baking, which is what gives shortcrust pastry its desirable flaky layers. If the butter melts too early, you’ll end up with a greasy, tough crust instead of a light, airy one.
- Add Water Incrementally: The exact amount of water needed can vary slightly depending on factors like the type of flour you use, its protein content, and even the humidity in your kitchen. Always add the water a little bit at a time, pulsing or mixing gently after each addition. Stop immediately when the dough just begins to come together and can be pinched without crumbling. Over-hydrating can make the dough sticky and difficult to work with.
- Avoid Overworking the Dough: The more you handle, knead, or process the pastry, the more gluten develops in the flour. While gluten is good for bread, it makes pastry tough and chewy. Do not overwork the pastry; aim for just enough mixing to bring the ingredients together. A light hand will result in a tender, melt-in-your-mouth crust.
- Respect Resting Times: This step is non-negotiable for a pastry that doesn’t shrink or lose its shape. Follow the resting and chilling instructions diligently. Resting the dough allows the gluten strands to relax, which prevents the pastry from pulling back (shrinking) when rolled and baked. Rushing this step is a common cause of pastry mishaps.
- Chill Thoroughly Before Baking: After shaping your pastry in the pan, a final, thorough chill is essential. I even go a step further and like to freeze the pastry just before placing it in the oven! This ensures the butter is absolutely rock-hard and ice-cold when it enters the hot oven, maximizing the steam production for maximum puff and flakiness.
- Always Dock the Pastry: Don’t forget to “dock” your pastry, which simply means using a fork to poke small holes all over the bottom of the crust. This prevents steam from getting trapped underneath, which can cause the pastry to puff up unevenly and create large air pockets or bubbles during baking.
- Invest in the Right Pan: For effortless removal and presentation, I highly recommend using a tart or quiche pan with a removable bottom plate. This makes serving your beautiful quiche or tart incredibly easy. Additionally, I personally find that metal pans conduct heat more efficiently and consistently than ceramic or glass alternatives, contributing to a better-baked crust.
Savoury Shortcrust Pastry: Your Questions Answered
Absolutely! While a food processor offers speed and convenience, you can certainly achieve excellent results by making this savoury shortcrust pastry by hand. The fundamental process remains the same, but instead of pulsing the butter, you’ll need to physically cut the very cold butter into the flour. This can be done effectively with your fingertips, rubbing the butter into the flour until it resembles fine breadcrumbs or wet sand. Alternatively, a pastry blender is a fantastic tool for this task. While some bakers prefer leaving larger lumps of butter for an extra-flaky texture, I personally find that smaller, pea-sized pieces create a more consistently tender and reliable crust.
Whether or not to blind-bake your pastry largely depends on the specific filling you plan to use. It’s always best to consult your quiche or tart recipe for their recommended approach. As a general guideline, if your filling is particularly liquid (like for a traditional quiche such as my Cheese and Tomato Quiche, or a deep, saucy pie), I highly recommend blind-baking the crust first. A quick 15-minute blind-bake helps to dry out the bottom of the pastry, preventing it from becoming soggy once the wet filling is added. For more solid or drier fillings (like a thinner savoury tart such as a Goats Cheese Beetroot Tart or a rustic Tomato Galette), blind-baking is often not necessary, and you can bake the pastry directly with the filling. While you can use baking weights or beads to prevent the pastry from puffing during blind-baking, I personally don’t find them essential if the pastry is well-chilled and docked.
Absolutely! This savoury shortcrust pastry is an excellent make-ahead component. You can easily prepare the dough and store it in the refrigerator for up to 24 hours without any loss of quality. While it can last up to two days, it might start to dry out slightly over a longer period, so 24 hours is ideal for peak freshness. I find it convenient to store it either as a flattened disk, wrapped tightly in plastic wrap, or already rolled out and lined in the tart pan, covered to prevent drying.
Yes, this pastry freezes beautifully, making it perfect for meal prep and future baking! You can prepare larger batches and store them in the freezer for 2 to 3 months. Ensure the dough is thoroughly wrapped in plastic wrap and then again in aluminum foil to prevent freezer burn. When you’re ready to use it, simply let it thaw completely in the refrigerator before rolling it out. Remember to follow the recommended resting times after thawing. For added convenience, you can also freeze the pastry already rolled out or even lined inside a metal tart pan. Once fully frozen, you can carefully remove the frozen pastry shell from the pan (if you need the pan for something else) and store the shell itself, wrapped. Just remember to return it to the pan before baking. There’s no need to thaw a frozen, pre-lined pastry shell before baking – it can go straight into the oven, often yielding an even flakier result!
Troubleshooting Common Savoury Shortcrust Pastry Issues
Making pastry, like any baking skill, improves with practice. While this recipe is straightforward, occasional issues can arise. Don’t worry, they are almost always fixable! Here’s a guide to common problems and how to quickly remedy them:
- The pastry is quite sticky: If your dough feels overly sticky and difficult to handle, it likely has too much moisture. The simplest solution is to add a little bit more Flour, one tablespoon at a time, until it reaches a manageable consistency. Be gentle as you incorporate it, trying not to overwork the dough.
- The pastry is rather dry or doesn’t come together: Conversely, if your dough is crumbly and won’t form a cohesive ball, it needs more liquid. Gradually add a little bit of cold water, one teaspoon at a time, until the crumbs begin to stick together when pinched. It’s better to add too little and gradually increase than to add too much at once.
- When I try to roll it, the pastry pulls back: This common issue, known as “shrinkage,” occurs when the gluten in the flour hasn’t fully relaxed. The solution is simple: simply rest the dough for an additional 10 to 15 minutes in the refrigerator. This gives the gluten time to relax, making the pastry much more pliable and easier to roll without resistance.
- It collapsed in the oven (sides slid down): Pastry collapse can be attributed to several factors. Insufficient resting time is a prime culprit, as relaxed gluten holds its shape better. The pastry not being cold enough before baking can also cause the butter to melt too quickly, leading to structural failure. Lastly, an oven temperature that is too high can also contribute. To help prevent this, ensure proper chilling, adequate resting, and consider using pie beads or weights during blind-baking, especially for deeper pans.
- The pastry is starting to burn / get really brown: This often happens when blind-baking or when the pastry is baked for a long time with a liquid filling. If you notice the edges or top browning too quickly, simply cover the exposed pastry with aluminum foil. This will protect it from further browning while allowing the filling to continue baking until it’s perfectly set.
Inspiring Quiche & Savoury Tart Filling Ideas
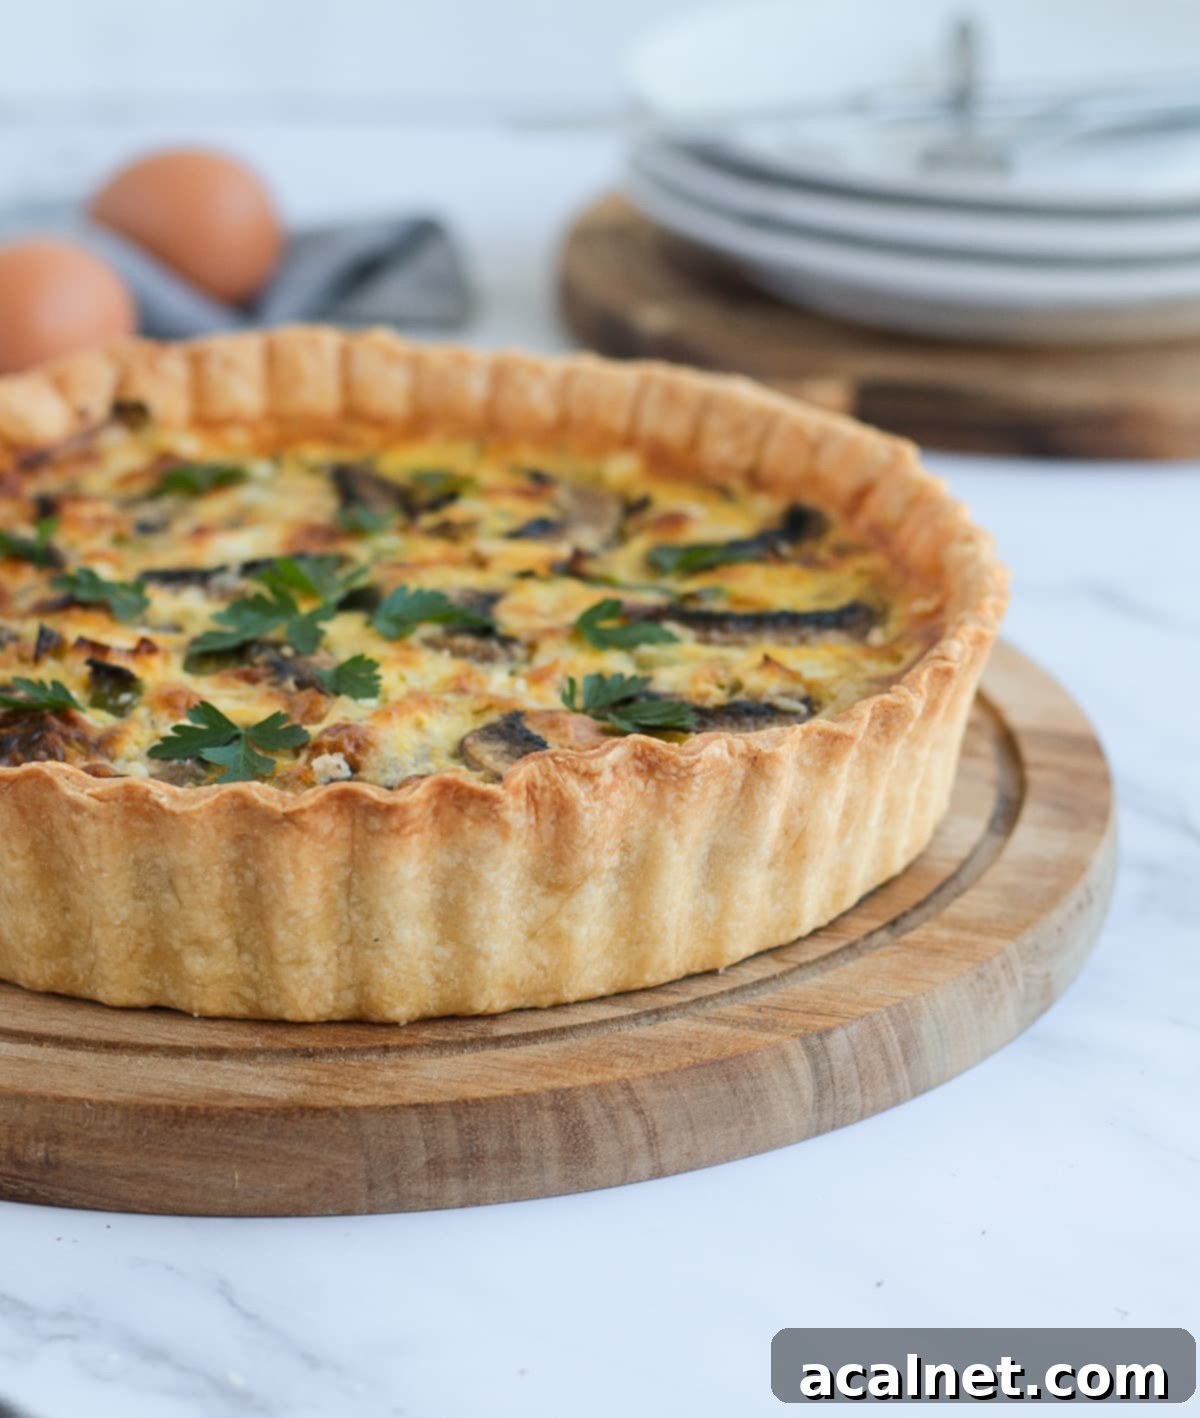
With your perfect homemade savoury shortcrust pastry ready, the possibilities for delicious fillings are endless! Here are some fantastic ideas to get your culinary creativity flowing:
- Spinach and Mushroom Quiche
- Cheddar Broccoli Quiche
- Smoked Salmon Quiche with Leeks
- Leek and Mushroom Quiche
- Onion and Fig Tart
- Feta and Asparagus Quiche
- Roasted Pumpkin Quiche
Made this recipe?
Let us know if you liked it by leaving a comment below, and tag us on Instagram @a.baking.journey with a photo of your creation!
Full Savoury Shortcrust Pastry Recipe

Savoury Shortcrust Pastry for Quiches and Tarts
Yields: 1 tart crust (approx. 25-28cm / 10-11 inch)
Author: Sylvie
Print Recipe
Ingredients
- 200 g (1 1/3 cup) Plain / All Purpose Flour, sifted
- 1/2 teasp. Table Salt
- 100 g (7 tablesp.) Unsalted Butter, very cold, cut into small cubes
- 65 ml (1/4 cup) Water, very cold (or milk for richness)
Instructions
- In your Food Processor, combine the Flour and Salt. Pulse briefly to mix them together evenly.
- Add the very cold Butter, cut into small cubes. Pulse slowly until the butter is incorporated into the flour and resembles fine crumbs (wet sand consistency).
- While pulsing, gradually add the very cold Water, one tablespoon at a time. Stop immediately as soon as the dough begins to clump together (refer to Note 1 below for guidance). Transfer the dough mixture onto a sheet of baking paper on your work surface.
- Gently gather the dough into a ball and flatten it into a disk with your hands. If needed, lightly dust with flour. Place a second sheet of baking paper over it and let it rest at room temperature for about 10 minutes to allow the gluten to relax.
- Using a rolling pin, roll the pastry into a large circle, approximately 4mm (1/8 inch) thick (see Note 2). Ensure it’s wide enough to fit your tart or quiche pan by placing the pan over it as a guide.
- Carefully transfer the rolled pastry (still between the baking paper) onto a flat tray and place it in the refrigerator. Let it chill and rest for a minimum of 1 hour, and up to 24 hours.
- Remove the top baking sheet and gently transfer the rolled pastry into your quiche or tart pan. Carefully ease the pastry down the sides of the pan, pressing it firmly into the corners to eliminate any air gaps. Trim off any excess pastry using a small paring knife or by rolling your pin over the edge of the pan (see Note 3).
- Using a fork, “dock” the bottom of the pastry by poking holes all over. Return the lined pan to the refrigerator for another 1-hour chill. Just before baking, transfer the pan to the freezer for at least 15 minutes to ensure the butter is extremely cold.
- Bake your pastry according to your quiche or tart recipe’s instructions. If blind-baking, preheat the oven to 180°C (350°F), line the pastry with baking paper, fill with pie weights, and bake for about 20 minutes, then remove weights and paper and continue baking if needed. Or, bake directly with your chosen filling.
Video Tutorial
Would you like to save this recipe?
We’ll email this post to you, so you can come back to it later!
Recipe Notes
- Depending on your specific brand of flour and even the humidity in your kitchen, the exact amount of water required can vary. Always add the water slowly, a little bit at a time, and pulse the food processor between additions. Stop as soon as the dough starts to come together. You’ll know it’s the right consistency if the crumbs stick together when you pinch them firmly between your fingers. If the dough appears very wet or feels sticky, you’ve likely added a touch too much water; easily remedy this by adding a small amount of extra flour, a tablespoon at a time, until the texture is correct.
- For optimal rolling, place your dough between two sheets of baking paper. The most effective way to roll pastry is to always move your rolling pin in one direction, then lift and turn the pastry 90 degrees before rolling again. This technique helps maintain an even shape and prevents sticking. Aim for a consistent thickness of about 3 to 4 mm (approximately 1/6 to 1/8 inch) for the perfect balance of crispness and tenderness.
- To prevent your pastry from shrinking or collapsing in the oven, it’s crucial to ensure there are no air gaps between the pastry and the sides/bottom of your pan. Press the bottom corners of the pastry tightly against the pan’s base. If you notice any small cracks or areas where the pastry doesn’t quite reach the top edge, don’t worry! Shortcrust pastry is very forgiving; you can easily patch up these spots with your fingers, using any excess dough trimmings. This ensures a uniform and sturdy crust.
Nutrition Information (per serving)
Carbohydrates: 153g |
Protein: 22g |
Fat: 83g |
Saturated Fat: 52g |
Cholesterol: 215mg |
Sodium: 1181mg |
Potassium: 214mg |
Fiber: 5g |
Sugar: 1g |
Vitamin A: 2499IU |
Calcium: 54mg |
Iron: 9mg
