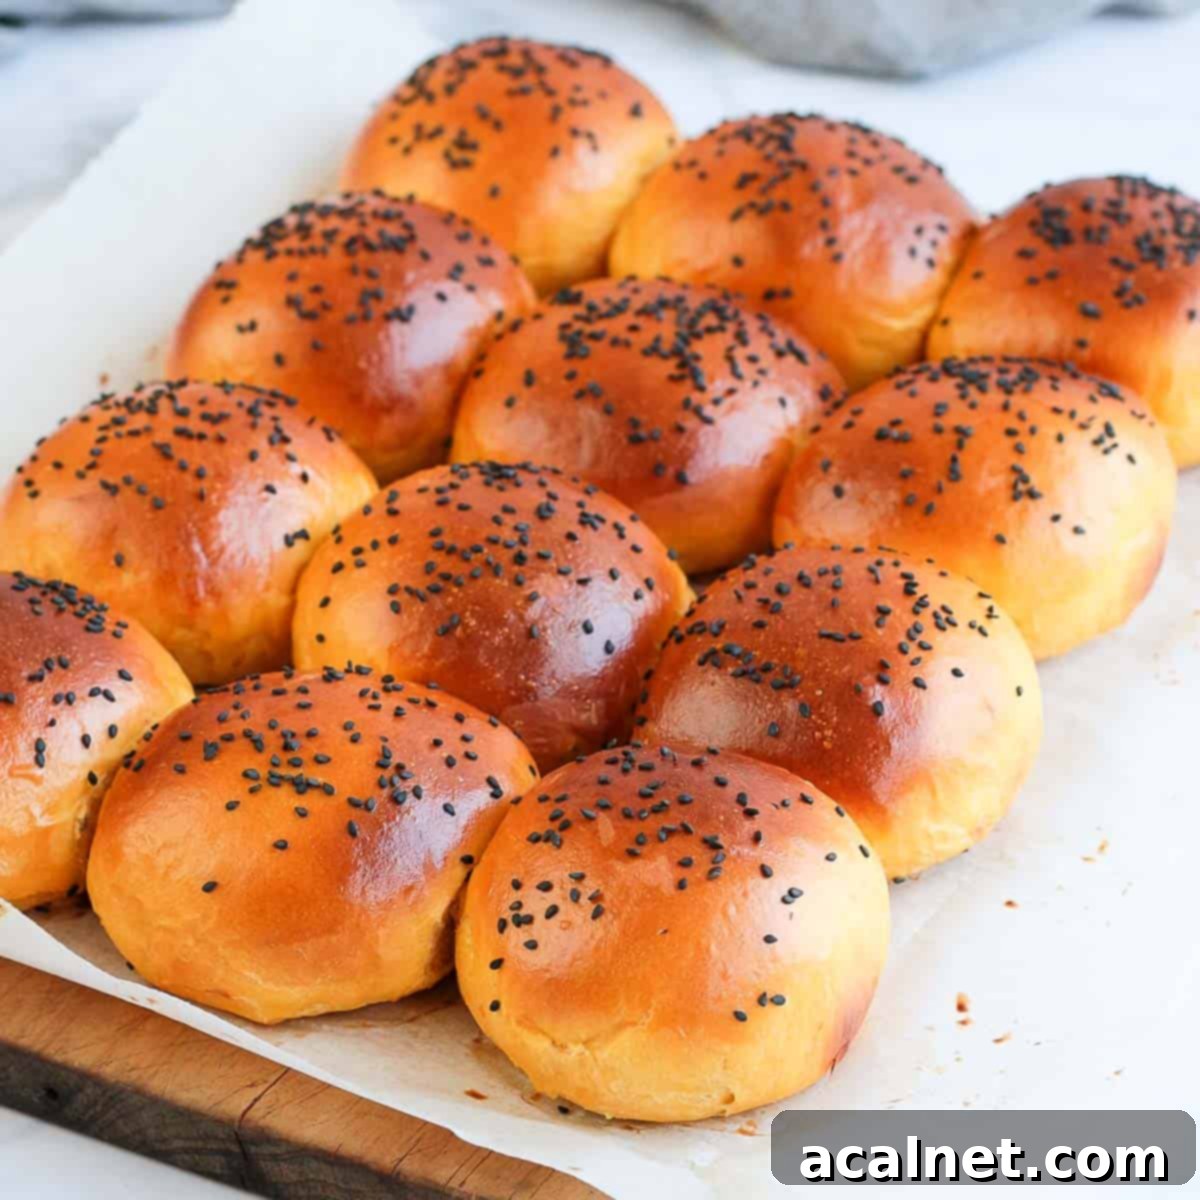
Homemade Sweet Potato Buns: Fluffy Brioche-Style Recipe for Burgers & Dinner Rolls
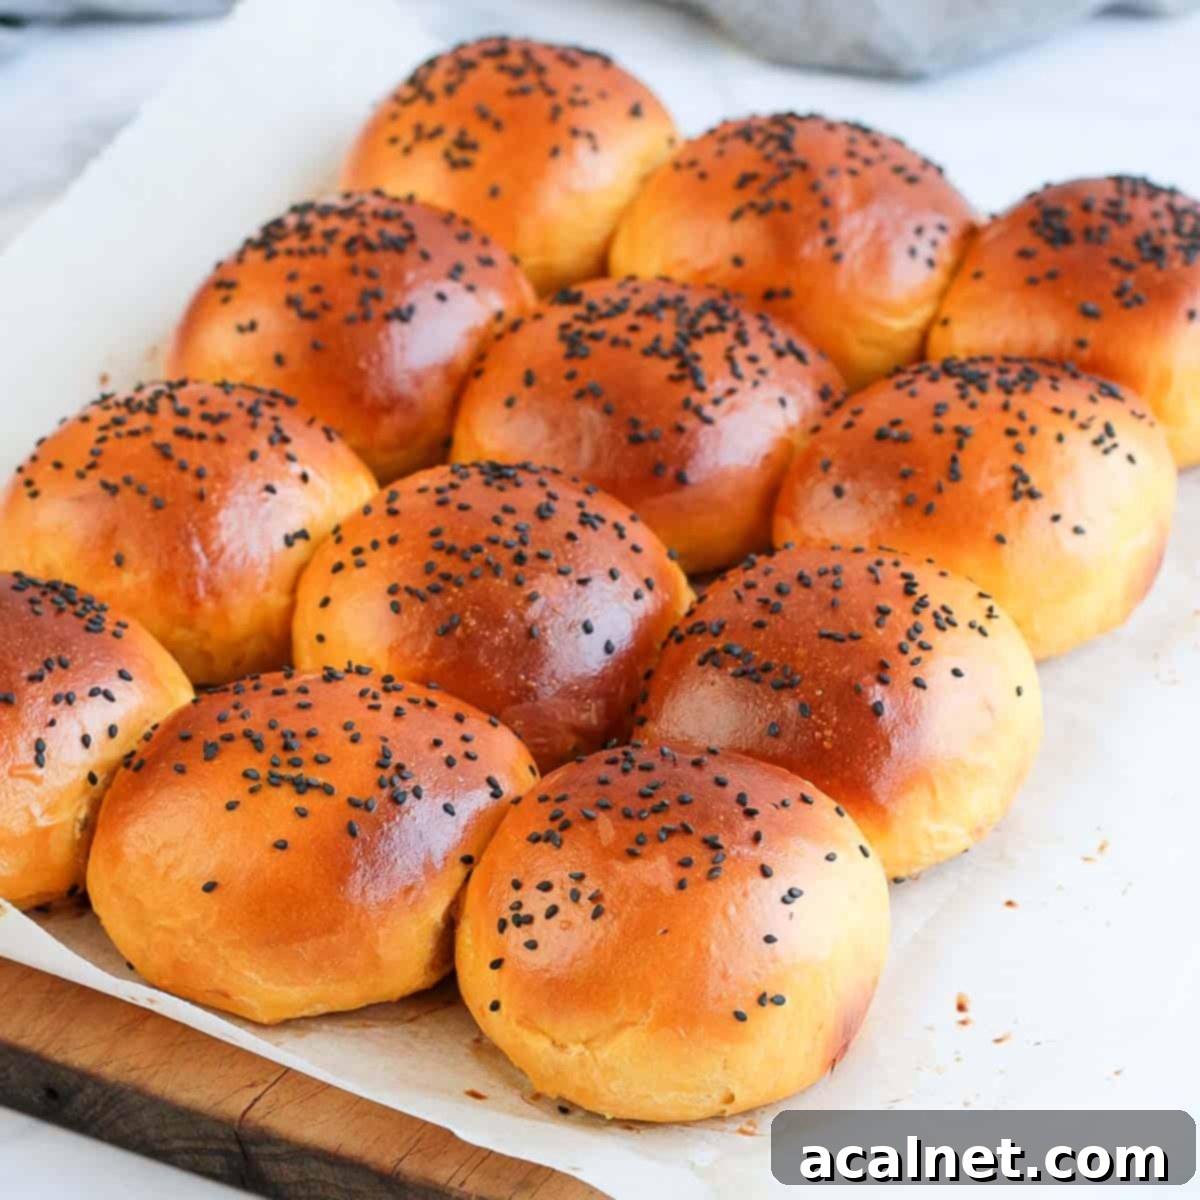
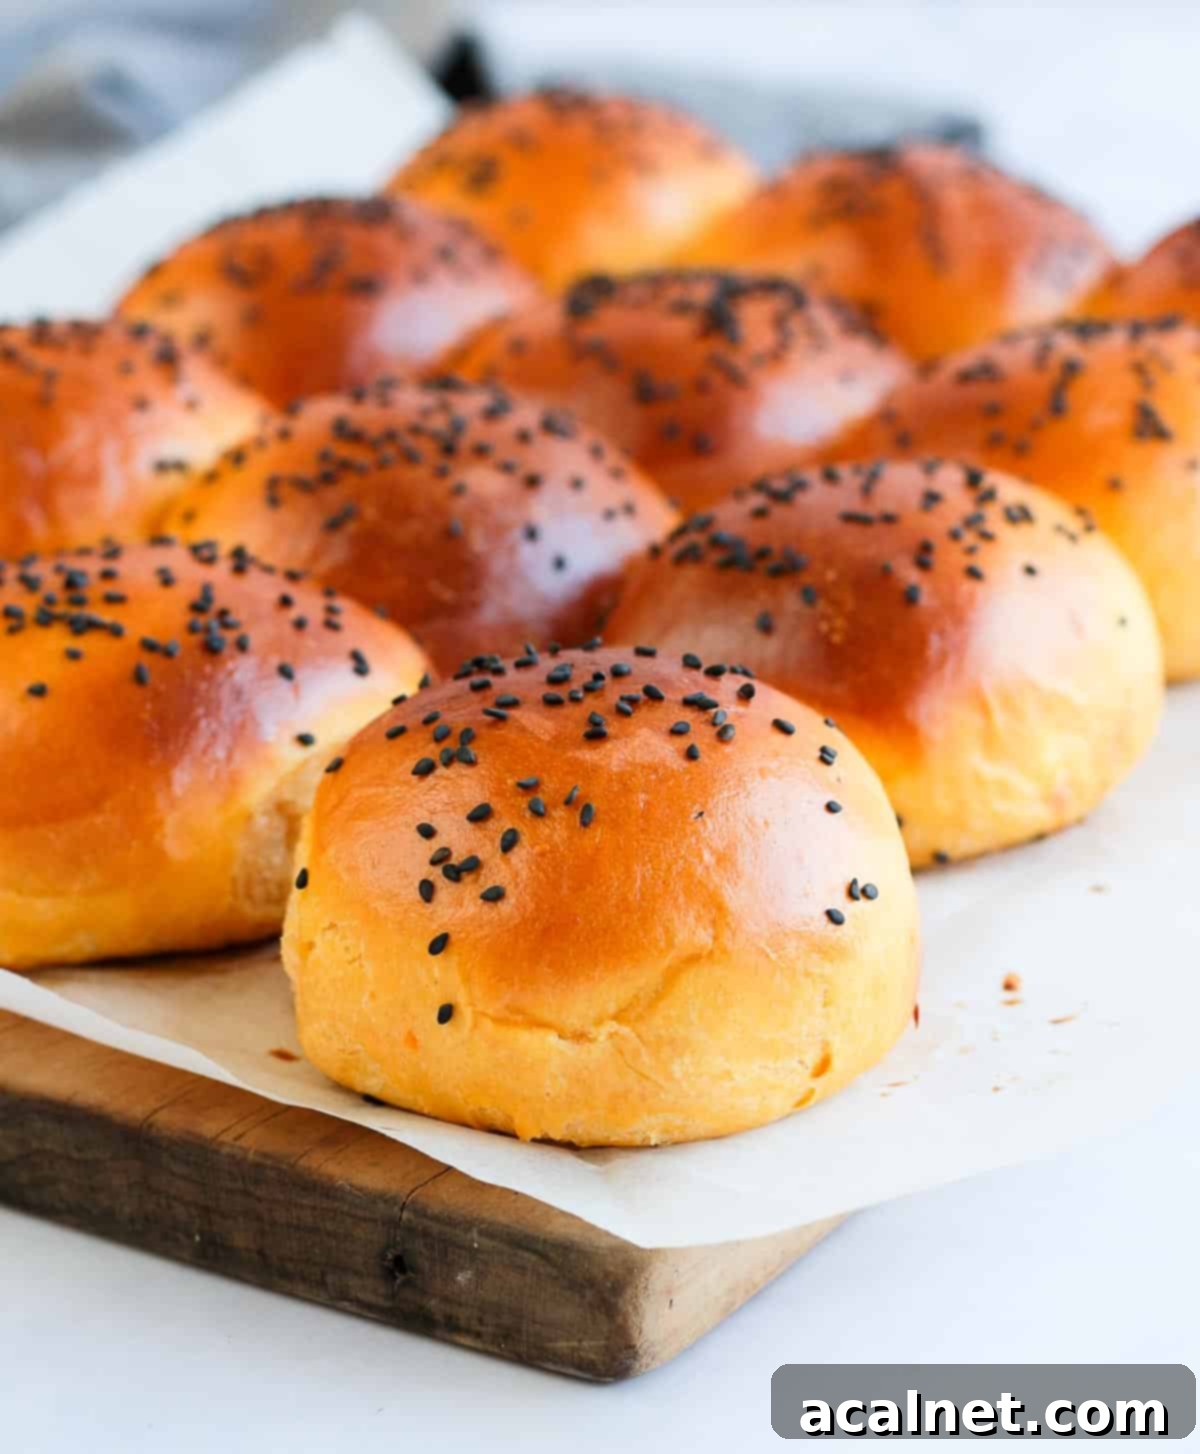
Experience the warmth and deliciousness of these light, airy, and incredibly fluffy Sweet Potato Buns. Perfect as gourmet slider buns, hearty burger buns, versatile bread rolls for sandwiches, or elegant dinner rolls, these brioche-style buns are infused with the natural sweetness and vibrant color of mashed sweet potatoes. They’re a delightful and unique addition to any meal, especially during the holiday season, or simply as a comforting homemade bread for everyday enjoyment.
[feast_advanced_jump_to]
Why You’ll Adore These Sweet Potato Buns
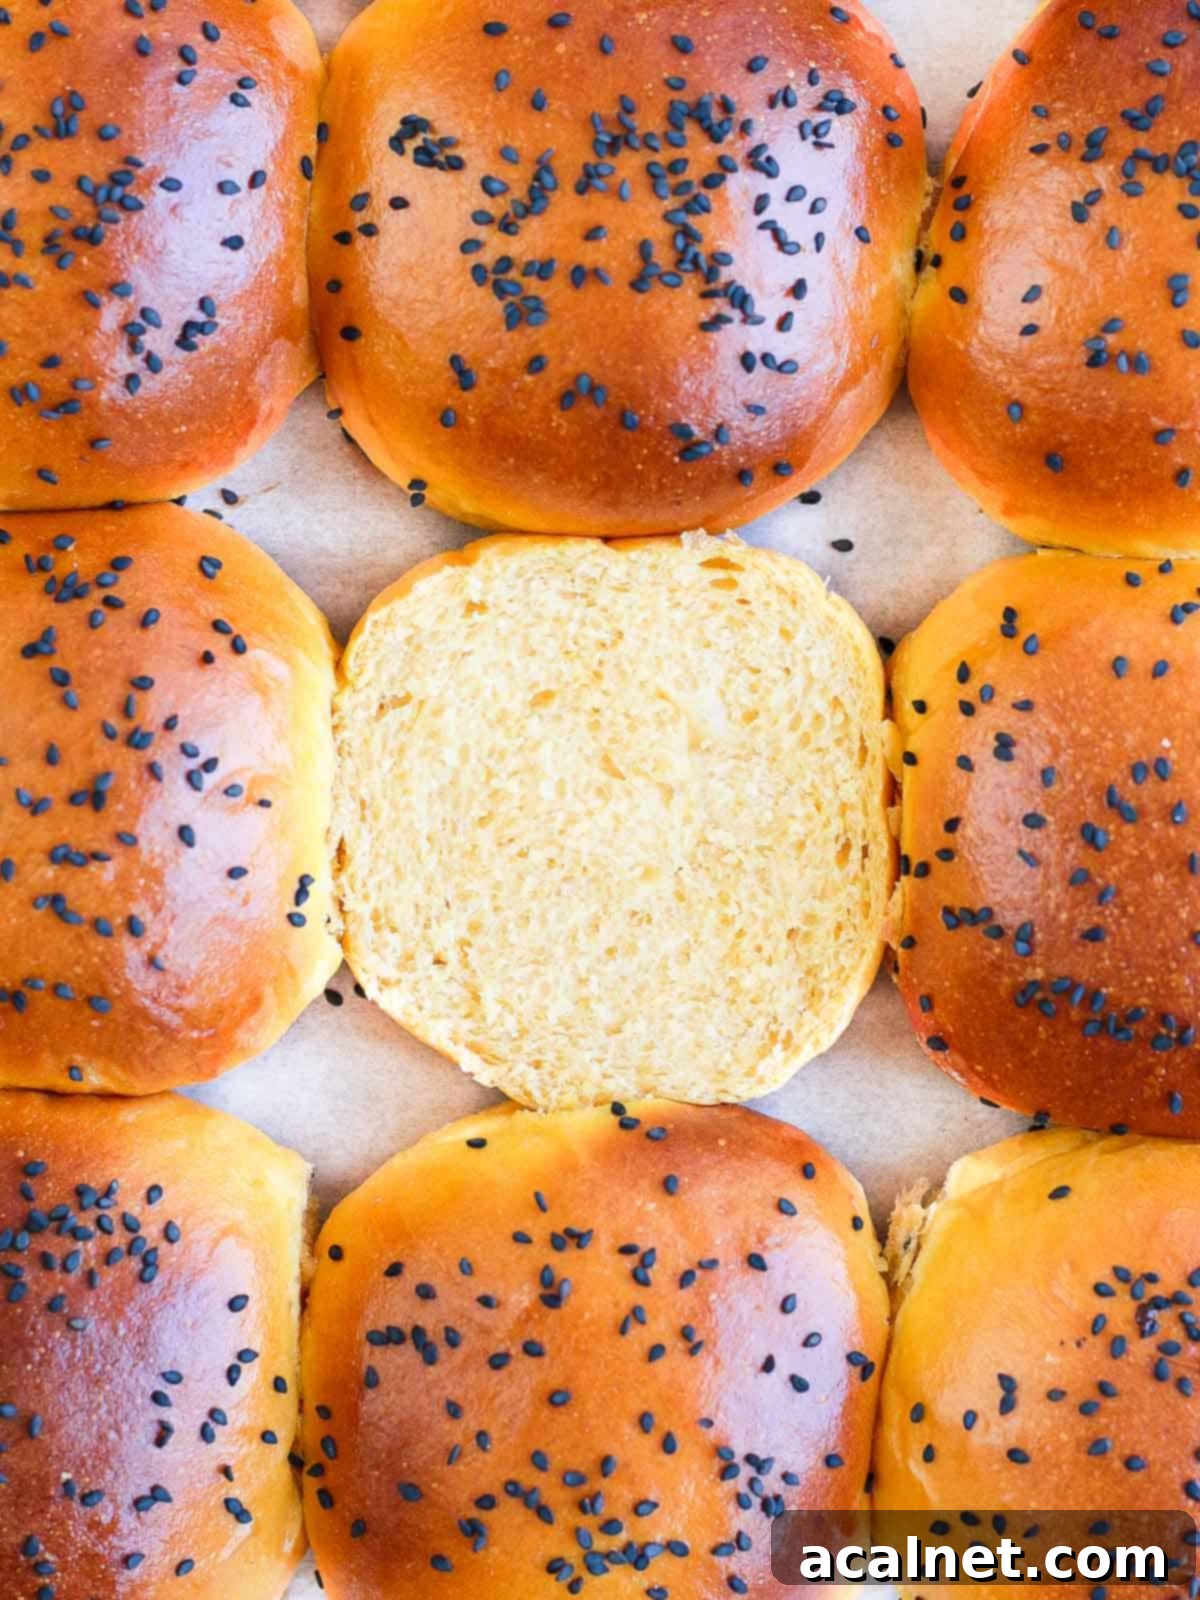
These Sweet Potato Buns are more than just bread rolls; they’re a culinary experience! What makes them truly special is their unbelievably light and fluffy texture, reminiscent of classic brioche, but with an added depth of flavor and a subtle, natural sweetness derived from the sweet potato. This unique twist elevates them beyond ordinary buns.
Incorporating mashed sweet potato into the dough isn’t just about achieving that beautiful, appetizing orange hue, much like these Pumpkin Buns. It fundamentally transforms the crumb, making it incredibly moist, tender, and intensely flavorful. The sweet potato acts as a natural humectant, keeping the buns fresh for longer and imparting a delightful sweetness that complements both savory and sweet fillings.
While I cherish all forms of bread, from rustic loaves and tangy sourdough to versatile flatbreads like Rosemary Focaccia, there’s an undeniable joy in infusing bread with vegetables or cheese, much like my Spinach and Ricotta Rolls. These sweet potato buns bring that same level of excitement and unique character to your table.
Their versatility makes them indispensable, especially during the festive season. Imagine serving them as gourmet sliders, robust hamburger buns for a holiday feast, delicate dinner rolls that add a pop of color, or as the perfect vessel for leftover holiday dinner sandwiches. Beyond the holidays, these buns are fantastic for summer barbecues, picnics, or simply as an elevated everyday bread roll. They truly are a recipe you’ll want to keep on rotation!
Essential Ingredients for Sweet Potato Buns
Crafting these delectable sweet potato buns requires a thoughtful selection of ingredients. Each component plays a crucial role in achieving the desired texture, flavor, and vibrant color.
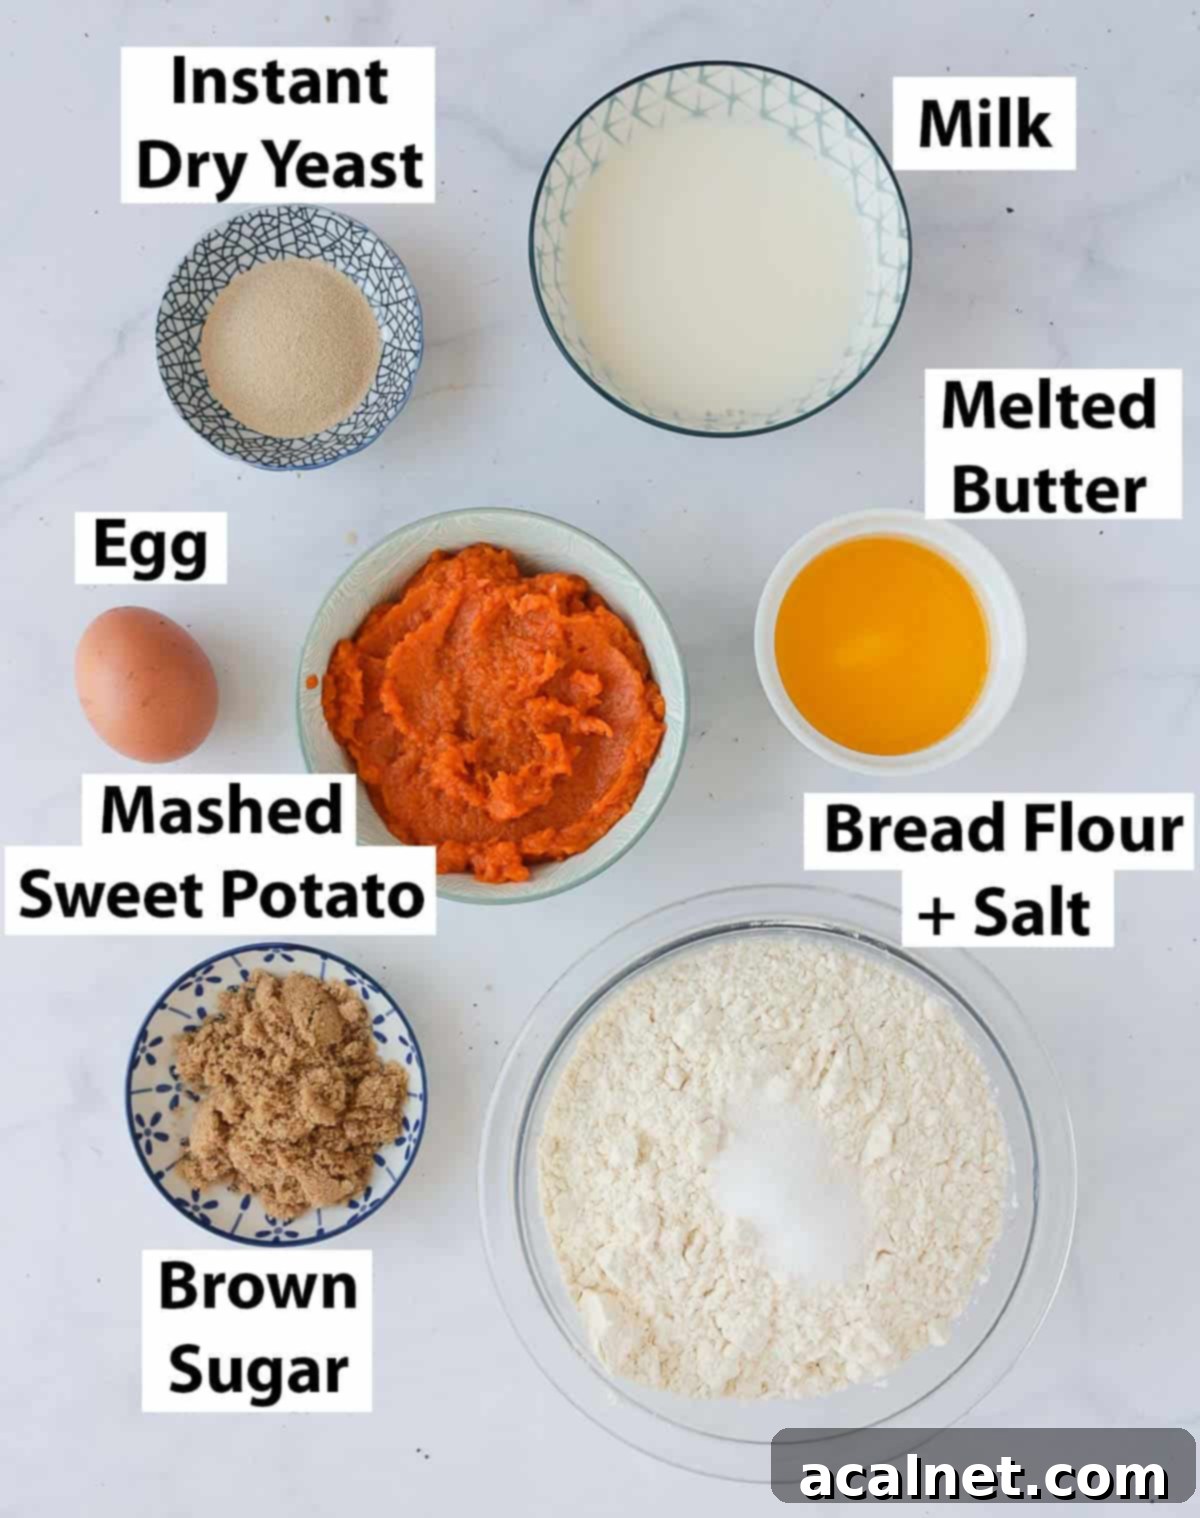
(Scroll down to the detailed recipe card below for exact quantities and measurements.)
- Mashed Sweet Potatoes: The star of our recipe! Use plain cooked and mashed sweet potatoes, free from any seasoning, butter, or other additions. It’s crucial that you measure the weight/quantity of the sweet potato *after* it’s been cooked and mashed, not before. For tips on how to achieve perfectly smooth mashed sweet potatoes, refer to our FAQ section below. While I haven’t personally tested it, canned sweet potato (drained and mashed) might also work as a convenient alternative.
- Instant Dry Yeast: This finely granulated yeast is known for its quick action and typically doesn’t require prior dissolving in warm liquid. However, I always recommend proofing it first in warm milk to ensure it’s alive and active. This small step guarantees your buns will rise beautifully. If you’re using active dry yeast, you’ll need to dissolve it in warm liquid and let it bloom for 5-10 minutes before adding other ingredients. Find more information on using active dry yeast here.
- Brown Sugar: The subtle molasses notes in brown sugar perfectly complement the earthy sweetness of the sweet potato, adding depth and a rich flavor profile to the buns. You can also experiment with other sweeteners like honey for a different nuance (see FAQ).
- Milk: Full cream milk is preferred for its richness and contribution to a tender crumb. For a dairy-free option, plant-based milk (like almond or oat milk) can be substituted. While water can be used, it will result in a less rich and flavorful bun. Ensure the milk is warm, but not hot, to activate the yeast effectively.
- Unsalted Butter: Melted and brought back to room temperature, butter adds incredible richness, flavor, and tenderness to the dough. Using unsalted butter allows you to control the overall salt content of the recipe. If you need to make these buns dairy-free, a neutral-flavored oil like canola or vegetable oil can be used as a substitute.
- Egg: A single medium-sized egg, at room temperature, contributes to the bun’s rich flavor, tender texture, and golden color. It also adds structure and helps with the rise.
- Bread Flour: For the lightest, fluffiest, and most professional-looking buns, bread flour is highly recommended. It has a higher protein content than all-purpose (AP) flour, which allows for stronger gluten development, resulting in a superior crumb structure. If you only have AP flour, please refer to the FAQ section below for adjustments and expectations.
- Table Salt: Beyond just seasoning, salt plays a vital role in controlling yeast activity and strengthening the gluten network in the dough. Always add salt last, ensuring it doesn’t come into direct contact with the yeast initially, as high concentrations of salt can inhibit or even kill the yeast.
For an optional, beautiful golden finish and added flavor, I use a simple egg wash (a whisked egg with a splash of milk) and sprinkle the tops with black sesame seeds. Feel free to use your favorite seeds or grains!
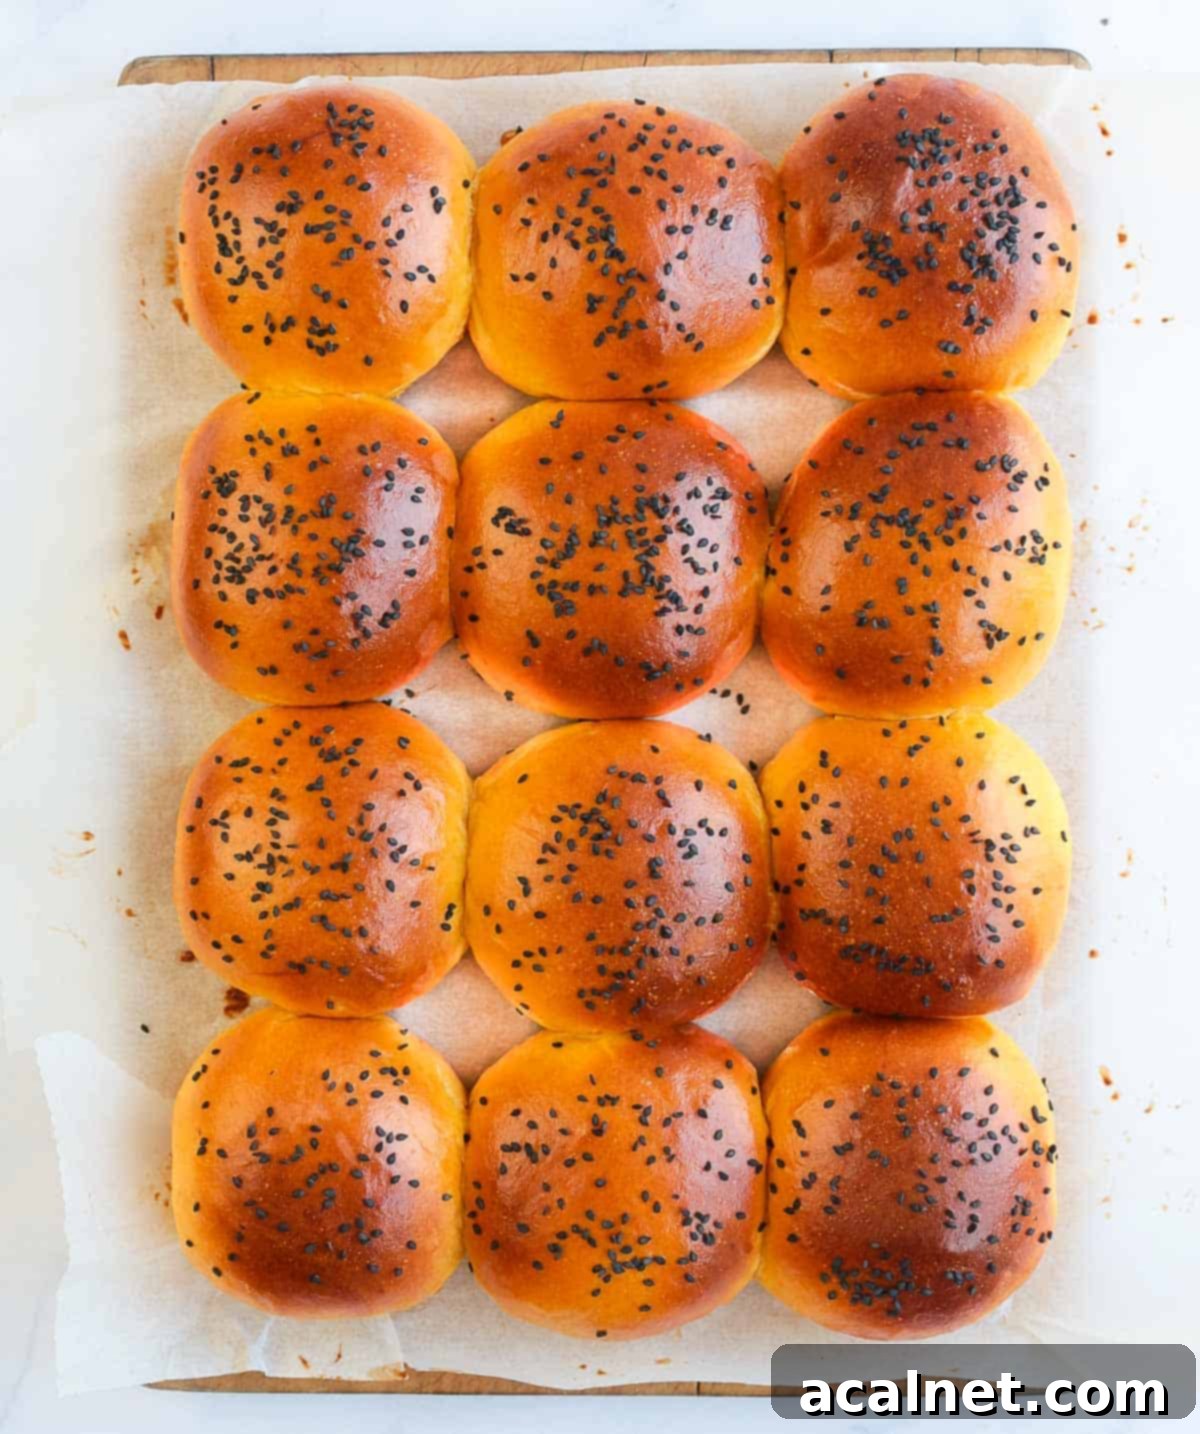
How to Bake Perfect Sweet Potato Bread Rolls
Making these delightful sweet potato rolls is a rewarding process broken down into four manageable and crucial steps, ensuring a light, fluffy, and flavorful result every time.
- Preparing the Mashed Sweet Potato, Making and Kneading the Bread Dough
- First Proving (Bulk Fermentation)
- Shaping the Individual Buns
- Second Proving (Proofing) and Baking
Step 1: Making the Dough
The journey to perfect sweet potato buns begins with the mashed sweet potato itself. It’s essential to prepare it and allow it to cool completely before incorporating it into your dough.
To cook your sweet potato, I recommend a simple oven-baking method: prick the sweet potato all over with a fork, wrap it in foil, and bake it at 180°C/350°F for approximately 45-60 minutes, or until it’s exceptionally soft and tender when squeezed. Alternatively, you can achieve a similar result by cooking the sweet potato in the microwave or by boiling cubed pieces until very soft (refer to our detailed FAQs for more on cooking methods). The key is to ensure it’s cooked thoroughly so it mashes easily.
Once cooked, mash the sweet potato very well until it’s perfectly smooth with no lumps whatsoever. This step is critical for ensuring it integrates seamlessly into the dough. A regular potato masher works wonderfully, but for an ultra-smooth consistency, you could briefly blend it, being careful not to over-process it into a thin liquid.
After your smooth, cooled mashed sweet potato is ready, you can begin assembling the sweet potato bread dough:
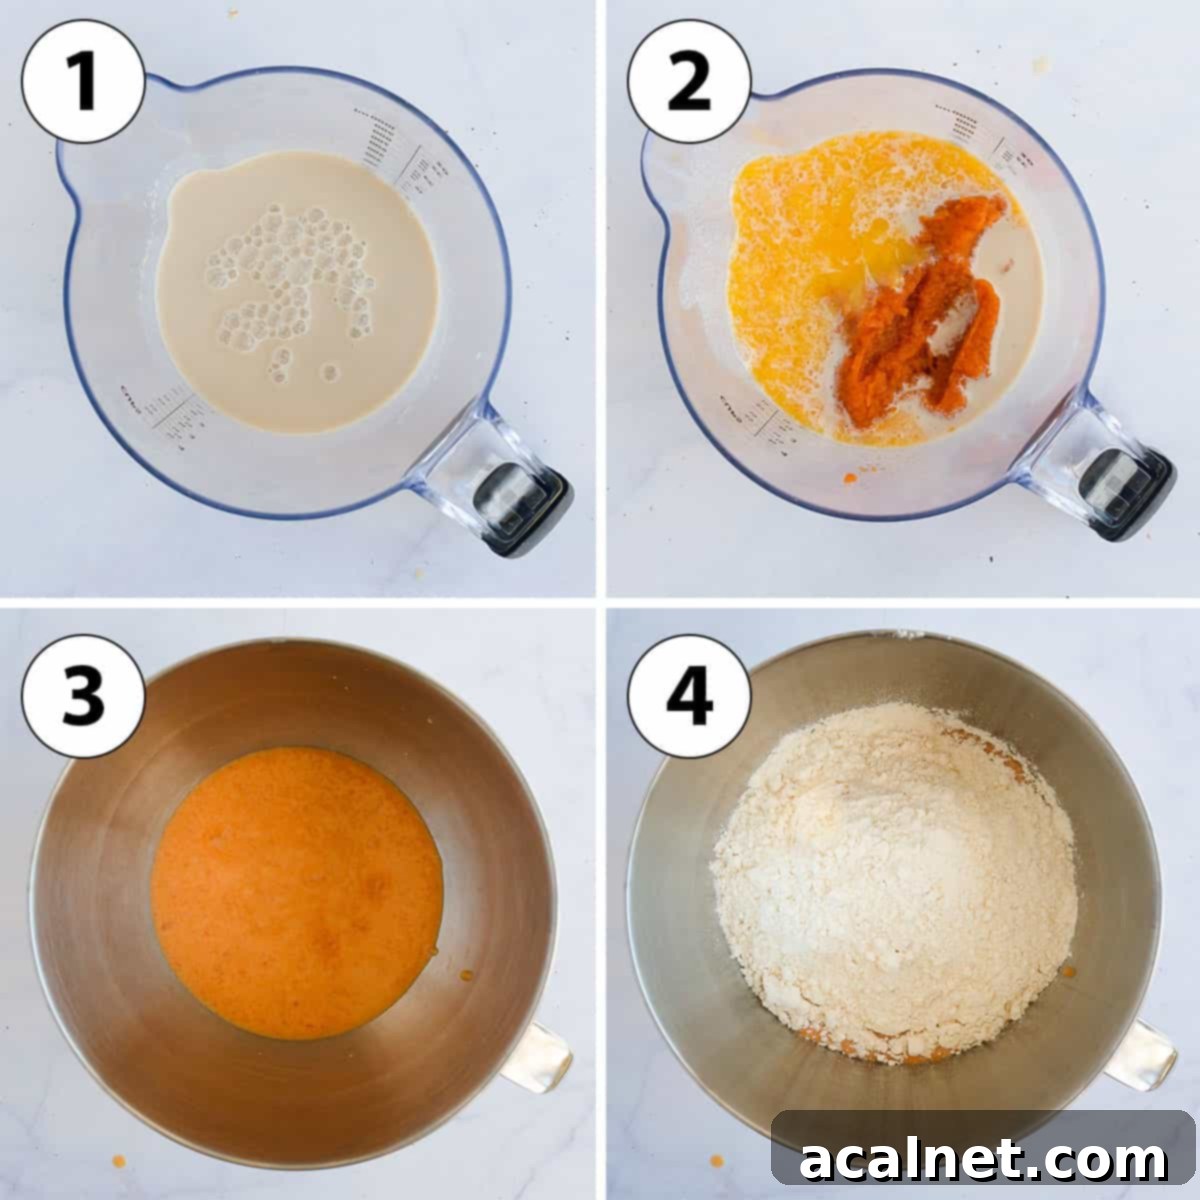
- Place the Milk in a heat-proof bowl or jug and warm it slightly in the microwave. It should be just warm to the touch, not hot – ideally around 38-43°C (100-110°F), similar to your body temperature. If it’s too hot, it will kill the yeast; too cold, and the yeast won’t activate.
- Photo 1: Whisk in the Brown Sugar until it fully dissolves, then sprinkle the Instant Dry Yeast over the surface. Stir gently to combine, then set this mixture aside for 5 to 10 minutes. This allows the yeast to activate. You should observe a light foam or small bubbles forming on the surface of the milk, indicating active yeast.
- Photo 2: Once the yeast is active, add the Melted Butter (which should have cooled back to room temperature) and the prepared Mashed Sweet Potato to the mixture.
- Photo 3: Whisk all the wet ingredients together until thoroughly combined and smooth. Then, transfer this vibrant mixture into the bowl of your stand mixer, fitted with the dough hook attachment. (If you’re kneading by hand, see our FAQ section for detailed instructions.)
- Photo 4: Add the Bread Flour (preferably sifted to prevent lumps) to the wet ingredients, followed by the Salt. Begin kneading on a medium-low speed for approximately 3 minutes. Pause as needed to scrape down the sides of the bowl to ensure all ingredients are incorporated. Increase the speed to medium-high and continue kneading for another 5 to 8 minutes. The exact time may vary depending on your mixer, but aim for a dough that is very smooth, elastic, and still ever-so-slightly sticky to the touch. This slight stickiness is normal and desired.
Step 2: First Proving (Bulk Fermentation)
After kneading, the dough needs time to rise, developing flavor and a light texture.
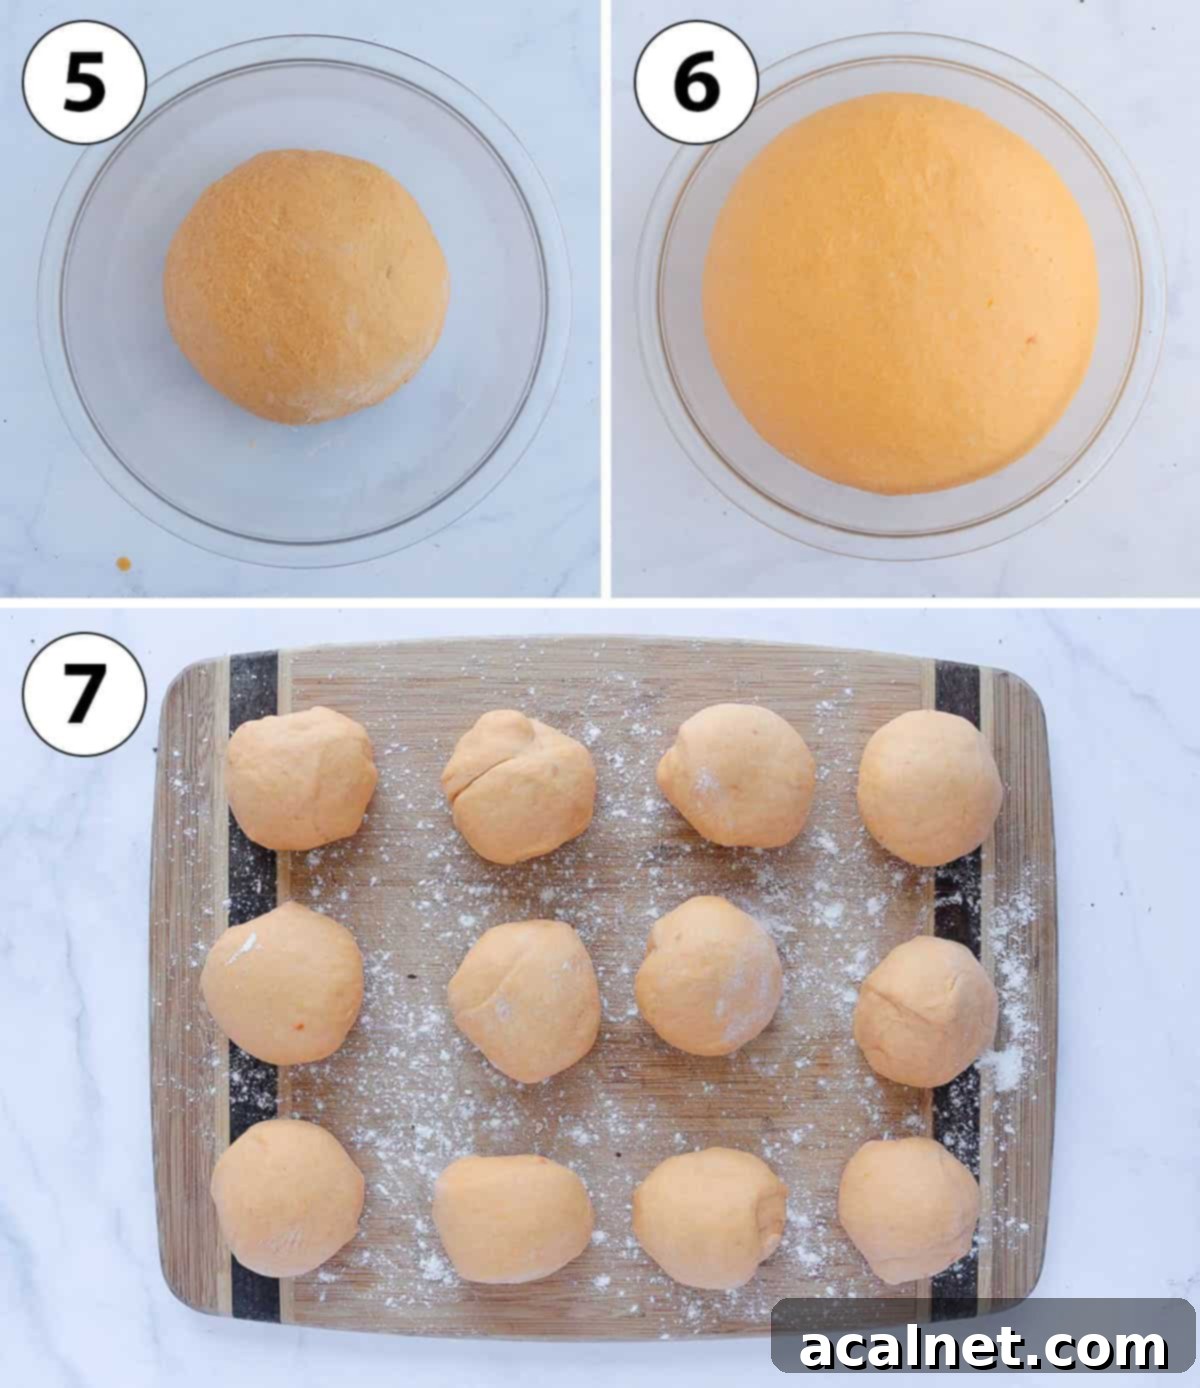
- Photo 5: Lightly flour or grease a clean work surface. Transfer the dough onto it and gently bring it together to form a smooth ball. Remember, the dough should still feel slightly sticky – this is perfectly normal and a sign of proper hydration. Avoid adding excessive flour unless absolutely necessary. Place the dough ball into a large, clean, lightly greased bowl and cover it tightly with a clean kitchen towel or plastic wrap.
- Photo 6: Allow the dough to prove (first rise) for 1 to 1.5 hours, or until it has visibly doubled in size. The precise proving time will depend significantly on your room temperature; a cooler kitchen will require a longer rise. To test if the dough is ready, gently poke it with a floured finger. It should slowly spring back, leaving a small, lingering indent. If it springs back immediately, it needs more time; if it collapses, it might be slightly over-proofed.
- Photo 7: Once fully proved, gently punch the dough down to release the accumulated air. This step helps redistribute the yeast and creates a finer crumb structure. Transfer the deflated dough onto a lightly floured surface. Divide the dough into 12 equal pieces for medium-sized buns. For larger burger buns, divide into 9 pieces, or for smaller dinner rolls, divide into 15. For precise and uniform buns, use a kitchen scale to weigh the entire dough and then divide that weight by the desired number of buns.
Tip: When baking during colder months, I often place the covered dough in a slightly warmed-up oven (preheat for a few minutes then turn off) to create a consistent, warm environment for proving.
Step 3: Shaping the Buns
Proper shaping is key to achieving perfectly round, evenly risen buns.
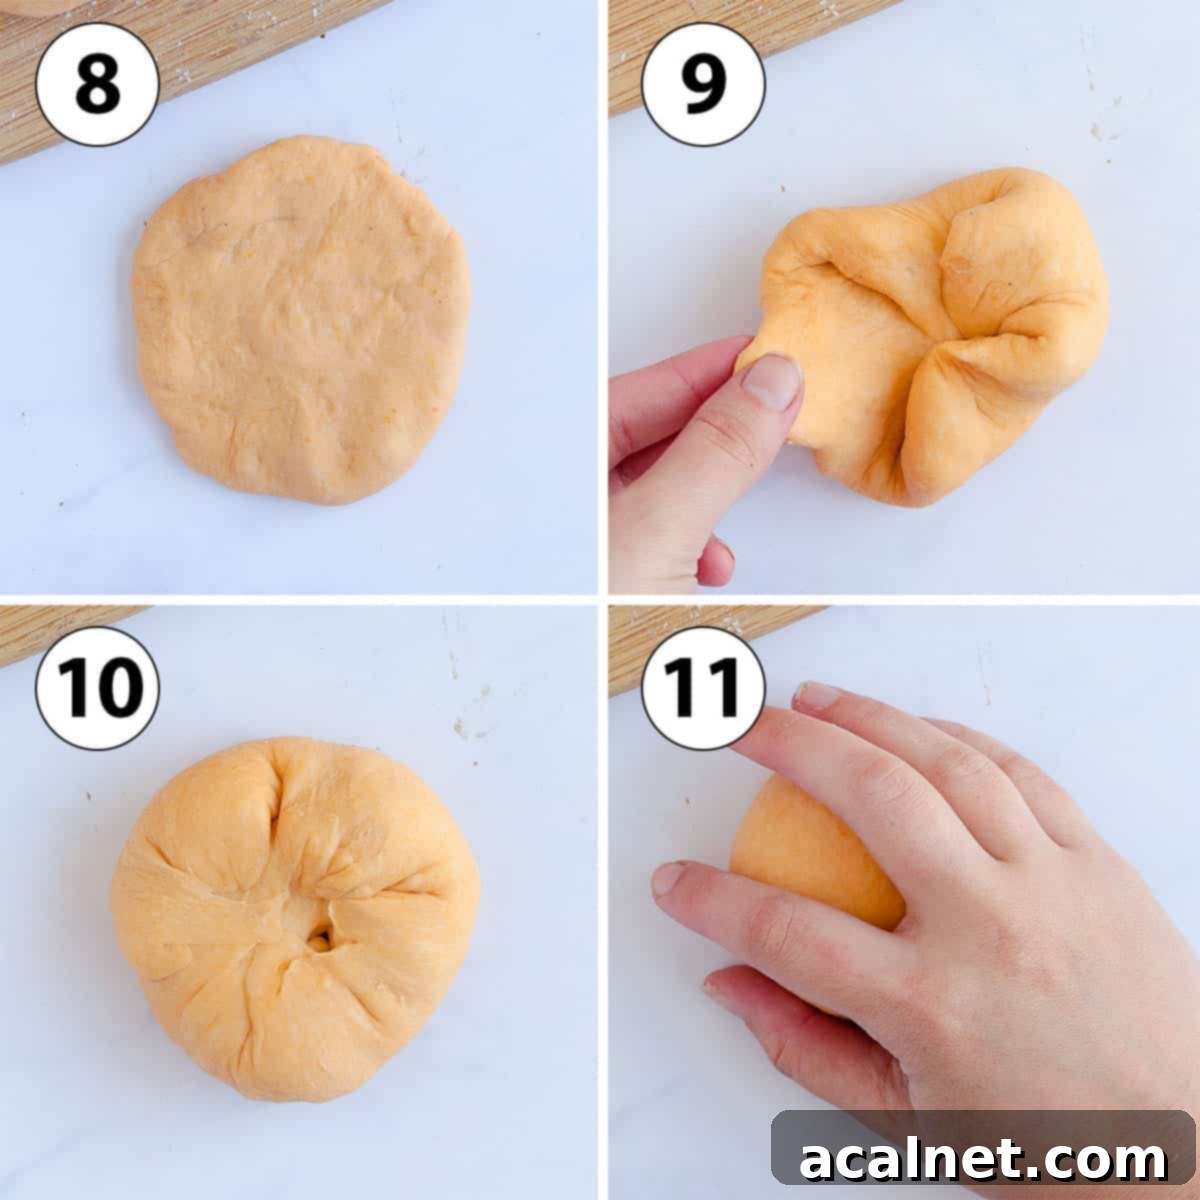
- Photo 8: Take one piece of dough and gently flatten it into a small disk using your fingertips. This prepares the dough for tension building.
- Photo 9: Carefully fold the edges of the disk towards the center of the dough ball, working your way around the entire circumference. The goal here is to create surface tension on the top of the dough. Continue folding and pulling the edges until it feels taut and you can no longer easily pull the edges. This technique traps air inside and contributes to a beautiful rise in the oven.
- Photo 10: Once all edges are folded to the center, gently pinch the dough together in the middle to seal the seams. This ensures the bun holds its shape.
- Photo 11: Turn the dough ball over so the seams are facing downwards. Using the palm of your hand, gently roll the ball against the countertop in a circular motion. Apply slight, even pressure to further tighten the surface and create a perfectly smooth, round shape for your sweet potato buns. Repeat this process for all remaining dough pieces.
Step 4: Final Proving and Baking
The final rise and proper baking technique are crucial for achieving irresistible sweet potato buns.
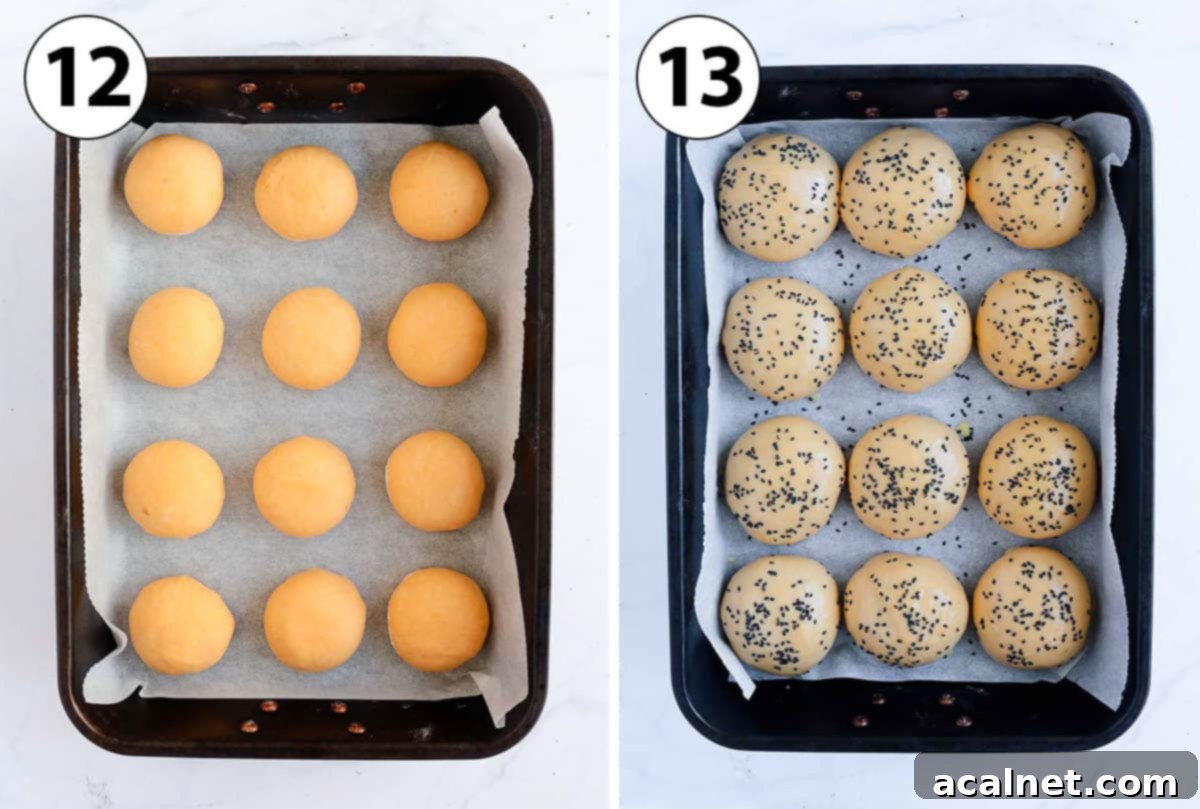
- Photo 12: Once each bun is perfectly shaped, arrange them on a large baking tray (I often use a large roasting pan for this) lined with baking paper. Ensure you leave ample space between each bun, as they will expand considerably during this second proving stage and then further in the oven.
- Allow the buns to prove a second time for approximately 30 to 45 minutes. Again, the exact duration is temperature-dependent. They should nearly double in volume, appearing visibly puffed and tender.
- While the buns are on their second prove, preheat your oven to 180°C/350°F. This ensures the oven is at the correct temperature for an immediate and effective rise (oven spring).
- Photo 13: (Optional, but highly recommended) For a stunning golden-brown, glossy finish, prepare an Egg Wash. Whisk one egg together with a small amount of milk until well combined. Gently brush this mixture over the top of each risen bun. Finish by sprinkling your desired seeds or grains over the egg wash – I used black sesame seeds, but white sesame seeds, poppy seeds, oats, or pumpkin seeds would also be lovely additions.
- Bake the sweet potato rolls for about 25 minutes, or until they are beautifully puffed up and have achieved a deep golden-brown color. Once baked, it’s vital to let them cool down completely inside the baking tray before attempting to move or slice them. This step is critical because the buns continue to “bake” internally as they cool, allowing residual steam to reincorporate and create that wonderfully fluffy, moist crumb. Moving or cutting them while still warm will release this steam, potentially leading to a drier, less airy texture.
Expert Tips for Perfect Sweet Potato Buns
Achieving bakery-quality sweet potato buns at home is easier than you think with these helpful tips:
- Always Proof Your Yeast: Even with instant dry yeast, it’s a good practice to dissolve it in warm milk (not hot!) first. Look for a frothy, bubbly surface after 5-10 minutes. This confirms your yeast is alive and active, guaranteeing your dough will rise. If no activity occurs, your yeast might be old or the milk too hot/cold, and it’s best to start with fresh yeast.
- Stand Mixer for Superior Results: While hand-kneading is possible, a stand mixer with a dough hook attachment offers the best results. It ensures thorough kneading, leading to superior gluten development, which is critical for creating a truly light, airy, and fluffy crumb structure. It also saves you effort and mess!
- Resist Adding Excess Flour: It’s common to be tempted to add more flour if the dough feels sticky. However, this dough is designed to be slightly sticky before its first rise. Adding too much flour can result in dense, dry buns. Only add a tiny bit more flour if the dough is excessively sticky and unmanageable. Trust the process and the recipe’s hydration levels.
- Respect Proving Times: Proving is a crucial step for flavor and texture. Both under-proofed and over-proofed dough can lead to a less-than-ideal result (dense, dry, or collapsed buns). Since room temperature greatly affects rise time, rely on visual cues (doubled in volume for the first rise, visibly puffed for the second) and the “poke test.”
- Master the Poke Test: To check if your dough is perfectly proved, gently poke it with a floured finger. The indent should slowly spring back, but a small dent should remain. If it springs back immediately, it needs a bit more time. If the dough deflates or the indent stays completely, it’s likely over-proved.
- Enhance with an Egg Wash: Brushing the buns with an egg wash (egg mixed with a little milk) just before baking isn’t just for aesthetics. It creates a beautiful, shiny, golden-brown crust and can add a subtle richness. Don’t forget to add your favorite toppings like white sesame seeds, poppy seeds, oats, or pumpkin seeds for extra texture and flavor.
- Cool Completely for Best Texture: This is a non-negotiable step for the fluffiest buns! Even after removing them from the oven, the buns continue to cook and develop internally. Slicing or moving them while still warm allows steam to escape, which is essential for a moist, tender crumb. Patience will be rewarded with perfectly soft and airy buns.
Sweet Potato Bun Recipe FAQs
Yes, honey can absolutely be used as a substitute for brown sugar in this recipe. Keep in mind that honey is a liquid sweetener, so it will add more moisture to your dough. You might need to slightly increase the quantity of bread flour by a tablespoon or two to compensate for the added liquid and maintain the desired dough consistency. The flavor profile will also shift slightly, offering a distinct, floral sweetness from the honey.
While these sweet potato buns can technically be made with plain (all-purpose) flour using the same ratio and quantity, for the absolute best crumb and bun texture, I strongly recommend using bread flour. Bread flour boasts a higher protein content, which is crucial for developing strong gluten strands. This gluten network traps gases produced by the yeast, allowing your buns to rise higher and achieve that incredibly light, fluffy, and chewy texture. Using plain flour will still yield delicious buns, but they may be slightly denser and less airy compared to those made with bread flour.
There are several effective ways to cook sweet potatoes for mashing in this recipe. You can bake them (as described above, wrapped in foil until very tender), boil them (peeled and cut into small pieces until fork-tender), or cook them in the microwave (pricked and cooked until soft). The specific method is up to your preference and convenience. Regardless of how you cook them, the critical factor is to ensure the sweet potato is extremely tender so you can mash it into a perfectly smooth, lump-free consistency. Allow it to cool completely before adding it to the dough.
Yes, you can absolutely make these sweet potato bread rolls by hand if you don’t have a stand mixer. However, be prepared to knead the dough for a significantly longer period than you would with a mixer – typically 10-15 minutes or even more, until it becomes smooth and elastic. Since the dough is slightly sticky, it can be a bit messy, but try to resist the urge to add too much extra flour. A light greasing of your hands and work surface can help manage the stickiness. Kneading by hand builds arm strength and offers a tactile connection to the bread-making process!

Storing & Freezing Sweet Potato Buns
Ensure your delicious homemade sweet potato buns stay fresh and ready to enjoy with these storage and freezing tips.
Storing Baked Buns
Once completely cooled, these sweet potato buns will maintain their freshness and soft texture for up to 3 days when stored at room temperature. For optimal freshness, place them in an airtight container, a bread box, or simply cover them well with plastic wrap or a clean kitchen towel. I strongly advise against storing them in the refrigerator, as the cold air can quickly dry out bread, making them stale and hard.
Making Ahead for Convenience
These buns are perfect for preparing in advance! You can do most of the work the day before and bake them fresh just before serving. To make them ahead, follow all the instructions up to the point where the individual buns are shaped and placed on the baking tray. Instead of the second prove at room temperature, cover the tray tightly with plastic wrap or foil and refrigerate overnight. The cold temperature will significantly slow down the proving process.
The next day, take the tray out of the fridge and let the buns come back to room temperature for about an hour. This allows them to warm up and become active again. Then, allow for the normal 30 to 45 minutes for the second prove, or until they are visibly puffed. As always, ambient room temperature will influence the exact time needed for them to rise properly before baking as directed.
Freezing for Long-Term Freshness
These sweet potato buns freeze exceptionally well, allowing you to enjoy fresh-baked taste whenever you crave it. To freeze, ensure the buns are completely cooled after baking. For best results and to prevent freezer burn, wrap each bun individually in a layer of plastic wrap, followed by a layer of aluminum foil. Alternatively, you can place them in a large freezer-friendly container or a heavy-duty freezer bag, but I recommend separating each bun with baking paper or foil to prevent them from sticking together.
They can be frozen for up to one month while maintaining optimal freshness and quality. When you’re ready to enjoy them, simply remove the desired number of buns from the freezer and let them thaw at room temperature for a few hours, or overnight in the refrigerator. For a “just baked” experience, you can warm them briefly in a preheated oven (150°C/300°F) for 5-10 minutes.
More Delicious Homemade Bread Recipes
If you loved making these sweet potato buns, explore our other delightful homemade bread recipes perfect for any occasion:
- Chocolate Brioche Bread Wreath
- Easy Lemon Sweet Rolls
- Classic Cinnamon Scrolls (From Scratch)
- Apple Cinnamon Pull-Apart Bread
- Chocolate Chip Brioche Bread
- Classic French Brioche Loaf
- Triple Chocolate Cinnamon Rolls
- Rich Chocolate Brioche Bread
- Homemade Sesame Bagels
- Versatile Challah Rolls (4 Ways)
Made this recipe?
We’d love to hear from you! Leave a comment below and share your delicious creations on Instagram. Don’t forget to tag us @a.baking.journey!
Recipe

Sweet Potato Buns for Burgers or Dinner Rolls
Print Recipe
Ingredients
Sweet Potato Buns
- 200 gr (7 oz) Mashed Sweet Potato, (*) (about 3/4 cup)
- 180 ml (3/4 cup) Full Cream Milk, warm
- 11 gr (1 tablesp.) Instant Dry Yeast
- 30 gr (2 1/2 tablesp.) Brown Sugar
- 50 gr (3 1/2 tablesp.) Unsalted Butter, melted and at room temperature
- 1 Egg
- 500 gr (3 1/3 cup) Bread Flour, (**)
- 8 gr (1 1/2 teasp.) Table Salt
Egg Wash & Topping (optional)
- 1 Egg
- 15 ml (1 tablesp.) Full Cream Milk
- Seeds or Grains to top the buns (I used Black Sesame Seeds), to taste
Instructions
Sweet Potato Buns
- Cook the Sweet Potato then mash it until very smooth. This can be done in the microwave, oven or by boiling it (refer to FAQ section above). Leave it to cool down until it reaches room temperature.
- Place the Milk in a bowl or jug and heat it up slightly in the microwave (see note 1). Whisk in the Brown Sugar until dissolved, then add the Instant Dry Yeast. Set aside for 5 to 10 minutes or until the yeast starts to activate and you can see froth/bubbles on the surface.
- Whisk in the melted Butter (at room temperature), the Egg and the Mashed Sweet Potato then place it all in the bowl of your Stand Mixer fitted with the Dough Hook attachment (see note 2).
- Add the sifted Bread Flour and Table Salt and start kneading the dough on a medium-low speed. Stop to scrap the edges of the bowl if needed. Knead for about 3 minutes, then increase the speed to a medium-high and keep kneading for another 5 to 7 minutes (see note 3).
- Flip the dough on a very lightly floured or greased surface and bring together into a large ball (it will still be slightly sticky, it’s normal). Transfer into a clean bowl that has been lightly greased, cover with a tea towel and leave to prove for about 1 to 1,5 hour – or until the dough has doubled in size (see note 4).
- Punch the air out of the dough, then transfer over a lightly floured surface. Divide the dough into 12 equel balls (or more or less if you want smaller or larger buns). Use a scale to weight the dough and get the exact same size for each buns.
- For each bun, gently flatten the ball of dough with your finger to strech it out, then fold each side towards the middle of the disk to create tension within the dough. Turn the ball over and gently roll it under your palm, applying slight pressure against the surface, to get a perfect round bun.
- Place the buns inside a large lined baking tray, leaving enough room between each buns for them to prove and expand again. Leave to prove a second time for 30 to 45 minutes, or until the buns have risen again.
- Preheat your oven on 180’C/350’F.
Egg Wash (optional)
- Just before baking the buns, prepare the Egg Wash by whisking together the Egg and Milk. Brush the liquid over each buns, then sprinkle your choice of topping over the buns.
- Bake for about 25 minutes, or until the buns are puffed and golden. Leave to cool down completely in the tray before moving the sweet potato buns.
Would you like to save this recipe?
We’ll email this post to you, so you can come back to it later!
Notes
Yield: this recipe with make 15 small dinner rolls, 12 medium size buns or 9 large burger buns.
Ingredient Notes:
(*) Mashed Sweet Potato: make sure to weight/measure the potato after mashing it. The sweet potato will get lighter after baking so it is important to start with a sweet potato that is heavier/larger than the recommend mashed sweet potato. Refer to the FAQ section above to learn how to prepare mashed sweet potato if needed.
(**) Bread Flour: can be substituted with AP/Plain Flour but the buns won’t be as fluffy. You might need to add a little bit of flour as you knead the dough, but try not to add too much; the dough will naturally be slightly sticky before the first rise.
Instruction Notes:
- Be careful the Milk is not too hot or it will kill the yeast. It should only be slightly warmer than room temperature and about your body temperature (if you touch it with your finger, you shouldn’t feel much heat from it).
- The dough can be kneaded by hands on a slightly floured or greased surface if you don’t have a stand mixer, but you will need to knead it for much longer to get a similar result.
- The dough should be smooth, without lumps, and very stretchy. It will be slightly sticky – it is completely normal. Try not to add too much flour unless absolutely necessary (if the dough is extremely sticky)
- The exact proving time will always depend on the temperature of your room, so I can only give you an estimate. In a very cold room, it could take much longer for the dough to rise. As an indication, the dough should have about doubled in volume before you move onto the next step.
Nutrition (per serving)
