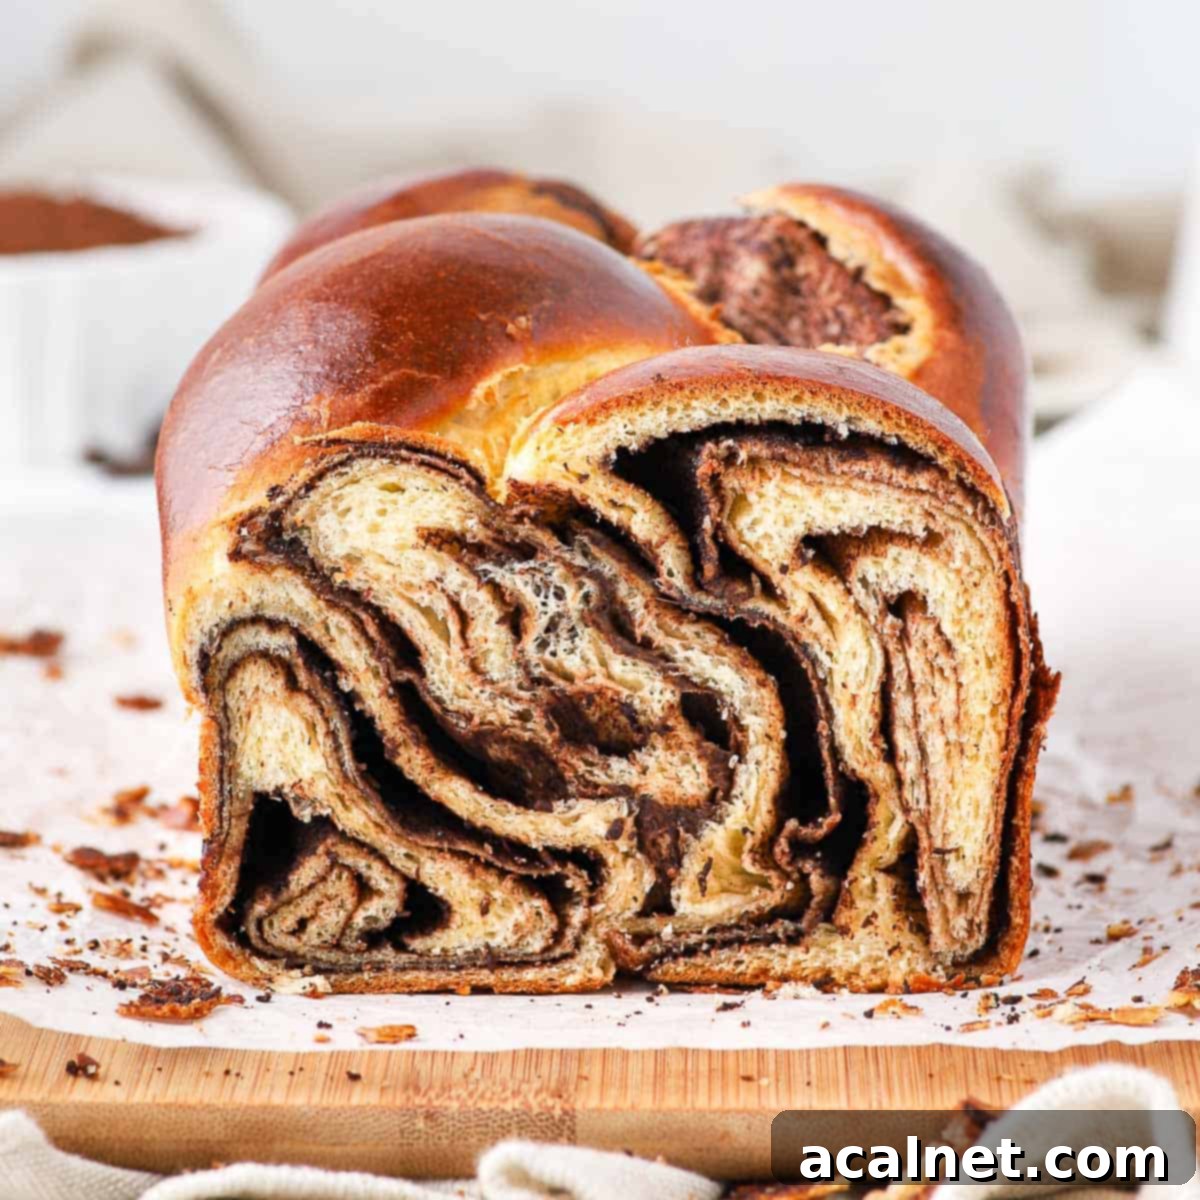
Irresistibly Buttery Chocolate Swirl Brioche Bread: Your Ultimate Guide to a Decadent Homemade Treat
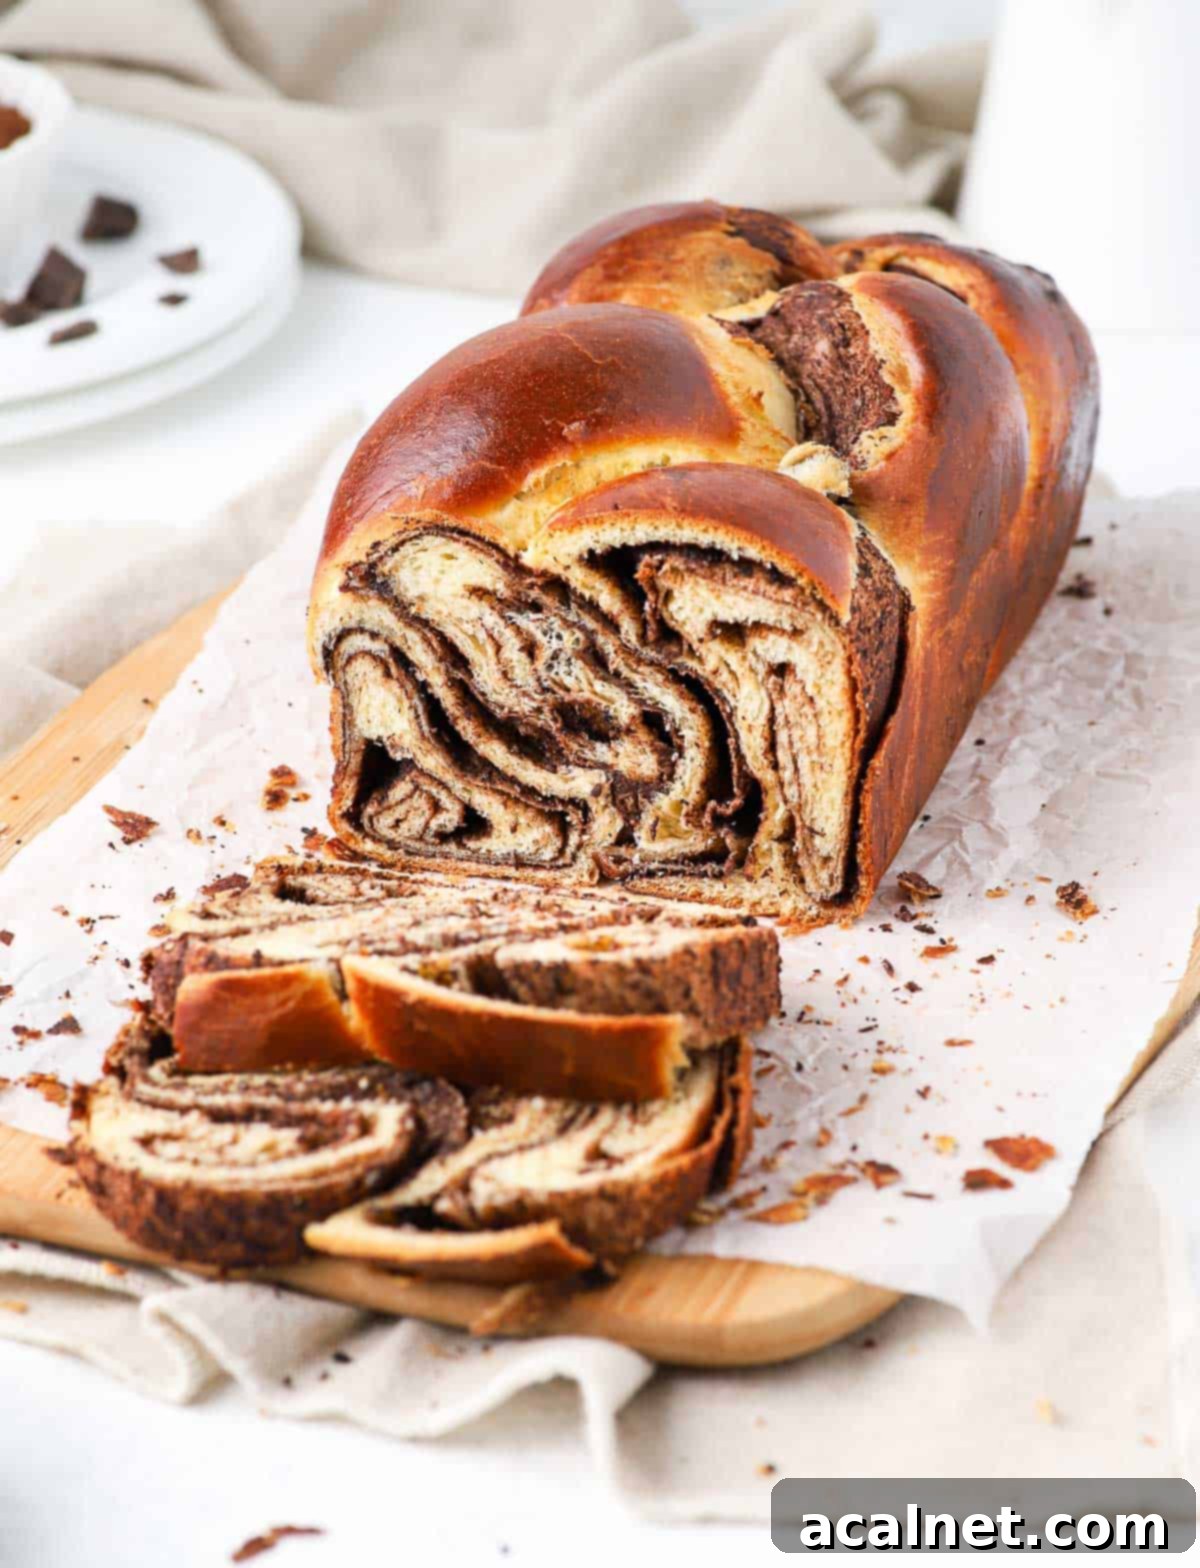
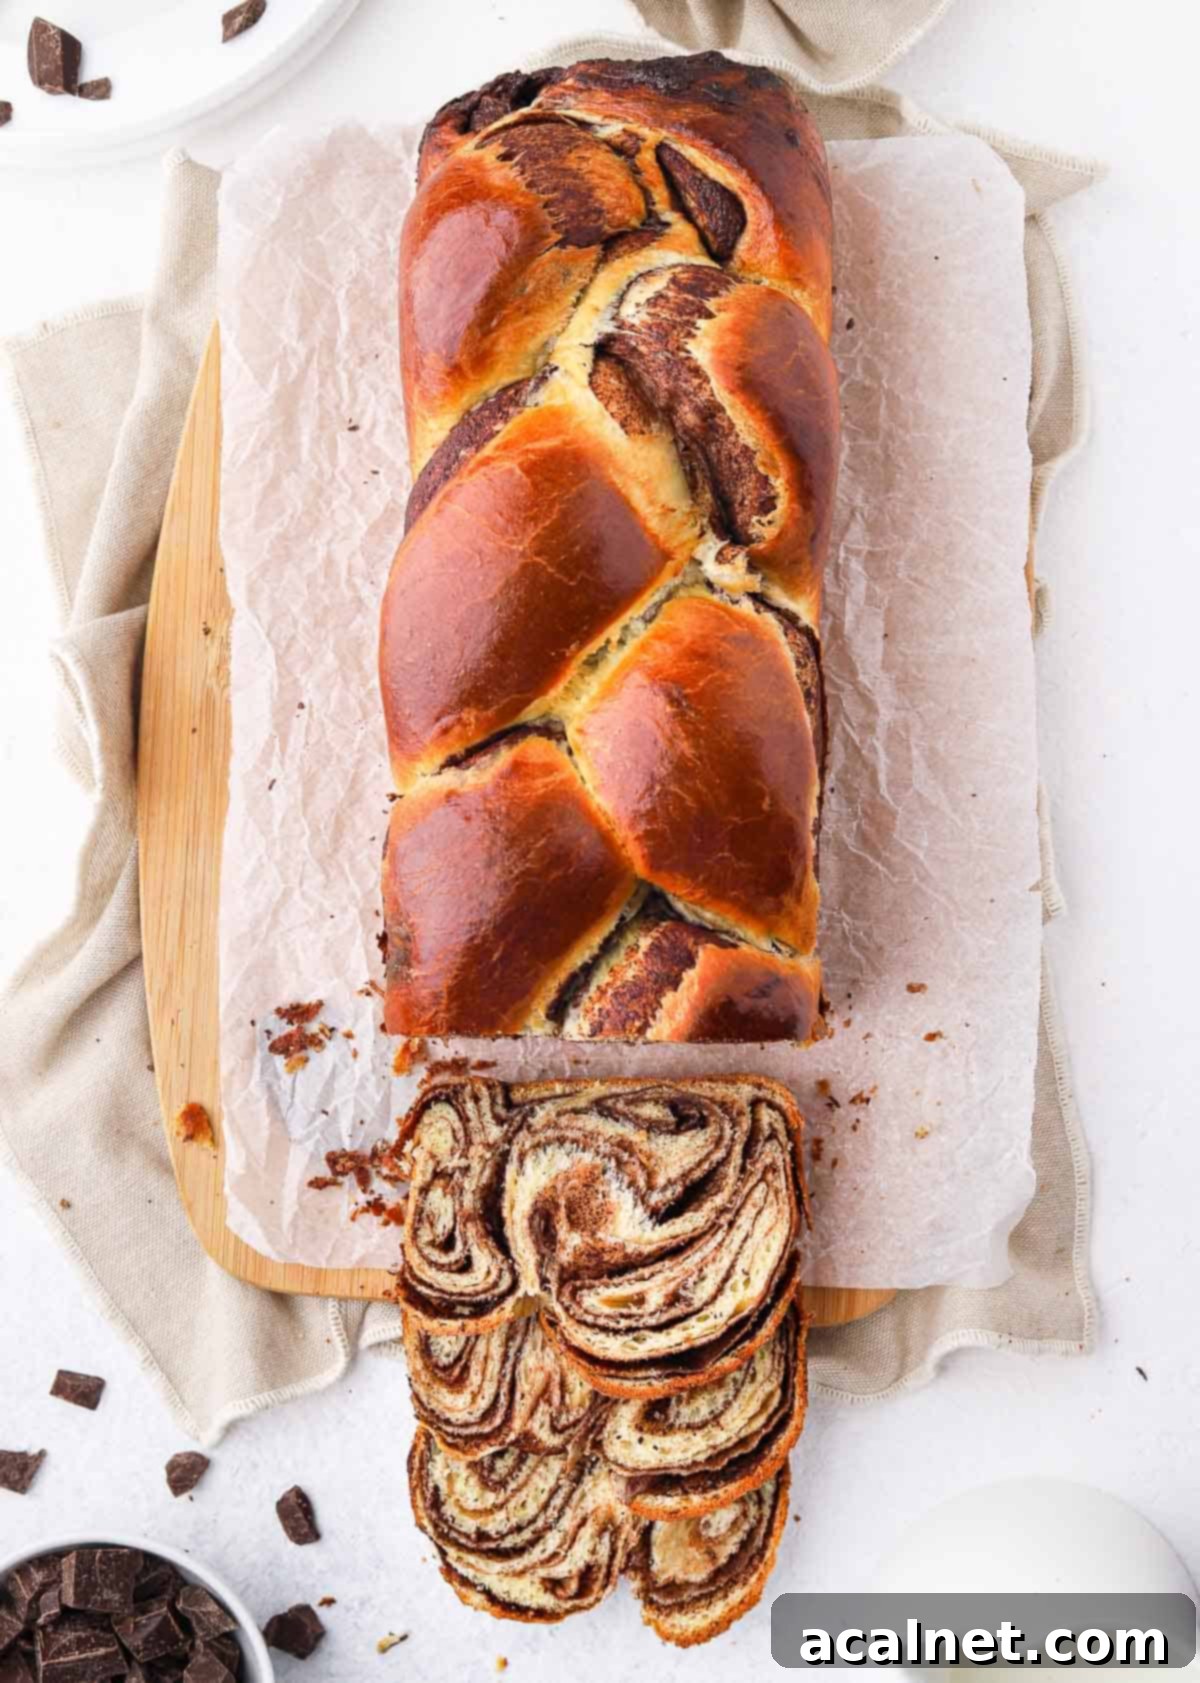
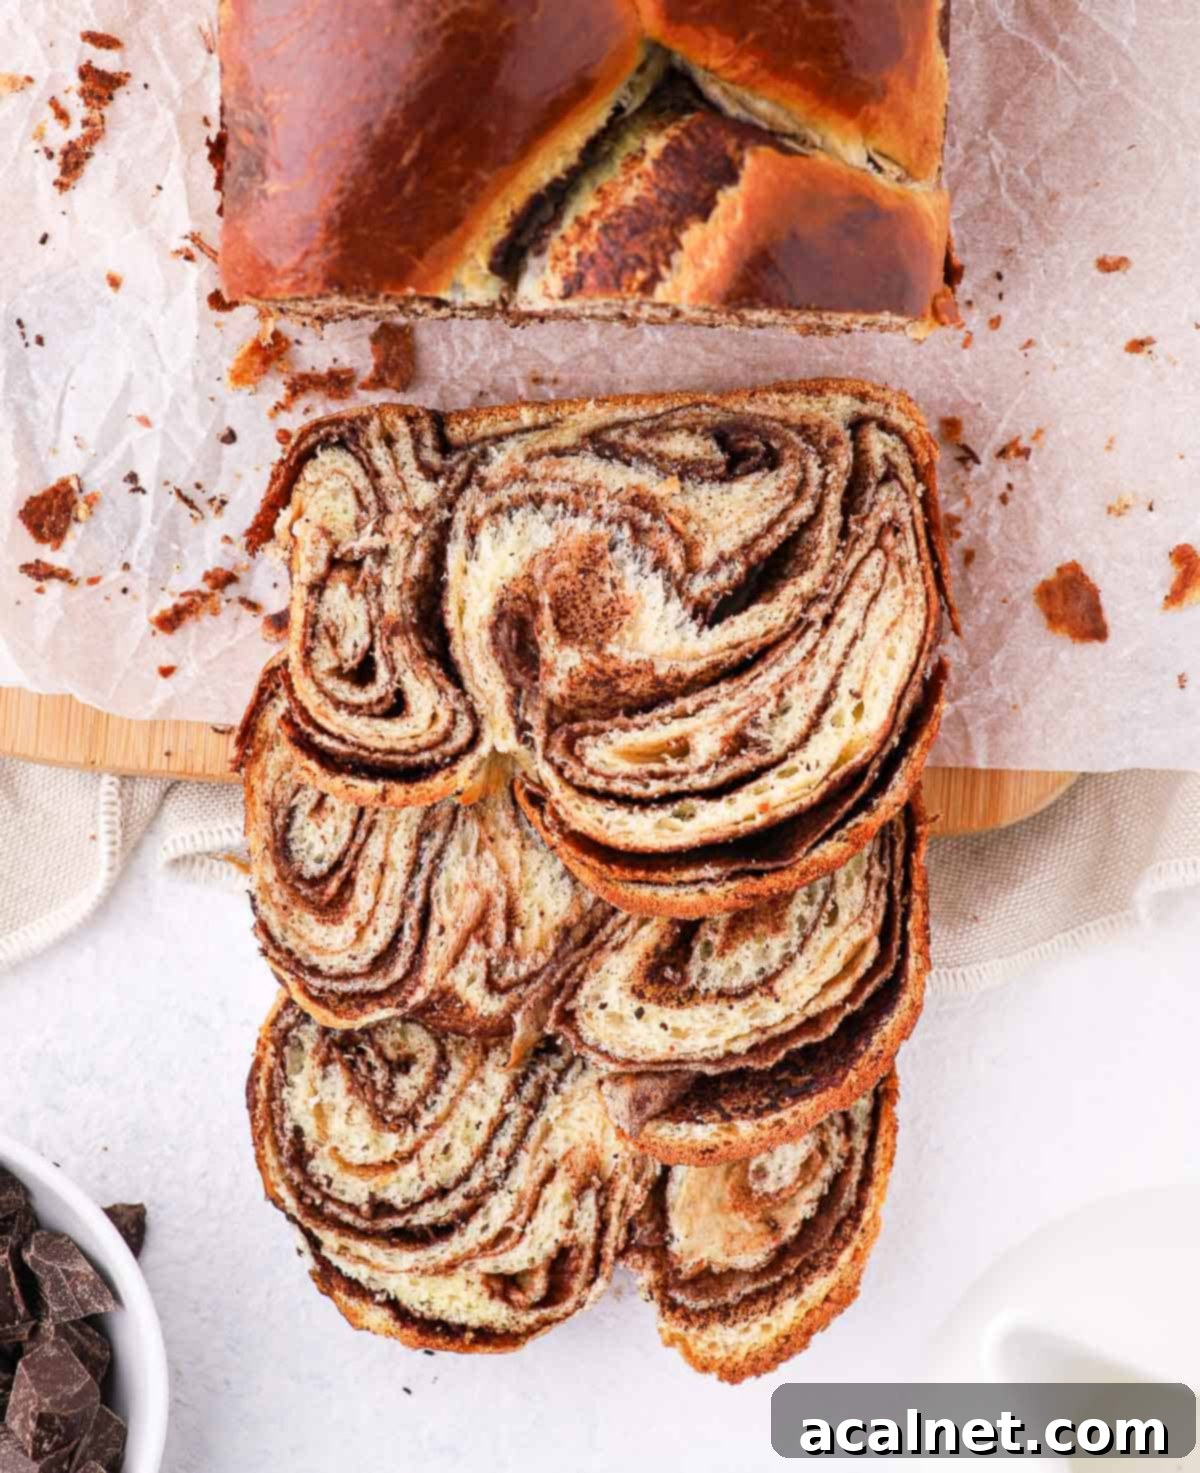
Prepare to be enchanted by this **Chocolate Swirl Brioche Bread**, a true masterpiece of baking that combines rich flavor with stunning aesthetics. Imagine sinking your teeth into a slice of perfectly golden-brown brioche, incredibly soft and buttery, revealing beautiful ribbons of luscious dark chocolate swirling throughout. This isn’t just bread; it’s an experience, a delightful treat that elevates any breakfast, brunch, or afternoon tea into a special occasion. Crafted from classic French brioche dough, this recipe guides you through creating a tender, enriched bread, generously filled with a decadent chocolate blend, then artfully braided to showcase those irresistible chocolate layers. The result is a truly indulgent sweet bread that’s as delightful to look at as it is to eat, promising pure bliss in every bite.
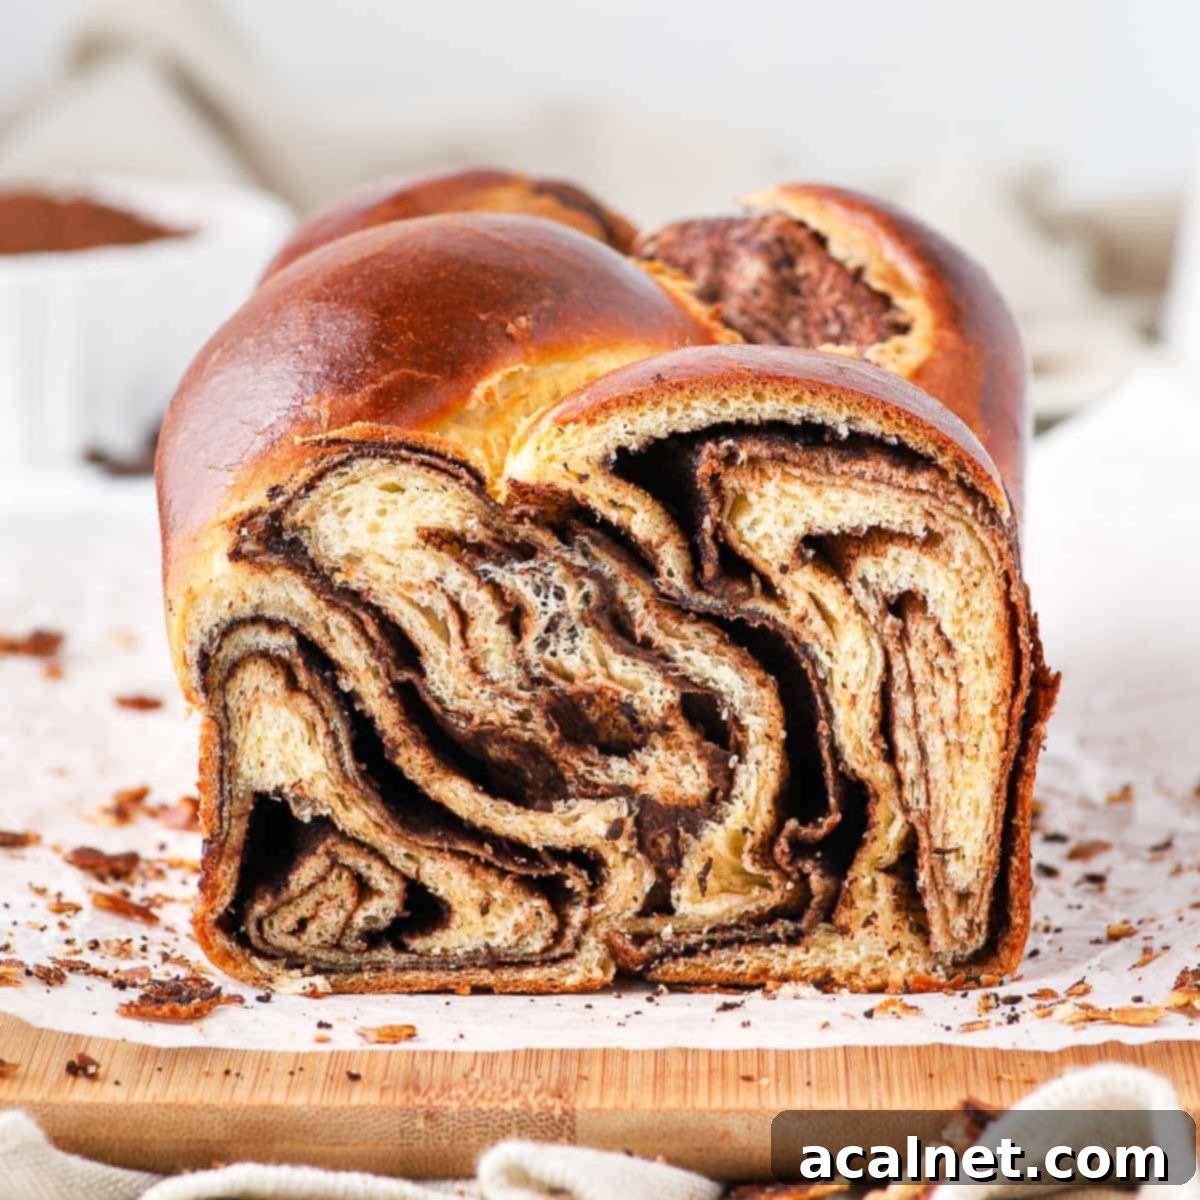
[feast_advanced_jump_to]
Why You’ll Adore This Chocolate Swirl Brioche Bread Recipe
There’s something truly magical about brioche – its rich, buttery texture and delicate sweetness stand unparalleled. But what if we told you it could get even better? This recipe takes classic French brioche to new heights by infusing it with generous layers of rich, dark chocolate. The result is a profoundly indulgent, melt-in-your-mouth experience that is utterly ‘more-ish’ – you’ll find it hard to stop at just one slice!
This sweet braided bread masterfully combines the best elements of several beloved pastries: the tender crumb of our Chocolate Chip Brioche, the irresistible layers of our Chocolate Cinnamon Rolls, and the intricate swirls reminiscent of a classic Cinnamon Babka. We start with our signature brioche dough, roll it thinly, lavishly fill it with a rich chocolate spread, and then braid it to create those visually stunning chocolate swirls that run throughout every slice.
While its elegant appearance might suggest a complex baking project, don’t be intimidated! This chocolate brioche is surprisingly straightforward to make. We’ve broken down each step to ensure your baking journey is enjoyable and successful, even for novice bakers. It’s the perfect show-stopping treat for a lavish breakfast or brunch (imagine it as a special Christmas morning delight!), a sophisticated addition to your afternoon tea spread, or a comforting indulgence any day of the week. Plus, it’s a fantastic make-ahead recipe, staying wonderfully fresh for several days, meaning you can enjoy its deliciousness long after baking.
Essential Ingredients for Your Homemade Chocolate Brioche
Crafting the perfect chocolate brioche starts with understanding the role of each ingredient. Here’s what you’ll need to create this delectable sweet bread. For specific quantities, please refer to the detailed recipe card below.
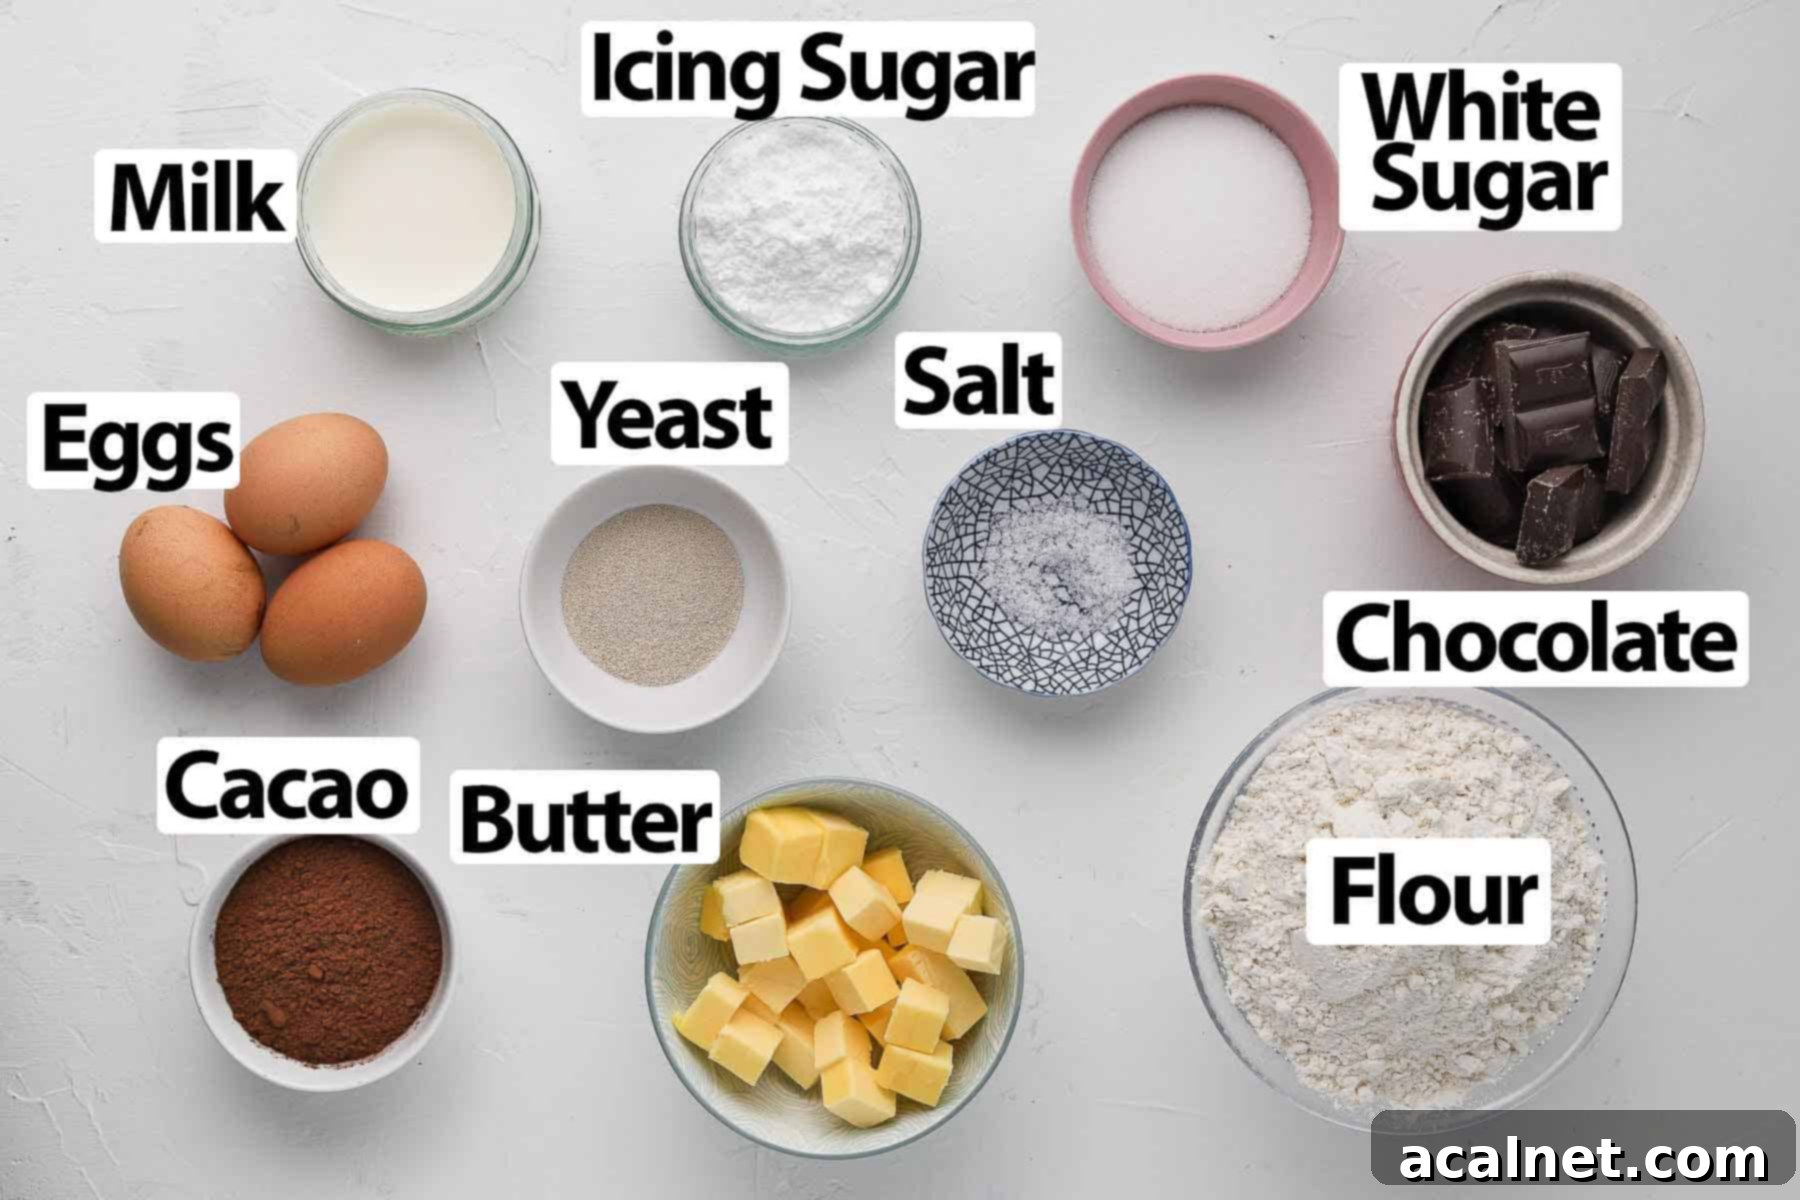
For exact quantities, please scroll down to the recipe card.
For the Rich Brioche Dough:
- Whole Milk (Full Cream): This is crucial for achieving the ultimate richness and tender texture in your brioche. Ensure the milk is lukewarm – not hot – to gently awaken the yeast without killing it. A good test is if it feels warm to the touch, but not uncomfortably hot (around 105-115°F or 40-46°C).
- Caster Sugar (Fine Granulated Sugar): This fine-grain sugar dissolves easily, providing the necessary sweetness and feeding the yeast. It’s divided into two portions to ensure optimal yeast activation and dough development.
- Instant Dry Yeast: While instant yeast is designed to be added directly to dry ingredients, we recommend activating it in the warm milk and a portion of sugar. This step is a fantastic way to verify your yeast is active and eager to work, preventing potential disappointment later. Active Dry Yeast can also be used following the same activation process.
- Large Eggs: Always use room temperature eggs. They emulsify much better with other ingredients, leading to a smoother, more homogeneous dough and a lighter, airier brioche crumb.
- Plain / All-Purpose Flour: Uniquely, brioche often uses all-purpose flour rather than bread flour. This contributes to its characteristic tender, cake-like texture, which is a hallmark of truly exceptional brioche. Bread flour can be substituted if you prefer a slightly chewier result, though the tender crumb is part of the brioche charm.
- Unsalted Butter: This is the heart of brioche, providing its signature richness and flavor. It must be very soft, almost at room temperature, and cut into small cubes. Incorporating cold or firm butter will make kneading incredibly difficult and can result in an unevenly textured dough that struggles to come together.
- Fine Salt: A small amount of salt enhances all the flavors and balances the sweetness of the brioche. Remember to add it towards the end of the initial mixing, keeping it separate from direct contact with the yeast to ensure the yeast remains active and effective.
For the Decadent Chocolate Swirl Filling:
- Dark Cooking Chocolate (70% Cacao): I personally opt for 70% dark chocolate for a deep, sophisticated chocolate flavor that perfectly complements the buttery brioche. However, feel free to use a slightly less dark variety (e.g., 50-60%) if you prefer a milder, sweeter profile. The key is to use actual cooking chocolate (from a bar), not chocolate chips or eating chocolate, as cooking chocolate is formulated to melt smoothly and set properly, preventing a grainy or oily texture in your filling once baked.
- Unsalted Butter: This adds to the richness of the filling and helps create a spreadable, smooth consistency that’s easy to work with.
- Icing Sugar (Powdered Sugar): Sifted icing sugar is essential for a lump-free, silky-smooth filling. This fine sugar also ensures the filling isn’t gritty.
- Unsweetened Natural Cocoa Powder: Also sifted, this intensifies the chocolate flavor significantly without adding extra sweetness, ensuring a balanced and rich taste that stands up to the brioche.
Feel free to customize your chocolate filling! A hint of cinnamon, finely chopped chocolate chunks (ensure they’re small enough not to tear the dough when rolled), or a touch of vibrant orange zest can add an exciting twist to this already incredible treat, offering a new layer of flavor complexity.
Crafting Your Chocolate Swirl Brioche: A Step-by-Step Guide
Follow these detailed steps to create a beautiful and delicious braided chocolate brioche bread. Precision and patience are key for the best results, transforming simple ingredients into a show-stopping pastry.
1. Preparing the Enriched Brioche Dough
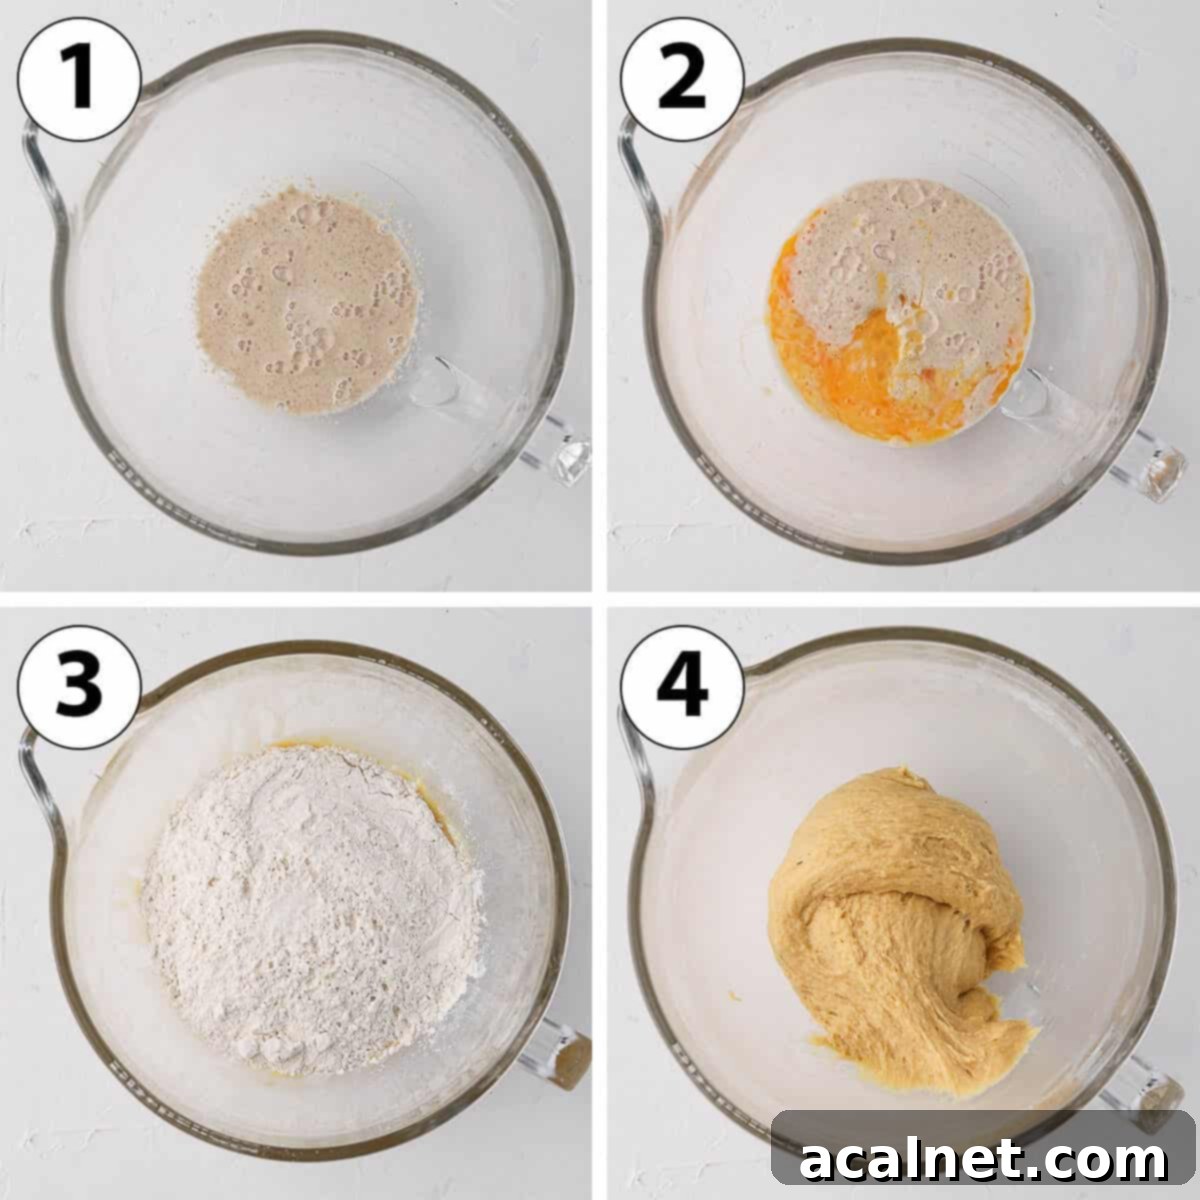
- Activate the Yeast (Photo 1): In the bowl of your stand mixer, combine the lukewarm milk (it should feel just warm, like a baby’s bath – around 105-115°F or 40-46°C), half of the caster sugar, and the instant yeast. Stir gently to mix, then let this mixture rest for about 10 minutes. You’ll know the yeast is active and healthy when small bubbles or a frothy layer appears on the surface. This step, while not strictly necessary for instant yeast, acts as an excellent quality control check to ensure your yeast is alive and ready to make your brioche rise beautifully.
- Combine Wet Ingredients (Photo 2): Lightly whisk the room temperature eggs in a separate bowl before adding them to the yeast mixture. Stir until well combined. Using pre-whisked eggs helps them integrate more smoothly and evenly into the dough.
- Add Dry Ingredients (Photo 3): Now, incorporate the remaining sugar, all-purpose flour, and lastly, the salt. It’s crucial to add the salt last, ensuring it doesn’t directly contact the yeast, as salt can inhibit yeast activity and potentially kill it.
- Initial Mixing (Photo 4): Attach the dough hook to your stand mixer and begin kneading on a slow speed. Mix until all the ingredients come together and form a sticky dough. Many bakers find it helpful to initially mix everything with a sturdy spatula to prevent flour from flying around before starting with the dough hook, ensuring a clean start.
2. Intensive Kneading & First Proofing
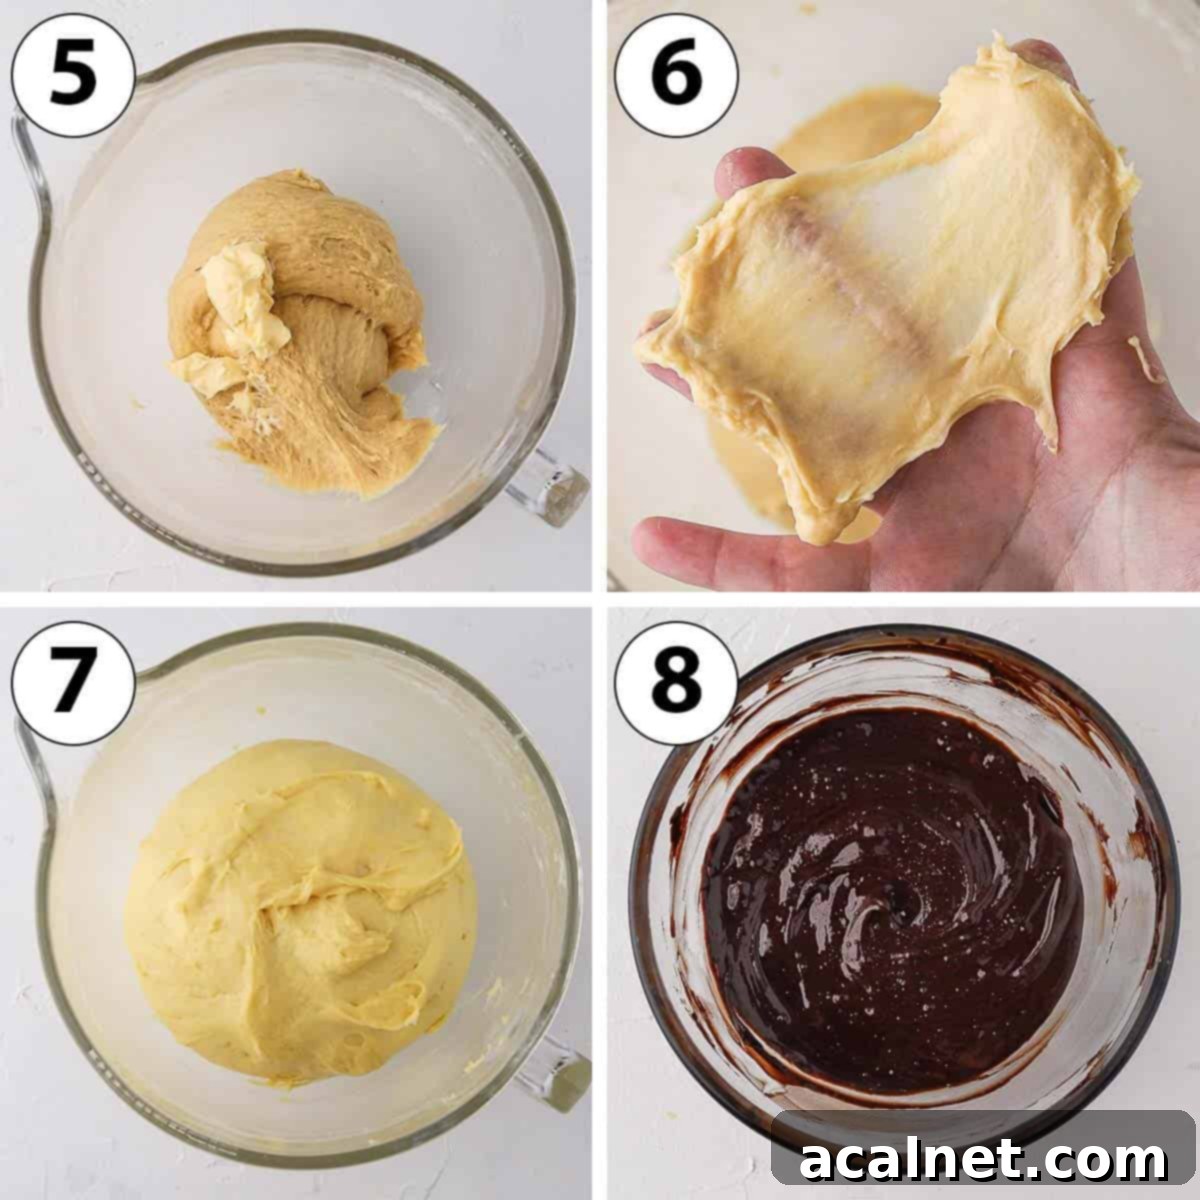
- Incorporate Butter (Photo 5): With the mixer running on a low speed, gradually add the very soft, cubed unsalted butter, about one tablespoon at a time. Wait until each addition is fully incorporated into the dough before adding the next. This slow and steady incorporation is vital for developing the brioche’s signature tender crumb and ensuring the butter is evenly distributed. If the sides of your mixer bowl become greasy and the dough struggles to pick up, simply pause and scrape down the bowl with a rubber spatula to help the process along.
- Long Kneading for Gluten Development: Once all the butter is added, increase your mixer speed to medium-high and knead for a substantial 15-20 minutes. This might seem like a long time, but brioche is an enriched dough, and it requires extended kneading to fully develop its gluten structure, resulting in a wonderfully soft, stretchy, and elastic dough. Don’t worry if the dough remains slightly sticky; this is perfectly normal for brioche and contributes to its moist texture.
The “Windowpane Test” (Photo 6): To confirm your dough is perfectly kneaded, perform the “windowpane test”. Gently pull a small piece of dough from the main ball and slowly stretch it between your fingers. If it stretches thinly enough to let light pass through it without tearing, it has passed the test and your gluten is well-developed. If it breaks quickly, continue kneading for a few more minutes and retest. This step is key for achieving an airy and soft texture.
- First Proofing (Photo 7): Transfer the dough to a lightly oiled bowl, cover it securely with a clean tea towel or plastic wrap, and place it in a warm, draft-free spot. Allow it to proof for 1 to 1.5 hours, or until it has noticeably doubled in size. Be aware that cooler ambient temperatures can extend this proofing time, so be patient and let the dough guide you.
- Overnight Proofing Option: For an even deeper flavor and a dough that’s easier to handle (as it will be firmer), consider an overnight proof in the refrigerator. Simply cover the bowl and place it in the fridge for 8-12 hours. More details on this can be found in our FAQs section below.
Once your dough has completed its first rise, also known as the “bulk fermentation” stage, it’s time to prepare our delectable Chocolate Swirl Filling.
- Prepare the Chocolate Filling (Photo 8): Begin by finely chopping your dark cooking chocolate. Place it in a heat-proof mixing bowl along with the unsalted butter. Gently melt these two ingredients together until perfectly smooth. This can be done either in 30-second intervals in the microwave, stirring after each, or over a double boiler. Once melted, stir in the sifted icing sugar and unsweetened cacao powder until well combined and smooth. Set the filling aside to cool and slightly firm up – it shouldn’t be too warm or liquid when you spread it on the dough, as this can make it difficult to handle. If it’s too runny, a few minutes in the fridge will help it firm up.
3. Spreading the Decadent Chocolate Swirl Filling
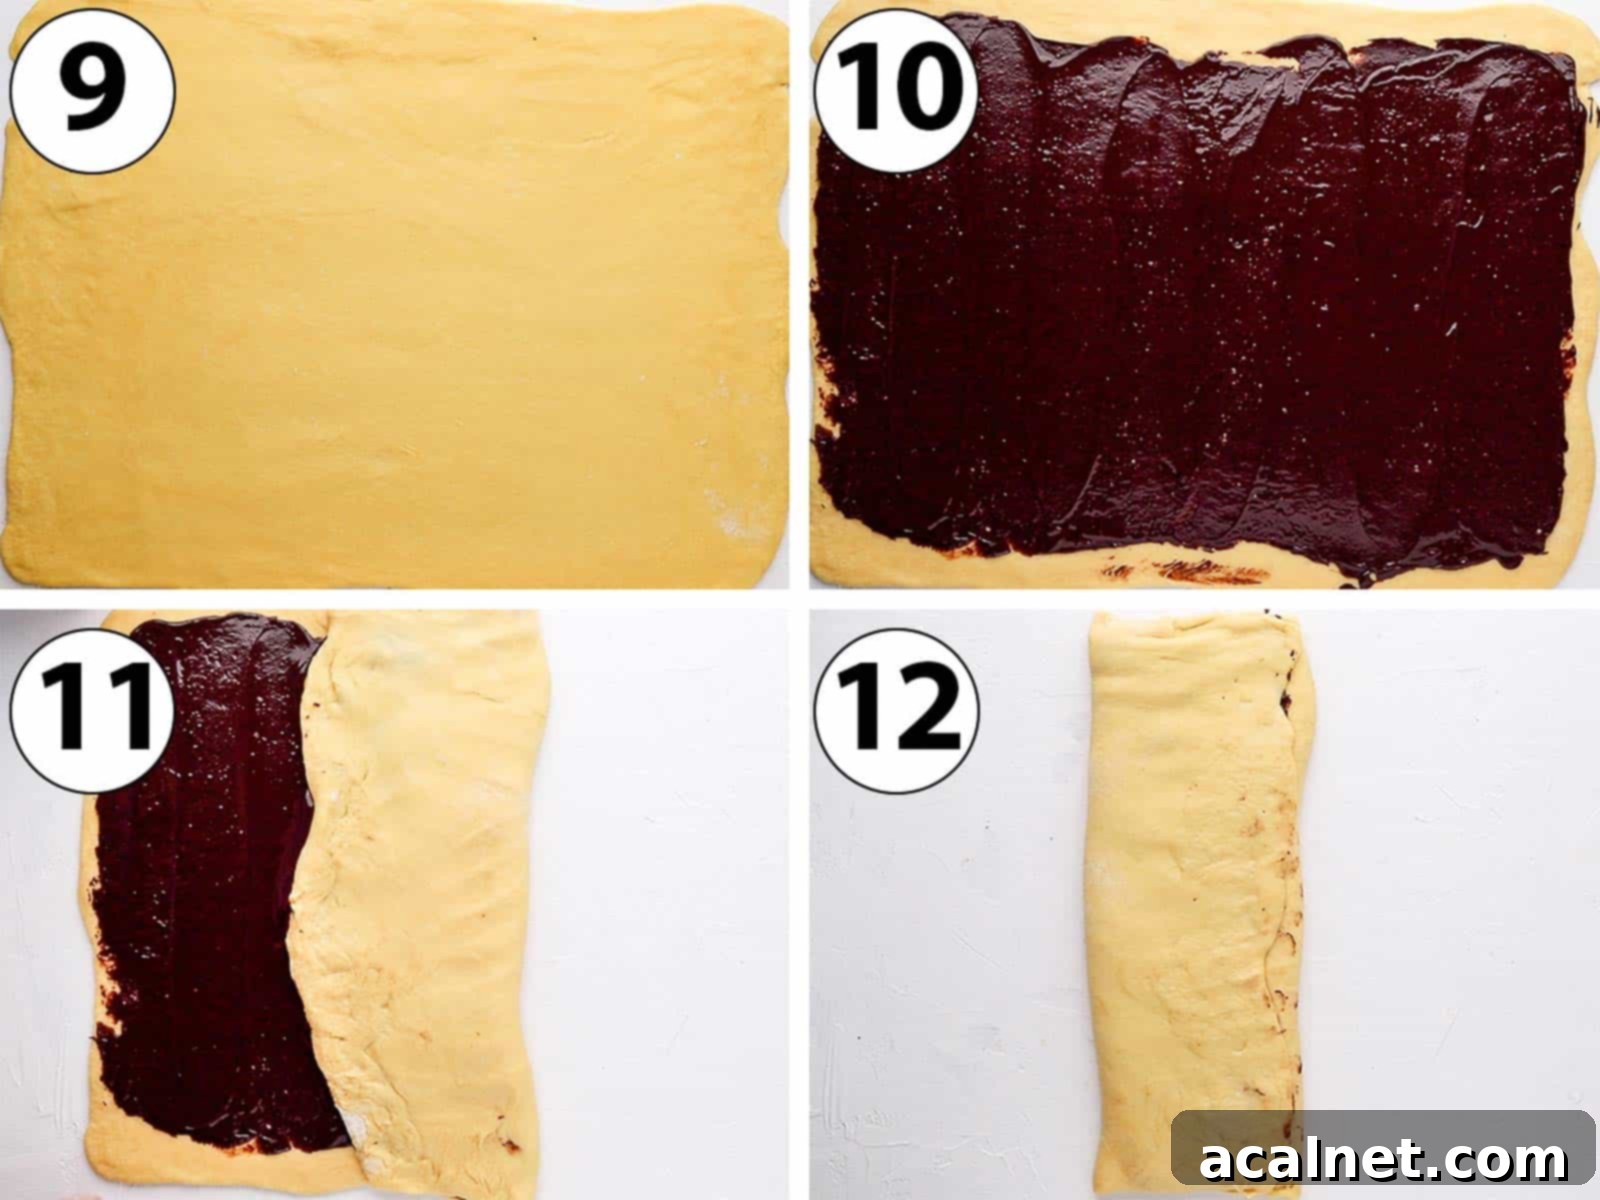
- Roll Out the Dough (Photo 9): Gently punch down the proofed brioche dough to release the air. Transfer it to a lightly floured surface. Using a lightly floured rolling pin, roll the dough into a large rectangle, approximately 30 x 50 cm (12 x 20 inches). The dough will be soft and slightly sticky, which is characteristic of brioche due to its richness. If you opted for overnight proofing, you’ll find it a bit firmer and much easier to handle.
- Spread the Chocolate (Photo 10): Evenly spread your prepared chocolate filling over the entire rolled dough rectangle, making sure to leave a small border (about 1 cm or ½ inch) clear around the edges. This clear border helps in sealing the dough later, preventing the filling from oozing out. Ensure your filling has cooled enough to be spreadable but not overly liquid; if it’s too runny, chill it in the fridge for a few minutes until it reaches a thick, spreadable consistency.
- First Fold (Photo 11): Carefully fold one-third of the dough (choose either the right or left side, along the longer dimension of the rectangle) over towards the center. You’ll be folding chocolate over chocolate. Take care as the dough is soft and enriched; gentle handling is key to prevent tearing.
- Second Fold (Photo 12): Now, fold the remaining third of the dough over the first fold, bringing it towards the center. At this point, all the chocolate filling should be enclosed within the dough, creating a neat, layered package.
4. Shaping and Braiding Your Brioche
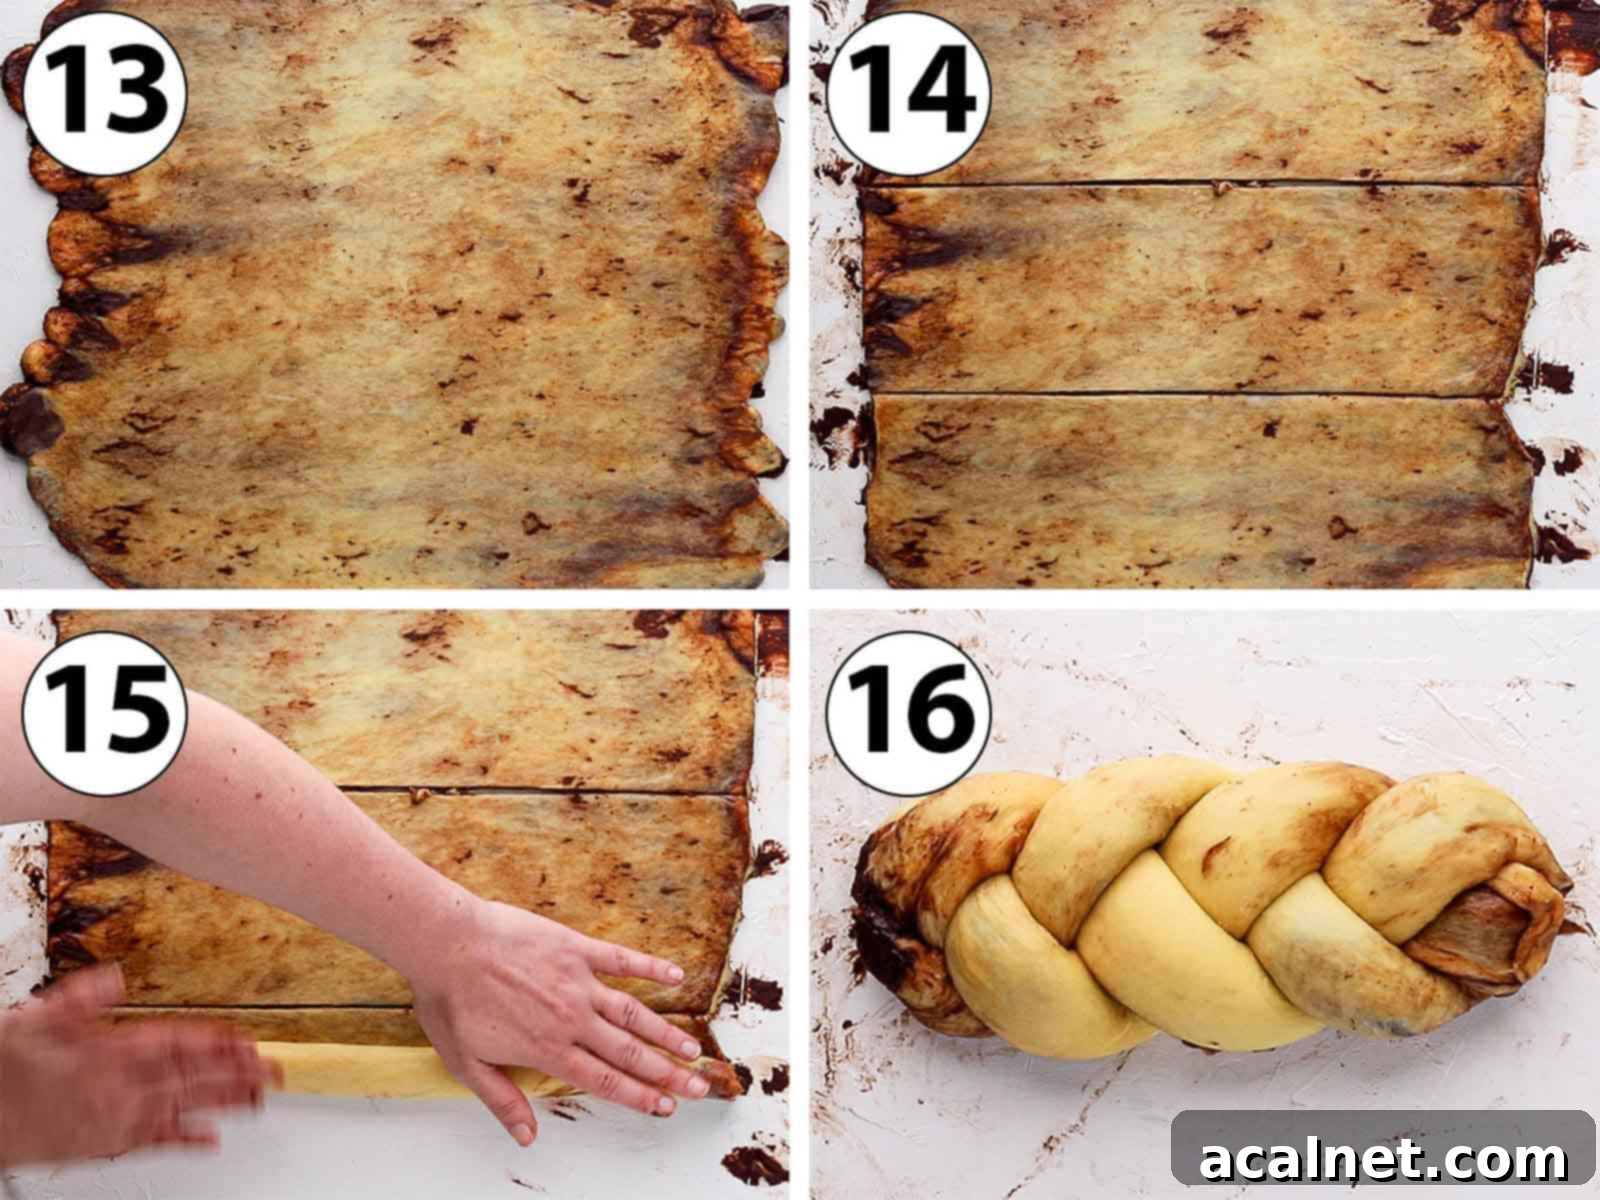
- Second Roll (Photo 13): With a light hand, gently roll the folded dough again with your rolling pin to form a rectangle of approximately 30 x 40 cm (12 x 15 inches). It’s common for a little chocolate to peek out or get slightly messy during this stage, but that’s part of its charm and won’t affect the final taste. Just be careful not to press too hard.
- Cut into Strips (Photo 14): Using a sharp knife or a pizza cutter, slice the dough lengthwise into three long, even strips. Aim for consistency to ensure an evenly braided loaf.
- Form the Logs (Photo 15): Take each strip and gently roll it onto itself to create a long, cylindrical log, similar to how you would prepare for Cinnamon Rolls. You should now have three distinct chocolate-swirled logs, each showcasing beautiful layers.
- Braid and Seal (Photo 16): Arrange the three logs side-by-side and braid them together, just like you would braid hair. This creates the signature intertwined look. Once braided, gently pinch and seal the two ends of the braid firmly to prevent unraveling during baking and to maintain the loaf’s shape.
- Prepare for Second Proofing: Line a loaf pan (a 11.5 x 30 cm / 4.5 x 12 inch pan works perfectly) with parchment paper, first greasing the pan lightly to help the paper stick. Carefully transfer your beautifully braided brioche into the prepared loaf pan.
- Second Proofing: Brush the entire surface of the brioche with an egg wash (one egg whisked with a tablespoon of water or milk). This gives the brioche its characteristic golden, shiny crust. Cover the pan loosely with plastic wrap or a clean tea towel and let the dough rise for a second time in a warm spot, for about 30 to 45 minutes, or until visibly puffy and almost doubled in size again.
- Baking Your Brioche: While your brioche is completing its second rise, preheat your oven to 180°C (350°F). Once heated, bake the chocolate brioche bread for 40 to 45 minutes, or until it’s beautifully risen and golden brown on top. The internal temperature should reach around 90-95°C (195-205°F) for full doneness. If you notice the top browning too quickly before the bread is fully baked, loosely tent it with aluminum foil to prevent burning while allowing the inside to cook through.
- Cooling: Once baked, remove the loaf pan from the oven and allow the brioche to cool completely in the pan on a wire rack before attempting to remove it. This ensures it sets properly and is easier to slice without crumbling, allowing the chocolate filling to firm up.
Frequently Asked Questions About Chocolate Brioche Bread
Brioche stands apart from typical bread doughs as an “enriched bread dough.” This means it’s made with a significant amount of fat, derived from ingredients like eggs, butter, and milk, giving it a much richer profile. Unlike lean bread doughs (which primarily use flour, water, yeast, and salt), brioche boasts a luxurious tenderness, a finer crumb, and a distinctive, sweet, buttery flavor. It shares similarities with other enriched doughs like challah or babka, often blurring the line between bread and dessert due to its indulgent nature and soft, almost cake-like texture.
For an intensely rich and balanced chocolate flavor, I highly recommend using a high-quality 70% dark cooking chocolate. This level of cacao provides a deep, complex taste that perfectly complements the sweetness of the brioche without being overly sweet. If you prefer a milder, sweeter chocolate experience, a 50-60% dark chocolate can also work wonderfully. The most crucial factor is to use actual cooking chocolate (typically sold in bars or blocks) rather than chocolate chips or standard eating chocolate. Cooking chocolate is formulated to melt smoothly and achieve the right consistency when baked, preventing a grainy texture or excessive oil separation in your filling.
Absolutely, and it’s a highly recommended technique for several reasons! Proofing the brioche dough overnight in the refrigerator not only allows for a slower fermentation, which develops a much deeper and more complex flavor in your bread, but it also makes the dough significantly easier to handle. A cold dough is firmer and less sticky, making rolling and shaping much simpler. To do this, simply prepare the dough as instructed, cover the mixing bowl tightly with plastic wrap, and place it in the fridge for 8 to 12 hours (or even up to 24 hours). In the morning, remove the dough, gently punch out the air, and let it come to room temperature for about 15-20 minutes before rolling it out and proceeding with the filling and braiding steps. You’ll find the shaping process much smoother and less prone to sticking.
While rolling the filled dough twice doesn’t fundamentally change the flavor, it dramatically impacts the visual appeal and the number of beautiful chocolate layers and swirls throughout your brioche. This technique creates a more intricate, ‘babka-like’ appearance with distinct, numerous chocolate ribbons, making for a truly stunning presentation. If you’re short on time or less concerned about achieving a highly defined swirl pattern, you can certainly opt for a single roll. In that case, simply roll out the dough once, spread the filling, cut it into three long strips, roll each strip into a log, and then braid them as usual. The brioche will still be incredibly delicious, just with fewer, larger chocolate swirls.
Expert Tips for a Flawless Chocolate Swirl Brioche
Achieving bakery-quality brioche at home is entirely possible with a few key techniques and insider tips. Keep these pointers in mind as you embark on your baking journey to ensure a perfect, delicious result every time:
- Always Activate Your Yeast (Even Instant!): While instant yeast is designed to be added directly to dry ingredients without prior rehydration, taking a few minutes to “bloom” it in warm milk and a pinch of sugar is a fantastic habit. This crucial step confirms your yeast is alive and active before you invest significant time and ingredients into the dough. Seeing those small bubbles or a frothy layer form on the surface provides immense peace of mind and ensures your brioche will rise beautifully, preventing the frustration of a flat or dense loaf.
- Master the “Windowpane Test” for Perfect Kneading: This isn’t just a fancy trick; it’s the most reliable indicator that your brioche dough has been adequately kneaded and its gluten sufficiently developed. A properly kneaded dough will be incredibly soft, elastic, and will yield a wonderfully tender brioche with a fine, even crumb. To perform the test, gently pull a small piece of dough from the main ball and slowly stretch it between your fingers. If you can stretch it thin enough to see light pass through it, like a delicate windowpane, your dough is ready. If it tears easily, continue kneading for a few more minutes and retest. This ensures optimal texture and rise.
- Embrace Overnight Cold Proofing for Enhanced Flavor and Handling: For a brioche with truly exceptional depth of flavor and a dough that’s a dream to work with, consider an overnight proof in the refrigerator. Preparing the dough the evening before, covering it securely, and letting it slowly ferment in the cold for 8-12 hours develops complex, nuanced flavors that a quick proof simply can’t achieve. The chilled dough will also be much firmer and less sticky, making it considerably easier to roll, fill, and braid without tearing or sticking – a major advantage, especially for beginners. Simply remove it from the fridge in the morning, gently punch out the air, let it warm up slightly for 15-20 minutes, then proceed with the recipe as written.
- Get Creative with Your Chocolate Filling Customizations: While our classic chocolate filling is divine on its own, don’t hesitate to experiment and make this brioche uniquely yours! A dash of ground cinnamon can add a warm, inviting spice that pairs beautifully with chocolate. For extra texture and chocolate intensity, finely chopped chocolate (ensure it’s very small to avoid tearing the delicate dough during the second rolling) or even a handful of mini chocolate chips can be folded in. Bright citrus notes from fresh orange zest also pair incredibly well with dark chocolate and buttery brioche, adding a refreshing contrast. And remember, any leftover brioche (though unlikely!) makes the most decadent Brioche French Toast or bread pudding you’ll ever taste!
Storing and Freezing Your Chocolate Brioche
To keep your delicious chocolate swirl brioche at its absolute best, proper storage is key. It will remain wonderfully fresh, soft, and tender for 2 to 3 days when kept at room temperature in an airtight container or a tightly sealed bread bag. While it’s delightful served at room temperature, a quick reheat can miraculously bring out its freshly baked qualities and melt the chocolate to gooey perfection. Pop a slice in the microwave for a few seconds (5-10 seconds for a single slice) or toast it lightly in a toaster or oven for a warm, comforting treat.
This brioche also freezes exceptionally well, allowing you to enjoy homemade goodness whenever a craving strikes without the immediate effort. Due to the delicate nature of the slices and the possibility of the chocolate filling flaking off, we highly recommend freezing the entire loaf whole. First, wrap it tightly in plastic wrap, then add an additional layer of aluminum foil to prevent freezer burn, and finally, place it in a large freezer-safe bag. When you’re ready to indulge, simply transfer the frozen loaf to your countertop and let it thaw at room temperature overnight. For a refreshed taste, you can warm the thawed loaf slightly in a low oven (around 150°C/300°F) for 10-15 minutes before serving, which will gently soften the bread and warm the chocolate filling.
More Delightful Bread Recipes to Explore
If you’ve fallen in love with baking this chocolate brioche, you’re in for a treat! Our collection of bread recipes offers a variety of comforting and exciting bakes, from sweet indulgences to savory delights. Expand your baking repertoire with these fantastic ideas:
- Sweet Potato Buns
- Spinach and Ricotta Rolls
- Brioche Donuts
- Apple Cinnamon Pull Apart Bread
- Chocolate Brioche Bread Wreath
- Chocolate Raspberry Brioche Buns
- Cinnamon Roll Bread Loaf
- Sesame Bagels
- Challah Rolls
- Brioche French Toast Casserole
Made this recipe?
Let us know if you liked it by leaving a comment below, and tag us on Instagram @a.baking.journey with a photo of your creation! We love seeing your delicious bakes!
Recipe

Chocolate Brioche
Print Recipe
Ingredients
Brioche Dough
- 75 ml Full Cream / Whole Milk, lukewarm
- 80 gr Caster Sugar, or fine white granulated sugar
- 9 gr (2 teaspoons) Instant Yeast
- 3 large Eggs, at room temperature
- 350 gr Plain / All-Purpose Flour
- 1/2 teaspoon Fine Salt
- 120 gr Unsalted Butter, soft
- 1 Egg for egg wash, optional
Chocolate Filling
- 100 gr Dark Cooking Chocolate, finely chopped
- 60 gr Unsalted Butter
- 75 gr Icing Sugar, sifted
- 15 gr Unsweetened Cacao Powder
Instructions
Brioche Dough
- Mix the Lukewarm Milk, half of the Sugar and Yeast in the bowl of your stand mixer. Let it sit for about 10 minutes or until small bubbles/froth appears on the surface (see note 1).75 ml Full Cream / Whole Milk, 80 gr Caster Sugar, 9 gr (2 teaspoons) Instant Yeast
- Mix in the Eggs, then add the rest of the Sugar, Flour and lastly the Salt (see note 2). Slowly knead with the dough hook attachment until a sticky dough comes together and all the ingredients have been incorporated.3 large Eggs, 350 gr Plain / All-Purpose Flour, 1/2 teaspoon Fine Salt
- Slowly add the very soft butter, about 1 tablespoon at the time. Knead on slow until all the butter has been added and incorporated (see note 3).120 gr Unsalted Butter
- Once all the butter has been added, increase the mixer speed to medium high to high and knead for about 20 minutes or until very soft, stretchy, elastic and passes the “windowpane test” (see note 4). The dough will still be slightly sticky, that’s normal.
- Cover the bowl with a tea towel or plastic wrap and place it in a warm spot. Leave it to proof for 1 to 1,5 hours or until it has doubled in size (see note 5).
Chocolate Filling
- Finely chop the Dark Chocolate and place it in a heat-proof mixing bowl with the Butter. Melt them together until smooth – either in the microwave in 30 seconds increments or over a double boiler. Mix in the sifted Icing Sugar and Cacao Powder. Set aside to firm up (see note 6).100 gr Dark Cooking Chocolate, 60 gr Unsalted Butter, 75 gr Icing Sugar, 15 gr Unsweetened Cacao Powder
Rolling & Shaping
- Prepare a Loaf Pan (I used a 11,5x30cm / 4,5×12 inch loaf pan) by slightly greasing it and lining it with baking paper. Set aside.
- Punch the air out of the proofed dough and transfer over a lightly floured surface. Using a rolling pin, roll the dough into a large rectangle that is about 30 x 50 cm (12 x 20 inch).
- Spread the Chocolate Filling over the rolled brioche dough, leaving the edges clear.
- Fold one third of the dough (either the right or the left side of the dough) towards the centre (chocolate over chocolate). Fold the second third of the dough towards the centre (the part of the dough where you can still see the chocolate filling), going over the first fold. You shouldn’t see the chocolate filling anymore.
- Gently roll the dough with the rolling pin again into a 30 x 40 cm rectangle (12 x 15 inch) approx. (see note 7). Cut the dough into 3 long strips, then scroll each strips into a long snail-like log. Braid the three logs and gently seal the two edges by pressing them together.
- Place the brioche braid into the prepared loaf pan and brush it with the whisked egg for the egg wash. Cover the pan and let it rise again for 30 to 45 minutes.1 Egg for egg wash
- Preheat your oven on 180’C/350’F then bake the Chocolate Brioche Bread for 40 to 45 minutes, or until risen and golden brown (See note 8). Take it out of the oven and let it cool down completely before taking it out of the pan.
Video
Would you like to save this recipe?
We’ll email this post to you, so you can come back to it later!
Notes
- If you don’t see froth or bubbles after 10-15 minutes, it could be because the milk is not warm enough (it should be about body temperature – if you touch it with your finger, you shouldn’t feel its warmth) or because the Yeast is not alive. You might need a fresh pack of yeast to ensure successful proofing.
- Make sure to add the Salt last as you do not want it to come into direct contact with the yeast; salt can inhibit yeast activity and potentially kill it.
- If the bowl gets greasy and the mixer struggles to mix, stop and use a spatula to scrape down the side of the bowl. This helps to re-incorporate the dough and butter for better kneading.
- To do the windowpane test, pull a small piece of dough and gently stretch it between your fingers. If the dough breaks quickly, it needs to be kneaded for longer. If it stretches easily without breaking and you can see light coming through it, it has passed the windowpane test, indicating optimal gluten development. The proofing time is quite long for brioche, but that’s because the high content of fat in the dough requires more time for the gluten to properly develop.
- Depending on the temperature of your kitchen, the dough could take longer to proof (if too cold). For best results, find a warm, draft-free spot. Alternatively, you can proof the bread in the fridge overnight or for 8 to 12 hours for a deeper flavor and easier handling.
- If the chocolate filling is too soft or liquid, it will be a bit hard to spread evenly over the dough and can get messy when you roll it again. It should firm up at room temperature, but you can also place it in the fridge for a few minutes if it is still too soft to achieve a good, spreadable consistency.
- It is quite common for some of the chocolate to escape from the dough during the second rolling and braiding, and that’s perfectly normal. Using a filling that has set a bit more will help minimize this.
- If the top of the bread seems to be browning or burning before the bread is fully baked through, loosely cover the loaf with aluminium foil. This will protect the crust while allowing the interior to finish cooking.
Nutrition (per serving)
