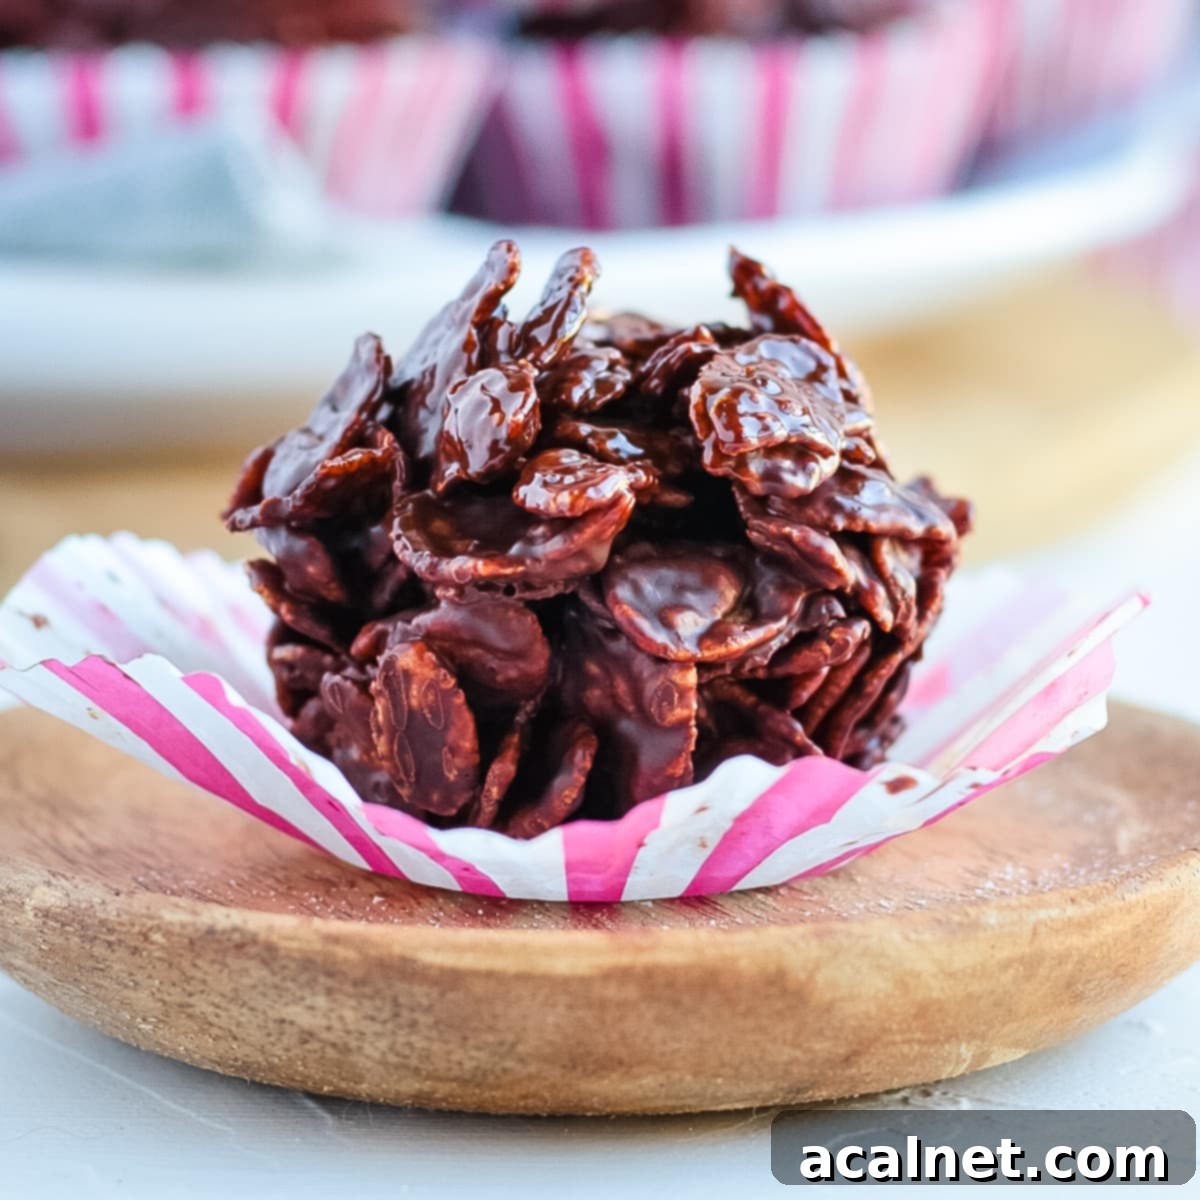
Easy No-Bake Chocolate Cornflake Cakes: The 4-Ingredient Crunchy Treat You’ll Love
Welcome to the ultimate guide for creating incredibly simple and deliciously crunchy Chocolate Cornflake Cakes! These delightful sweet treats are a true marvel, boasting a rich dark chocolate flavor and a satisfying crispy texture. Best of all, they require only four basic ingredients and are ready to set in a mere 15 minutes – no oven or golden syrup needed! Perfect for a quick snack, a fun activity with kids, or a delightful addition to any party spread, these no-bake wonders are about to become your new favorite go-to dessert.

[feast_advanced_jump_to]
Why These No-Bake Chocolate Cornflake Cakes are a Must-Try
These No-Bake Chocolate Cornflake Cakes aren’t just easy; they’re effortlessly delicious, making them an instant favorite for both novice and experienced dessert makers. Their simplicity is truly unmatched, making them one of the quickest sweet recipes you’ll ever encounter. Forget complex techniques or lengthy baking times – these treats are all about minimal effort and maximum reward!
They shine as a fantastic baking project for kids, offering a safe and engaging way to introduce them to the joy of cooking without using an oven. Children love the hands-on mixing and the delightful process of turning simple ingredients into a magical treat. But don’t be fooled by their kid-friendly nature; adults will find themselves reaching for these crunchy bites just as eagerly. The blend of satisfyingly crisp cornflakes and the deep, rich flavor of dark chocolate creates an irresistible texture and taste combination that perfectly curbs any sweet craving.
The marriage of cornflakes and chocolate is a universally loved pairing, creating a delightful crunch in every bite. Whether you enjoy them in the form of these individual cakes, or explore other variations like Chocolate Peanut Butter Balls or No Bake Chocolate Peanut Butter Bars, the combination is always a winner. This particular recipe also offers a delightful chocolatey twist on the traditional Australian Honey Joys. Unlike the classic Honey Joy, which typically requires baking, our version is completely no-bake, simplifying the process while delivering a similarly addictive crunch and sweetness, but with a rich chocolate overlay.
Beyond their incredible ease, these chocolate cornflake cakes are wonderfully versatile. They make for an ideal afternoon tea treat, a quick after-school snack, or even a thoughtful homemade gift. Their delightful crunch and sweet profile make them suitable for almost any occasion where a simple, satisfying dessert is desired. Plus, the quick preparation time means you can whip up a batch whenever a chocolate craving strikes, without planning hours in advance.
The Simple 4 Ingredients You’ll Need
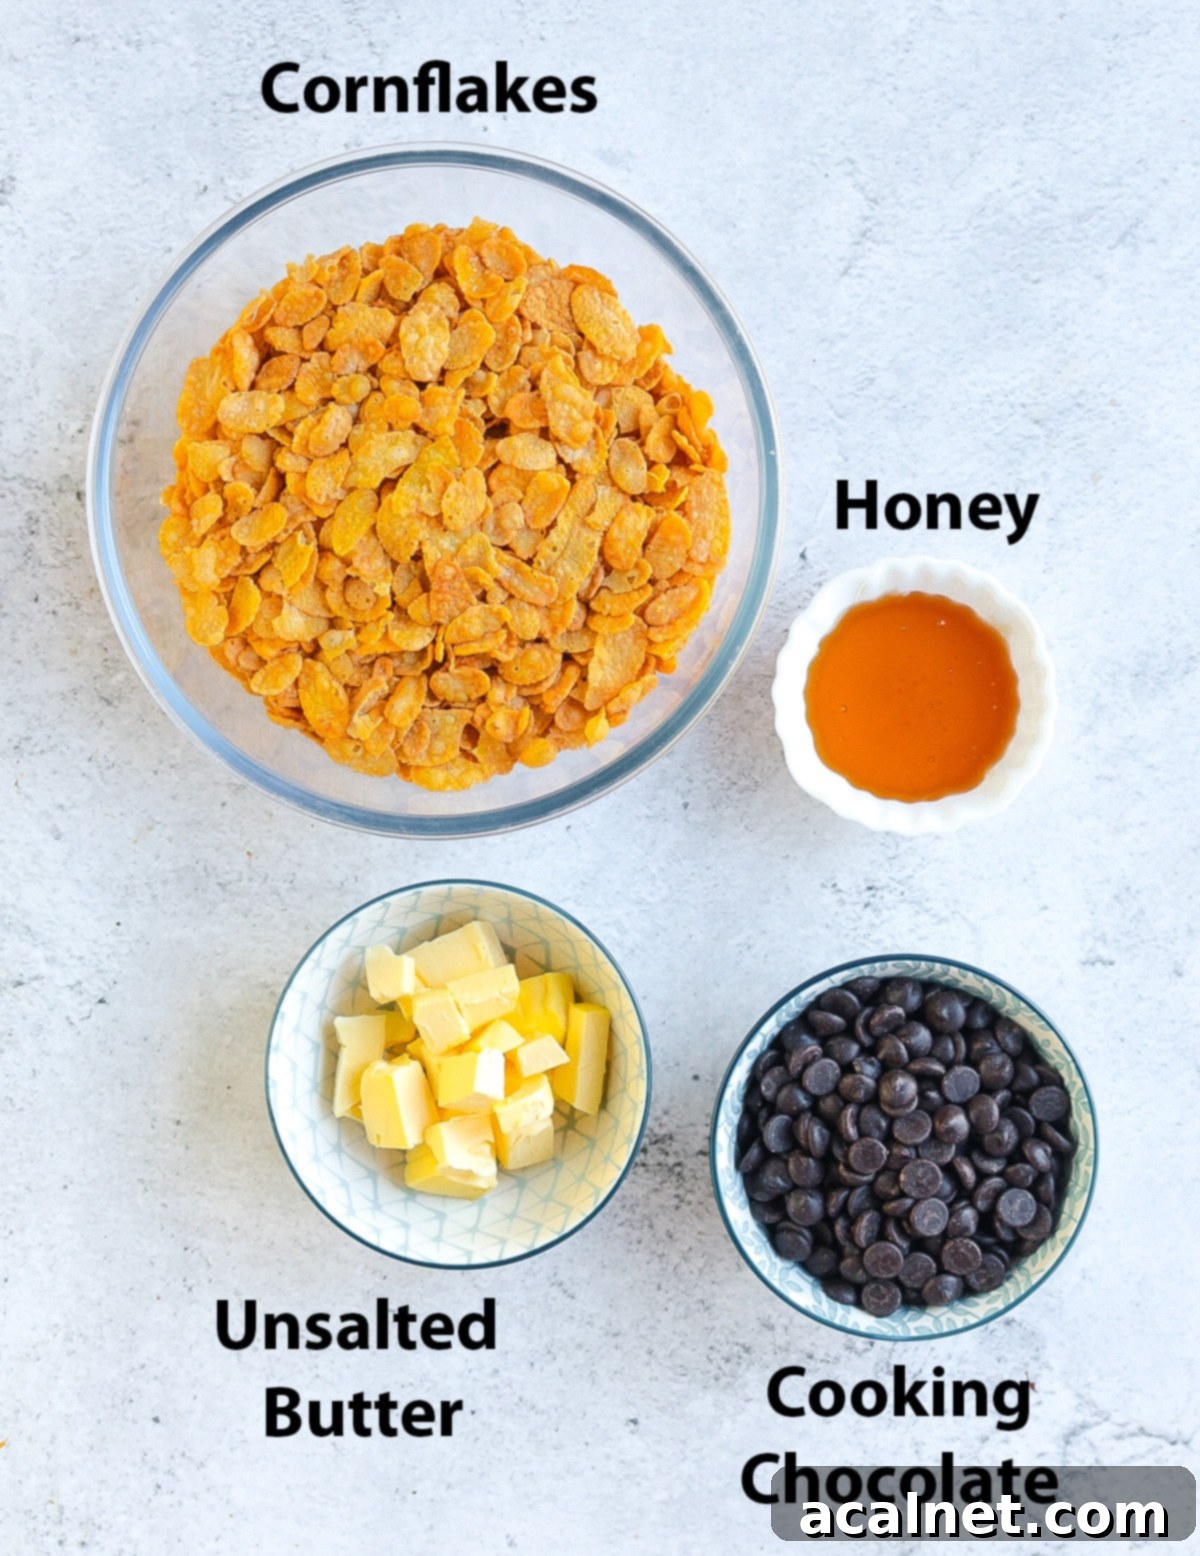
One of the beauties of this recipe lies in its minimal ingredient list. You only need four fundamental items, which you likely already have in your pantry:
Scroll down to the recipe card below for exact quantities.
- Cornflakes: The star of our crunchy treat! Ensure you use fresh, crispy cornflakes for the best texture. If you’re looking to make these treats gluten-free, simply opt for certified gluten-free cornflakes. The flakes provide that signature crisp bite that perfectly complements the smooth chocolate.
- Honey: This recipe uses honey as its primary sweetener and binder, setting it apart from traditional British cornflake cakes that often call for golden syrup. Honey not only offers a delicious, natural sweetness but also contributes a unique flavor profile that pairs wonderfully with dark chocolate. It also works as a fantastic binding agent, holding all those crunchy cornflakes together. This choice is also a nod to the Australian Honey Joys, giving our chocolate version an extra layer of flavor complexity.
- Butter: Unsalted butter is preferred here to control the overall saltiness of the cakes. Butter adds richness, depth of flavor, and plays a crucial role in the melting and setting process of the chocolate mixture. It helps to create a smooth, pliable coating that evenly adheres to the cornflakes. Ensure your butter is fresh for the best results.
- Dark Chocolate: The quality of your chocolate makes a significant difference. It’s essential to use proper Cooking Chocolate (also known as couverture chocolate) rather than regular eating chocolate. Cooking chocolate is specifically formulated to melt smoothly without becoming grainy and to set properly and firmly once cooled. Depending on the brand and its specific fat content (fluidity), you might need to adjust the quantity slightly to ensure all the cornflakes are perfectly coated. A dark chocolate with a cocoa percentage of 50-70% is often ideal, offering a deep, intense flavor that balances the sweetness of the honey.
Ingredient Substitution Options
While the four core ingredients work best, some substitutions can be made:
- Honey: If honey isn’t your preference or isn’t available, you can certainly use Golden Syrup to mimic the classic British recipe, or opt for Rice Malt Syrup if you’re seeking a plant-based sweetener. Be cautious with more liquid sweeteners like Maple Syrup or Agave Syrup, as their thinner consistency might alter the setting time and final texture of the cakes, potentially making them softer.
- Butter: For a dairy-free version, Dairy-Free Butter Spread or a good quality Margarine can be used as a direct substitute. While some no-bake recipes use coconut oil, I haven’t personally tested it for this specific recipe, so I cannot guarantee the same results or texture. If attempting with coconut oil, ensure it’s solid at room temperature and be aware it might impart a subtle coconut flavor.
Step-by-Step Guide: How to Make Chocolate Cornflake Cakes
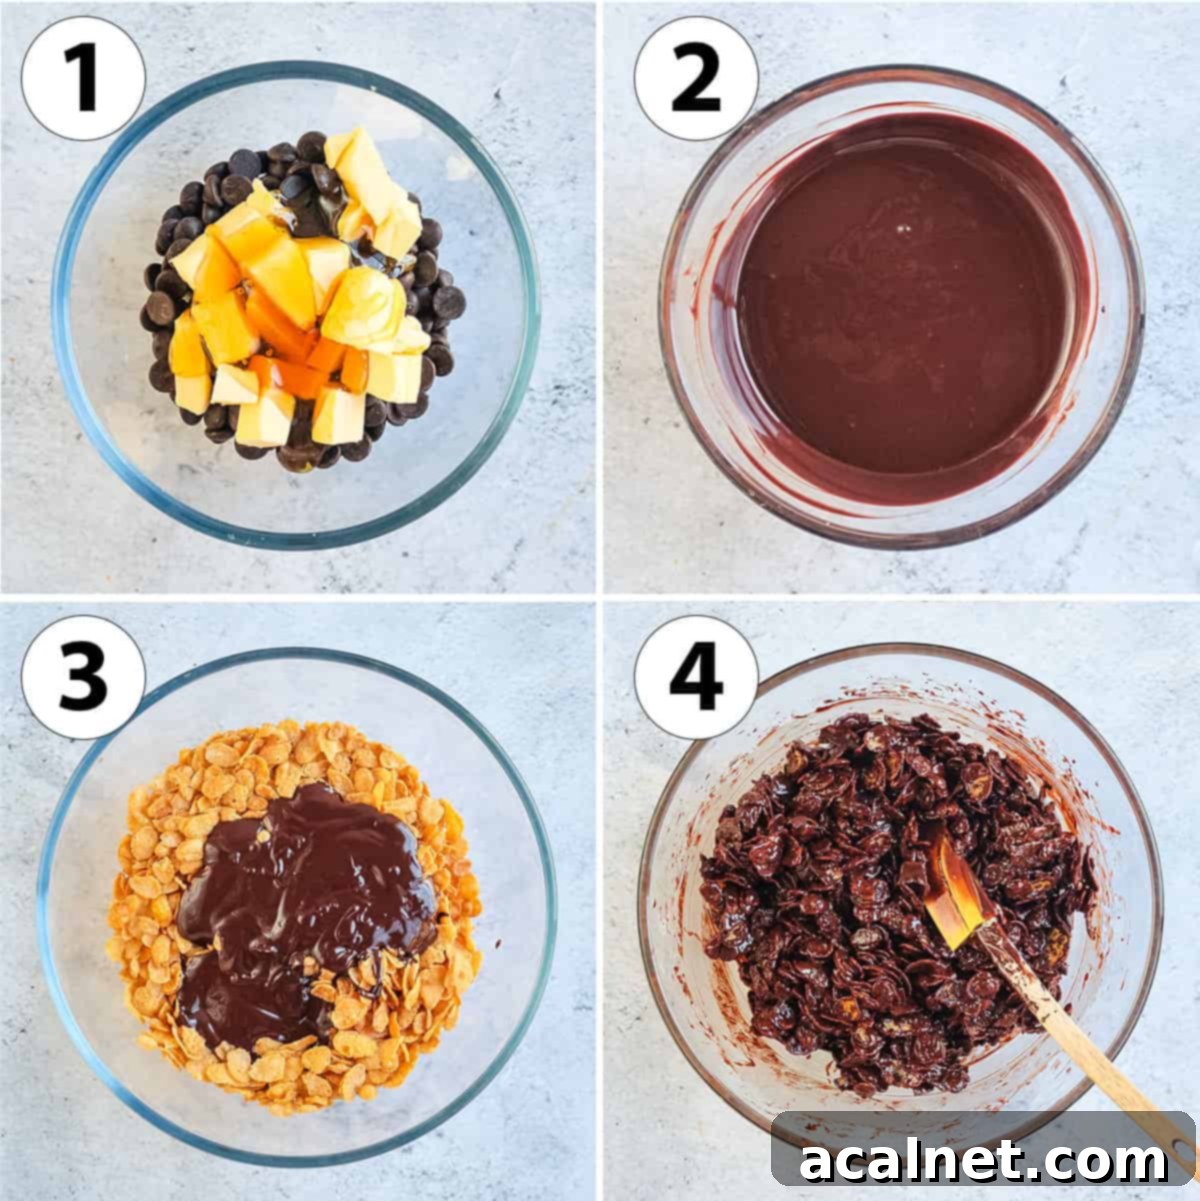
Making these delicious chocolate cornflake cakes is incredibly straightforward, involving just a few simple steps. The entire process from start to setting takes minimal time, making it perfect for last-minute cravings or busy schedules.
- Preparation is Key: Begin by preparing your muffin pan. Line each cavity with paper liners or cupcake cases. This crucial step prevents the cakes from sticking, ensuring easy removal once they’re set. Attempting to make them directly in an unlined pan will result in a messy and frustrating experience, as they will cling firmly to the metal.
- Photo 1: Melting the Base: Carefully chop your cooking chocolate into small, even pieces. This allows it to melt more quickly and smoothly. Place the chopped chocolate into a heatproof bowl along with the measured unsalted butter and honey.
- Photo 2: Achieving a Smooth Mixture: There are two primary methods for melting your ingredients. You can use a microwave: place the bowl in the microwave and heat in short 30-second intervals, stirring thoroughly after each interval to prevent burning the chocolate. Continue until the mixture is completely smooth and glossy. Alternatively, you can use a double boiler method: place the heatproof bowl over a small saucepan containing a shallow amount of simmering water on low heat, ensuring the bottom of the bowl does not touch the water. Stir continuously until everything is fully melted and beautifully smooth.
- Photo 3: Combining with Cornflakes: Transfer your cornflakes into a very large mixing bowl. It’s important to use a spacious bowl, as cornflakes take up a lot of volume, allowing for easier and more effective mixing. Pour the warm, melted chocolate, butter, and honey mixture directly over the cornflakes.
- Photo 4: Even Coating: Using a sturdy spatula or a wooden spoon, gently yet thoroughly mix everything together. The goal is to ensure every single cornflake is evenly coated with the rich chocolate mixture. Make sure to scrape the bottom and sides of the bowl to incorporate all the chocolate. Keep mixing until there are no dry spots. Remember, the fluidity of your chocolate brand might mean you need a little more chocolate than initially recommended to achieve perfect coverage, so adjust if necessary.
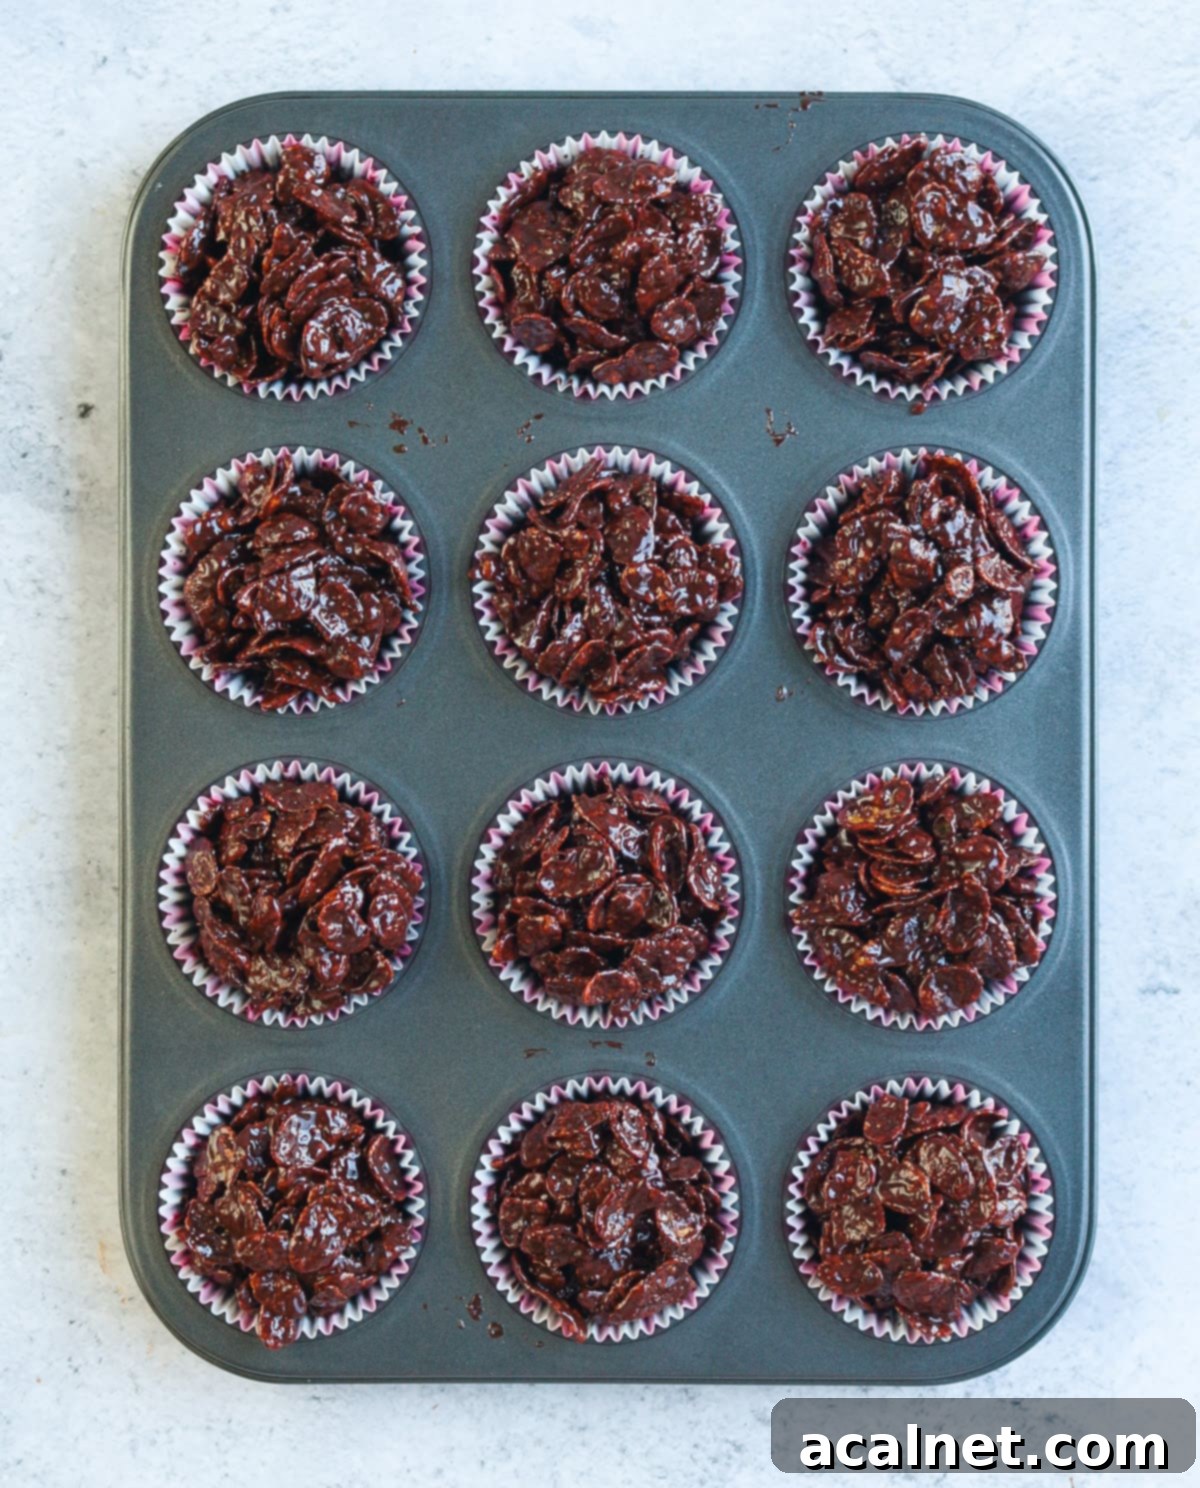
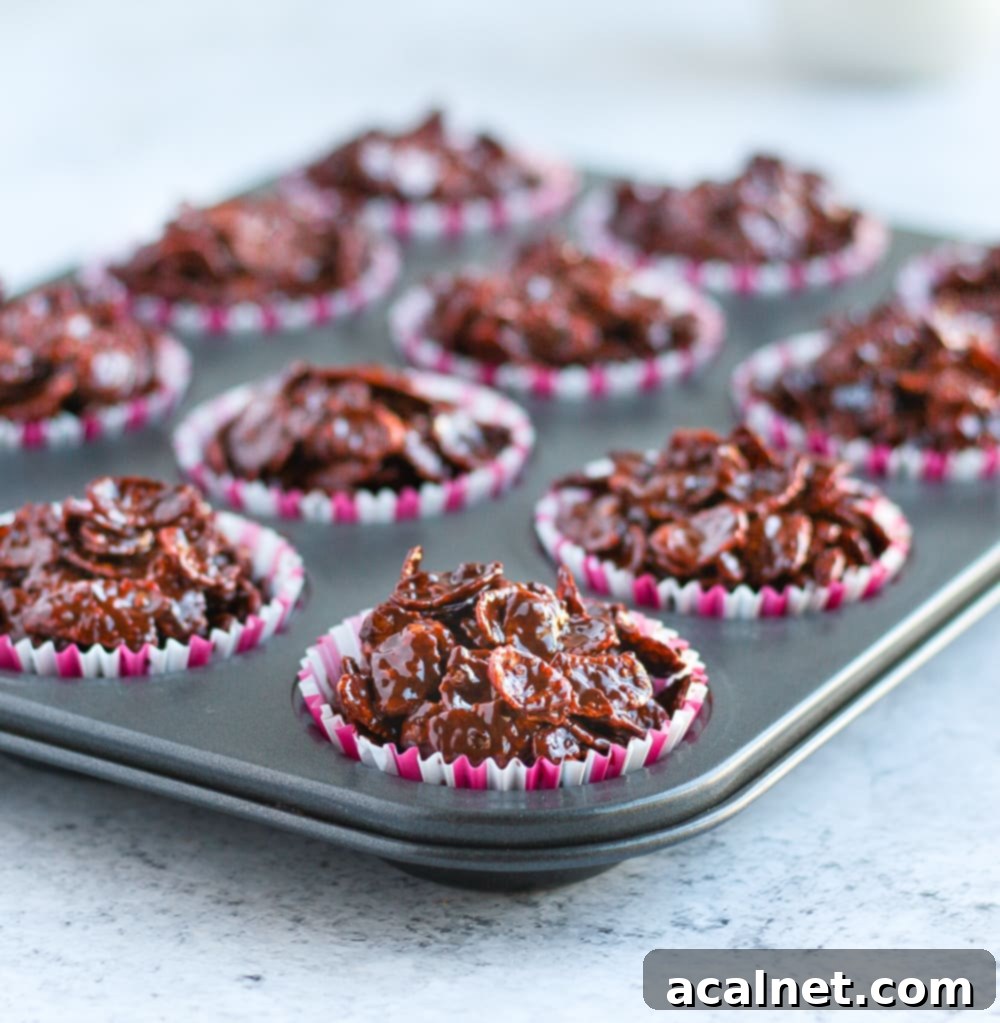
- Filling and Compacting: Once the cornflakes are coated, spoon the chocolate-covered cornflakes into your prepared muffin tin liners. As you fill each liner, gently press down on the mixture with the back of your spoon or fingers. This compaction is essential to remove any large air pockets and ensure that all the cornflakes are touching each other. This step is crucial for the cakes to hold together firmly when they are cold and set. I find it effective to add about a tablespoon of cornflakes at a time, gently pressing them before adding more, to guarantee a dense and stable cake.
- Chill to Perfection: Finally, place the muffin pan into the refrigerator to set. This process typically takes about an hour, or until the chocolate has completely hardened and the cakes are firm to the touch. Once set, keep them in the fridge until you’re ready to serve and enjoy these delightful no-bake chocolate cornflake cakes.
Depending on the size of your muffin pan and how compactly you fill each liner, this recipe will yield approximately 12 to 15 wonderfully crunchy chocolate cornflake cakes.
Your Top Questions About Cornflake Cakes Answered
For the best results, always use proper Cooking Chocolate, also known as couverture chocolate. Unlike standard eating chocolate, cooking chocolate has a higher cocoa butter content and is formulated to melt smoothly without seizing or becoming grainy, and then re-harden beautifully once cooled. I personally prefer a 70% dark chocolate for its intense flavor, which provides a lovely contrast to the sweetness of the honey. However, you are welcome to experiment with other percentages of dark chocolate, or even use milk chocolate for a sweeter, creamier cake if that’s your preference. White chocolate can also be used, though it might require slight adjustments to the butter quantity as white chocolate has a different fat composition.
If your cornflake cakes turn out soggy rather than crisp and firm, it’s typically due to an imbalance in the ingredients, most commonly too much butter or honey. These ingredients, while essential for flavor and binding, can prevent the chocolate from setting properly if used in excess. Too much butter makes the mixture overly soft and fatty, while too much honey can draw moisture, leading to a chewy or gummy texture instead of a firm crunch. Ensure you measure your ingredients accurately to achieve the perfect consistency.
The setting time for these cornflake cakes can vary slightly, primarily depending on the cocoa butter percentage in your chosen chocolate and the ambient temperature of your refrigerator. Generally, they take approximately 1 to 1.5 hours to fully set in the refrigerator. To check if they are ready, gently touch one; it should feel firm and solid. Patience is key here, as rushing the setting process can result in crumbly or soft cakes.
Absolutely! This recipe provides a fantastic blank canvas for creativity. Toppings are a wonderful way to customize your cornflake cakes for different occasions or personal tastes. For example, during Easter, they transform into charming “Easter nests” with the addition of Mini Eggs. You can also involve children in the decorating process, letting them add their favorite small candies like mini marshmallows, colorful sprinkles, or a delicate drizzle of melted white chocolate for a beautiful contrast. Other fantastic ideas include chopped nuts (almonds, pecans), shredded coconut, dried fruit bits, or even a dusting of cocoa powder for an extra chocolatey kick.
Storing Your Chocolate Cornflake Cakes for Maximum Freshness
Proper storage is essential to keep these delightful chocolate cornflake cakes at their best, maintaining their signature crunch and preventing them from becoming messy.
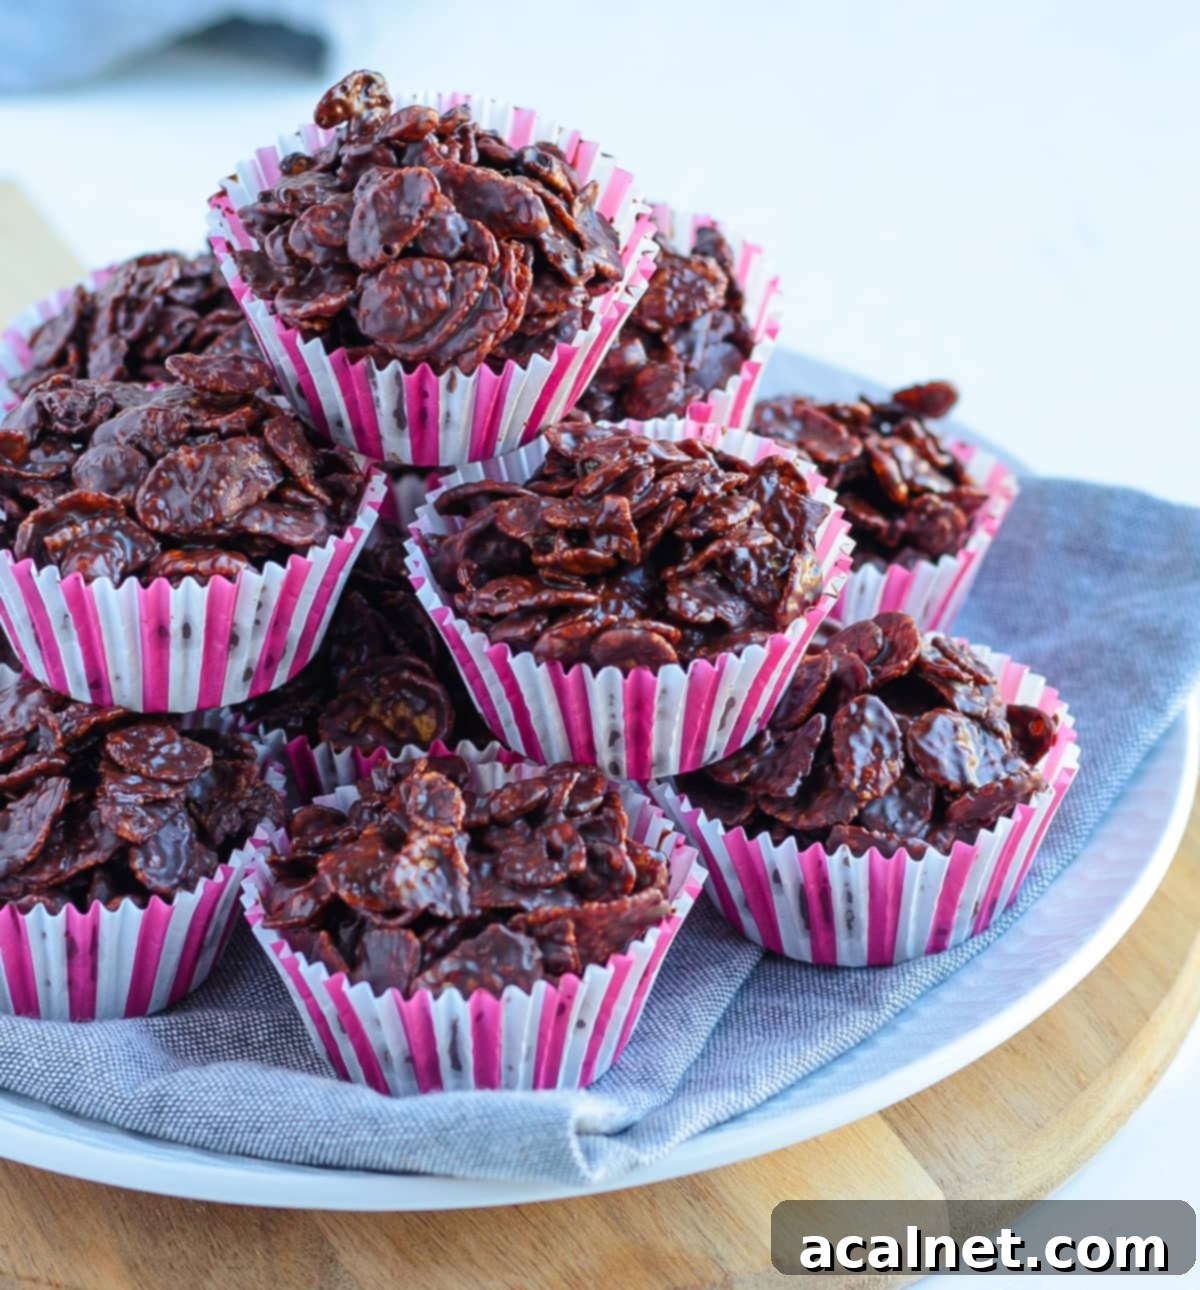
These cakes should always be stored in the refrigerator. Once they have fully set, you have a couple of options: you can either leave them in the muffin pan, covered tightly with plastic wrap to protect them, or carefully transfer them to an airtight container. The airtight container is highly recommended as it prevents the cakes from absorbing any unwanted odors from other foods in your fridge, keeping their delicious chocolatey flavor pure. Stored correctly in the refrigerator, these chocolate cornflake cakes will stay fresh and crunchy for up to 3 days.
It is strongly advised against keeping them at room temperature. The chocolate and butter in the recipe have a relatively low melting point, meaning they will quickly soften and start to melt outside of a cool environment. This will not only make the cakes sticky and difficult to handle but also compromise their delightful crunchy texture, turning them into a gooey mess.
Given their excellent shelf life in the fridge, these chocolate cornflake cakes are perfect make-ahead treats. You can prepare them a day or two in advance for parties, potlucks, or simply to have a ready supply of delicious after-school snacks for your kids. This convenience makes them a fantastic option for busy households or when you want to impress guests without last-minute culinary stress.
Unfortunately, these cakes do not freeze well. The cornflakes tend to lose their crispness when frozen and thawed, resulting in a somewhat soggy and unappealing texture. For this reason, it’s best to enjoy them fresh from the fridge within a few days of making them.
Explore More Irresistible Chocolate Treats
If you’re a chocolate lover, these cornflake cakes are just the beginning! Dive into more delicious chocolate recipes:
- Double Chocolate Brownie Muffins
- Chocolate Fondant Cakes for Two
- Chocolate Caramel Slices
- Mini Brownie Bites
- Chocolate Rugelach
- Mini Chocolate Tarts
- French Chocolate Truffles
- Chocolate Financiers
- Chocolate Madeleines
Made this recipe?
We’d love to hear from you! Let us know if you liked it by leaving a comment below, and don’t forget to tag us on Instagram @a.baking.journey with a photo of your delicious creation!
Recipe Card: Quick and Easy Chocolate Cornflake Cakes
Chocolate Cornflakes Cakes
Print Recipe
Ingredients
- 200 to 300 gr (7 to 10.5 oz) Dark Cooking Chocolate, (see note *)
- 50 gr (3 1/2 tbps) Unsalted Butter
- 50 gr ( 2 1/2 tbsp Honey
- 200 gr (6 cups) Cornflakes, Certified Gluten-Free if required
Instructions
- Prepare a Muffin Pan with Paper Liners or Wrappers and set aside.
- Place the Cooking Chocolate (1), Butter and Honey in a heat-proof bowl and melt in the microwave (2) or on a double boiler. Stir until completely smooth.
- Place the Cornflakes in a very large Mixing Bowl, and pour the warm melted Chocolate over them. Using a spatula, mix them together until all the Cornflakes are evenly covered in Chocolate.
- With a spoon, place the Chocolate Cornflakes in each Muffin Liners, gently pressing on them to make sure they are tightly and compactly packed together (3).
- Place in the fridge to set for about 1 hour, or until the Chocolate is fully set and hard.
Video
Would you like to save this recipe?
We’ll email this post to you, so you can come back to it later!
Notes
(*) I have found that different brands of chocolate melt better than others, and sometimes more chocolate is required to cover all the cornflakes.
Start with 200 gr of chocolate (7 oz) and if you notice that a lot of the cornflakes are not covered with chocolate, melt a little bit more and mix it in.
Note that you need to use proper Cooking Chocolate (not eating chocolate) for the chocolate to melt properly without becoming grainy.
Instructions Notes:
- If using a Cooking Chocolate Bar, make sure to thinly chop the chocolate before melting it so that it will melt more quickly and smoothly.
- If melting in the microwave, stop to stir every 30 seconds to avoid burning the chocolate. You do not need to leave it in the microwave until fully melted; if there are a few small bits of unmelted chocolate, it will melt with the residual heat.
- You want to make sure all the cornflakes are touching each other or the cakes might break apart when set and cool. I like to add about one tablespoon of cornflakes at the time and gently compact them before adding more. This is to insure there are no large air pocket in the cakes.
Once the cakes have set, you can transfer them in an air-tight container in the fridge.
Nutrition (per serving)
Carbohydrates: 22g |
Protein: 3g |
Fat: 12g |
Saturated Fat: 8g |
Cholesterol: 9mg |
Sodium: 155mg |
Potassium: 166mg |
Fiber: 3g |
Sugar: 5g |
Vitamin A: 402IU |
Vitamin C: 4mg |
Calcium: 19mg |
Iron: 8mg
