
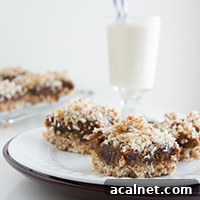

I’m thrilled with how this recipe turned out — simple, nourishing, and delicious.
After testing many vegan and paleo desserts while preparing my holiday cookbook, I kept returning to this date square recipe. It didn’t quite fit the Christmas spread for the book, so I’m sharing it here for you instead. These no-bake date squares are naturally sweetened, grain-free, and easy to make ahead.

For best digestion and texture, I strongly recommend soaking and drying the brazil nuts and macadamia nuts before using them. Soaking reduces phytic acid and can make the nuts easier to process and gentler on the stomach. If you don’t have a dehydrator, you can dry soaked nuts in a low oven (around 180°F) until fully dry.
If you prefer not to soak, the recipe will still work with raw nuts, but the texture and digestibility may differ slightly.

To print, save, or share this recipe, use your browser or device options to print or send this page.
- Crust
- 1 cup brazil nuts, soaked and dried
- 1/3 cup macadamia nuts, soaked and dried
- 1 1/4 cups shredded coconut
- 8 medjool dates, pitted
- 1/2 teaspoon pure vanilla extract
- 1/8 teaspoon sea salt
- Date Filling
- 2 cups medjool dates, pitted and roughly chopped
- 1 cup dried mission figs, hulled and roughly chopped
- Zest from a medium orange
- 1 teaspoon pure vanilla extract
- 1/8 teaspoon sea salt
- 1/4 cup water
- Place the soaked and dried brazil nuts and macadamia nuts in a food processor and pulse until they are finely broken down but not fully pasty.
- Add shredded coconut, the 8 pitted medjool dates, vanilla, and sea salt. Pulse until the mixture starts to come together and holds when pressed.
- Reserve about one-third of the mixture. Press the remaining two-thirds firmly into an 8 x 8-inch pan to form an even crust layer.
- In a large bowl, combine the 2 cups of pitted, roughly chopped medjool dates, chopped mission figs, orange zest, vanilla, and salt. Stir to combine.
- Place half of this fruit mixture into a food processor with 1/4 cup water. Blend until smooth and creamy.
- Return the blended fruit to the bowl with the remaining chopped fruit and fold together until evenly mixed.
- Spread the date filling over the prepared crust, smoothing the top with the back of a spoon. Crumble the reserved crust mixture over the filling.
- Cover the pan and chill in the freezer for at least 12 hours to firm up the bars for clean slicing.
- When set, cut into 16 bars. Store in the refrigerator up to 10 days or freeze for up to 4 months.
View nutrition information: check the nutrition label on packaged ingredients or calculate based on the quantities used.

Aim for a coarse, uniform grind for the nuts; small chunks are fine. The recipe is forgiving, so exact uniformity isn’t necessary.

Press the crust into the pan firmly so it holds together. If you’re concerned about sticking, line the pan with parchment paper, allowing the paper to extend over the edges for easy removal.
After the crust is set, spread the date filling evenly and finish with the crumb topping.

Crumble the reserved crust evenly over the filling and chill for at least 12 hours. Firm chilling ensures clean slices and a pleasant bar texture.

These date squares are a wholesome alternative to traditional versions made with butter and flour. They keep well, travel easily, and make a satisfying snack or dessert.
Enjoy making them, and feel free to adapt the filling or nuts to suit your taste and dietary needs.